10. Open source hardware
This week we built a spinning machine !
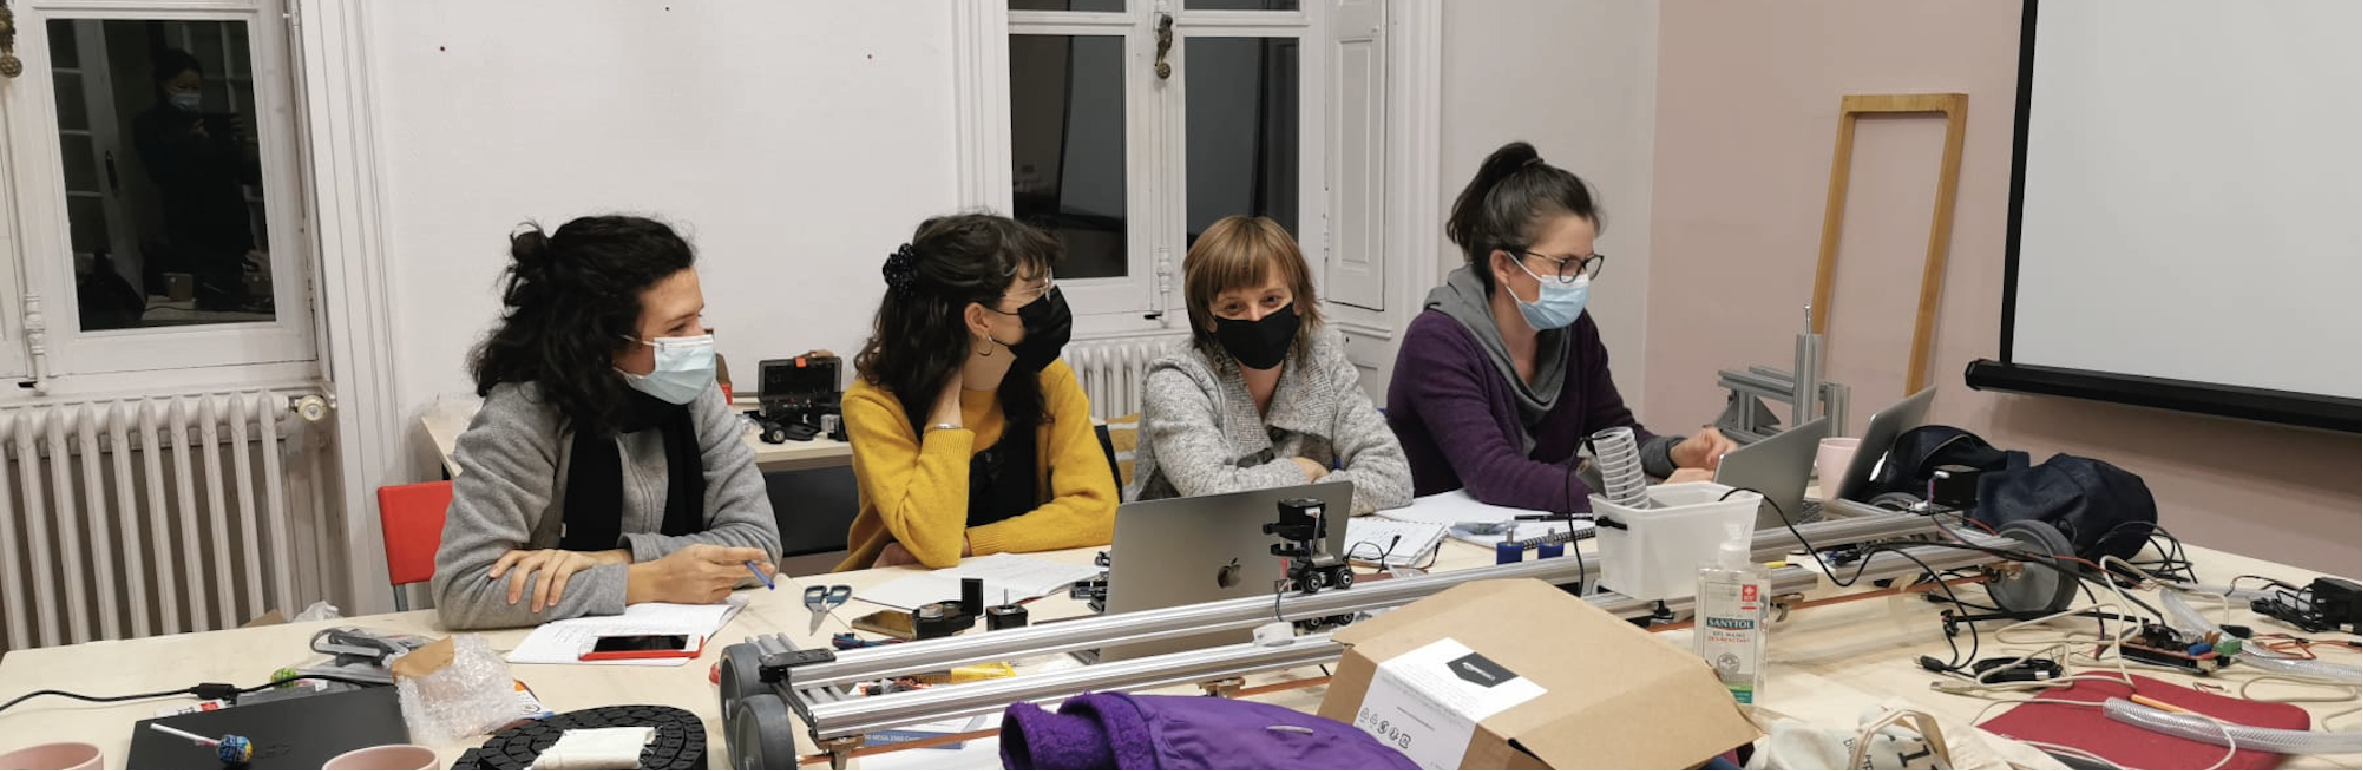 Our team
Hilo spinning machine
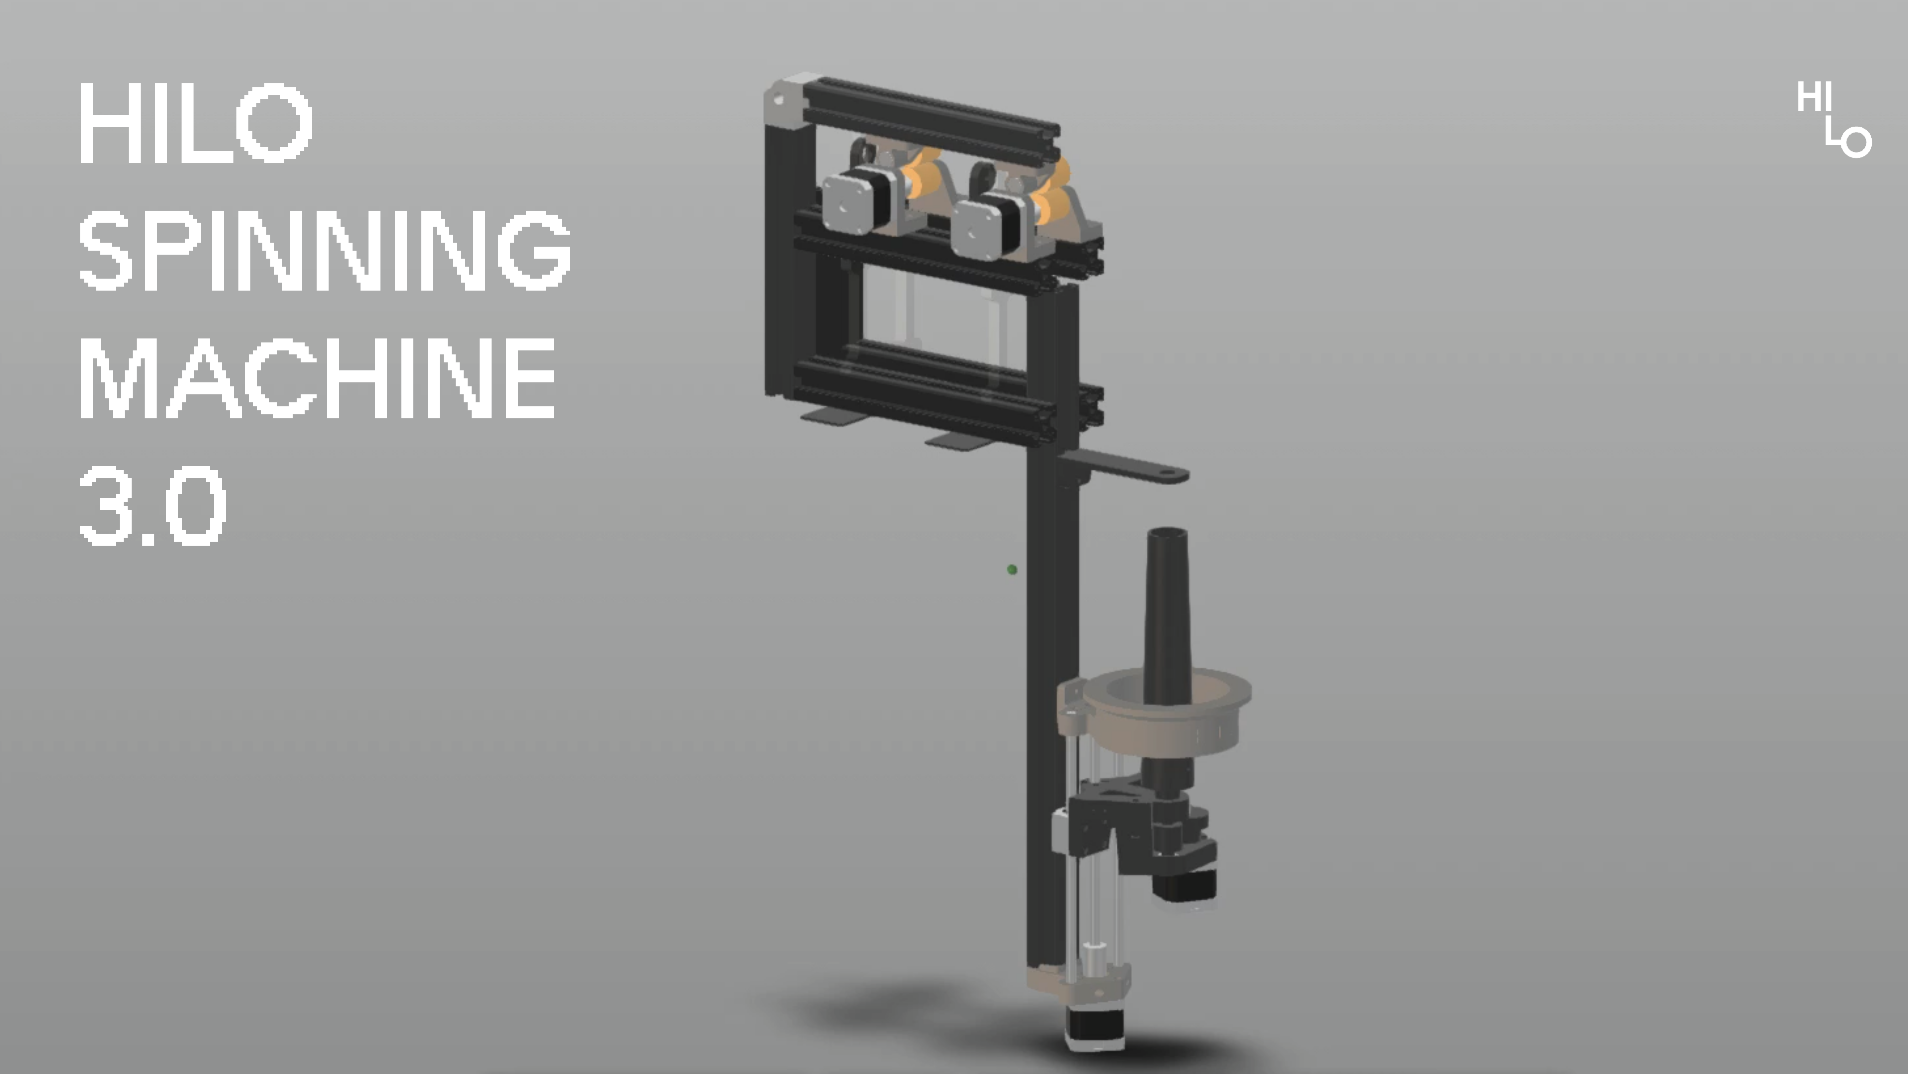 image from Studio Hilo
Studio Hilo
Studio Hilo was created by Natalija Krasnoperova and Sara Diaz Rodriguez and they are working on textile innovation. They created an open source spinning machine that we built in 3 days.
Ressources
Plans to construc the machine -> here
Tutorials by Sara Diaz :
Part 1 -> here
Part 2 -> here
Part 3 -> here
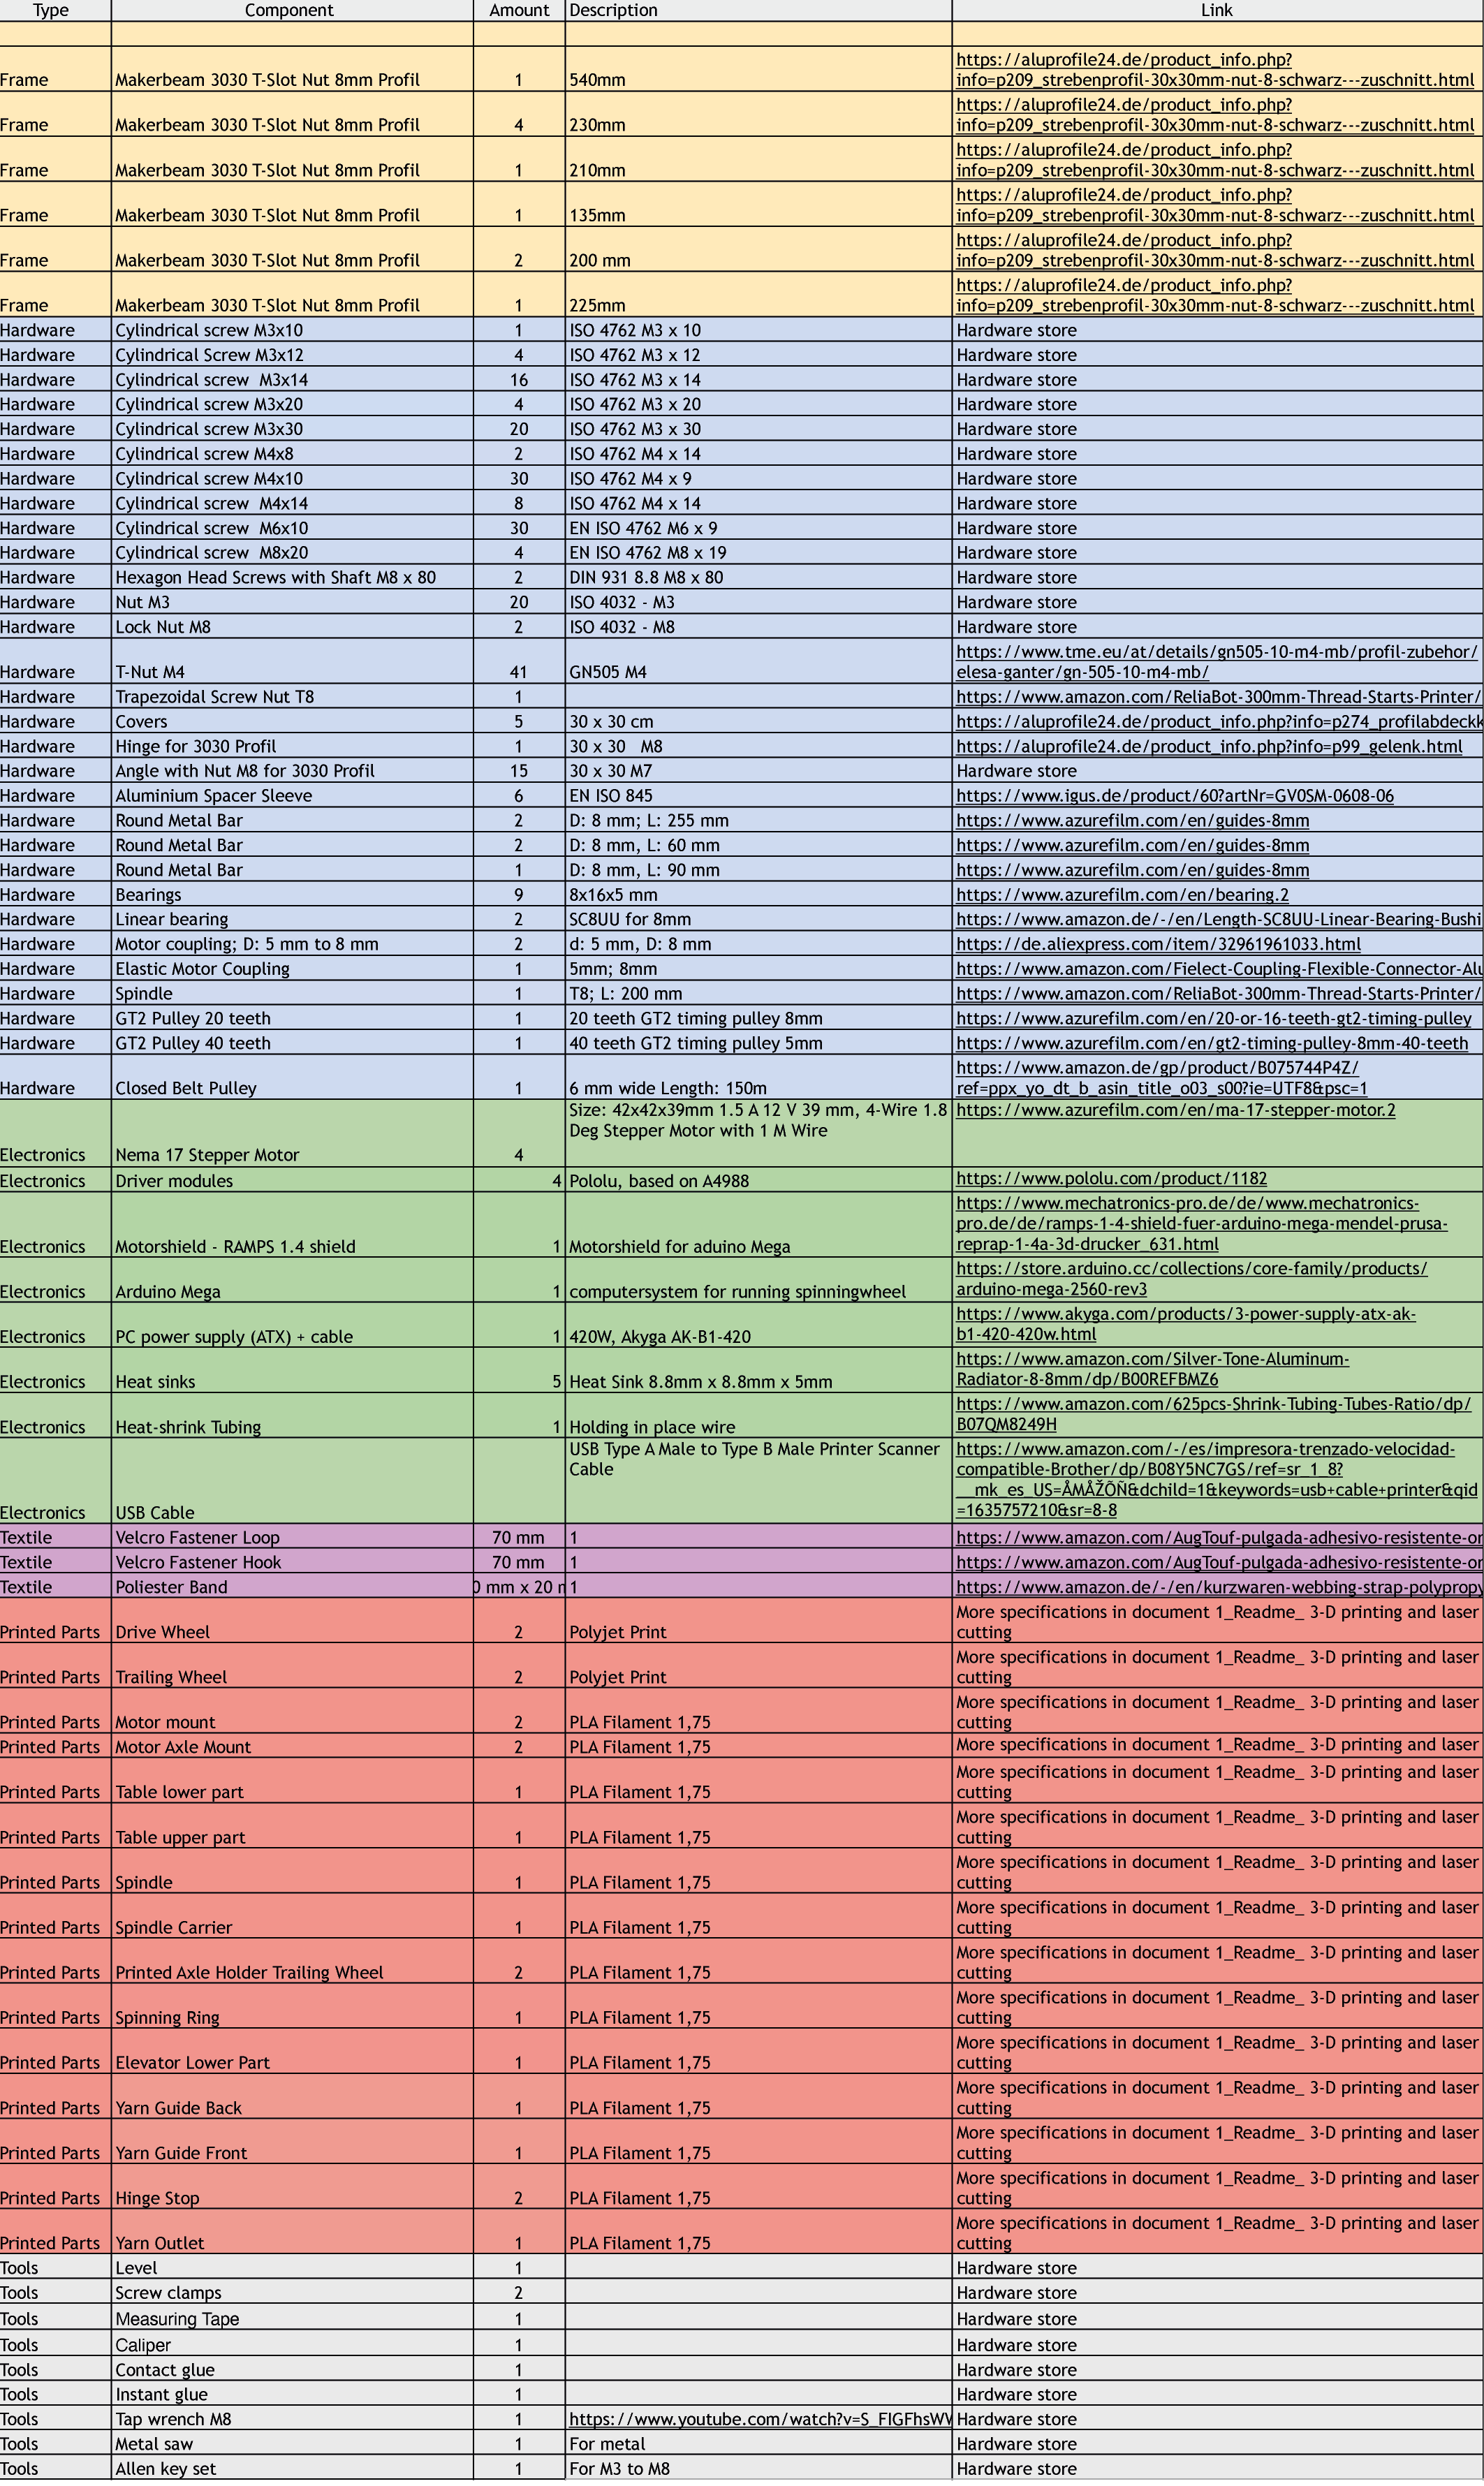
List of materials (better to look at it in the Gitlab but to have a quick overview):
The hardware part
There are 6 groups, each step is explained in the Ghitlab.
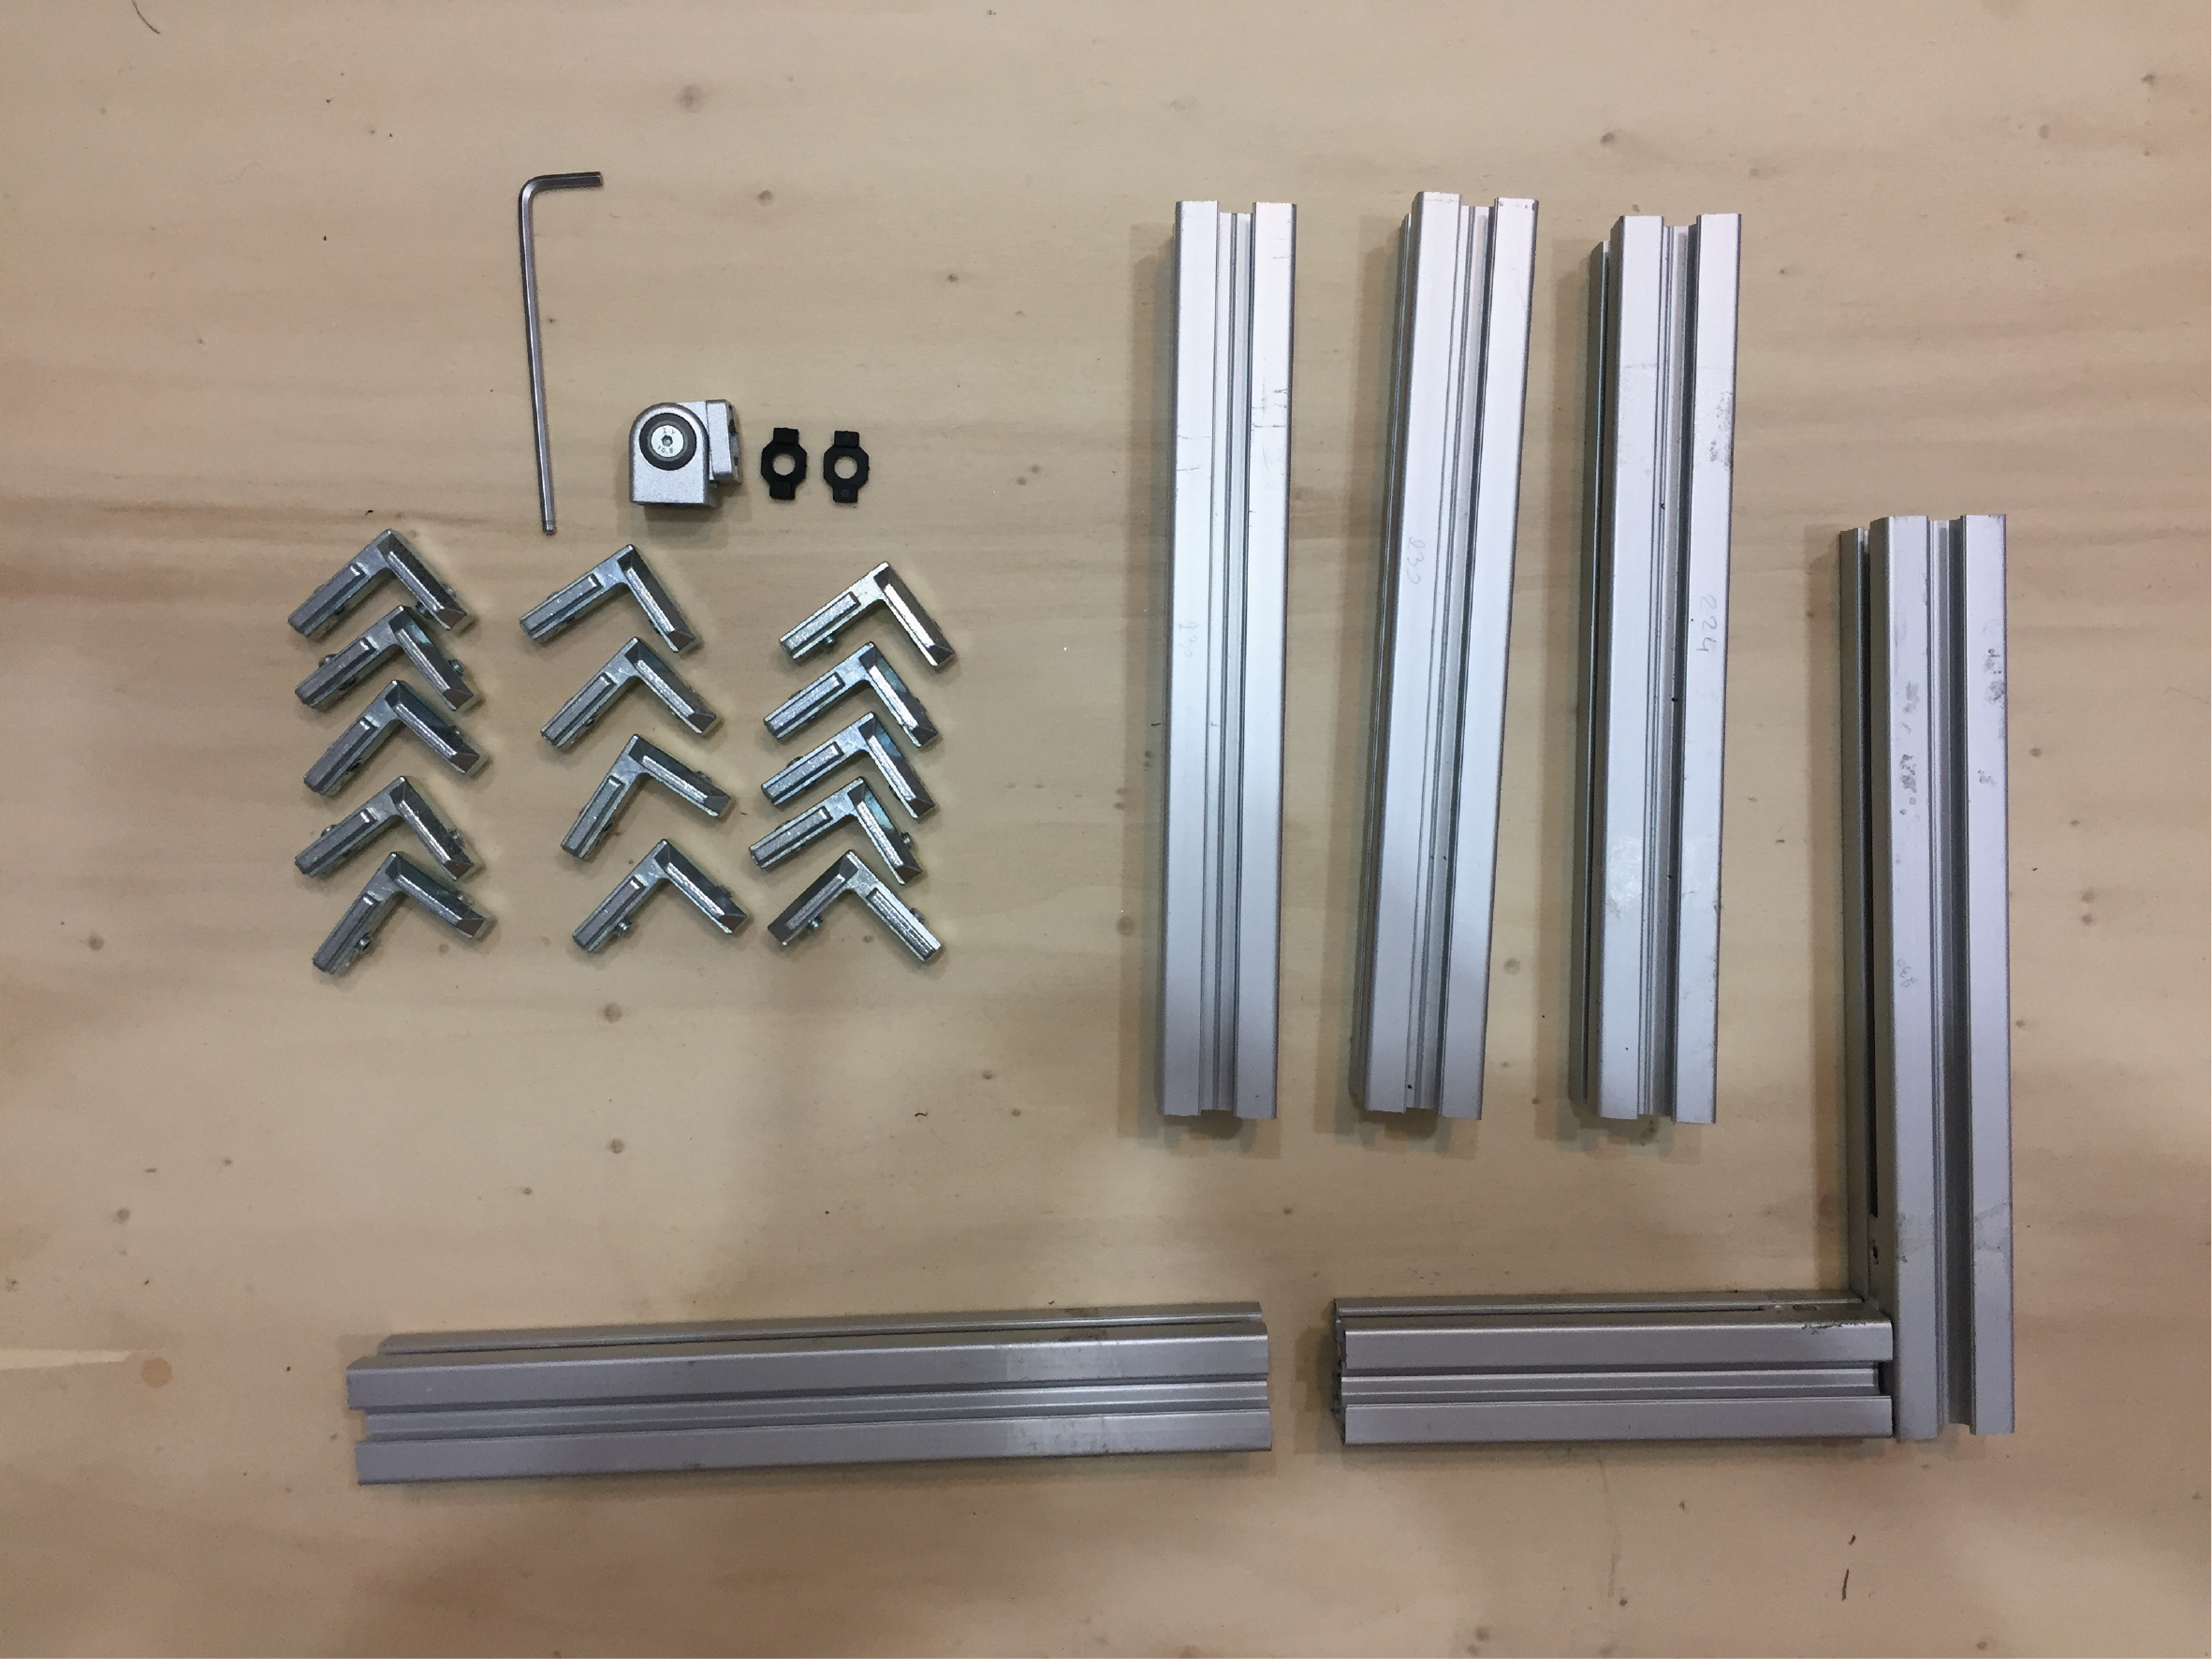
Group 1 structure
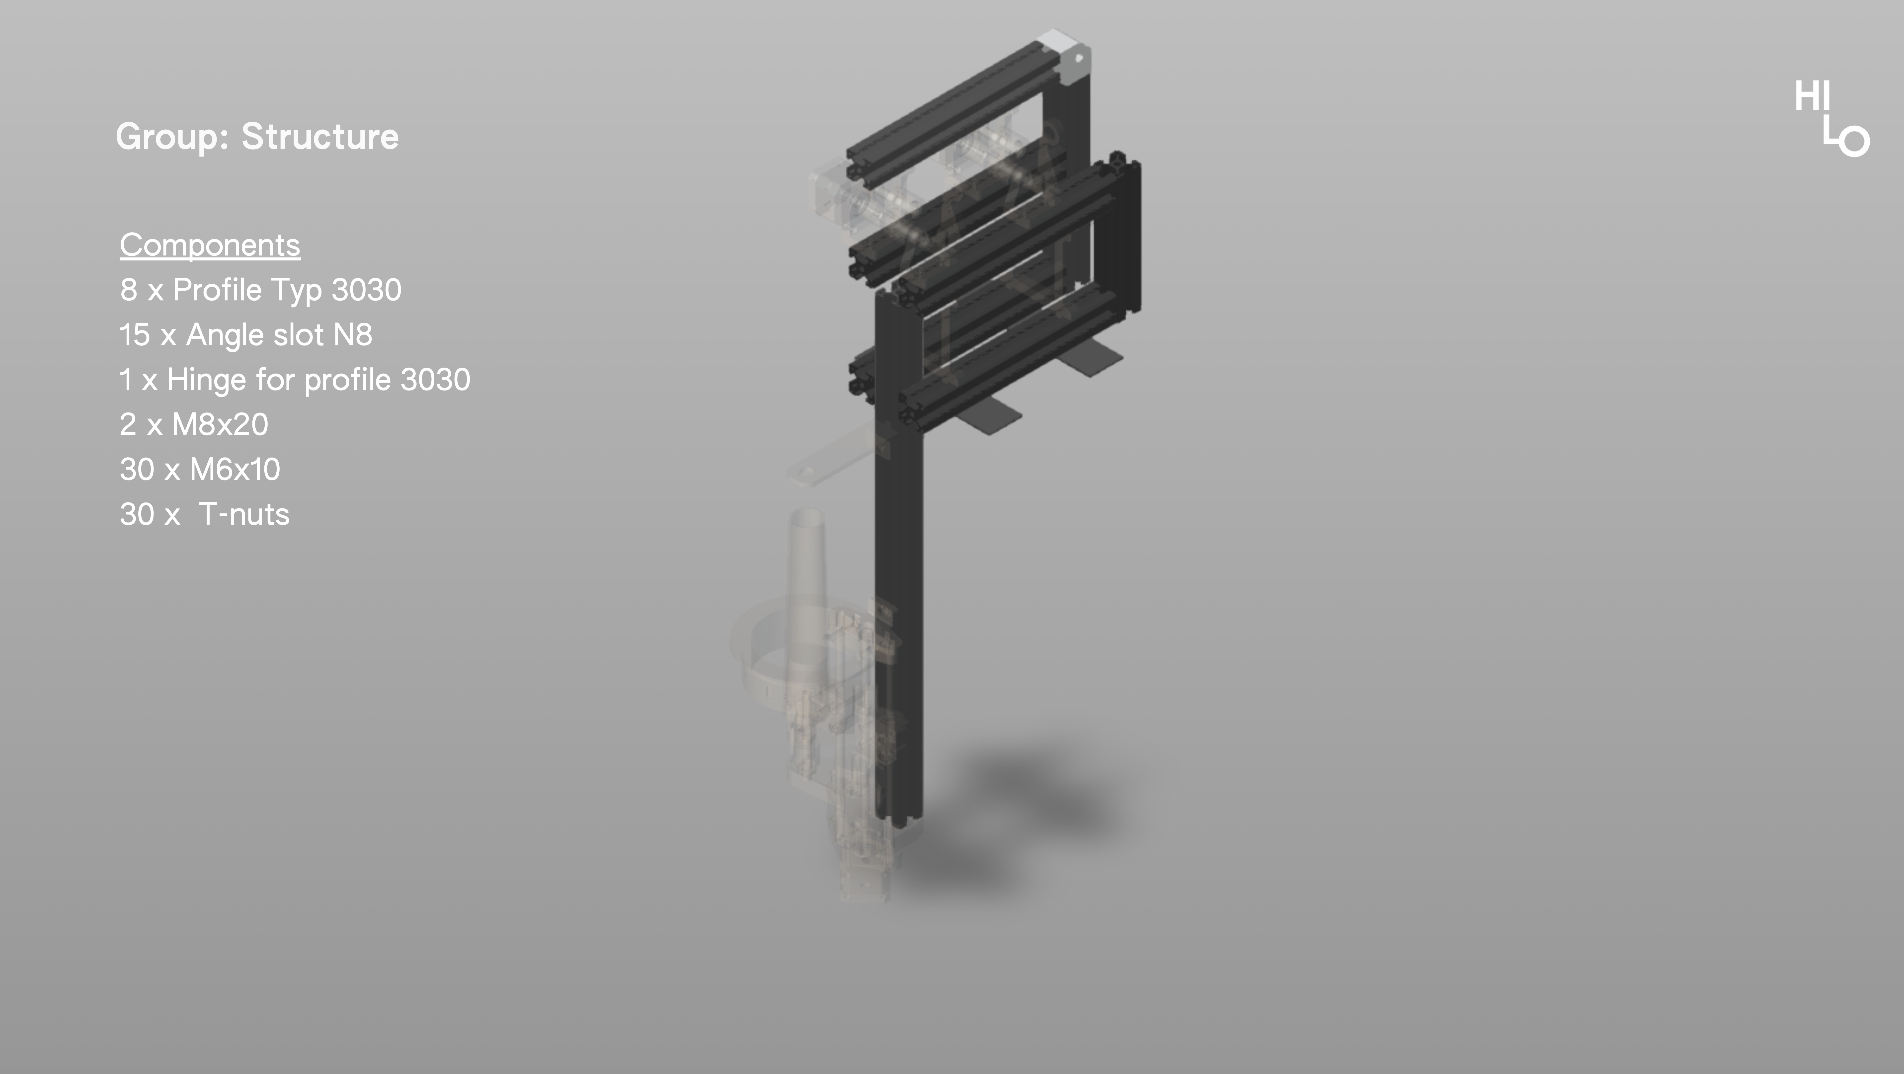 image from Studio Hilo
It took a while to understand and gather all the different pieces, what they were, their names in french and in english. Pauline and Diane had already 3D printed the pieces and cut some profiles, that was a great save of time ! We cut the pieces of metal we needed left, some by hands with a saw and some with a grinder.
We didn't have the right hinge so we built the machine without.
We thought it would be nice to have a picture of the components needed to build each group. Actually on this picture, 2 profiles are missing...
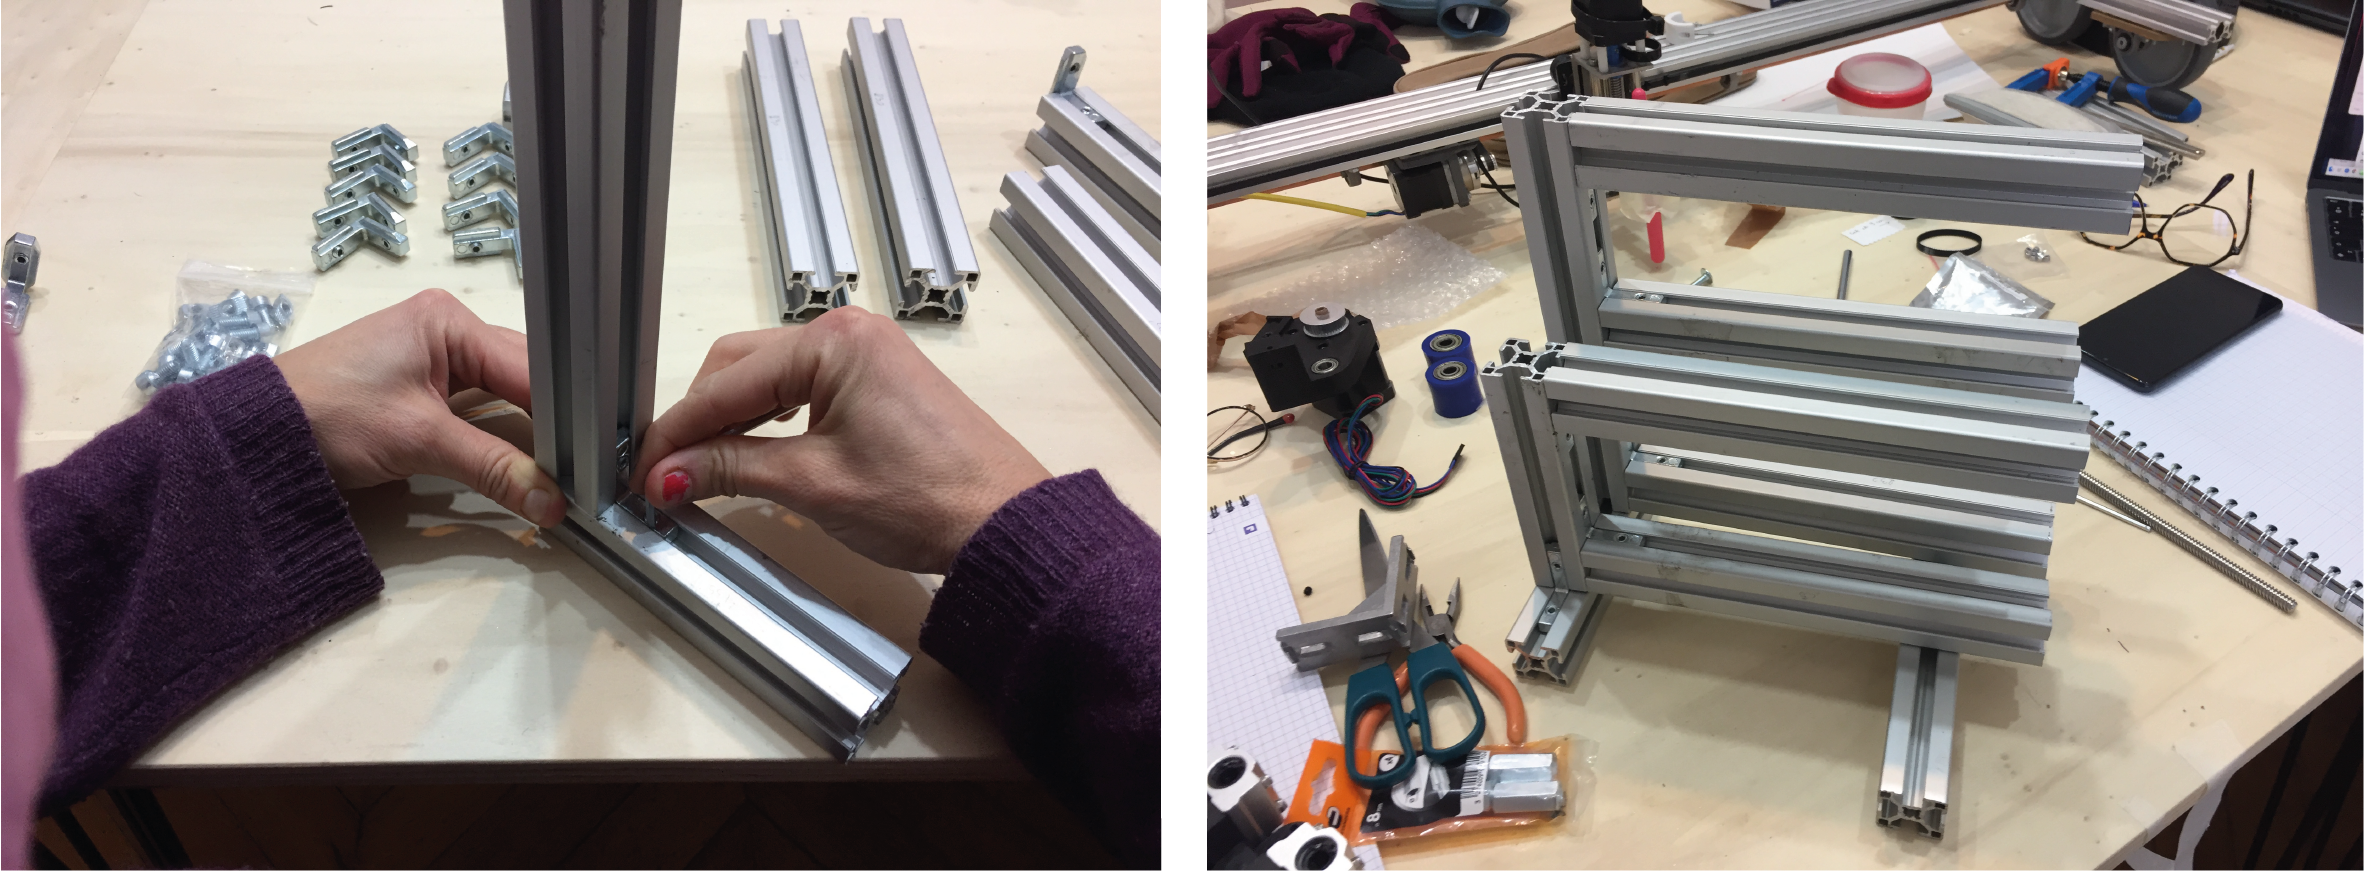
This is how we fixed the profiles together :
notes
- on the documentation, it's written 4 profiles of 230mm but we actually needed 6 of them
- on the 3D drawing, it looks like the structure holds on 2 metal plates but we fixed it on 2 profiles
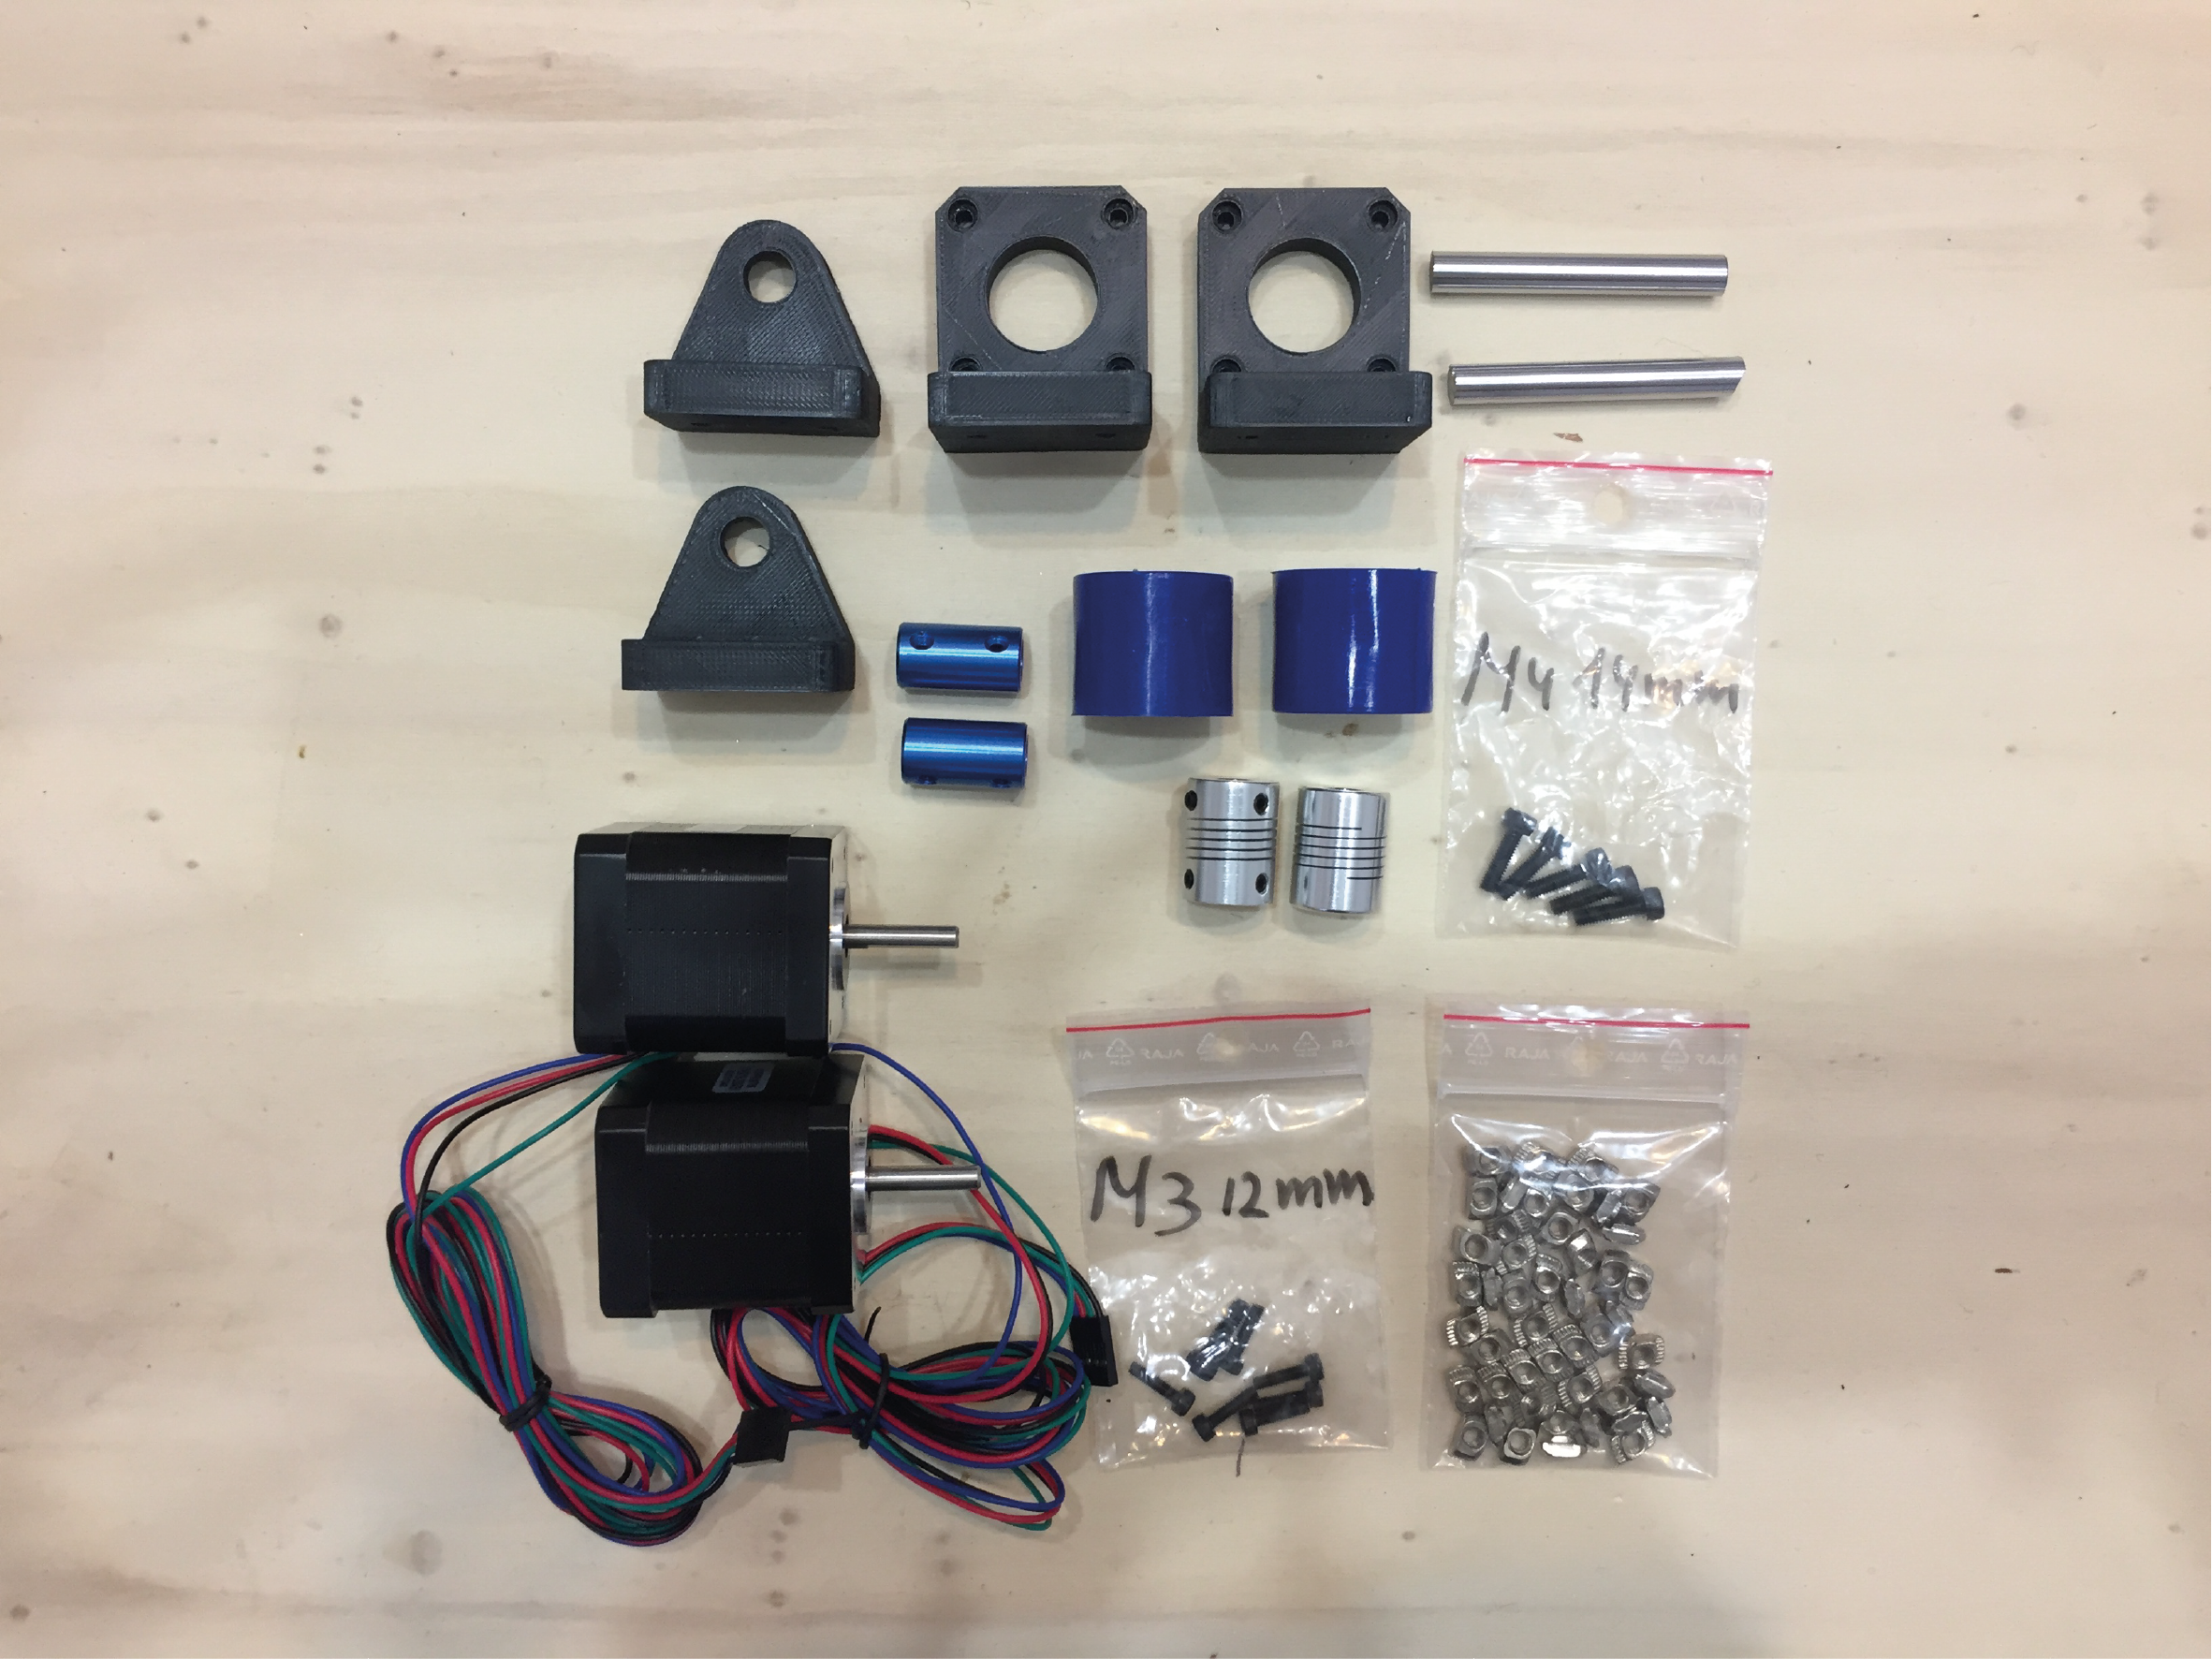
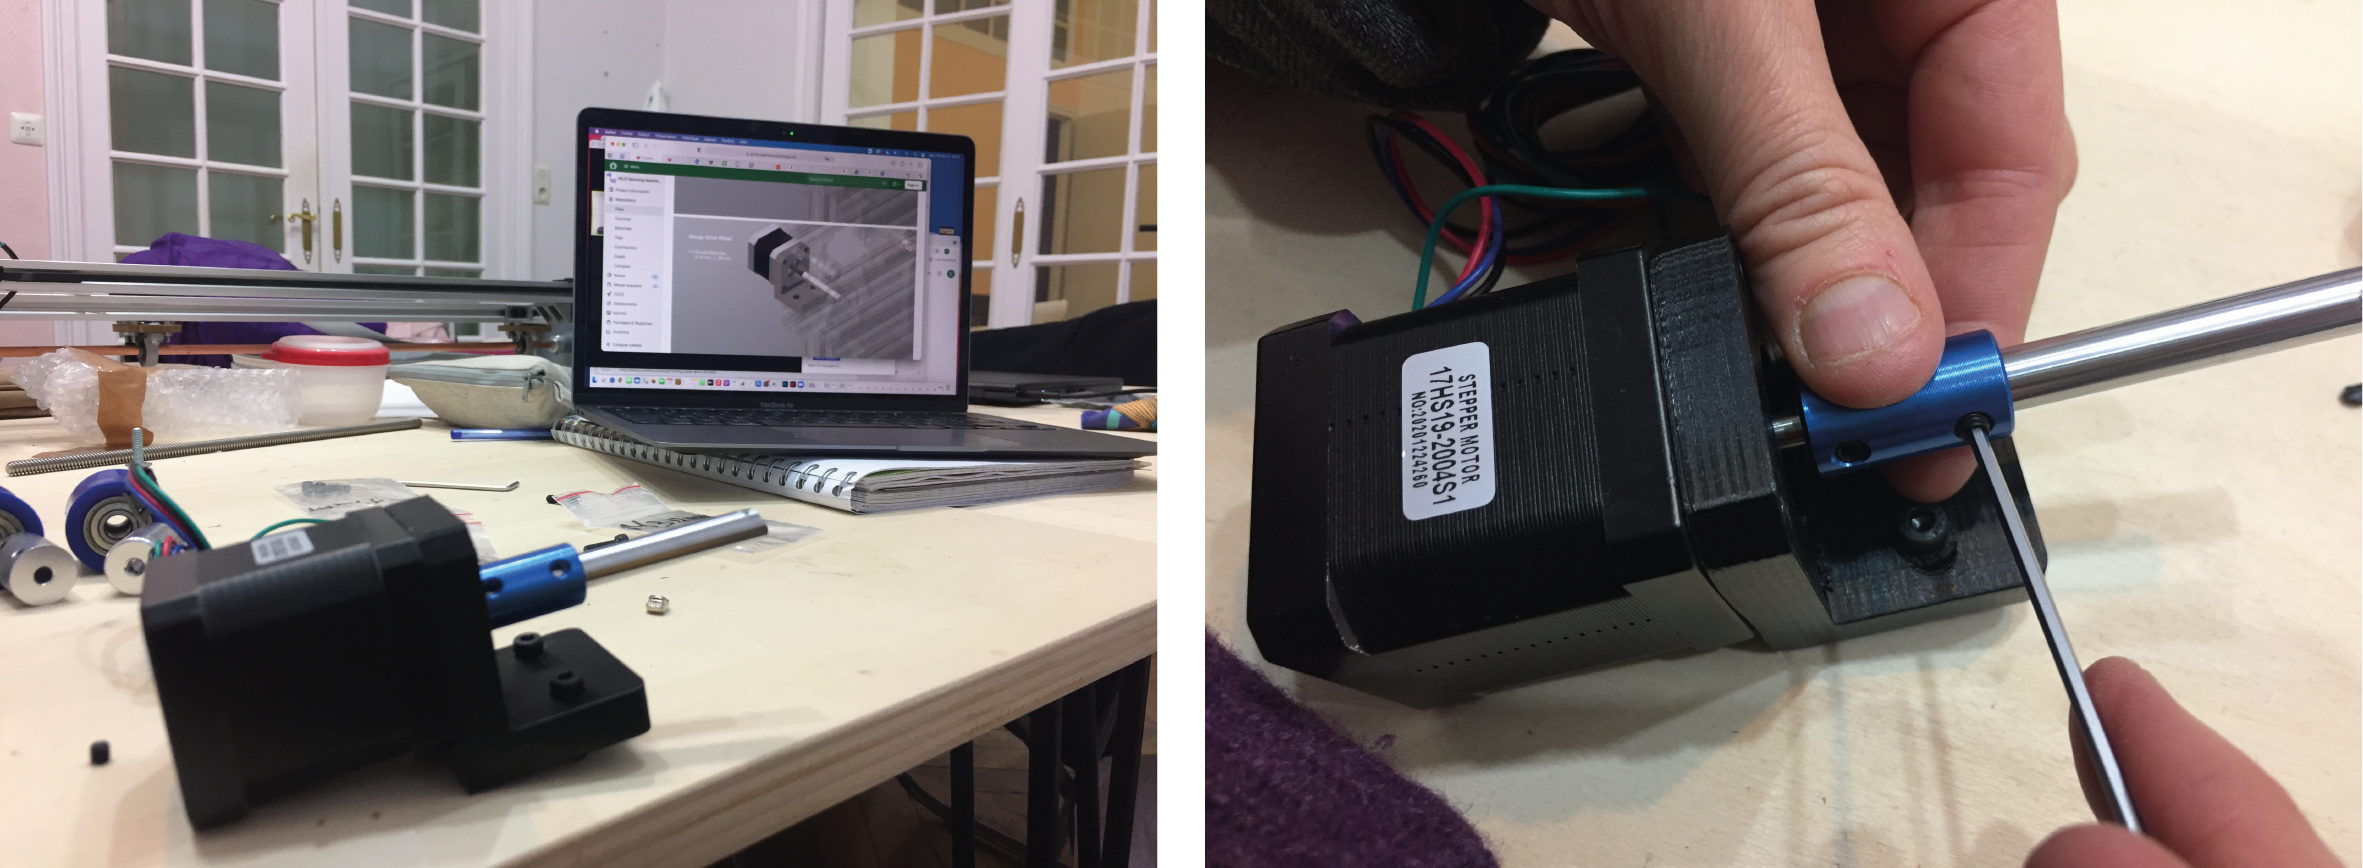
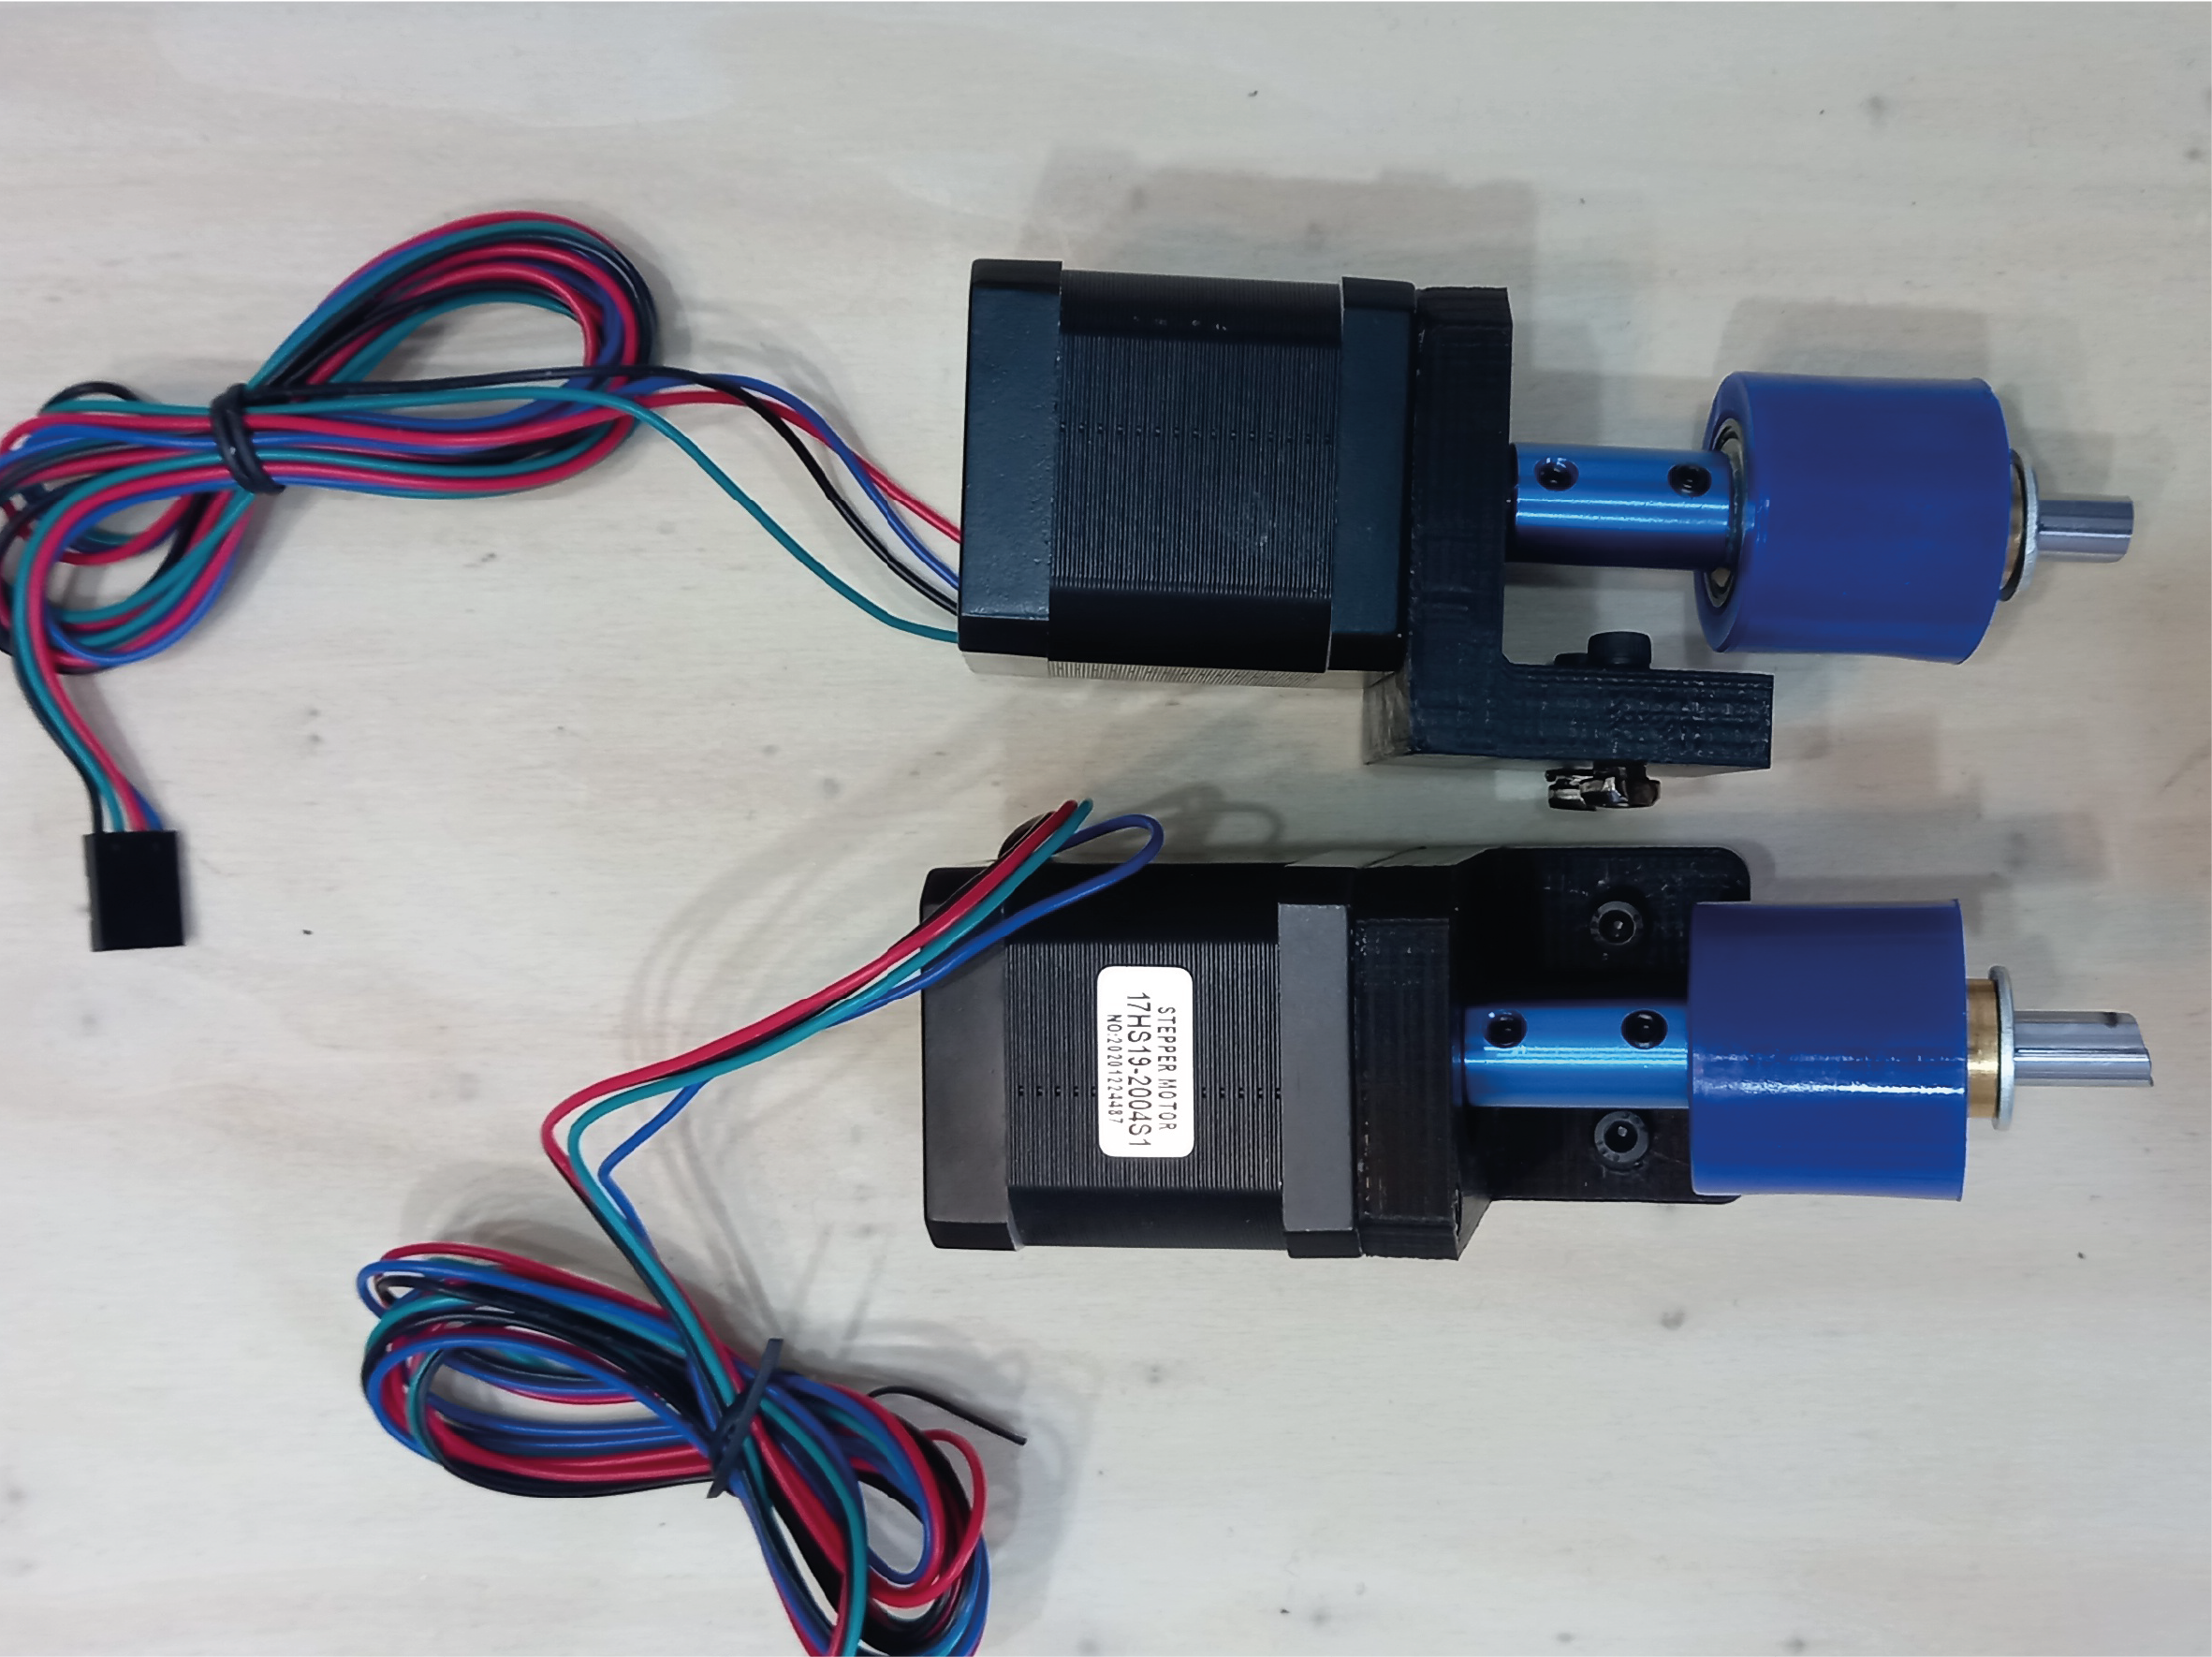
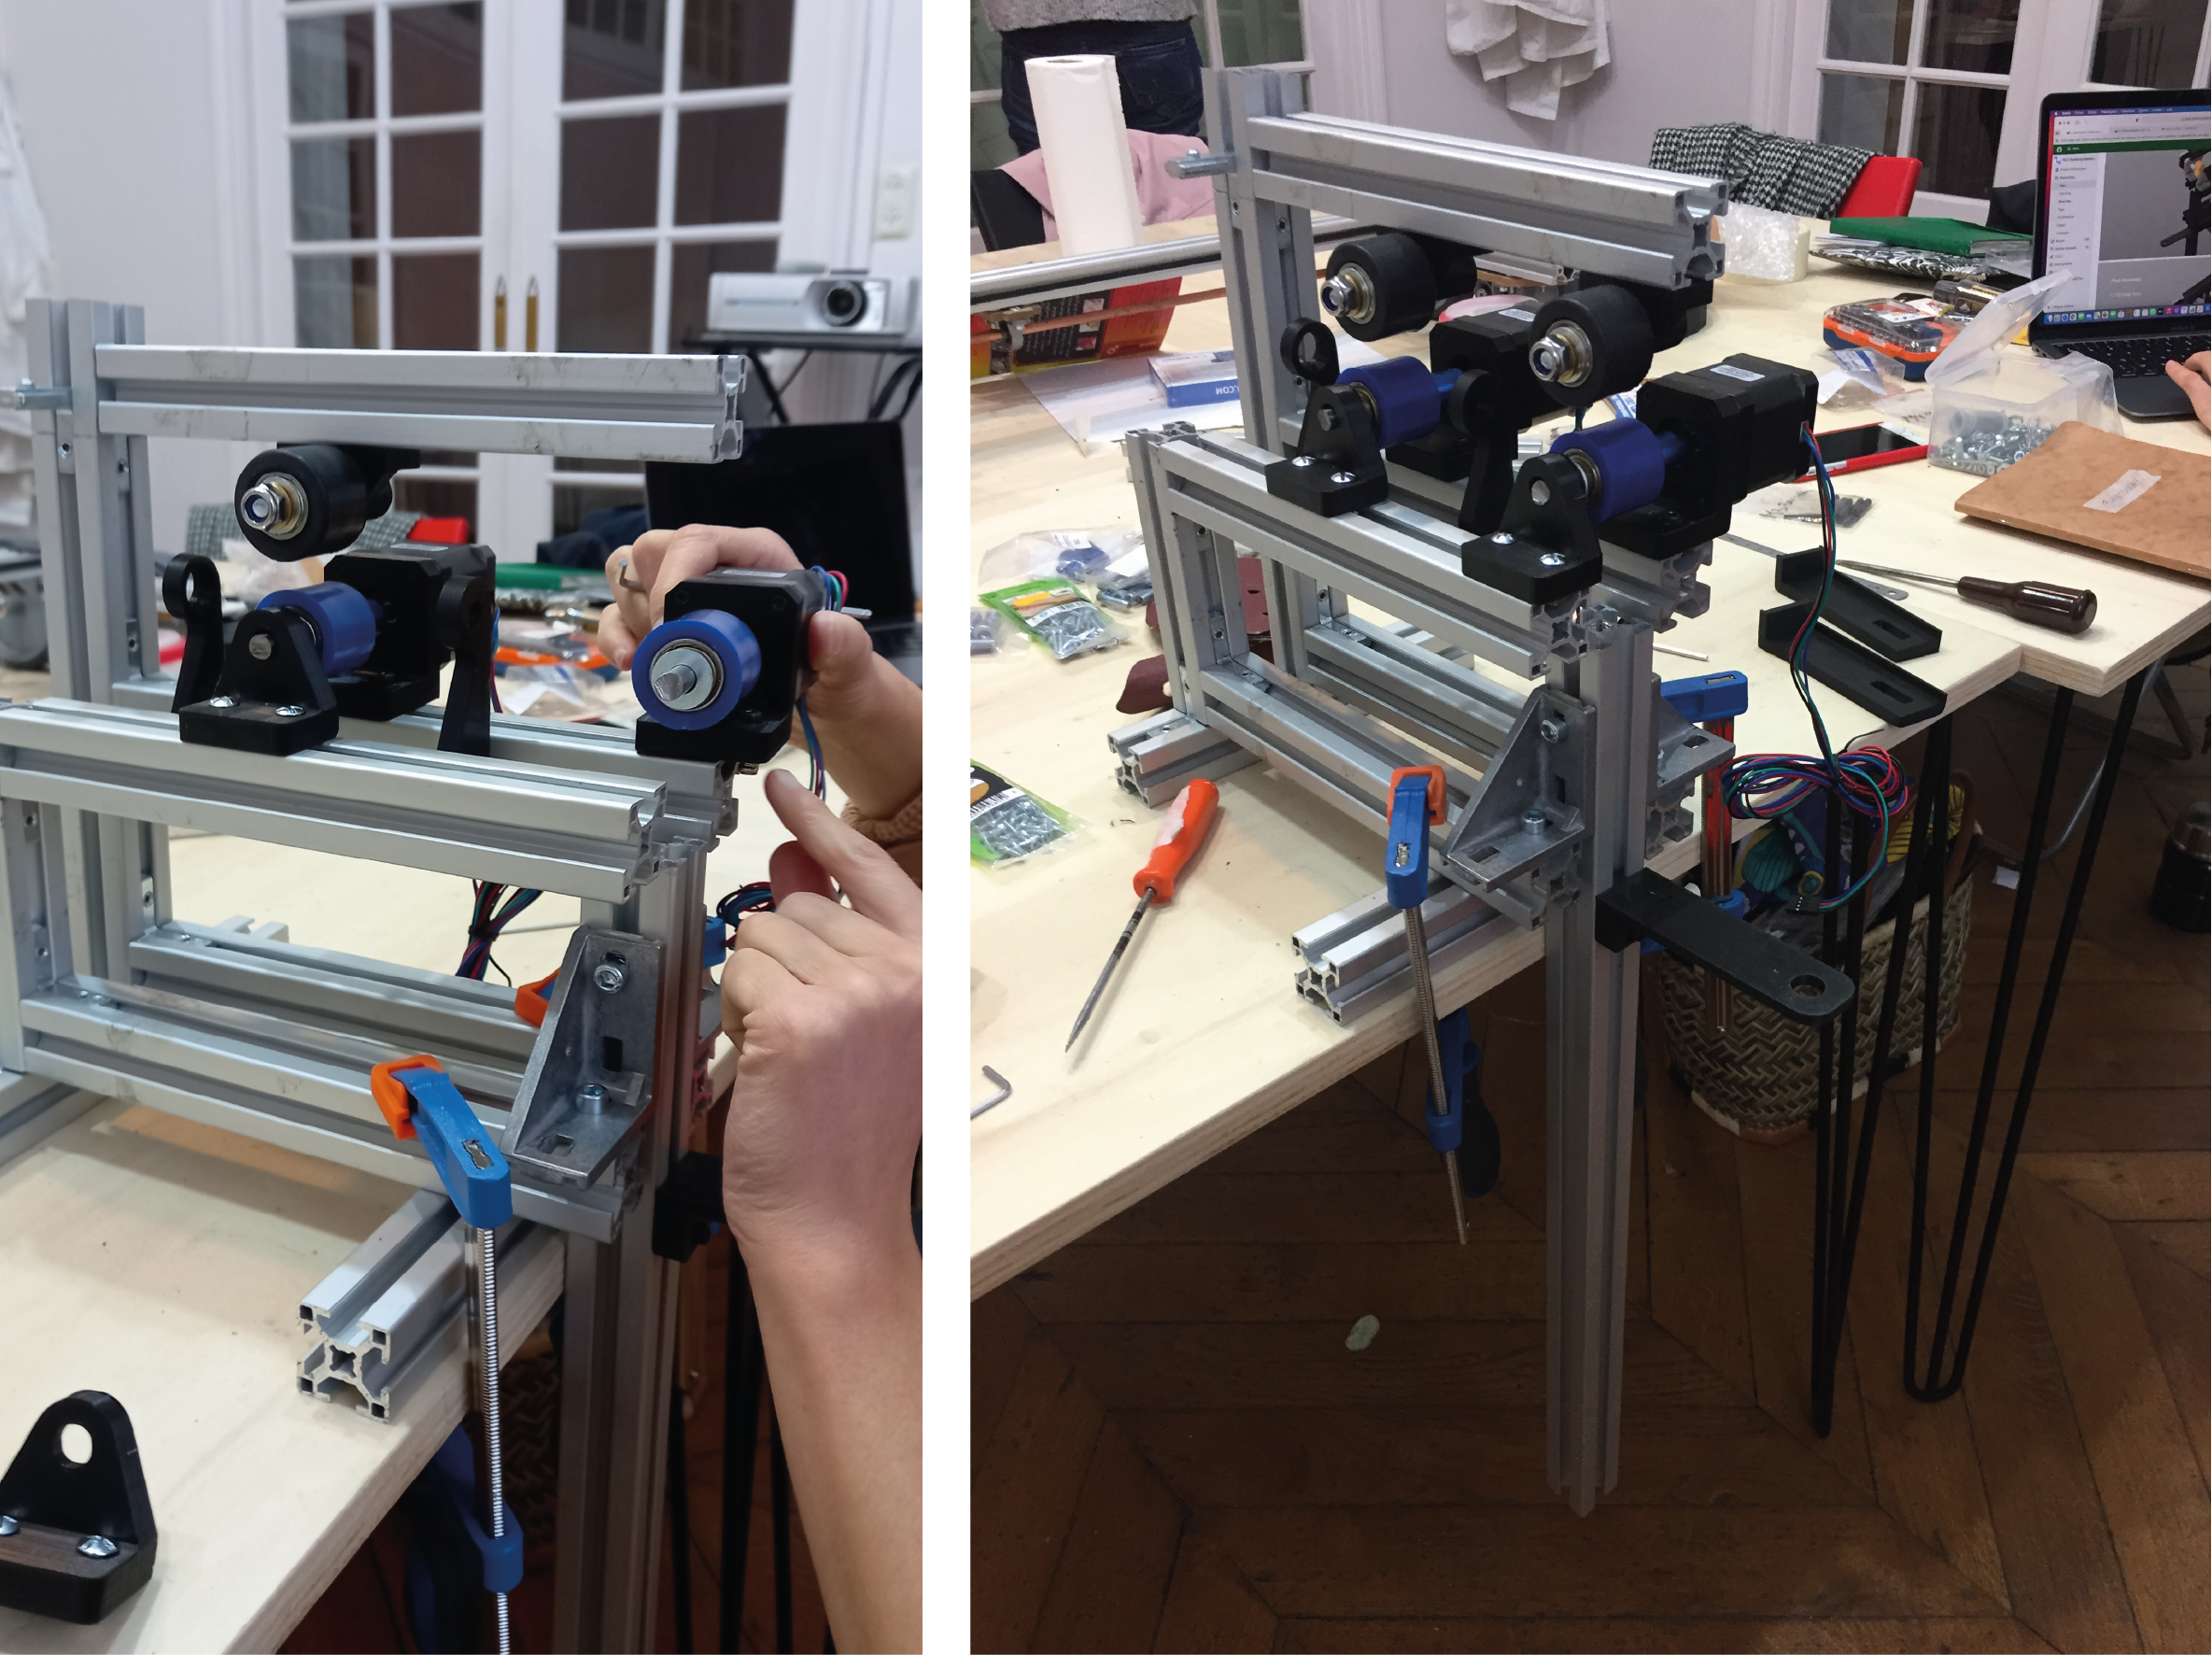
Group 2 drive wheels (blue)
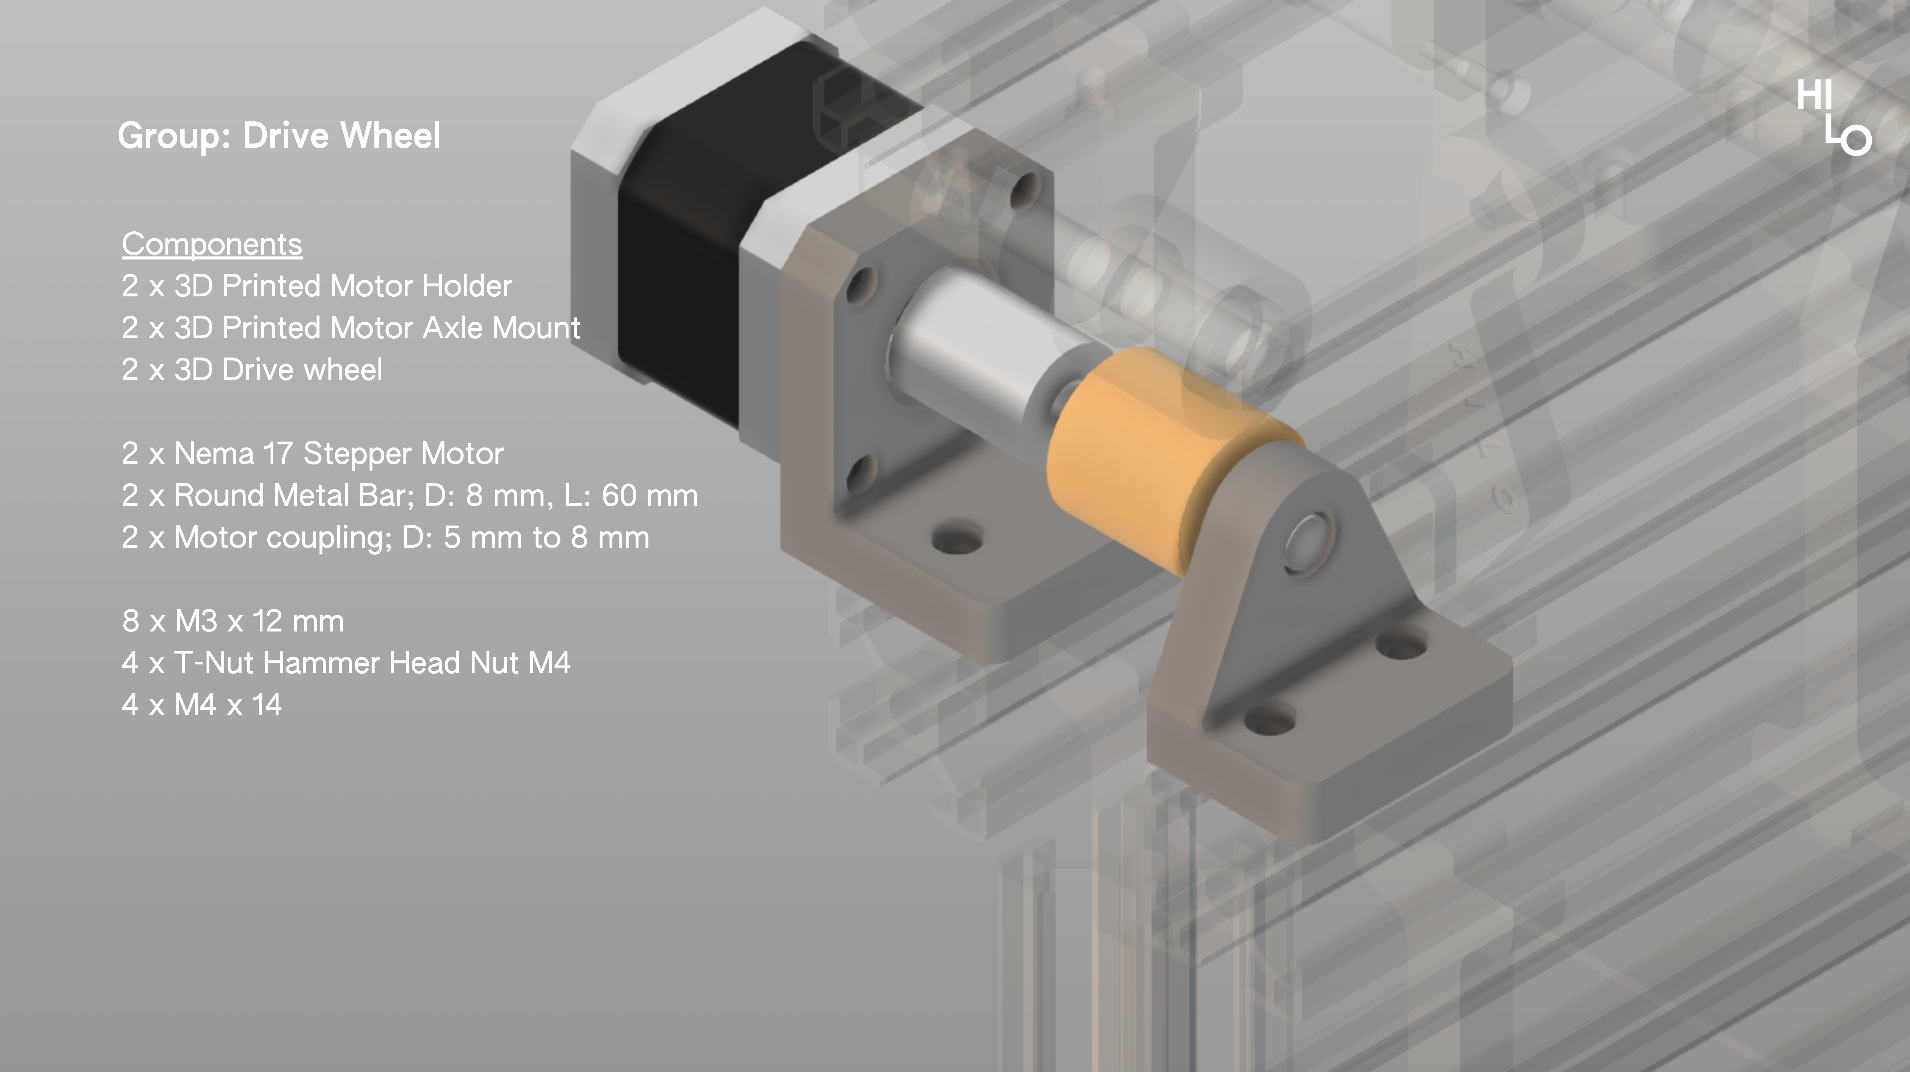 image from Studio Hilo
The wheels are glued in a metal bar which is driven by a motor.
notes
- we glued the wheels on the metal bar with a basic liquid glue and it worked
- more M3 12 screw needed than what we thought
- on the slides, we had the impression that we needed a pierced rod to put in the motor rod. Actually, we used this blue tube (on the picture above) and it worked.
 slides from Studio Hilo
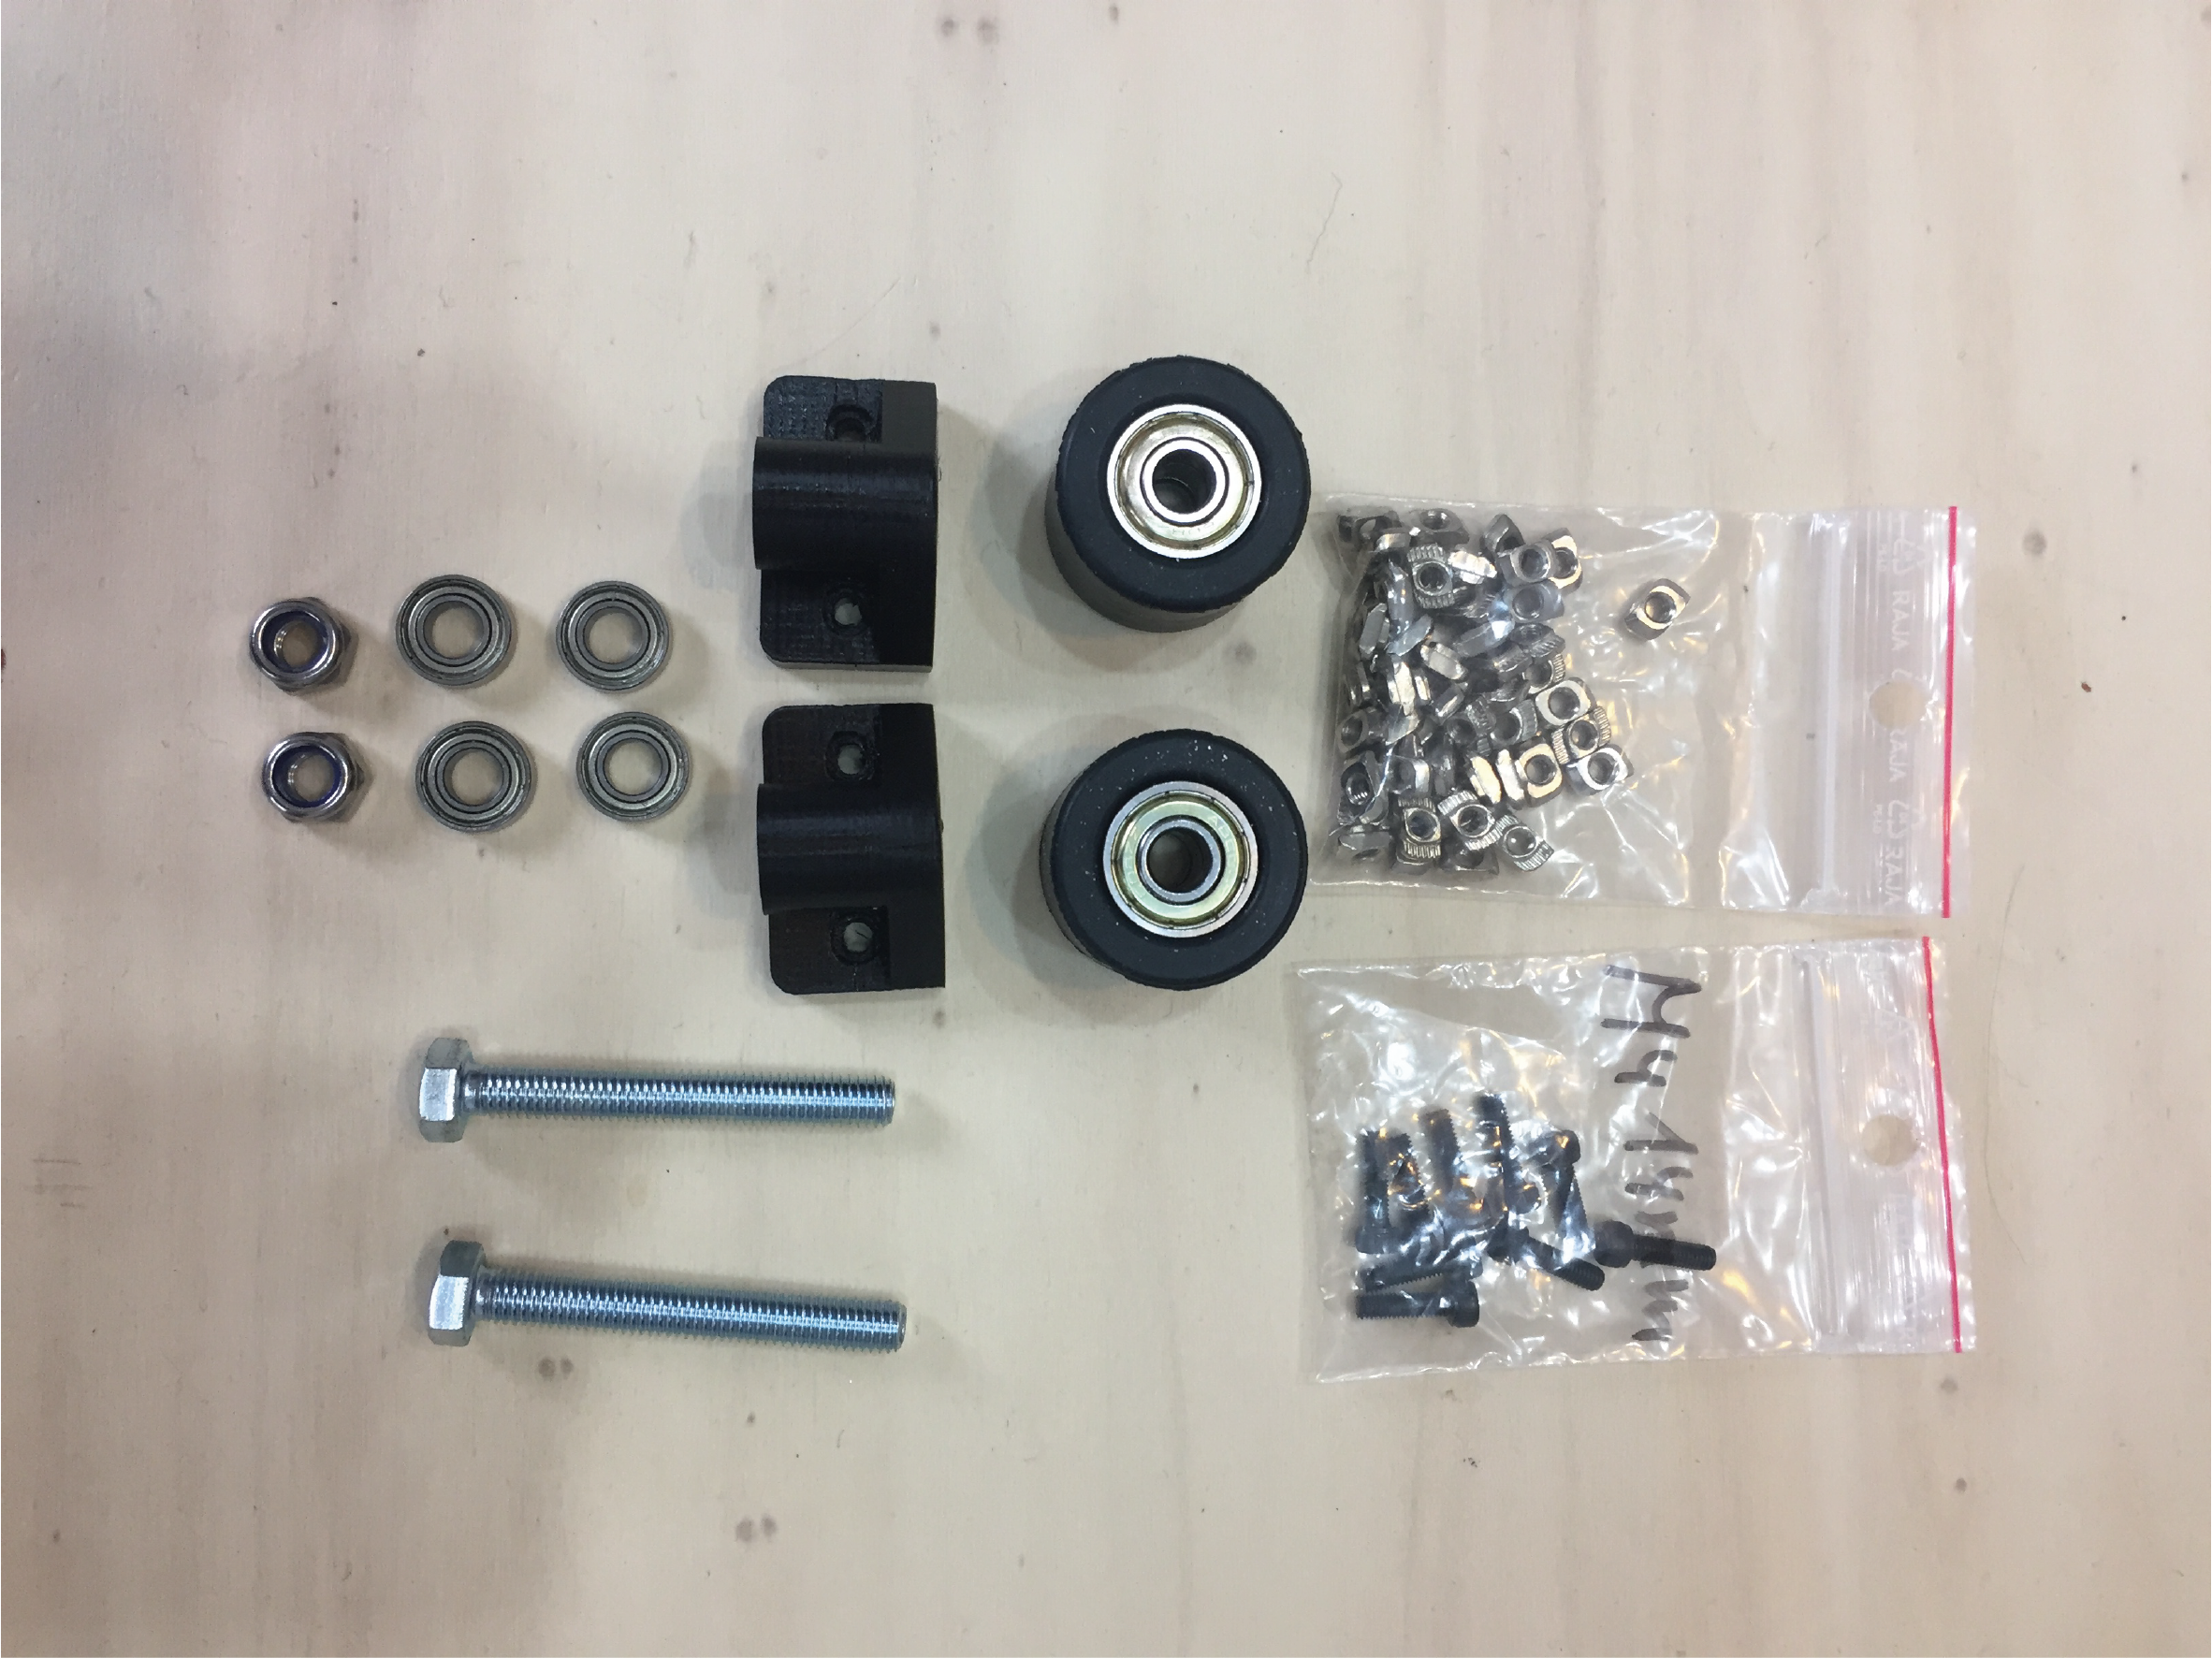
Group 3 trailing wheels (black)
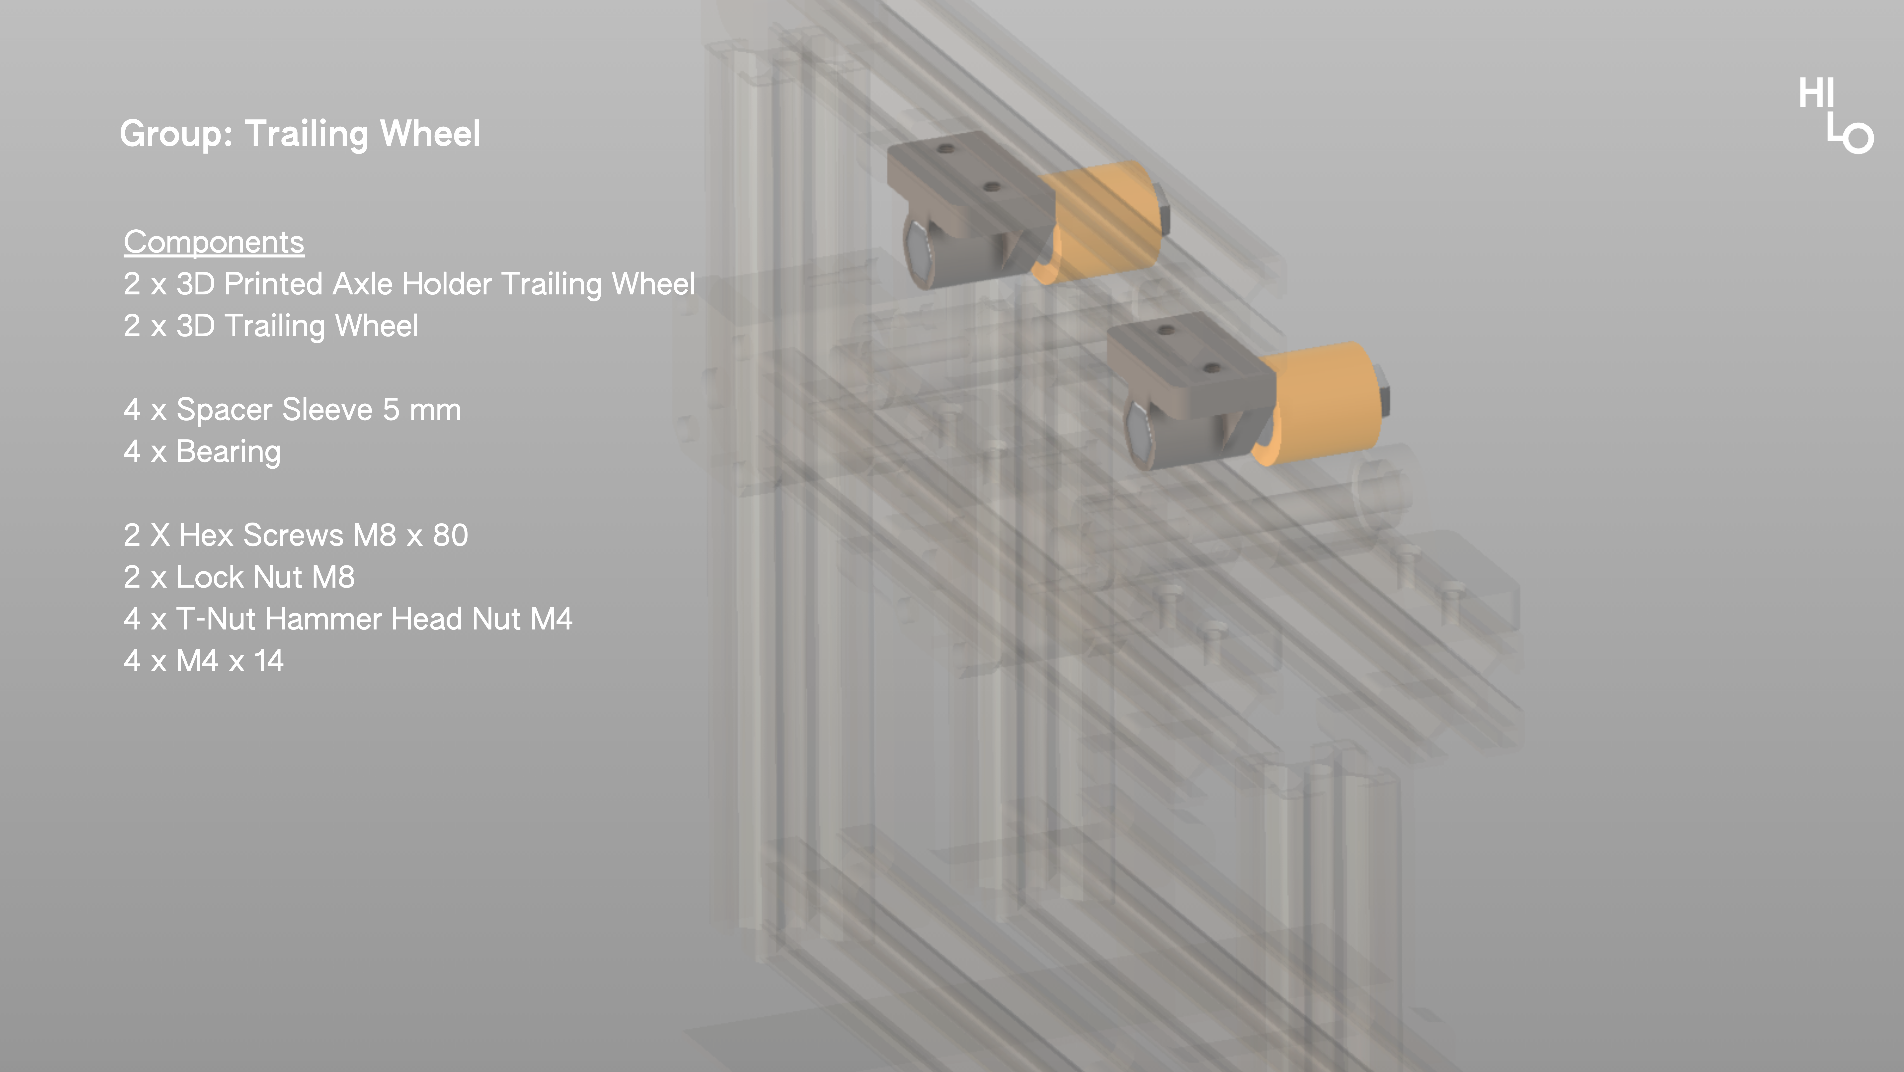 image from Studio Hilo
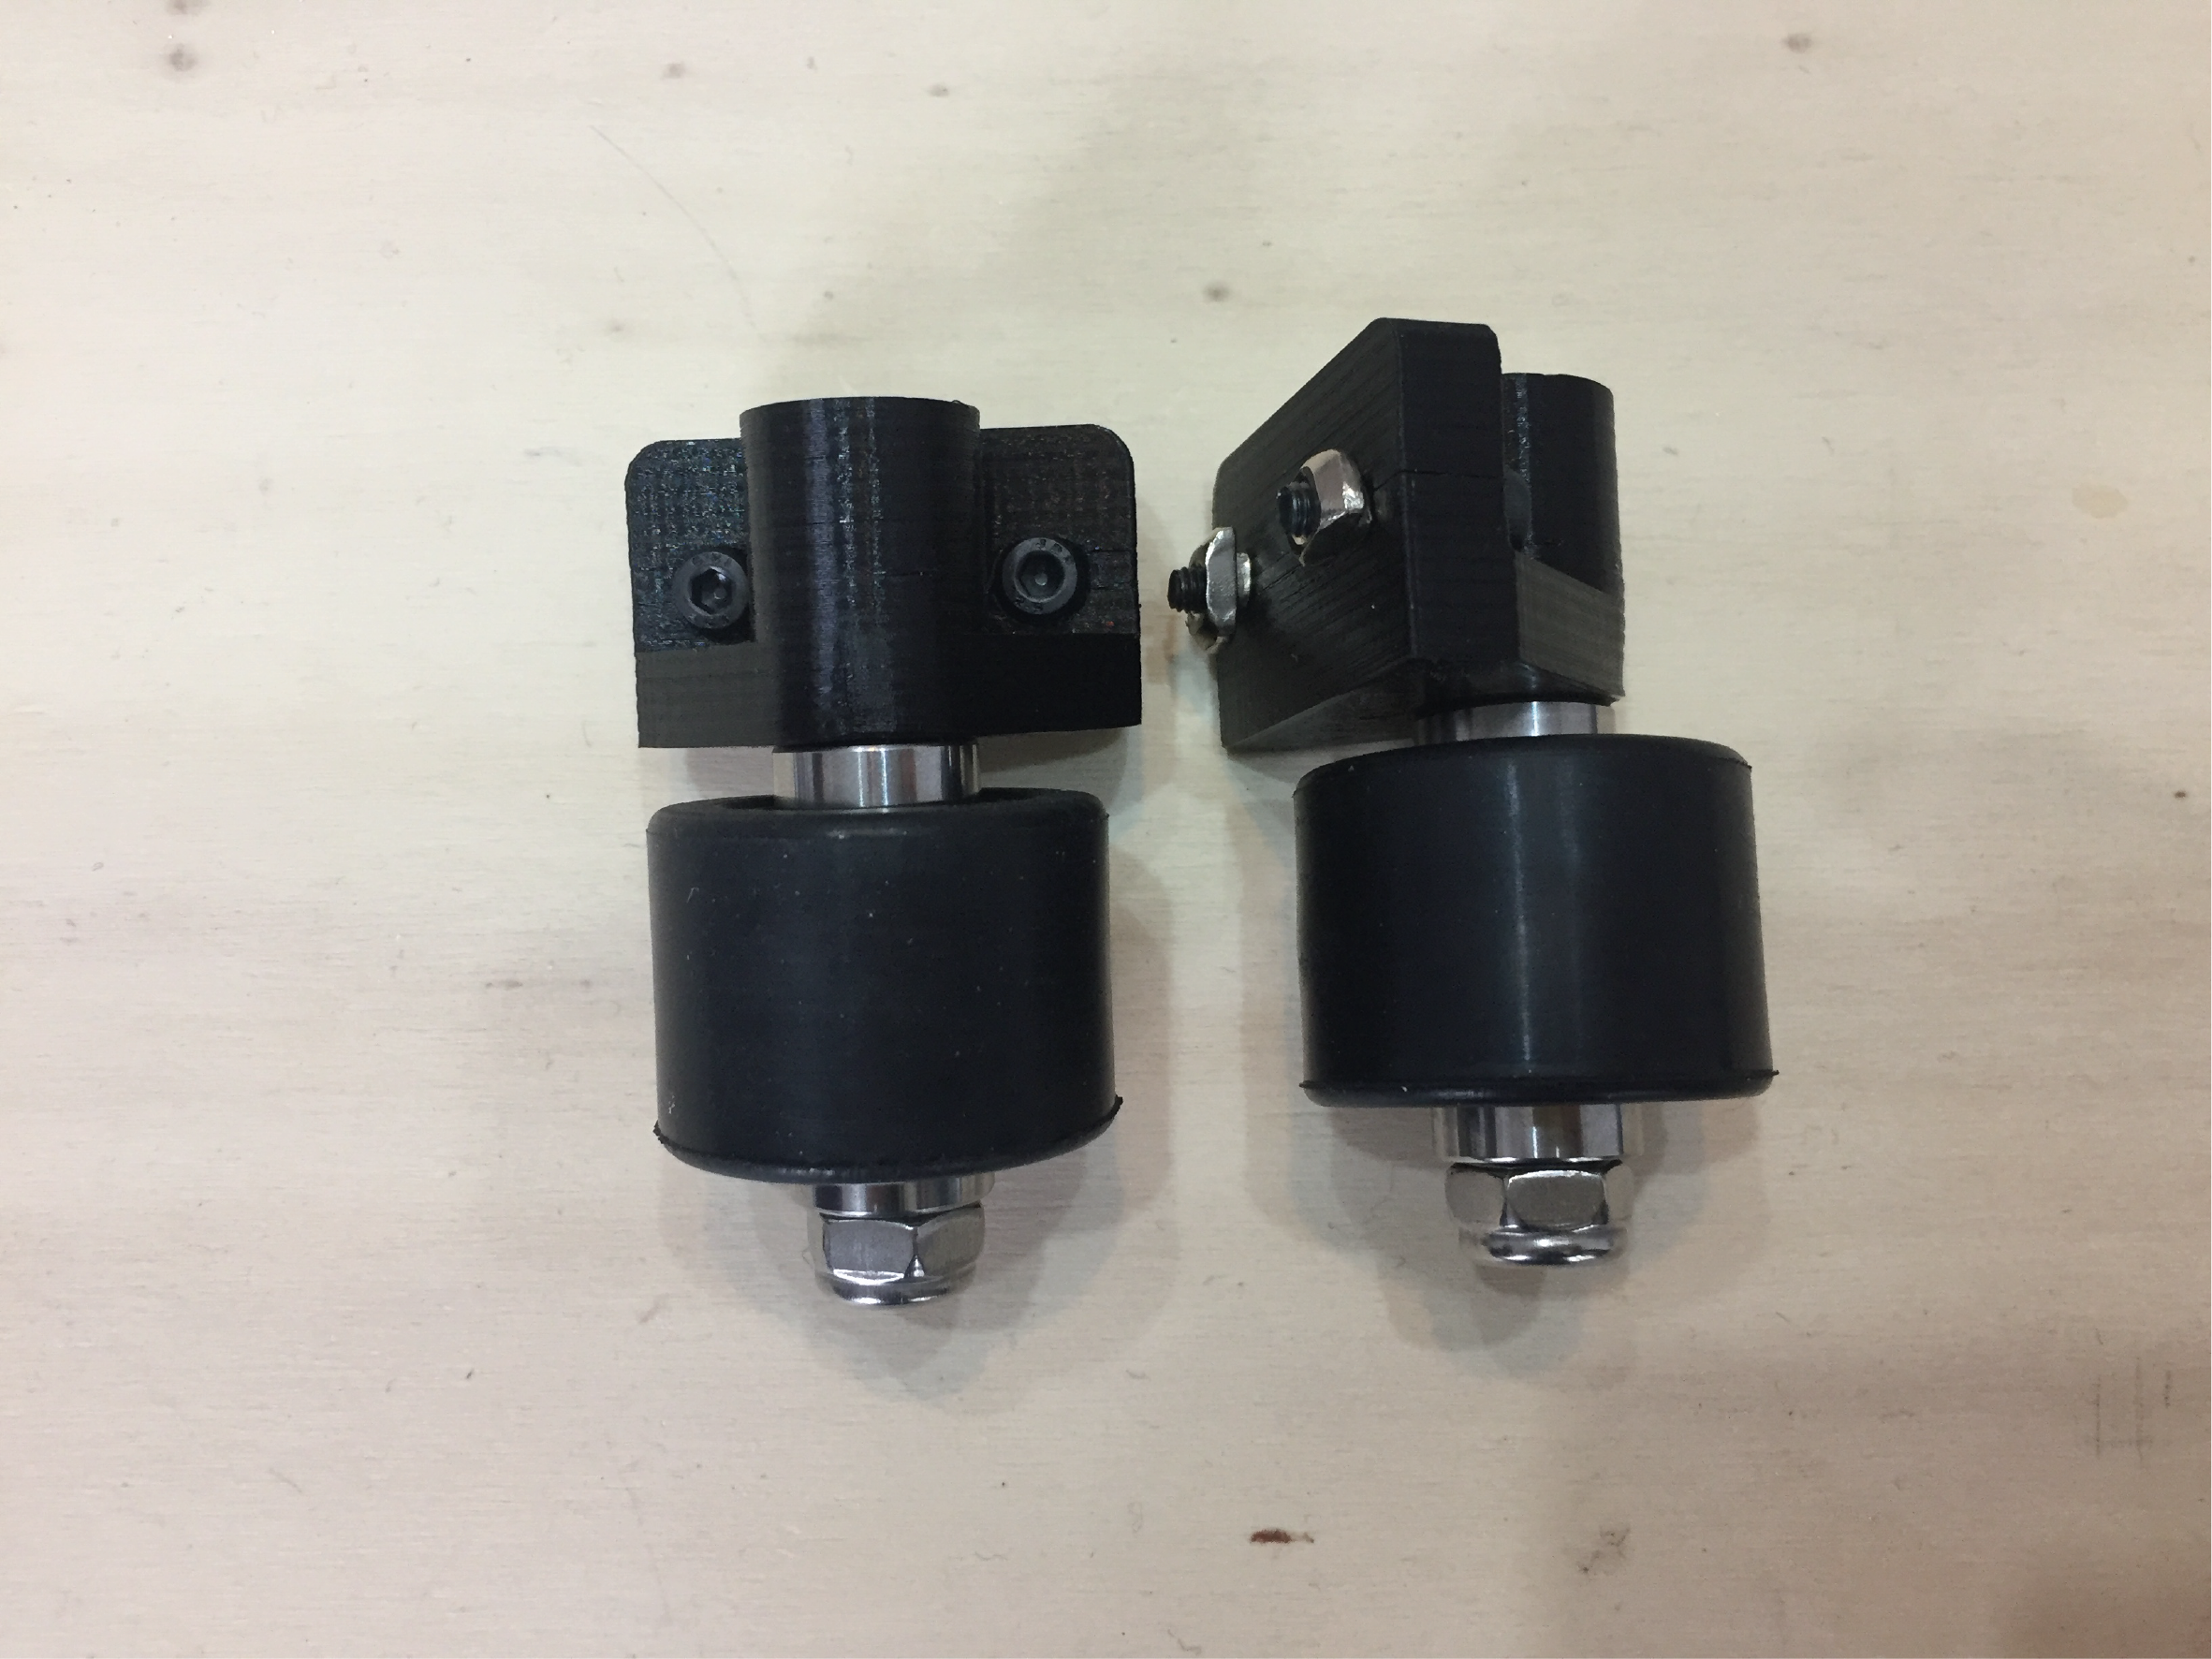
notes
- the bearing is already included in our wheel
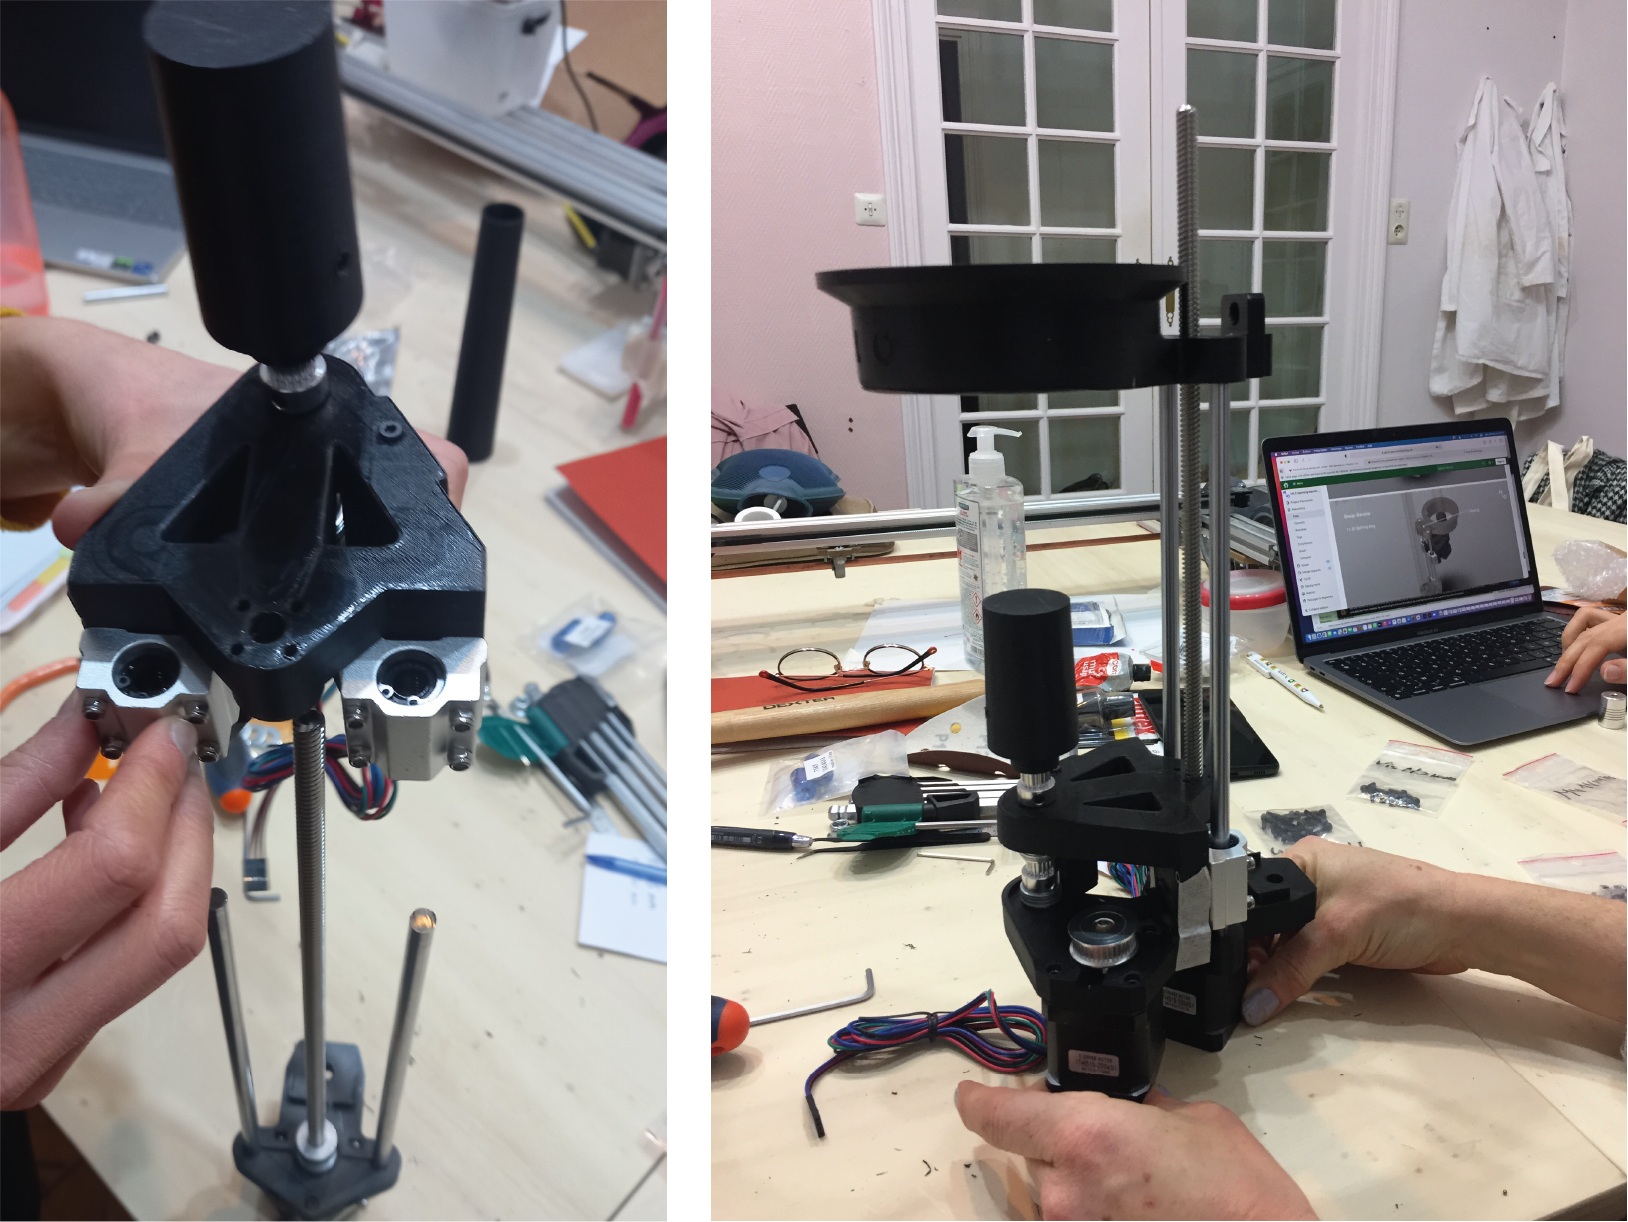
Group 4 spindel platform
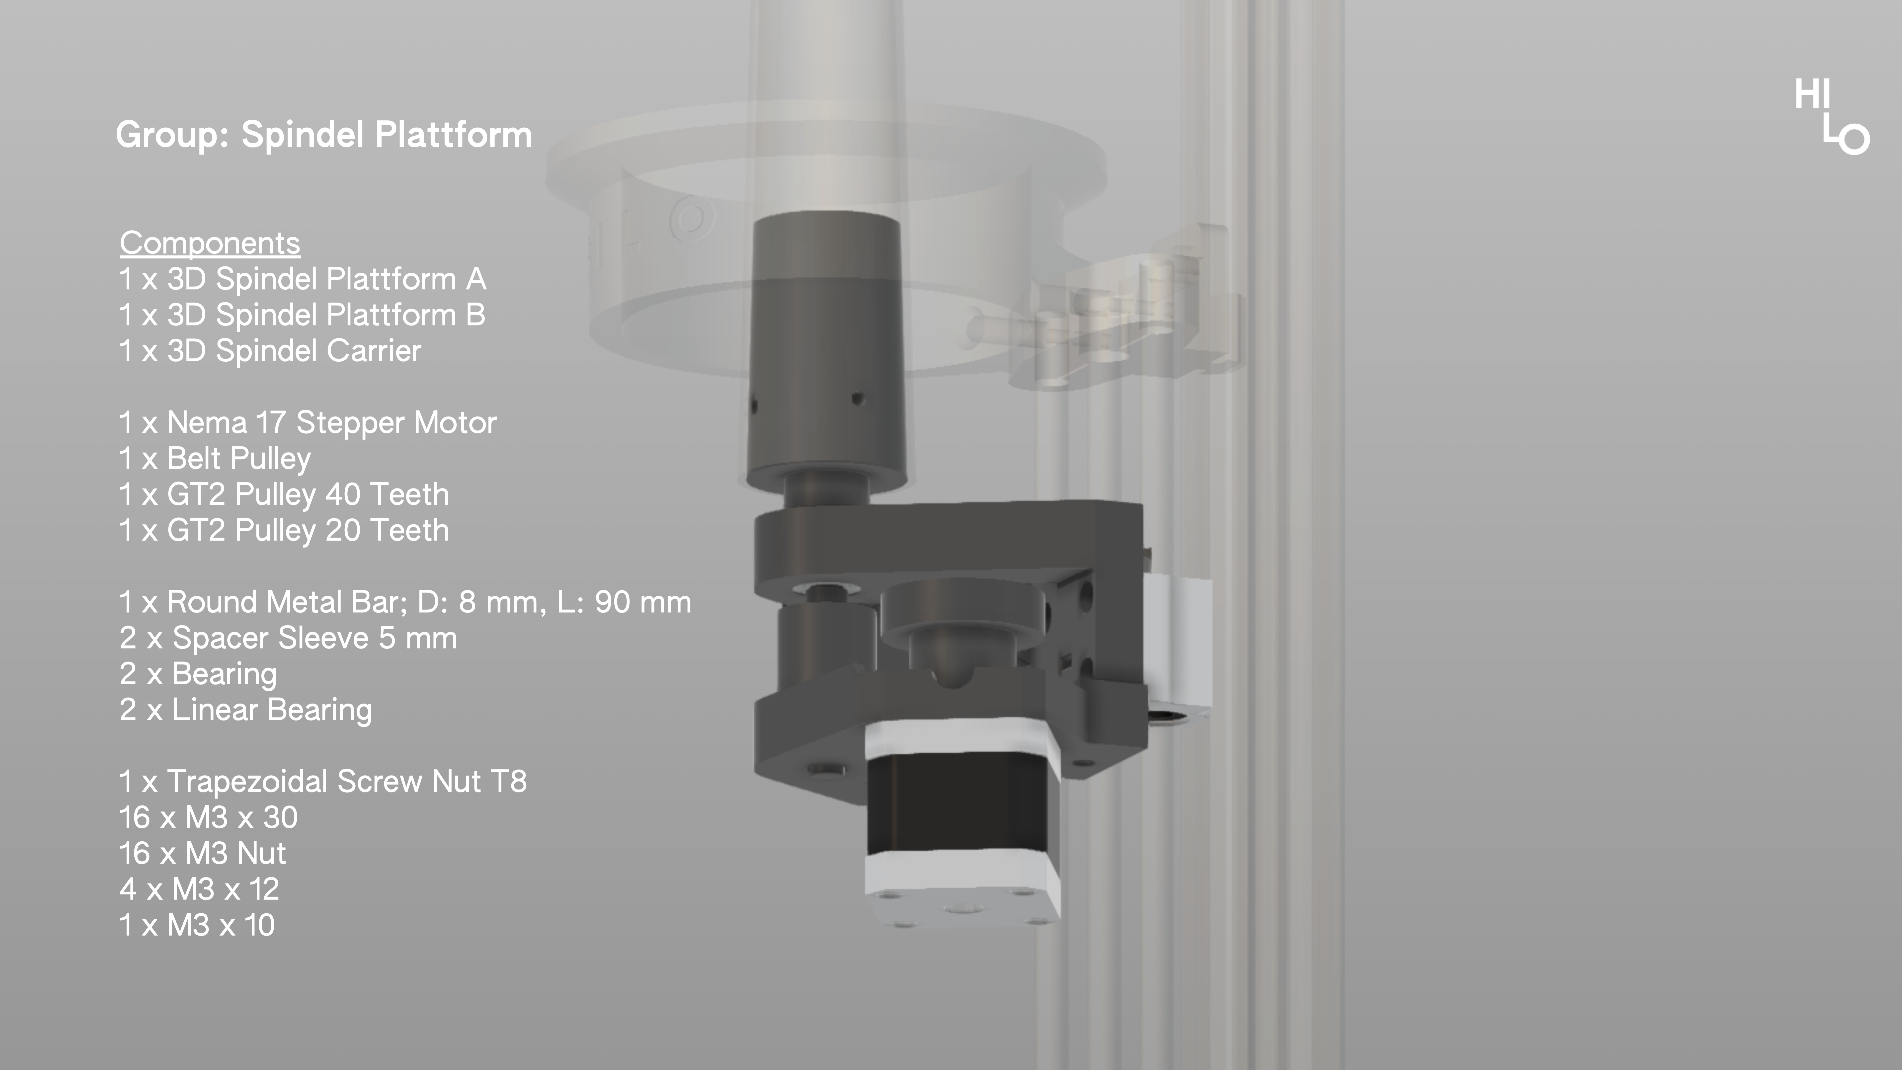 image from Studio Hilo
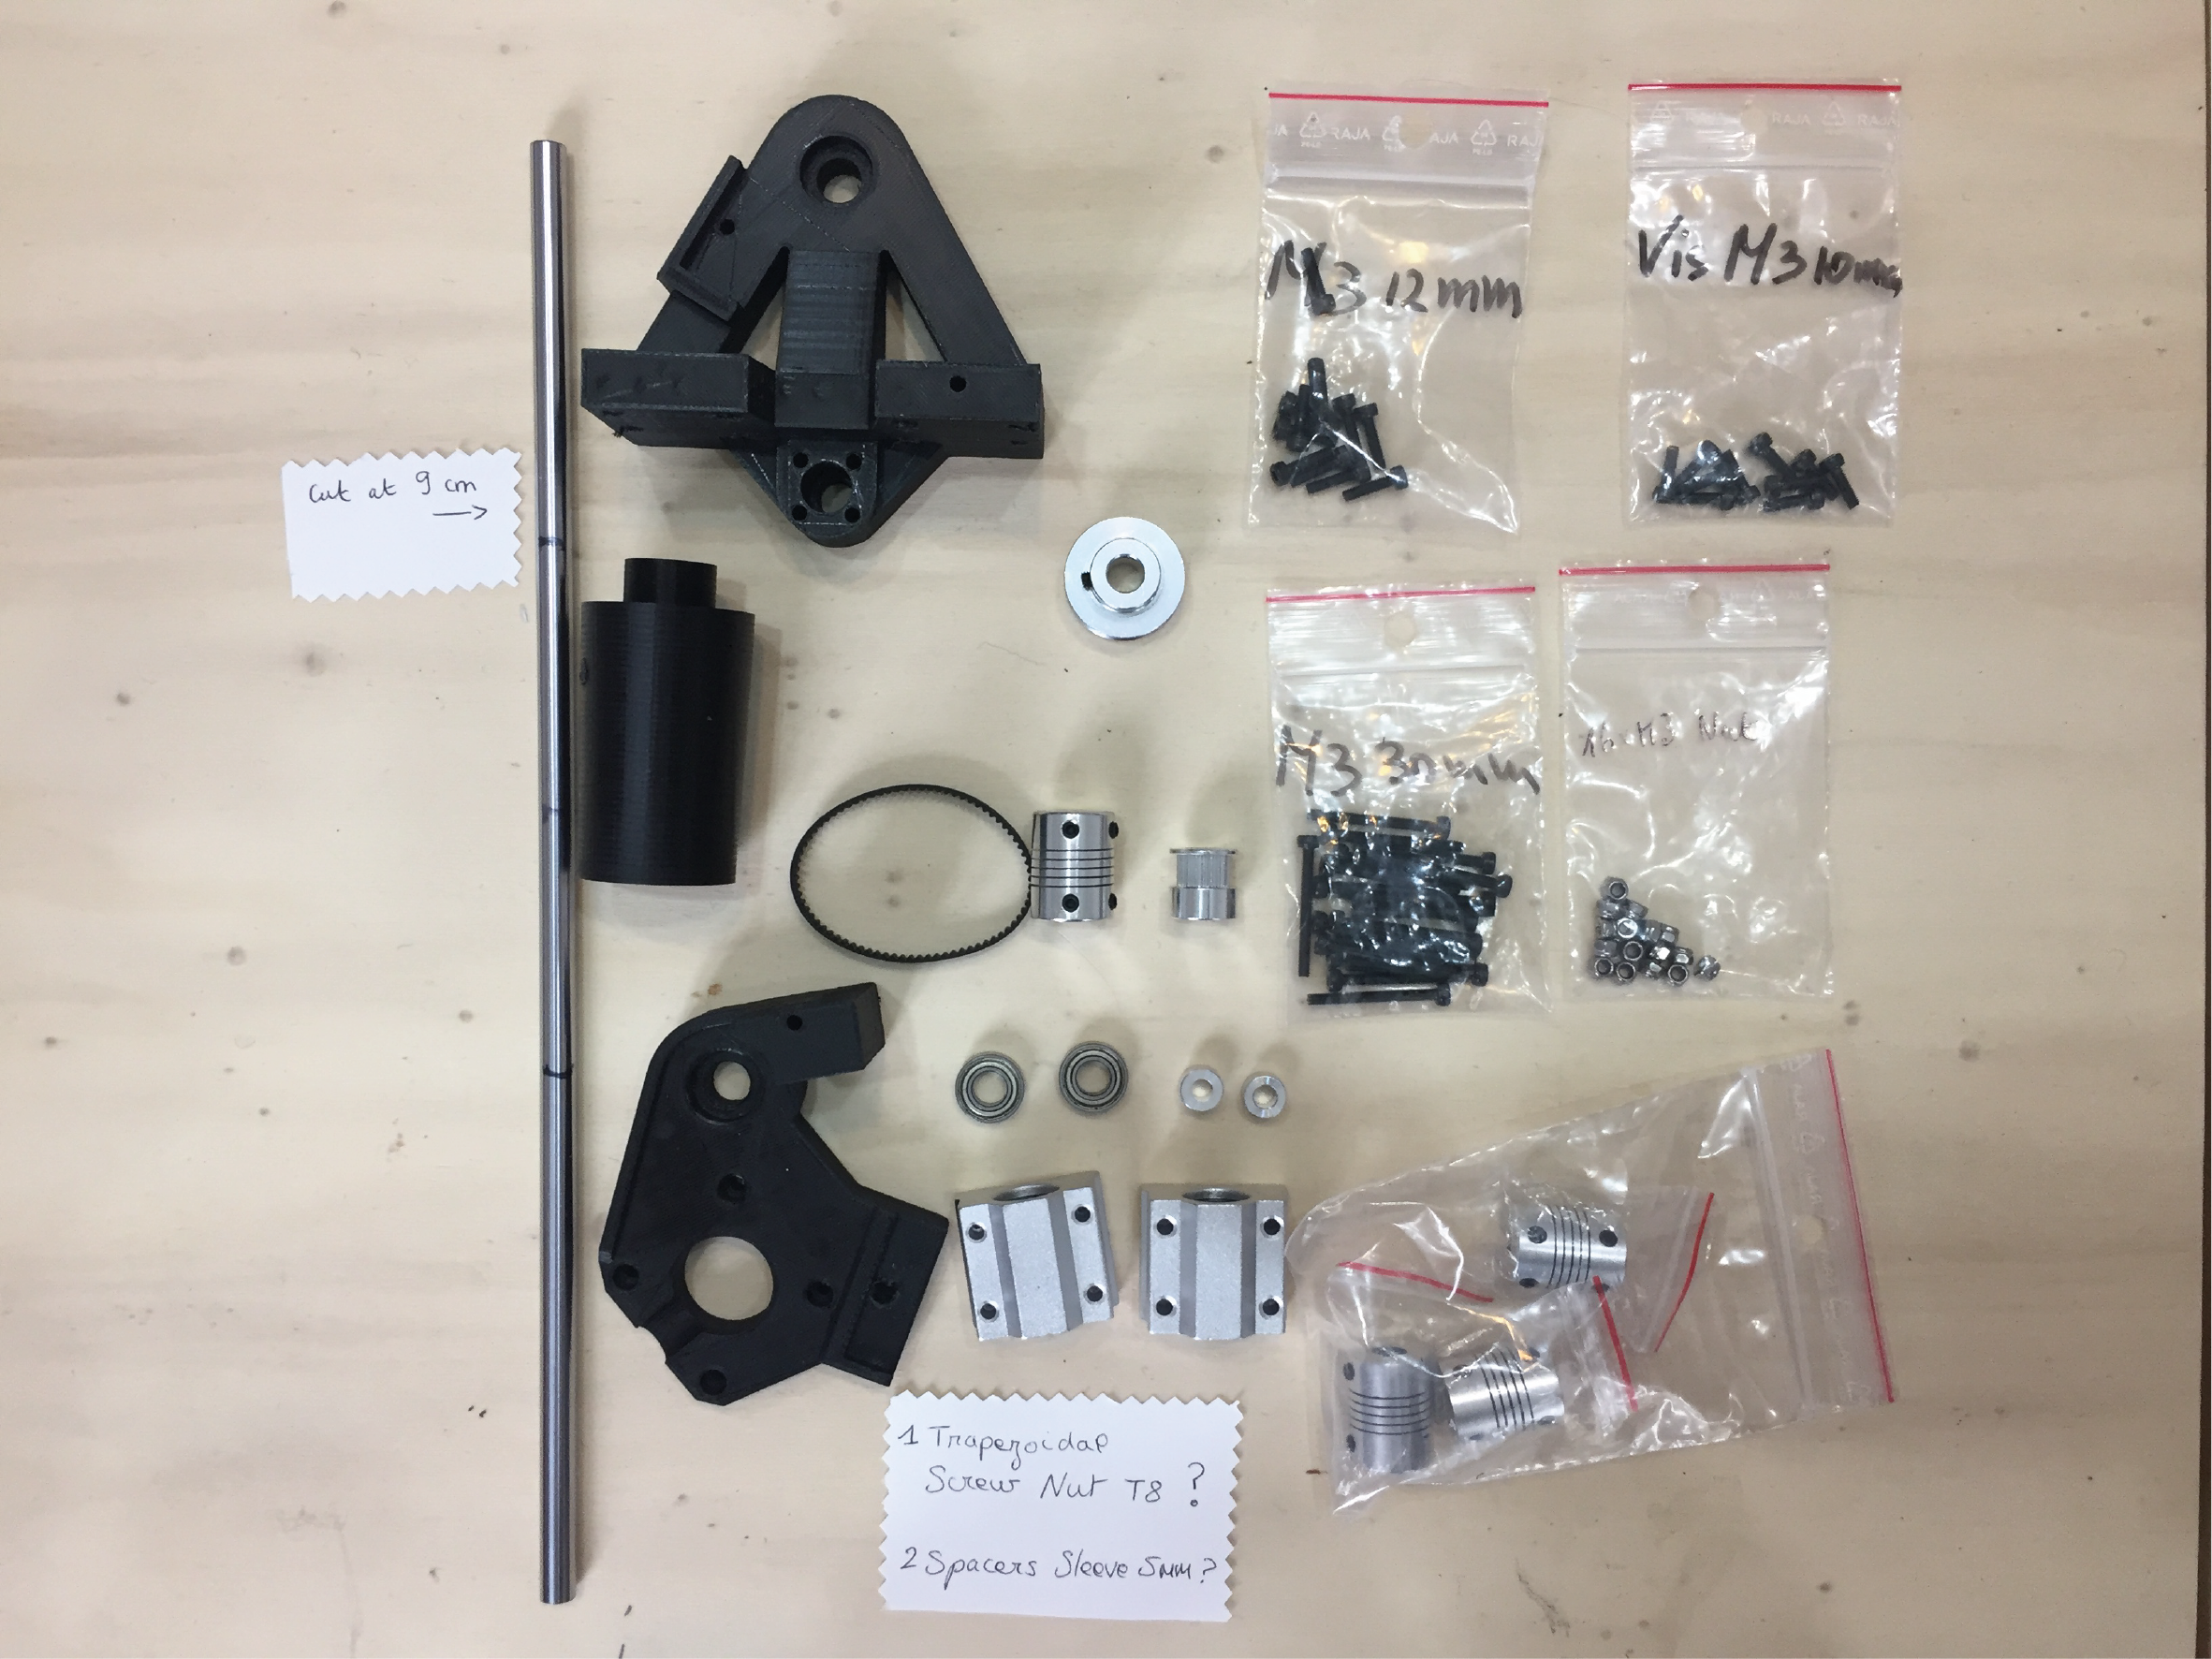
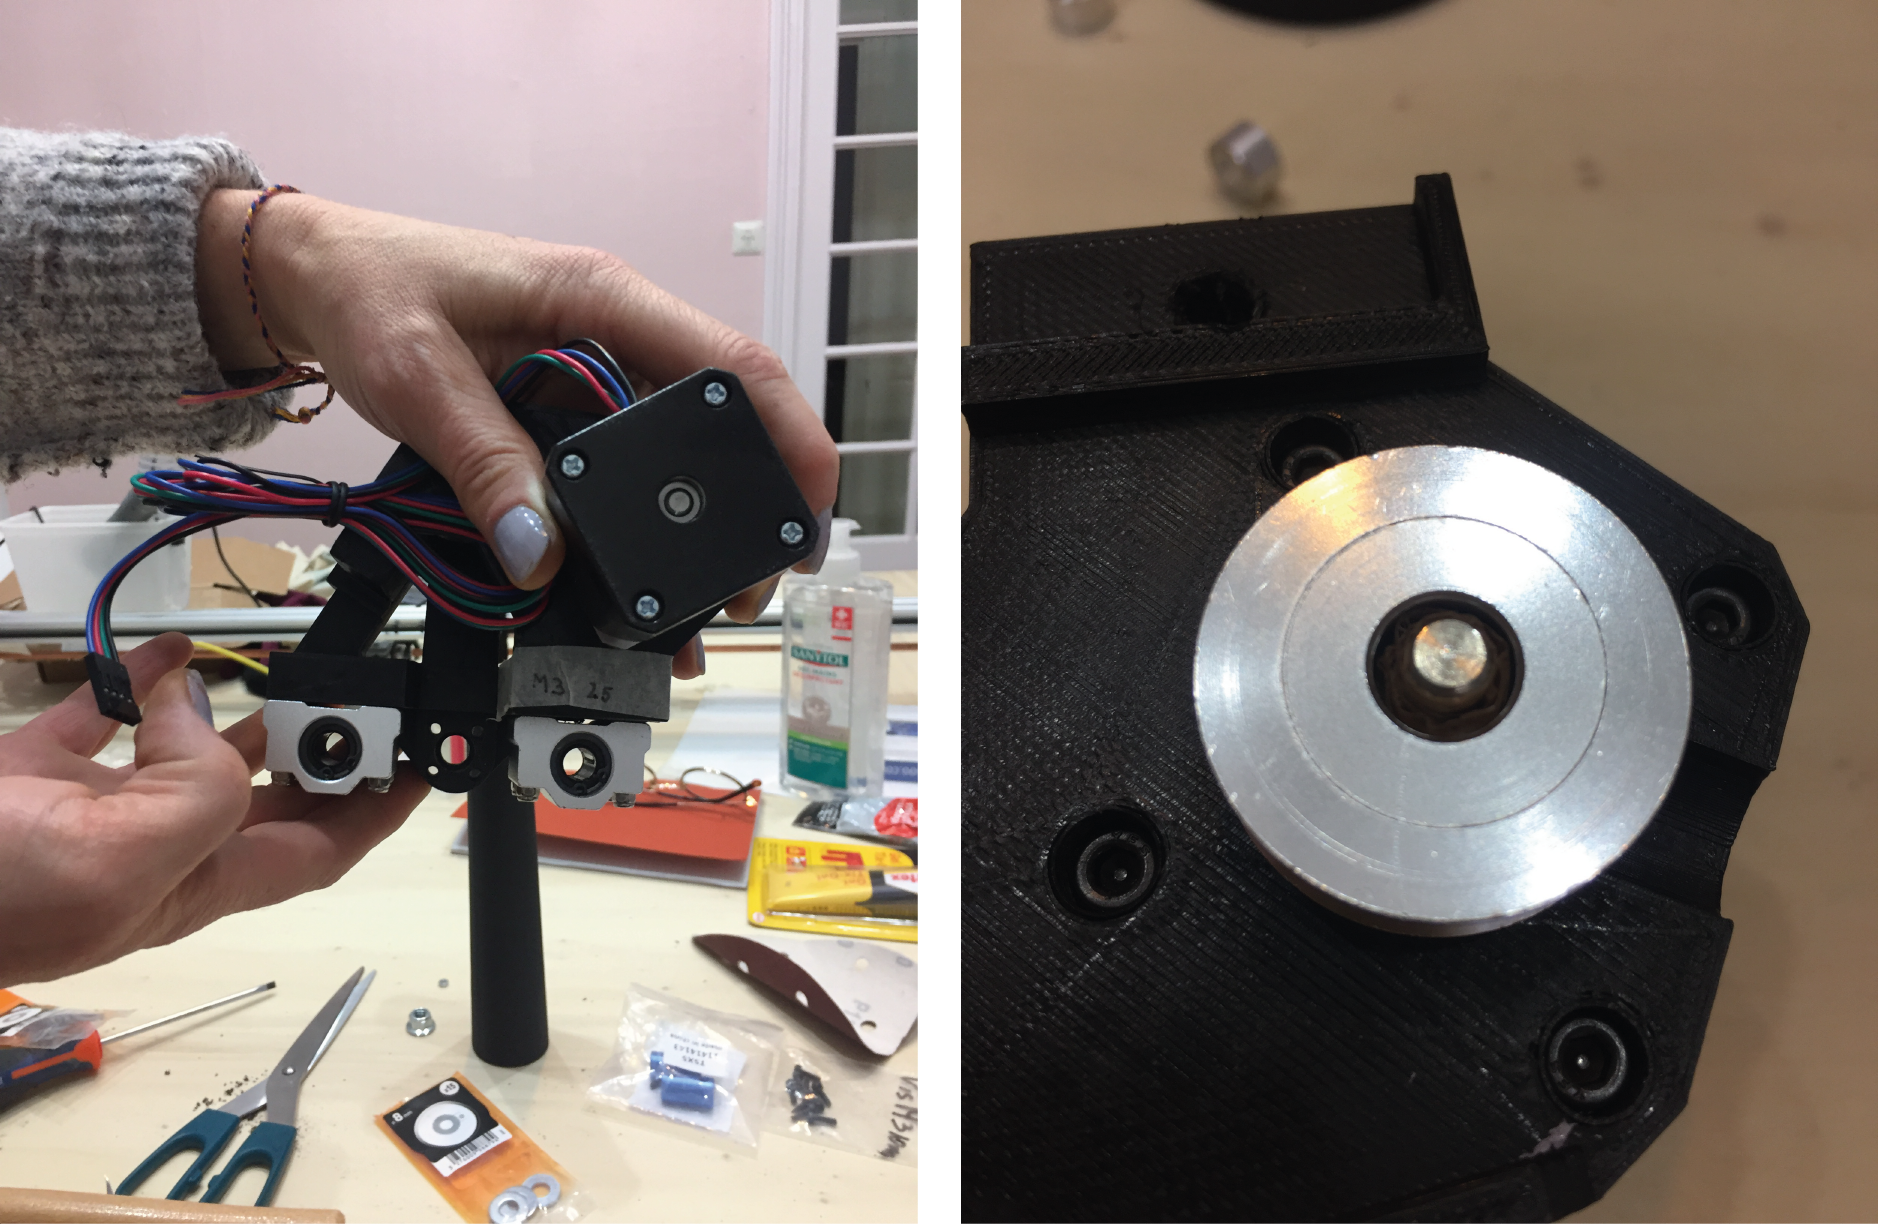 Our GT2 pulley 40 teeth was actually to big so we put tape inside to fit the motor.
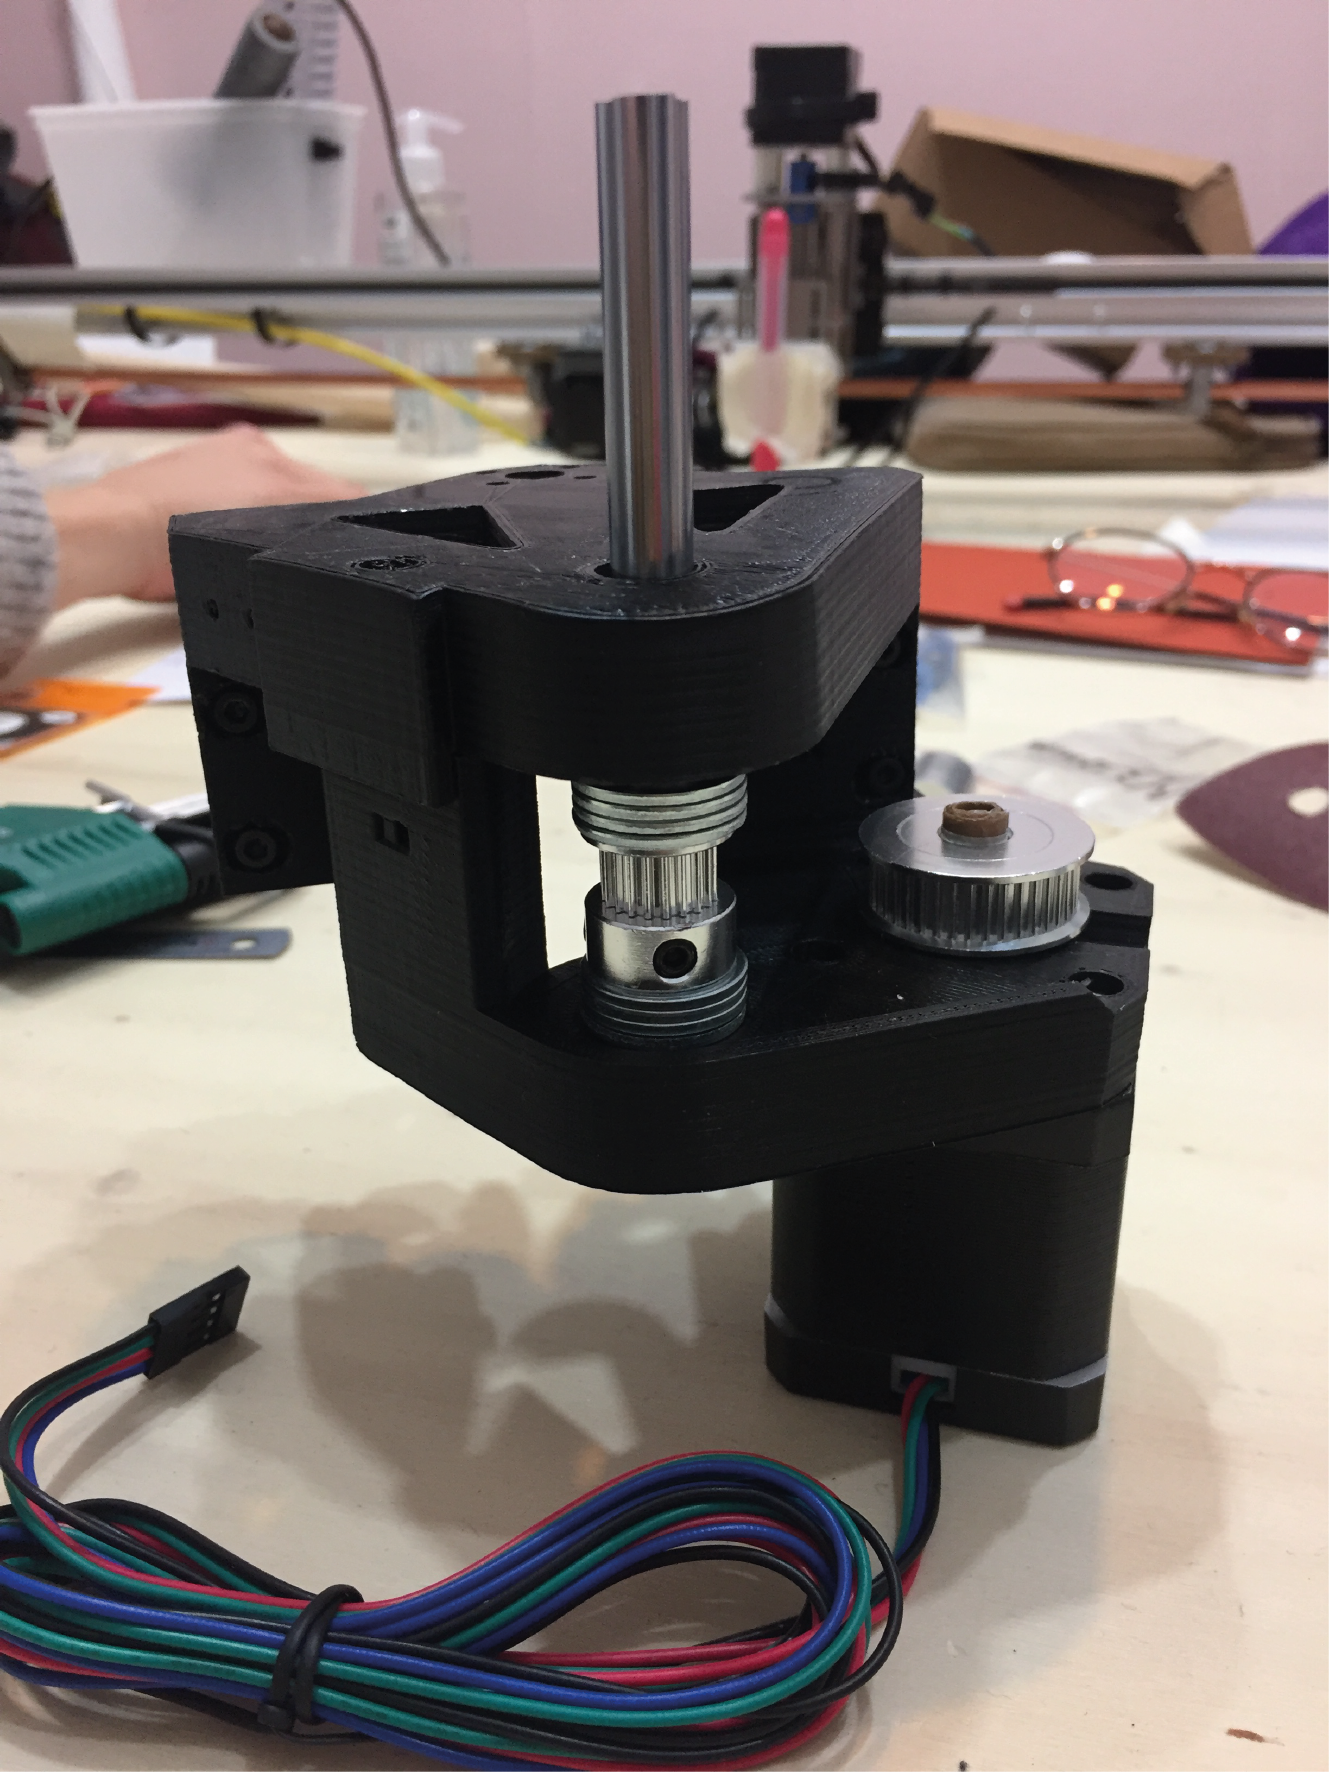 In the picture we actually built it wrong, the GT2 pulley 20 teeth is upside down and we forgot to put the belt pulley... We had to do it again !
notes
- we didn't have the trapezoidal swrew but it's not needed to run the machine
- we pushed the 9cm rod at the bottom of the hole
- our GT2 pulley 20 teeth was to big so we had to put tape in it to fit the motor
- the 3D printed holes for the M3 nuts were very very tiny, we had to dig inside with a srewdriver
- one M3 30 screw was to big (the one which connect platform A to platform B), M3 20 would be better
- on the last slide, we didn't know where to put the M3 10
- we had to unbuild the spindel platform and make it again because we forgot the belt pulley, it's not on the documentation slides
Group 5 elevator
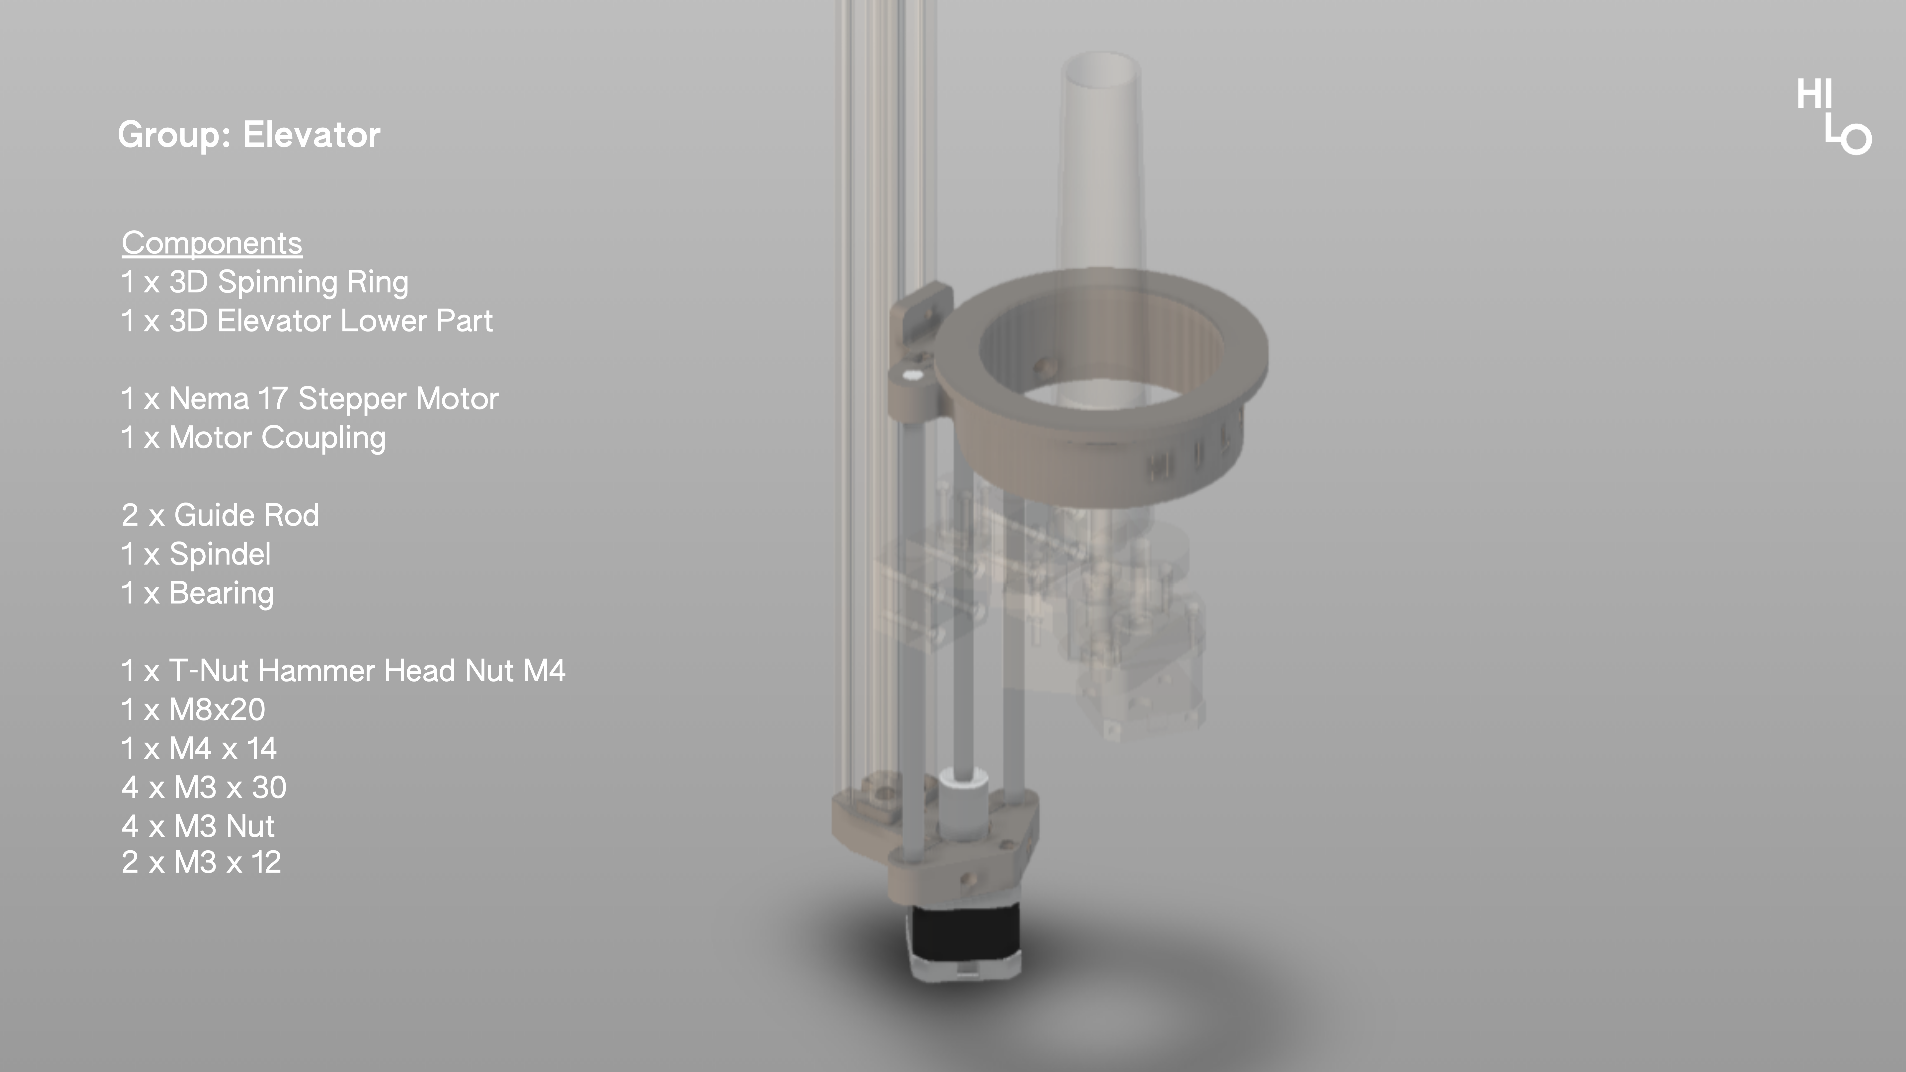 image from Studio Hilo
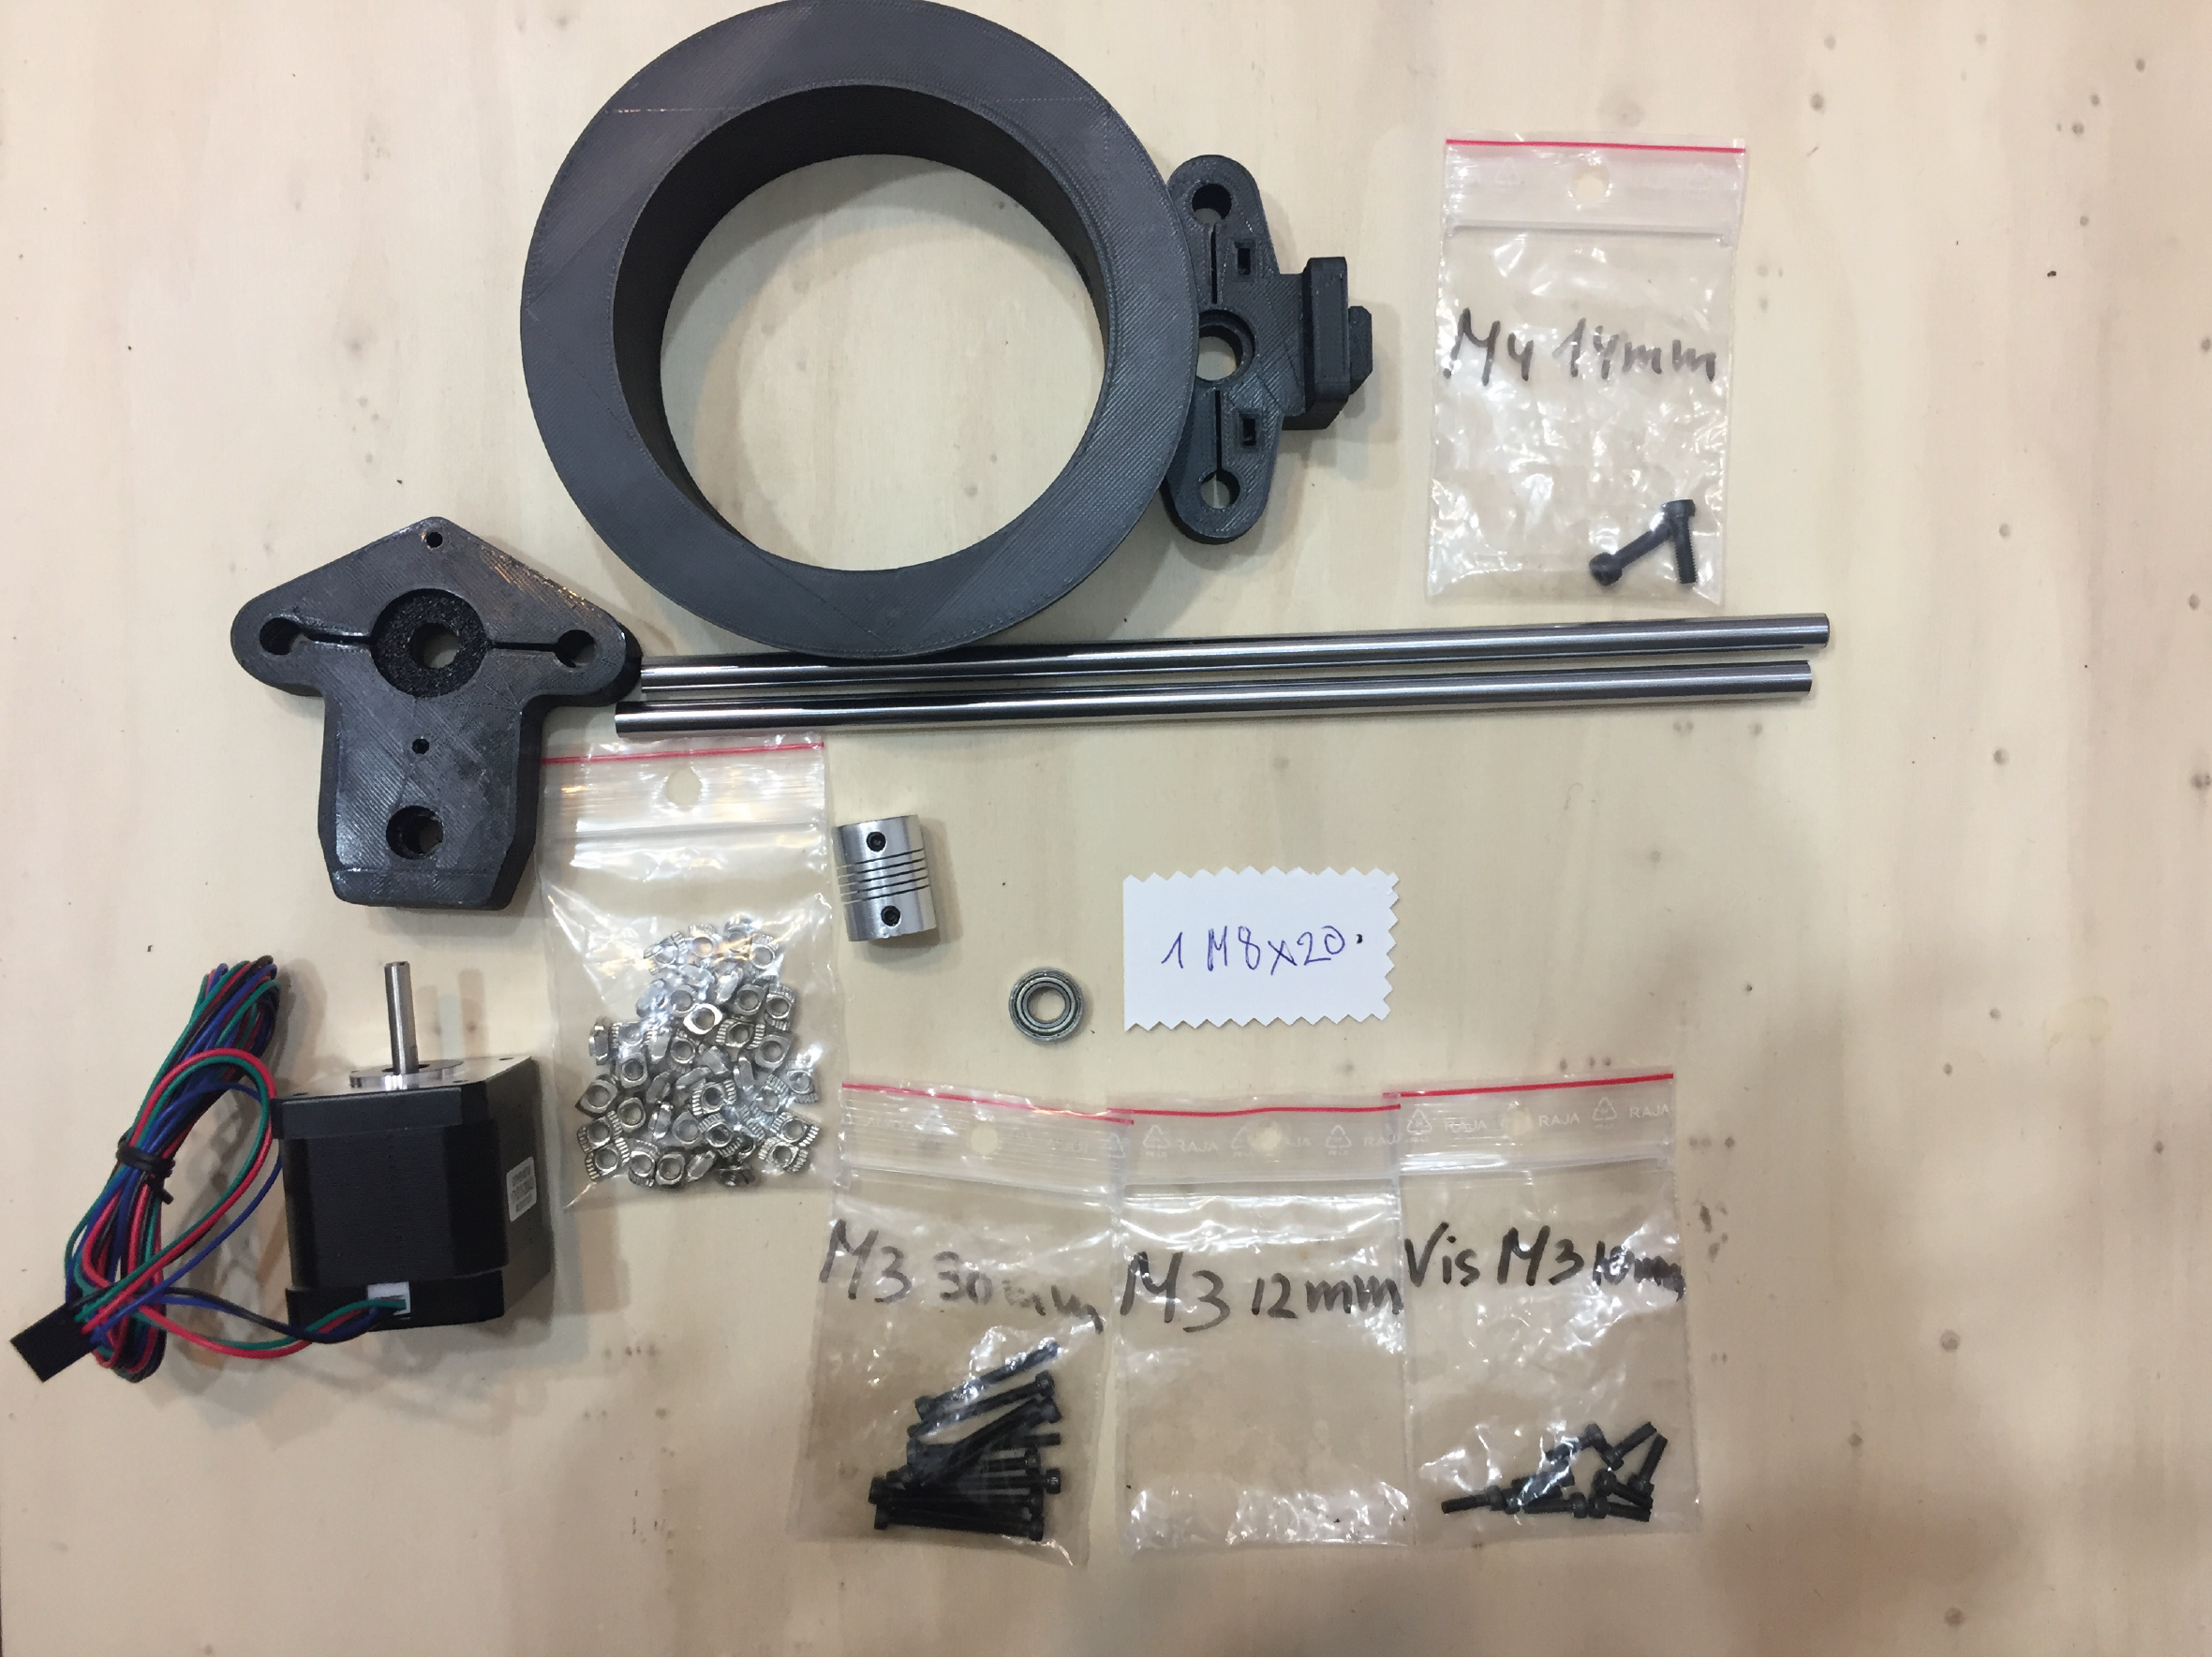
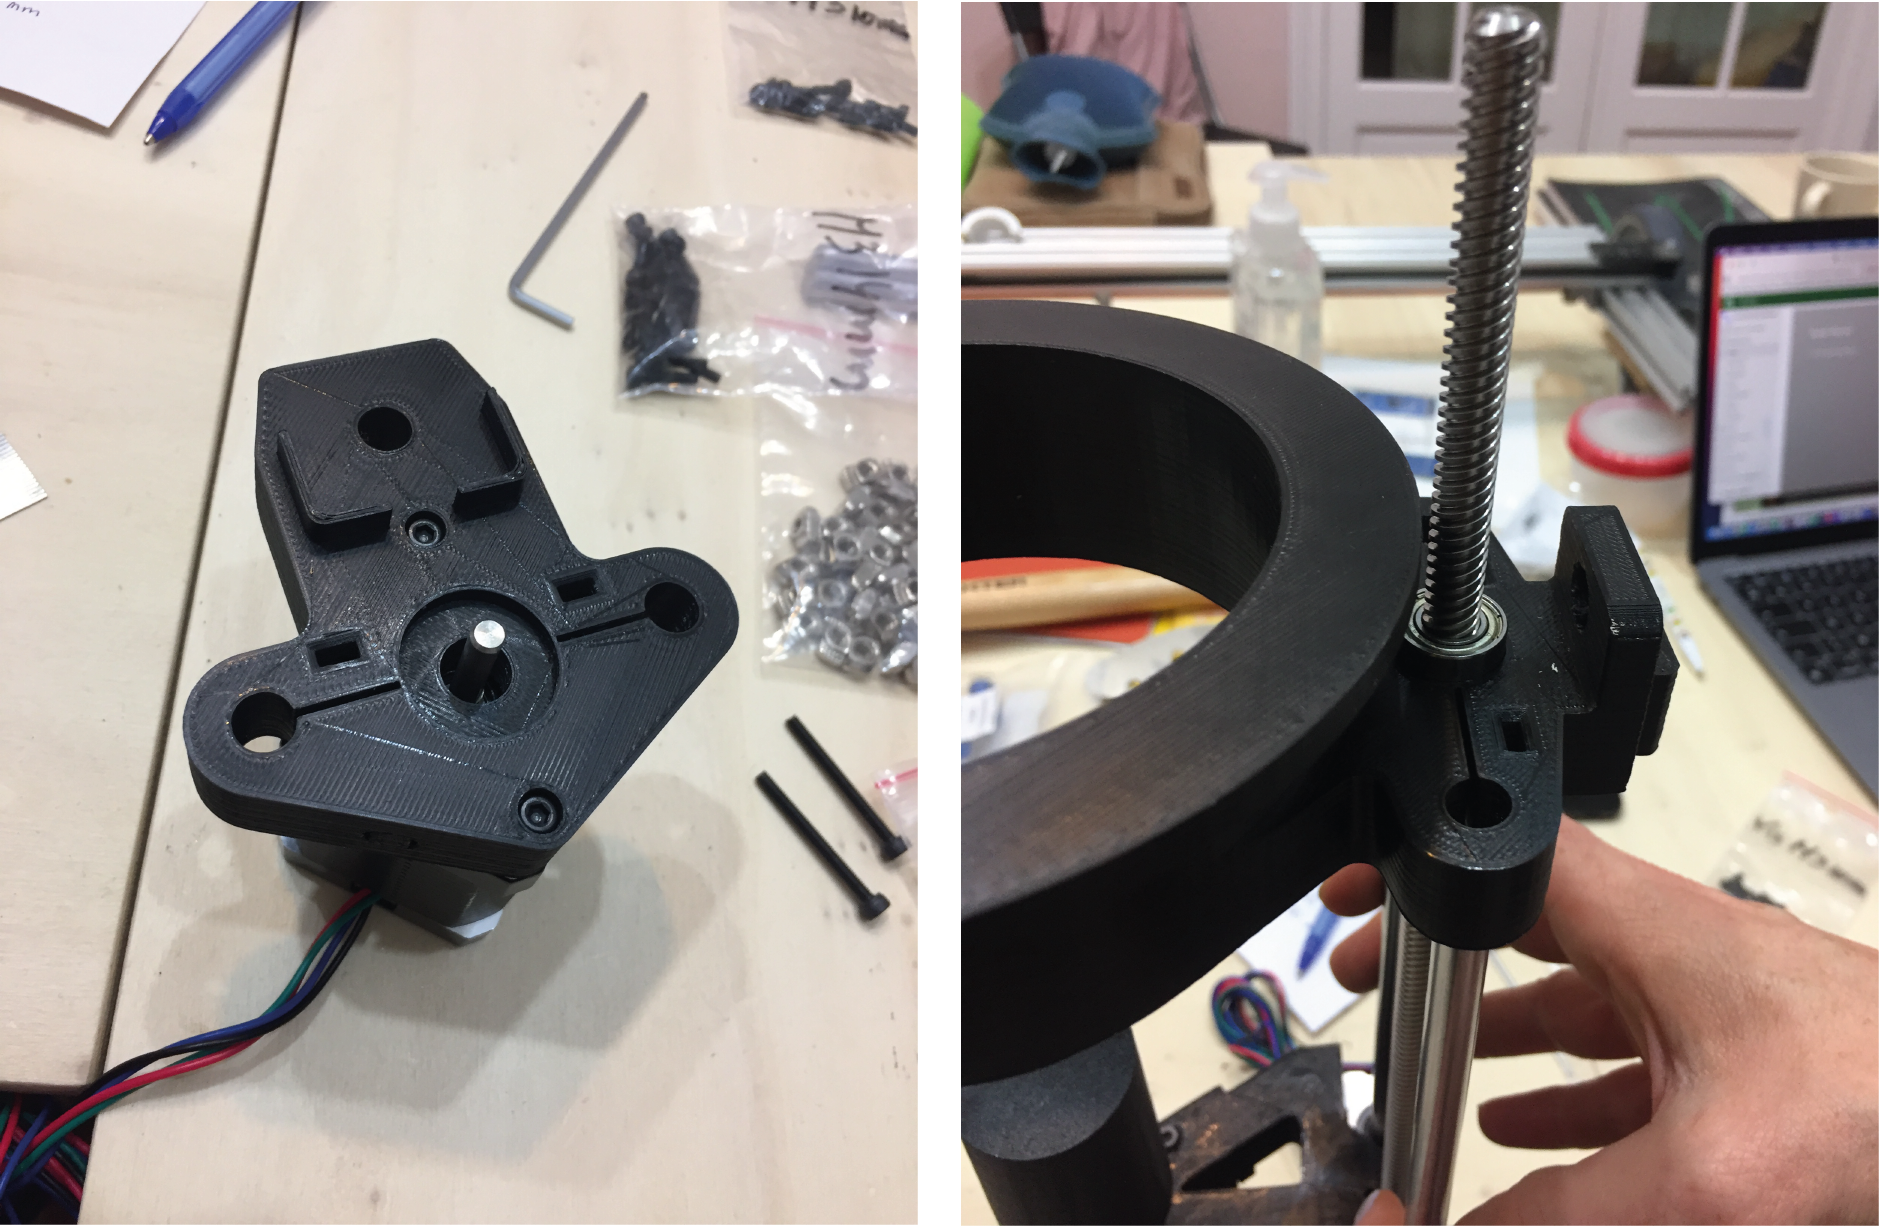
notes
- we didn't have enough M3 12 srews
- 3D printed holes are to tiny, we couldn't put the nut inside...
Group 6 final assembly
image from Studio Hilo
tap wrench
We used the tap wrench to create a screw thread inside the profiles. We had it on the last afternoon. Unfortunately, it didn't fit in the drill or in a screwdriver ! So... we did it in a special way !
assembling the different parts
And the final machine :
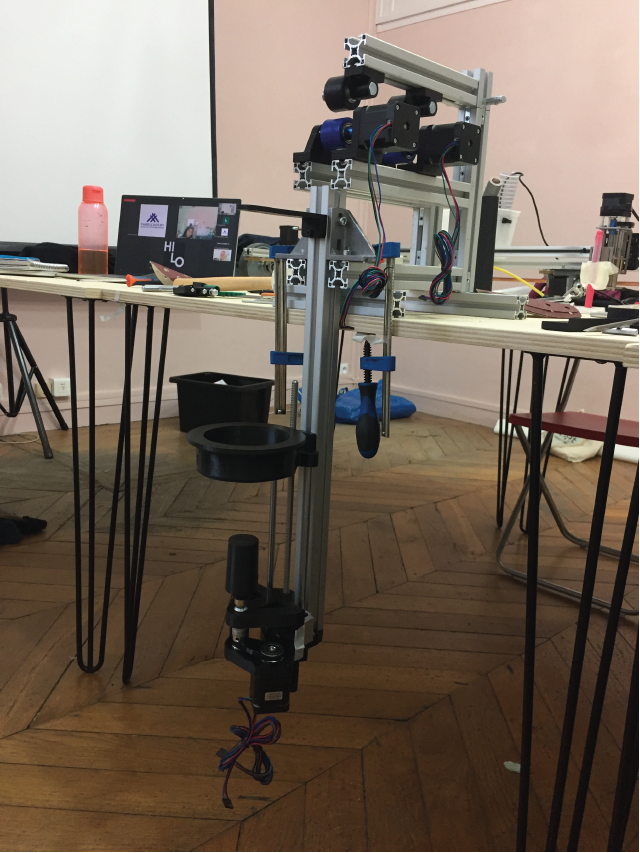
notes
- make sure that everything is very weel srewed and 90° built
The electronic and software part
We followed each step of the documentation.
electronic
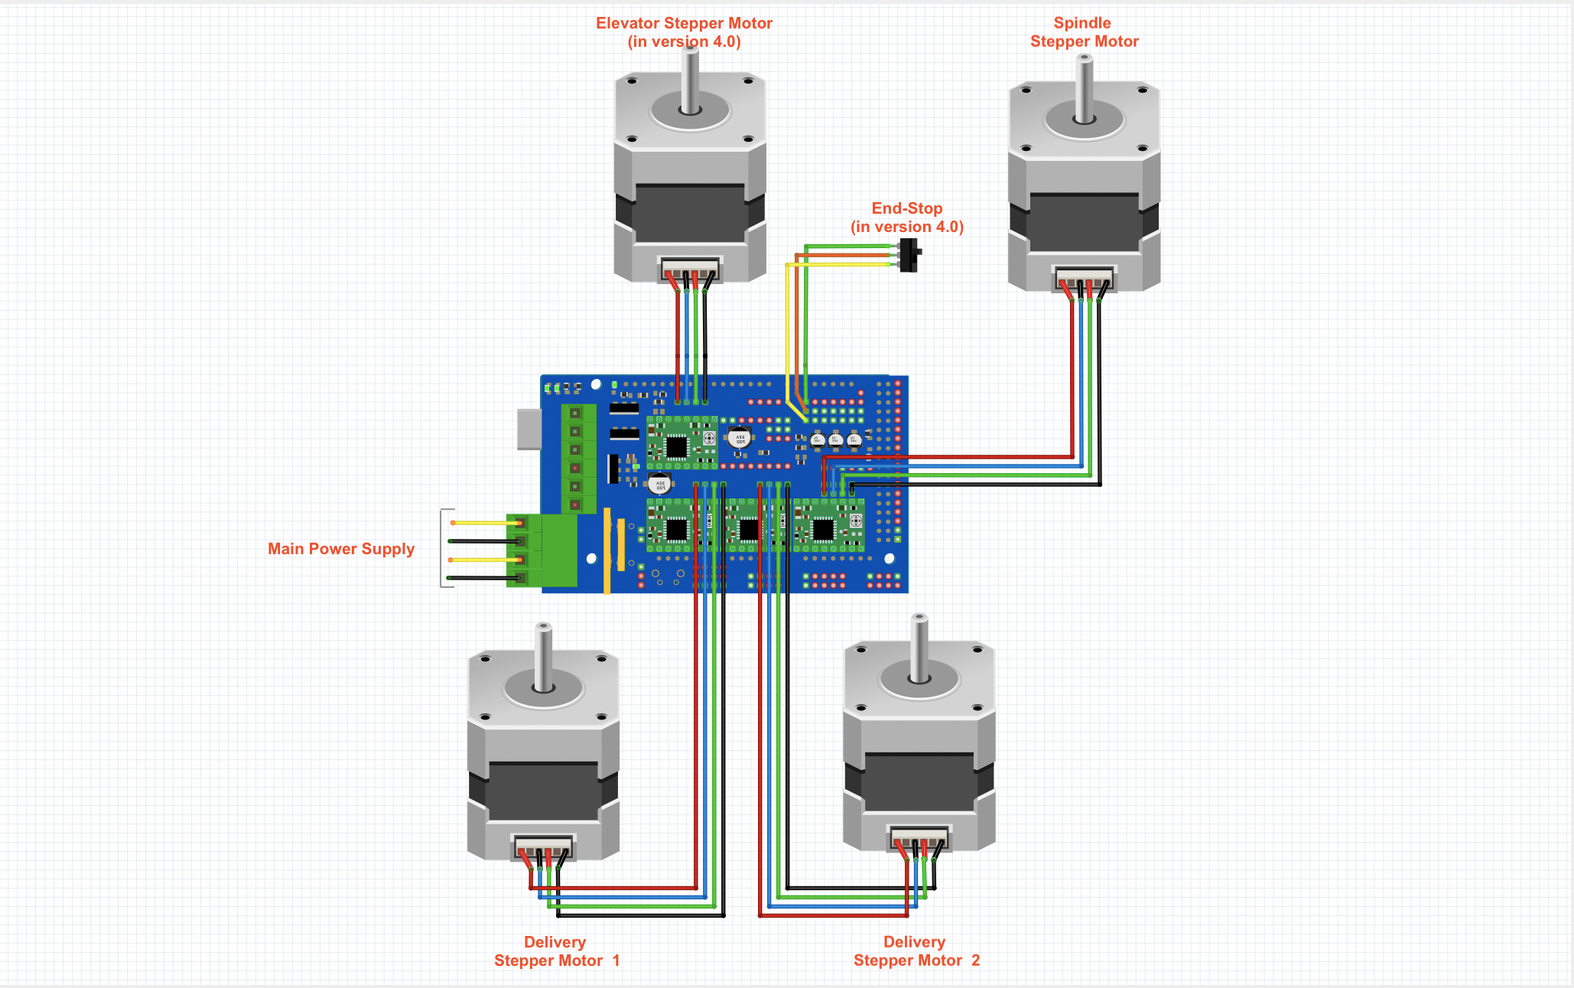
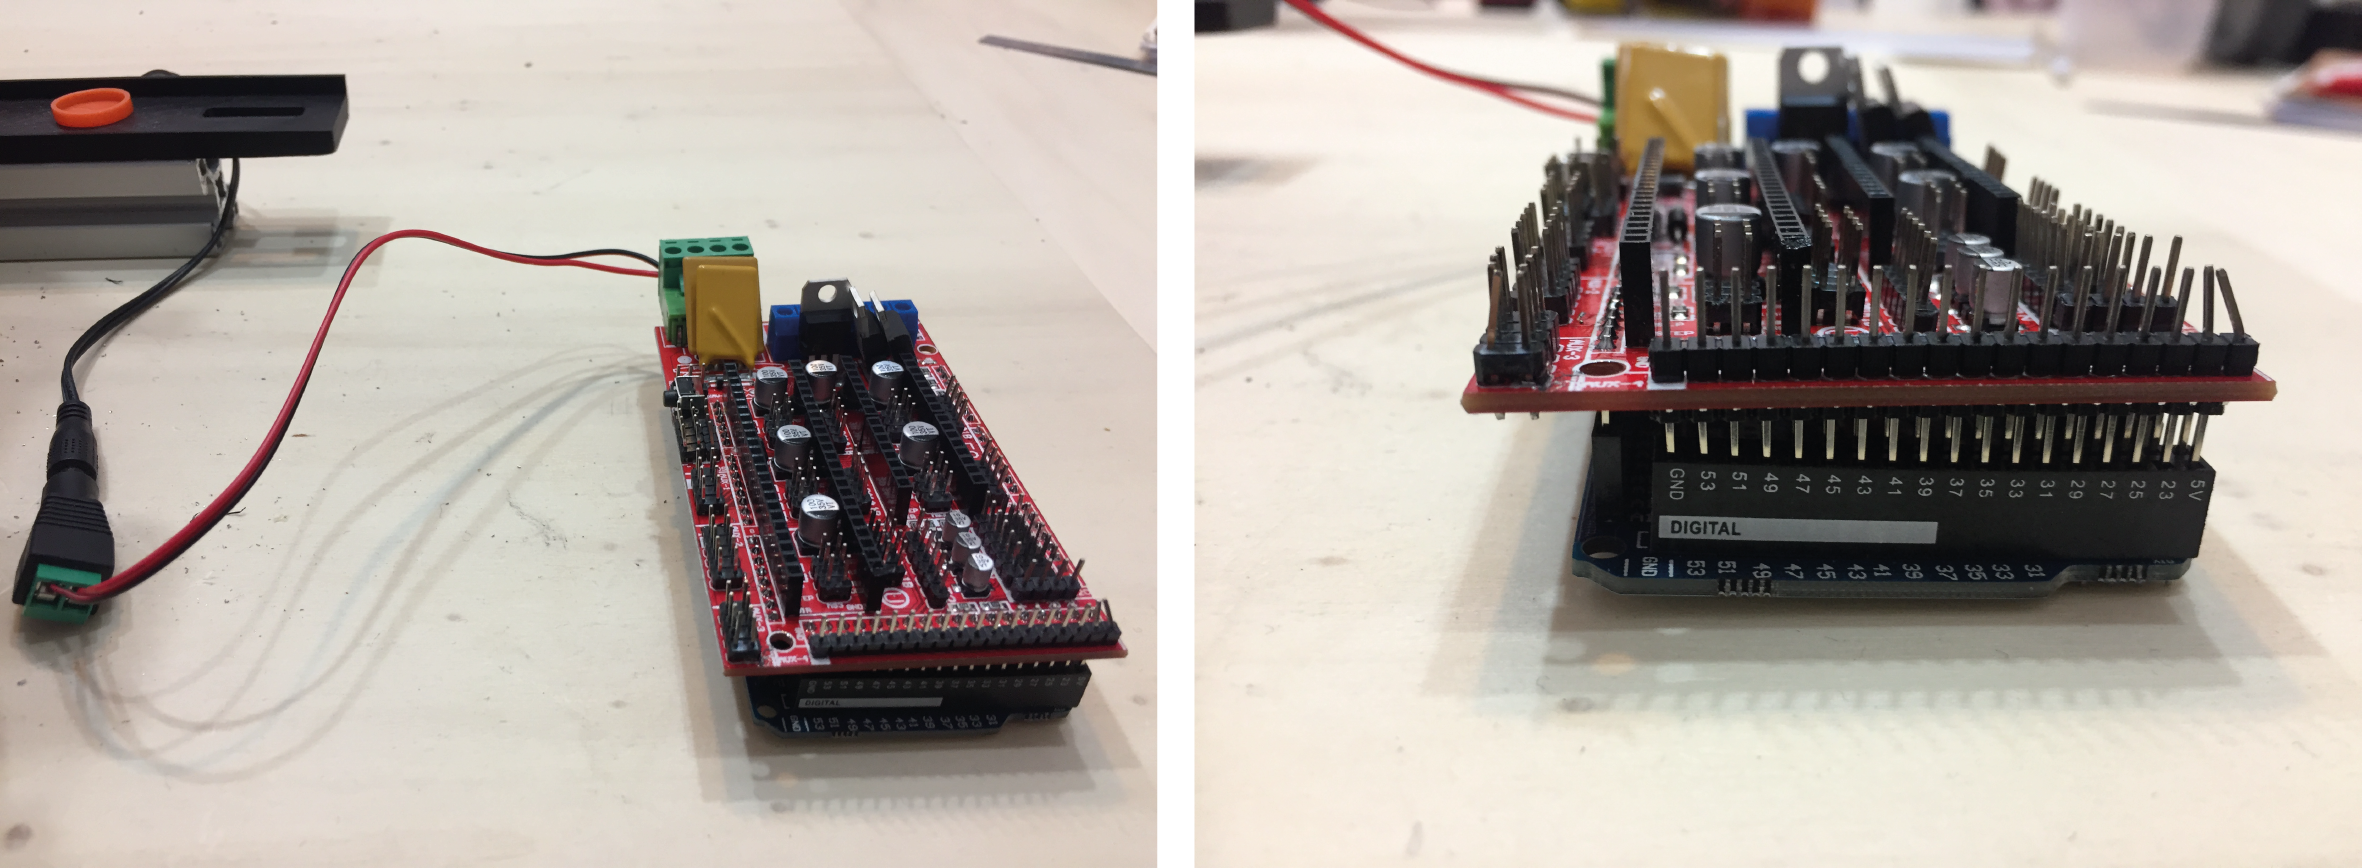
We connected the motors with the red board.
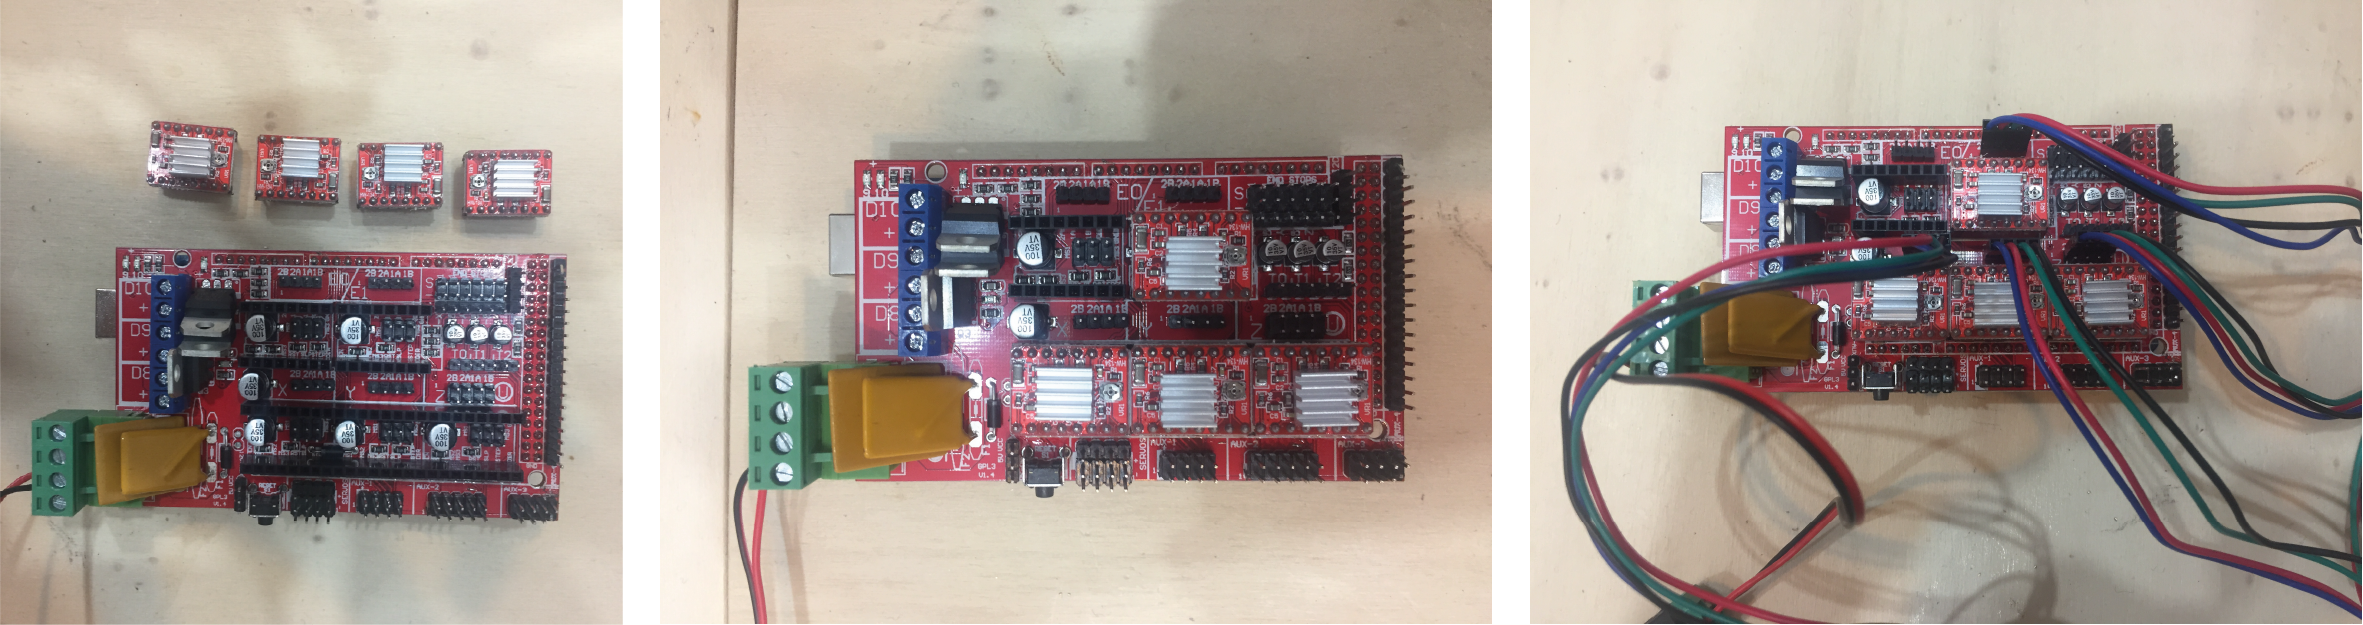
We put the red board on the green board.
arduino
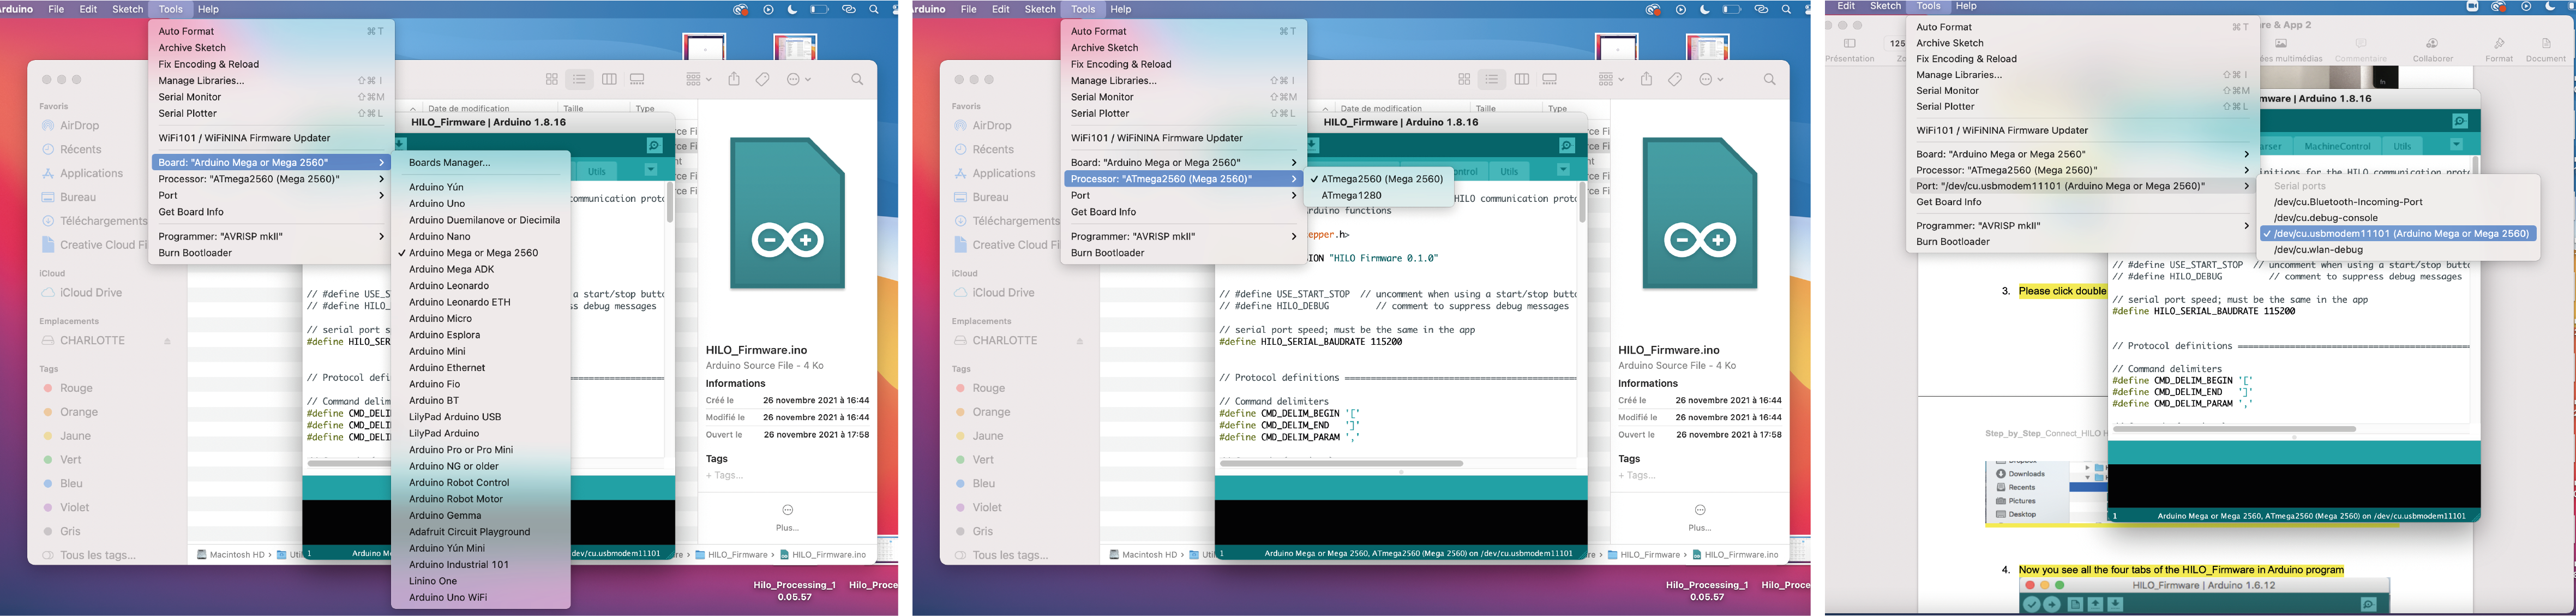
The Arduino sketch is on the documentation. This is the set up to upload the sketch :
-
board : Arduino Mega or Mega 2560
-
processor : ATmega2560
-
port : Arduino Mega or Mega 2560
processing
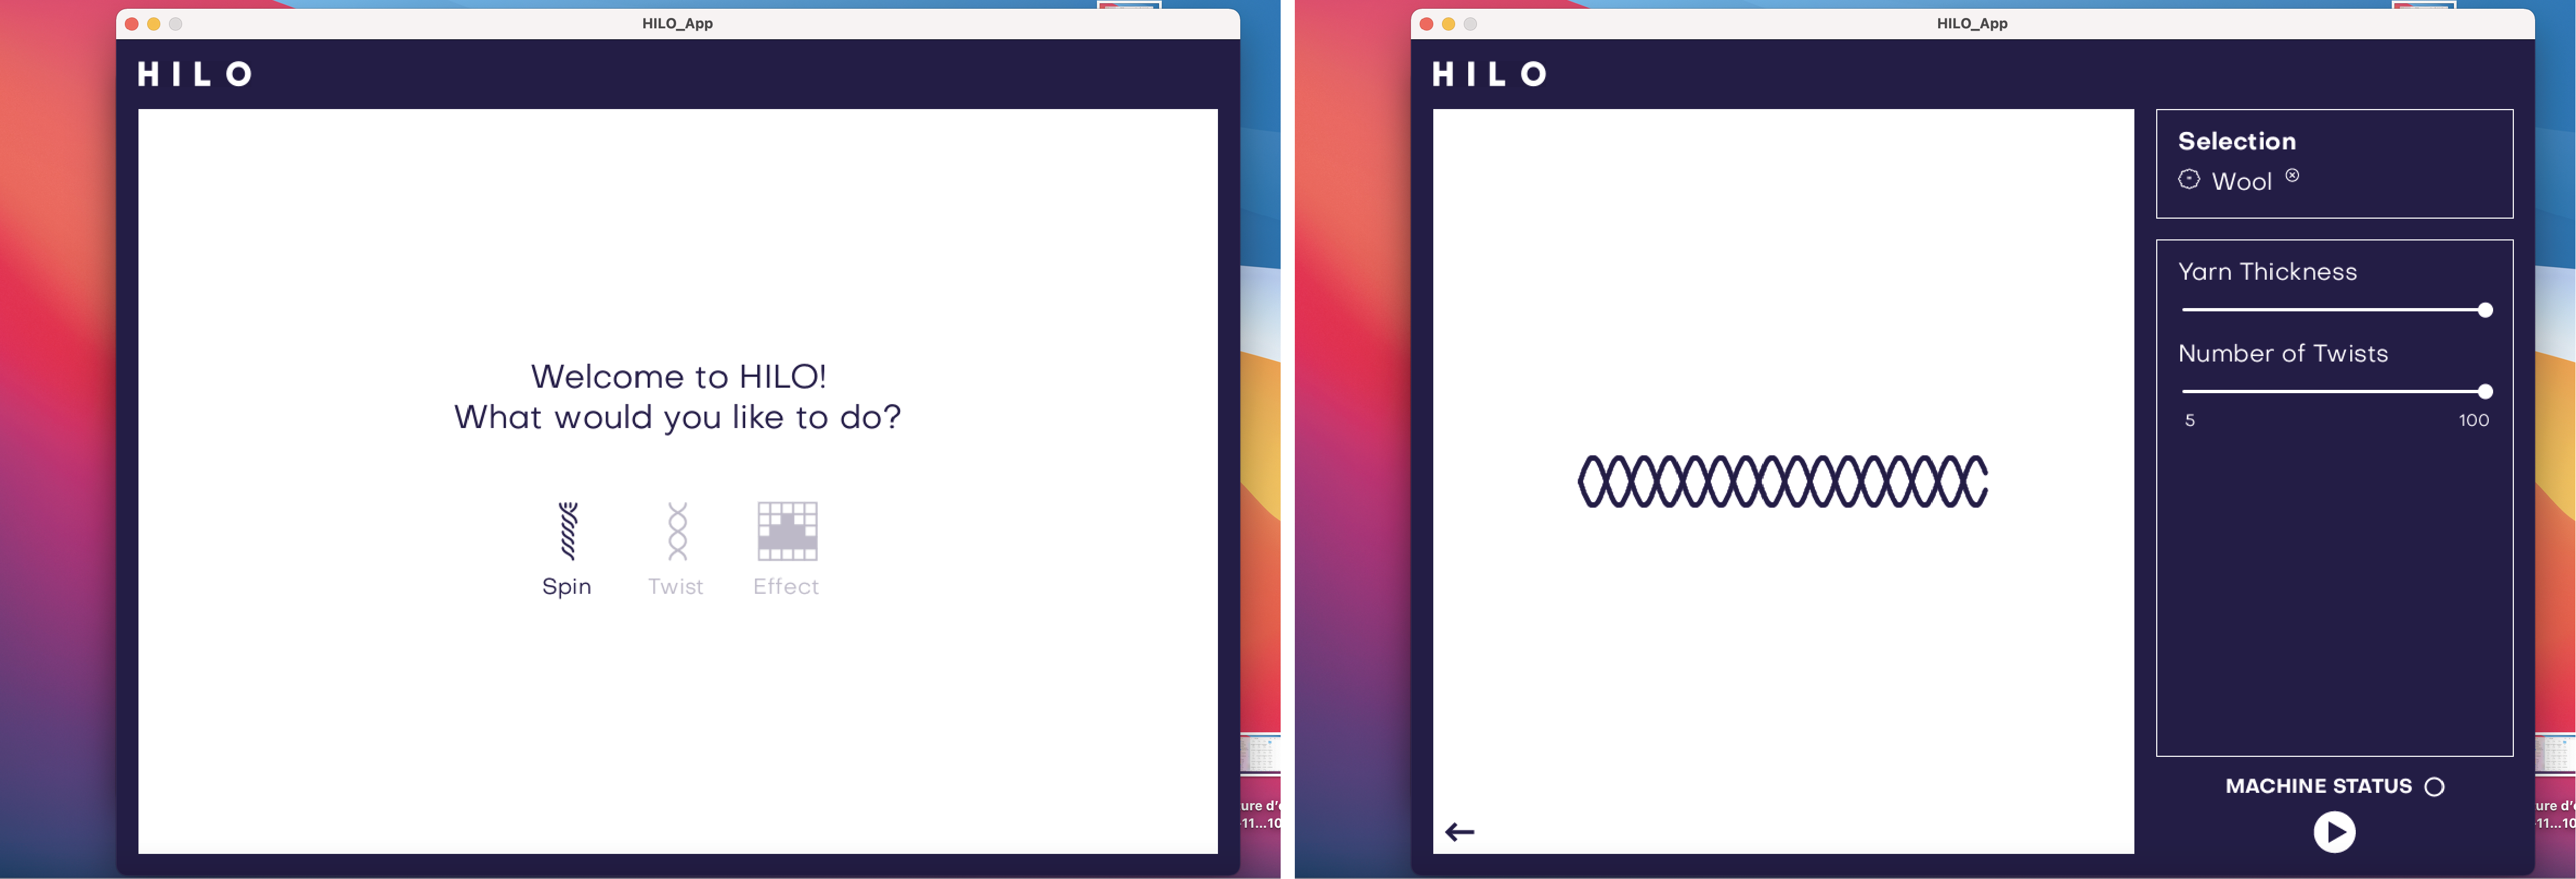
Very intuitive app.
running machine !
What needs to be improved in our machine
- Unfortunately we didn't have time to try with a fiber...
- We need to set the driver modules with this video.
- One motor is not running, we didn't have time to understand why but we made hypotheses about it. The Arduino sketch is working because the other motors are working. One of the connections is wrong, or one of our driving motor may not work or is not fixed properly. The motor itself may not work.
- One wheel goes away from the rod, it's not fixed properly.
- We need to find and fix the right hinge to "open" the top profile.
- We need proper squares to fix the last profiles together.
Conclusion
It was hard work but a lot of fun ! I feel capable to re-build it.