6. BioFabricating Materials
This week I experimented with different recipes and came up with recipes of my own for different textured biomaterials.
Research
This video is a must-watch for anyone interested in biomaterials or who wants to get some general information about it A TED talk - Why "biofabrication" is the next industrial revolution | Suzanne Lee
Some useful links :
-fabtextile - bioplastic
-Margaret Dune bioplastic cook book
Gelatine Recipes
Bio-Plastic
My first recipe to try out is a Bio-Plastic one

| Solvent | polymer | plasticizer | Additive | texture | Notes |
|---|---|---|---|---|---|
| Water | Gelatin Powder | Glycerine | refer to picture | ||
| 120 ml | 24 g | 6 g |
Started with heating the water then adding the Glycerine then the Gelatin. The heat was medium, no boiling for around 5 minutes
| Flexibility | Strength | Hardening time | Shrinkage | Notes |
|---|---|---|---|---|
| Low | Medium | Low | Medium | shrinkage is totally controlled if the mixture sticks to the mold edges |
The results were left for 3 days before being taken out of the mold. They were somewhat hard with minimum flexibility. The pistachios were very hard to get out and some were left.
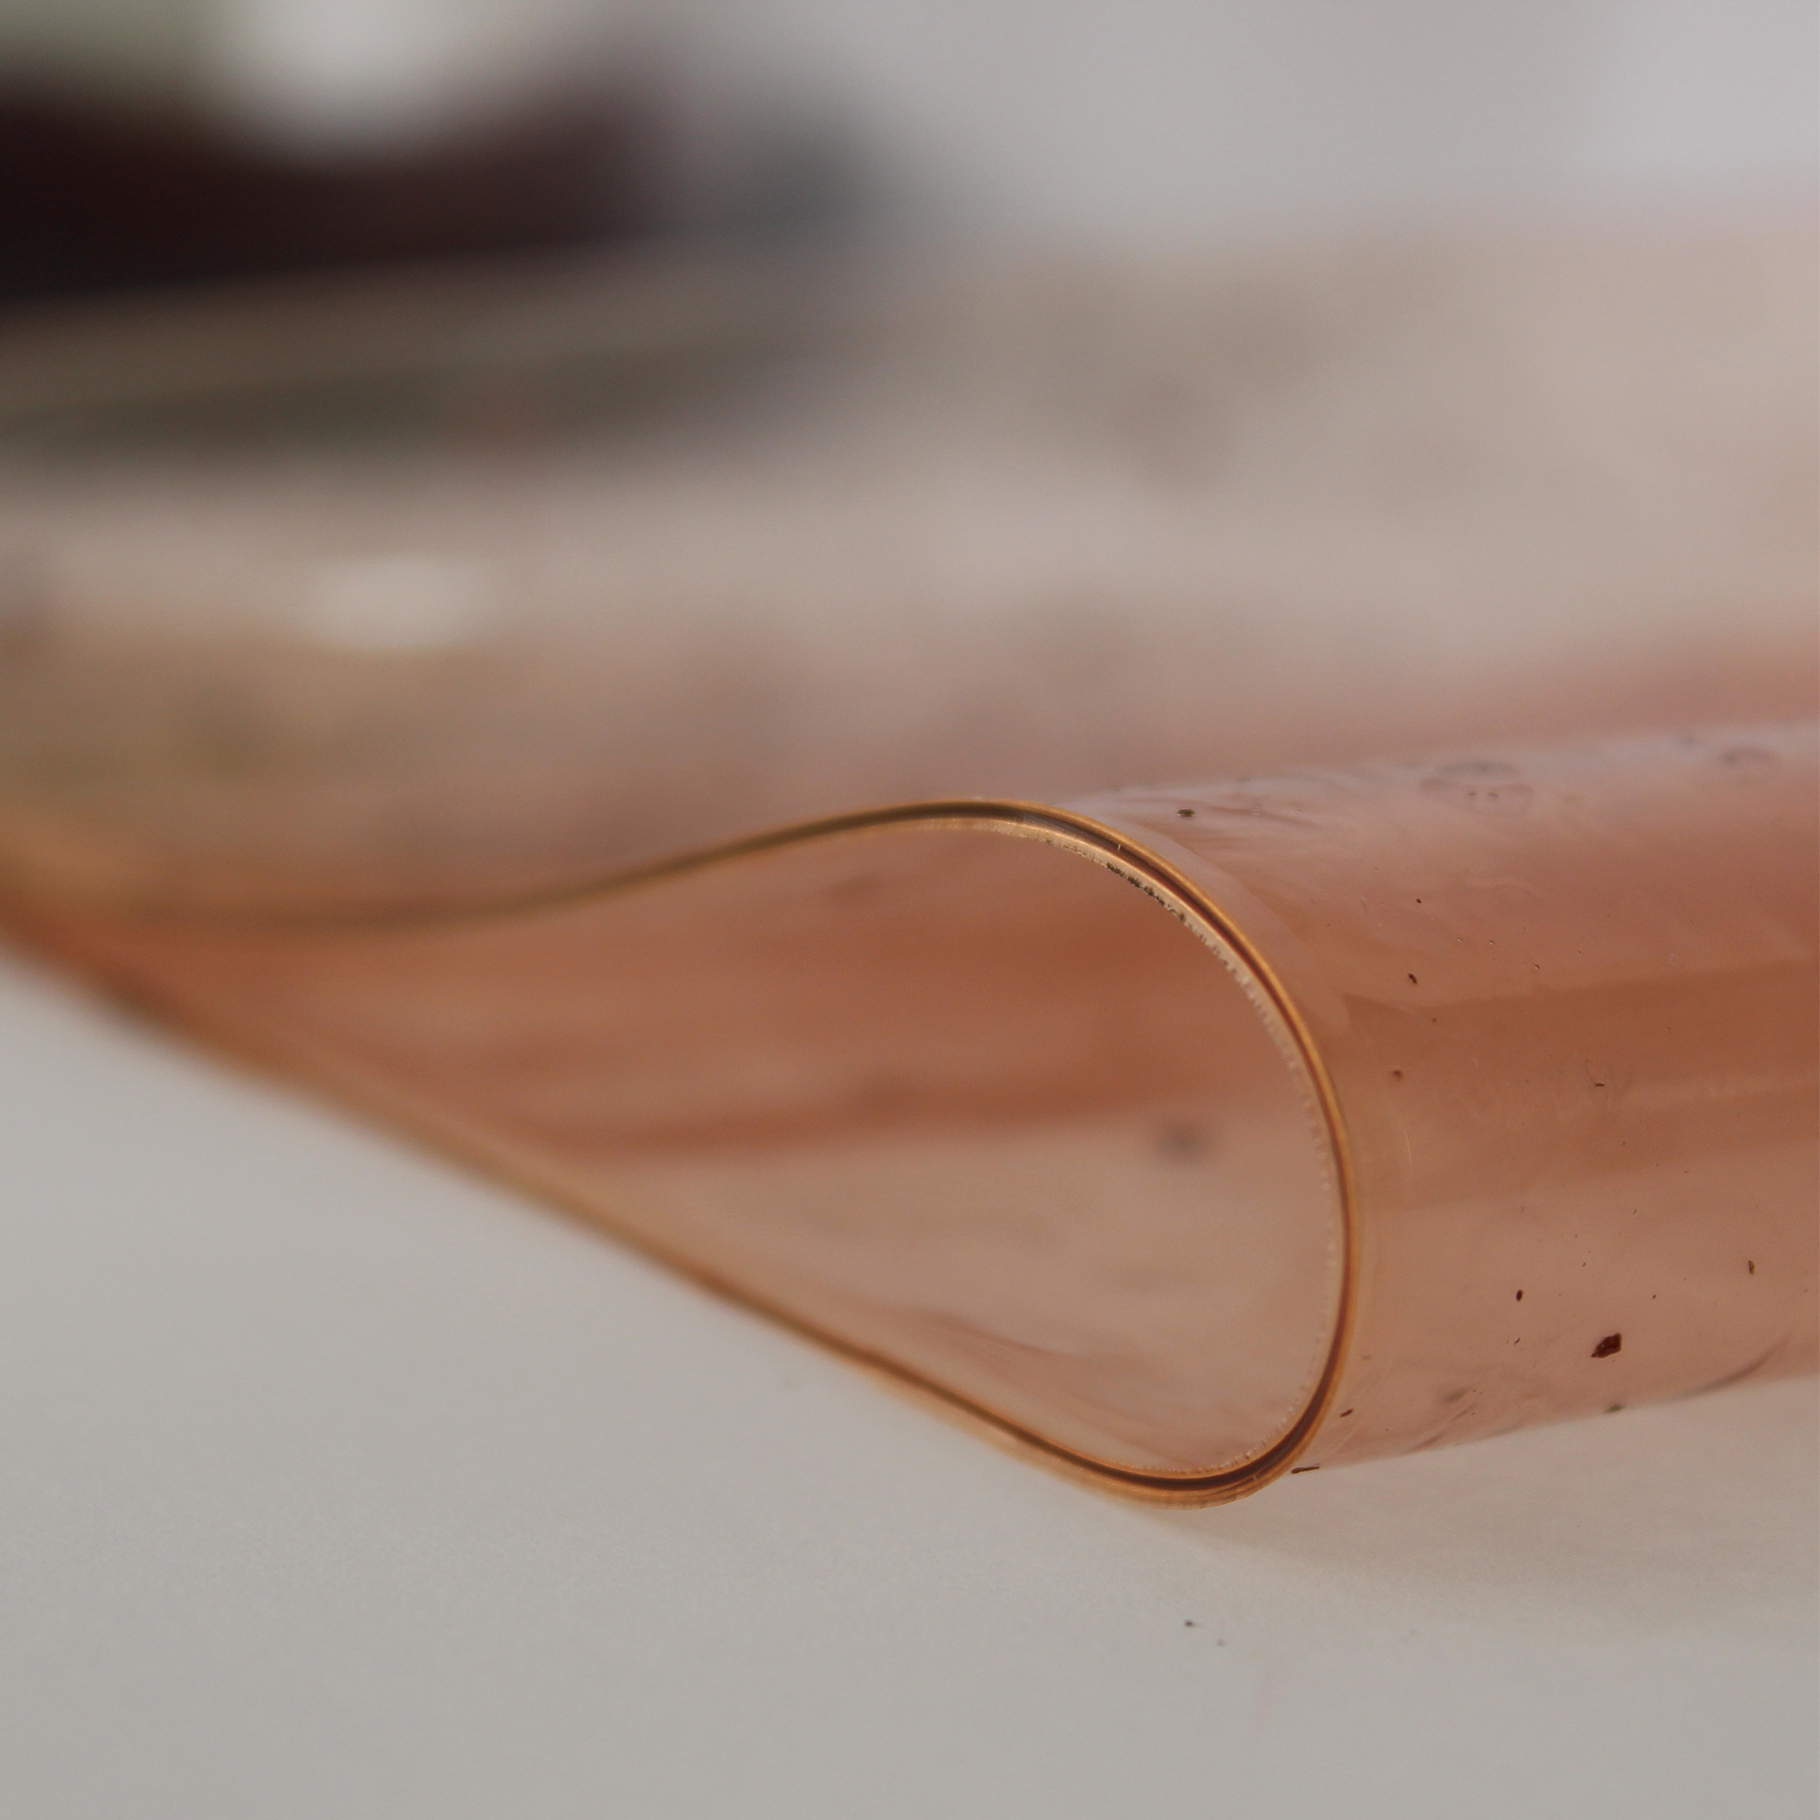
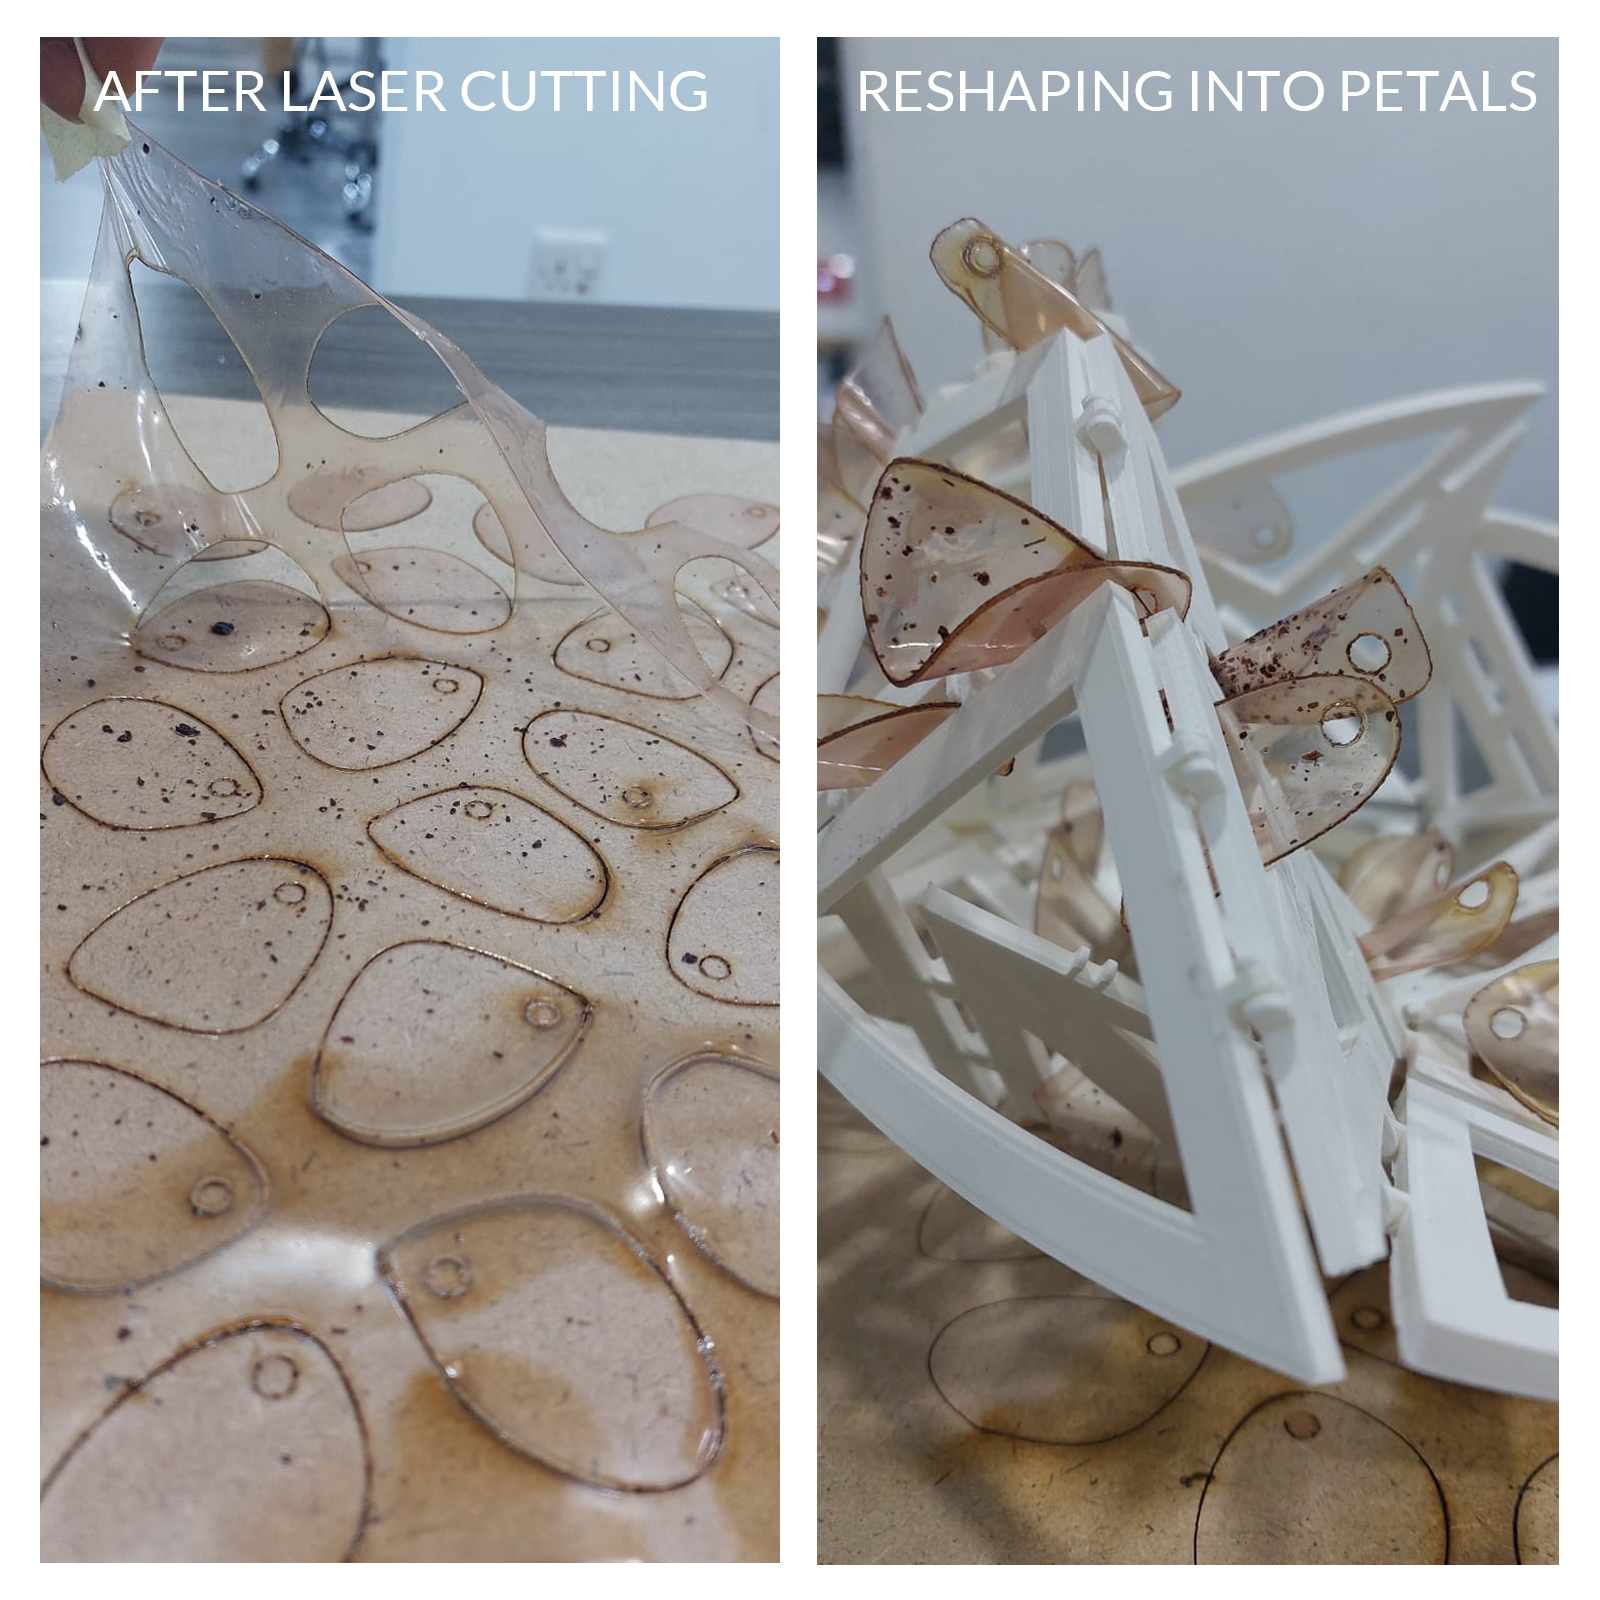
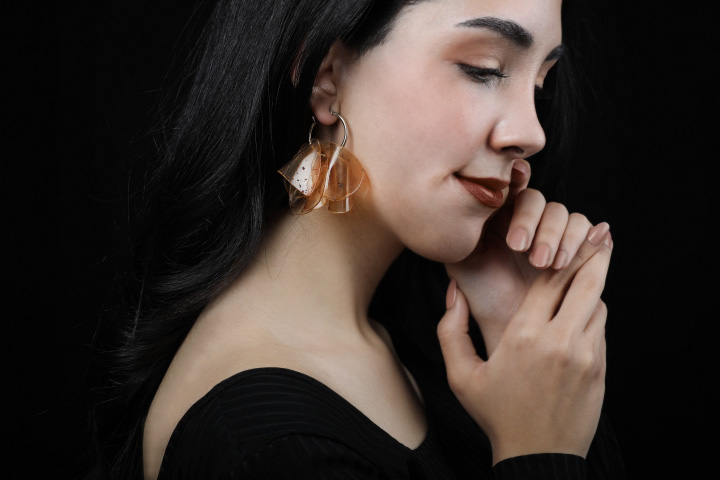
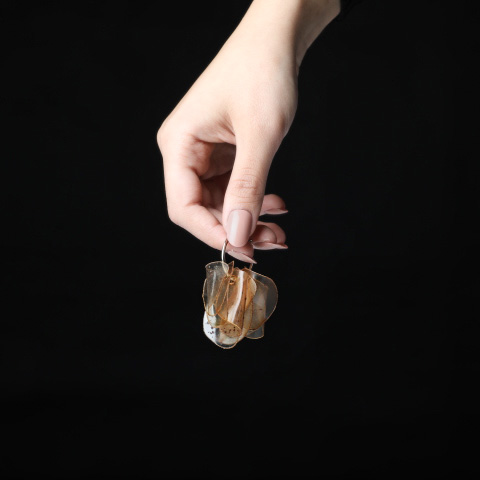
Bio-Silicone
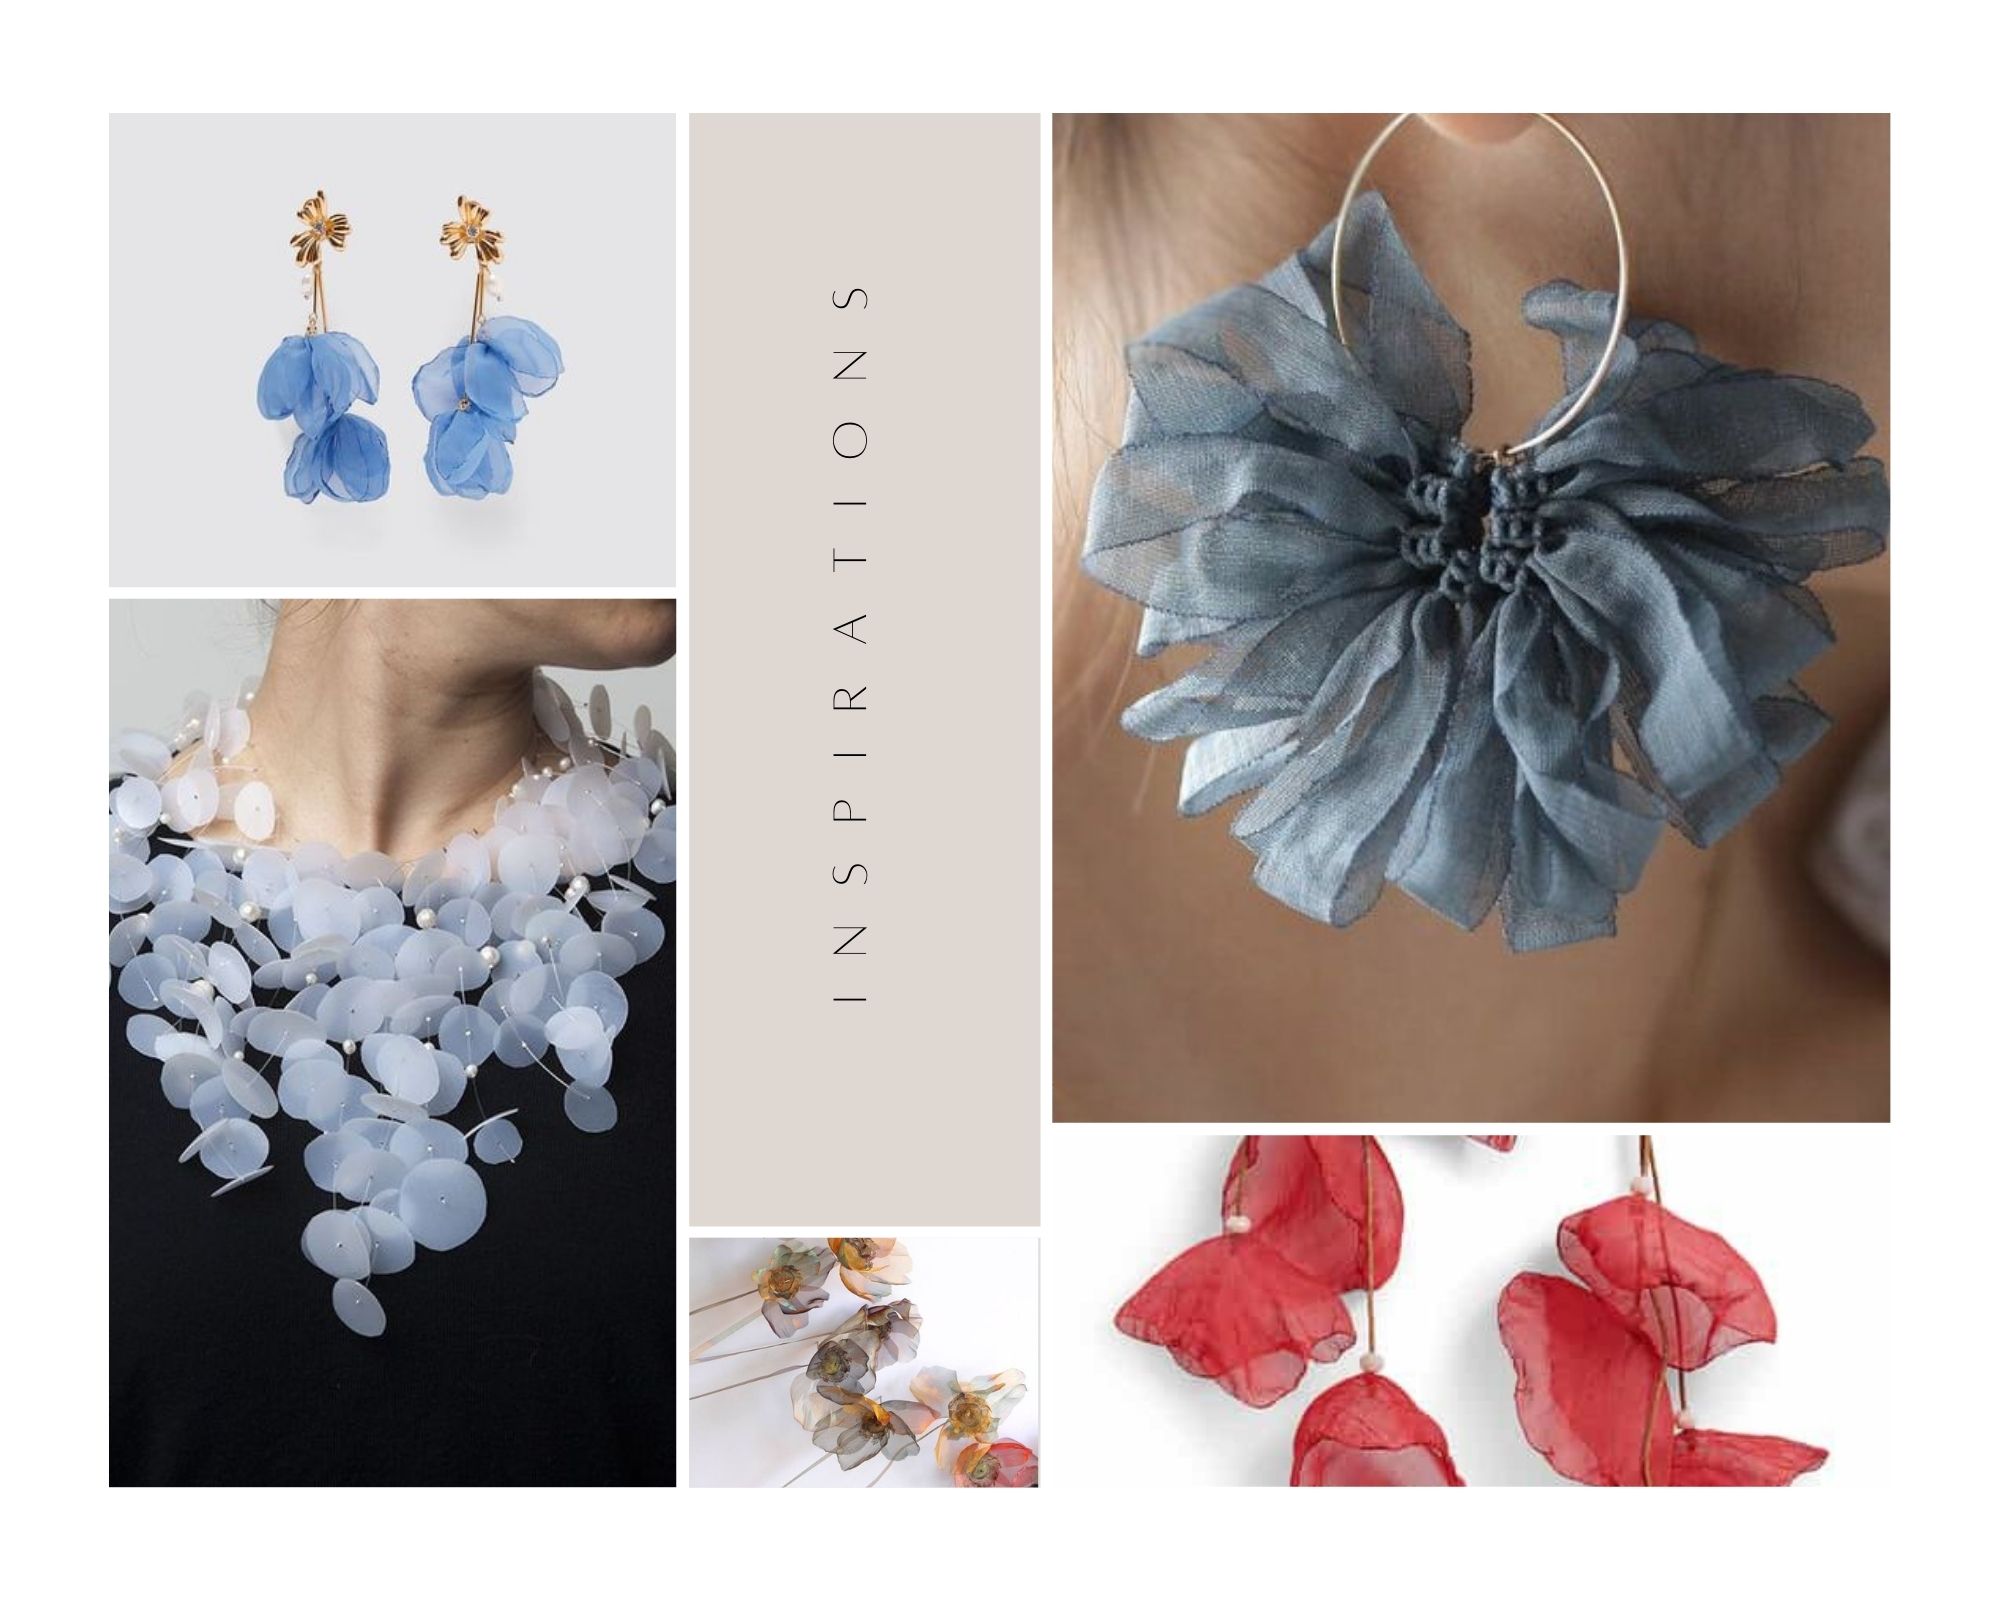
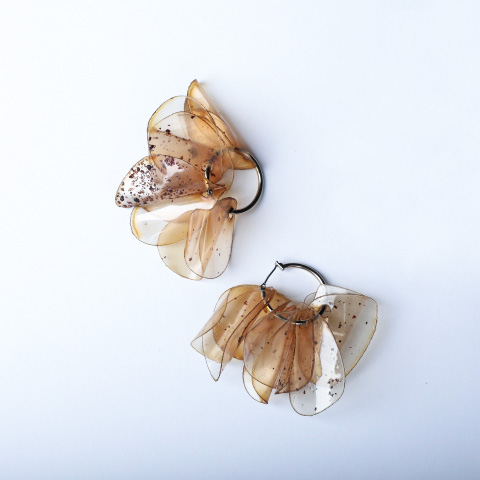
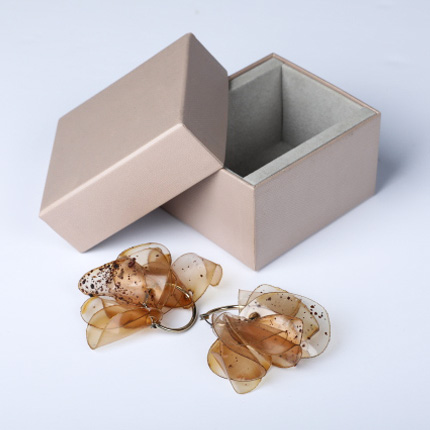
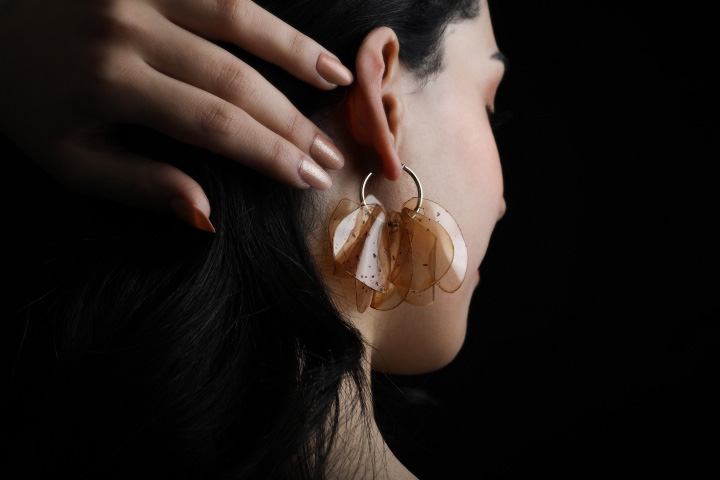
For this one, I was aiming for a flexible biomaterial sheet that is foldable. After that, I wanted to create some earrings inspired by the following picture by laser cutting the sheet into petals.
| Solvent | polymer | plasticizer | Additive | texture | Notes |
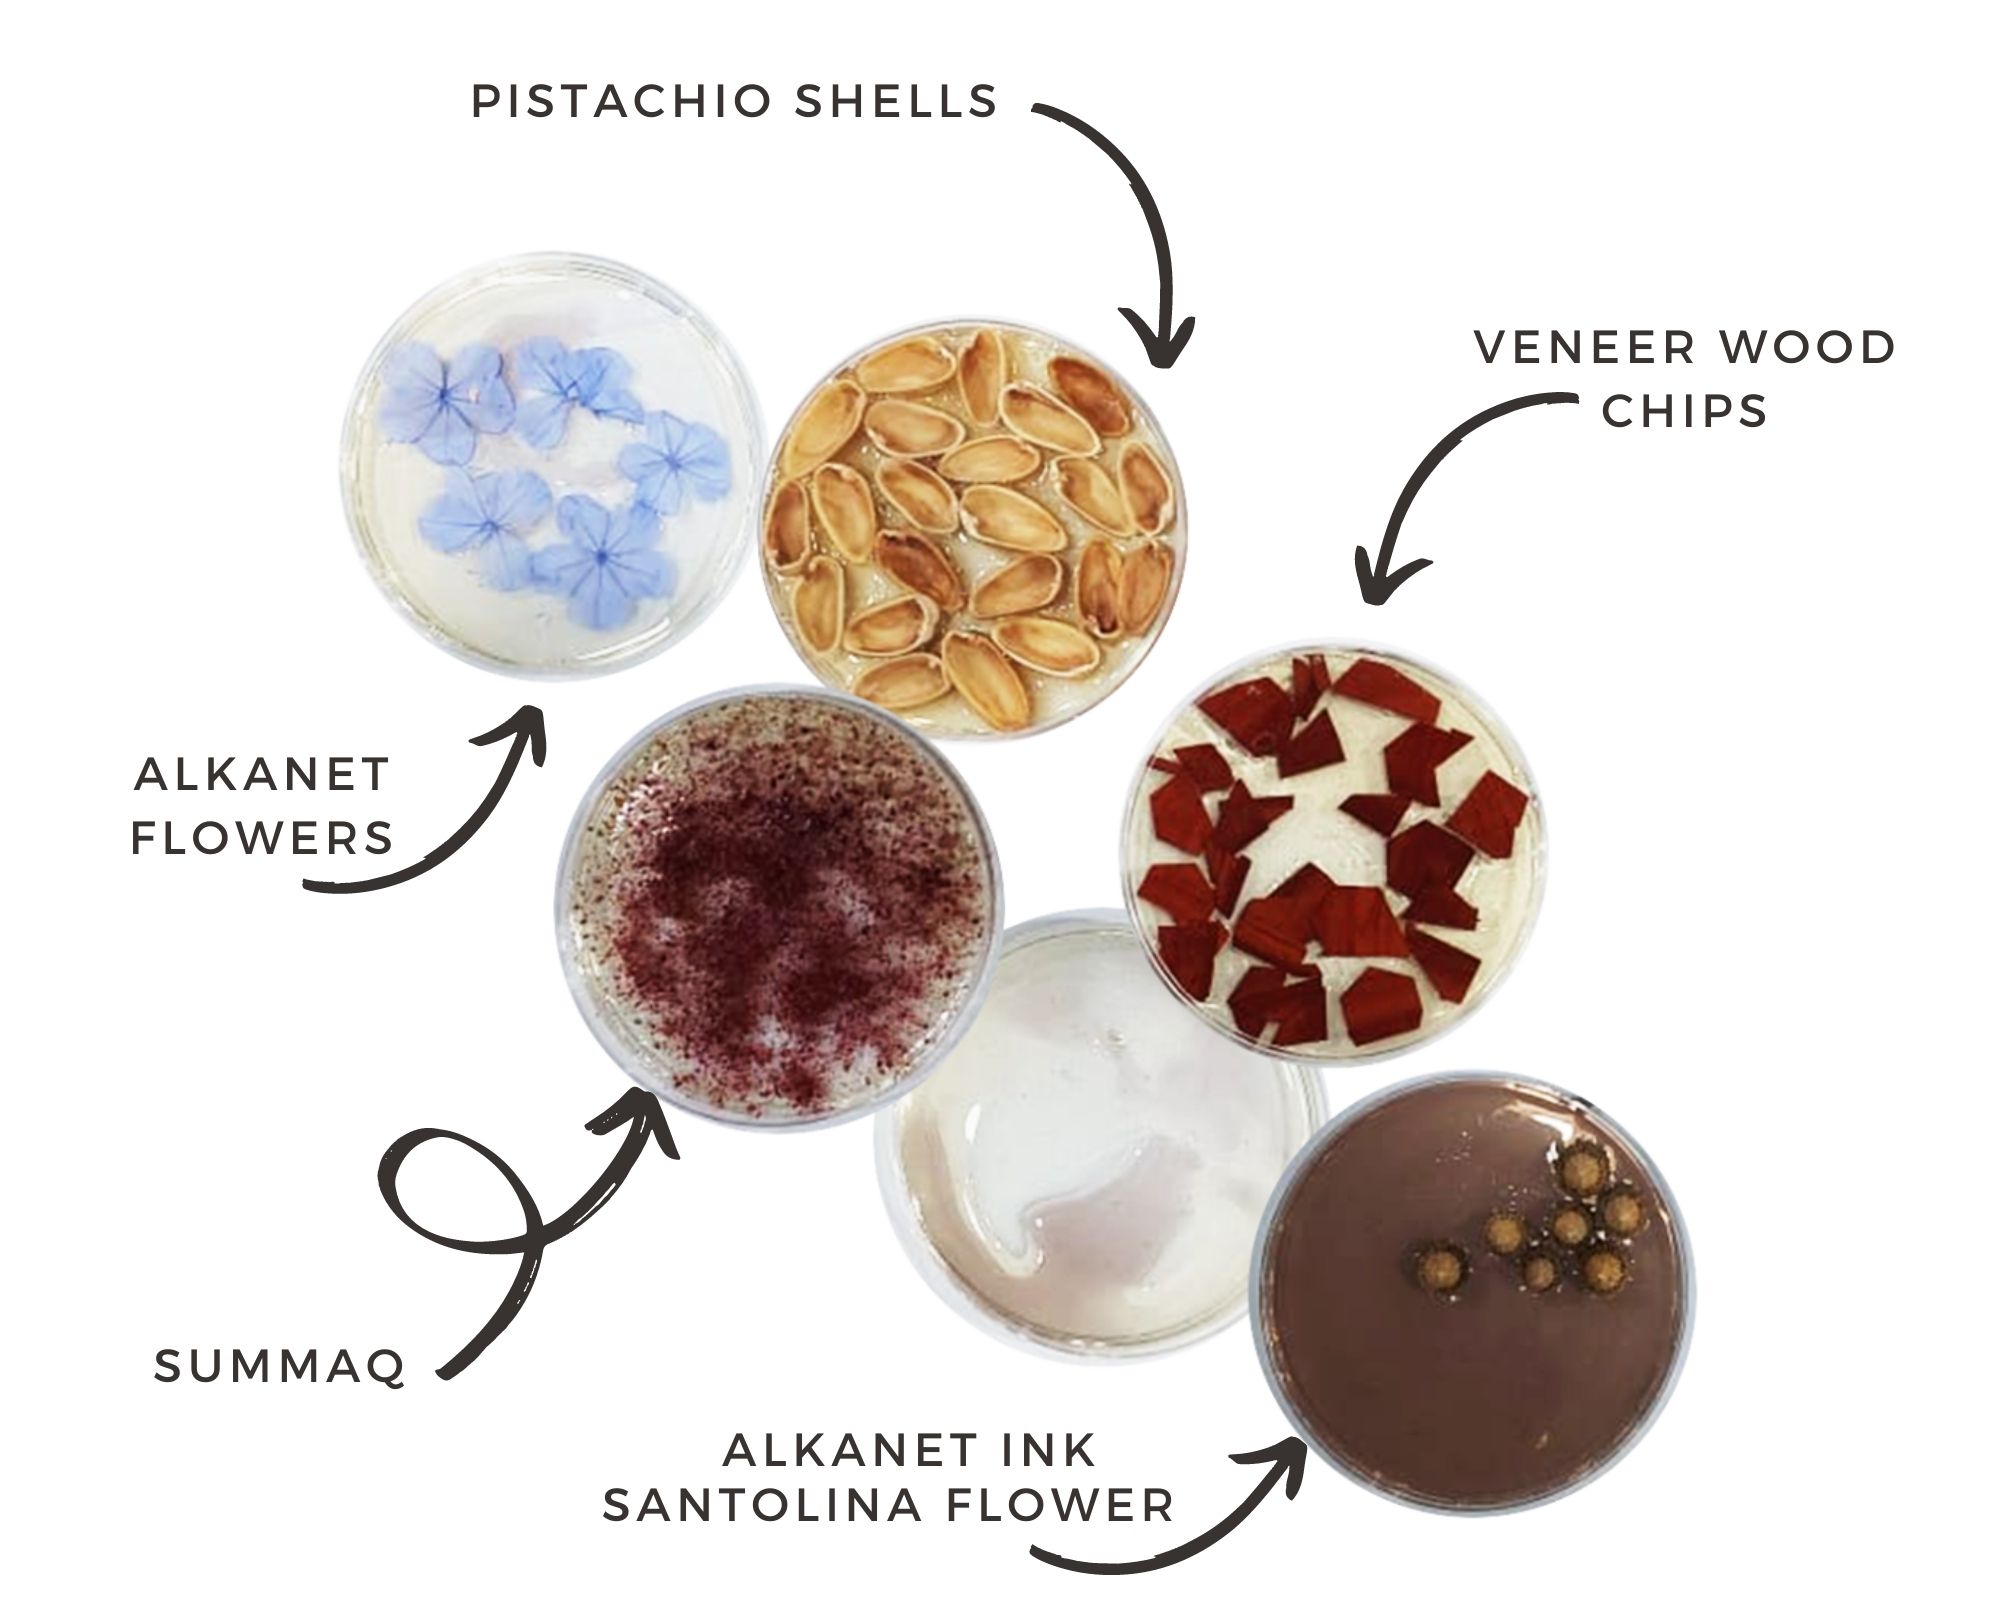
|---|---|---|---|---|---|
| Flower Water bath | Gelatin Powder | Glycerine | Bougainvillaea flowers | Summaq | |
| 240 ml | 22 g | 18 g |
Started by creating a water bath using a handful of Bougainvillaea flowers simmering in around 500 ml water on medium to high heat for 20 min.
After heating 120 ml of the water bath I added the Glycerine then the Gelatin. The heat was medium, no boiling, and for around 5 minutes. Poured into the mould ( Acrylic sheet) and sprinkled the Summaq lightly.
The mixture is very thin and easily spread into a large mould by itself.
I used a leftover acrylic sheet (around 40 by 20 cm) for the base and taped some parts on top to make edges.
I then left it to dry for 2 days before taking it out very slowly so it wouldn't tear.

| Flexibility | Strength | Hardening time | Shrinkage | Notes |
|---|---|---|---|---|
| High | Medium | Medium | Medium | shrinkage is totally controlled if the mixture sticks to the mould edges but expect thinning |
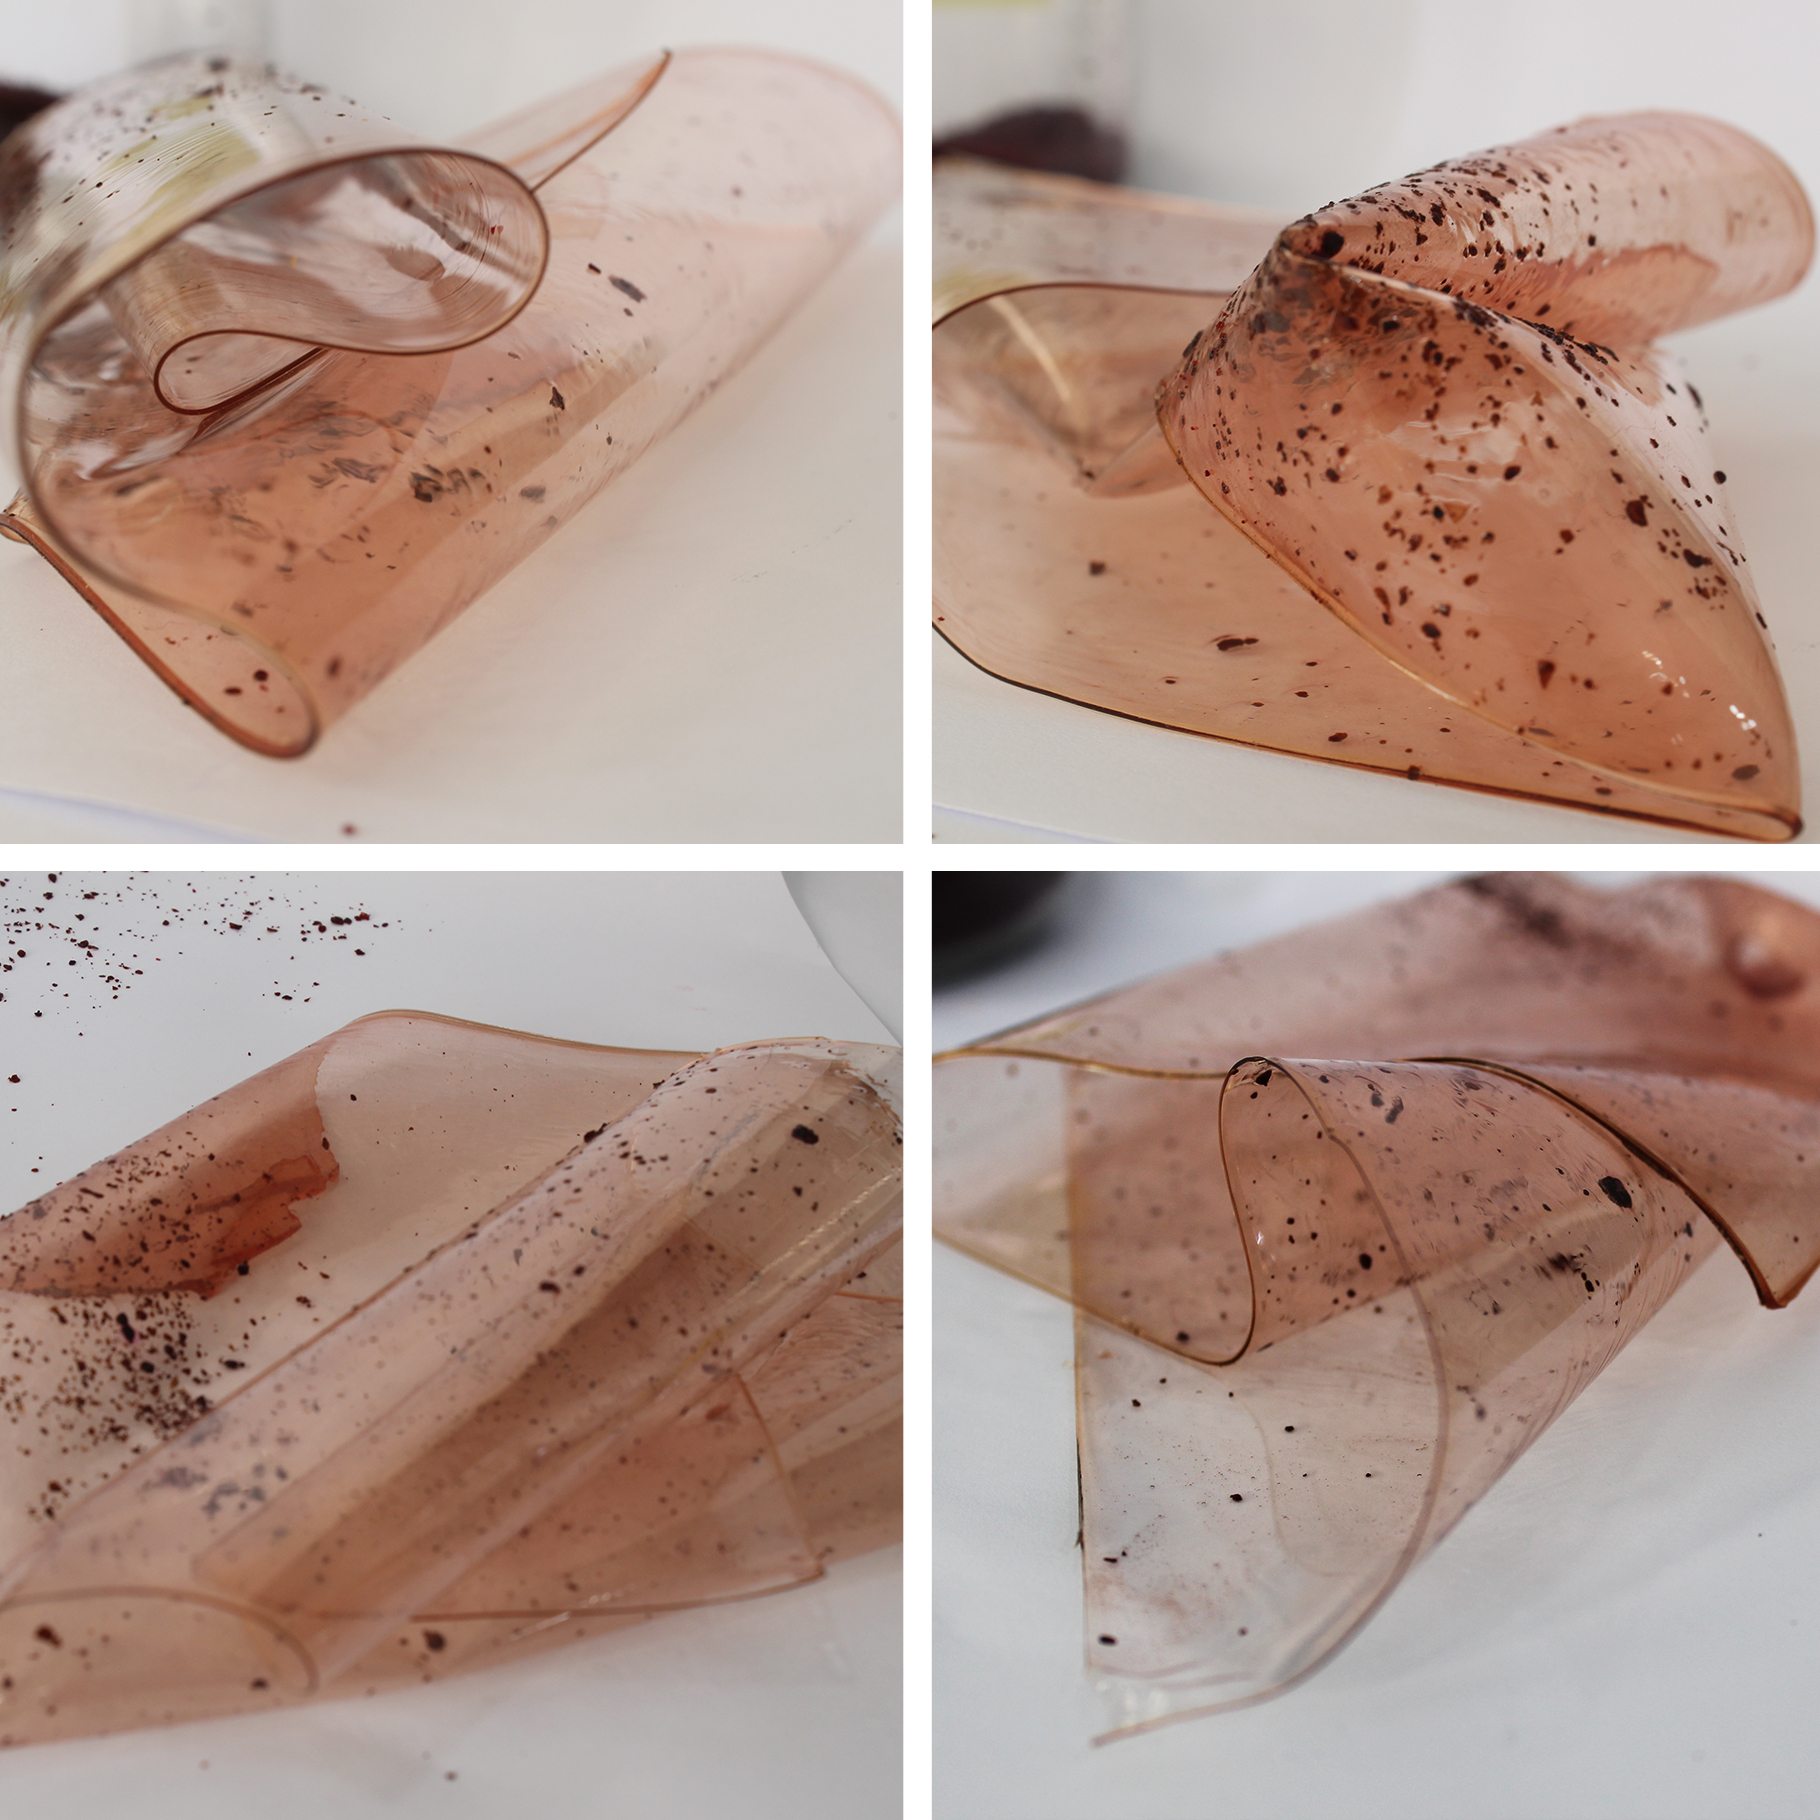
The result is a very flexible sheet that is not delicate yet can handle grabbing and manipulation.
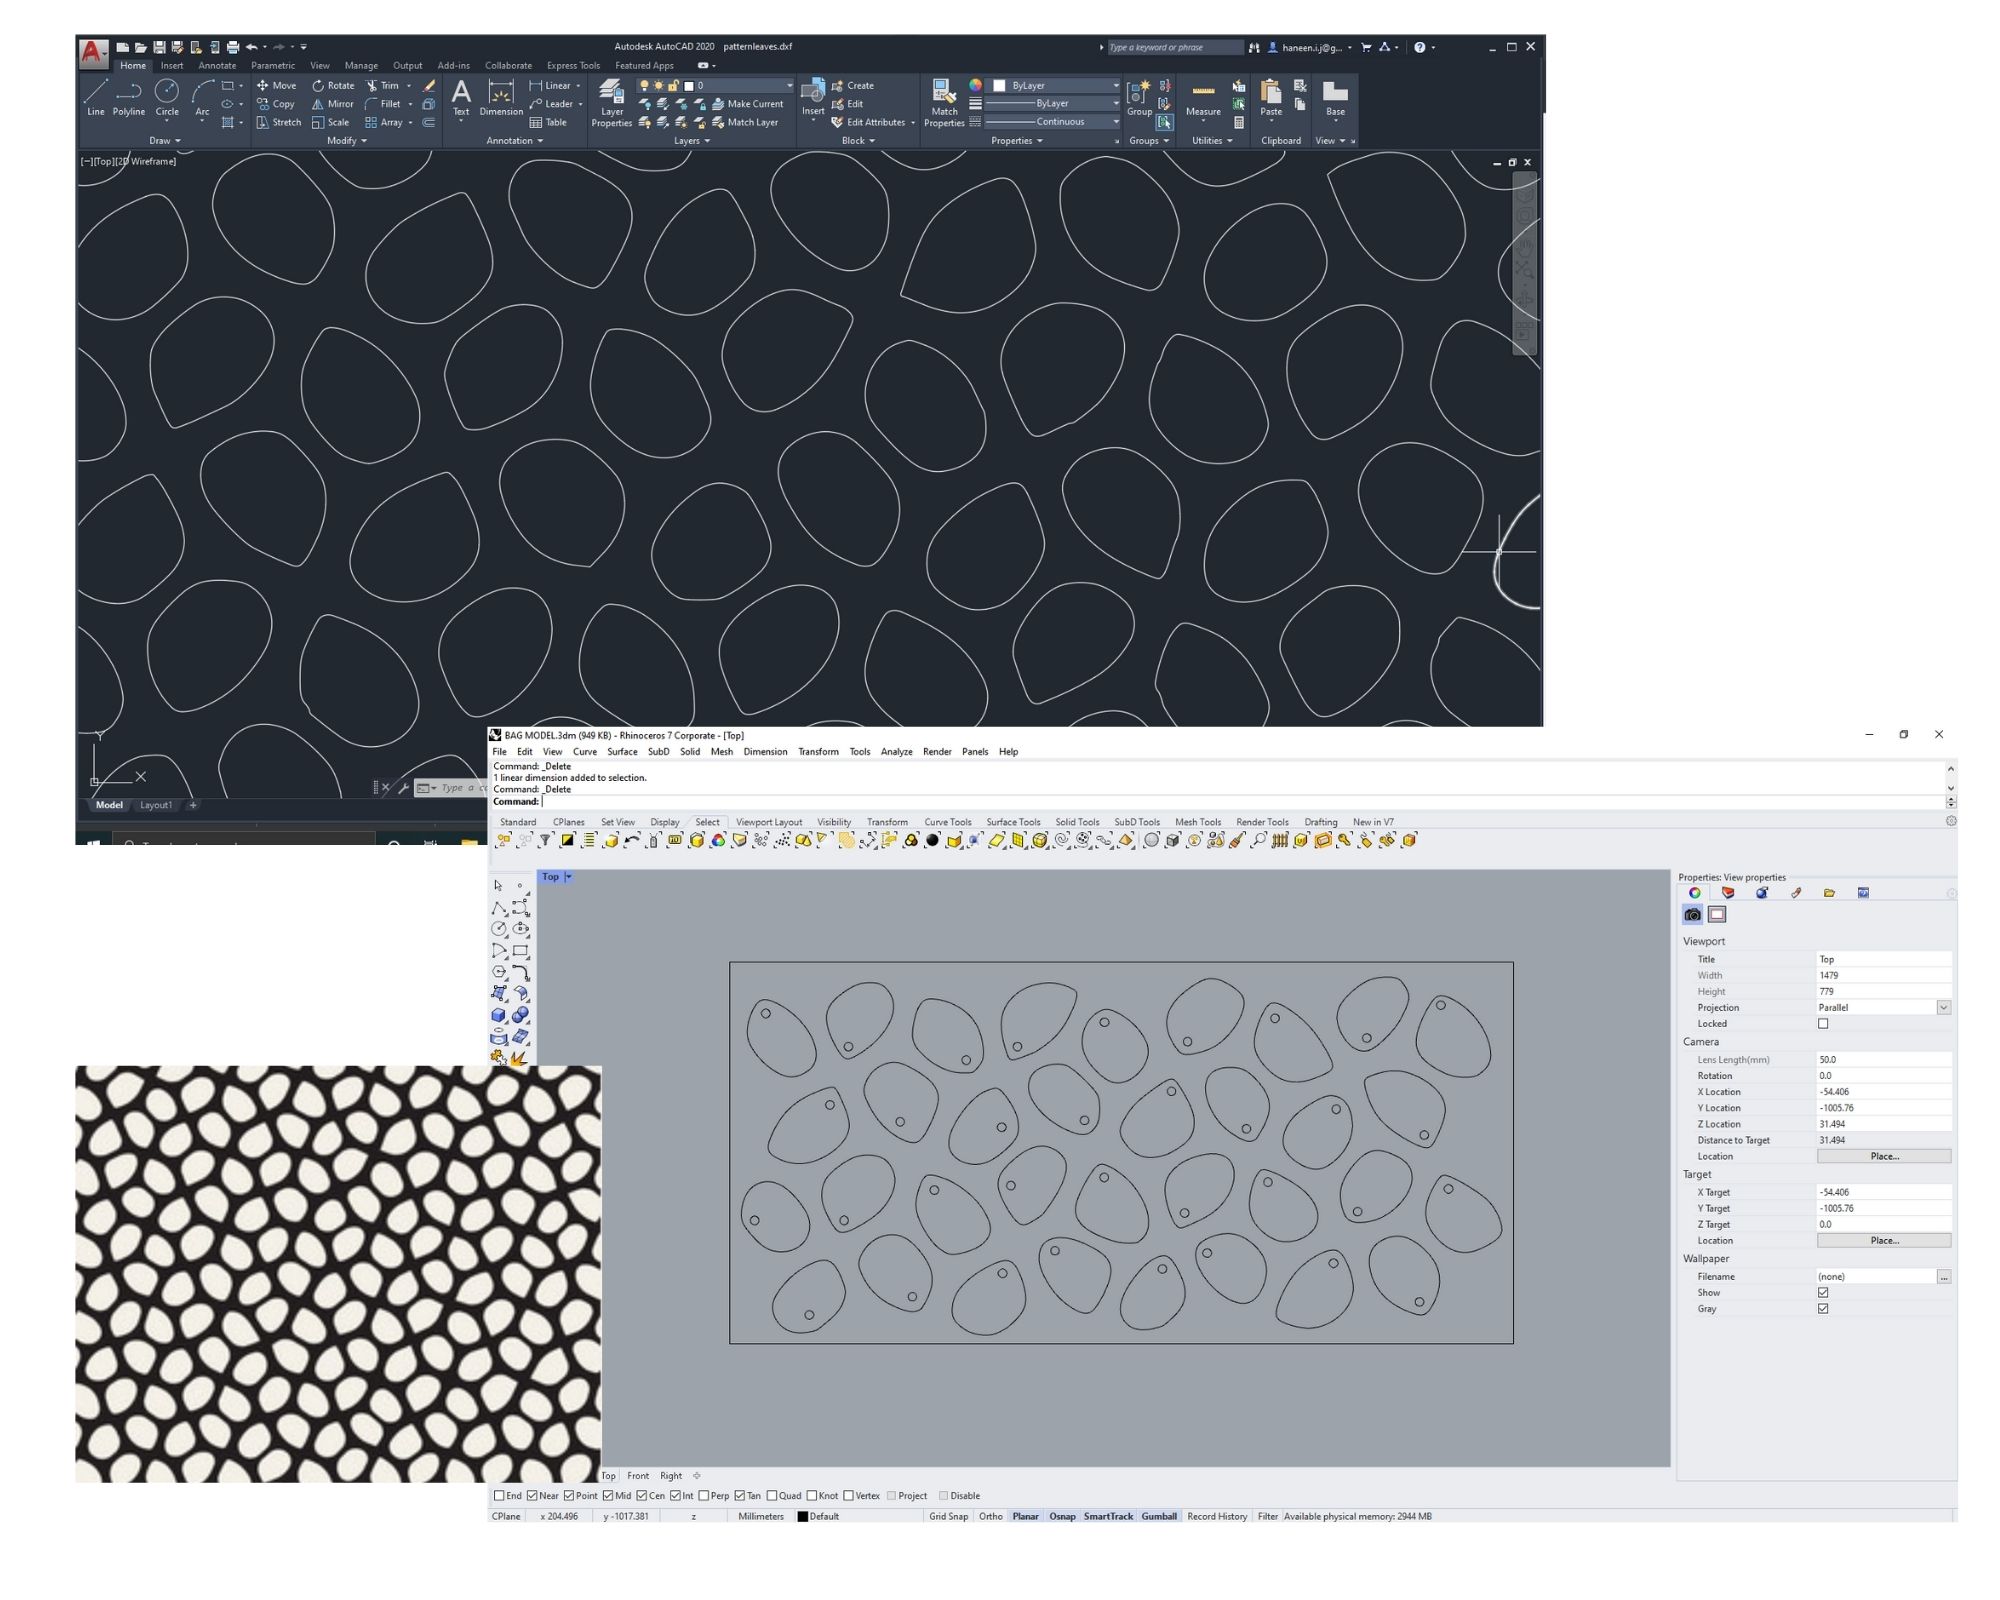
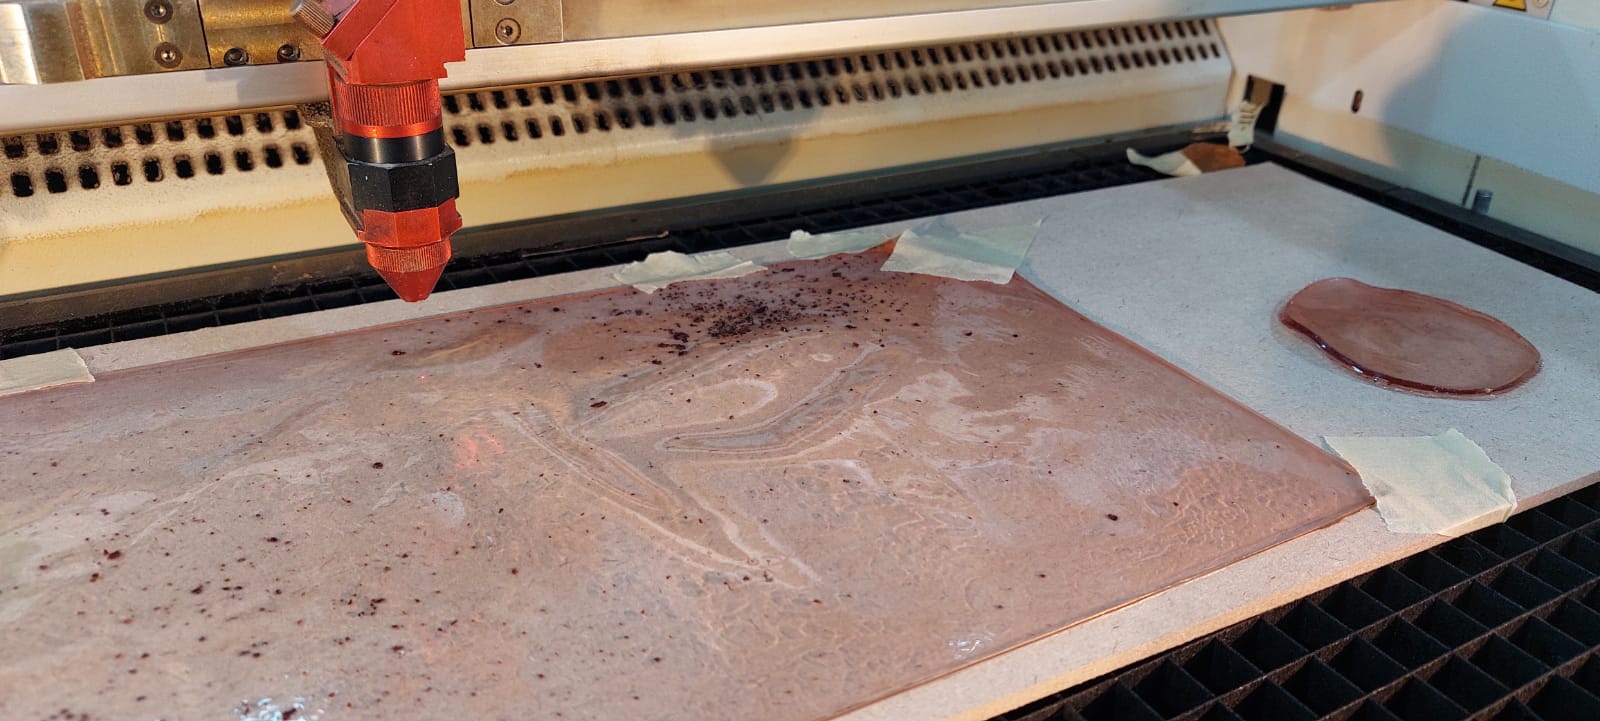
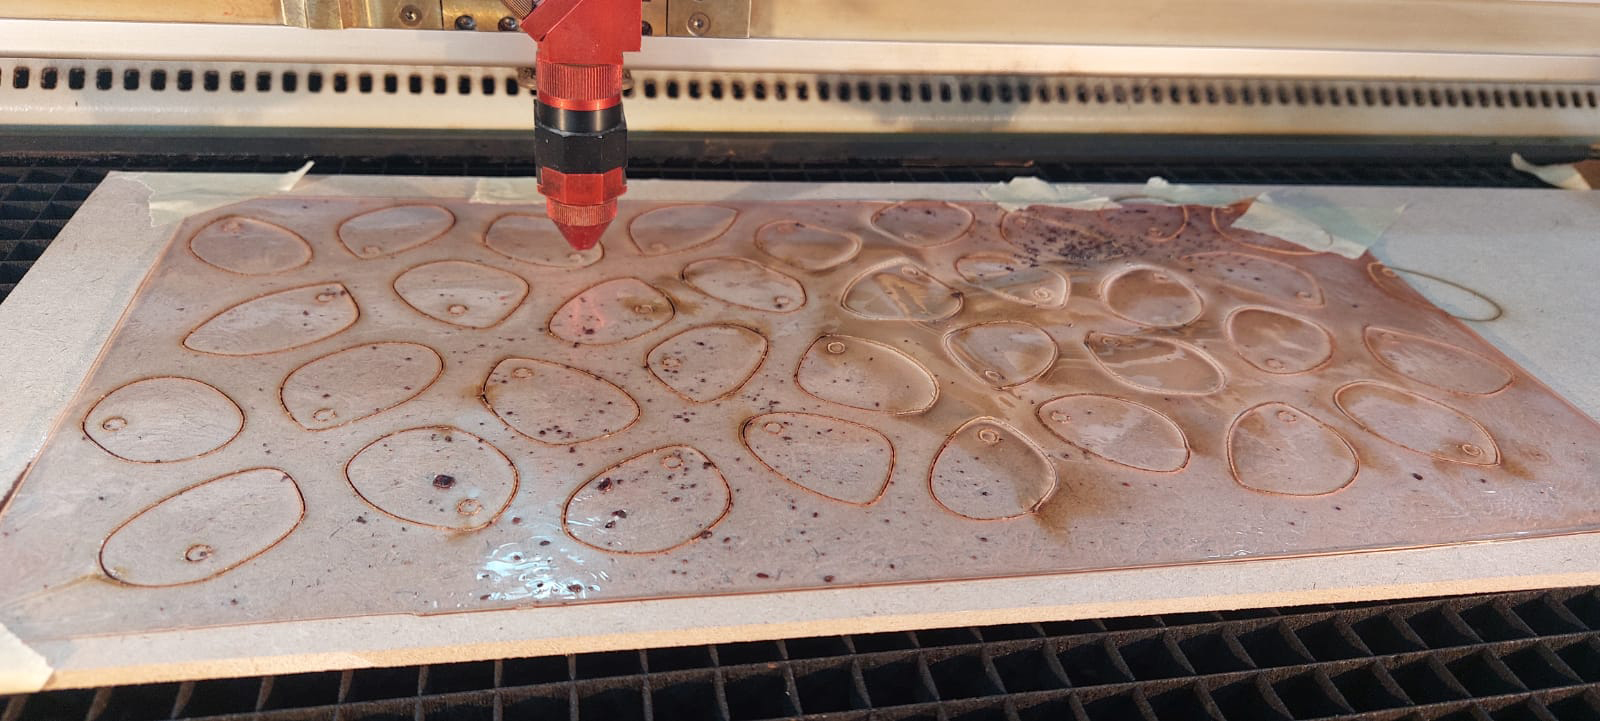
I used a pattern to create the shape of the petals across the bio silicone sheet, made sure each petal has a hole for connecting them to an earring. And then laser printed it using the following settings
The Trotec laser specifications:
Power: 40
Speed: 2
Thickness: 1 mm
I then let them dry more while shaped and somewhat pressed using a 3d printed project I found.
After attaching to the ring they looked so beautiful here are some pics

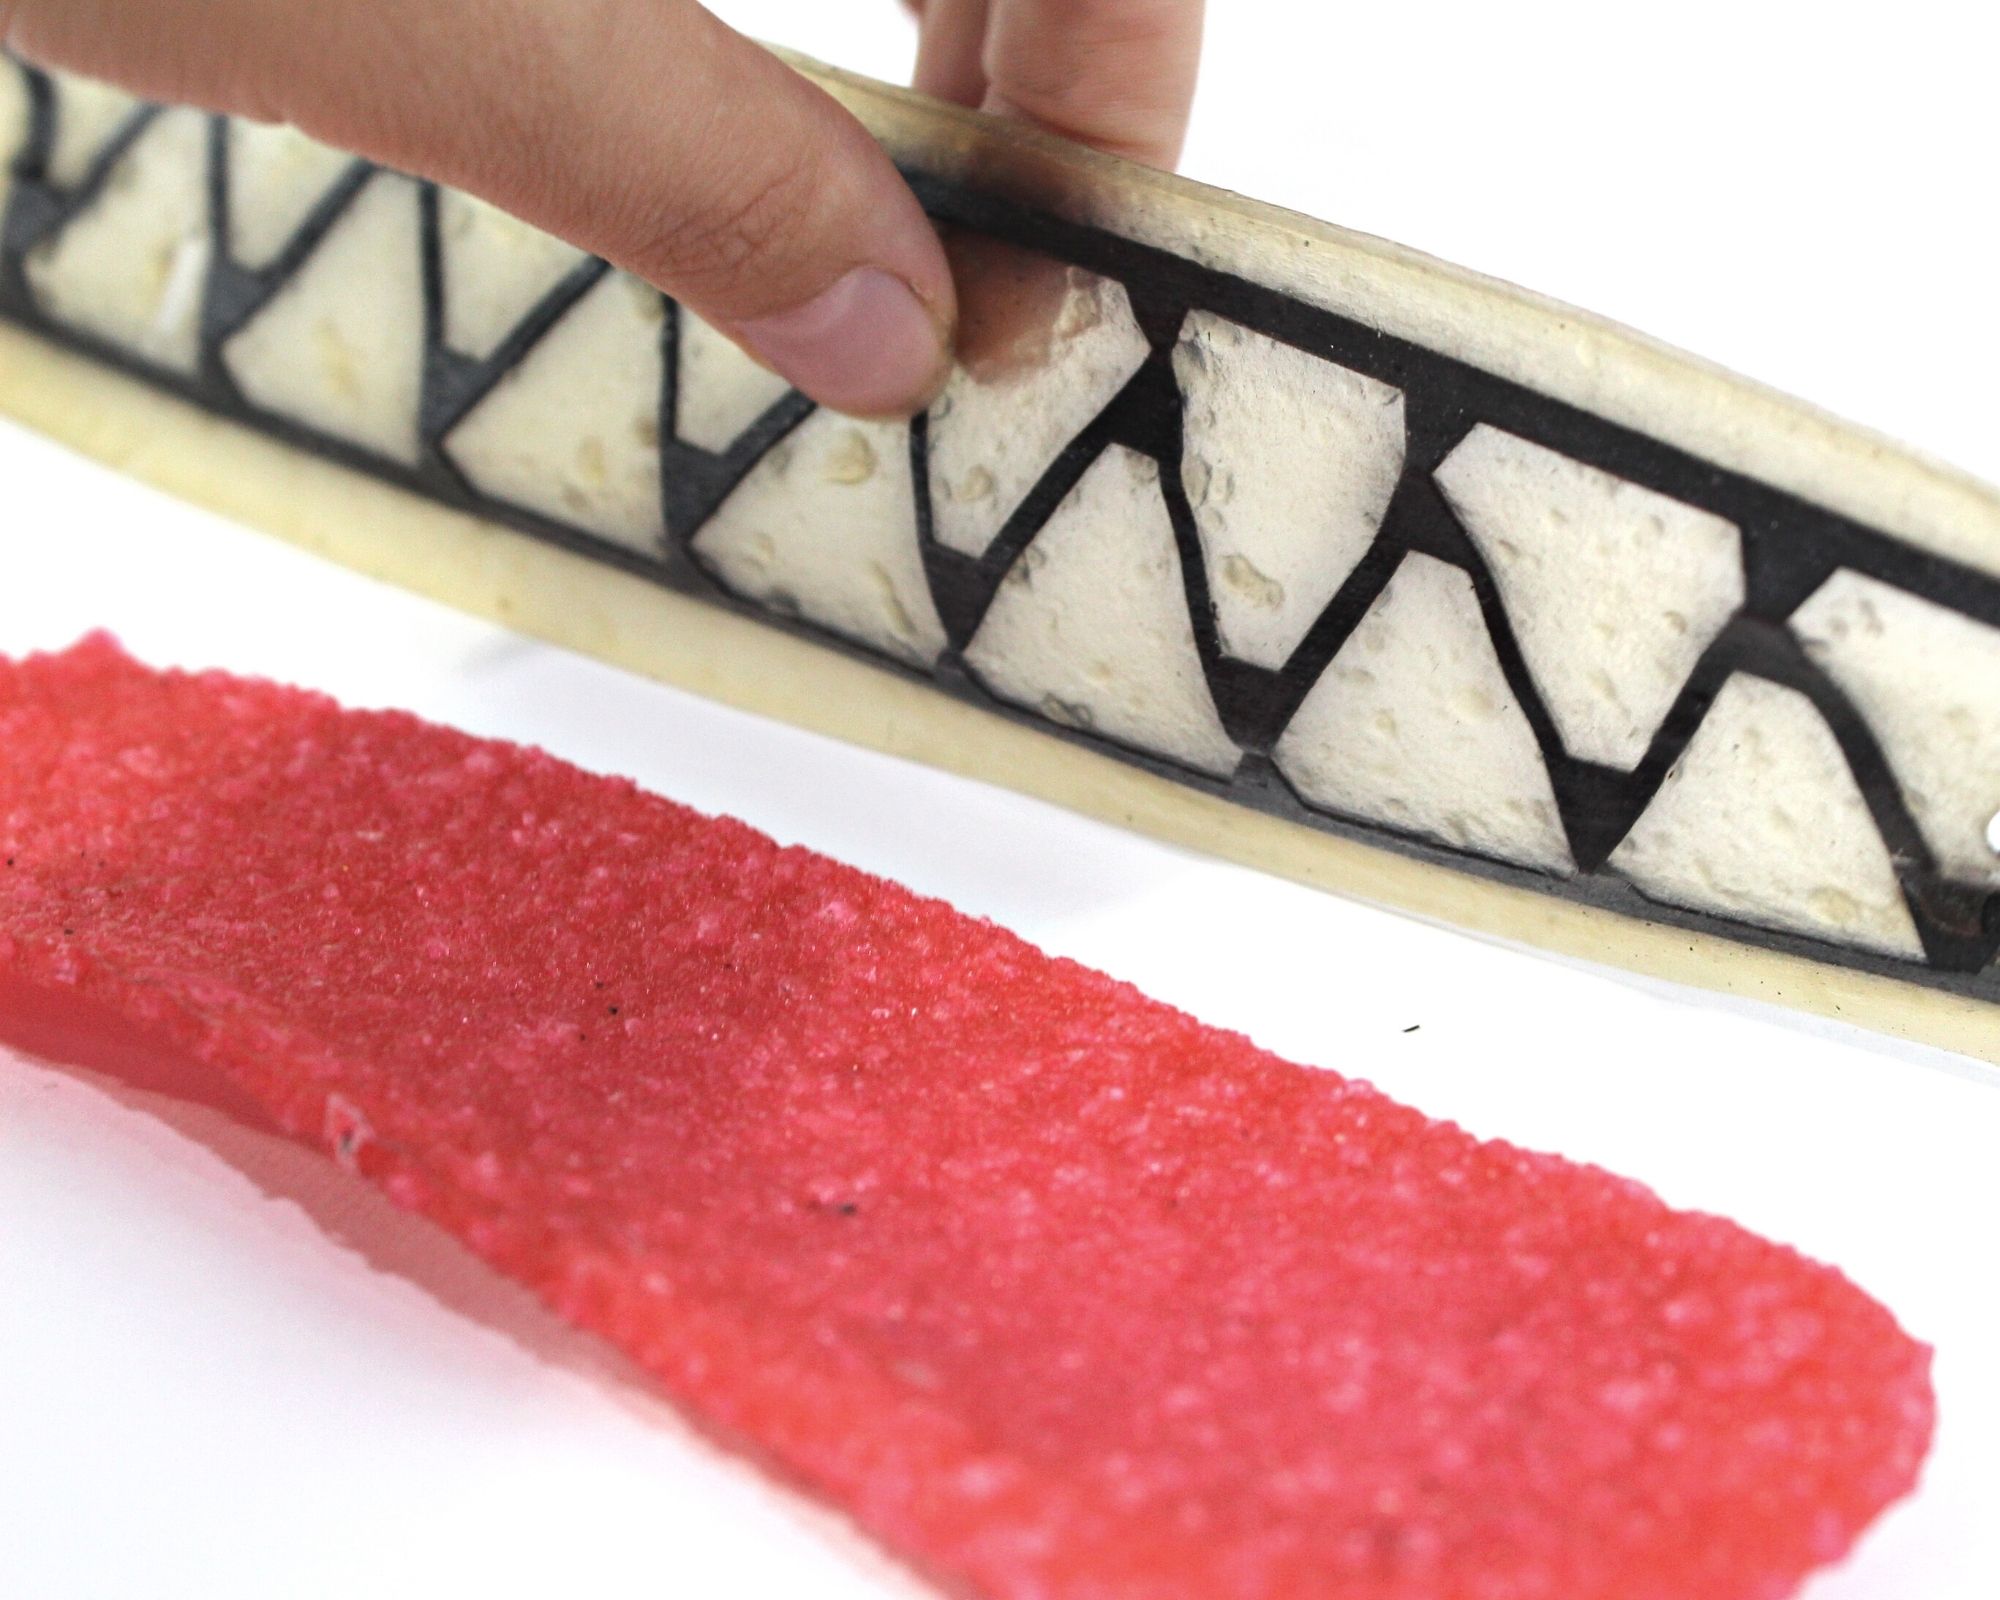
Agar Agar Recipes
Bio-Plastic 1
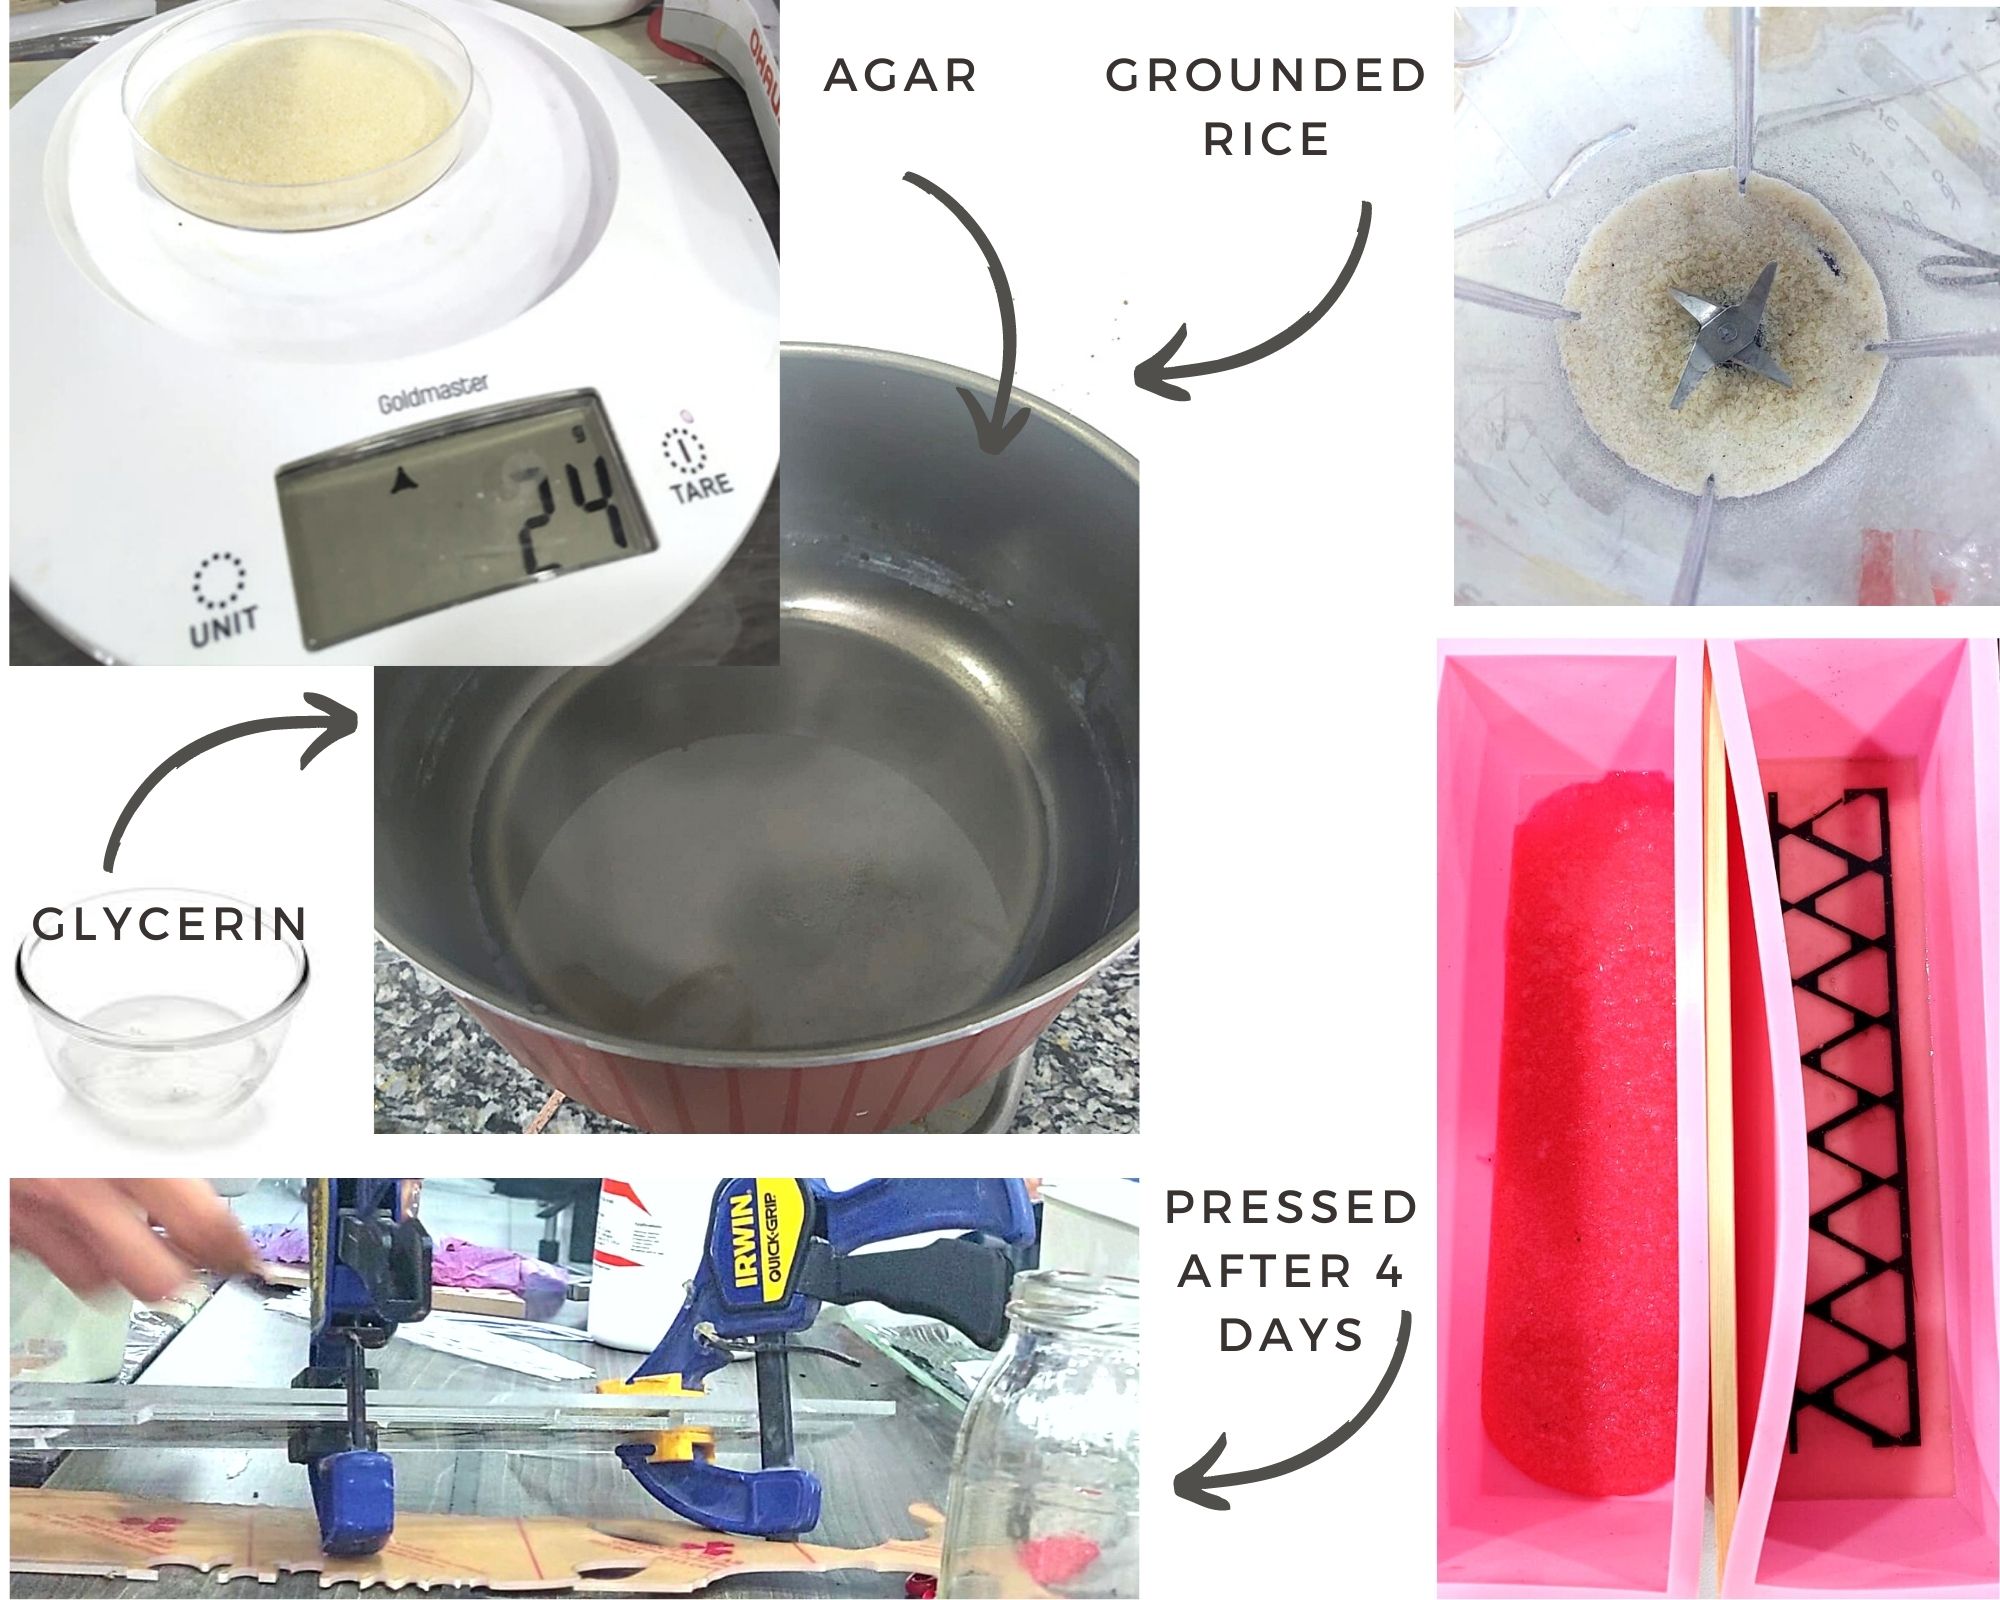
This time I wanted to try out Agar Agar. A gelatin-like product made primarily from the red algae Gelidium and Gracilaria.
| Solvent | polymer | plasticizer | Additive | texture | Notes |
|---|---|---|---|---|---|
| Water | Agar Agar | Glycerine | Food Colour | Rice, Leftover Laser-cut Wood veneer | |
| 200 ml | 4.4 g | 23 g | 1 drop | 5.3 g , 1 piece |
    I made one batch that I divided later into two
    I started The main batch by heating the water then adding the Glycerine then the Agar.
    Left them simmering while slightly stirring for around 10 min until the texture got thicker but still manageable.
    For the first part, I added 2 thirds of the mixture to a leftover wood veneer of my friend's work
    which I placed in a silicone mould
    The second part I left on the stove and added the food color and rice.
    Mixed them for 3 minutes and then poured into the silicone mould.

    I also had to press them after 3 days since they started to twist within the mould.
| Flexibility | Strength | Hardening time | Shrinkage | Notes |
|---|---|---|---|---|
| Medium | Medium | Low | Medium |
| Flexibility | Strength | Hardening time | Shrinkage | Notes |
|---|---|---|---|---|
| Low | Low | Medium | Low | Medium |
leathers and Rubber
Alkanet rubber
Alkanet
- Glycerine 110 g
- Gelatine 22.2 g
- ALkanet 100 g
- Bees Wax 11 g
- Ethanol 500 ml
- Water 120 ml
    1. I used the blender on the alkanet and ethanol until the result felt smooth enough
    2. simmered the mixture on low heat until the ethanol evaporated
    3. I added the Beeswax and mixed till it melts
    4. I added water and glycerine to the simmering mix
    5. I added the gelatine
    6. I poured the mixture into a textured plate then added weight on top and left it for 1 day

    It took 10 min after the ethanol evaporated on low heat.
Notes: The mixture feels rubbery yet fragile. I would redo the experiment using more glycerine and less Alkanet root.
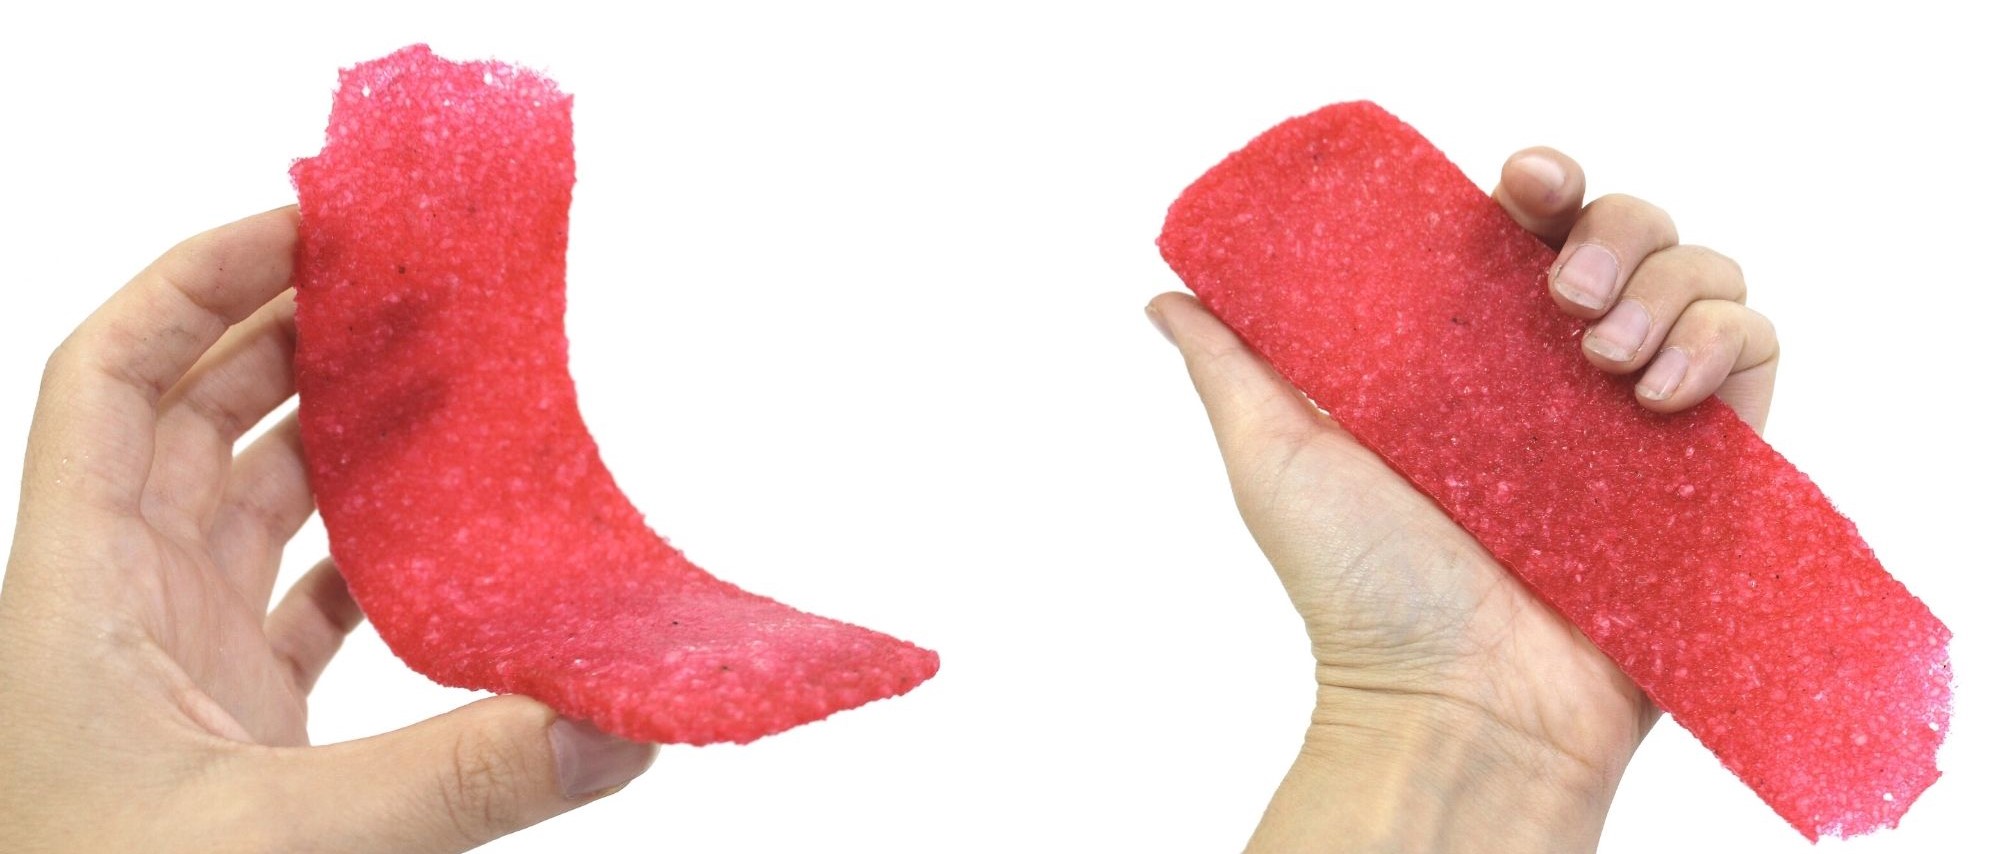
Apricot Leather
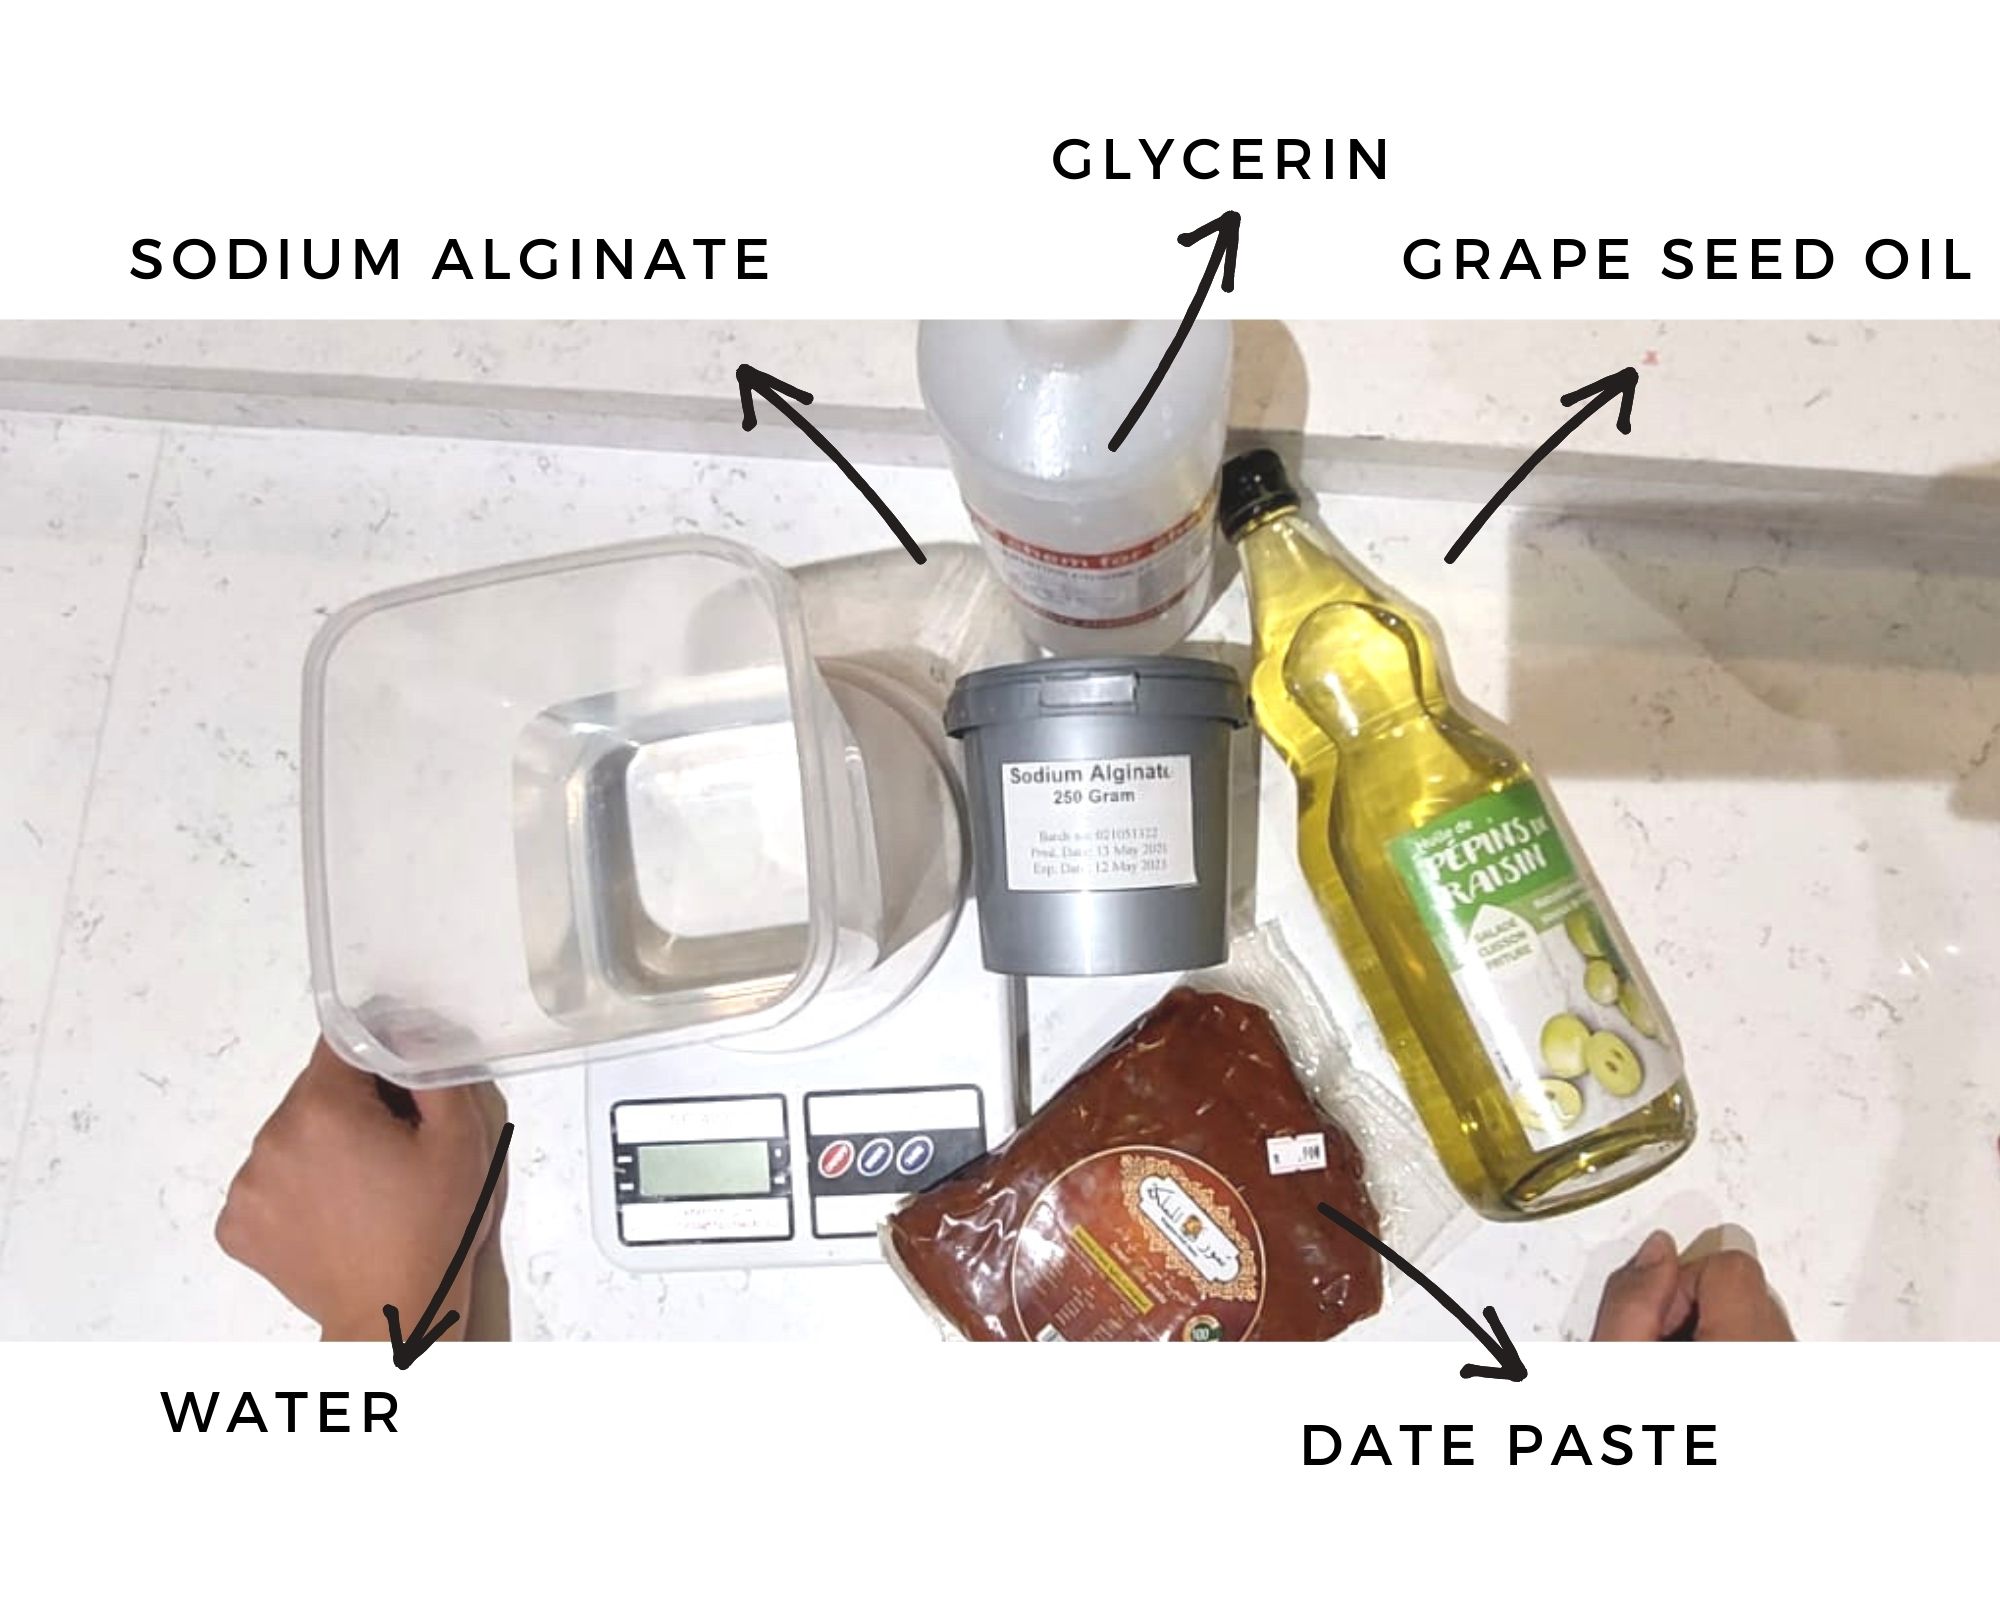
I was trying to mix edible local material as a base for a smooth leather outcome using Alginate as a polymer.
| Solvent | polymer | plasticizer | Additive | texture | Notes |
|---|---|---|---|---|---|
| Water | Sodium Alginate | Glycerine | Dried Apricot, Grapeseed oil | ||
| 1150 ml | 18 g | 87 g | 240 g , 13 g |
Curing
- Water 400 ml
- Calcium Chloride 40 g
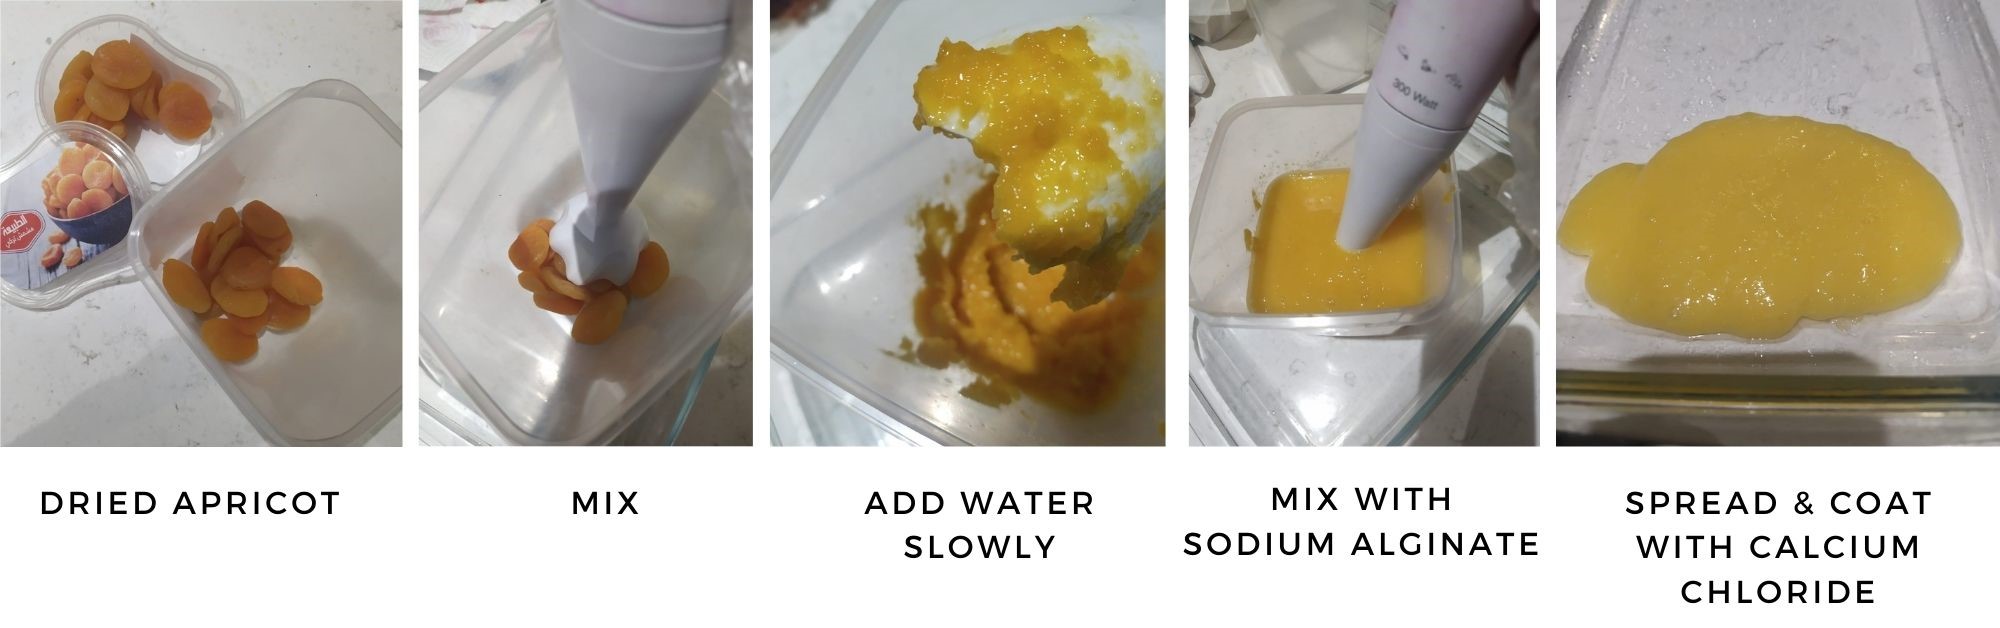
1. I prepared the curing solution by mixing the calcium chloride with water in a spray bottle
2. Using the mixer and a little bit of water, I mixed the apricots first for a smoother result
3. I mixed all the ingredients together starting with water and then adding the oil, Glycerine, and Sodium Alginate.
4. left the mixture in the fridge for 1 day to get rid of bubbles
5. I used a glass container for the mould
6. I sprayed the container with the curing solution
7. I poured the mixture into the container and spread it lightly
8. I sprayed more curing mixture on top. left it to dry for 2 days and kept spraying when I got the chance.
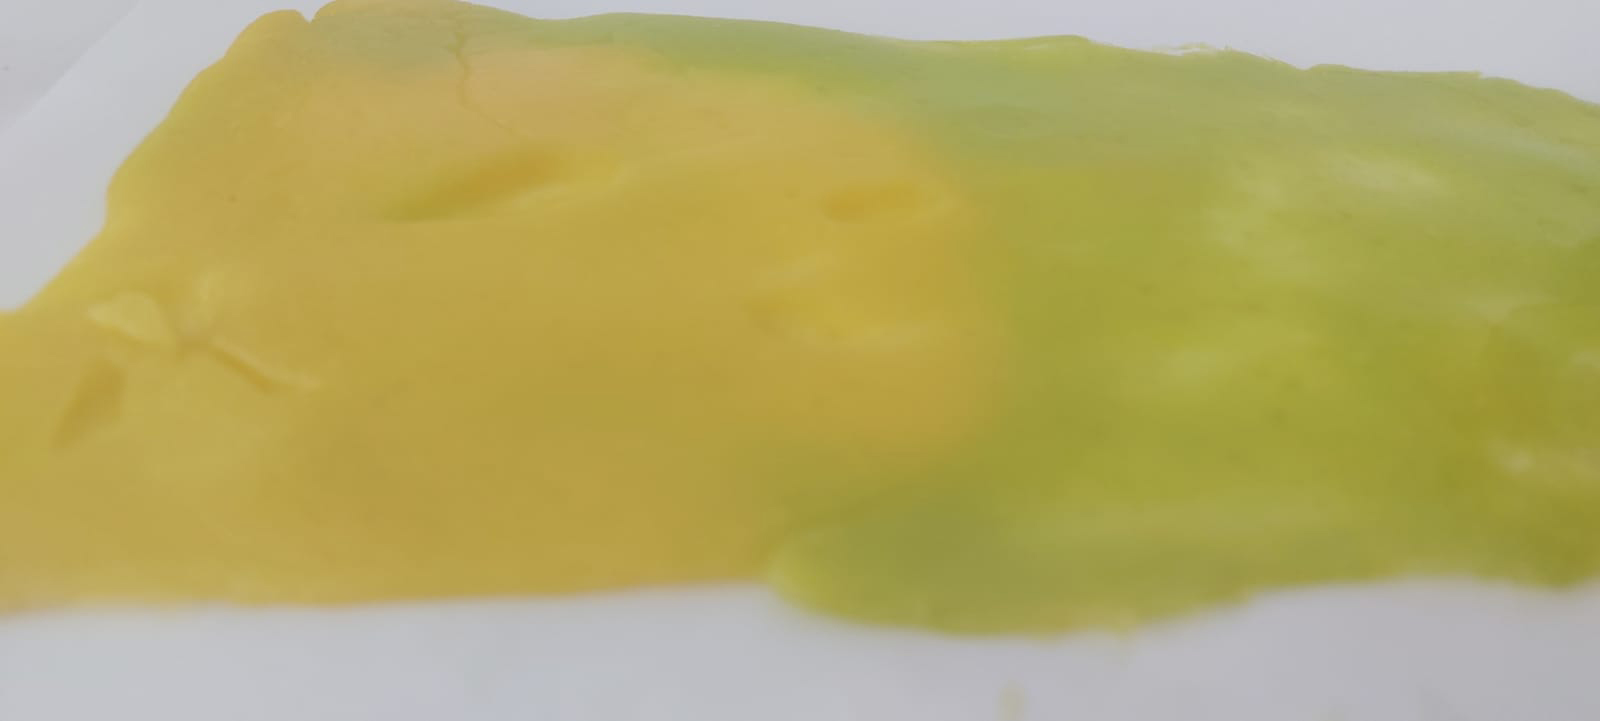
The green part is due to adding 2 drops of food color to a small amount of the mixture
| Flexibility | Strength | Hardening time | Shrinkage | Notes |
|---|---|---|---|---|
| High | High | Low | High | Medium |
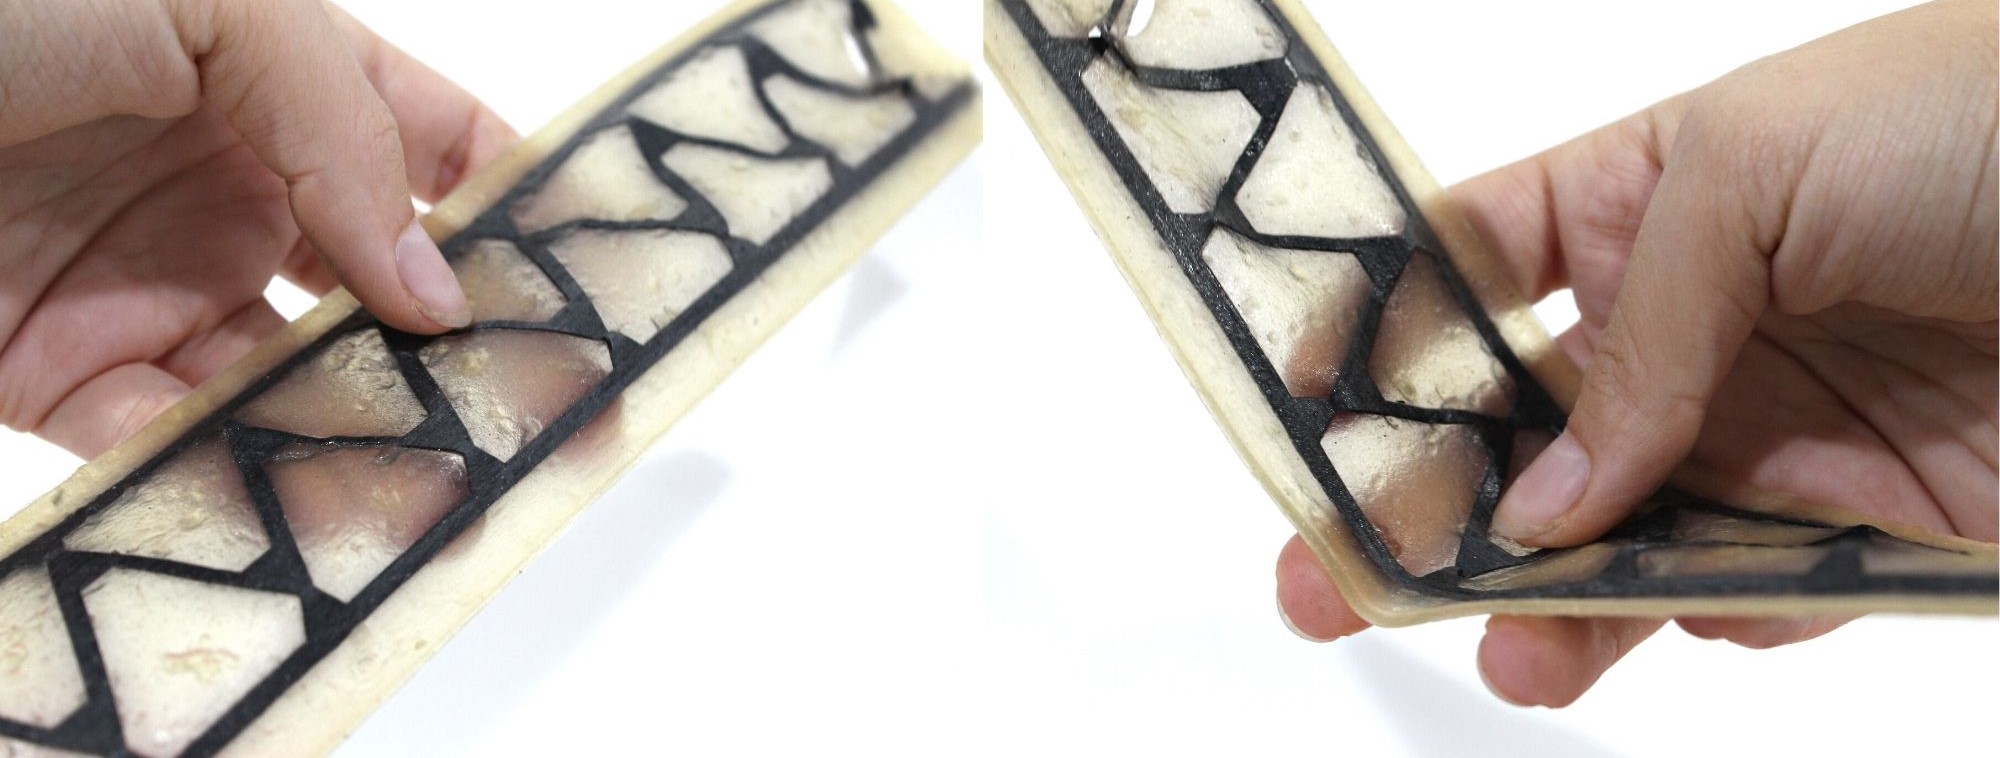
Date Leather
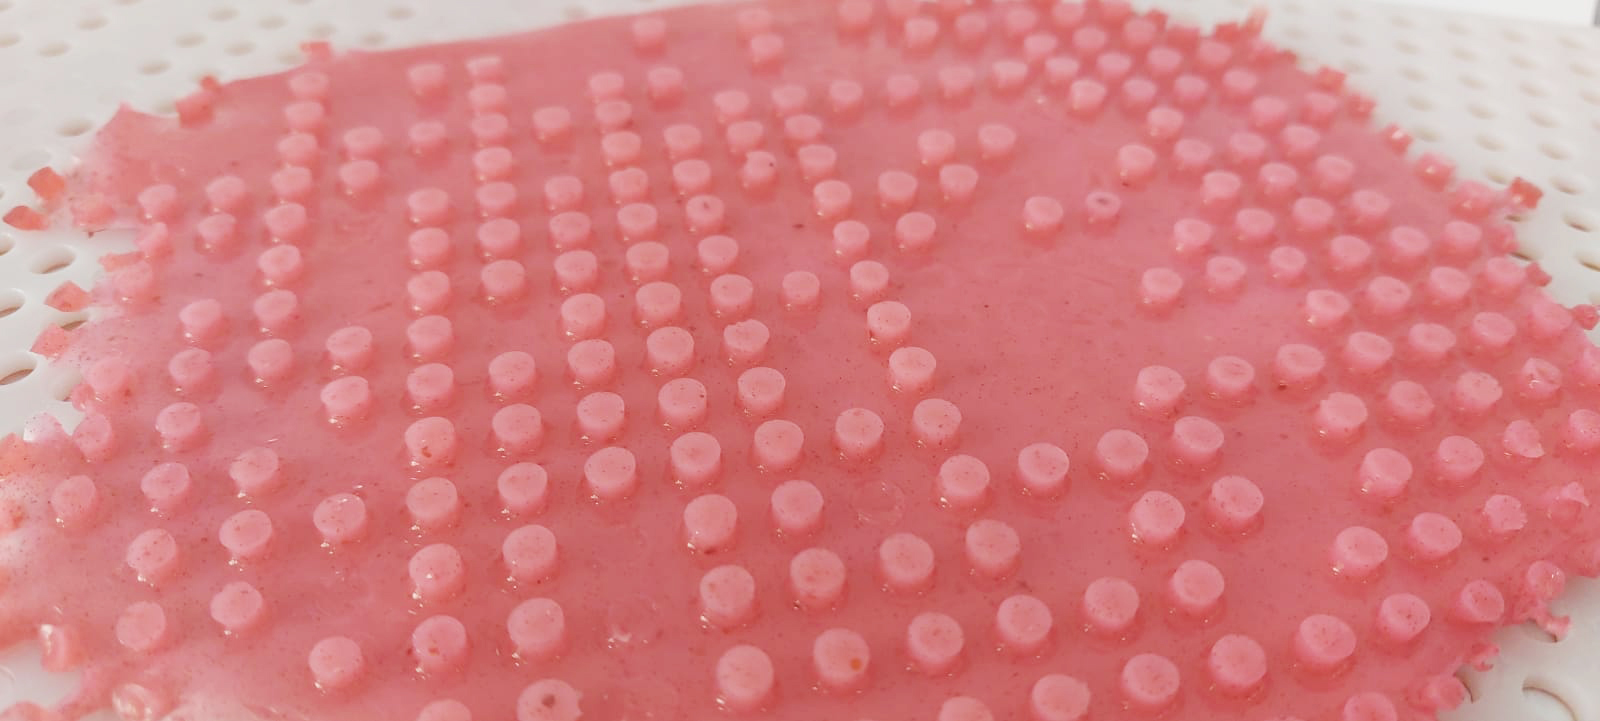
| Solvent | polymer | plasticizer | Additive | texture | Notes |
|---|---|---|---|---|---|
| Water | Sodium Alginate | Glycerine | Date paste, Grapeseed oil, food color | Acrylic mould base | |
| 900 ml | 22 g | 75 g | 31 g , 13 g , 4 drops |
Curing
- Water 400 ml
- Calcium Chloride 40 g

1. I prepared the curing solution by mixing the calcium chloride with water in a spray bottle
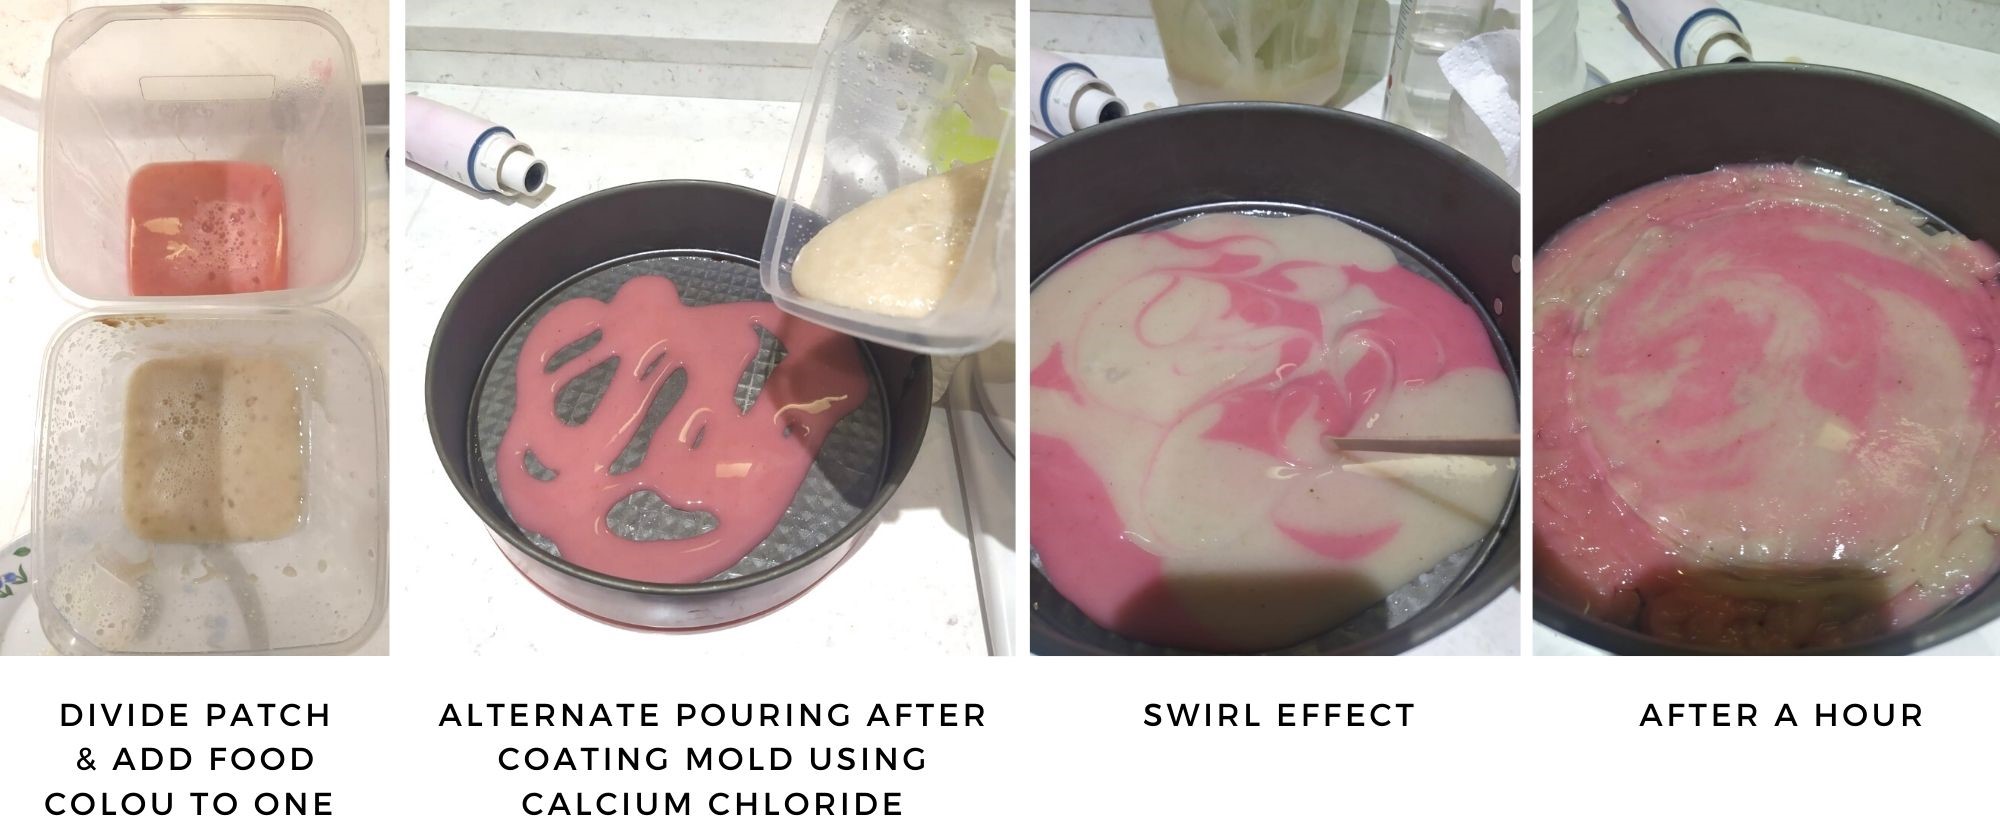
2. Using the mixer, I mixed all the ingredients together starting with water and date and then adding the rest
3. Added food color to part of the mixture.
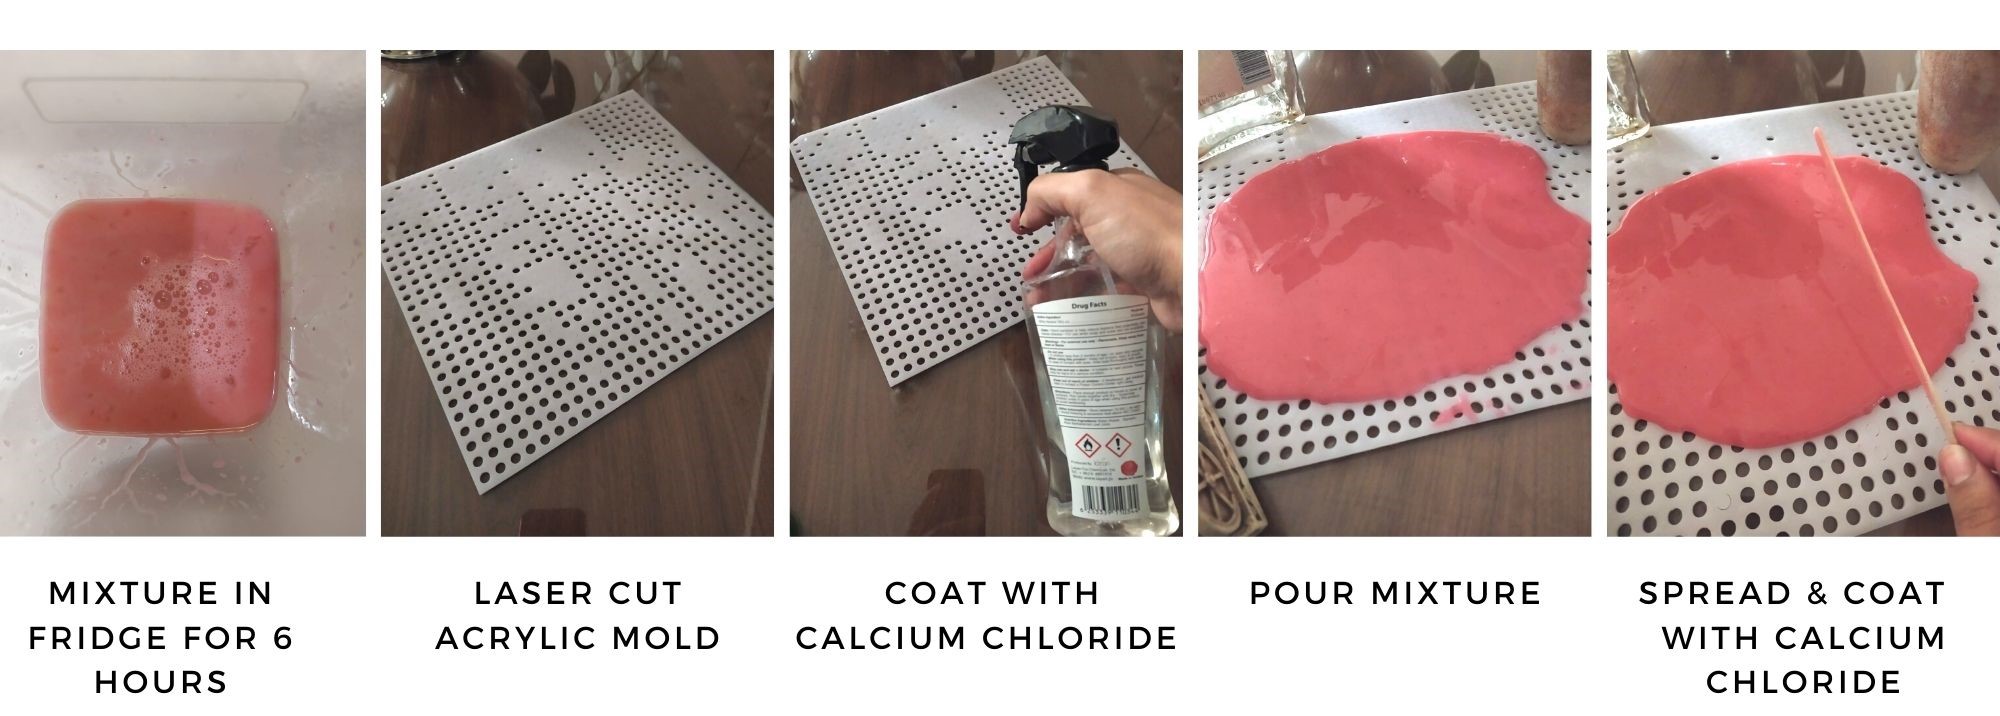
4. left the mixture in the fridge for 1 day to get rid of bubbles
5. I had a leftover acrylic sheet laser cut to make a pattern before
6. I sprayed the acrylic sheet with the curing solution
7. I poured the mixture above the sheet and spread it lightly
8. I sprayed more curing mixture on top. left it to dry for 2 days and kept spraying when I got the chance.
| Flexibility | Strength | Hardening time | Shrinkage | Notes |
|---|---|---|---|---|
| High | High | Low | High | Medium |
The mould was a pan and the mixture erupted at one point inside the mould creating a texture at the top. Also, there has been a change in color and some moulding happening. Although using the same mixture with the other experiment there hasné been any moulding or extreme change of color. However, with the second experiment, the color deepened and got a bit darker and more translucent.
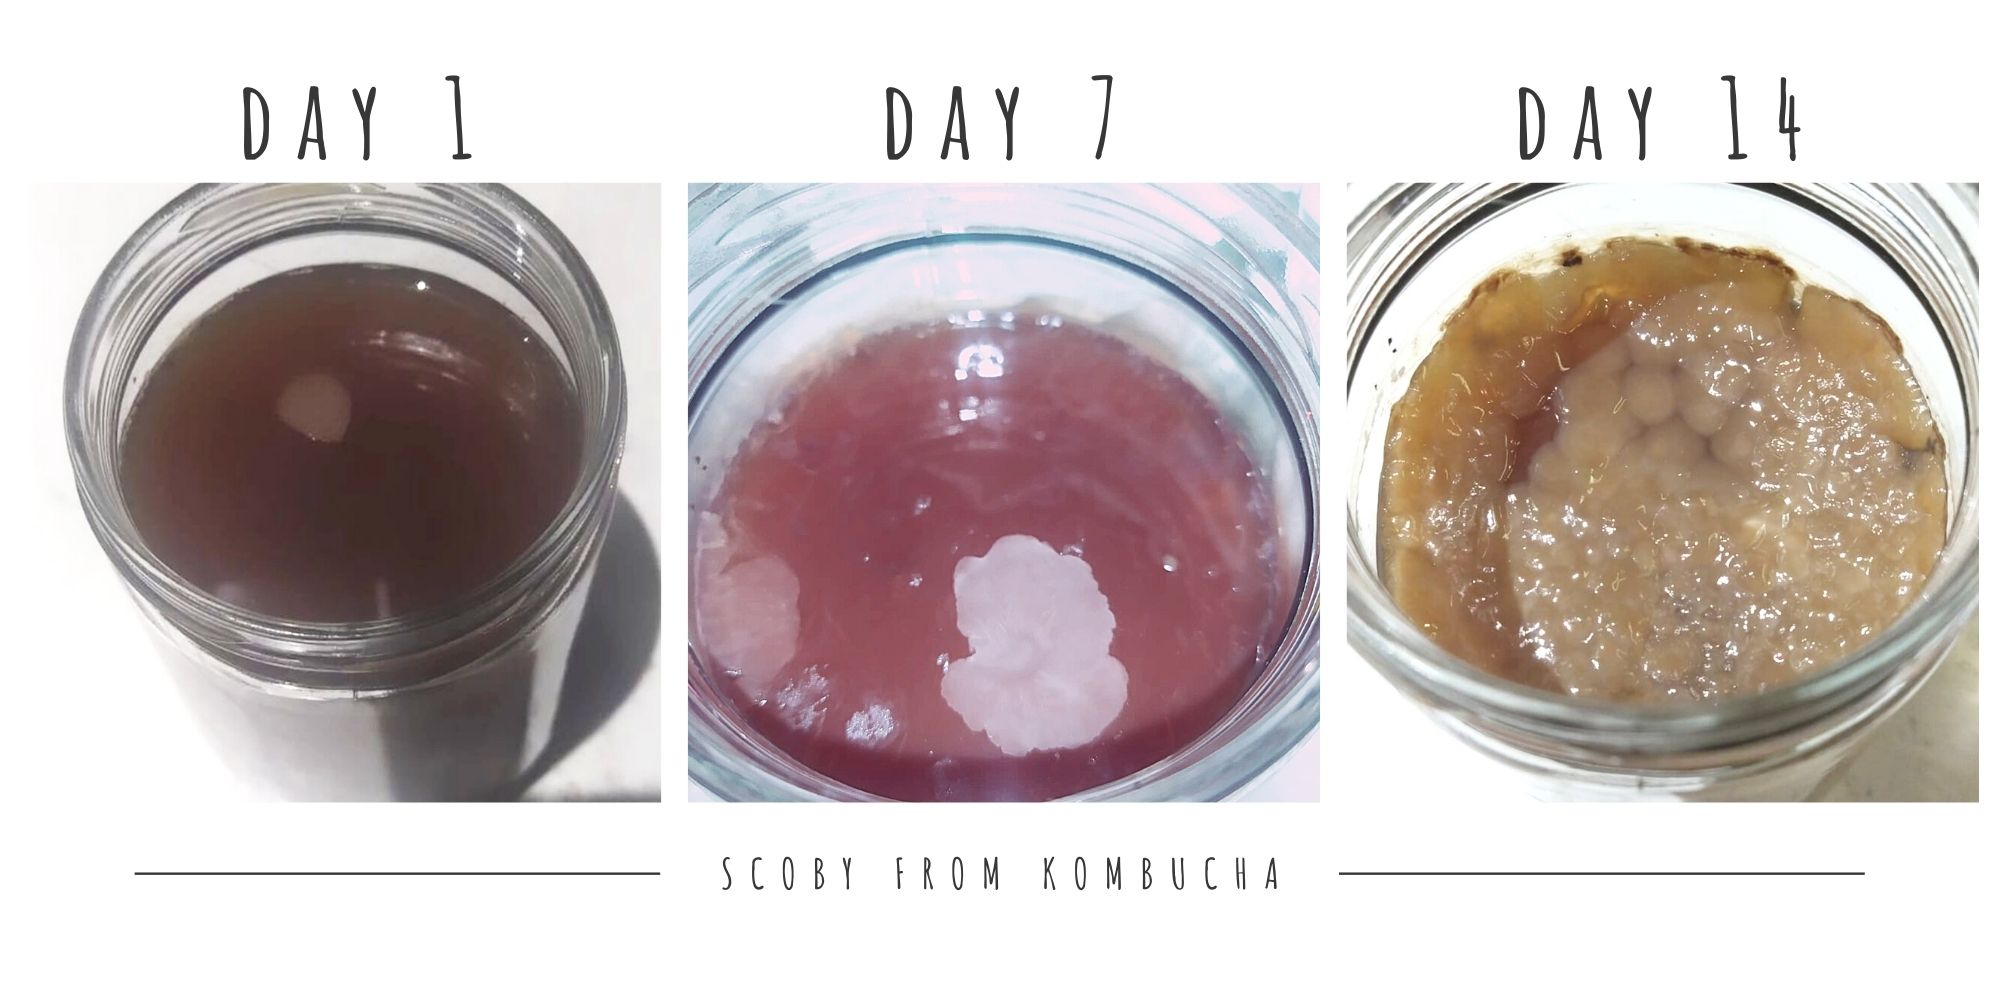
SCOBY leather
SCOBY from scratch Recipe
  Bought Kombucha     400 ml
  Sugar               0.25 cup
  Black tea bags      5 bags
  Water               5 cups
  Add a splash of vinegar if PH is higher than 3.5
    1. Sterilise everything by boiling it all for 15 minutes and letting it cool down naturally.
    2. start by adding the tea to hot water and let it simmer for 20 min.
    3. Let the tea mixture cool down naturally.
    4. Drain the tea mixture into a jar add the sugar and stir slowly
    5. Add a splash of vinegar if the Ph is higher than 3.5
    5. close it tightly using a piece of fabric and leave it in the dark in a slightly ventilated, warm space