7. Computational Couture
This week is all about parametric design, textile, and 3D printing. I have been waiting for this week and here it comes. My goals for this week are to learn grasshopper and create different 3d printed textile swatches. I am familiar with 3dsmax and AutoCAD since I use them for my architecture and interior work. However, I am new to Rhio and therefore new to a grasshopper. I Used this week as an opportunity to gain skills using grasshopper, Learning the workflow, and obtaining some tricks to feel comfortable in this new setting.
LET'S WALK THROUGH IT TOGETHER
Research & some technical information
Inspirations
THE OCEAN CALLS
My inspiration for the sea and the coral reef never ends. The options are endless but all are beautiful.
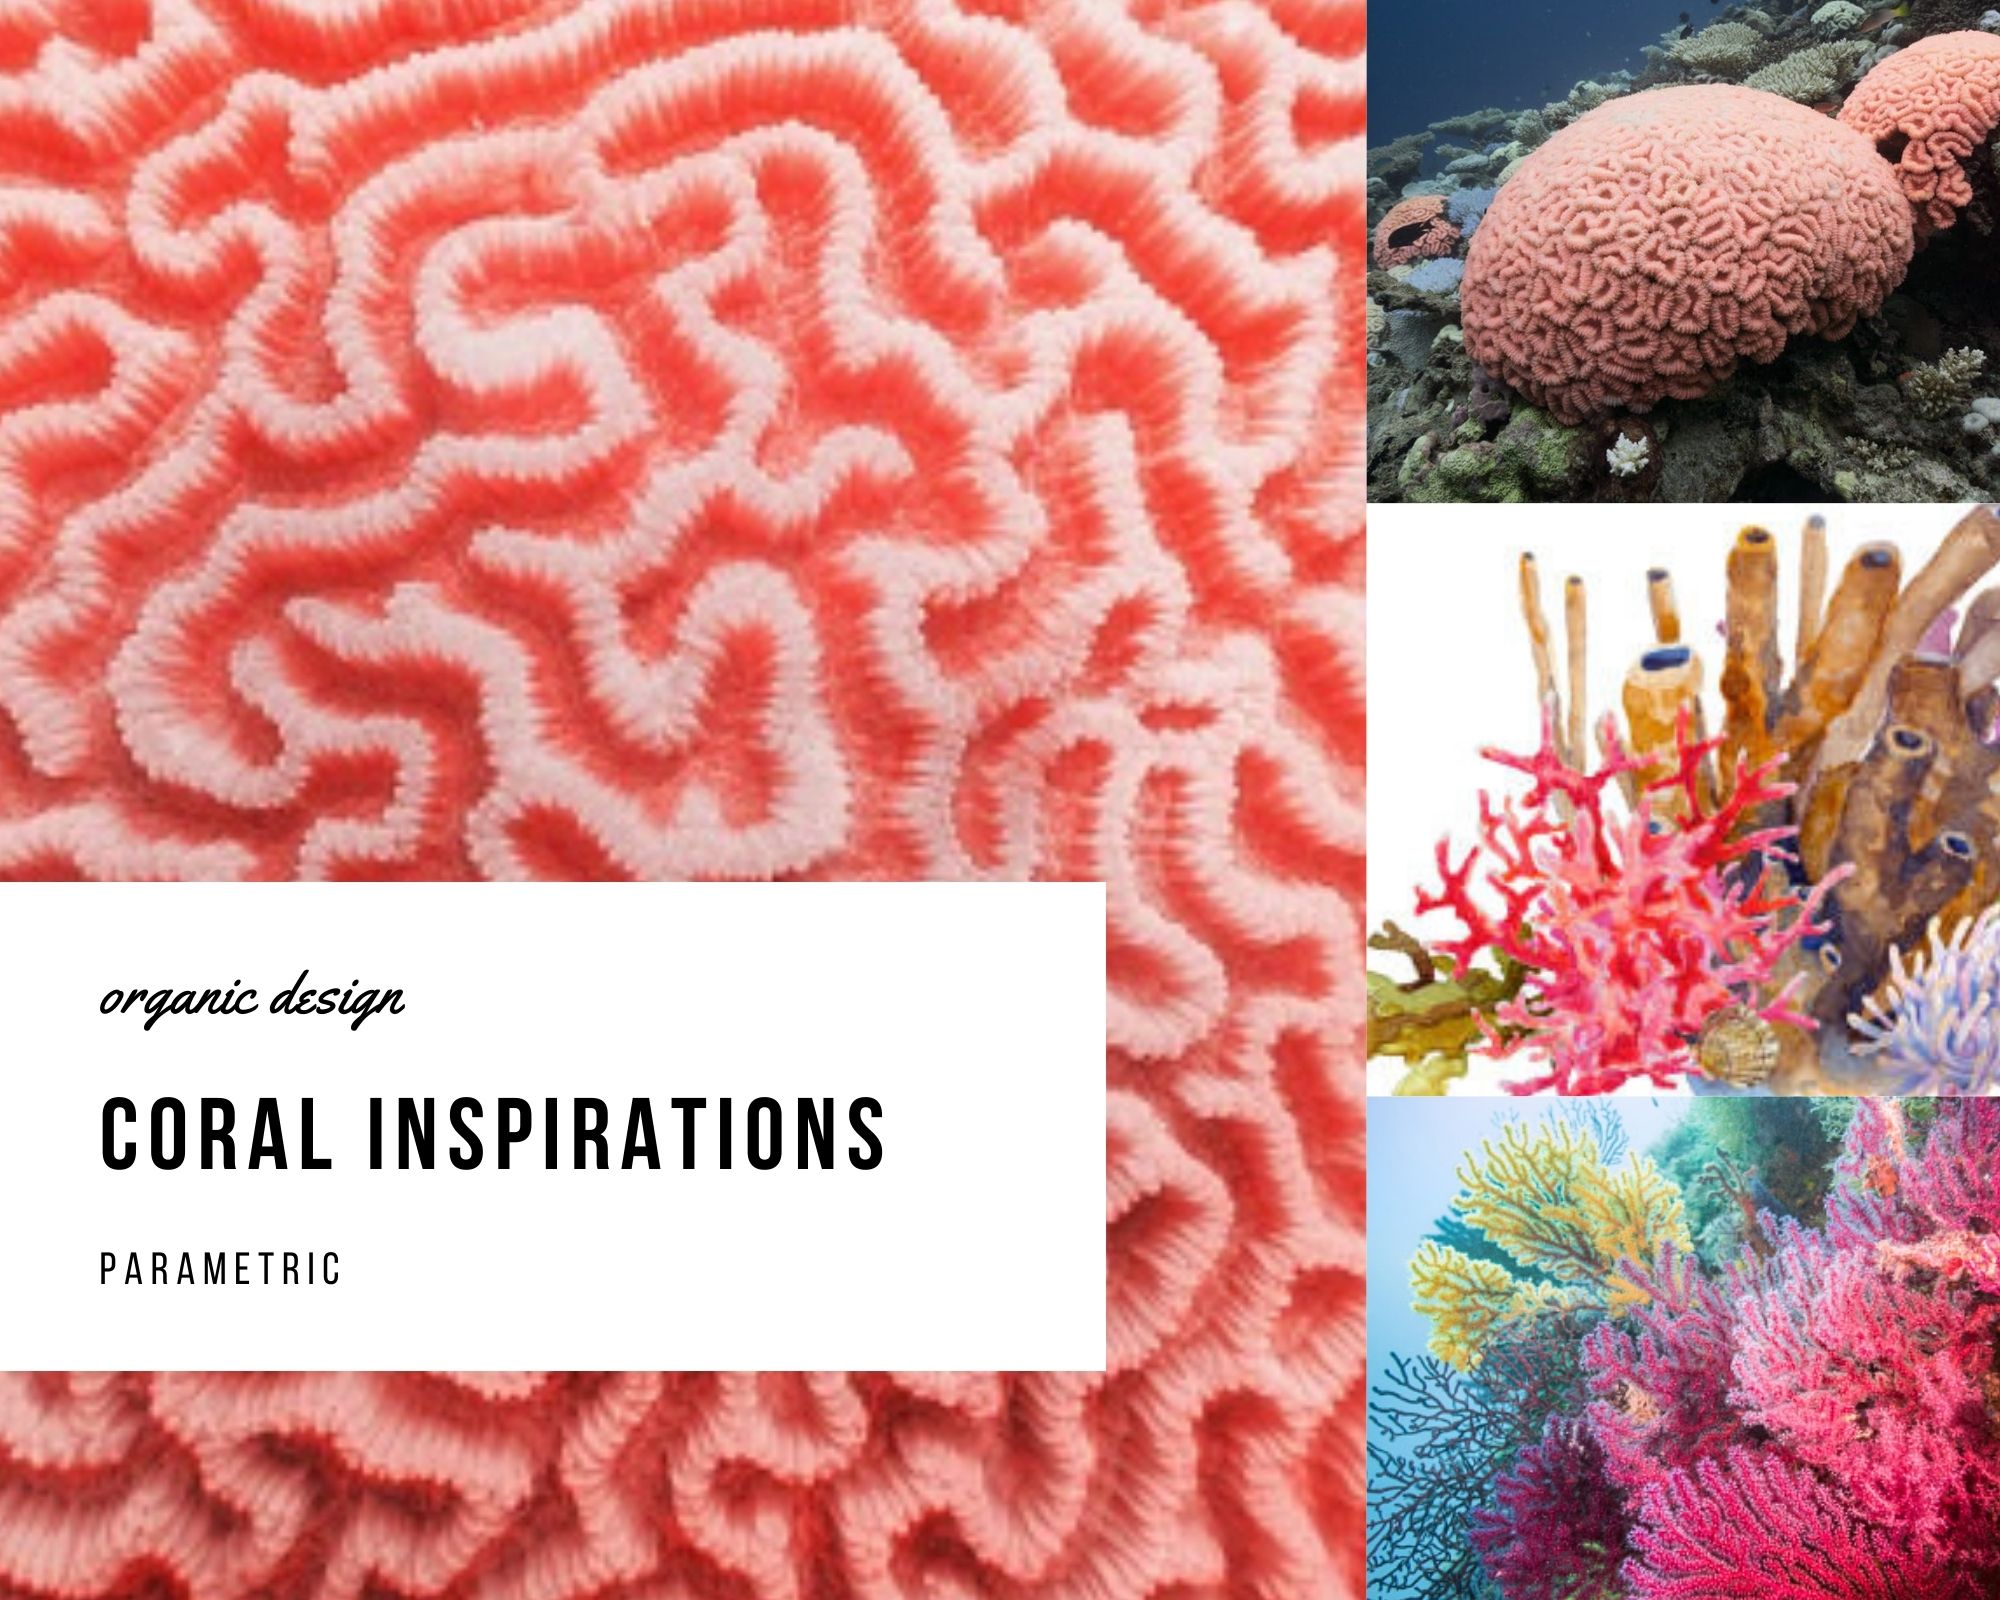
These projects by Iris Van Herpen are something to inspire for

Getting 3d printer ready
The 3d printing process is pretty easy. However, getting familiar with the slicing settings and gaining experience to get high-end results within minimum time is a long learning process.
First, make sure the printer is on and the needed material is loaded.
To load the material I used the setting from the machine to unload the previous material and then load the new chosen material from its designated place in the back then wait for the machine to do its work and get it ready.
Make sure to clean the surface and the nozzle using a brittle brush.
Some machines require manual leveling like Ultimaker2 and 2+ which through using a piece of paper, you twist the spring underneath the print plate until the tip of the nozzle touches the paper.

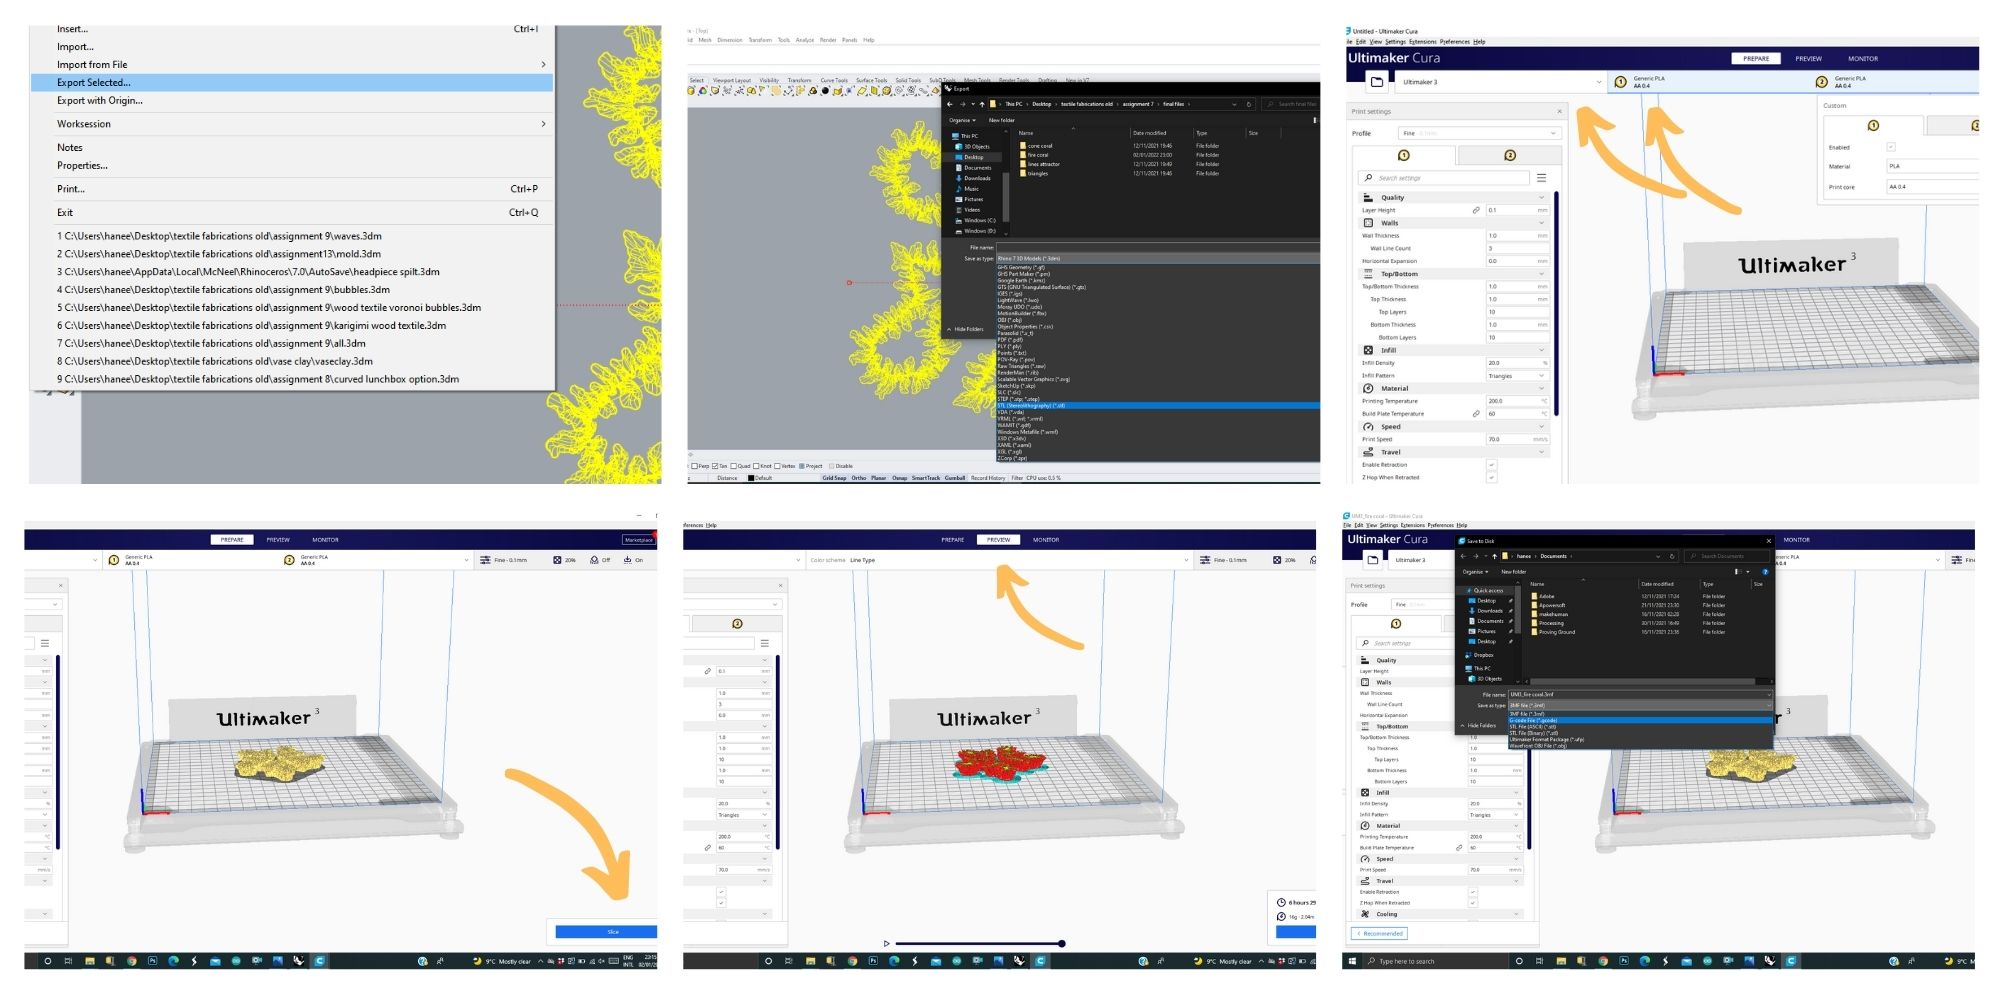
Slicing program
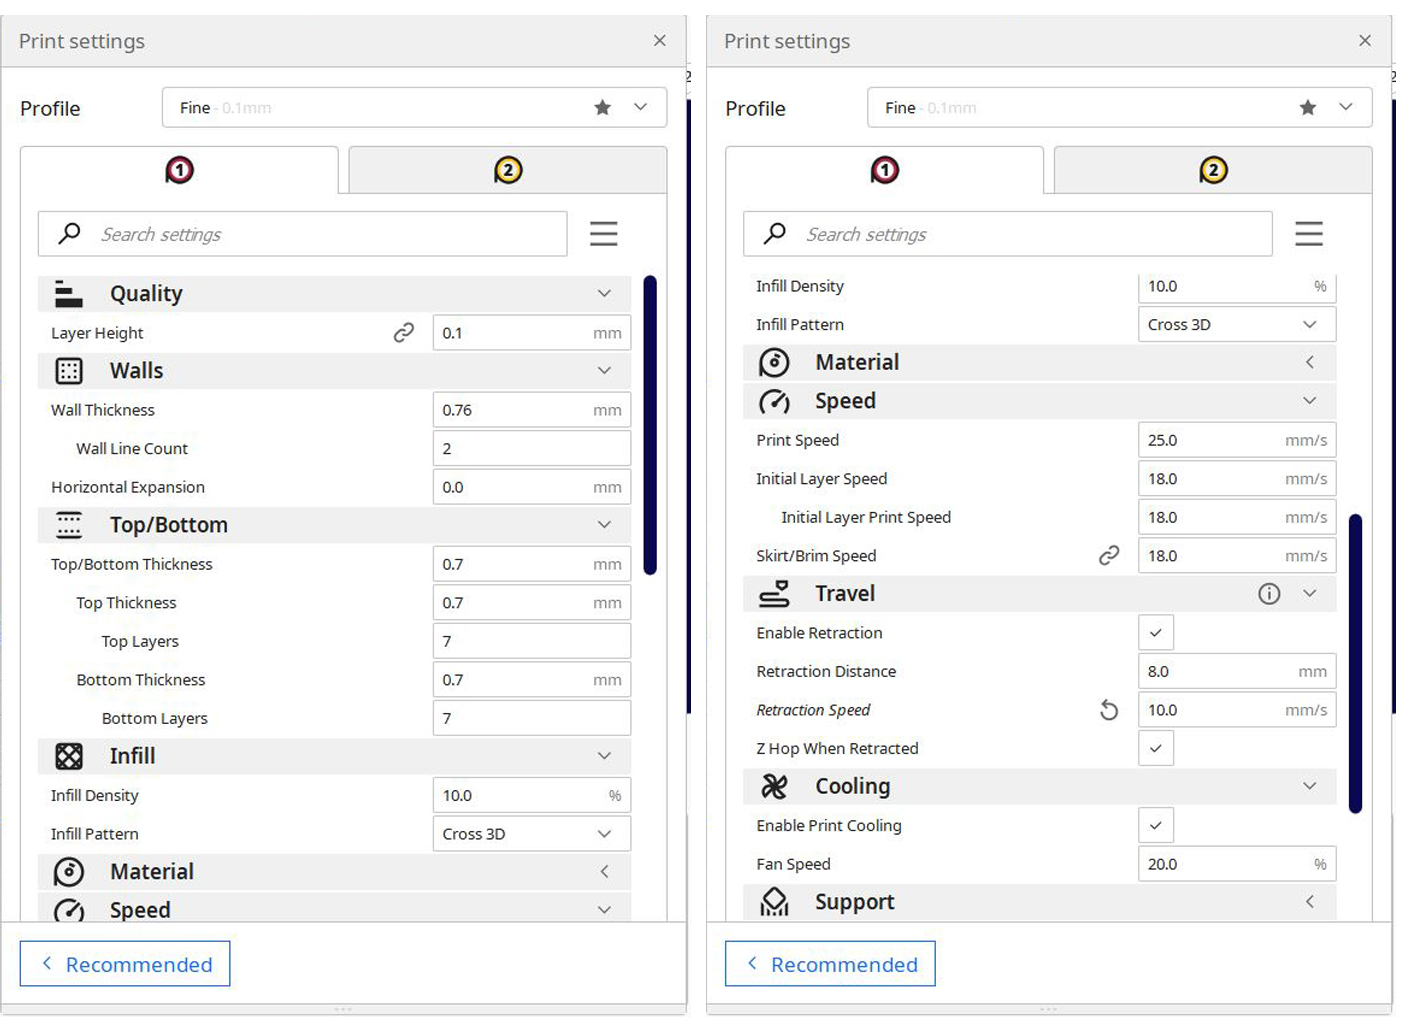
All the printers I used work with .gcode files. Therefore I used Cura. I exported the designed 3ds from Rhino in a .stl format.ANd then uploaded into Cura. I made sure to choose the right printer and material on the top first.
Using the advanced settings I changed some settings for which you may take a look when we go through each sample done. In general, make sure the slice thickness is right based on the nozzle size you are using. After that I pressed the command slice I hit the preview button to check all is good. and then saved a .gcode file.
Plugins I tried working with:
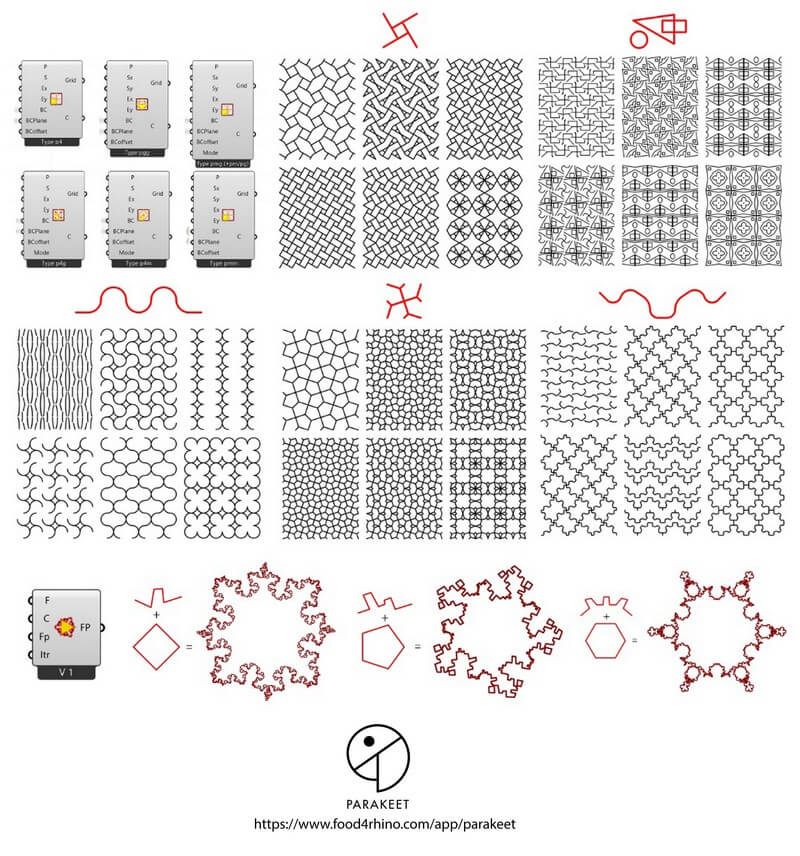
Parakeet plugin for grasshopper: amazing for patterns
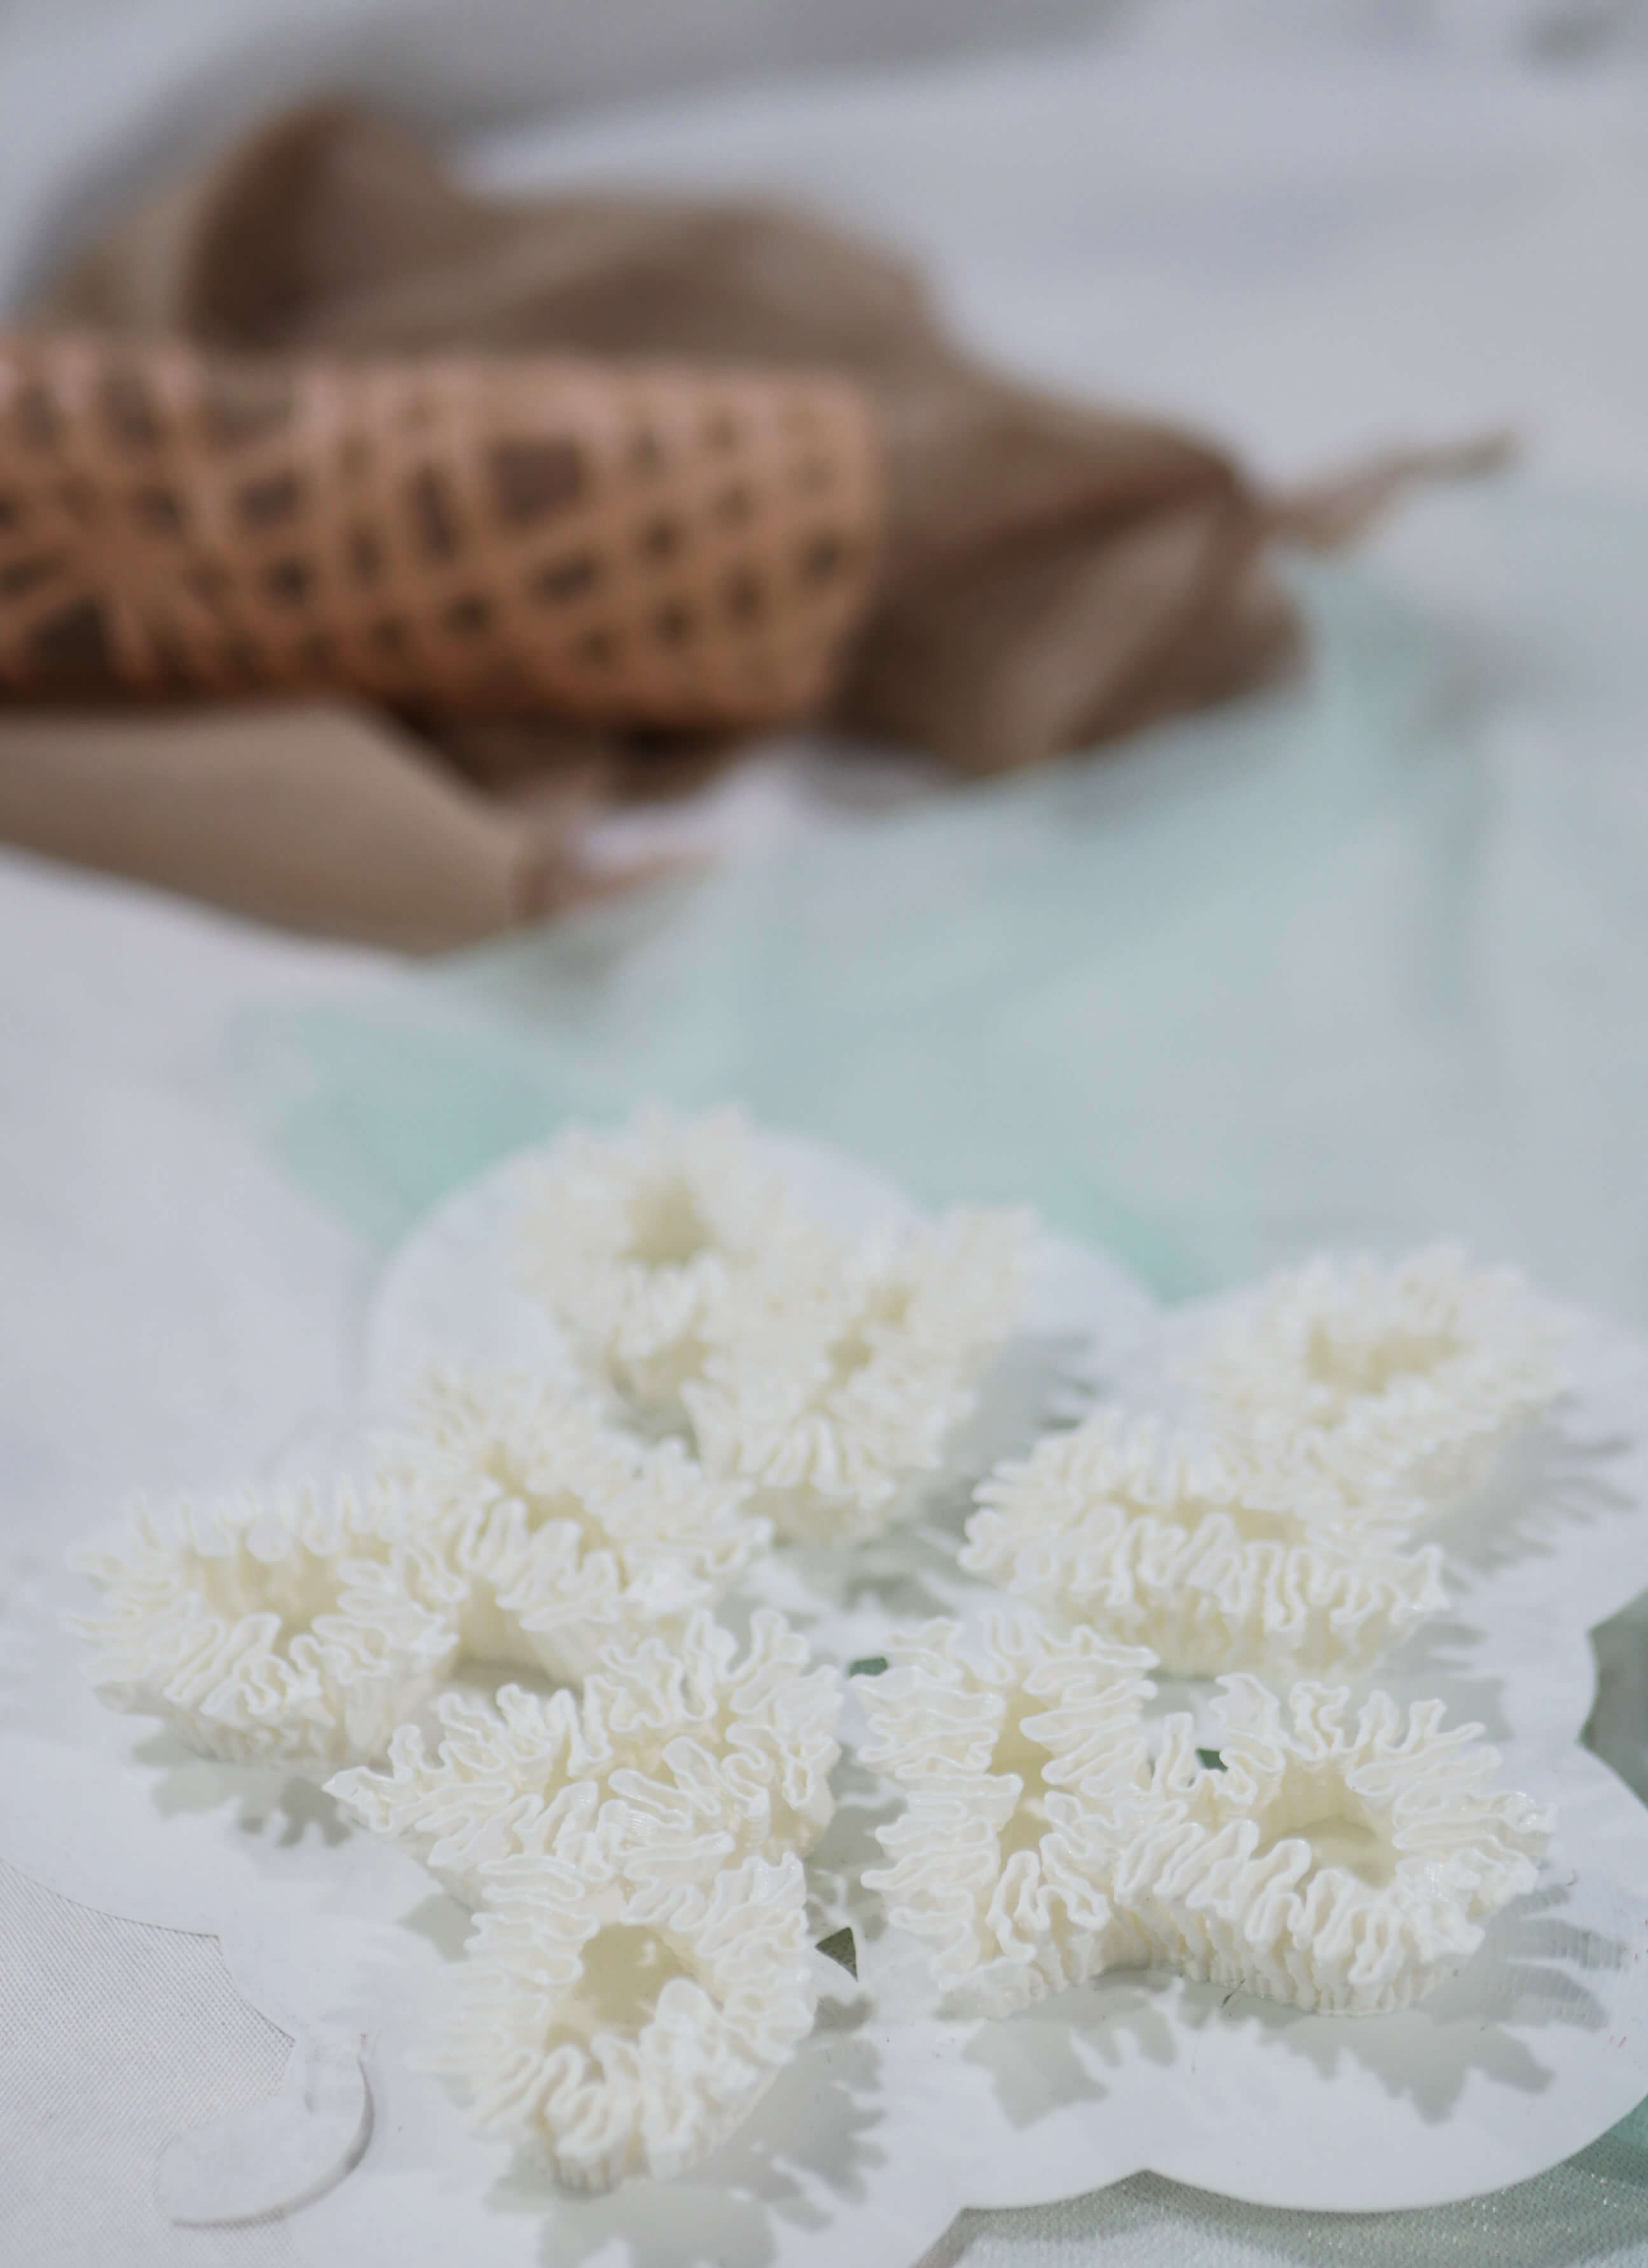
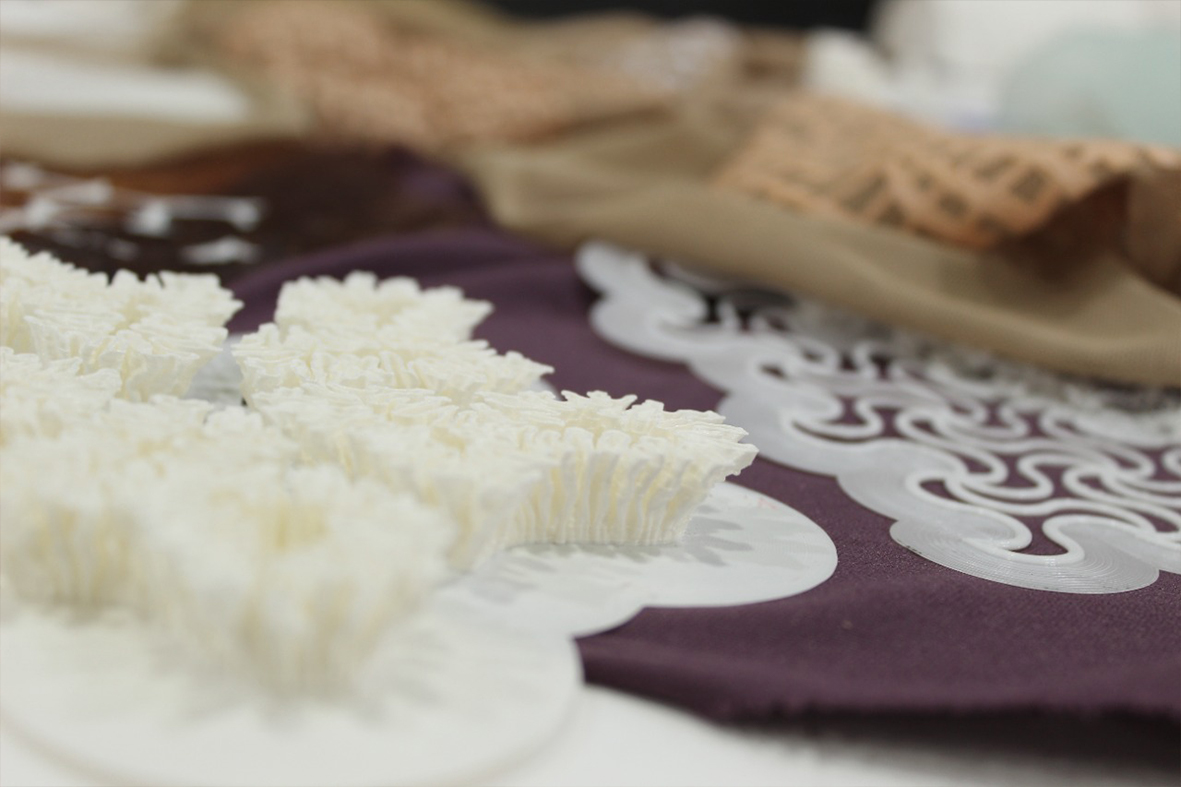
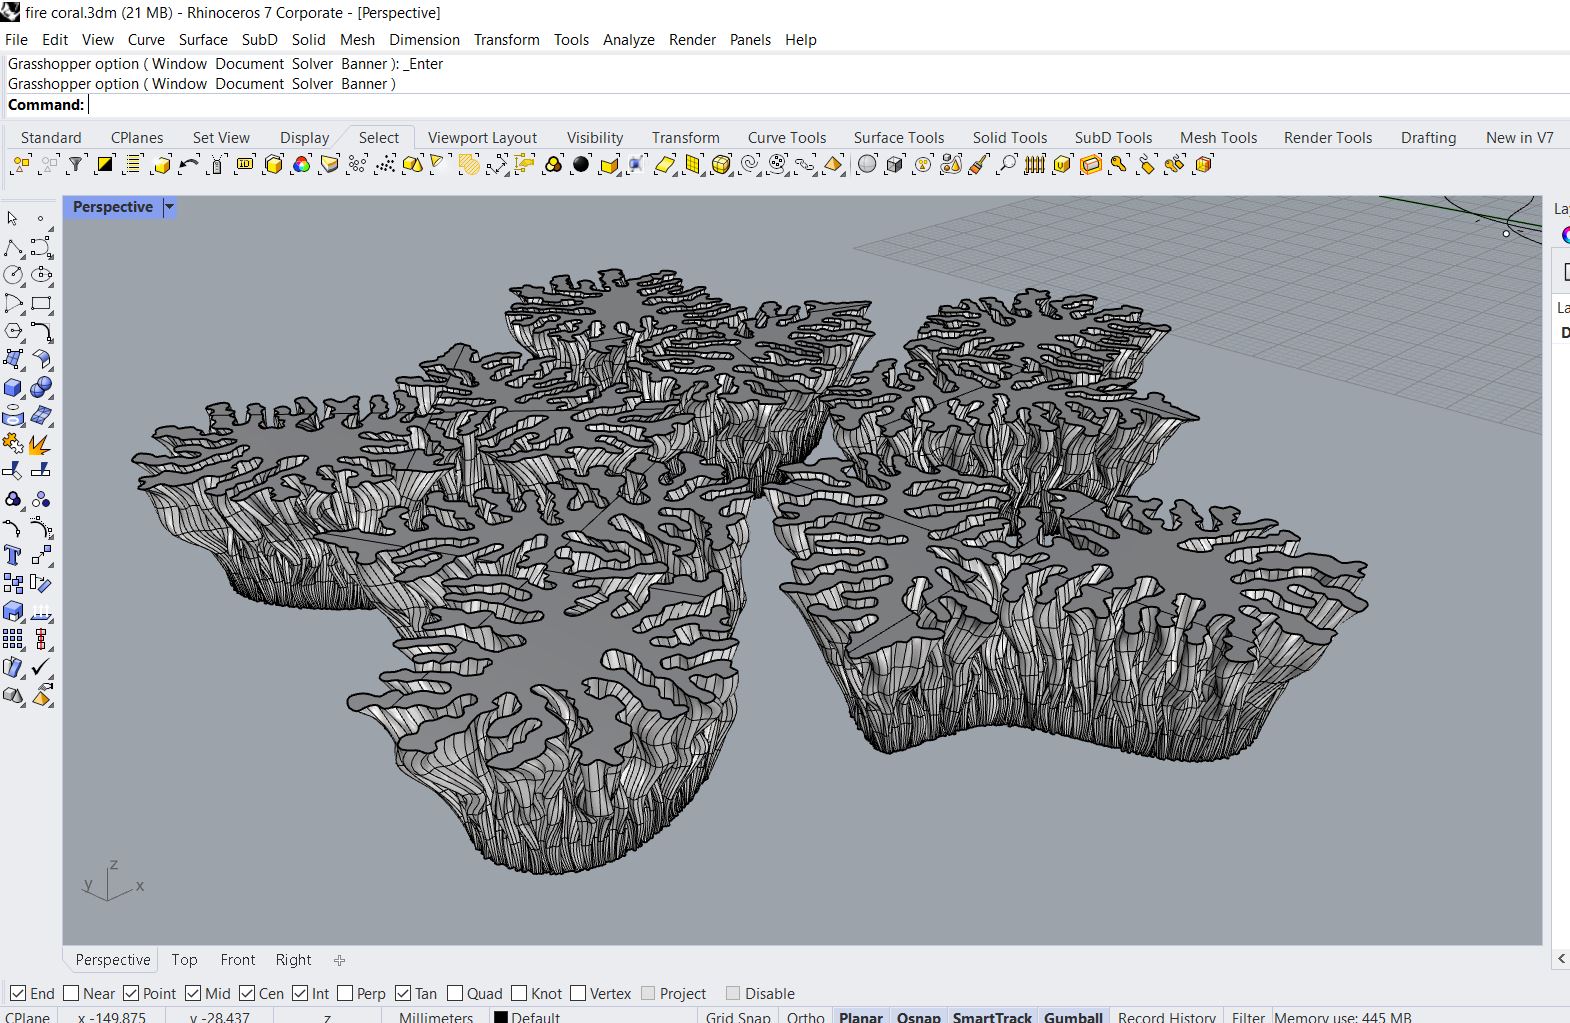
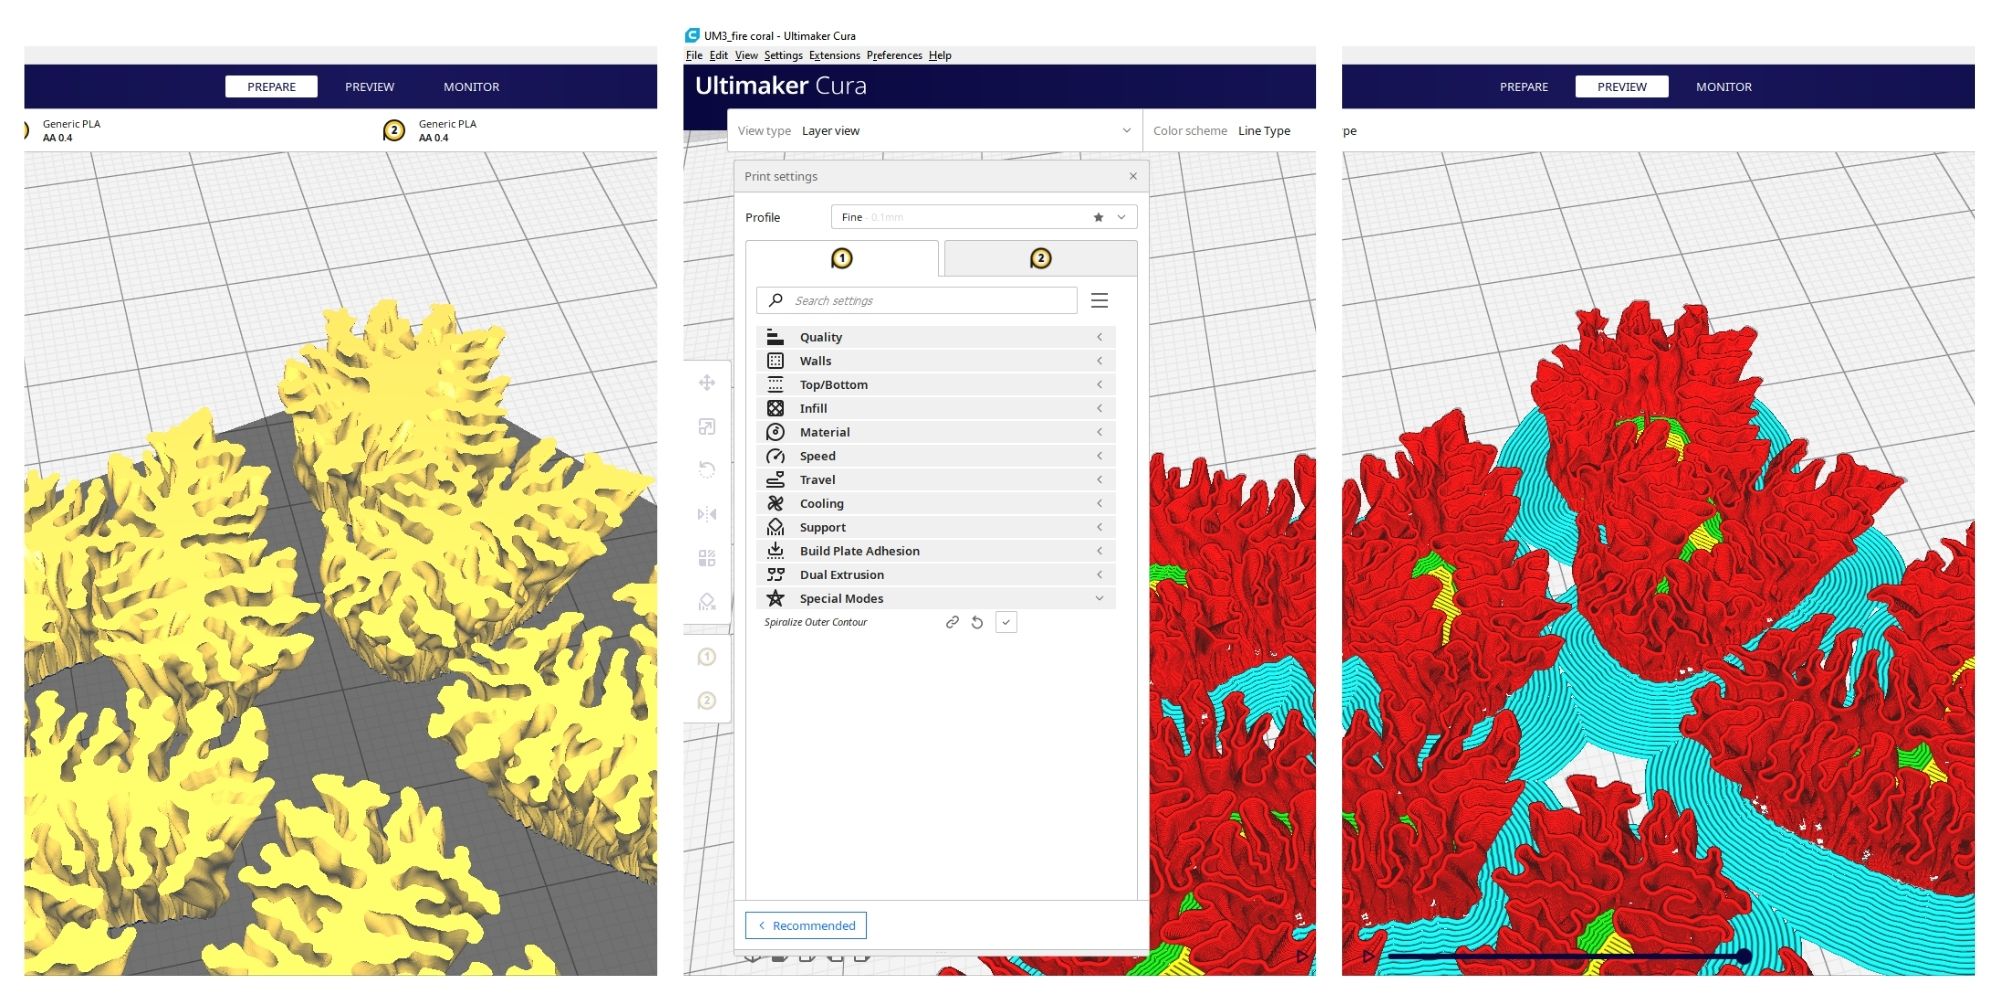
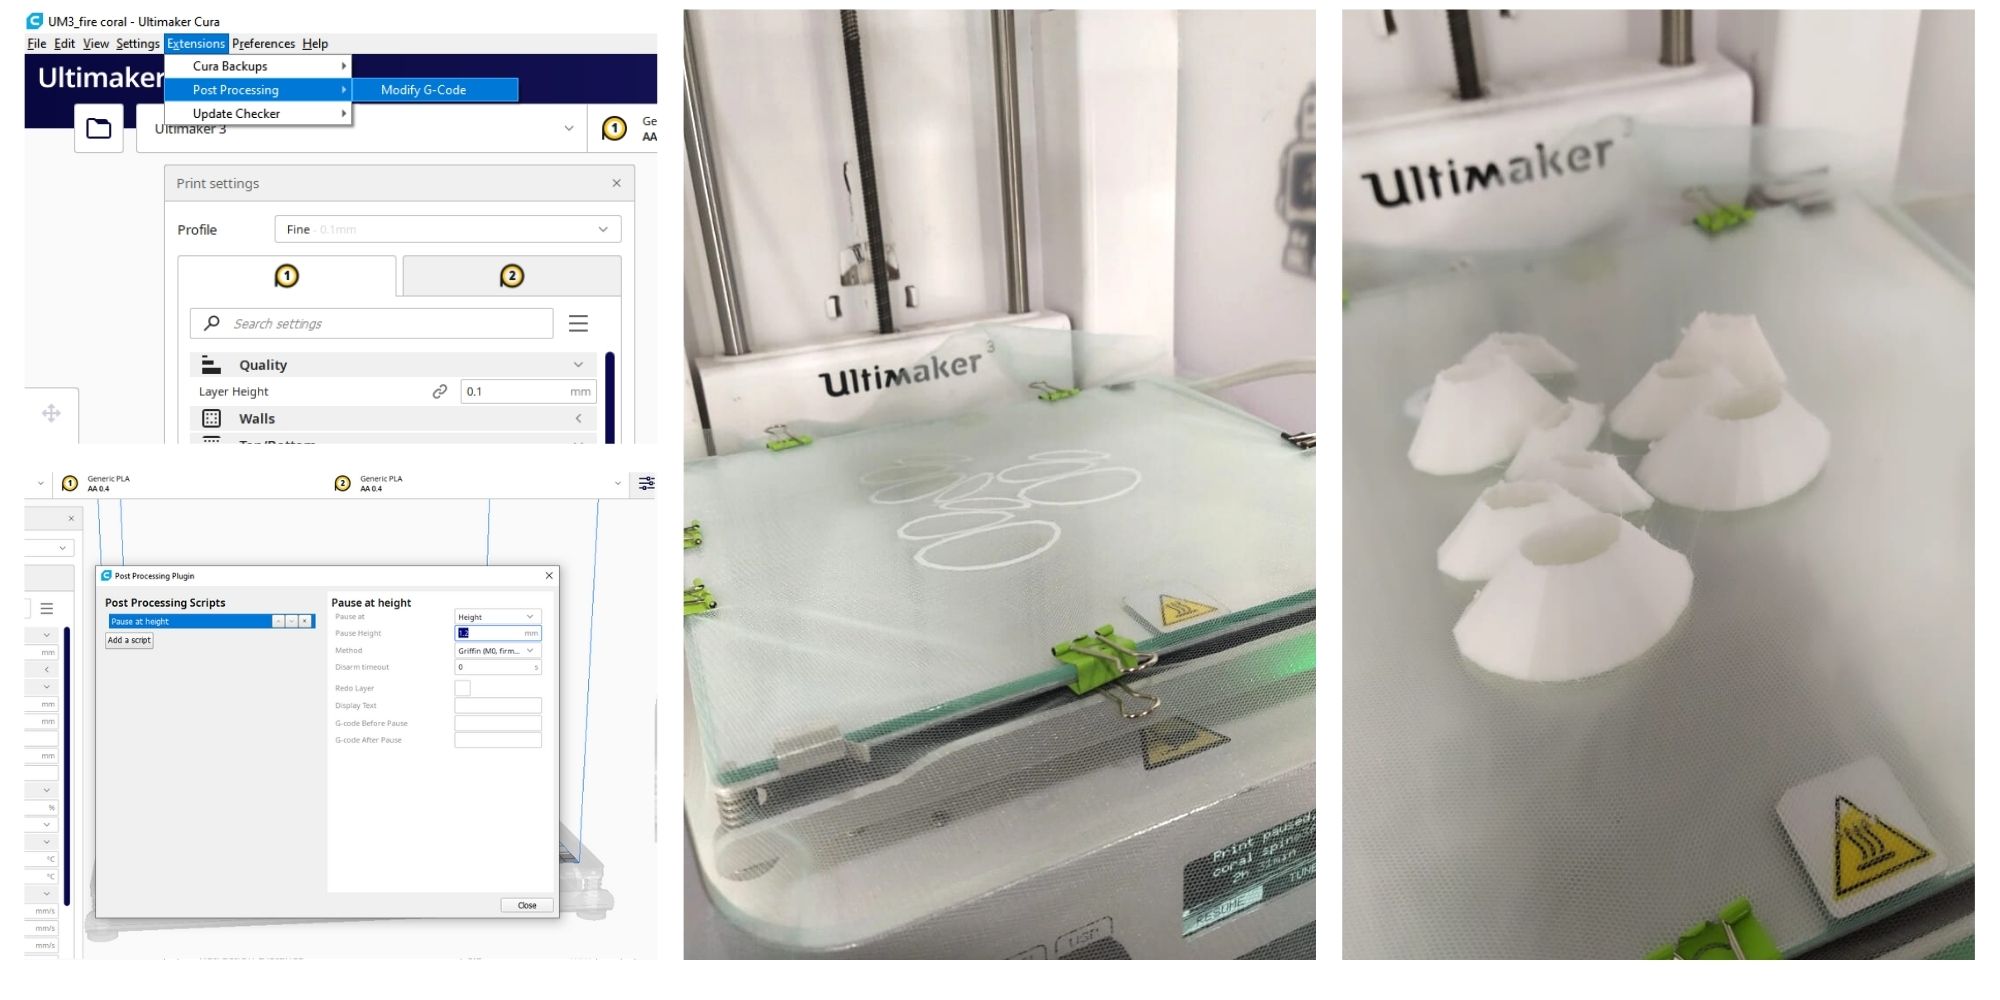
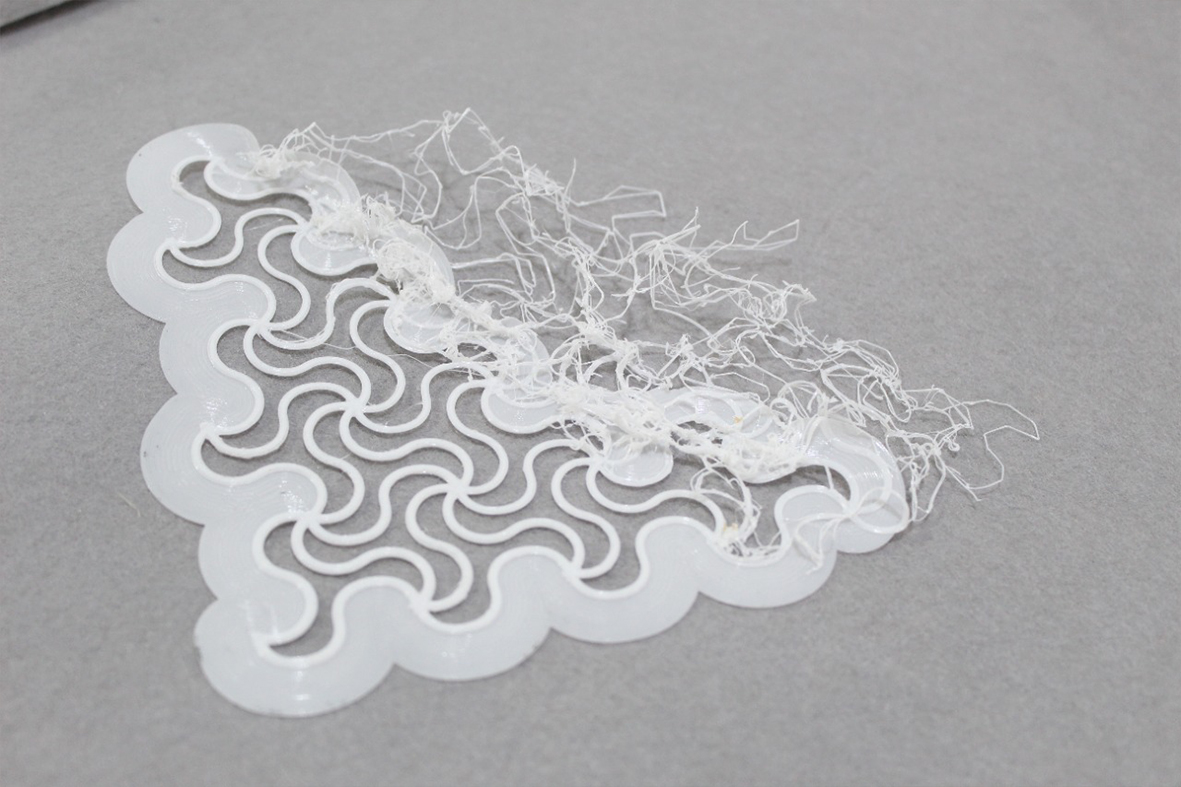
Fire Coral Textile Pattern


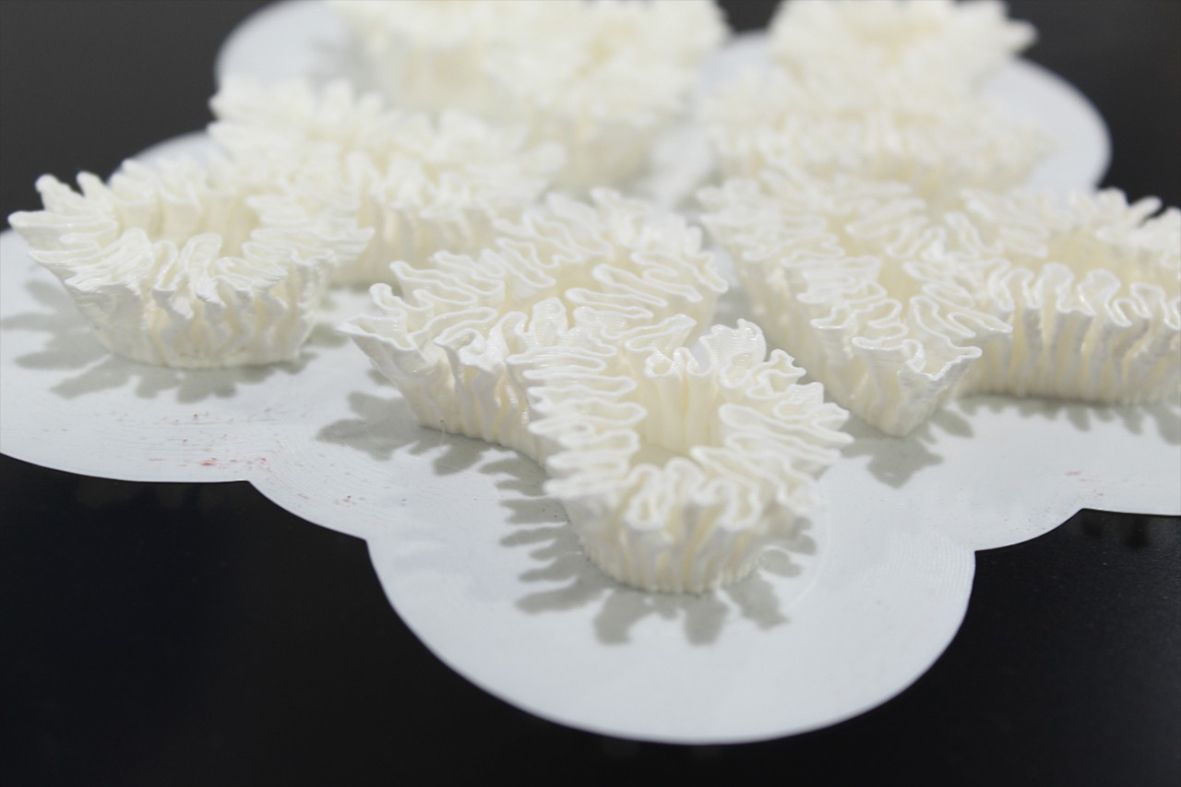
For this project, I used simple growth simulation by creating a curve, then exploding it into little segmented lines, then I used kangaroo plug-in to simulate a growth in the lines constrained within a larger curve. and then using a loop to make copies in the z direction which gradually increase in length and width at the same time. and then loft the curves into a mesh.
The video can explain all the process in details.

After exporting the baked file in an stl format, I dropped the file in cura after choosing the printer and material. After choosing the settings shown below, I sliced and then reviewed and got file ready to print.
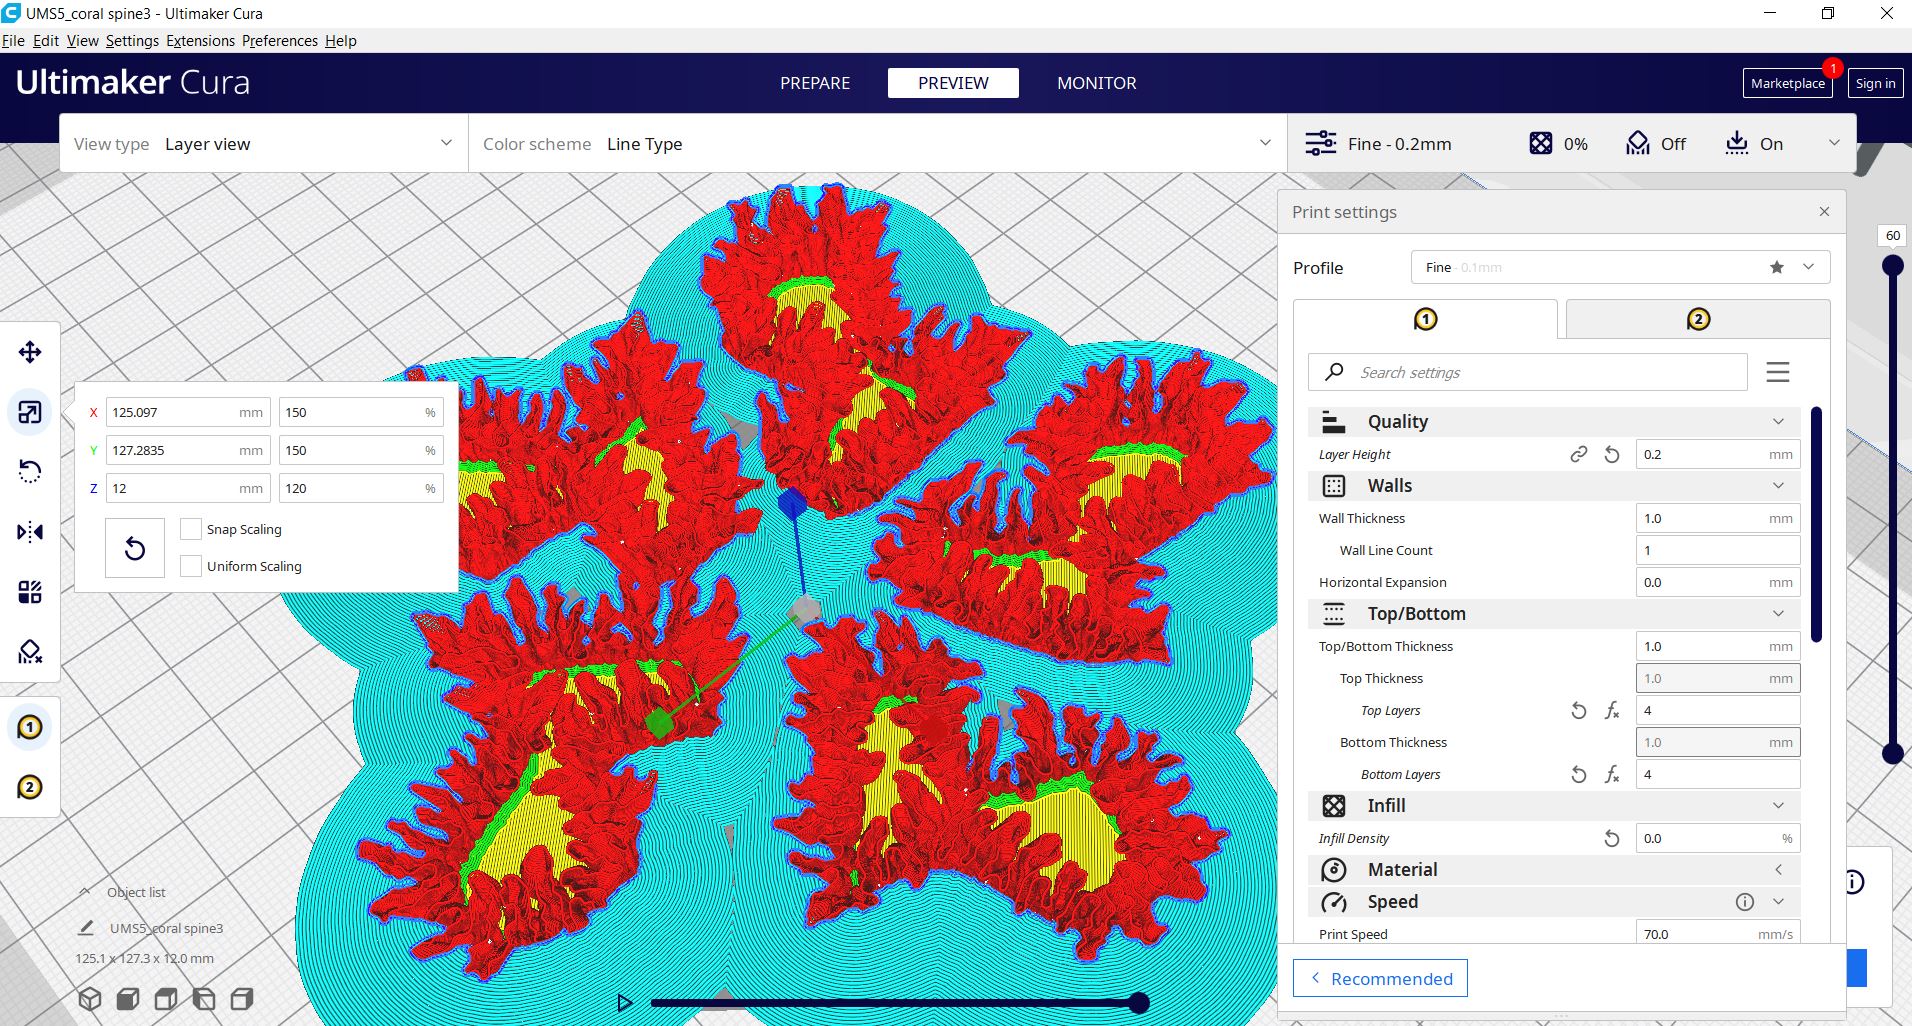
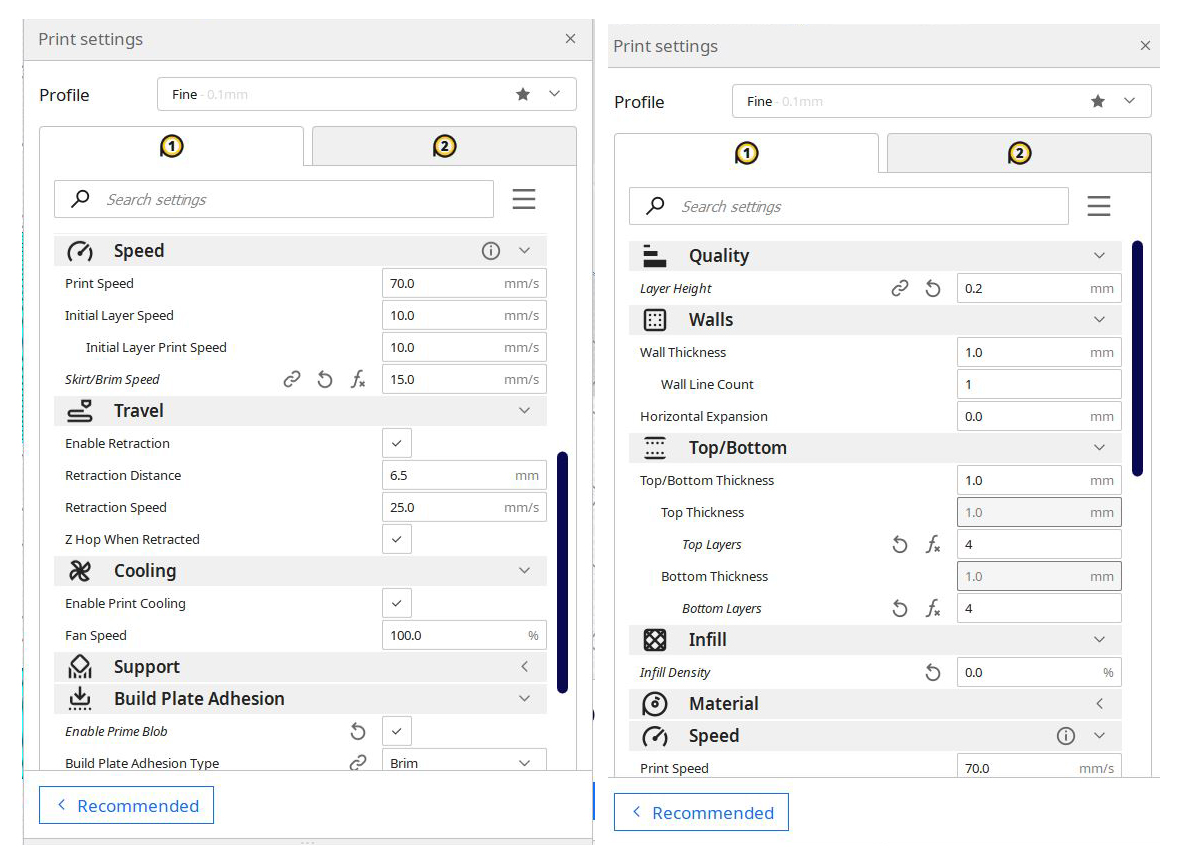
As you can see her by choosing the Spiralize outer countoure, only the walls are thickened and used with no top or bottom.
Materials and Machines used for the printable
Material : PLA
3d printer : Ultimaker S5
Note
The result is Hard as PLA is. IF used on the fabric it will follow the body contour to a certain extent. However, I would recommend a trial using TPU on fabric.
You can download the files here:
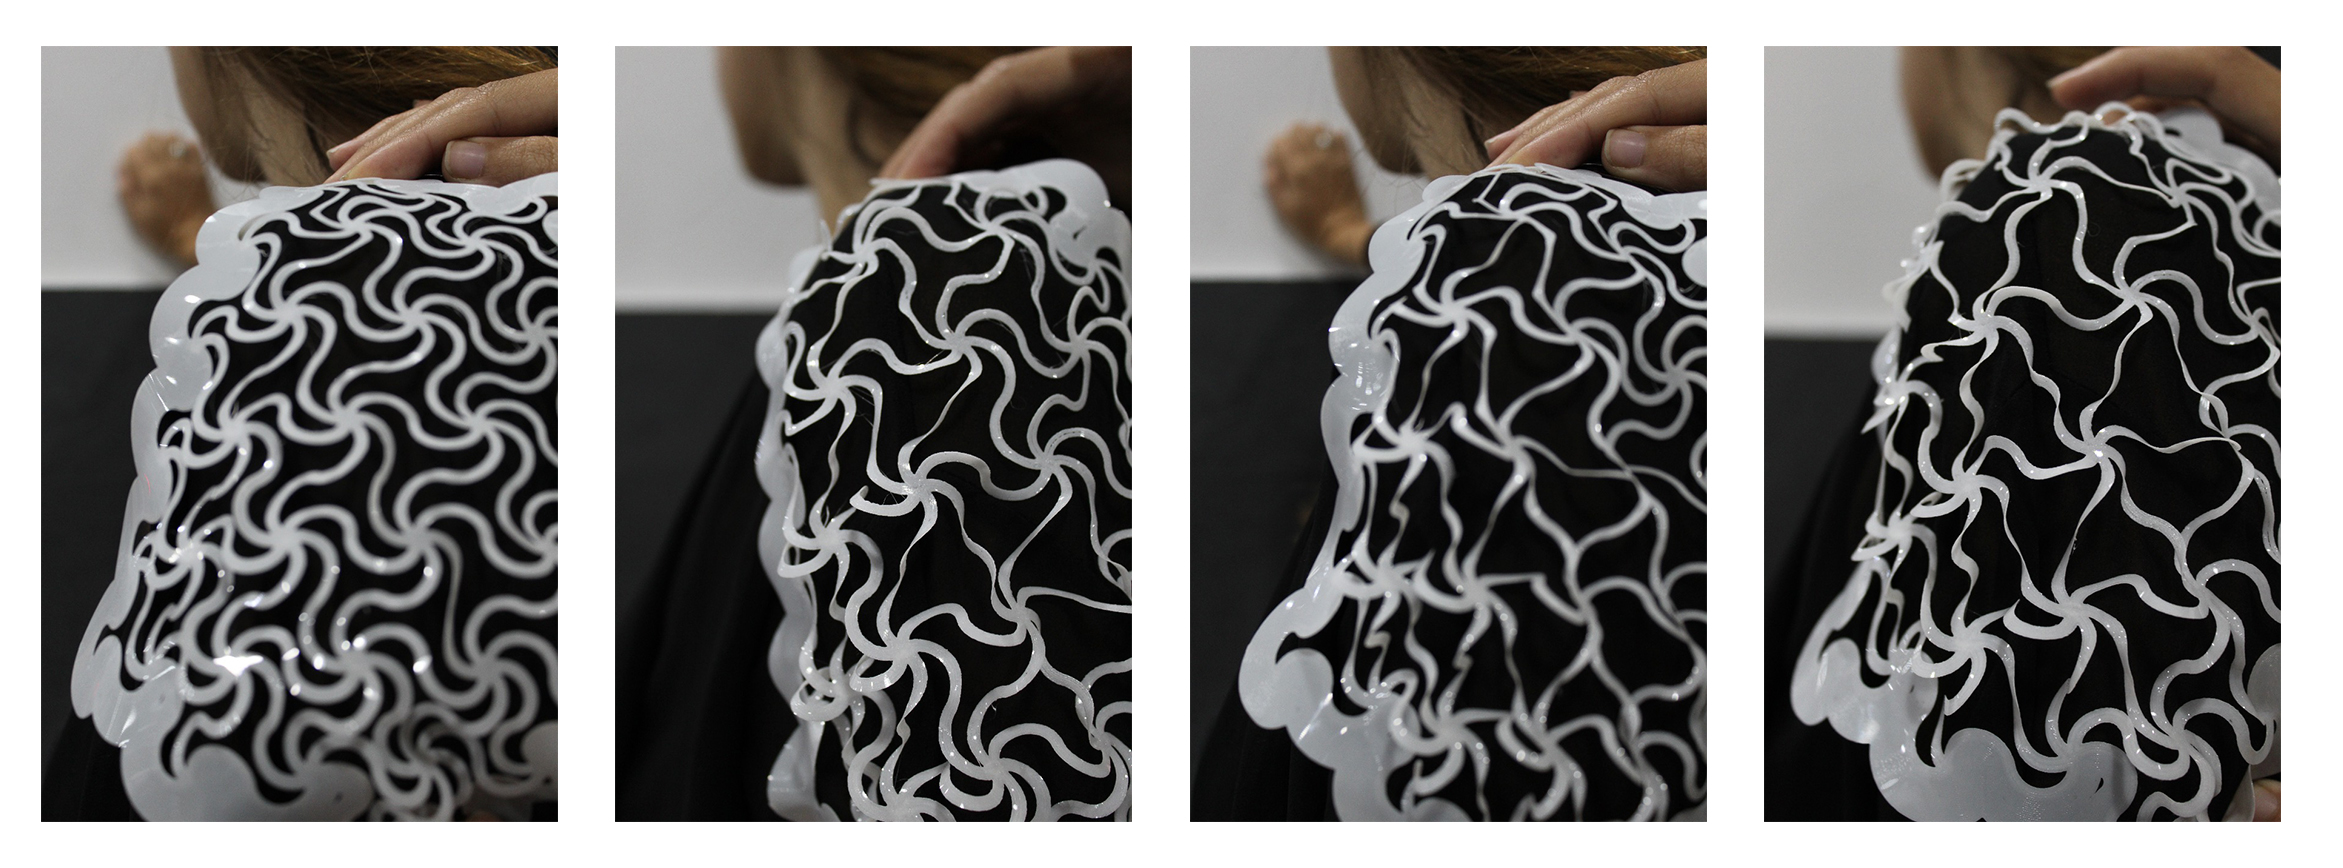
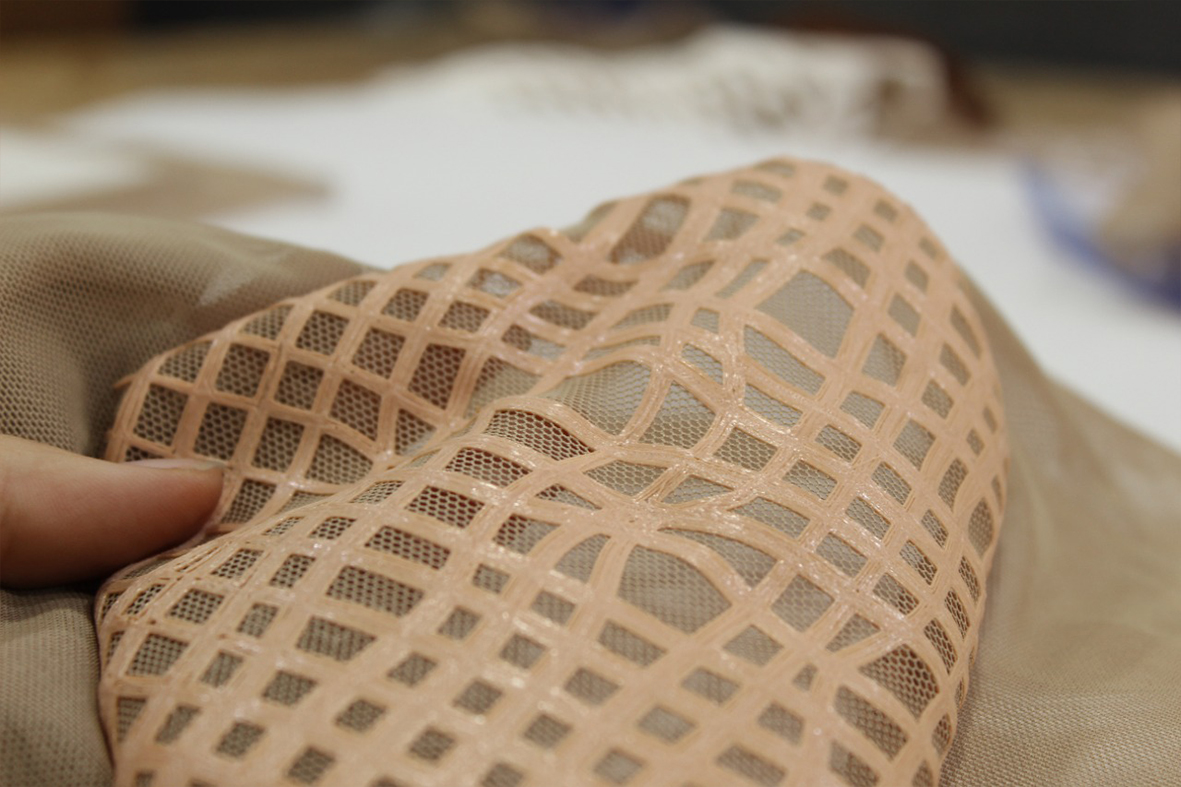
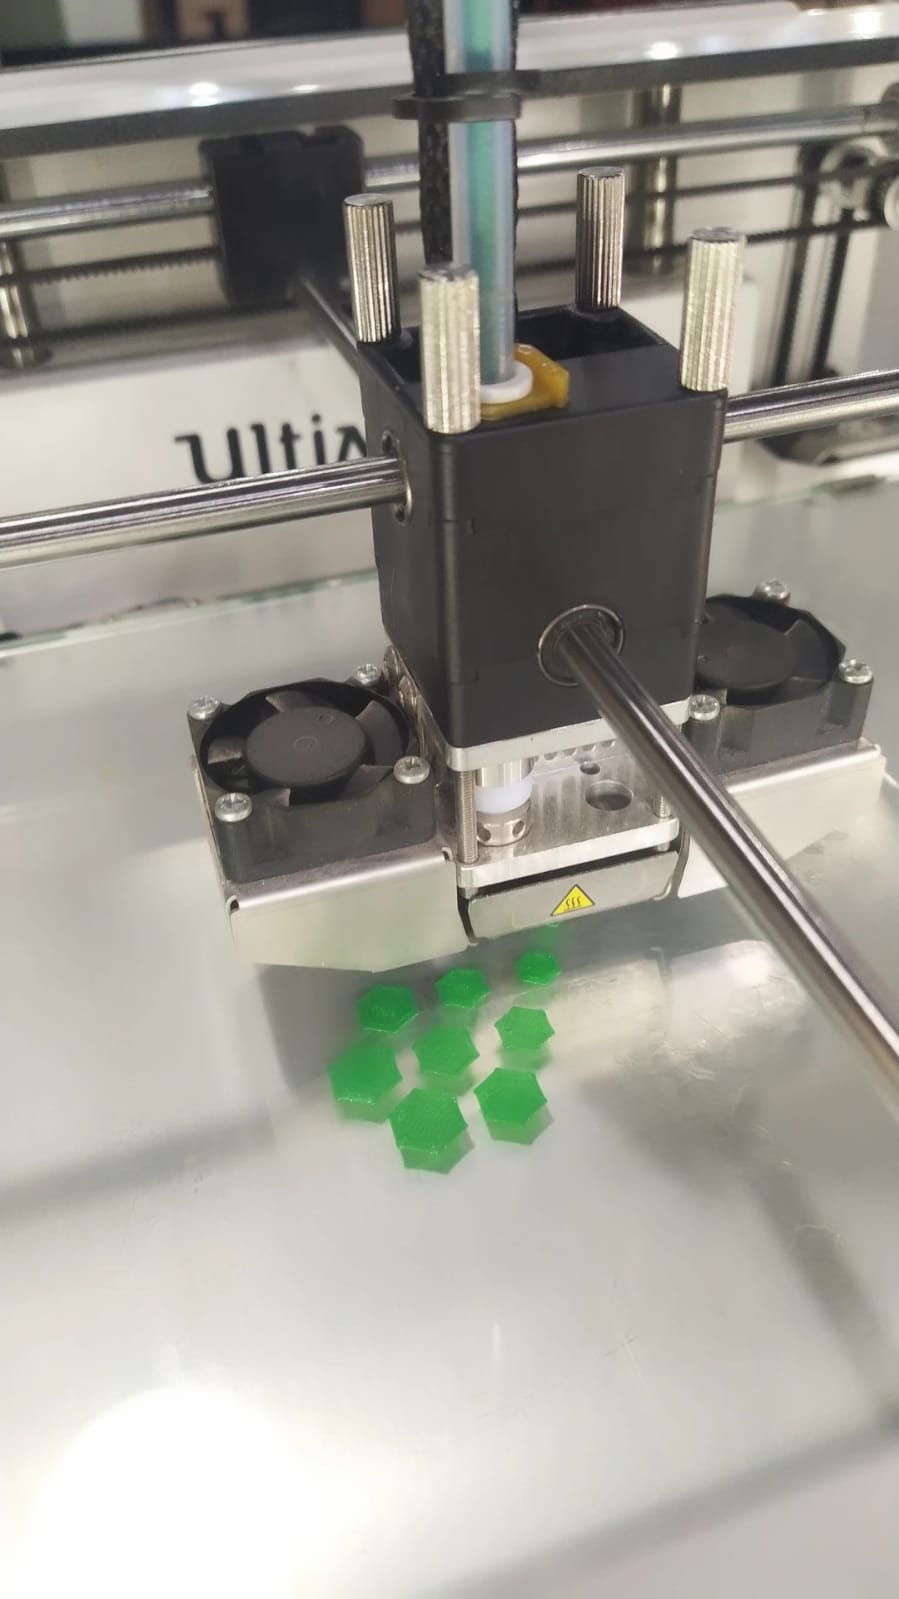
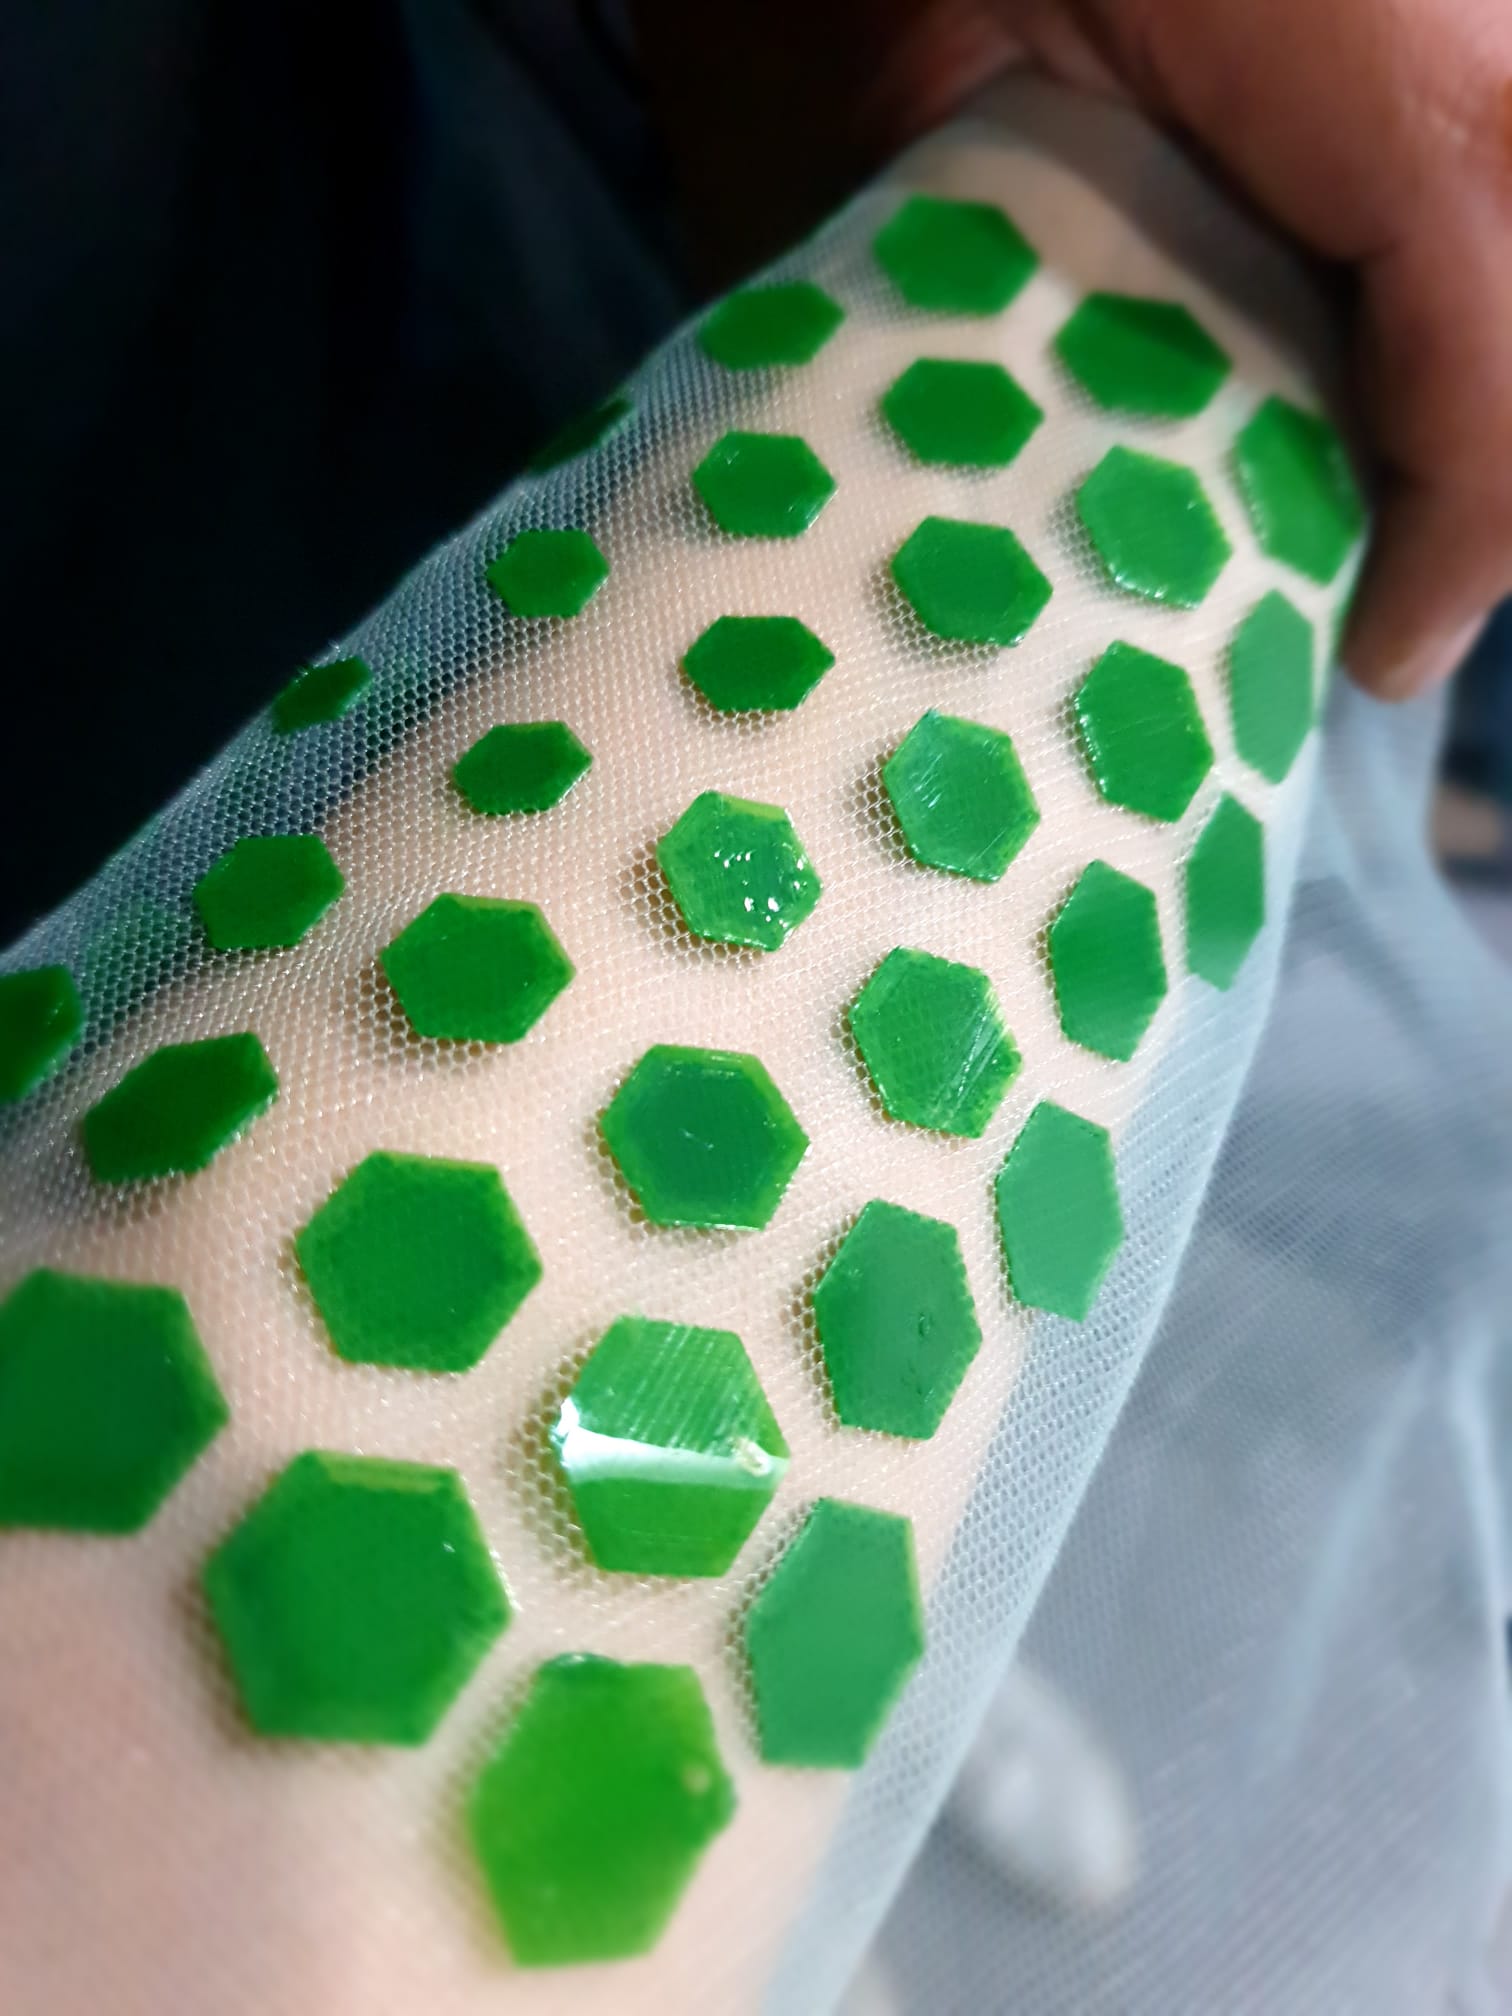
Candy Cane Coral Textile Pattern


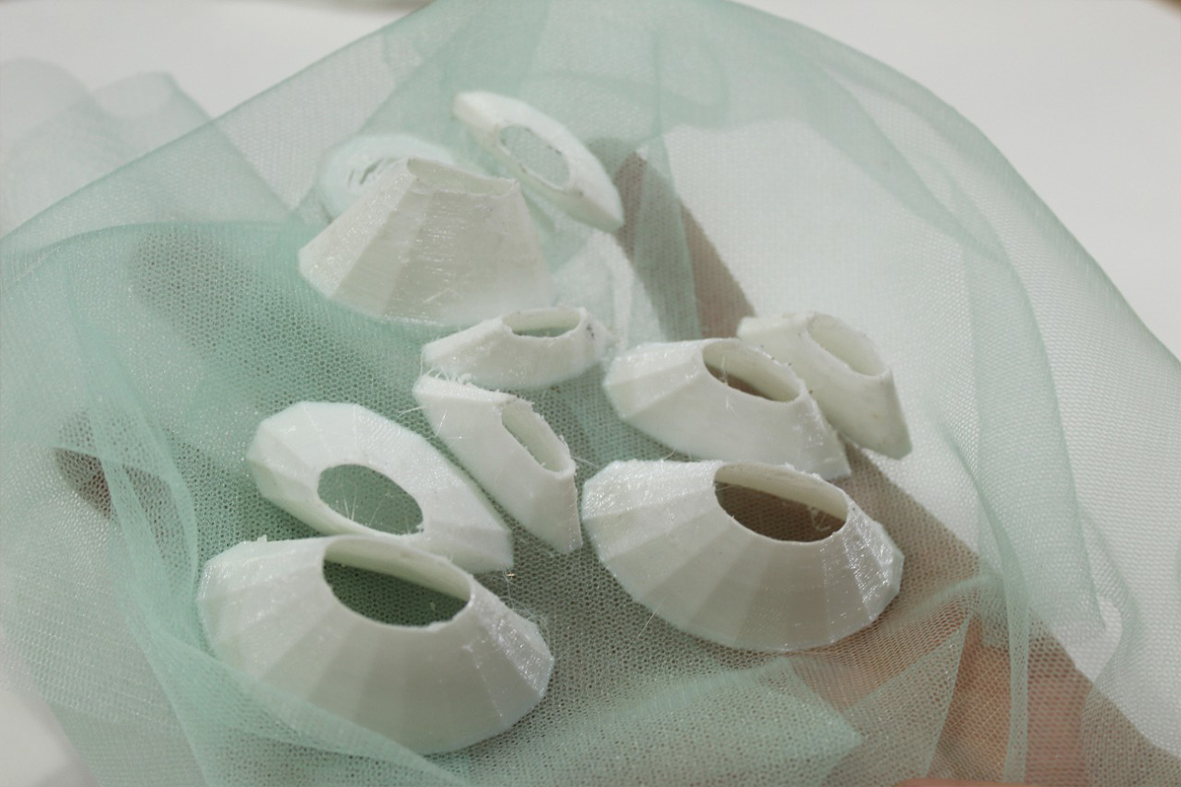
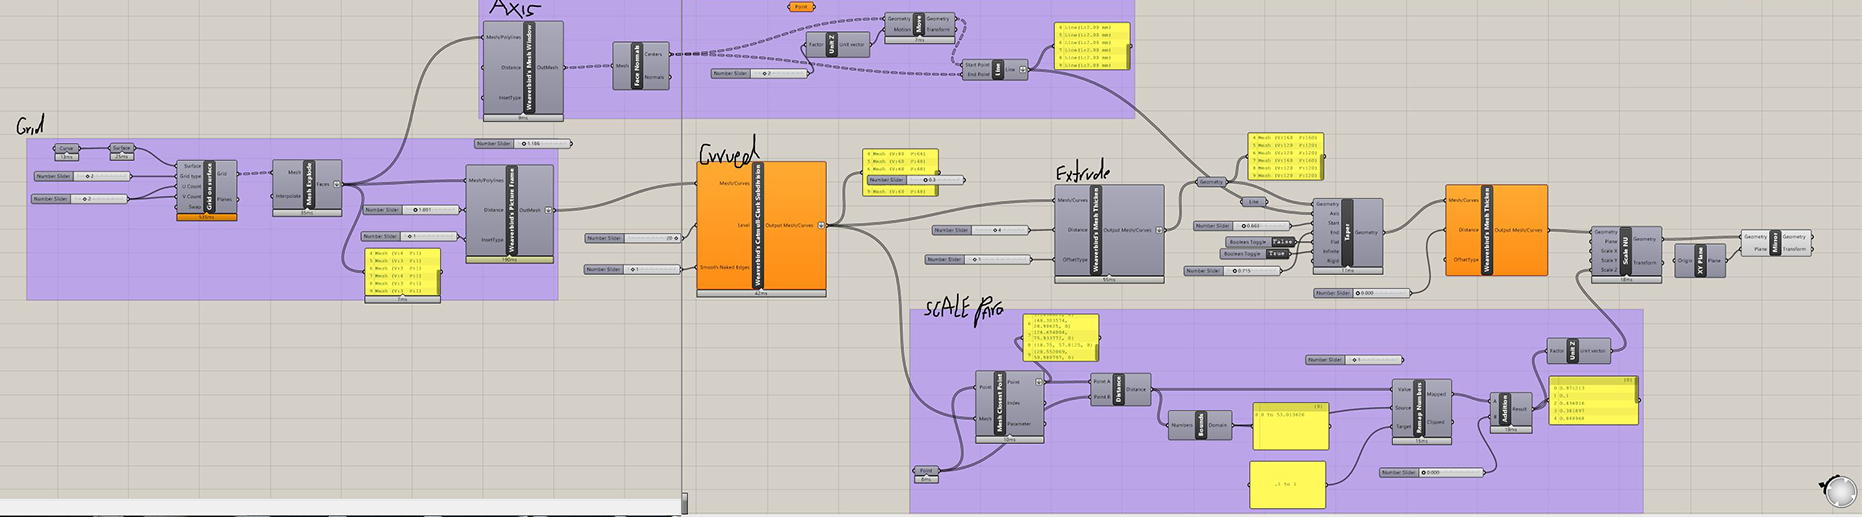
I used the plug-in Parakeet to make a grid using a defined surface creating a parametric hexagonal grid within a boundary (only whole hexagonals no parts). Then using weaverbird plug-in, picture frame component each hexagonal was divided into shapes with a hole in the middle. These meshes is curved using weaverbird's Catmull-Clark Subdivision component.Then extruding the mesh and tapering the geometry based on 2 attracting points.
Started by defining an attracting point for which you can move through the mouse. the distance is measured from center of each mesh and these numbers remapped into a printable desirable range of heights to be used for extruding and tapering.
Resulting in a full parametric design where you are in control of width, quantity, layout, thickness parameters and a degrading height parameter that is interactive to movement of a single point.
Candy Cane Coral Textile Pattern by haneen ja'afreh
Materials and Machines used for the printable
Material : TPU
3d printer : Ultimaker 3
Using the extension tab and choosing post processing I was able to pause the printing process at 1.2 mm height and then added the fabric after the print was paused using clips to stretch it carefully. and then resumed the print.
Note
The result is a somewhat squishy cones that can move with the body since they are not connected to each other but connected to the fabric. The TPU in a thin wall gives a flexible result yet not too flexible. However it needrd some grinding and cleaning as the material is harder to use for such designs.

You can download the files here:
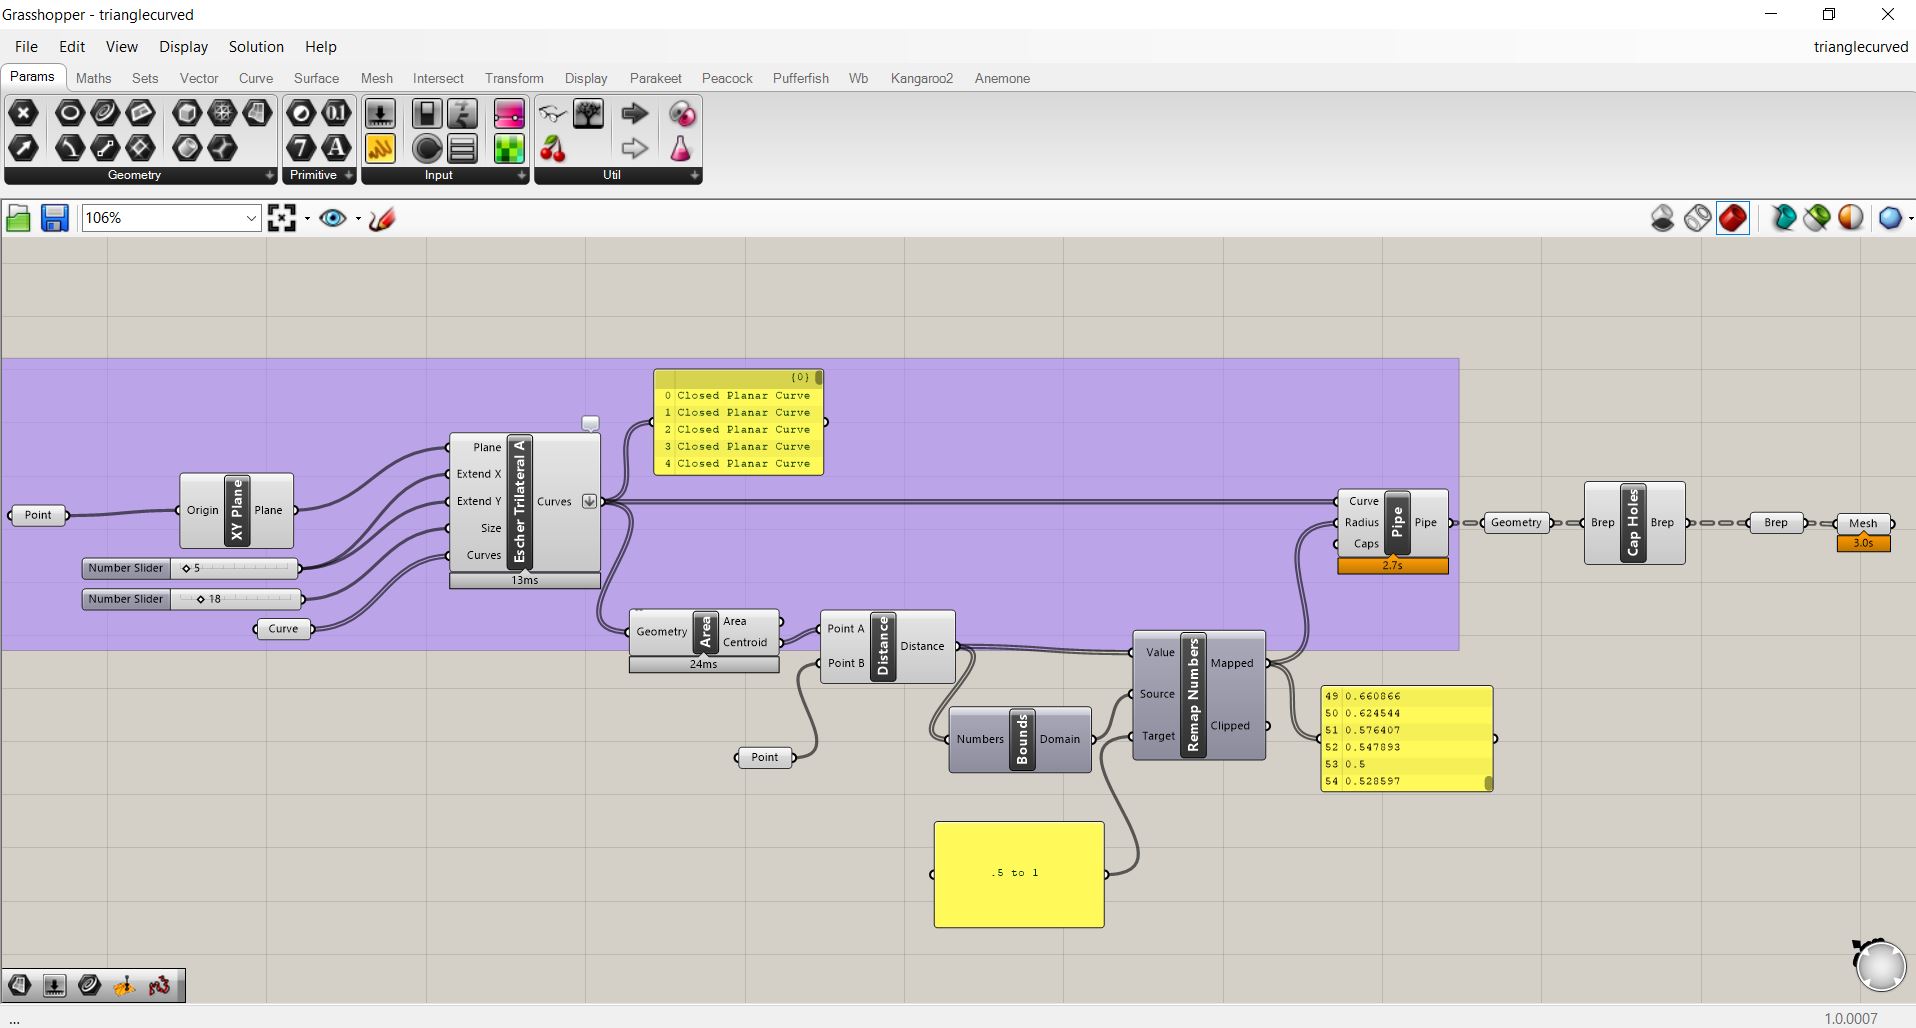
Spiral Triangles
Inspired by strechable 3d printed projects like the one you can find in the link below below along side different geometrical patterns that I stumbled upon I designed this sample.
I was looking to try out a 3d printed parametric streched textiles. No fabrics. All 3d printed. Manipulating geometry to maximise the stretching ability.
I used Grasshopper and rhino to design and Cura to slice.
Through Parakeet plug-in I used the Escher Trilateral on a curve (plane parameter). It generates a tiling of custom curves based on a square grid - Best Known from Drawings of M. C. Escher -. Drawing simple curves Within multiple parameters, I created the spiral triangle shape pattern.
From there I used the Area component to define the center of each trangle and then the distance component to find the distance between the center of each triangle and an attraction point that I have defined. And by remapping these distances into an acceptable printable range of width to be used for piping the entire thing. Thus creating a parametric design that changed the width gradually based on an attracting point.
spiral triangles video by haneen ja'afreh
Here you can check the 3D and download it for free
Through the Cura settings, I added a brim inorder to create a frame for the stretched fabric to hold ino in order to easily stretch it be hand.
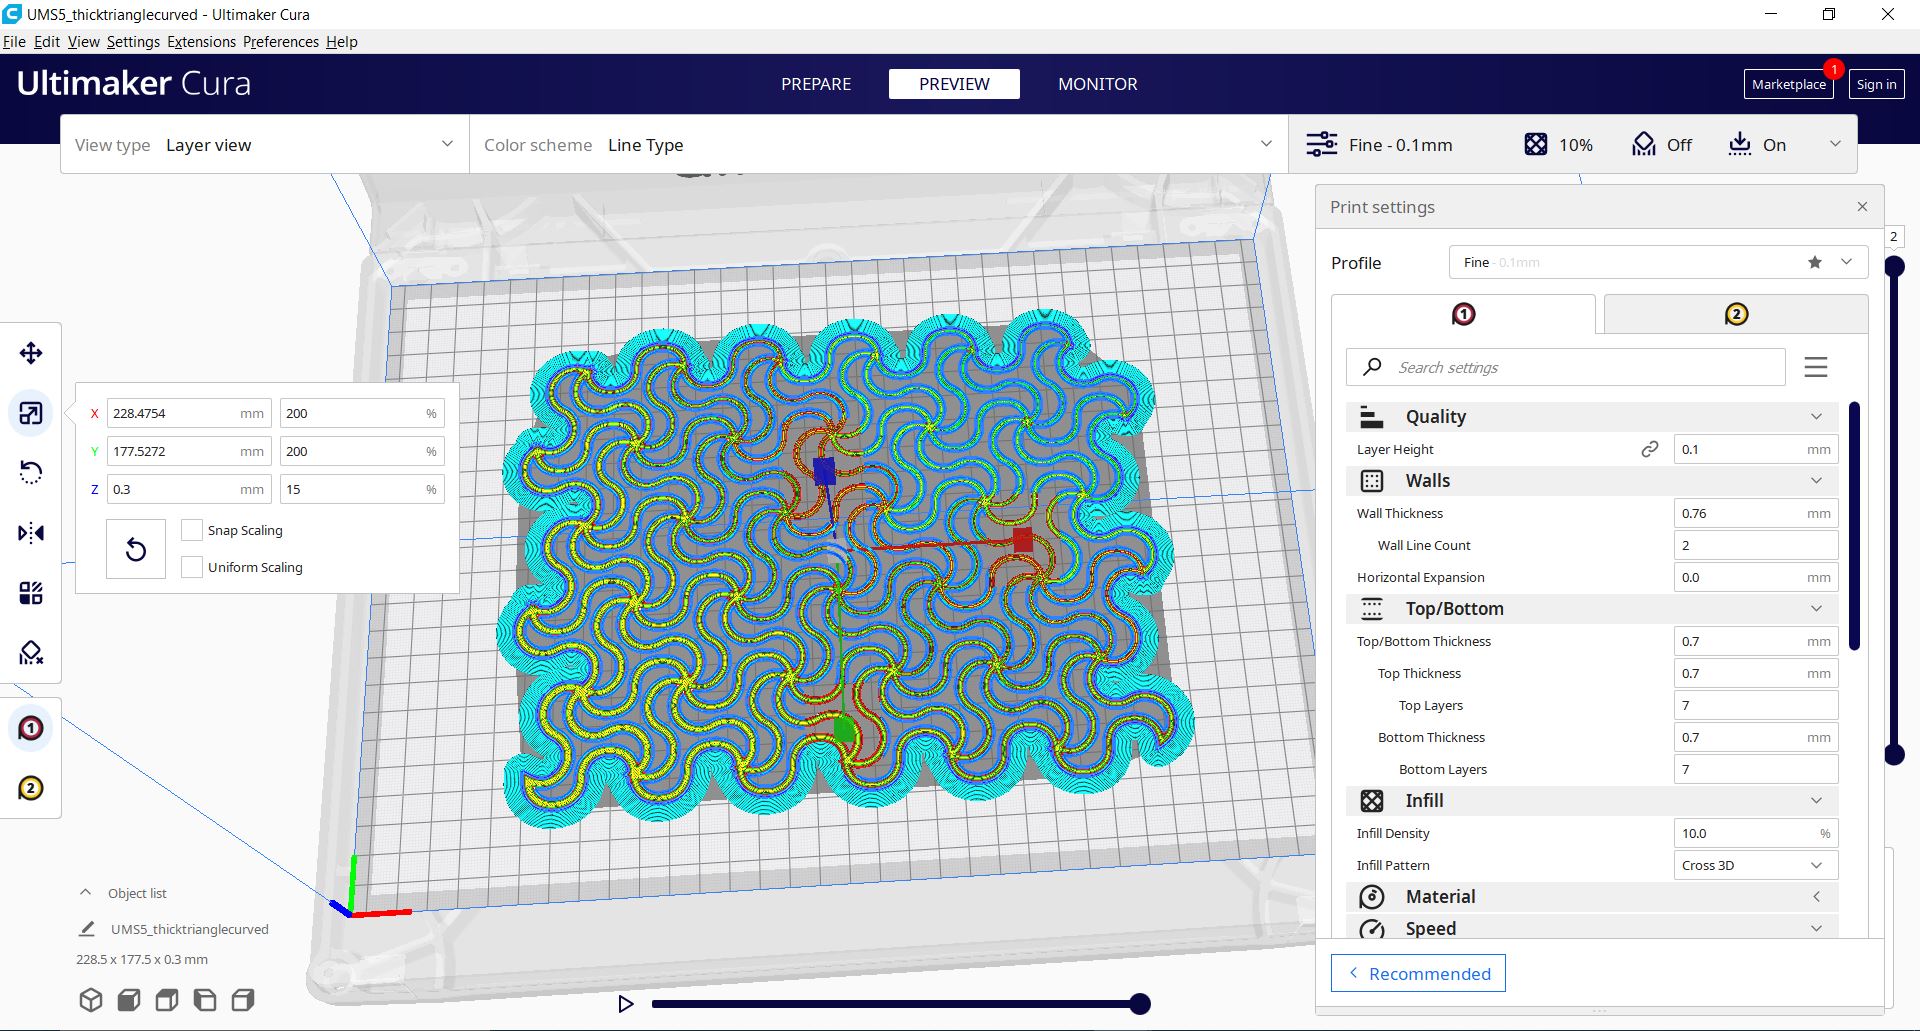
Materials and Machines used for the printable
Material : TPU
3d printer : Ultimaker 3
Note
The result is a very stretchy fabric that reshapes itself with movement.
You can download the following :
A beautiful mistake while 3d printing
Effect of Geometry on stretched fabrics
I was looking to create a 3d print on fabric that reshapes the fabric and create a 3d effect out of the voids and fills within the pattern.
Inspired by the amazing work of nervous system which you find if you click here

To design the pattern I followed this tutorial which is very helpful.
Using spinning force and point charge to affect points from a square. Then offsetting with variables so the thickness would differ as the line moves. All parametric. Then extrude it in the Z direction. and You can follow the entire grasshopper process in the image below.

Effect of Geometry on stretched fabrics grasshopper by haneen ja'afreh
Materials and Machines used for the printable
Material : TPU
3d printer : WITbox 2
Note
The result made an effect of the fabric and reshaped it although not in the intended amount. However, if the lines were thinner and more voids were availablie, I expect a better outcome. The result is very flexible
Effect of Geometry on stretched fabrics by haneen ja'afreh
You can download the files here:
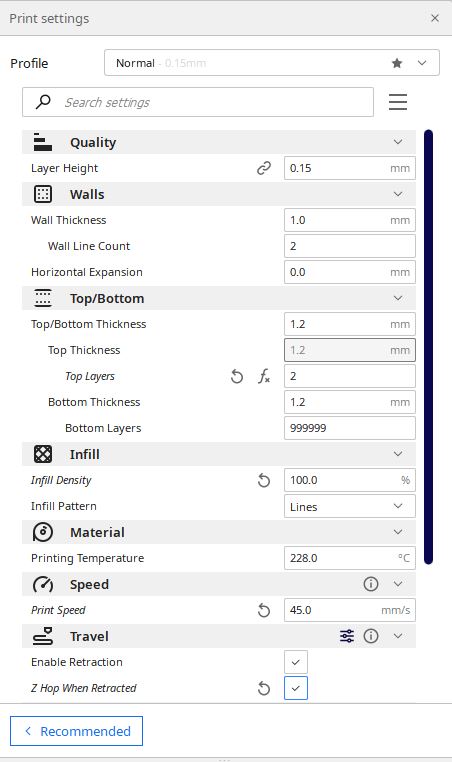
First Trial
A parametric design using hexagon that change size based on a movable attractor point. The printing was paused after 2 layers and then a stretched fabric was added and the print continued.
Materials and Machines used for the printable
Material : PLA
3d printer : Ultimaker 3