5. E-textiles
Inspiration
Loomia
Connextyle
Levi’s® Jacquard Google
DIGITAL SENSOR
Digital Sensors produce a digital output signal with voltages that represent the digital level to be measured. Digital sensors produce a binary output signal, in the form of a logic signal “1” or a logic signal “0”, (“ON” and “OFF”).
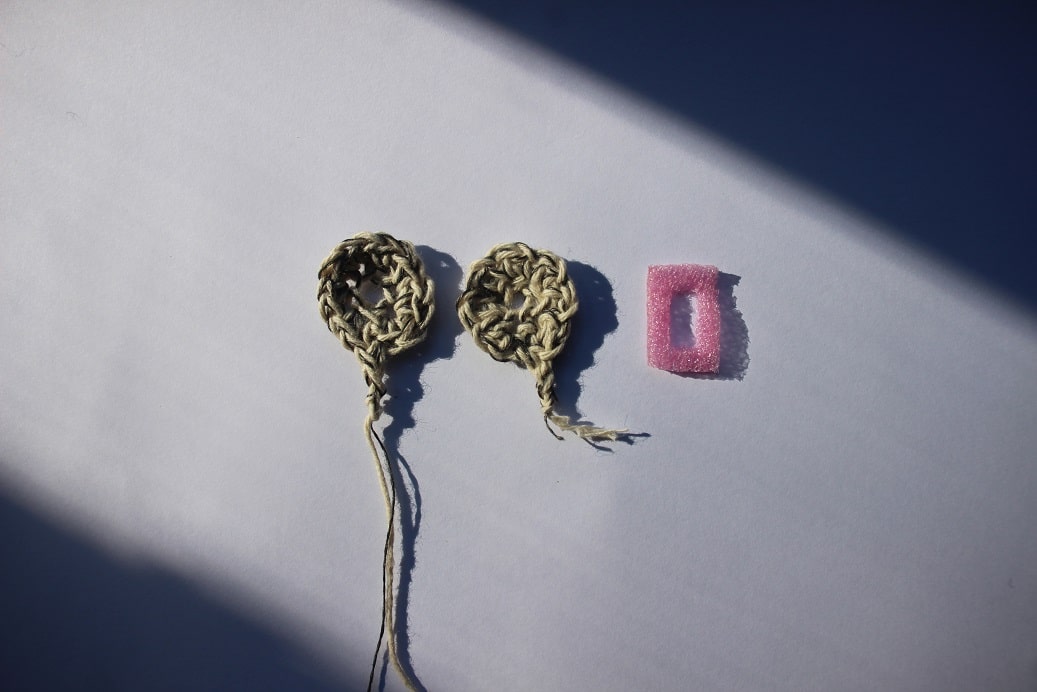
To create a soft button I used Kobakant's crochet button tutorial and popklab's crochet battery holder tutorial. Using the conductive thread as an electrode, I joined a thread of string with the conductive thread using a low stitch inspired by this magic circle tutorial.
- Conductive thread: 10cm/8 ohms and Crochet hook: n°2
DIGITAL READ SENSOR
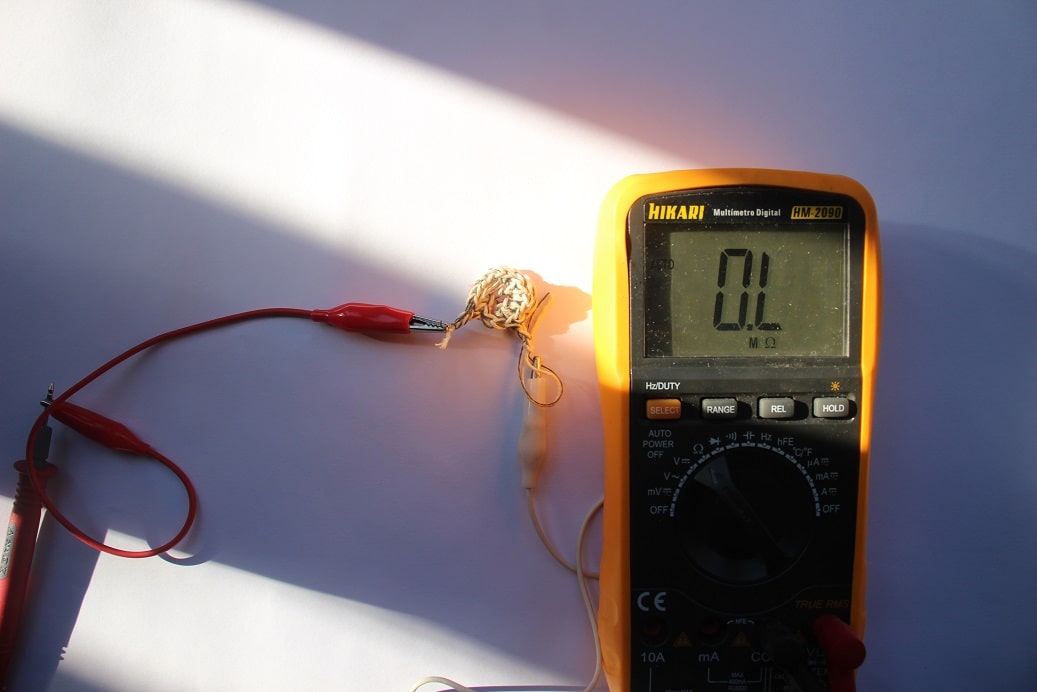
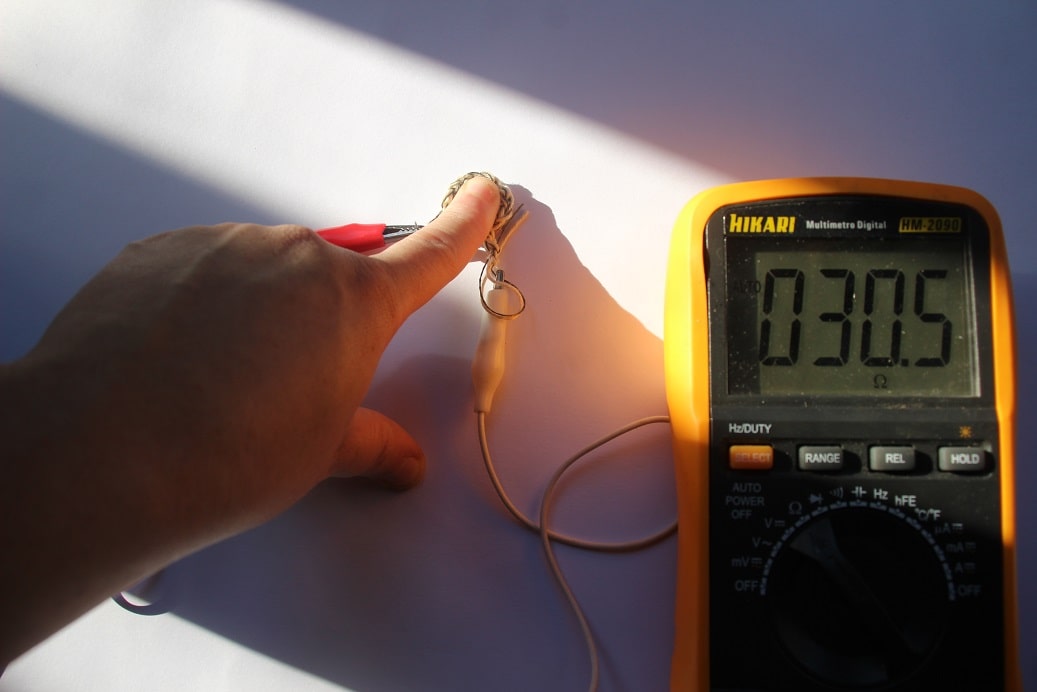
After testing the sensor with a multimeter analyzing its conductivity and resistivity and I sent the code to the arduino uno board through the Arduino software.
ANALOG SENSOR
Analog sensors tend to produce signals that change over time. Physical quantities such as temperature, velocity, pressure, displacement, voltage, and others are all analog measurements.
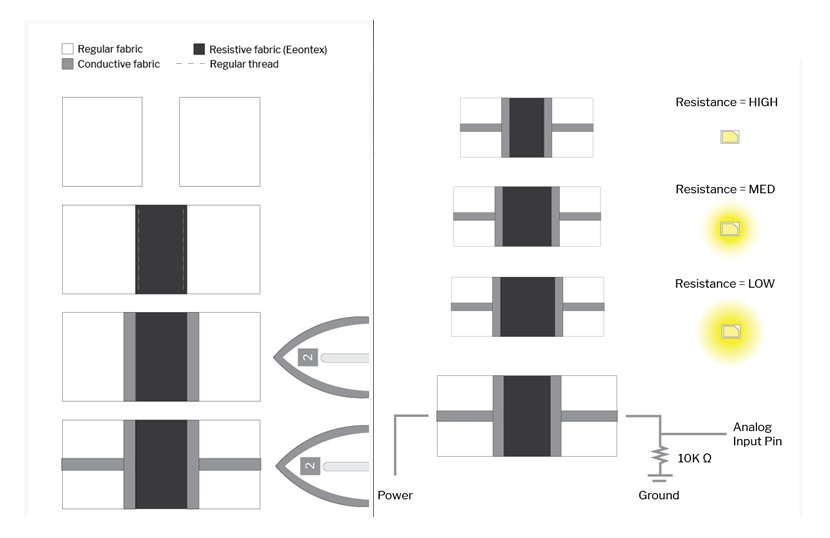
To build my stretch sensor I will use EeonTex Conductive Fabrics. This EeonTex fabric is a bidirectionally stretchy nylon/spandex, elastic fabric coated with a long-lasting conductive formulation.
I used Lisa Stark's scheme to create this type of sensor.
ANALOG READ SENSOR
After testing the sensor with a multimeter analyzing its conductivity and resistivity and I sent the code to the arduino uno board through the Arduino software.
/*
  AnalogReadSerial

  Reads an analog input on pin 0, prints the result to the Serial Monitor.
  Graphical representation is available using Serial Plotter (Tools > Serial Plotter menu).
  Attach the center pin of a potentiometer to pin A0, and the outside pins to +5V and ground.

  This example code is in the public domain.

  https://www.arduino.cc/en/Tutorial/BuiltInExamples/AnalogReadSerial
*/

// the setup routine runs once when you press reset:
void setup() {
  // initialize serial communication at 9600 bits per second:
  Serial.begin(9600);
}

// the loop routine runs over and over again forever:
void loop() {
  // read the input on analog pin 0:
  int sensorValue = analogRead(A0);
  // print out the value you read:
  Serial.println(sensorValue);
  delay(1);        // delay in between reads for stability
}
When stretching, I could see through the serial monitor the highest and lowest value generated by the sensor.
You will need to note these values (min/max) to change the next code.
ANALOG READ SENSOR MAP
The map() function allows mapping a numeric range to another desired numeric range. This means that in a numerical range that goes from a minimum value to a maximum value, the minimum value will be mapped to a new_minimum, and the maximum value will be mapped to a new_maximum, and the intermediate values will be remapped to new intermediate values, so corresponding.
In my case, the minimum value is 175 and the maximum is 203. These values must be changed in the line code:
analog_sensor_value = map(analog_sensor_value, min, max, 0, 255).
int analog_sensor_pin = A0;   //change the pin, where the sensor is connected?
int analog_sensor_value = 0;

void setup() {
  // put your setup code here, to run once:
  pinMode(analog_sensor_pin, INPUT);
  Serial.begin(9600);

}

void loop() {
  // put your main code here, to run repeatedly:
  analog_sensor_value = analogRead(analog_sensor_pin); //read the Voltage of the pin sensor

  analog_sensor_value = map(analog_sensor_value, 175, 203, 0, 255); //we change the range
  analog_sensor_value = constrain(analog_sensor_value, 0, 255); //we apply the limits

  Serial.println(analog_sensor_value); // print the value on the Serial monitor
  delay(100);

}
Input: Stretch sensor > Output: LED
With the sensor configured I added a led to the circuit and loaded the code below to the board.
int analog_sensor_pin = A0;   //change the pin, where the sensor is connected?
int analog_sensor_value = 0;
int led_pin = 3;


void setup() {
  // put your setup code here, to run once:
  pinMode(analog_sensor_pin, INPUT);
  pinMode(led_pin, OUTPUT);
  Serial.begin(9600);

}

void loop() {
  // put your main code here, to run repeatedly:
  analog_sensor_value = analogRead(analog_sensor_pin); //read the Voltage of the pin sensor

  analog_sensor_value = map(analog_sensor_value, 175, 203, 0, 255); //we change the range
  analog_sensor_value = constrain(analog_sensor_value, 0, 255); //we apply the limits

  analogWrite(led_pin, analog_sensor_value);  //we use the mapped value to control the Led
  Serial.println(analog_sensor_value); // print the value on the Serial monitor
  delay(10);

}
Fabric Stretch Sensor
Research
MHow to Wire and Program a Button