10. Open Source Hardware - From Fibers to Fabric
I'm very excited for this week because I love working in group, the emulation it creates to put our brains and knowledges altogether, help each other, ideas come from everywhere and it usually creates a great result !
We're very lucky to all get on well in the Lyon team, and it's a pleasure to know better a new mate by working together !!
We had the choice of the project we were interested in, and when Sara Diaz presented her Hilo project, I definitely chose to work on this machine !
Presentation of the project
Studio HILO

What is the studio-Hilo business Model ?
- Trainings : Learn to people how to build and use the machine
- Innovation trainings : interdisciplinary to develop new solutions for textile, open knowledge and share
- product and material developemnt : collaborate with industry, testing for companies
- Research
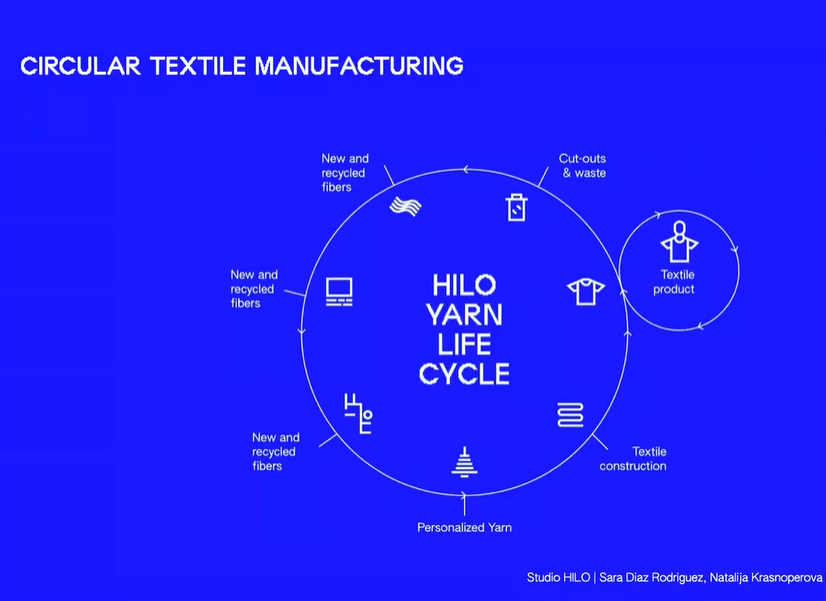
HILO 3.0
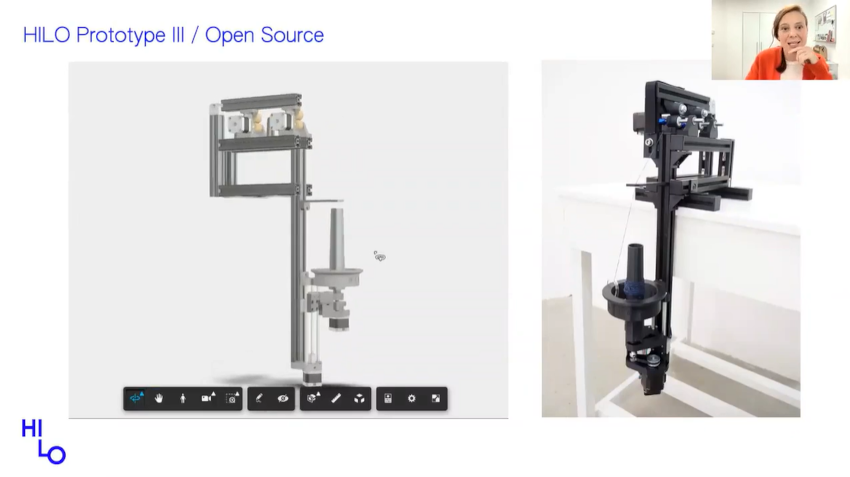
Here is the Prototyp III of the Hilo Spinning Machine we're gonna build this week : the first open-source spinning machine !
Objectives of the workshop
There are several objectives through this experience, but the major one to me is to help Sara and Natalija by testing there Open Source Instructions, so that it may be improved if necessary. I imagine that feedbacks are really precious to them !

So document our building experience will be an important part of this week !
When I arrived in Oullins on thursday morning, the Hilo Team had already begun to work on it, and I had to get in the train and catch up the delay, to understand what they had already done and how they were working.
The HILO TEAM :

Before starting to build
Instructions and files
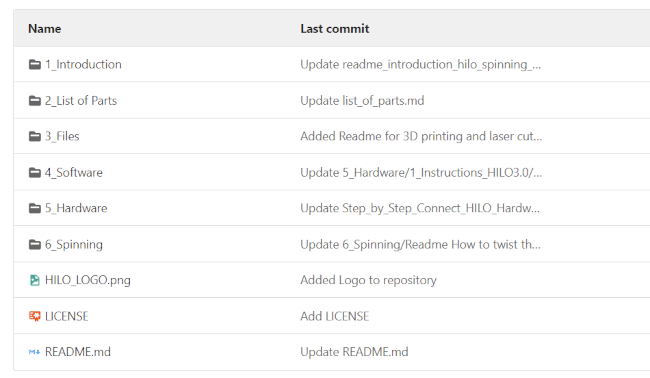
All the documentation is shared through Gitlab, so everyone can find all the elementsand instructions to be able to build its own machine.
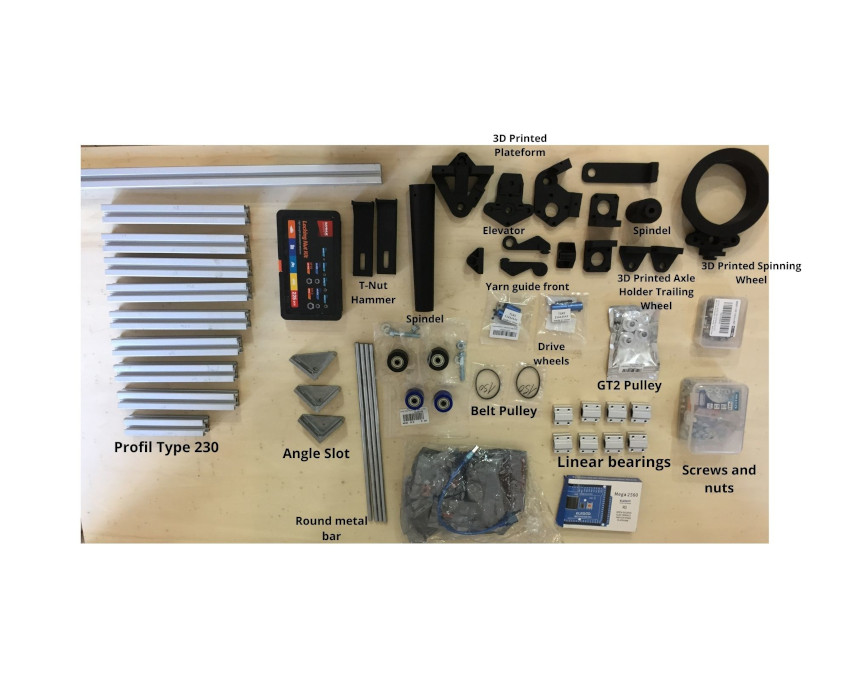
The material list
In those files, we had the list of all the materials, classified by Type (Harware / Software / Frame...), Component, Quantity, Description, and a Web link to order or just see what it is.
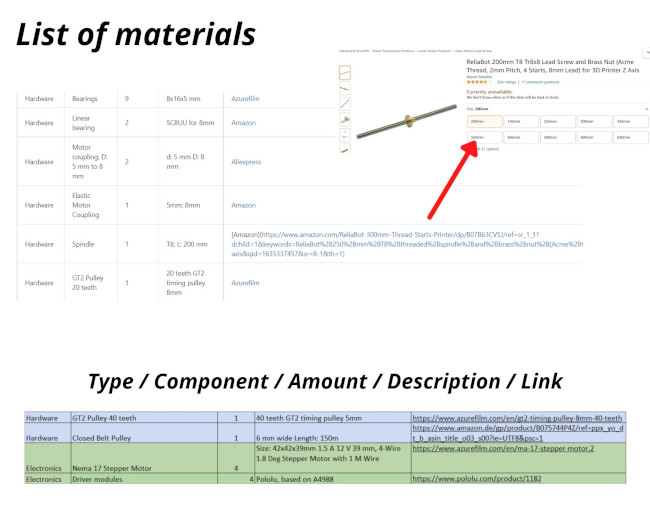
Pauline and Diane had already ordered the pieces, which allowed us to save a precious time on one hand, but on the other hand, it took us huge time to check and understand the whole materials !
Starting to build !!
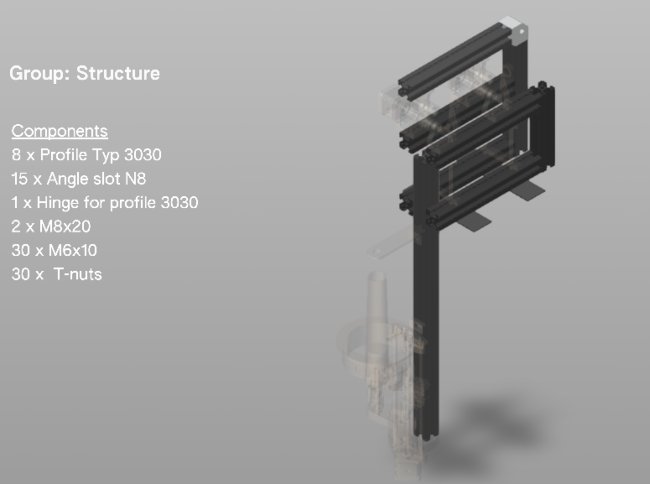
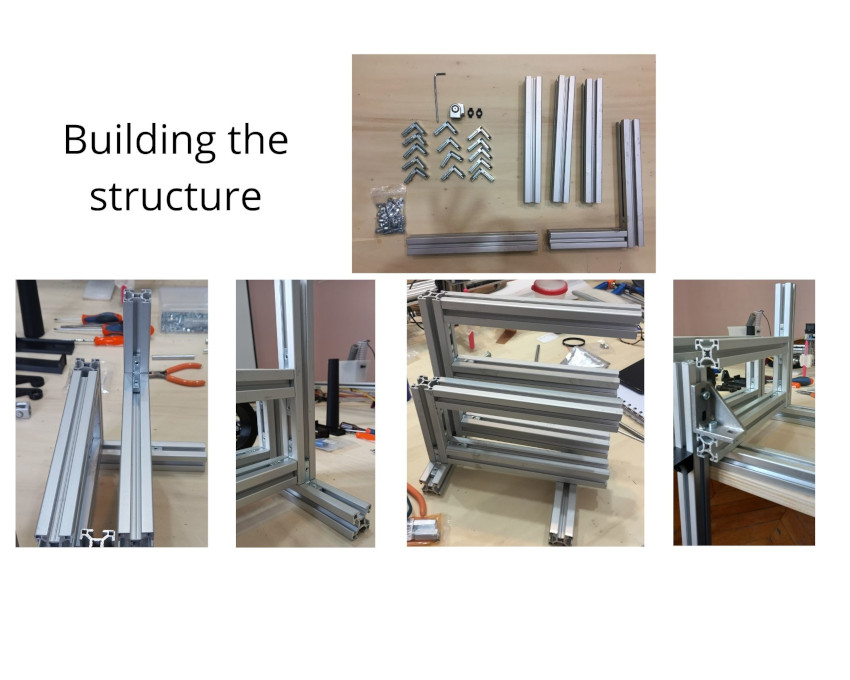
Group 1 Structure
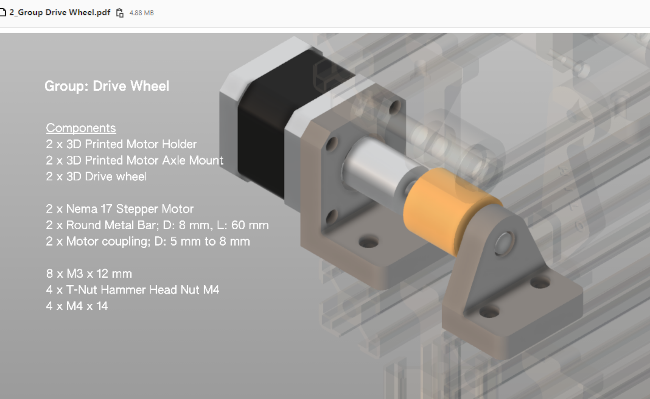
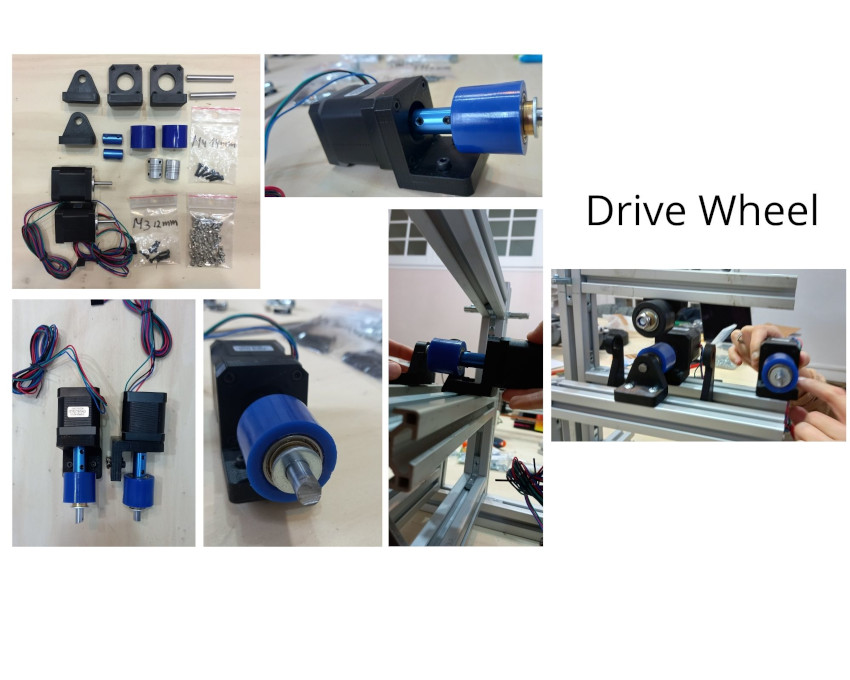
Group 2 Drive Wheel
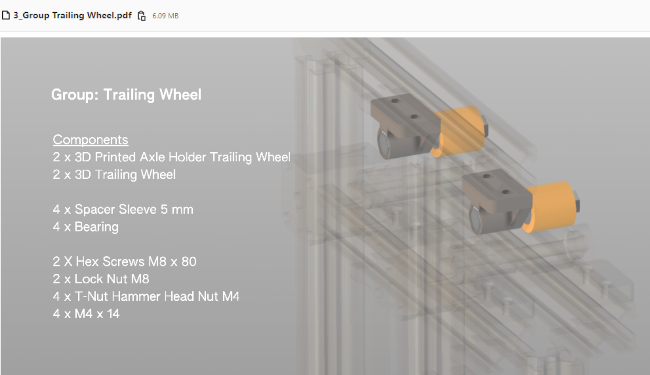
Group 3 Trailing Wheel

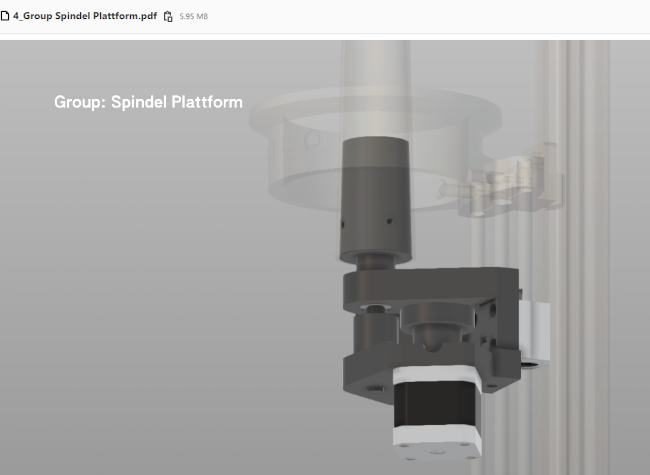
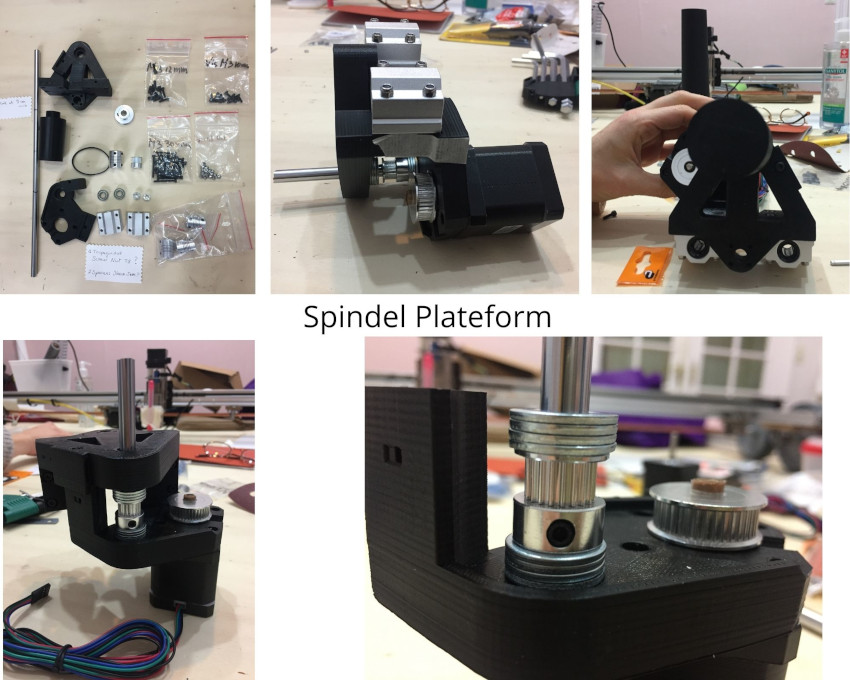
Group 4 Spindel Plateform
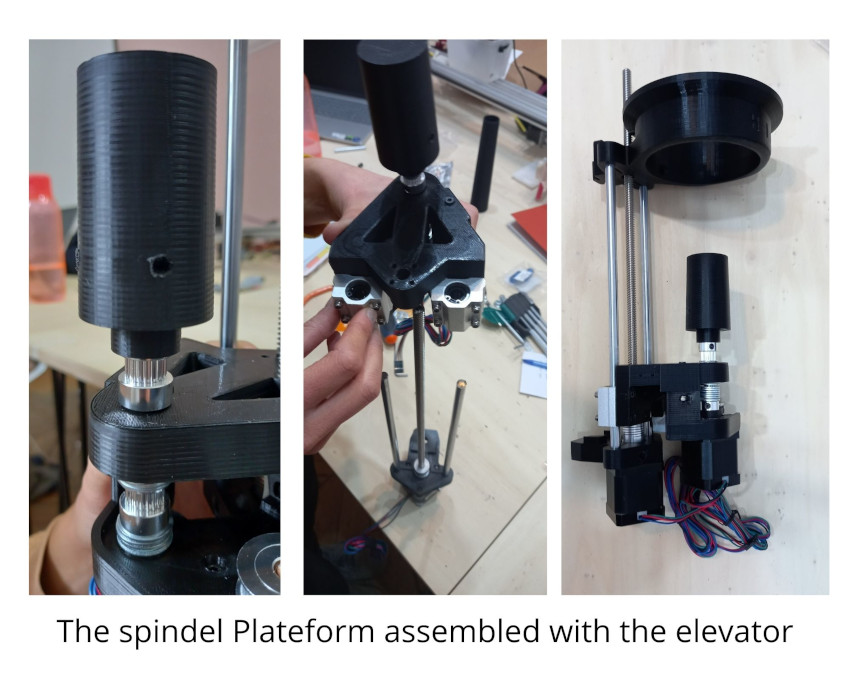
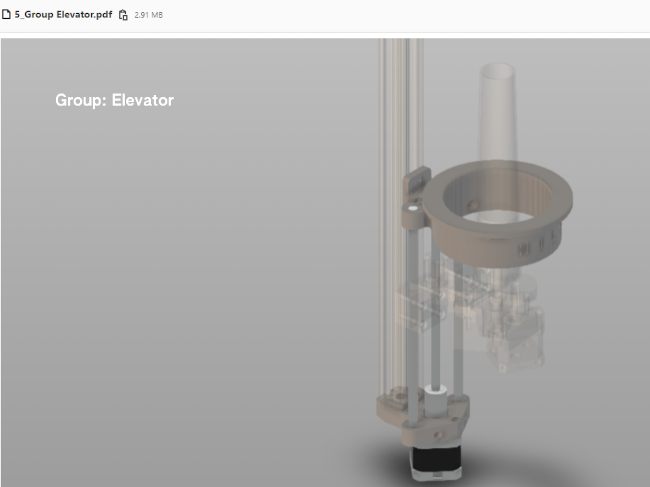
Group 5 Elevator

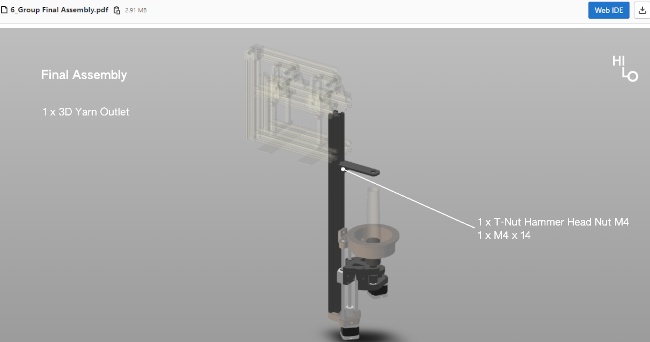
Group 6 Final Assembly
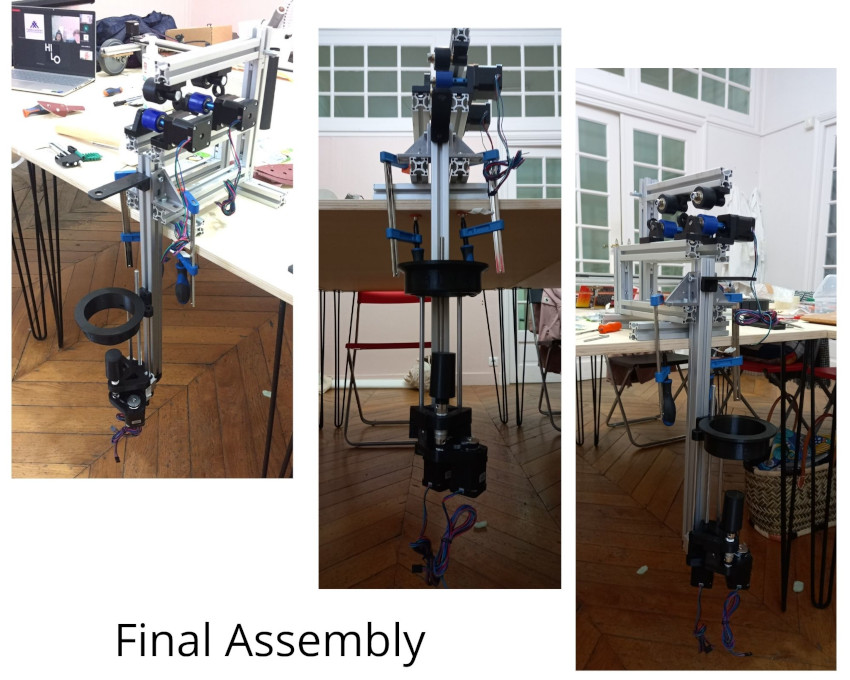
Now, the next step is to connect our machine to the electronic components and power supply !
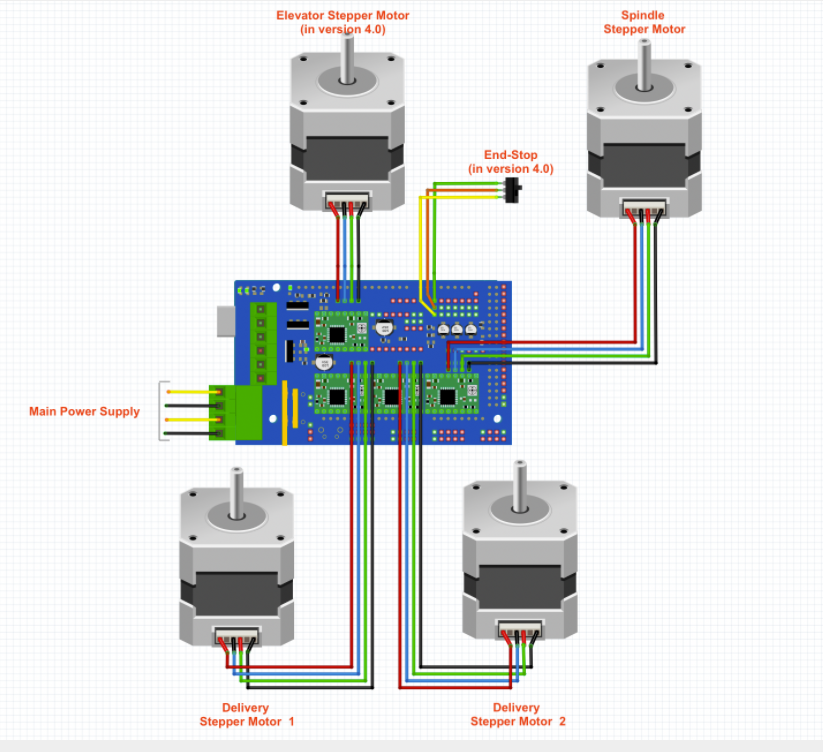
Group 6 Electronic and process
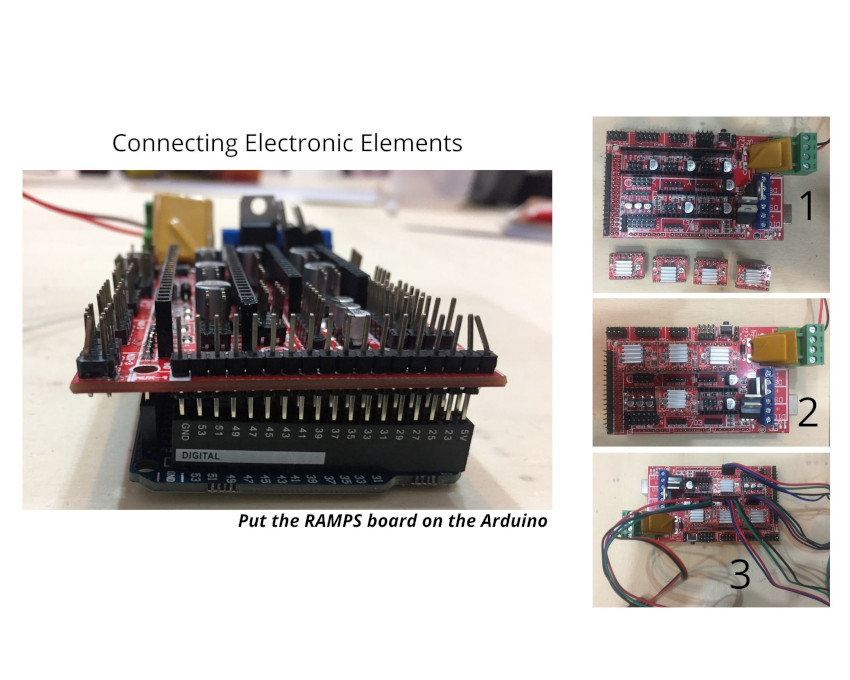
Electronic Schematic : Follow the instructions here to make all the connections properly.
1. Glue the Heat Sink to each Driver Modules
2. Connect the Driver Modules* to the board as you see in the image.
3. Connect each Delivery Stepper Motor to the Board
Connect the power supply to the RAMPS
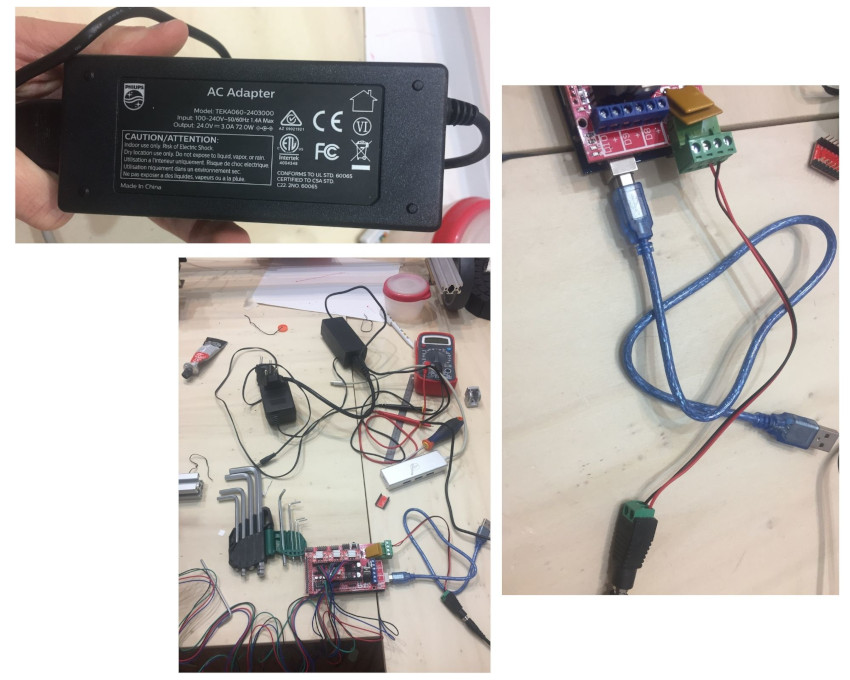
Don't forget to calibrate the Driver Modules !! We didn't do it because we knew that we wouldn't be able to test the machine spinning. Check this video for help
So now, the crucial question is : DOES IT WORK ??????????????
And yes, it works 😍😍😍: See below 👇
🤖 But, yes, let's say that there are still many things to improve 🤖
- The Delivery Stepper motor n°1 doesn't work :
Several hypothesis to check : 1. the driver module is broken ? 2. the motor is broken ? 3. the space between the 2 wheels may be not good : Sara advised us to check whith a sheet of paper so that it is not too large nor too narrow.
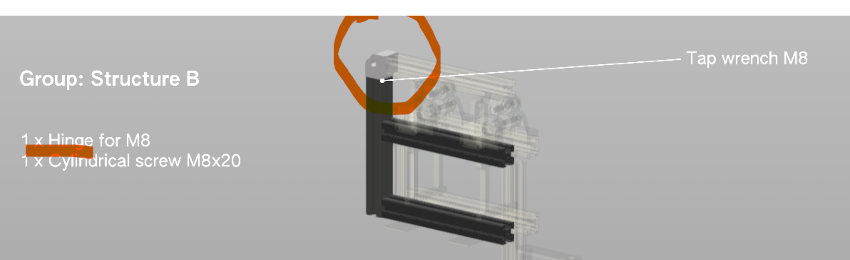
- We still miss some pieces like the hinge :
Feedback
I loved
-
The experience of buidling a machine in team, quite challenging and we learn a lot from each other !
-
Learn to use some tools I would never have approach otherwise, like a grinder for example !!!
-
Work with the other labs, share our experience and chat in real time with Sara
-
Feel that our experience and feedback will be useful to Studio Hilo to improve their open source machine
-
Find solutions when you don't have the right piece or when you miss some tools !!! real fun !!
I wish
- more time to test the machine while spinning !!
Major difficulties
-
The number of pieces is really huge and it has took us quite a long time to recognise them, understand where they go and what is their fonction... Being able to order the material so that we don't discover everything at the beginning
-
Adapting the 3D pieces : holes were not well digged, so we had to do it and it was an important waste of time
-
Some of the photos were not totally corresponding to our material and sometimes it disturbed us a lot , for example, the "Angle slot" about which we talked during hours ha ha !!!
-
Miss material : next time, we could order a bit more elements than the necessary number (more screws for instance ;-)
...we couldn't find any tap wrench, in fact we found half of it, but missed the handle ! Using other tools, we managed finallly to find solutions !!
In the end, I think this week will be the one I loved the most, because I learnt a lot, I had real fun and I'm very proud of what we managed to do with the team !!! This experience has opened new ideas for my final project, things I wouldn't have think I > > > would be able to so thank you again to Sara and Fabricademy of course ♥ !!!
Lecture by Varvara Guljajeva
Interesting links
- Lego NXT Embroidery machine :
- Lego Minbdstorms NXT Loom Machine :
- Library OpenSource for Computational Embroidery : PEmbroider:
And here is a tutorial for PEmbroider:
PEmbroider Tutorial from STUDIO for Creative Inquiry on Vimeo.
NeroKnitting Beethoven (2020)
Yiuchi Iroshe fabricademy 2013
Rocking knit Damien Ludi, Colin Peillex
Ohm Hook
Hyperbolic crochet
Rope O'Maric
Catherine Euale Fabricademy 2019 Alginator and Carolina Delgado 2020
WraPr
CADKnit and InverseKnit : designing
unmade.com
stitchfiddle.com/en
tufting machine
Filt.cl : filt system, economie circulaire textile
Wendy Andreu Latex and rope
Turm2
Petro Vrellis, a new way to knit