Open Source Hardware
From Fibers to Fabric
📅This week started on Tuesday 23th and was kind of intimidating because we saw lots of machines and amazing hardware that were builded to create and create. The fact of going form fibers to fabrics is something really old, but I've never been in touch with those process or even with the workflow of getting the fabric. With HILO I undestood a lot about the raw materials and how to get threads and yarns. It was an interesting new knowledge that I need to keep complementing in the future.
▪ What I made?
🗹 Research and document existing fabrication methods, machines and industries
🗹 References and sketches of the machine
🗹 Design and document the files of the machine
🗹 Show the Assembling process
🗹 Small video of the machine
Assignment
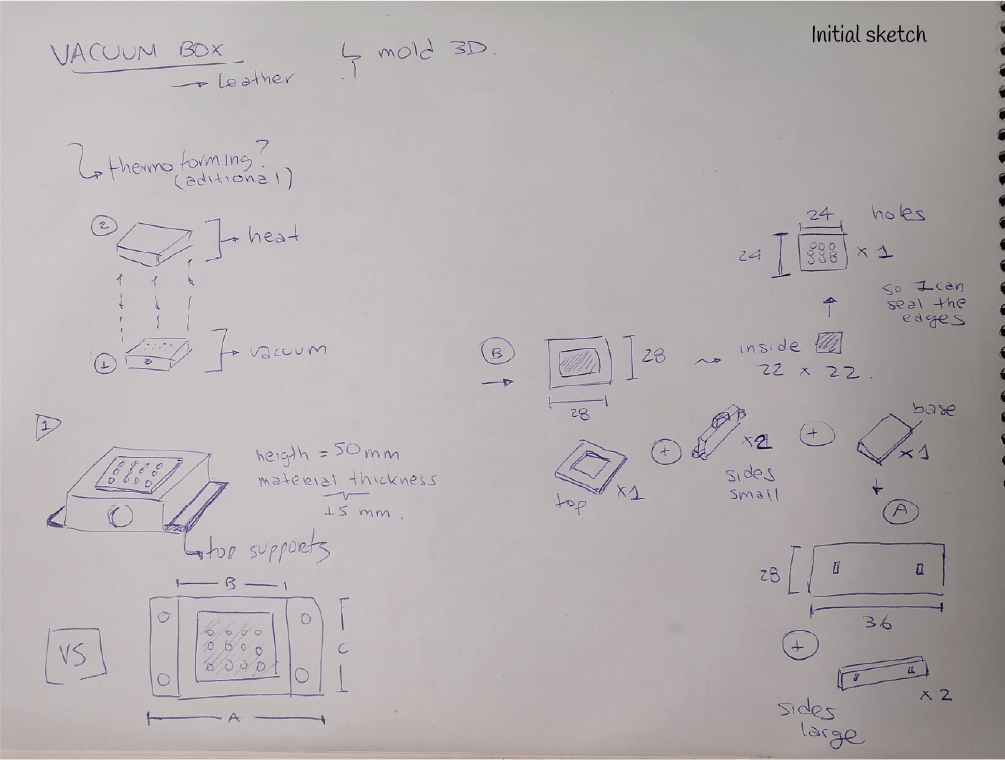
I was looking forward to improve my assignment from week 9, so this time I focused on building a vacuum box that I want also to use at home to make molds with plastic and heat
I looked for the documentation from other students and also from instructables to make this assignment
▪ Pauline Gamore documentation
BOM 📌
| Materials | Size / amount |
|---|---|
| MDF 15 mm | area: 1520 x 470 mm |
| White glue | 1 spoon aprox. |
| Metal sheet 2 mm | 4 triangles with side a:55, b:55 and c=77 mm |
| Soldering elements | 5 electrodes |
| MDF 4 mm | area: 700 x 430 mm |
| Clamps | 2 |
| Metal tubes 1/4 inches thickness | 2 of 20 mm diameter |
Base module
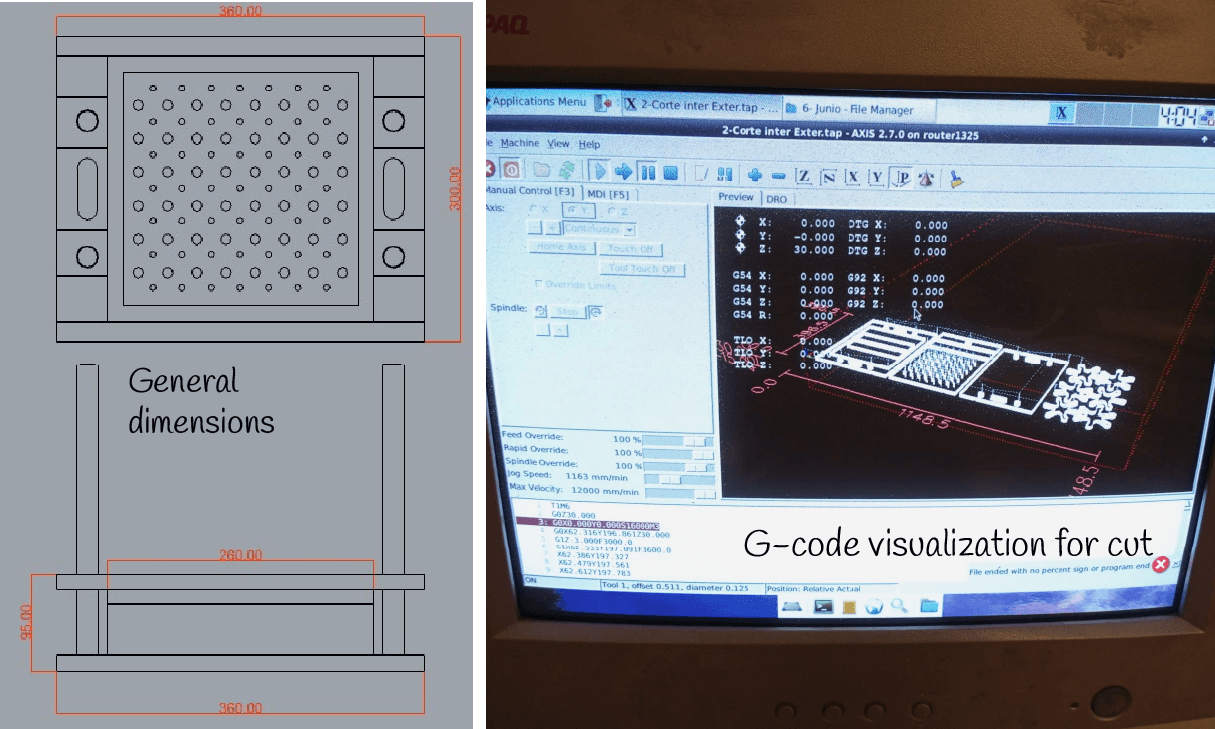
For the base, I chosed the CNC milling process for MDF of 15 mm thickness that we had at the lab
Generate the G-code usign Art CAM. You can open the dxf file directly in this software and then set up all the toolpaths for the material you're using. It's better to set the colors for the different cuts, this is possible even in Rhino. In case you need to know, we used the end mill cutters of 1/8 inches
Use the Gcode simulator to check the sequence of steps in the file that you got from Art CAM, this also gives you an stimated time of the milling process
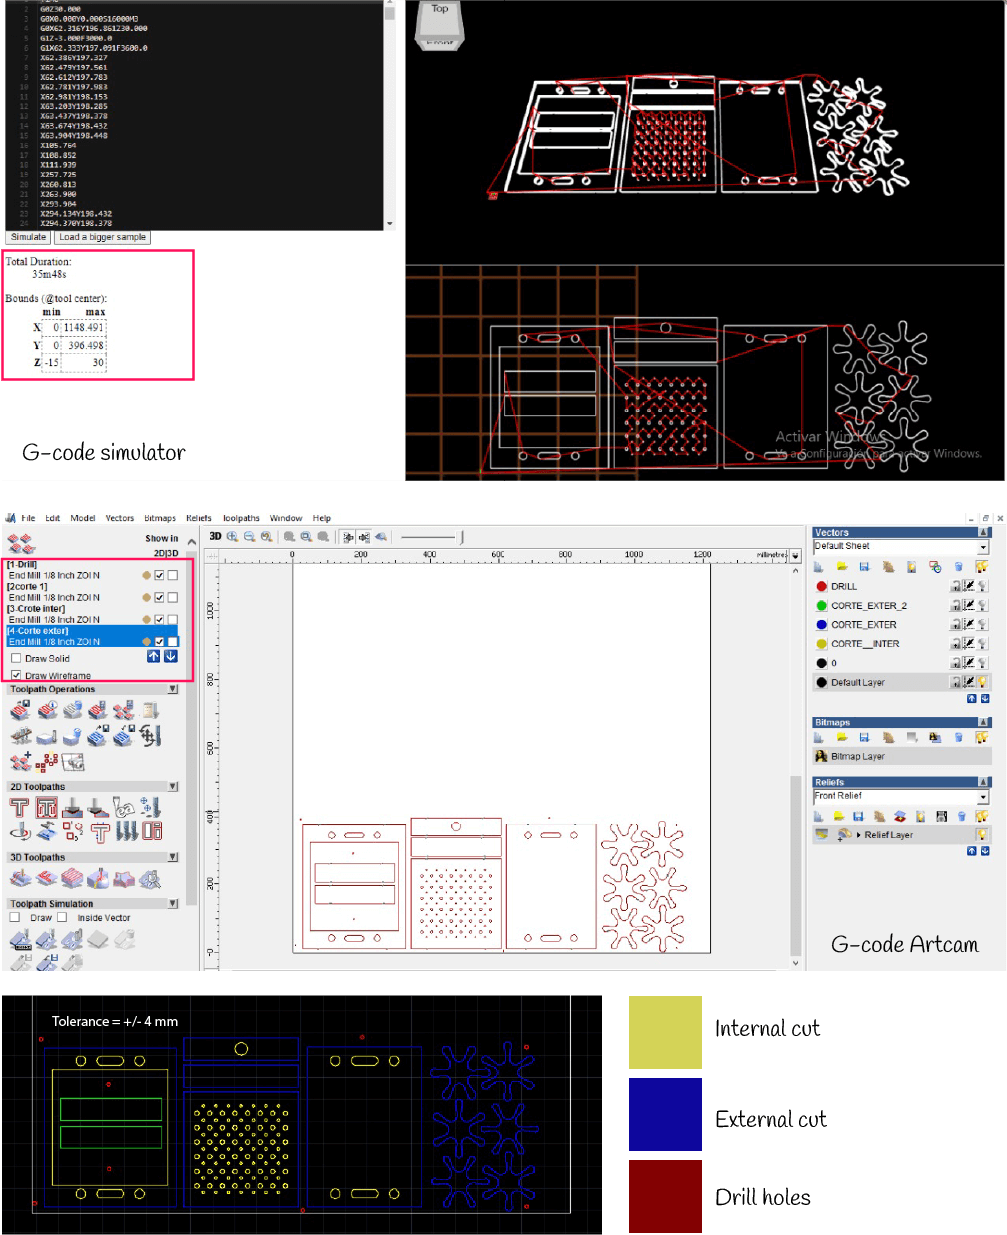
double check the size of the file and the deep of the material that is going to be cut. Now the file is ready to star cutting!
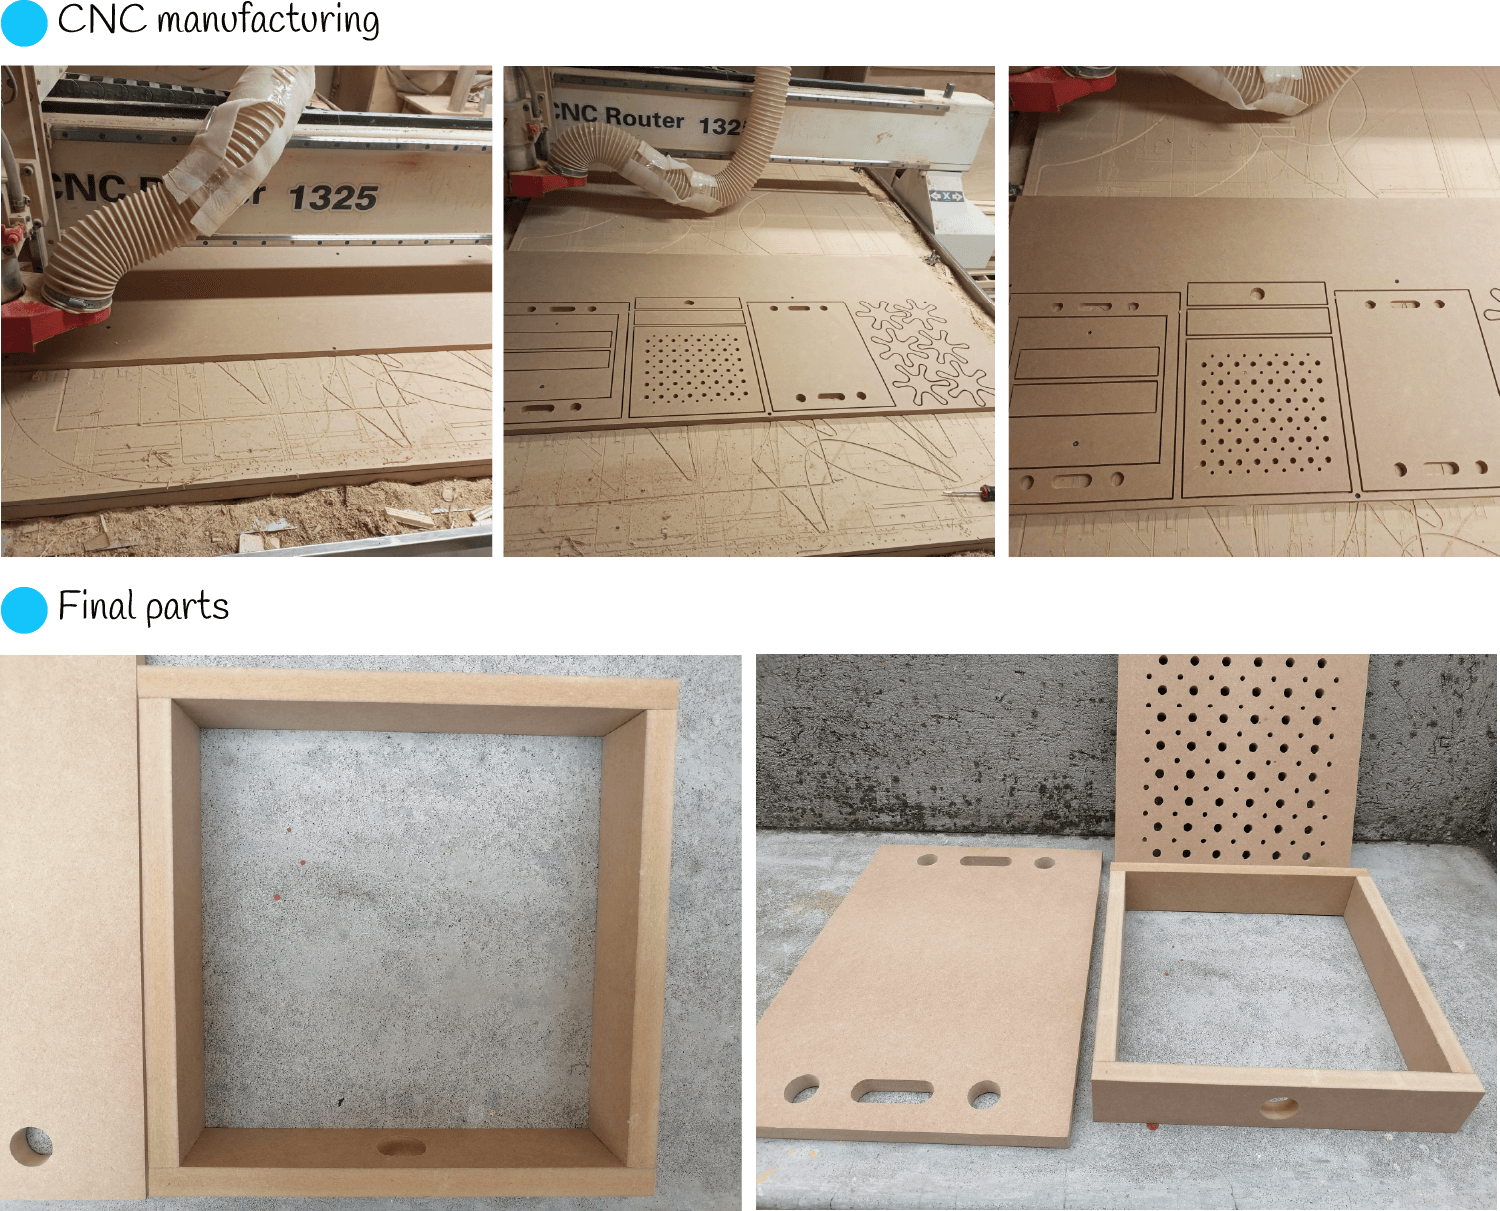
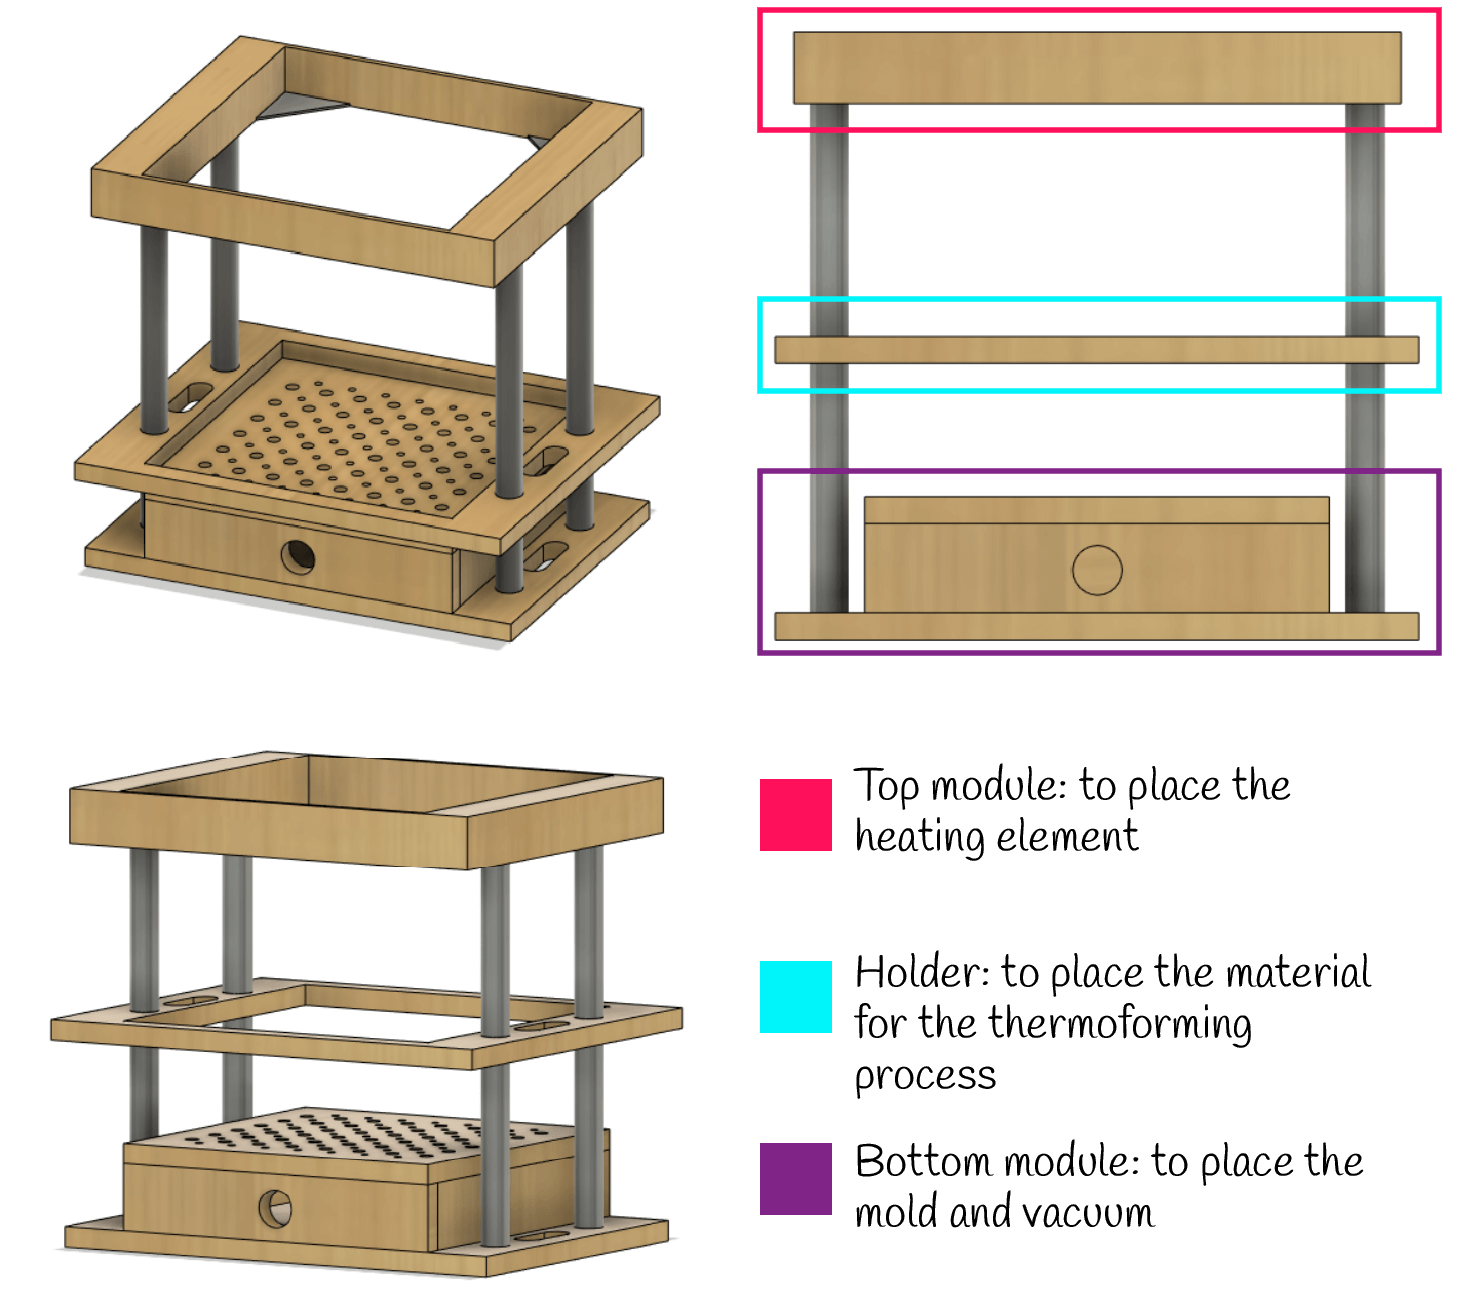
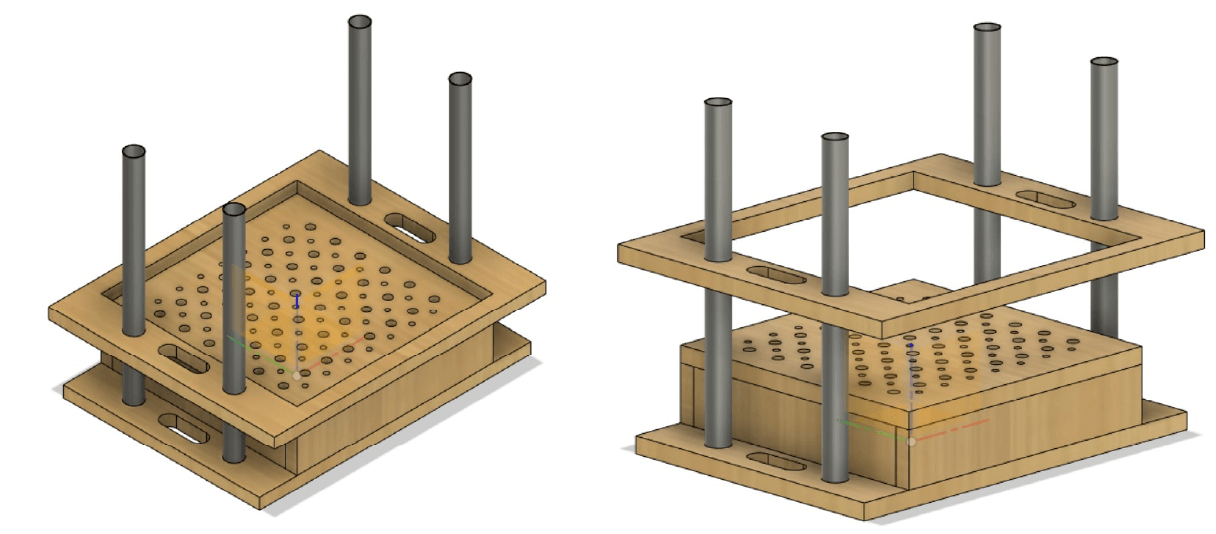
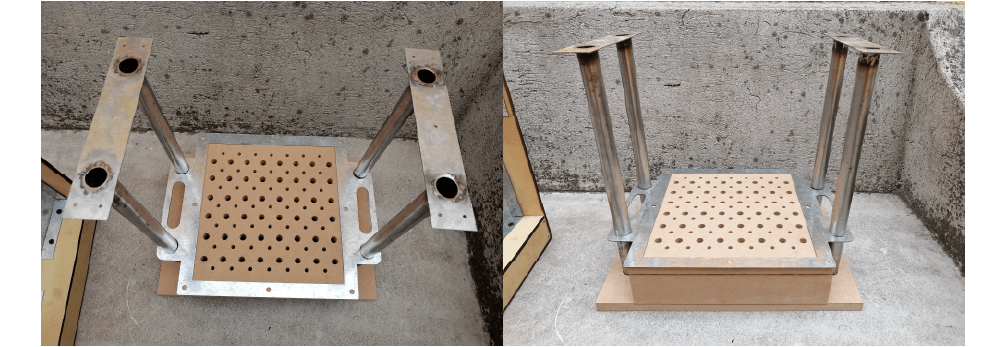
For the final machine I designed another module for the top, here will be placed the heating element to use plastic in the thermoforming process. I made it with MDF of 4mm (so it's not too heavy) and I used metal tubes for the support of it
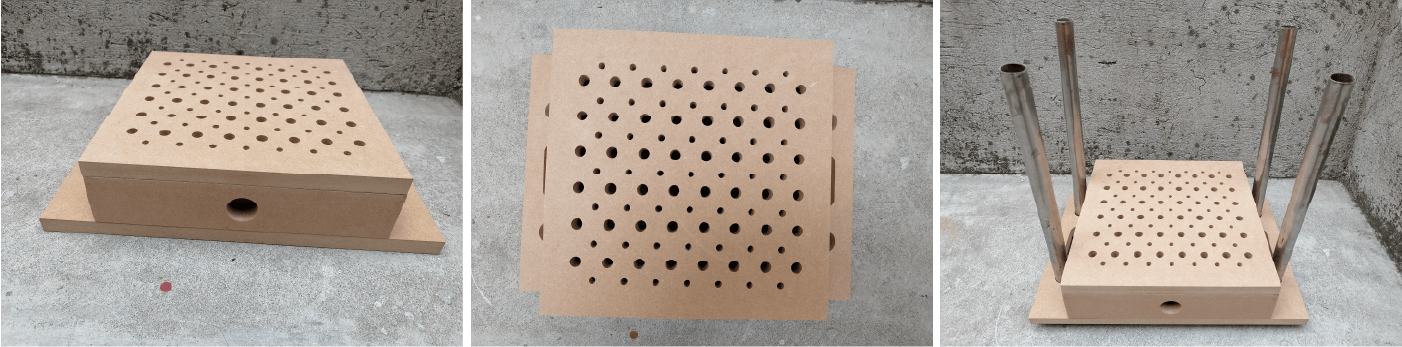
Sand all the pieces (the parts of the bridges that hold the material in place to prevent it from flying away). Then add some white blue in the edges and glue the part as showed in the assembling process. Let the glue dry well and fix the pieces with the help of clamps.
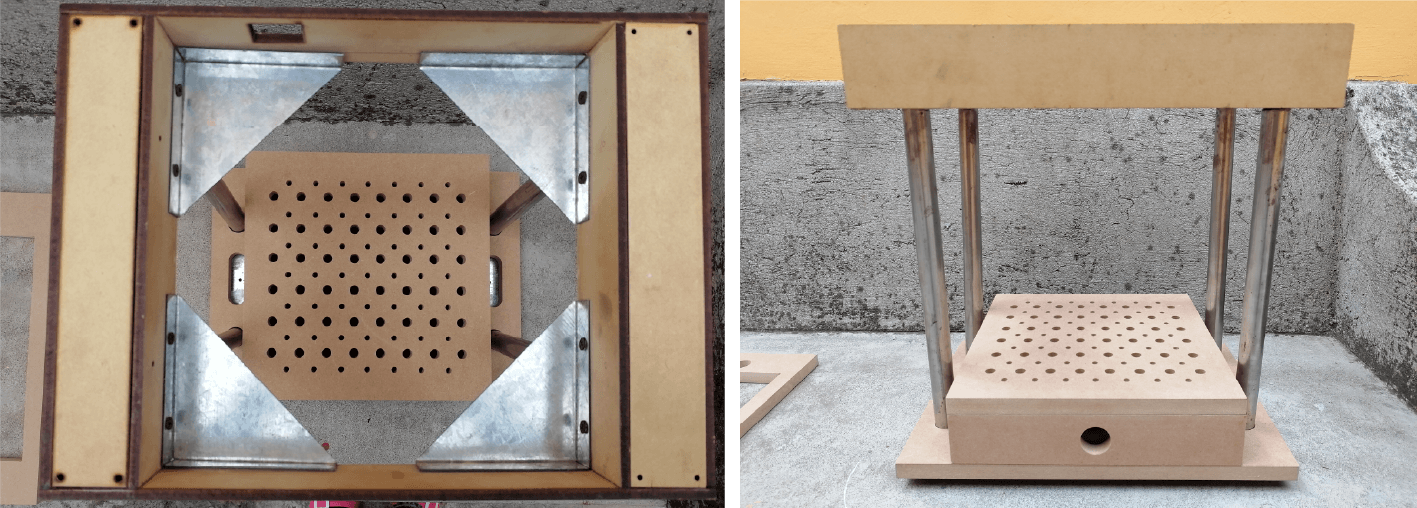
I had some issues with the support (because of the soldering) so it was not appropiated to use it in the base in this way
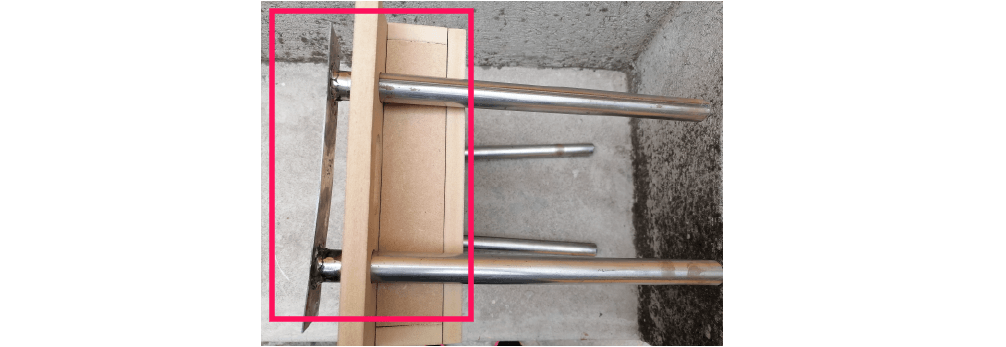
I changed the orientation of the supports and this was helpful and also allowed me to put the module on the top without problems.
Finally, I checked that the base box was well sealed to prevent air to escape and the video below shows the tests I did with a glossy piece of fabric.
Week's outcomes and learning 📌
List of files 📁
Other thougths 💭
I was interested in the looms because I've never used one before and I don't have experience with weaving so, I wanted to have a mini loom for beginning weavers, this migth be a useful material to have at the lab for other students too 🪢
First I looked at simply solutions to start weaving (like this cardboard loom), but that one is not durable so someone made a customizable 3d printed loom that seams to work really good. I choosed the 5 x 5 loom that is just perfect to cut also with the laser cut (instead of printing it)
🪡 Weaving was very nice! I saw this video that help me too. I used a rainbow thread to make it colourful and the steps were easy to follow, buuuut the tricky part for me was at the end. I made some mistakes while taking the piece out of the loom. In the pictures below I highligthed those mistakes so I'll remember them the next time.
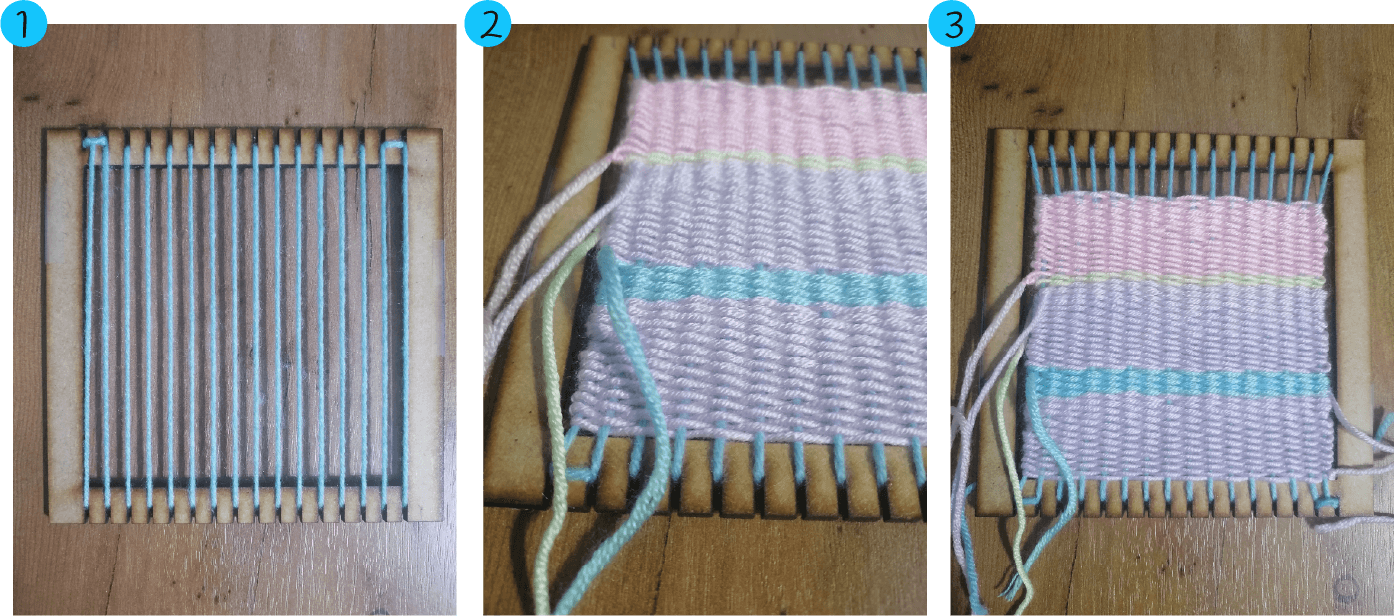
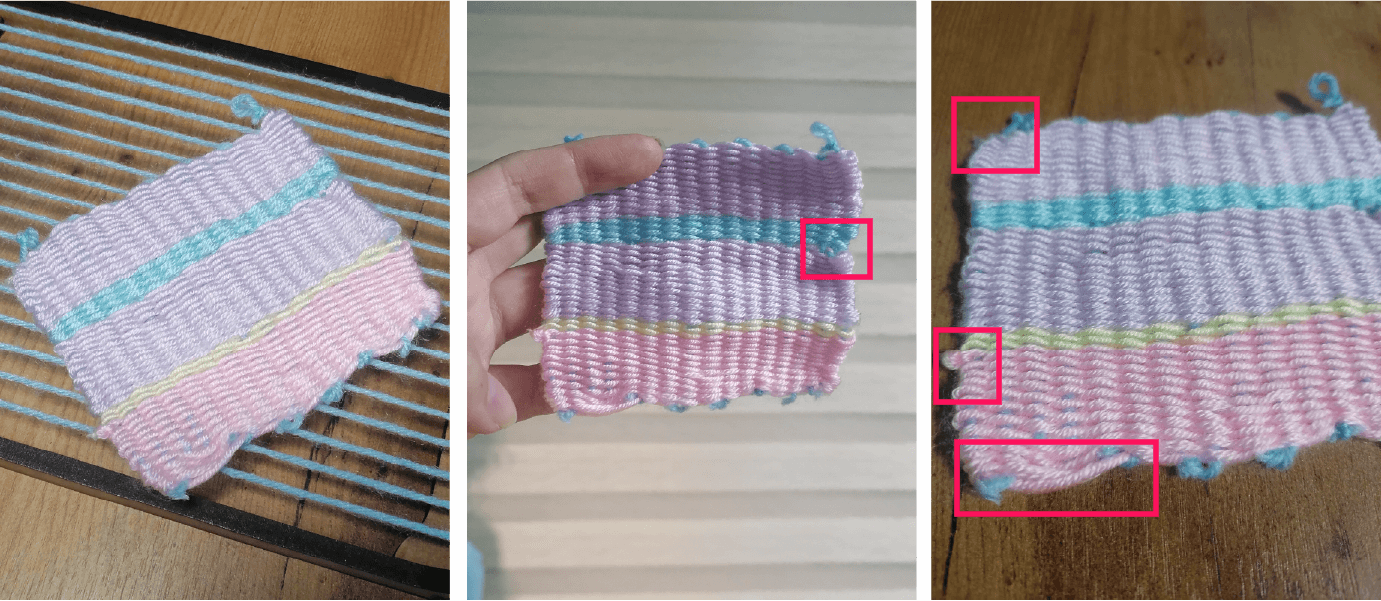
📝 Reminder: Don´t pull the strip of thread so hard! It can damage the guide line from the loom. Try to use a large piece of thread (in my case I prefer that instead of using several small threads)
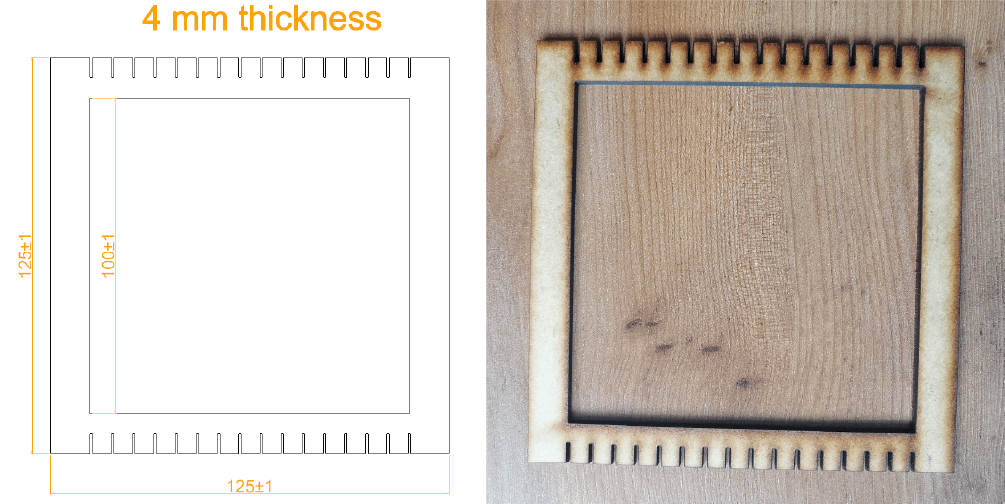
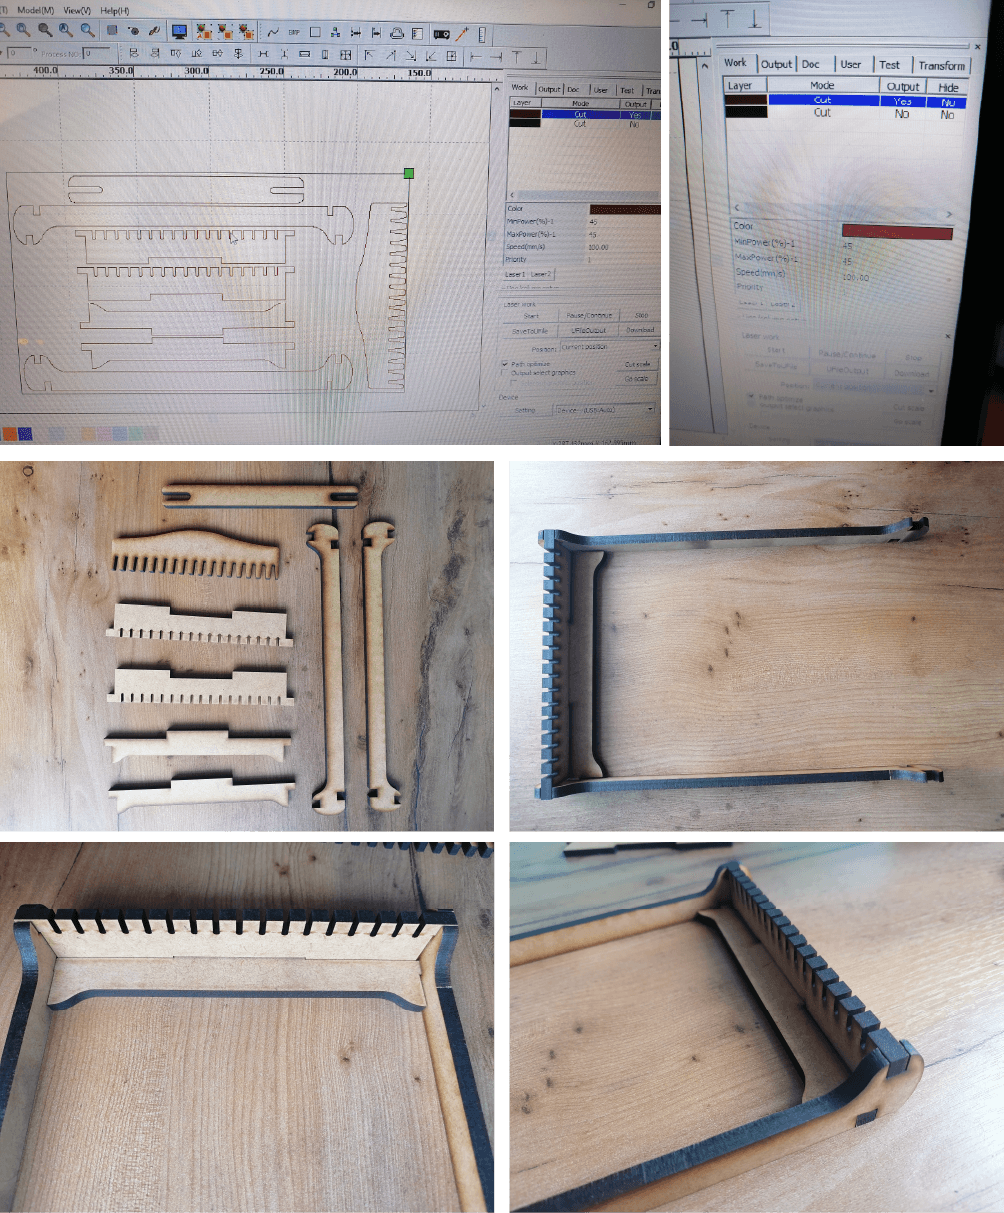
After understanding the weaving logic, I adjust some dimensions from this Tiny Loom to cut this one at the laser cutter using MDF of 4 mm (the original was for 6 mm)
Files 📁
Other useful resources
Since the computational couture week I've been thinking about one thing that I would like to have: a 3D pen. Why? sometimes you print something and it goes a little bad somewhere, and this pen can be used to modify and repair 3D printed objects. In adittion, if you have an object that was created on a desktop 3D printer, you can use the pen to add details to it. The pen can be moved around and print in any orientation. Also I would to try some garments all 3D printed and for that I need to sew some pieces (a soldering tool will also be useful but you need to be more careful with it)
This could be a nice project also to learn about electronics but I need more time to figure out how to build this with all the components working well. Even if I don't build this one, I made some research about 3D pens ⬇️
A 3D printing pen is like a handheld 3D printer. It uses the same kind of heating element and extruder that you would find on a desktop 3D printer. But instead of being controlled with computer software and motors, you guide the printer head by hand. Actually, this is very similar to how a hot glue gun works.
Useful resources
▪ In 3dsimo you will find some types of 3d pens and also here's all well docummented for customizing and building it
▪ 3doodler