Circular Fashion
📅This week started on October 4th.
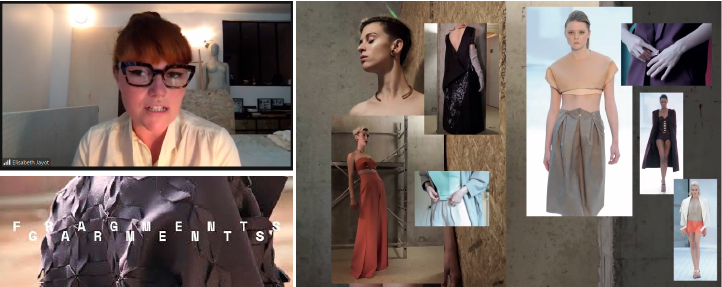
First, we had a recitation from Elisabeth jayot and her interesting design process that she developed in order to create her modular garments called Fragments Garments
▪ What I made?
🗹 Design and prototype with paper and scissors modular configurations and locking connections
🗹 Run tests of laser cutting of your designs in fabric and document the parameters for the chosen fabric
🗹 Design and Document the process
🗹 Create a modular or seamless garment, showing the connection
🗹 Upload the open source files at oscircularfashion.com
▪ Let's talk about: Circular Fashion
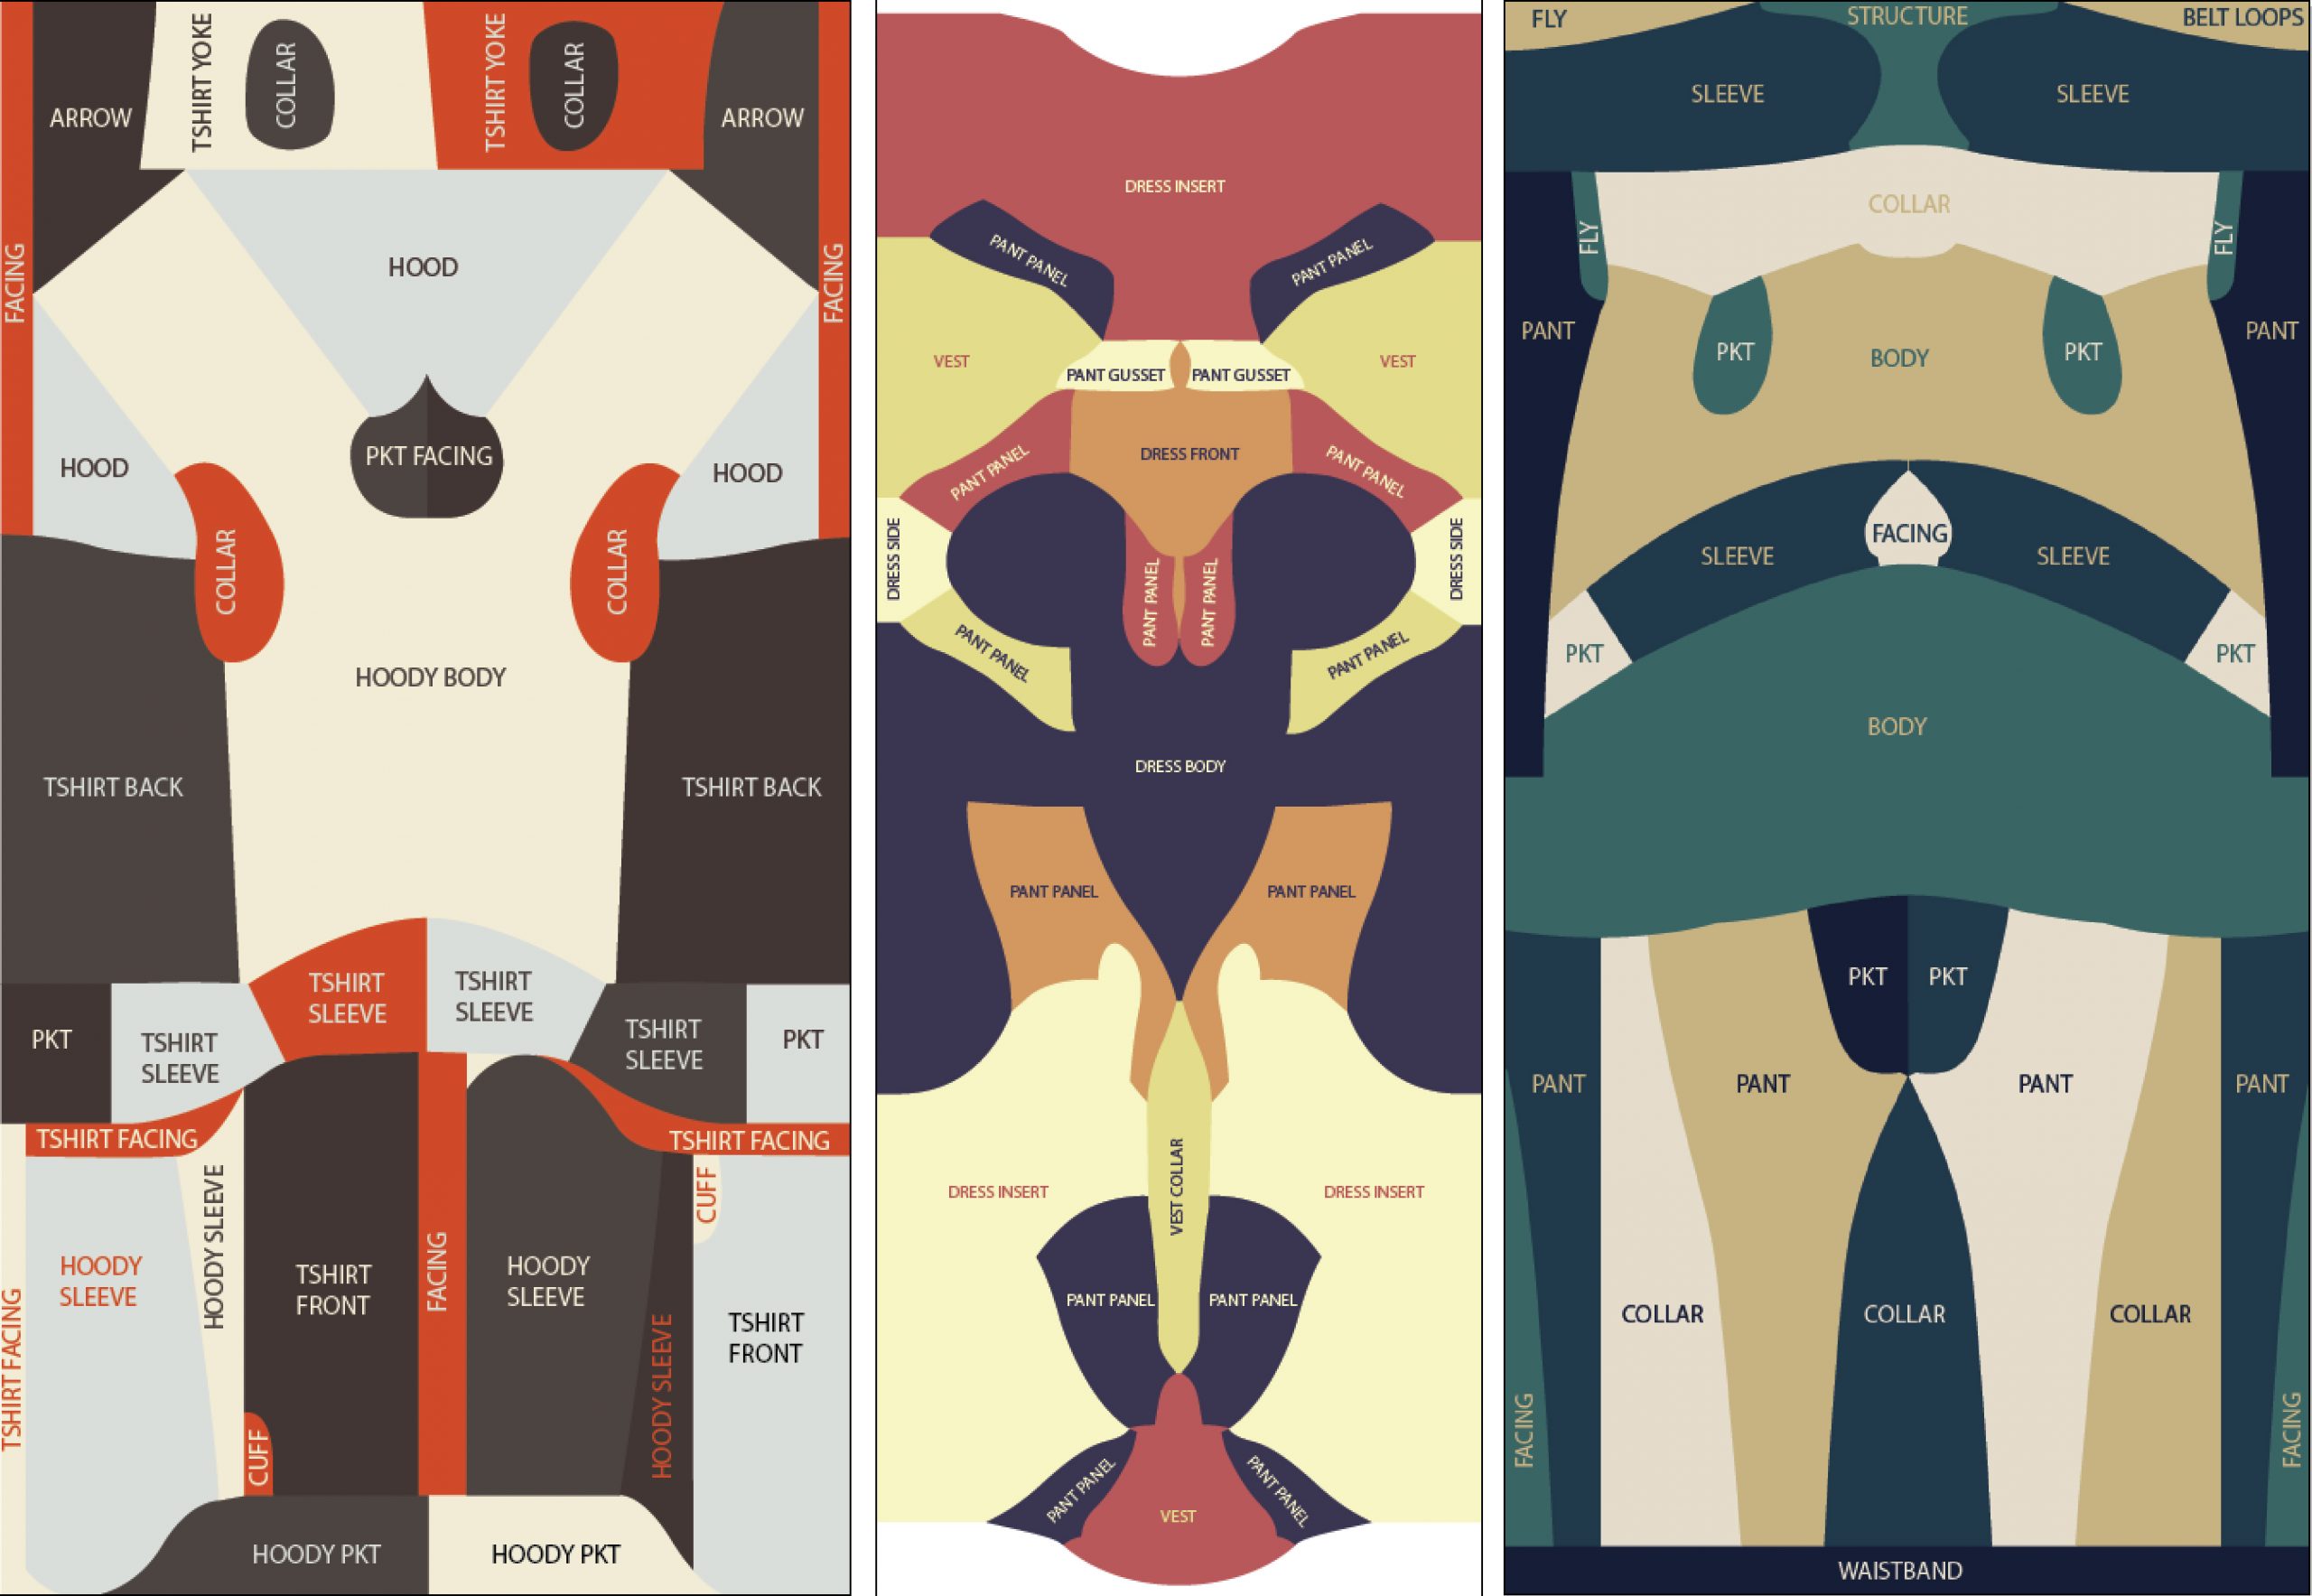
I believe this is a very broad topic, with different elements that are involved and must be dealt with. I will not analyze them all now, I just want to focus my attention in one thing: patterns
What about Zero Waste?
Garments can be produced with little or no textile waste. How is this possible? In brief, I think there a two choices:
But, however, I think there will always be an small % left (or not?) Zoe Romano Teached us about: Open Source Circular Fashion. More than ever, it’s crystal clear that the fashion industry needs a quick approach to develop a more sustainable approach.
▪ Inspiration for this week
Here is an interesting animal (fish) that lives in clear water reefs, it's called "Lettuce sea slug" and has enlarged fleshy appendages that are folded over one another, with colors ranging from blue to green, with purple and red lining.
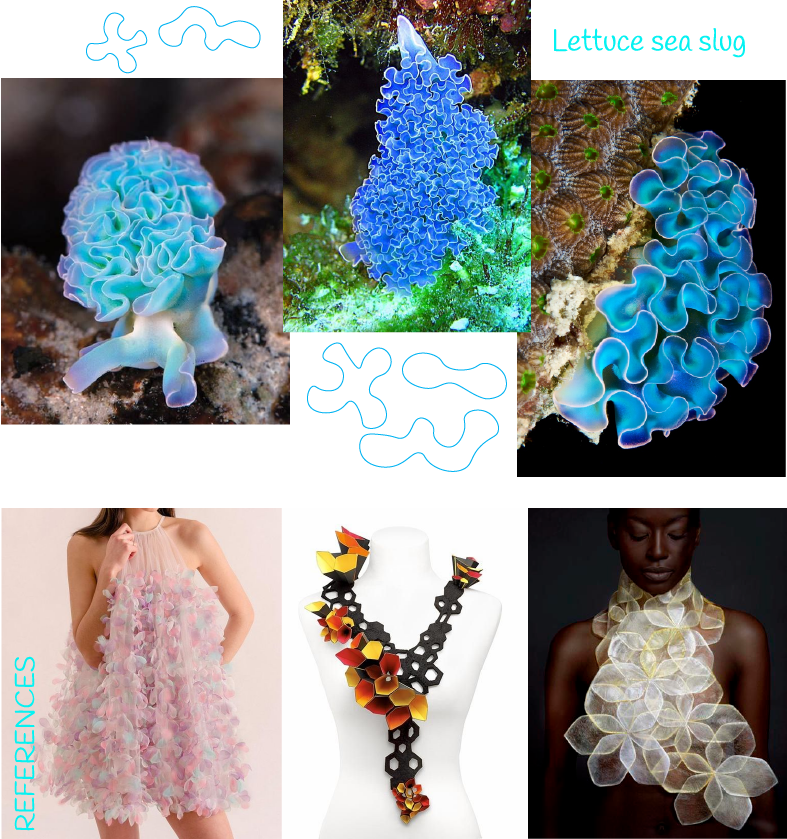
This references were took from Pinterest
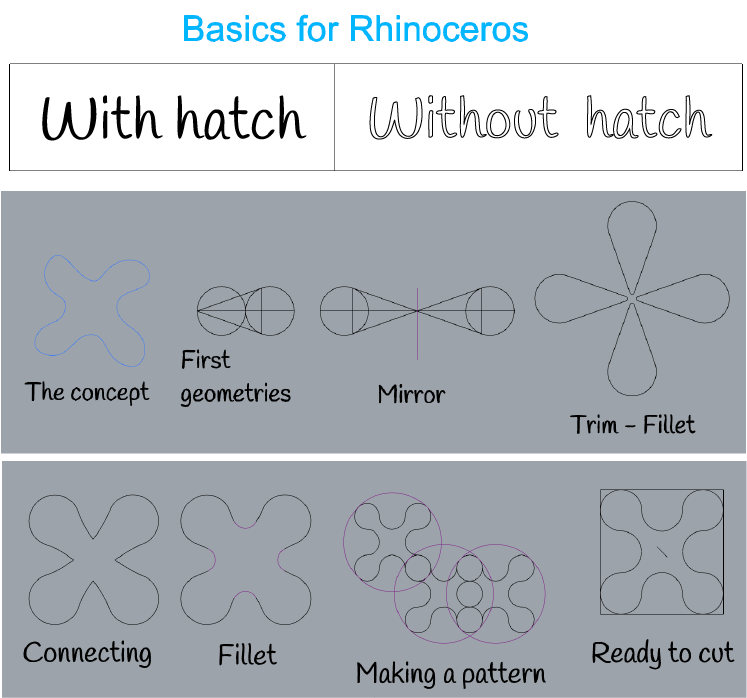
▪ Basics for Rhinoceros 💻
I learned new commands on Rhino. The ones I liked most:
▪ Click here to find all the commands
⬇️ Here is an image of the pattern I made while I was trying to use all the commands that were teached at class. Also I put below the file if you want to download everything I made this week in Rhino.
▪ AllSea Pattern v1
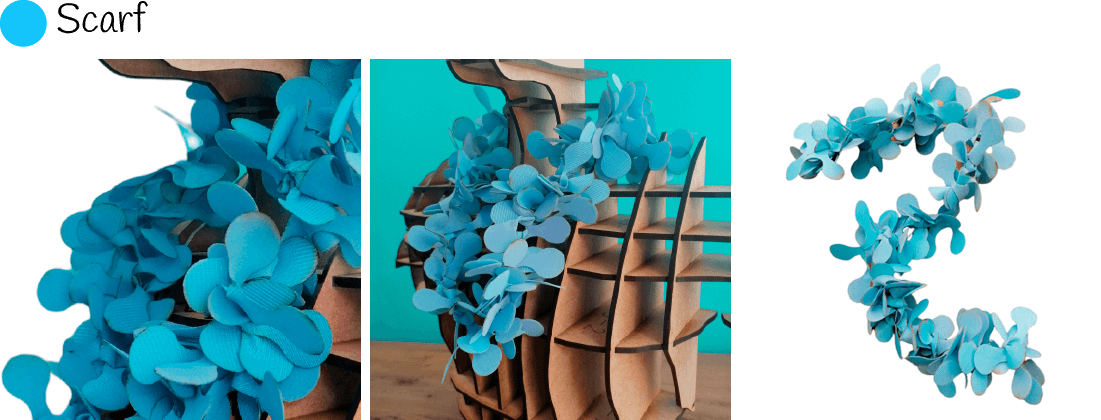
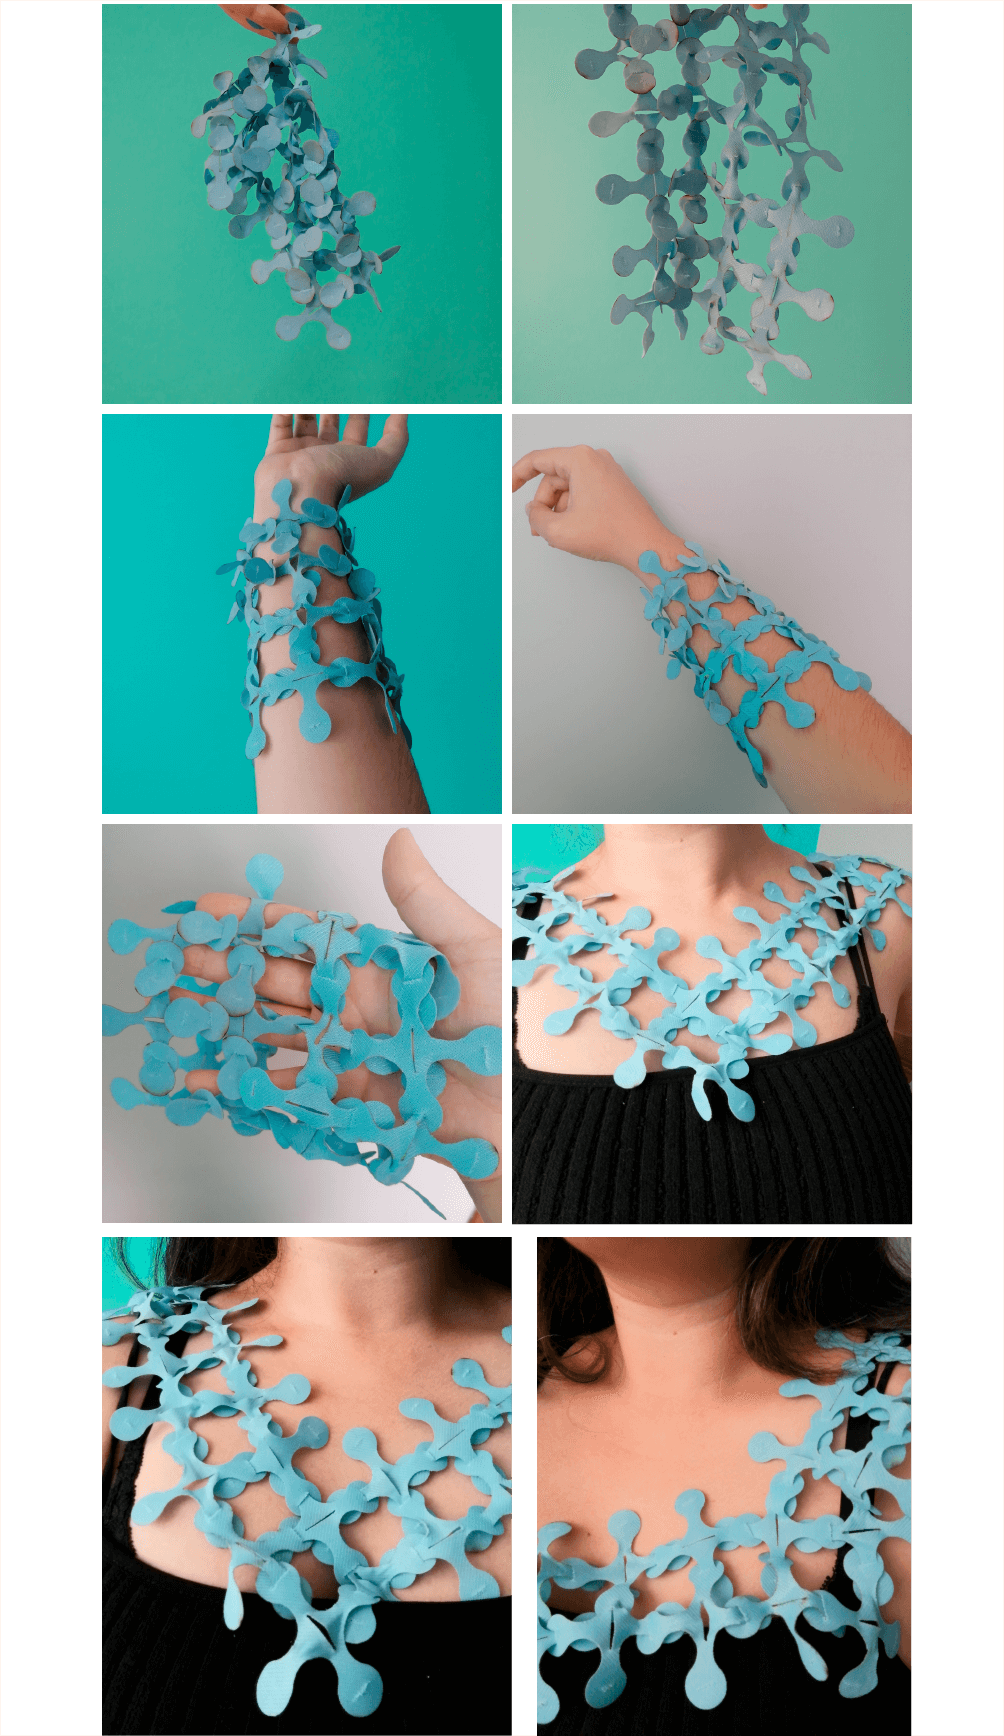
✂️ First I cut the pattern above on paper and started trying to figure out a garment with that. I got really surprised and motivated with this result but it wasn't what I was really looking forward.

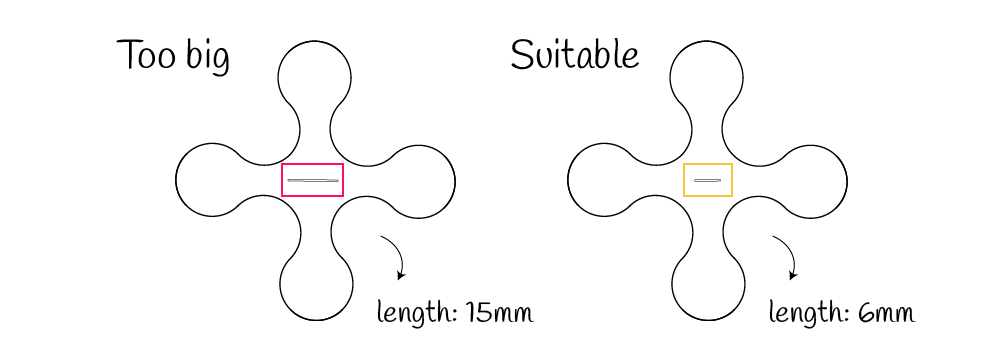
However, this is what I was talking about at the beggining, I used a pattern and I explored with it, but I really didn't know what I'll gonna get with that. That's mindblowing! It means you can explore with so many other pattern techniques and see what you can get! The first thing I thought about this pattern, which I will call: AllSea pattern is that it would look great as an scarf or a necklace. When I cut it on the fabric I made a mistake and I cut the pattern with the slot length of 15mm and when I was interlocking the modules I realized that it was too big... So I decided to finish my garment by tying some knots with the modules so that they don't slip off. The correct length of the slot is 6mm, *be careful and check your vectors before cutting them.
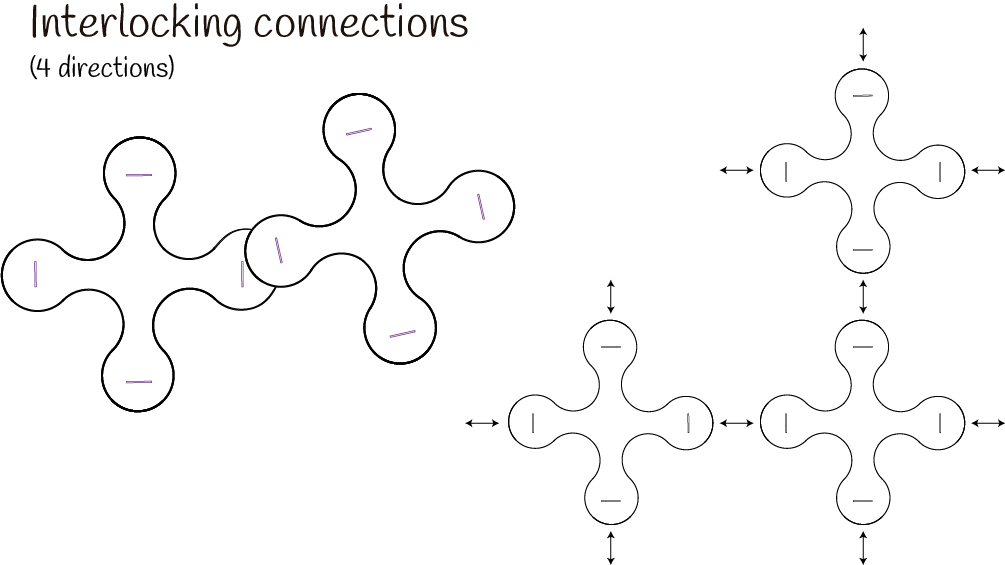
The other issue was the interlocking, was not intuitive at all. This module doesn't have directions to follow the interlocking and I was trying to fix it following this logic ⬇️

But it wasn't working at all for me. And this was the result after all ⬇️ - Okay, I like it even it's not the same visual result as the paper prototype.
▪ Hexagonal Pattern
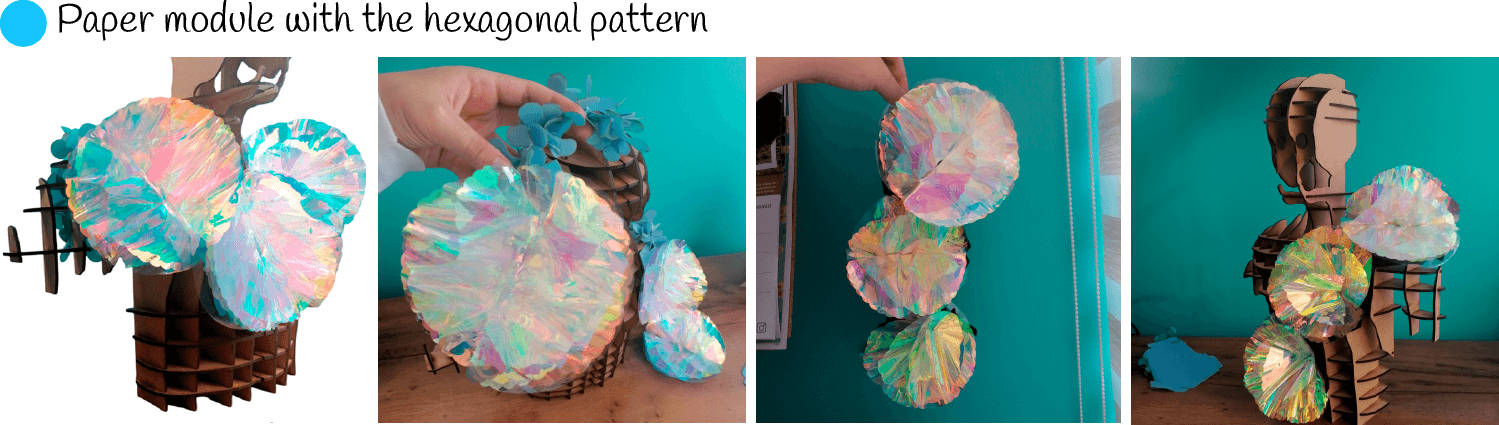
Then, I started to think about a pattern than allows me to get some waves like in a 3D view, I was expecting to get a garment that is not completely flat. So, I started using paper and exploring with a circular pattern.
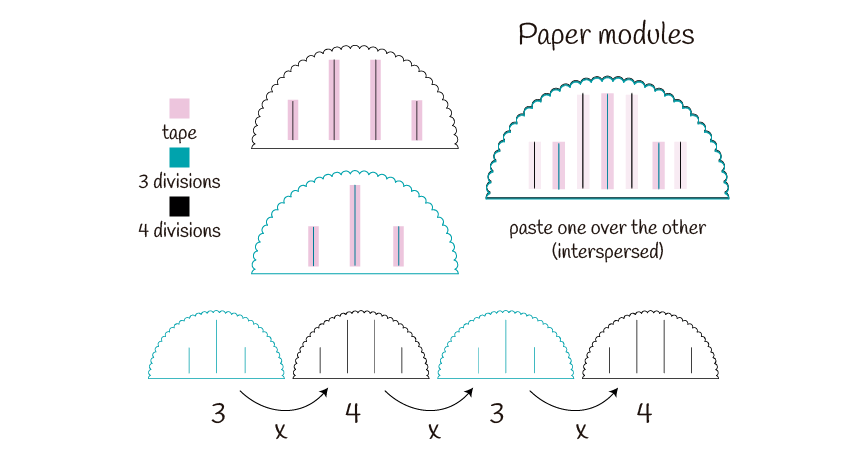
Voila! With a nice colourful paper (in spanish is called: papel tornaso), scissors and some adhesive tapes I got this, that looks beautiful and it changes the colours just like the lettuce sea slug.
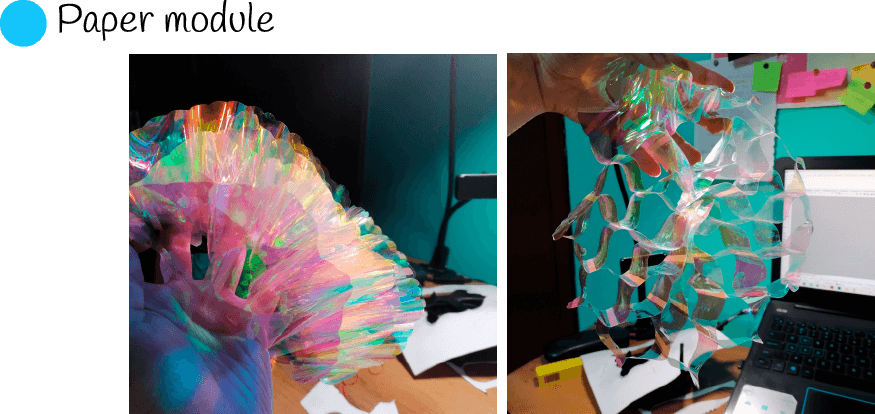
I cut the papers in circles and then in halfs. Then I cut the waves around the edges and made the divisions in each half. Here is the way you have to make the divisions and how to paste each paper one over the other.
💭 Some troubles at this moment
I was trying to get the same result with a pattern to transform it to digital fabrication using a fabric, but after several tries I didn't get it. I was expecting to achieve the shape of the center piece which is the one that determines the number of directions and the ways of interlocking, but my mind did not come up with this fundamental piece 💢. I went to the lab and explained my work. My local instructor came up with a great idea to use my paper modules with other patterns.
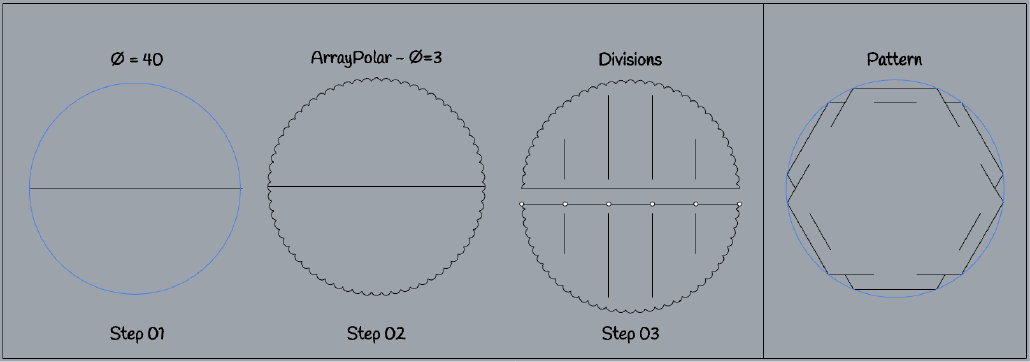
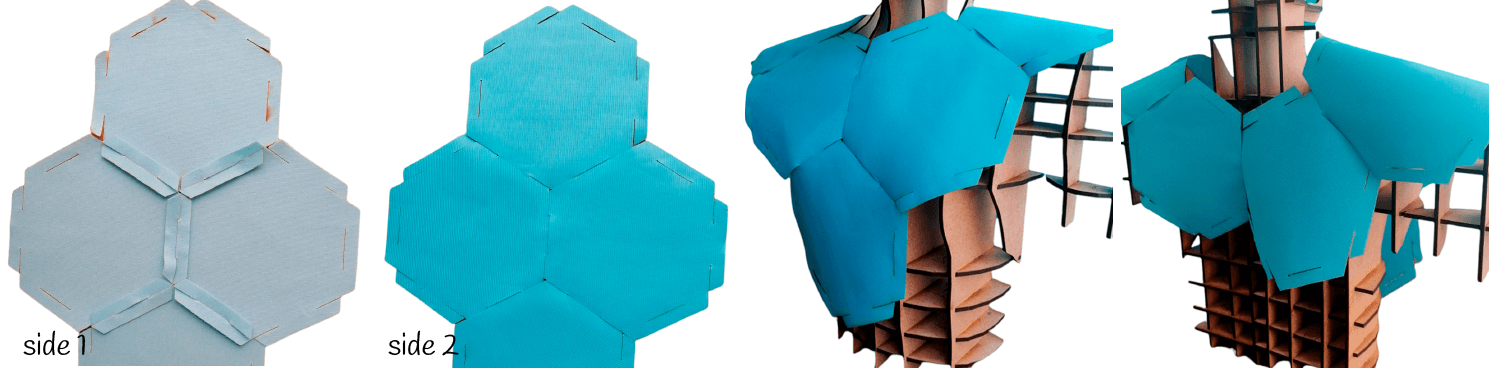
Finally I thought about how many directions I wanted and the interlocking type. I chose an hexagonal central structure that matches with the circular shape of the paper module and can somehow be fitted into it. So.. 6 directions! I thought the fastest way would be to use tabs and slots on each side of the hexagon so I made the necessary cuts.
With this I made the protoypes with an hexagonal module with 10 cm of diameter. The first tests of this model were made using paper + foamy. The foamy is a really nice material to work it! Below is a video with all the paper prototypes that I made until this point.
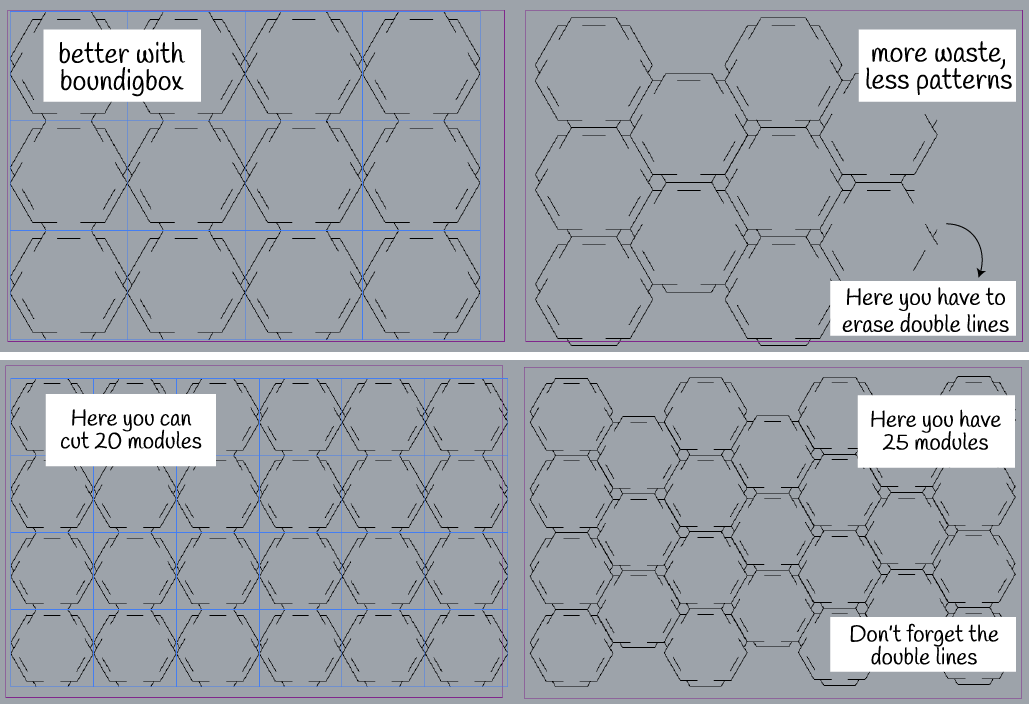
Then I changed the diameter to 14 cm because that was the diameter of the paper waves that I've done before. This pattern I exported to .dxf. When I did this I realized that The size matters! Why? - Because it changes your way to cut and the way you create the garment. And with the small ones it is better to cut because you get more patterns with less waste on the fabric, but this doesn't mean that this will always be the same with all patterns. Below, on the second case you can see that is better to place the vectors without using the bounding box, just in this case, but you need to prove which is the best thing to optimice your material.
For making life easier, I found this program called Deepnest that seems to be useful for this part! You can download it by clicking here it helps you to place the vector in the size of your material without wasting material.
This time I tried the modules using some felt that was at the lab. After laser cutting, the edges of the felt were rough and this helped the attachment between modules. Then I made some cuts on the paper modules but it was really difficult because this paper is really thin and it tends to break easily, so I made some small cuts very carefully and inserted the tabs of the hexagonal module into it.
💡 Shoul I use another fabric?
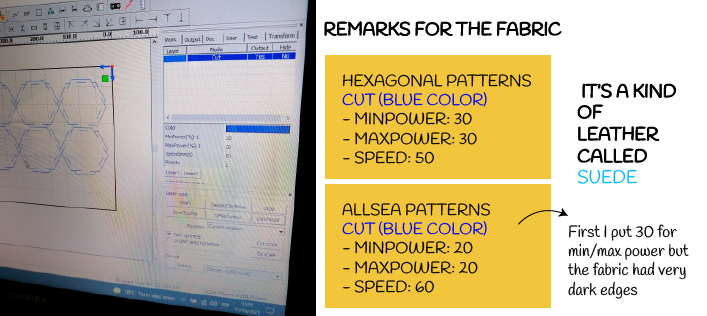
First, I looked at the list of fibres from The Fabric Selector that helped me to understand which are fabrics that can be used in the laser cutter (I wanted to avoid making a burning test haha). At the end, I bought a type of leather or suede that is very thin (not a really good idea). I searched for it's composition to be sure it doesn't have a dangerous component and I chose the color I liked the most. I cut two fully pieces of material (400600 mm) for this assignment. Also I was thinking about cutting the acetato at the laser, but it contains pvc so the smoke of it is very dangerous to smell. Don't do that!**

📓 IMPORTANT NOTES FOR LASER CUTTING
You can use the command
SelDupwhich is very useful to select all duplicated lines and then erase them before cutting.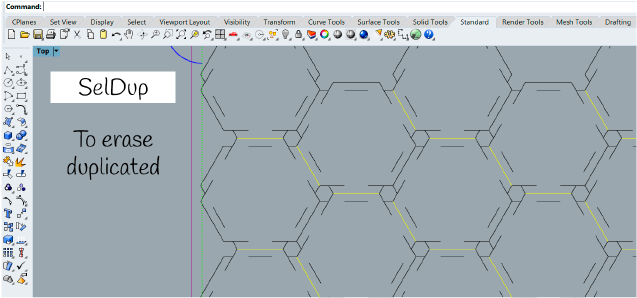
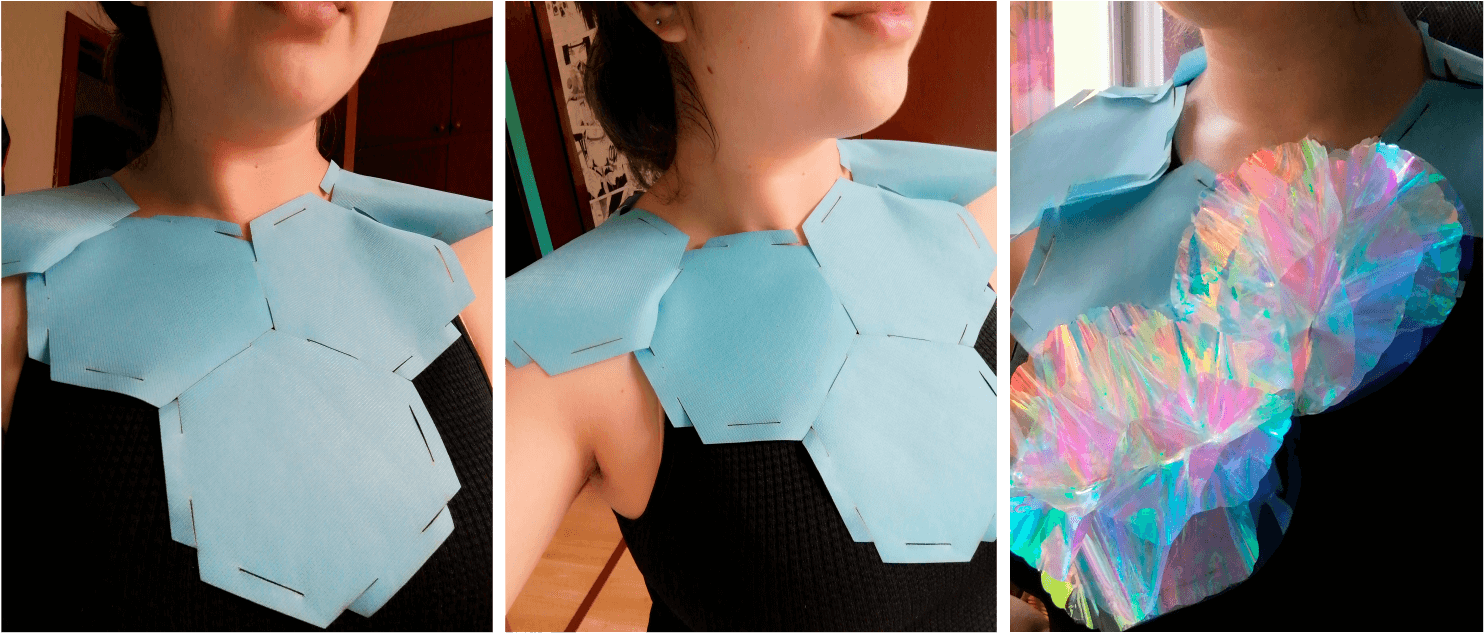
To attach the paper modules I figured out another way instead of cutting the paper. I pasted an acetato sheet in each side of the final module and made three slots. This was really helpul because this material is harder and allows you to insert the tabs of the fabric easily while attaching the paper module. I made a video with the full process that I follow in order to get the final garment... Here I also show where you need to cut the acetato film.
About the fabric - Just one observation at this point: The felt was better for attaching the modules and also the foamy could have been a better option. Any way, I liked the suede, it has two sides with two different textures and also the color changes a little.

Note: I realized that it would be better to keep the diameter of 10 cm because when you wear the 14 cm of diameter around your body they feel a little uncomfortable on certain parts (specilally near the armpit area).
▪ Exploring CLO3D 🔎
Pauline Gamore - Teached us about: a 3D fashion design software very nice for garment visualization. The tool we learned is Clo3D, you can download the free trial to explore it and learn about it with this tutorial
Here are some examples that I made after watching the tutorials. I really like this and I want to learn more about the modular configuration.
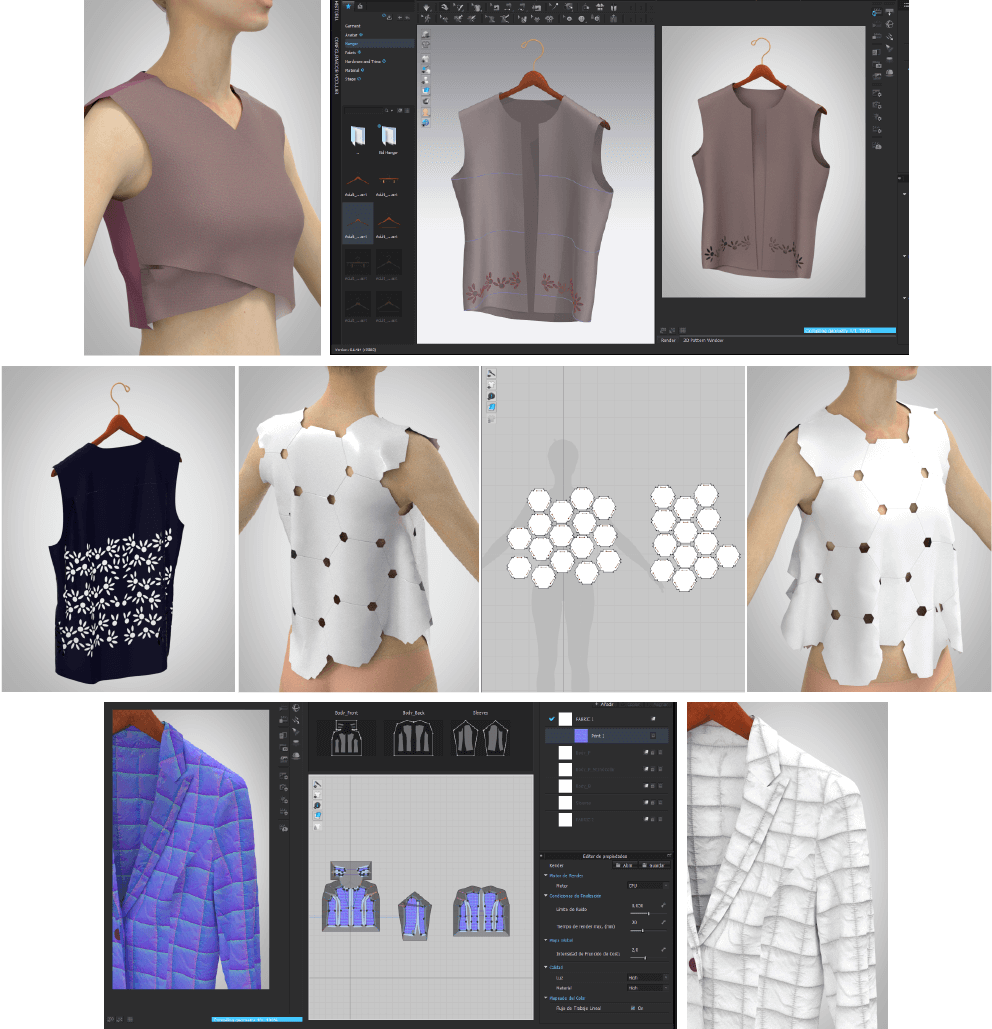
I tried some material from ambientCg and uploaded them to the texture files on the software. You can draw the patterns with any vectorial software and then import the .dxf file to Clo3D.
Other useful resources
▪ Week's outcomes and learning 📌
This Circular topic is huge to analyze and has many ways to resolve it, I think there is not only one way to produce circular fashion, so it interesting all the solutions that the other Fabricademist made! Definitely, the size of the pattern matters and that will affect your Zero Waste desing in many cases.
▪ I learned a bit about tessellations and I think it can be really interesting to keep trying more patterns with less waste and this time making my garment more flat, I think it's easier that way to manipulate the garment and use it.
▪ List of files 📁
You can find the .dxf + .pdf+ interlocking instructable files of the patterns in my profile at OsCircularFashion
AllSea Patter v2
After some weeks, I decided to review this assignment and I wanted to make some other tries. Also I checked some others works to learn more and see what I can improve this time. After exploring more with the first module, I made some changes on it and I endedn with something really similar to the work from Takehiro Ando.


This pattern is now more intuitive to follow and with the same number of pieces you can get a larger garment. I cut this new slots by hand at home, so it is still being a prototype but looks nice. Also I veryfied the length of the slot and yes! with approx. 6mm it's okay. This pieces are strong!
Useful works