2. Digital bodies
Objectives:
- References and Concept development
- Design: 3D scanning, 3D file manipulation, mesh repair tools, explore 3D programs (open and closed sourced)
- Fabrication: Capable of executing from file to production workflow, from slicer to laser cutting
- Documentation: Anyone can go through the workflow, understand it and reproduce it
- Final outcome: Is the project assembled, functioning and complete
- Originality - Aesthetics: Has the design been thought through and elaborated
Student Checklist
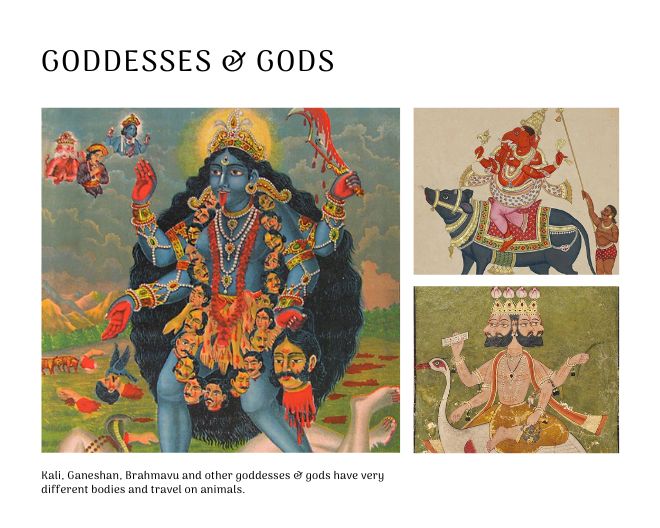
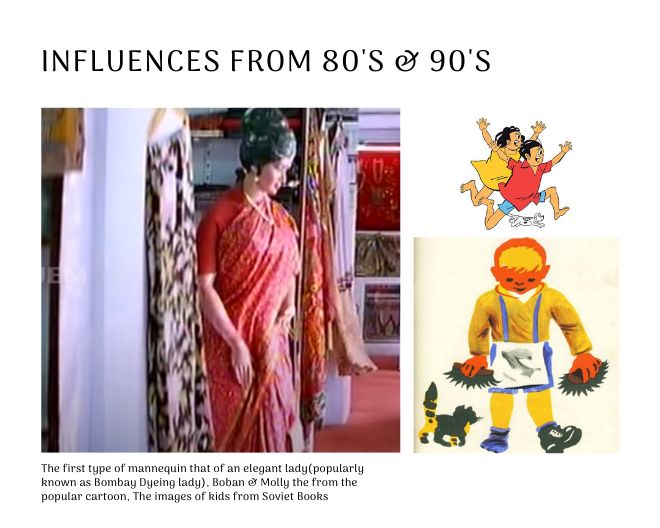
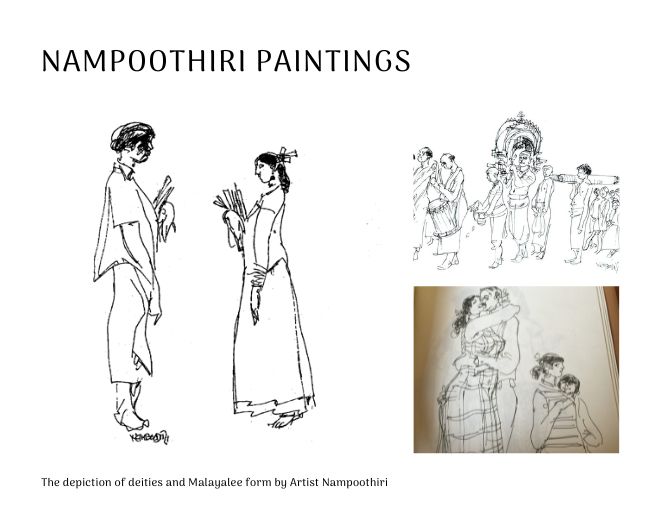
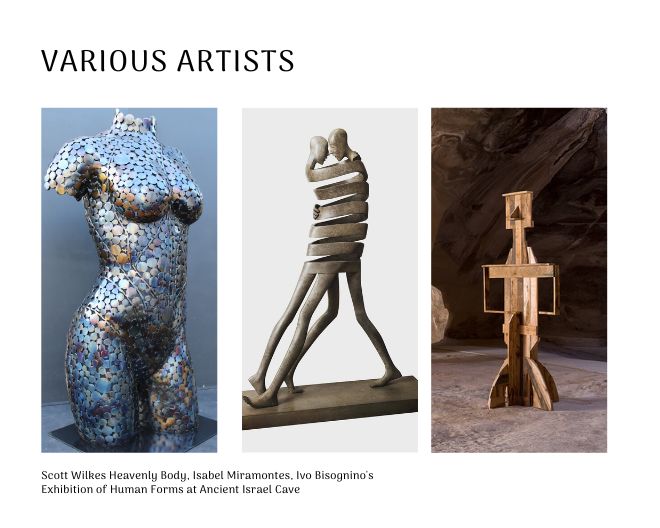
- Include some inspiration: research on artists or projects that work with the human body
- Document the use of 3D scanner and software to acquire a 3D model
- Document the process of repairing and/or manipulating a 3D mesh and slicing it
- Document the process of file preparation for laser cutting
- Learn how to laser cut, document the workflow including the machine settings, material type and thickness
- Upload your 3D file (STL/OBJ) and your 2D files (DXF/PDF)
- Build and/or assemble a mannequin or body parts
- Create a stop motion or step-by-step assemblying process and upload one picture (HIGH RES) of your mannequin (extra credit)
Research

3D Scanning:
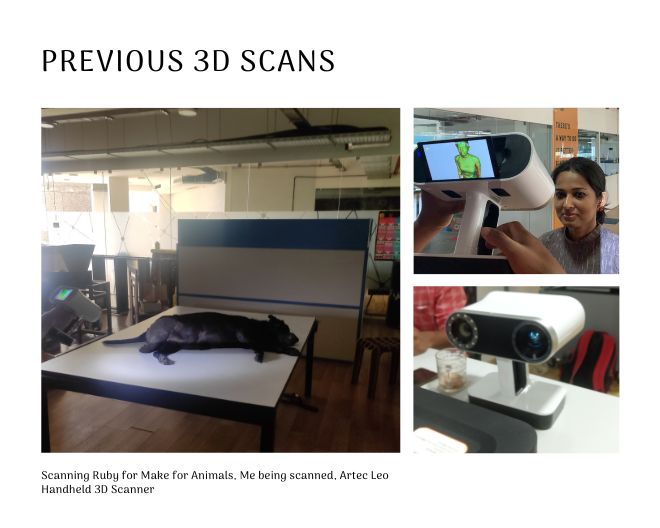
I have 3D scanned many times before. I have used Artec Leo, Kinect and photogrammetry softwares for 3D scanning. Here is my Fabacademy documentation of 3D scanning using Kinect.
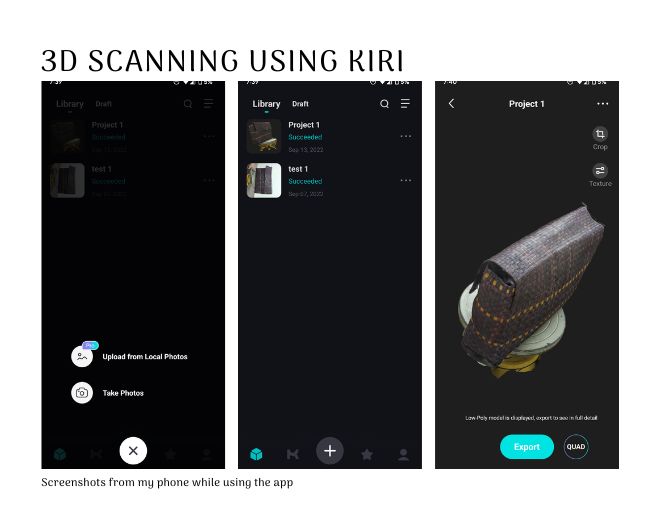
Since I didn't have access to the lab, I scanned using Kiri engine a photogrammetry software that can be downloaded to my phone. I use a Google Pixel 6 phone, which has a pretty good camera. So it was easy to work with it.
Kiri Engine to create 3D models
Kiri Engine is a mobile app available for both Android and iOS devices. With this tool, you can easily capture objects and your environment and convert them into 3D models. Follow these simple steps to learn how to use Kiri Engine:
Step 1: Download and install Kiri Engine from the App Store or Google Play Store.
Step 2:Register and sign in to the app.
Step 3:Once signed in, click the plus sign to start capturing objects.
Step 4:You can upload images from your device's library or take photos directly within the app. To take photos, click "Take Photos" and scan the object from different angles. The more pictures you take, the better the model will be. The minimum number of pictures you need is 20, while the maximum is 200. This can be done in 2 ways:
1. Keep the object stationary and take photos around it
2. Rotate/flip the object take photos in one position.
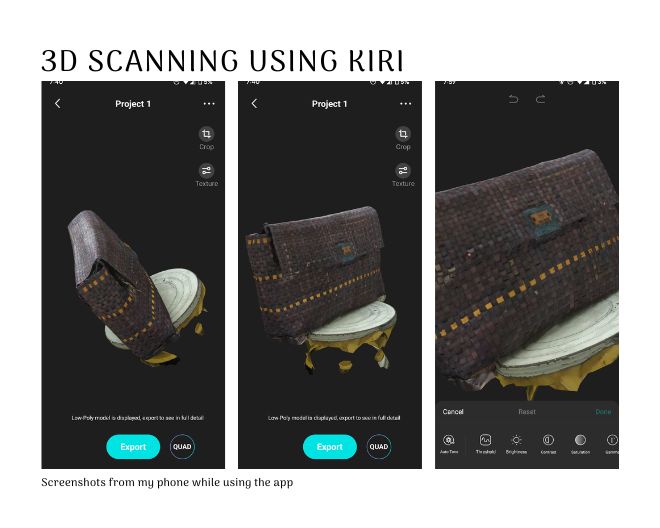
I wanted to scan a screwpine bag. I decided to rotate the bag and used a cake stand for this purpose. It is better to get help from someone to rotate while you take the pictures.
Step 6:After capturing, go to the "Model" section and enter the name of the model. You can select the label type and choose whether you want the model to be obj or fbx. You can also check the model quality and turn on AI object masking to mask your object outside the background.
Step 7:Click the "Upload" button to upload all the pictures to the cloud. The process of converting the object into a 3D model will then begin. A faster internet connection is recommended to get the models done quickly.
Step 8:After processing, you can now check your model. Press the "Share" button to export the model. A link will be generated that you can use to download the model. These links are active for one hour and are not restricted by the number of people who can download them.
With Kiri Engine, creating 3D models is easy and straightforward.
Creating Mannequin
Concept
I want to create a mannequin of a female form that can be used in trade fairs. One problem I found for mannequins is that they are hard to carry around due to its rigid shape. So I want the mannequin to be foldable or aasembled at sight. I also want the mannequin to be multipurpose, one that act as a box which can carry the clothes for the trade fair. So I want the body to have a flap like a box.
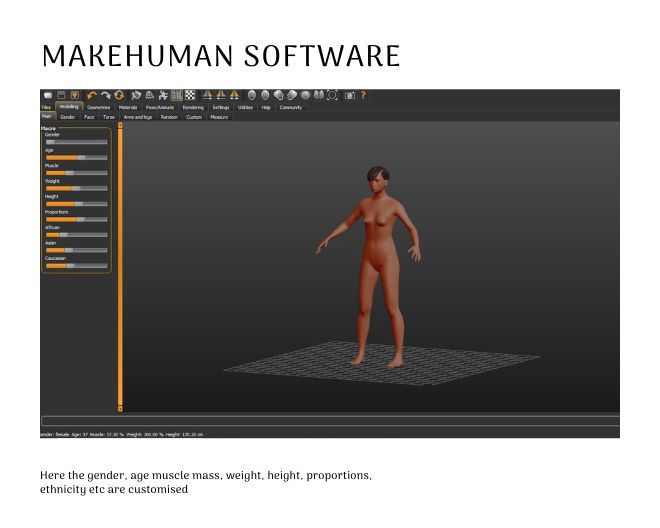
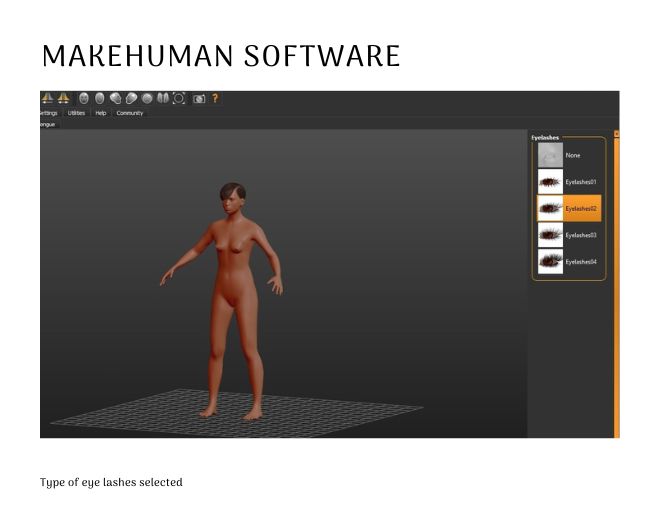
Step1: Make a body using Makehuman software
To create a mannequin, you will first need a model of a human body. This can be obtained by downloading an existing model from various online sources, using 3D scanning technology to create a model of a real-life human, or using software like Makehuman to generate customizable models.
When you open Makehuman, an "average" human model will appear, which can be modified using the various tabs for different parts of the body in the "modelling" section. Nearly every aspect of the body can be resized and reshaped to your liking. Main parameters available for adjusting are gender, age, muscle, weight, height, and ethnicity (African, Asian, or Caucasian). If you need to enter precise measurements, the "measure" tab allows you to input custom measurements, which can be especially useful for creating realistic models of people who may have physical limitations that make 3D scanning difficult.
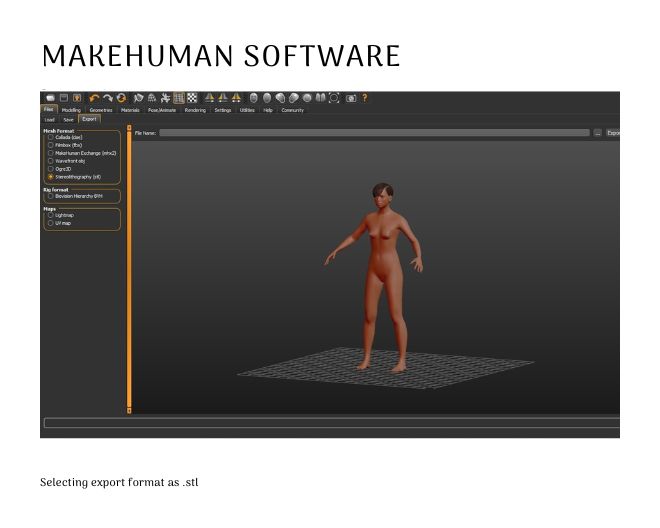
One can input their own body measurements under "Modelling/Measure" by following the instructions in the different categories on the right, including neck, upper arm, lower arm, torso, hips, upper leg, knee, lower leg, and ankle. You can also experiment with facial modeling under "Modelling/Face," but this step may not be necessary if the project does not require a head. Remember to save your human as an obj. file for opening in Rhino.
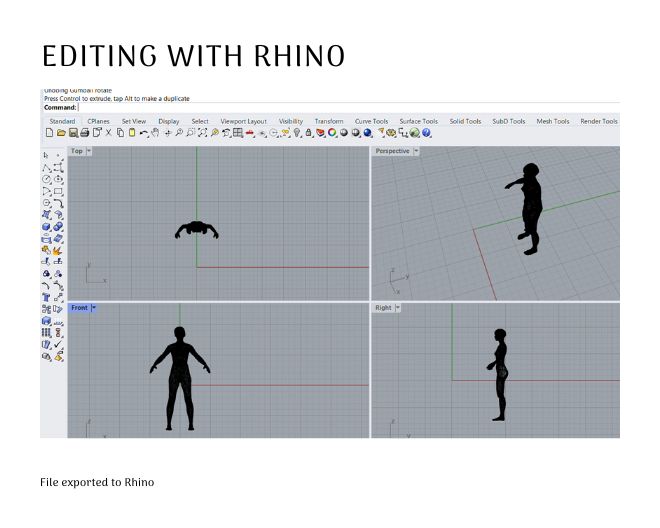
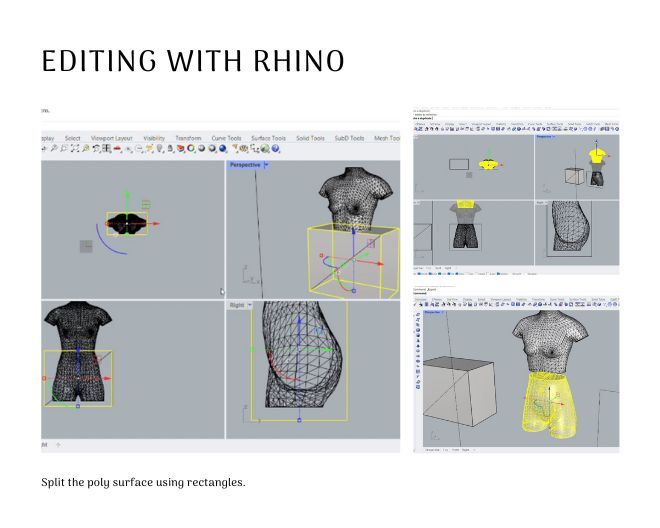
Step 2: Removing unnecessary body parts with Rhino or Fusion 360
Makehuman doesn’t allow you to slice up your 3D model, so to isolate just the torso to make a mannequin, we need another tool. There are lots of ways to do this, such as using 3D design tools like Fusion or Rhino. First I did with Fusion 360.
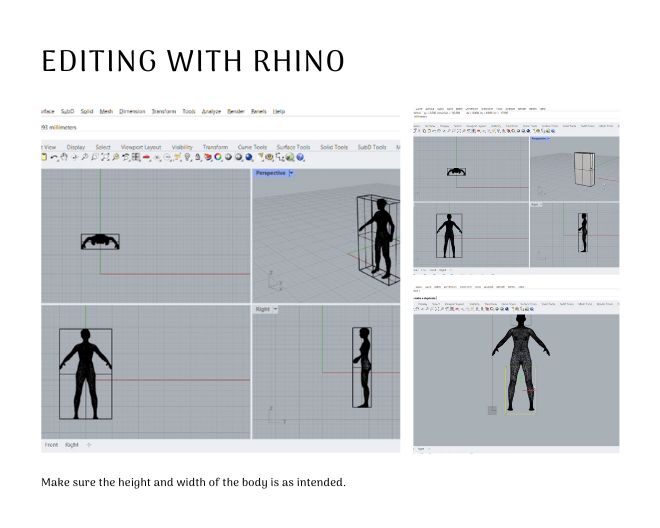
Start by importing the .obj file you exported from Makehuman. I created planes and used the planes to divide the body. Then saved each required body as .stl file. I did not convert the mesh body to nurbs instead I converted the extrusions to mesh. The boolean difference these extrusions made with the body are the remaining parts which I split into two to get 2 parts. Here is the screen recording of how I did it:


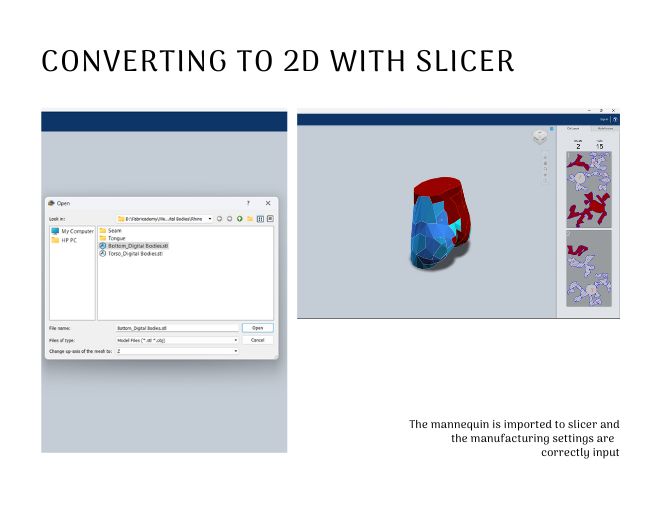
Step 3: Converting a 3D model into 2D using Slicer for Fusion 360.
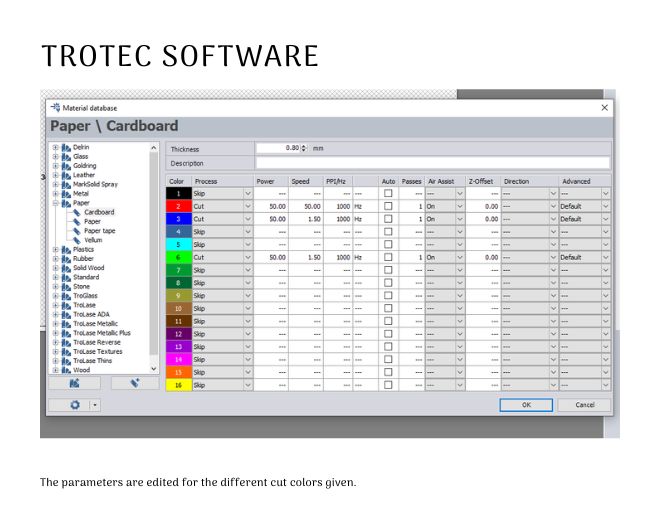
To create our mannequins at IAAC, we utilized cardboard and a laser cutter. Since laser cutters can only cut 2D shapes from flat materials, we had to divide our 3D model into several 2D shapes which could be laser cut and assembled to form a 3D mannequin. For this, I used Slicer for Fusion 360 which can be downloaded from here.
To begin, import your model in the .stl format exported from Rhino/Fusion 360 into Slicer for fusion. While importing be sure to change the axis of the mesh to the correct axis, in my case the z axis. Then, modify the Manufacturing settings (located at the top left of the screen) and enter the size of the material that will be used. This ensures that the plans generated by Slicer will be the correct size for the chosen material. For example, in our case, we used cardboard measuring 1000mm x 600mm with a thickness of 3mm, so these values were entered in the menu at the bottom of the screen. Be sure to also verify that the object size is correct by checking the dimensions and units of measurement in the menu on the left-hand side.
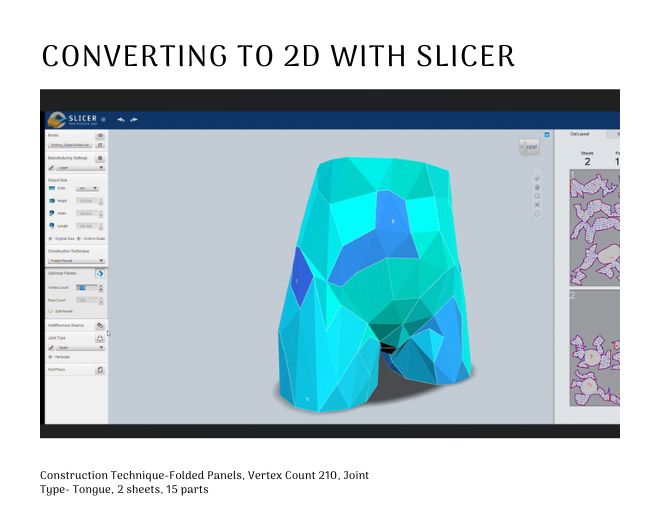
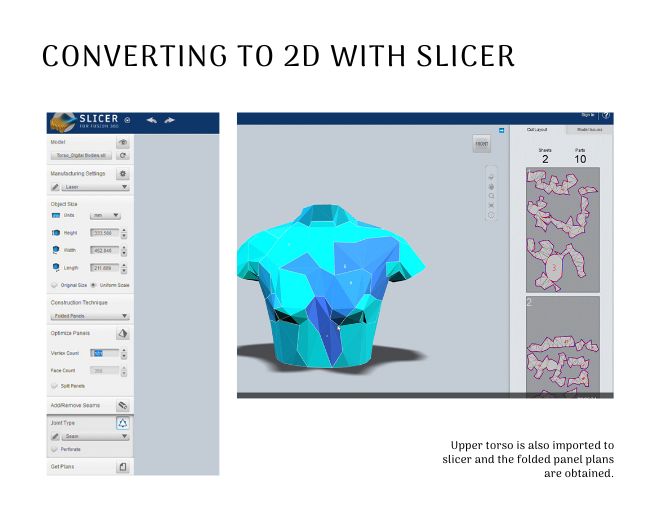
Once the mannequin is imported to Slicer for Fusion 360, you can choose the construction technique for assembling it. There are several options available, such as Stacked Slices (which results in a compact mannequin using a lot of material), Interlocked Slices (which creates a waffle straight structure), Curve (which generates a waffle curved structure), Radial Slices (which produces a waffle radial structure), Folded Panels (which results in a 3D puzzle with no structure inside), and 3D Slices (which creates a 3D print object). I personally opted for the Folded Panels technique, as it would provide me with a box-like structure.
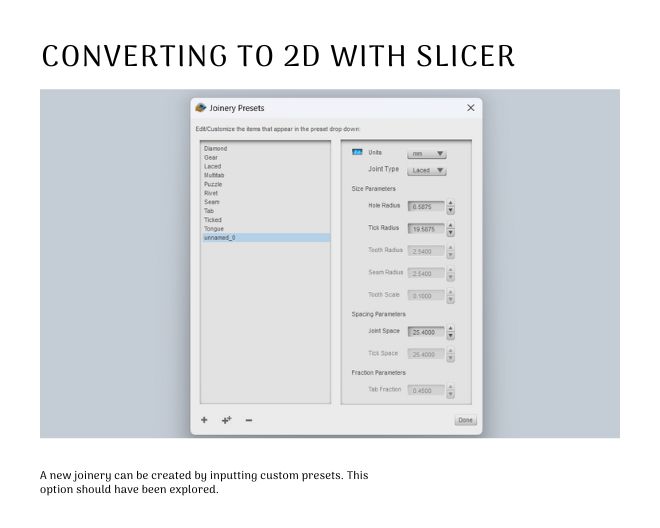
In the Optimize Panels section, enter a Vertex Count of 200 or more. Your body mannequin will likely have red and blue parts. Select the Joint Type for your folded panels body mannequin; in my case, I chose the Tongue joint. Then, utilize the Add/Remove Seams feature to remove the red parts and ensure that the folded panel construction is feasible. Finally, save your file in DXF format in the Get Plans section so that it can be opened in Rhino.
Mistakes made:
I made a huge mistake here which I realize now. While selecting the Joint Type, I shouldn’t have chosen tongue. Instead I should have clicked on the pencil, added a custom joint type by pressing the + button underneath. This way I could have still had my own type of Joint with custom sized holes. This would have saved me a lot of time and effort in assembling and also I could avoid a whole lot of editing I did on the plan to remove all the tiny letters which were engraved.
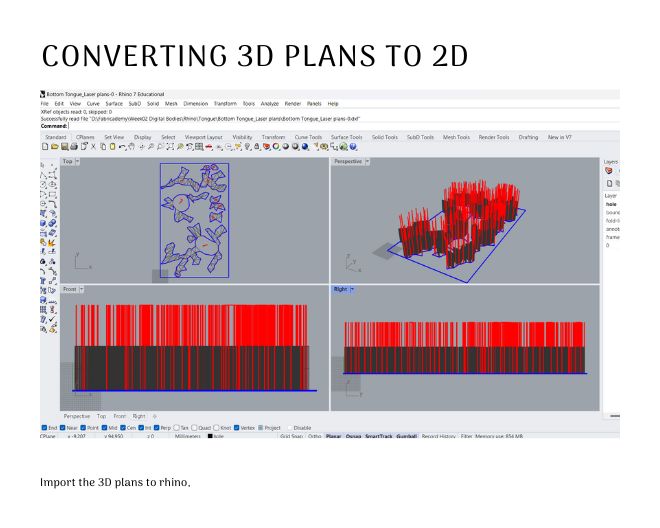
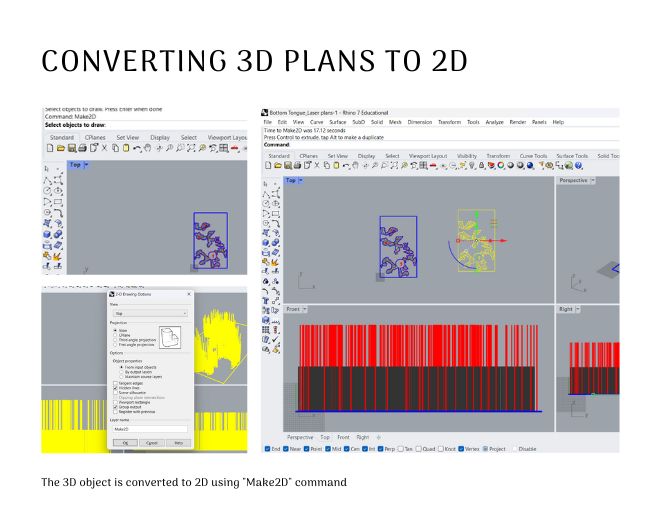
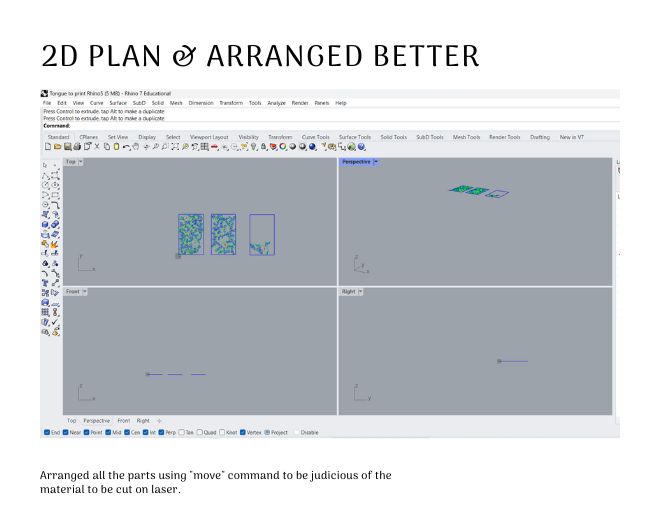
Step 4: Rhinoceros- Make 2D & Move
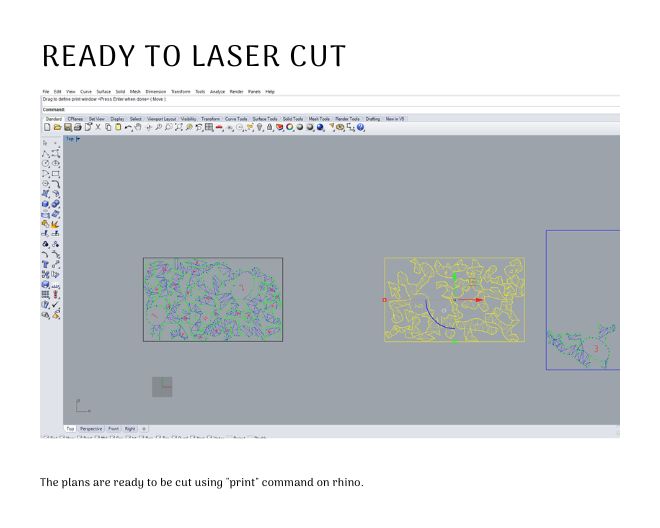
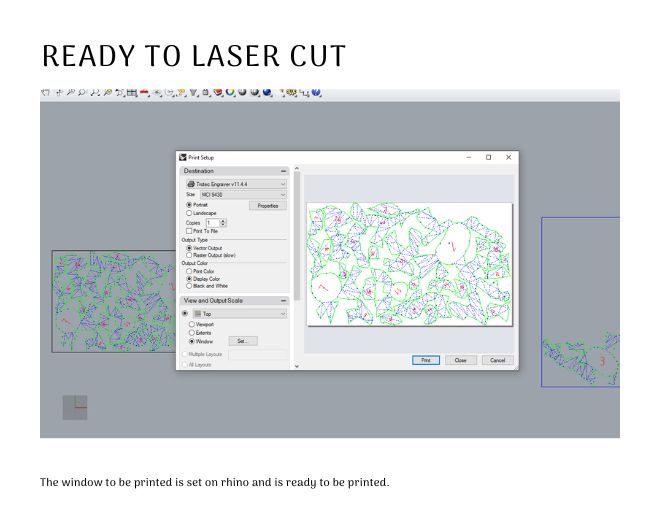
Open the DXF. file in Rhino. You can see 3d colors layers, convert each color layers (one engrave, one cut) in 2d with the Make2D command. Then, re-organize the pieces in the sheets for optimize the space using Move command and use the less material as possible. Save your file for the laser cut your are using, here in 3dm. for the laser Trotec.
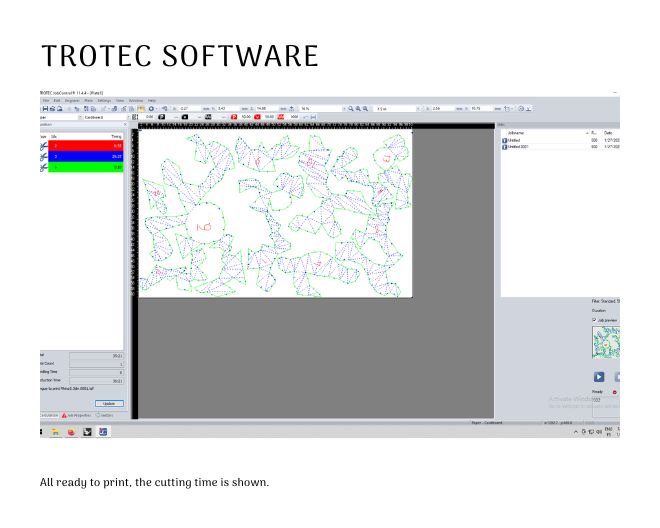
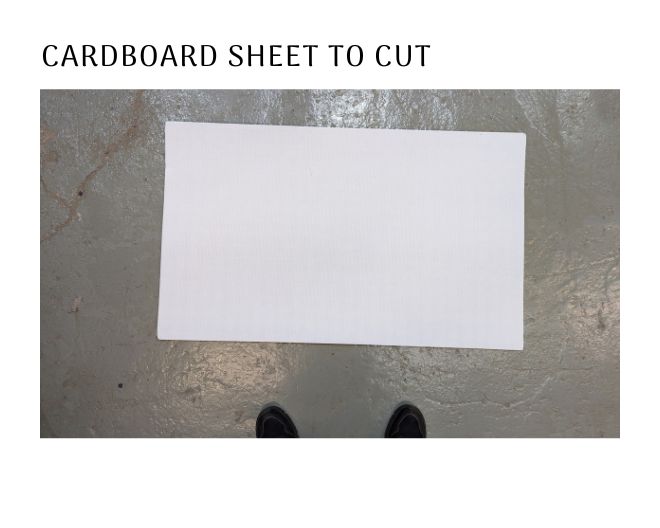
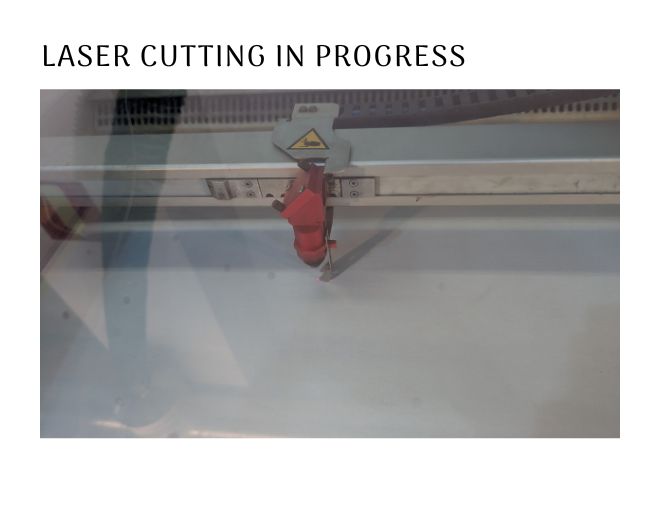
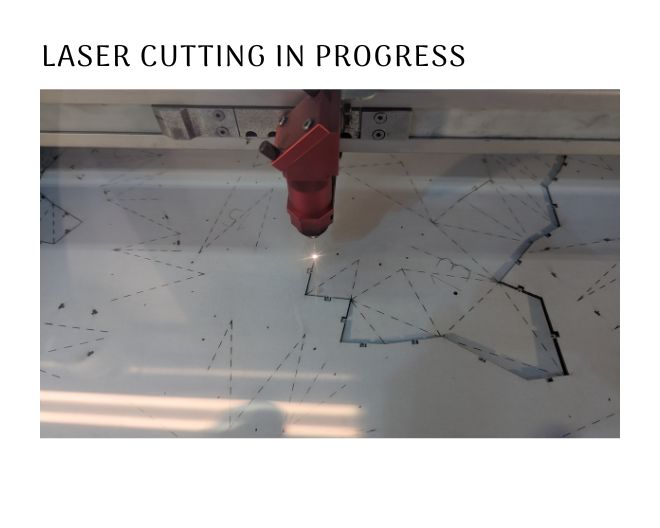
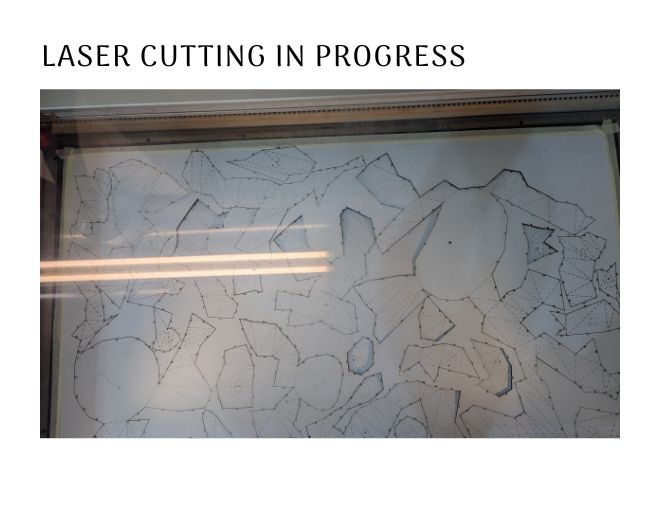
Step 5: Laser Cutting
At the lab we use white cardboard sheets for cutting the mannequin. I used 2 sheets for the bottom part and 2 for the top part. The size of the sheets are: 60X 90 cm. Thickness of the sheet was 2mm.

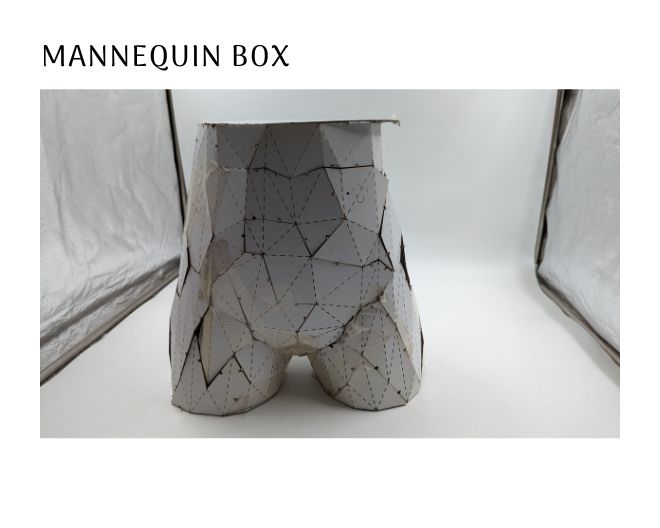
Step 6: Assembling
Assembling was really hard and it took me 3 days to finish just the bottom part. None of the tongues would go into each other and i tried to sew it but the cardboard split apart. Finally I used tape on the other side to fix the parts. If I had done custom Joint Type all of this could have been avoided.
Files
File of 3D scanning can be downloaded from here
Files for mannequin can be downloaded from here.
- Mesh body from Makehuman
- Edited body from rhino
- Plans from Slicer for Fusion 360
- 2D plans ready to laser cut