9. Textile as scaffold
Learning outcomes
- References and Concept development
- Design: Sketch, 3D modeling skills, mould design
- Fabrication: Capable of executing from file to production workflow, from 3D modelling to 3D milling and composite making, laser cutting, crystal growing, concrete casting
- Documentation: Anyone can go through the process, understand it and reproduce it
- Final outcome: Various samples created using different techniques
- Originality - Aesthetics: Has the design been thought through and elaborated?
Student checklist
- Document the concept, sketches, references also to artistic and scientific publications
- Produce 2 techniques of textile scaffold choosing from the following: fabric formwork with casting, crystallization, wood-textiles composite, resin & bio resin-textiles composite, leather molding, other
- Document the process from CAD to CAM, the step-by-step instructions for CNC milling, mold making, vacuum forming and textile composites
- Upload your design and fabrication files, including the 3D model and CAM file
- Document at least 2 processes from design to prototyping, fabrication, materials used, document your achievements and unexpected outcomes
- Make a stop motion of your crystal growth or use 3D modeling software to simulate your design (extra credit)
Research
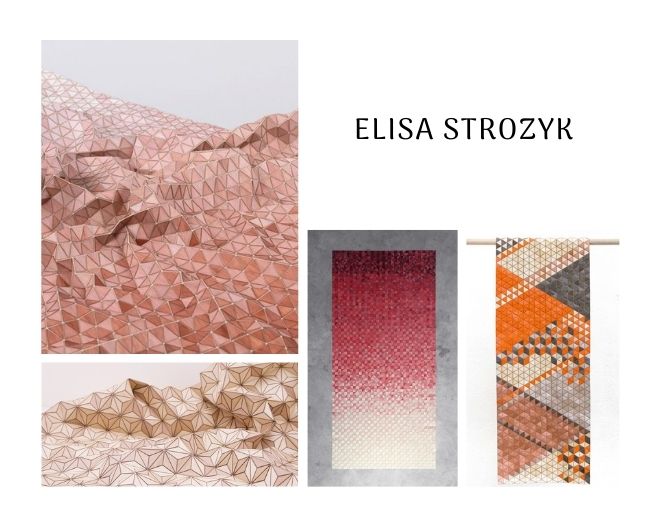
- Elisa Strozyk makes colourful wooden rugs
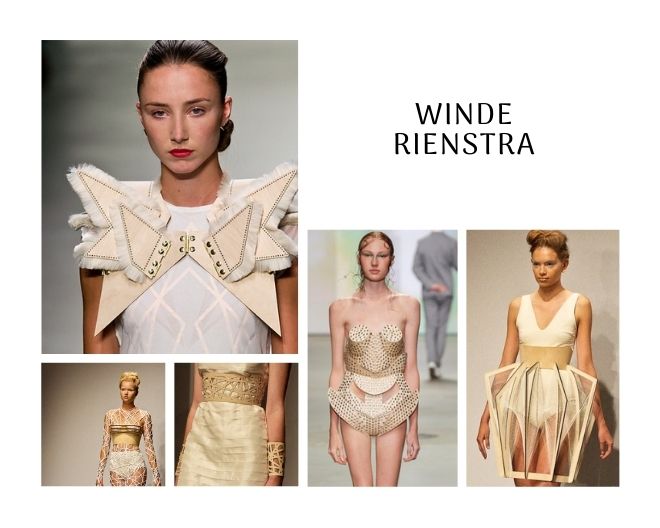
- Winde Reinstra is a fashion designer who mixes textile and plywood to make clothes
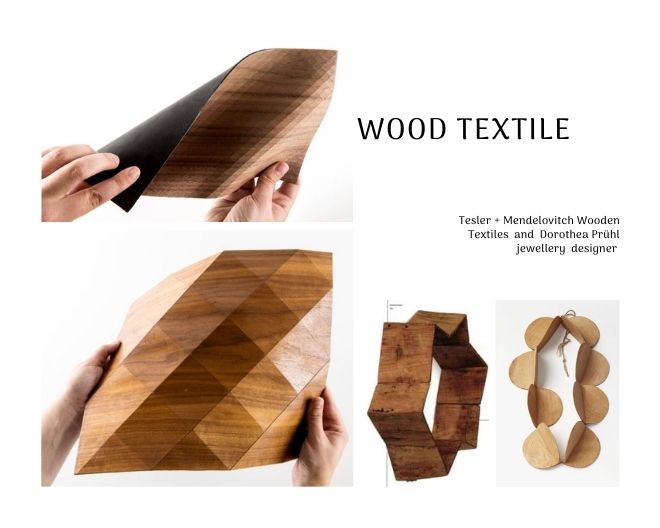
- Tesler + Mendelovitch Wooden Textiles
- Dorothea Prühl jewellery designer
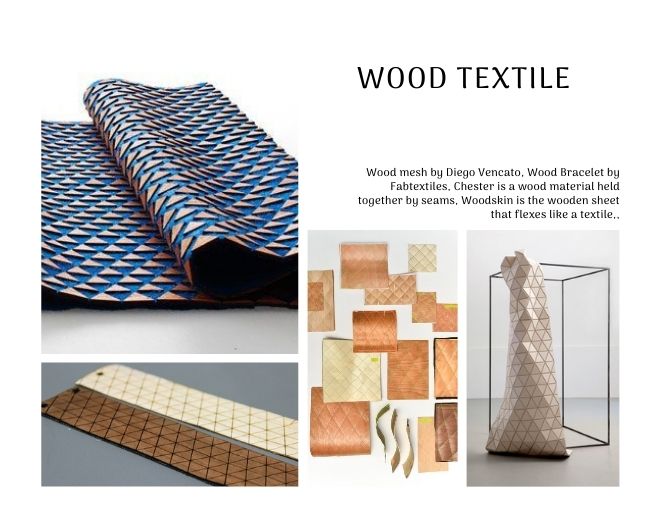
- Wood mesh by Diego Vencato
- Wood Bracelet by Fabtextiles
- Chester is a wood material held together by seams
- Woodskin is the wooden sheet that flexes like a textile
Wood-textile Composite
There are many ways in which this can be achieved. First is by cutting the wood pieces and then sticking the cut pieces on to the cloth material in a pattern. Second is by gluing the veneer on to the cloth piece and cutting the pattern on the wood portion only carefully adjusting the laser power. I decided to do the first method.
Materials
Step 1: Decide on a pattern and materials
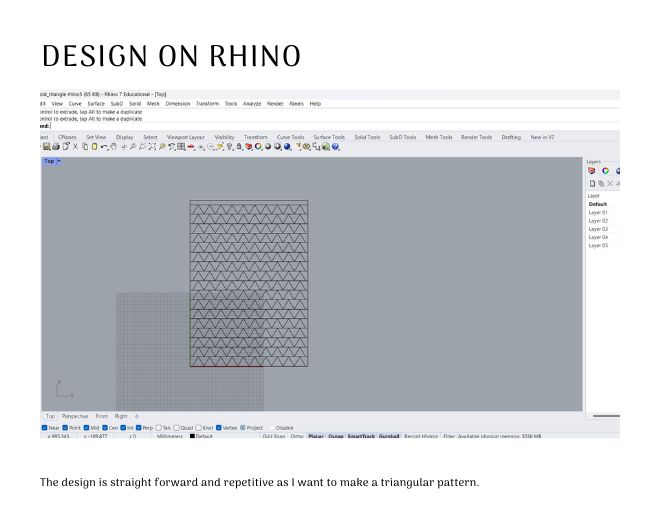
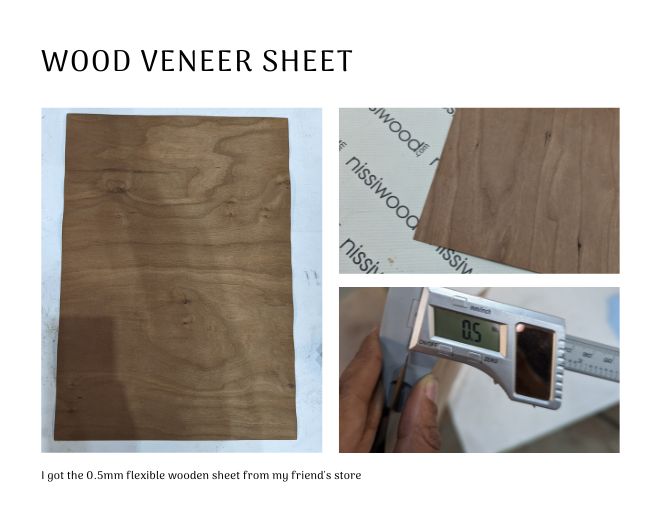
I decided to make a triangular repetitive pattern using flexible wooden veneer and cotton cloth. I got the flexible veneer of 0.5 mm thickness from Nissiwood, a company that my friend Elias owns.
Design
Step 2: Create the pattern on Rhino
It was the easiest pattern to make. First I made a triangle and repeated the triangle by using an Array command to y axis 10 times. Then I repeated this line of triangles by using the Array command and selecting the all the triangles in that line and to repeat in y axis 1 time, x axis 17 times and z axis 0 times. This fits the size of the wooden sheet which is 450mm length and 320 mm breadth.
To export the design save the file as .3dm but in rhino5 as the computer with the laser machine can only read upto Rhino5 and not the later versions.
Fabrication
Step 3: Prepare the Materials for laser cutting
I kept the wooden sheet on the laser bed and glued down all the sides using paper tape.
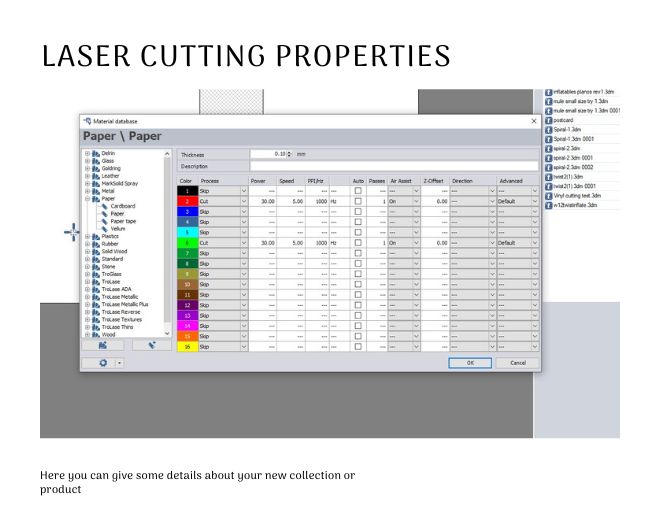
Step 4: Laser Cut
I used the settings of 0.35 mm cardboard laser cutting
Dyeing
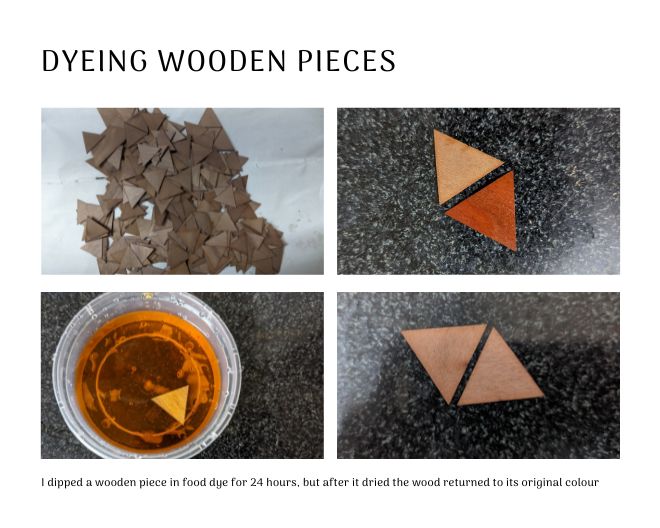
Step 5: Dye the wood
I used food dye to colour the wood. I tried 2 varieties of dyeing this. One by simply rubbing the colour on the wood using a cotton and second by dipping in the dye bath for a night. But both didn't work. After dipping the wood in food dye for 24 hours the colour changed but went backt o its original colour when it dried out. The temperature may affect the wood, so be very careful about the dye bath.
Glueing
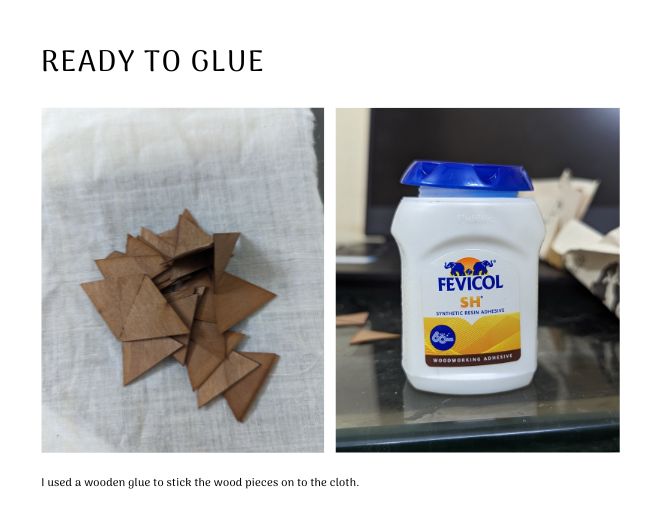
Step 6: Prepare the cloth material and glue
I used a cream handloom cloth material and used wood glue(Fevicol SH) to attach the pieces on the cloth material.
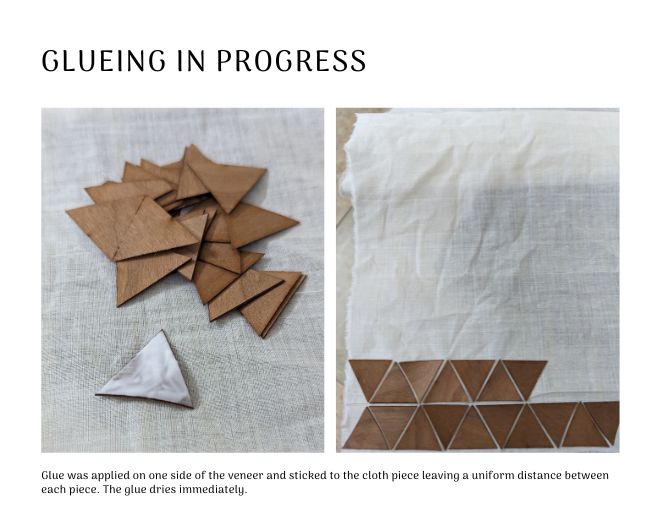
Step 7: Glue the wood on to the textile
Apply a thin and even layer of wood glue on one side of each wooden piece, then place them onto the fabric, ensuring that the fabric is flat. The glue sticks on to the wood pretty fast.
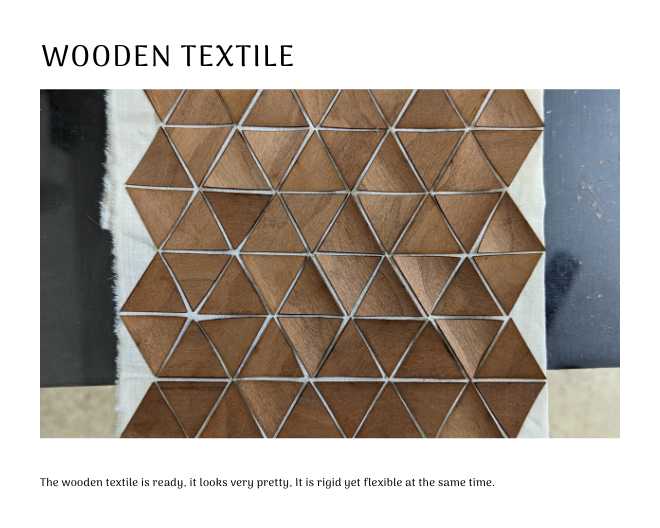
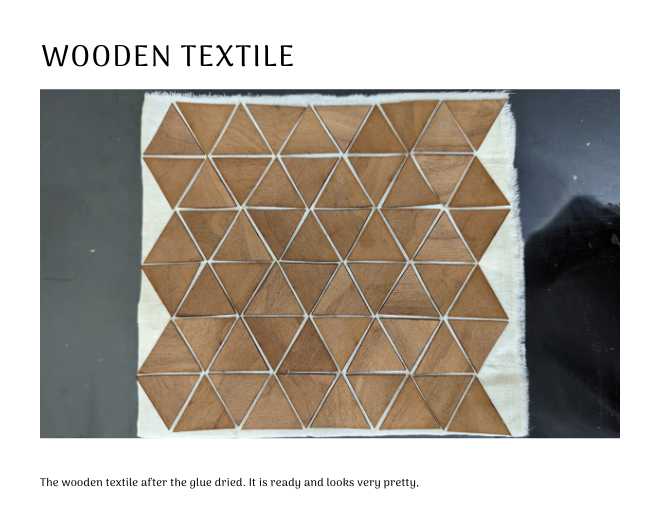
The textile cloth is very pretty. It offers rgidity and flexibility at the same time. I'm planning to make bags from this new material.
Crystallization
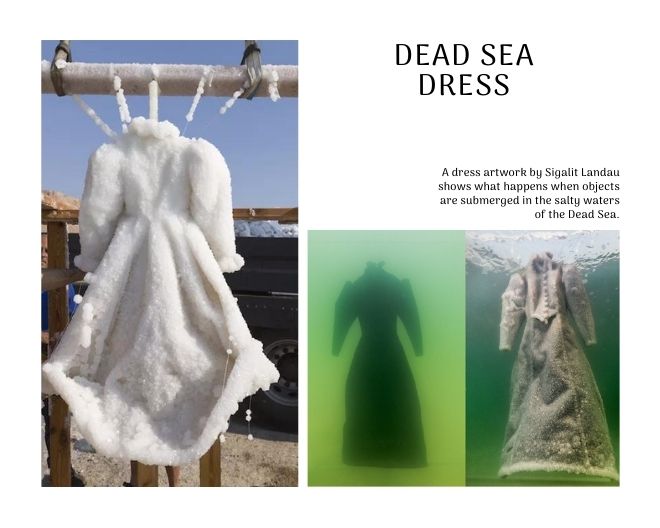
- Artist Sigalit Landau submerged a 1920s-style long, black dress in Israel's Dead Sea for two months in 2014. When the dress was lifted from the salty waters, it was a sparkling, crystalline sculpture formed from salt.
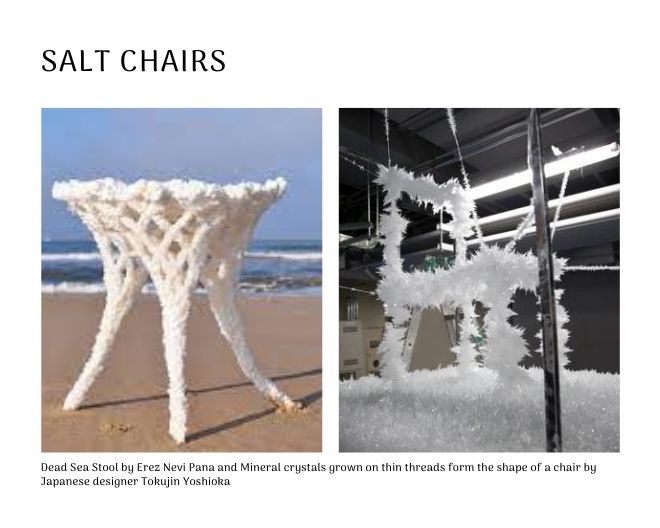
- Israeli designer Erez Nevi Pana used natural substances he found in the Israeli desert – branches, leaves, stones and textile scraps – and combined them to form a chair. This was then dipped in water from the Dead Sea for several months. When it emerged, it was coated with a "skin" of salt crystals.
- Mineral crystals were grown on thin threads that form the shape of a chair by Japanese designer Tokujin Yoshioka.
What is Borax
Borax is a compound that occurs naturally and is made up of boron, sodium, and oxygen. It is also called sodium borate or sodium tetraborate. The borax we purchase is the natural form of this element, which is ground into powder. Borax is commonly used as a laundry booster or as a cleaning agent in households.
Borax Crystallisation
Borax is a mineral in the form of soft crystals that can dissolve in liquids, especially water. In this experiment, we dissolve as much borax as possible in hot water, creating a "supersaturated solution". However, the solubility of Borax decreases as the water temperature drops. Therefore, as the supersaturated solution cools down, the water holds less Borax, causing it to fall out of the solution and form crystals on any object placed in the solution. This results in the formation of crystals at the bottom of the solution, leading to the creation of beautiful crystal formations.
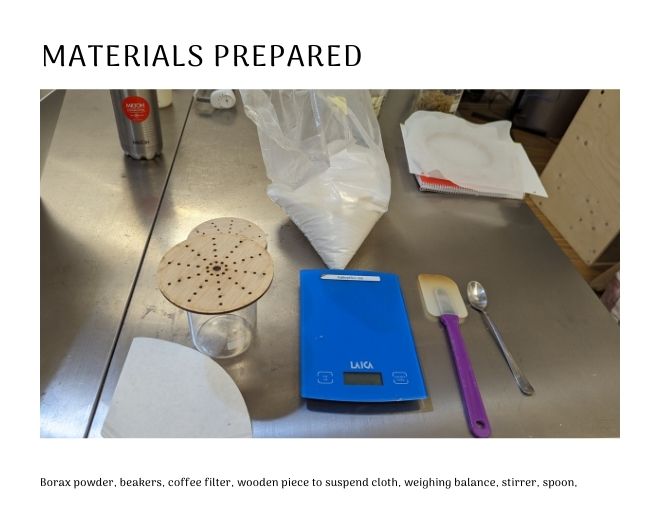
Ingredients
- Borax powder
- Water
- Cloth piece-a 10x10cm swatch
Tools
- Kettle
- A clean glass beaker or bowl big enough to fit the cloth piece without touching the sides or having to fold or crease it.
- A beaker to stir in the borax
- Spoon
- A filter paper
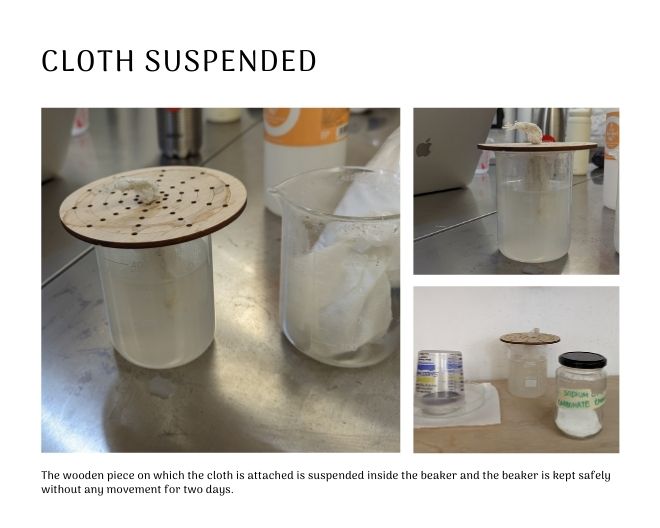
- Wooden piece to suspend the cloth piece into the beaker
Method
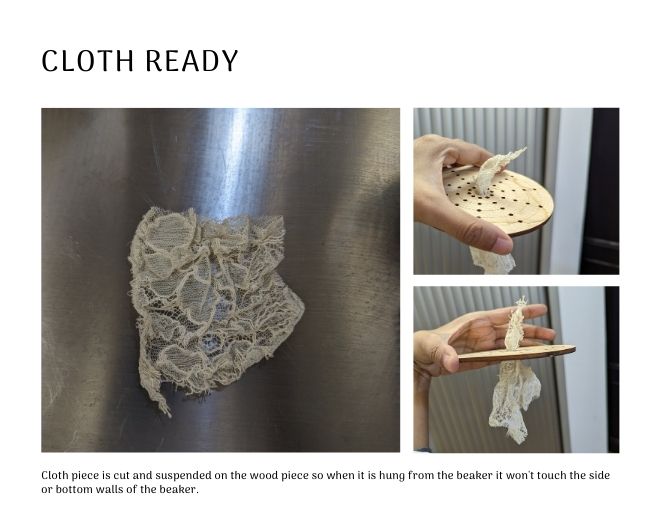
Step 1: Preparation:
- Boil water
- Attach the cloth piece on to the wooden piece so it can be easily suspended on to the beaker without touching the sides and walls of the beaker
- Clean the beaker
- Keep the filter paper on top of the beaker

Step 2: Dissolving the Borax
- Pour it into the beaker
- Spoon by spoon, add the Borax while stirring until no more alum dissolves and it sinks to the bottom, indicating the solution is saturated. I added 4 tablespoons into it.
- Pour the water through the filter paper into the clean beaker to remove the grains at the bottom.
- Suspend the cloth piece hung from the wood in the beaker, making sure that the cloth is immersed in the liquid but it doesn't touch any sides or the bottom walls of the beaker.

Step 3: Let the crystals grow
- Leave the beaker undisturbed to allow the crystals to grow, giving it at least 6-8 hours . I left it over night.

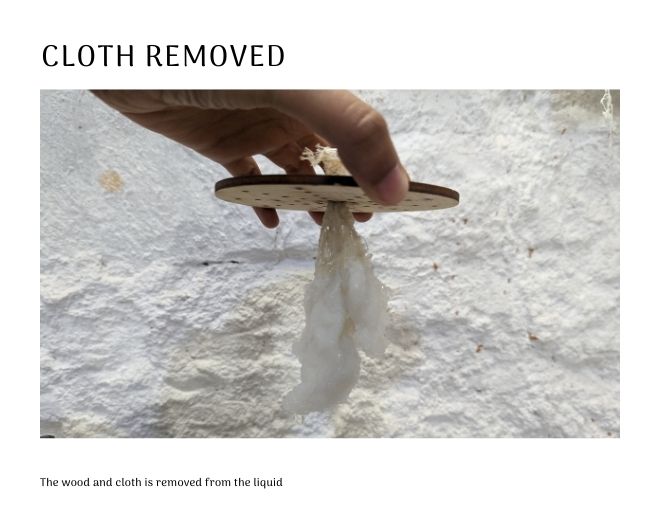
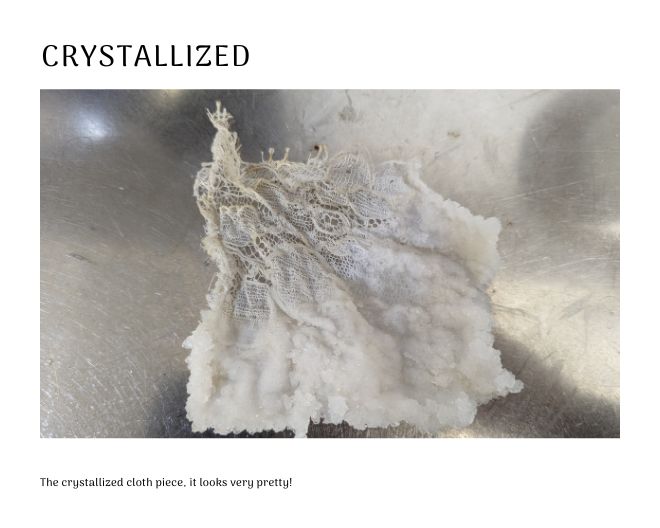
- Once the crystals are formed remove it from the beaker, remove the wooden piece and rinse the crystals under cold tap water. Let it dry. Beautiful crystal formation can be seen now on the cloth piece.
Files
The triangle cutting file can be downloaded from here