7. Computational Couture
Learning outcomes
- References and Concept development
- Design: sketch, 3D modeling skills, Parametric modeling skills
- Fabrication: Capable of executing from file to production workflow, from 3D modelling to 3D printing, parameters, materials
- Documentation: Anyone can go through the process, understand it and reproduce it
- Final outcome: Create a series of samples/swatches of 3D as fabric or on fabrics and a 3D parametric model.
- Originality - Aesthetics: Has the design been thought through and elaborated?
Student checklist
- Document the concept, sketches, references also to artistic and scientific publications on 3D printing and parametric modeling
- Design a parametric model using Grasshopper3D and upload the rhino file + grasshopper files
- Learn how to use a 3D printer and document the step-by-step process and settings
- Document the workflow for exporting your file and preparing the machine, Gcode and settings to be 3D printed
- Print your file and document the outcomes
- Upload your stl file
- Submit some of your swatches to the analog material library of your lab. Size 20cm x 20cm approx (extra credit)
References
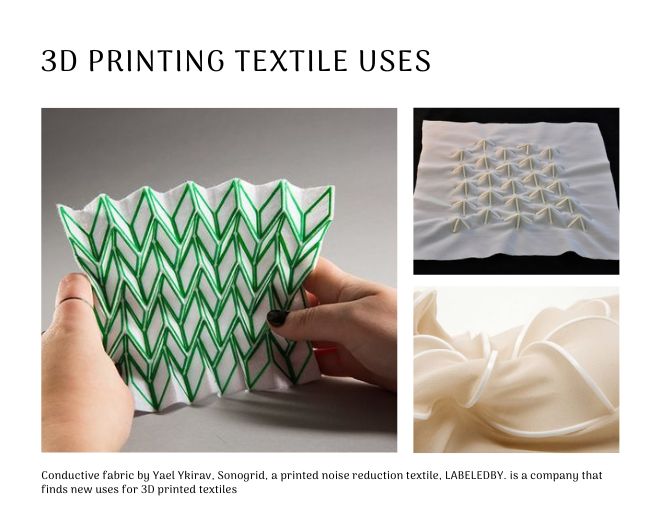
Conductive Origami: Yael akirav has developed ‘conductive origami’ that explores a new way of turning on light fixtures by using 3D printing of conductive filament, directly on textile. the rigid printing onto the textile allows the creation of complex elements and an array of different designs. when the printed material conducts electricity, the intersecting folds that stem from the art of origami present a new opportunity – turning on the light by contracting and stretching the structure.
Sonogrid: The 3D-imprinted, coarse-meshed fabric and its pyramid-like structure absorbs/breaks sound and generally improves the acoustics of the room. The solution combines the use of textiles for noise insulation with the benefits of rapid manufacturing. The stretched material is imprinted by fused filament fabrication and forms a three-dimensional structure when in a relaxed state. 3D-printing also allows structures to be produced in different sizes, alignments, and patterns. This allows the product to be tailored as much as possible to local requirements. This pattern can be adjusted to suit the spatial conditions on location because it is easy to trim and can also be applied to irregular surfaces. 3D-printing technology also allows the material to be printed on site in a flexible, customisable manner. Developed by KISD students and alumni
LABELEDBY. is a research and technological development studio, based in Eindhoven, the Netherlands, focusing on the possibilities of new techniques as 3D printing in combination with textile.
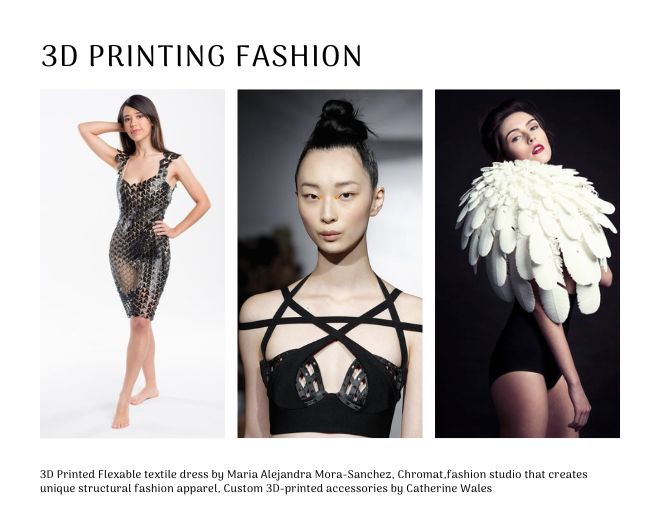
3D Printed Flexable textile dress: by Maria Alejandra Mora-Sanchez that won the Reddot design award-2017
Chromat- A fashion studio that creates unique structural fashion apparel like wearable exoskeletons and the structured undergarments.
3D-printed accessories by London fashion designer Catherine Wales can be ordered to fit any body shape and printed on demand.

Concept:
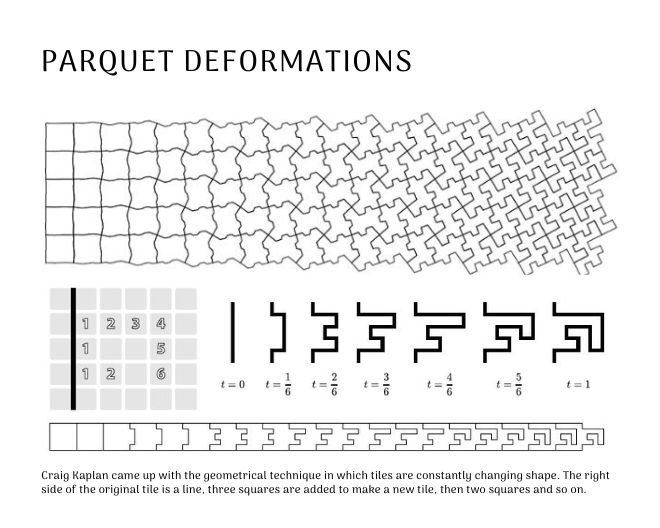
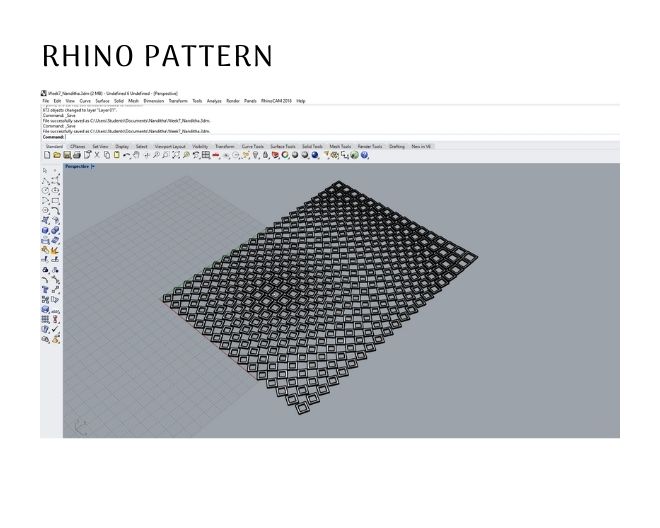
Parquet Deformation
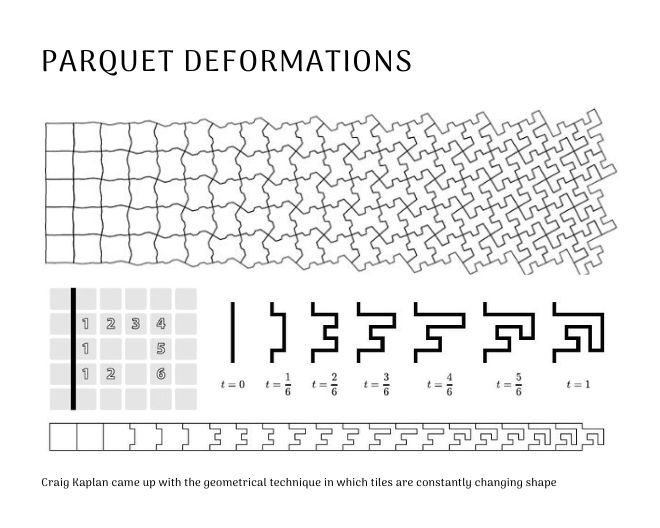
Parquet is a common type of flooring that uses rectangular wooden tiles, which are usually arranged in a herringbone or parallel style. In the 1960s an American architecture professor, William Huff, coined the term ‘parquet deformation’ to mean a regular pattern of tiles that transforms as you go from left to right whilst maintaining the regularity of the tiling. In recent years the parquet deformation has been rediscovered by Craig Kaplan, professor of computer science at the University of Waterloo, Canada, and a well-known mathematical artist.
The rules for parquet deformations are:
- the change happens in one dimension
- the tiling is always regular. (For more explanation see this post on tessellations and the mutt’s nuts.)
There are many strategies for making deformations. For example, the tile can evolve in a way that adds squares from a base grid: The right side of the original tile is a line, three squares are added to make a new tile, then two squares and so on.
Parakeet
I want to create geometrical patterns using parakeet and grasshopper. Parakeet is a free plugin based on rhino and grasshopper which contains a collection of tools that enables you to create a variety of geometrical and natural patterns. Components are centered around geometrical approach for design, Form-Finding and Pattern Generation.
Basic Parakeet Design Pattern
In order to create a pattern (a pattern is basically a network of curves) two key elements need to be determined. First of them is the base grid or what we call tiling in parakeet and second one is the generation method which you choose to implement on that grid. In terms of base period or tiling we can either choose grasshoppers native components like square grid or grinding light grid or we can use more complicated and more complex grid that parakeet provides. Secondly we need to determine that generation method. We can either choose from genotypes, star pattern methods 1 or 2. These 3 components can do further modification to the base grid.
These tutorials helped me in learning Parakeet design:
Parametric House offers a lot of paid videos. I was lucky to access those videos from Post graduate architecture students. The perks of studying in an Architecture school! However, a lot of the commands can be learned by trial and error only.
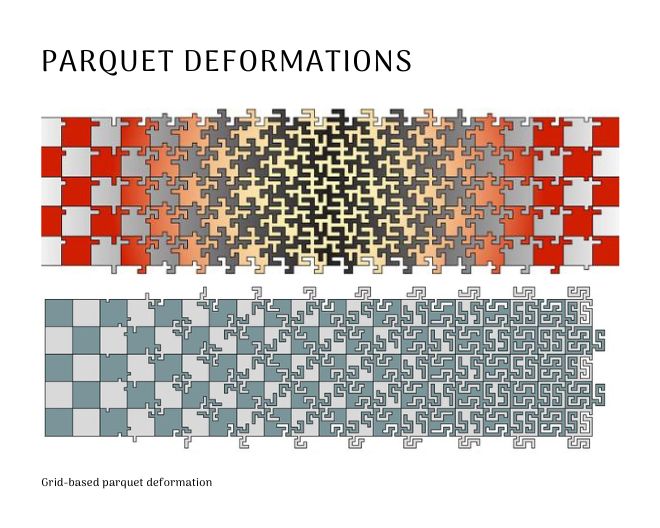
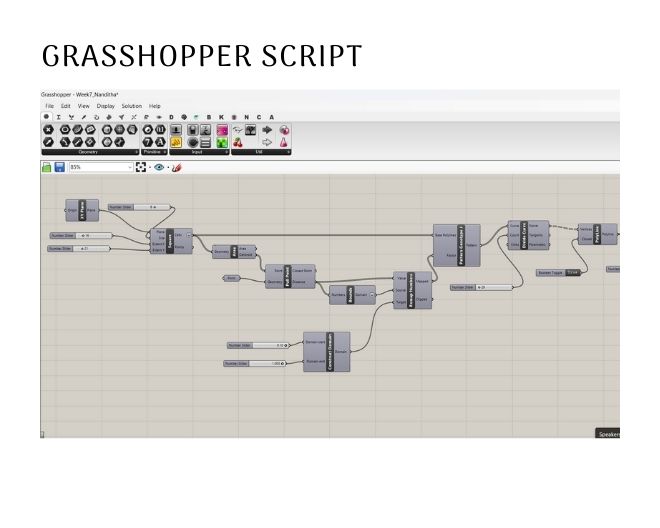
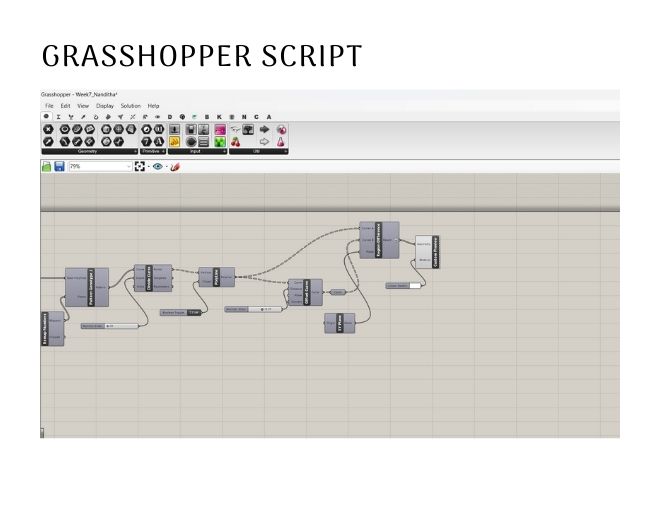
Parquet Deformation pattern using Parakeet
To make a Parquet Deformation pattern(Heterogeneous Tiling) one more step need to be added in parakeet. I used a simple gray square field and the number of cells in x and y direction were added and the plane was also added. Then I added a pattern genotype J and gave it a simple factor. In order to create a Deformation Parquet we have to provide a unique number for each cell. To get that we can get the centroid for each cell, then we can create an object like a point in Rhino and reference this point in grasshopper. The distance between the centroids and the point are obtained by using Pull Point. I have all the distance between these sets of points but of course these distances are quite large and will result an unpleasant pattern. I used a remap function to remap them between two values. for example 1 and 0 so now numbers are in the superevil range.
Slicing and 3D Printer
Prepare the file:
- Export the file in *stl format
- In the 3d printer check temperature, speed, thickness, size and finally
- If there is a problem in the geometry you can use 3D printer to verify your file
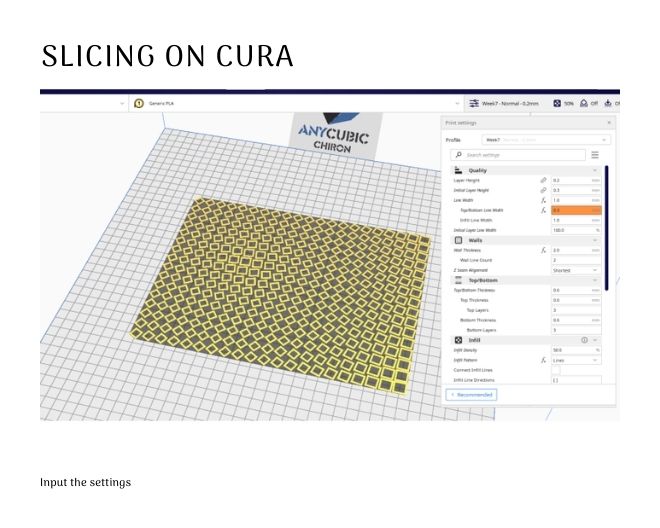
- Open it on Cura(Cura is an open source slicing application for 3D printers.)
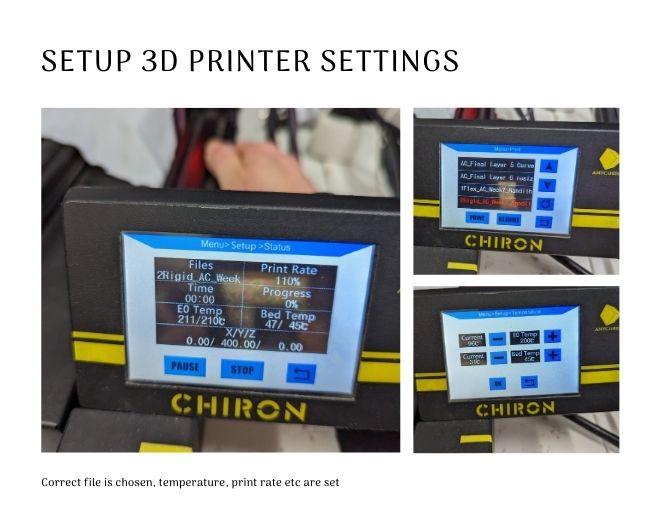
- Check temperature, speed, thickness, size of your textile and set the following settings: Layer Height: 0.2, Infill pattern: Lines, Infill density: 50%, Flow: 100%, Printing Temperature 210 degree Celcius, Enable Retraction:ON, Retraction distance:3 mm, Retraction Speed:40 mm/s, Print speed: 50 mm/s, Generate Support: OFF, Plate Adhesion: None, Nozzle size 1mm.
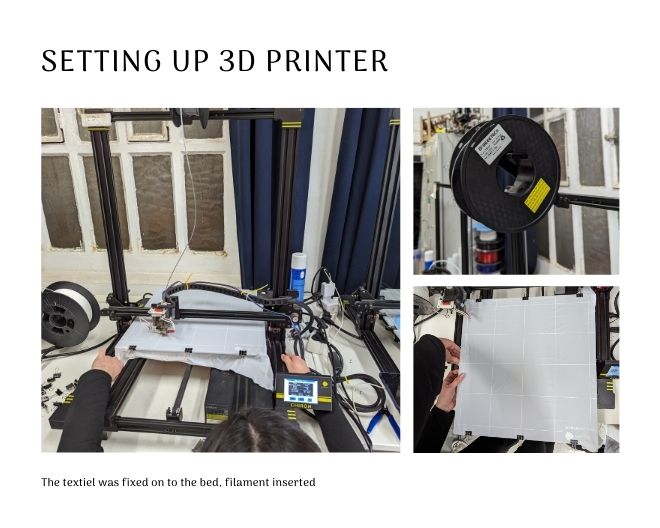
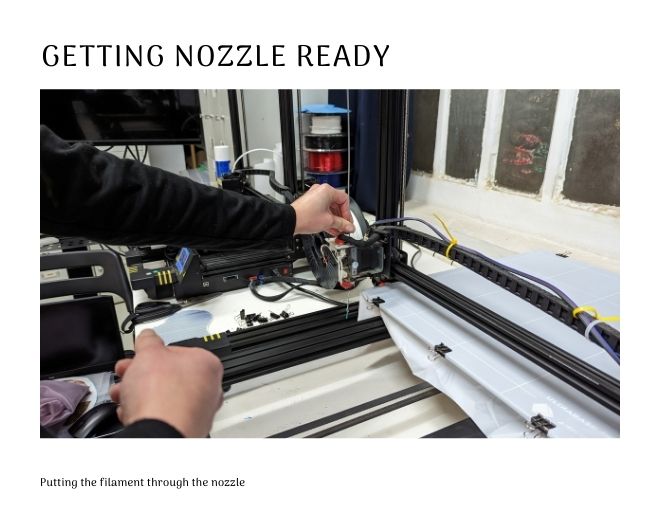
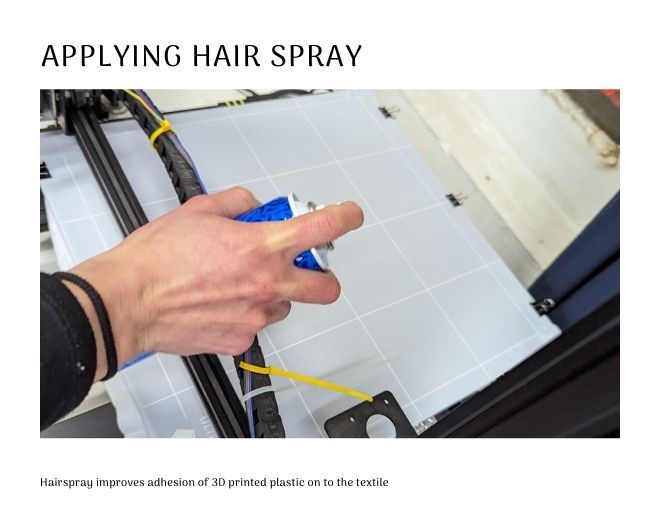
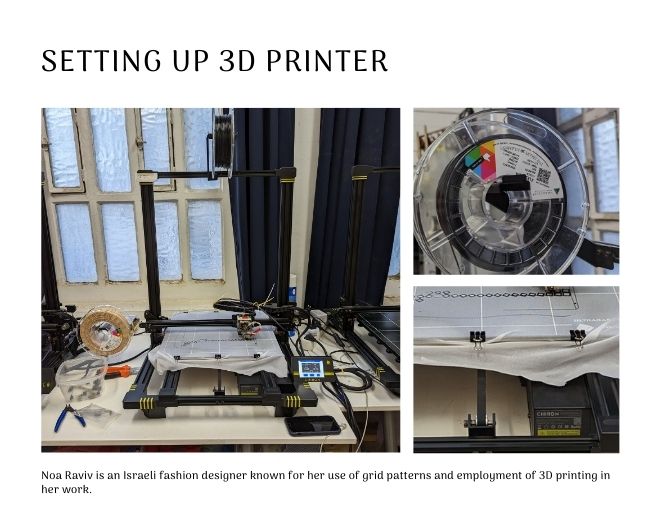
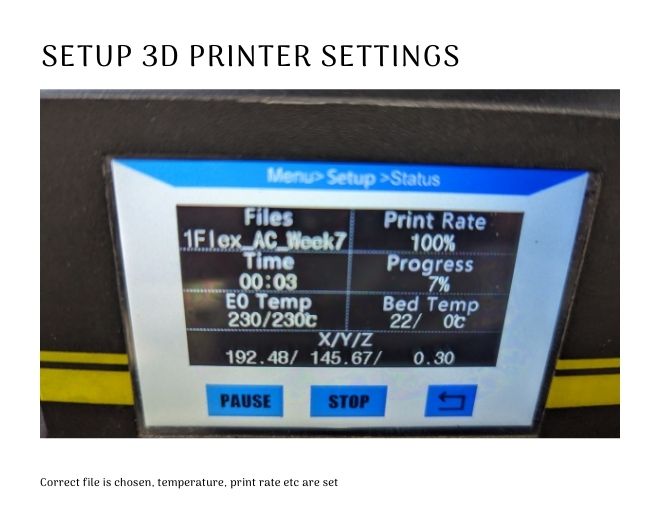
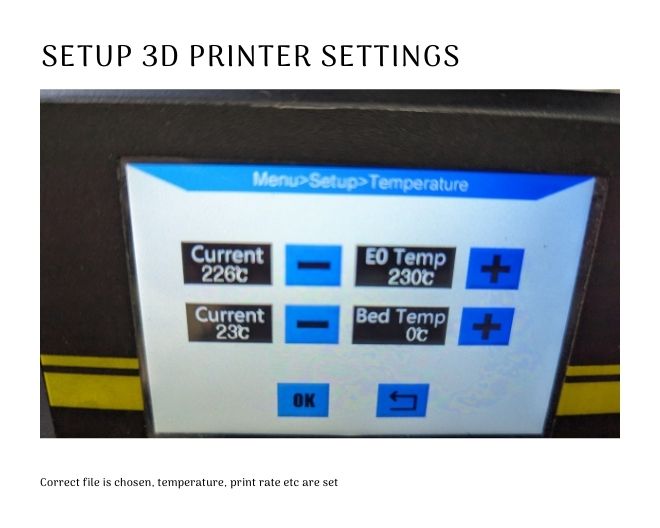
Set the machine:
In order to 3D print on fabric, begin by clipping the fabric onto the bed and ensuring that it is taut. Then calibrate the bed so that the nozzle is not too close to the bed so that the nozzle will not drag the cloth when moving or too far away, so that the plastic will be deposited in the correct way. The temperature of the nozzle should match the plastic manufacturer's recommendation. For this particular case, the recommended temperature range was 220°C to 235°C and we set it at 230°C. Finally, make sure that the nozzle is in the home position to prevent leaving tracks on the fabric.
3D Print Settings
Software used: Ultimaker Cura
3D Printer: Anycubic Chiron
Filament: PLA ( 1.75 mm )
Nozzle Size: 1.0 mm
Printing Time: 39mint 52 secs
Textile: Polyester
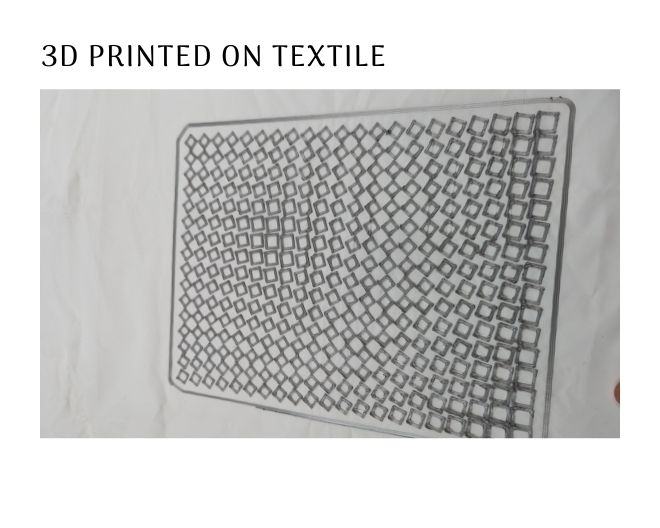
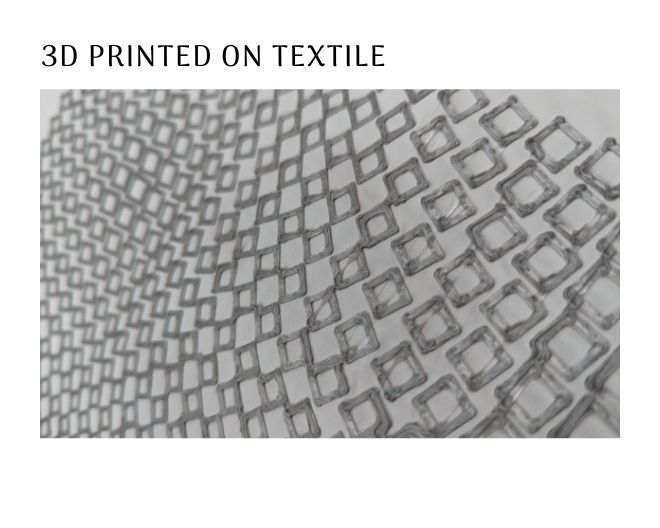
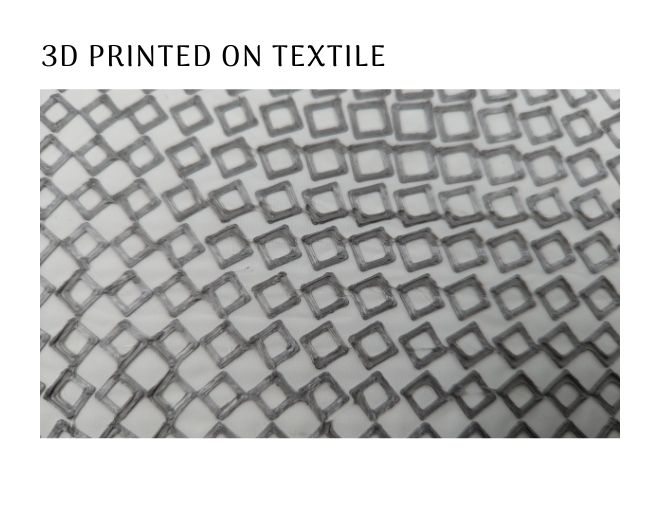
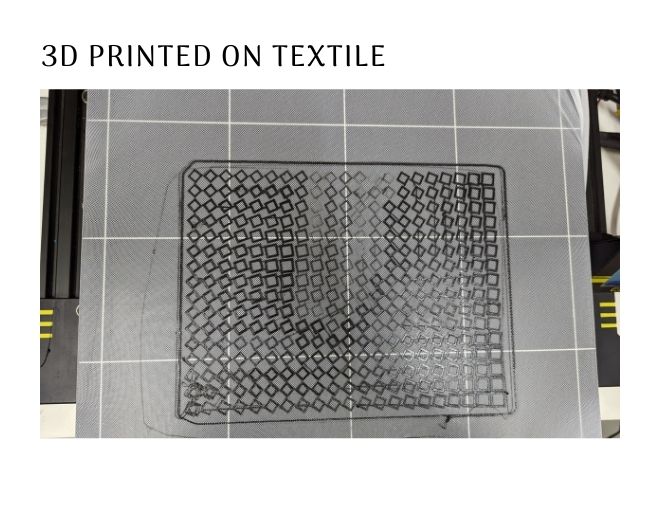
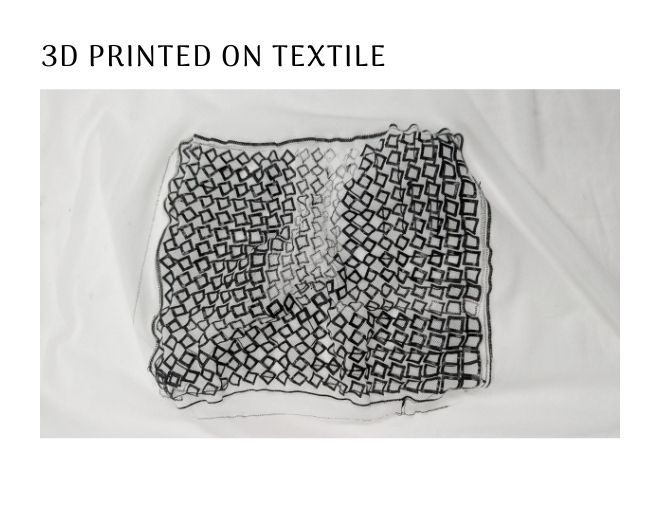
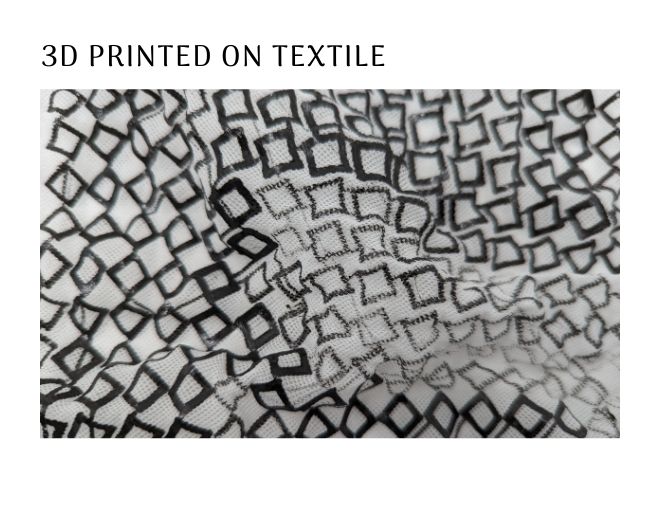
Once the printing was finished, I removed the clips and the final printed textile looks good.
3D Print Settings
Software used: Ultimaker Cura
3D Printer: Anycubic Chiron
Filament: Black colour Flex ( 1.75 mm )
Nozzle Size: 1.0 mm
Printing Time: 37mint 3 secs
Textile: Stretchable white net
Files
The grasshopper script, rhino file and cura files can be downloaded from here