4. Biochromes
Assignment
- Produce at least one natural dye and bacterial dye
- Natural dye - modifying it’s colour and mordanting it in different ways to dye at least 2 different categories of fibers
- Bacterial dye - Explored dyeing with bacteria of different fibers and/or bacteria
- Produce at least one botanical and bacterial ink:
- Botanical Ink - explore different materials, recipes and understand how to adjust them based on the ingredients
- Bacterial Ink - explore bacteria solvents and understand how to adjust or use the inks
- Document your recipes, the ingredients and process and if there have been changes, document your unexpected discoveries
- Name your materials, classify them by typology and display them in a systematic order of samples.
- EXTRA POINT Submit some of your swatches to the analog material library of your lab. (20cm *20cm aprox)
How will it be evaluated
- Master techniques for natural dyeing and bacterial dyeing
- Master techniques for making botanical and bacterial inks
- Documentation : Anyone can go through the process and use the recipes
- Final outcome: understand all the stages of color: a dye, an ink and a pigment
- Originality - Aesthetics : Has the design been thought through and elaborated
Research
Colours:
I want to understand colour in a cultural, historical and philosophical contexts as well altough we are learning about the chemistry and biology of colours.
Who Came Up With the Color Wheel?
Cecilia suggested I read these books to understand colour history:
- Secret life of colours by Kassia St Clair
- Interaction of color by Josef Albers
- Chromatography Or a Treatise on Colours and Pigments, and of Their Powers in Painting By George Field
Here is A brief History of colour:
Some links on Natural Dyeing:
Dyeing cotton fabrics is an ancient Indian art
Indian Dyes and Dying during 18th-19yth century
Natural Colorants: Historical, Processing and Sustainable Prospects
Fundamentals of Natural Dyes and Its Application on Textile Substrates
Five-Step DIY Guide To Natural Dyeing
The Art of Natural Dyeing + 6 Colors to Start With
Dyeing of Textiles with Natural Dyes
Recipes for Re-enchantment: Natural Dyes and Dyeing By aarti kawlra
Natural Dyes: Sources, Chemistry, Application and Sustainability Issues By Sujata Saxena and A. S. M. Raja
A future vision for natural dyeing in India, Uzramma
Status of natural dyes and dye-yielding plants in India By Ramamoorthy Siva
Books:
Natural Dyeing Process of India By B.C. Mohanty, K.V. Chandramouli and H.D. Naik
The colour of our lives - K.V. Chandramouli
The Art and Craft of Natural Dyeing by J.N. Liles
Natural dyeing facilities in India and what they mean to me
Adiv Pure Nature, Bombay
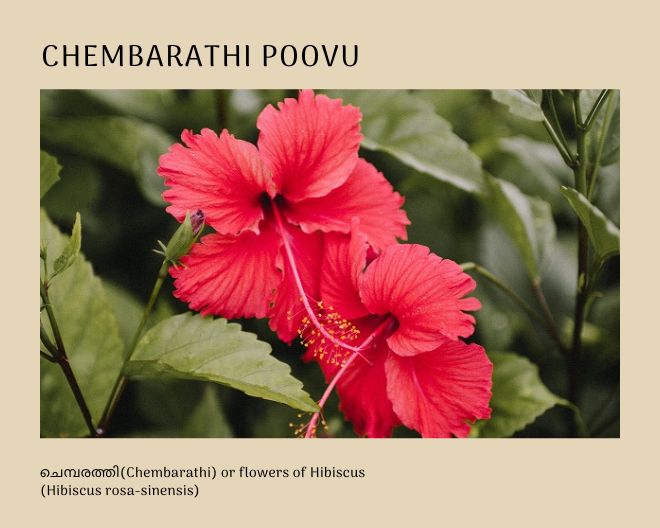
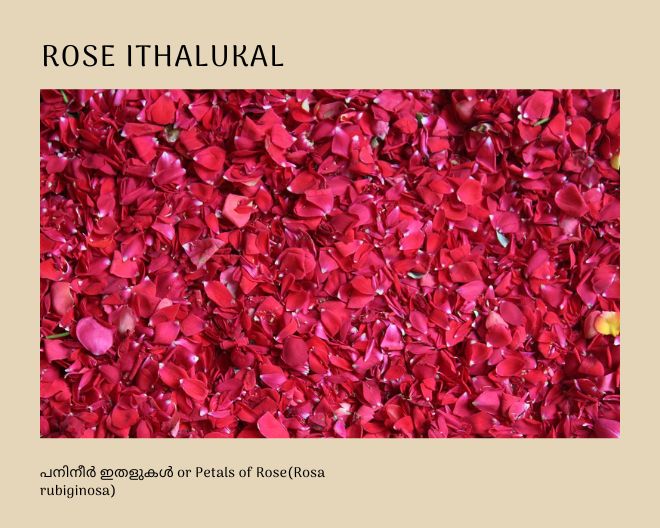
Founded by a great humanbeing Rupa Trivedi(proud to call her my friend and advisor, who always has a great suggestion regarding whatever problems I tend to bother her with) Adiv is a social venture which uses materials available around them some of which are coaxed from temple offerings like roses, marigolds and coconut, which would otherwise be swept away as waste. They don't work with yarn only with woven textiles.
Bio Dye, Sawantwadi
It was Roopa who introduced me to Bio Dye and Bosco Henriques, it's founder Director. Bio Dye has the most extensive range of dark, bright natural colours I have ever seen. Always waiting to find an opportunity to do a short experiment at Sawantwadi and take up on the invitation Bosco extended.
Aranya Naturals, Munnar
Although Sristi Trusts backed by Tata Tea Limited runs Aranya, it is synonymous with Victoria Vijayakumar, the woman who recruited and trained all the employees at Aranya. Their Shibori type dyeing is absolutely beautiful. They do yarn dyeing.
Gandhigram, Dindigul
Tharangini, Bengaluru
Padmini Govind runs Tharangini
KBCols Sciences
KB Cols, started by
Rangotri, Jaipur
Vikram Joshi, co-founder of Rangotri is a craft historian and is an exponent of natural dyes, who studied under the master of natural dyes, K.V Chandramouli at Kalakshetra in Tamilnadu in a sort of Gurukula system although Vikram confesses it was an Annan-Thampi(Elder-younger Brothers) relationship between them. Vikram does hand block printing using natural dyes although there are not many takers due to the high price associated with it.
Vikram kindly offered to teach me natural dyeing and I was hoping to spend a week but it totally slipped my mind that the week I chose to travel was Navarathri.
Farmer's share, Shornur
Ambrose Kooliyath founded Farmer's Share at Shornur, it is a collective that believes in a life in sync with nature. My friend Meera does natural dying at farmer's share. They use local materials, mostly available in the farm itself, the rest are purchased from Ayurveda stores. Both Meera and Ambrose Chetan guided me on where to purchase.
All of these are available in Ayurveda stores, popularly called as "Angadi Kada". These can be powdered at a nearby mill. The mill that I worked with requires a minimum of 1/2 kg material to powder.
The Art of Natural Dyeing
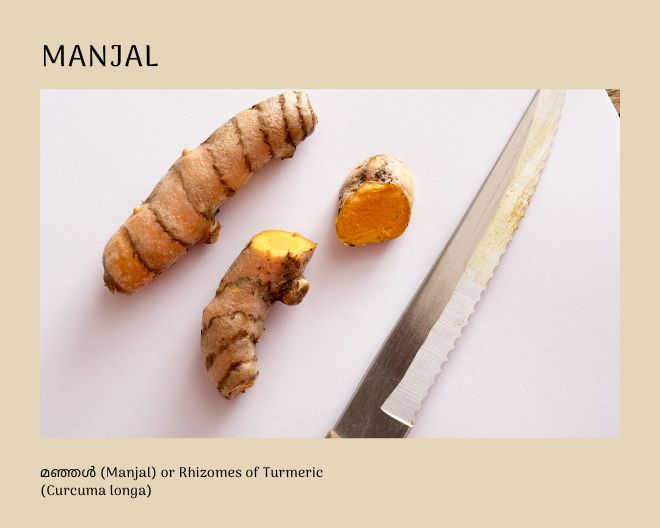
There are thousands of natural materials that make a broad range of colours in fabric, from turmeric and henna to indigo and mulberry. Natural dyeing is an ancient tradition that has been practised across the world with slight variations in techniques, textiles and dyeing materials. It's likely that natural dyeing was informed by cooking, as the process of extracting pigment is exactly like boiling food.
Language of Natural Dyeing
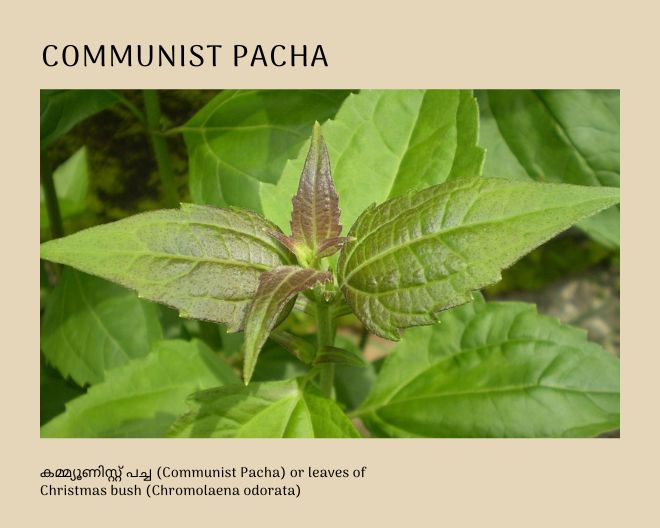
While reading about natural dyeing and trying to buy the materials given by my european teachers, I quickly realised there is a gap somewhere. That I'm unable to find the materials they are suggesting while I know it should be much more easier for me to find natural dyeing materials in India than anywhere else. I called up my friends who are from North India whose wise answers were a little more approachable though not clear for me yet. This is the same case for weaving as well. While working with the weavers of Kerala, I had to learn the language they used. As I had no prior knowledge of weaving, it was easy. They have local names for every colour like Rajeshwari Pacha (Bluish green) or Rani for Pink etc which were for me as a learner wonderful to study.
I had planned to learn natural dyeing at one of the facilities of my friends(Mostly at Vikram's in Jaipur as we are working on couple of other projects) but I forgot that it was the Navarathri week. All of India is closed and not a good week to travel for work. So I had to buy the materials locally and do on my own.
To understand the local materials and the stores from where I can buy the materials, I called up an aquiantance of mine, a model and a small time actress in Kochi who showcased a set of natural dyed clothes at a flea market here, 3-4 years ago. When I asked her where to purchase these materials she said she imports everything from Western Countries and that all the materials are very expensive and she cannot share any of her materials. Either she doesn't want to impart the knowledge of natural dyeing or more likely she has absolutely no knowledge of the chemistry behind natural dyeing, the availability of materials around her and might be depending on some foreign dyeing kits.
Then dear friend Manju Vasudevan who runs ForestPost reminded me that Meera does natural dyeing with Ambrose Chetan at Farmer's share. Meera spent years in forest and did her Phd on Hornbills, hence known among friends as Forest Meera. Both Manju and Meera were introduced to me by Professor Kochuthresia Thomas, who retired from Botany Department of All Saints College, Thiruvananthapuram. She later co-founded Little Flower Farms, a space where we all love to go.
Abrose Chetan and childhood memories to the rescue
Everything actually started making sense to me when I spoke to Ambrose Chetan who told me in malayalam, the names of the materials he uses. All the materials he uses are very familiar to me and I could somehow connect with the chemistry I read and the names/processes that Cecilia was trying hard to make me understand. Even Meera was using the language of a professional which I'm not. Ambrose Chetan also gave me the confidence to try out using the materials available around me rather than buying everything from the shop. I realised it would be more fun if I can find a new colour or material on my own. Ambrose Chettan's explanations were quite simple and relatable. He told me to find out the plants/inorganic substances around me that makes കറ(Kara) or stain on clothes, then find out what can be added to make which colour using trial and error.
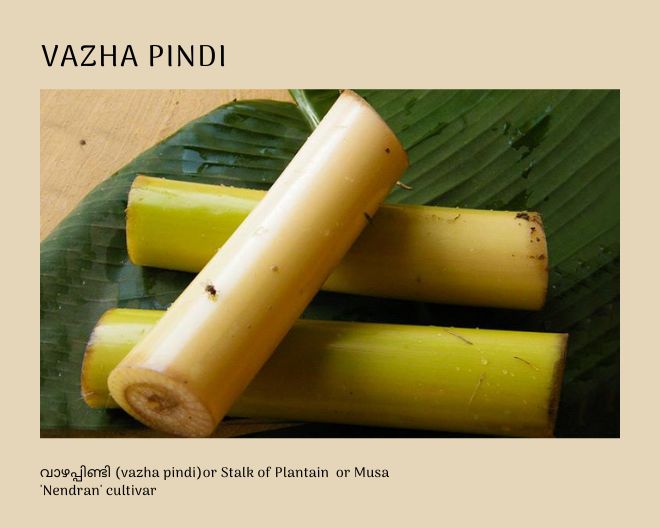
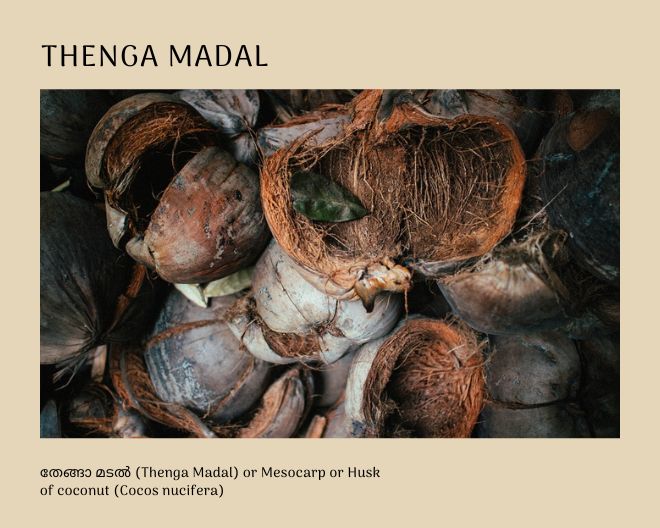
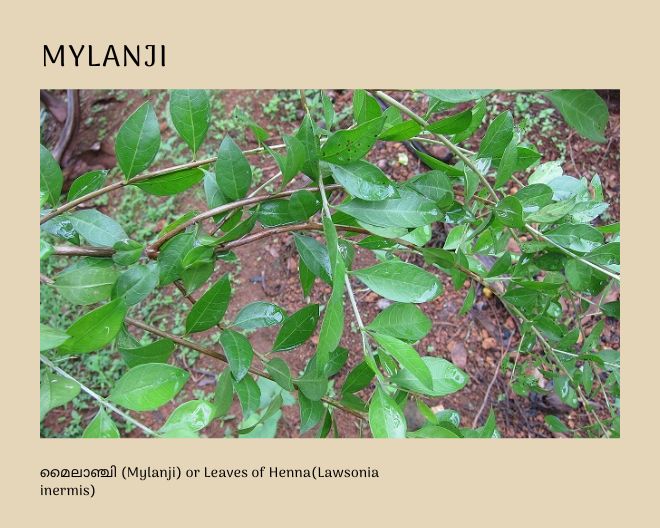
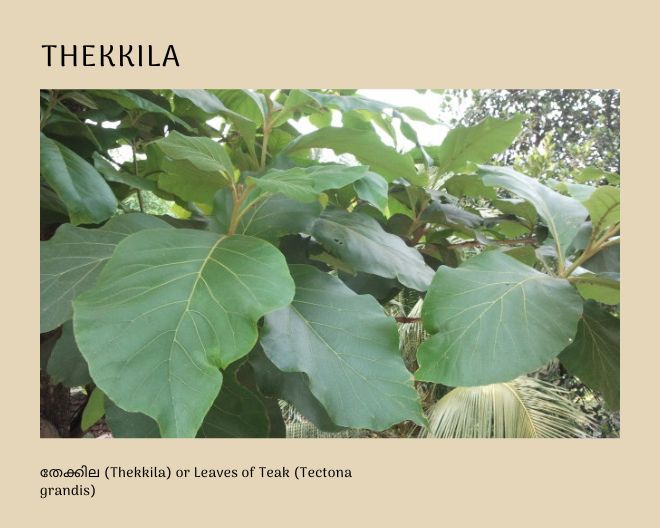
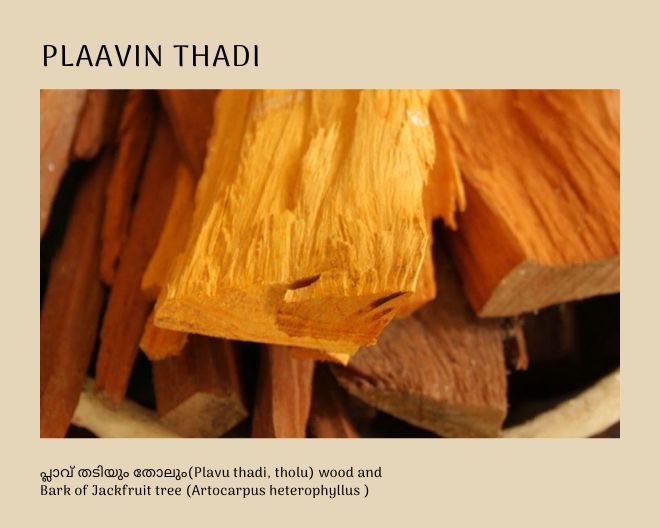
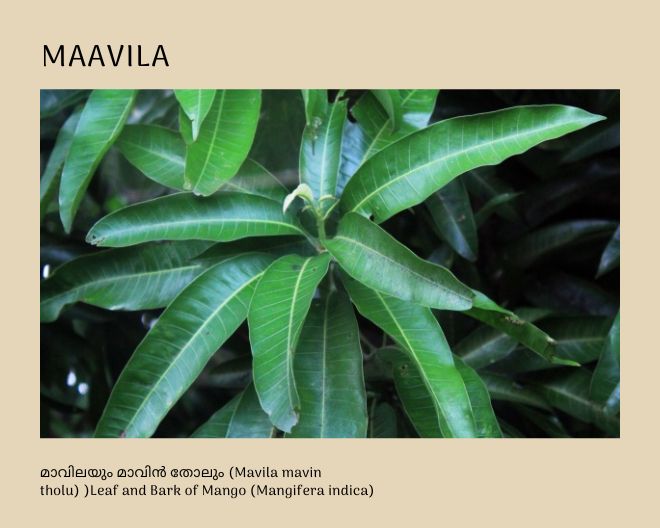
I started connecting this with my childhood memories of playing around with leaves, seeds etc and how it used to create stains on my clothes, making my mom go crazy. Lipstick tree seeds or sindoorakkaya, mango leaves, karingali etc were the usual villains. We were often told to stay away from cocoa and mango while wearing the white school uniform, so these will also be added to my list. Last minute frenzy to cut banana leaves for making pothichor (Lunch meals packaged in banana leaves) used to end up in many panicked situations before school as Banana stalk has a stain which can't be washed away from clothes. Jackfruit makes a lot of stain but it is more of lacquer but I hate the smell of jackfruit maybe I shall explore it later. I would also like to try out Kanikkonna, the state tree and cocoa. Vattayila or leaves of Macaranga peltata plant and Thekkila or leaves of Teak tree were generally used as packaging material for food items and I remember that Thekkila used to make red colour on hands, a different kind of henna and Vatta has a lacquer.
Language of Science and the need to use vernacular language to explain science
This one hour talk and discussion on Telling Colour by Smell, Memory and Song: The Innovation of Traditional Craft in South India by Annapurna Mamidipudi is really great. It seems her journey is very similar to mine, rather I have been following her footsteps although I didn't know I was.
Natural Dyeing:
- Selection of fibers
- Selection of natural dye
- Scouring the fabric
- Mordanting & dyeing the fabric
- Pigment making
1. Selection of fibers
2. Selection of natural dye
Materials commonly available in Kerala for natural dyeing

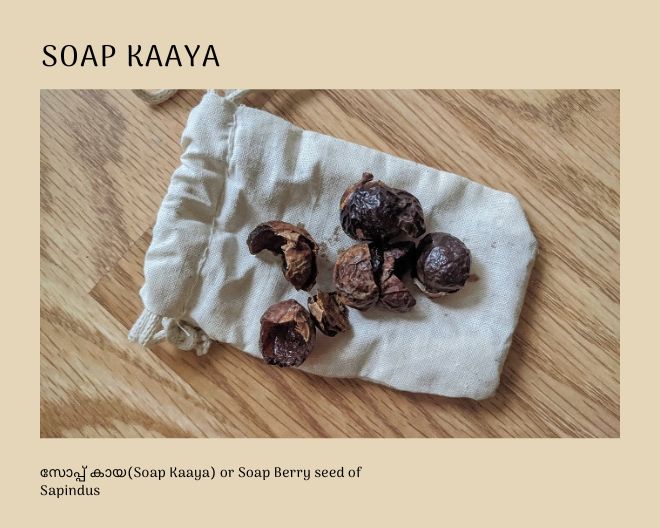
- കരിങ്ങാലി(Karingali) or Khair or Black Catechu (Senegalia catechu)
- അഞ്ജനകല്ല്(Anjanakallu) or Antimoney Sulphide
- കയ്യന്യം(കയ്യോന്നി) Kayyonni or False Daisy (Eclipta Prostrata)
- നീല അമരി(Neela Amari ) or Indigo (Indigofera tinctoria)
- മഞ്ചട്ടി(Manchatti) or മഞ്ജിഷ്ട(Manjishta) or Indian Madder (Rubia Cordifolia)
- ചപ്പണം(Chappannam)or Indian redwood (Biancaea sappan)
- സബോള തോൽ or Peels of Onion(Allium cepa)
- കരിവേലം(Karivelam) or Babool or Gum Arabic (Acacia Nilotika )
- ബന്ദി അഥവാ ചെണ്ടുമല്ലി(Bandi aka Chendu malli) or Mexican Marigold (Tagetes Erecta)
- മുശുക്കൊട്ട അഥവാ മൾബറി (Musukkotta aka Mulberry) or Red Bulberry(Morus Rubra)
- ഞാവലിൻറ്റെ കൂമ്പില njavalinte koombila or new leaves of Malabar Plum or Java Plum (Syzygium cumini)
- വിനാഗിരി (Vinagiri) or Vinegar
3. Scouring the fabric
Scour is nothing but the peocess of removing soluble and insoluble impurities found in textiles.
Cow Dung as a bleach/scouring agent
- Bleaching With Cow Dung - Mostly about Flax
- The art of using plant & vegetable based dues - Passion Lillie
- Kalamkari Dye - Unnati Silks
- Bleaching with Cowdung- White Wolf Fian
Tools and ingredients:
- Soda Ash: the recommended amount of soda ash is 2% WOF(Weight Of Fabric).
- Fabric materials to dye(plants, insects or minerals you will use to dye)
- Soda ash
- A container to dissolve the soda ash
- A large stainless steel dye pot, large enough to hold the fibers with plenty of room to move around
- Water
- Heat source
Steps:
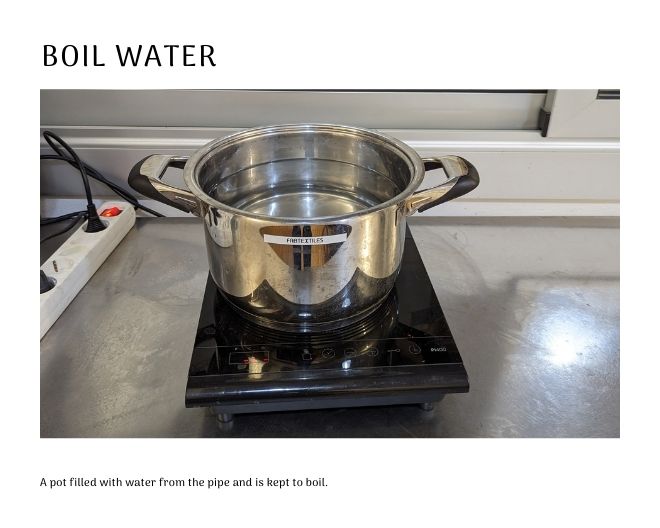
Step 1: Fill the pot with enough water from the pipe (room temperature) so as the fibers move easily and place it on a heating source.
Step 2: Weigh the fabrics
Step 3: Take the Soda, weigh 2% of the weight of fabric.
Step 4: Wet the soda first with normal water, add boiling water to dissolve. Add the dissolved soda ash gradually to the dye pot. Stir well.
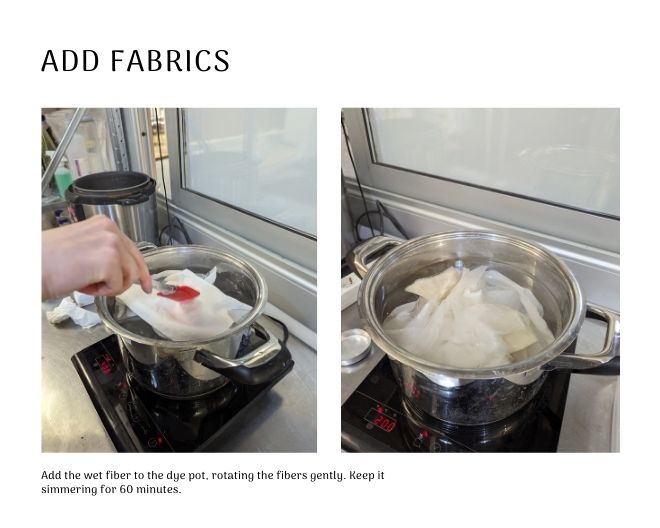
Step 5: Add the wet fiber to the dye pot, rotating the fibers gently.
Step 6: Keep it simmering for 60 minutes.
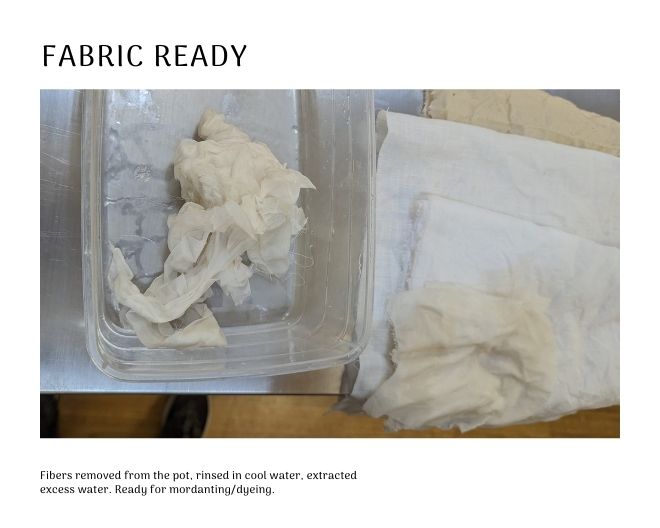
Step 7: Remove fibers from the dye pot (be careful as it is very hot), rinse in cool water, extract excess water and proceed to mordanting. If the fibers are particularly dirty, you may repeat the process.


4. Mordanting & dyeing the fabric
Mordant It is a substance used to “fix” natural dyes to a material. Mordants allow the dye to chemically bind to the fabric. Without a mordant, most natural dyes would simply wash out. You can add mordant to your fabric before you dye it or add it to your dye pot. Mordants such as copper and iron will also alter the color of your dye.
Commonly used Mordants are Feso4, Vinegar, Lemon juice
Note: Some plant materials are rich in tannins and therefore do not require a mordant.
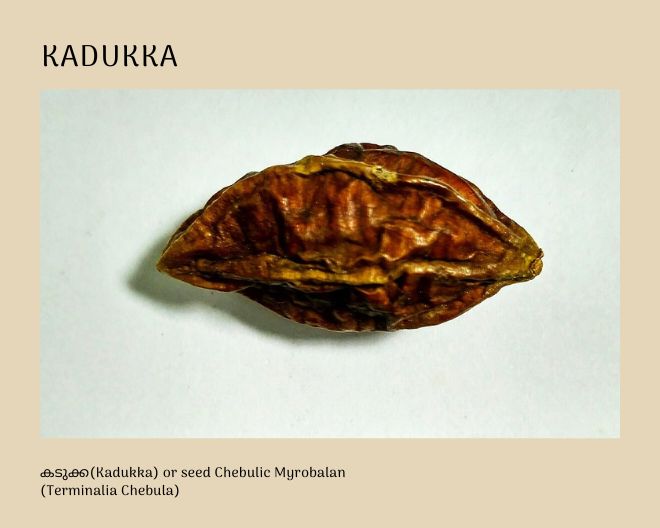
Plant Mordants found in Kerala are Thannikka and
Dyeing
Step 1: Gather Avocado skins and pits. I normally collect them over 2 weeks and place them in a bag and put them in the freezer to avoid them collecting mold. Collect enough to make up around the same weight as your fiber goods. For this project I recommend between (100-200g). Also, make sure to wash off the green remnants of avocado well. I recommend using the hass ****avocados instead of the bigger ones.
Step 2: Prepare the dye bath- Place Avocado pits in dye pot and cover with water. Bring to a boil and simmer for 2 hours or more. Turn off the heat and let cool. Strain avocado pieces from the liquid. Divide the dye bath into two. One to add Iron and another to Alum.
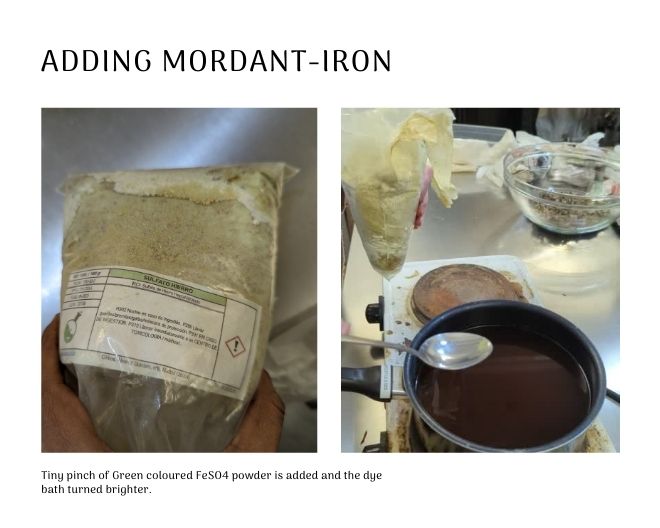
Step 3: PART 1- Add a tiny pinch of iron(Green colour FeSO4 powder) into one pot of dye bath and stir it well. Immediately the colour of the dye bath turns darker.
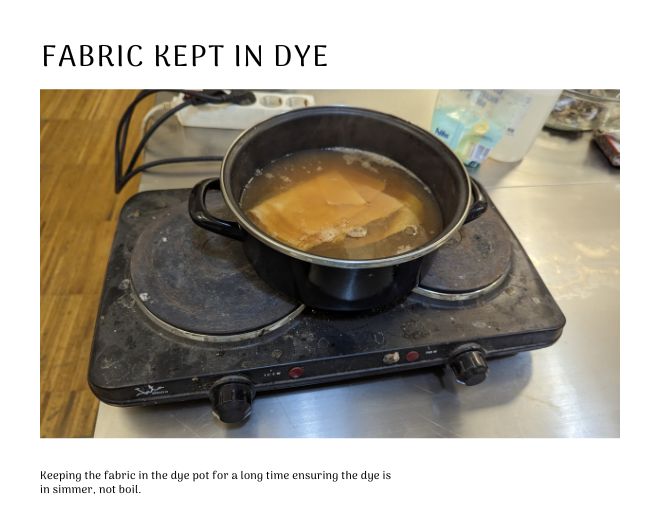
Step 4: Add two sets of scoured wet fabric to the bath and let it simmer for 50 minutes(or even over night). Bring it very slowly to simmer (do not boil!).
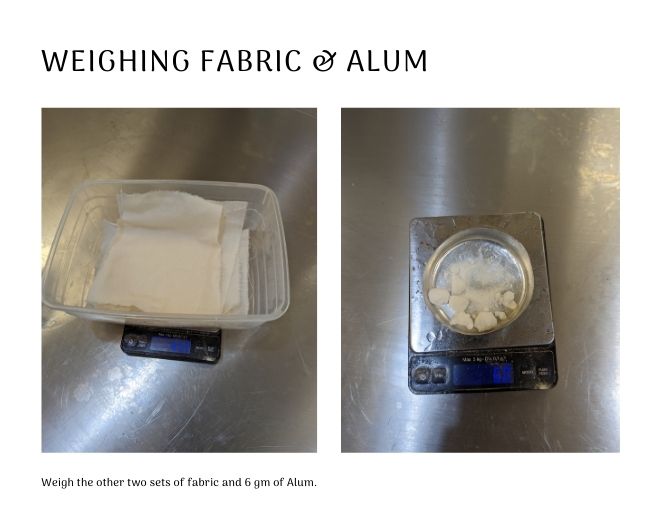
Step 5: PART 2- Weigh the second set of Fabrics. I weighed it to gms, Weigh 6 gms of Alum. Add it to the second part of the dye bath. Immediately the colour changes and the dye bath becomes brighter. Add the wet mordanted fabric in the dye pots.
Step 6: Let both the dye baths with the fabric simmer for a few hours, If the dye bath is going to boil remove it from the stove cool it and again start heating so the temperature is always balanced. Stir occasionally, so the dye will be evenly absorbed.

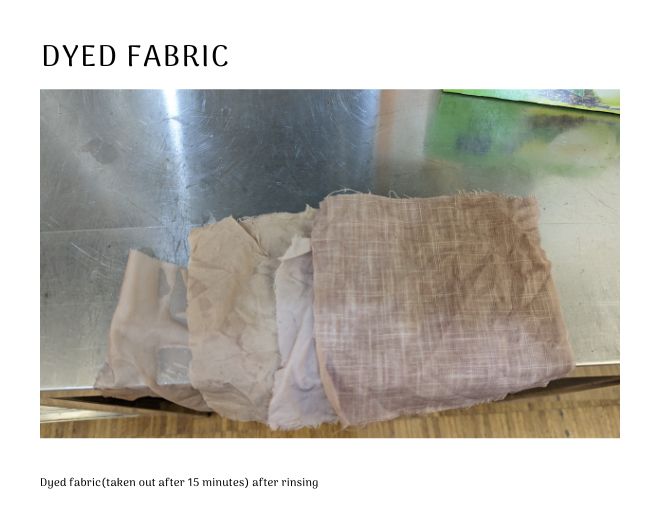
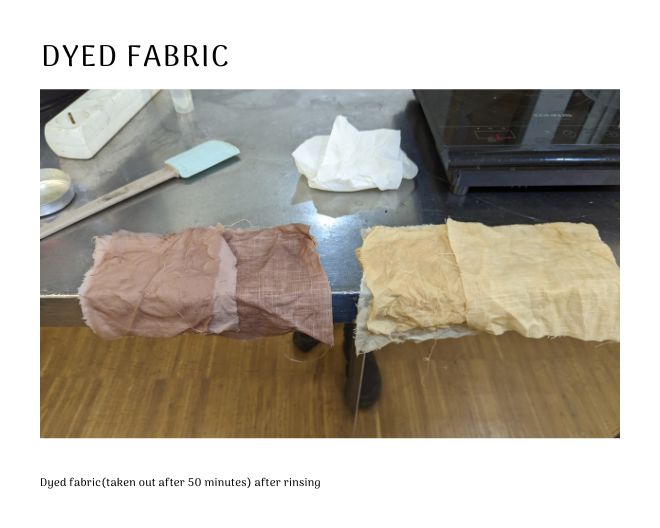
Step 7: Remove the fabric from the dye bath using tongs or after a long time in this case after 15 minutes(First set from both baths) and 1 hour(Second set from both baths). Rinse the fabrics in the water, if required can use a gentle soap.
During this time the fiber will take up as much dye as it possibly can. If the dye bath still has color after our first dye bath, you can add more fiber and simmer it for a few hours for a second dye bath. However, the first dye bath will have always the deepest tones.
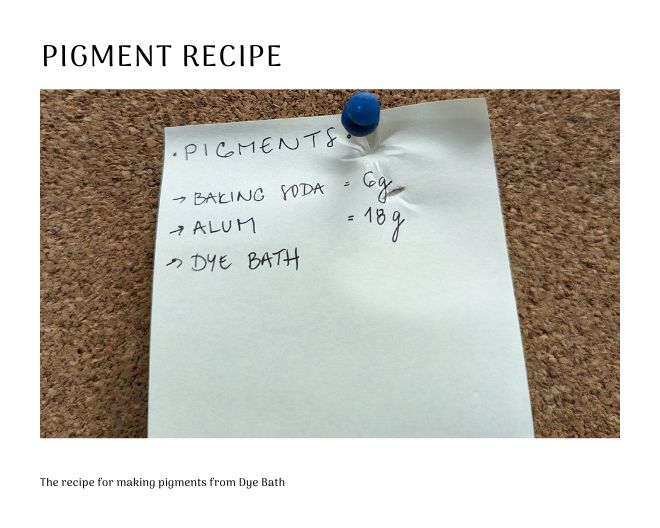
5. Pigment making
I used the leftover dye to make pigments
Step 1: Take the leftover dye bath in a container. Take only 75% of the container even if there is excess. Keep the container inside a bigger Bowl like in double boiling methods.
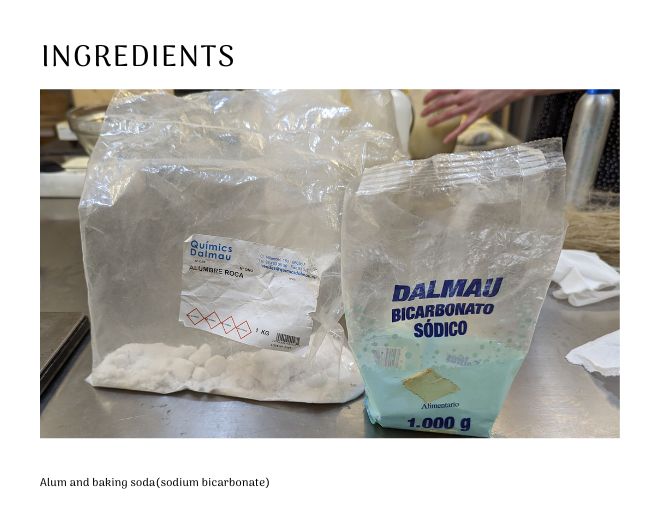
Step 2: Weigh the required amount of Alum - 18g and Baking Soda - 6g
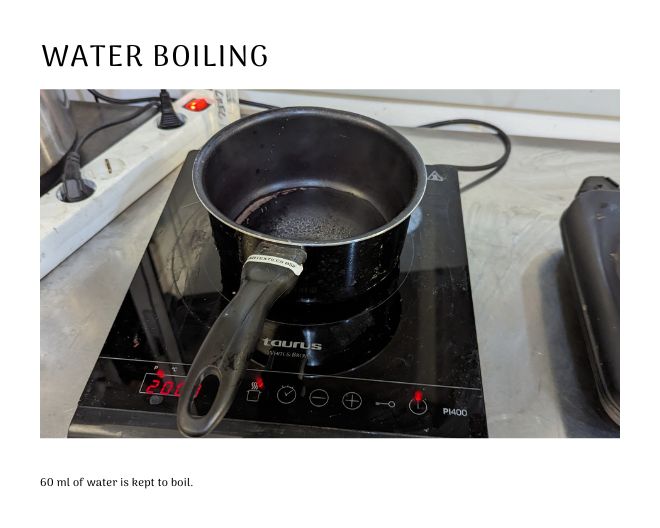
Step 3: Boil 60 ml of water
Step 4: Add the alum into the dye bath slowly and stir. Make sure the everything dissolves.
Step 5: Take the boiled water in a bowl and add the baking soda into it and stir well until it dissolves. Stir it with an egg beater. This can cause foams.
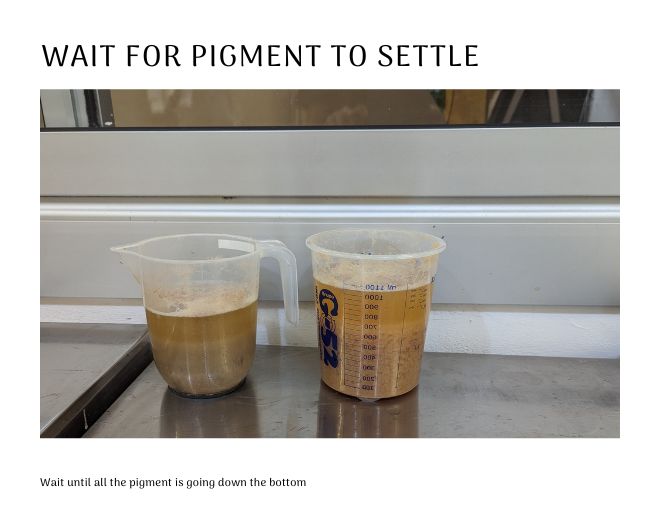
Step 6: Add the soda hot water to the soda dye bath slowly. The pigment will precipitate and foam up. Use the spatula and press it down gently.
Step 7: Keep it aside for some time so that the pigments settle down in the bottom of the container.
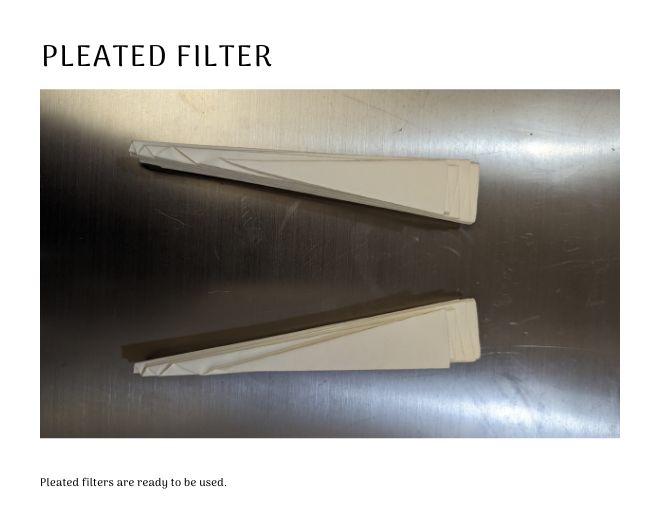
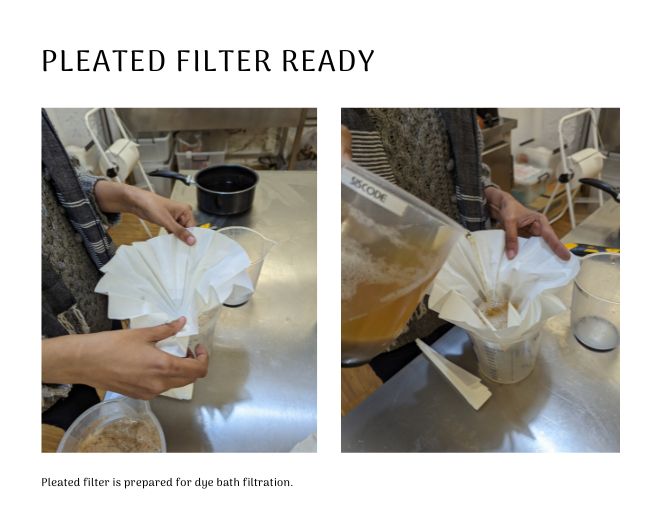
Step 8: Take a coffee filter or pleated filter, unfold it and keep it on top of the new container. Use a rubber band to keep the filter in place.
Step 9: Pour the dye bath into the pleated filter, it will take a long time to filter.
Step 10: Let the pigment dry overnight in the filter.
Step 11: Grind the pigments to make them powder after removing them from the filter or petri dish.

Bacteria Dyeing
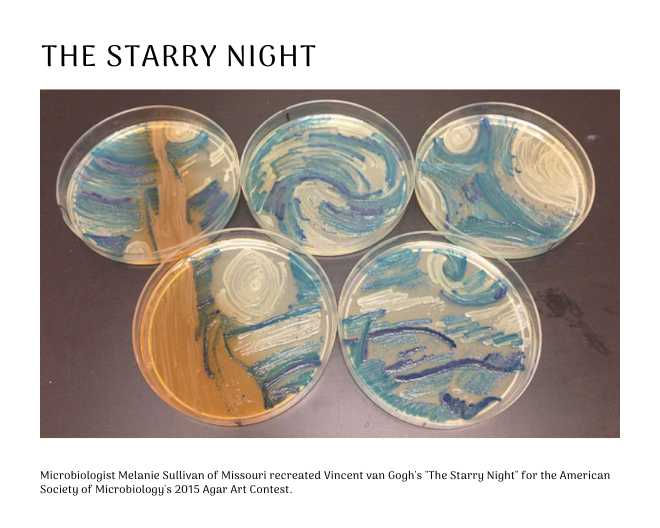

- Pinting "Starry night" with bacteria
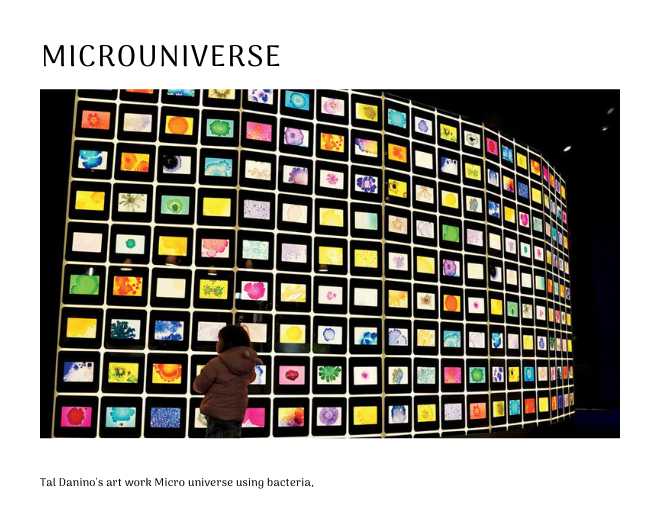
- The Miraculous Beauty and Healing Power of Ordinary Bacteria- An article about Biologist & Columbia Asst. Professor Tal Danino's work with bacteria to paint and for cancer treatment.
- Panagia collaborated with Colorfix
- Pili & Vienna Textile Lab also does interesting work with bateria dye.
Different Bacteria
Name of the bacteria: Serratia Marcescens
Colour: Pink
Name of the bacteria: Janthinobacterium Lividum
Colour: Blue
Name of the bacteria: Streptomyces coelicolor
For PH Change
Recipe for Bacteria nutrient Agar (bacteria food) for 4 petri dishes is made with:
- 200ml of distilled water
- 4g of Nutrient Agar
- 1ml of Glycerin
Recipe for inoculating the bacterial dye:
- 250ml distilled water
- 6.75g of LB Broth
- 1ml of Glycerin
Dyeing with bacteria-Janthinobacterium Lividum
Tool and ingredients
- 500ml media glass bottle with cap that will fit into the pressure cooker
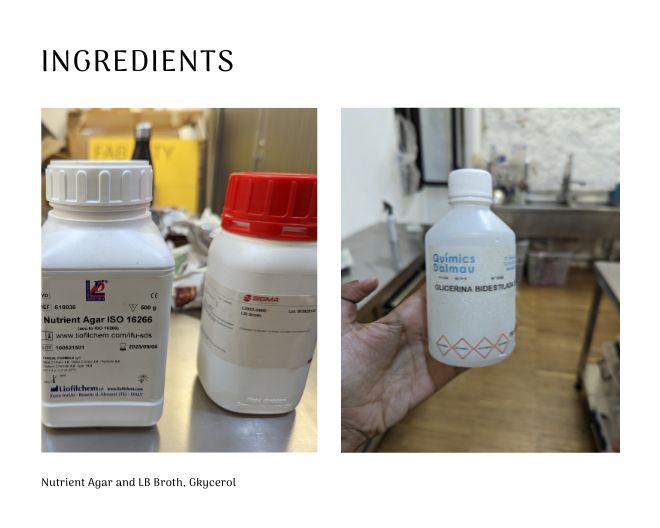
- Nutrient broth NR1(LB Broth)
- Nutrient Agar
- Glycerin
- Distilled water
- Pressure cooker
- Petri dishes-2
- Inoculation loop
- Camping burner
- lighter
- Parafilm tape
- Autoclave bag
- Scoured fabric
- Isopropyl Alcohol
Inoculating the bacteria (dyeing)
Steps:
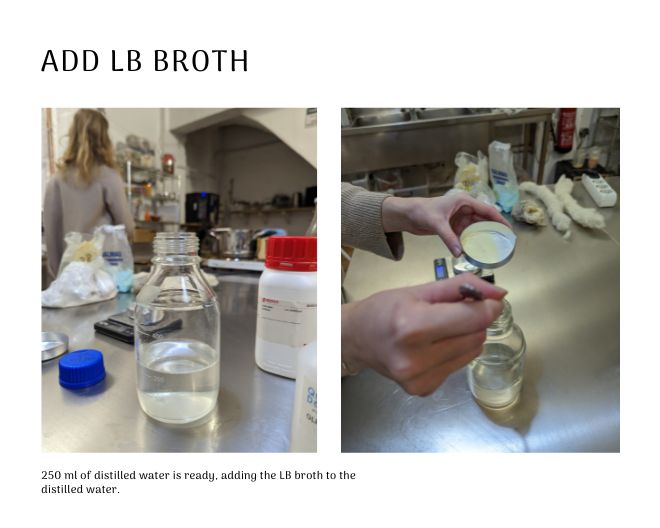
Step 1: Take 250 ml distilled water in a clean glass bottle.
Step 2: Weigh 6 gm of LB Broth and 1 ml of glycerin.
Step 3: Add the LB Broth and glycerin also to the media bottle.
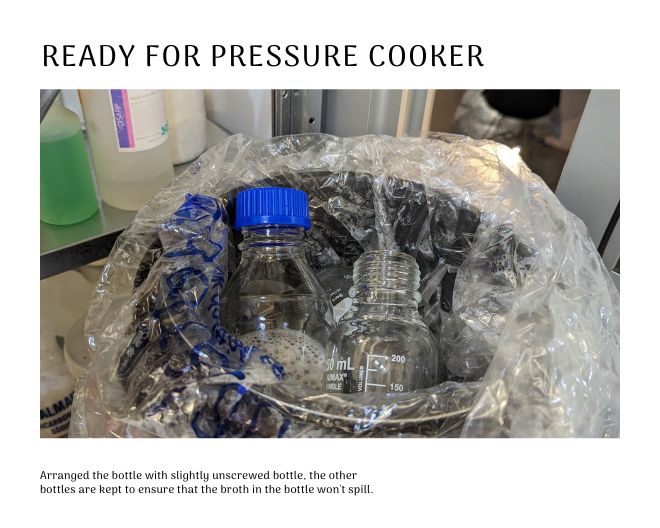
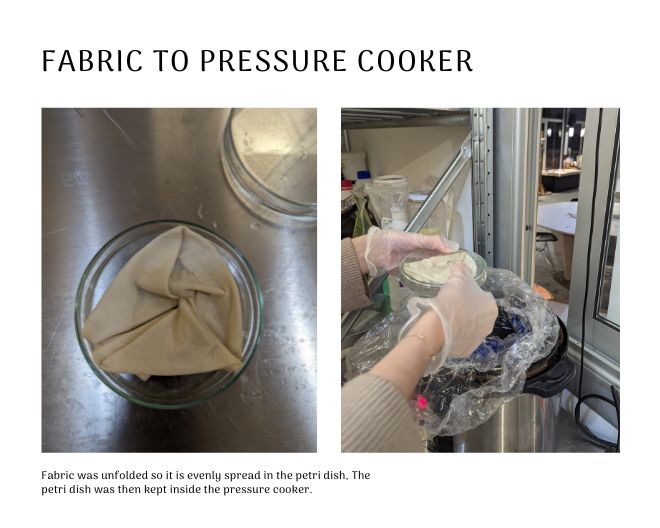
Step 4: Take autoclave plastic bag and keep it inside the pressure cooker.
Step 5: Take the media bottle, unscrew the cap of the bottle a little bit so the pressure will not cause the bottle to break. The media bottle needs to be kept in such a way that the water inside won’t spill. (2 other bottles were used to keep it straight)
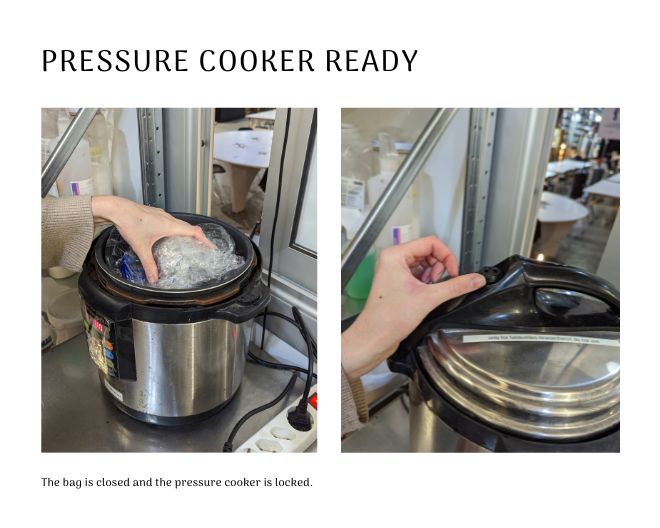
Step 6: The pressure cooker is locked and is kept to the maximum(meat) temperature for 30 minutes.
Step 7: The scoured fabric is folded (used a tie-dye method) and kept inside a petri dish. The folded fabric is spread inside the petri dish so the bacteria will spread evenly.
Step 8: The petri dish is then kept inside the pressure cooker to sterilize.
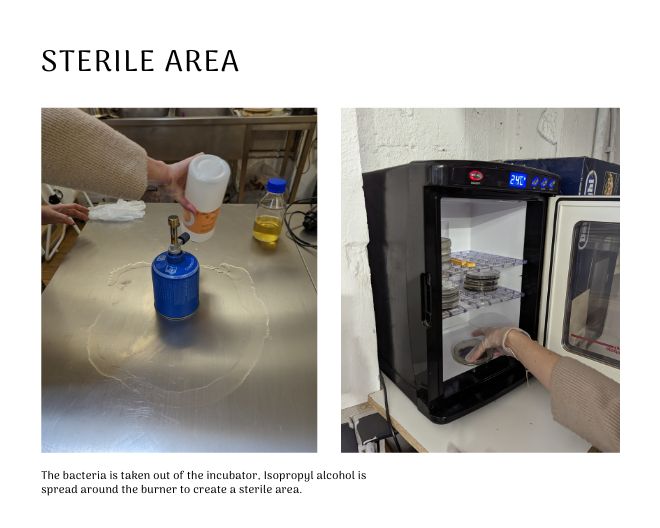
Step 9: A clean surface on the table is found, sterilize the area by rubbing isopropyl alcohol. The burner is kept in the middle of it and the flame is started. Douse the area around the gas burner with denatured alcohol 96%. Keep this area wet with ethanol throughout the process. This will create a sterile bubble when the flame is on. Be very careful as the flame and alcohol are not a good combination.
Step 10: Take the bacteria from the incubator, the LB Broth and Fabric petri dish from the pressure cooker inside the sterile bubble. From here on keep all your movements and lids, tools, dishing inside this bubble at all times. Work quickly, don't open the petri dishes more than strictly necessary.
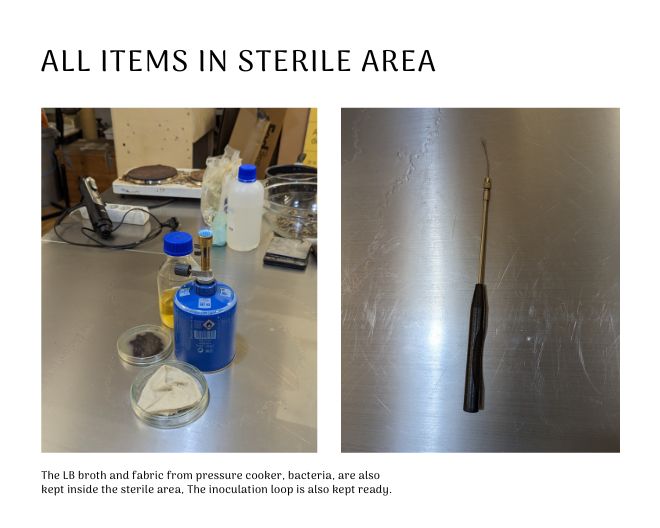
Step 11: Open the LB Broth bottle cap and show the rim of the bottle on the flame for a second to sterilise it.
Step 12: Open the Fabric petri dish and pour some LB Broth into the fabric. Not too much so that the fabric will float in the broth but just enough to coat the fabric in its entirety.
Step 13: Show the inoculation loop in the flame until it turns red to sterilize it.
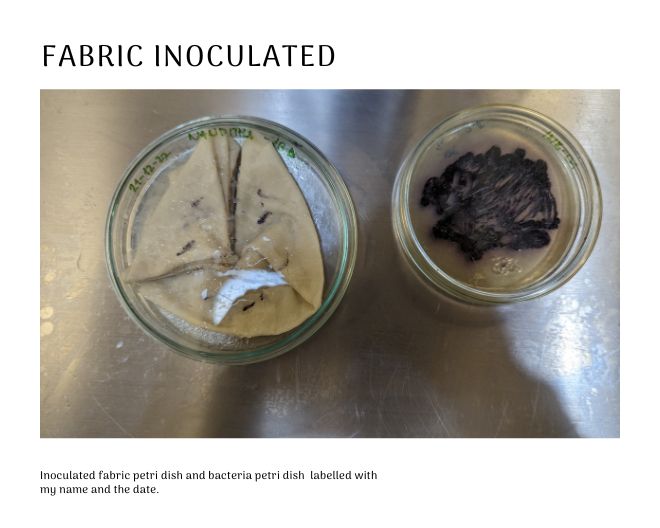
Step 14: Open the bacteria petri dish and dip the inoculation loop into the agar jelly, where no bacteria is growing. You can hear a psss sound. This is to cool the loop.
Step 15: Scrape a bit of bacteria from the jelly on the loop, move it to the dish with the fabric, and spread onto the fabric and into the liquid food around it. Close it as fast as possible. While doing the inoculation ensure that the fabric petri dish is opened only partially just enough to do the work.
Step 16: After this, the loop is showed into the burner.
Step 17: This process is repeated once more.
Step 18: Once done the Fabric petri dish is closed with para film by stretching it all around the petri dish. It needn’t be tight.
Step 19: Label the petri dish with name of the bacteria, name of the growth media (NA, for nutrient agar), date, your name
Step 20: The Fabric Petri dish and the bacteria petri dish are kept in the incubator.
Step 21: Let it incubate for 3 days at 23 to 25 degrees Celsius.


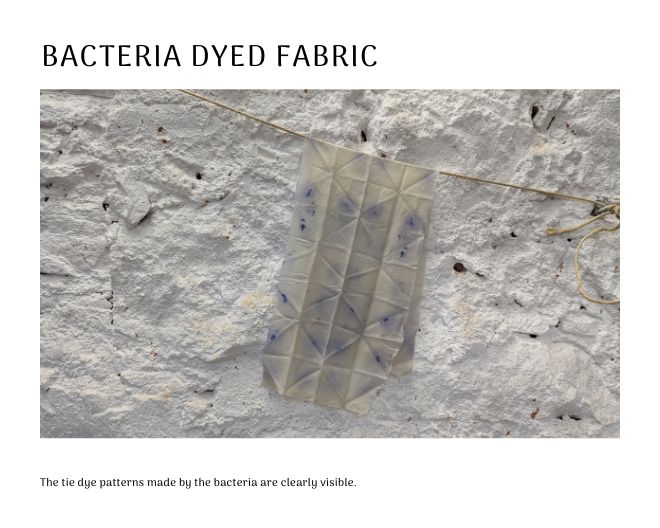
Dyed Fabric
The dyed fabric was taken out after a few days out of the incubator. Here is the final dyed fabric.