9. SOFT ROBOTICS

BIOINSPIRED DESIGN
Biomimicry has emerged as a fascinating field of study in robotics, which aims to design and create soft, flexible, and adaptable robotic systems by drawing inspiration from biological systems and structures capabilities of biological organisms, such as soft-bodied animals, plants, and even some microorganisms, in terms of flexibility, dexterity, and adaptability, have led researchers to emulate these features in designing soft robotic systems. The ultimate goal is to develop soft robotic systems that can perform tasks in a way that is more similar to natural organisms.
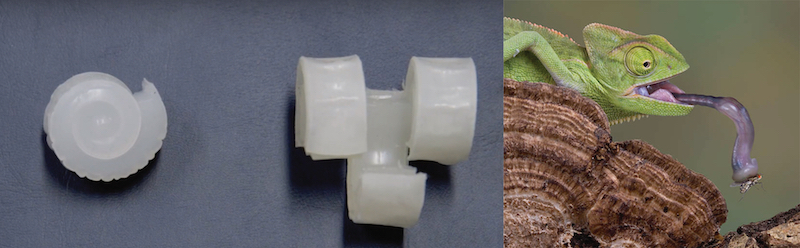
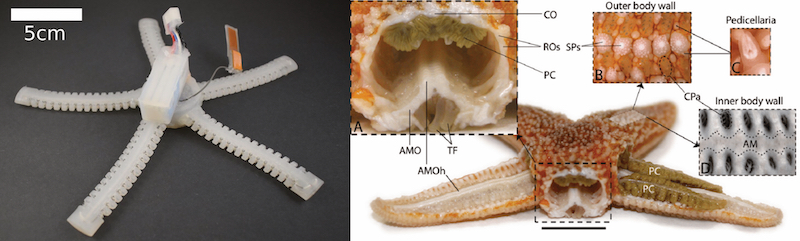
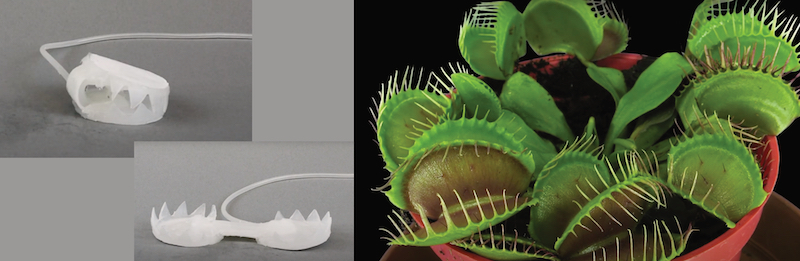
When I think of soft robots, I imagine sea animals with highly flexible and diverse bodies. For example soft robotic grippers have been designed to mimic the structure and movement of octopus tentacles. These grippers can conform to the shape of objects, providing a gentle yet firm grip. Soft robots can also be designed to mimic the movement and locomotion of soft-bodied animals like worms or slugs.
Mimicking nature's solutions has always been a part of an engineer's job. Soft robotics are providing good ground for bioinspired technologies.
INSPIRING PROJECTS / RESEARCH
SASKIA HELINSKA - Unflatables research project.
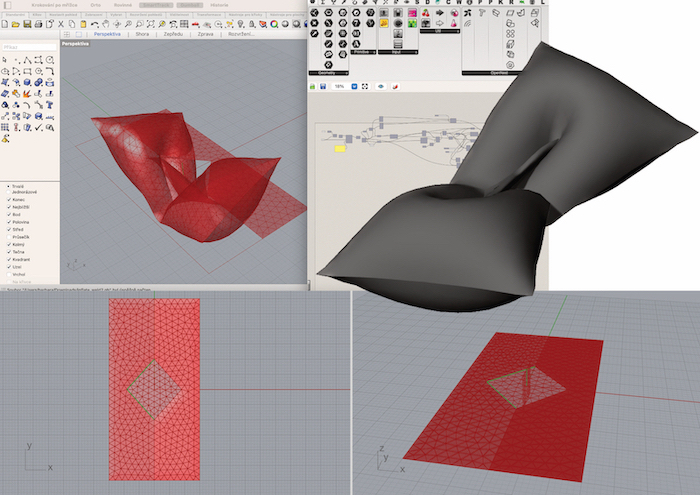
SIMULATING THE INFLATION
When starting out, I spent a considerable amount of time thinking about ways to streamline my design process and make it more efficient. I had several ideas that I wanted to experiment with, and the most straightforward one was to employ rapid prototyping software that could simulate the inflation of objects.
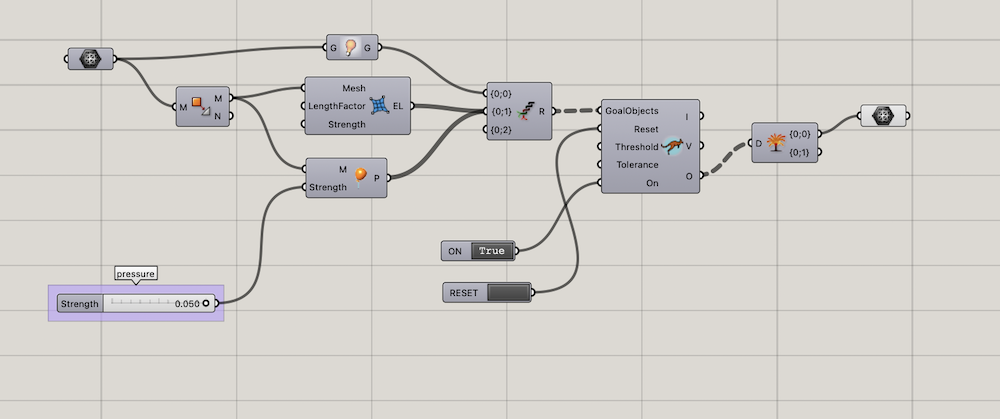
- Simulating the inflation of a shape using Kangaroo Physics in Grasshopper
General description of how the program can be used
-
Kangaroo Physics: "Kangaroo Solver"
-
Define Anchor Points: If there are specific points on your shape that should remain fixed, use the "Anchor" component. Connect the points you want to anchor to the "P" input of the "Anchor" component.
-
Create an Attractor: If you want to guide the inflation using an attractor point, use the "Point" component for the attractor position and the "PointCharge" component to apply forces. Connect the attractor point to the "P" input of the "PointCharge" component.
-
Apply Forces: Use components like "Spring," "Length," and "PointCharge" to apply forces to the geometry. Connect these components to the "Goals" input of the "Kangaroo Solver."
Example: Use the "Spring" component to simulate internal springs within the shape. "Length" component to maintain desired distances between points. "PointCharge" component to simulate repulsive forces, pushing points apart.
Adjust the Parameters: Connect sliders or numeric values to the parameters of Kangaroo components (such as rest lengths, spring constants, etc.) to control the simulation. Adjust these parameters to achieve the desired inflation effect and run the Simulation
- Activate the Kangaroo Solver by connecting a toggle or boolean value to the "Go" input of the "Kangaroo Solver." Gradually increase the number of iterations using a slider connected to the "Iterations" input of the "Kangaroo Solver" to observe the inflation process.
RESEARCH
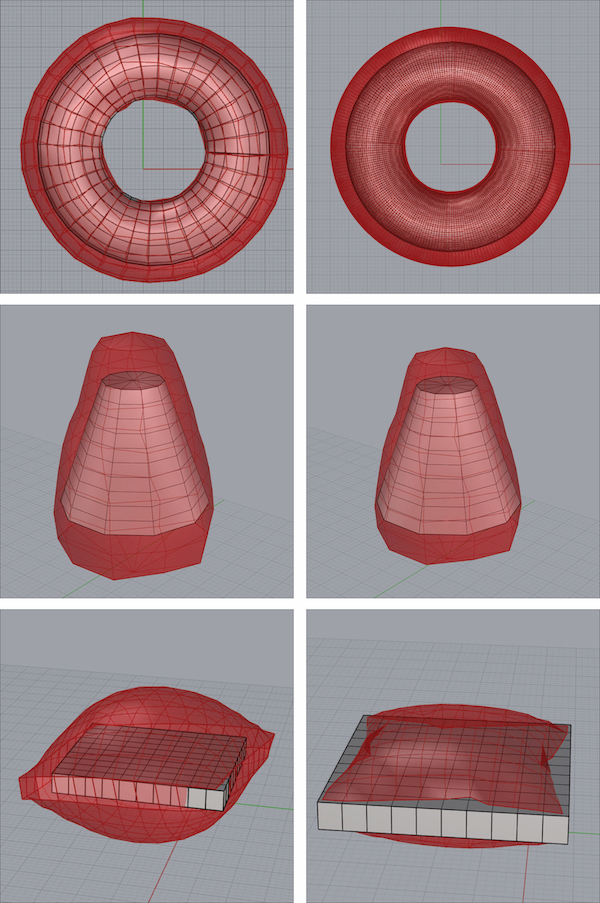
I inquired about a more realistic simulation variant in Grasshopper that includes bending and real inflator behavior.
-
Inflation simulation with bending
-
I was very interested in the topic, so I explored grasshopper forums and tutorials. I found a well-known example of bending surfaces with non-inflating diamond shapes - MIT aeroMorph project. I attempted to comprehend the subject and tried the simulation, however, I would need to incorporate the physical properties of the material into the script for the shapes I wanted to simulate.
TUTORIALS
MY OWN EXPLORATIONS WORKING WITH KANGAROO
- I was experimenting with simple objects. I think it works for a basic idea of what an inflated object will look like.
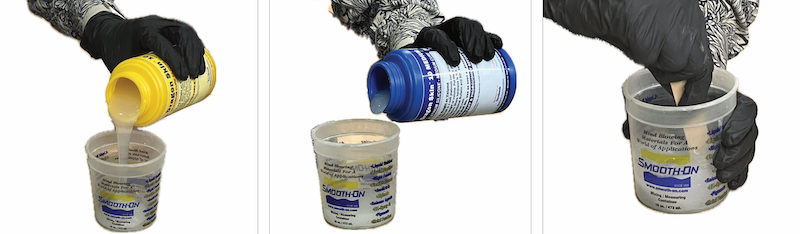
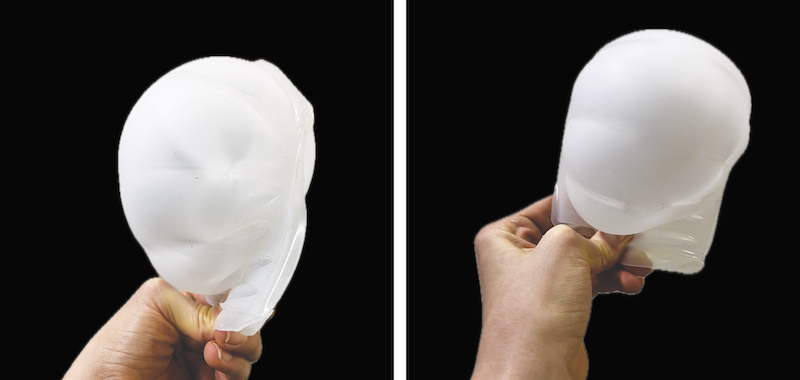
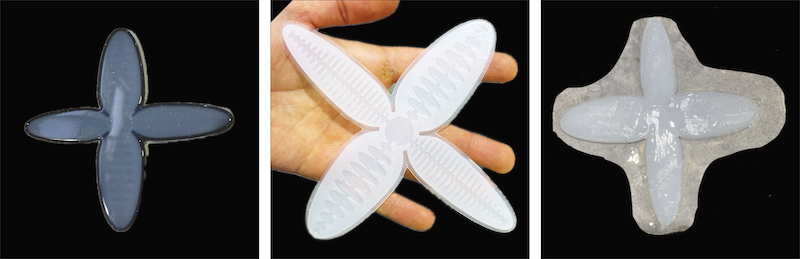
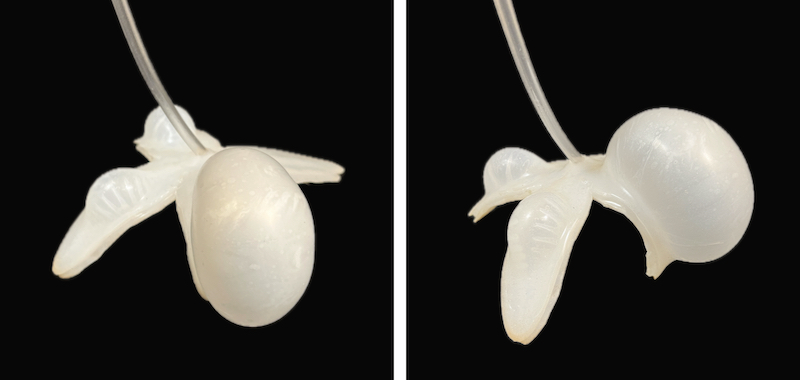
SILICONE CASTING
- WORKSHOP in FabLab BCN.
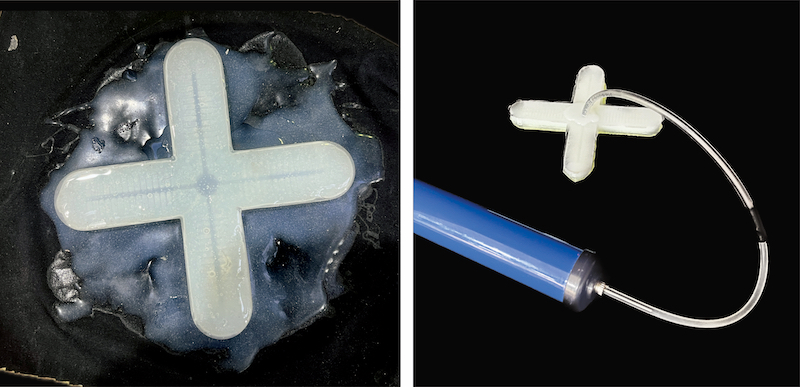
TOOLS FOR SOFT ROBOTICS
- Eco-Flex - Dragon Skin™ 10 MEDIUM
- Pump - tubing and hand pump / compresor
- containers, gloves and stirrer
- moulds
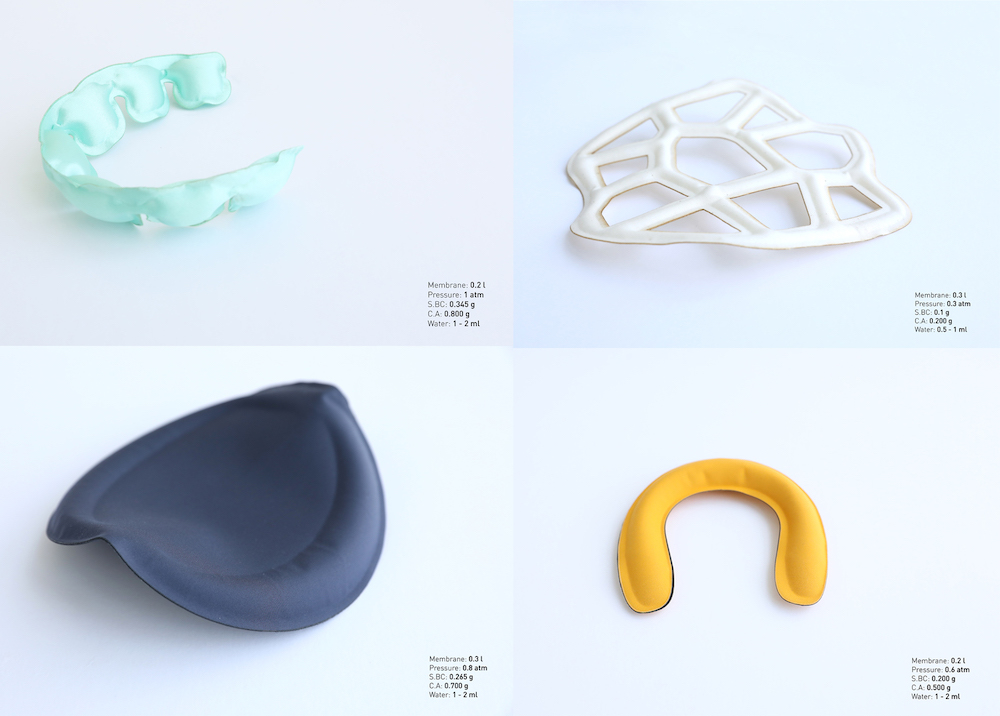
Dragon Skin™ 10 MEDIUM - Technical Data
| Mix Ratio By Volume | Mix Ratio By Weight | Pot Life | Cure Time | Shore Hardness |
|---|---|---|---|---|
| 1A:1B | 1A:1B | 20 minutes | 5 hours | 10 A |
SILICONE -BASIC PROCESS
-
Create/choose a Mold: Ensure that the mold is properly sealed and prepared for casting. - 3D printed / laser cutted...
-
Mix Eco-Flex Silicone: Follow the manufacturer's instructions for mixing Eco-Flex silicone. This typically involves combining the base and curing agent in the correct ratios. Thoroughly mix the components to ensure a uniform consistency.
-
Pour Silicone into the Mold: Carefully pour the mixed Eco-Flex silicone into the prepared mold. Take care to avoid trapping air bubbles.
-
Curing: Allow the Eco-Flex silicone to cure according to the manufacturer's recommended curing time. The curing time may vary depending on factors such as temperature and humidity.
-
Demolding: Once the silicone has fully cured, carefully demold the casting. Use caution to avoid damaging the mold or the casting.
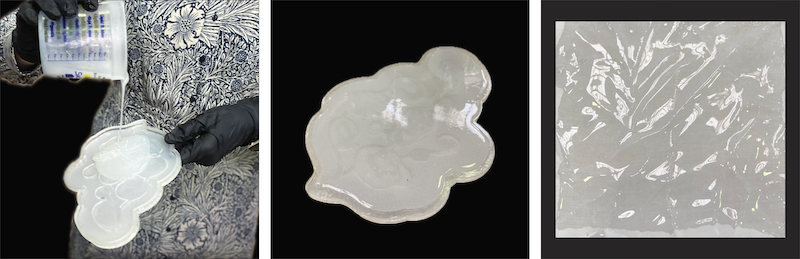


MAKING OWN MOULD

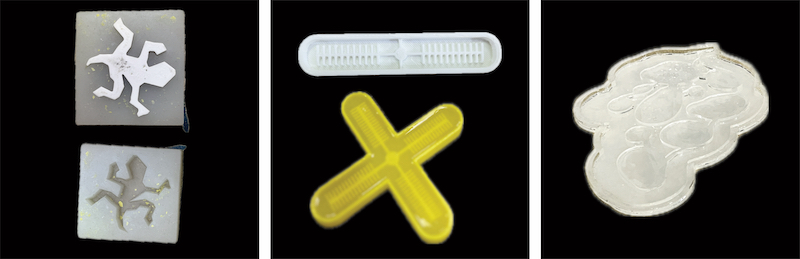
THERMO-ADHESIVE VINYL
INSPIRATION
- MIT Researchers Create Auto-Inflatable Structures - This project inspired me to explore shape manipulation principles further by inflating different structures. And the next level is that they can inflate themselves.
THERMOADHESIVE VINYL PROCESS
Using thermoadhesive vinyl is easy. It can be cut with scissors or a vinyl cutter. The vinyl comes in sheets or rolls and has two sides:
-
A matte side (the sticky) and glossy (the exterior part)
-
To stitch two parts together, you can use either an iron or a thermo press. However, it is important to exercise caution and notof the iron/press melt. To avoid this, simply place a sheet of baking paper in between the plastic and the iron/press surface. let the plastic on the surface
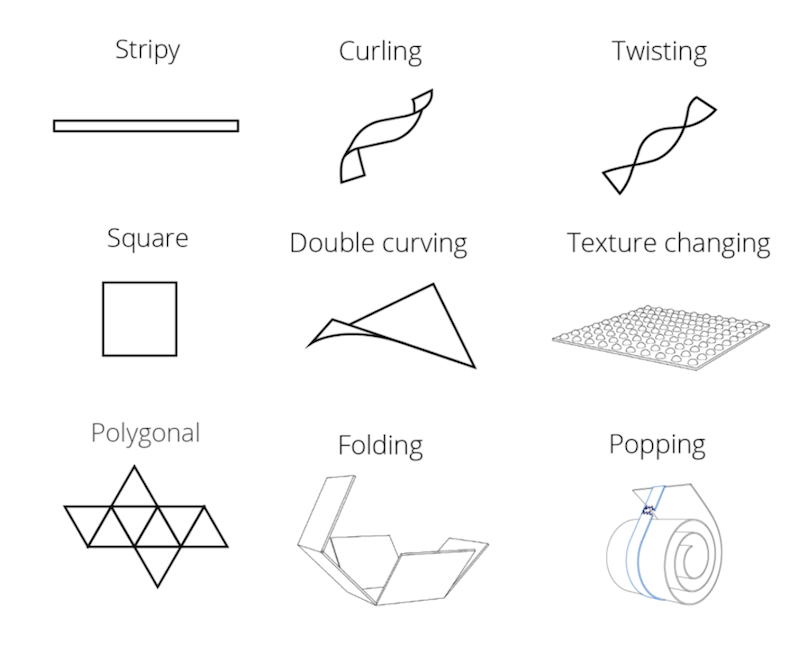
What kinds of movements can we achieve with inflating thermoadhesive vinyl?
TOOLS
- Scissors or laser cutting
- Iron or heat press
- Syringes or air pump
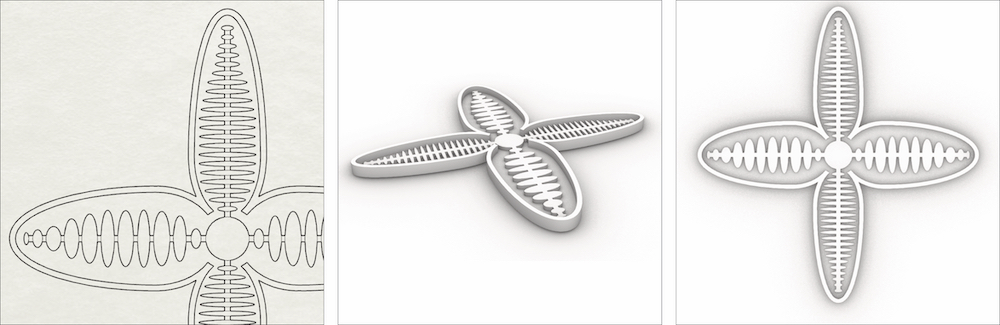
THERMO-ADHESIVE VINYL Workflow
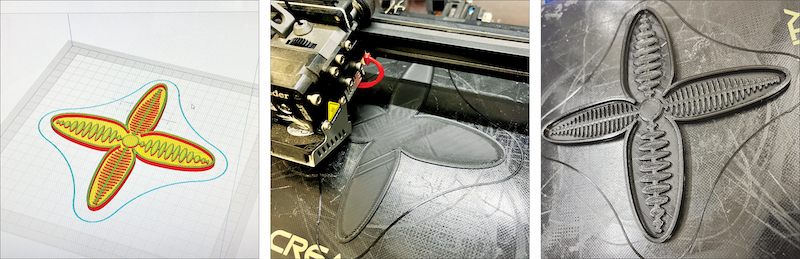
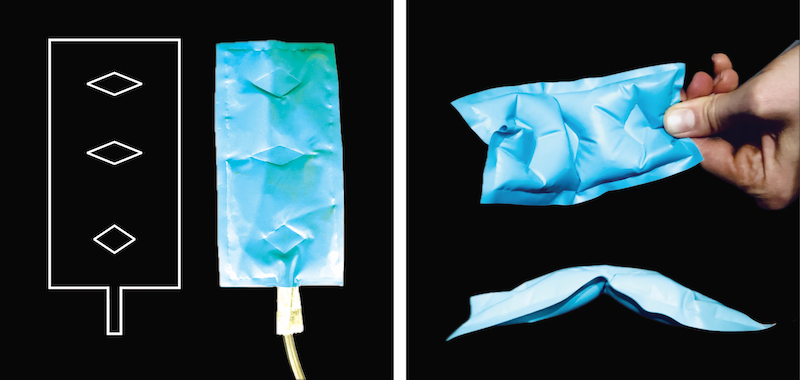
To create an inflatable, you need to follow a few simple steps. 1) First, design your pattern on a sheet to identify the parts that you want to inflate. Remember that the baking paper is the part that will inflate and gain volume. Next, create the pattern in Rhino and use different colors to indicate the order of the laser cutting - start with red, then blue, and finally green. Save the pattern as a Rhino 5 file and upload it to the IAAC Cloud. Once you have downloaded the file, press cmd P to print it and adjust your project in the print box. Then, send the file to the cutting table.
2) To cut the baking paper, select the properties of the material: Power: 30.00 // Speed: 5.00 // PPI/Hz: 1000. Turn on the laser cutter machine and the air extractor. Be sure to prepare the baking paper sheet and tap it down with cardboard to prevent it from flying away. Adjust the nozzle height of the material and start cutting. During the cutting process, pause the machine occasionally to prevent the little pieces from burning or getting cut incorrectly.
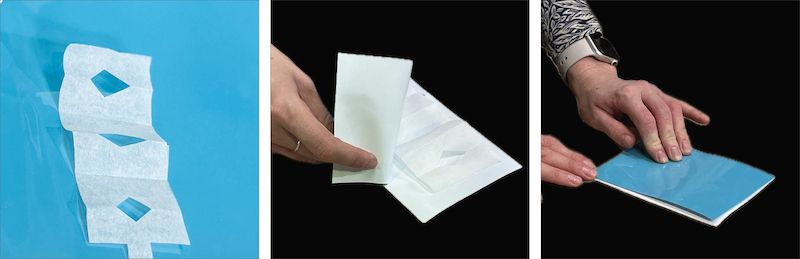
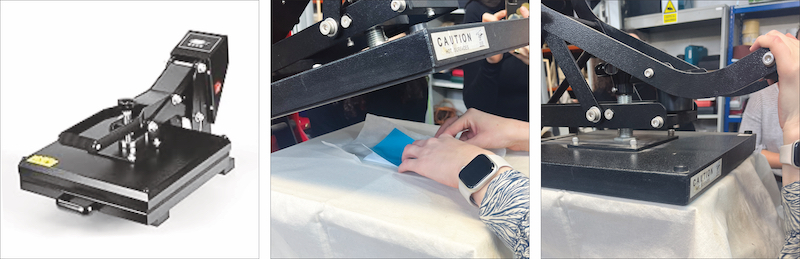
4) Once the baking paper is cut, cut two pieces of vinyl sheets, one for the top and one for the bottom, larger than required with an additional 2cm around the shape. The vinyl cannot be cut with the laser cutter. Preheat the heat press and add the baking paper between the project, so you will have: baking paper + vinyl + baking paper (part to inflate) + vinyl + baking paper. Be careful! The vinyl has two different sides, the plastic one goes outside. Start with a low temperature (120°C) and time (15/20 seconds) to avoid burning the material.
5) When you have joined the vinyl sheets, cut the exterior shape you want with scissors, leaving a minimum of 0.5cm of edge. Remove the transparent sheet from both sides. Try inflating the shape with a syringe. In case some parts of the project are not joined correctly, iron them again with baking paper between them. Finally, add a tub to the final sample. Cut the inside part at an angle and the exterior straight to be able to plug it.

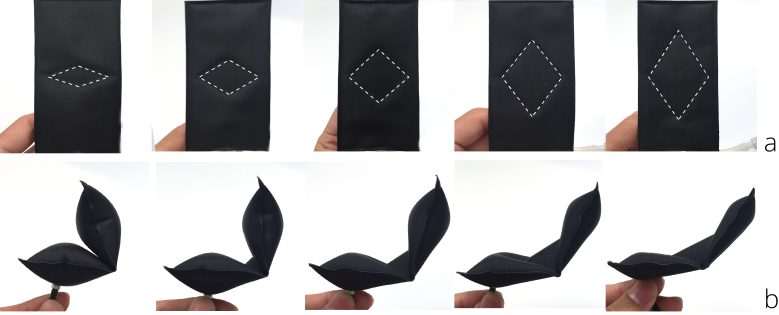
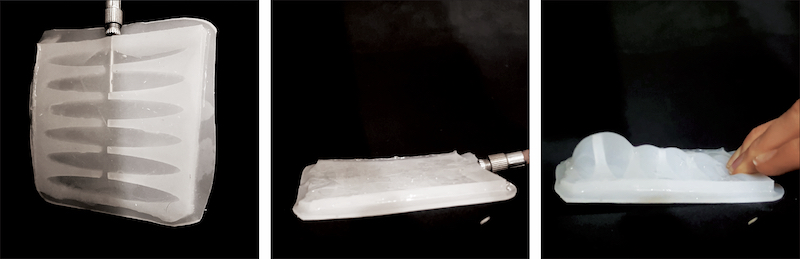
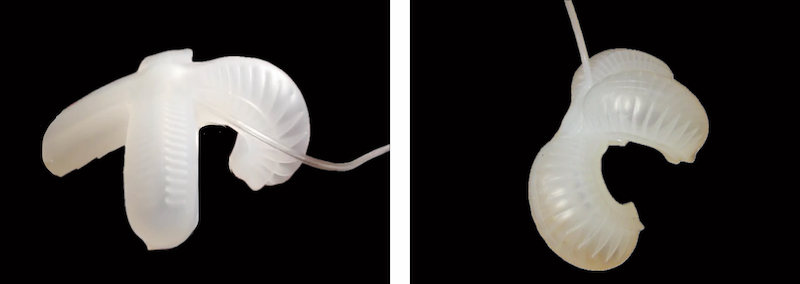
EXPLORING DIFFERENT SHAPES AND BENDING
-
Design Hinges - During the tutorial I learned that I can influence the movement by different channel sizes and it also depends on the angle I use.
-
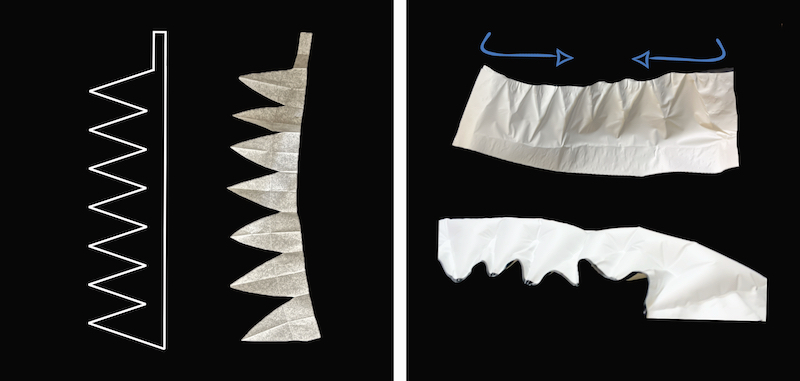
I tried experimenting with a zigzag shape that should shrink inwards.
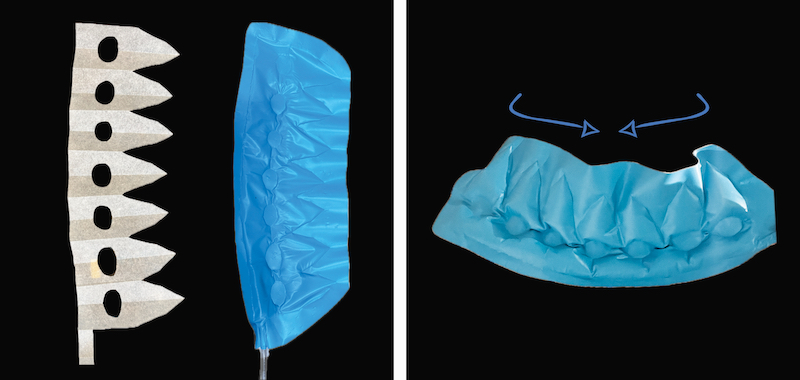

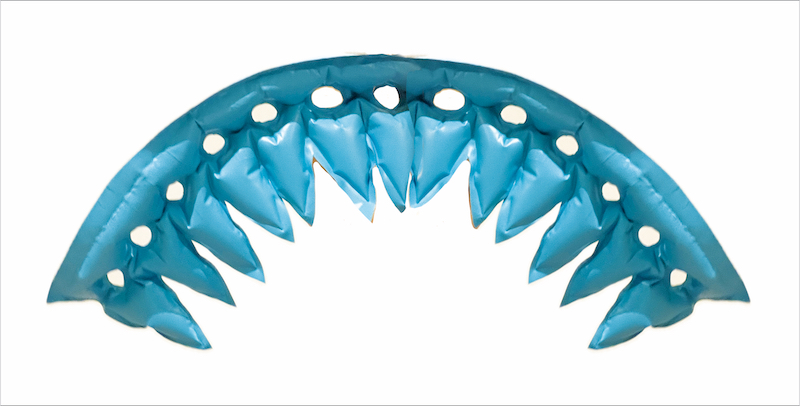
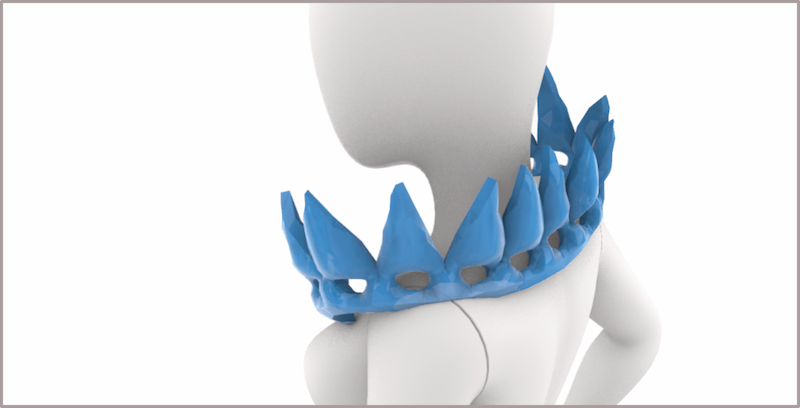
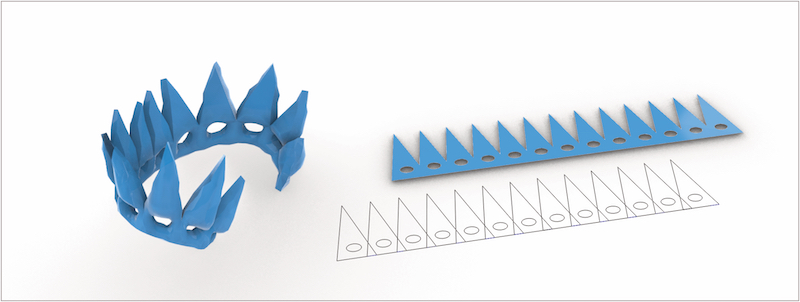
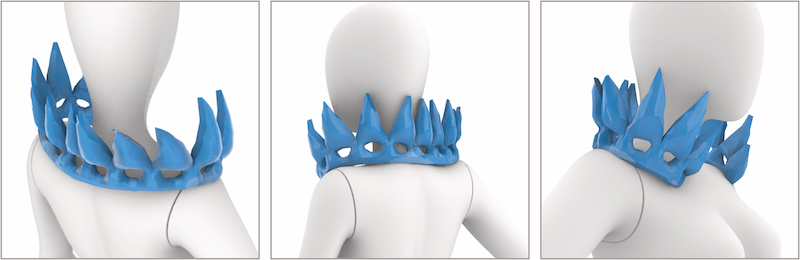
DYNAMIC INFLATABLE COLLAR