11. TEXTILE SCAFFOLD

During this class, we explored techniques and applications of technical textiles in the industry. We learned about designing custom processes that require a set of tools, processes, and workflows. In this class, we learned about using textiles for composites, polymerization, solidification, fabric formwork, crystallization, composites, bio-composites, and agglomerates. I find the new methods of textile production very intriguing. I focused on a few topics due to time constraints.
TECHNIQUES EXPLORED
| Technique | Example |
|---|---|
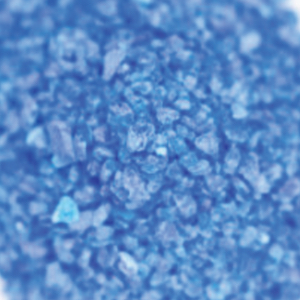
| CRYSTALLIZATION - Crystal growth on knitted fabric. |  |
| LEATHER MOLDING | 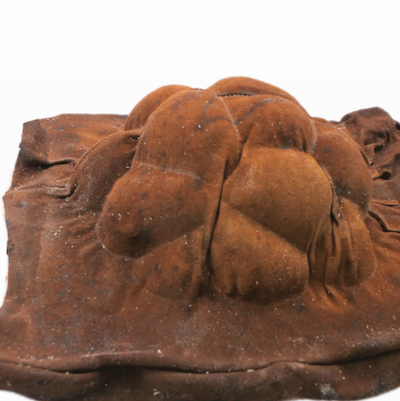 |
| WOOD + TEXTILE - Laser-cutting a paper bio-composite material and then combining it with textile fabric. | 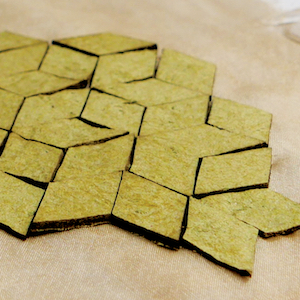 |
| CNC MILLING - CNC milling of the form for leather molding. |  |
| COMPOSITES & BIOCOMPOSITES - Paper composite | 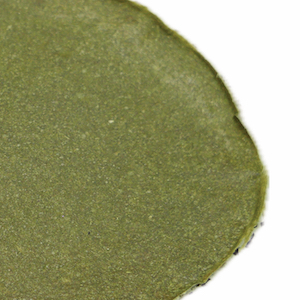 |
Alumni's pages as an inspiration
CRYSTALLIZATION
INSPIRATION
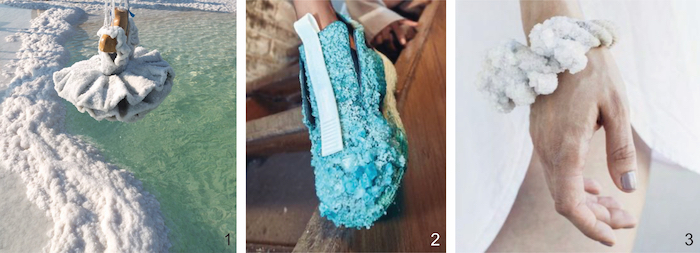
1) Sigalit Landau 2) Felipe Fiallo 3) Zorya - bracelt
Resources and links
RECIPES
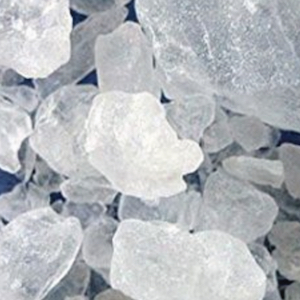
| ALUM | BORAX | COPPER SULPHATE |
|---|---|---|
 |
 |
 |
| Potassium alum KAl(SO4).12H2O, | Sodium borate - Na2H20B4O17 | Copper sulfate = (CuSO4), diamond-shaped crystals, Water temperature - 80°C |
| RECIPE: Alum powder: 60 g, Water: 500 ml Duration: 30 min - 12 / 24 h | RECIPE: Borax powder: 150 g, Water: 400 ml, Duration: 12 / 24 h | RECIPE: Copper sulphate crystals: 200 g, Water: 300 ml, Duration: > 24 h |
BASIC PROCESS
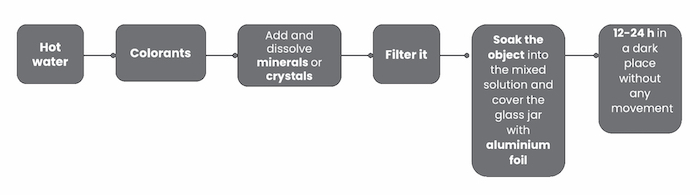
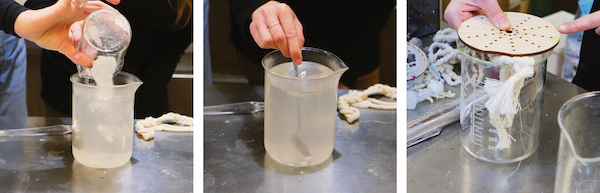
∙ Cooking pot / electric kettle
∙ Cooking plate
∙ Filter (optional)
∙ Spoon / something to stir
∙ Pot for soaking
∙ Support for crystallization (to hang your object)
∙ Aluminum foil / fabric (to cover the pot)
To prepare the substance for crystallization, follow these steps:

1. Weigh the substance according to the recipe.
2. Heat the water, but don't let it boil. Add the powdered substance to the water.
3. Stir the solution constantly.
4. If desired, add food dye or other additives.
5. OPTIONALLY - Filter the solution through a coffee filter into a container where you want the crystallization process to occur.
6. Cover the top of the container with aluminum foil or fabric.
7. Do not move the container until the process is complete. Moving the container can cause newly forming crystals to fall and crystallize on the bottom of the container.
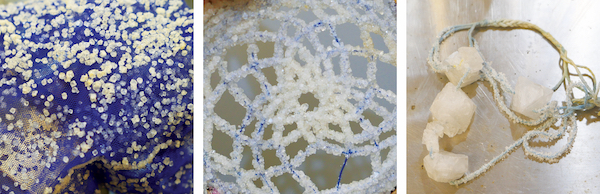
MY EXPERIMENTS
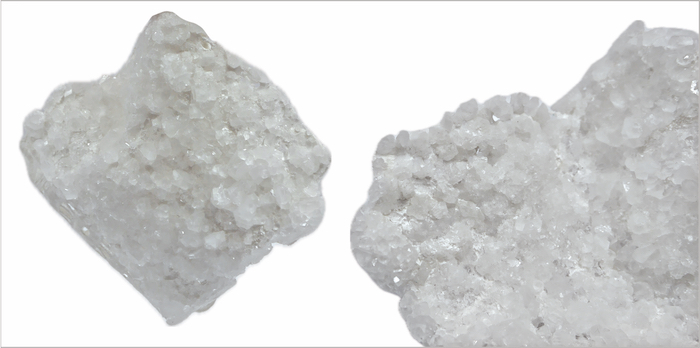
- I tried borax on cotton cloth, which seeped downwards in the container and did not touch the bottom. Crystallization was completed in about three days.
-
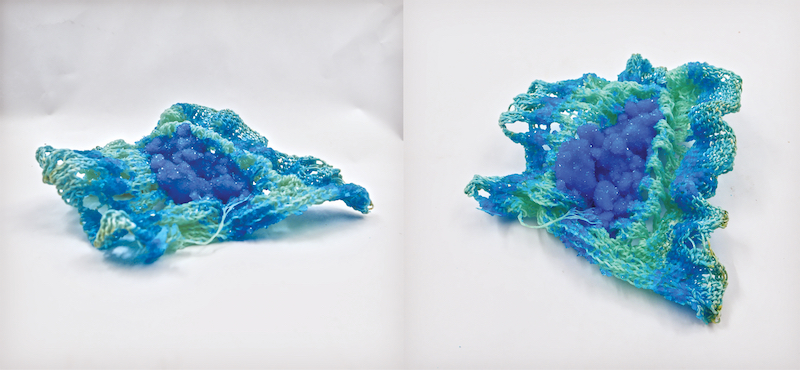
I let the copper sulphate crystallize on the knitting pattern, but in a different way. I used the knitted fabric to make a sort of boat that was attached to two sides of the container.
-
The crystallization was much slower than with borax, I left the process for six days.
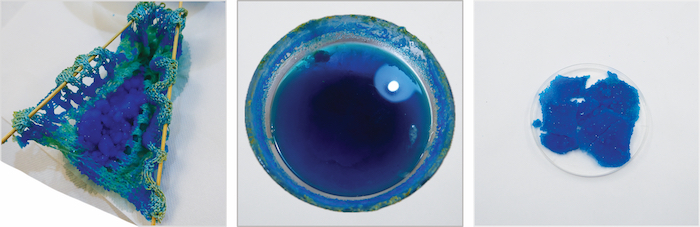
- Probably the different way of hanging caused the crystals to appear mostly in the bent part of the knit.
LEATHER MOLDING & CNC MILLING
INSPIRATION & RESEARCH
1) Betiana Pavon 2) Saskia Helinska 3) Dinesh Kumar
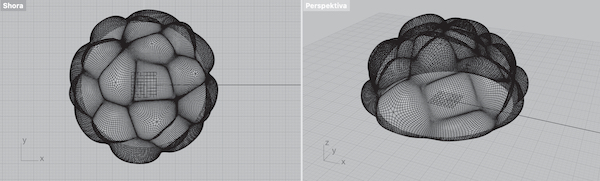
MAKING THE FORM
-
Rhino 7 & Grasshopper - Parametric Modeling
-
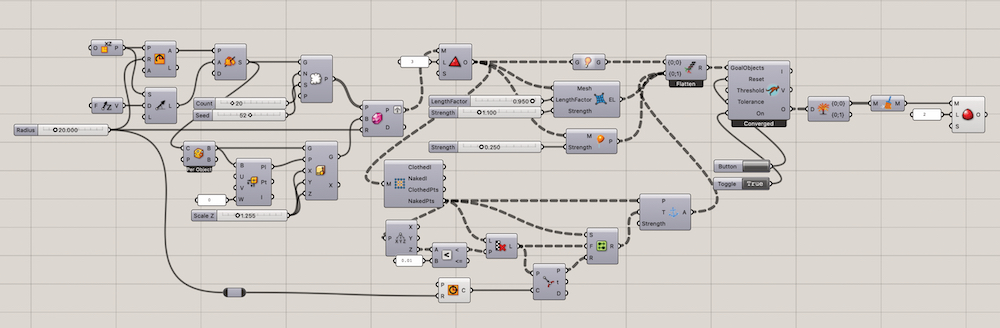
During the soft robotics week, I gained knowledge about inflating shapes in Grasshopper, and I intended to create a more compact and organic shape based on that knowledge. I still enjoy this process of inflating objects.
INSPIRATION
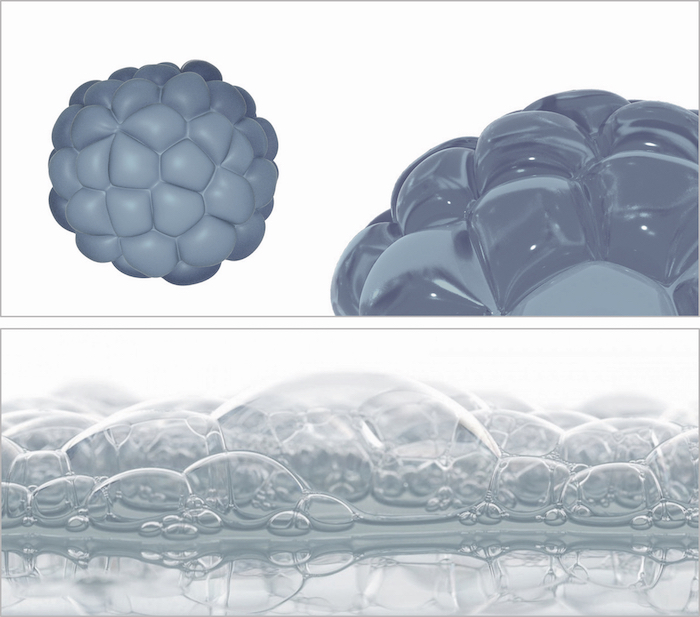
- My shape comes from the surface tension phenomena on the water surface it's one of the strongest structures in nature.
GRASSHOPPER DEFINITION
TIPS FOR MODELLING PROCESS IN GRASSHOPPER
Working with 'Volume' is easier than with 'Pressure' because pressure maintains the same force per unit area. When the membrane resistance is low, this can lead to a dangerous situation where the shape expands, causing an increase in area, more force, and greater expansion resulting in an explosion. 'Volume,' on the other hand, makes the pressure dependent on the contained volume which avoids this dangerous situation.
I have also added a 'SphereCollide' to prevent mesh from passing through itself when it expands significantly. This part is not always necessary; therefore, you can disable it to speed things up."
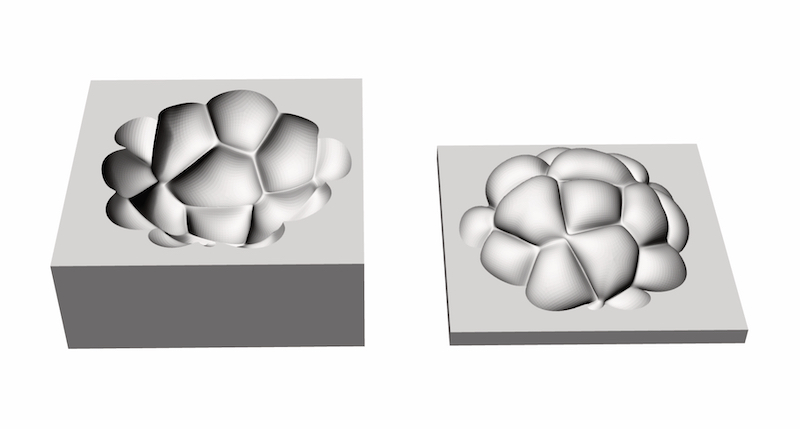
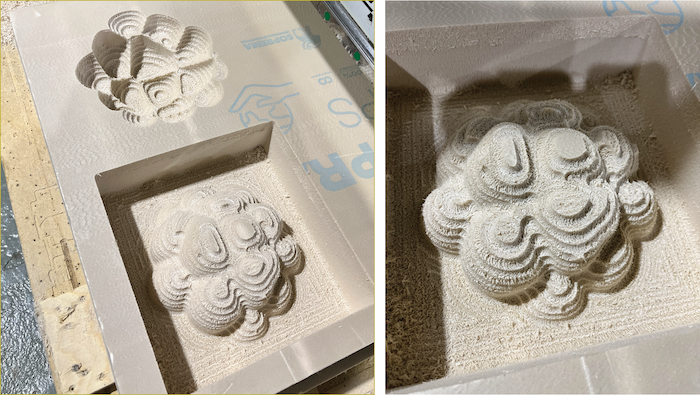
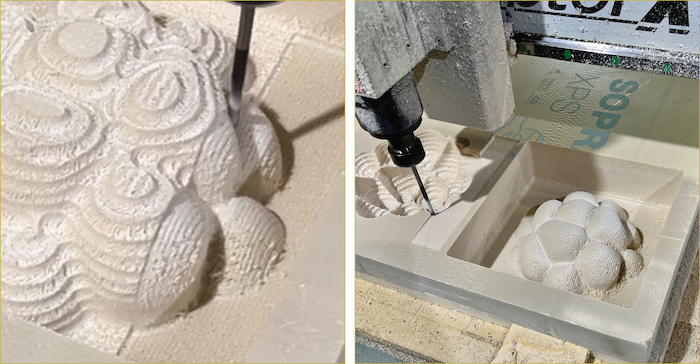
CNC MILLING OF THE FORM
-
In order to mill a form, it is necessary to prepare the form beforehand. We used the RhinoCAM software.
-
CNC basics - When working with CNC machines, safety gear (glasses) is essential. After you prepare the model in RhinoCAM, you then make further settings in the computer you use to control the machine.
CNC PROCESS
-
Make sure to attach your material securely to the CNC bed. Avoid using any metal parts or screws near the mill operation area. For best results, use additional pieces of wood that are screwed to the bed and apply pressure to the material being cut.
-
Before starting the operation, remove any bit from the spindle and clean any debris or chips using an air compressor. Then, insert the bit that is appropriate for your purpose and make sure it is securely fixed.
-
While operating the machine, pay close attention to the sounds it makes, especially the sound of the bit breaking.
Horizontal Roughing
- Take a look at the following instructions to ensure a successful completion of the task. You can find all the necessary tools under 'Machine Operations'. The first step is to perform the 'Horizontal Roughing'. To ensure that the roughing is applied to all the required parts, make sure that you have a projected square matching the edges of your model on the zero plane.
CNC SETTING AND preparation of drill bits
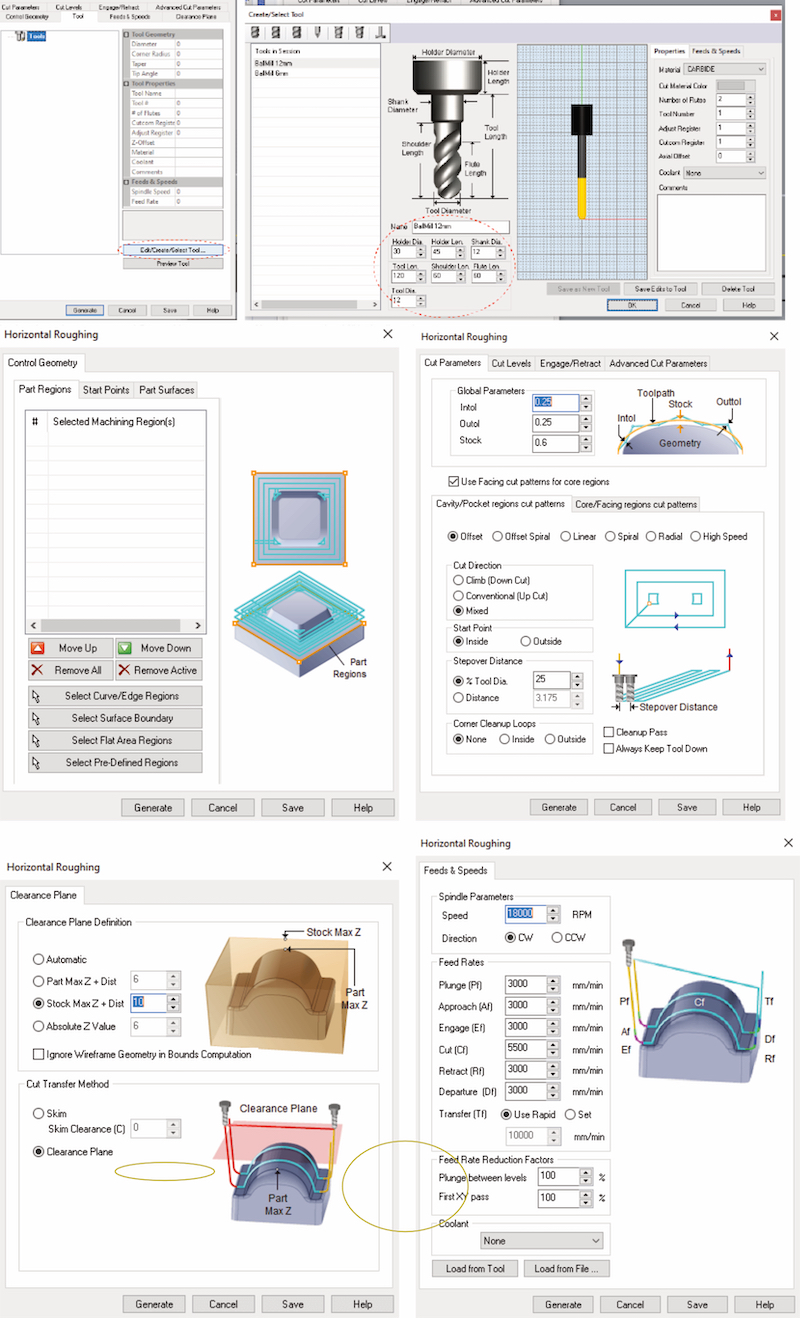
Finishing
- Create a new tool for the 6mm finishing toolpath. Take a look at the following instructions to ensure a successful completion of the task.All the settings can be found there.

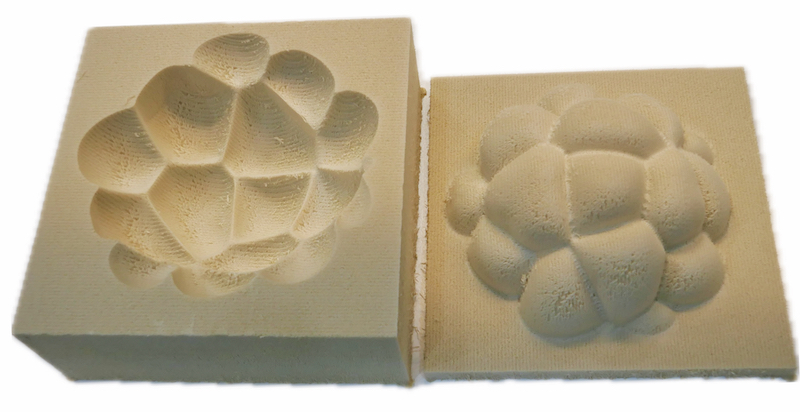
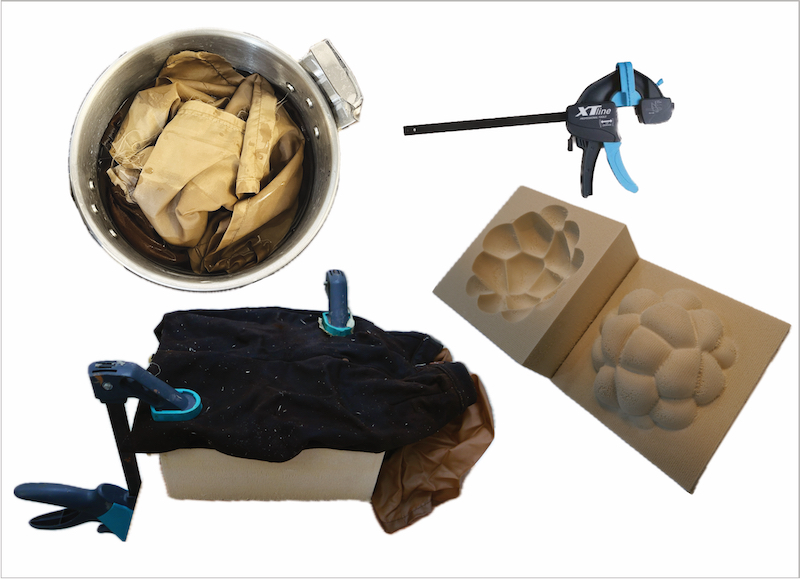
LEATHER MOLDING
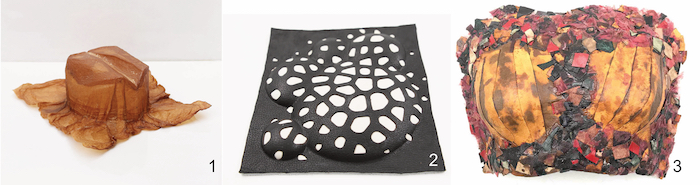
I used an old leather skirt made from pigskin that was quite thick and shrank significantly when heated in water. I soaked the leather in water for three hours and then heated it in a pot for a while. Once it became a little stretchy, I put it in the mold and clamped it down. I left it to dry over the weekend.
Leather
Cut the leather into appropriately sized pieces. Heat the water to approximately 90 degrees. Soak the leather in the hot water for about 10 minutes, (depending on the type of leather). Once soaked, squeeze out any excess water from the leather. Place the leather in the mold, and pull the edges of the leather outside of the mold as much as possible, and add the stretching, pressing, and clamping process. Leave the leather in the mold for a few hours to set.
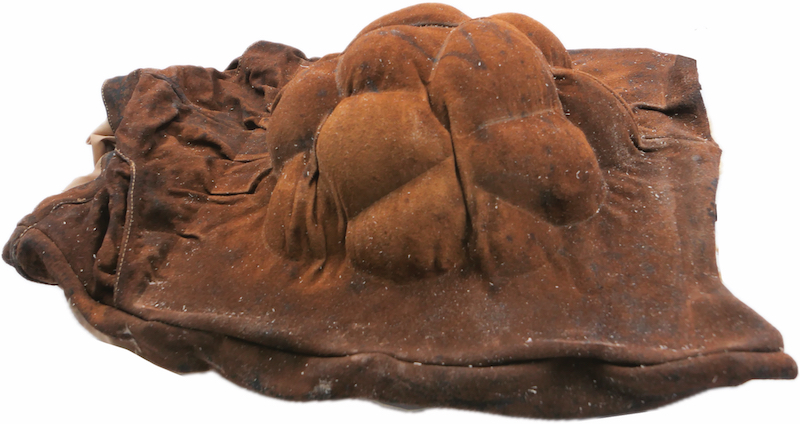
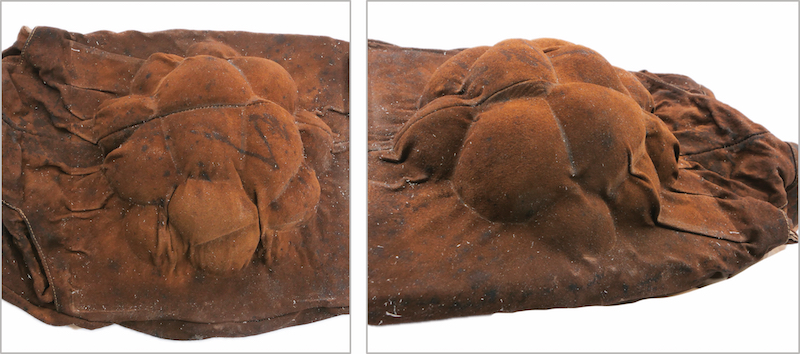
- I would like to repeat the experiment as small folds formed due to imperfect skin stretching.
RECYCLED PAPER COMPOSITE
- Recycling the paper already used.
- We can use, almost, all kind of discarded paper material and transform it in beautiful new composite.
Egg cartons are typically made of paper, but they cannot be recycled efficiently. The reason behind this is that paper can only be recycled up to seven times, after which its fibres become too short to be used in paper production. As a result, the egg tray is the final use for this material. The same is true for toilet paper rolls. It's better to dispose of them in the mixed waste or, ideally, in a bio-waste bin or compost to reduce environmental harm.
- I decided to create a biocomposite using discarded egg cartons.
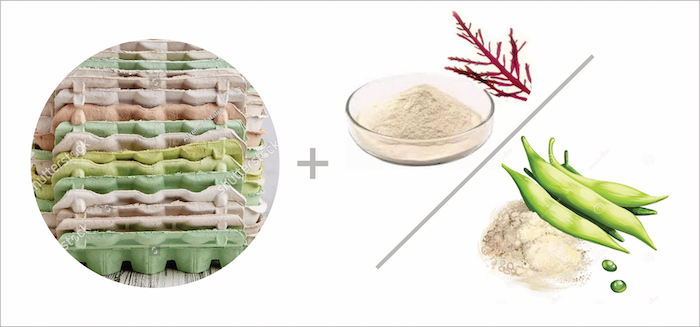
- I created two paper composites using different thickeners: one with agar agar powder and the other with guar gum, mixed with ground paper and water.
| QUANTITY OF PAPER WITH WATER | AMOUNT OF ADDED INGREDIENT |
|---|---|
| approximately 400 ml | 1 table spoon of guar gum |
| approximately 400 ml | 2 table spoons of agar agar |
- I heated each mixture until it thickened, then poured it into the prepared frames in a thin layer and allowed it to dry.
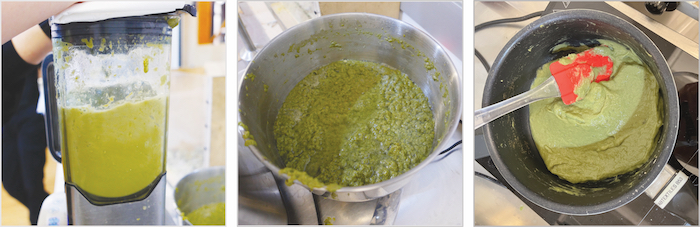
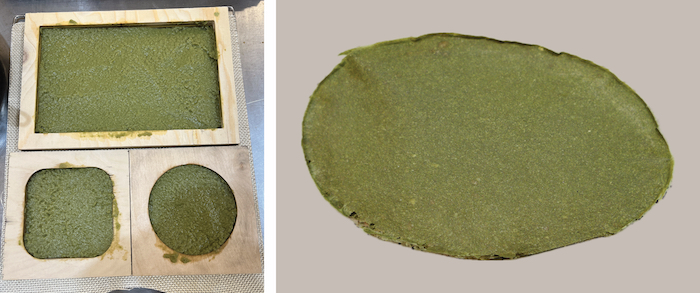
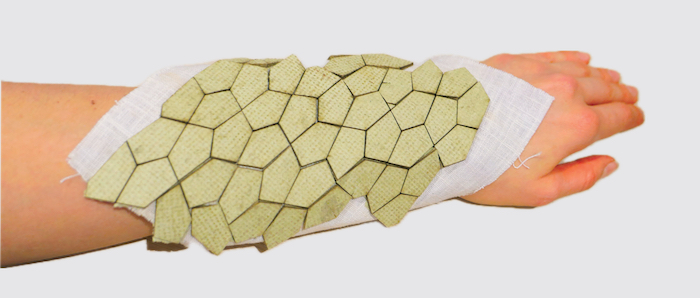
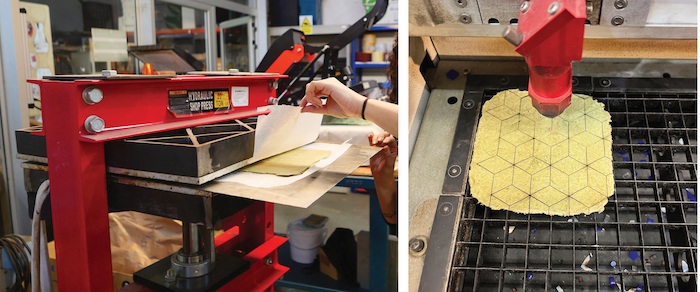
The composite material turned out to be very good, especially when combined with guar gum. As a result, I decided to use it for my next project - WOODEN TEXTILES TECHNIQUE. To prepare the material for laser cutting, I had to first heat press it to make it perfectly flat.
- For the heat pressing, I used approximately 80 degrees Celsius for about 5 to 7 minutes.
Laser cutter settings
| Material | Thickness | Power | Speed |
|---|---|---|---|
| RECYCLED PAPER COMPOSITE - Cut | ≈ 0.7 mm | 30 | 1 |
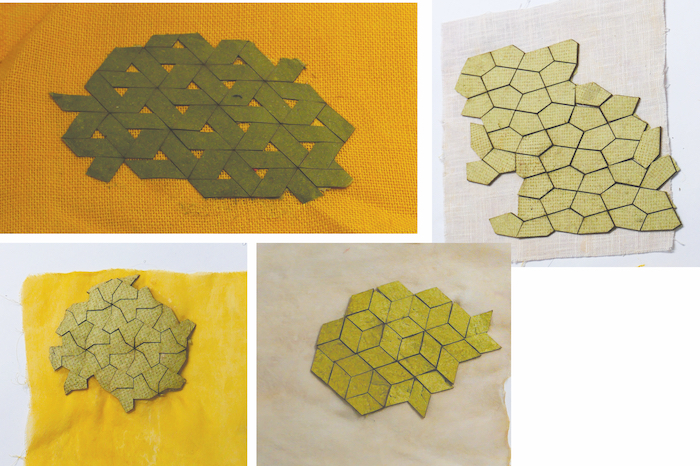
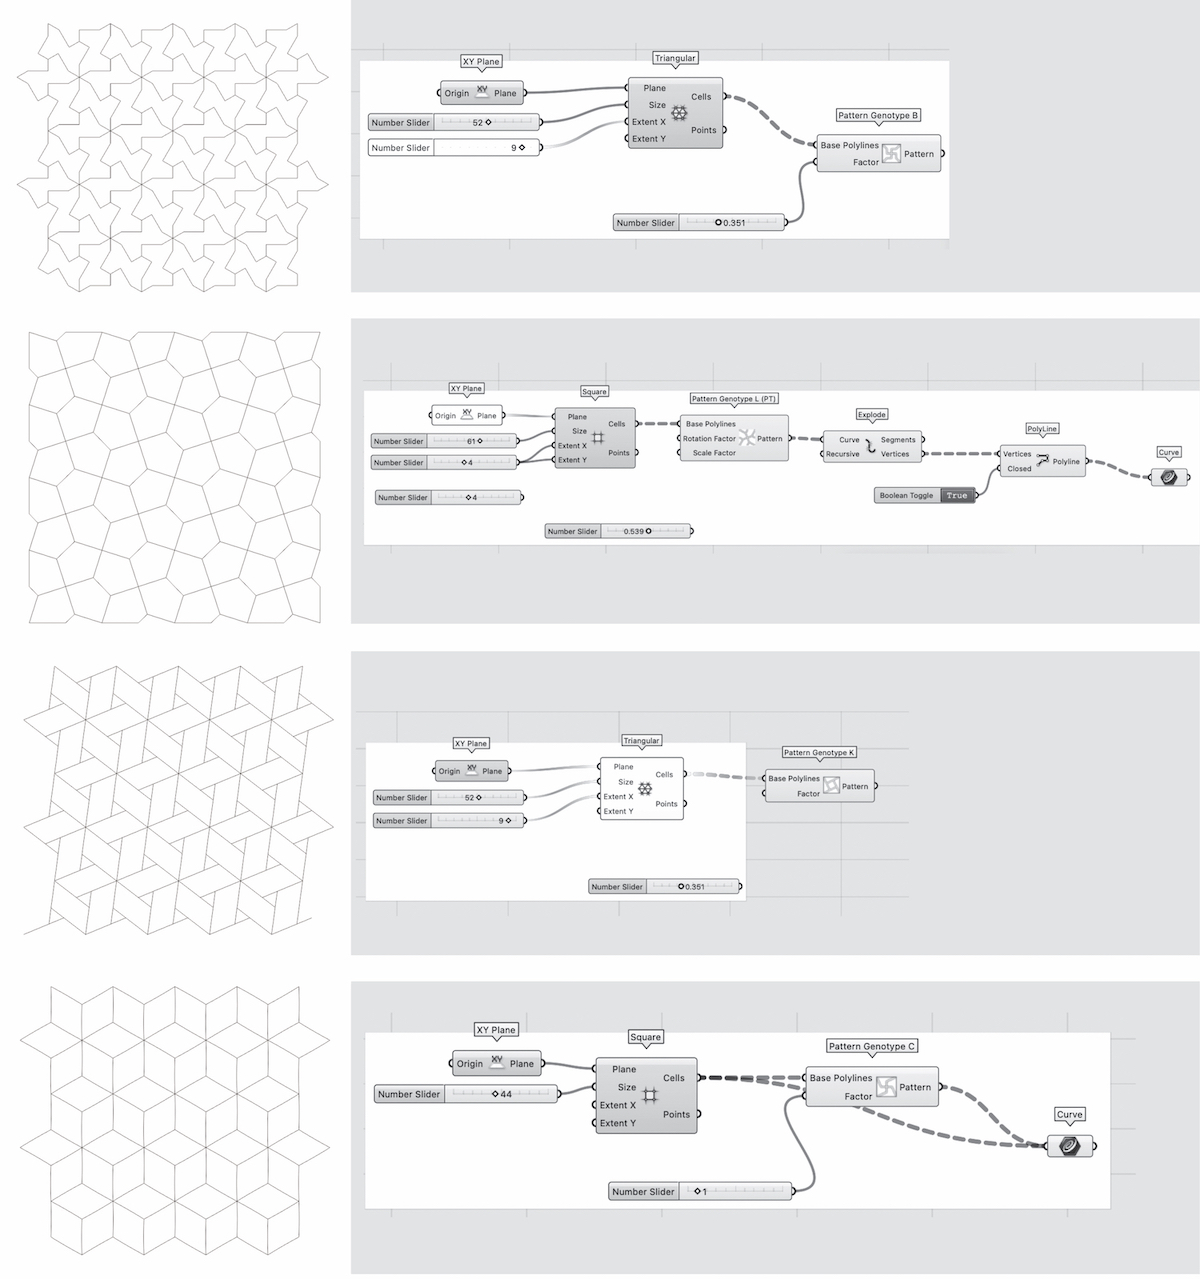
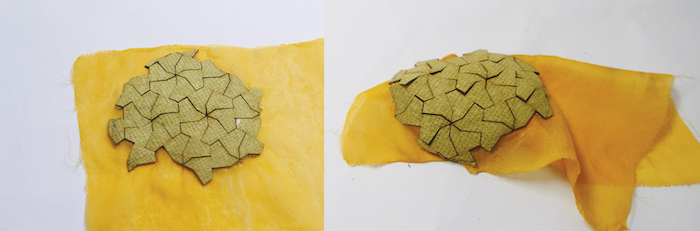
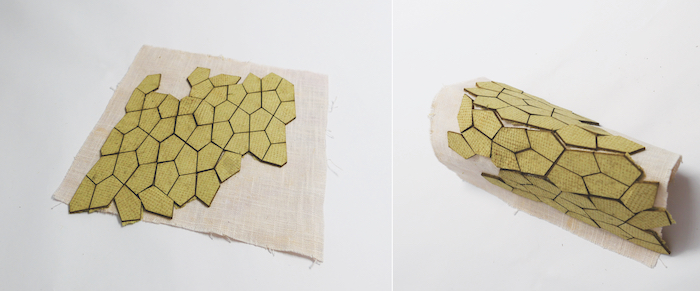
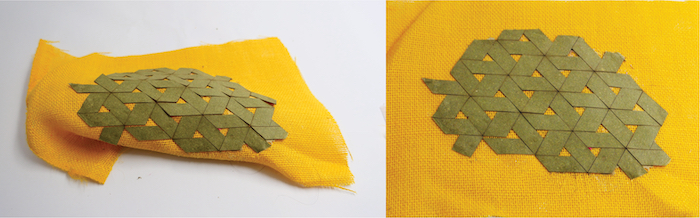
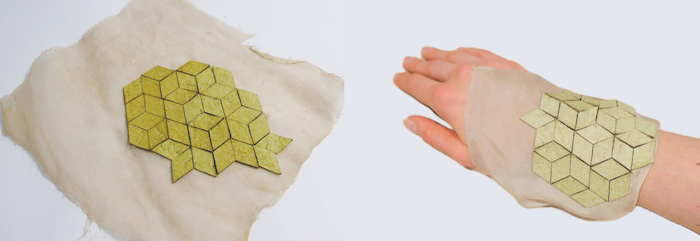
WOODEN TEXTILES TECHNIQUE
Inspiration: A material between wood & textile
- Plugin - Pattern Genotype I
- Rhino 7 & Grasshopper - Parametric Modeling
- Different patterns were created using grasshopper. After laser cutting, I glued everything on different types of fabric.