Digital Bodies
Research & Ideation
The lecture was really inspired, Anastasia introduced the history, fabrication process of mannaequin as well as mannequin related artworks and artists, I started collect the images, the more diverse, the better.try to find my own interest.
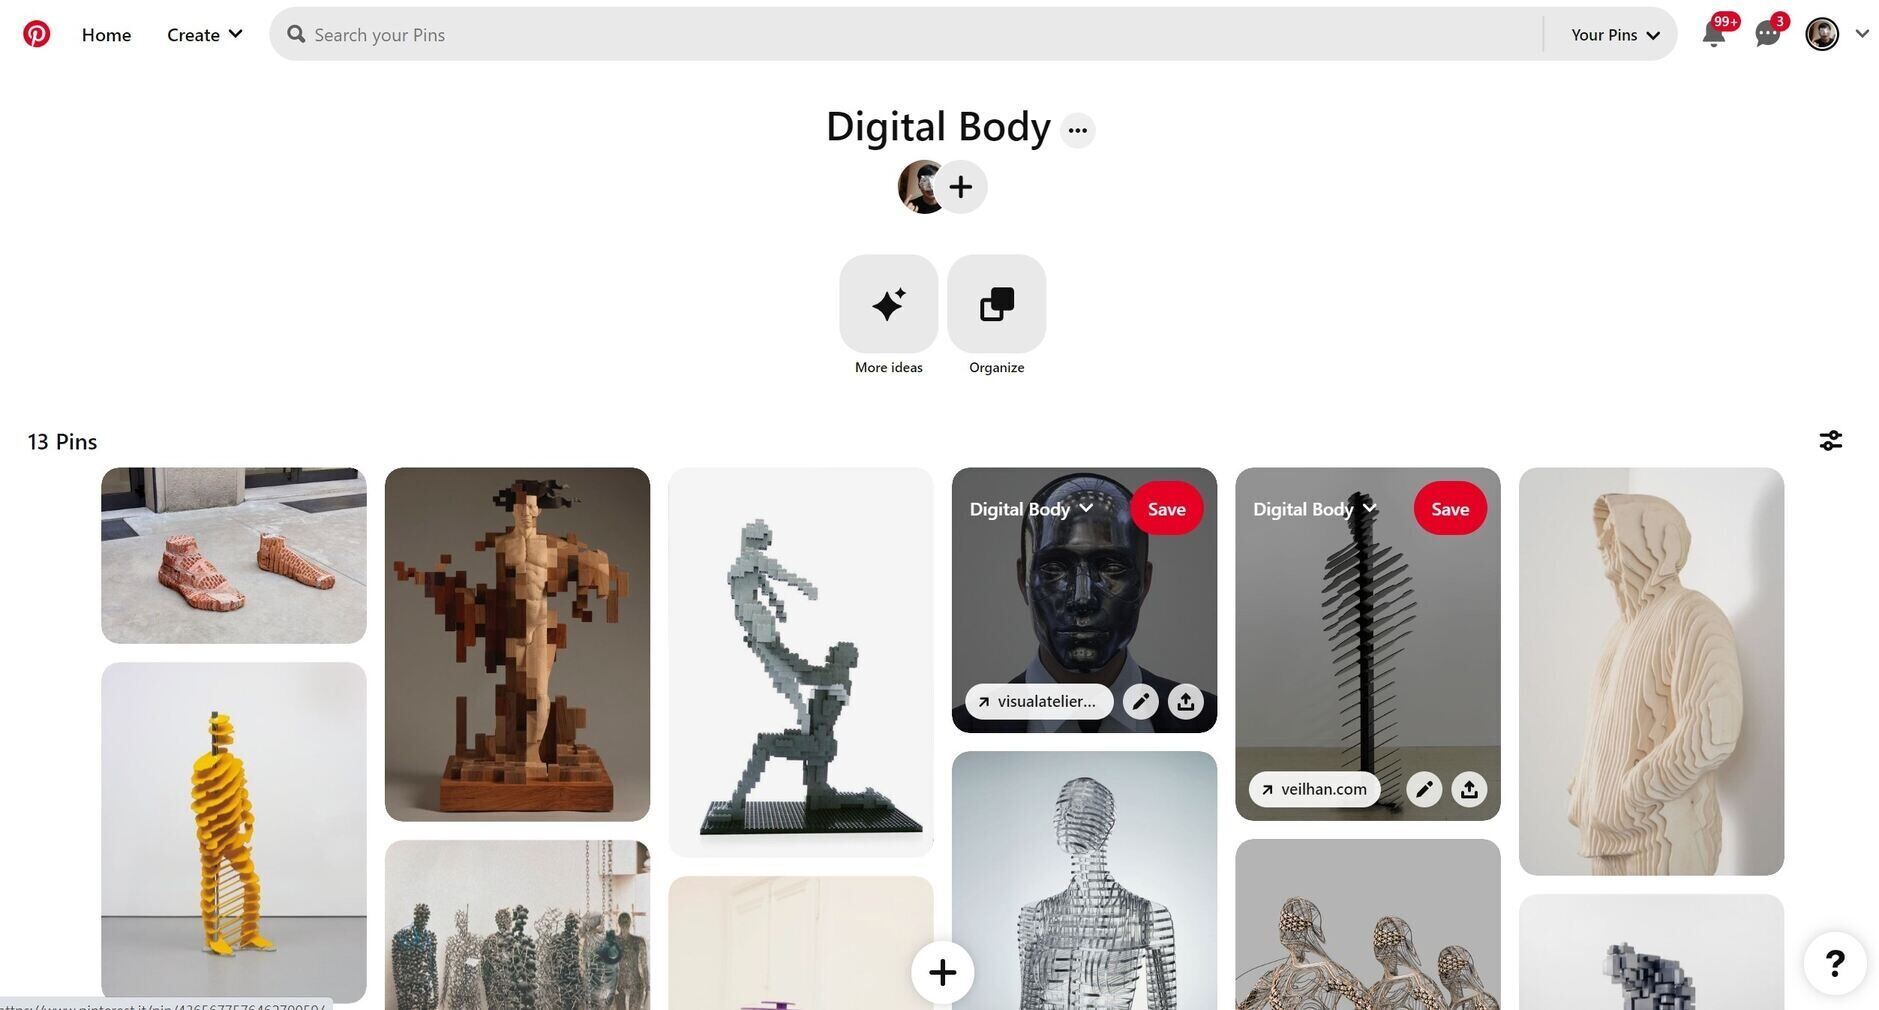
References & Inspiration
I'm fascinating in the contrast created by the combination of different materials or substances. Italian artist Giuseppe Penone's work is a great example. He often uses various materials to present different aspects on a single object, allowing viewers to read different features in one piece. Not only the combination of materials with materials, but also the interaction between materials and emptiness, or one could say, the interaction with the air(pure substance). Sukhi Barber's sculpture represent this idea, You can feel the fusion of artwork with the environment.
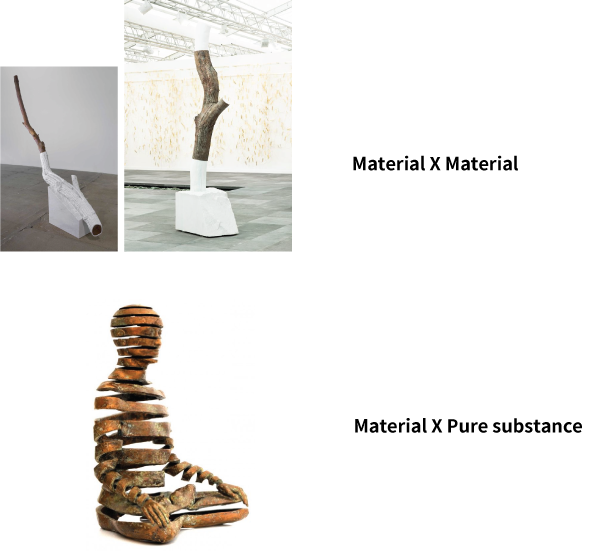
01-02 Giuseppe Penone
03 Sukhibarber
Tools
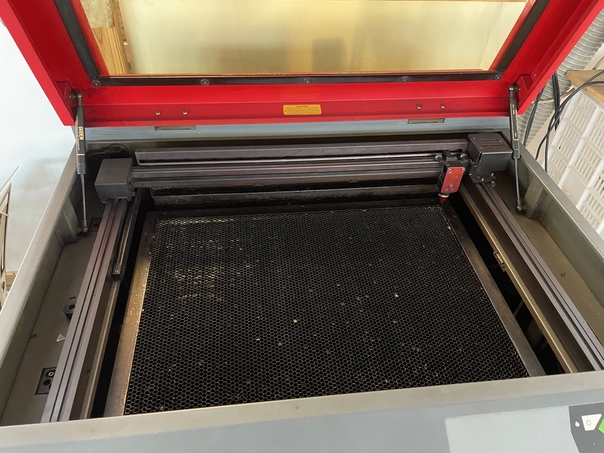
1.Laser cutting
Laser cutting is a relatively beginner-friendly and straightforward fabrication method. The general process involves obtaining or creating a 3D model, using slicing tools to convert it into an EPS or vector path file. Then, you can edit it in vector software like Adobe, modifiy settings like line width and color according to the laser cutting machine's requirements. By changing settings allows you play between cutting or laser engraving.
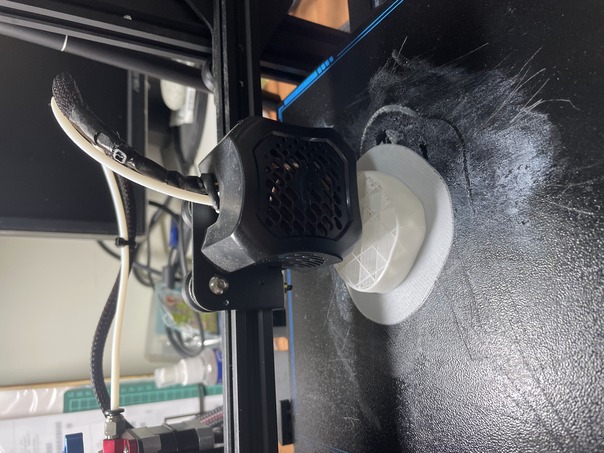
2.3D printing (FDM)
FDM 3D printing is also a fairly user-friendly fabrication technique, but what I find distinct is that 3D printing offers more parameters to experiment with, and the outcomes can vary based on individual experience or objectives. This is what makes 3D printing fascinating.
Process and workflow
I was using laser cutting and 3D printing technologies in the fabrication process. The established workflow is as follows:
Laser cutting
3D model source
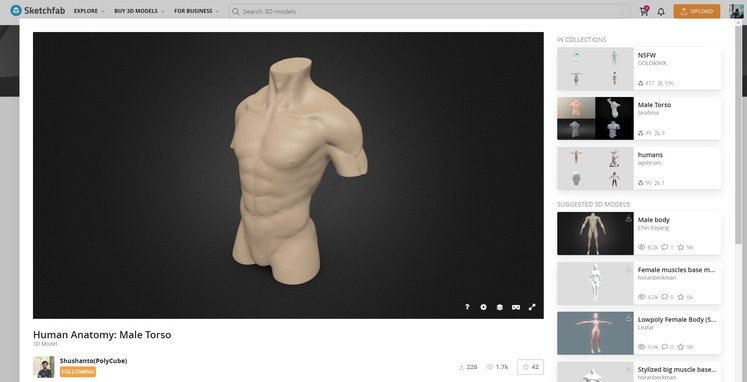
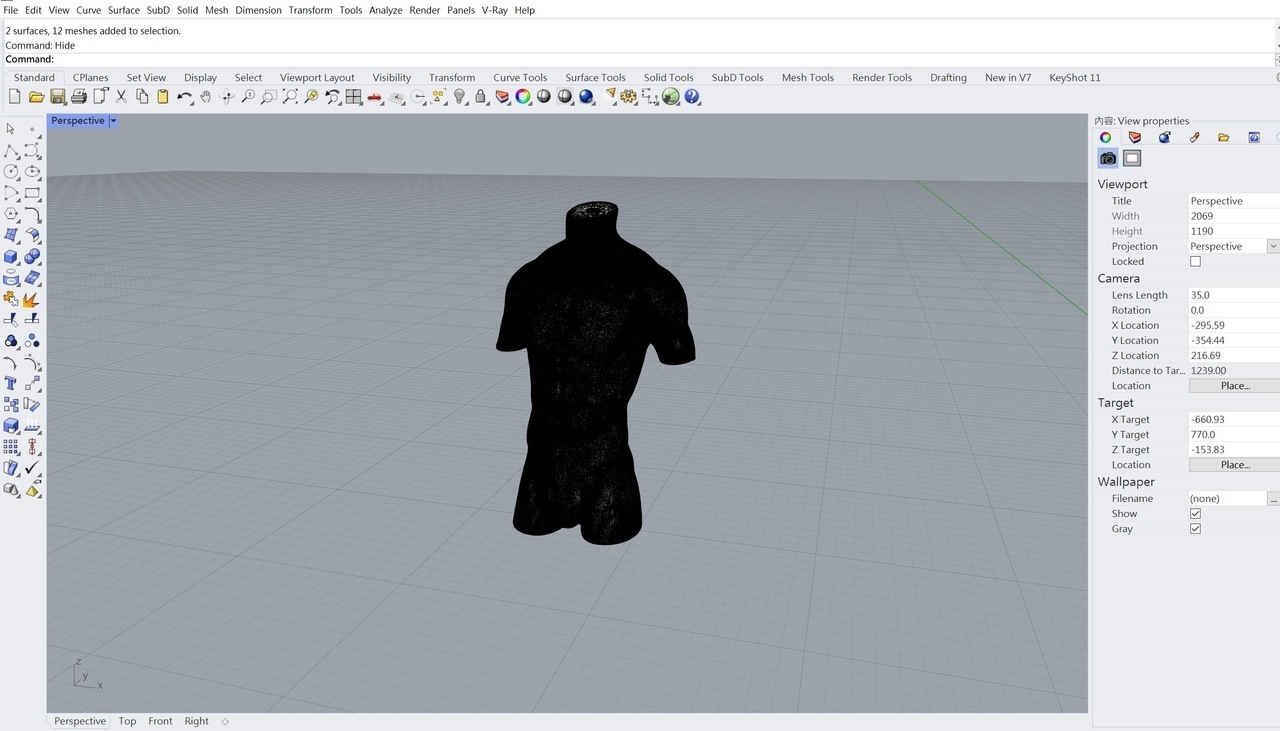
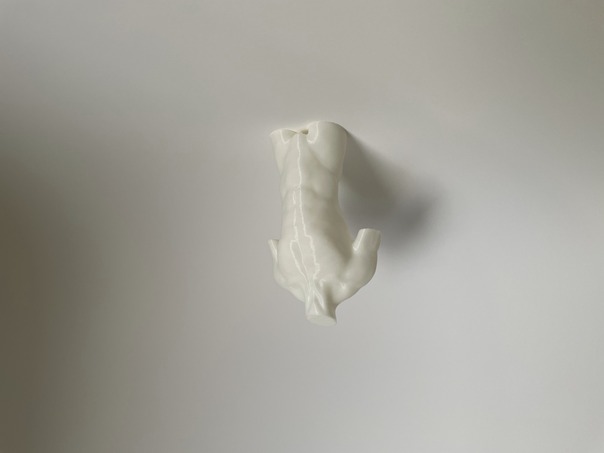
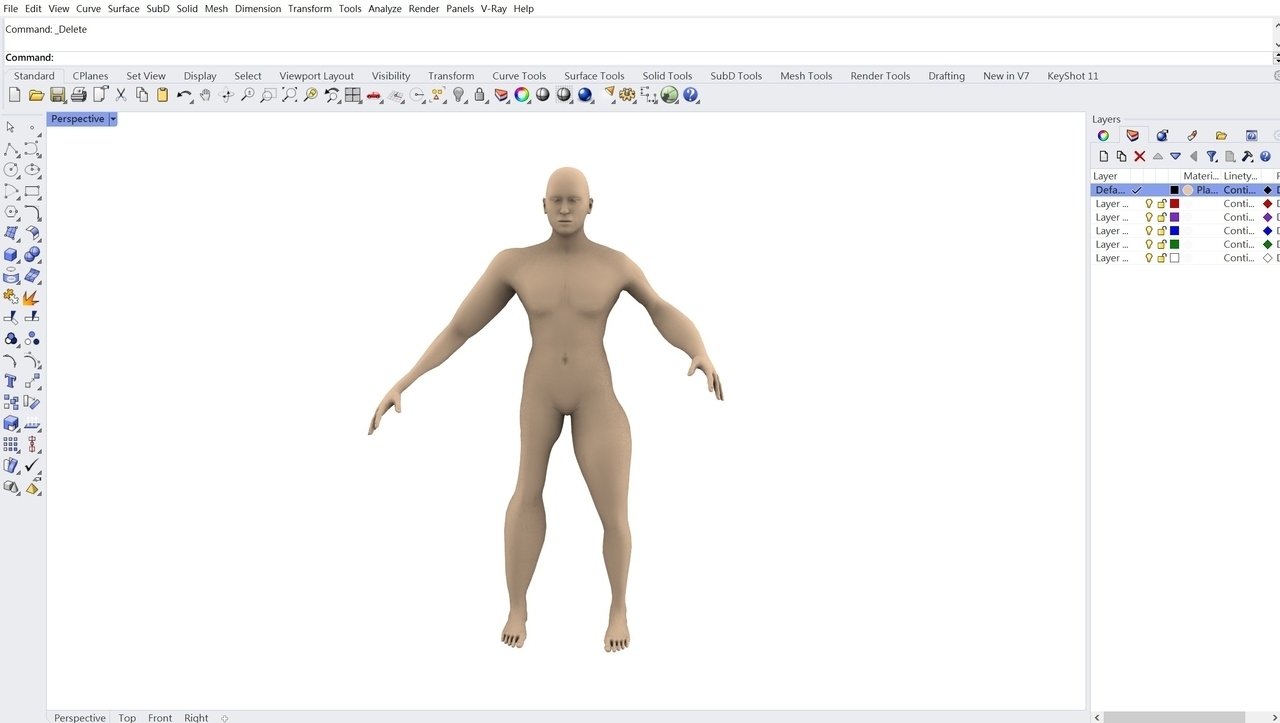
This model [^1] was obtained from 3d model source website which is called: Sketchfab , model author: Shushanto. 3D format: obj. This male torso model is so detailed, you can clearly see each human muscle, perfect for study anatomy.
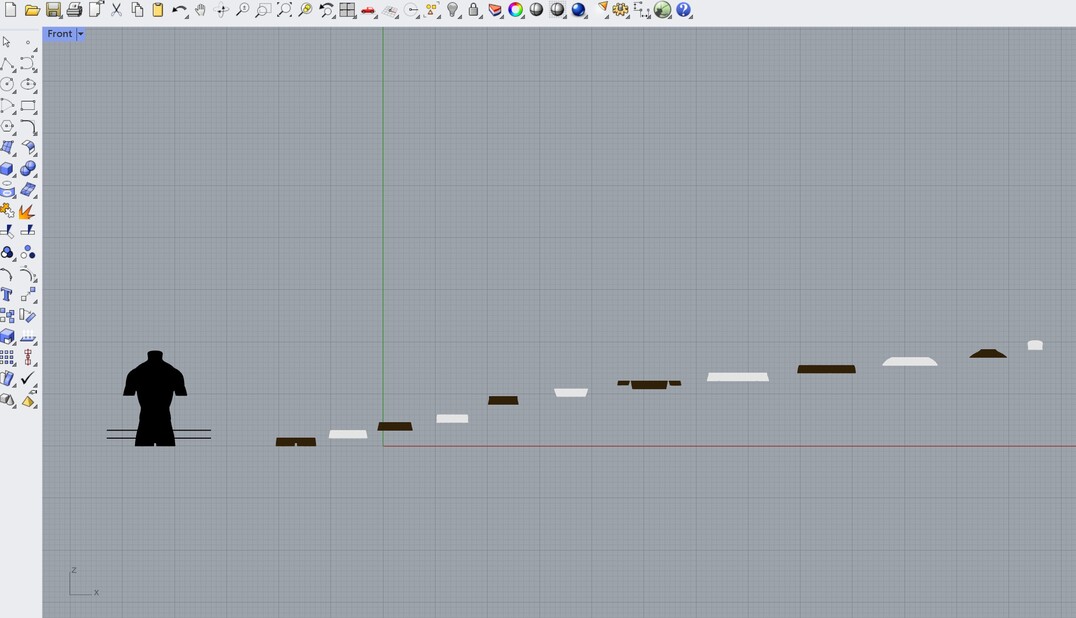
Slice by SliceforFusion360
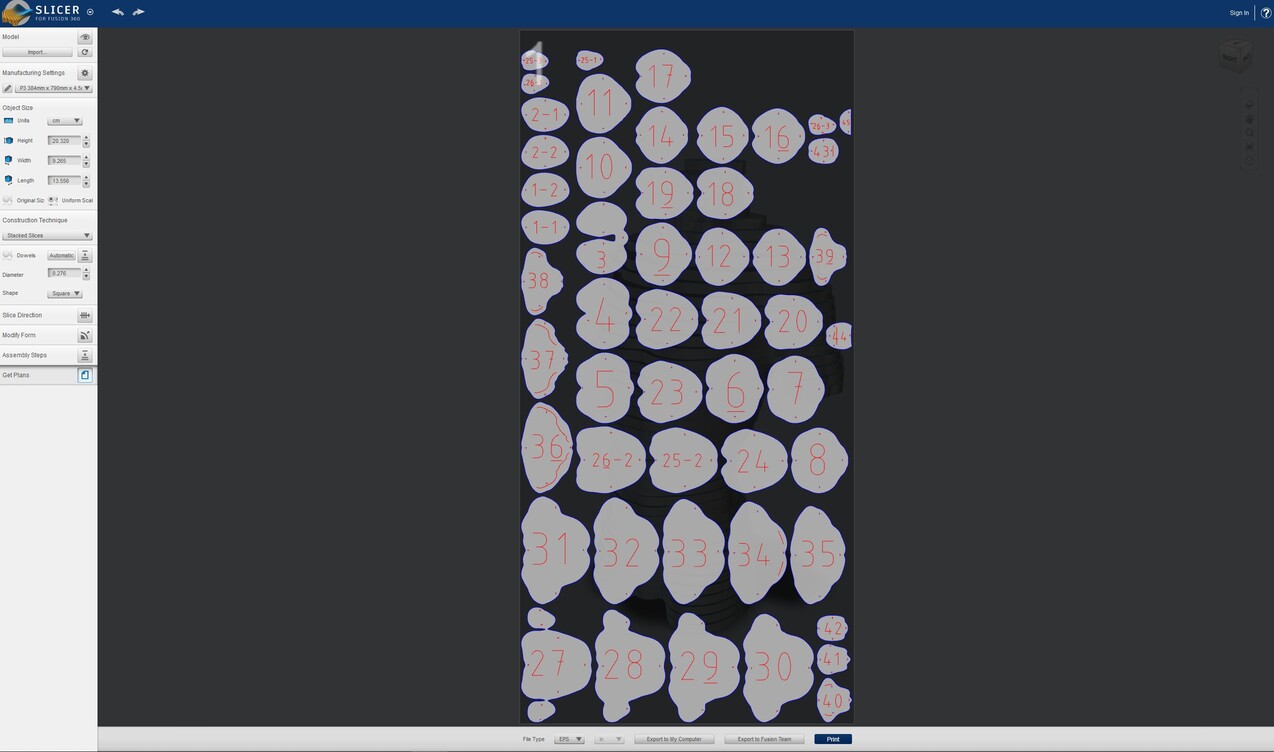
The laser cut nesting [^2] was created using..
After importing the human body model into Sliceforfusion360, you can input various parameters such as layer thickness and size. The software offers several slicing methods. I choose the 'Stacked Slices' method, with the intention of creating a comparison with 3D printing.

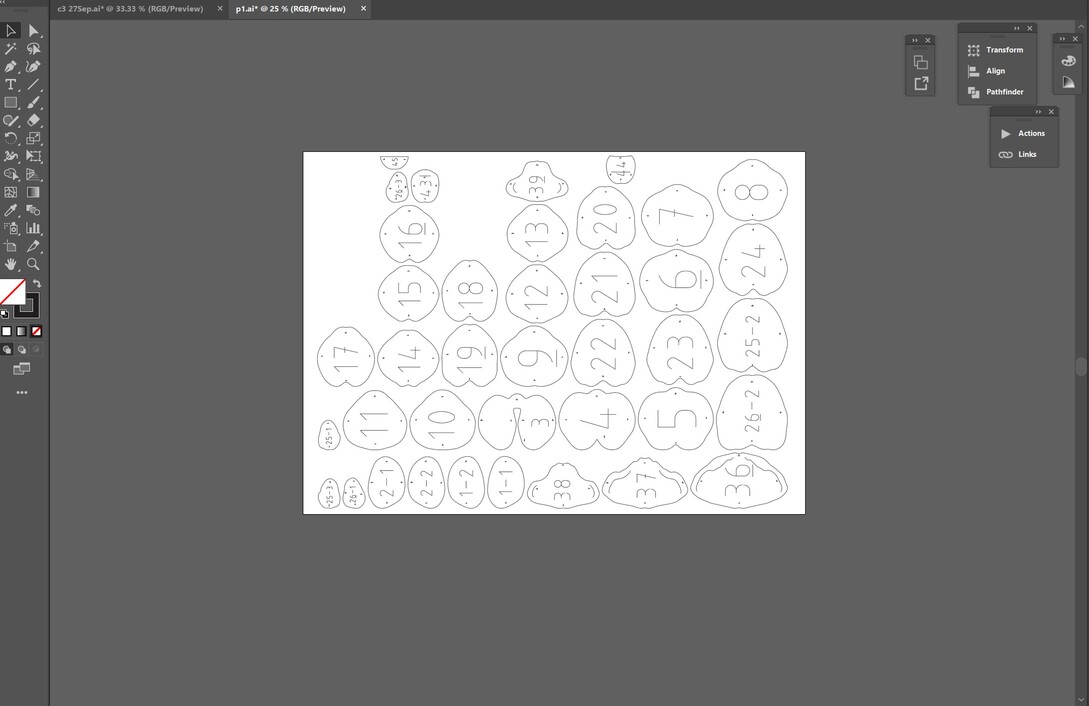
Edit vector line color and width by Illustrator
Using the vector file exported from Sliceforfusion360, I edited the position, line width (set to 0.001pt), color mode (RGB), and line color in Illustrator. In the laser cutting machine software, you can adjust the colors to correspond to the desired power settings for cutting or laser engraving. In this instance, my primary focus was on cutting.


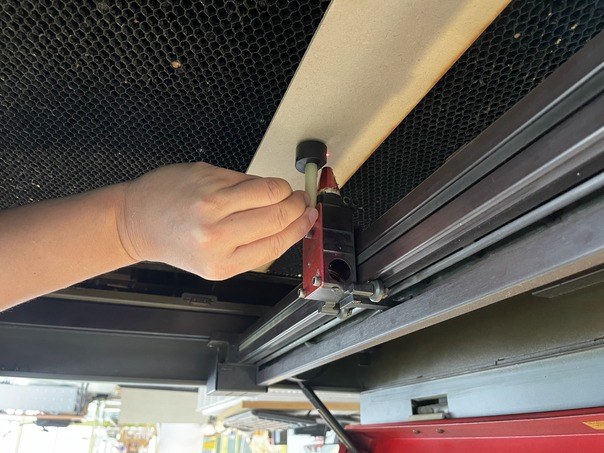
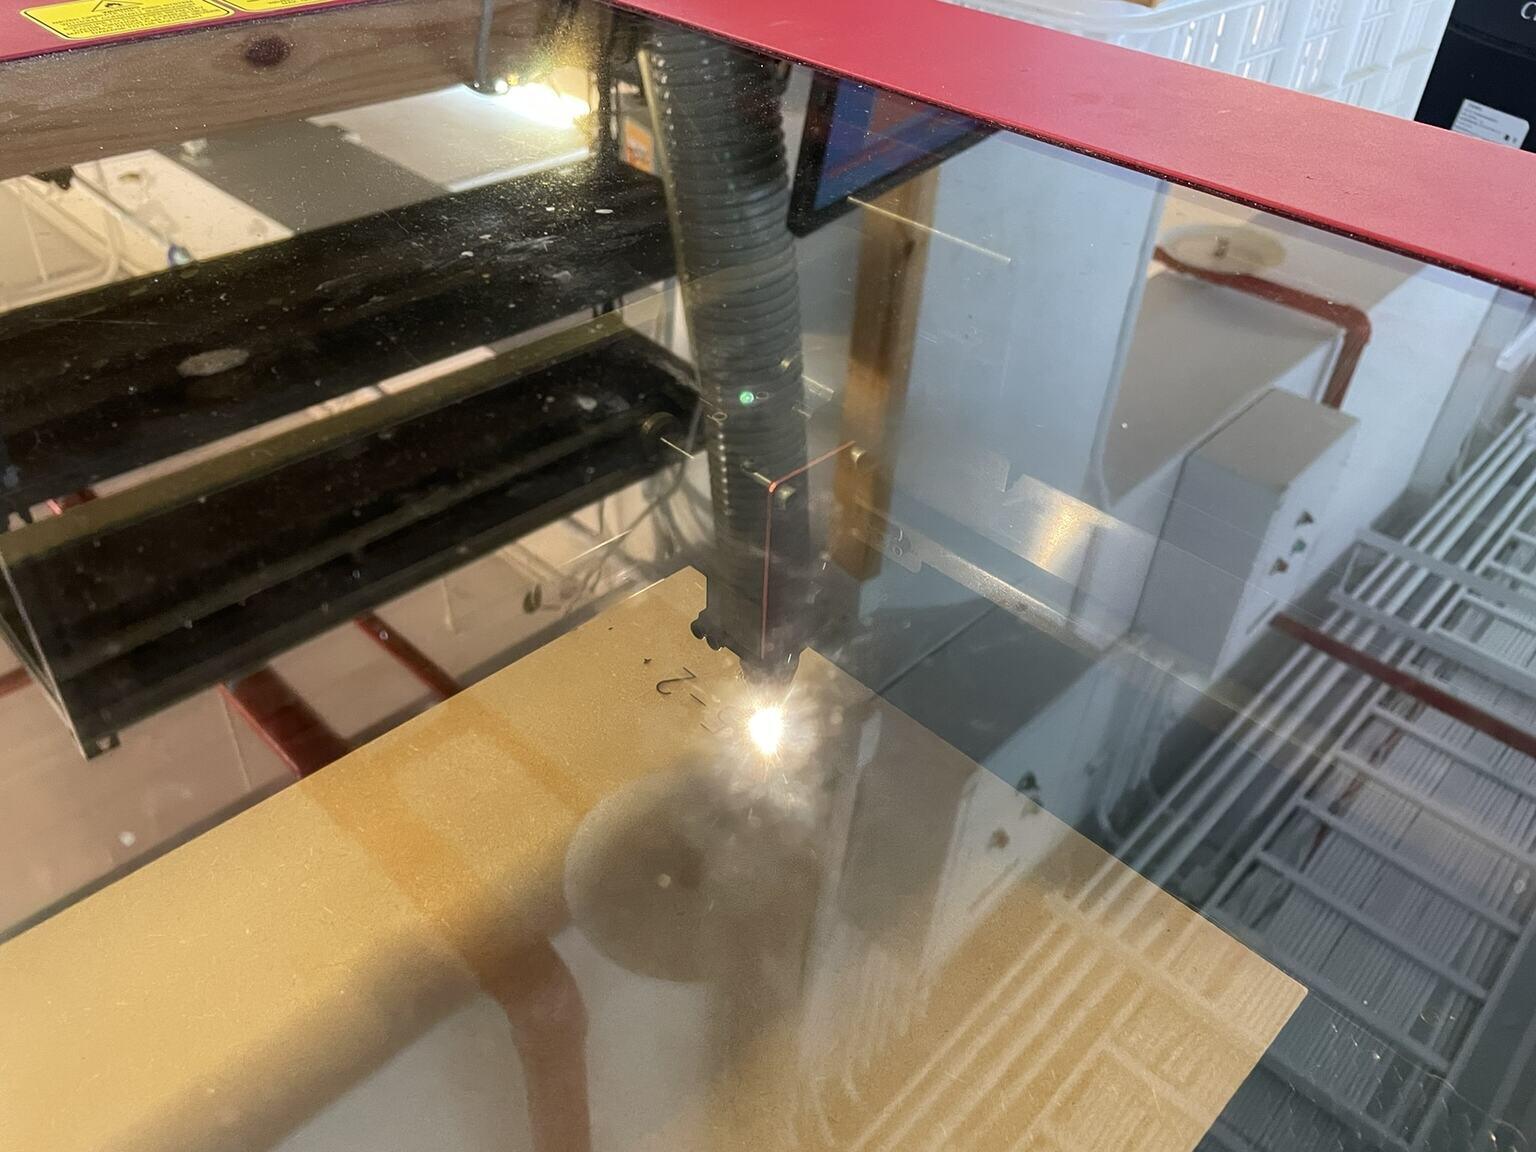
Start laser cutting
After adjusting all the parameters, time to start laser cutting! But before beginning, there's an important reminder: it's necessary to adjust the relative height of the laser head based on the thickness of the material you've chosen. Failure to do this could potentially result in issues such as insufficient focus due to changes in the relative distance between the laser and the material, or problems with cutting continuity or excessive scorching due to excessive power.
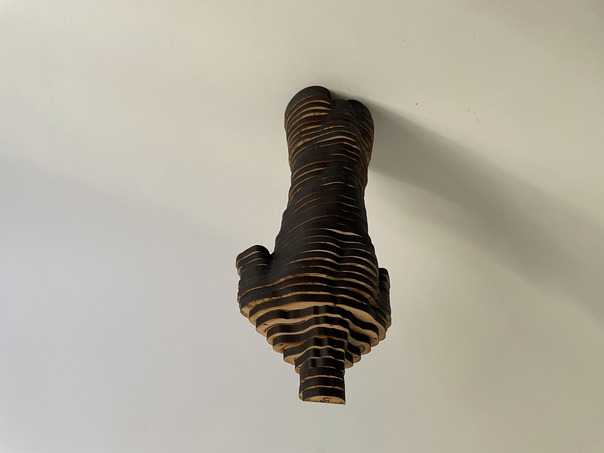
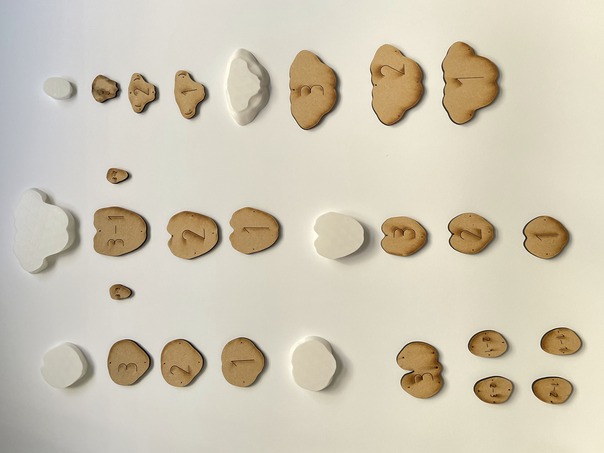
First laser cutting model
Sliceforfusion360 is very considerate in labeling each slice with a number and alignment holes, which makes assembly very easy.
3D printing (FDM)
3D model editing and Slice
I use the same 3D model and import it into the Rhinoceros 3D Rhinoceros 3D to make size adjustments and check if any modifications are needed. Afterward, I export it as an STL (Stereolithography) file and import it into the 3D printing slicing software, Cura from Utlimaker UltiMaker Cura, for slicing.
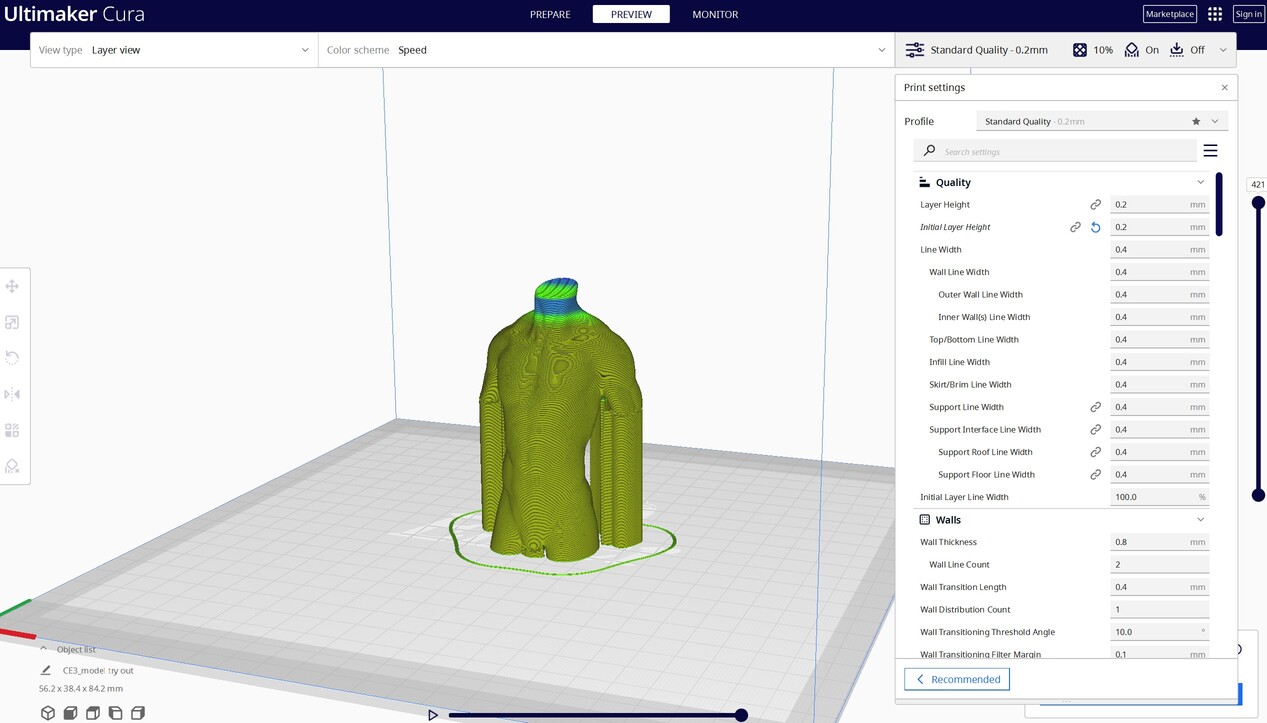
3D Model by 3D printing
I scaled the model down so that the printed model is approximately 12 cm tall, estimating a scaling ratio of about 1:6 (if the head and lower body are added back).
3D printing (FDM)
3D model editing and Slice
I use the same 3D model and import it into the Rhinoceros 3D Rhinoceros 3D to make size adjustments and check if any modifications are needed. Afterward, I export it as an STL (Stereolithography) file and import it into the 3D printing slicing software, Cura from Utlimaker UltiMaker Cura, for slicing.
3D Model by 3D printing
I scaled the model down so that the printed model is approximately 12 cm tall, estimating a scaling ratio of about 1:6 (if the head and lower body are added back).
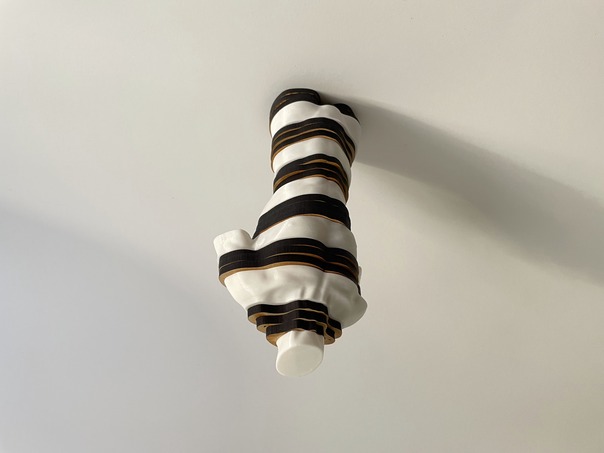
Interested in contrasting laser cutting and 3D printing.
Next, I want to experiment with these two layer-by-layer principles. I will divide the model into 12 equal parts, each 15mm thick (considering the 5mm thickness of the laser-cutting material). Then, one part will be laser-cut, and one part will be 3D printed, continuing to stack them. My goal is to present an interesting comparison, whether in terms of precision or materials.
3D model editing
I divided 3D model,then separate file saving within Rhinoceros.

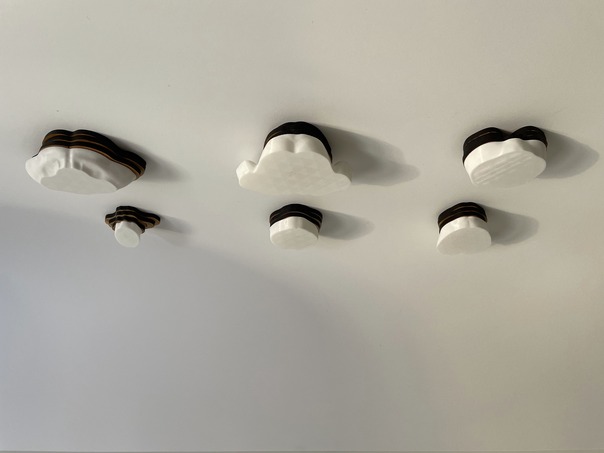
After fabrication process
After laser cutting and 3D printing, I obtained numerous components, which I then organized into groups and systematically assembled.
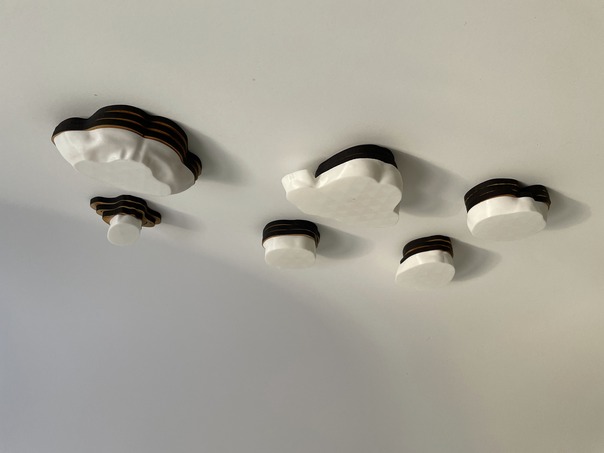
3D Model by 3D printing and Laser cutting
Even though it's done with simple processing methods, I enjoy this kind of comparison; it's quite fascinating.

3D Models
Source from SketchFab
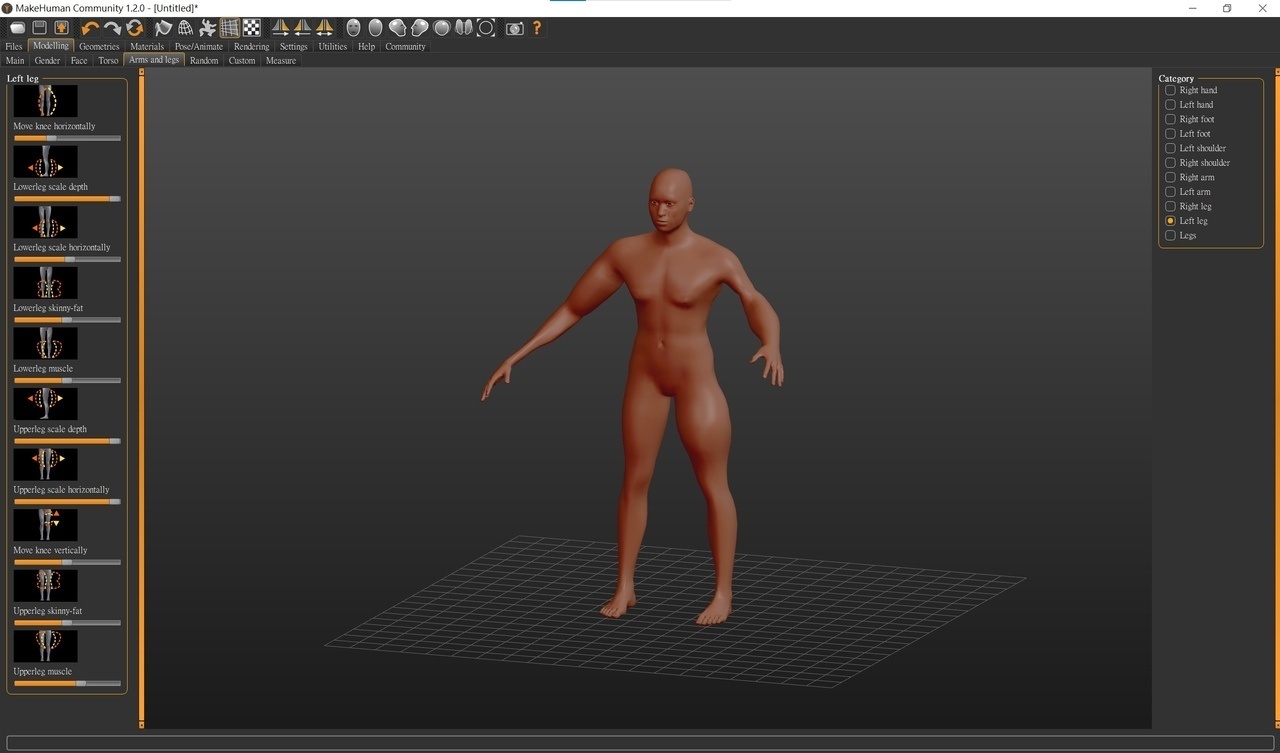
MakeHuman try out
MakeHuman is one of the most cool tools I learned this week. It has many parameters related to human body, such as the thickness of arms, the distance between eyes...etc, you can play with, create whatever you like. I imagine in the future, humans might be able to control each of their muscles more precisely, allowing for greater differences in the development of each muscle and thus creating asymmetrical human bodies.
Inspiration Videos
When first time I saw theme: digital body, I thought about Taiwanese artist Yi-Fan Li, in his work: howdoyouturnthison不好意思...請問一下這個怎麼打開 he was exploring the interactive relationship between humans and technology, as well as images. The other really inspired artist is Bart Hess. He always searching narrative through the relationship between materials and the human body. His works, or performances, often create a sense of interplay between reality and unreality.