Wearables
Research
This week we had really inspired presentation given by Liza Stark and Emma, there are limitless possibilities in the development of wearables.
Reference
02 Kobakant
03 Jingwen-zhu
Tools
Libraries
Libraries in the Arduino IDE contain pre-written code that simplifies complex tasks. It include functions for a wide range of purposes, such as controlling specific sensors, communicating with other devices, or managing complex algorithms. When you want to use a specific functionality in your Arduino project, you can include the relevant library in your code.
Capacitive sensor
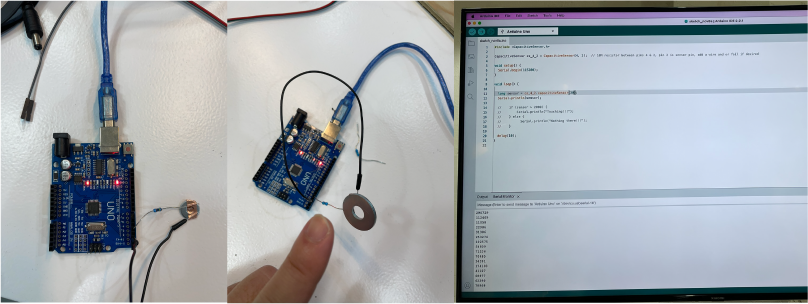
This week we start to try capacitive sensor and LED stripe with Gerard Montaño, Capacitive sensing is a technology used to detect the presence or touch of an object by measuring changes in capacitance. It relies on the principle that when a conductive object, such as a human finger. But we also had the first challenge is there's libraray compatible issue of XIAO ESP32C3, we couldn't work out, so we try our sensor with an arduino uno.
Code
#include <CapacitiveSensor.h>

CapacitiveSensor   cs_4_2 = CapacitiveSensor(4,2);        // 10M resistor between pins 4 & 2, pin 2 is sensor pin, add a wire and or foil if desired

void setup() {
   Serial.begin(115200);
}

void loop() {

    long sensor =  cs_4_2.capacitiveSensor(30);
    Serial.println(sensor);

//    if (sensor > 2000) {
//        Serial.println("Touching!!!");
//    } else {
//          Serial.println("Nothing there!!!");
//    }

    delay(10);
}
This readily available small iron piece, unexpectedly, serves as an excellent medium. After completing the circuit connections, the results are very satisfying.
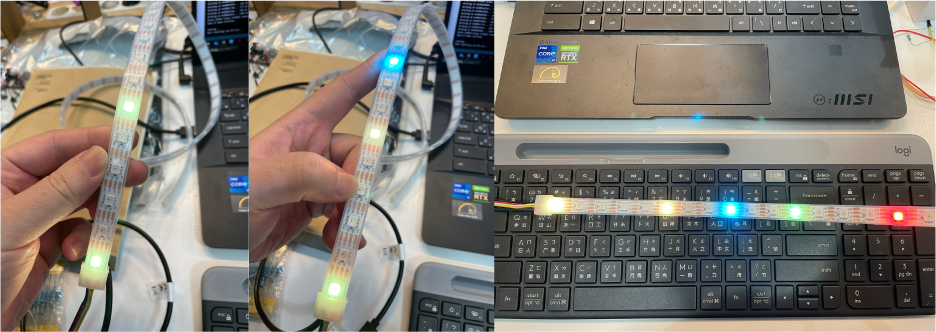
LED Stripe
Next, we experimented with the control of LED strips. We encountered these two types this week: 1.Neopixels: Neopixels are are a brand of individually addressable RGB (Red, Green, Blue) LEDs (Light-Emitting Diodes).
2.Adafruit NeoPixel: the other brand of individually addressable RGB LEDs produced by Adafruit Industries.
- Tips RGB LED strips come with controllers that allow users to customize the color output, brightness, there's nice site that you can search requested color: HTML Color Picker.
Code
#include <Adafruit_NeoPixel.h>

#define LED_PIN    D2
#define LED_COUNT 20

Adafruit_NeoPixel strip(LED_COUNT, LED_PIN, NEO_GRB + NEO_KHZ800);

void setup() {
  strip.begin();
  strip.show();
}

void loop() {

   strip.setPixelColor(0, 255, 180, 0);
    strip.show();
    strip.clear();
  delay(20);

  strip.setPixelColor(5, 178, 98, 0);
    strip.show();
    strip.clear();
  delay(20);

  strip.setPixelColor(8, 13, 240, 168);
    strip.show();
    strip.clear();
  delay(20);
  //
  strip.setPixelColor(11, 102, 153, 0);
    strip.show();
    strip.clear();
  delay(20);

  strip.setPixelColor(15, 210, 0, 0);
  strip.show();
  strip.clear();
  delay(20);

}
Example
Thermochromic ink
Thanks to Citlali Sánchez for showing us the tutorial of thermochromic ink, we had a lot of fun with it!
Thermochromic pigments are temperature-sensitive and can undergo a reversible color change when exposed to heat or cold. The mechanism involves a shift in the molecular structure of the pigment or ink, leading to alterations in the way it absorbs and reflects light, resulting in a visible color change.
References
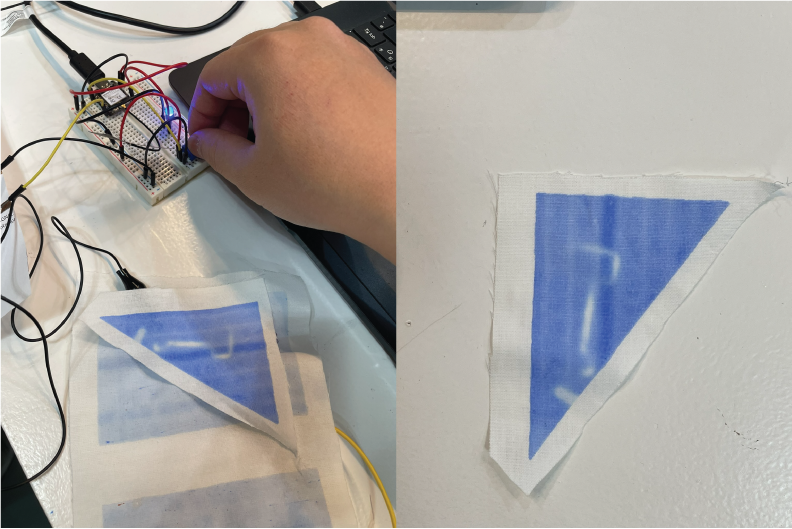
Thermochromic pigments preparing
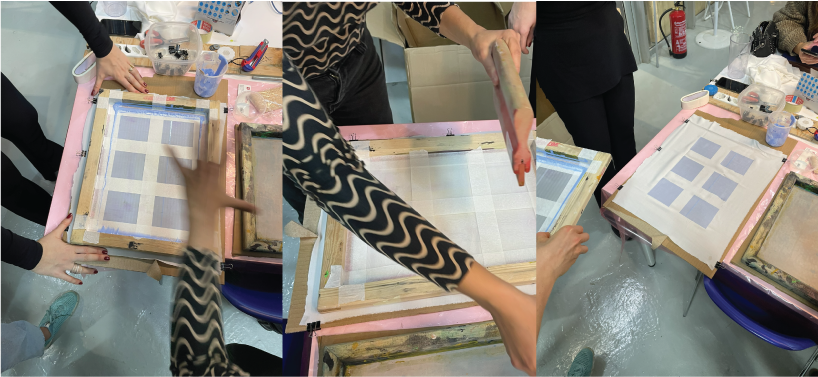
First, we need to mix the thermochromic pigment with paint nicely until you don't see any pigments. Then, prepare the screen and the fabric you would love to print on. Here's a little tip: if you want to divide the printing area into several blocks, it's recommended to place the masking tape on the bottom side rather than the side the tool moves on. This ensures a smooth printing process without any disruption caused by the thickness of the tape.
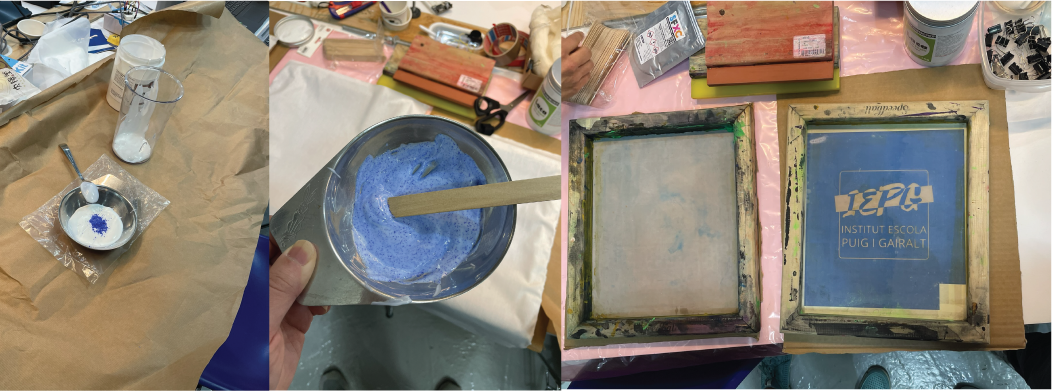
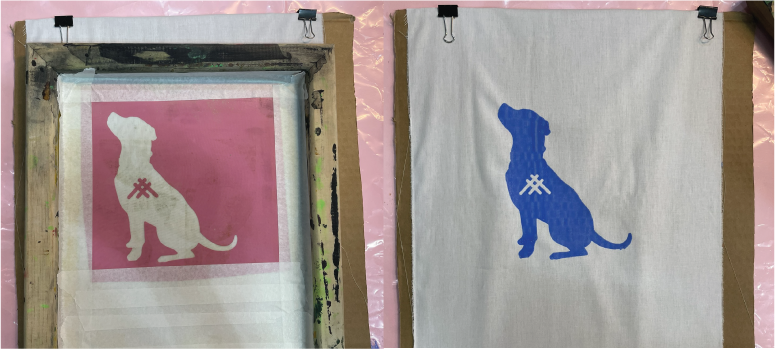
Petra used a vinyl cutter to create a silhouette of our lab manager, Mila. We need to print it nicely to express our respect for Mila.
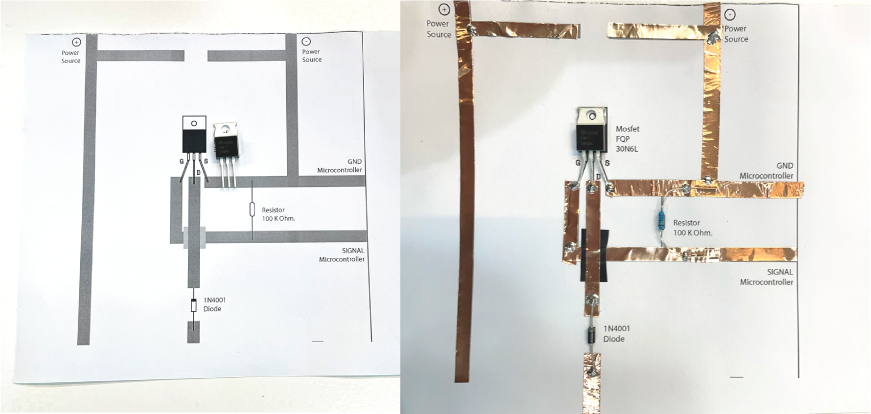
Circut mock up
Citi also prints out the template of the circuit, and we can easily follow the instructions on it to complete the heat up circuit. During the process, we also need to solder to ensure that each connection point makes good contact.
Code
int valPoten;
int poten=A0;
int led=D7;
int heat=21;
int mapPot;

void setup() {
  pinMode(poten,INPUT);
  pinMode(led,OUTPUT);
  pinMode(heat,OUTPUT);
  Serial.begin(9600);
}

void loop() {

  valPoten= analogRead(poten);
  mapPot= map(valPoten, 0, 4095, 0, 255);

  Serial.println(valPoten);
  delay(250);

  analogWrite(led, mapPot);
  analogWrite(heat, mapPot);
}
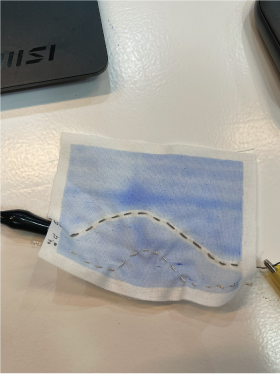
Try out titch conductive thread heating up.
Development
While applying thermal coating, I casually practiced calligraphy. Consequently, an idea emerged to utilize the thermal properties of the material to create instructional items like a calligraphy-themed T-shirt or bag. Petra suggest me to check Emma Picanyol document exploring the use of an embroidery machine. To achieve this, we would need to utilize the Inkscape extension called InkStitch. You can refer to the user-friendly tutorial created by Fab Lab BCN intern Julia Gase for guidance.
The ideation sketch shows below
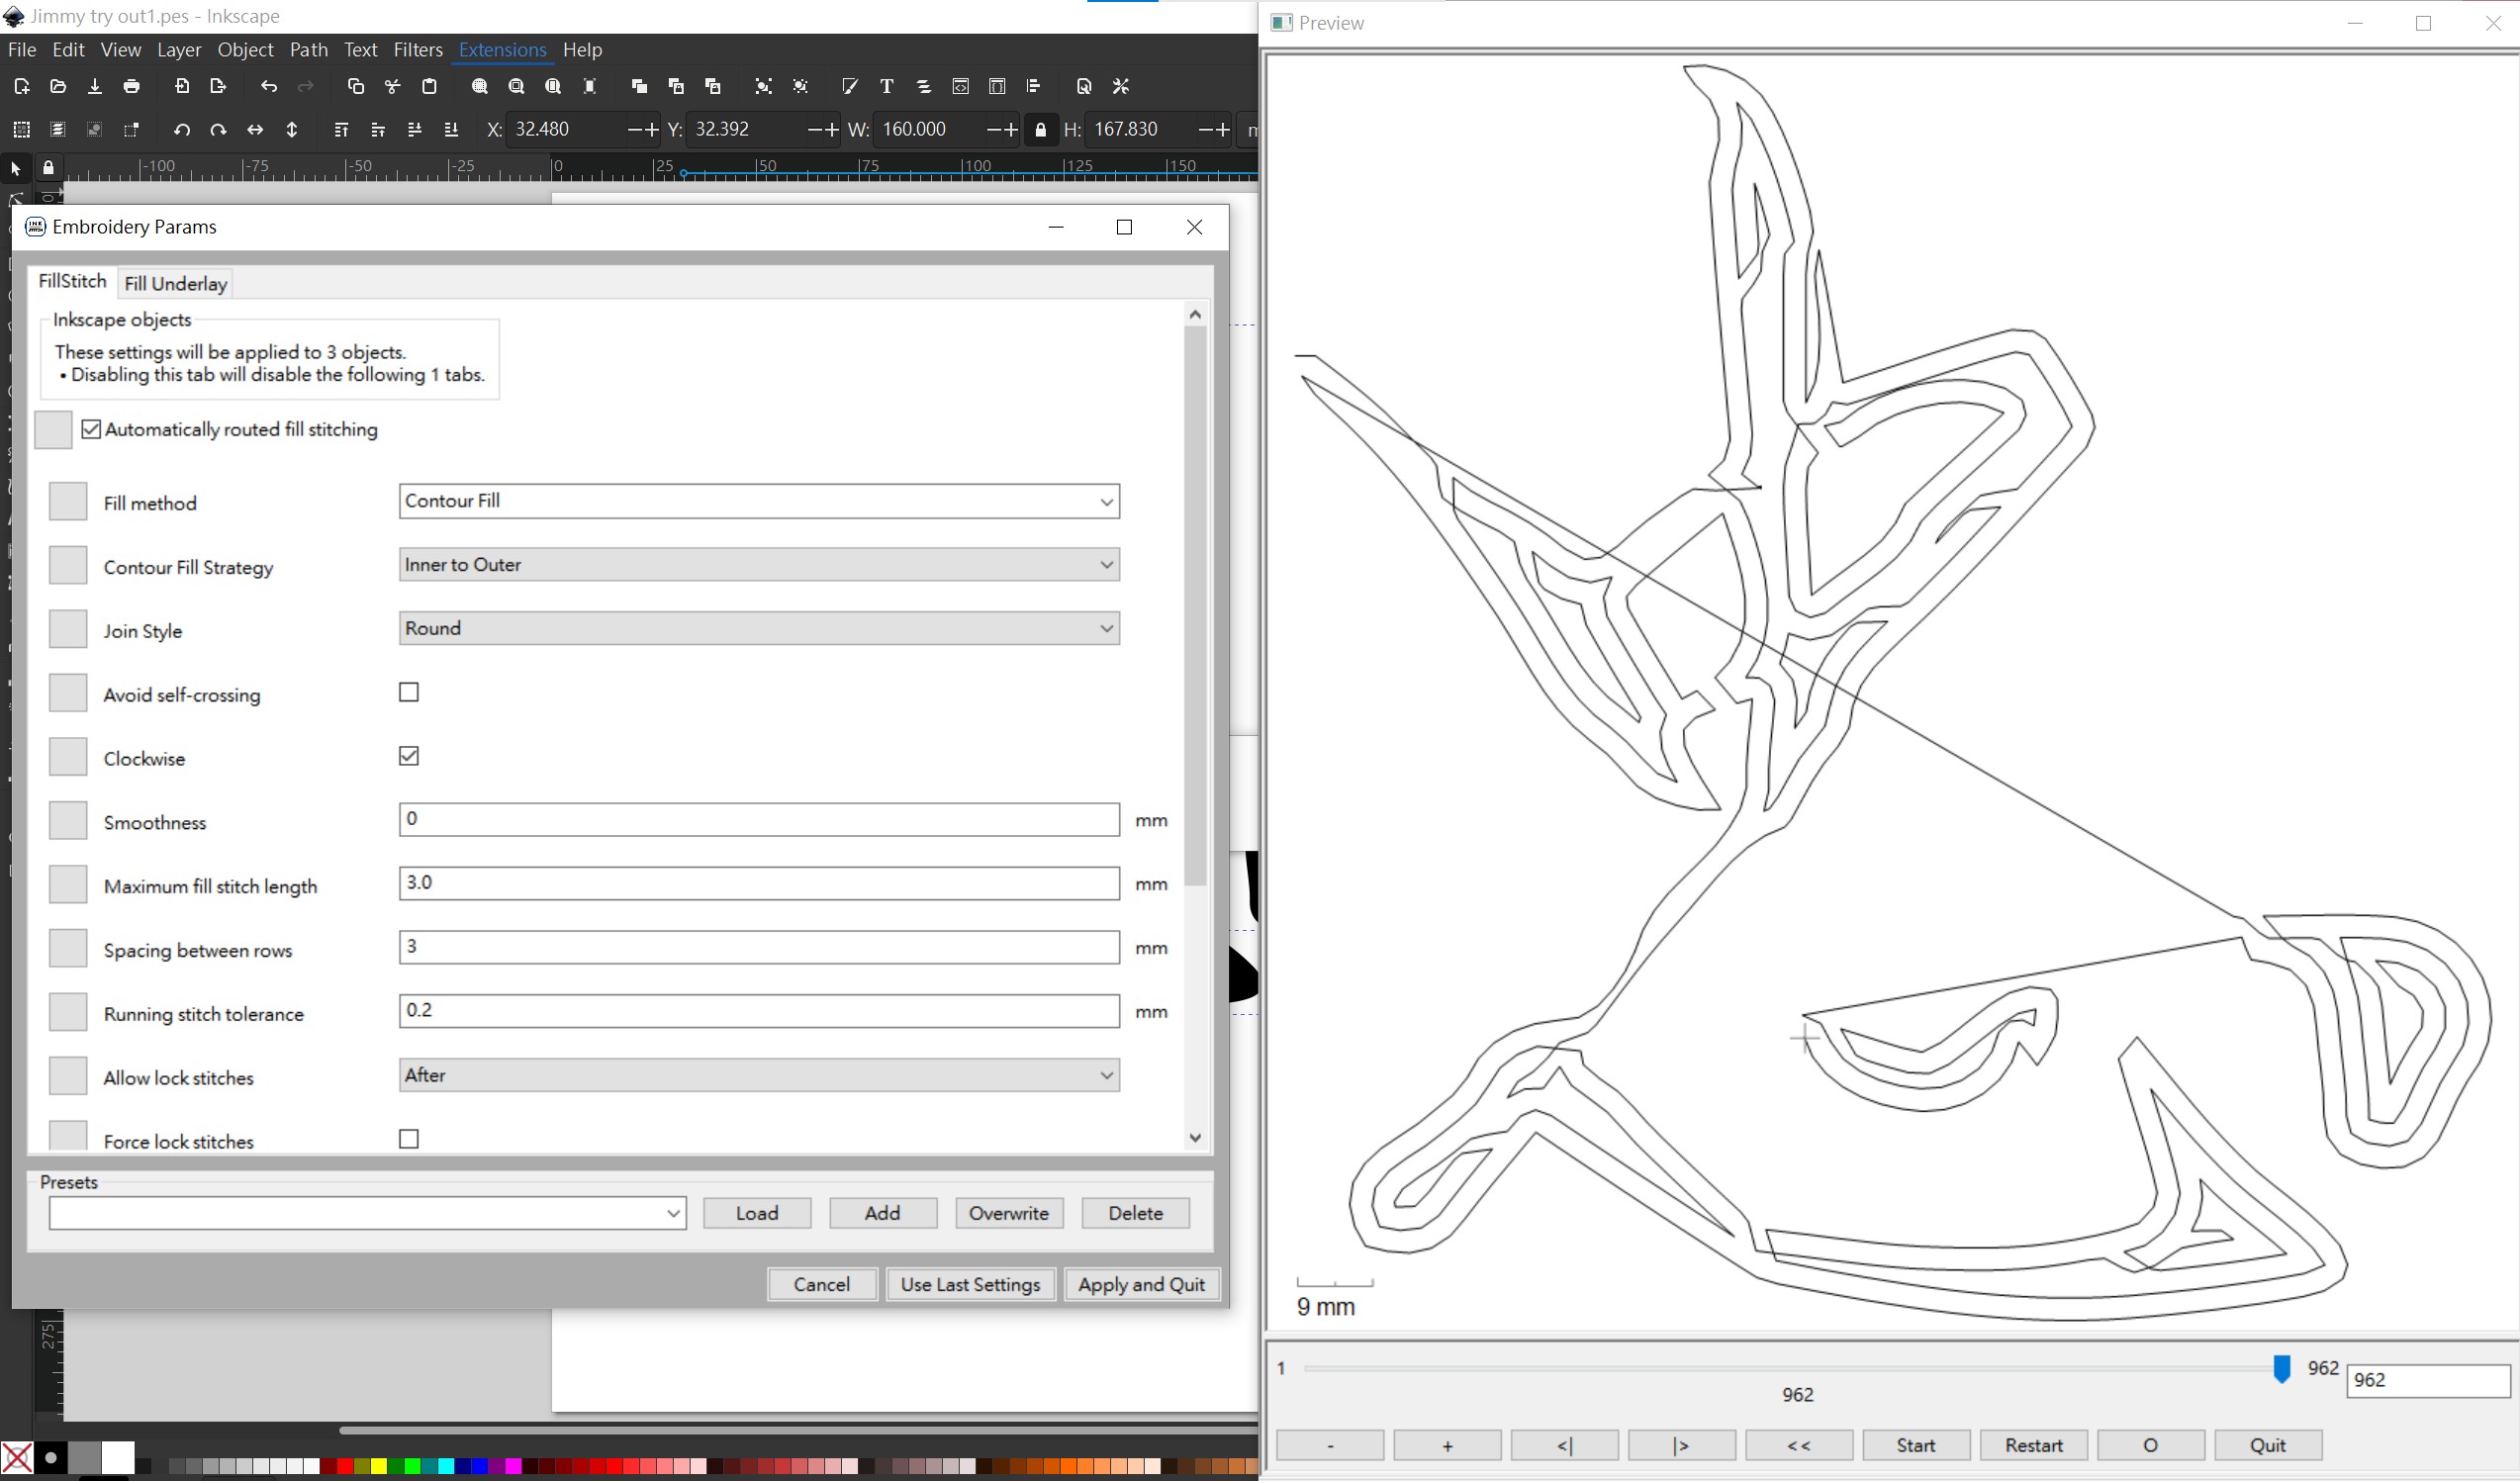
I wrote first on the paper and use Adobe illustrator to make it as vector, then export as SVG file in order to import into inkscape, you can edit with InkStitch customize the stitch path, gap between line, density...etc.

It was my first to use digital embroidery machine, thanks to Julia to support me.
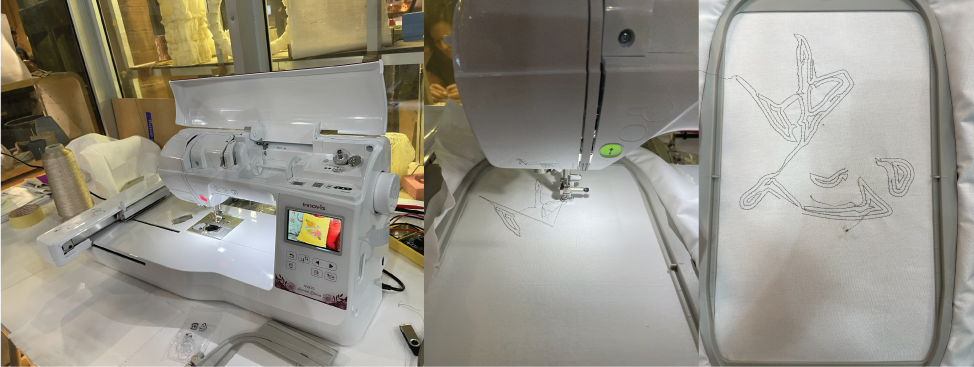
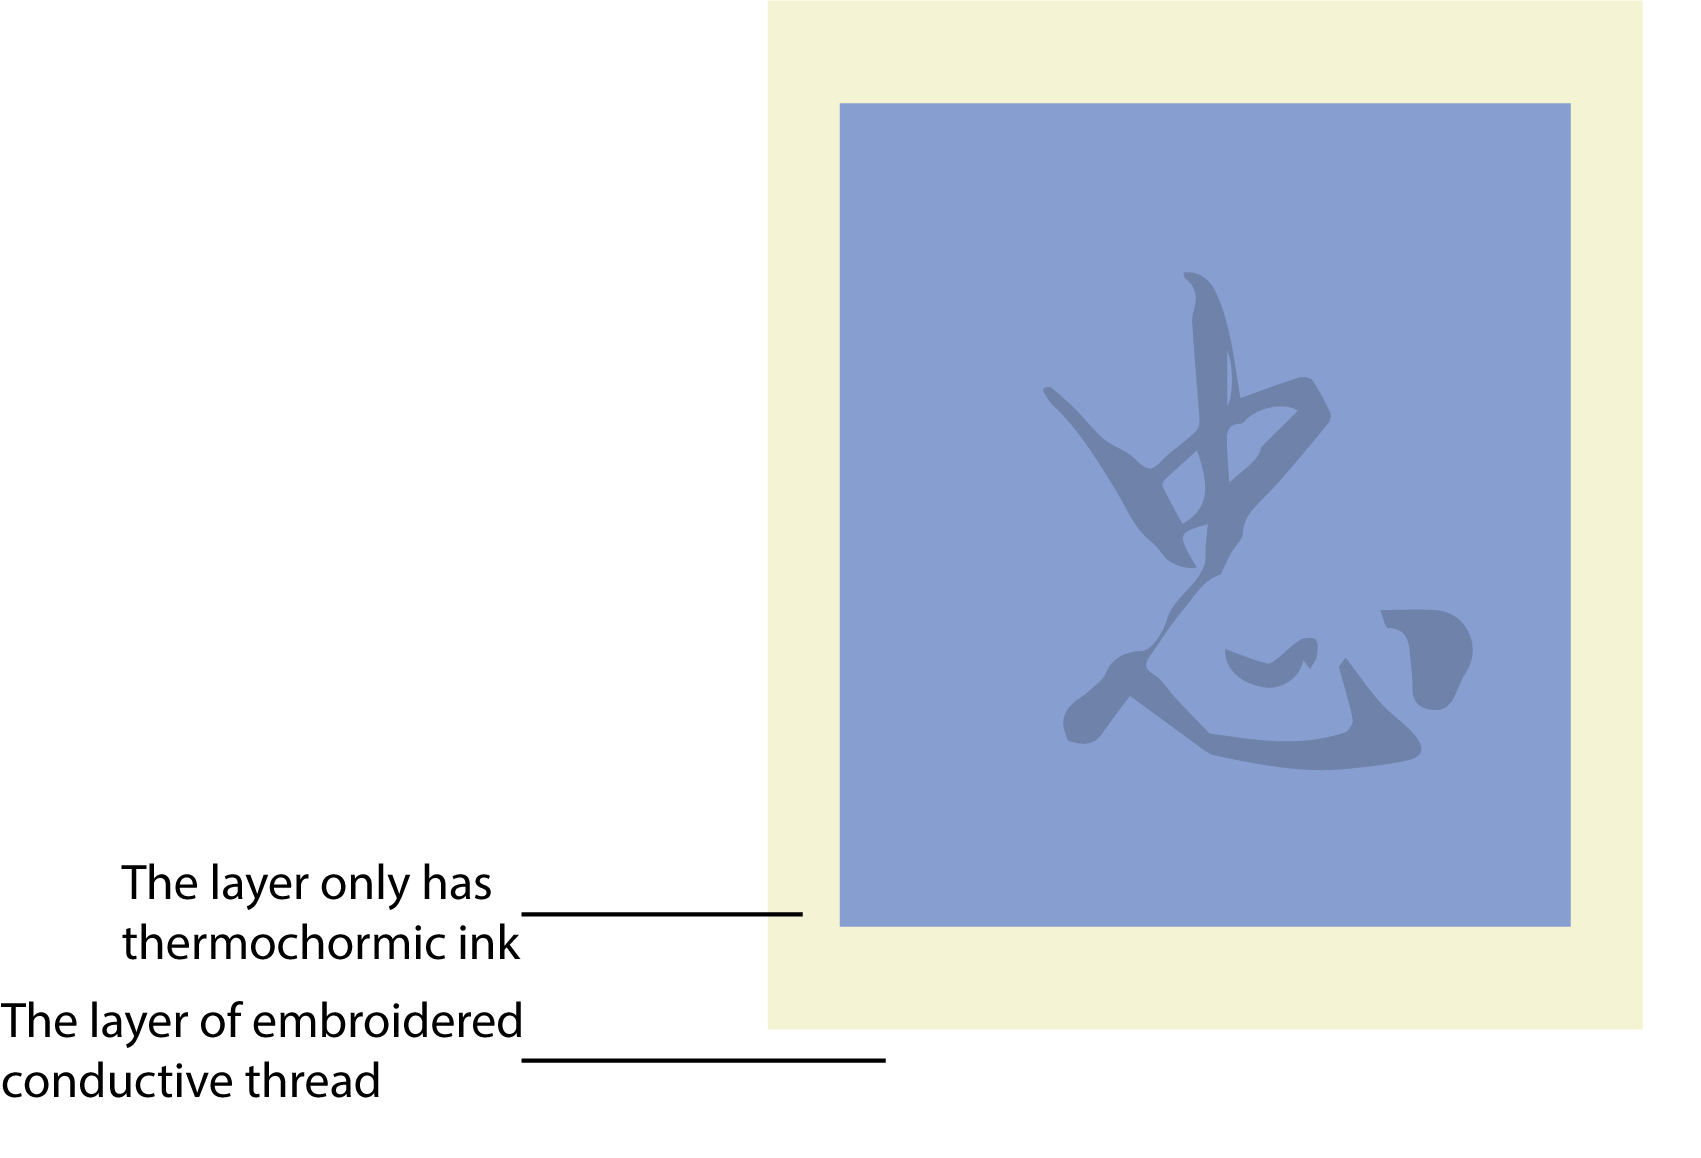
But somehow it didn't work so well, maybe because the stitch was too many, so there's some disconnection, after tried severl times still not solve it, so I made a smaller one and simple 中 font to determine the problem. For the future it would be nice to understand more how emoidery machine work in order to avoid disconnection and consider density of conductive thread will effect resistance.