12. Skin electronics
Inspiration
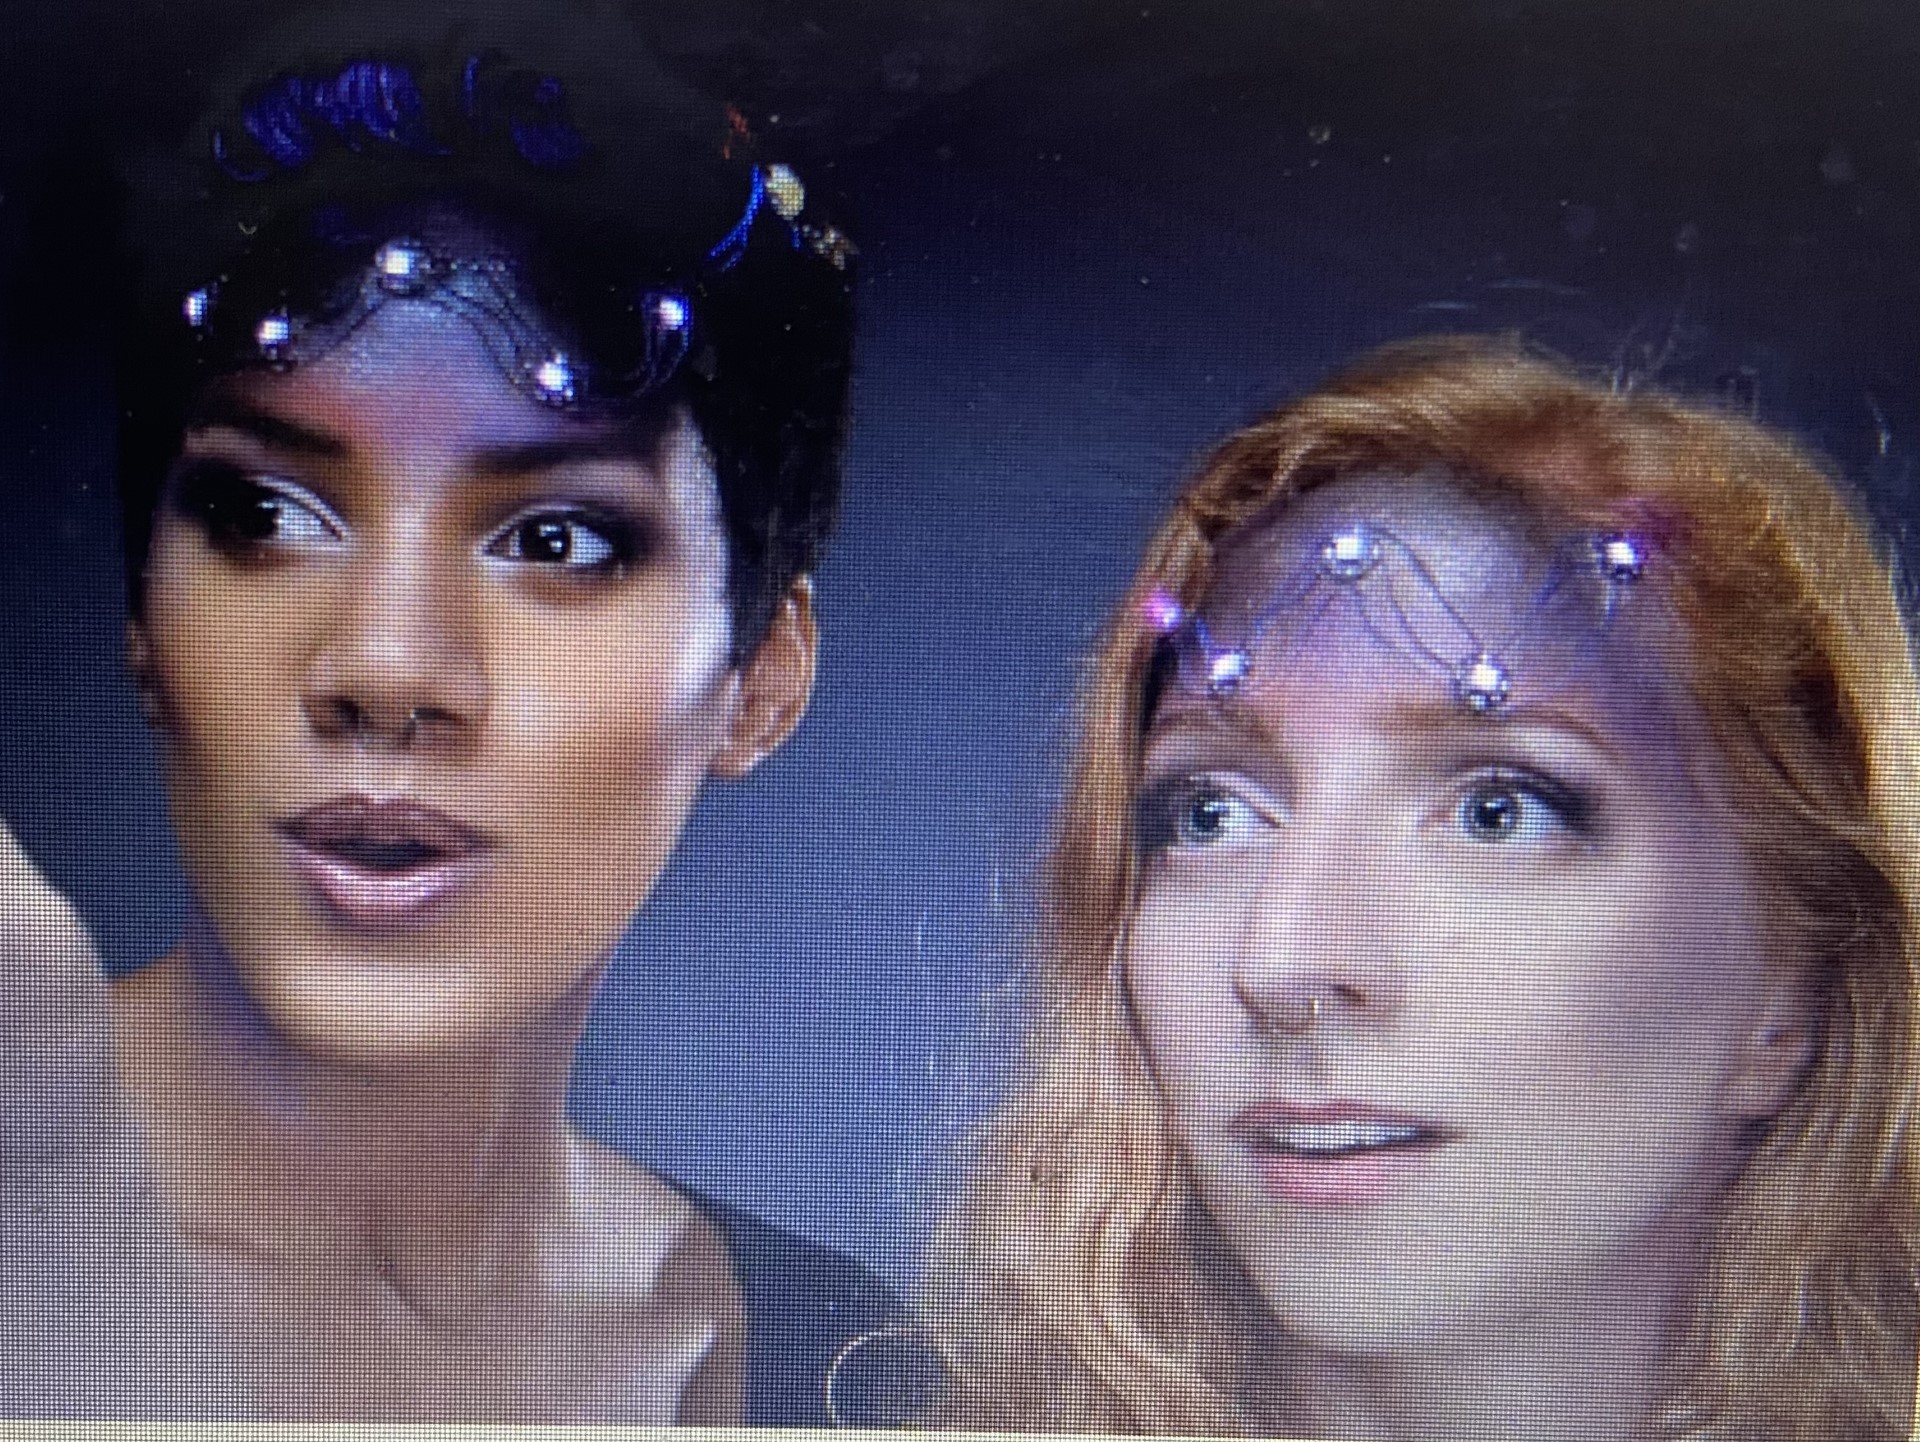
After watching the presentation of Katia Vega, I decided I wanted to make something cool for my children.
I liked this Adafruit project, altough I did not want to make a make-up project but electronics integrated into hair.
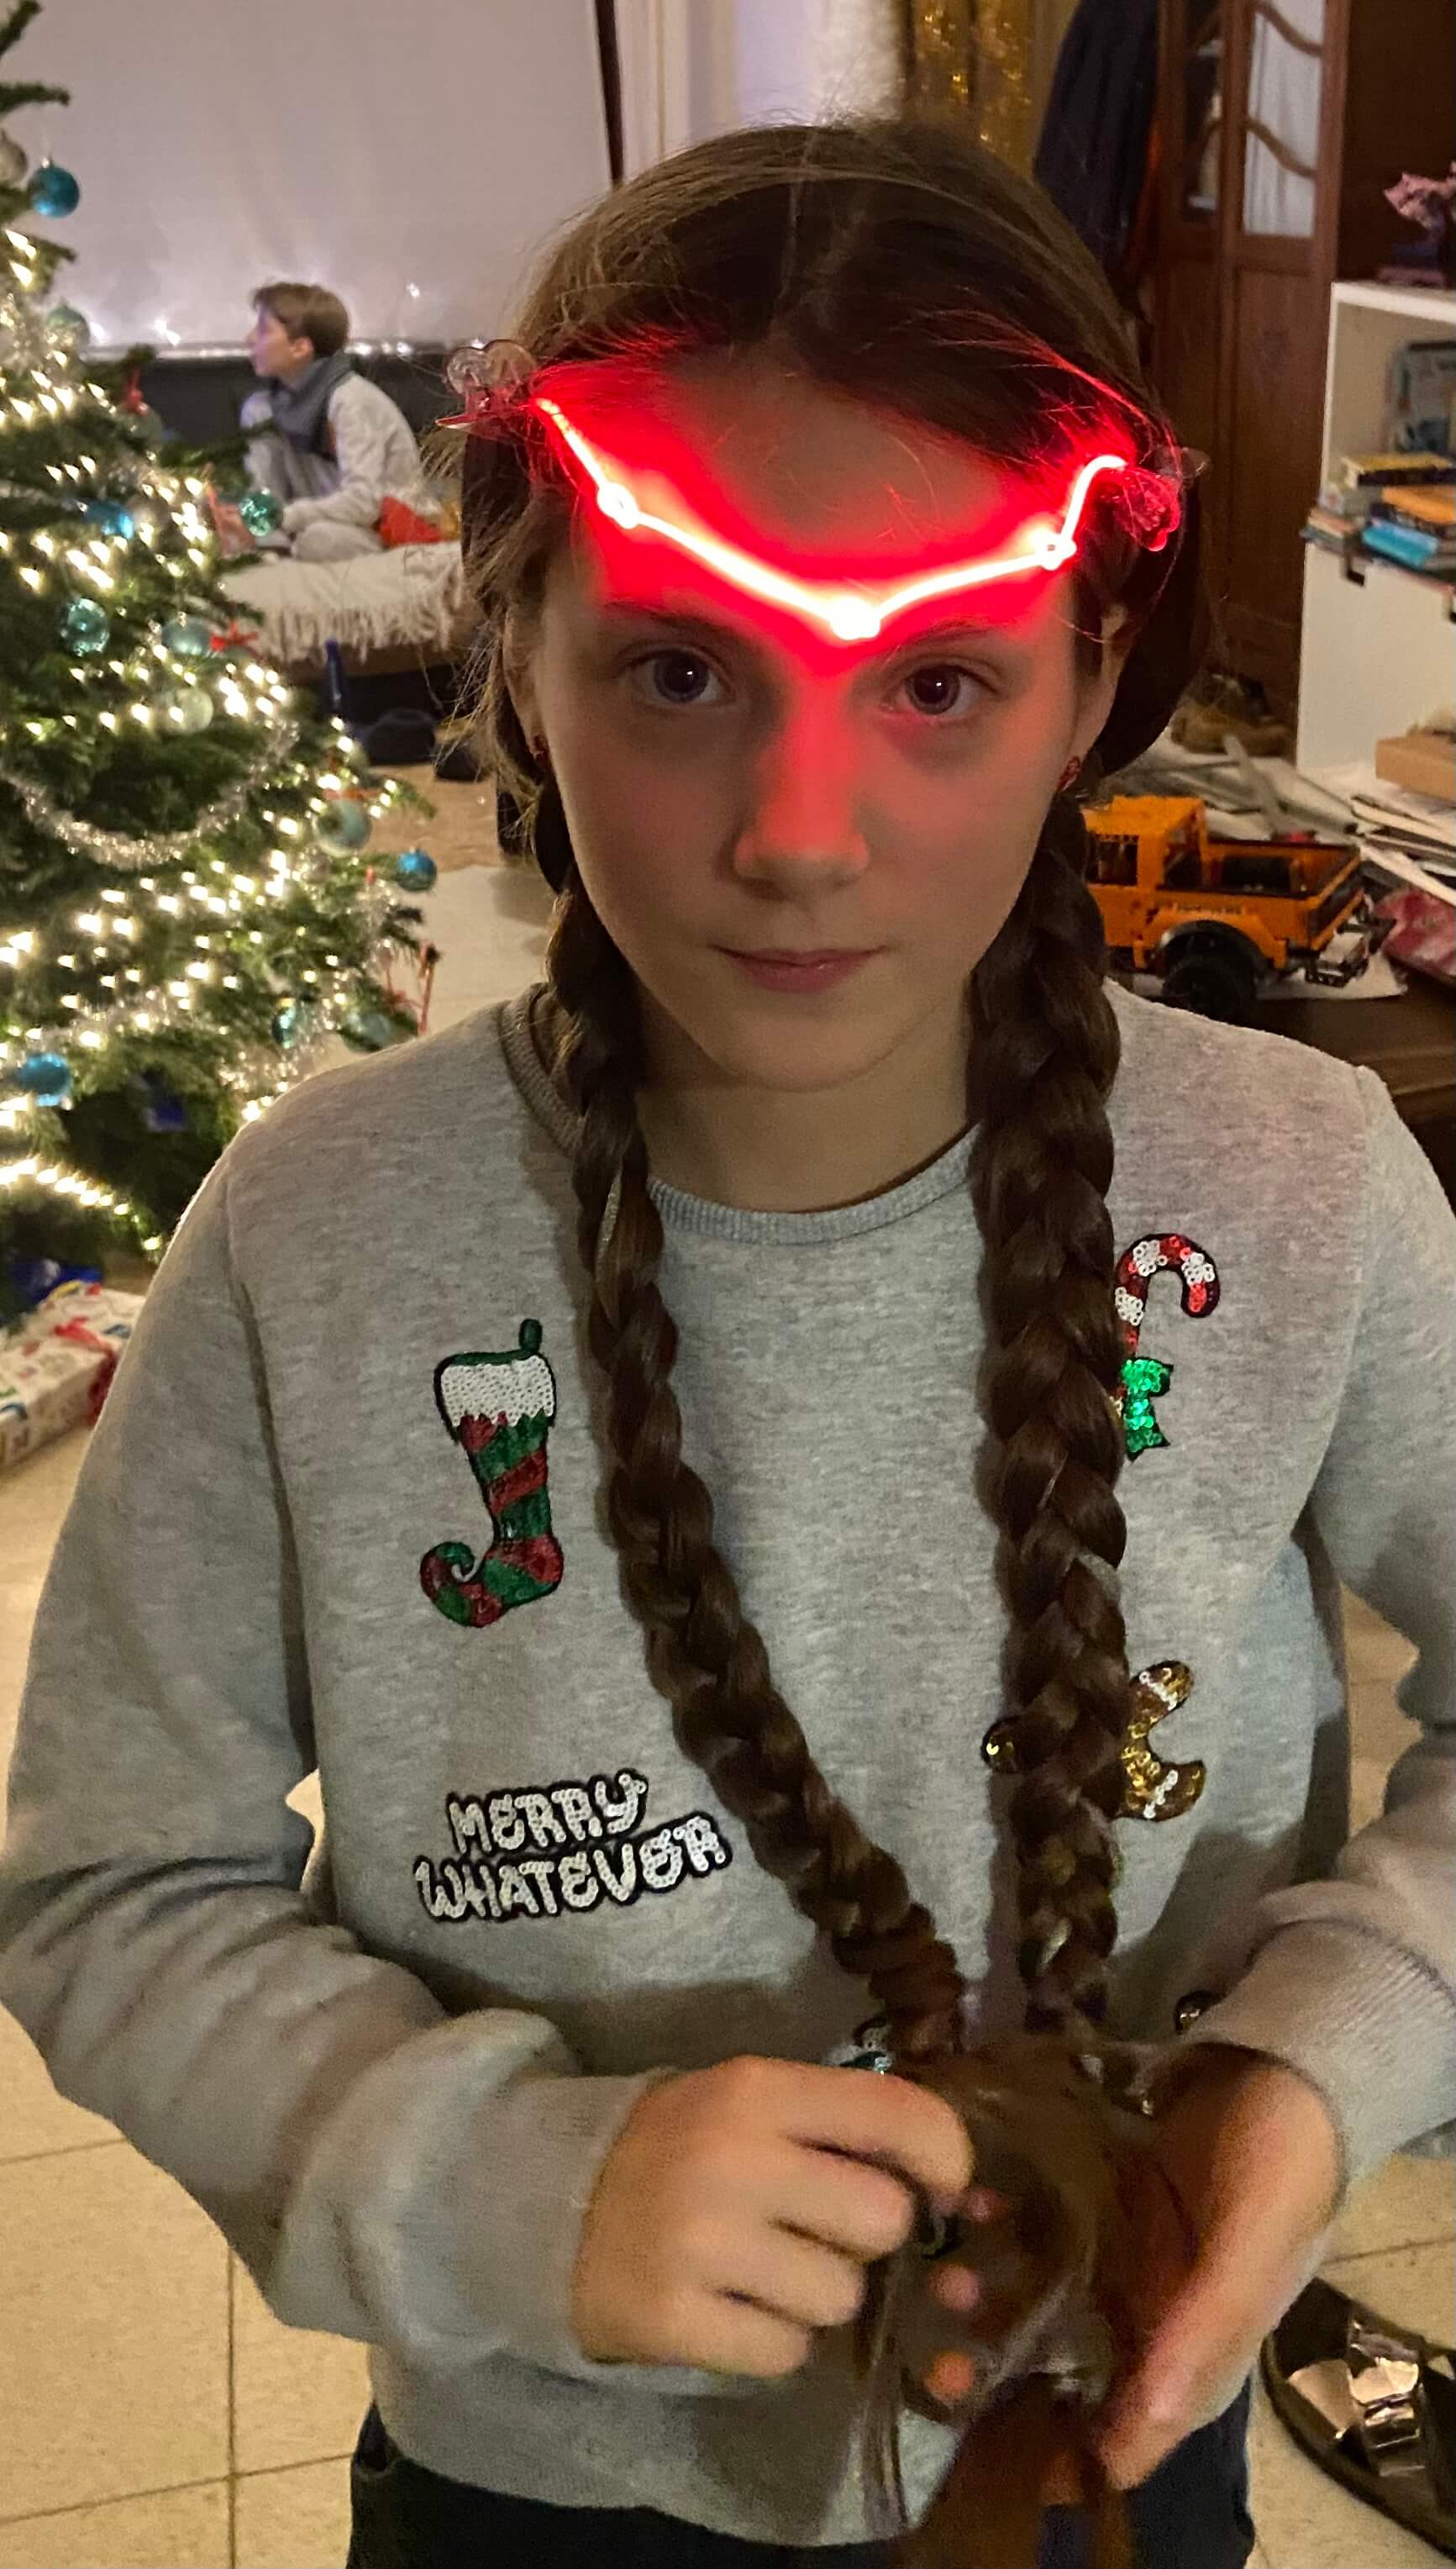
Because Christmas is almost there I decided to integrate a light-effect with the long hair braids of one of my twindaughters.
Process and workflow
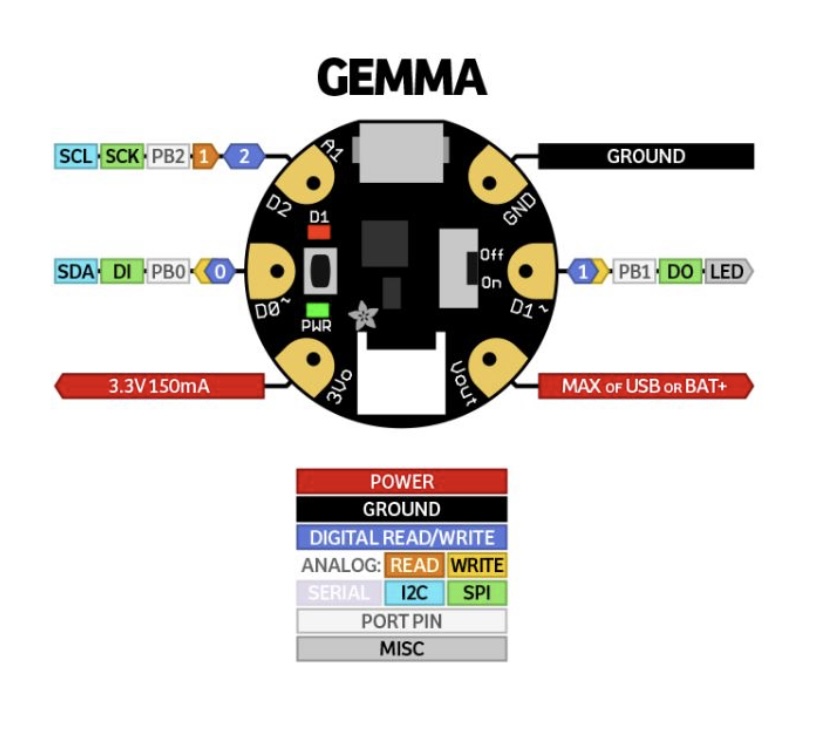
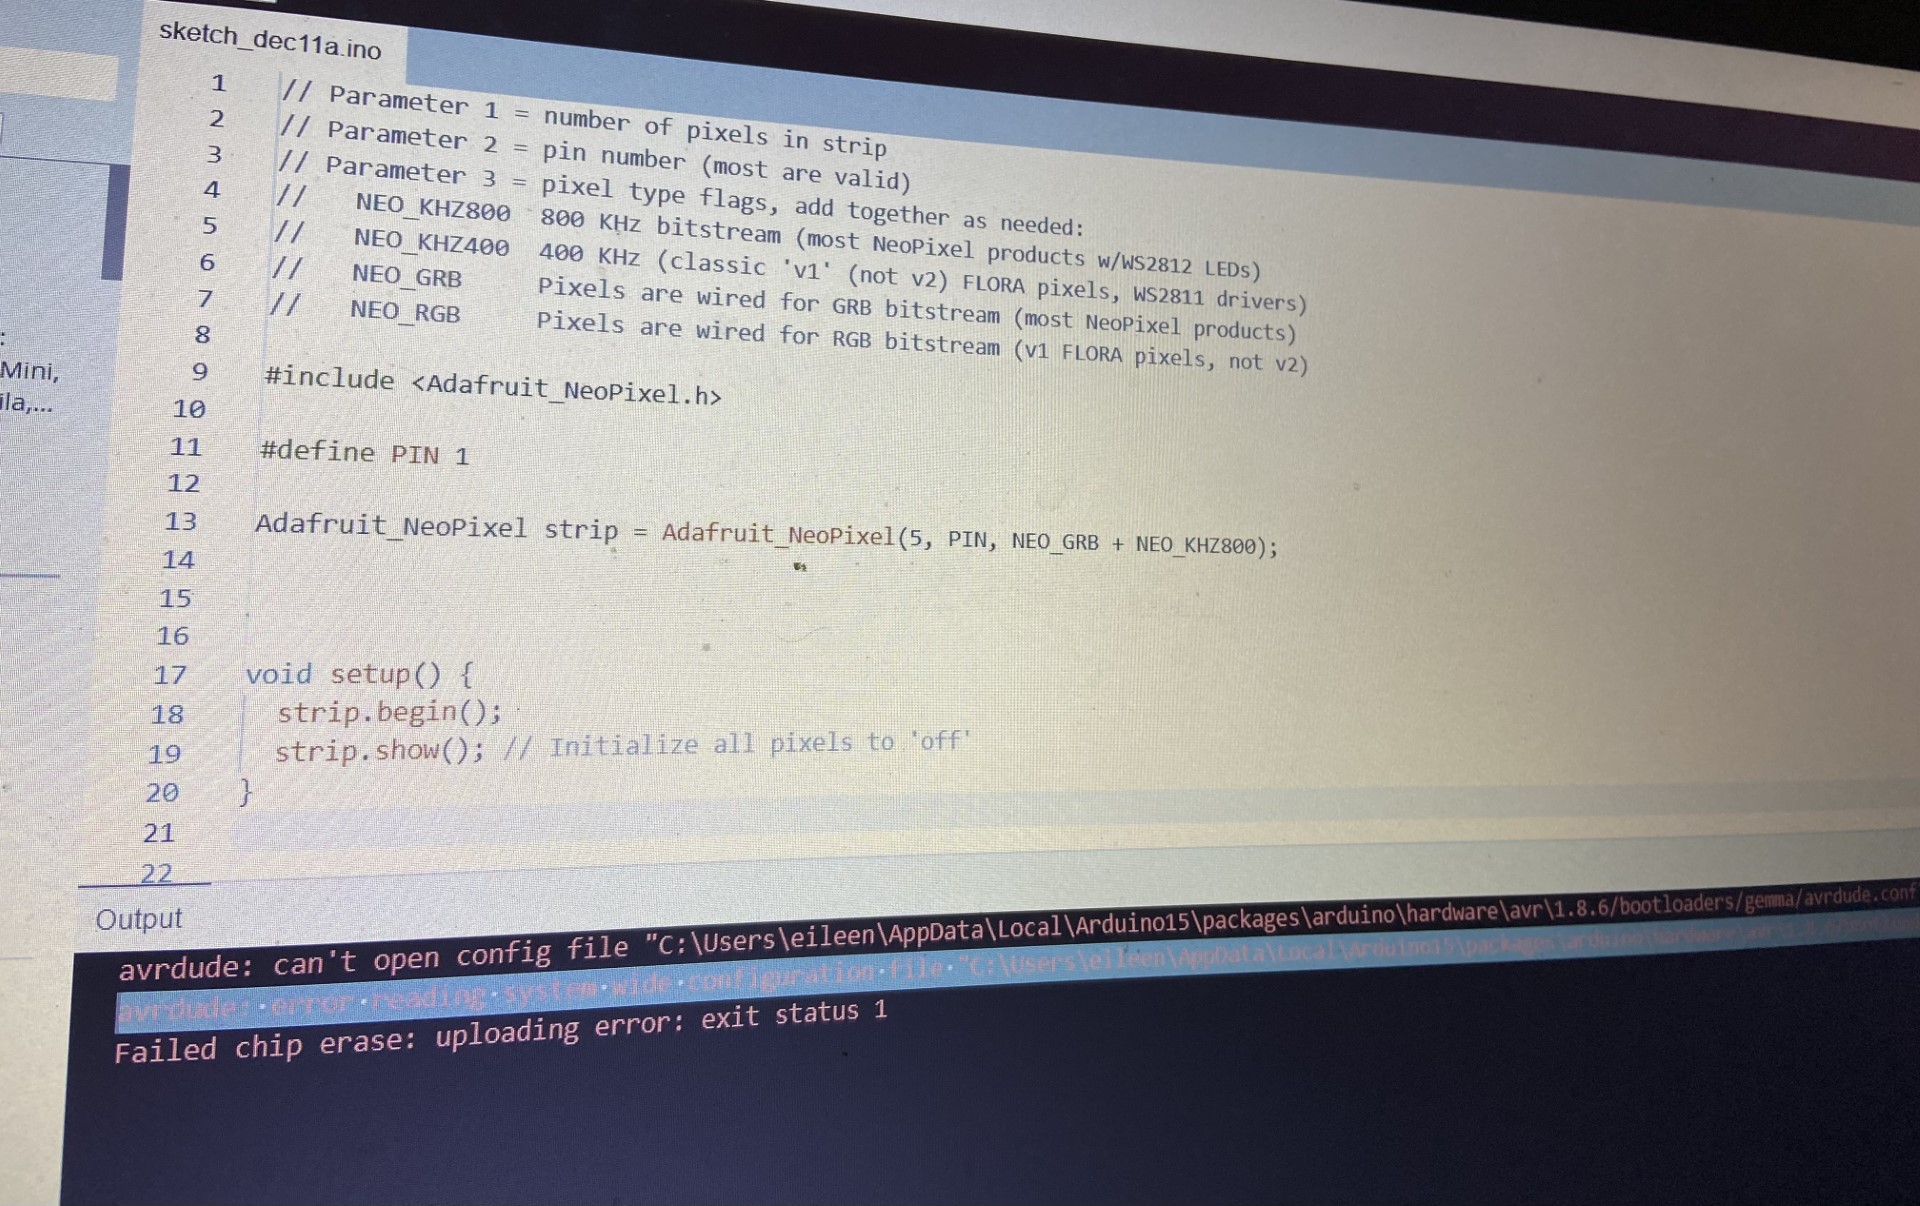
First I tried to connect the Gemma microprocessor on a simple circuit with a FLORA Smart Neopixel.
I wanted to use this Arduino code:
// Parameter 1 = number of pixels in strip
// Parameter 2 = pin number (most are valid)
// Parameter 3 = pixel type flags, add together as needed:
//   NEO_KHZ800  800 KHz bitstream (most NeoPixel products w/WS2812 LEDs)
//   NEO_KHZ400  400 KHz (classic 'v1' (not v2) FLORA pixels, WS2811 drivers)
//   NEO_GRB     Pixels are wired for GRB bitstream (most NeoPixel products)
//   NEO_RGB     Pixels are wired for RGB bitstream (v1 FLORA pixels, not v2)

#include <Adafruit_NeoPixel.h>

#define PIN 1

Adafruit_NeoPixel strip = Adafruit_NeoPixel(5, PIN, NEO_GRB + NEO_KHZ800);


void setup() {
  strip.begin();
  strip.show(); // Initialize all pixels to 'off'
}


void loop() {
  // all pixels show the same color:
  colorWipe(strip.Color(50, 0, 50), 50); // Purple
}

// Fill the dots one after the other with a color
void colorWipe(uint32_t c, uint8_t wait) {
  for(uint16_t i=0; i<strip.numPixels(); i++) {
      strip.setPixelColor(i, c);
      strip.show();
      delay(wait);
  }
}
But the circuit with Gemma and LED didn't work when I tried to upload the sketch in Arduino.
Stephanie realised that we had to click 'Upload with Programmer' in 'Sketch'. But still there were some errors.
Because I was running out of time for this week and I wanted to have a final result that was working, I decided to continue with my initial idea to create a lighteffect when tapping to eachother the hairbraids of my daughter.
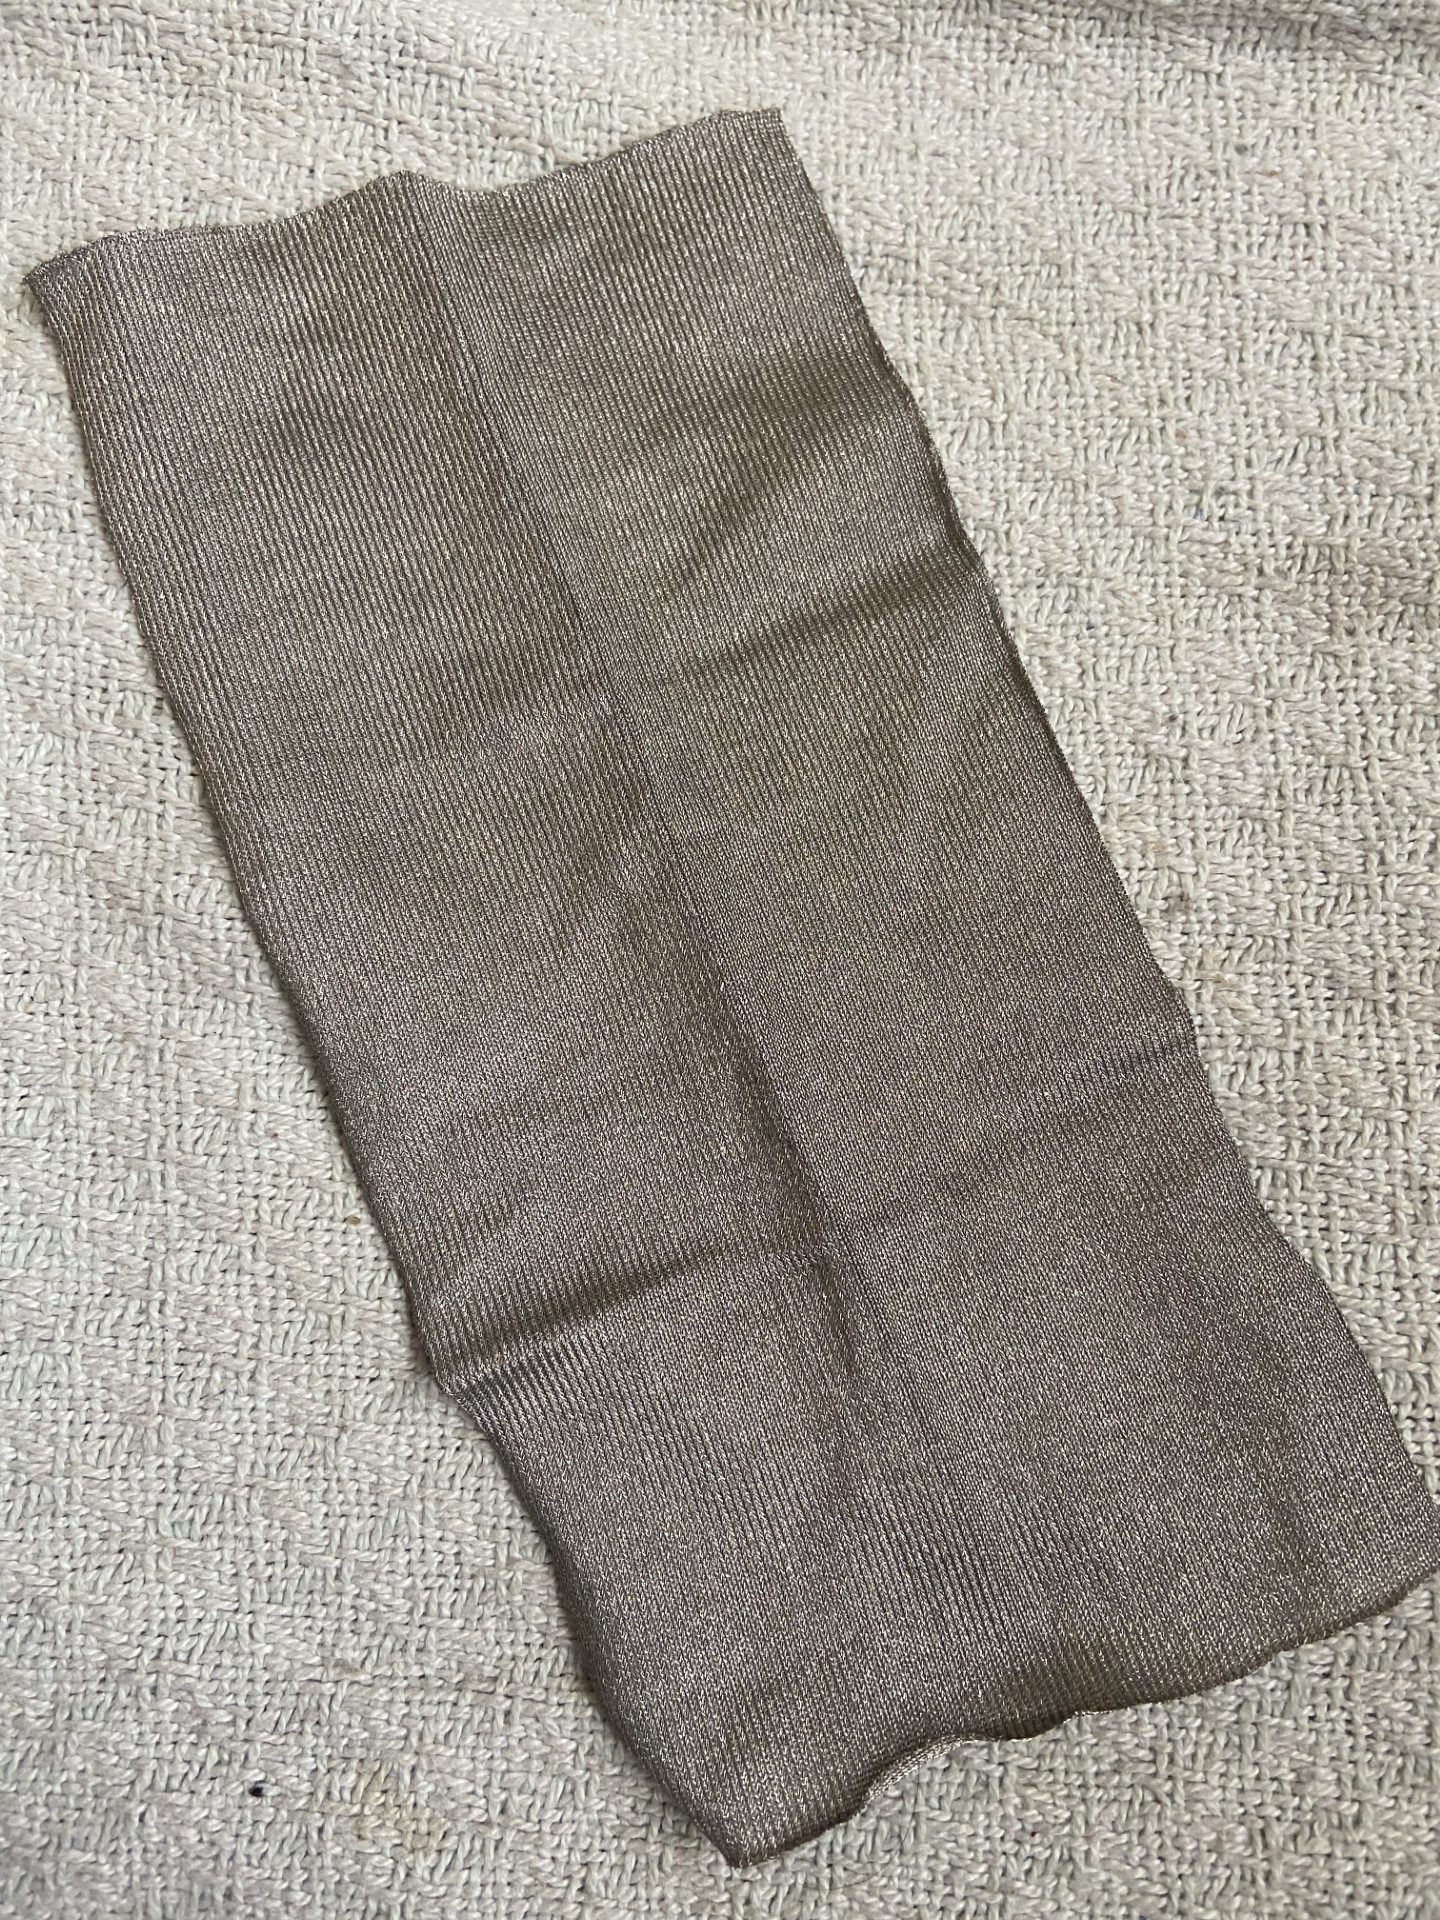
I used the flexible LED filament, a 3V battery and knit conductive fabric
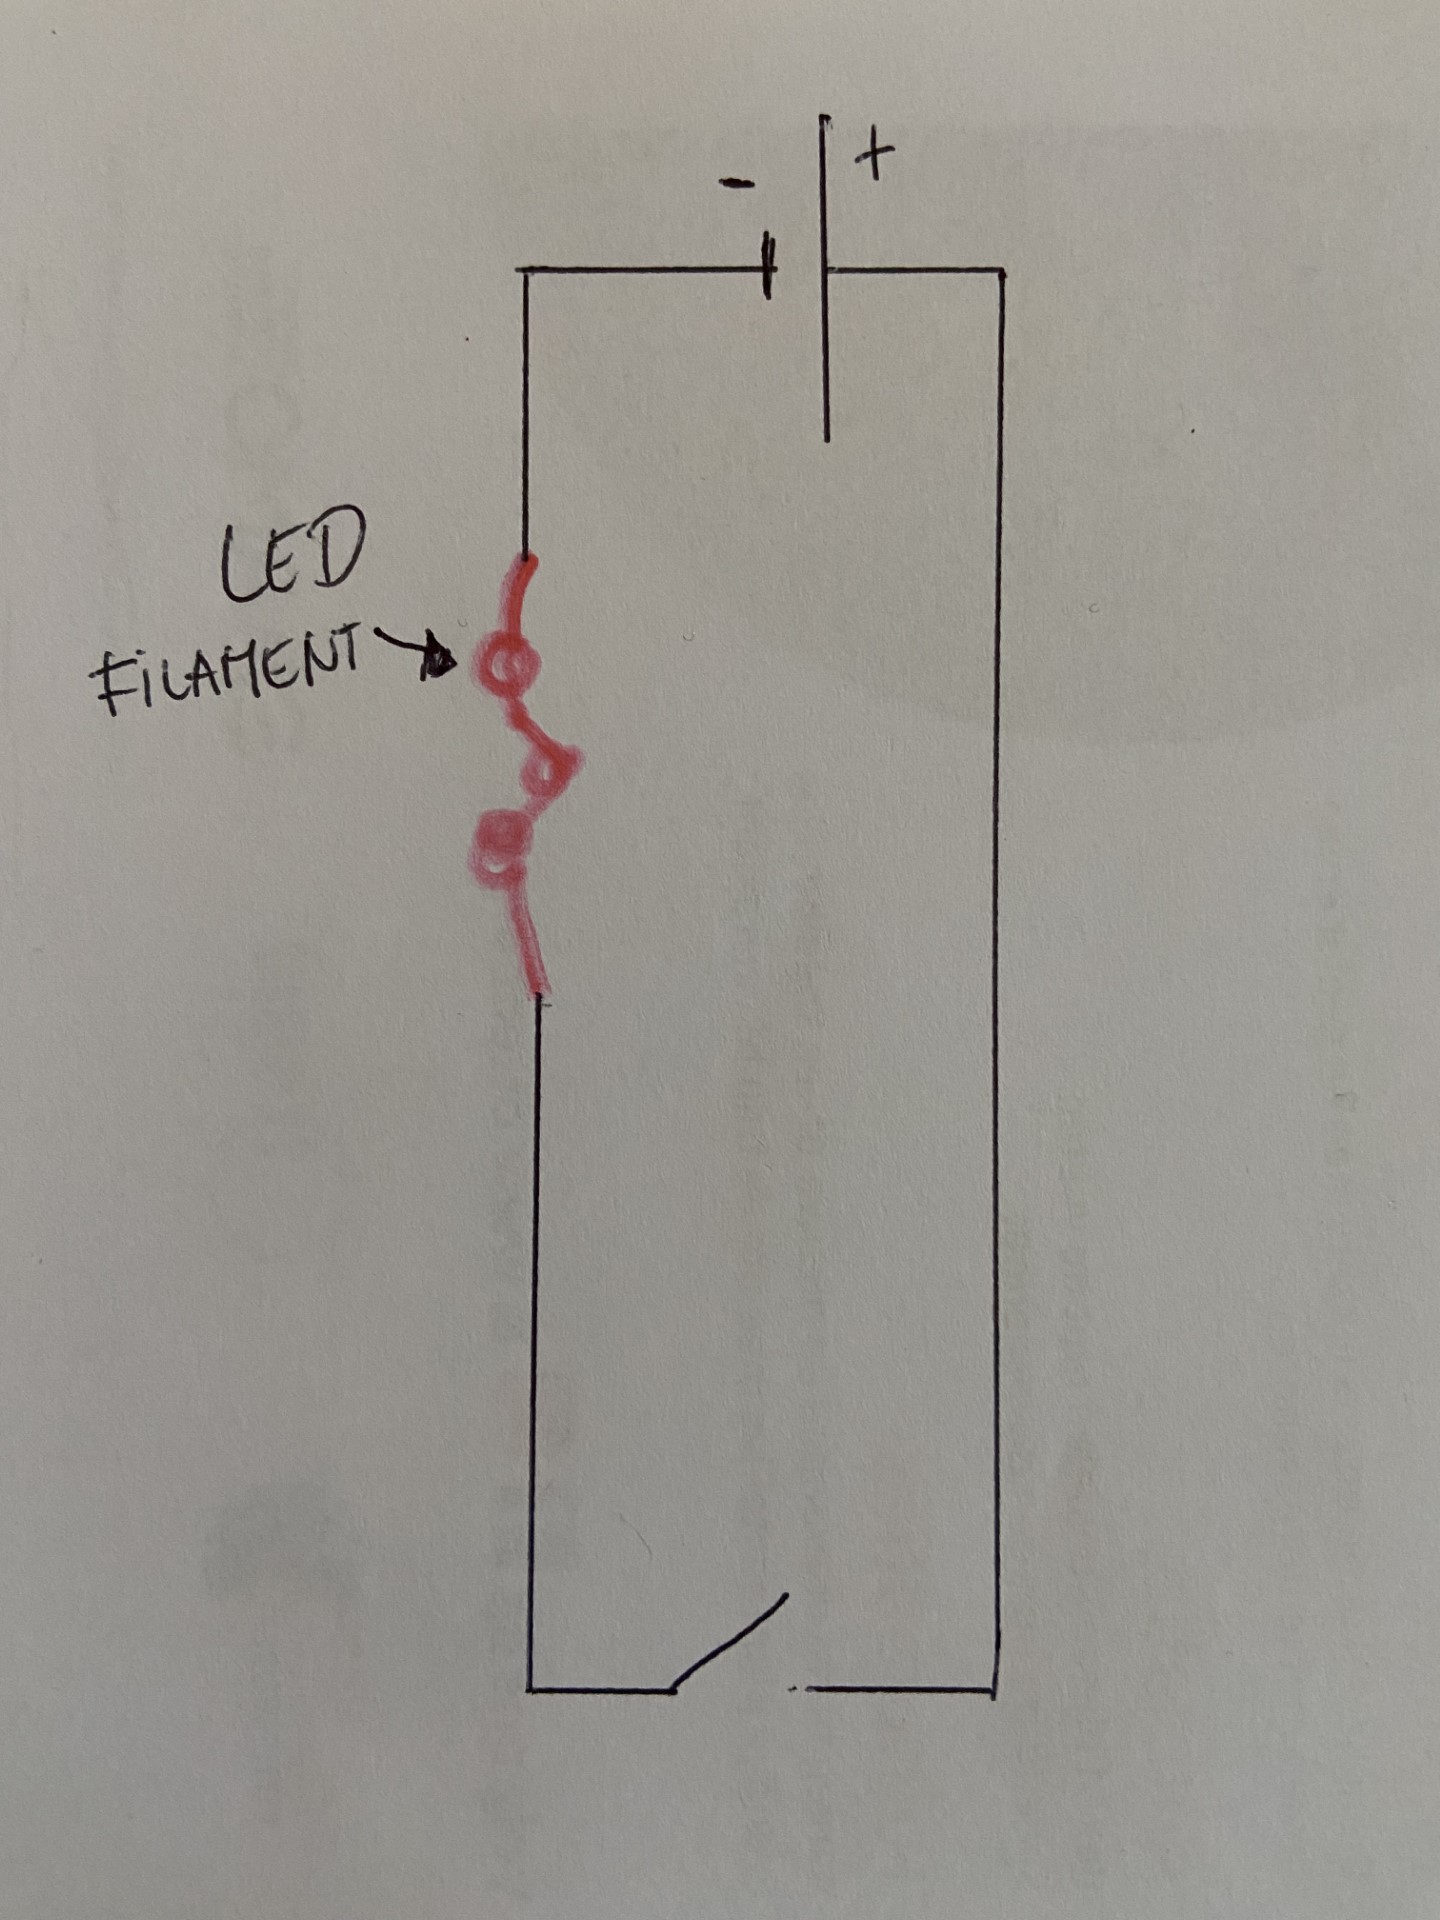
I first build the circuit to see if it was working.
This was the scheme I used
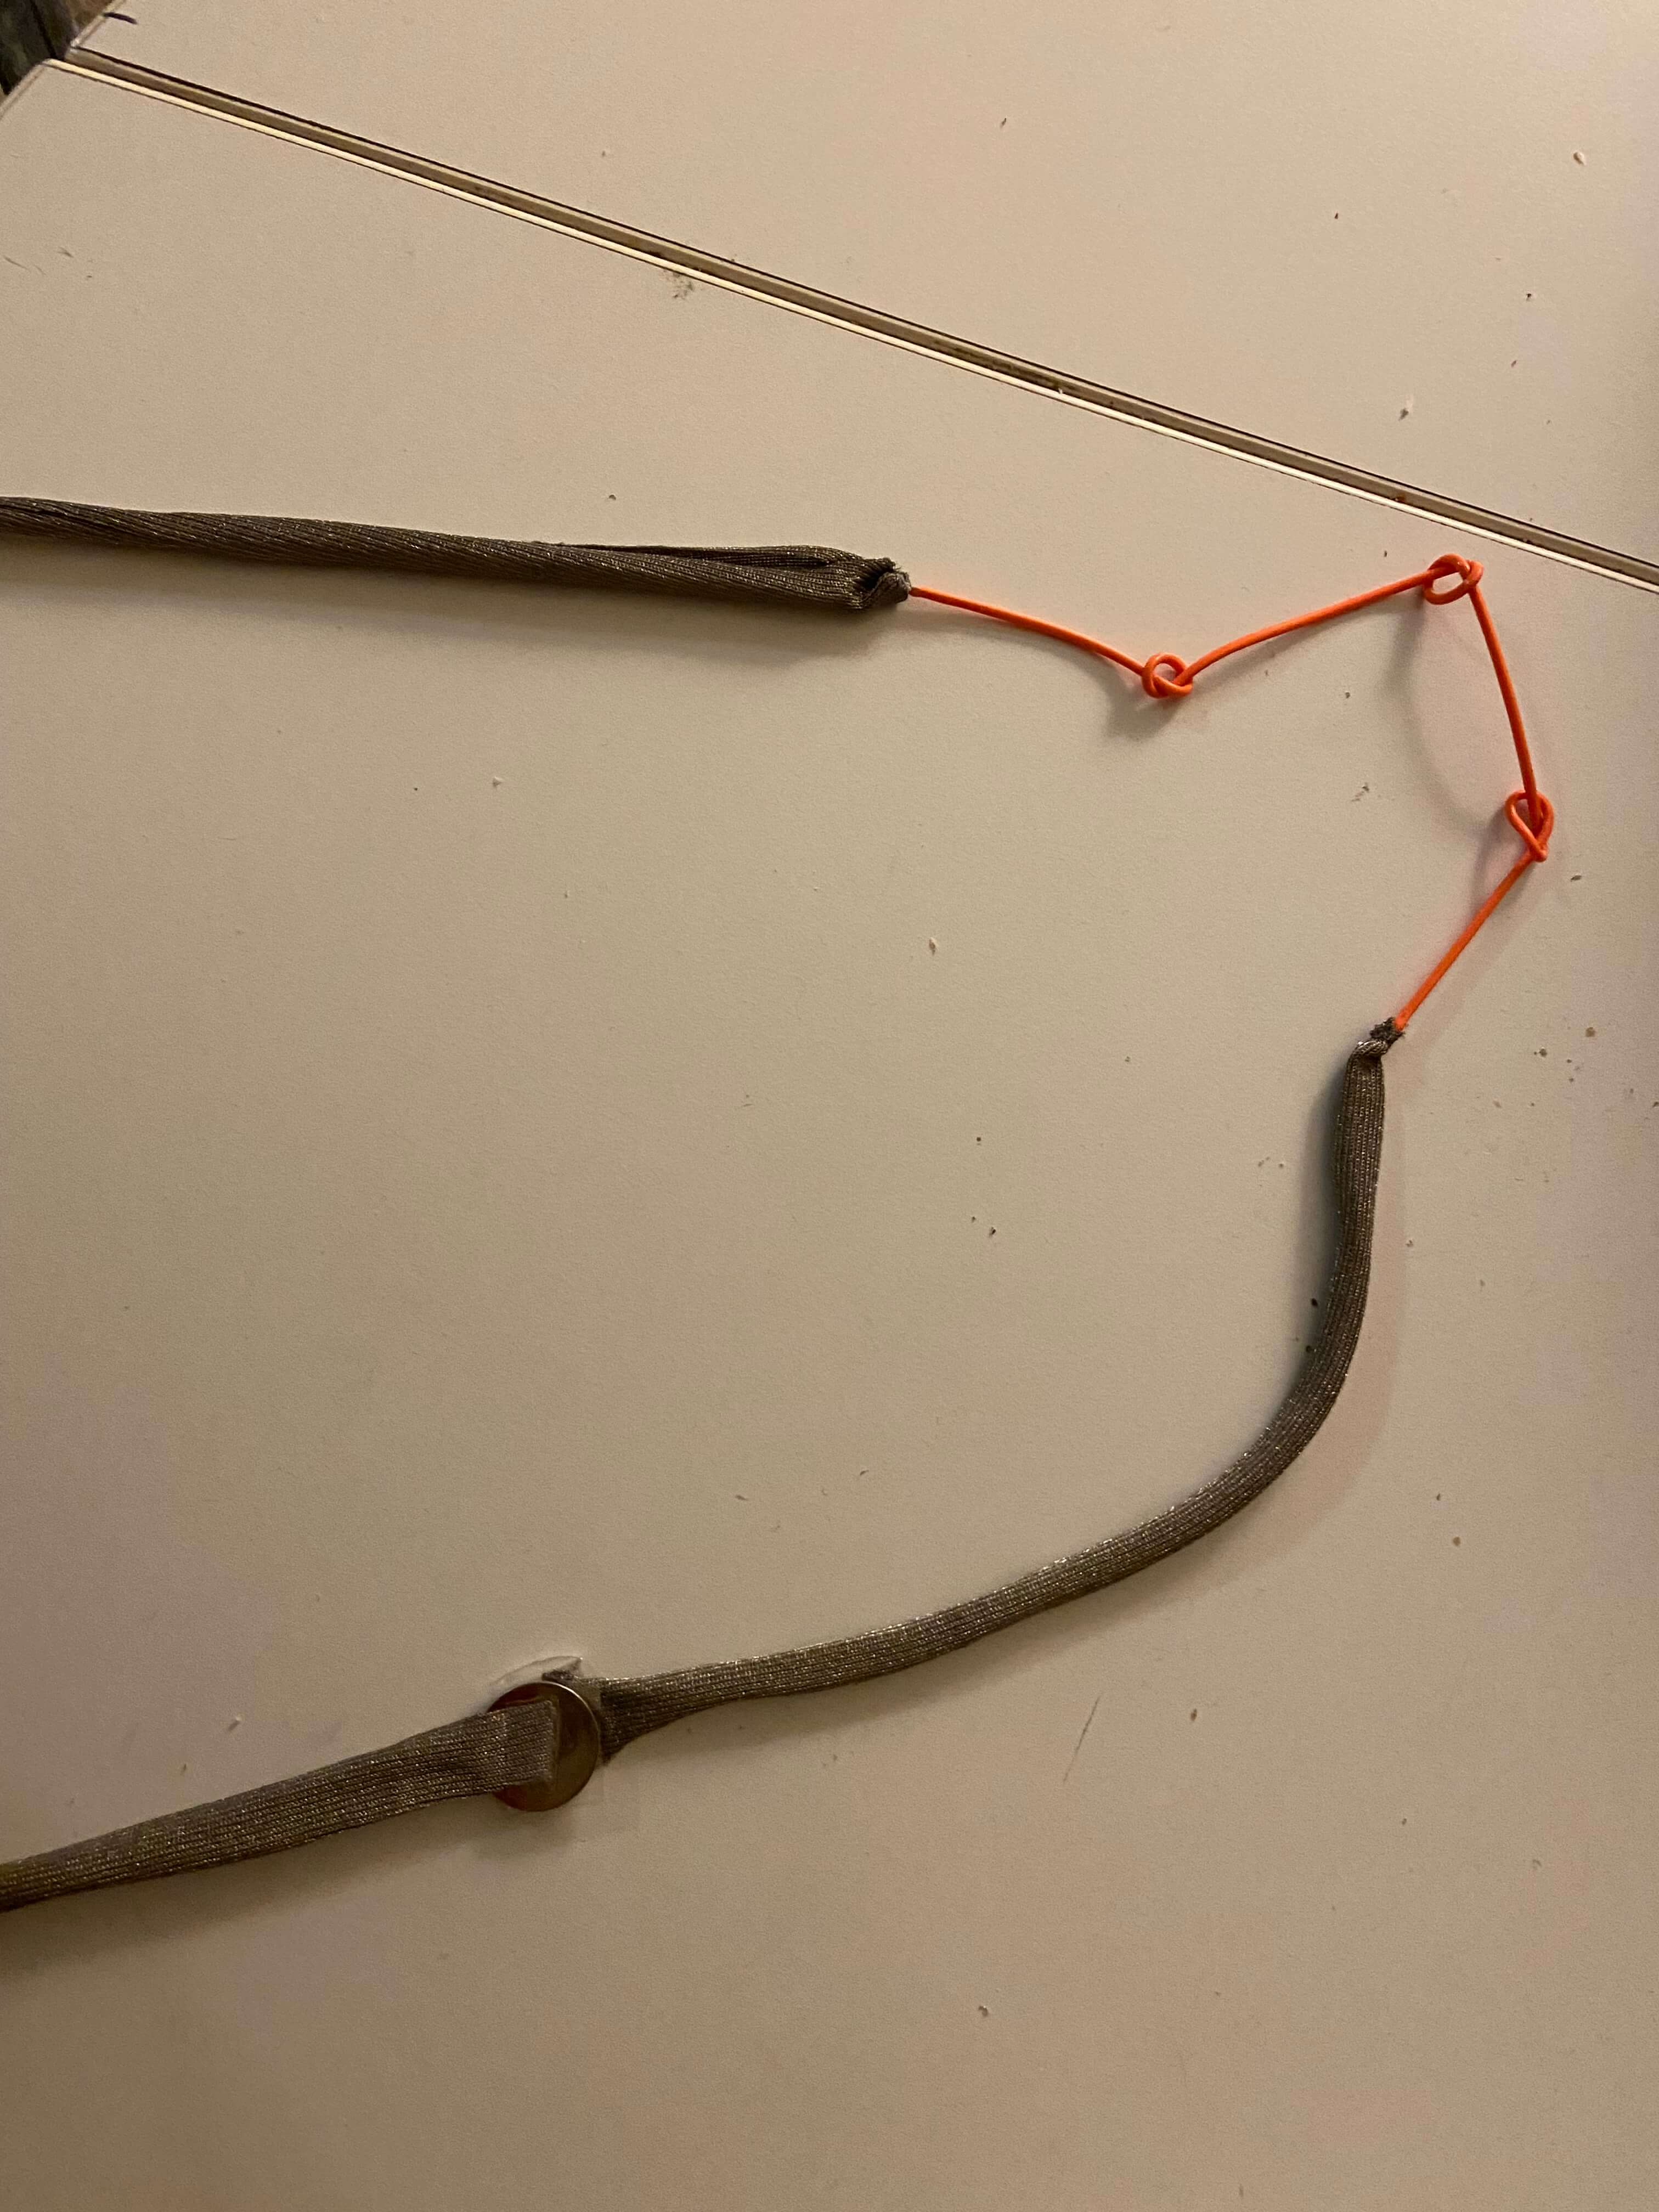
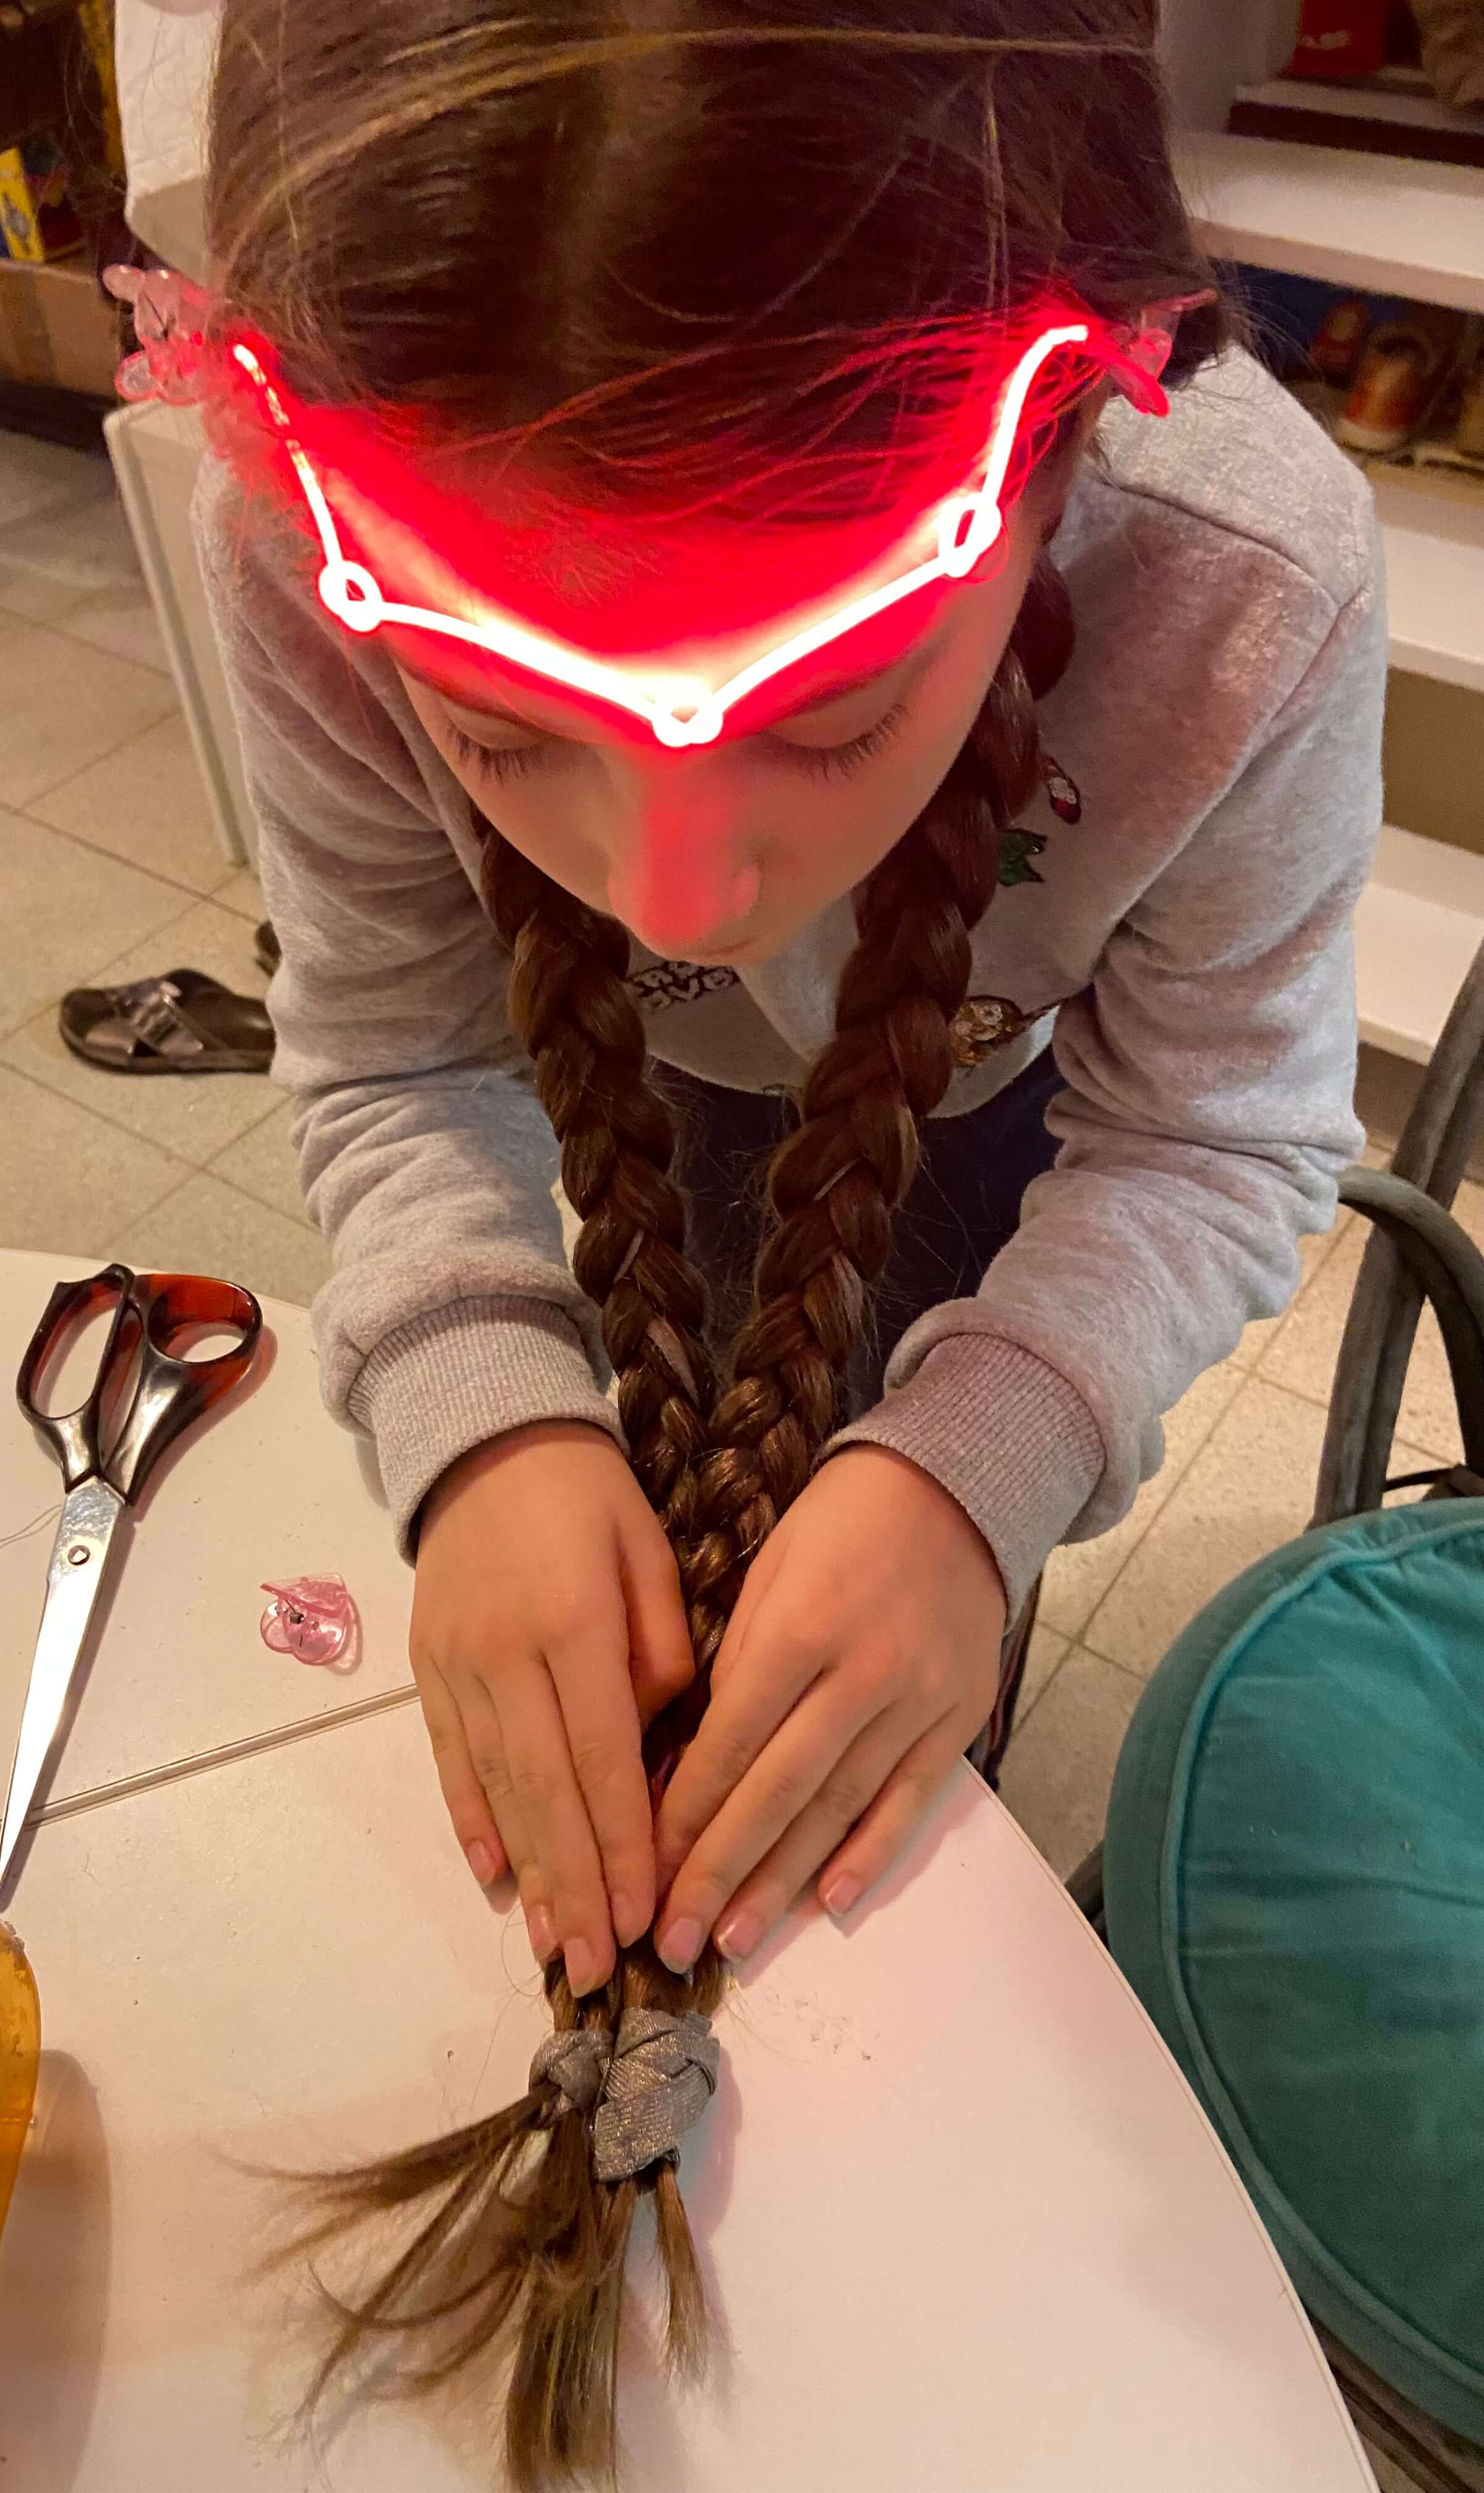
I then sewed the two endpoints of the LED filament to the conductive knit conductive fabric. I had to sew several pieces of fabric to eachother to have enough textile to integrate in the hairbraids of my daughter.
I integrated the positive side of the battery on one end of the conductive fabric, the negative side of the battery on another end conductive fabric.
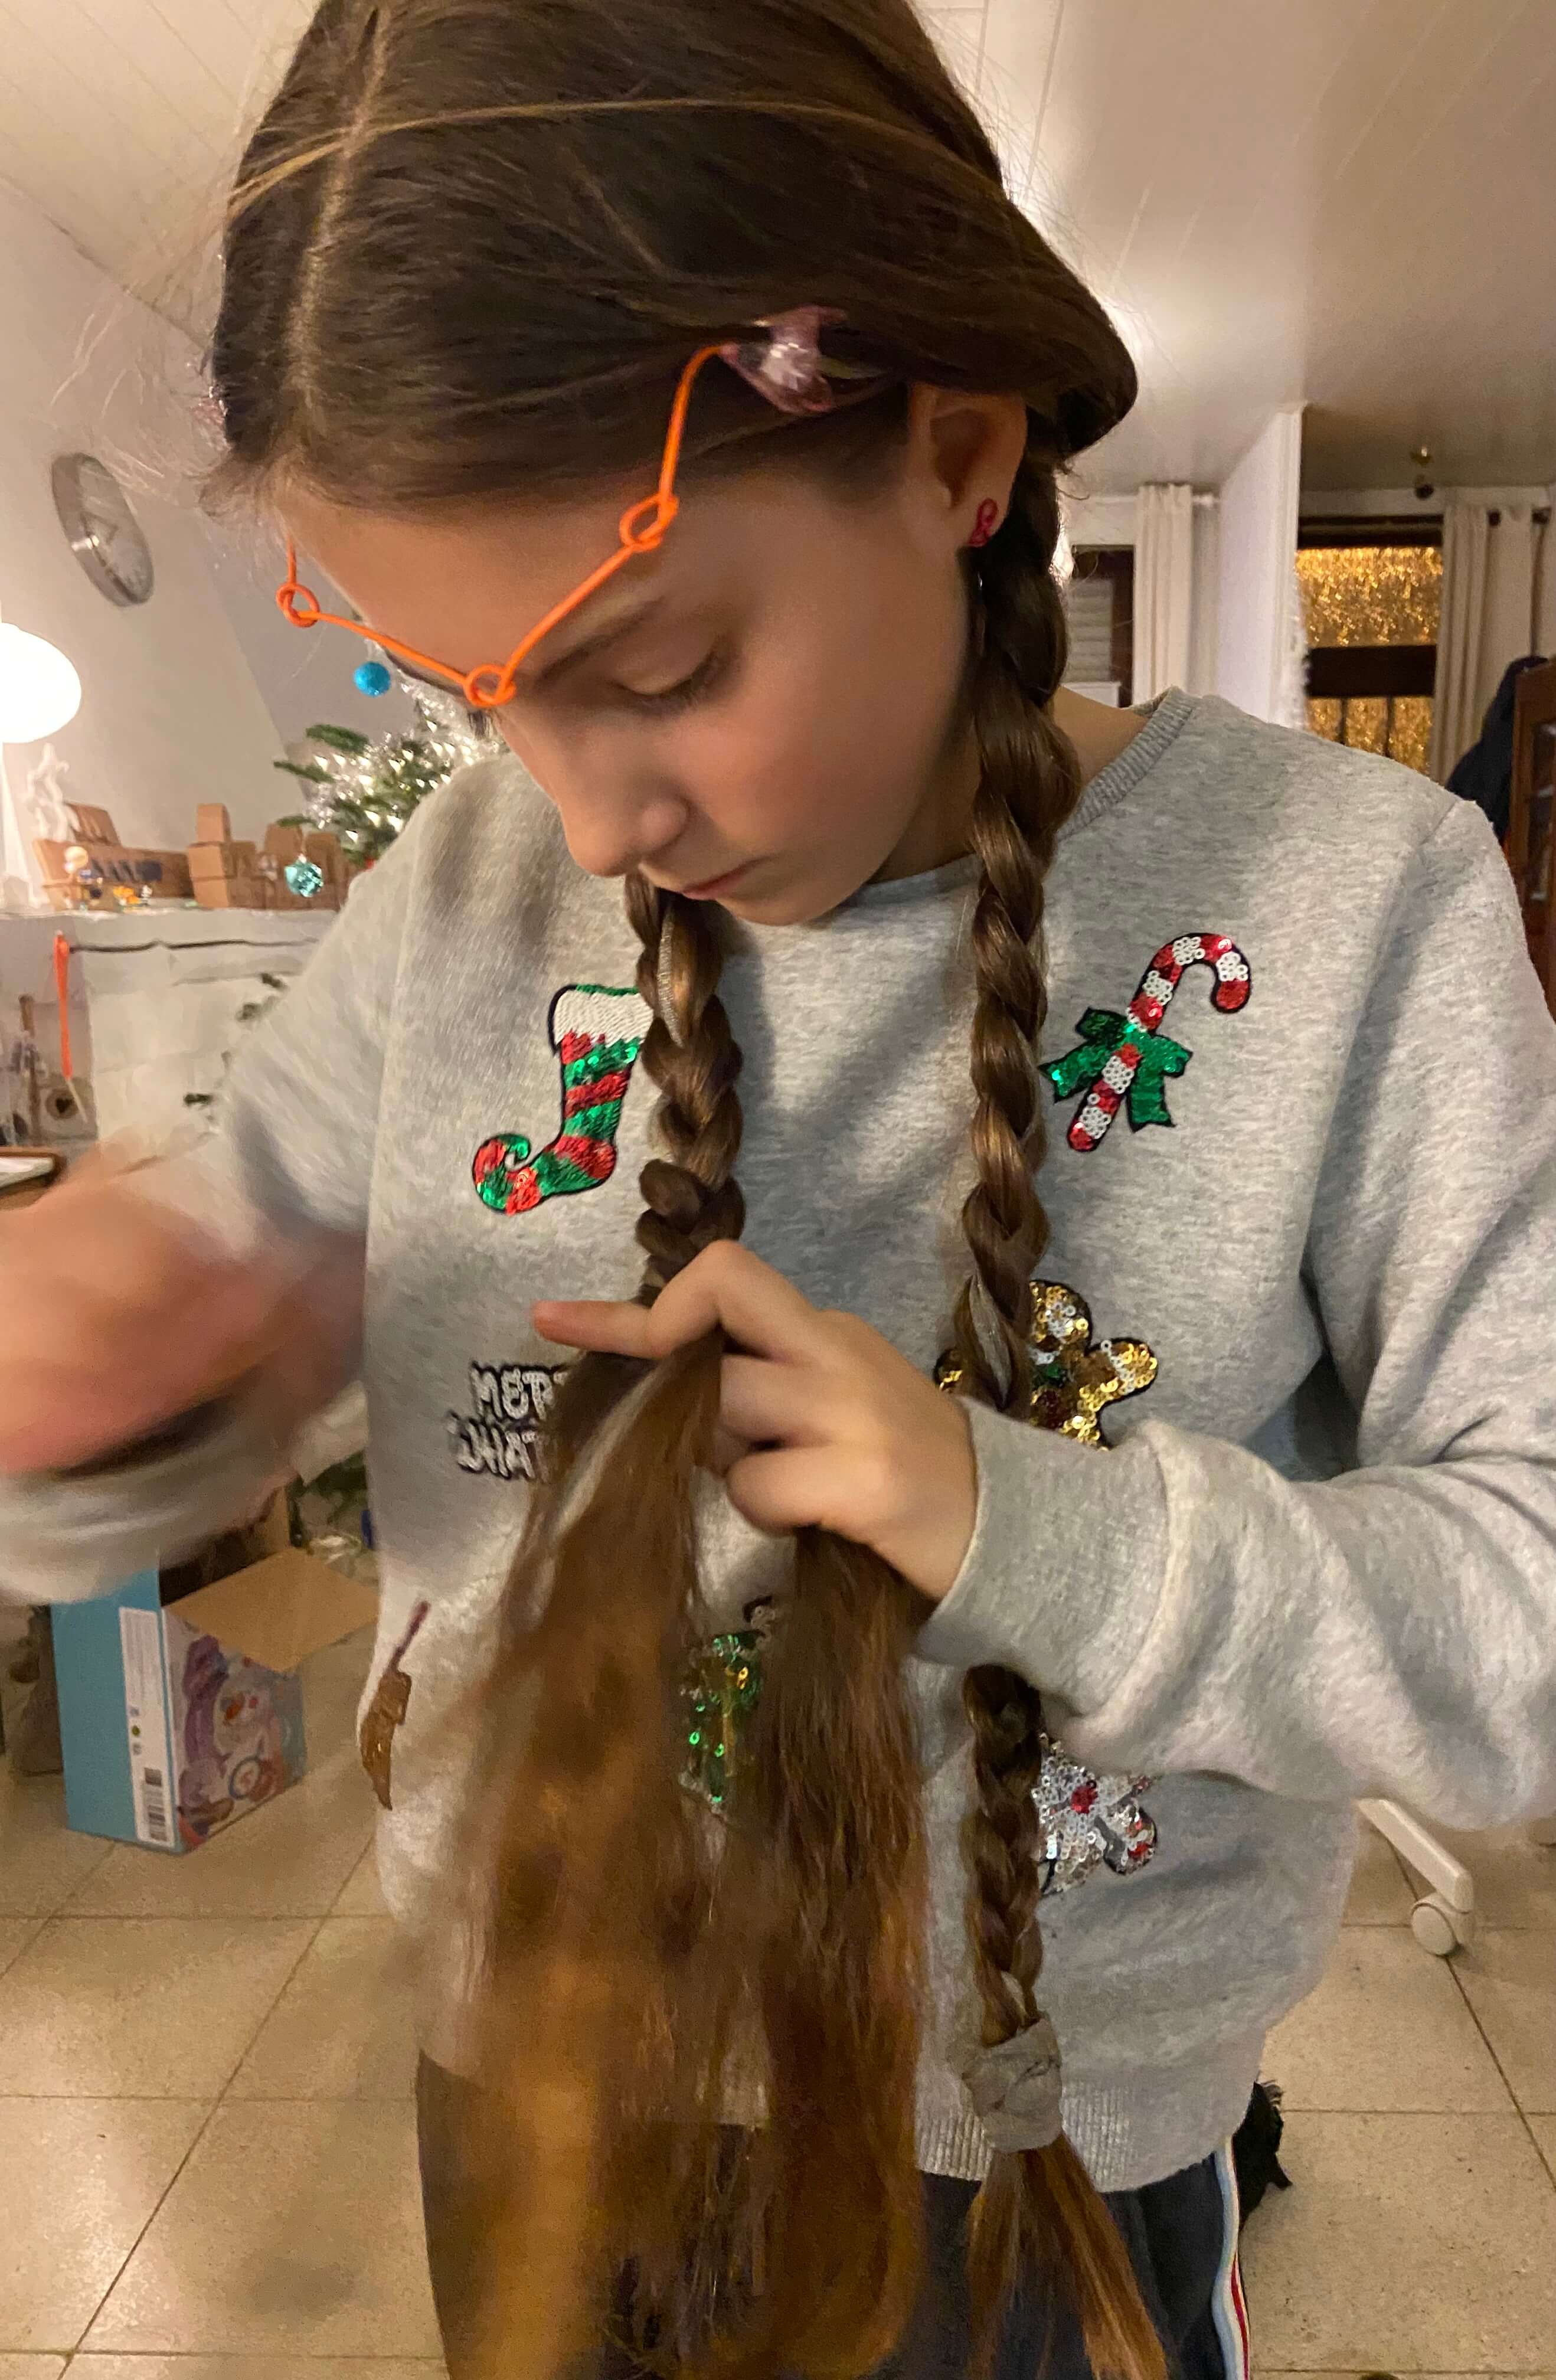
Then my daughter integrated the conductive textile in her hairbraids. The LED filament was laying on her forehead, the more fragile connectionpoints between LED filament and conductive fabric were pinned into her hair with plastic hairpins.
The ends of the hairbraids were tied up with the rest of conductive fabric.
When tapping those ends to each other, the electric current can pass through the circuit and the LED starts to shine.
Final result
Altough I wanted to go further and integrate a morse code in Arduino in this project, my daughter was very happy with the result. But her twin-sister and older brother were jealous... So I promised we will make together a lightcircuit for both of them.
So I would like to make another project with the touch sensor and also one with an eletronic tattoo.