2. Digital bodies
Past Related Works
Throughout the lecture on Digital Bodies, many ideas were spurring in my head. We are to 3d Scan, turn 3D models to 2D and then build them back to 3D. I will outline the ideation and assignments below.
weekly assignment
- Include some inspiration: research on artists or projects that work with the human body
- Document the use of 3D scanner and software to acquire a 3D model
- Document the process of repairing and/or manipulating a 3D mesh and slicing it.
- Create my ready to cut file for laser cutting, learn how to use the laser cutter and document the workflow and upload your 3D and 2D files
- Learn about the fab lab processes, booking system, usage, machine demos, tools and safety rules
- Build and/or assemble my mannequin, create a stop motion assembling it or stepped process
- Send one picture (HIGH RES) of my mannequin to enter the competition for the annual exhibition (extra credit)
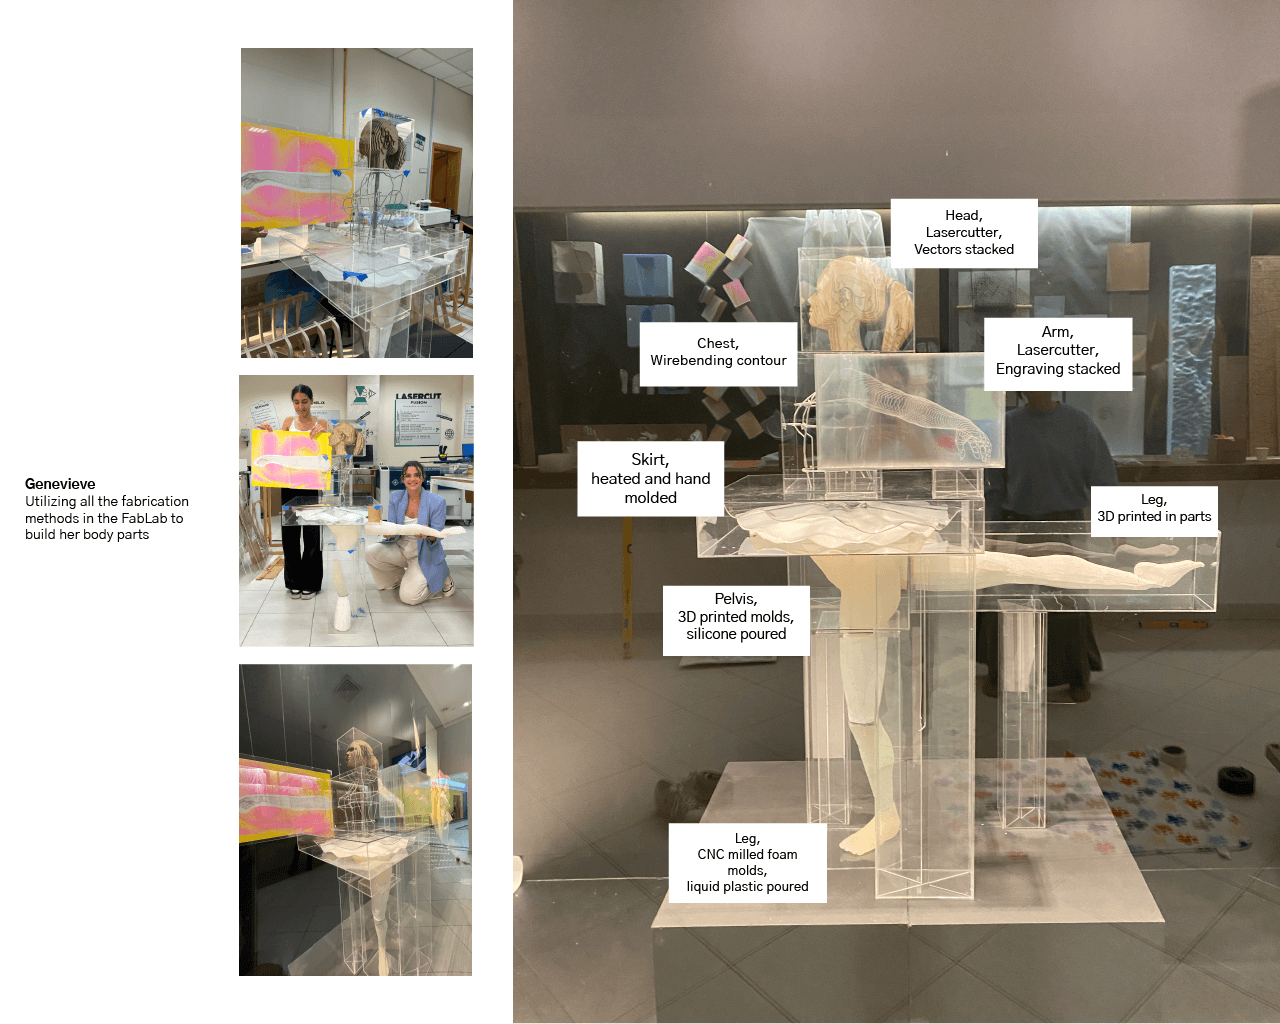
Last year, I designed and worked on an exhibition that showcases the different tools and fabrication techniques available in our FabLab/MakerSpace with the team. One of the pieces we worked on was called 'Genevieve'. She was a ballerina that we split, produced in a different techniques, and displayed each body part in an acrylic box.
Inspiration
Antony Gormley
What interested me in the project is how abstracted the figures are but yet you can tell the poses and emotions just by looking at them.
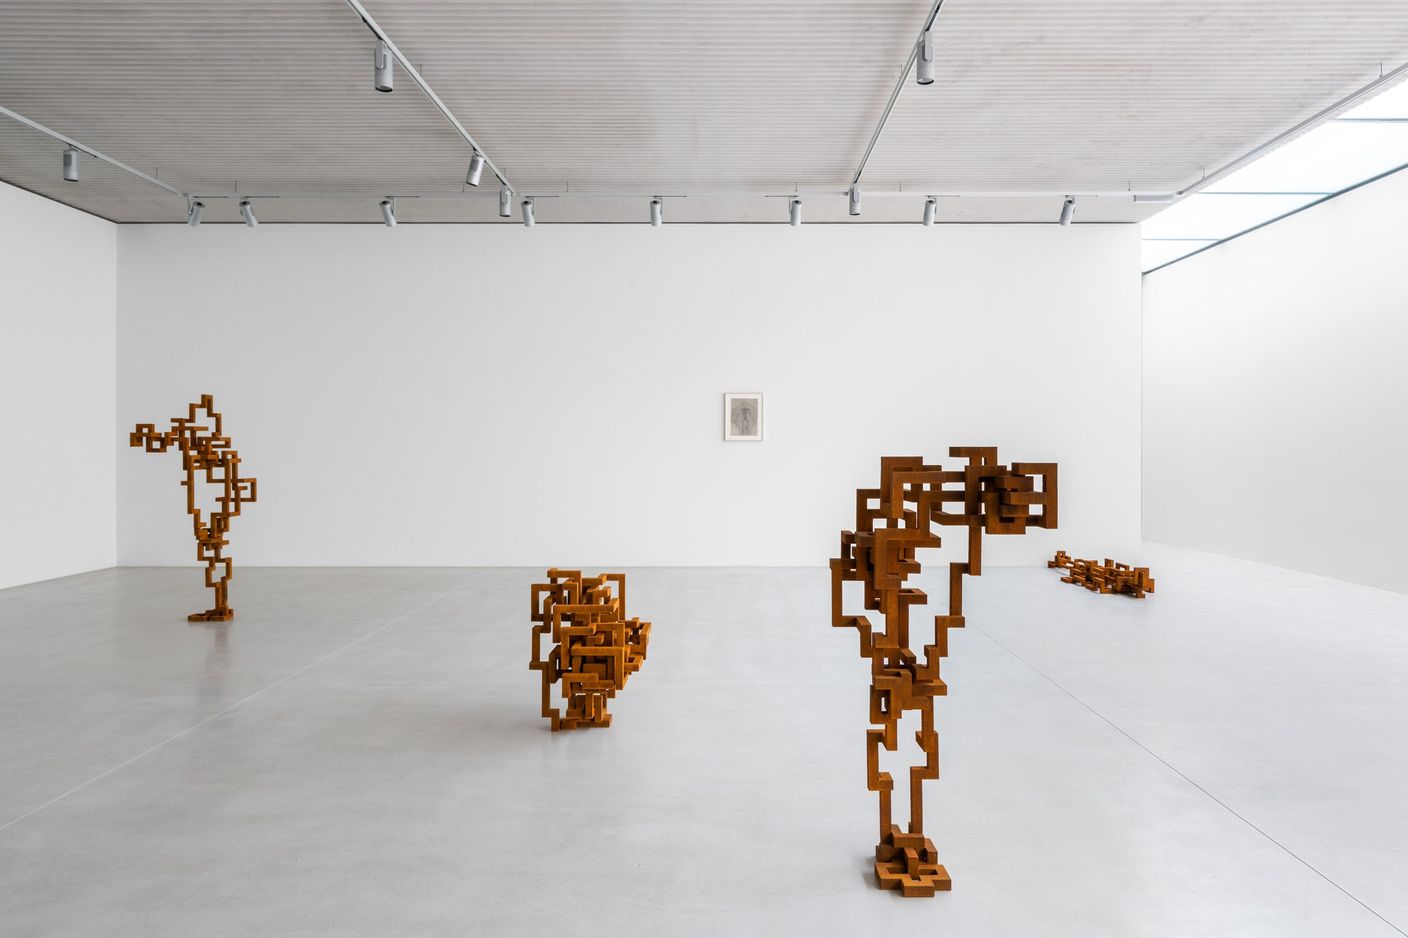
Body Field
Jaume Plensa
Jaume's work is interesting due to two things, the play on transparencies and the proportions. I find the transparency specifically interesting and would like to explore the idea of it with solids & voids.
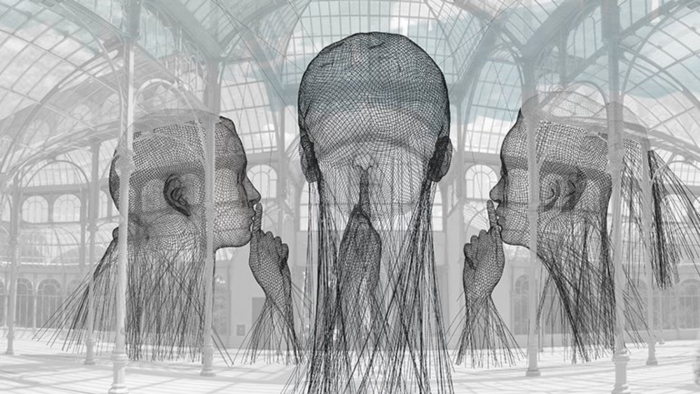
Invisibles
Anders Krisar
Claudia's Foreigner shows a moment of time which I find very inspiring. One of my favorite words of description for artworks is 'morphing' and I see it quite clearly in Claudia's work.
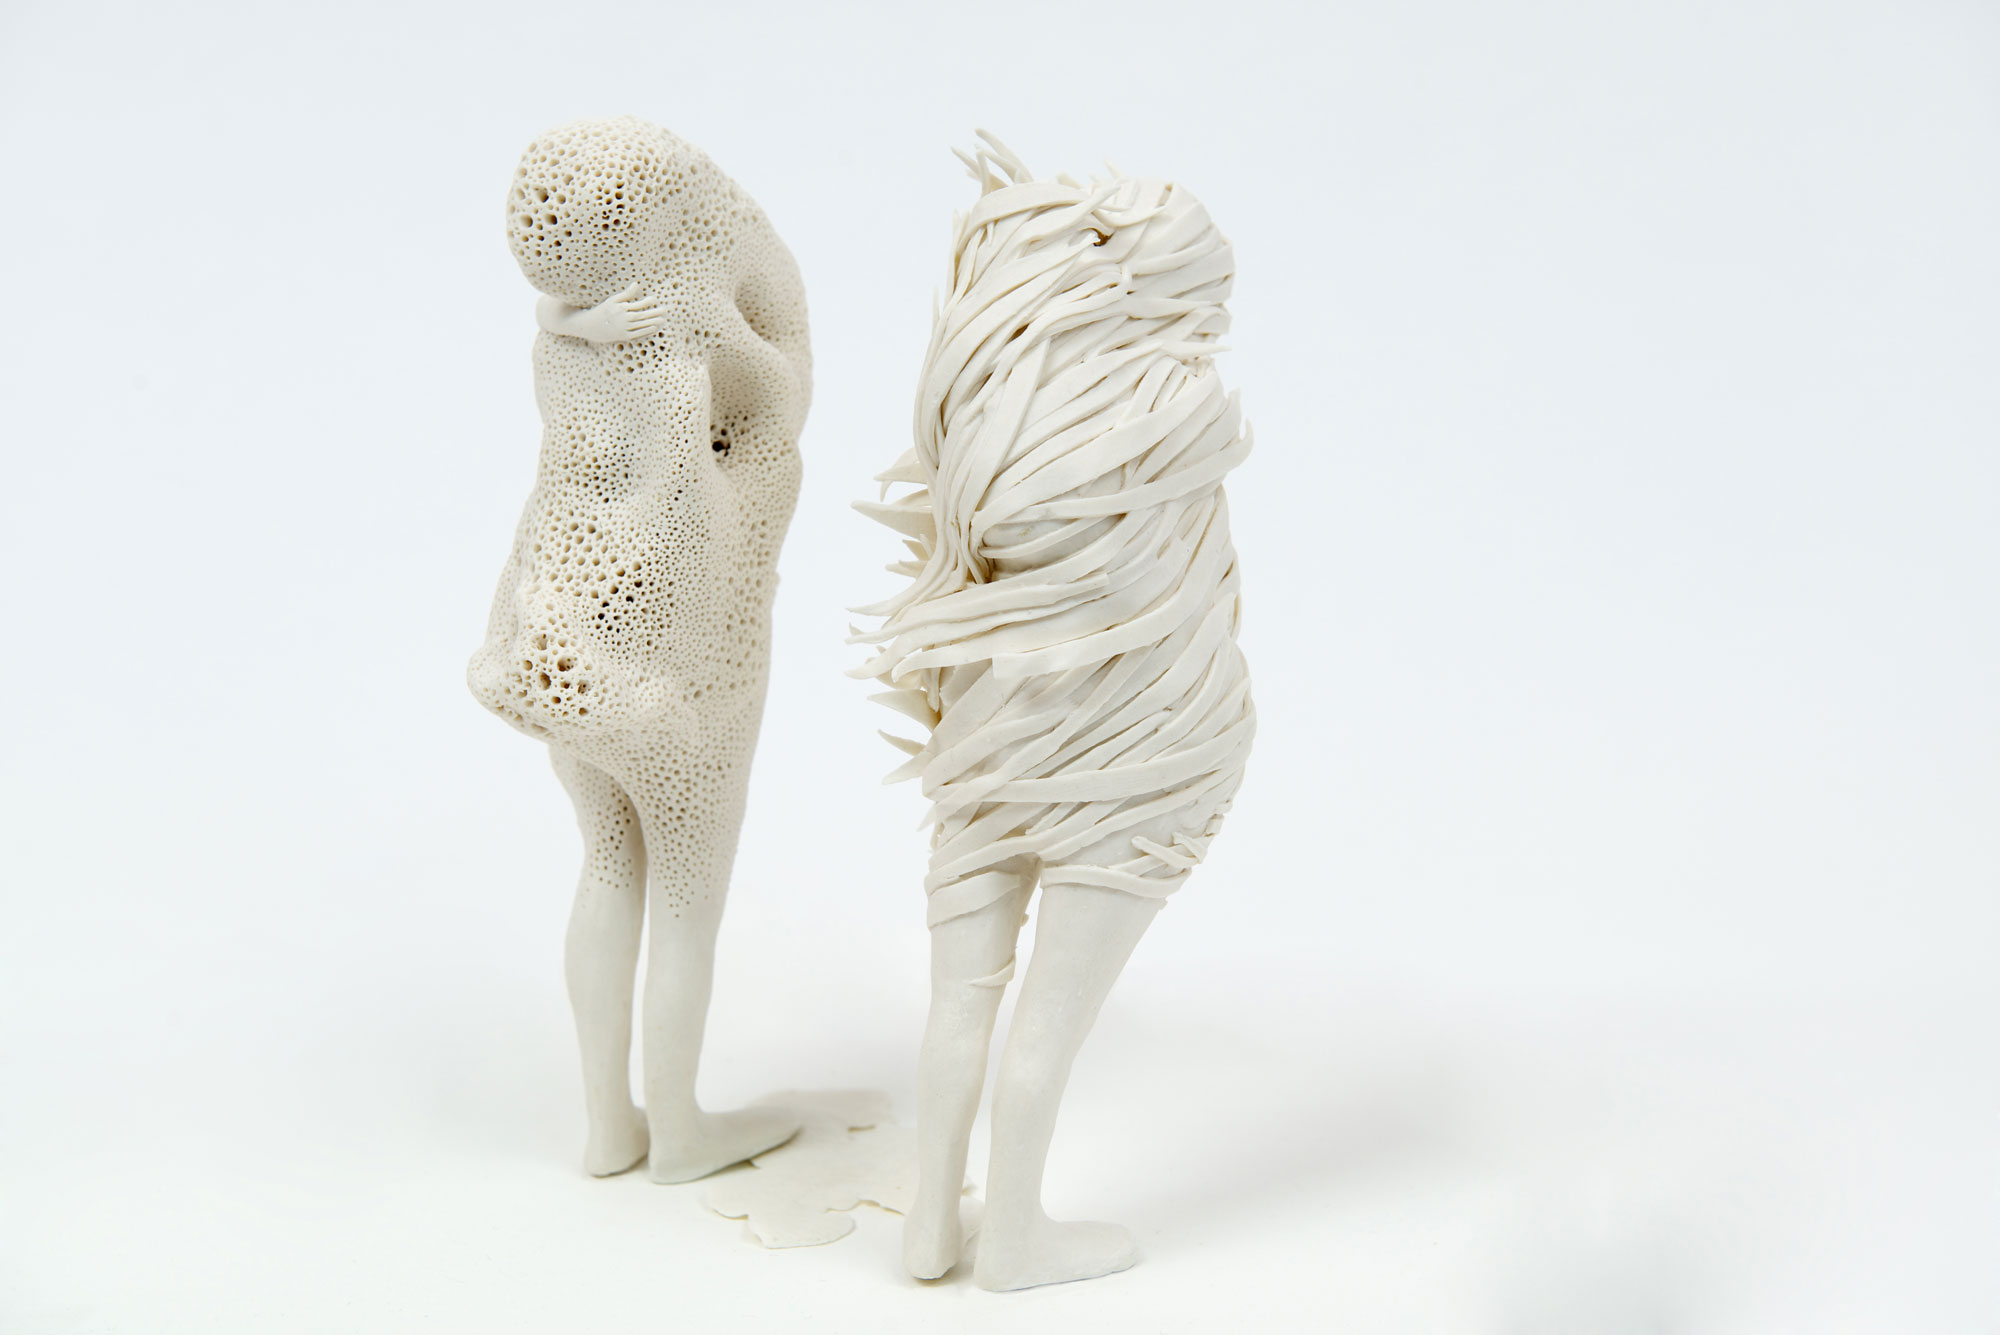
Foreigner
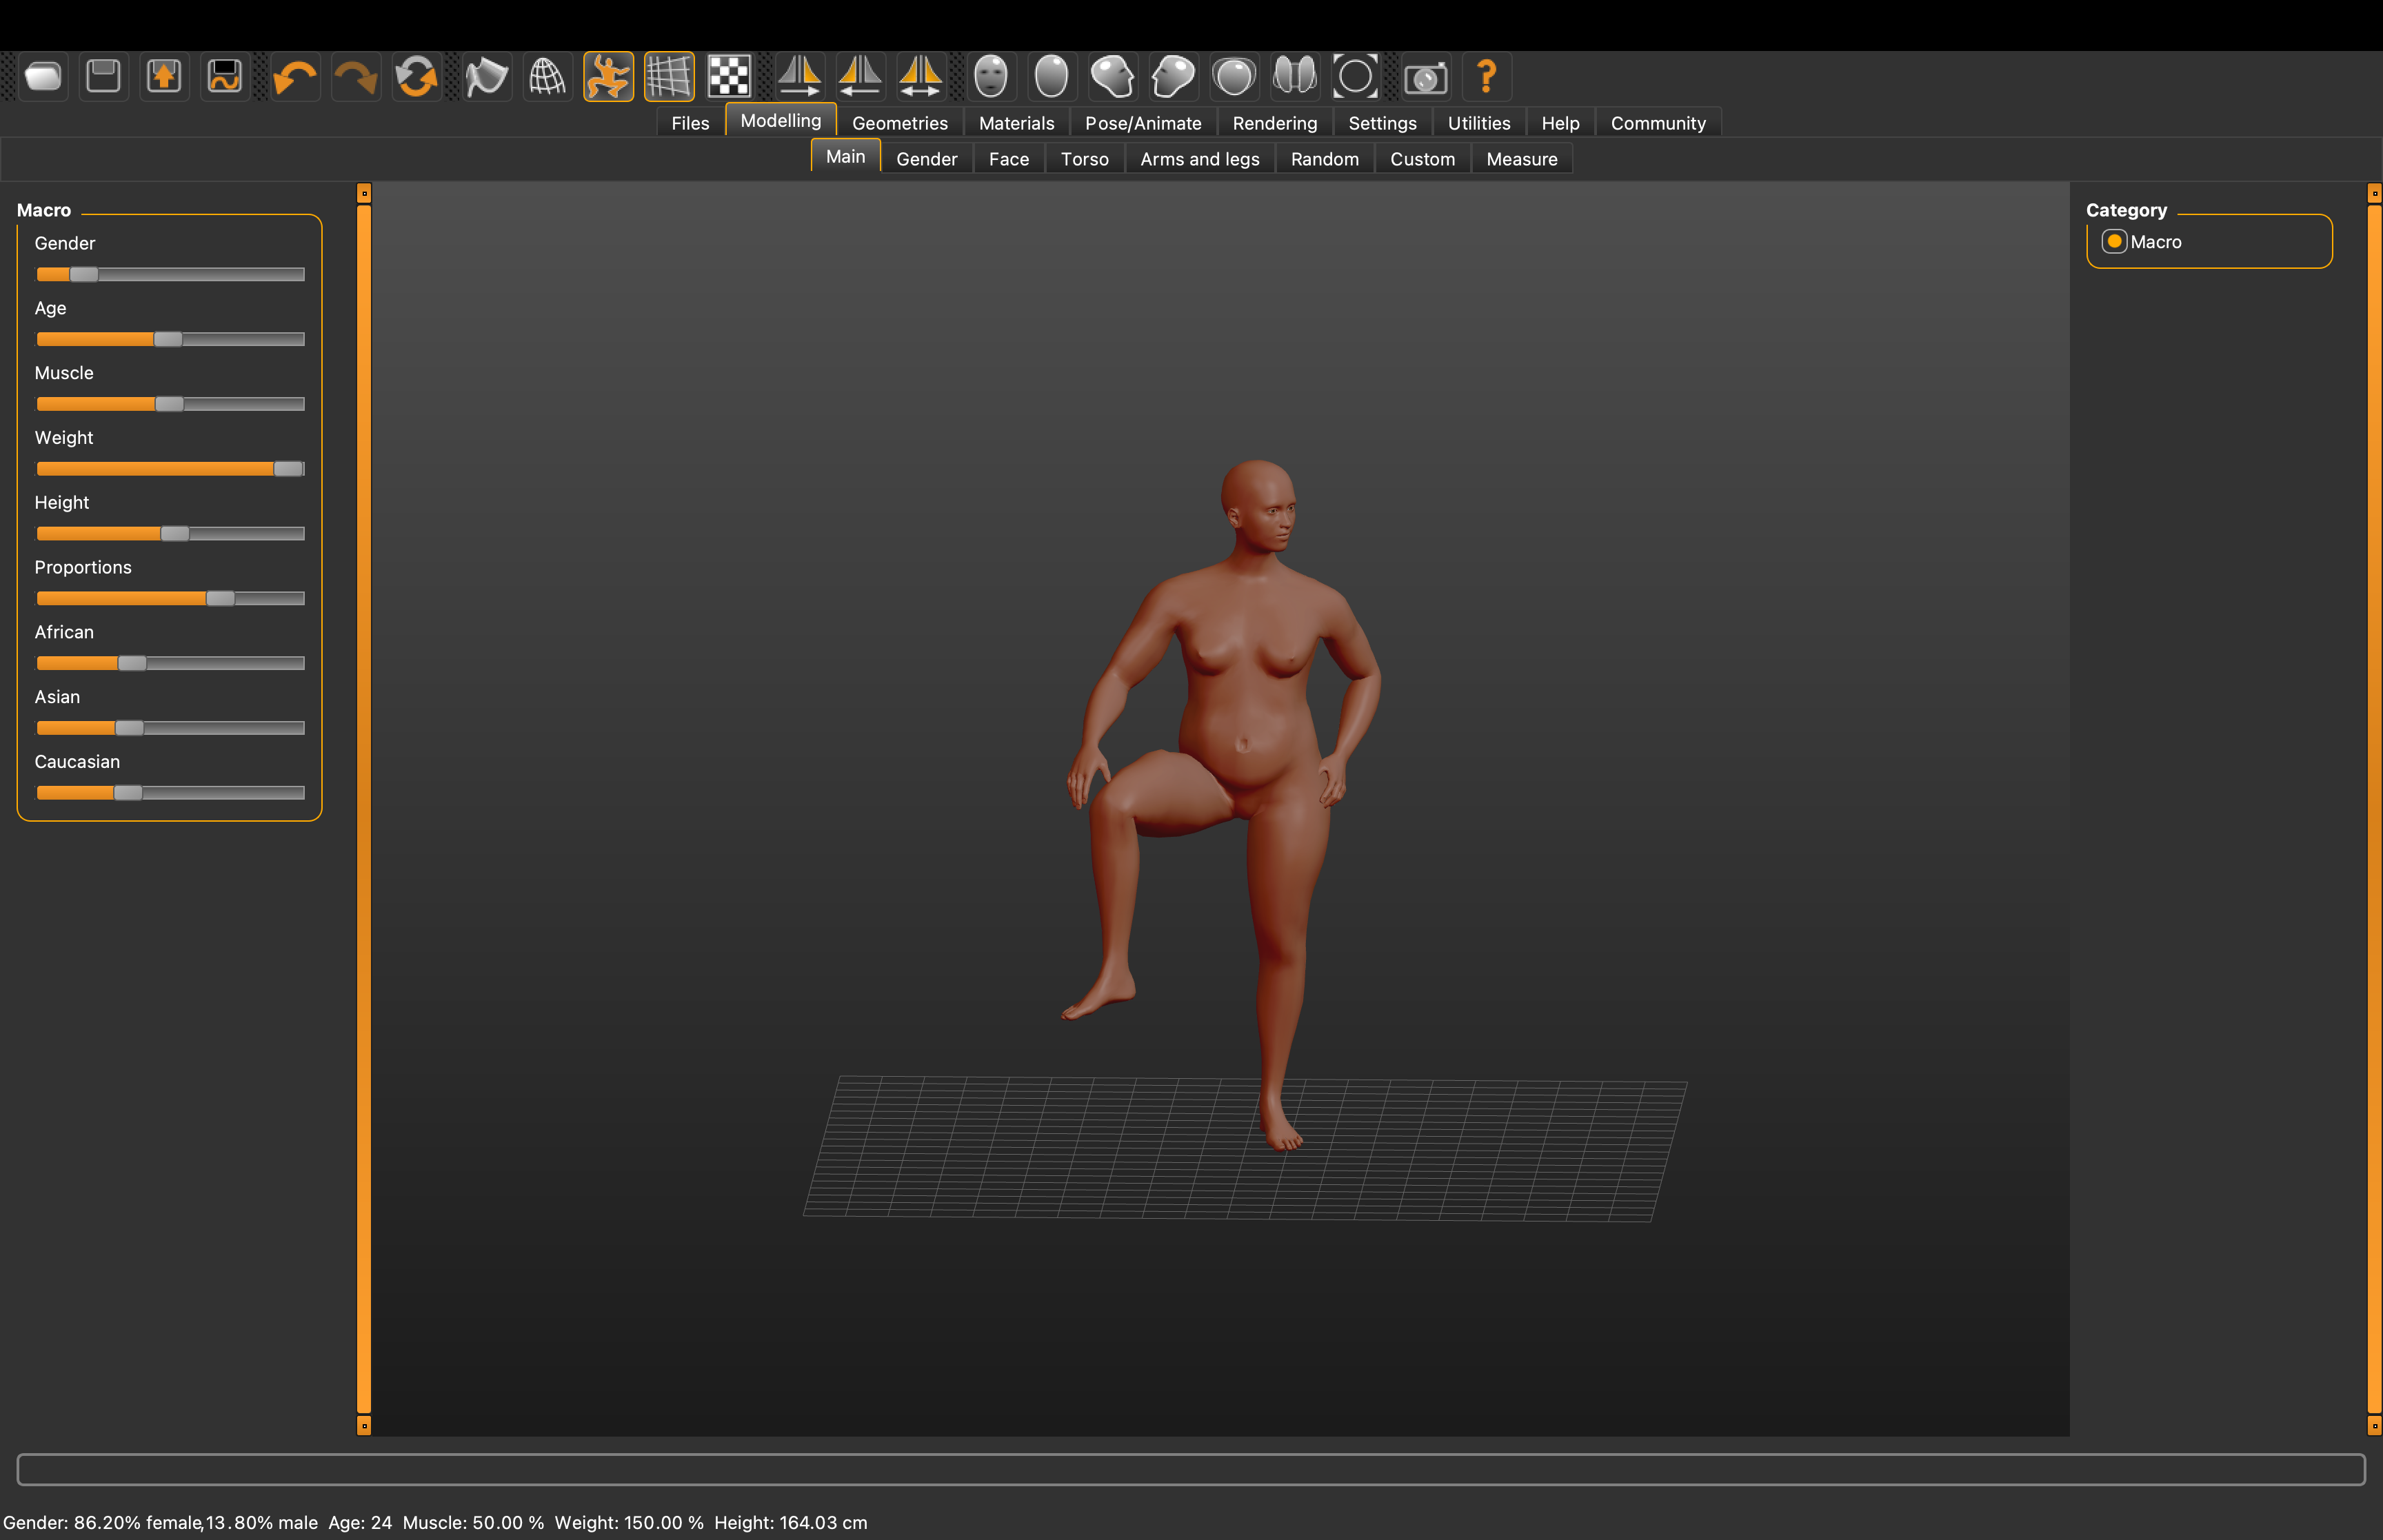
MakeHuman
During the tutorial by Diane, I followed the steps and designed my own little Human. I played around with the sizes of the body parts enough to make it look a little like myself. I would experiment, moving forward, with taking all the measurements and building a little to-scale-Hala. As Diane said, it is exactly like a video games character building segment and is a great resource to start off with! In the past, as the case for Genevieve above, we downloaded the ballerina body from free stl website online like Thingiverse. These free files are not usually the best in quality and are not usually closed tight meshes that can be manipulated easily. That is the benefit I see in MakeHuman.
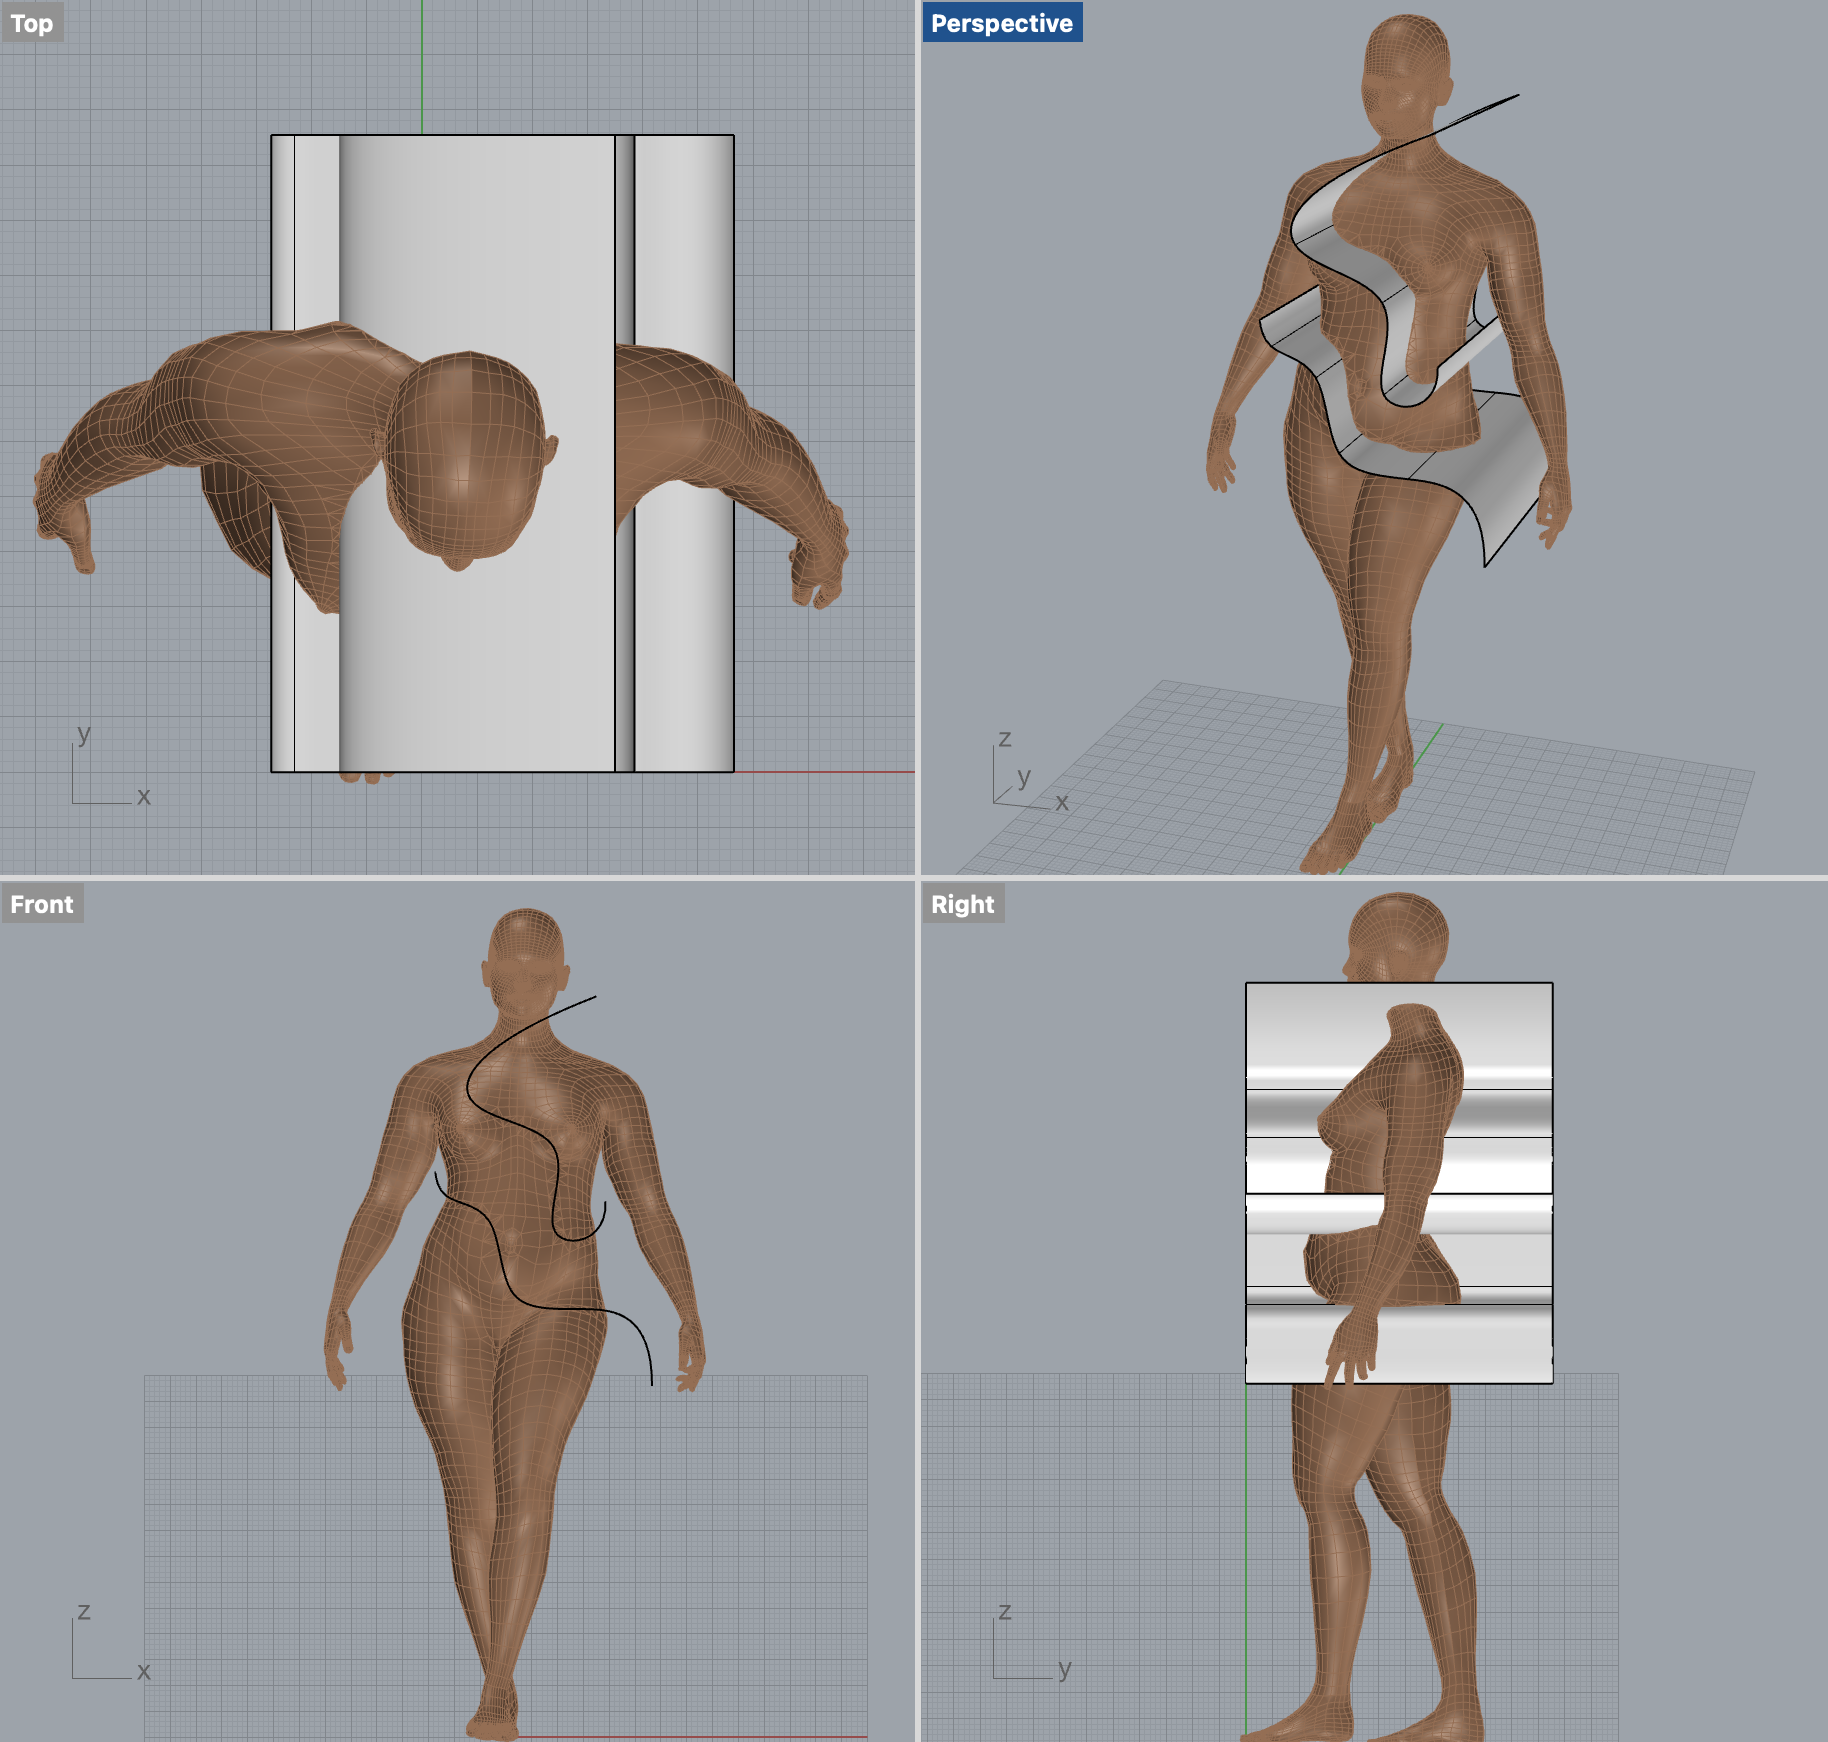
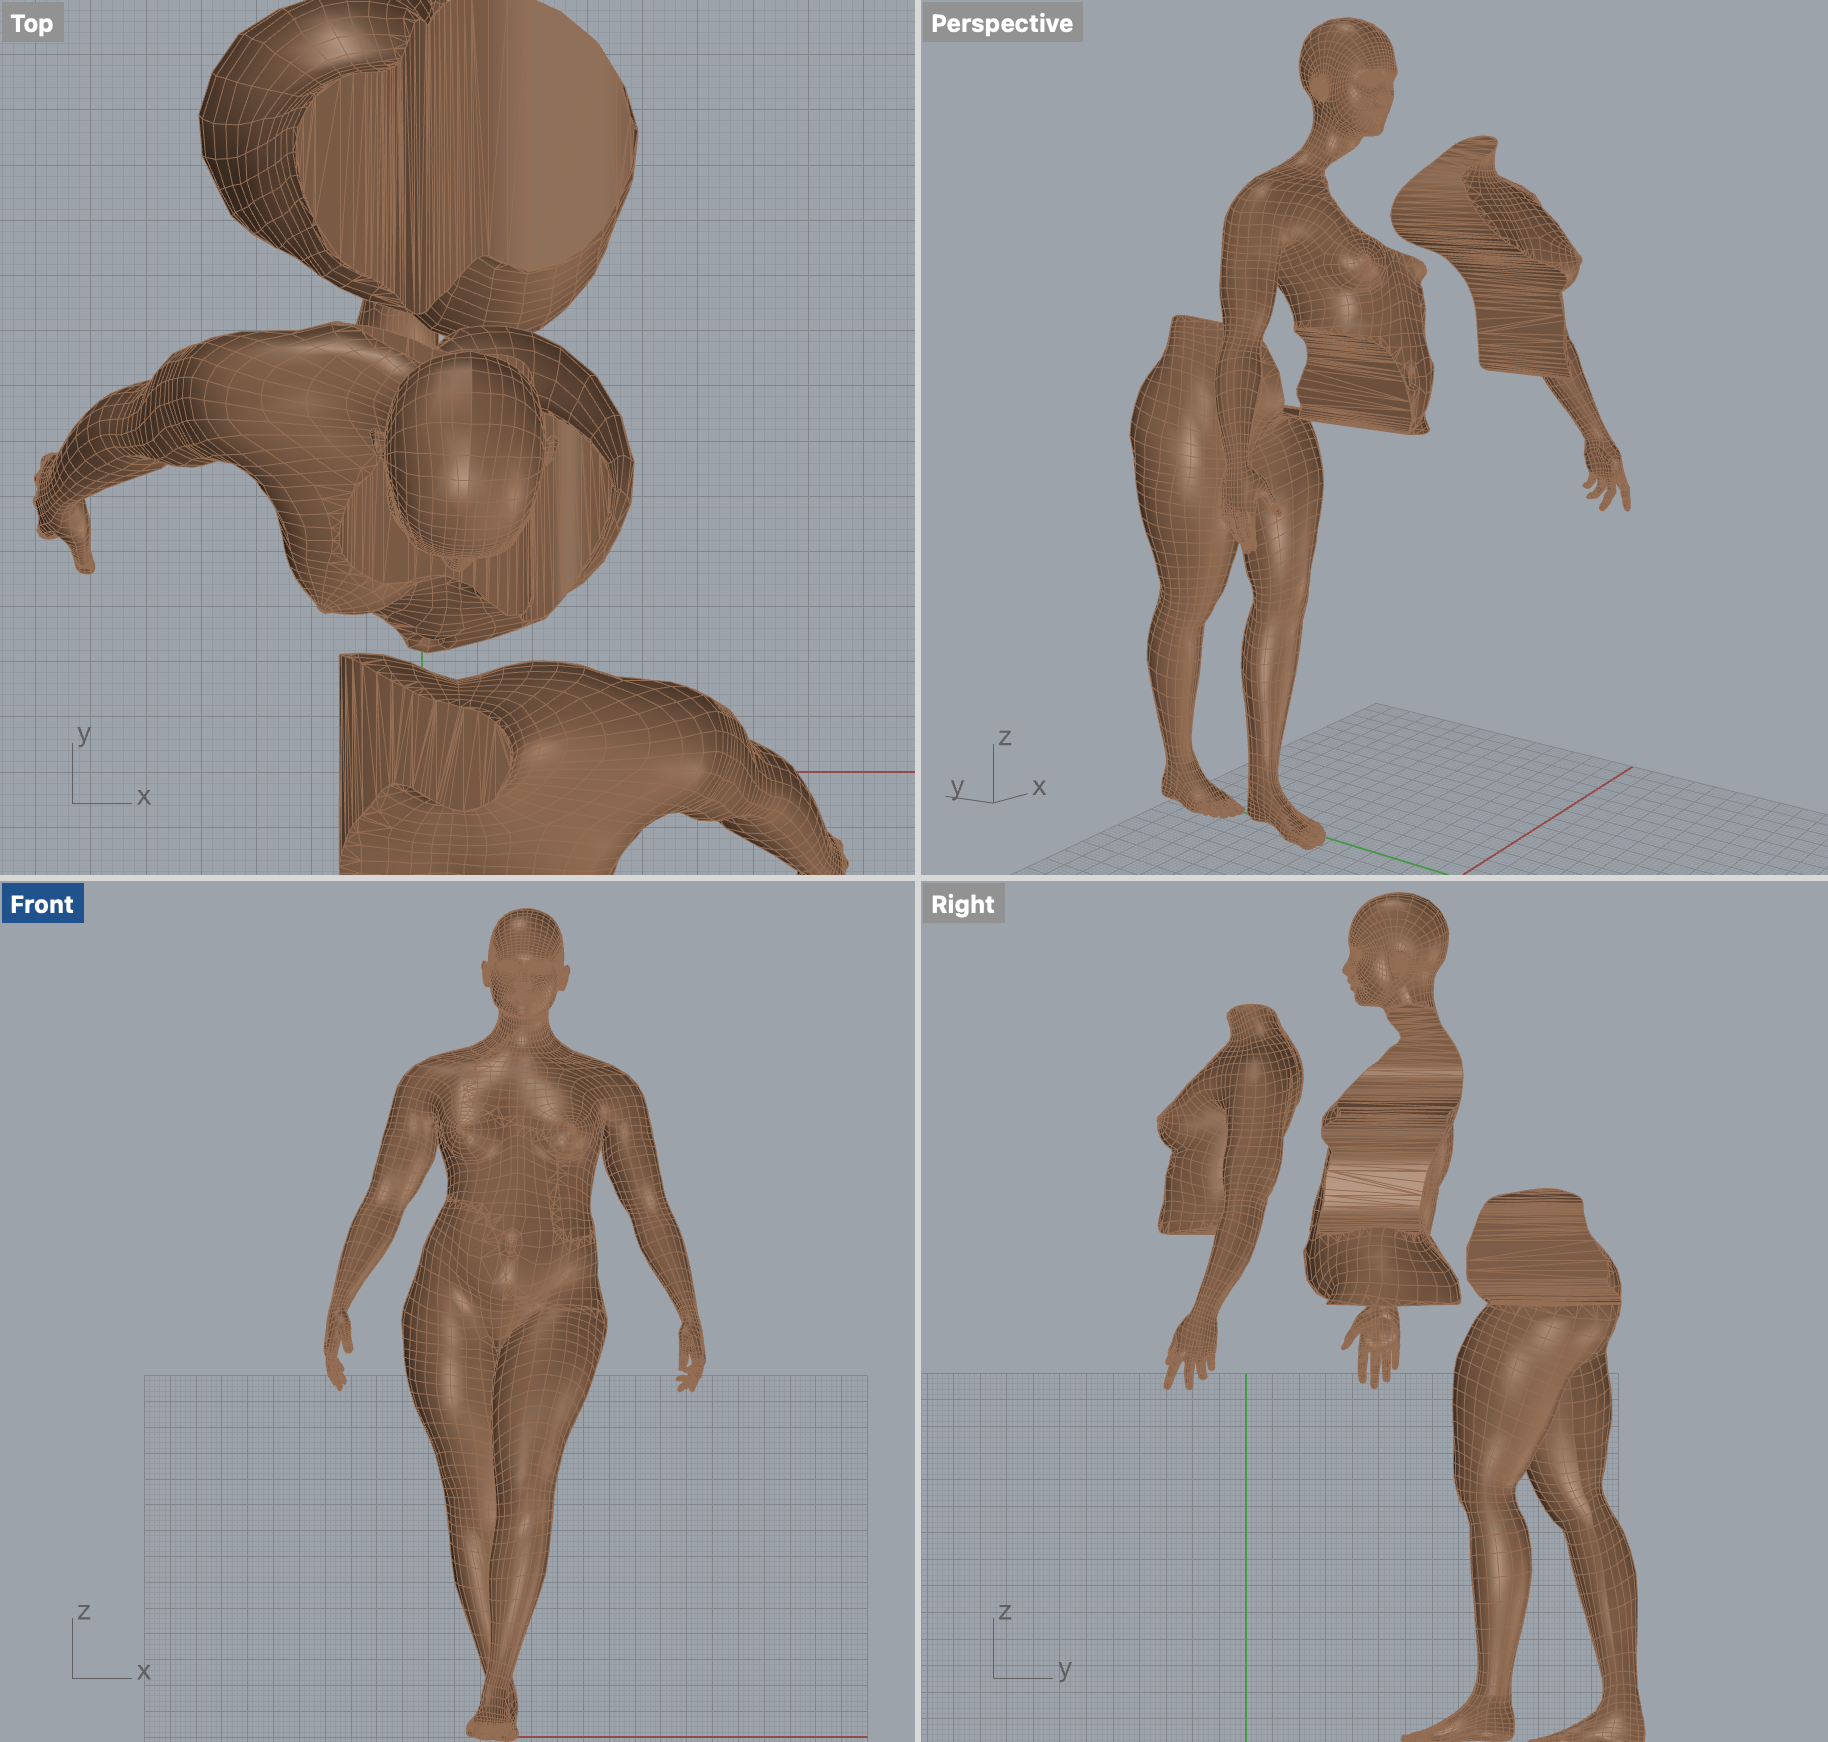
Rhino
After exporting the Human as .obj, I imported it into Rhino and began slicing it to take the parts I wanted. I slice it by drawing surfaces at the points I want to cut and then use 'MeshBoolean Split'. This keeps the Mesh closed and watertight.
Visualizing
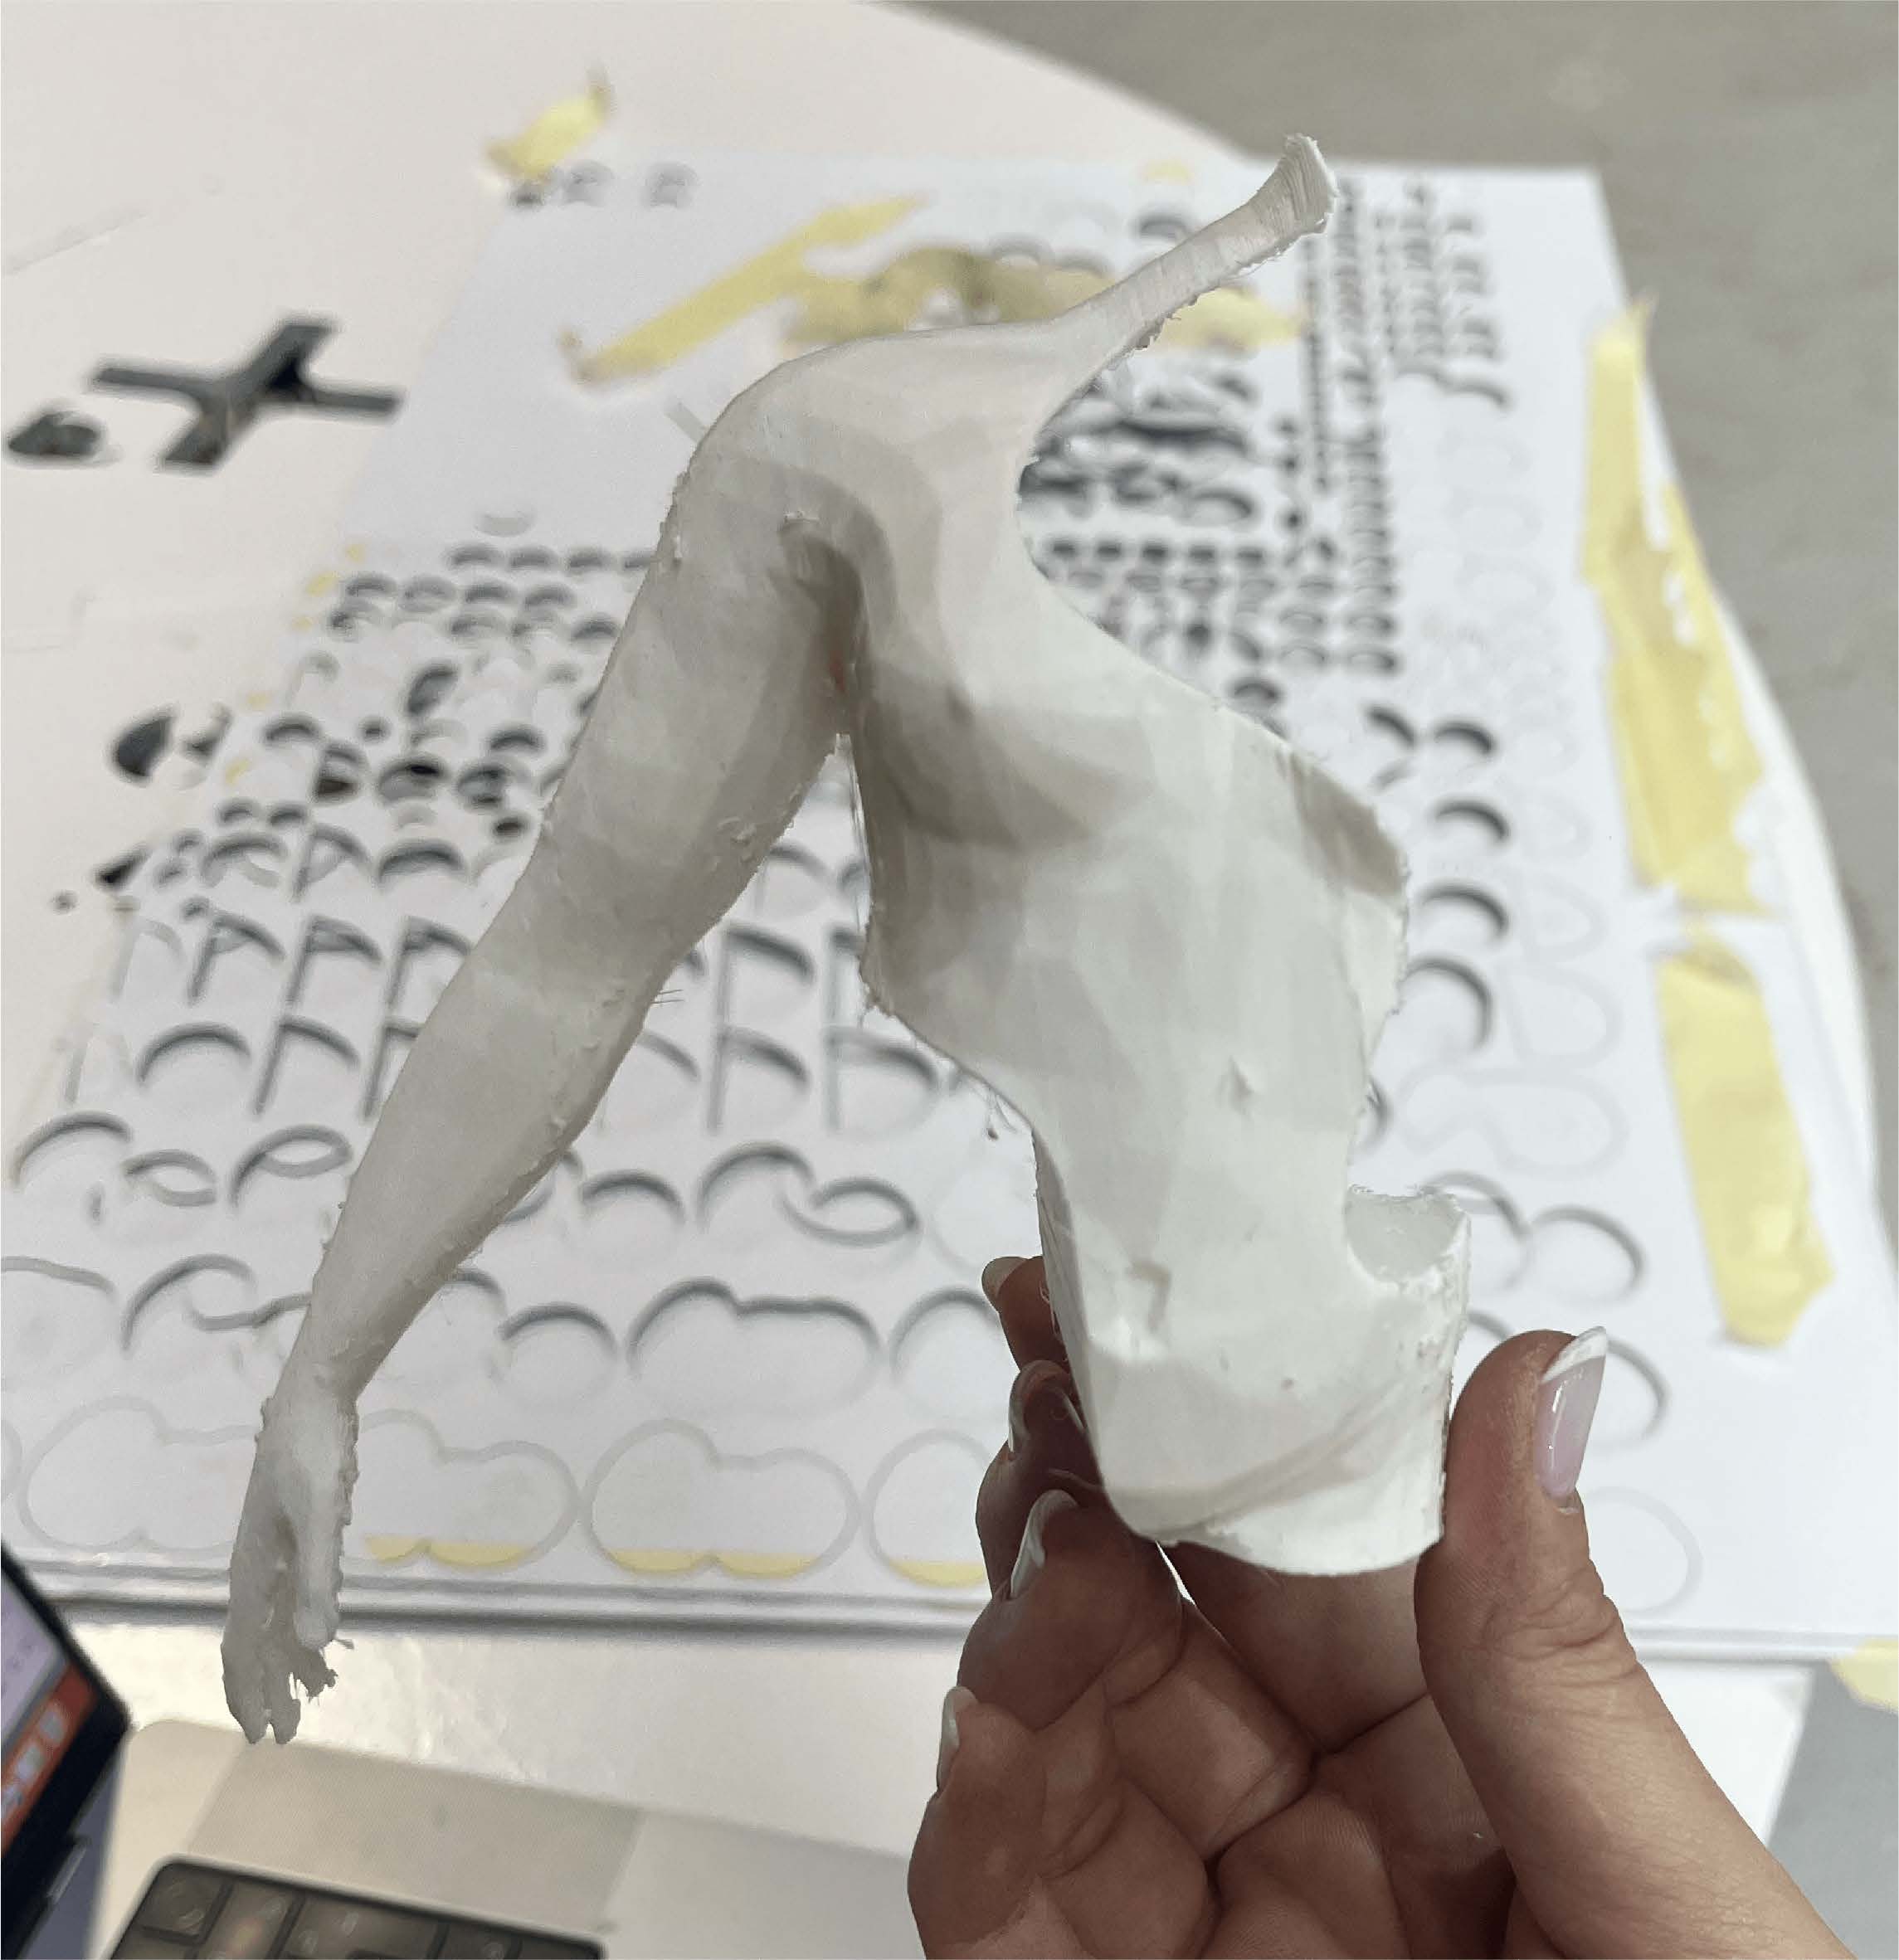
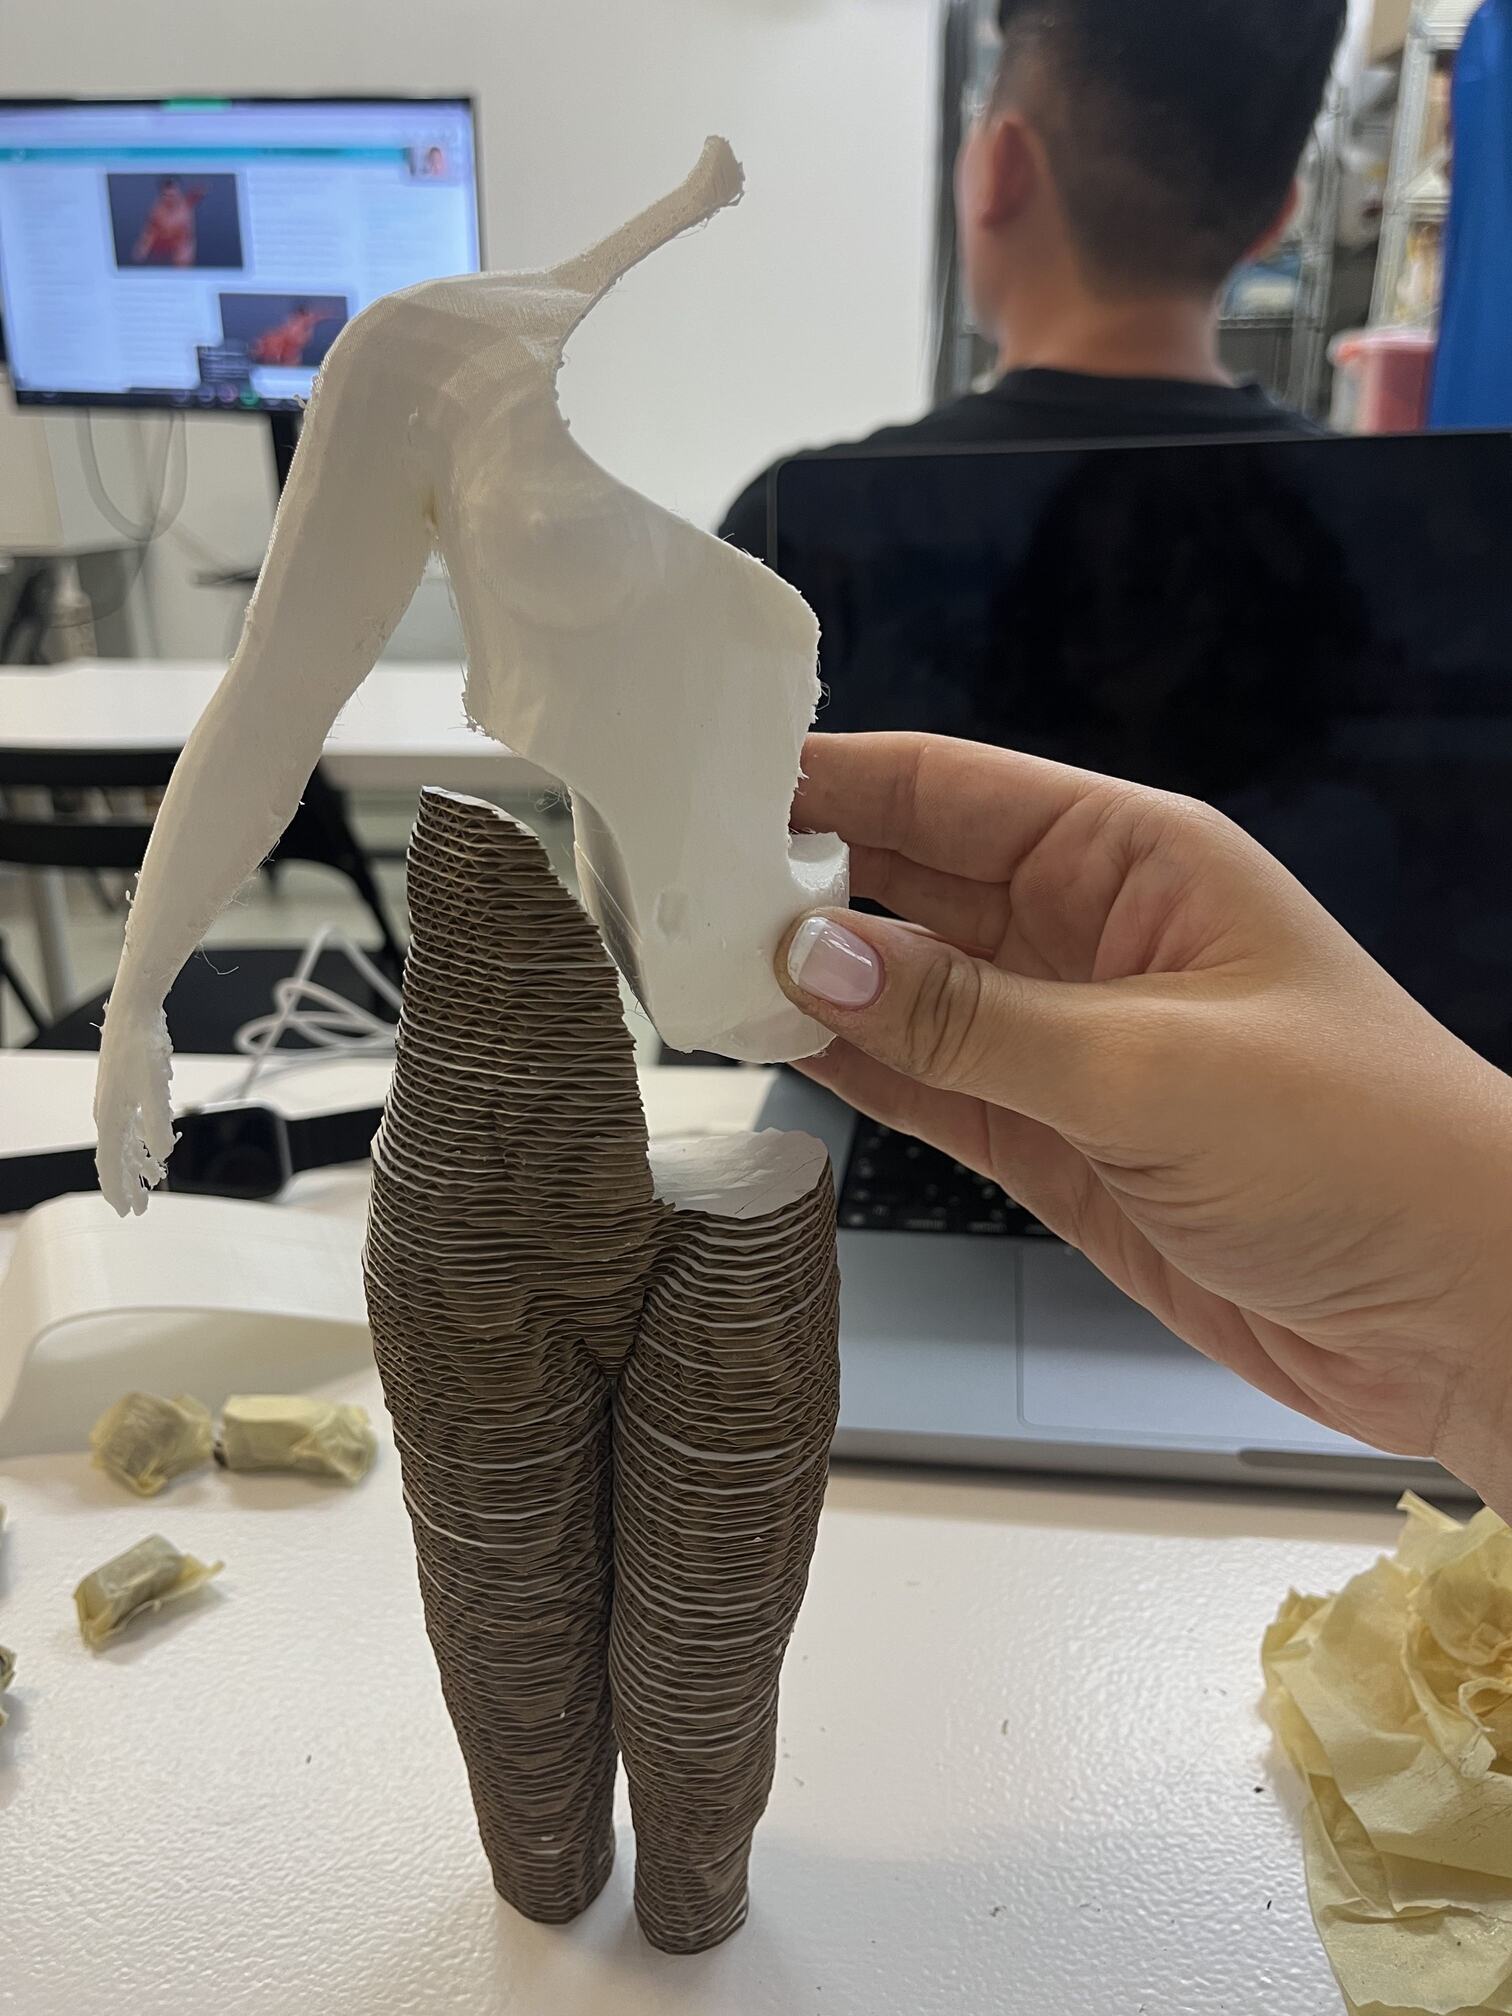
Before moving on to designing the mannequin, I wanted to start by experimenting with different techniques, methods, and transparencies. I split the Human into three parts. Legs would be stacked in clear acrylic, chest and head would be 3D printed, and the shoulder and arm would be using the folded panel technique. The folded panels technique on its own would not hold and carry weight, so by using it along with the printed part, it might do so!
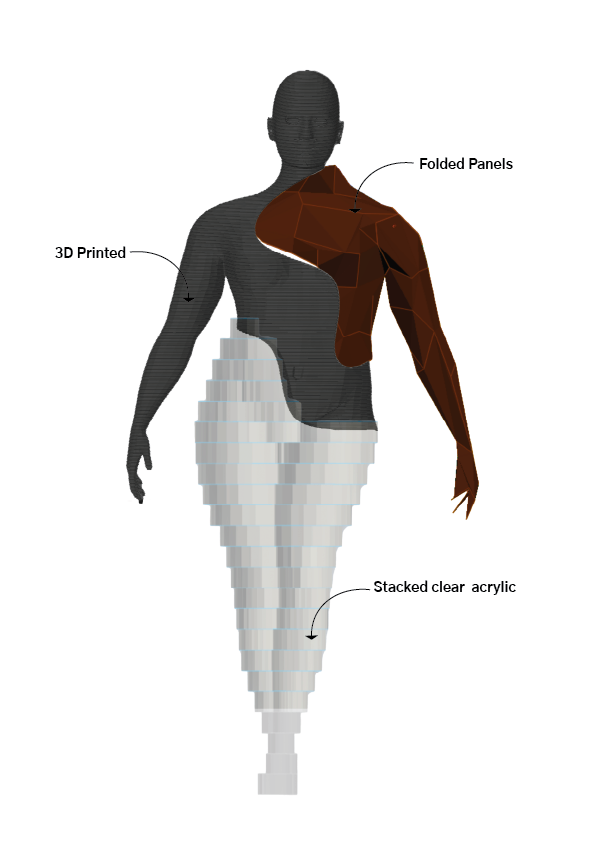
screenshots from the softwares to help visualize the final outcome
I did not create the shoulder
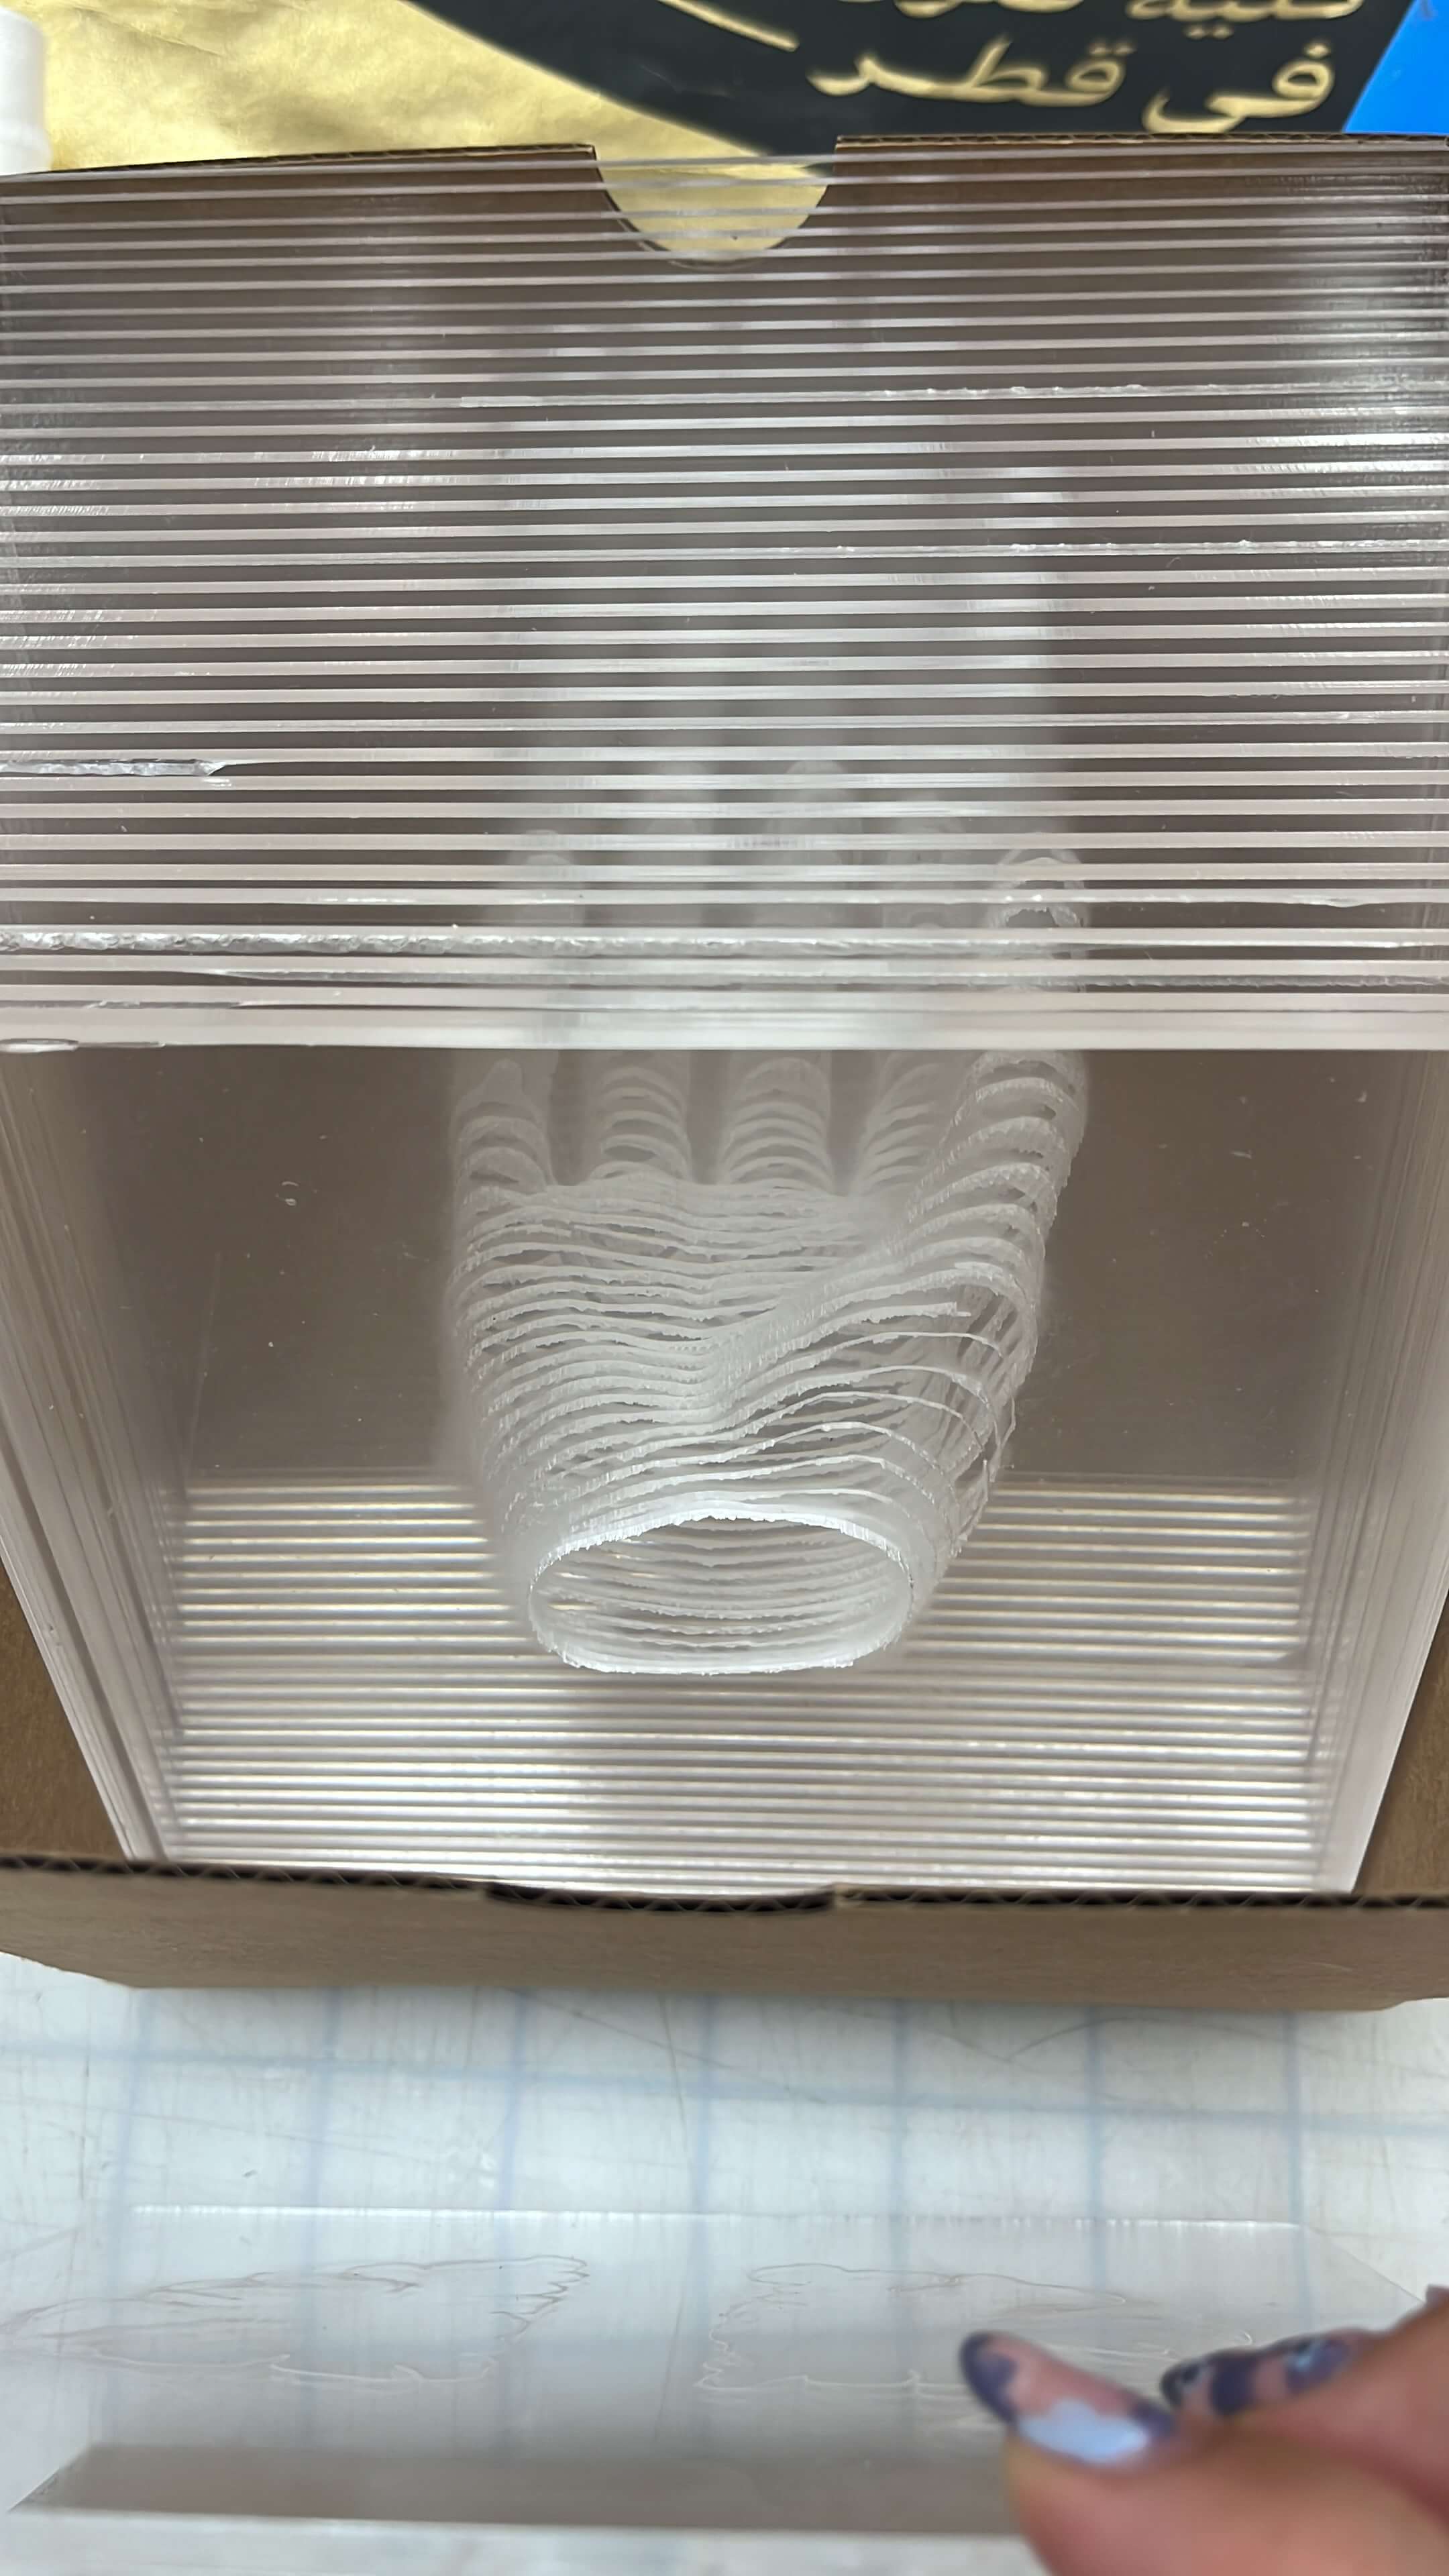
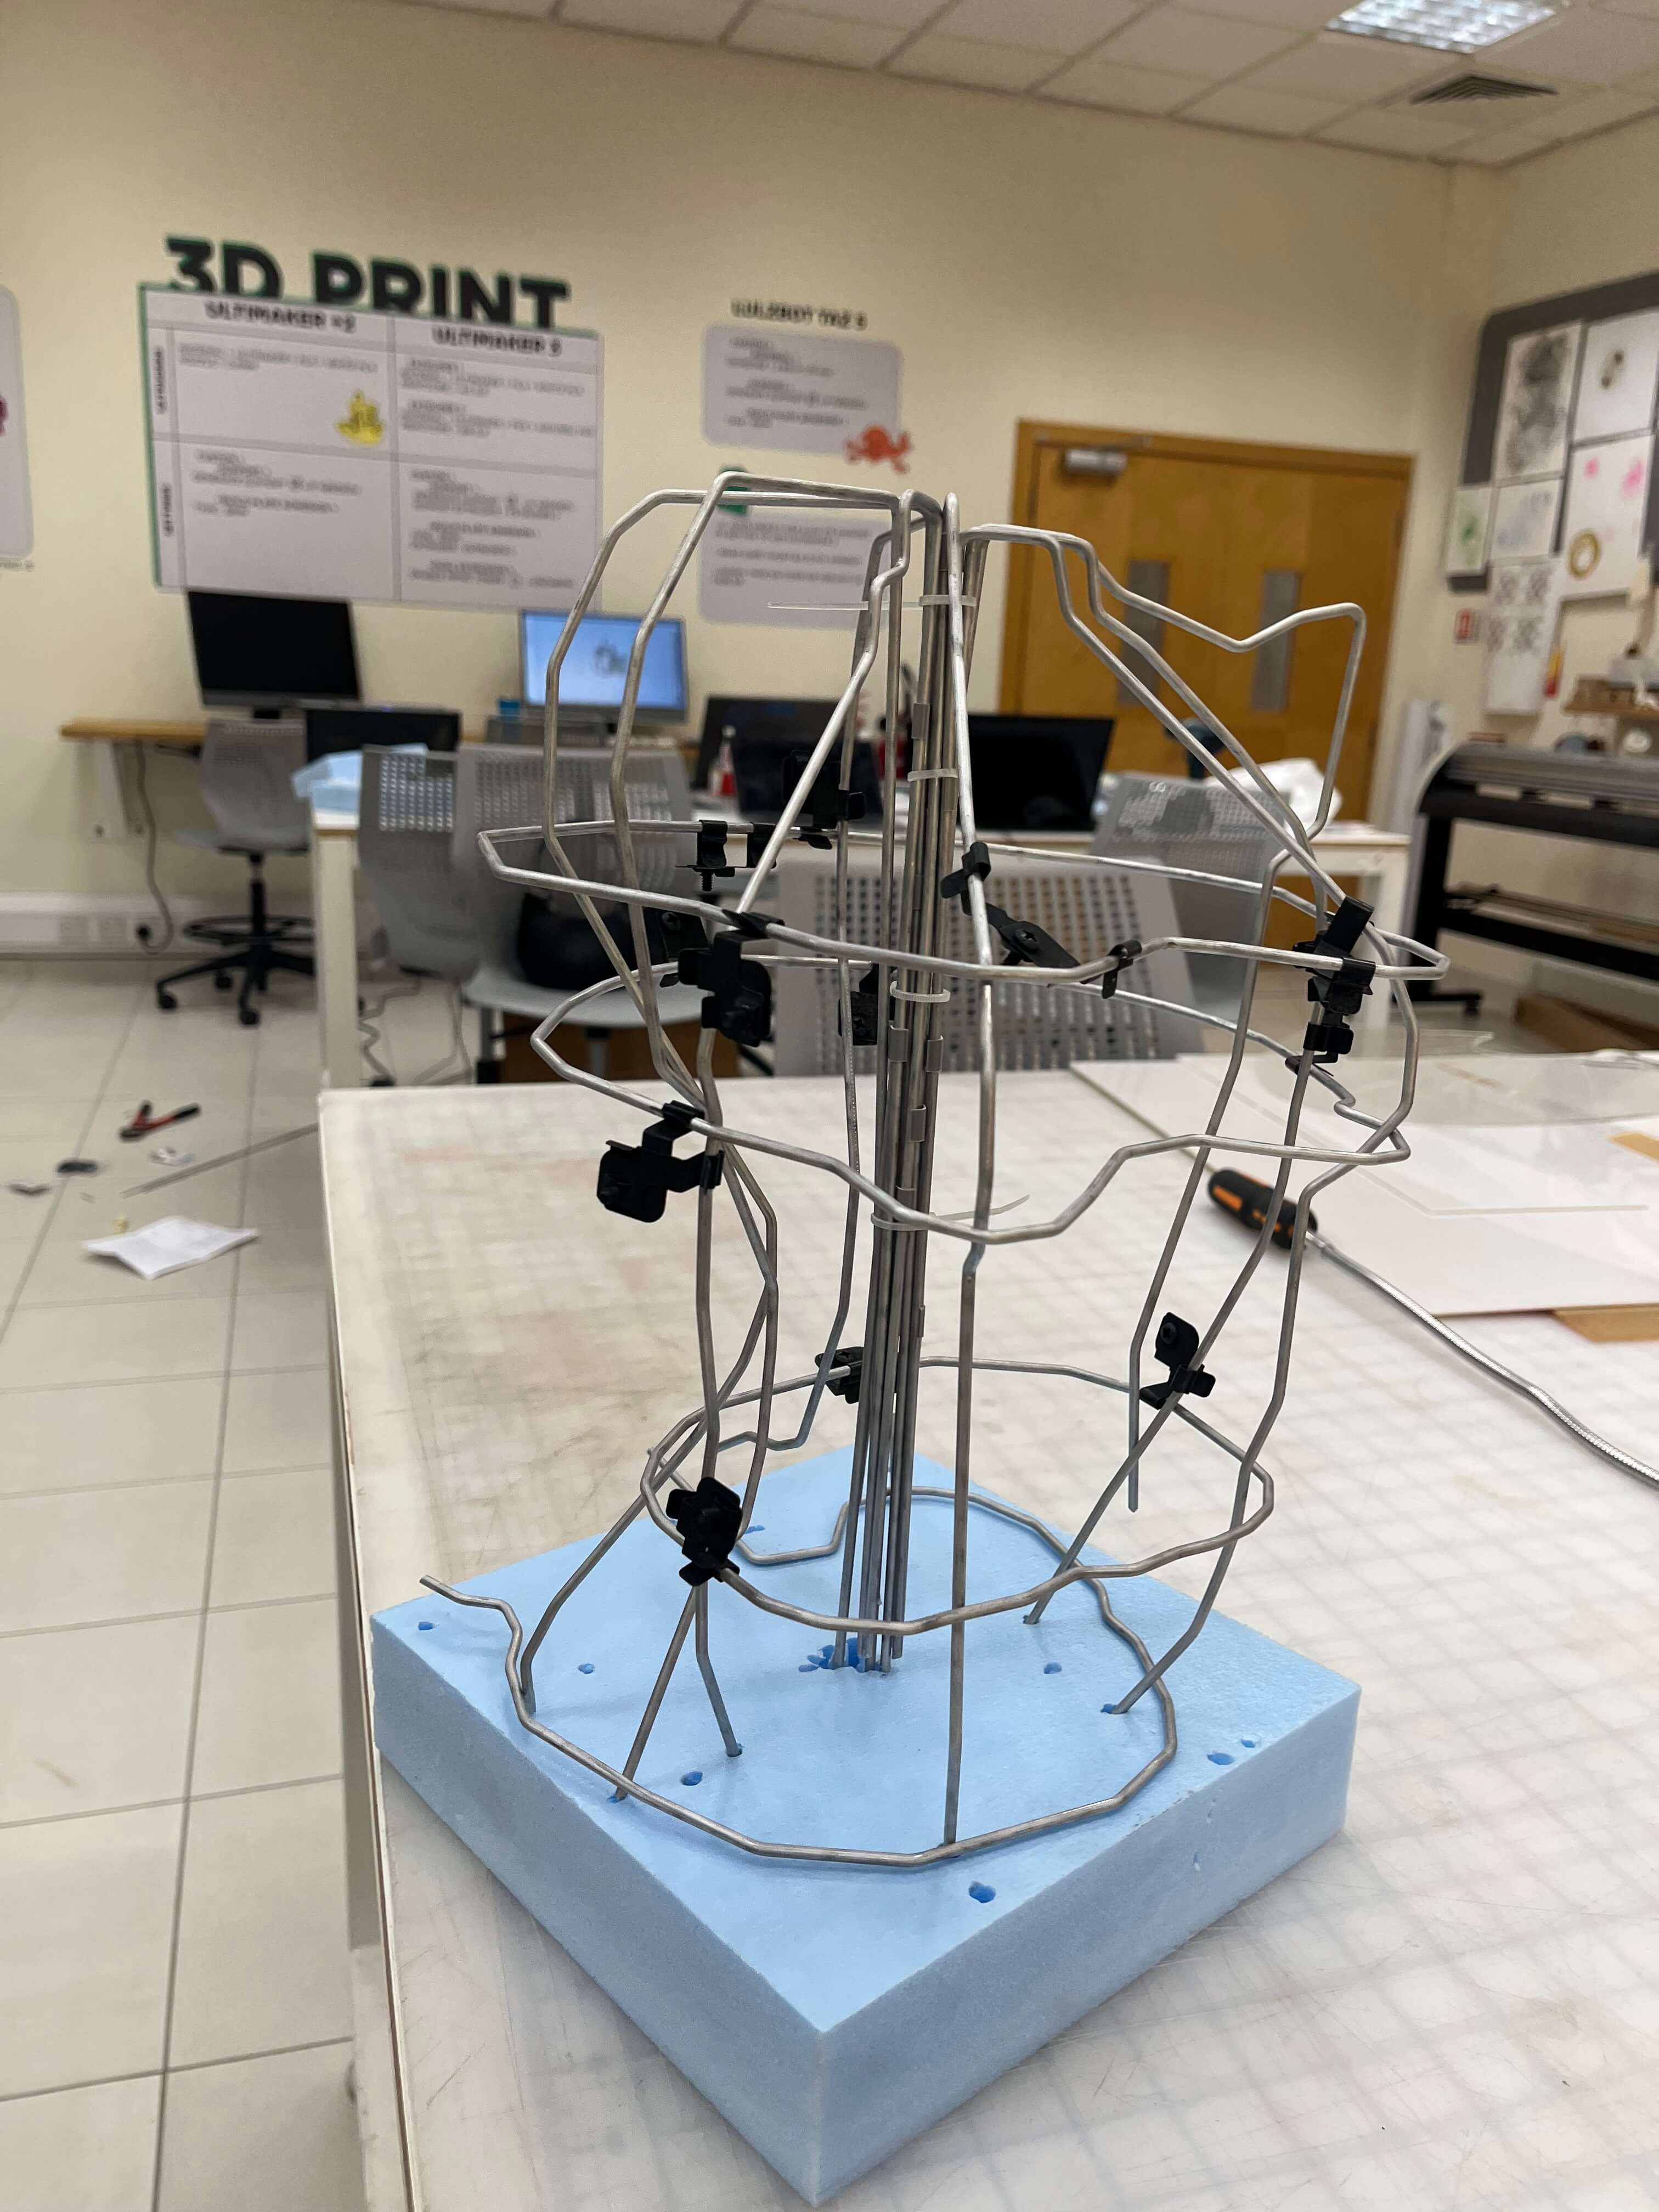
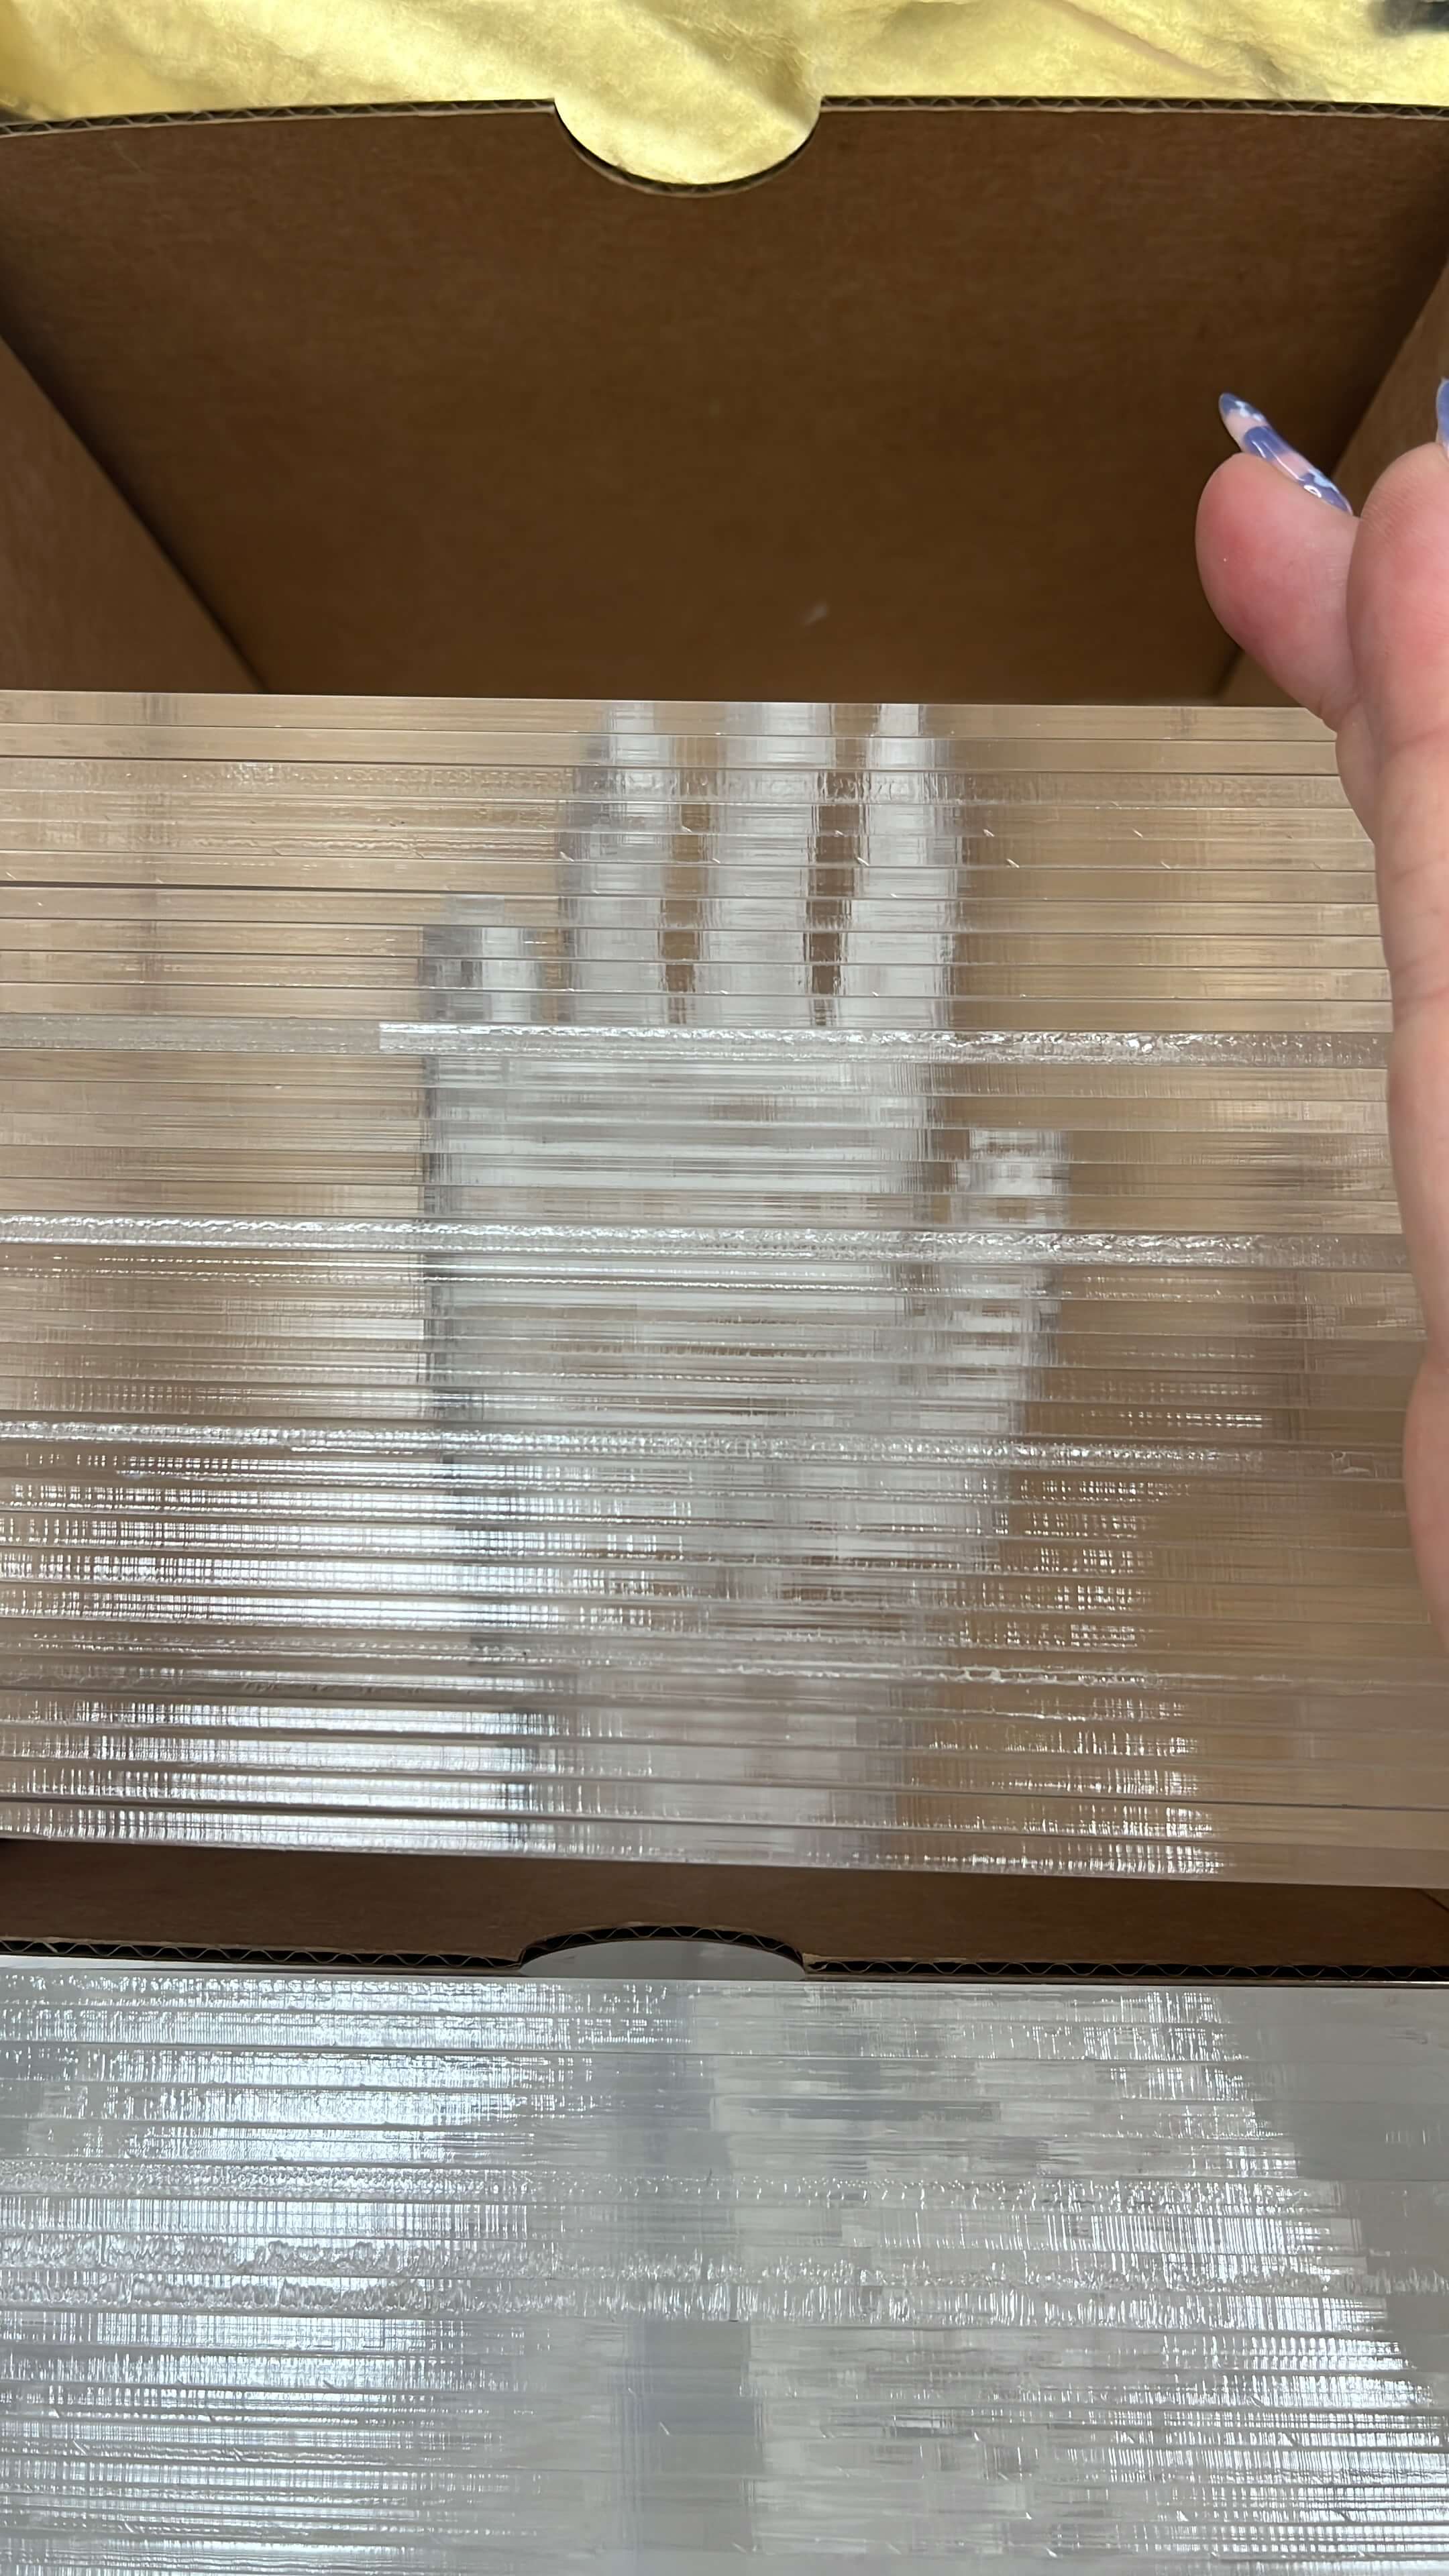
Slicer for Fusion360
For the Genevieve project, we used the fusion360 slicer to get initial plans and then manipulated them to the purpose we needed. For the chest, we used the plans as vectors on illustrator and exports them as paths for the DIWire (wirebender) to follow. For the hand, we used the slicer to visualize the distances between the slices to minimize material used but still keep it in 3D.
 |
 |
 |
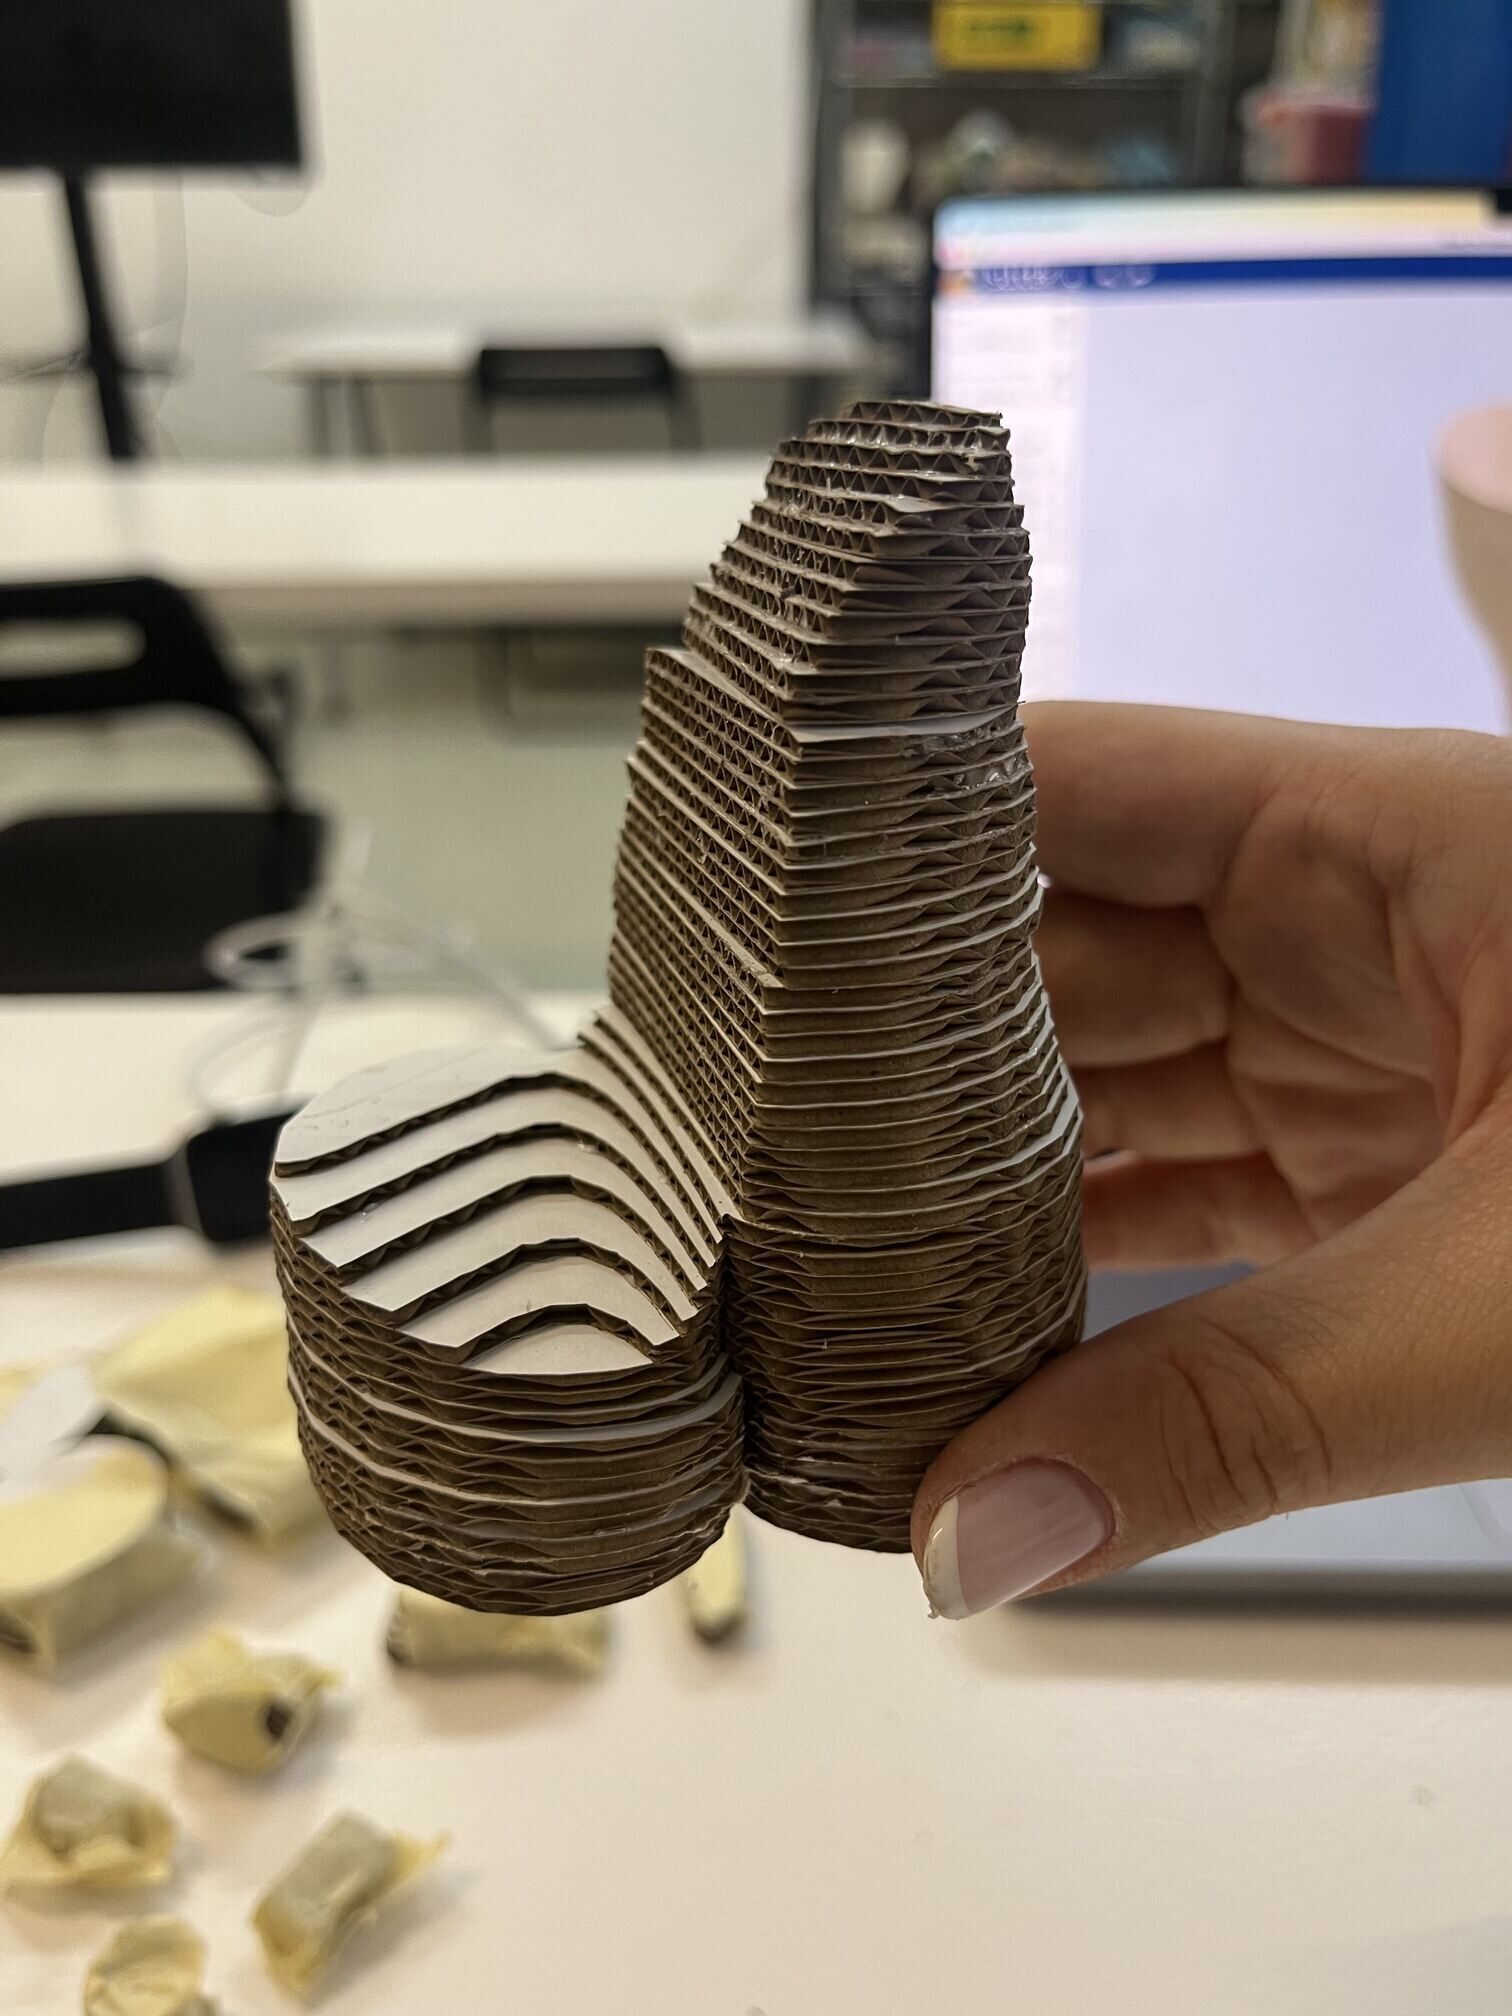
Current Model
In this current model, I plan to use the stacking construction technique for the legs, and 3d printing the top part. The lasercutting material size is 1000 x 590 x 1 mm. My model is quite small, around 1:5 scale, leaving the full model to be 300 mm in height. Below are the 3dprinting and lasercutting notes.
3D Printing
For the top half of the model, I wanted to 3D print sections of the body with a lot of voids. I exported the model from Rhino and imported it into Cura. At FabLab BCN, we have a Creality Ender-3 model, with a 0.4mm nozzle and PLA. I sliced the model in Cura using the recommended settings and Tree structure for the support material. In my personal practice I find that the tree structure uses the least amount of unecessary support and is easiest to take off afterwords. The print took around 5 hours using 0.3mm layer height, tree support, 10% infill, and skirt adhesion.
Laser Cutting
For the stacked legs, I exported the plans from the Slicer and imported them into Rhino. In Rhino I had to go through, delete all the unnecessary lines, separate the annotation (vector engraving) from the cuts (vector), and then join all the lines into closed curves. Once that was done, I changed the cutting colors to Green and Vector Engraving colors to Red and sent it over to the lasercutter.
On the laser cutter, we checked the focus and homing of the machine and then tested a few cuts to make sure they were the correct settings then ran the whole file!
Once the file was fully cut, which took around 30-40 minutes. I removed it from the lasercutter to notice that it wasn't fully cut through! So we had to run it again...
The material used is chipboard/illustration board with 1.75mm thickness with the settings below.
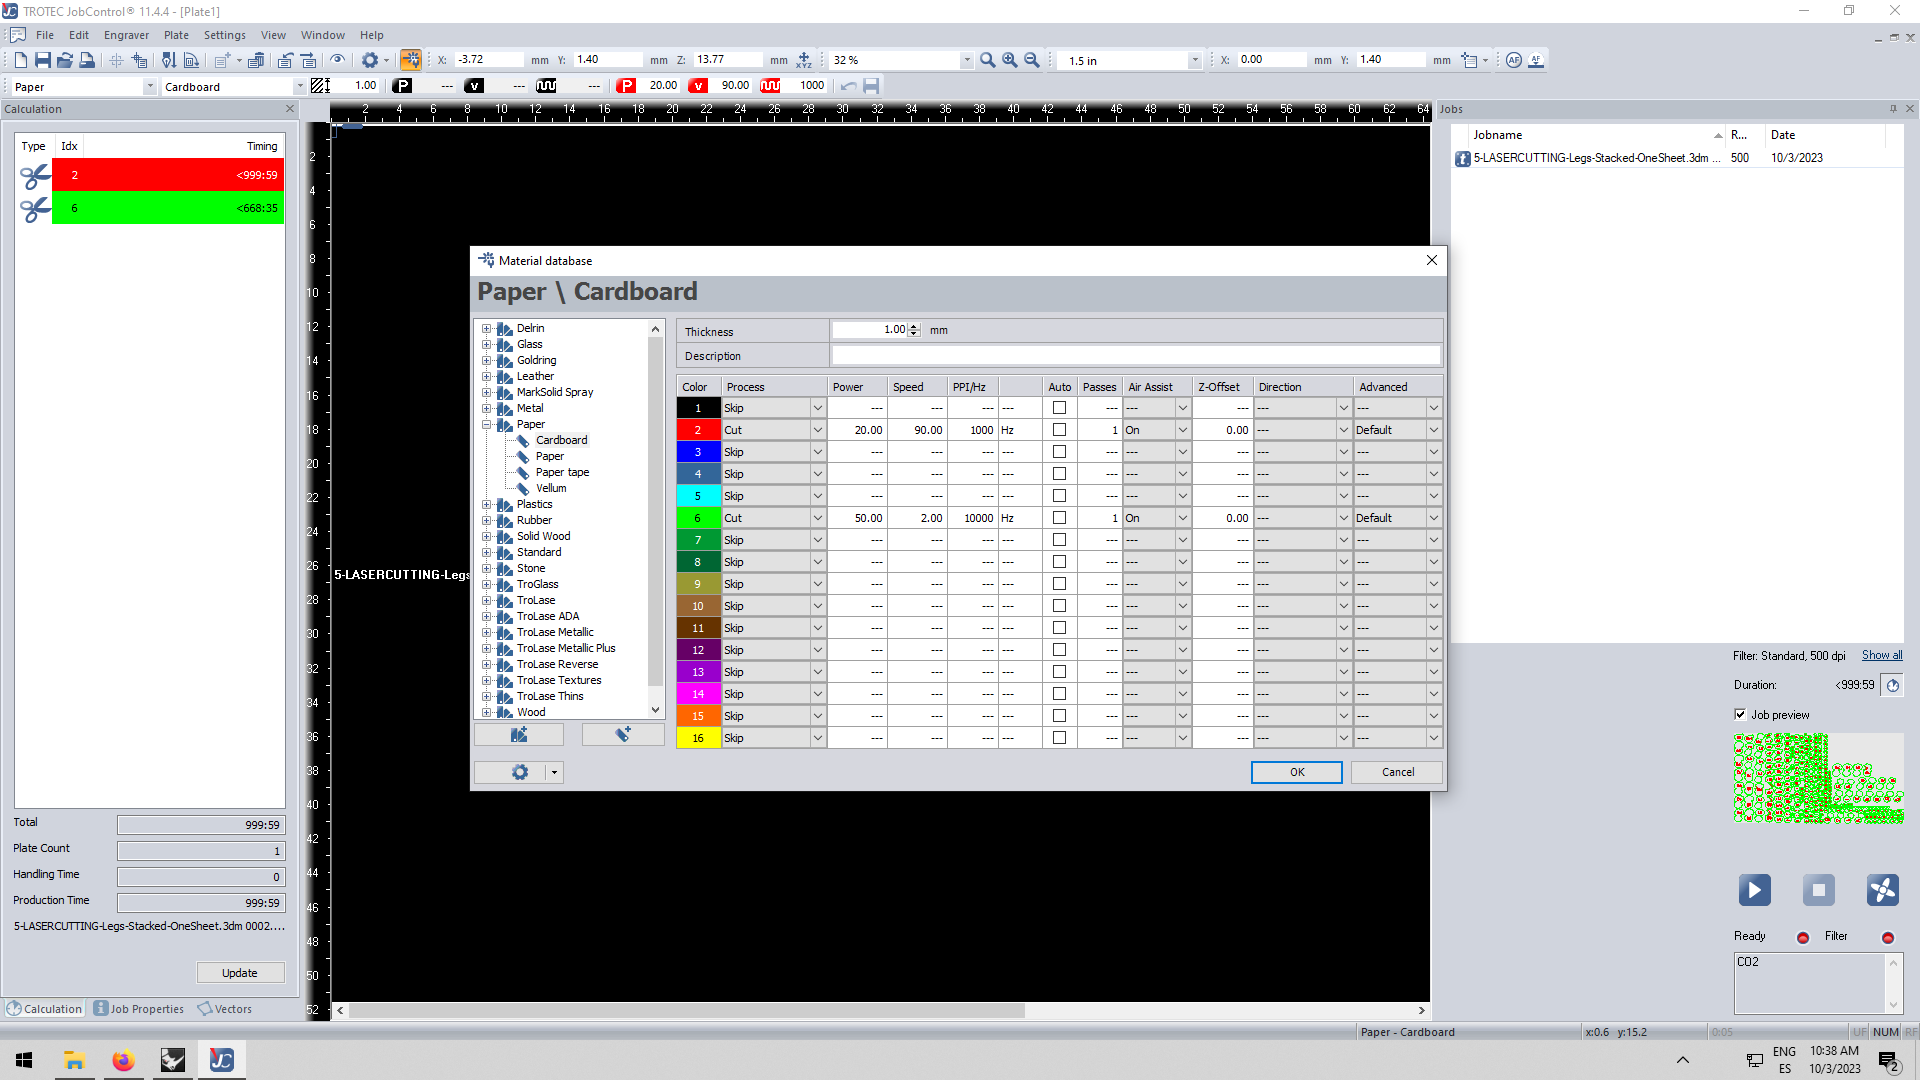
The PPI was set to 10,000 instead of 1,000
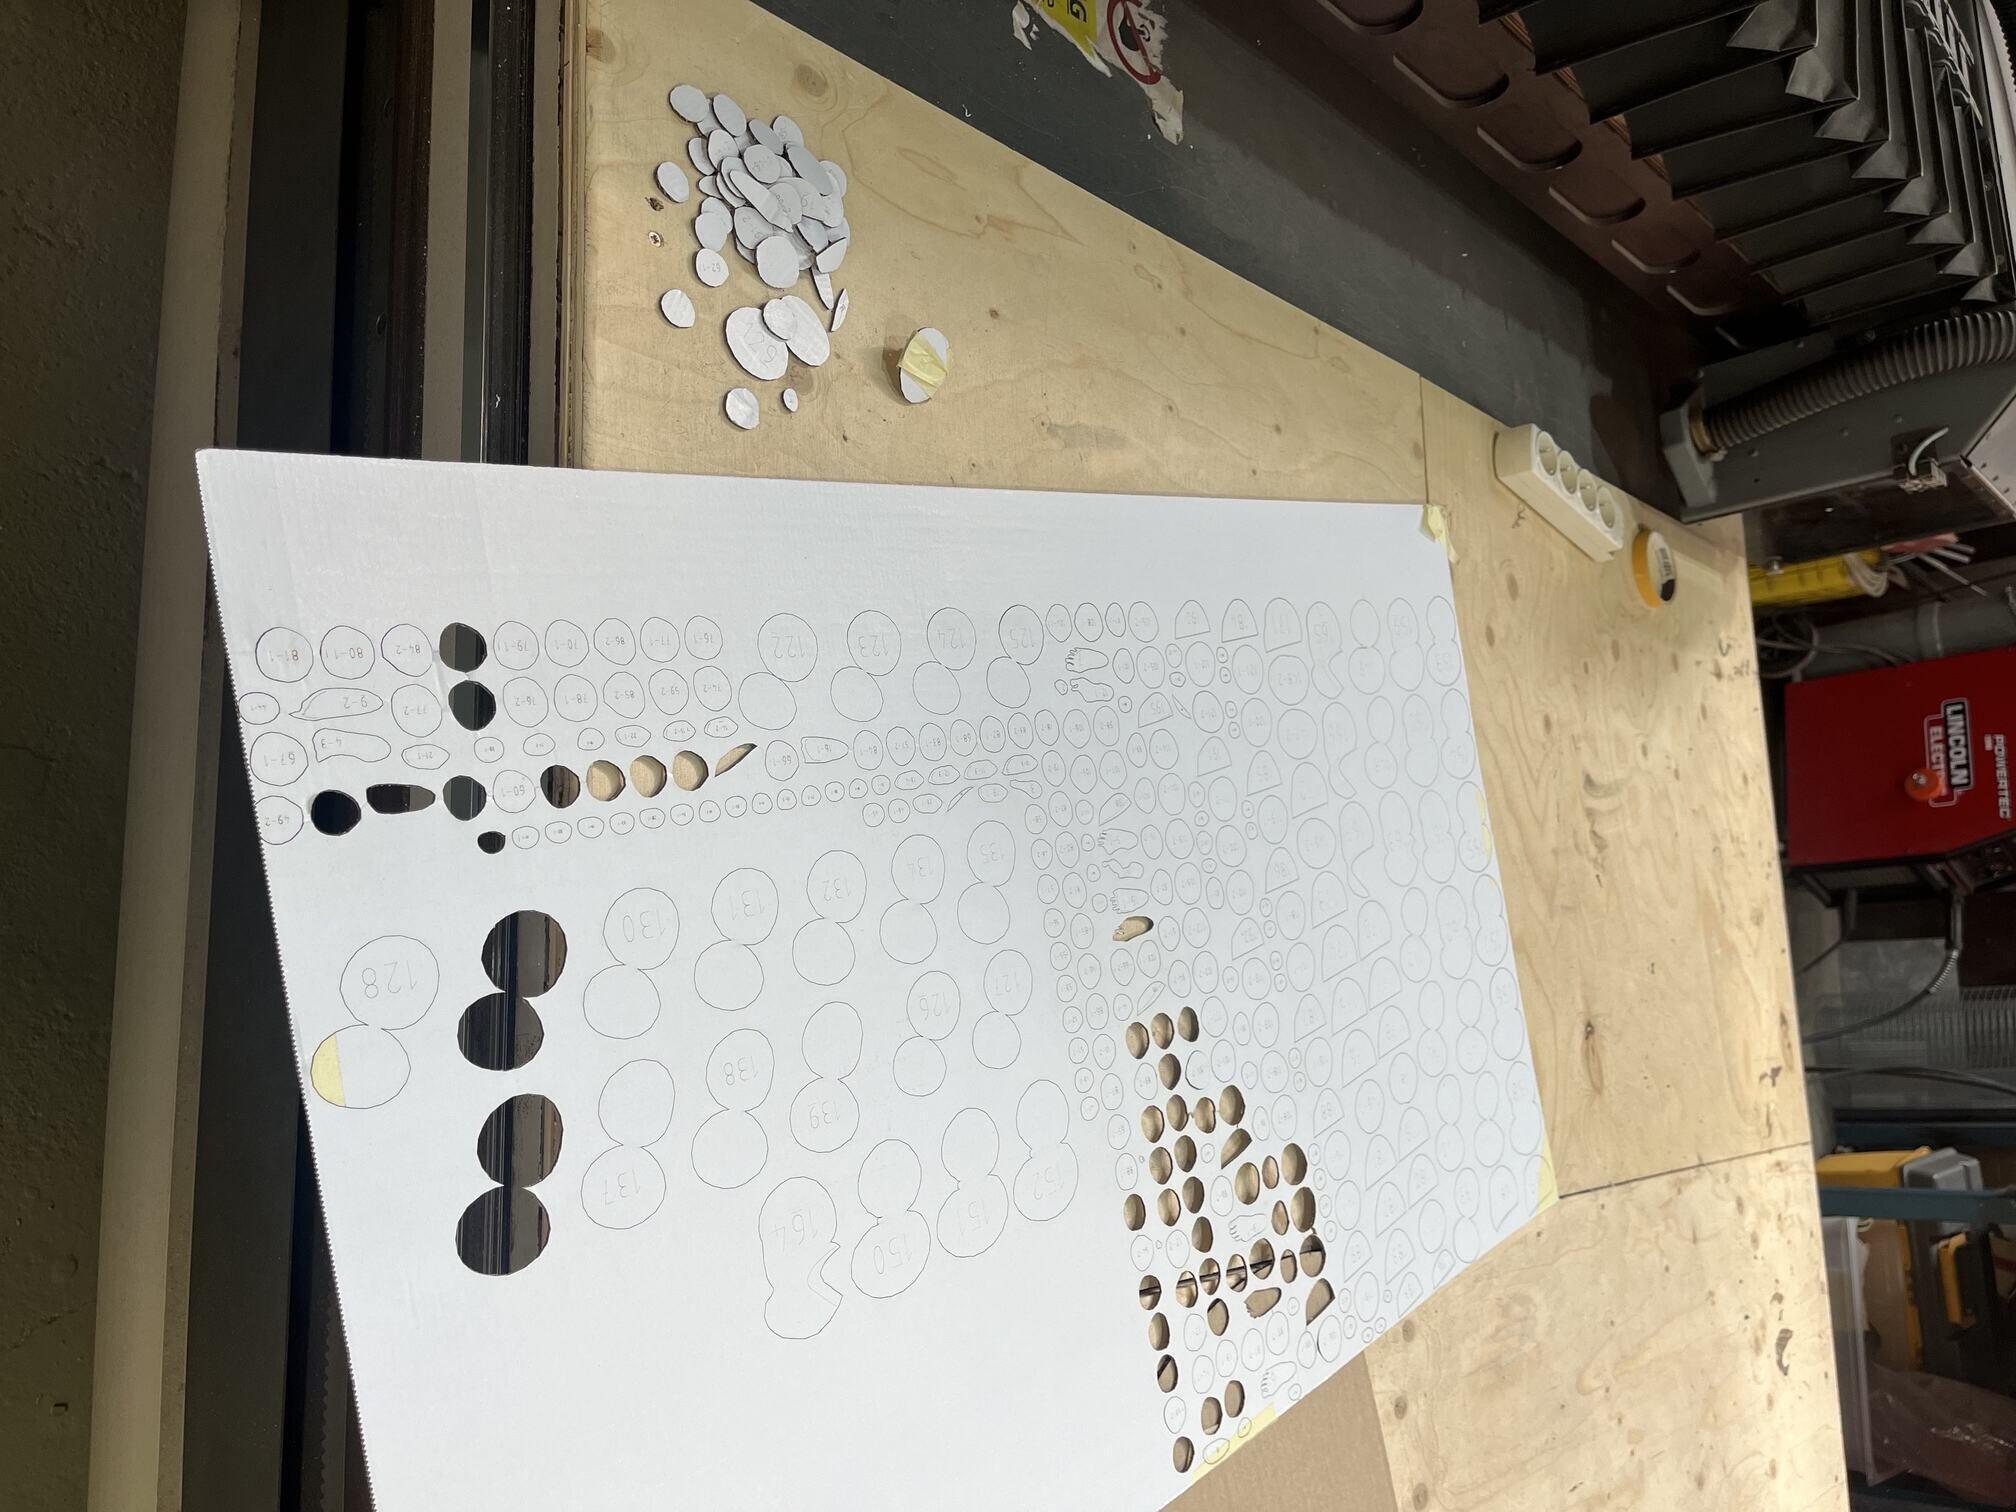
parts were not fully coming out of the board
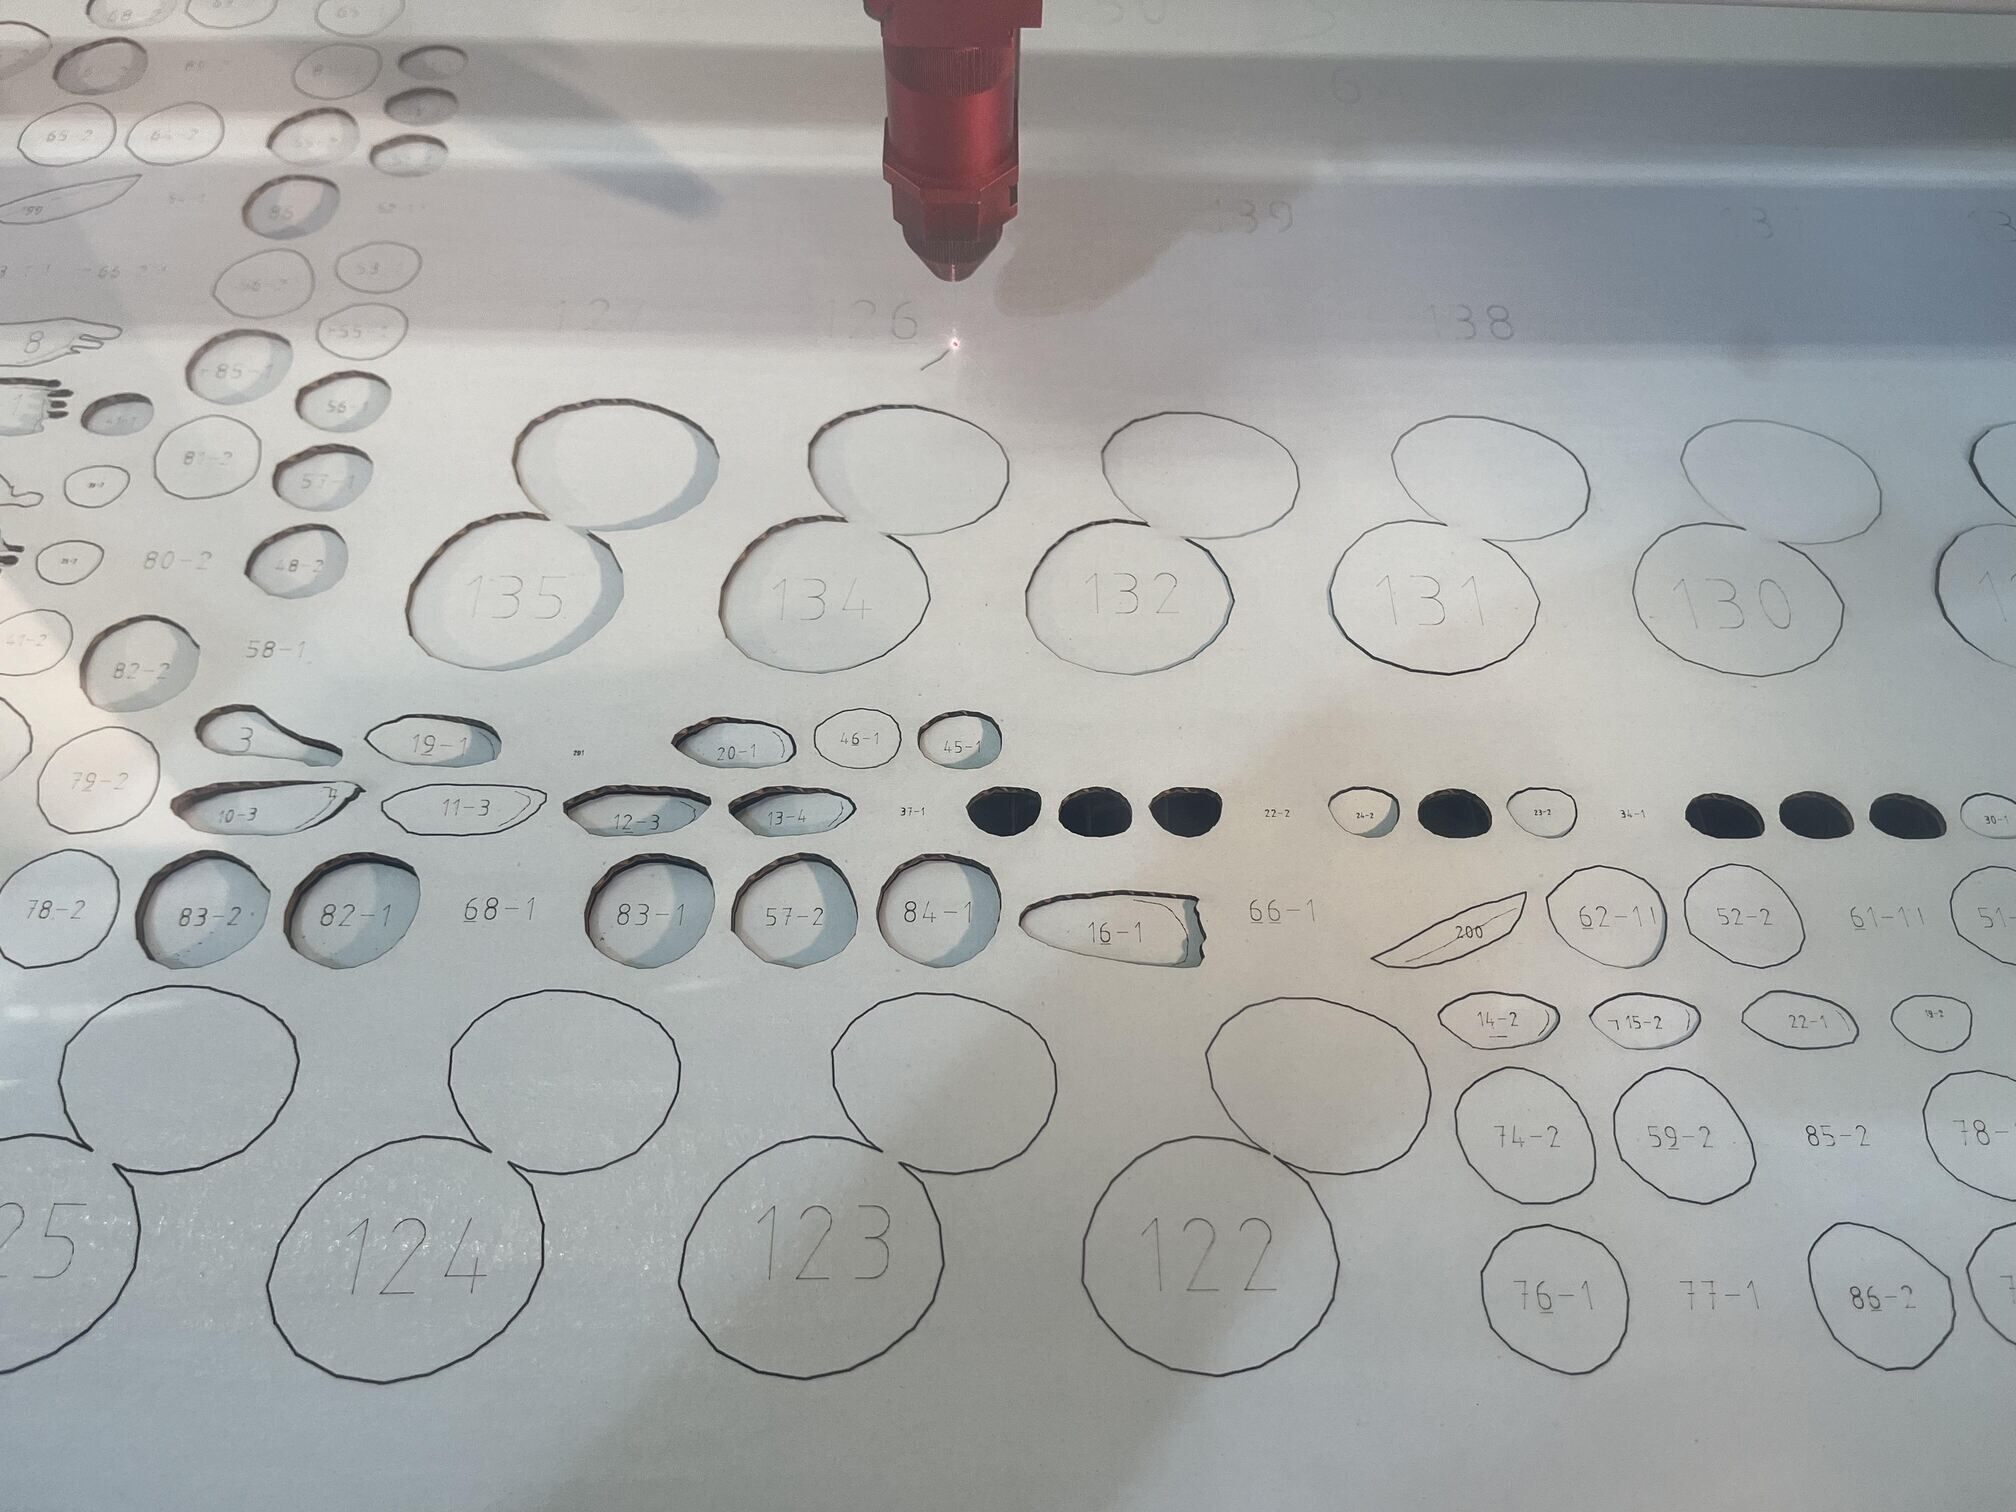
how it should look like cutting
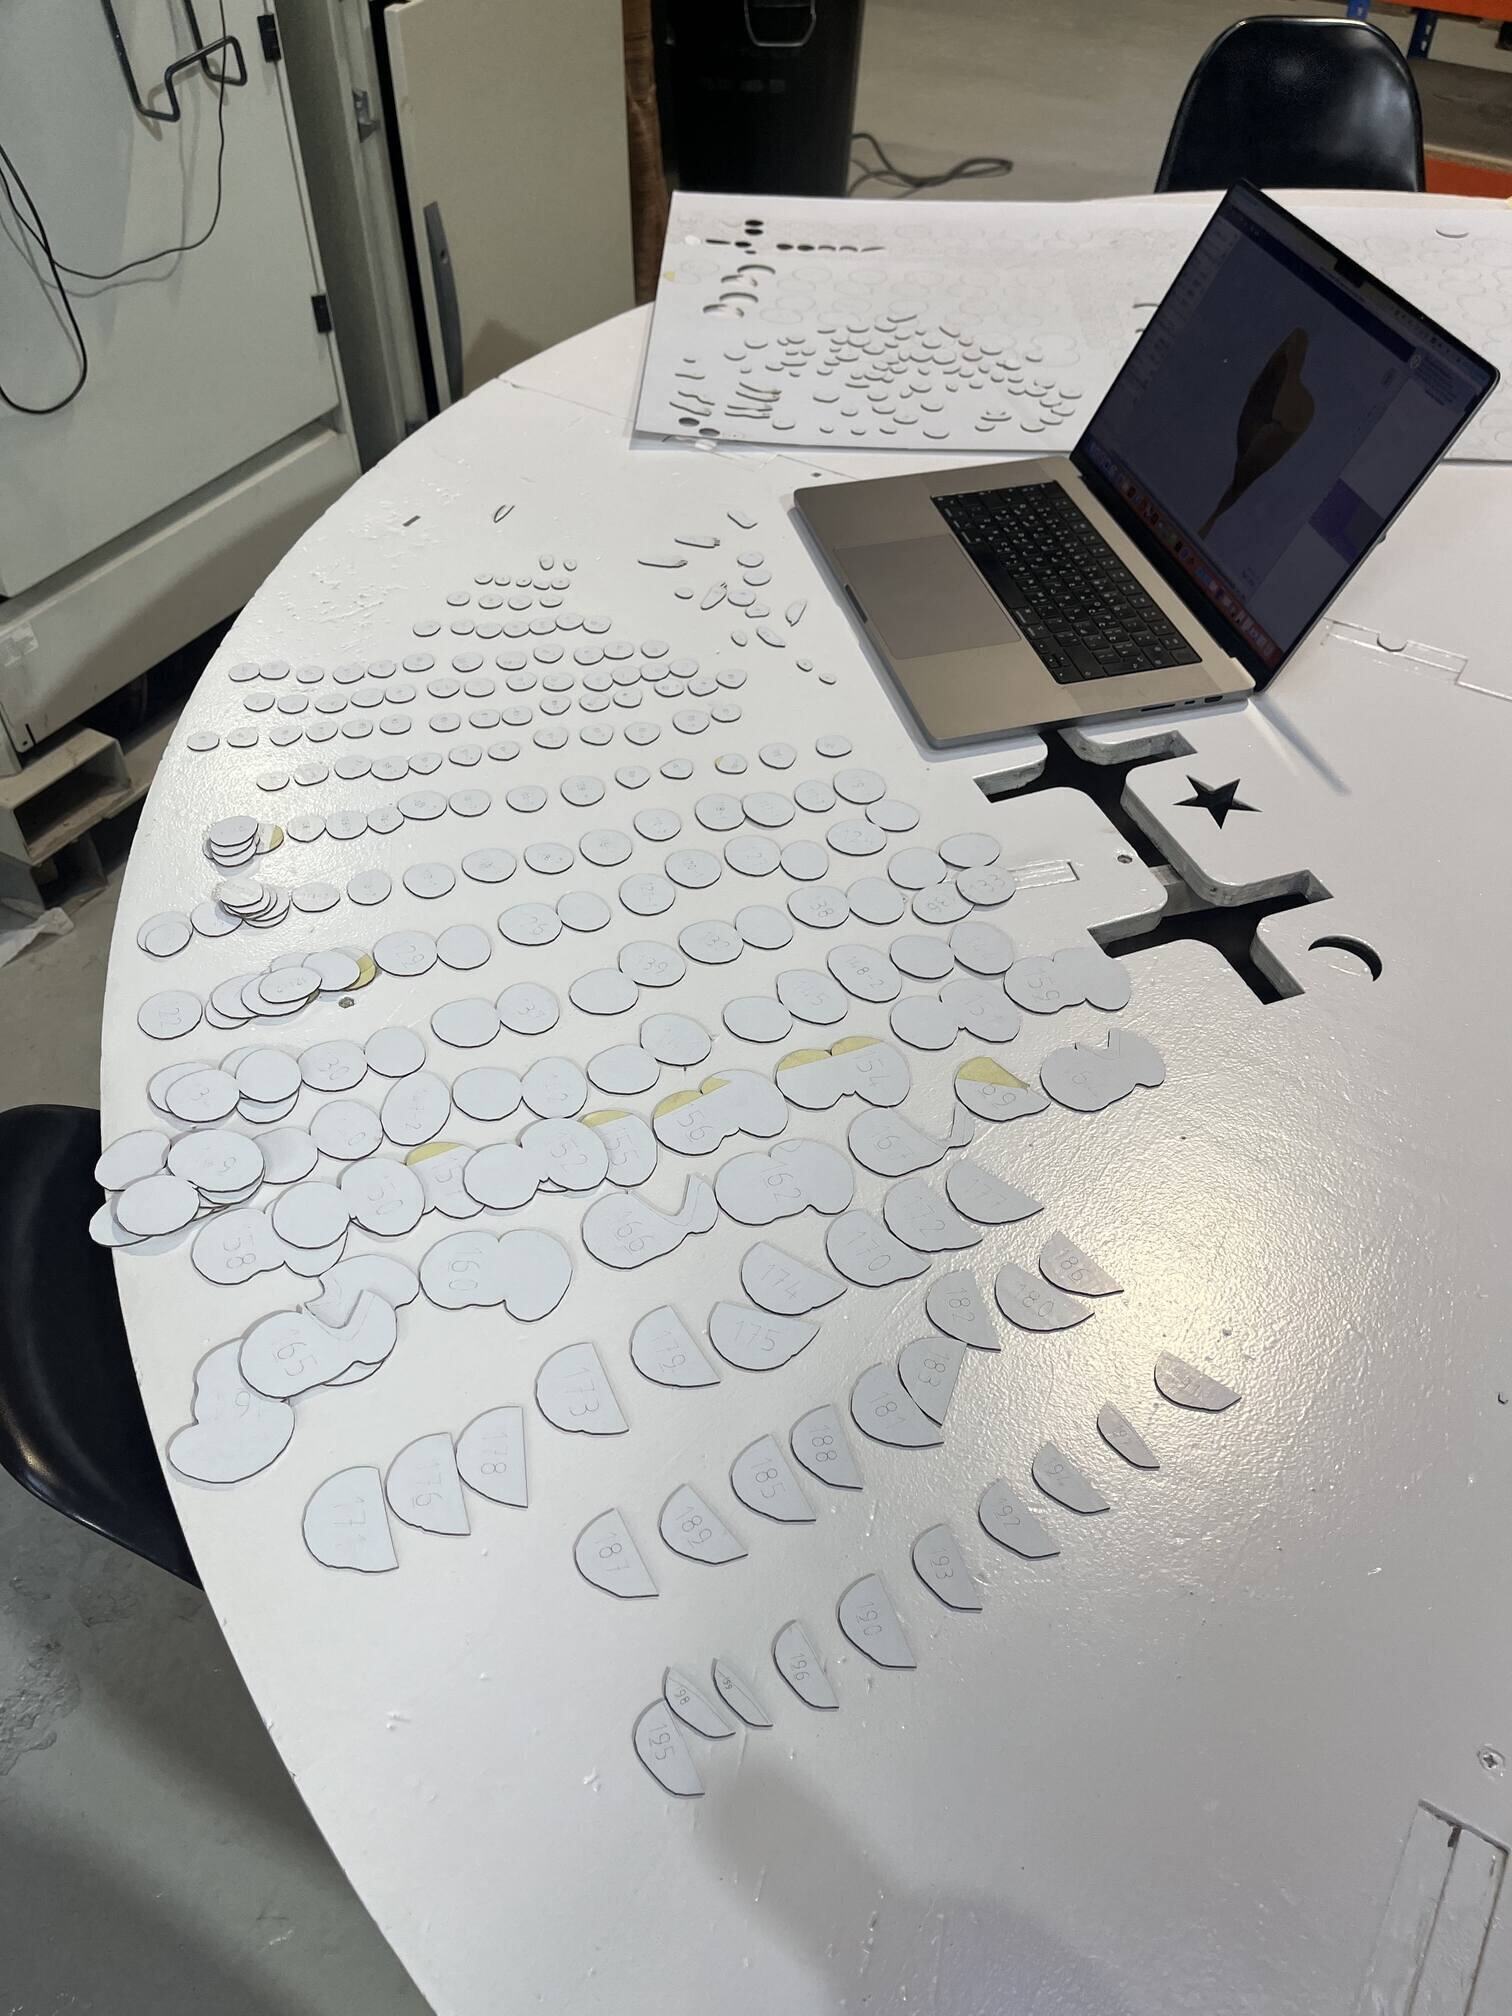
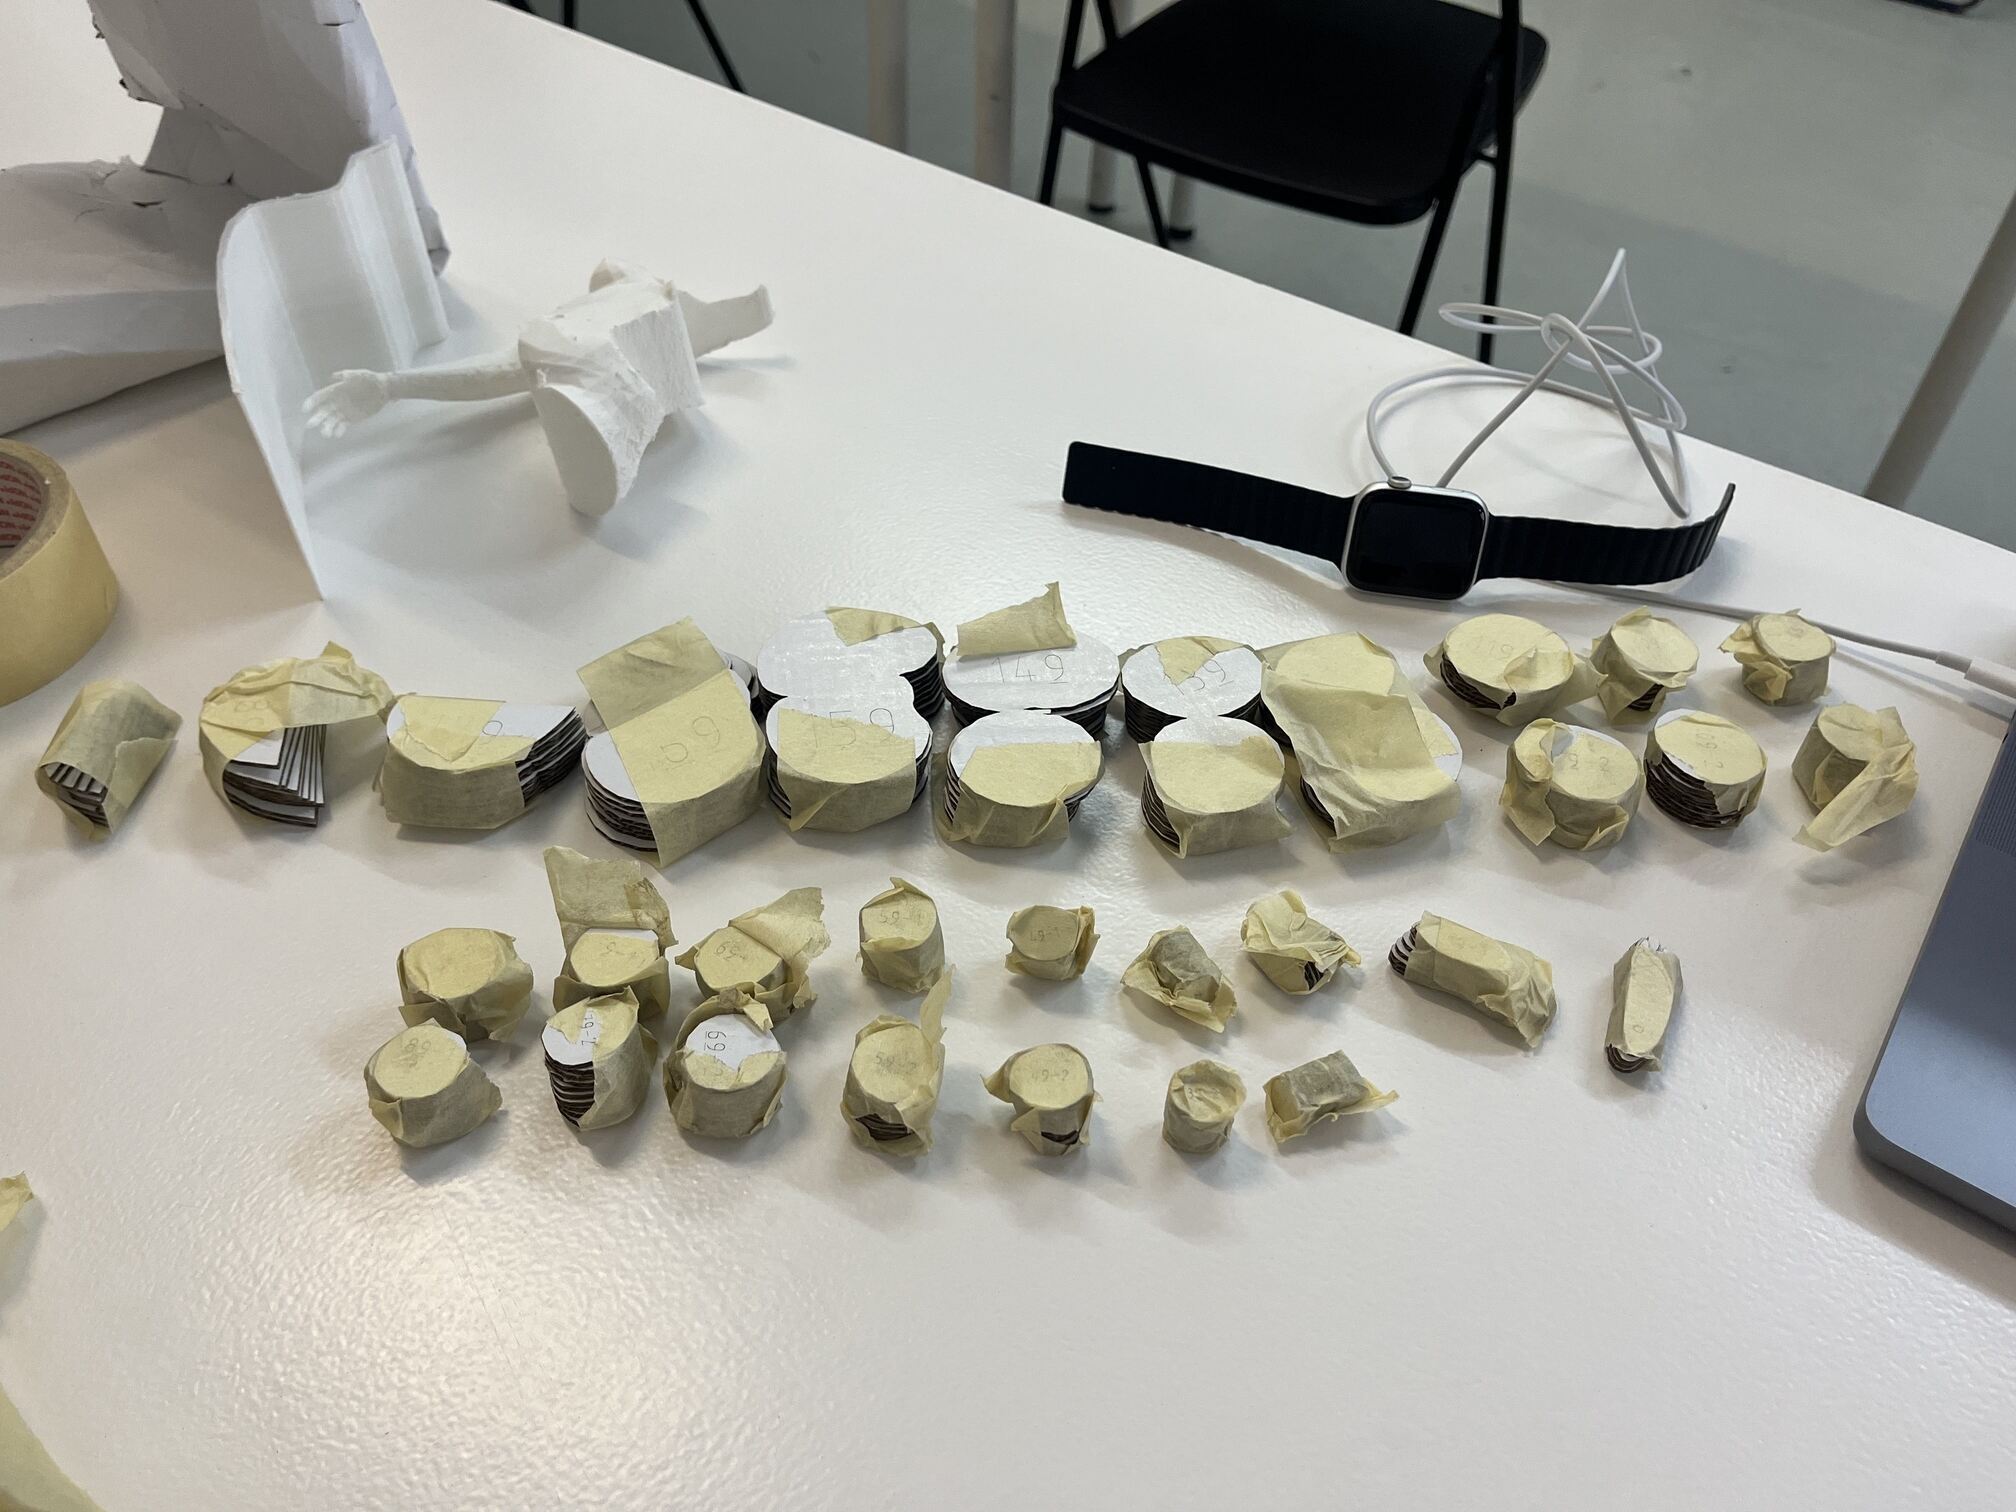
Assembly
As the parts were many and small, I began by dividing them into parts according to their numbers, bundling them, and then gluing each bundle.
Things planning to try: Photogrammetry
- Regard3D
- Colmap
- Meshroom
- MicMac
- 3DF Zephyr
- Tinio
- Qlone.pro
- Bodi.me
More things planning to learn throughout all of Fabricademy
- Grasshopper waffle structures
3D Scanning
3D scanning is the process of analyzing a real-world object or environment to collect three dimensional data of its shape and possibly its appearance (e.g. color).
I used the KIRI Engine phone application to scan the model and send it to myself for free.
While trying Kiri Engine I kept getting 'fail' on the upload saying that the model pictures aren't okay.
Instead I'm using RealityScan which is powered by Unreal Engine. It uploads the model directly to Sketchfab
Photos
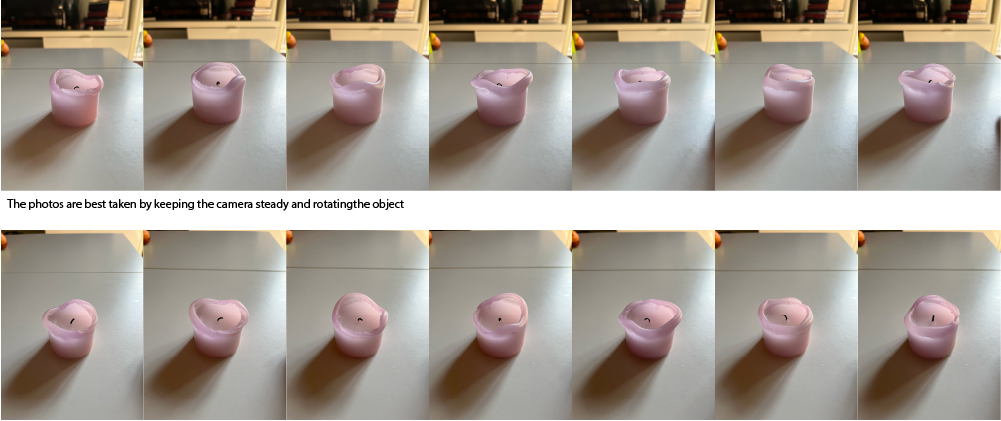
Steps:
- Choose an object
- Rotate and flip object wile taking photos
- Rotate objects in small increments
- Minimum of 20 photos
- Upload the photos to be turned into a 3d model
In the app there is an option to export it as a solo standing 3d model by turning on the Auto Object Masking feature before exporting.
While trying Kiri Engine I kept getting 'fail' on the upload saying that the model pictures aren't okay.
Instead I'm using RealityScan which is powered by Unreal Engine. It uploads the model directly to Sketchfab
Photos collected from the new scanning:
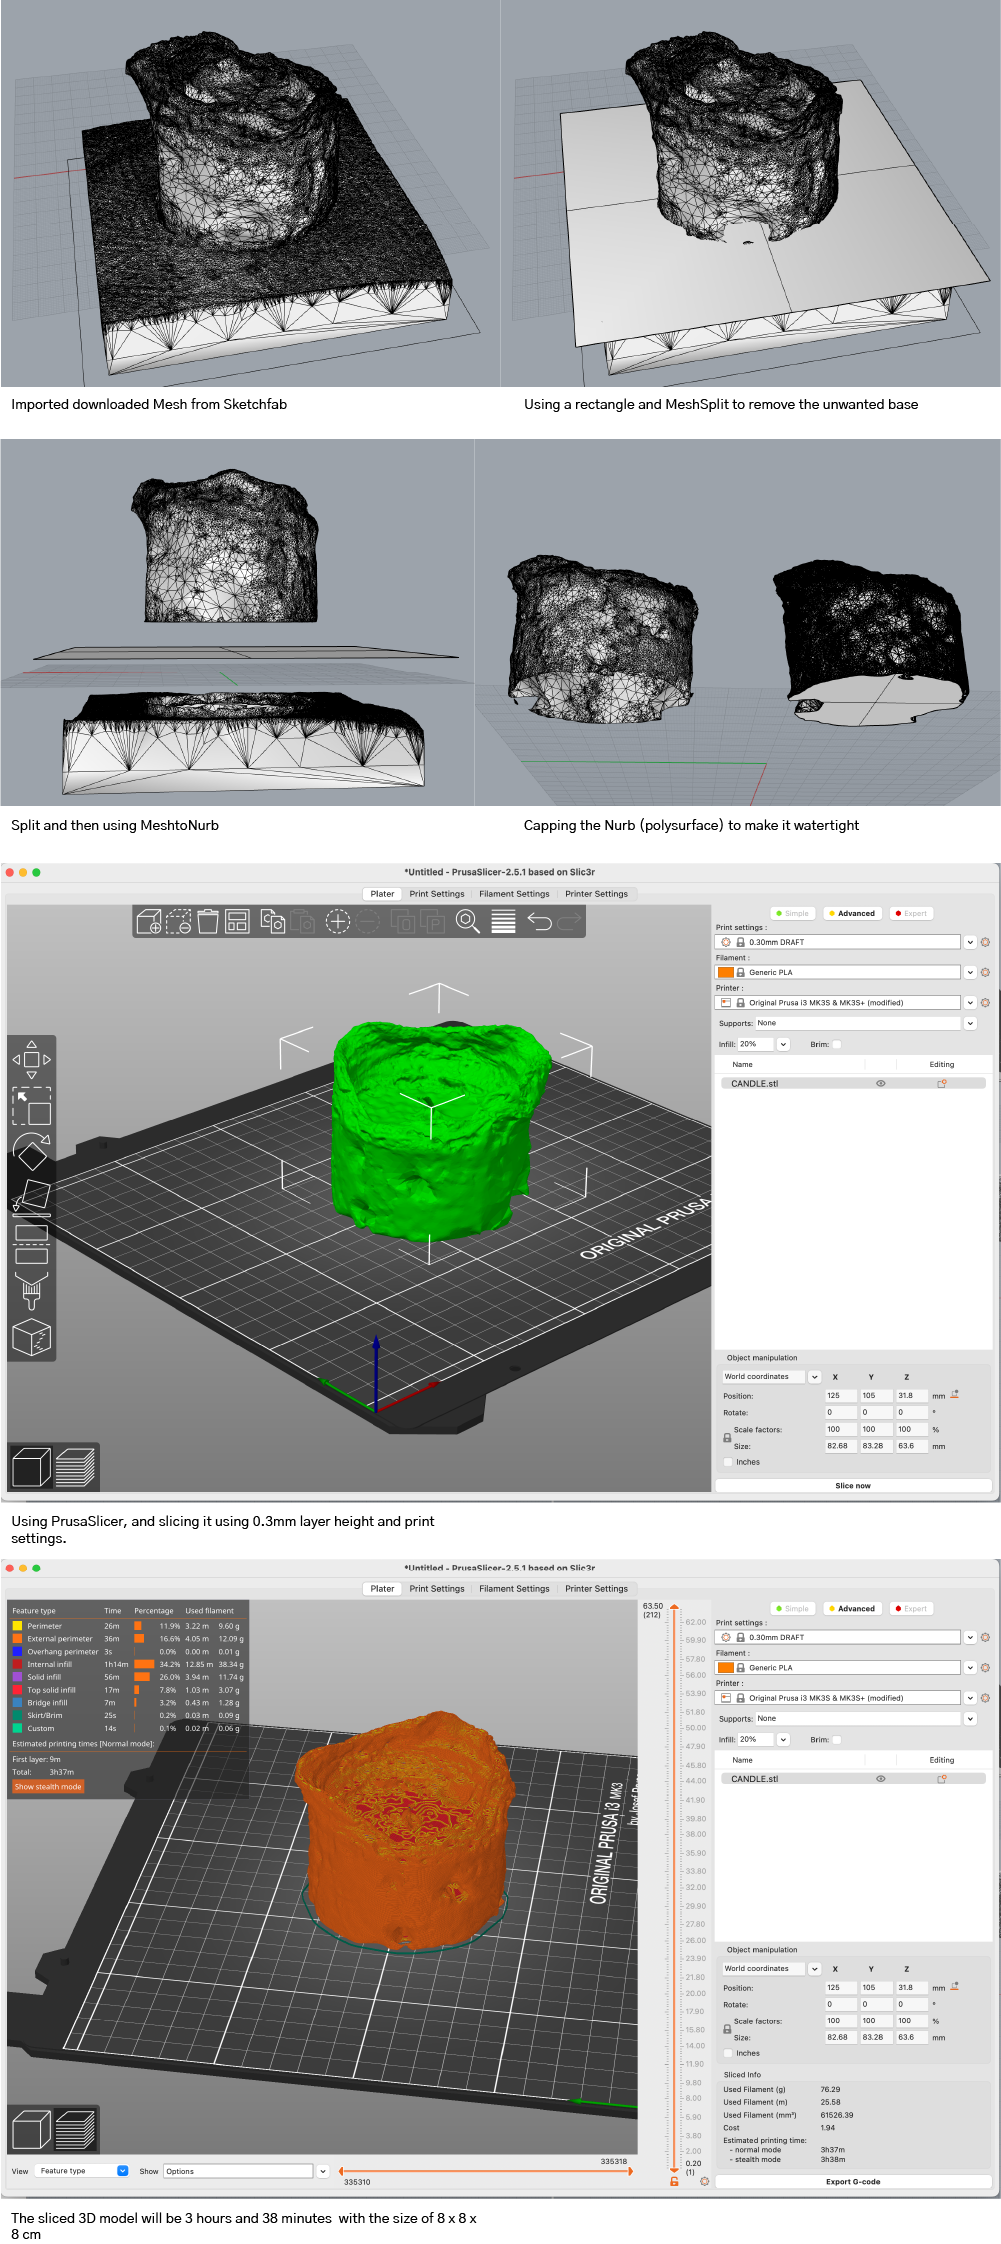
3D Model & Slicing
The 3D model comes out as an .obj. It is opened in Rhino and after checking it, export it as a .stl to be opened in a 3d printing slicer.
Fabrication files
-
File: Top Part .stl ↩
-
File: Lasercutting File ↩