7. Computational Couture
Reference Projects
 |
Subliprinting by Brigette | |
 |
Sewprinted | |
 |
Dinesh Kumar |
What is 3D Printing
3D printing is a process that uses computer-aided design (CAD) to create objects layer by layer. There are different types of 3D printers SLA, SLS, and most commonly FDM.
-
FDM: Fused Deposition Modeling (or fused filament fabrication / FFF) release thermoplastic filaments that are melted through a hot nozzle to form an object layer by layer.
-
SLA: Stereolithographic printer are equipped with a laser that forms liquid resin into plastic
-
SLS: Selective laser sintering printers have a laser that sinsters particles of polymer powder into an already solid structure
Not only do 3D printers require an .STL file to make a 3D print, it is also essentiona that your .STL file is a ‘watertight’ mesh. A ‘watertight’ mesh is a singular, manifold surface of polygons which describes your shape. Put simply, you need to ensure that your 3D model does not have holes, gaps, or overlaps in it. If your model were a bag, you should be able to full it with water without any leaks.
Need for Support Structure
FDM printers print by extruding plastic layers one at a time, from the bottom to the top. In other words, the layers build upon each other. If your model has any large overhangs, it will most likely need an additional support structure that will be generated by the 3D printer. Remember that the more support structure the model needs, the longer it will take to print. Supports can later be broken off, once 3D printing is complete, to reveal the original model. However, the separation of supports from the model could get difficult with intricate detailing.
Position
As a general rule of thumb, the model should be positioned in the center of the printing bed. The way you position your model can also reduce the need for additional support structure. Try to rotate your model such that the largest possible surface area of your model is in contact with the bed of the 3D printer. This is likely to reduce the need for additional support structure. Optimal positioning of the model will also reduce the 3D printing time.
If the model is complex, think of separating the model into fragments or chunks to increase efficiency and likelihood of success of 3D printing. A minimum distance of 6mm should be kept between each element.
Infill
Infill density refers to the internal structure of a print. It therefore relates directly to the strength of the model. The less dense the infill is, the lighter and faster the print is.
Buildplate Adhesion
What are they: Skirt: an offset of the outer outline of your model to make sure the material is being extruded and sticking to the plate
-
Brim: 1-2 layers of filament that are produced around the outside of your model. A brim touches your model with no offset
-
Raft: Up to 4 layers of filament that are produced under your model.
When to use each:
-
Skirt: when your model has a large surface area touching the buildplate already
-
Brim: when your model does not have a large surface area touching the buildplate to stabilize smaller models
-
Raft: when a model requires a lot of stabilization and has a tendency to warp up.
It is important to monitor the first 15 minutes of your print to ensure that:
-
The filament is being extruded properly
-
The material is properly sticking to the bed and not moving around
-
The machine is operating as expected by the slicer software
During the course of the print and afterwards, inspect it to ensure that some common issues are not occurring, such a ‘Under extrusion’, ‘stringing’ and ‘pillowing’.
If you see any errors in your print, abort it, reslice it, and print it again.
Grasshopper
Initial Grasshopper Introduction
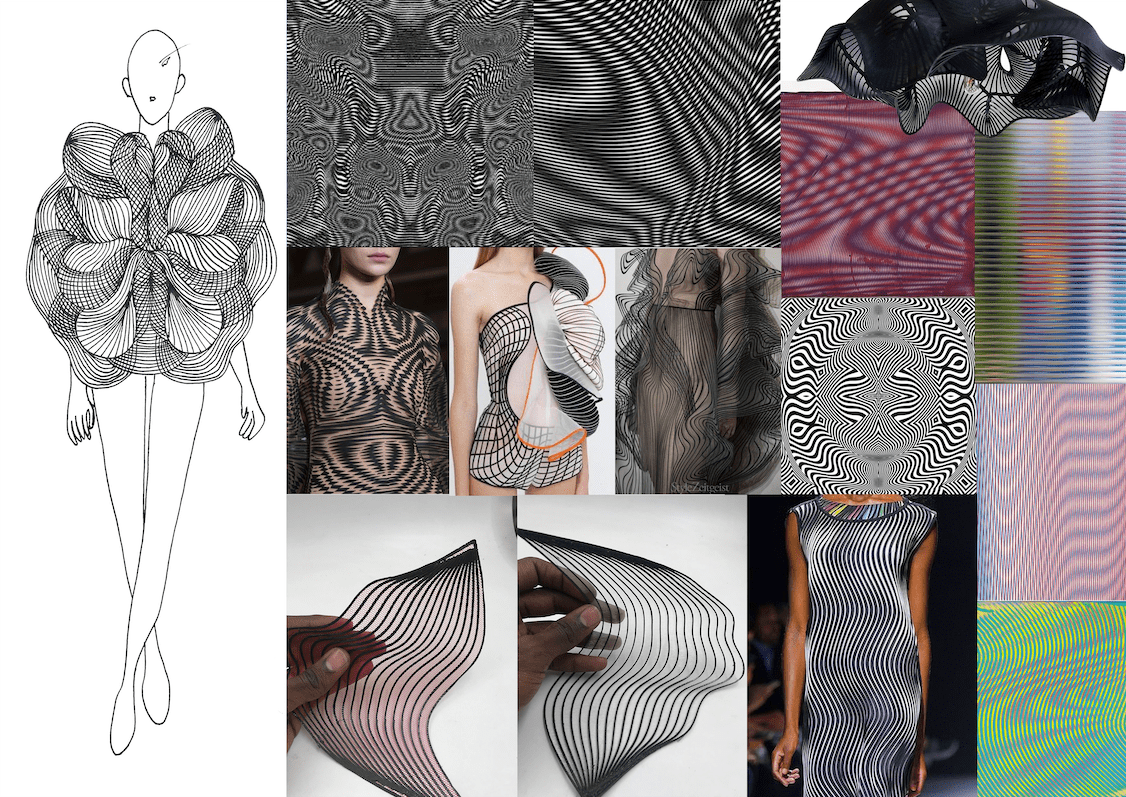
After the class with Eugenio from Noumena, I got inspired to begin testing out grasshopper. I was most interested with the Voronoi using attractor curves and Perlin Noise.

Firstly, I created a rectangle in grasshopper and arrayed it. This was a practice to see if I can understand the logic and order of commands.
Trial One // Manually Randomizing points for Voronoi


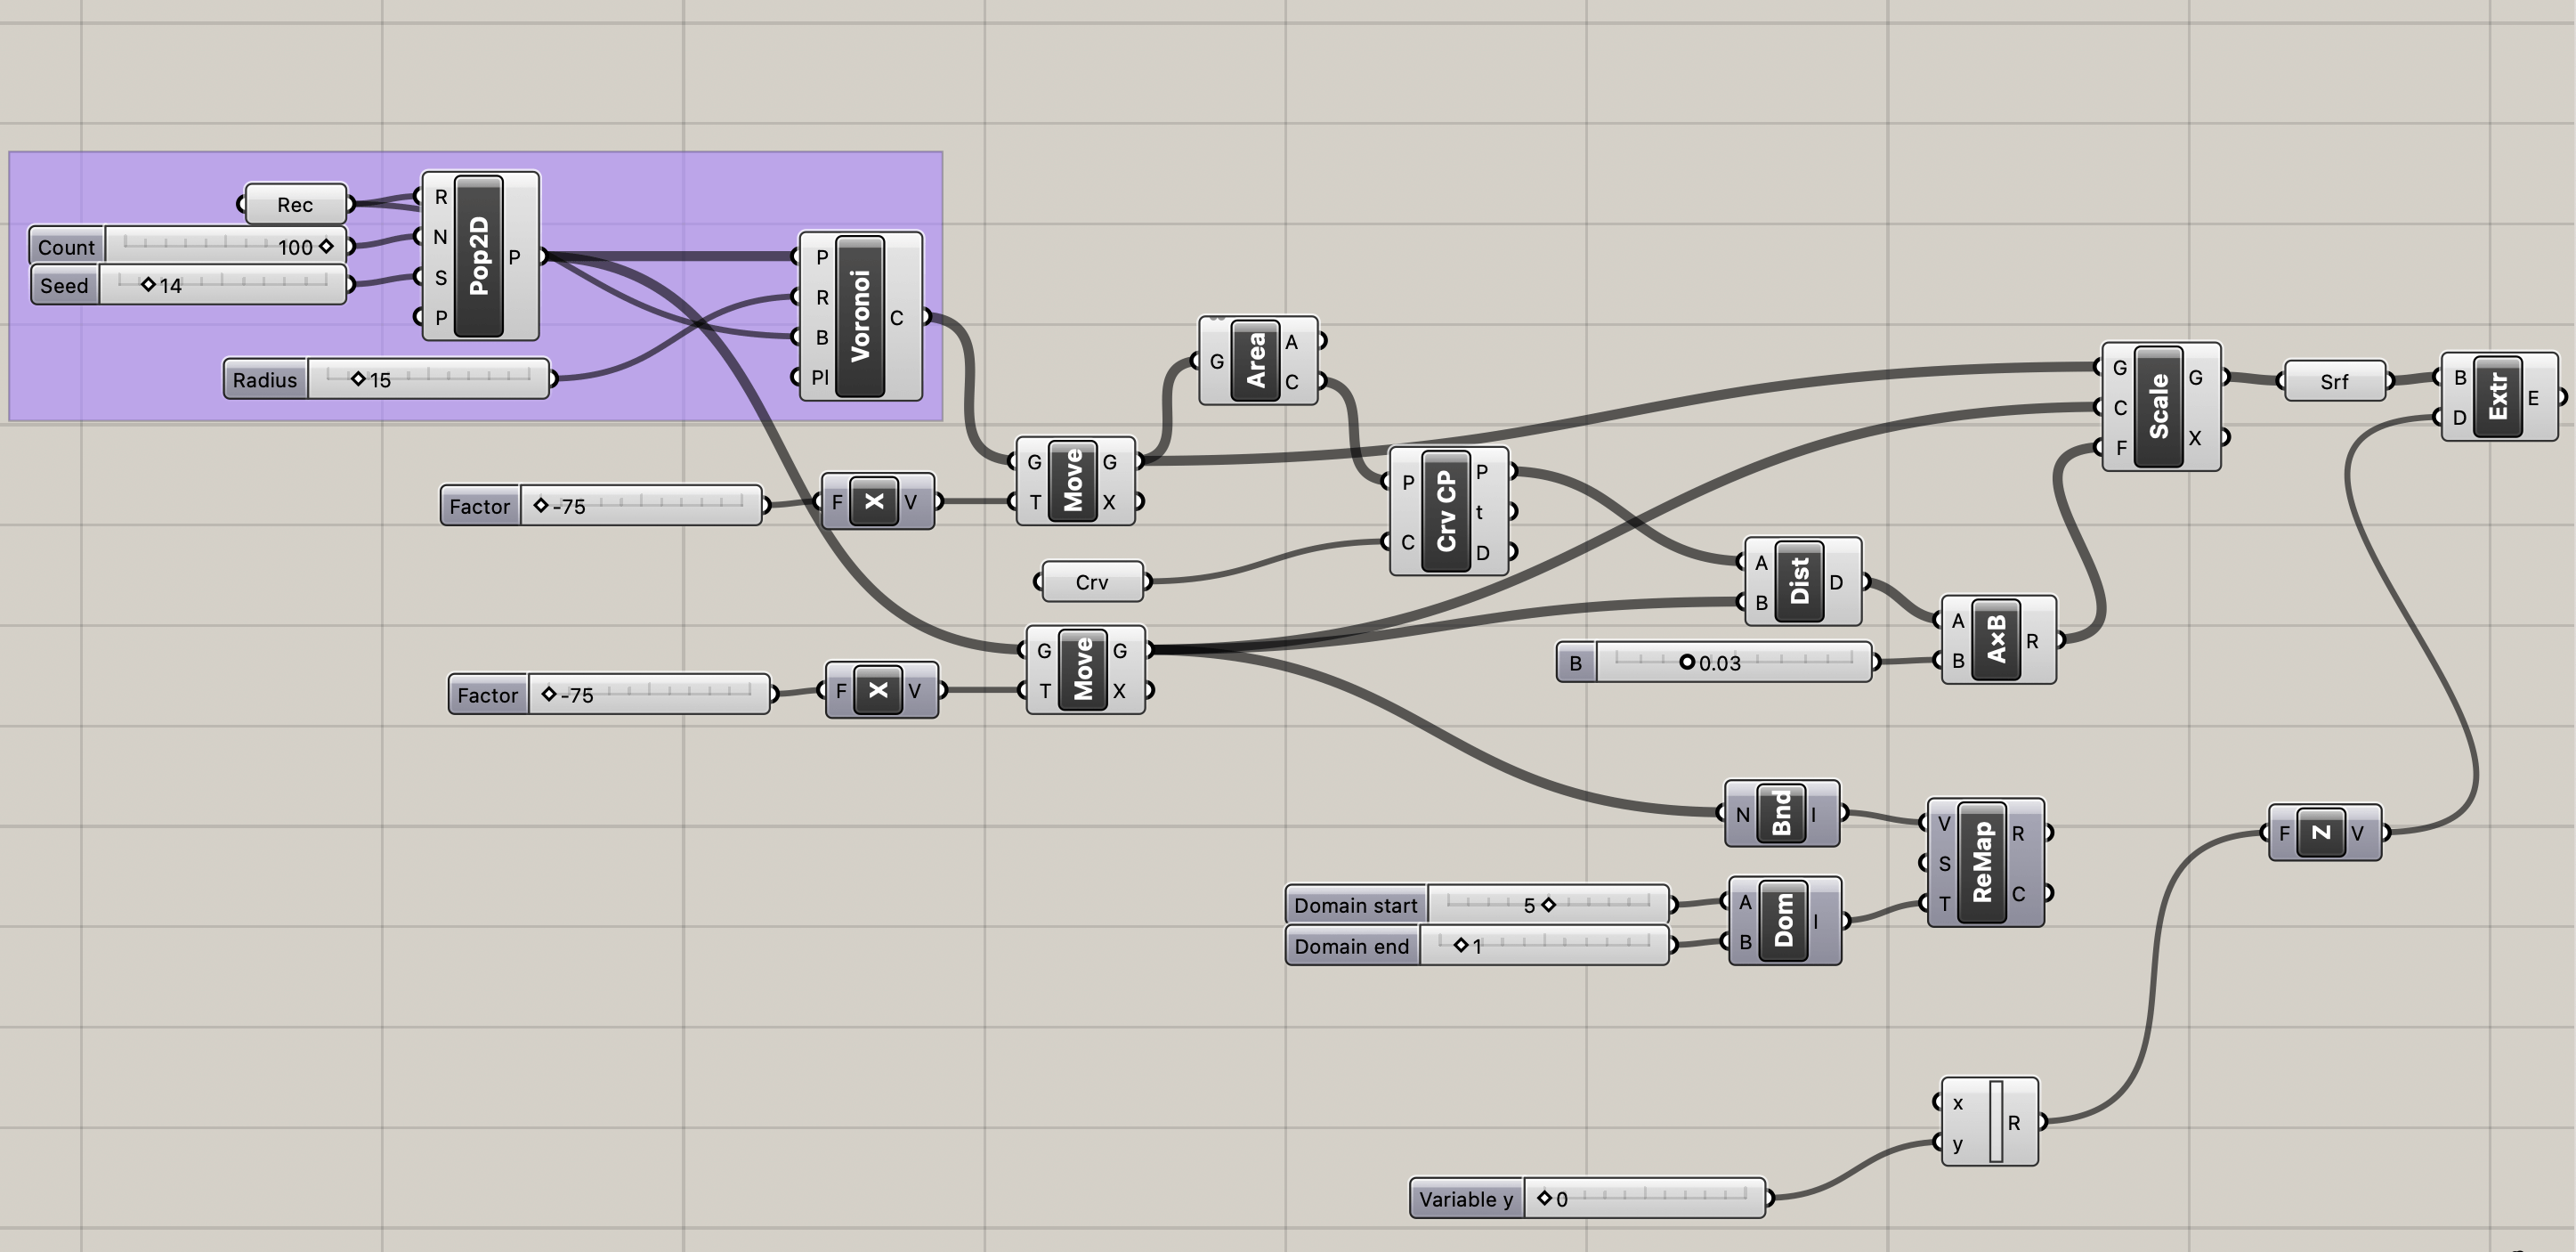
Trial Two // Using Pop2D and attractor point for Voronoi

Trial Three // Blind Trial Pop2D and attractor curve for Voronoi
I tried to use the same logic of the attractor point from above but using a curve without looking up how it is done. The result is not entirely bad!

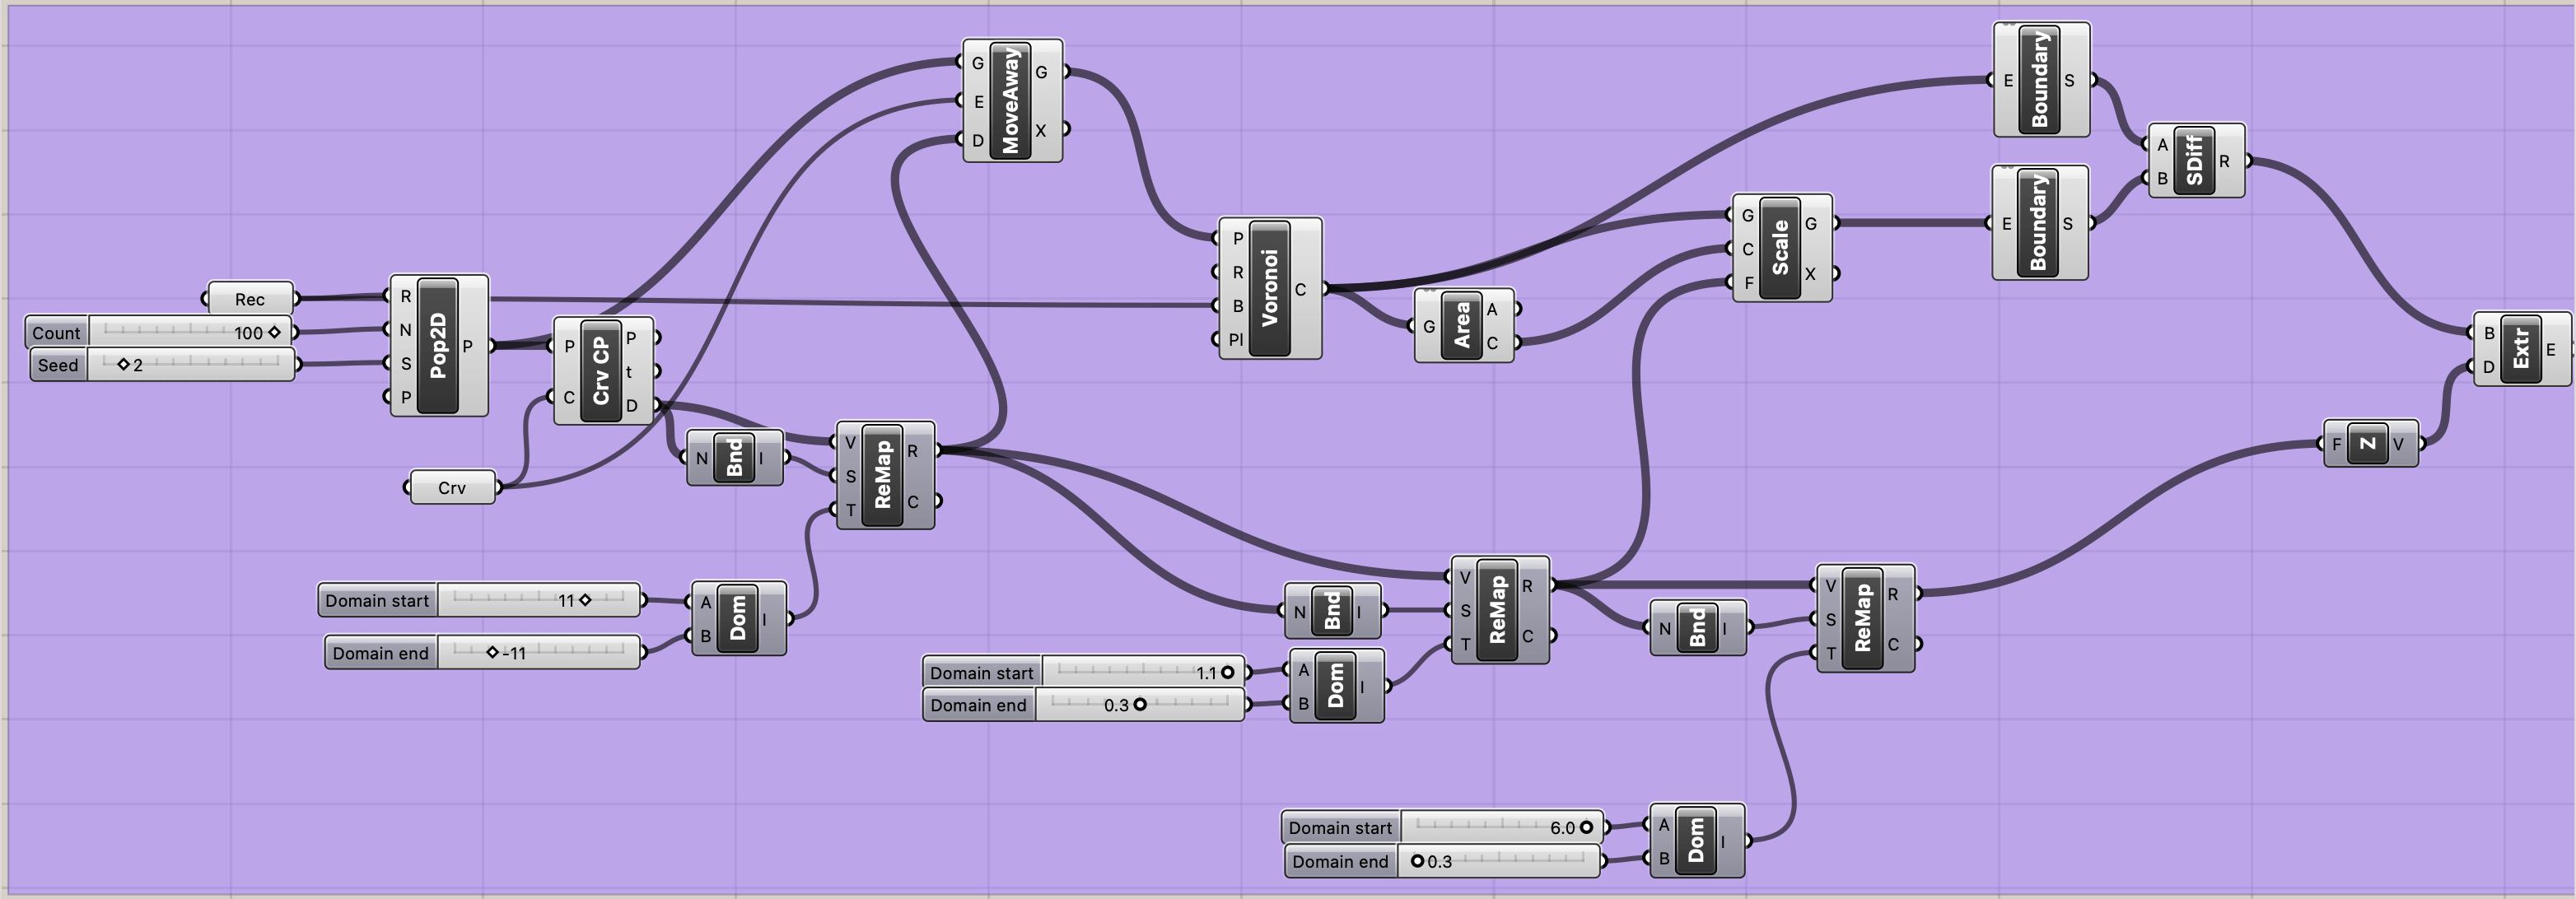
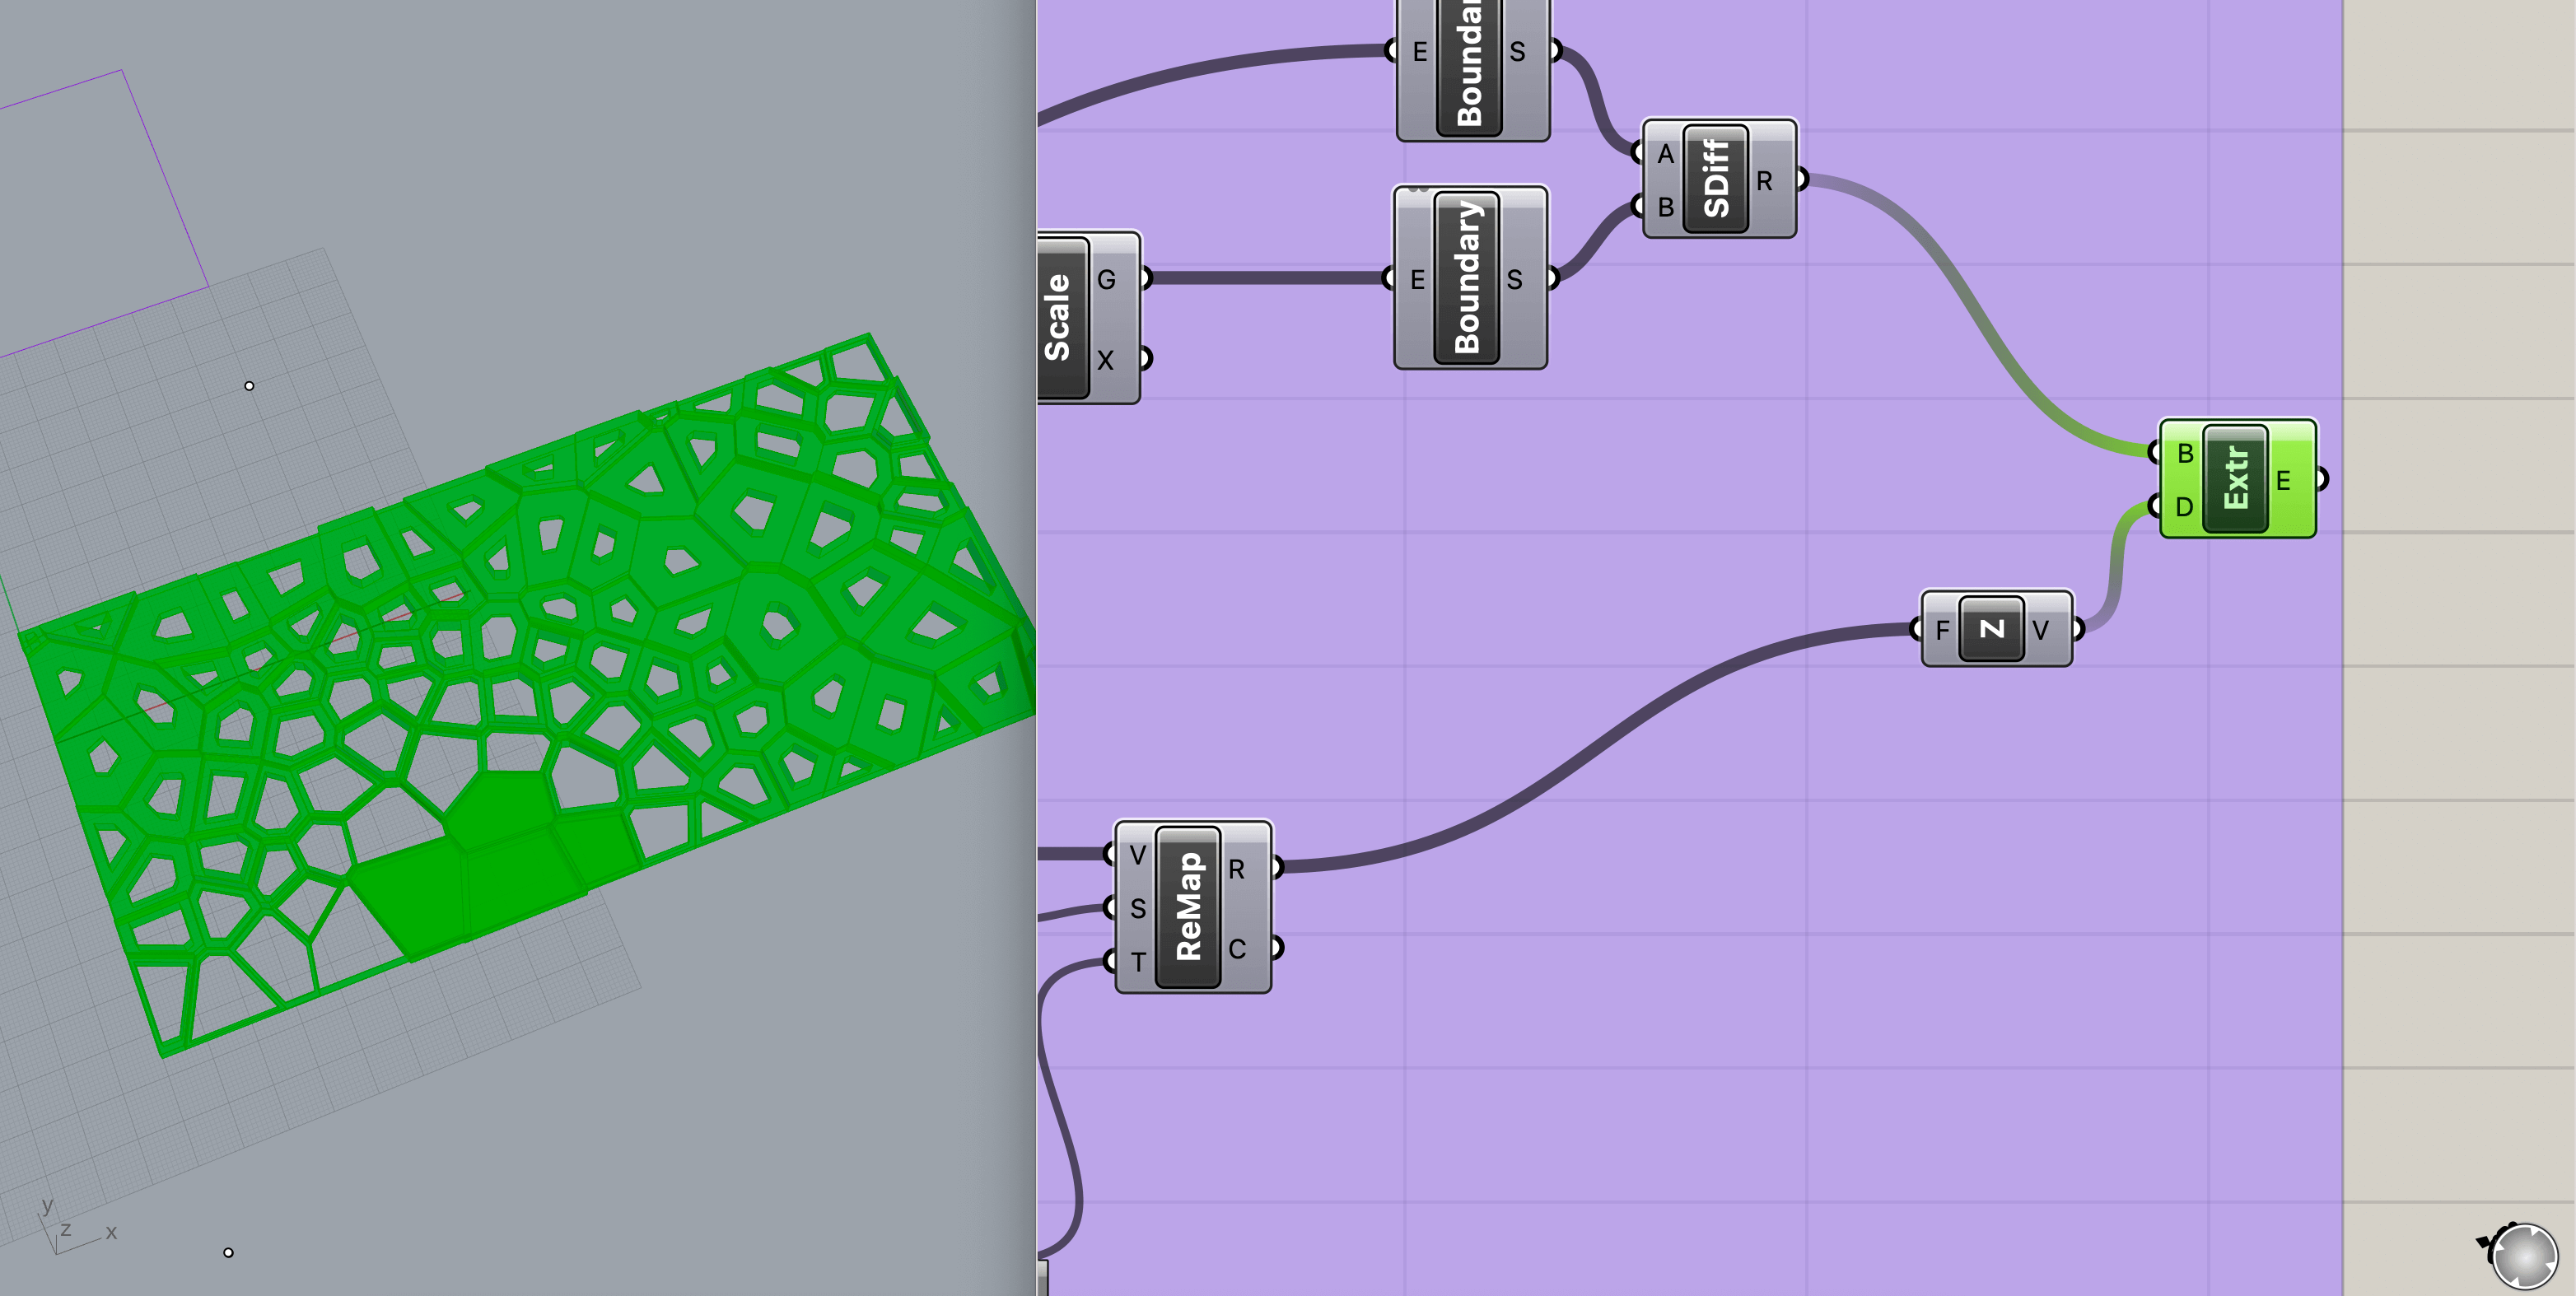
Trial Four // Using Move Away From
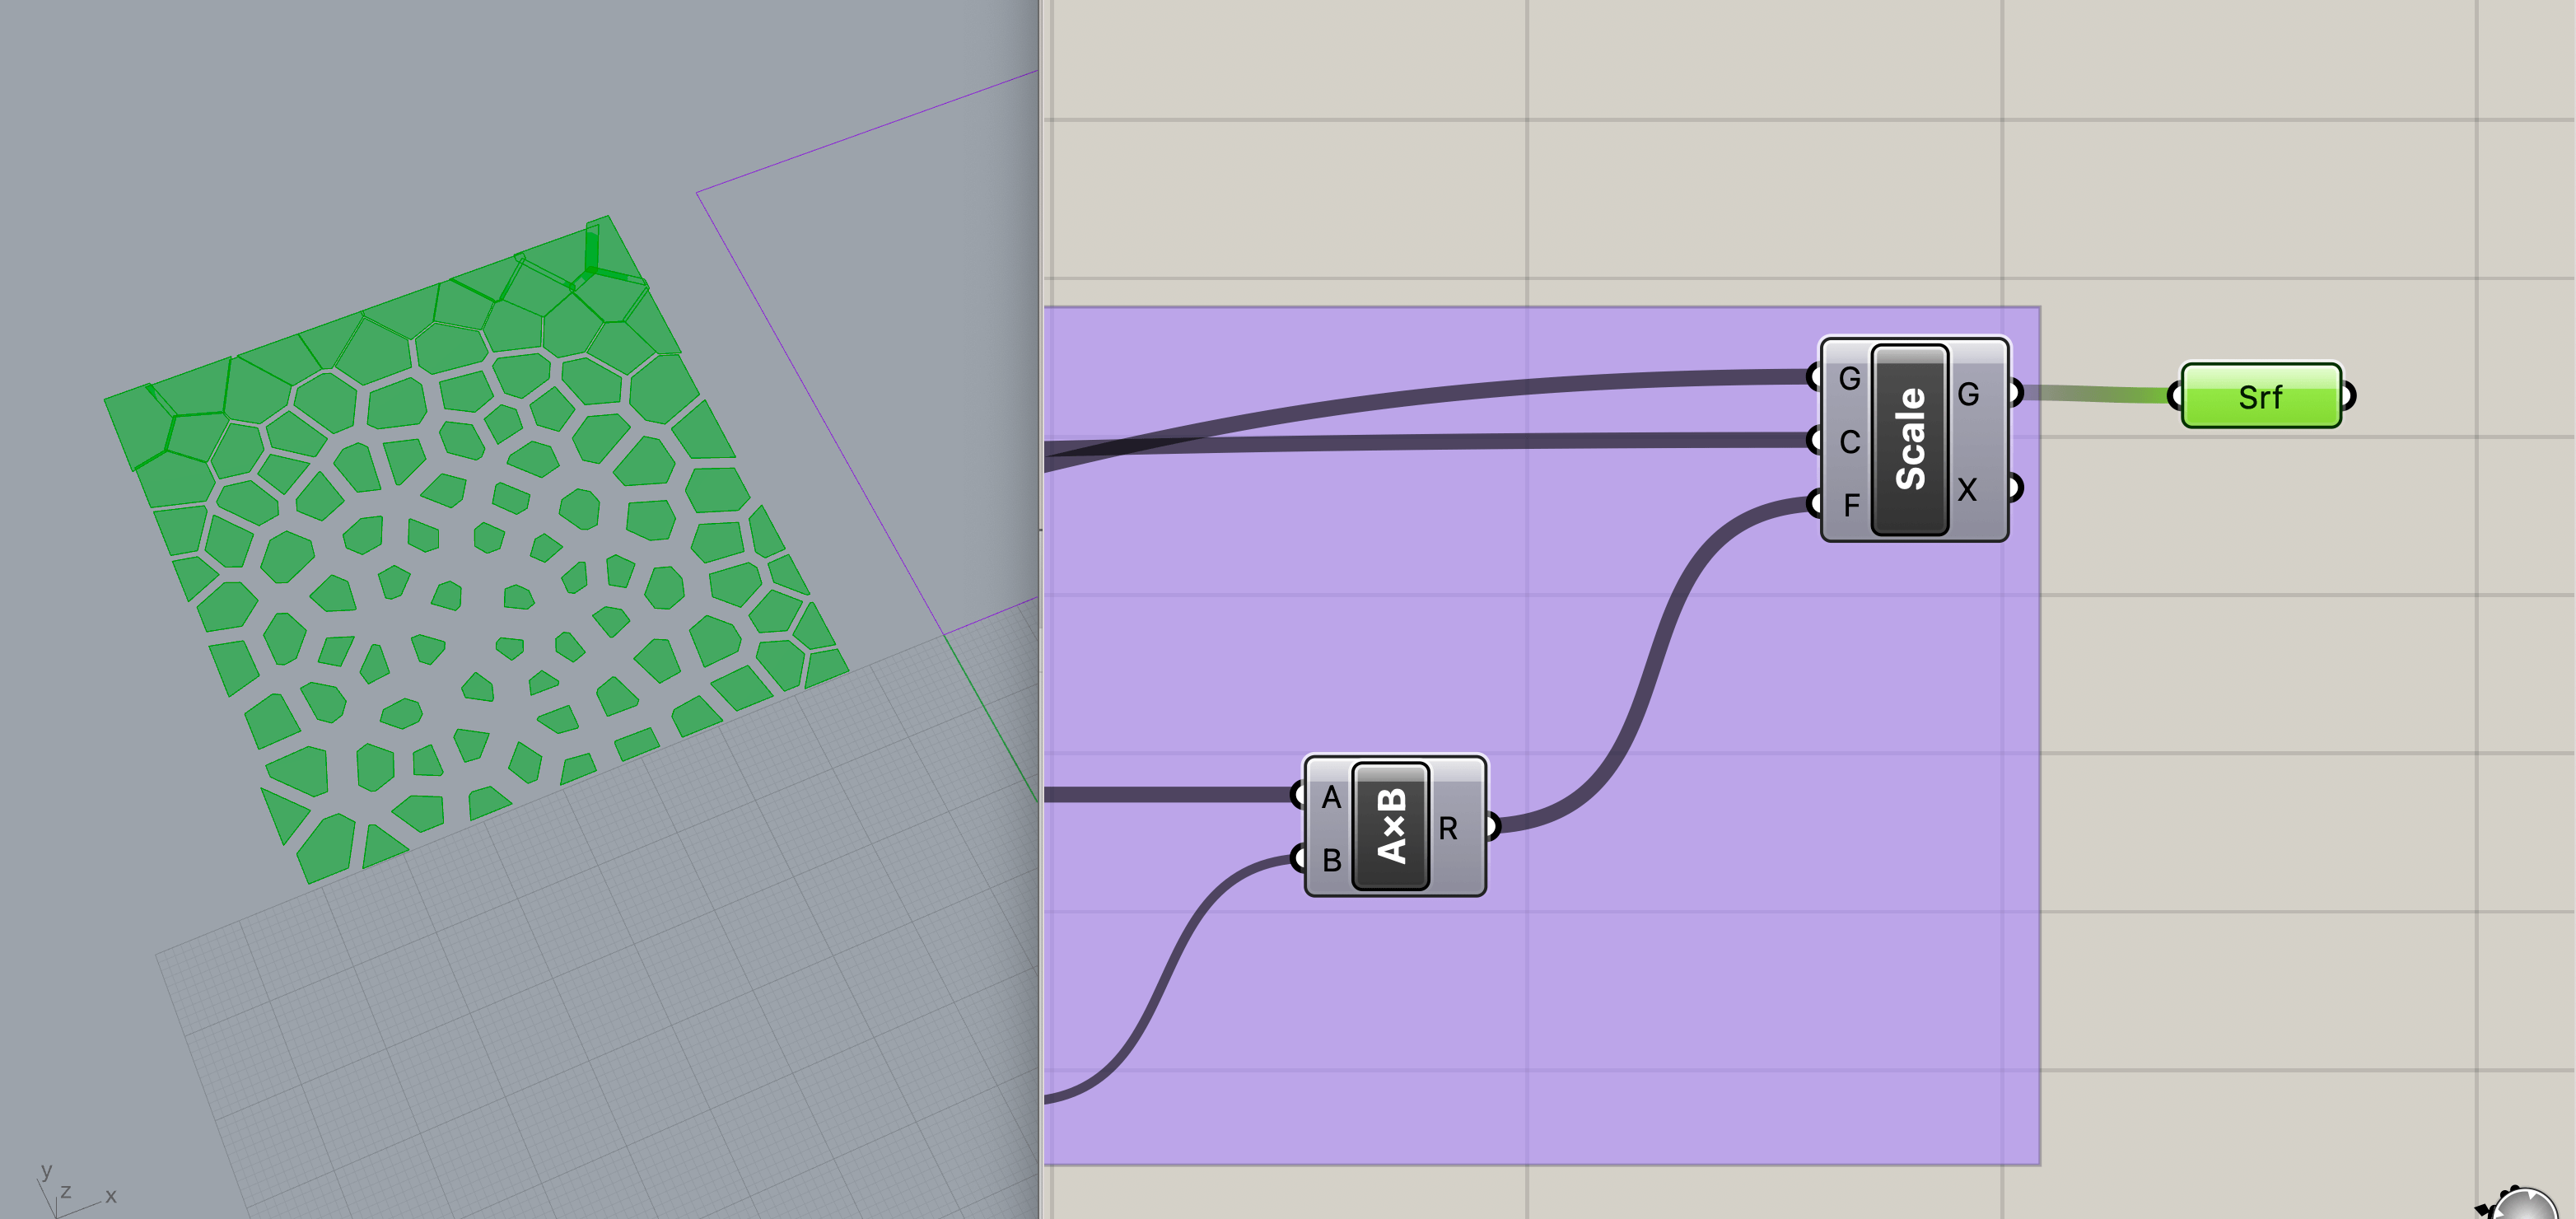
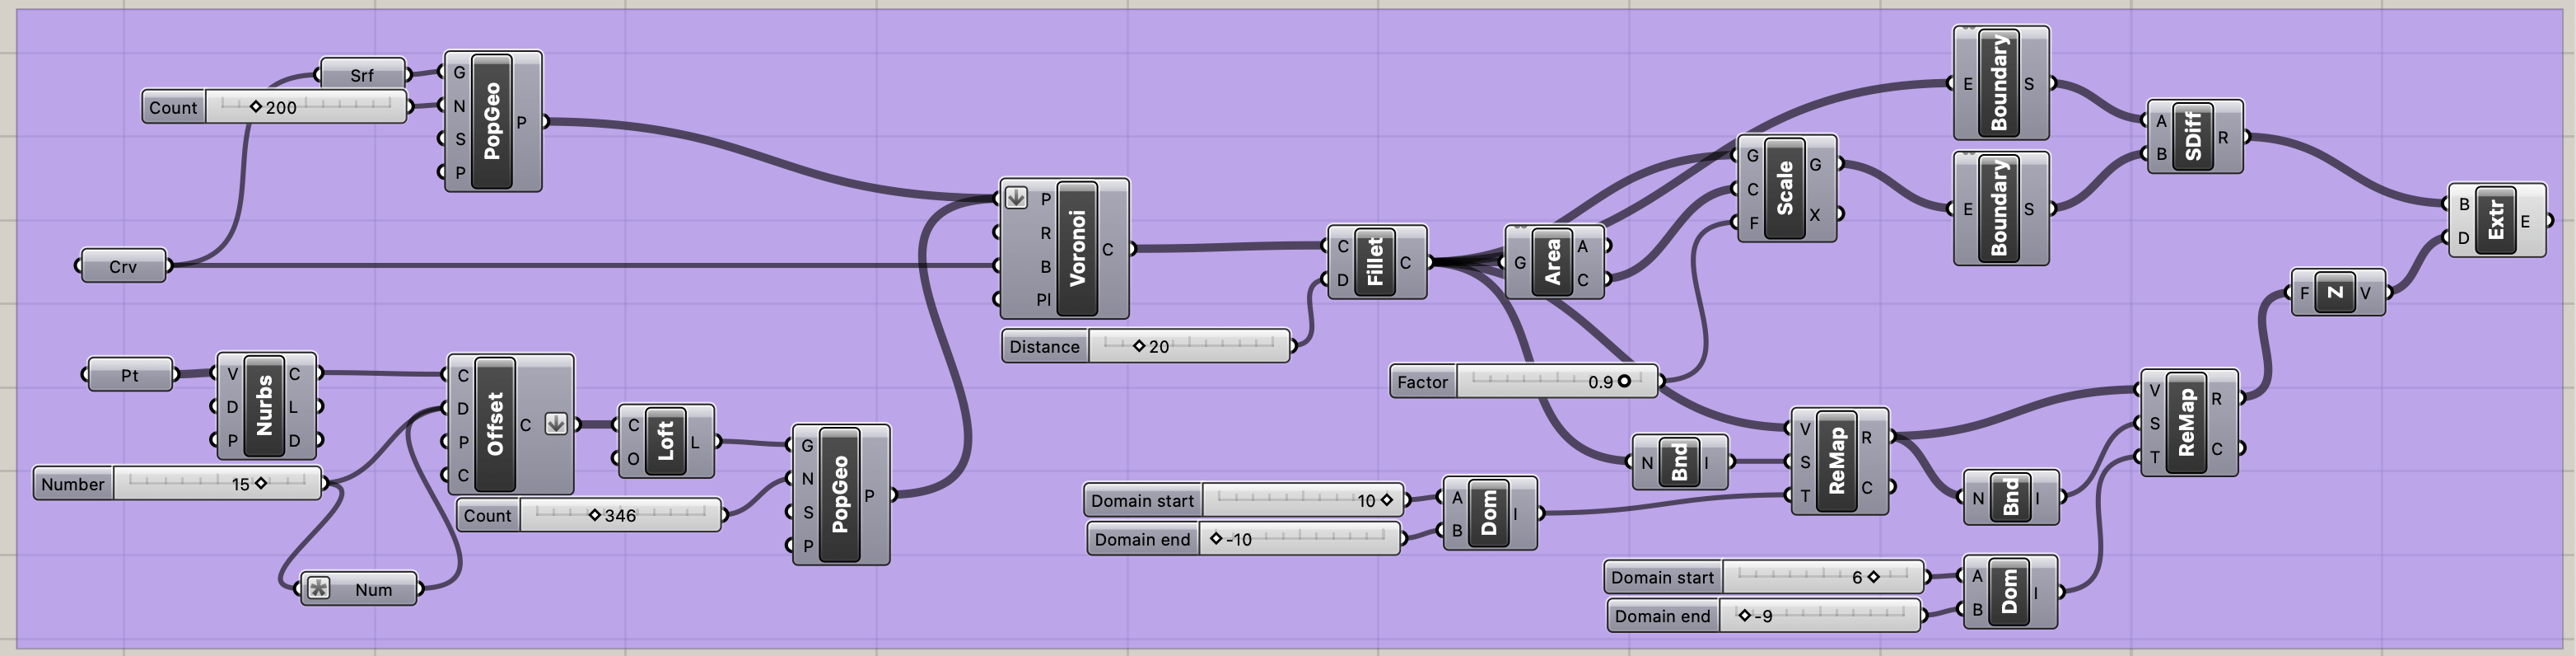
Trial Five // PopGeo Two Geometries into Voronoi

Adjusting the size for the 3D printer bedsize.

Printing On Textiles
I began experimenting with inspiration by Dinesh Kumar, Fabricademy 2022/23, during the week of OS Circular Fashion. I have been interested in Dinesh' final project since I attended the Bootcamp in Jordan May 2023.
My first experiment was following his script, tween lines. I followed it until I realized there was a plugin that is not available on the Mac however, I downloaded the script and was still able to connect it to my curves. I then exported it, placed it in Cura, and printed it!
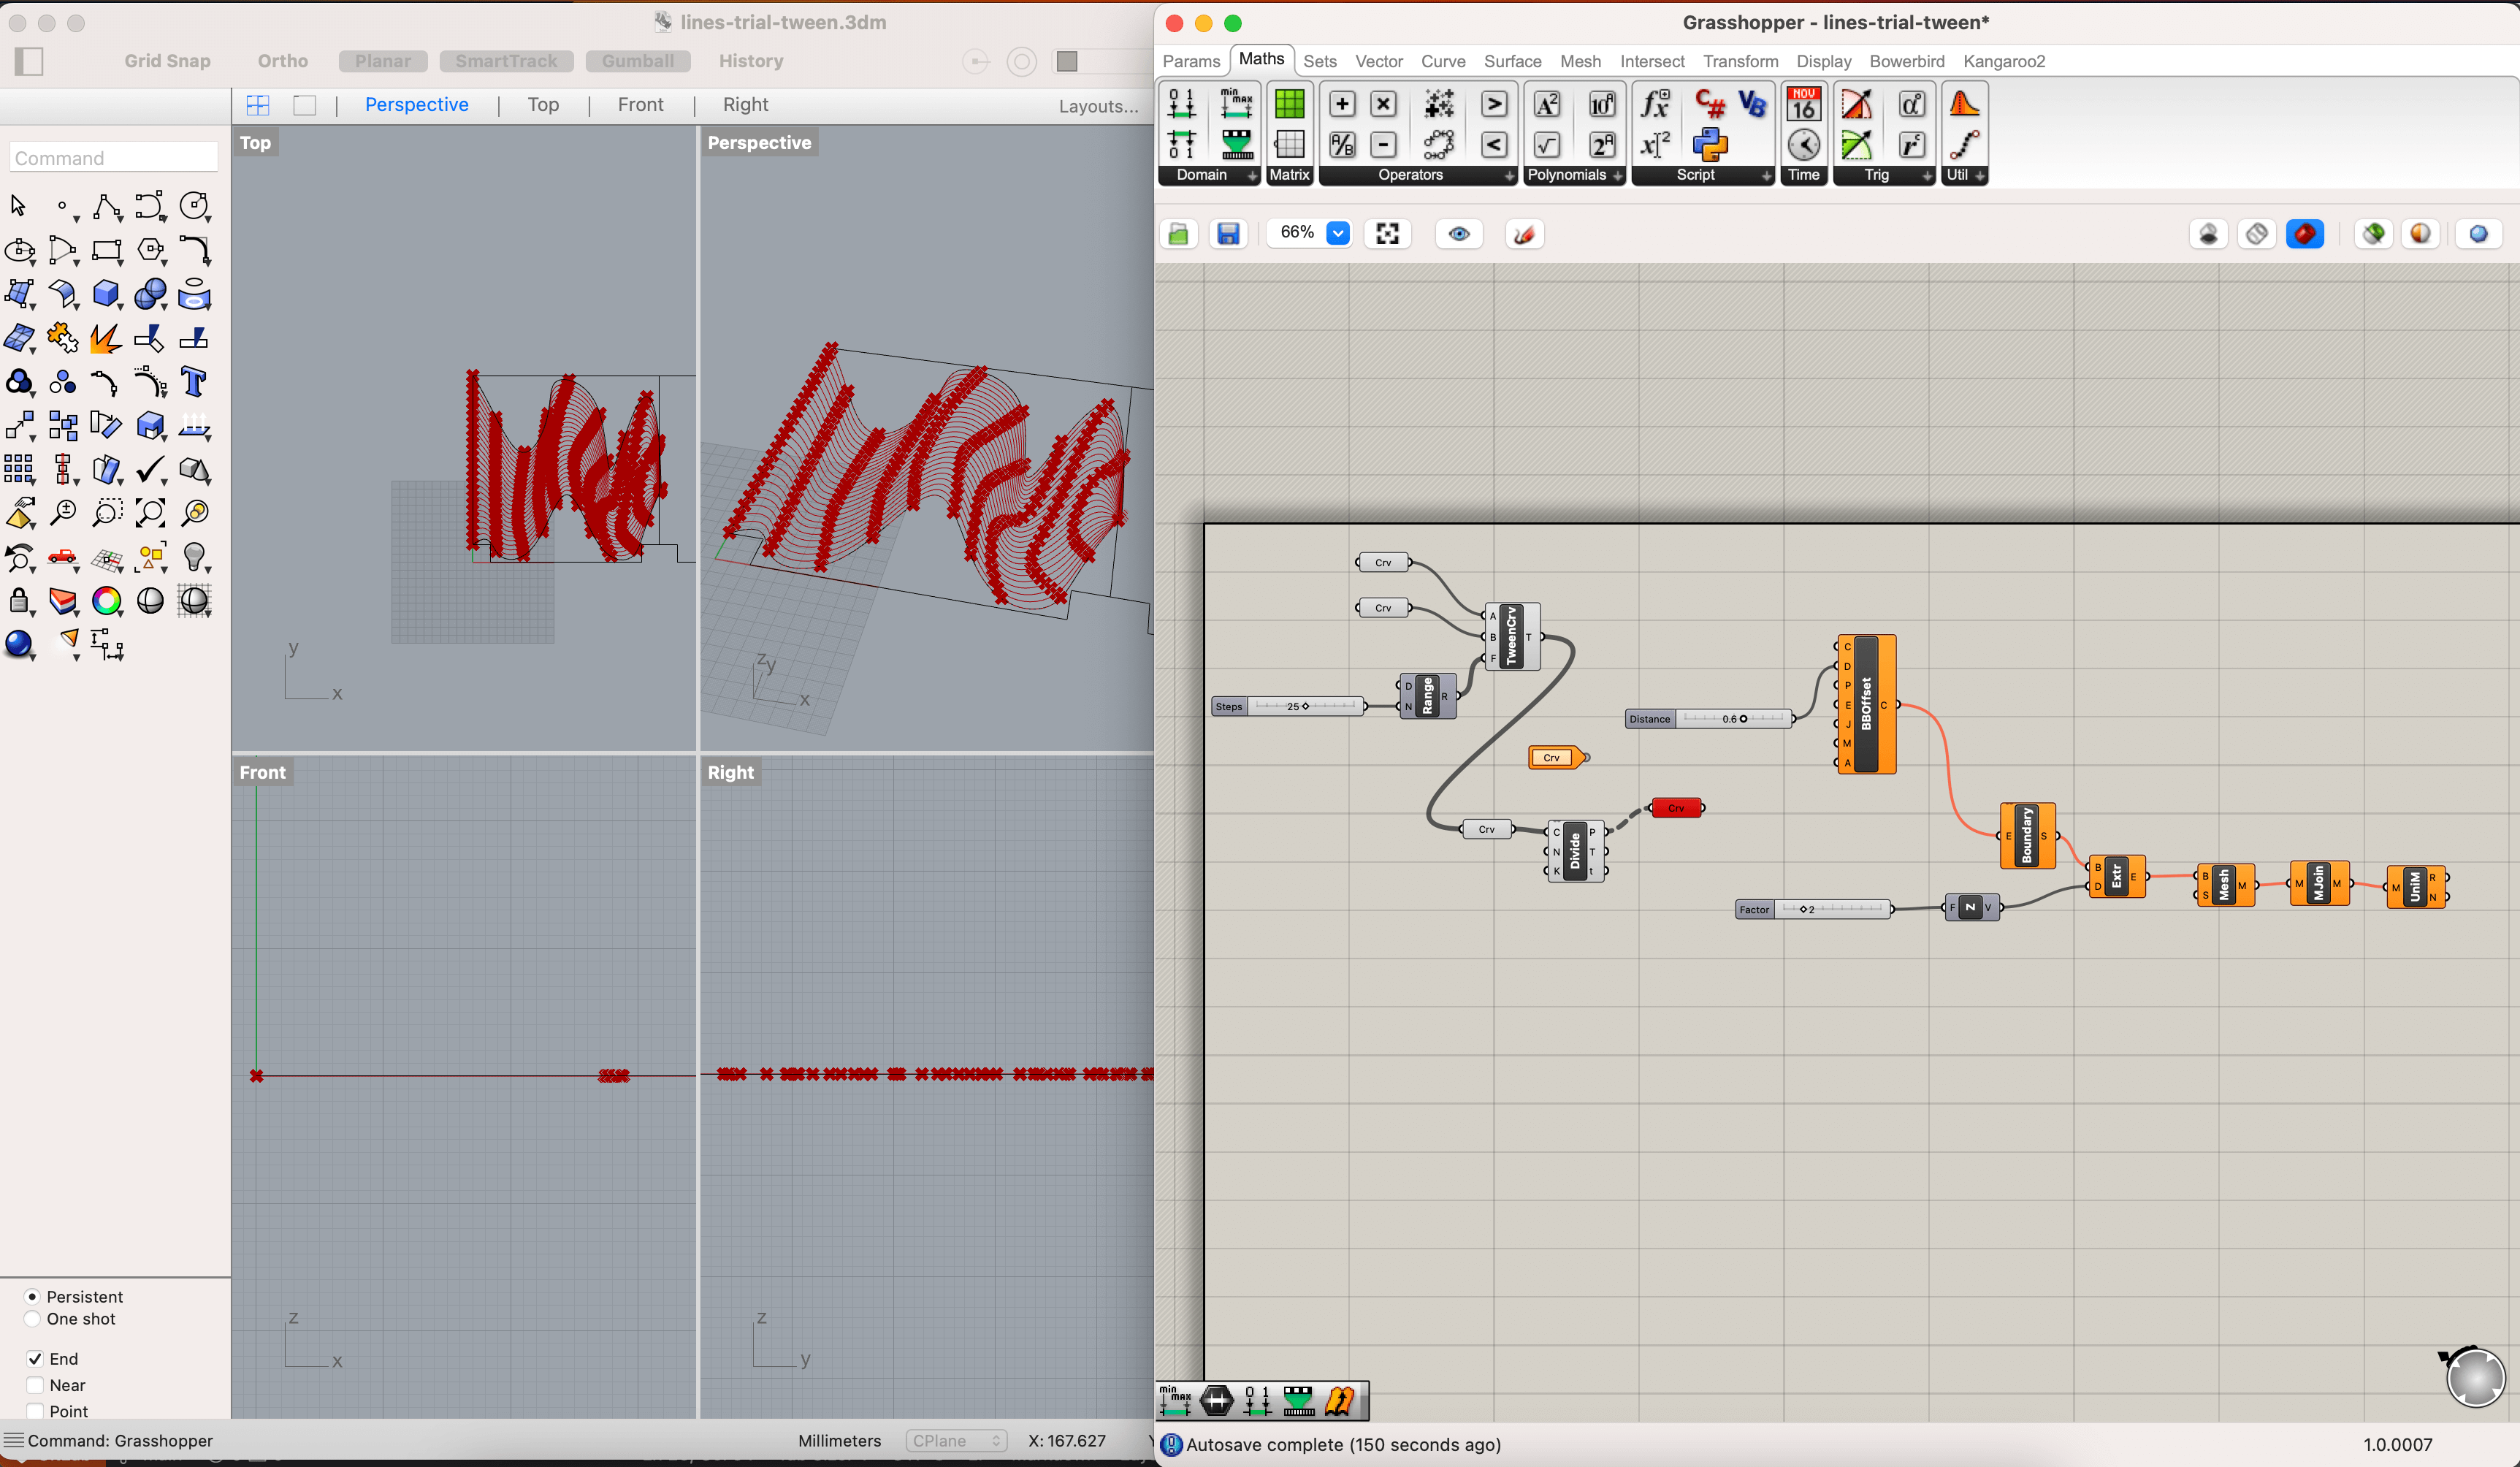
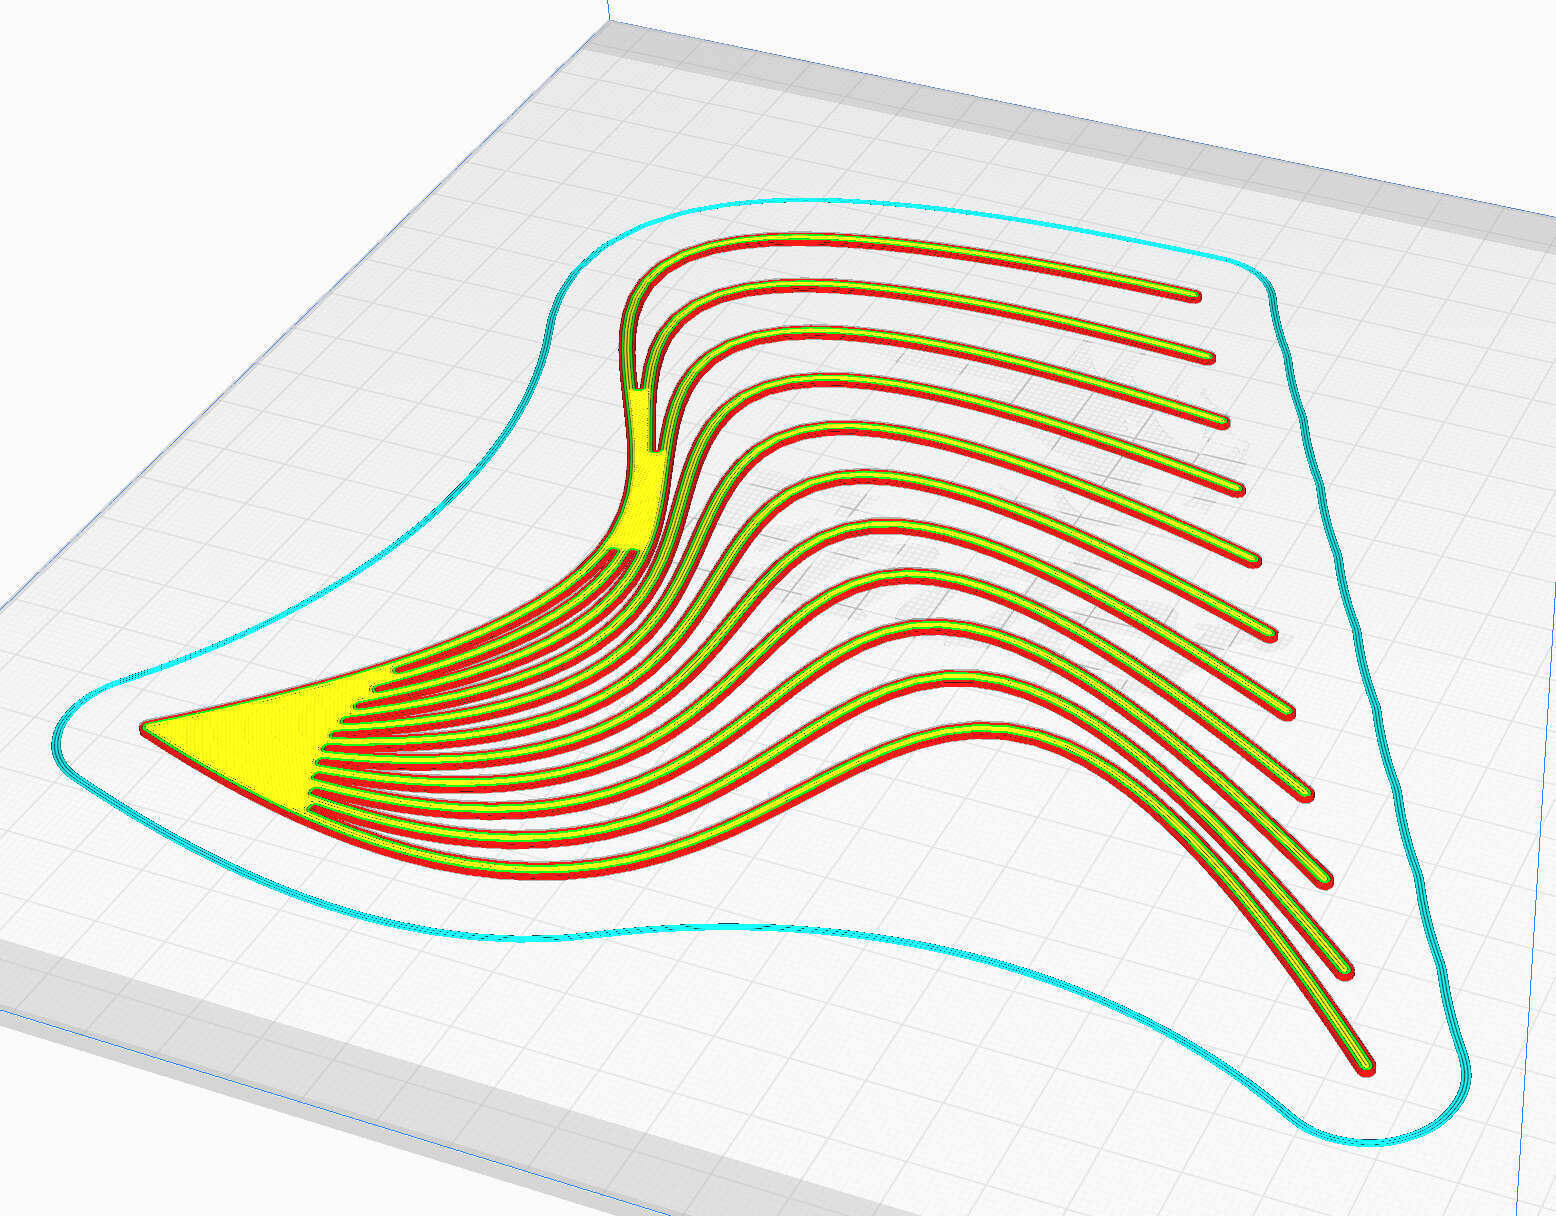
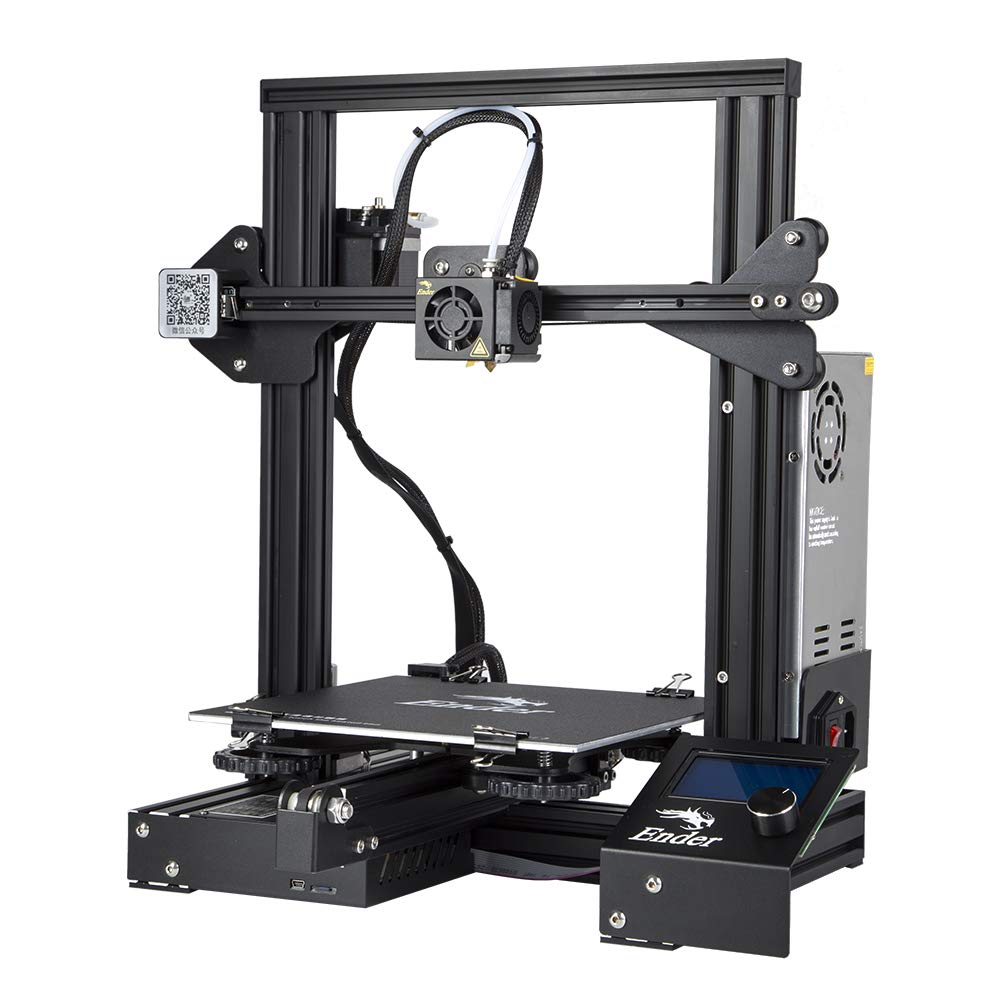
Using Cura, I created the Ender Crealty profile and printed with the recommended settings for the material.
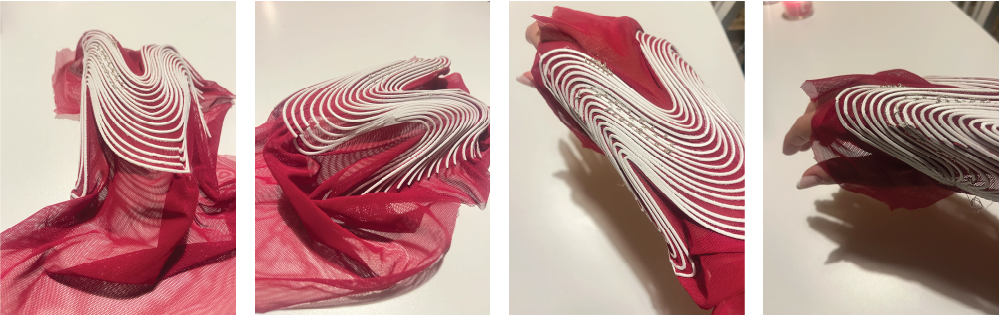
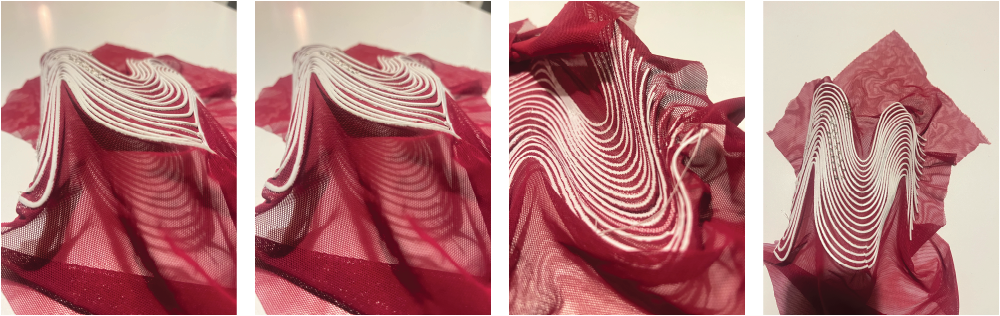
With printing on textiles, make sure to check whether the fabric stretches in one direction or both and make sure to utilize that when attaching it to the buildplate. Remember that the stretching is what will allow your lines to pop up. Make sure to use TPU if you want it to be flexible.
In my case, I wrapped the textile around the buildplate edge and clipped it on. When doing that, please remember not to attach and clips where there is movement of the head or bed or else they will scratch and fly off!
Also, make sure to stretch the fabric before clipping it so that it does not get dragged with the extruder head.
With specific textiles, you may need to take into consideration the thickness of your material and change the z-height.
This print took 1 hour including the pausing, adding textiles, changing z-height, and resuming!
Printing Textiles
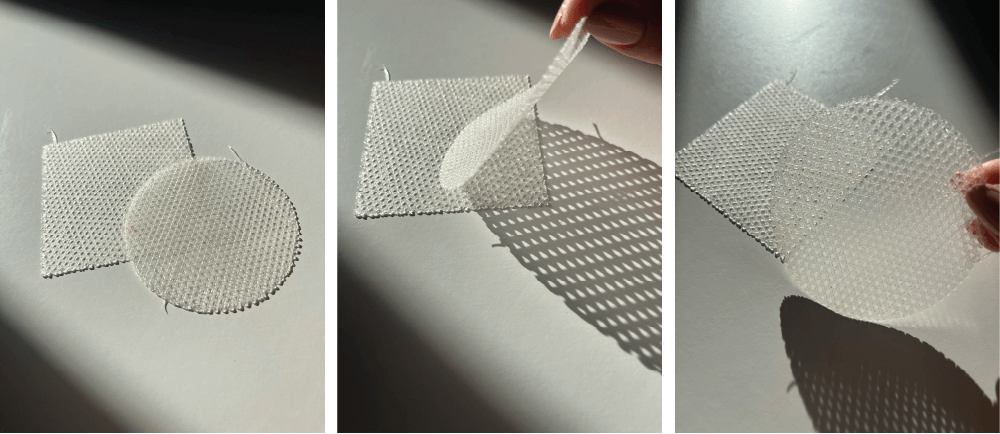
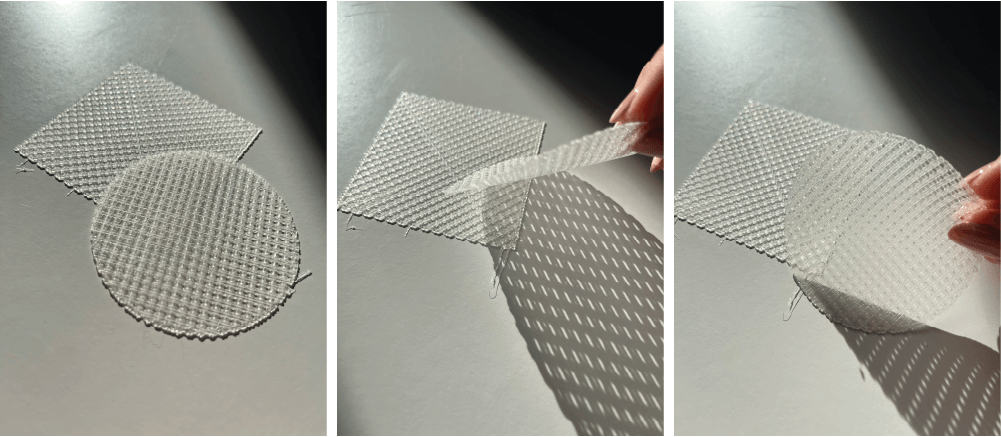
As an initial step, I created a square and circle to test the different infills on Cura without a top and bottom layer to create a textile. I used a TPU Filaflex 95-A filament and printed on a Creality Ender 3.


The only settings you need to change here are the Top and Bottom layers to zero and the type of infill. I used all the infills that are connected with a top and bottom as zero layers. I also tested some others with 1 bottom layer and 1 layer of infill. Each of these prints took around 20 to 40 minutes depending on the patterns of infill.


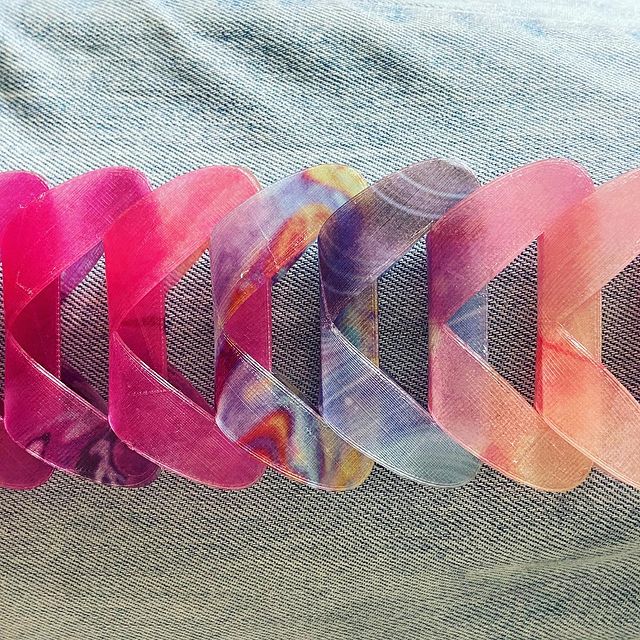
Subliprinting
I prepared for this week by printing paper with sublimation ink to test Brigettes technique. I collected a number of photos from the sand dunes and deserts of Qatar and Jordan. I was very interested in the natural lines and patterns they make due to the wind and the contrast between natural (wind/air), human (footsteps), and manmade (with the car tyre patterns).

Using this inspiration, I want to try merging the printing textiles and on textiles to create a layering effect. Firstly, printing modules with transparent flexible material onto the sublimation paper directly. Secondly, using the lines/patterns, printing on mesh textiles lines to imitate the movement and turn it into 3D.