Week 05 | E-textiles
Digital Circuits | Analog Circuits | Aurdino
Inspriation
When thinking about this week's topic of electrical components, I went on a trip down memory lane to when I used to play a circuit board game with my brother. The game was comprised of a snap board with a selection of components with metal snap buttons to attacreat and create different circuits. There were schematic sketches to follow, but my brother an I would usually come up with our own circuits.
Another trip down memory lane took me to light up sneakers and wondering how they worked. I came across different DIY options that people have been designing with LED light strips, but was wondeirng how the classic Sketchers light up sneaker worked. I came across this interesting video explaining it's components:
In addition to these trips down memory lane, I was inspired and fascinated by these projects I came across on Pinterest:
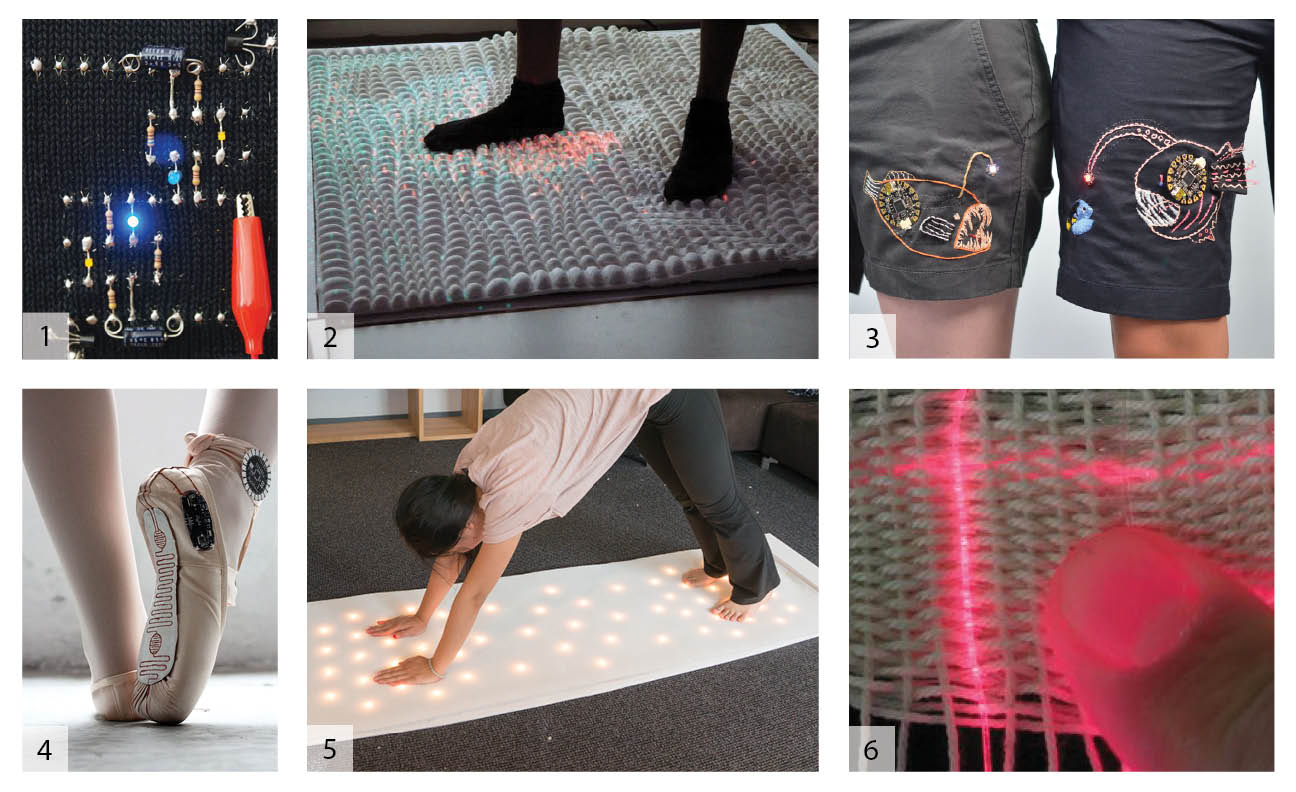
1| jseay
2| Drexel
3| Beck Stern & Danny Nosonowitz
4| Lesia Trubat
5| Yi
6| Gavin Corley
Electronic Basics
The basic concept of electronics is an energy source creates an electrical current that makes electrons be passed from one atom to another.
Important keywords:
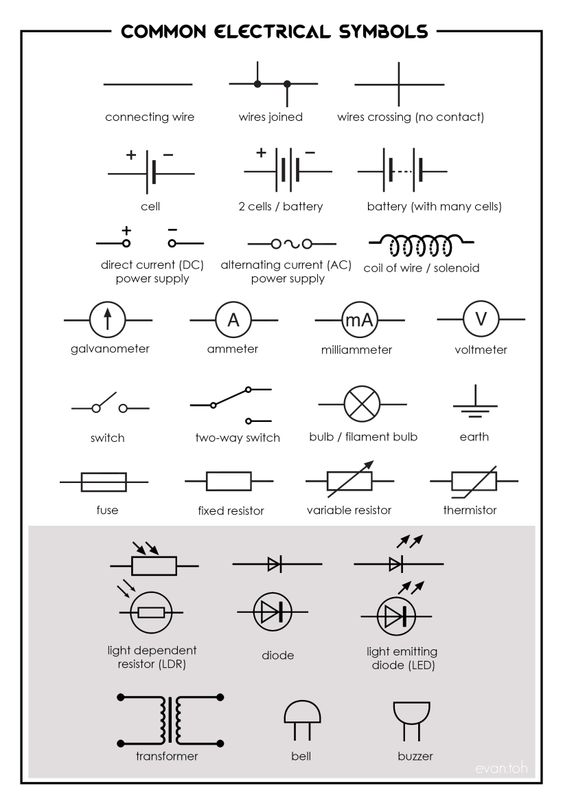
- Circuit: a path for electricity to flow through
- Voltage: the electrical pressure measured in Volt
- Current: the flow of electrons measured in Amps
- Resistance: a material or switch that resists the flow of current measured in Ohms
- Traces: pathways for electricity to flow
OHM's LAW: V=IR
Tools
- Non conductive Fabric
- Conductive thread or yarn
- Non conductive thread or yarn
- Velostat
- Tin foil
- Copper Tape
- Sewing needles
- Pins
- Scissors
- Aligator Clips
- Safety Clips
- 3V Battery
- LED lights
- Electrical Tape
- Aurdino UNO
- Aurdino IDE
Digital Circuits
A digital circuit can be thought of a switch with the ability to have an on/off option.
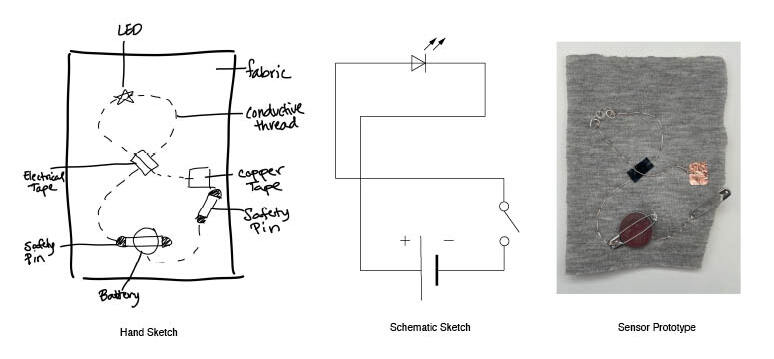
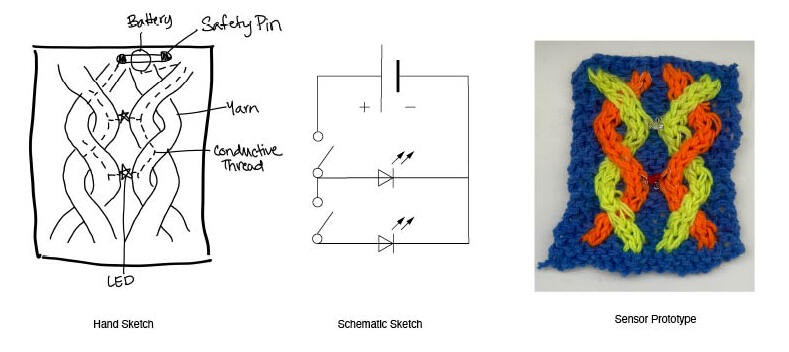
Crossover Circuit
My first attempt at a circuit and wanted to figure out how to have condictive threads overlap.
Materials
- Non Conductive Fabric
- Non Conductive Thread
- Safety Pins
- Copper Tape
- Conductive Thread
- 3V Coin Battery
- LED light
- Sewing Needle
- Scissors
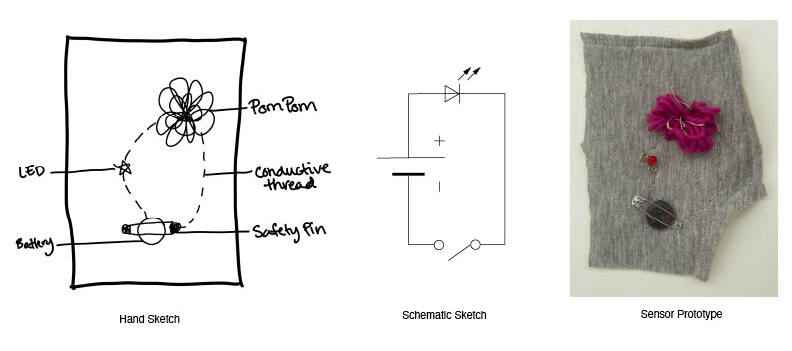
Flower Circuit
I had the mindset of thinking this would be an analog switch, but quickly realized that this would be another digital sensor.
Materials
- Non Conductive Fabric
- Non Conductive Thread
- Safety Pin
- Non Conductive Yarn
- LED Light
- 3V Coin Battery
- Sewing Needle
- Scissors
Knit Cables Circuit
I wanted to see how I could intergrate a switch circuit into knitting and after some brainstorming figured out how I could overlap conductive thread in the cables of the knitting to be pressed on to be the "linking" or "switch" to turn on and off the switch.
Materials
- Non Conductive Yarn
- Knitting Needles
- LED Lights
- Scissors
Analog Circuit
A circuit with a resistant compent that impacts the flow of the current.
I was a bit confused at first as to how analog switches worked. I kept making a digital switch thinking it was an analog switch until I realized that I needed Velostat to be a resistant material that would impact the flow of the current.
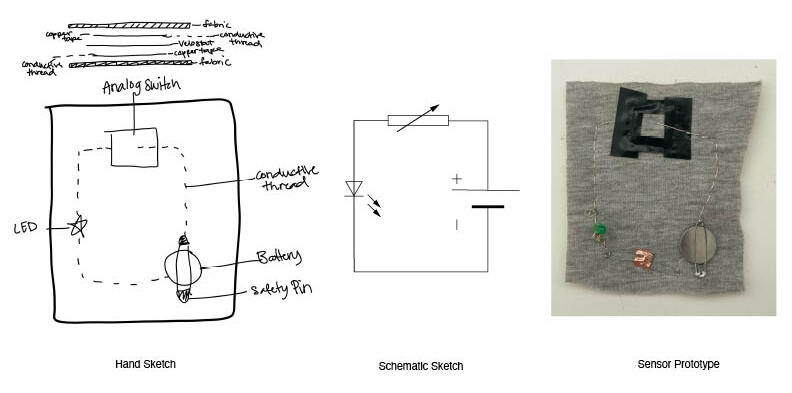
Pressure Circuit
Materials
- Non Conductive Fabric
- Non Conductive Thread
- Conductive Thread
- LED Light
- Safety Pin
- Electrical Tape
- Copper Tape
- Velostat
Aurdino
Aurdino is an open source microcontroller that can be programed to create specific/reactive outputs and collect data.
It was really cool to hook up out DIY sensors and get a basic understanding of how Arduino works. It will definitly take more playing around to get creative with coding in Arduino, so at the moment it was nice to be able to use the code Emma Pareshci provided during the tutorial. I did play around a bit with chaning the timing of how long the light was on or off for and reversing the output of pressing on the analog sensor. Below are some examples of what we tried out:
Read Digital Sensor
Materials
- Digital Sensor
- Arduino UNO
- Arduino IDE
- Code
- Emma Pareshci's presentation
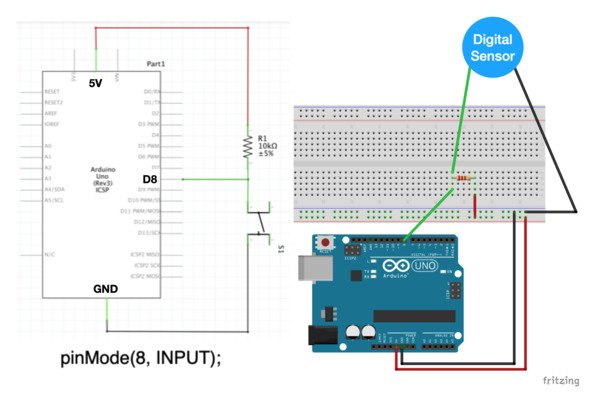
Here is the code Emma Pareschi gave us to use in the tutorial to read our digital sensors:
int digital_sensor_pin = 8; //change the pin, where the sensor is connected
int digital_sensor_value = 0; //variable in which we save the sensor voltage
void setup() {
// put your setup code here, to run once:
//pinMode(digital_sensor_pin, INPUT);
pinMode(digital_sensor_pin, INPUT); //define the pin as INPUT PULLUP
Serial.begin(9600); //open communication
}
void loop() {
// put your main code here, to run repeatedly:
// digitalRead(pin);
digital_sensor_value = digitalRead(digital_sensor_pin); // read the sensor
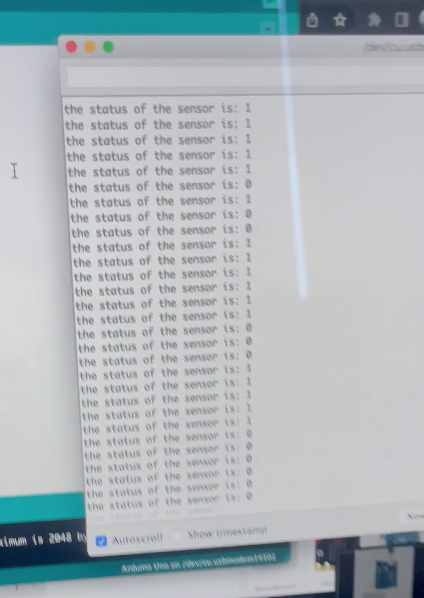
Serial.print("the status of the sensor is: ");
Serial.println(digital_sensor_value); //print the value
delay(100);
}
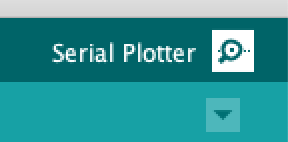
To find the serial plotter you click on the magnifine glass icon to open the panel when your Arduion is plugged in:
Read Analog Sensor
Materials
- Analog Sensor
- Arduino UNO
- Arduino IDE
- Code
- Emma Pareshci's presentation
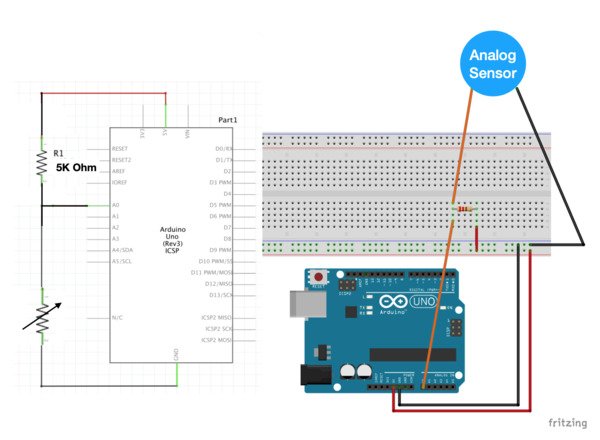
Here is the code Emma Pareschi gave us to use in the tutorial to read our analog sensors:
int analog_sensor_pin = A0;   //change the pin, where the sensor is connected?
int analog_sensor_value = 0;

void setup() {
  // put your setup code here, to run once:
  pinMode(analog_sensor_pin, INPUT);
  Serial.begin(9600);

}

void loop() {
  // put your main code here, to run repeatedly:
  analog_sensor_value = analogRead(analog_sensor_pin); //read the Voltage of the pin sensor

  Serial.println(analog_sensor_value); // print the value on the Serial monitor
  delay(100);

}
Analog LED Fade
Materials
- Analog Sensor
- Arduino UNO
- Arduino IDE
- Code
- Emma Pareshci's presentation

Here is the code Emma Pareschi gave us to use in the tutorial to read our analog sensors:
/*
  Smoothing

  Reads repeatedly from an analog input, calculating a running average and
  printing it to the computer. Keeps ten readings in an array and continually
  averages them.

  The circuit:
  - analog sensor (potentiometer will do) attached to analog input 0

  created 22 Apr 2007
  by David A. Mellis  <dam@mellis.org>
  modified 9 Apr 2012
  by Tom Igoe

  This example code is in the public domain.

  https://www.arduino.cc/en/Tutorial/BuiltInExamples/Smoothing
*/

// Define the number of samples to keep track of. The higher the number, the
// more the readings will be smoothed, but the slower the output will respond to
// the input. Using a constant rather than a normal variable lets us use this
// value to determine the size of the readings array.
const int numReadings = 10;

int readings[numReadings];      // the readings from the analog input
int readIndex = 0;              // the index of the current reading
int total = 0;                  // the running total
int average = 0;                // the average

int inputPin = A0;
int led_pin = 3; //change the pin of the Led

void setup() {
  // initialize serial communication with computer:
  Serial.begin(9600);
  // initialize all the readings to 0:
  for (int thisReading = 0; thisReading < numReadings; thisReading++) {
    readings[thisReading] = 0;
  }

    pinMode(led_pin, OUTPUT);   //initialize led pin
}

void loop() {
  // subtract the last reading:
  total = total - readings[readIndex];
  // read from the sensor:
  readings[readIndex] = analogRead(inputPin);
  // add the reading to the total:
  total = total + readings[readIndex];
  // advance to the next position in the array:
  readIndex = readIndex + 1;

  // if we're at the end of the array...
  if (readIndex >= numReadings) {
    // ...wrap around to the beginning:
    readIndex = 0;
  }

  // calculate the average:
  average = total / numReadings;


  // send it to the computer as ASCII digits
  Serial.println(average);
  average = map(average, 255, 0, 200, 60); //we change the range
  average = constrain(average, 0, 255); //we apply the limits

  delay(50);        // delay in between reads for stability
  analogWrite(led_pin, average);
}