05. E-TEXTILES
REFERENCES & INSPIRATIONS
I was inspired by a Nick Cave shirt that reminds me of an electrical circuit pattern, and of course by himself.

The main inspirations for this week's task are these: "How to get what you want" extensive and always growing e-textiles library. Liza Stark, her works are simply abundant and very well documented. More of Lizas works and tutorials here.
This week we learned about voltage, resistance, current and circuitry, conductive materials, tools, hard/soft connections, soft sensors and programming basics.
Started from making soft textile circuit.
PAPER PROTOTYPES
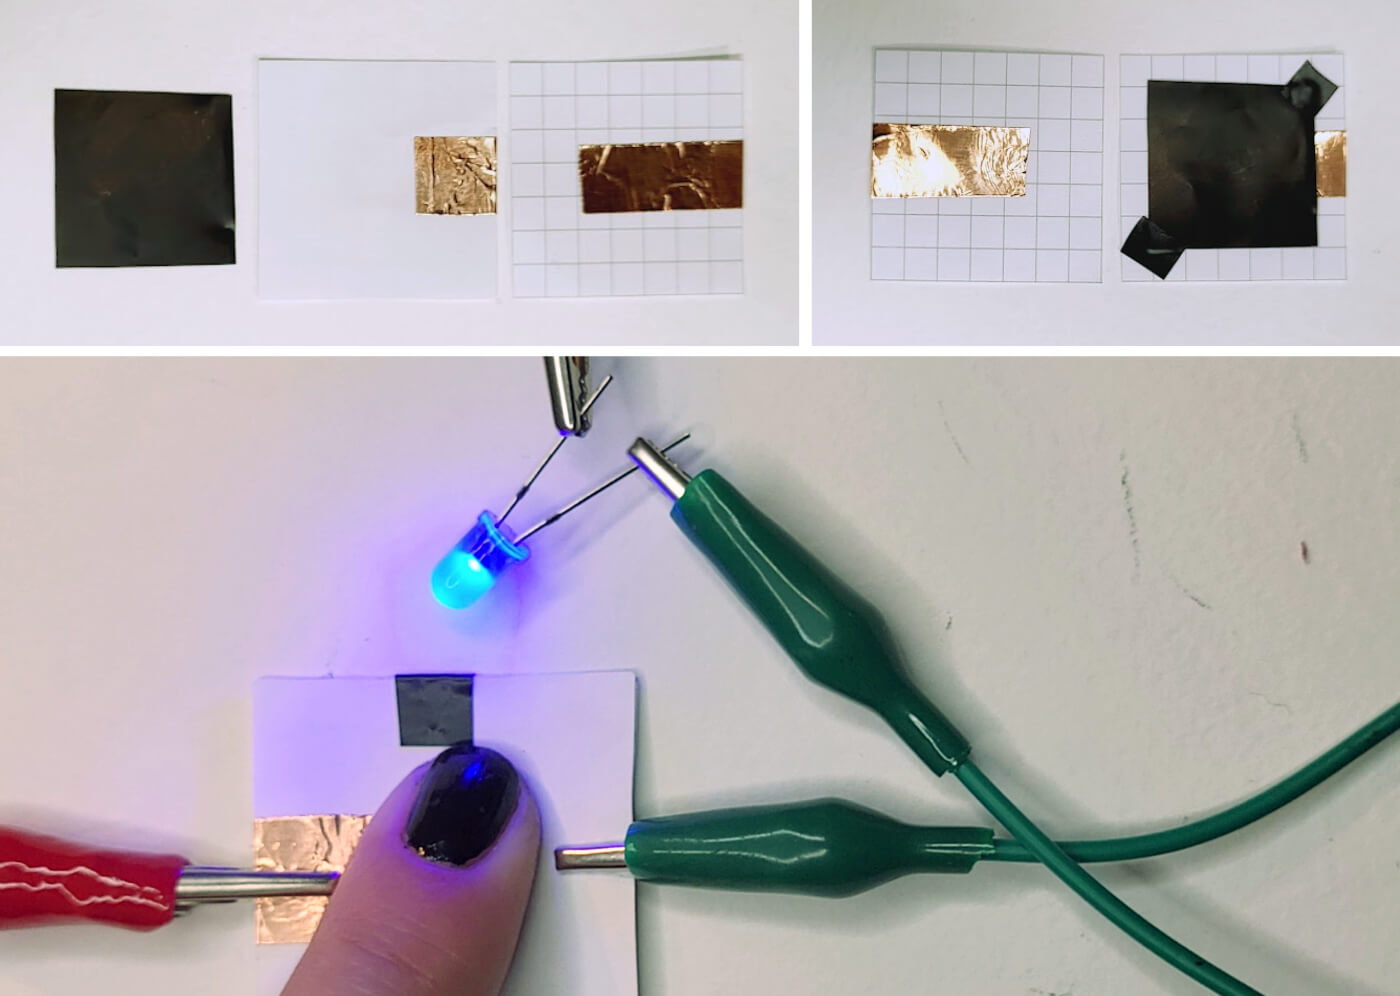
Started prototyping from paper and copper tape because it is fast and easy to work with.
tools and materials for paper sensors prototyping
- checkered paper, because it requires less drawing
- sissors
- graphite pencil
- insulating tape for fixing
- crocodiles
- LED diode
- Velostat
- 3V coin battery
- coin battery holder
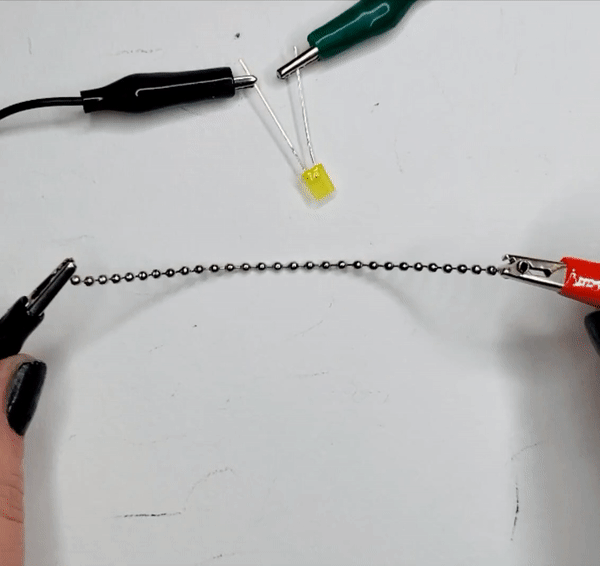
Prototypes of the following sensors were made: Press, Bend, Stroke/potentiometer.

Metal chain works as analog sensor.
DIGITAL & ANALOG SENSORS
We learned about digital and analog sensors. I made one digital and two analog sensors. Tools are required: needle, scissors, embroidery hoop.
Digital press sensor
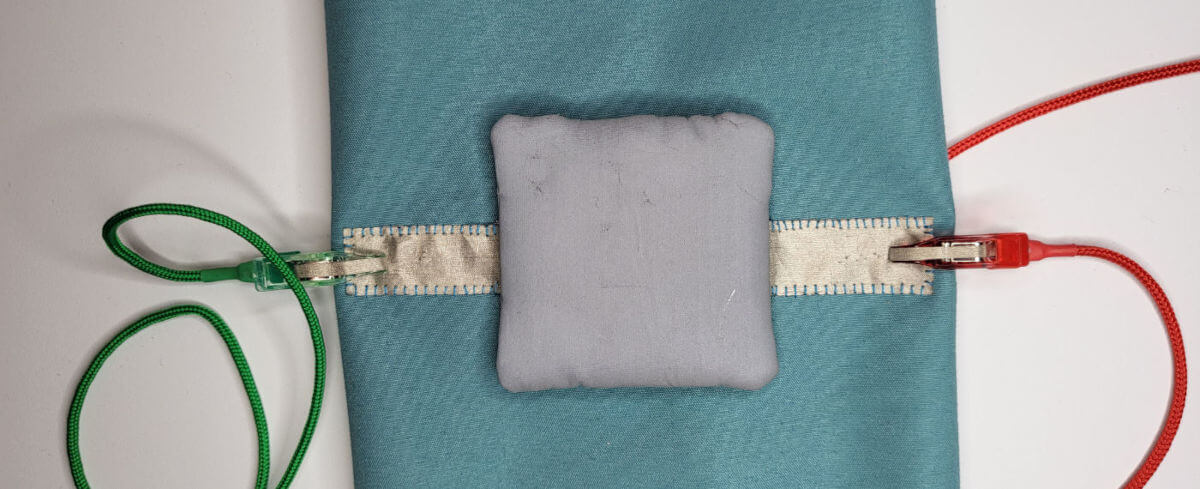
materials
- regular thread
- foam
- conductive fabric
- resistive fabric (neoprene as option)
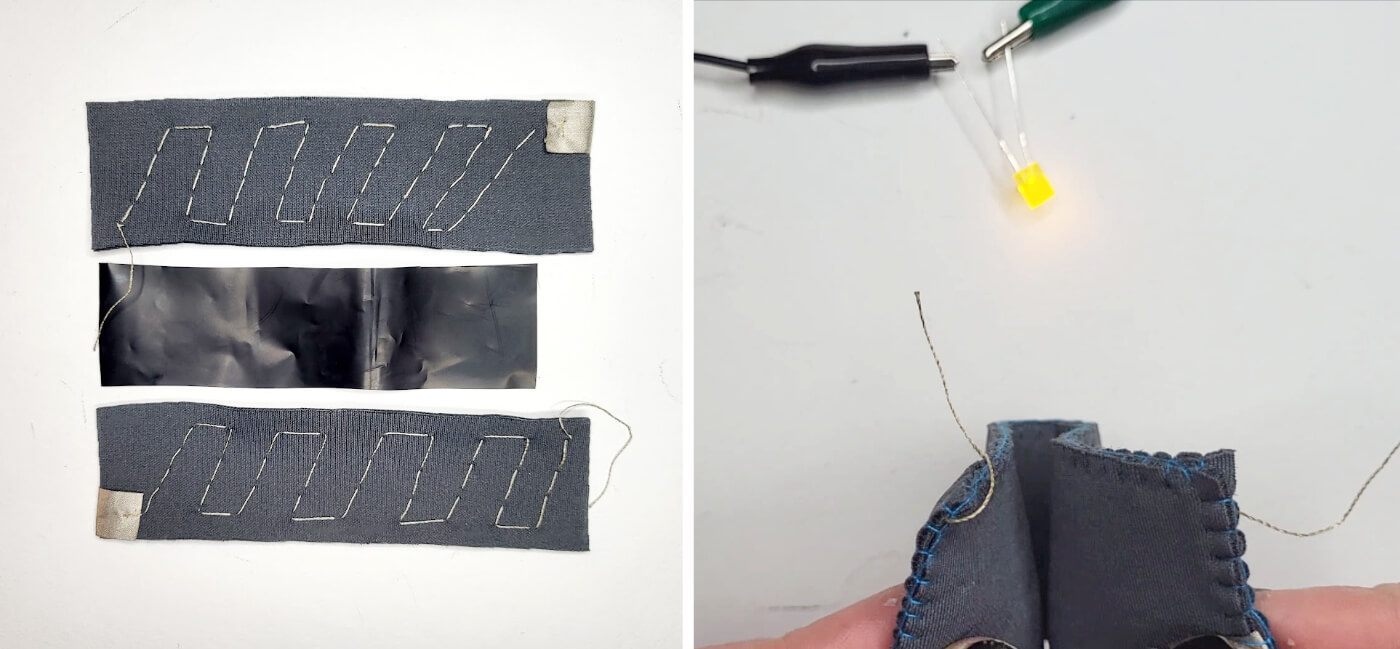
Analog bend sensor
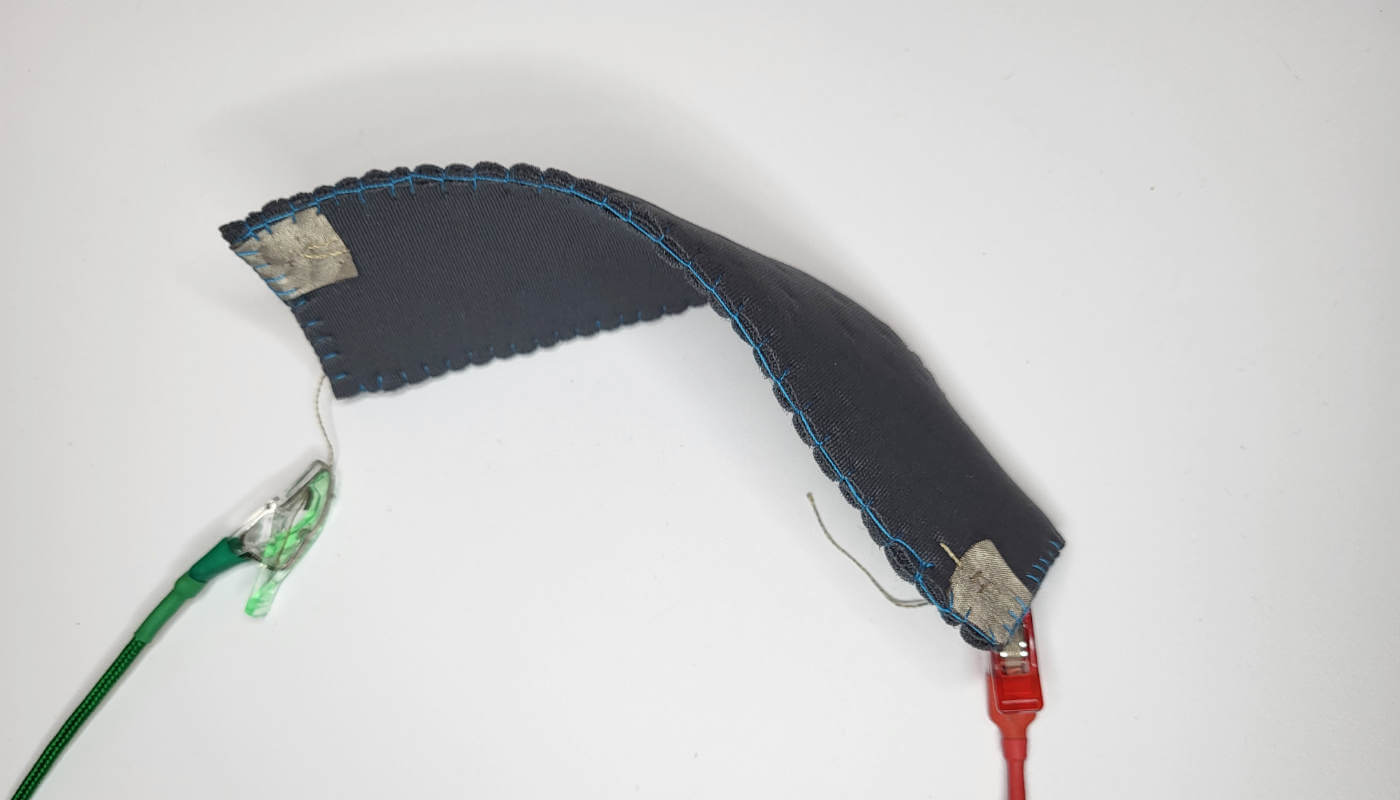
materials
- regular thread
- conductive thread
- conductive fabric
- resistive fabric (neoprene as option)
- Velostat
Analog tilt sensor
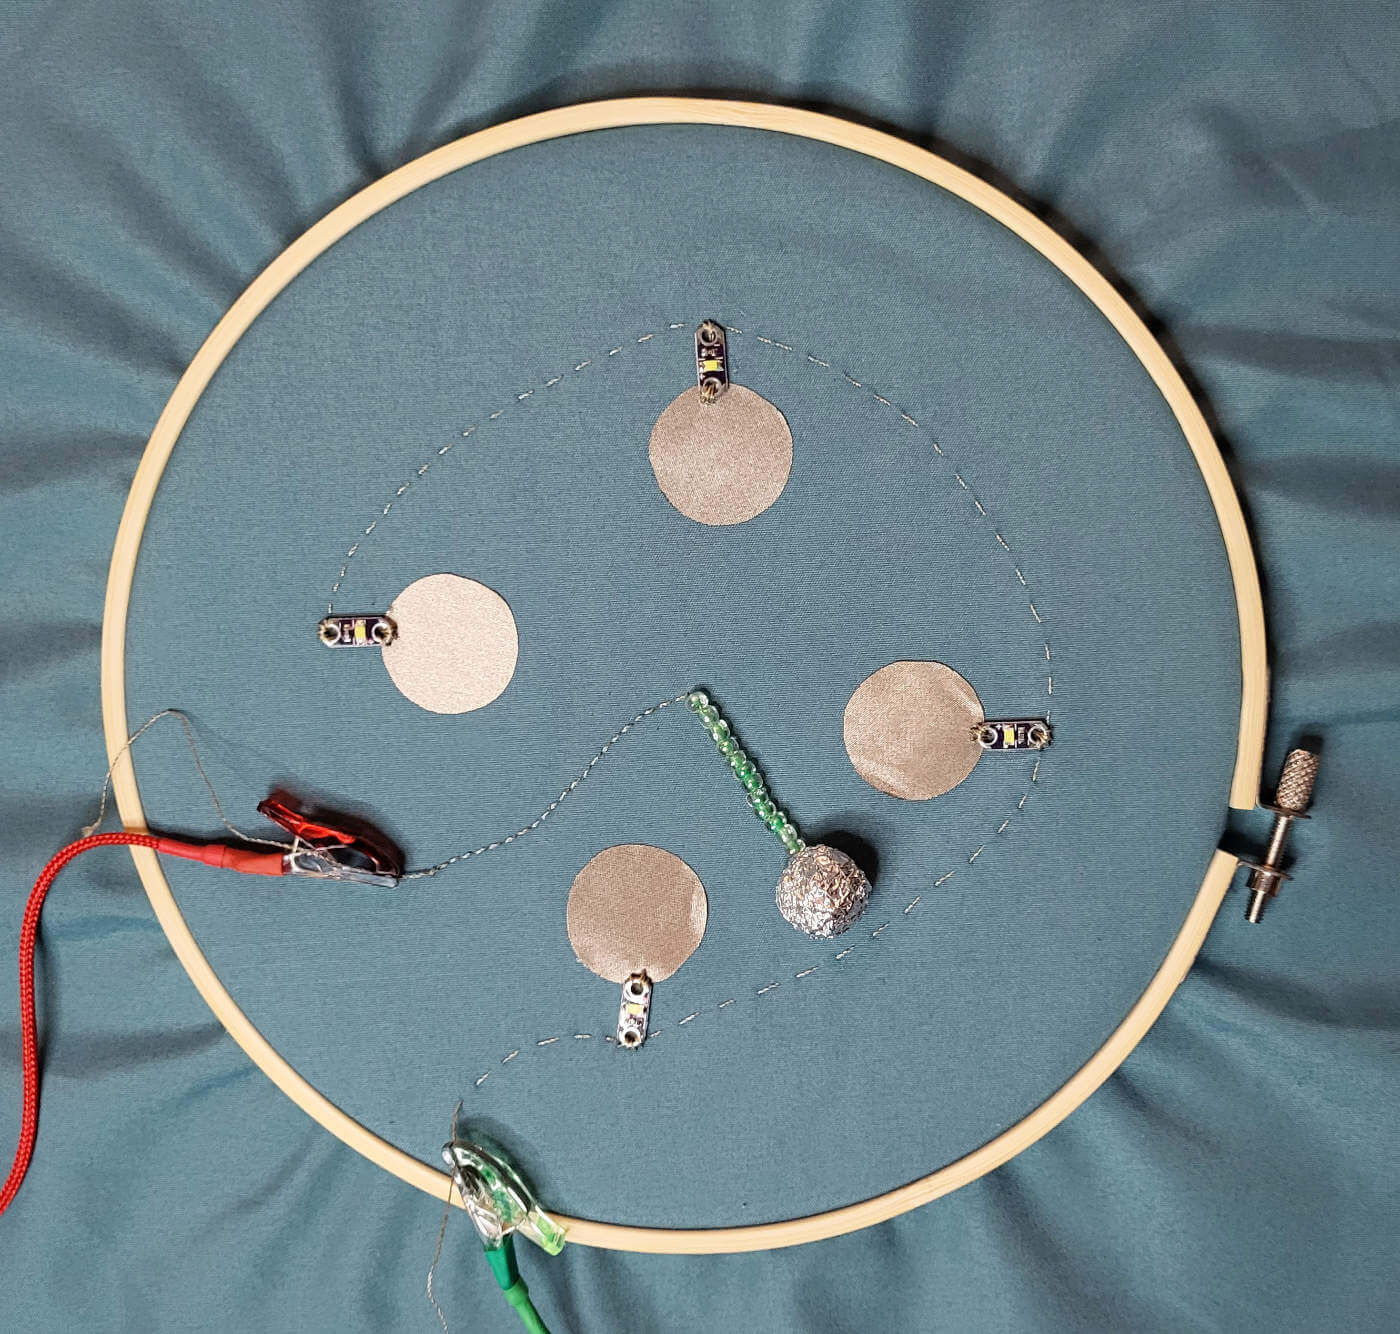
materials
- regular thread
- conductive thread
- conductive fabric
- aluminum foil
- plastic beads
- 4 SMD LED's
ARDUINO ANALOG SENSOR
I tested previously made bend sensor with Arduino and NeoPixels ring.
materials
- Neopixel ring
- 5 KOhm resistor
- Arduino UNO
- Breadboard
- Jumper wires
- Crocodiles
- Soft bend sensor
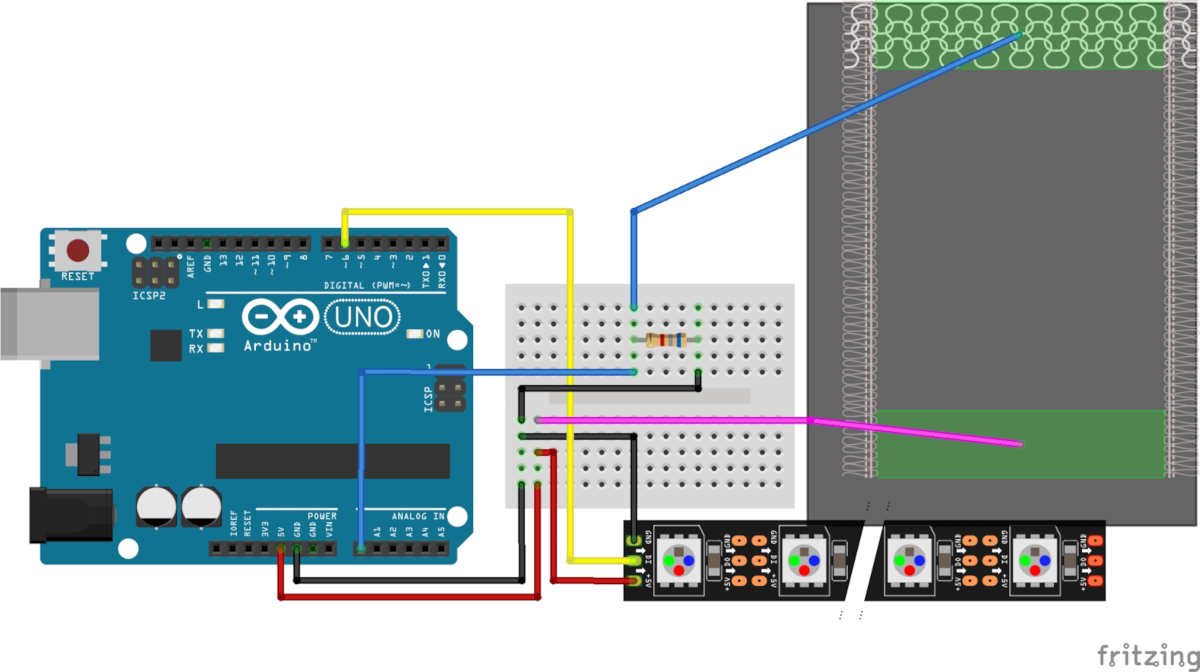
This analog sensor code is from Emmas 2nd day tutorial.
#include <Adafruit_NeoPixel.h>

#define PIN            6
#define NUMPIXELS      8

Adafruit_NeoPixel pixels = Adafruit_NeoPixel(NUMPIXELS, PIN, NEO_GRB + NEO_KHZ800);

uint32_t green = pixels.Color(0, 255, 155);
uint32_t off = pixels.Color(0, 0, 0);

int delayval = 100; // delay for half a second

// variables:
int sensorValue = 0;         // the sensor value
int sensorMin = 1000;        // minimum sensor value
int sensorMax = 0;           // maximum sensor value
const int sensorPin = A0;    // pin that the sensor is attached to

void setup() {
  Serial.begin(9600);
  pixels.begin(); // This initializes the NeoPixel library.
  pixels.show();            // Turn OFF all pixels ASAP
  pixels.setBrightness(50); // Set BRIGHTNESS to about 1/5 (max = 255)


   // turn on LED to signal the start of the calibration period:
  pinMode(13, OUTPUT);
  digitalWrite(13, HIGH);

  // calibrate during the first five seconds
  while (millis() < 5000) {
    sensorValue = analogRead(sensorPin);

    // record the maximum sensor value
    if (sensorValue > sensorMax) {
      sensorMax = sensorValue;
    }

    // record the minimum sensor value
    if (sensorValue < sensorMin) {
      sensorMin = sensorValue;
    }
  }

  // signal the end of the calibration period
  digitalWrite(13, LOW);
}

void loop() {
   int i;              // loop variable
   int value;          // analog read of potentiometer
   int display_value;  // number of NeoPixels to display out of NUMPIXELS

   // Read PIN value and scale from 0 to NUMPIXELS -1
   value = analogRead(A0);
   Serial.print(value);
   Serial.print(" - ");
   value = map(value, sensorMin, sensorMax, 0, NUMPIXELS);
   value = constrain(value, 0, NUMPIXELS);
   Serial.println(value);

   pixels.fill(green, 0, value);
   pixels.fill(off, value, NUMPIXELS);
   pixels.show();

   delay(delayval); // Delay for a period of time (in milliseconds).
}
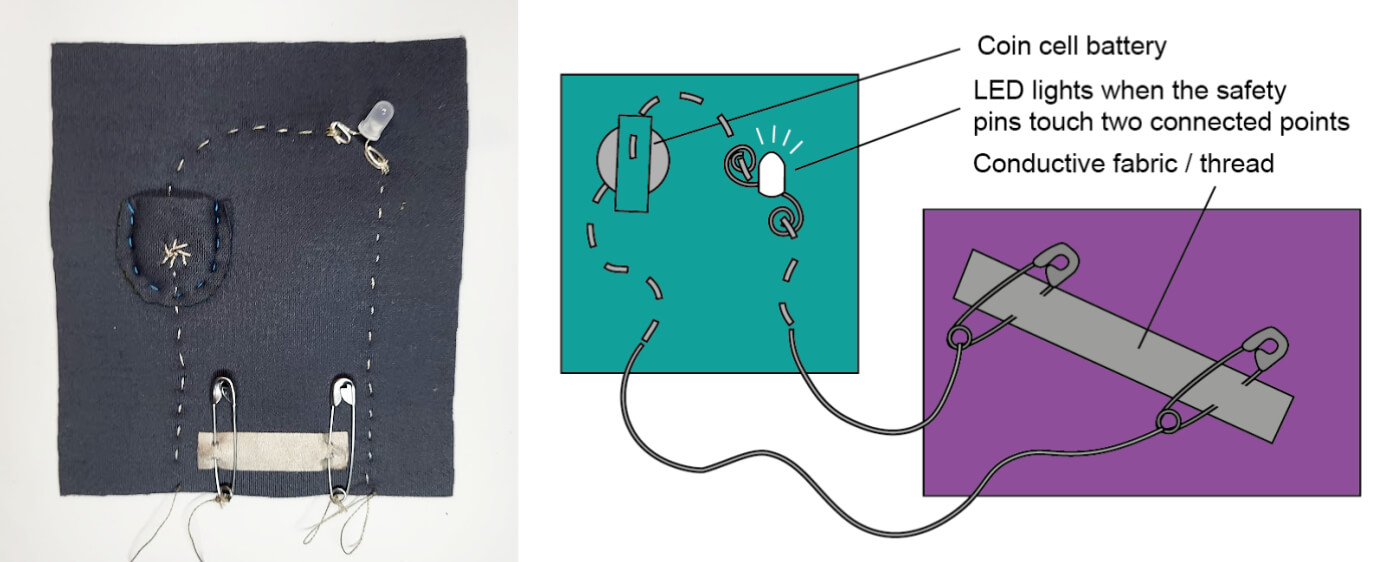
FINAL SWATCH
LED diodes will only allow current to flow in one direction. And when there's no current flow, there's no light. Luckily, this also means that you can't break an LED by plugging it in backward. This circuit has two 3V power sources, two switches and one switch with a coin wich allows it to make the shortage in the circuit and switch off the LED diodes.
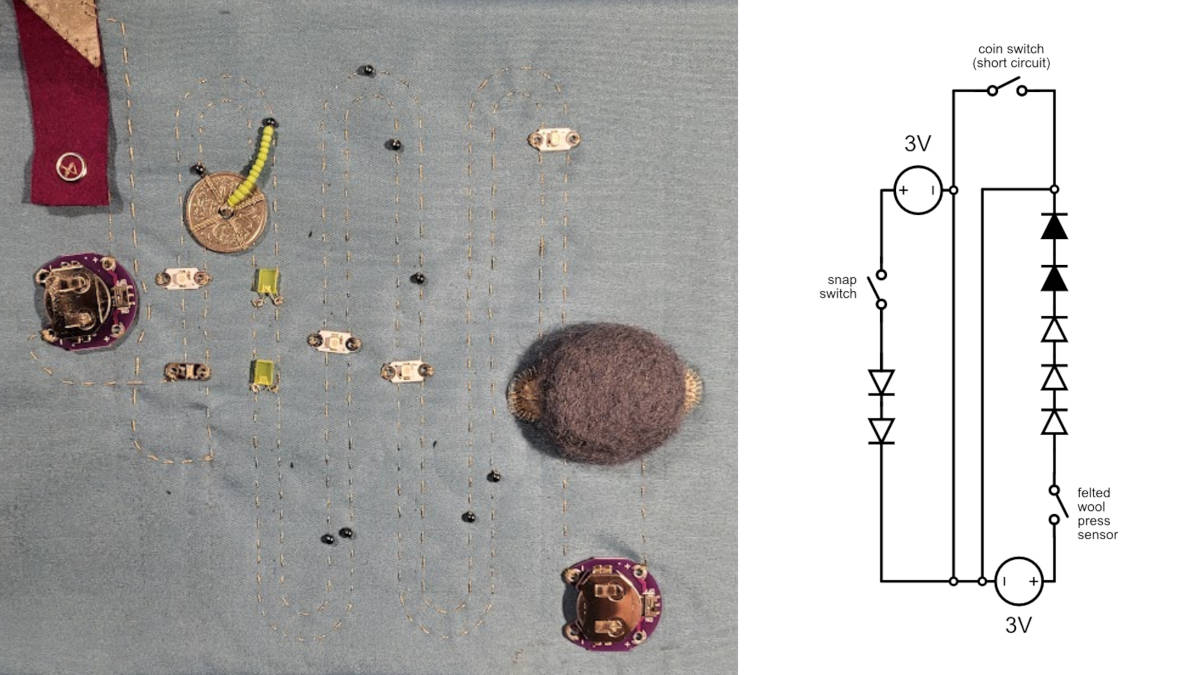
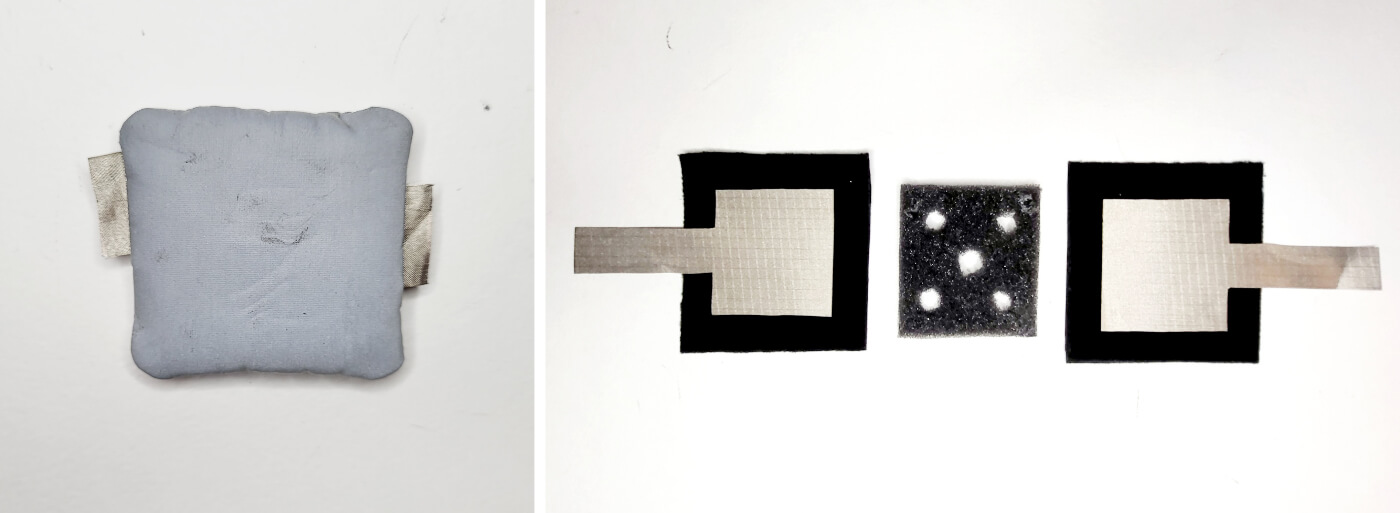
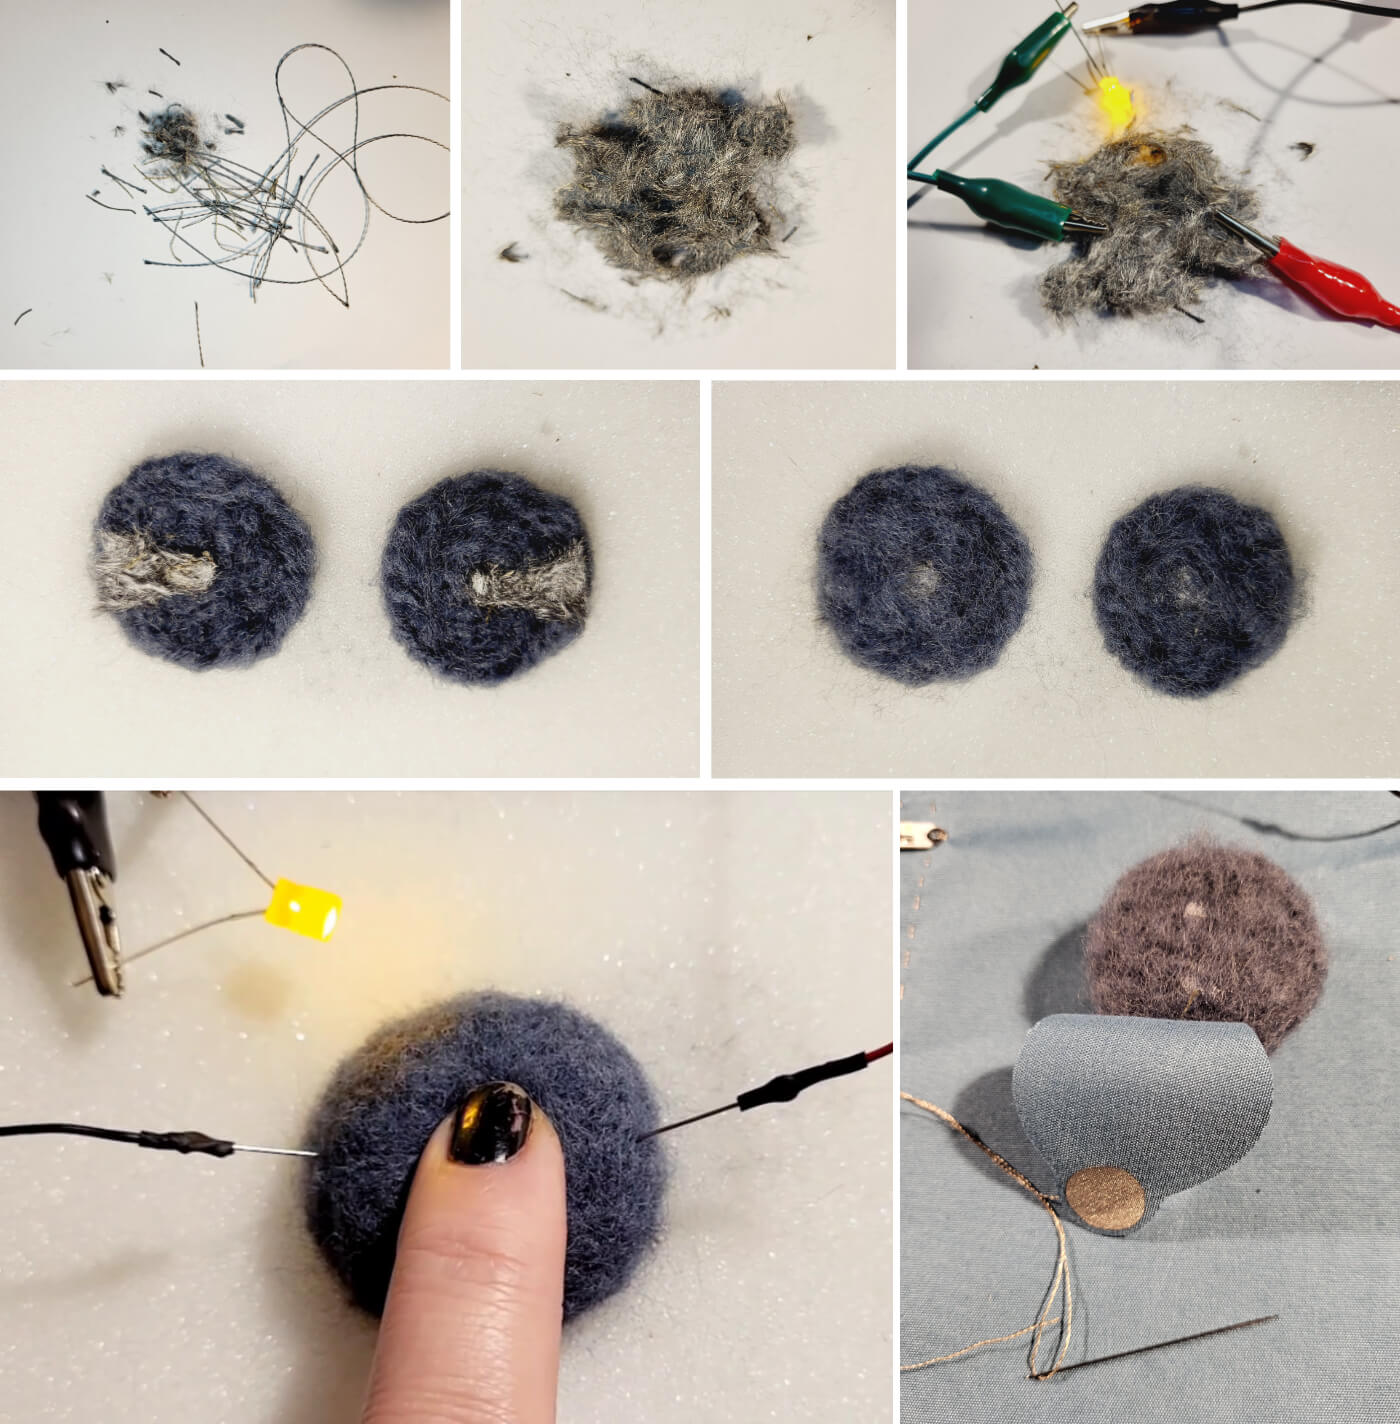
Felted wool press sensor
Since there was a lot of waste conductive thread left, I decided to experiment with it. To make this sensor you will need extra tools such as felting needle and a soft surface for felting, a piece of foam is best for this. To shred the conductive thread good to have good sharp scissors.
materials
- regular thread
- conductive thread waste
- wool bream
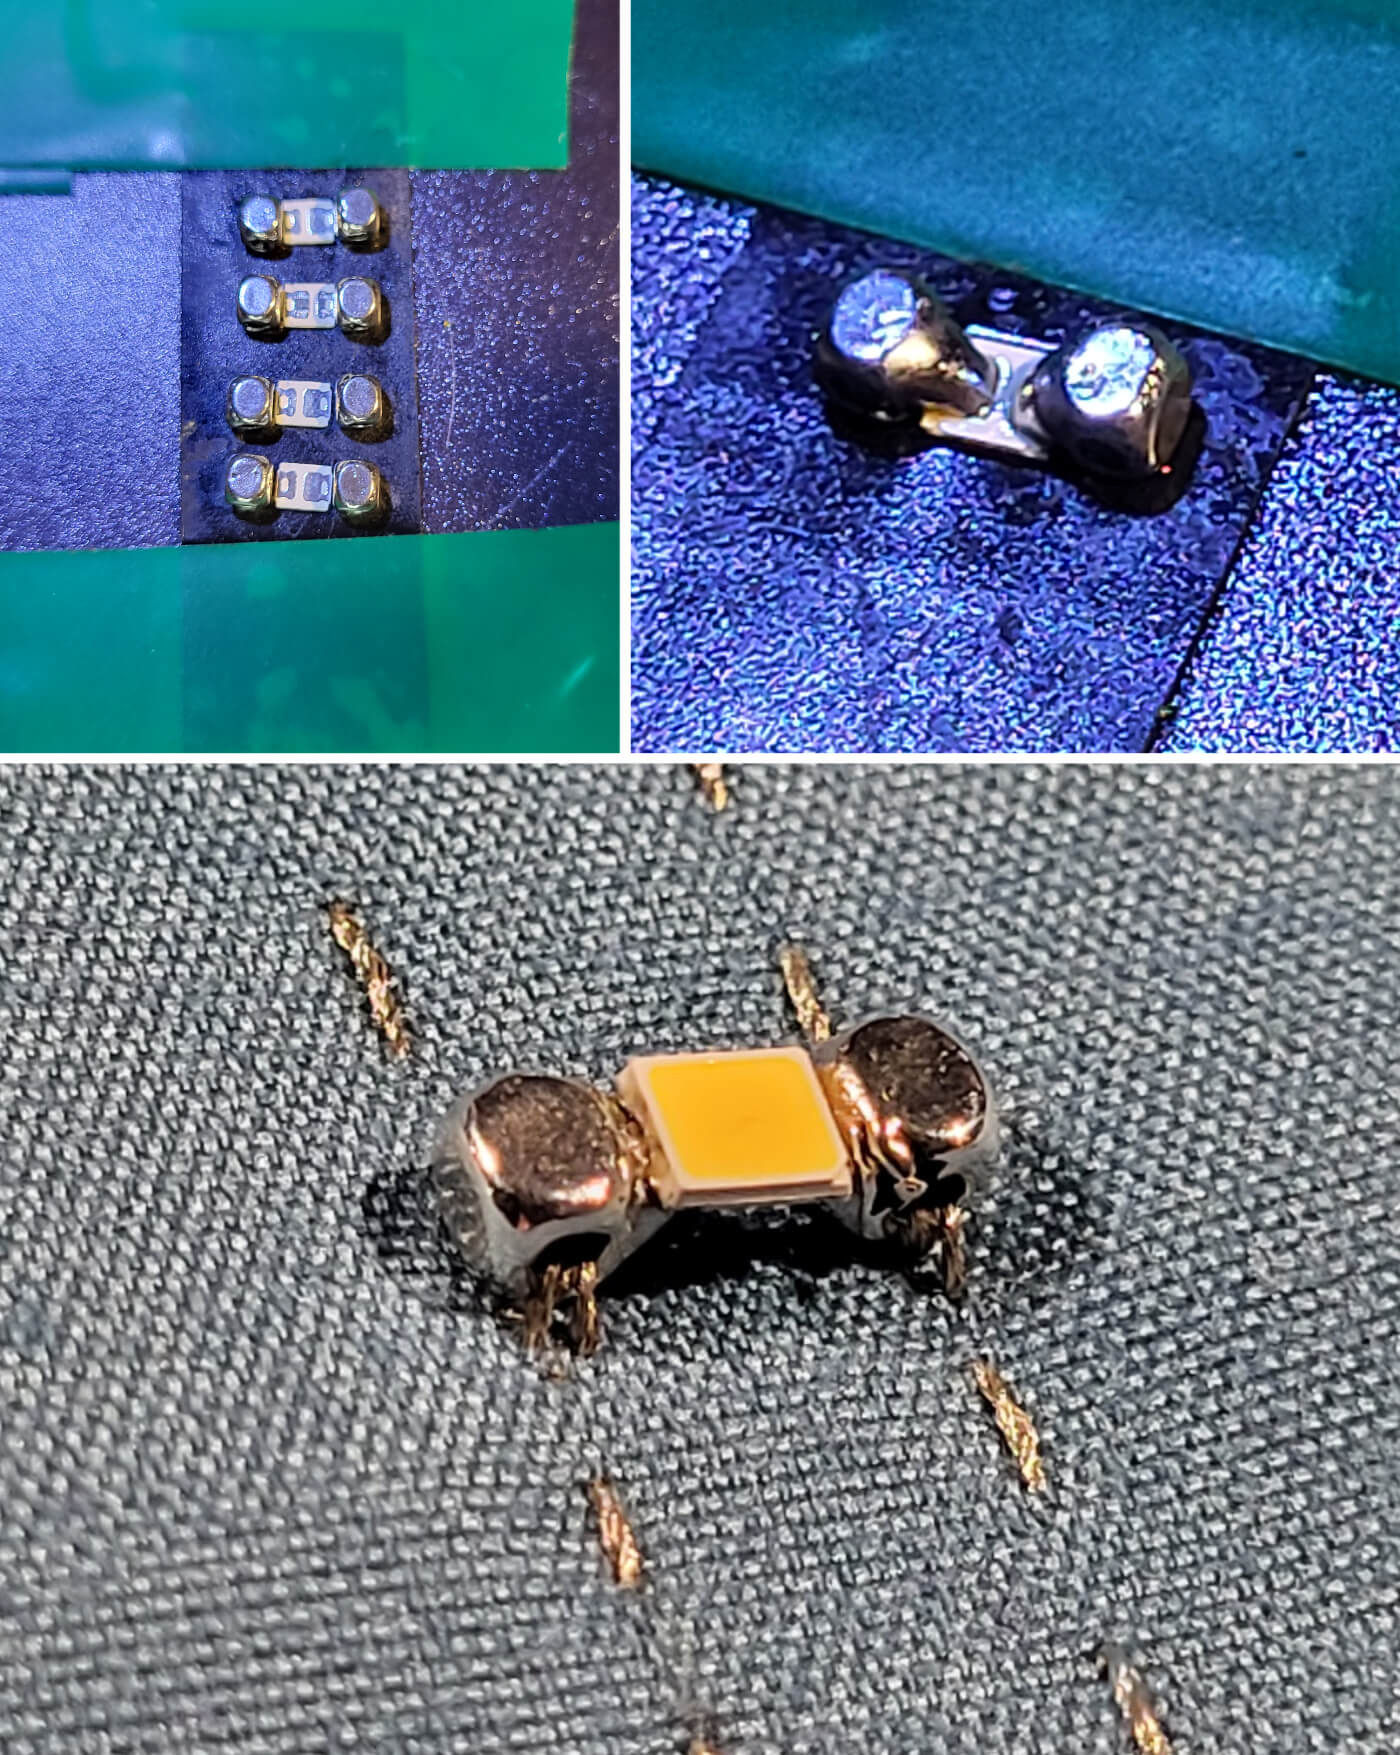
Soldering the SMD LED's
Also, I experimented with SMD LED's soldering and used the metal beads as sewable connections. To hold the LED in place isolation tape was used. Looking forward I want to make sewable and flexible PCB for SMD LED.
Clip Probe tools
Followed this very clear Irene Posch DIY tuttorial to make Clip Probe - soft "crocodile" clips.