10. Open Source Hardware - From Fibers to Fabric
For open source hardware I developed a DIY toolset to create and process biomaterials with special focus on bioleathers. With this I have given access to a DIY toolset for anyone who wants to work with biomaterials.
The main source of information is the Fabricademy lecture for week 10 on Open Source Hardware From Fiber to Fabrics. Especially page 20 to 29 of the presentation since they focuss on weaving and the loom.
But I also reference the Fabricademy lectures on Biomaterials, biochromes and Scaffolding.
Task "weekly assignment" Open Source Hardware - from fibers to fabrics
Learning outcomes
-
Research skills: the participant has acquired knowledge through references and Concept development
-
Design skills: the participant has learnt through sketches, 3D modeling, use of electronics, etc
-
Fabrication skills: the participant is capable of executing from file to production workflow, from 3D modelling to digital fabrication, electronics, materials
-
Process skills: Anyone can go through the process, understand it and reproduce it
-
Final outcome: The assignment is assembled and either complete or tested
-
Originality: Has the design been thought through and elaborated?
Student checklist
-
Research and document existing fabrication methods, machines and industries, add references, tutorials and sketches of the hardware you will make
-
Document the process of designing the files for your machine/machine-hack/tool and its fabrication including the assembly process
-
Document the schematic and the software source code (if any)
-
Document the parts and how to make your tool or machine
-
Document your BOM (Bill of materials): electronics, materials, their amount, etcetera (with references of the components)
-
Upload your 3D model and CAM files (if any)
-
Design, create and document a final outcome, a sample project of your process
-
Make a small video of the machine
-
Create an interface for controling your machine (extra credit)
Some interesting and inspiring alumni projects Fabricademy in Open Source hardware:
-
Clara Aciola Laminar flow hood
-
Rico Kanthatham Kumihimo Braiding Machine
-
Gabriela Lotaif Vaccuum travel box
-
Loes Bogers The Squeegee2000
Research & Ideation
Ideation
For this subject I:
1) lasercutted a loom from SheMakes.
The loom can be used to create a fabric base from plantfibers. In addition the crafter can later pour bioplastic or bio resin on the fibers to create a strong(er) biomaterial.
Here I chose a small loom from the SheMakes website to make swatches of material or small projects.
2) For the next step in this set I am adding another project I worked on during Fabricademy where I made 20 glassmolds to create several biomaterials.
3) To smoothen out the poured material in the glassmold, a vaccuumbox is needed to remove airbubbles. With the help of Theo, manager of IoTLab, I will also assemble a vaccuum box. This will help to smoothen biomaterials such as bioplastics and biosilicones by removing bubbles through air suction.
4) I also with some help from Rudy, my carpenter, made a stitching pony. This is a clamp or third arm to make stitching leather wear such as (bio)leather bags easier. This is a tool for postprocessing when the material has dried and is strong enough to assemble into a wearable.
Research
What is a loom?
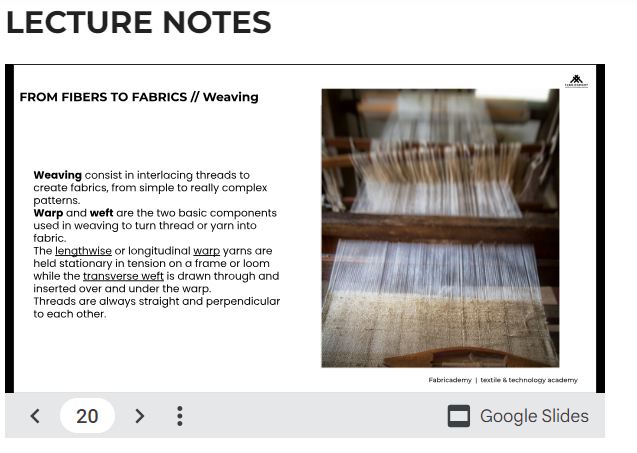
A loom is a frame or machine for interlacing (see INTERLACE sense 1) at right angles two or more sets of threads or yarns to form a cloth.
Interlacing: to unite by or as if by lacing together.
Source: Definition Merriam-Webster dictionary
The Cambridge dictionary online had a better definition:
to join different parts together to make a whole, especially by crossing one thing over another or fitting one part into another
Source: Definition Cambridge dictionary
Another explanation for Loom in Wikipedia:
A loom is a device used to weave cloth and tapestry. The basic purpose of any loom is to hold the warp threads under tension to facilitate the interweaving of the weft threads. The precise shape of the loom and its mechanics may vary, but the basic function is the same.
Source: Wikipedia
Online resources on Looms and weaving
Some of the many resources I found online on weaving and looms:
Tutorials from Creative Bugs Studios
DIY Pinterest Inspired Tapestry Room Decor + $5 DIY Weaving Loom // Lone Fox
Weaving with conductive material Kobakant
Mirrixlooms free weaving projects and tutorials
Kelly Casanova weaving lessons
Resources of fibers and designs
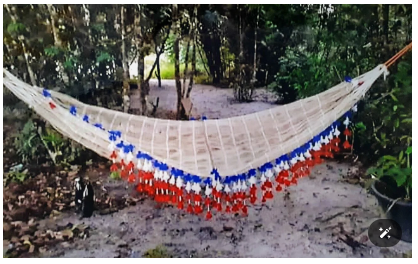
Local Weaving in Suriname
In Suriname it is especially the indigenous communities in the rainforest that traditionally weave and they have modernized the practices over the years to create craft for their feasts, traditions and for tourism craft.
Here are some examples.
My favorite woven item of all times: The cotton hammock!
Modernized Indigenous practices in beadweaving and garment weaving.
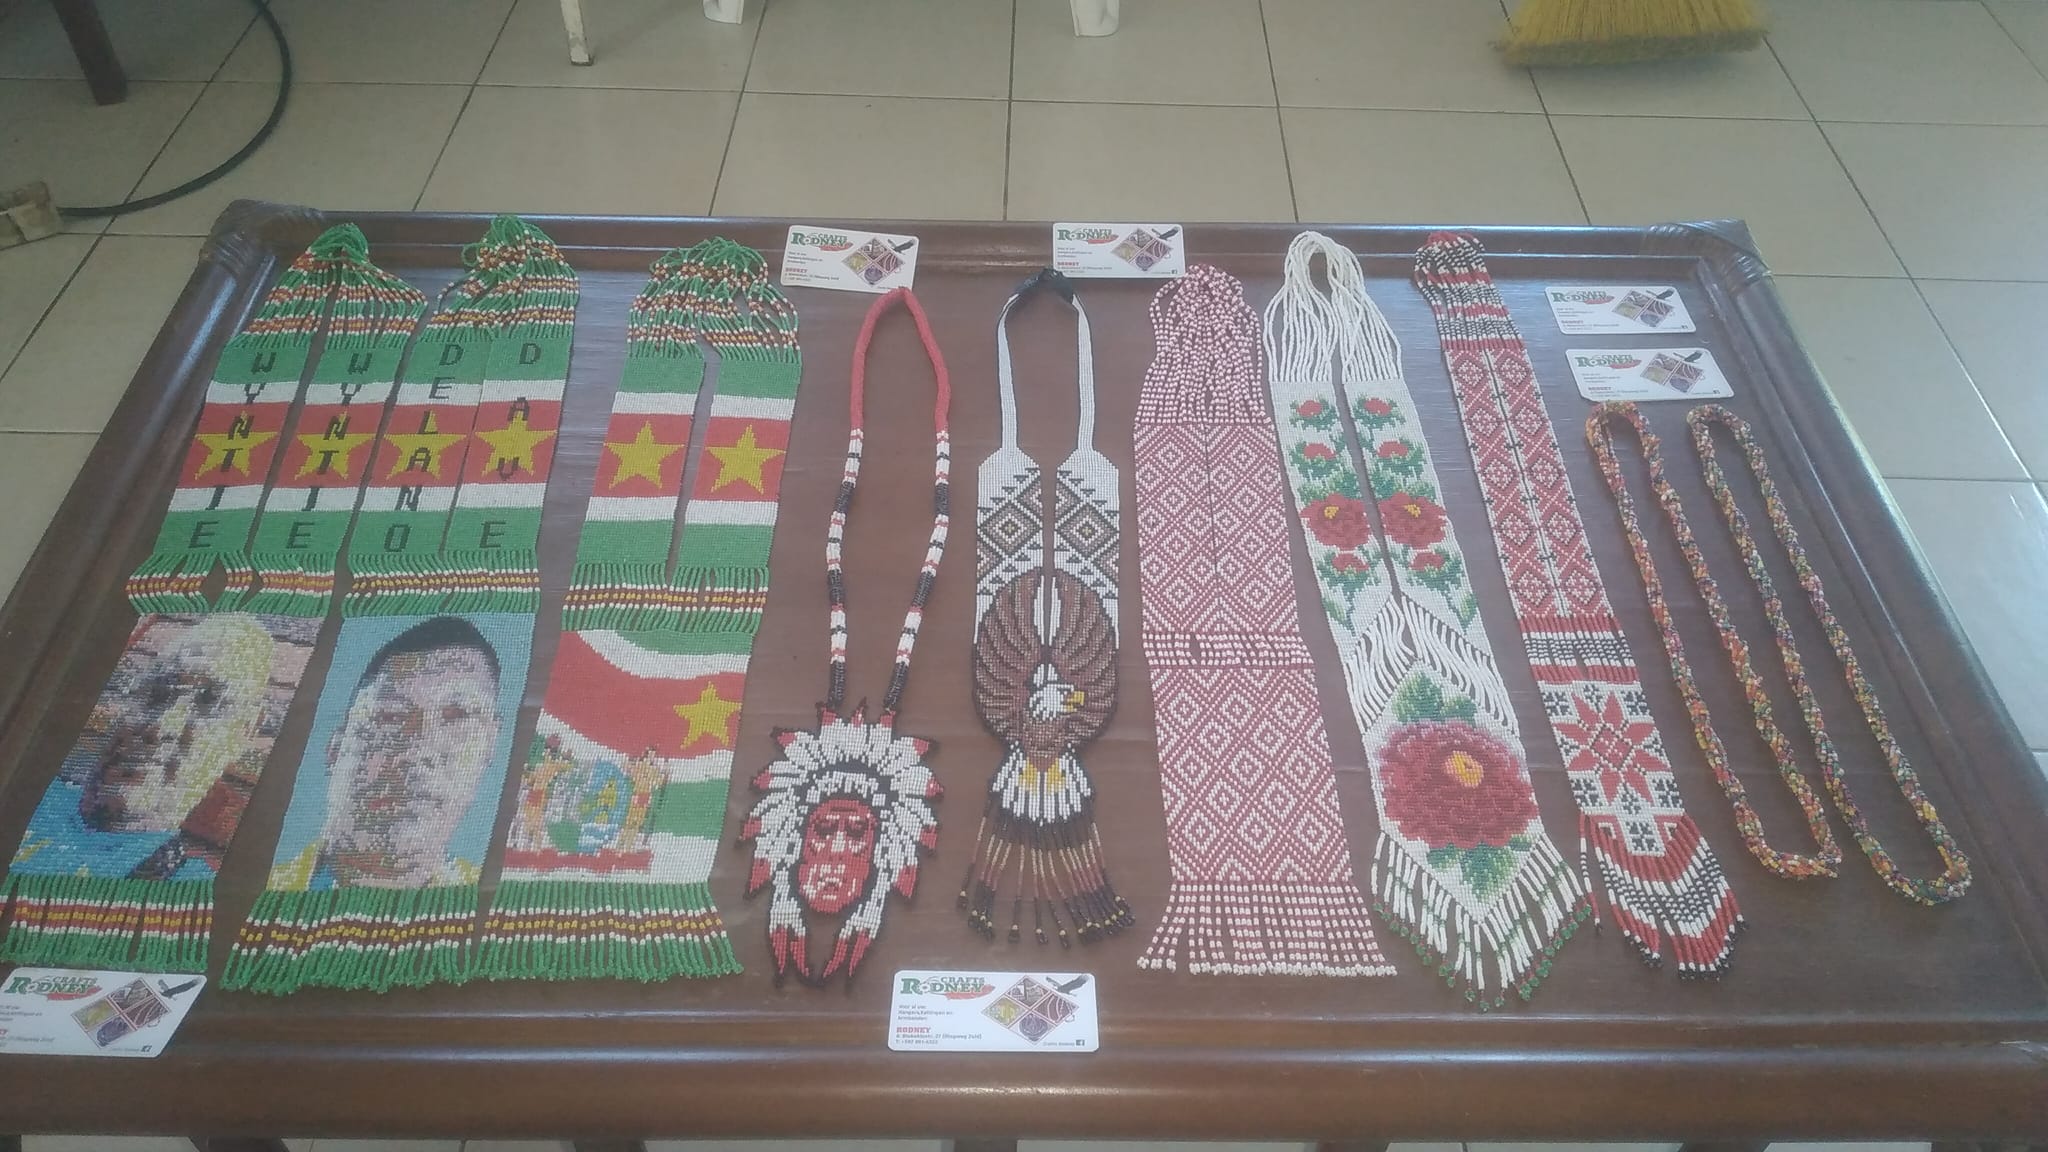
Source: Beadweaving by Indigenous Crafting
Source: News articleon Modern Indigenous Arts& Fashion weaving
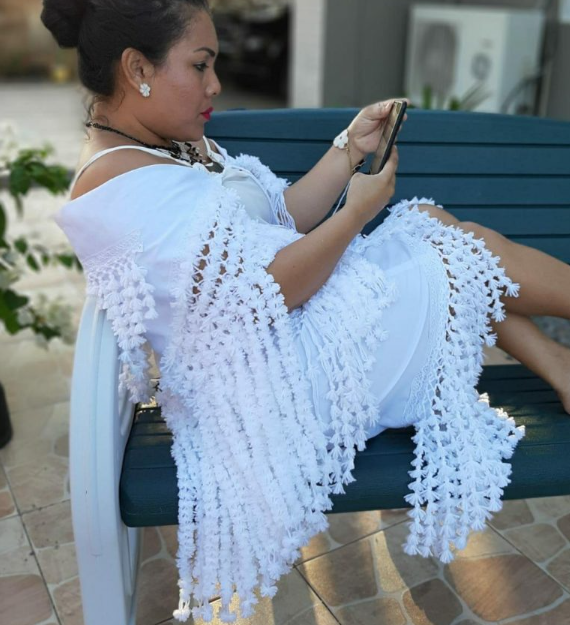
Inspiration
I enjoyed the colorful weaving patterns while researching.
Here are pictures showing some of the inspirations:
Looms&Weaving online by Reina Raveles
Sources:
Houzz Instagram: woven_paris In Weave Thread collective Australia
Process
I wanted to make a loom and try out weaving since I have never done this before. As an introduction I would try out a loom from She Makes. A small loom of less than 20 by 20 cm. The material I used is a piece of plywood, pre cut to 20 by 20 cm.
SheMakes Loom
For someone who never loomed or did any weaving this is a nice way to get a start.
A SheMakes digital loom Step by Step process
Here is a step by step how to replicate the She Makes loom kit.
SheMakesLoom process by Reina Raveles
STEP BY STEP
1) I downloaded a She Makes Loom.1
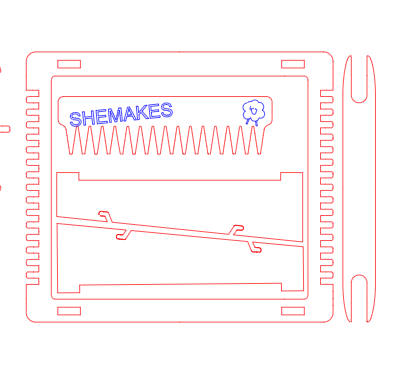
2) I opened it in Lightburn and send it to the lasercutter.
3) The lasercutter setting are
4) This is the result
5) I took the lasered pieces out of the loom. This took some time because of all the teeth. I didnt want to break anything. Then I had to clean all the grime from the sides. I you dont clean it your yarn turns black so its just something you have to do. Iused tissuepaper and a little water.
6) Next I sprayed clear coating on the loom just to be sure it wont leave smudges on a workpiece. I waited for 30 minutes to dry and not be sticky.
7) I locked the feet into the frame and after at first trying to figure out were the 2 other cut outs go (LOL) I found out that the 2 additiional cut outs are not part of the structure but they are tools.
8) Tools in the kit: What are they used for?
- A weavingcomb or Loom comb
- A weaving shuttle. In this case a stick shuttle.
Here is some information I found online about these tools.
LOOM COMB The loom comb is a weaver’s good friend that helps move the yarns to where they need to go.
What is a loom comb? A loom comb is a tool used to move the weft yarns into place. Of course you can use your hands to push the yarns down to the previous rows, but the density will not be even without a comb.
What is a loom comb made of? There are a wide variety of loom combs from material, texture, and size. Weavers have their own preference and you should pick a loom comb that fits your weaving needs the best.
How do you use a loom comb? Once a row of weft yarn is woven, the weaver takes the loom comb and beats the weft yarn down to the previous rows.
-Density and using a loom comb The harder you beat the weft yarns down, the tighter the yarns will be against the others, thus a higher density. The lighter you beat the yarns down the looser the pattern will be, thus lower density. The looser you beat the yarns down more of the warp yarns will be exposed.
In order to have balanced weaving you must beat the yarns at a consistent strength.
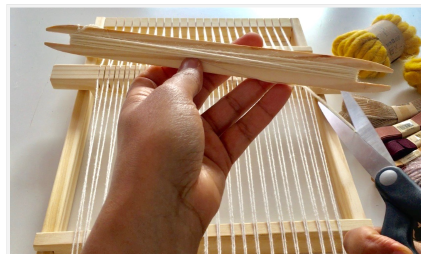
- A weaving shuttle. In this case a stick shuttle.
A stick shuttle is often made of wood, plastic or paper. Stick shuttles vary in size and shape. Short shuttles are used in shorter warp width projects and longer ones are used in longer width warp projects.
How do you use a weaving shuttle?
On the top and bottom of stick shuttles are grooves to wrap the yarn around it. Once you have the desired yarn, create a slipknot with it and attach the loop to the top of the grooves. Wrap the yarn from the top to the bottom, then the bottom to the top. Continue wrapping the yarn until you have reached the desired length cut the yarn and begin weaving. You can find a full tutorial for using a shuttle here on a previous blog post.
Source:Fibers and Design
This model 1 was obtained by She Makes handbook
Video
Here is a short video of all steps and a time-lapse of me assembling the loom. I hope to add a timelapse or picture of my first weave swatch soon!
Assembling the She Make Loom by Reina Raveles
Tools to make the loom
-
A Lasercutter
-
Lightburn software
-
Pocketknife
Supplies and materials
-
Water and tissue to clean the grime
-
Clear spray paint
-
Sanding paper in case there are some rough edges
BoM
Materials
Materials for the stitching pony
| Qty | Description | Price | Link | Notes |
|---|---|---|---|---|
| 1 | plywood 20 by 20 cm | 0$ | reclaimed wood | |
| 1 | clear spray paint | 2,50 $ | any hardware store or supermarket | the price is for a can |
| 1 | tissue or toilet paper (a few sheets) | 1 $ | Ultra Trading local hardware store |
Stitching pony
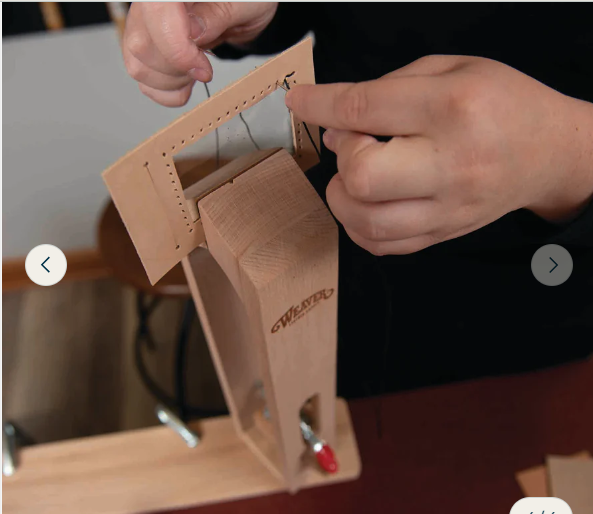
I first saw a stitching pony while ressearching how to cut and assemble (bio)leather purses. In one of the tutorials it came highly recommended by the instructor so I decided to look into it as a possible DIY project. It is not an expensive tool as it ranges from about 20 to 40 USD, although there are some fancy ones going all the way to 400 USD. In any case while researching I also came across some DIY tutorials so I decided to make this tool for OS Hardware week. It will also come in handy for future bioleather bags and workshops.
Full disclosure, I did not make the stitch pony by myself but got alot of help from my carpenter Rudy. It was definetly a subject to collaborate on for me. More about this in the process description.
What is a stitching pony?
A stitching pony is a tool for leather craft. Usually it is used while a leather bag or shoe is stitched together. It functions like a 3rd arm. A person can do the work in standing position, keeping the bag in one place, compared to sitting on a worktable and turning the bag or workpiece left and right. When doing a saddle stitch where the crafter needs both hands to stitch 2 needles in opposite directions, the stitching pony is essential.
Many different options of Stitching Pony models online
Many models stitching ponies online by Reina Raveles
Descriptions online
The following descriptions were found online:
Stitching pony keeps leather or fabric securely in place when stitching or lacing. ... Measures are approximately 15-1/2" L x 3" W x 14-1/2" H when assembled.
Source: Weaver Leather Supply
Why use a stitching pony?
The lacing and stitching pony allows the crafter to finish leather craft projects faster since they do not have to use one hand to hold the leather project. The lacing and stitching pony firmly holds the leather item in place so they can use both hands for lacing or sewing.
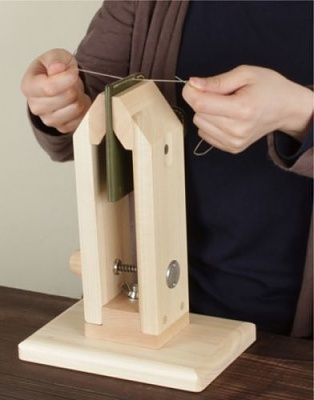
When it comes to stitching leather, it can be difficult to hold the material steady while also ensuring that the seams are tight and the thread is pulled smoothly. That’s where a leather stitching pony can come in handy. By holding the leather material securely, it frees up your hands to focus on the stitching work.
Source: International Leather Club
Requirements/ Specs
Important requirements for a good functioning stitching pony:
-
Stability: when working the stitch pony should not move, bend or be shaky, wiggly. A clamp keeps it in place on a table or workbench. The wood used has to be symmettric and the base needs to be straight.
-
Strong grip: when closed the beak/ clamp at the top should secure the material/ workpiece without moving or falling.
-
Enough space: When clamped, the workpiece should have enough space.
-
No damage: The workpiece should not be damaged while clamped on the stitching pony. Protective pieces of leather or fabric can be glued to both clamps to help prevent possible scratching of leather workpiece. The wood used should also be sanded properly.
-
1 flexible arm, 1 rigid arm: The hinge on the bottom and the butterfly nut in the middle should be on the same arm, the side that opens. The clamp to the table should be on side of the rigid arm.
ONLINE TUTORIALS
Online there are plenty DIY tutorials on making your own stitching pony. Here are a few links. I liked the Youtube tutorial from Open Sea Leather best. The tutorials focuses on a simple form usually made from wood leftovers. I like this concept of upcycling wood so I went for this option.
- Tutorial How to Make a Stitching Pony! Beginner Leather Craft by Open Sea Leather Co. Tutorials
Tools to make the stitching pony
-
Electrical Powertools
-
Circullar Saw
-
Power drill
-
Sander
Handtools:
* screwdriver
-
Clamps
-
Measurment tape or ruler
BoM
Materials
Materials for the stitching pony
| Qty | Description | Price | Link | Notes |
|---|---|---|---|---|
| 4 | wood 1 by 3 | 0$ | reclaimed wood | |
| 1 | L-bracket | 0.66 $ | Ultra Trading local hardware store | |
| 3 | washers | 0.15 $ | Ultra Trading local hardware store | |
| 1 | butterfly nut | 0.10$ | reclaimed wood | |
| 1 | hinges | 1.00 $ | Ultra Trading local hardware store | has to be bought in pairs, but only need 1 |
| 1 | carriage bolt | 0.30 $ | Ultra Trading local hardware store | |
| 1 | C-clamp | 2.16 $ | Ultra Trading local hardware store | |
| 1 | spring | 2.16 $ | Ultra Trading local hardware store | |
| 8 | screws long | 0.24 $ | Ultra Trading local hardware store | |
| 8 | screws short | 0.24 $ | Ultra Trading local hardware store | |
| 2 | pieces of leather | 0 $ | left overs | |
| 1 | contact cement | 10 $ | Kuldipsingh | |
| 1 | wood glue | 3.70 $ | Kuldipsingh |
In total I spend approx US$ 7 on materials, if I had to spend monney on the adhessives it would have been US$ 20.70
Process to make a stitching pony
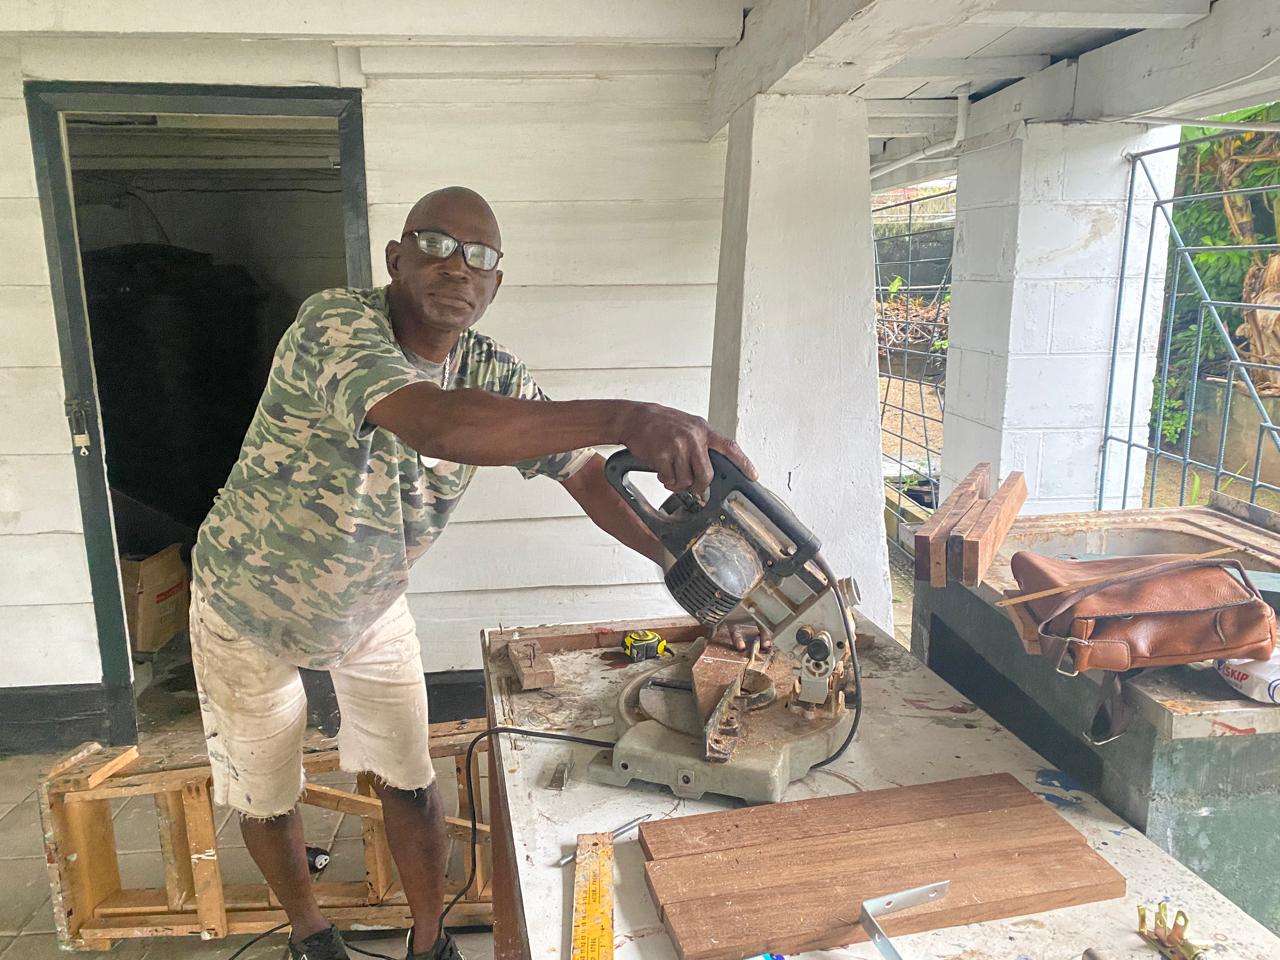
1) If you can't do it by yourself, find a helper! Someone in the lab, handyman or carpenter. In my case: Rudy!
First piece of advice I received is not to use the beautiful tropical hardwood I first chose. They looked really nice and sanded but would be too hard to drill.
2) We rewatched the tutorial a few times to catch the details.
Open Sea Leather Co Tutorials
3) I made a sketch - Frankenstein
The sketch shows the stitching pony completely locked and completely open.

4) Then we made a checklist of everything needed and went to the hardware store.
The checklist for the Stitching pony consists of:
-
4 Wood scraps/left over 1x3 inch length 15 inch or 38 cm
-
1 L bracket approx 6 by 4 cm
-
1 hinge (but you have to buy a pair) 2,5 x 1 3/4
-
1 carriage bolt 4,5 or 5 inch x 1/4
-
3 swatchers
-
1 butterfly nut 1/4 inch
-
spring 1/4 inch
-
C-clamp 4 to 5 inch
-
Woodglue
-
Contact cement
-
small Nails
-
8 long Screws 4 or 5 cm
-
8 short Screws 2 cm
-
piece of leather 25 by 25 cm
-
2 pieces of chalk
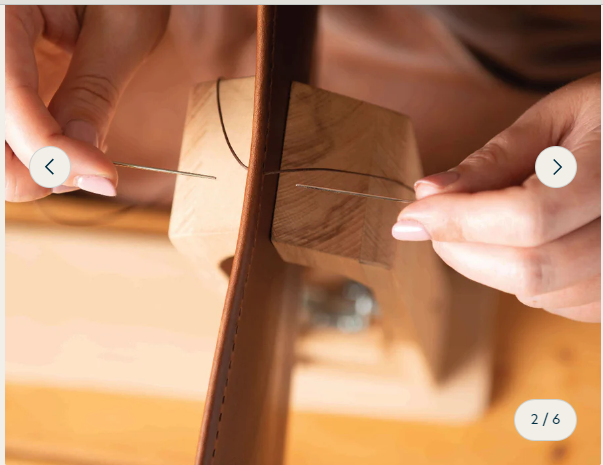
5) We marked everything with a piece of chalk before cutting and drilling
Here you can see how we did it:
Process stitching pony by Reina Raveles
6) All parts were cut according to the markings with a circle saw.
7) Then everything was assembled. If something didnt fit or stand straight it had to be sanded For extra strength and stability some skrews were drilled in from the bottom of the base into the rigid arm, apart from the bracket.
8) After assembly, 2 pieces of leather were glued to the clamps as a precaution to protect the workpieces from scratching.
Here you can see the assembly and attachment of the leather.
Cutting&Assembly(1) stitching pony by Reina Raveles
Cutting&Assembly(2) stitching pony by Reina Raveles
Video
Find the video of a piece clamped by the stitch pony. (Note: I still had to attach the leather)
Testing the stitch pony by Reina Raveles
