Process
WASP 2040 clay 3D printer
Today clay 3d printer is playing great role in the sustainability and enviromental designs and solutions. Check WASP2040
I will put some helpful referances and helpful tutorials for the machine as the issues and problems with clay machine are common and from all good and bad and trails i had during two months i would advise you to be prepare for trails and to invest in understanding the machine and here are some helpful links :
Clay 3D printer instrustions read before use
Safety
Safety instructions for your WASP Clay 3D printer blog should emphasize personal protective equipment, pressure limits, and maintenance protocols to prevent injuries from moving parts, high pressure, or clay handling.
Personal Protective Equipment Always wear protective gloves, safety shoes, protective workwear,during operation, preparation, or maintenance. Use dielectric gloves for any electrical work and nitrile gloves for clay handling to avoid skin irritation.
Pressure and Tank Safety Never exceed 8 bars of pressure; ensure both tank caps are fully tightened before pressurizing. Do not point the pressurized tank at people, and verify all pipes are correctly connected without deformations or leaks.
Operation Hazards Pause printing via the yellow button before interventions near moving parts; never insert fingers or body parts into the extruder or work area. Keep children away, do not eat extruded materials, and maintain distance during operation to avoid emissions.
Maintenance Rules Disconnect power and release air pressure before cleaning or adjustments; only trained personnel should perform work using original parts. Check the stepper motor fan regularly, ensure no clogs, and follow safety regulations for mechanical interventions.
Design Process Software
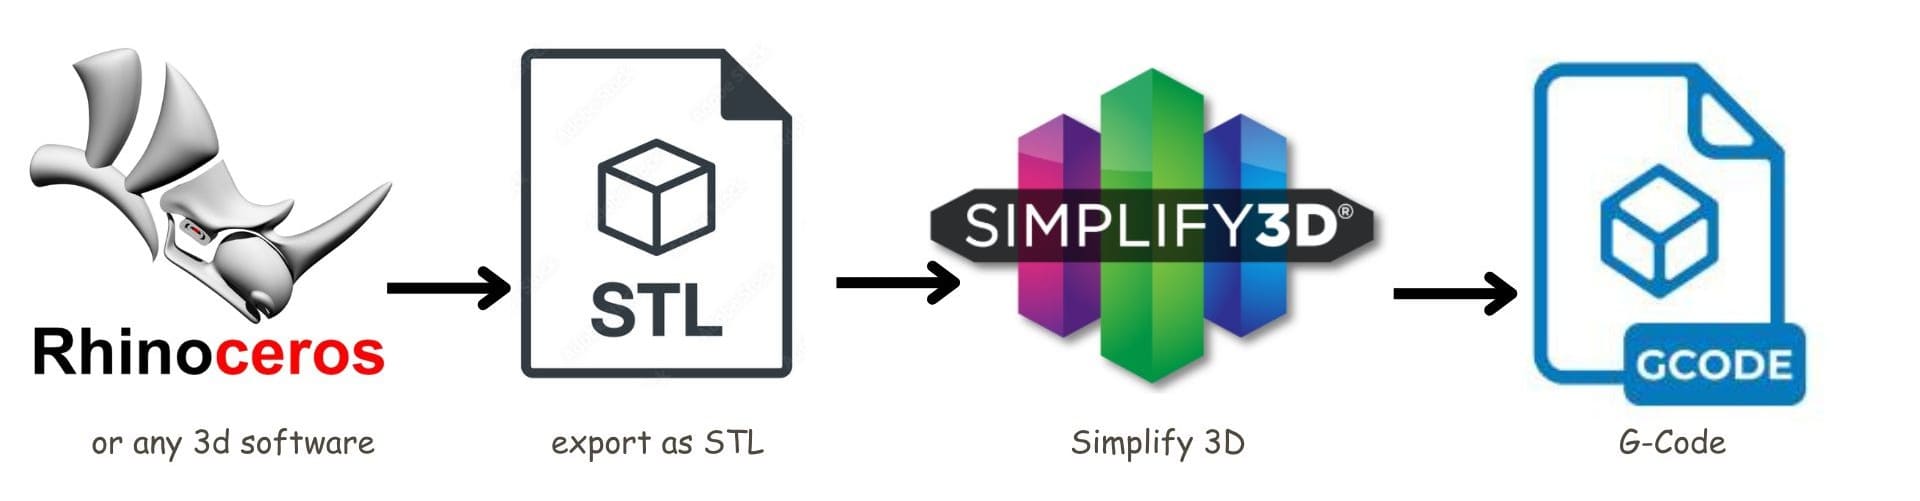
Using 3d software and here i used Rhino and blender then export the file as stl so it could be sliced though simplify 3d and export it as G-Code - as th wasp 2040 read G-code files .
Clay 3D print - exploration
1. Local Commercial Clay - Sama
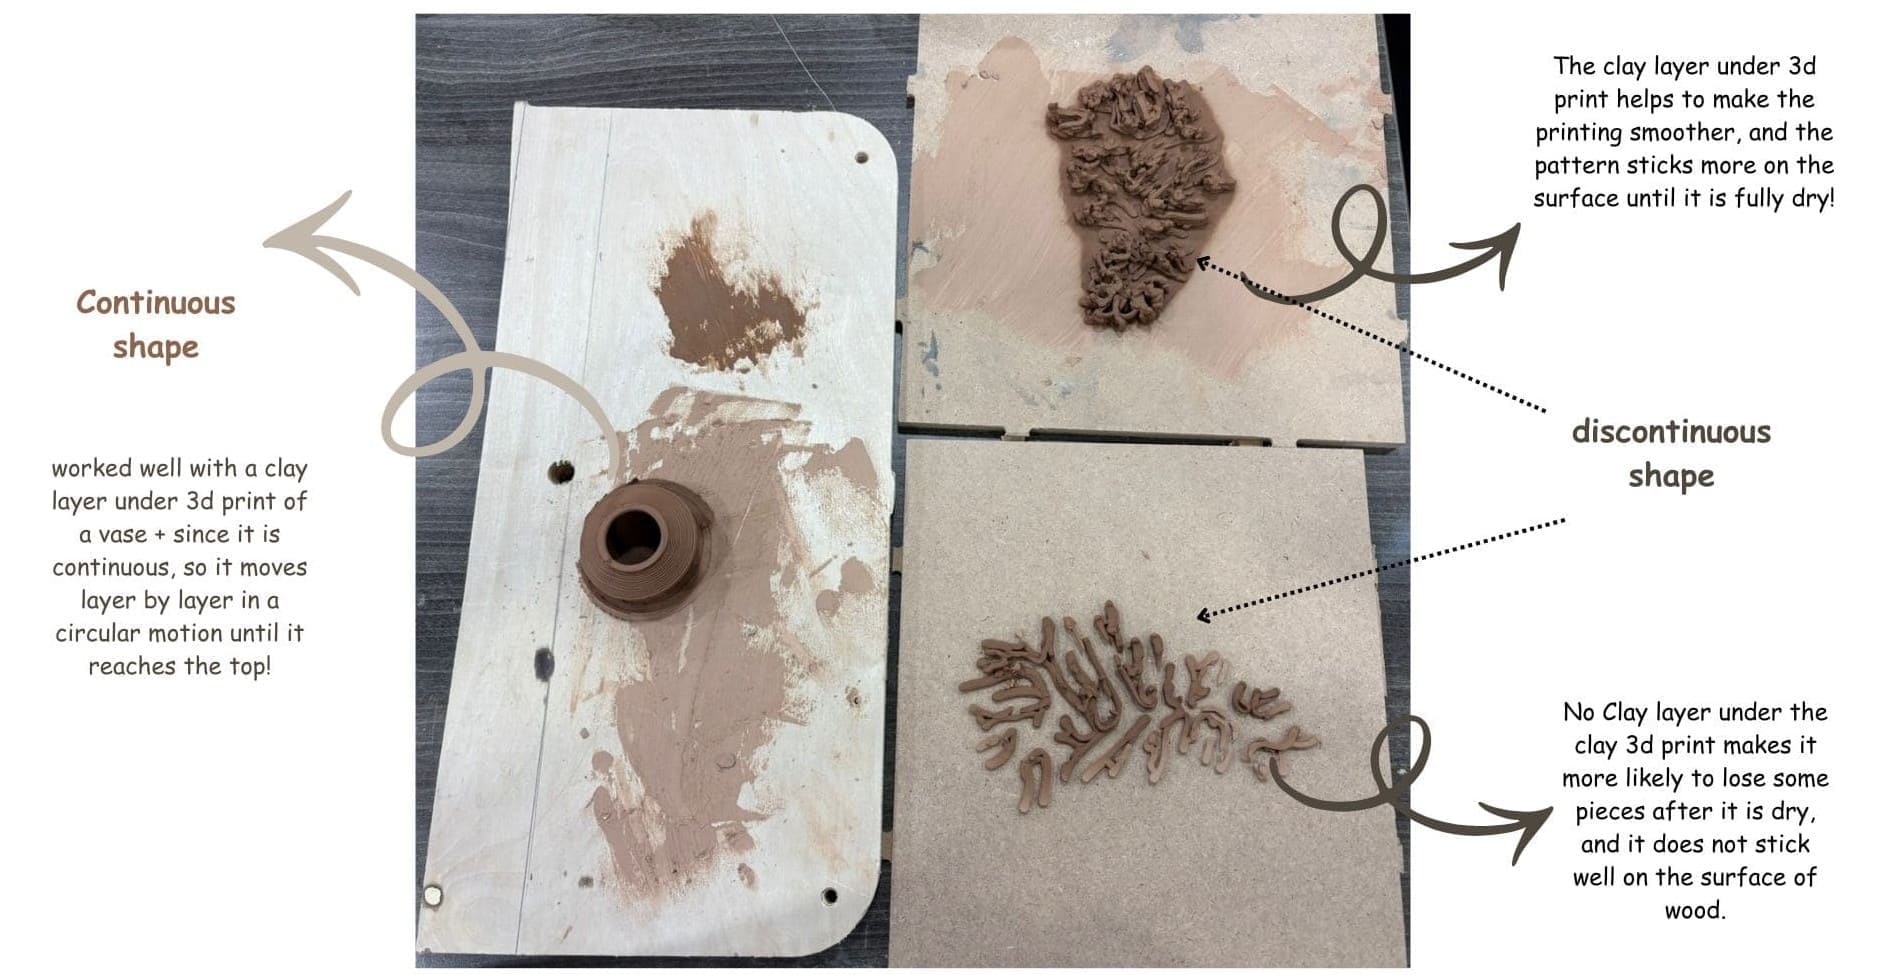
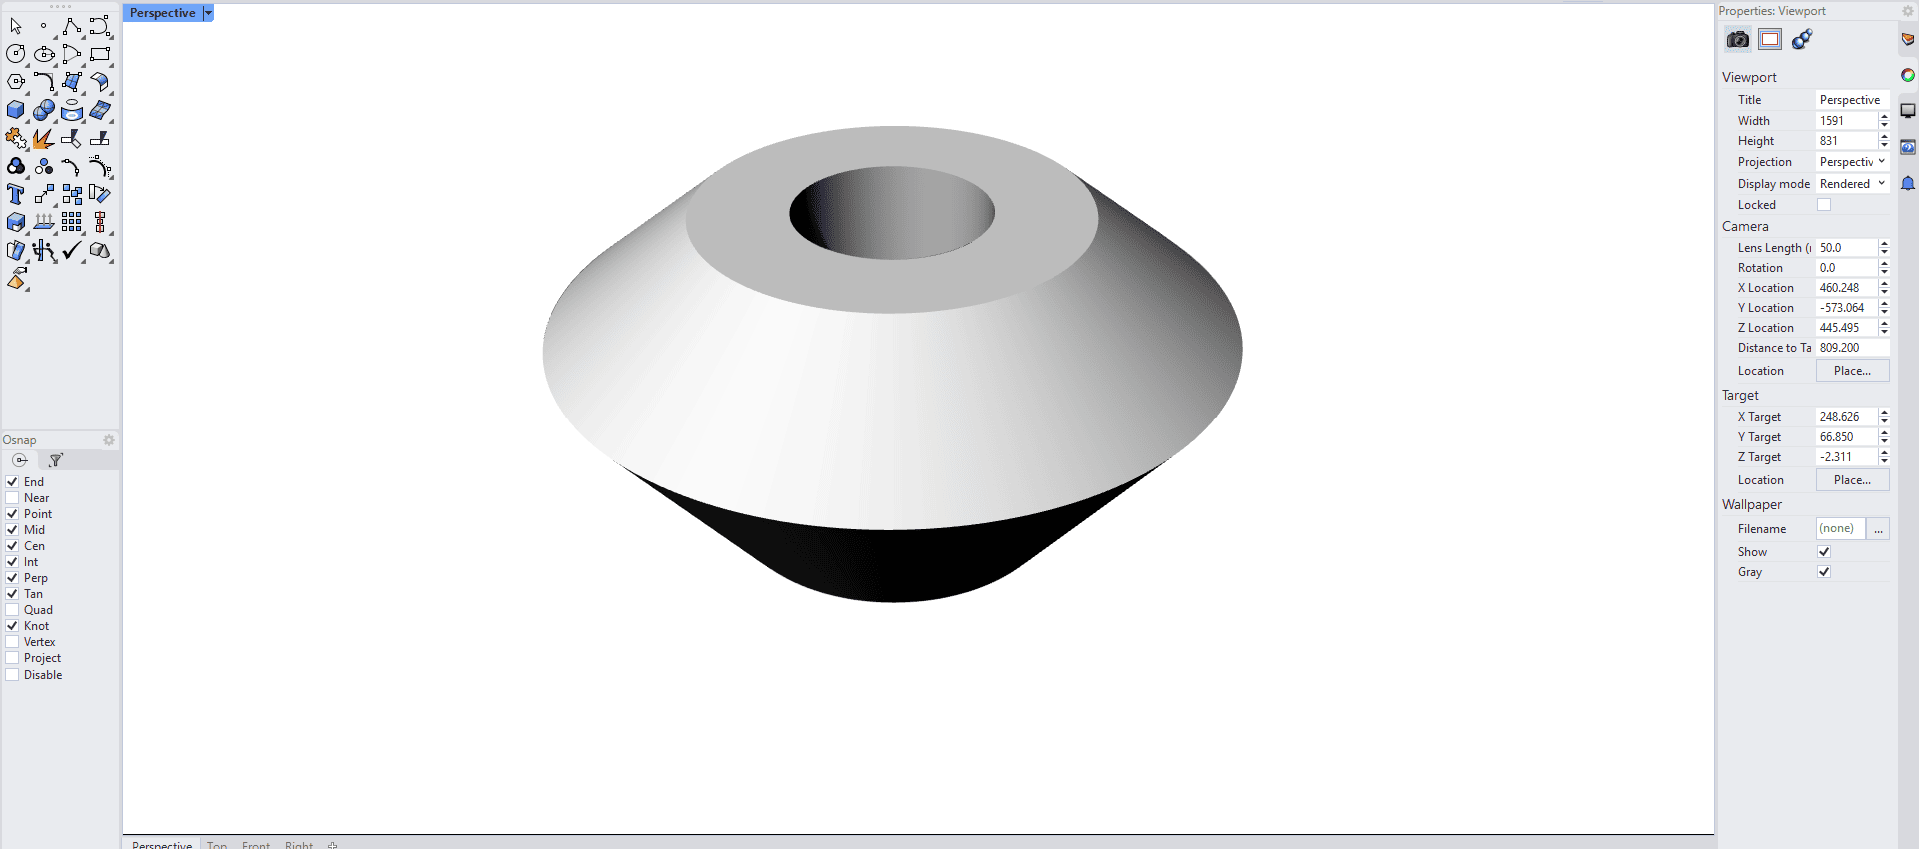
Continuous Layer- Vase
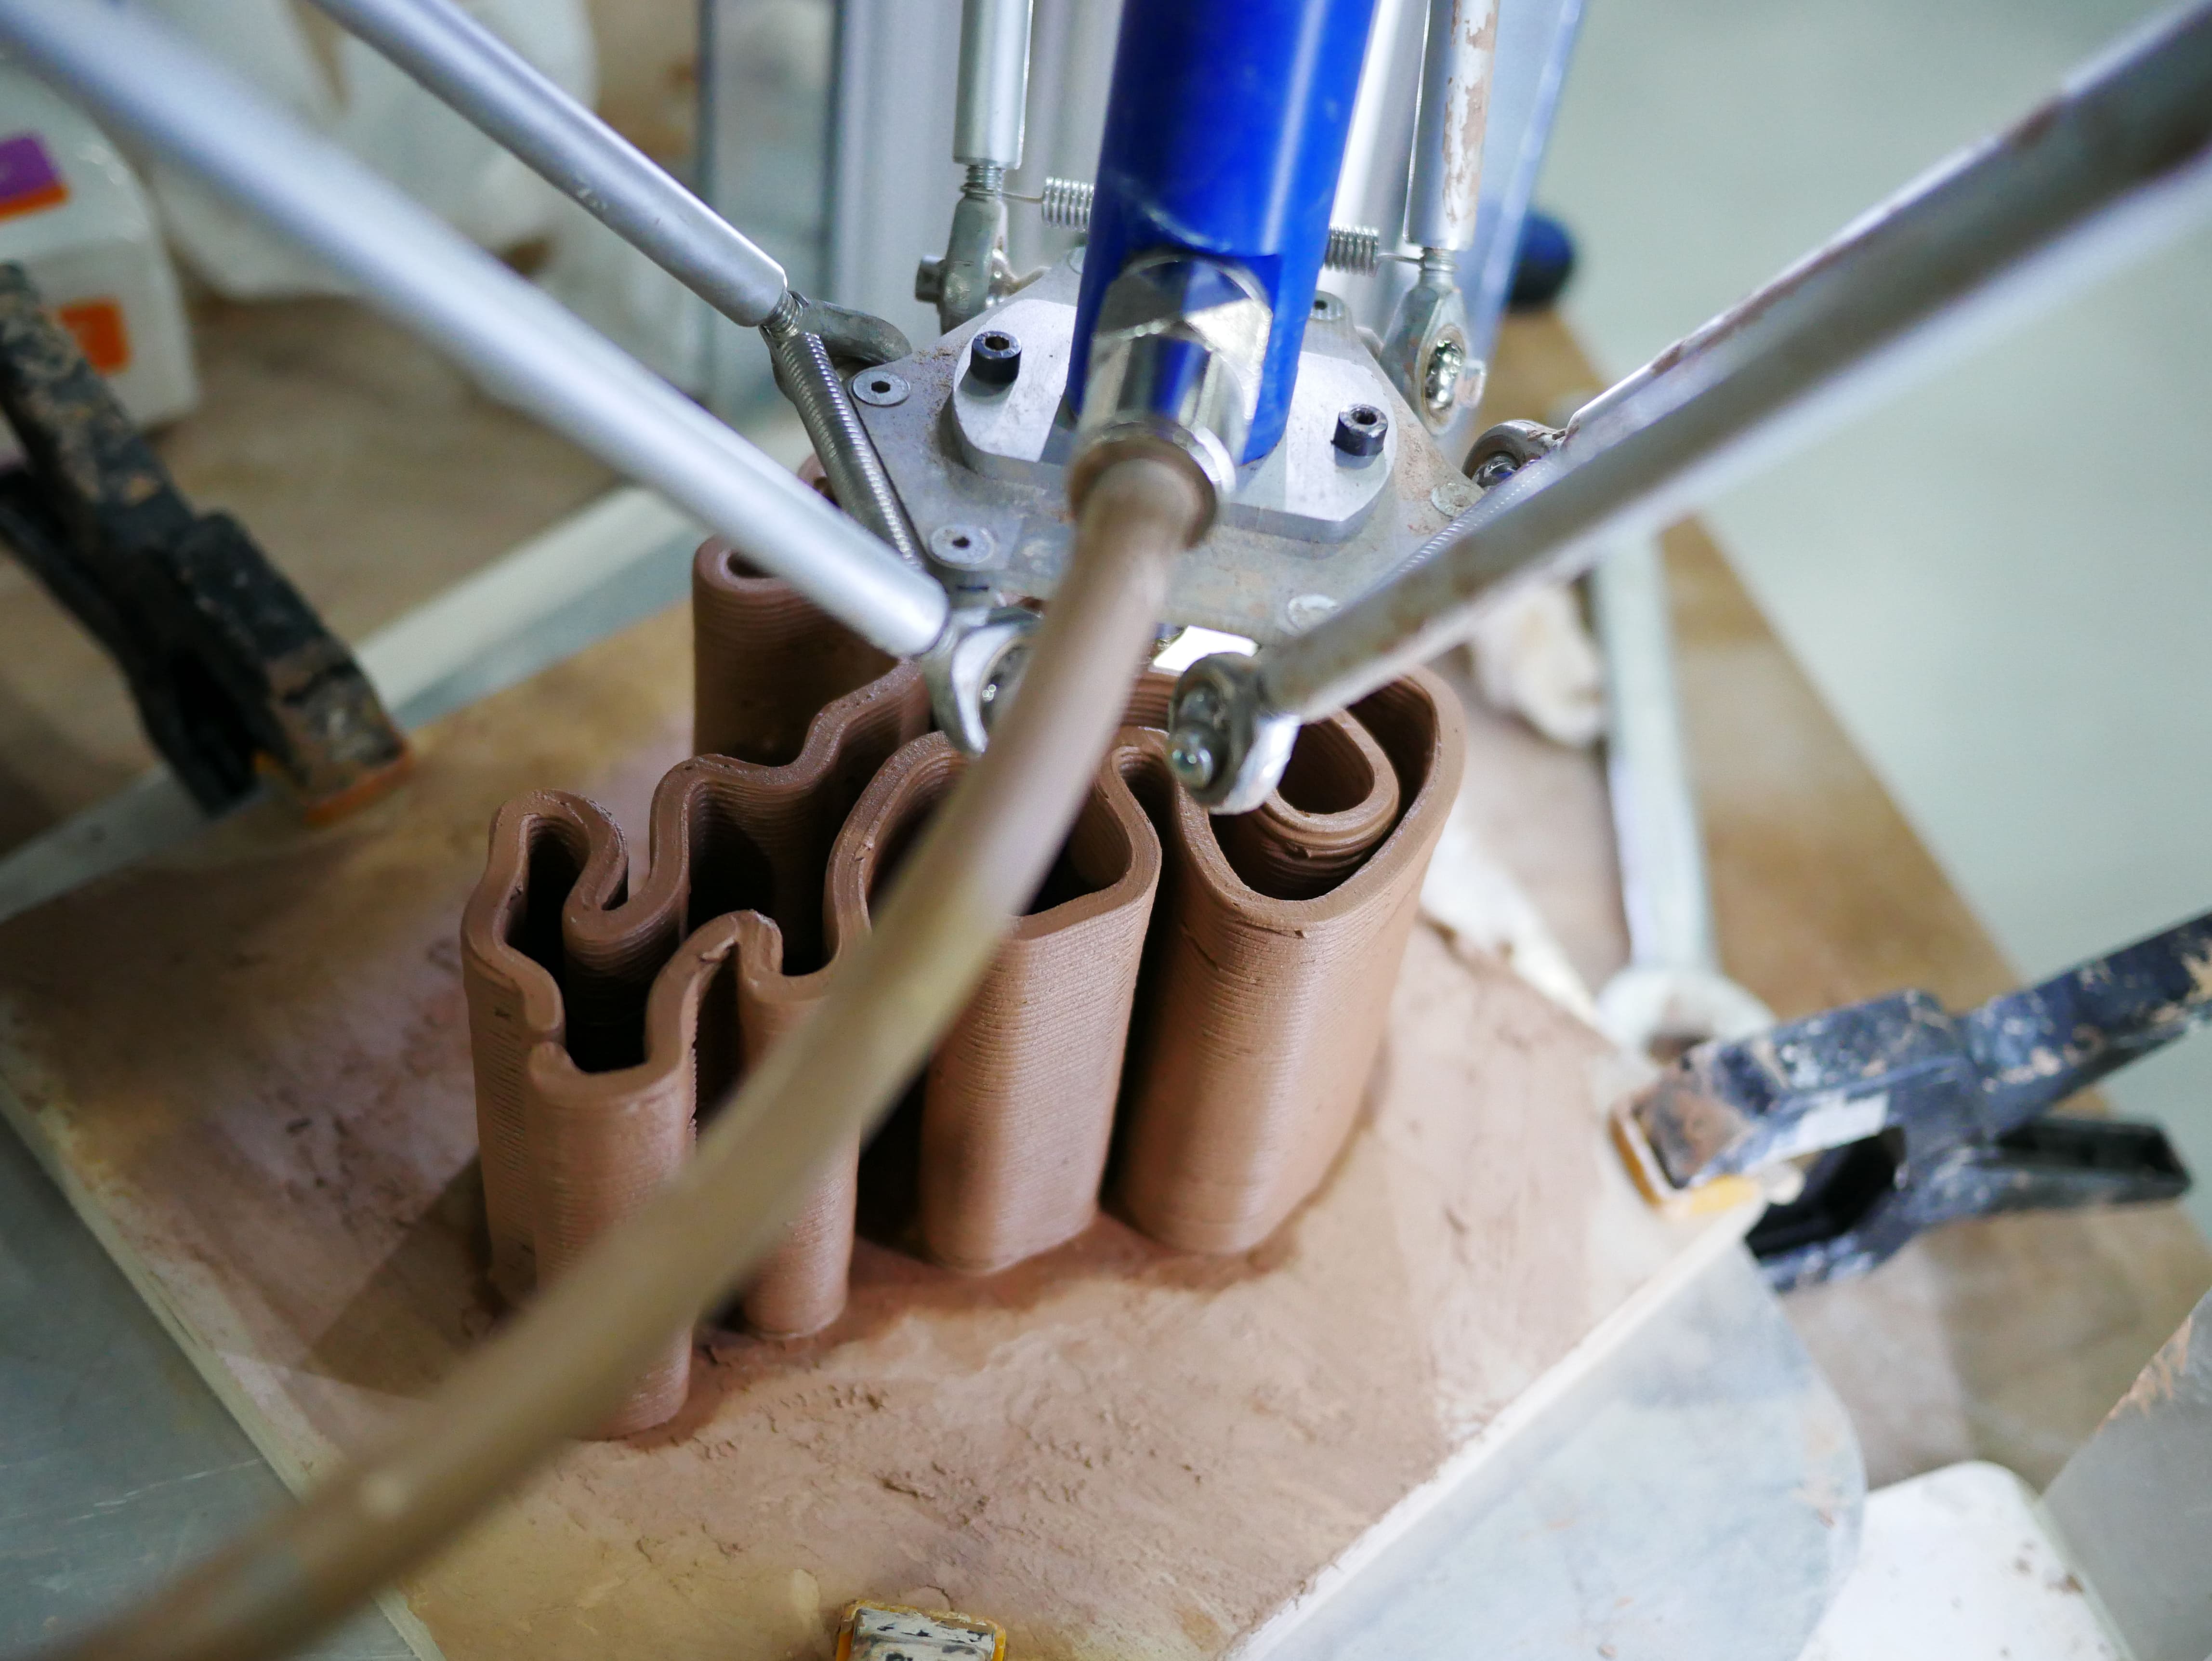
Simple skech model using revolve tool to test the toolpath on the machine.and here using a continuous vase design will make your opject solid so that means if you want to creat something divided peices you will follow uncontinuous mode to make it and the tool path machine will make it peices to collect instead of one peice (most likely it used for orniments or specific use but generally continuous solid closed is what common)
Slicing
After exported the file from rhino as stl file i uploaded simplify3d and here i do slicing test to generate GCODE to use for wasp2040.
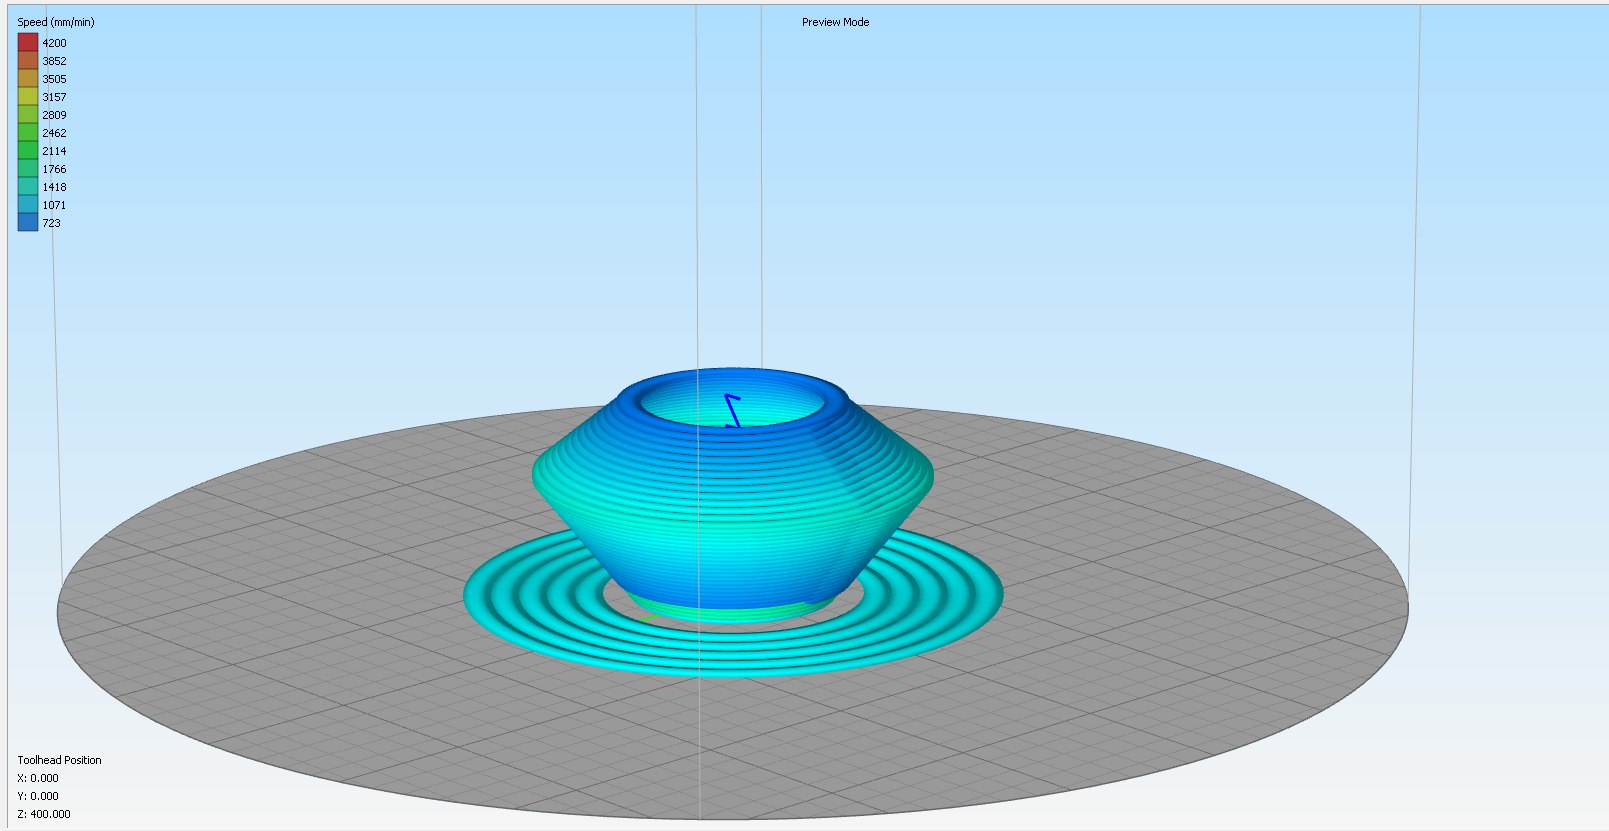
Vase 2
Rhino
Slicing
 While working on this Vase the focus was on the air compression and flow as you can see on the next photo how when air compression is low can create gaps in the line and makes it less continuous !!
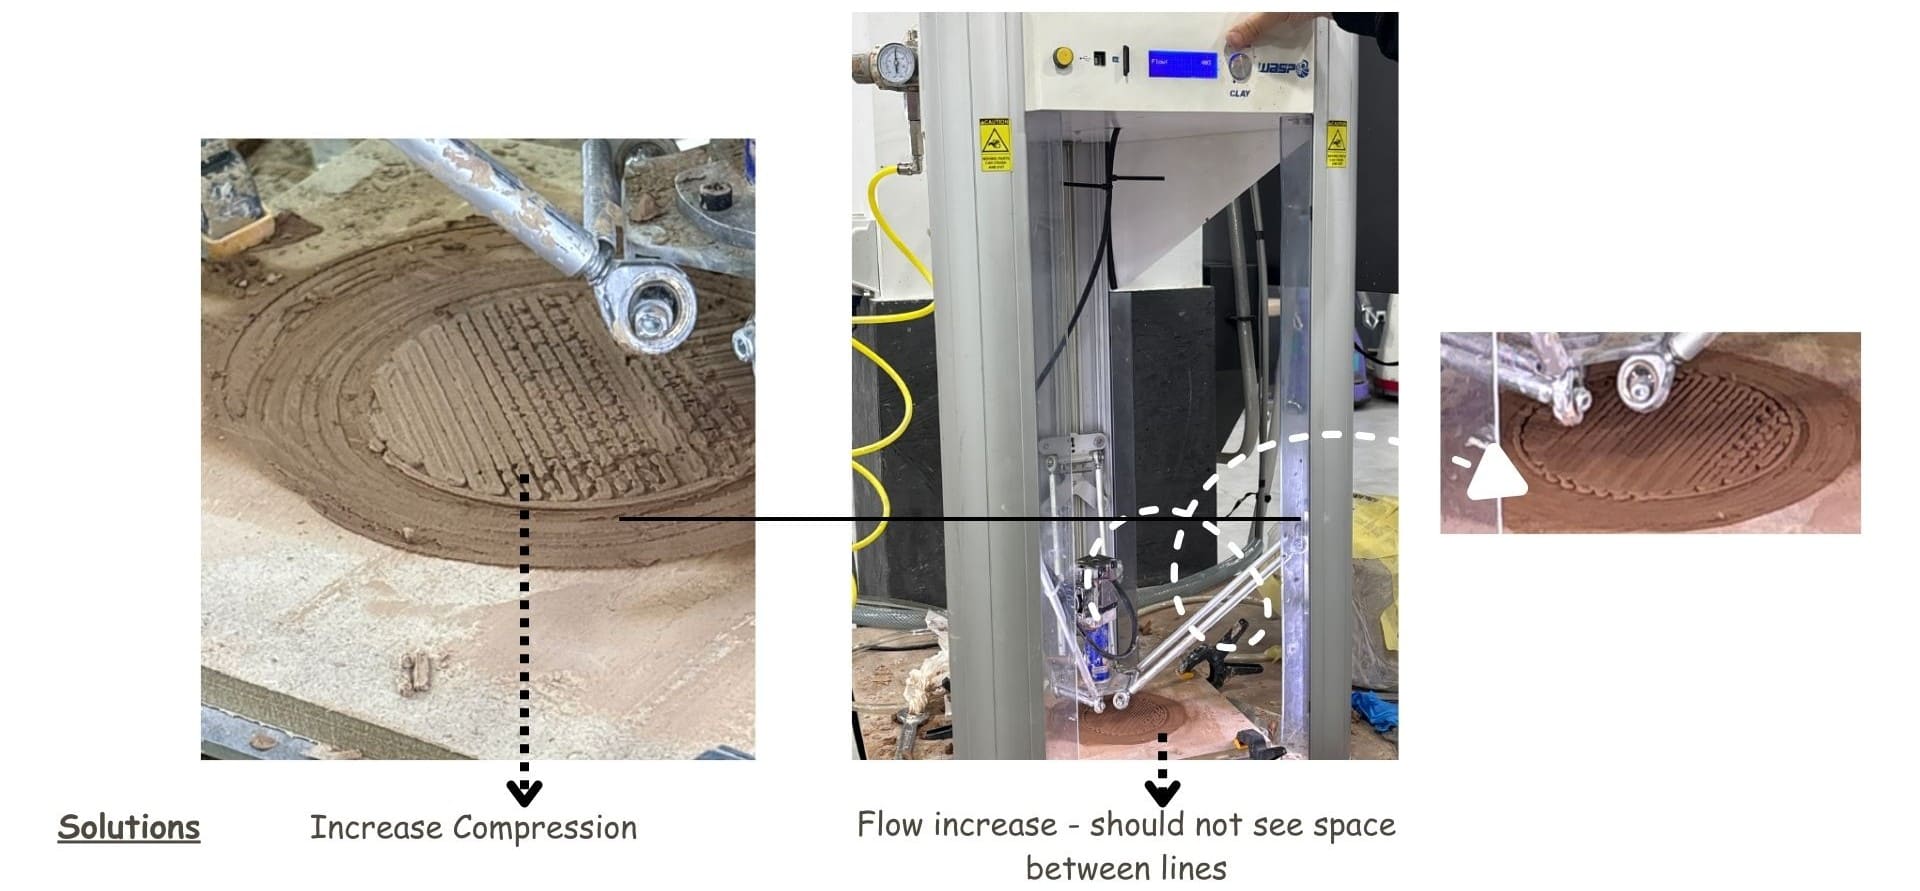 Adding to that there is important note that the compression and flow might change while printing as the amount of water and the hand prepare for clay might be less balance from xone to zone so that be ready to change based on observation.
Coral Morphology
Understand more about Corals morphology espicially the ones in Aqaba Gulf that help me to dive deep and even get inspired by some of its shapes ! espicially as its rich gulf of diverse corals worldwide.
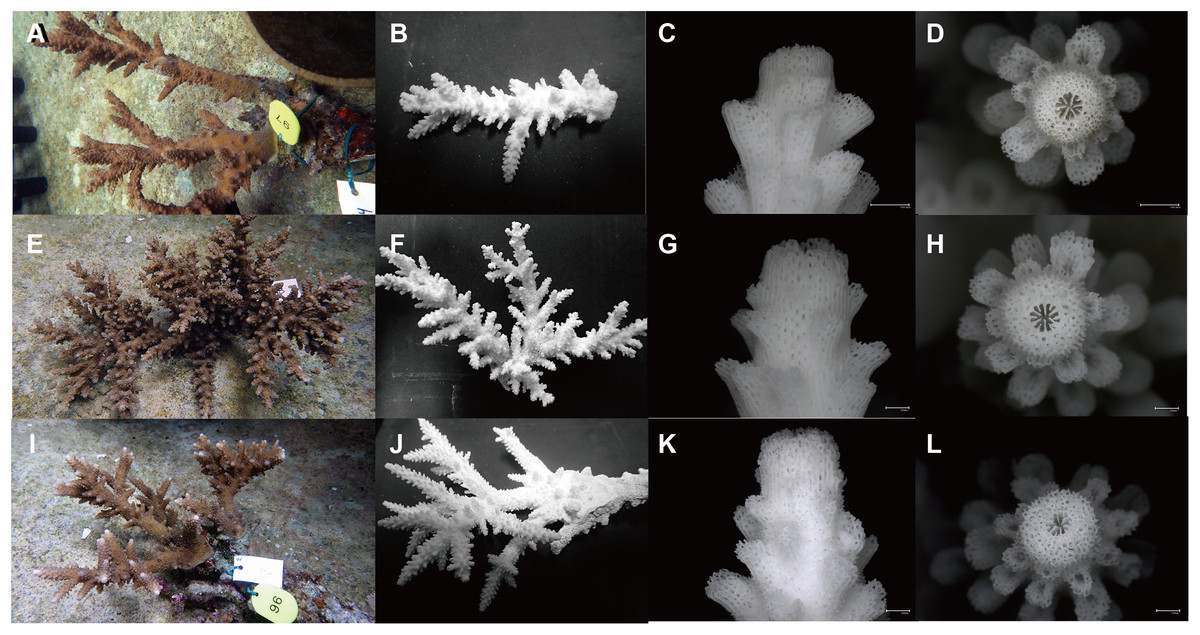 Acropora is the most species-rich genus of stony corals. They are colonies of individual polyps, which are about two mm across and share tissue and a nerve net.
This species are important reef builders but are also some of the most environmentally sensitive species in the planet.
CLICK HERE TO REVIEW The research and morphology study about corals in jordan and specific 3 types i choosed earlier for bio mimicry and it was with the assist of marina biologist like dr.Ehab and JREDS.
Acropora is the most species-rich genus of stony corals. They are colonies of individual polyps, which are about two mm across and share tissue and a nerve net.
This species are important reef builders but are also some of the most environmentally sensitive species in the planet.
CLICK HERE TO REVIEW The research and morphology study about corals in jordan and specific 3 types i choosed earlier for bio mimicry and it was with the assist of marina biologist like dr.Ehab and JREDS.
Ideation & sketches
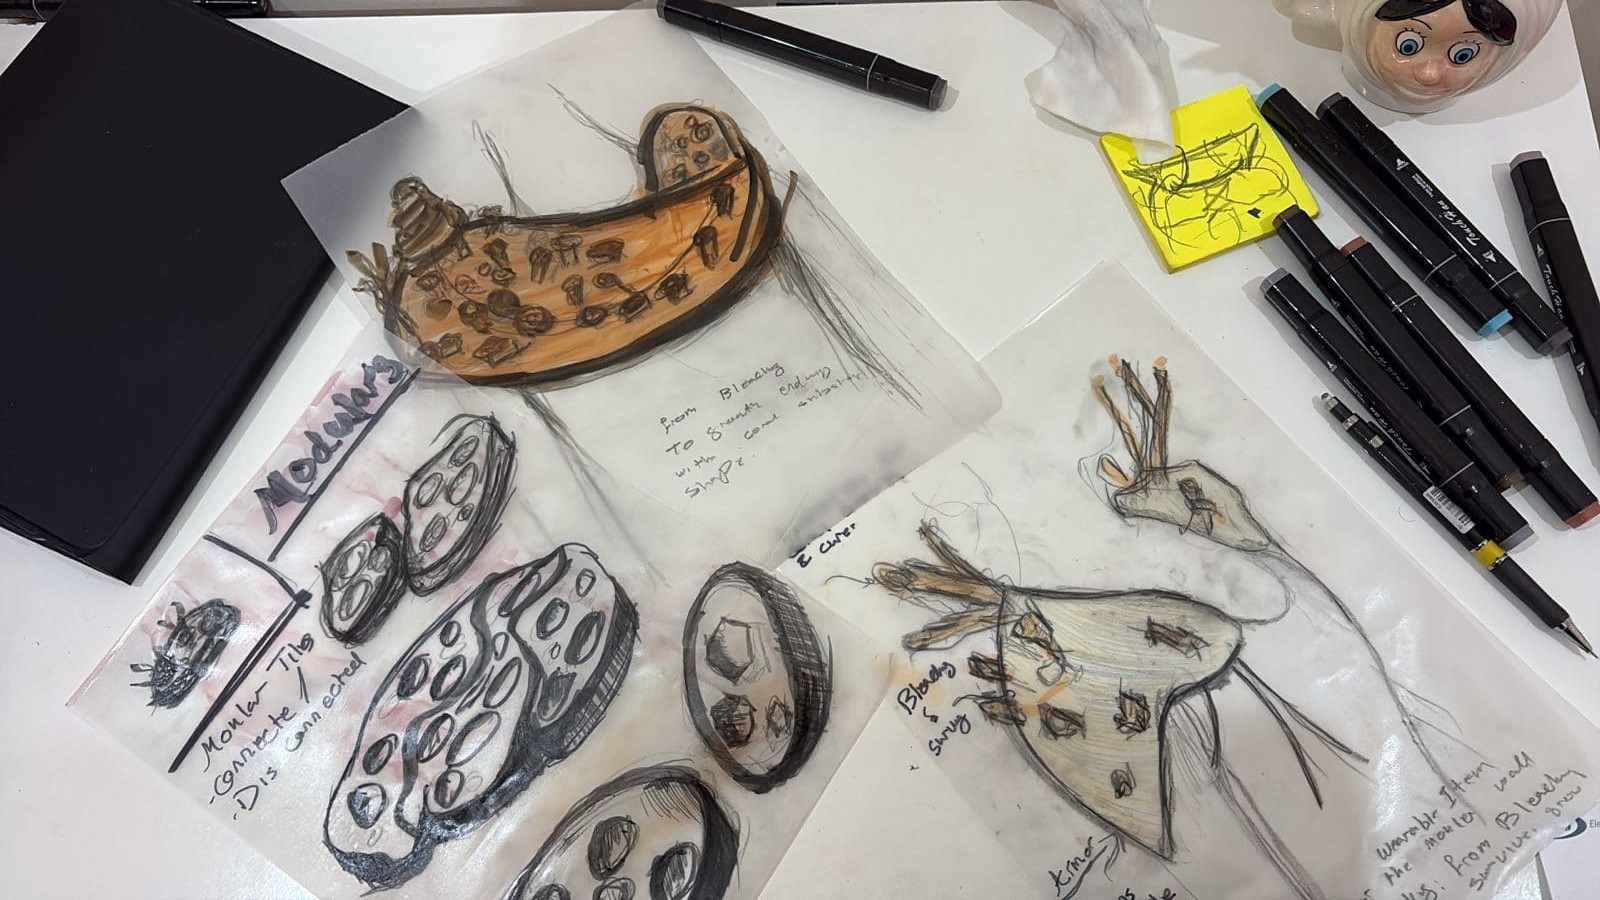 My initial vision was creating two designs one is primary prototype(Murjan) about modular pieced can connect to each other and increased based on the site and secondary prototype for story and show not to test in water, talking about the bleaching of corals in aqaba year 2024 + the Ghandour are in the north side of aqaba gulf which been rich with corals more than 20 years and now only little remain there ,so my initial sketch idea was from bleaching to growth to be two mode: one prototype for sea and one only a story telling as shoulder wearable telling the story of the bleaching and from little semi corals to well bold coral shape! and all on shoulder as a way human carry this mission on its shoulder to help marina and my primary prototype you can view within following lines !
Ghandour area water depth
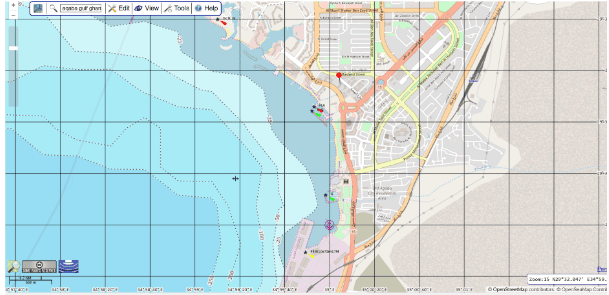
Ghandour contour level under the sea
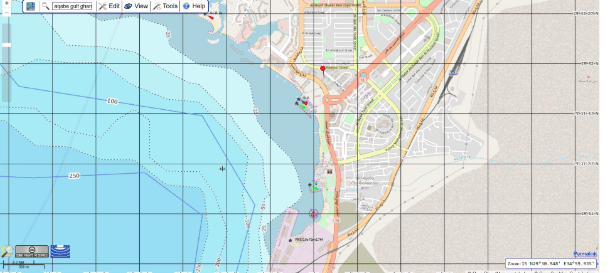
After i delve to understand undersea environment , where corals located and topology and even the water movement so i can design something could minimized the water flow so corals fragment have better chance to stay attached to the reef.so i back to sketch more and drawn my ideas on papers. And you can see how i was thinking about functional environmental solution + Modularity.
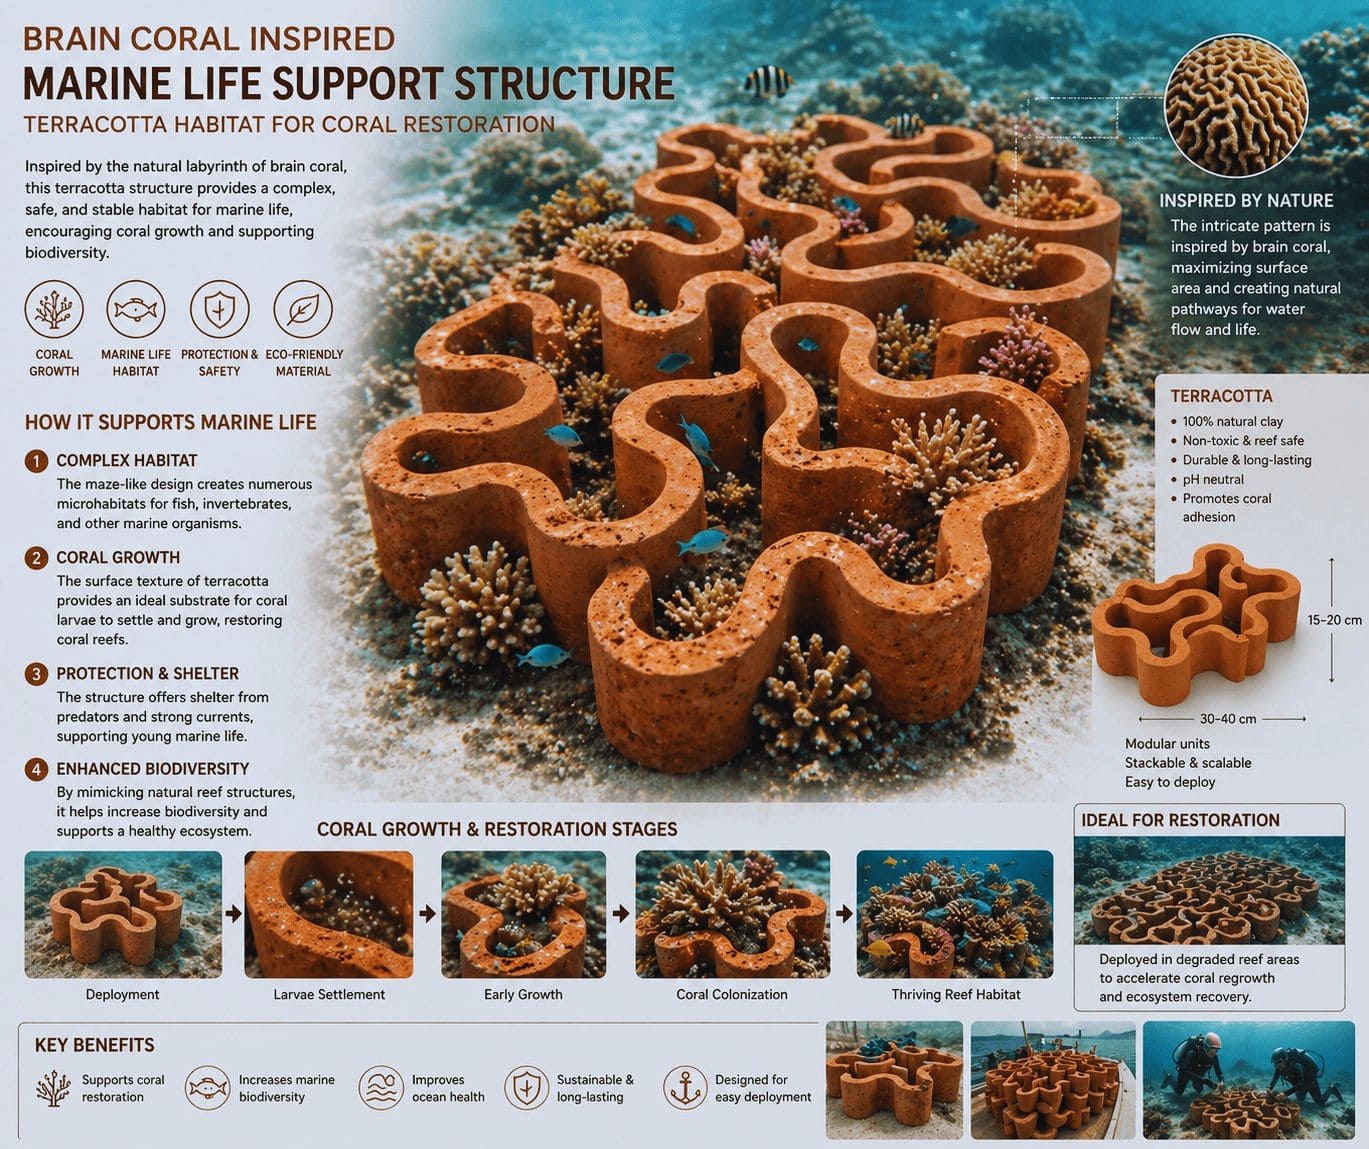
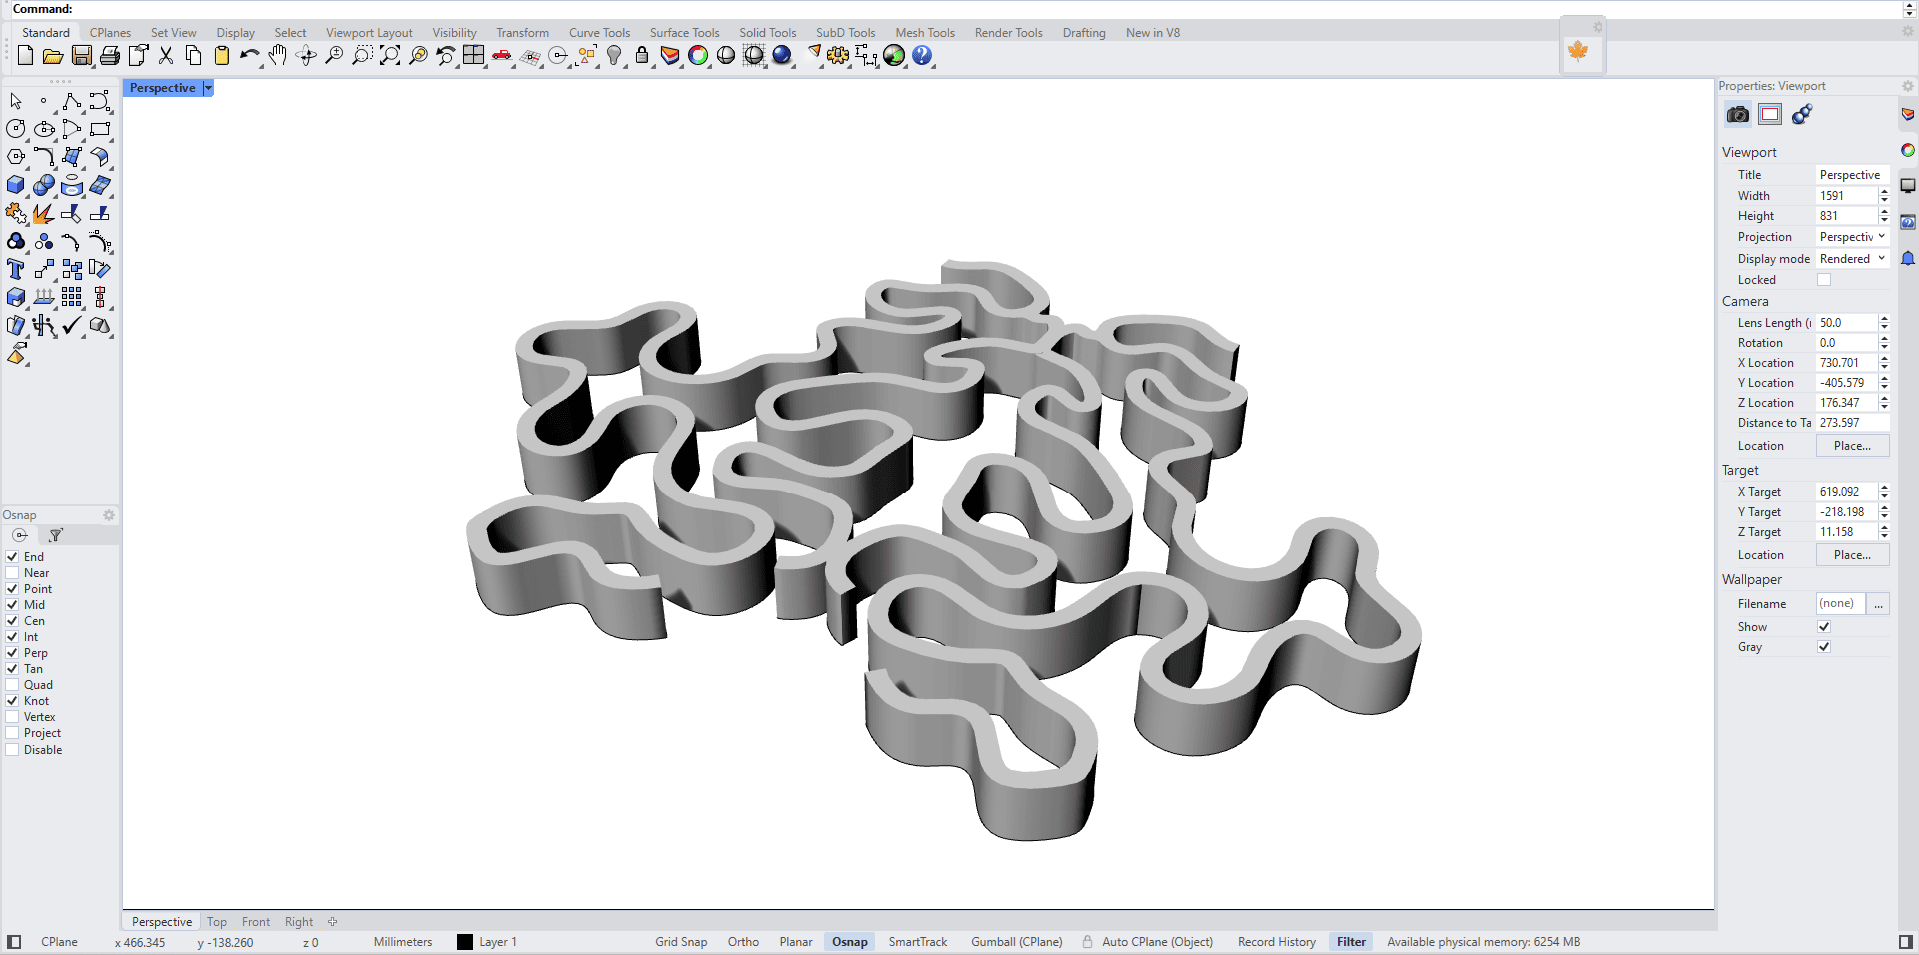
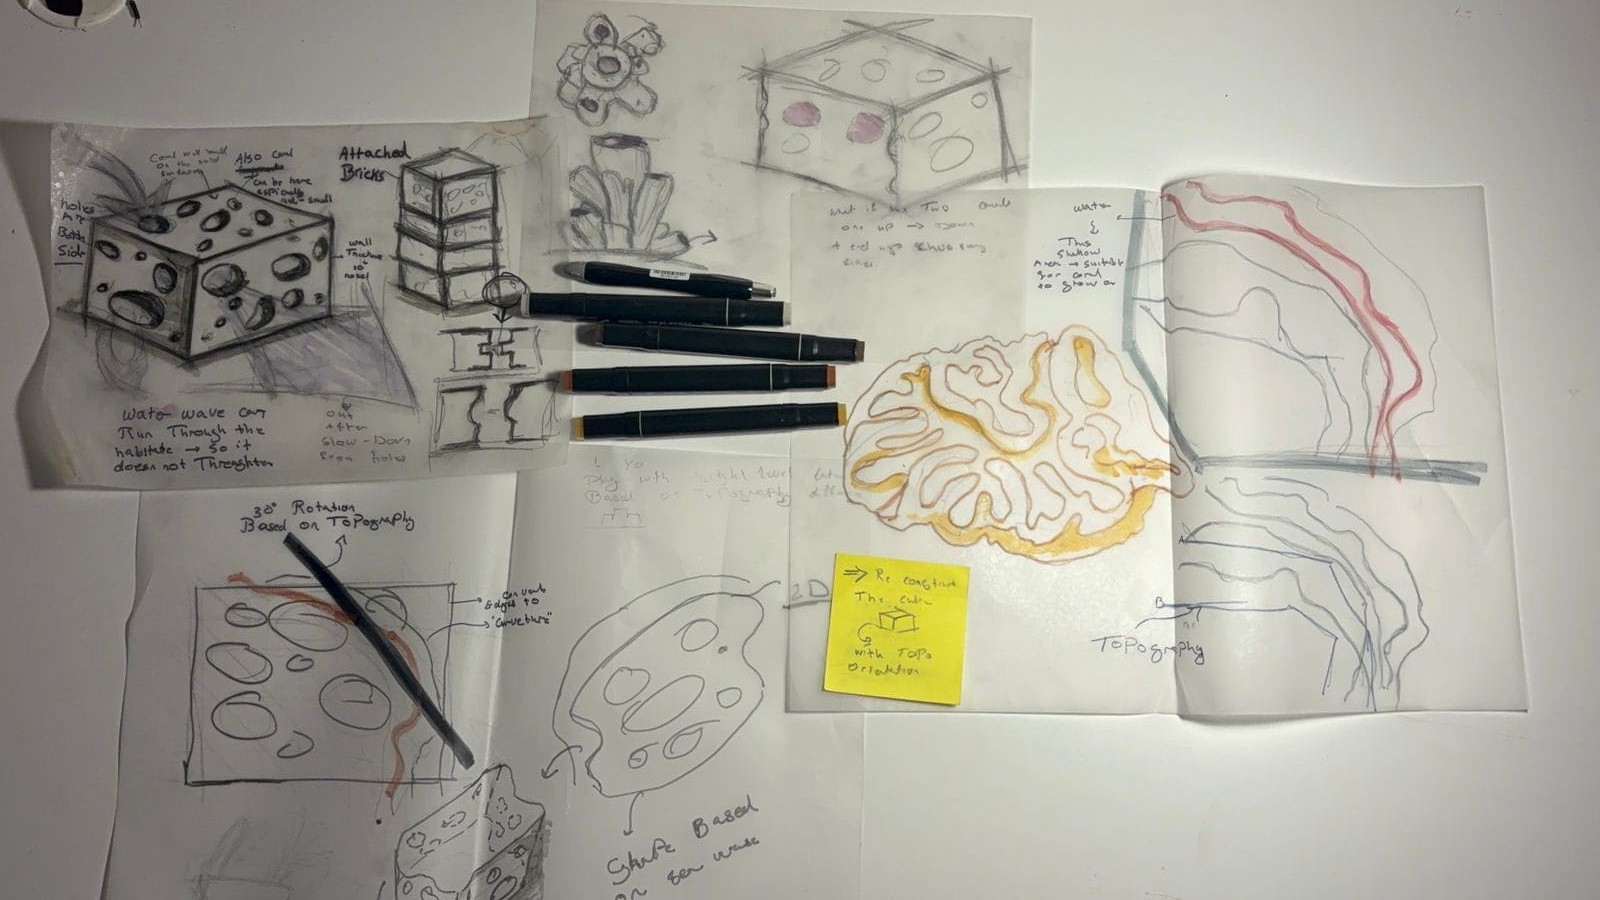 Following and understanding the coral morphology i got inspired from brain coral as my design translates the natural labyrinth like morphology into a modular terracotta structure that supports marine life, enhances biodiversity, and promotes coral reef restoration.
Design & Production
Trace some of the brain coral lines as The goal is to replicate its ecological performance
1. maximizing surface area.
2. creating shelter for corals and maina micro specious .
3. enabling coral larvae settlement attach, stay, and start growing on a terrecotta surface.
The design creates a range of microhabitats through its irregular, maze like geometry, offering both shelter and movement paths for different marine species. Its curved form also helps control water flow, allowing it to circulate smoothly, improving oxygen and nutrient distribution. At the same time, the structure provides protected and shaded areas, reducing exposure to strong currents and predators, and supporting early-stage coral growth.
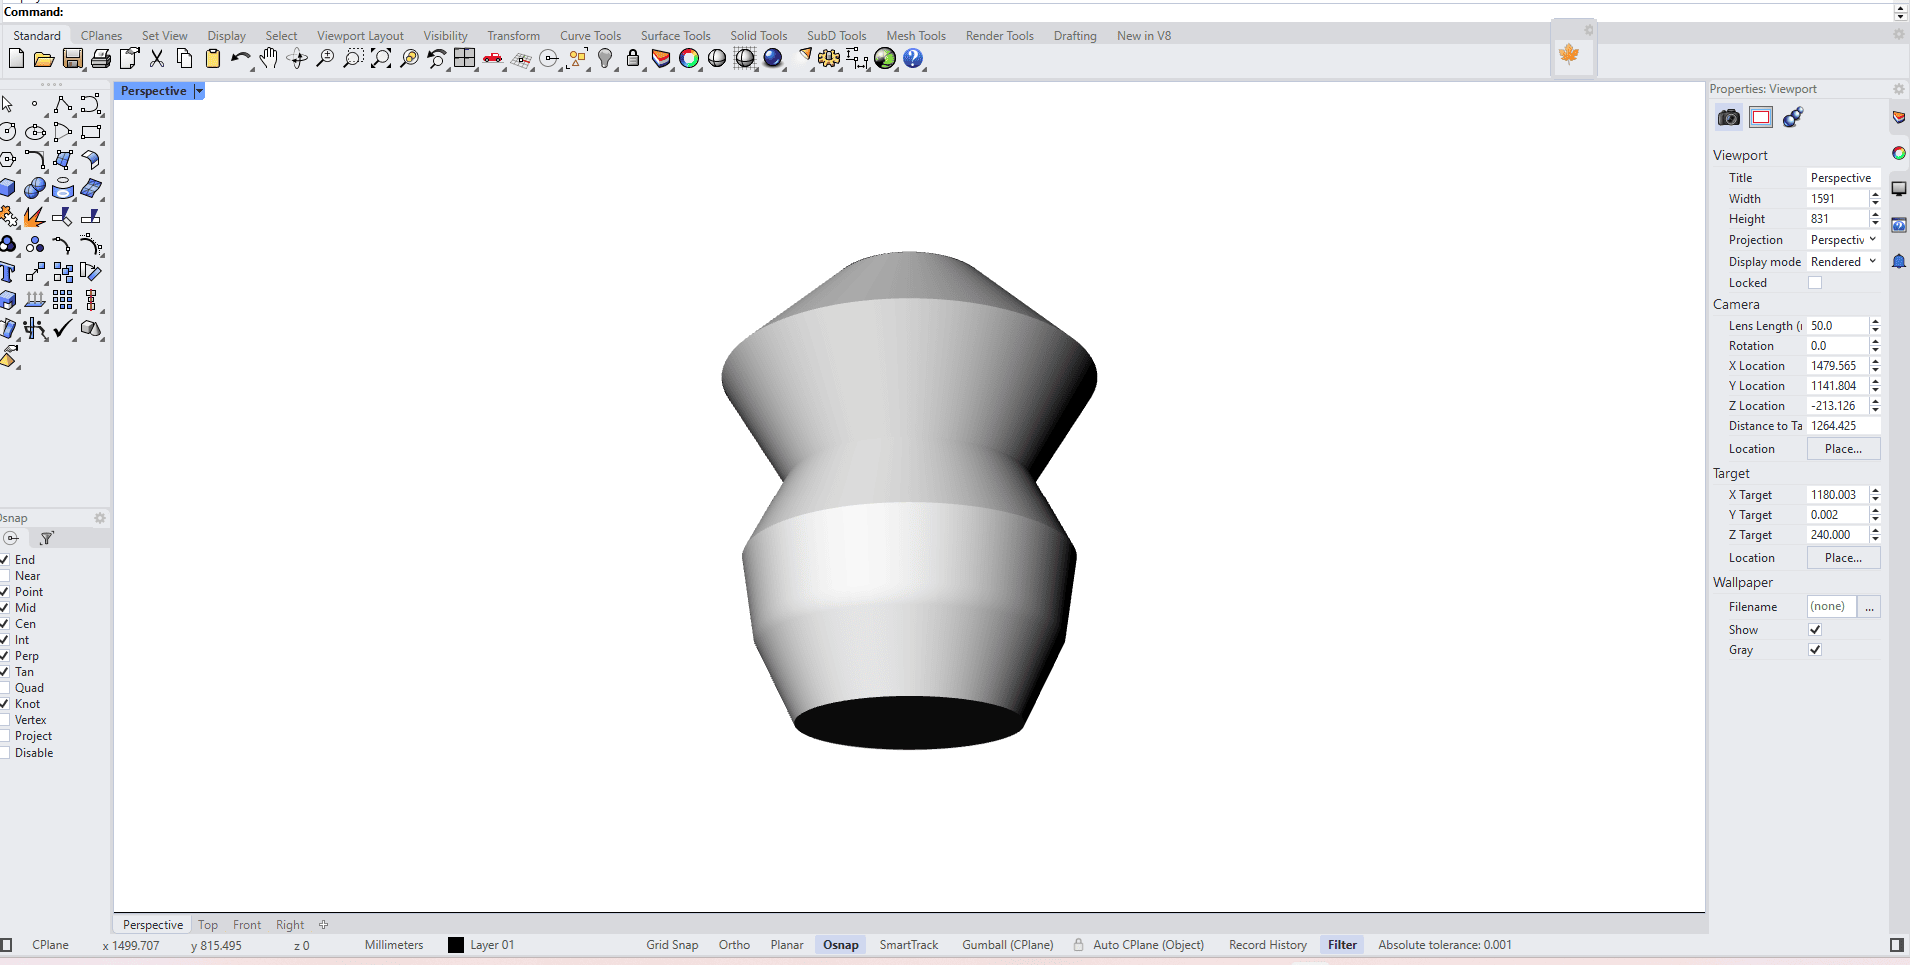
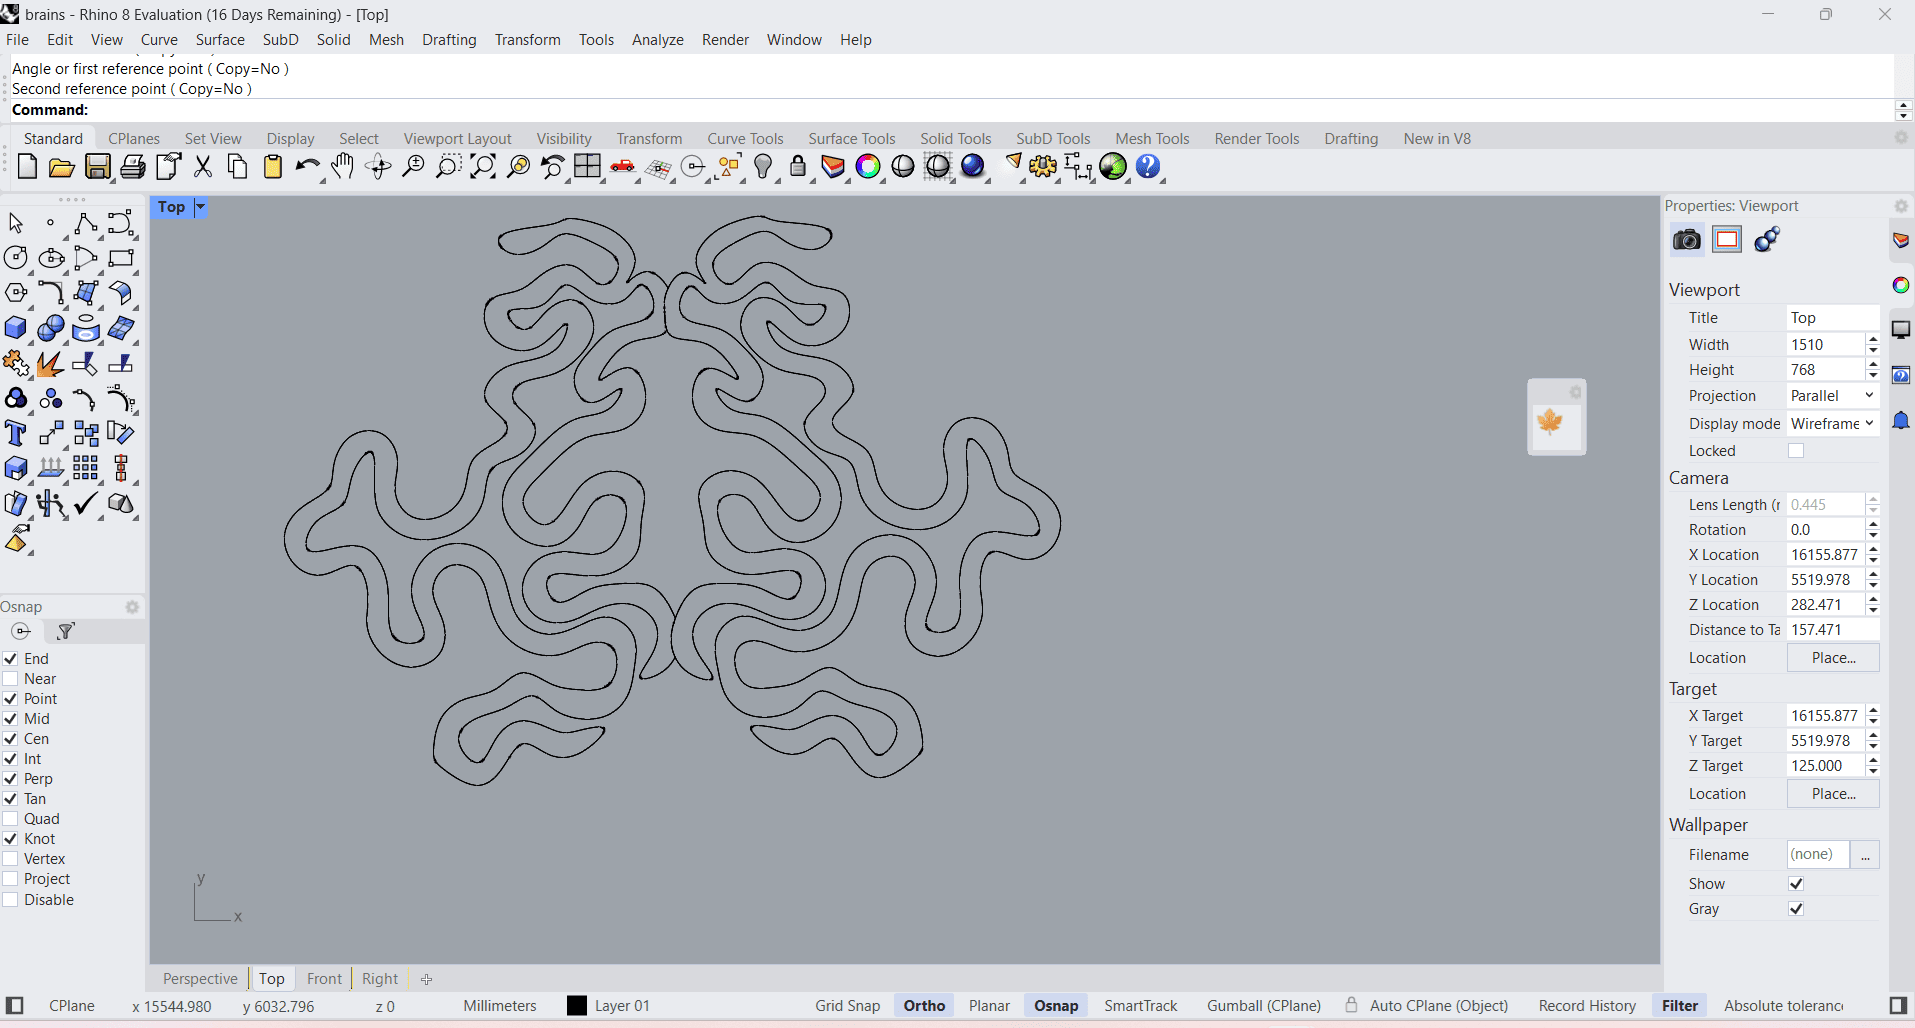
Rhino
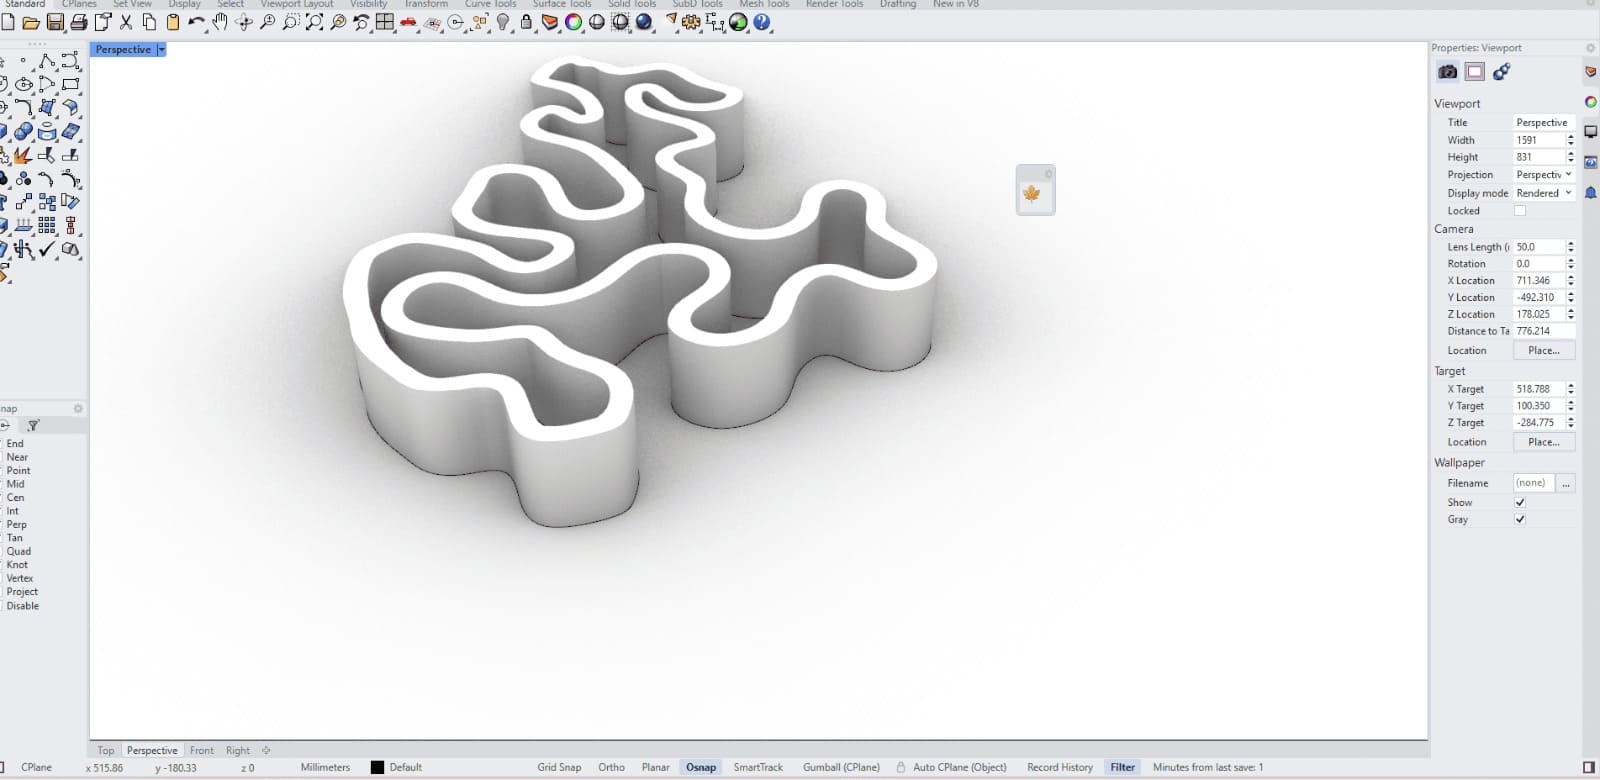
Extruded the 2d shape (extrude command >> close) to around 3cm.
 After this model i found out that doesnot fit the wasp2040 bed and can not be reduced as i am using 3mm nozzel for machine so i decided to cut the model and take one side fro 3d print and with claudia assist i adjusted according to wasp printer toolpath !
STL view
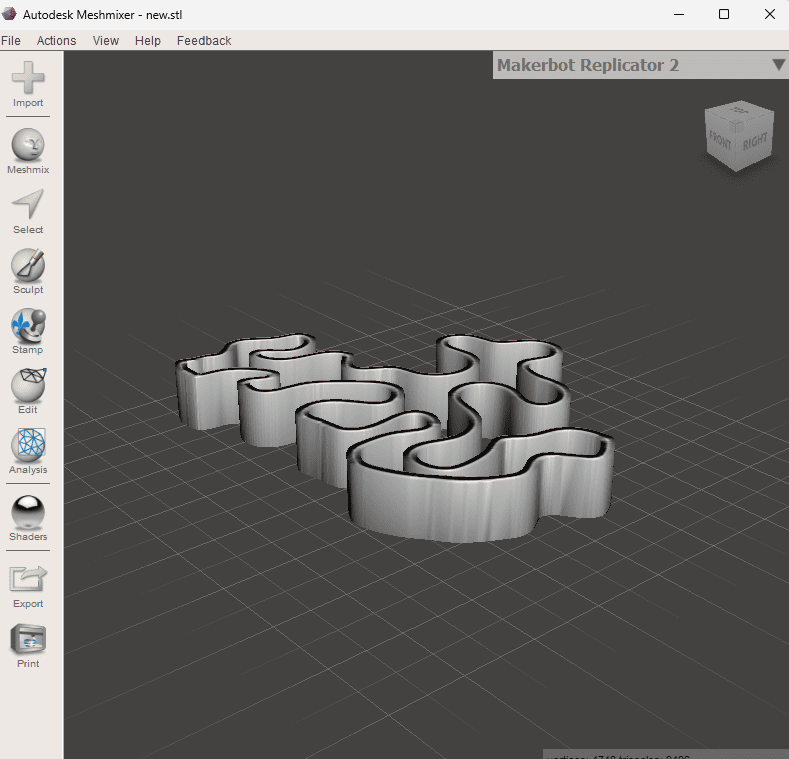
Here i was checking STL files how they look and if there i any opening to close from meshmixer before i upload to website , but all preview were good !

Slicing
When design should see the Slicing first to review the toolpath of the model - I am susing simplify3d as mentioned in the diagram earlier.
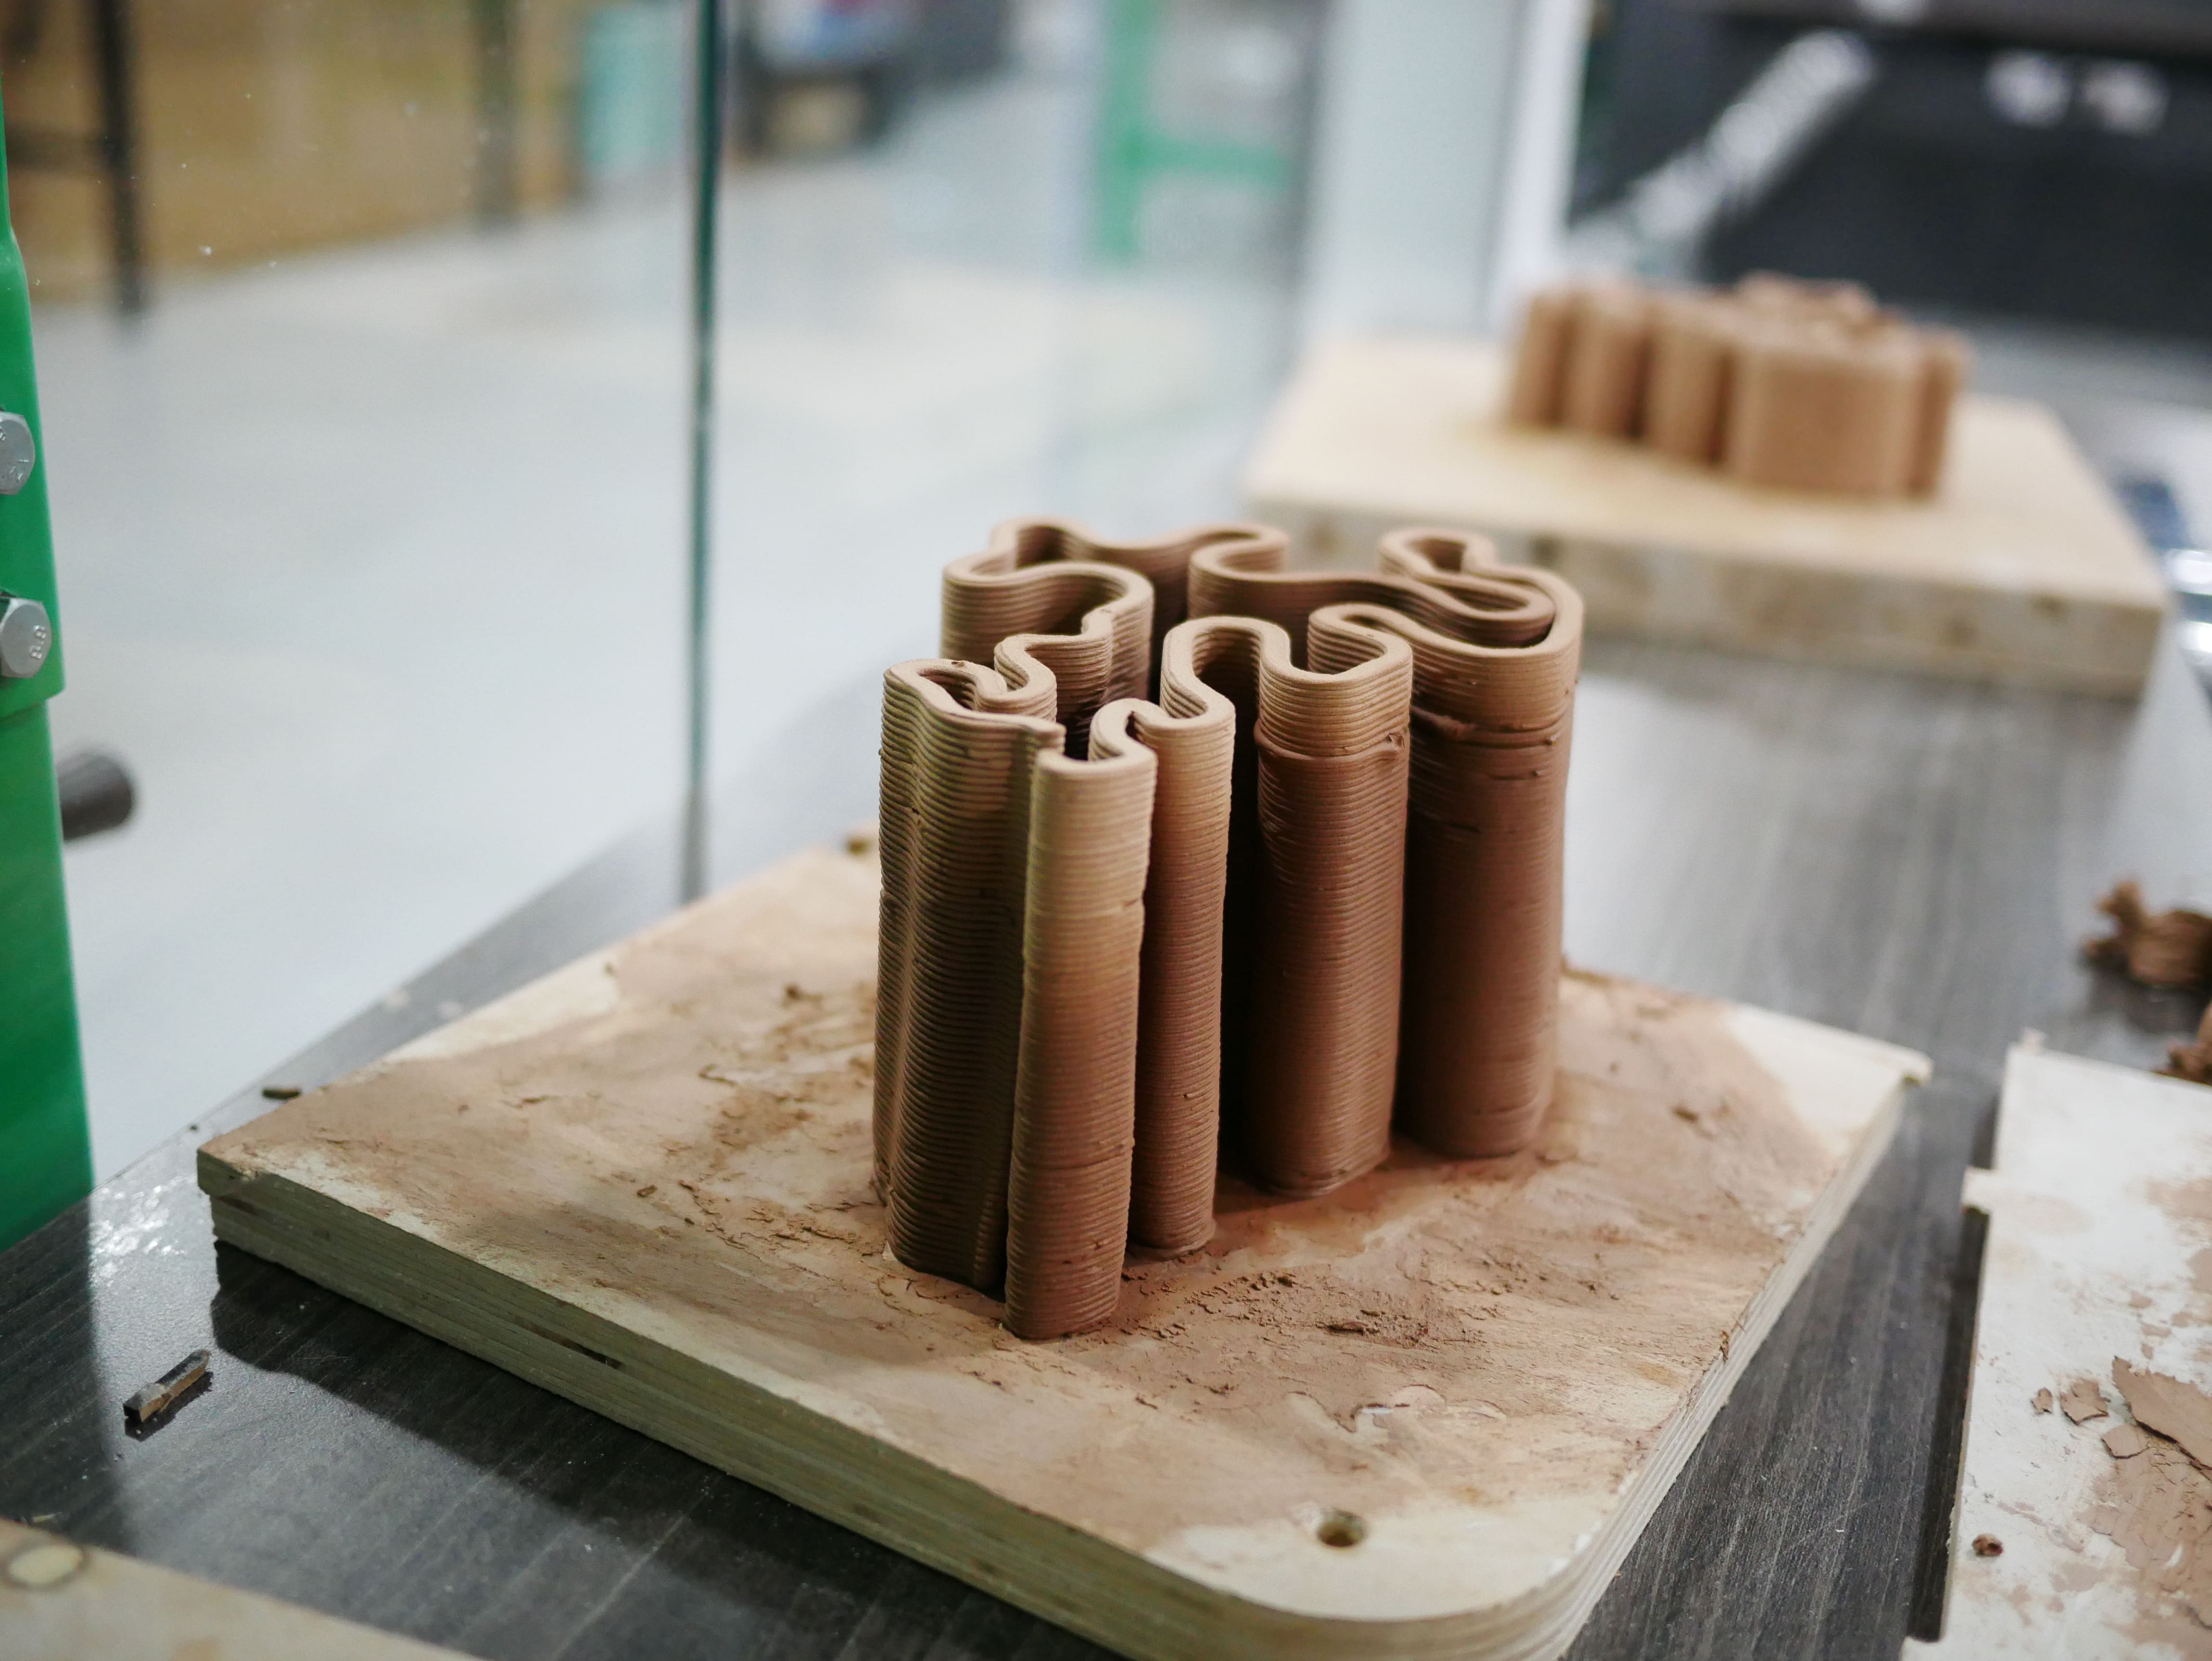
I made sure to export GCODE after slicing test in difrent length as you can adjust the length from slicing so i exported with three hights : 2cm , 5cm , 10cm . as you will see with prototypes 3d print.

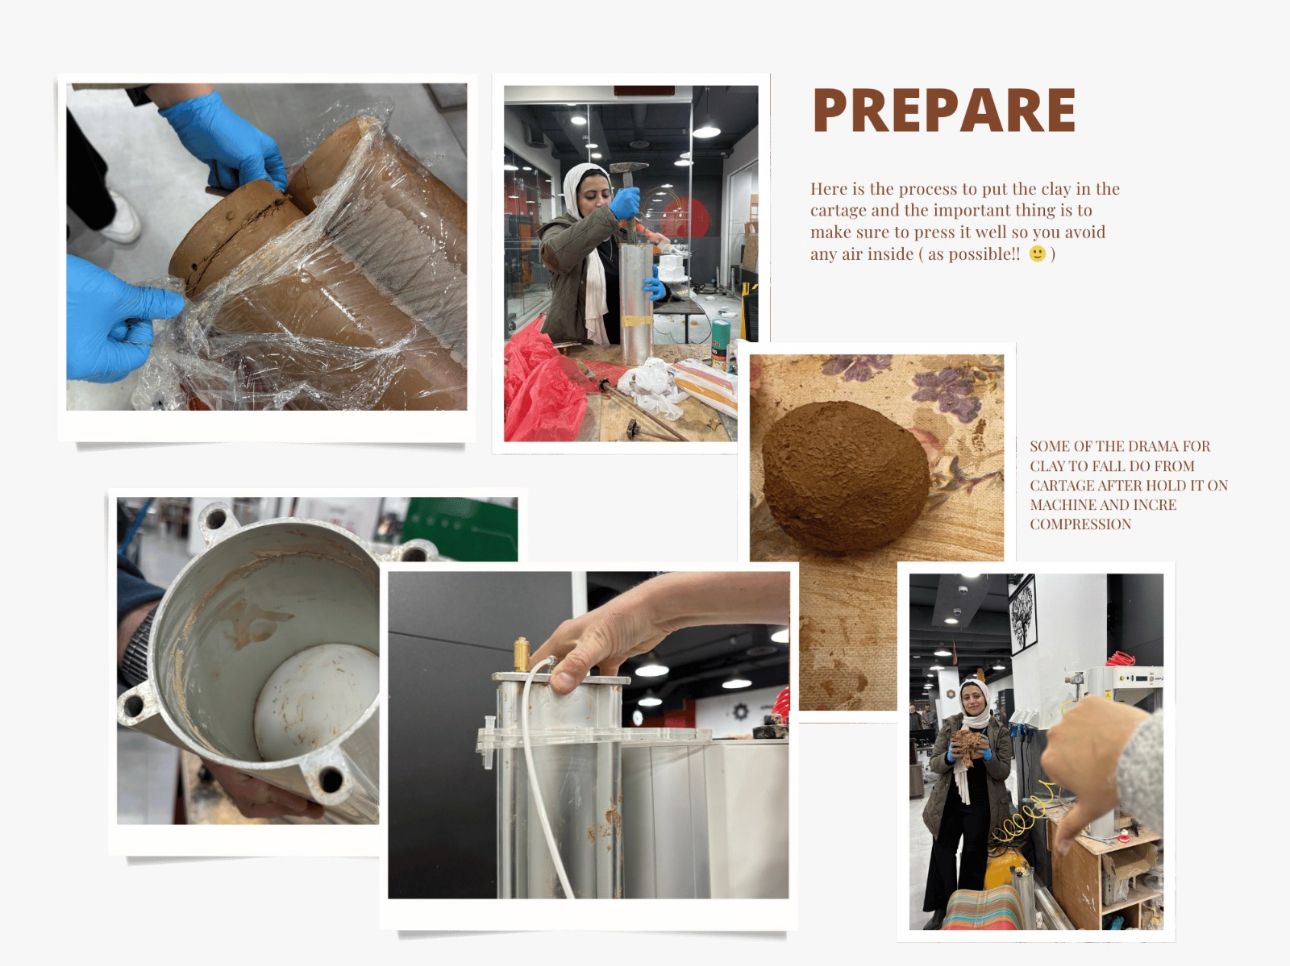
Cartage Prepare
Clay 3D printing
Video
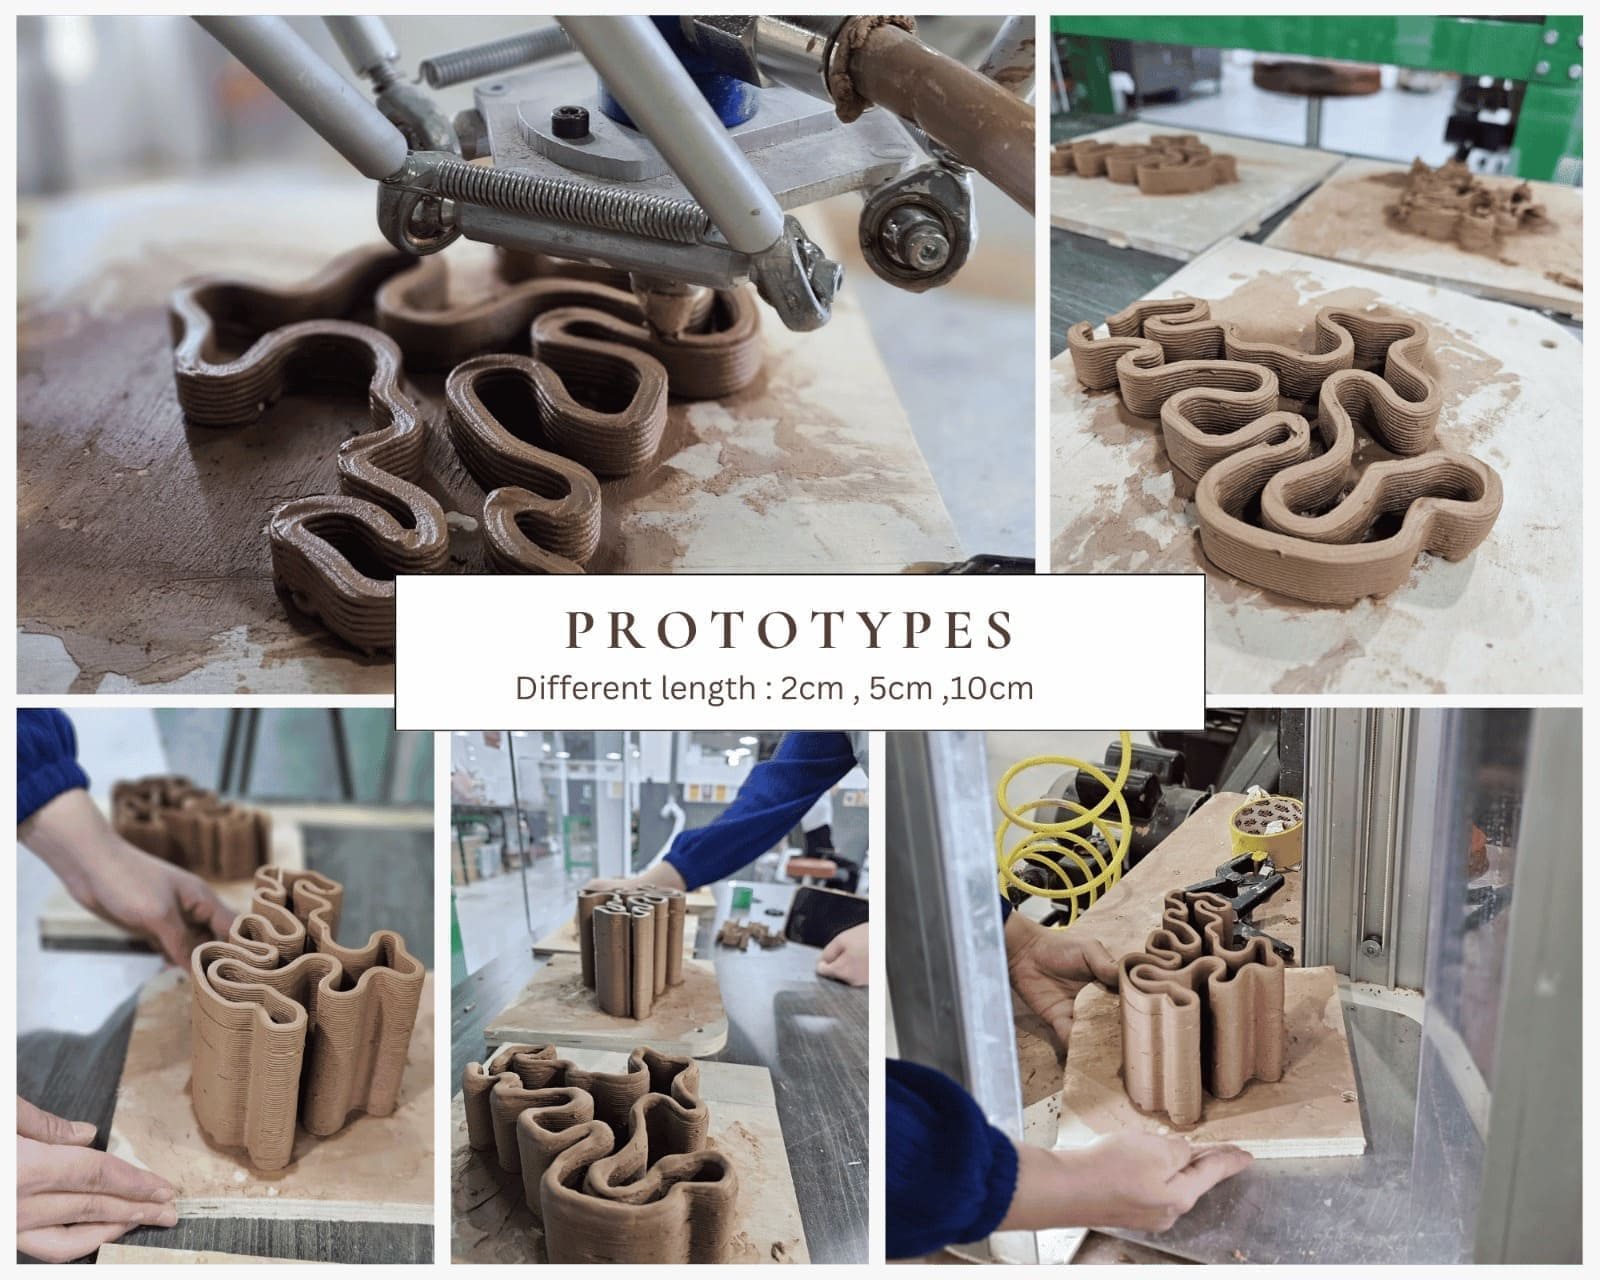
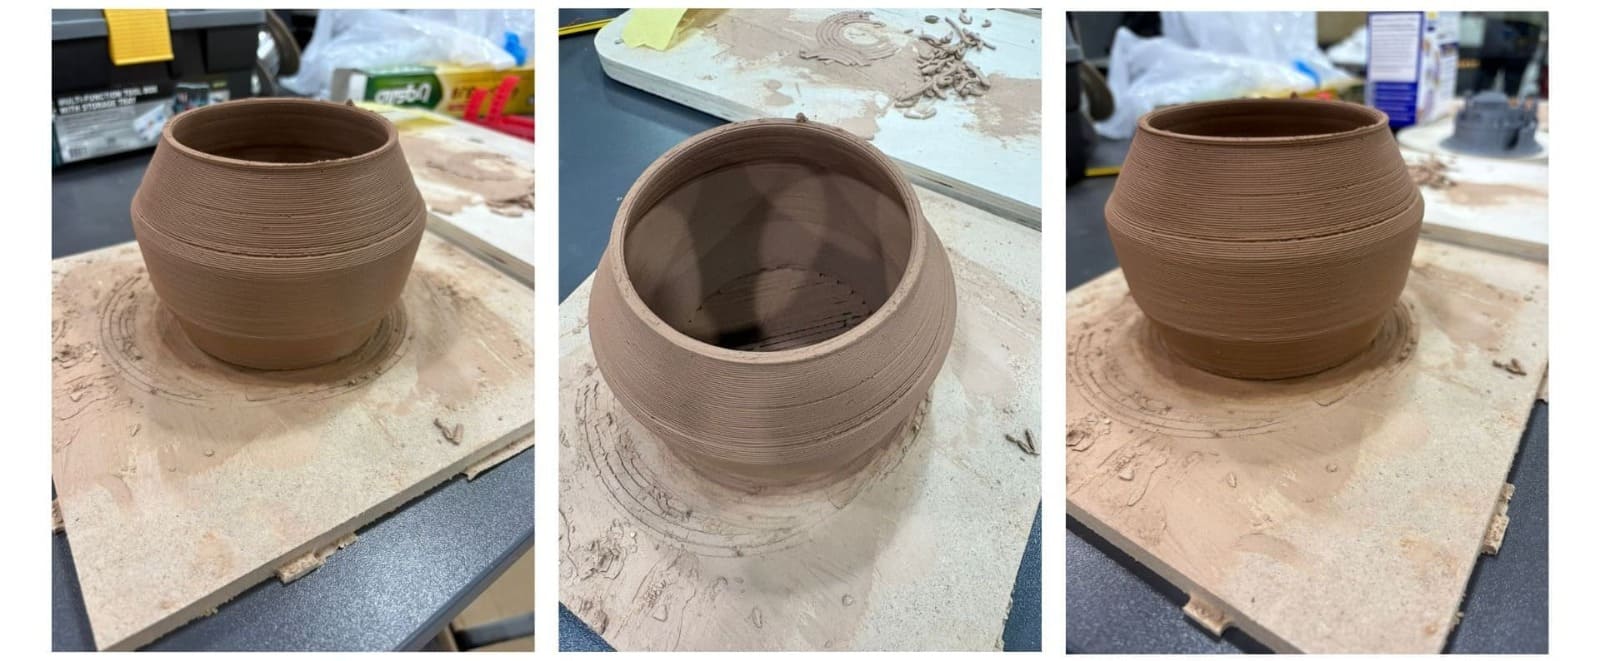
Clay Prototypes Drying

This is how the color start changing while clay drying !
 - To the next phase of development >> Post_Print