BioFabricating Materials
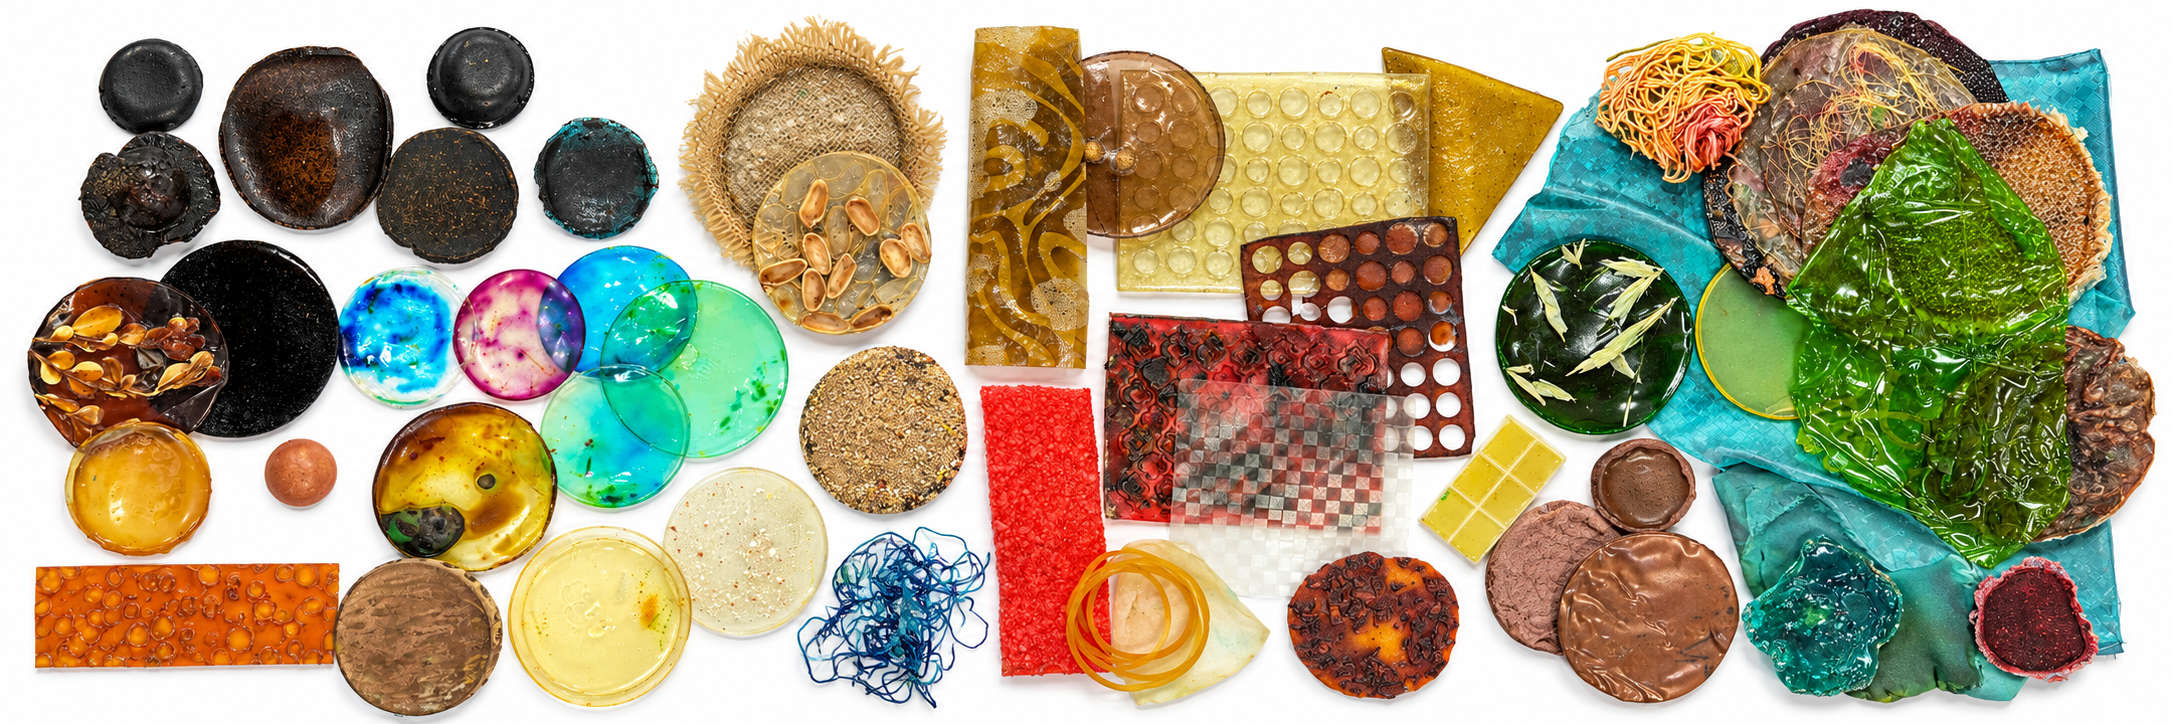
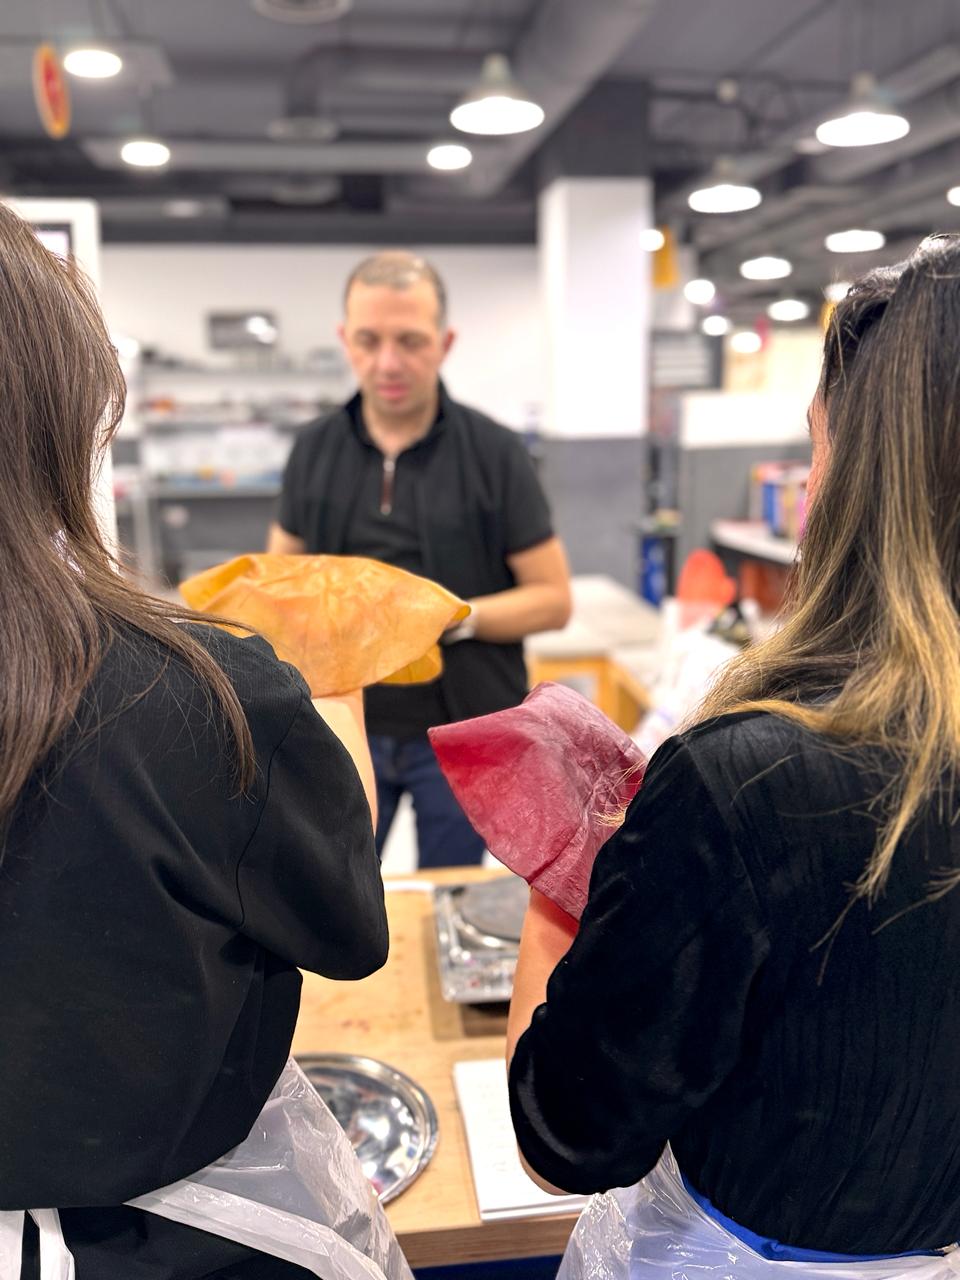
Samples from the biofabrication materials class | photograph by Esra’a Alshraiedeh.
Introduction
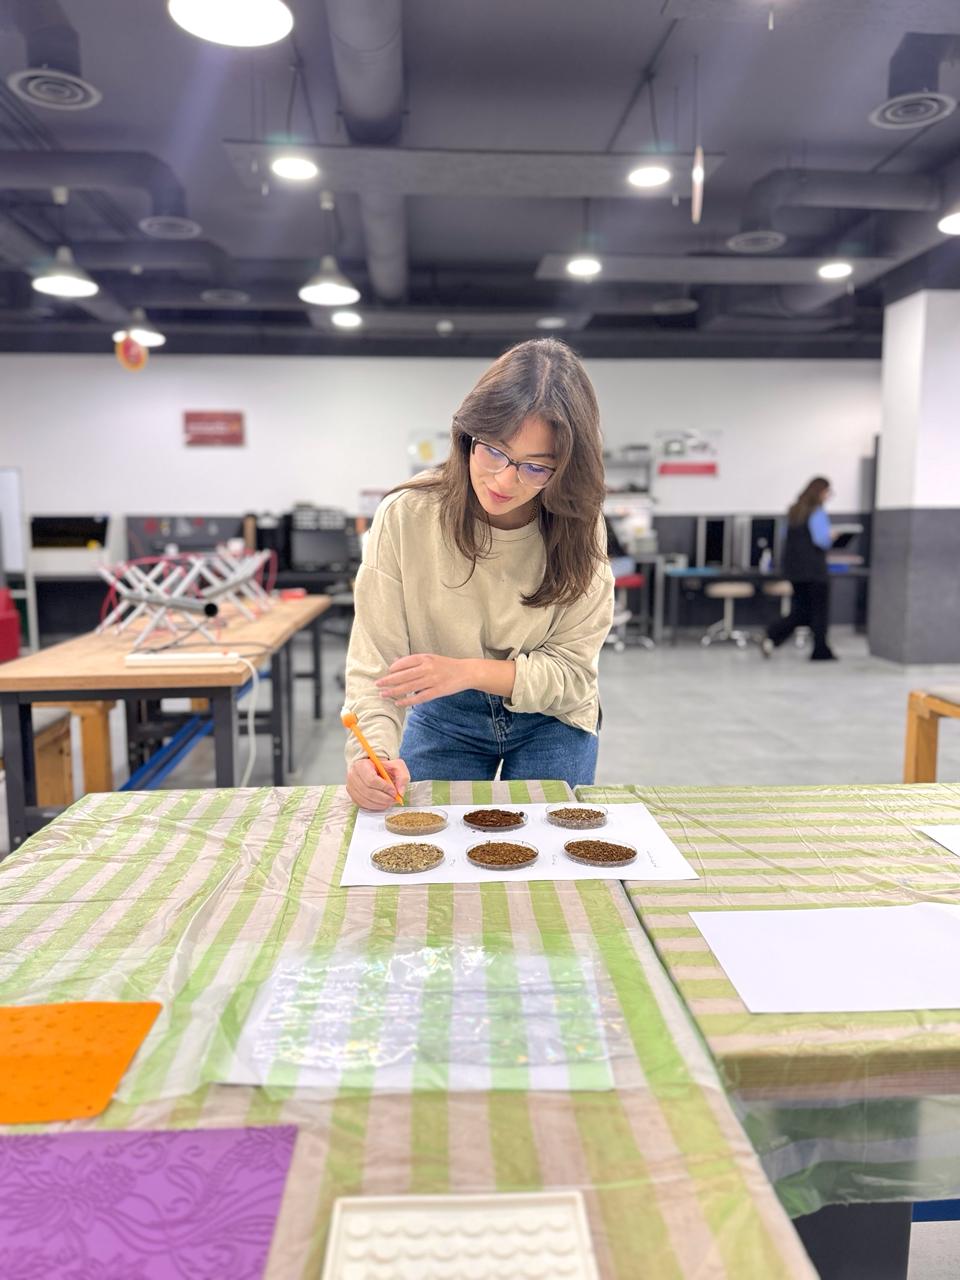
This week introduces a different way of approaching design, creating the material itself. Biofabricating materials let's me explore how biological processes and ingredients derived from natural sources can become sheets, fibres, and surfaces with new possibilities for design.
I am interested in how a material’s recipe and making process influence its texture, flexibility, colour, and transparency. I want to experiment, observe how the materials behave, and allow the results to guide my ideas. This also raises questions about where our materials come from, the resources needed to produce them, and what happens to them after use.
With my interest in lighting, I am curious about how these materials might filter light, reveal textures, and create different atmospheres.
References, research & inspiration
To begin my exploration of biofabricating materials, I looked at projects that bring together nature, material experimentation, and design. References such as Cellulea and Youyang Song’s BIOYARNS inspired me to think beyond using ready made materials and consider how creating the material itself can become part of the design process.
Cellulea
Cellulea is a Jordan based startup and biomaterials project focused on developing animalfree materials using bacterial cellulose. Its work explores leather alternatives and handcrafted products for fashion and design, with an emphasis on sustainability.
During our local lecture, Suhaib Kamal from Cellulea visited the lab and shared samples of his work with kombucha bioleather, made from kombucha derived bacterial cellulose.
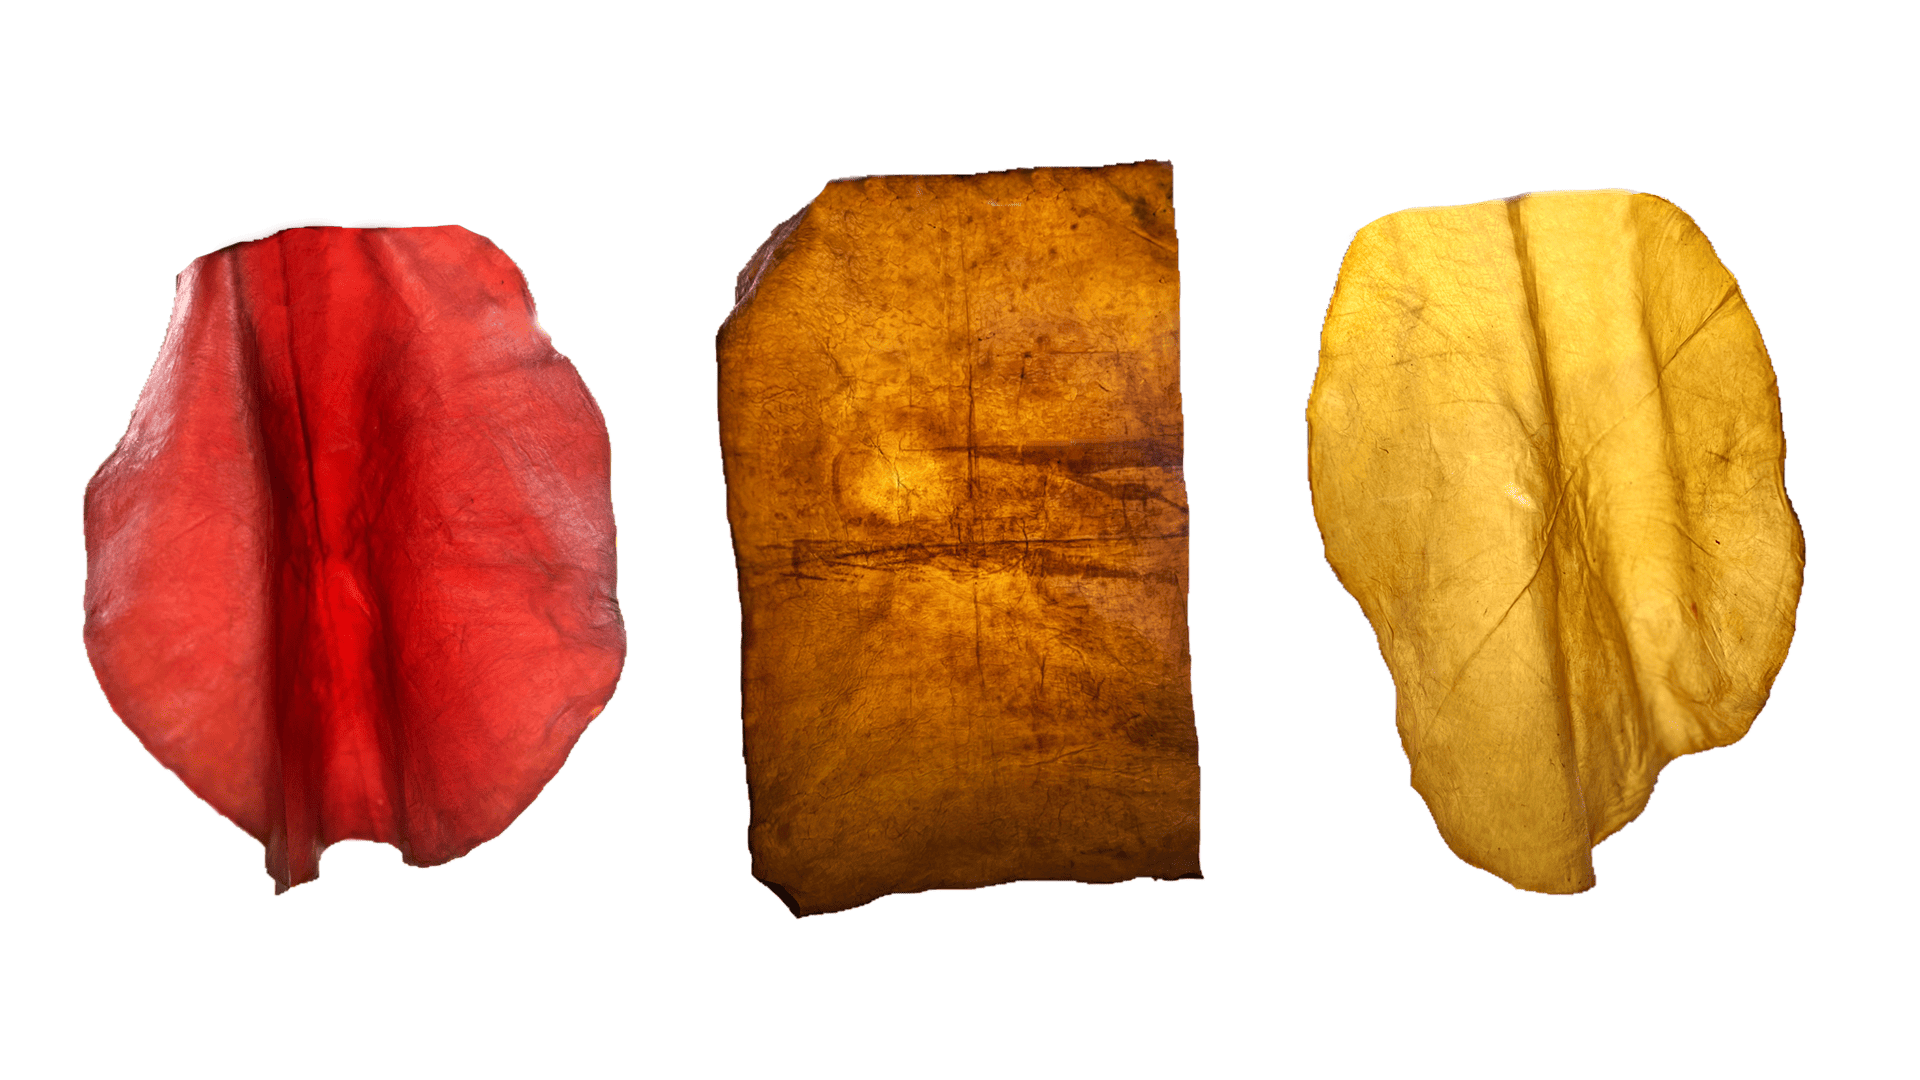
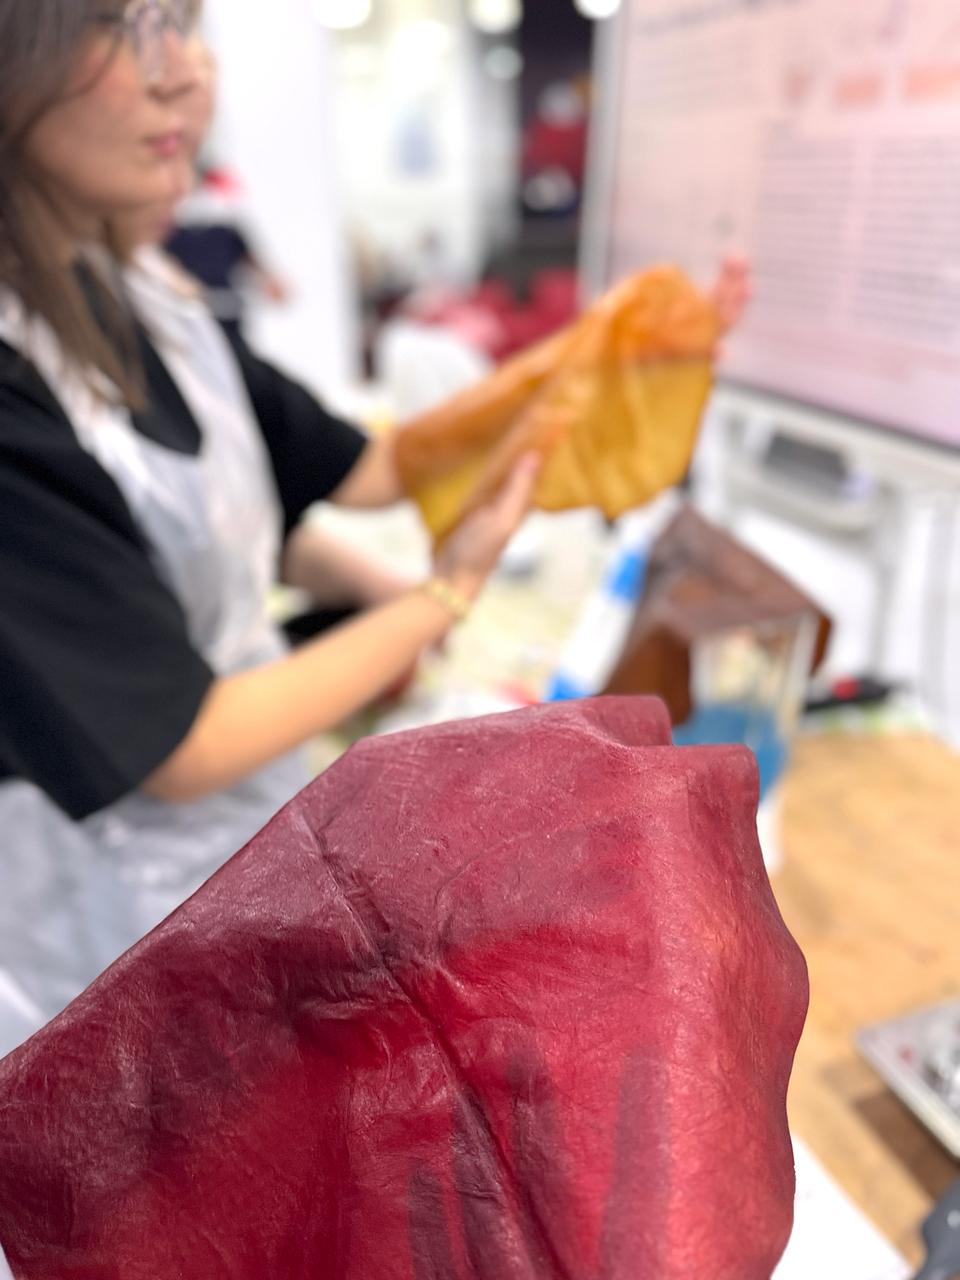
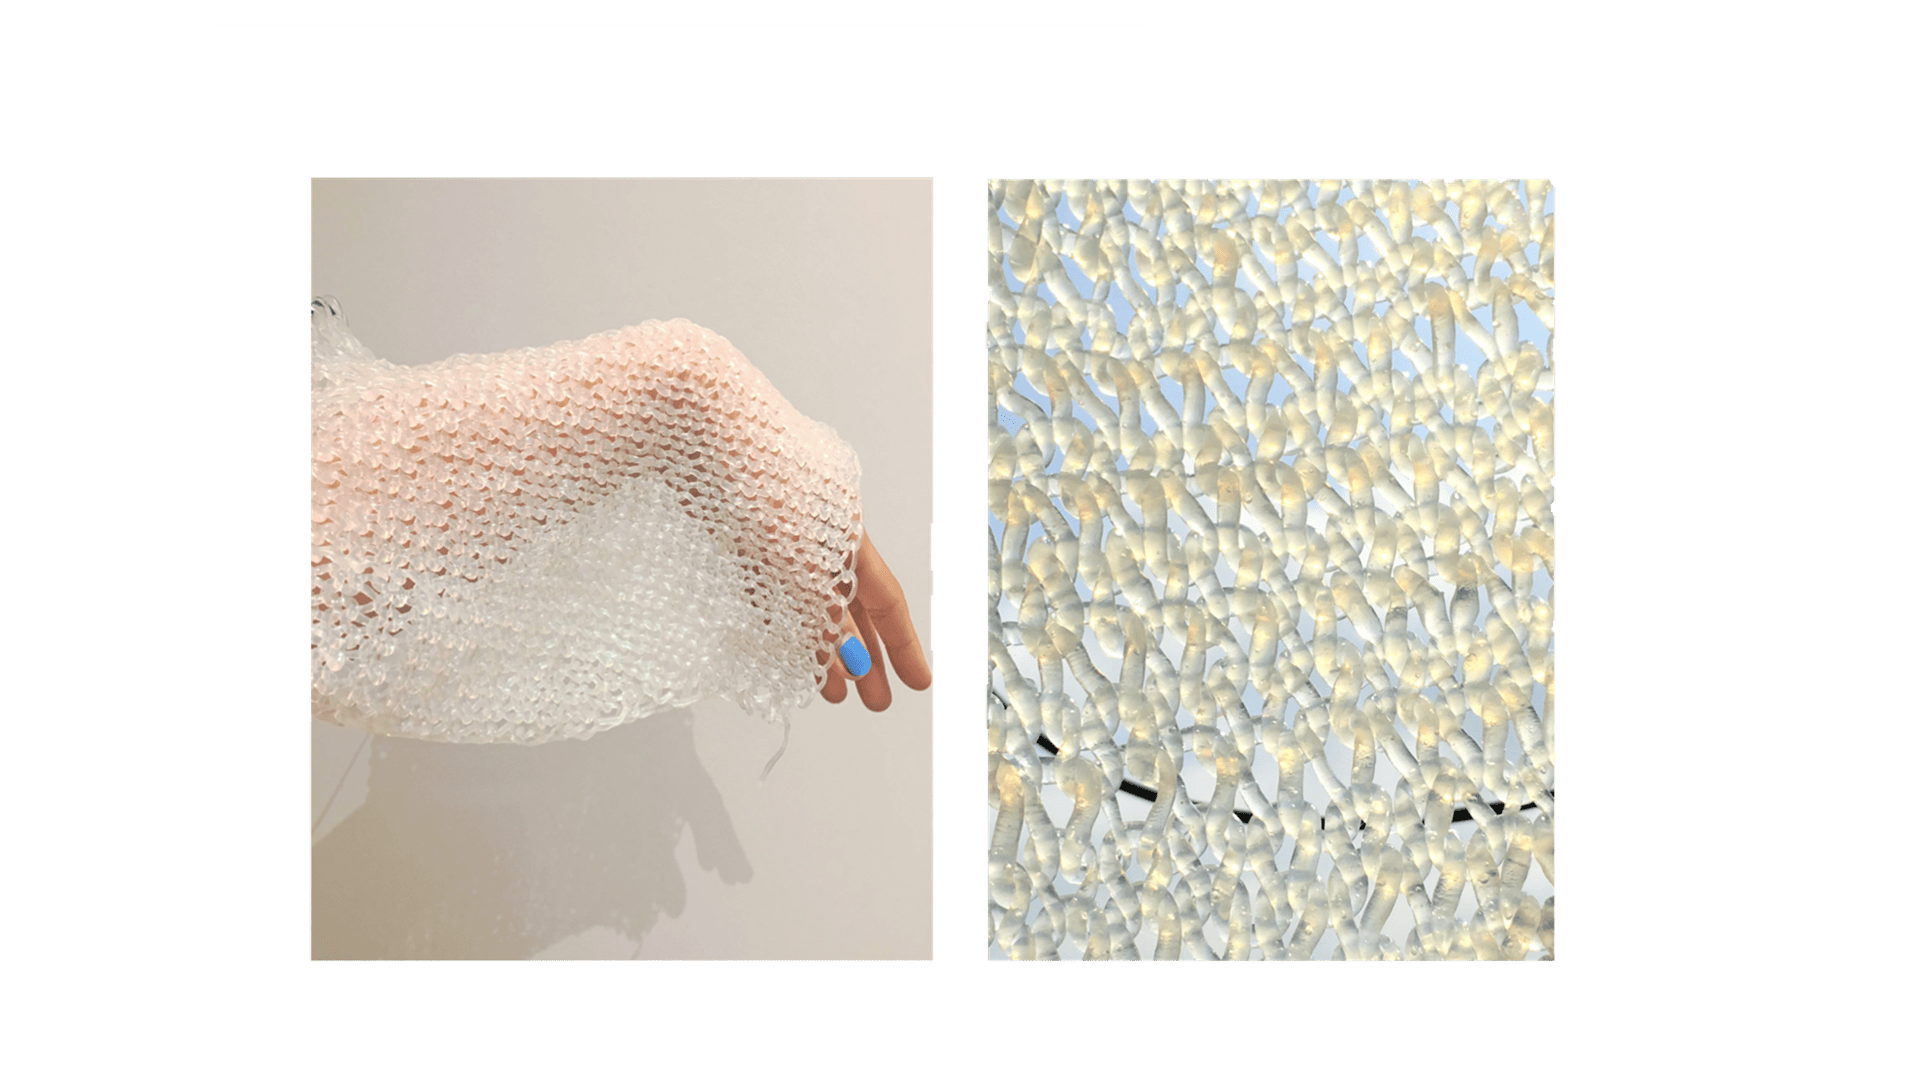
Bio yarn | Youyang Song
Youyang Song’s Bioyarn project takes inspiration from molecular cooking and explores alginate as a material for biodegradable yarn, using techniques including 3D printing and needling. It offers a way to think about textile design beginning with the creation of the fibre itself.
What Is Biofabricating Materials?
Biofabricating materials means to create materials using living organisms, biological processes, and natural ingredients. This can involve growing materials, such as bacterial cellulose from kombucha or mycelium from fungi, as well as craftet material by processing ingredients like alginate, gelatin, and glycerin added for flexibility into sheets, yarns, foams, or composites.
Terminology
Before starting my experiments, I explored the terminology used to describe biomaterials. These terms help me distinguish between where a material comes from, how it is made, and how it behaves after use.
| Term | Meaning |
|---|---|
| Bio-based | Made entirely or partly from biomass resources originating from living or recently living organisms |
| Bioplastic | Plastics that are bio-based, biodegradable, or both. A bioplastic is not necessarily biodegradable |
| Biodegradable | Materials that are capable of being broken down and decomposed naturally into substances |
| Compostable | Biodegradable under specified composting conditions, into natural, non-toxic components within a strict timeframe |
| Polymer | A large molecule made of many linked units called monomers |
| Crafted material | A material made by processing ingredients through methods such as mixing, heating, casting, extrusion |
| Grown material | A material formed through the activity of living organisms, such as bacterial cellulose or mycelium |
Grown Materialss
are formed through the activity of living organisms, such as bacteria and fungi. Instead of mixing a finished material, we provide the nutrients and conditions that allow an organism to produce or develop its structure.
One example is bacterial cellulose, which forms as a layer on the surface of the liquid during kombucha fermentation. This layer can be harvested, cleaned, treated, and dried into a leather like sheet.
Another example is mycelium, the branching network of fungi, which can grow through plant based substrates and bind them together. In this approach, the growing environment, time, and organism influence the result.
Crafted Materials
Crafted materials are made by processing and combining ingredients through techniques such as mixing, heating, casting, and extrusion. Unlike grown materials, their formation does not depend on an organism actively growing during fabrication.
Examples include gelatin-based sheets, agar-based films, and alginate yarns. These recipes usually contain a structural ingredient, such as a biopolymer, alongside water and other ingredients that adjust the material’s properties. For example, glycerin can be added as a plasticiser to increase flexibility.
Changing the recipe, thickness, mould, or drying conditions can affect the final material’s texture, transparency, flexibility, and strength.
Ingredients and Their Roles
In crafted biomaterials, ingredients work together to form a structure, adjust flexibility, introduce colour, or change the surface texture.
| Ingredient | Examples | What it does |
|---|---|---|
| Biopolymer | Gelatin, agar, sodium alginate | Forms the main structure of the material |
| Solvent | Water | liquid medium, Helps dissolve ingredients |
| Plasticiser | Glycerin | Helps the material become more flexible |
| Crosslinking agent | Calcium chloride, used with sodium alginate | Creates connections between polymer chains |
| Filler or reinforcement | Cellulose fibres, sawdust, ground plant waste | create texture, change stiffness, or reinforce the material |
| Colourant | Natural dyes, pigments, food colouring | Adds colour and can influence the material’s transparency. |
| Foaming agent | Soap | create a porous material |
The proportions matter as much as the ingredients themselves. For example, increasing glycerin may make a sample more flexible, but it can also make it sticky or more sensitive to moisture. Adding fibres may create an interesting surface while reducing transparency.
Group Work at The Lab
Sodium alginate bio-yarn & sheet
Sodium alginate is a natural polymer extracted from brown seaweed. When mixed with water, it forms a thick, viscous mixture that can be shaped into sheets, yarns, and other forms.
Alginate Bioyarn
 Water 500 ml
 Sodium alginate 27 g
 Glycerin 50 g
 Calcium chloride 8.75 ml
 mica powder
 Syringe or any extruding tool
 Spoon
 Blender
 Digital weighing scale
 Containers
 - Blend water, glycerin, and sodium alginate
 - Refrigerate for approximately 24 hours.
 - Prepare the setting and rinsing baths separately.
 - Extrude through a small nozzle directly into the setting bath.
 - Transfer the strands into the cold water bath.
 - Remove the strands and leave them to air dry.
Process and workflow
1. Preparing the mixture
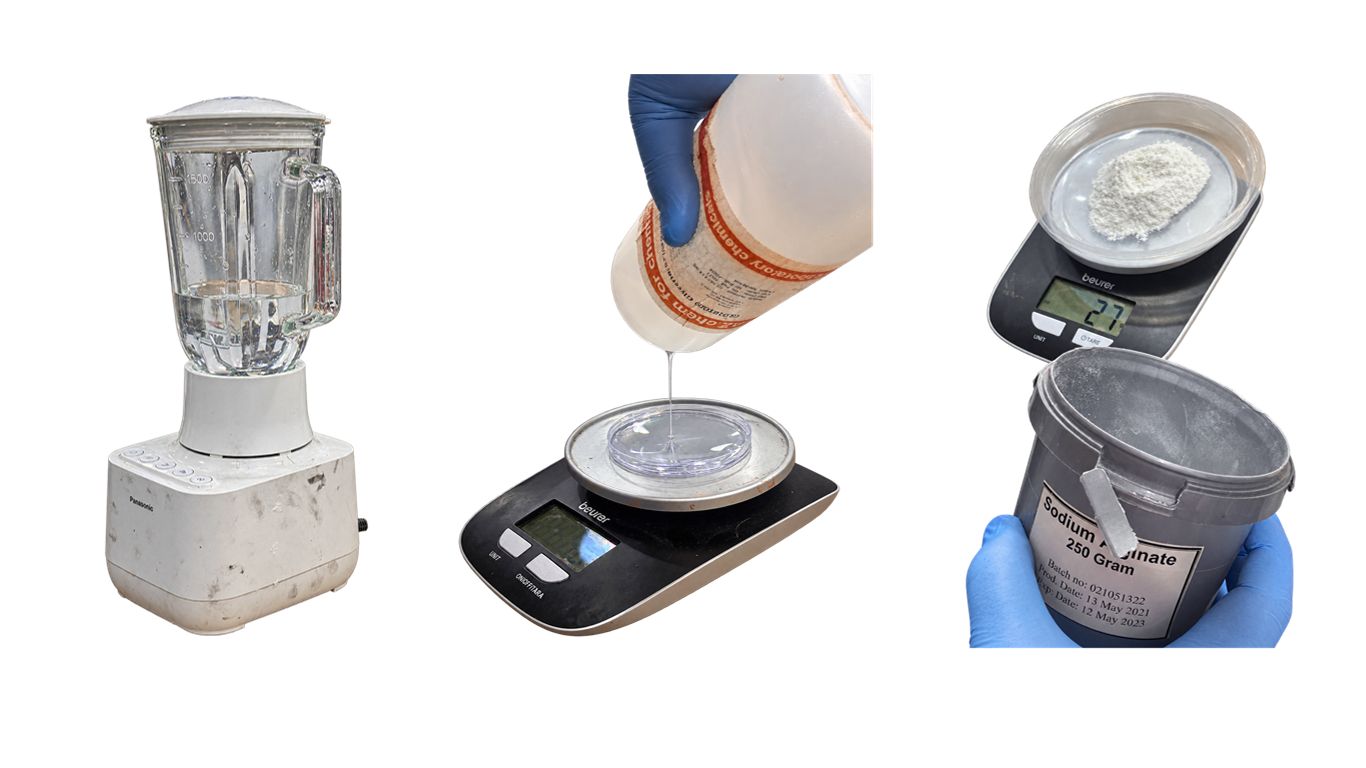
We poured 500 ml of water into a blender, weighed 50 g of glycerin, and added it to the water. We then weighed 27 g of sodium alginate, added it to the blender, and blended the ingredients together.
2. Adding colour
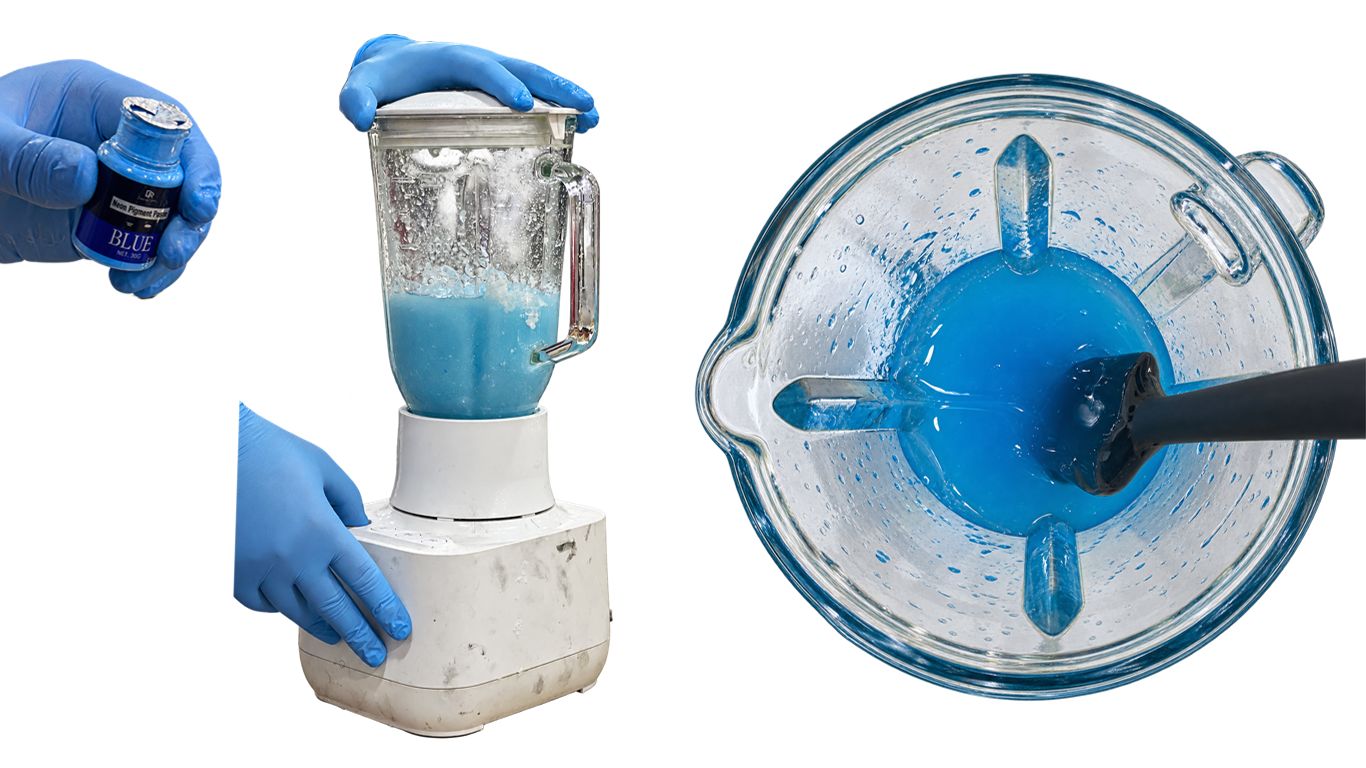
We added blue mica powder and continued blending until the colour was evenly distributed and the mixture reached a thick, liquid consistency.
3. Resting the mixture
We placed the mixture in the refrigerator overnight, approximately 24 hours, to allow trapped air bubbles to escape. The following day, we noticed a considerable reduction in bubbles.
4. Preparing the setting and rinsing baths
We prepared two deep graduated beakers:
 Water 3.5 litres
 Calcium chloride 8.75 ml
 Syringe or any extruding tool
 Deep container
 Spoon, cup
 Digital scale
1. Setting bath: Warm water with calcium chloride added at 7% of the water’s mass.
2. Rinsing bath: Cold water to rinse the yarn after setting.
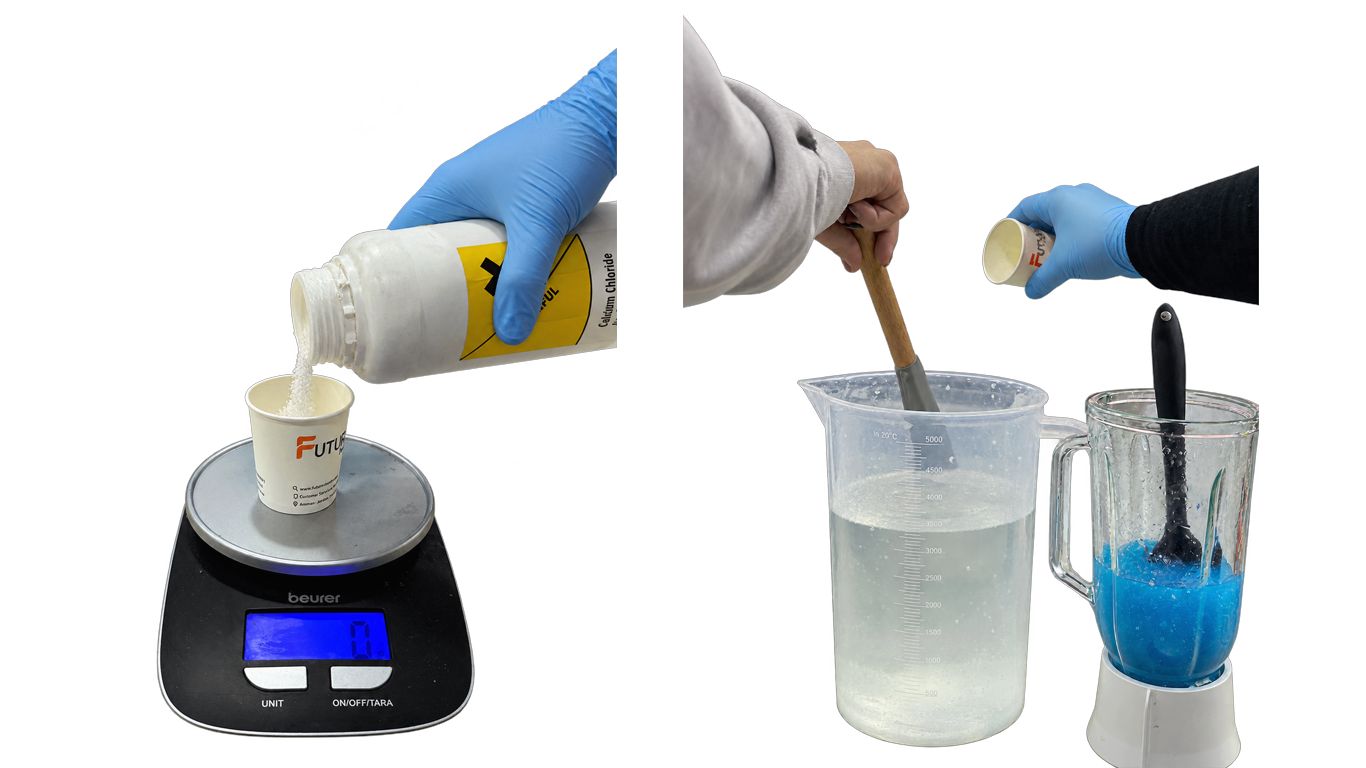
sodium alginate acts as the main structural ingredient. When it comes into contact with calcium chloride, calcium ions connect the alginate chains through a process called crosslinking, turning the mixture into a gel.
Calcium Chloride Safety Precautions
- Wear protective gloves and safety goggles to prevent skin and eye contact.
- Avoid inhaling dust when weighing or transferring the powder.
- Work in a well-ventilated area.
- Add calcium chloride slowly to cool water while stirring. Dissolving it releases heat, so allow the solution to cool before use.
- Do not eat or drink in the work area.
- Skin contact: Wash with plenty of soap and water.
- Eye contact: Immediately rinse with clean running water for at least 15 minutes. Remove contact lenses if easy to do and seek medical attention.
5. Extruding the bioyarn
We loaded the alginate mixture into an extruder fitted with a small nozzle and extruded it directly into the calcium chloride bath. As the mixture entered the solution, it formed gel like strands.
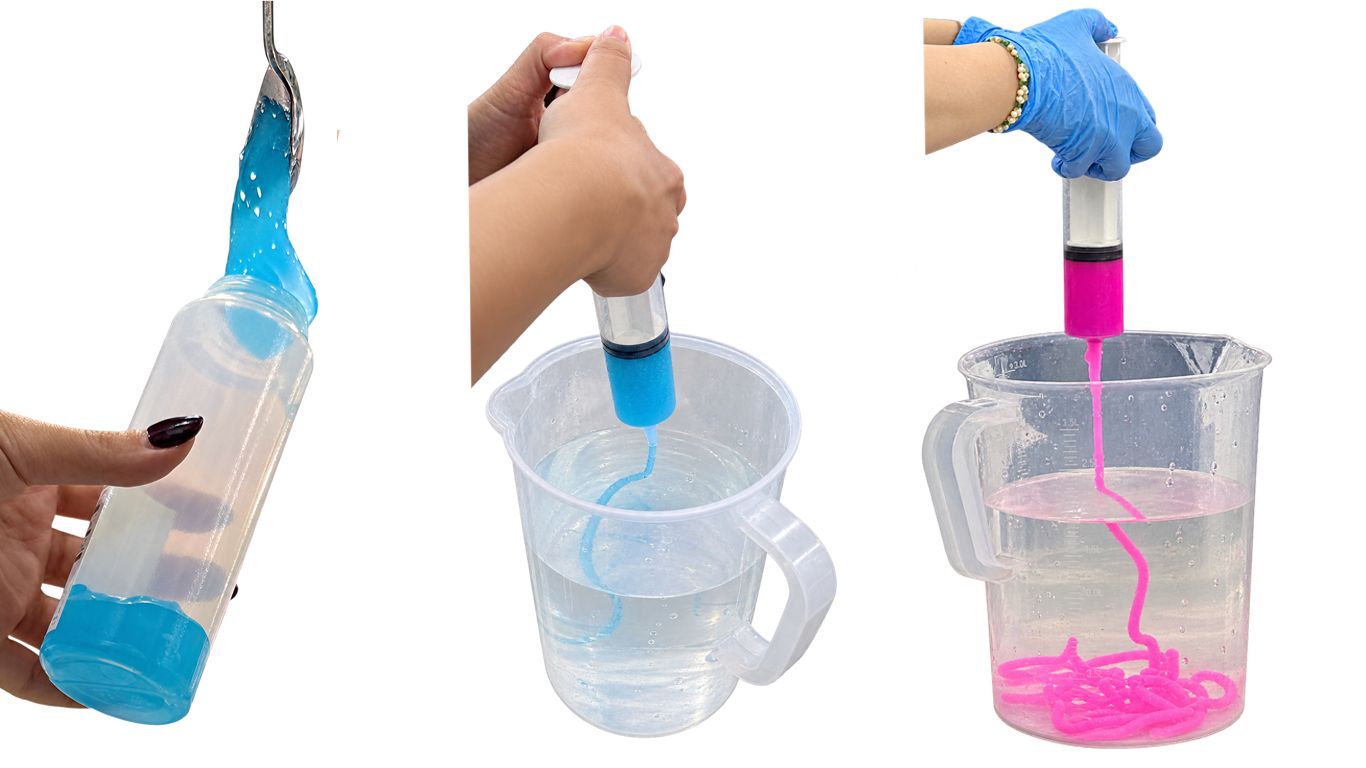
6. Rinsing
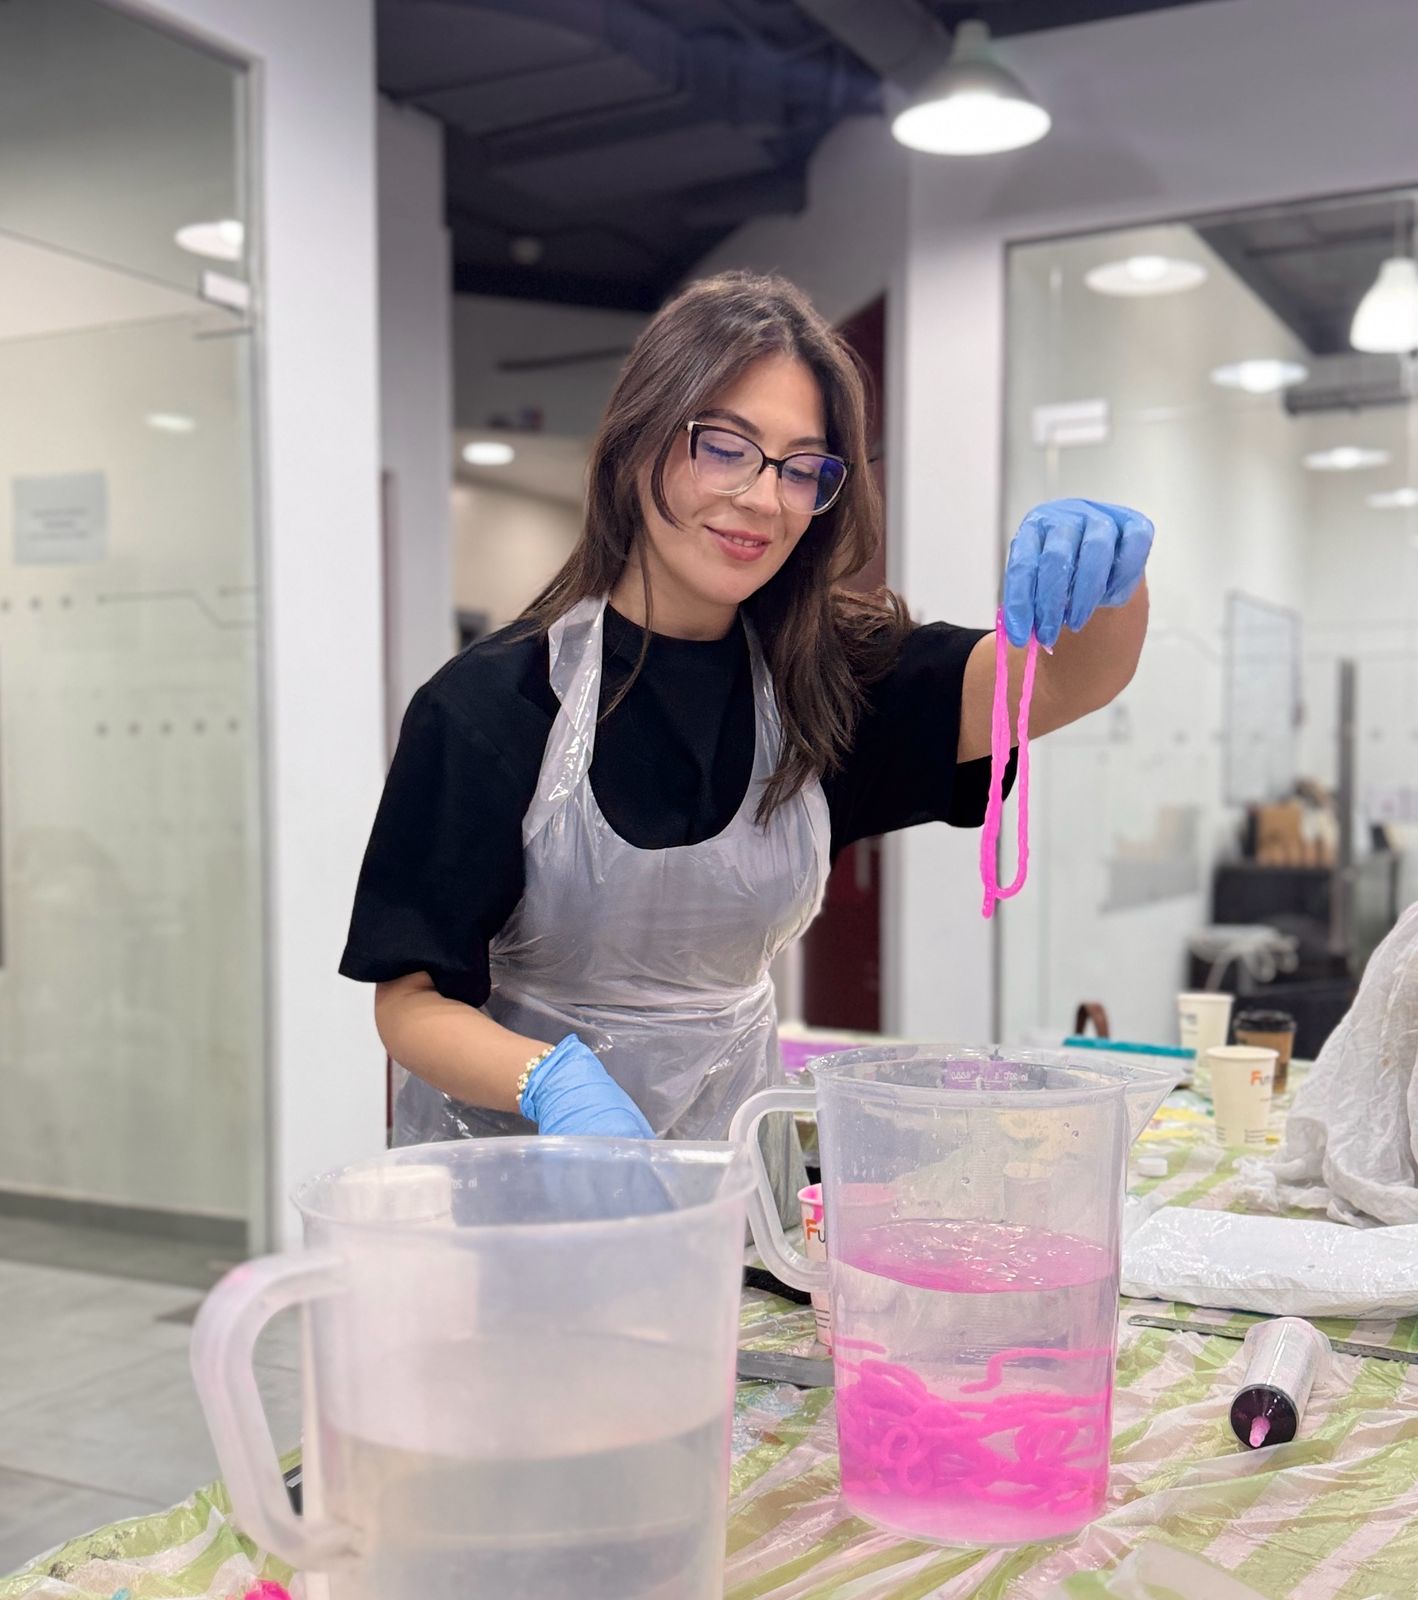
We transferred the strands into the cold water bath to rinse off excess calcium chloride.
7. Drying
After rinsing, we removed the bioyarn and left it to air dry. As water evaporates, the strands become thinner and shrink.
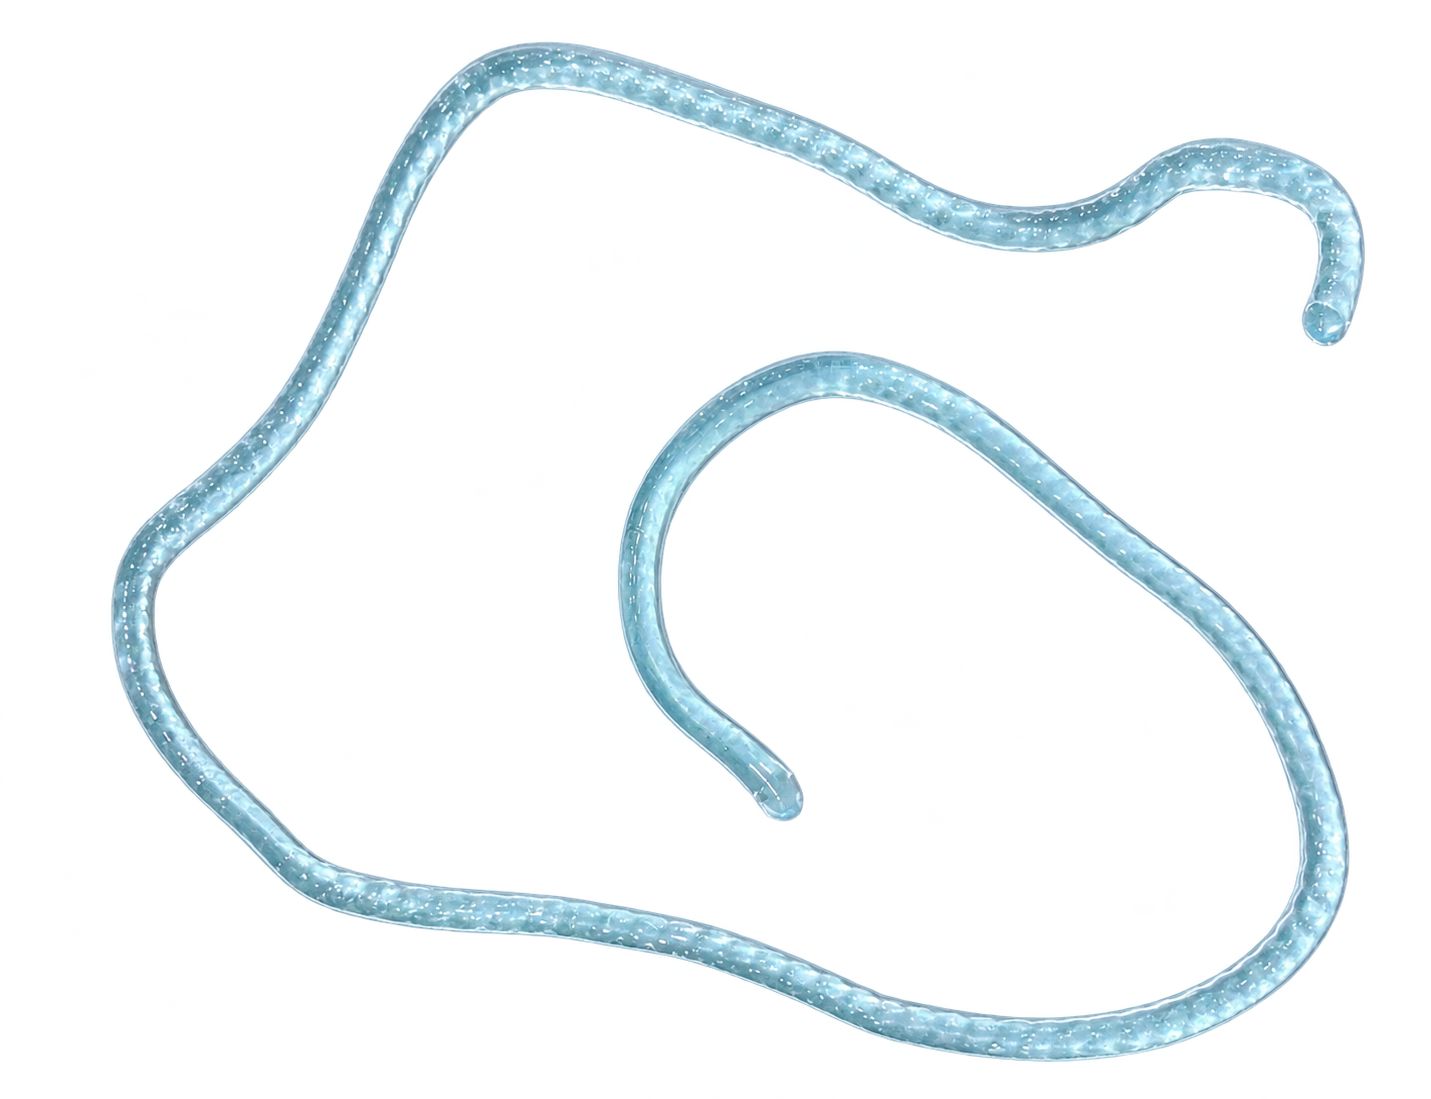

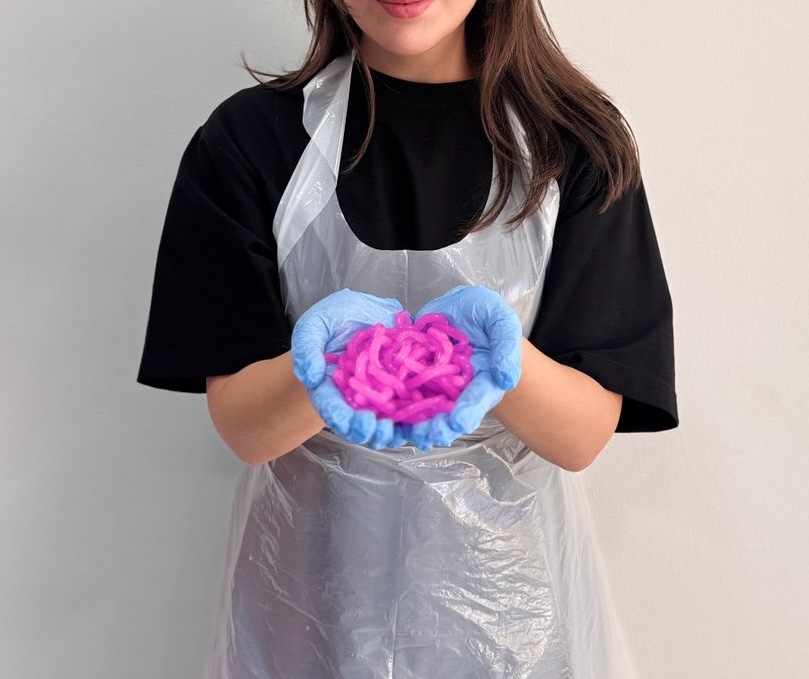
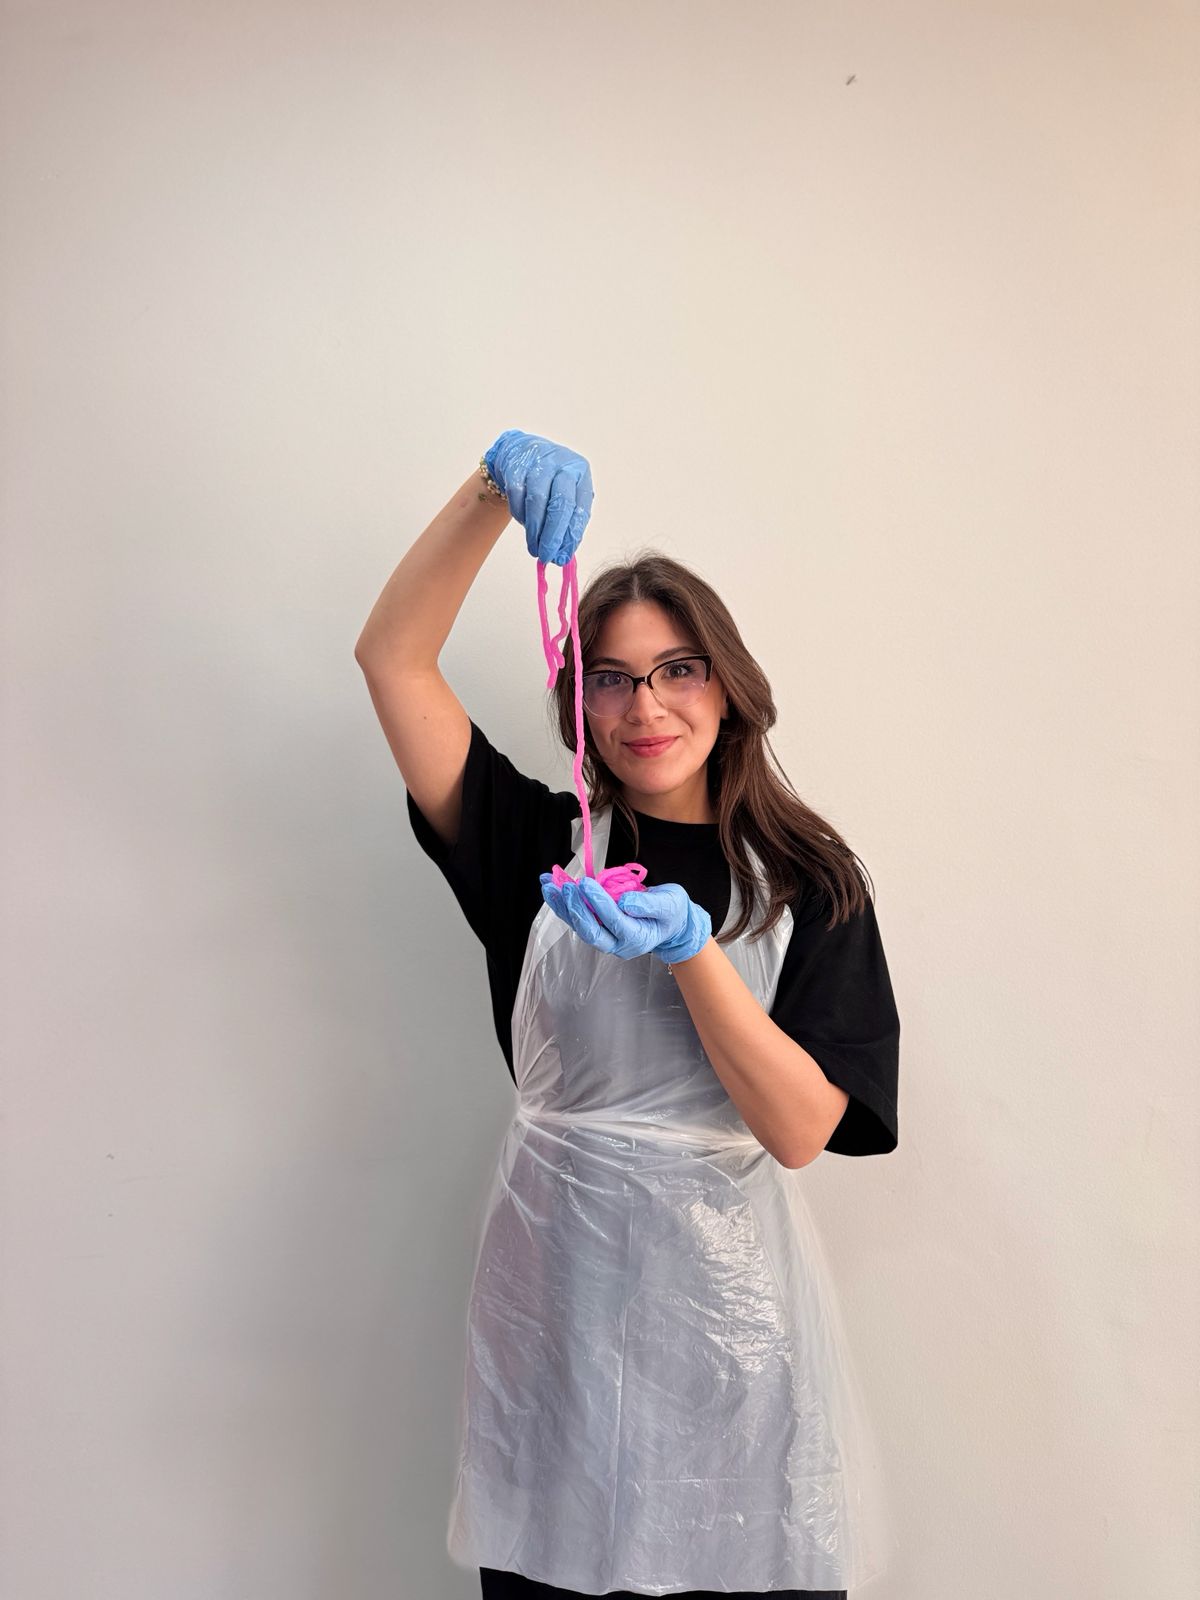
Yarn after drying completely
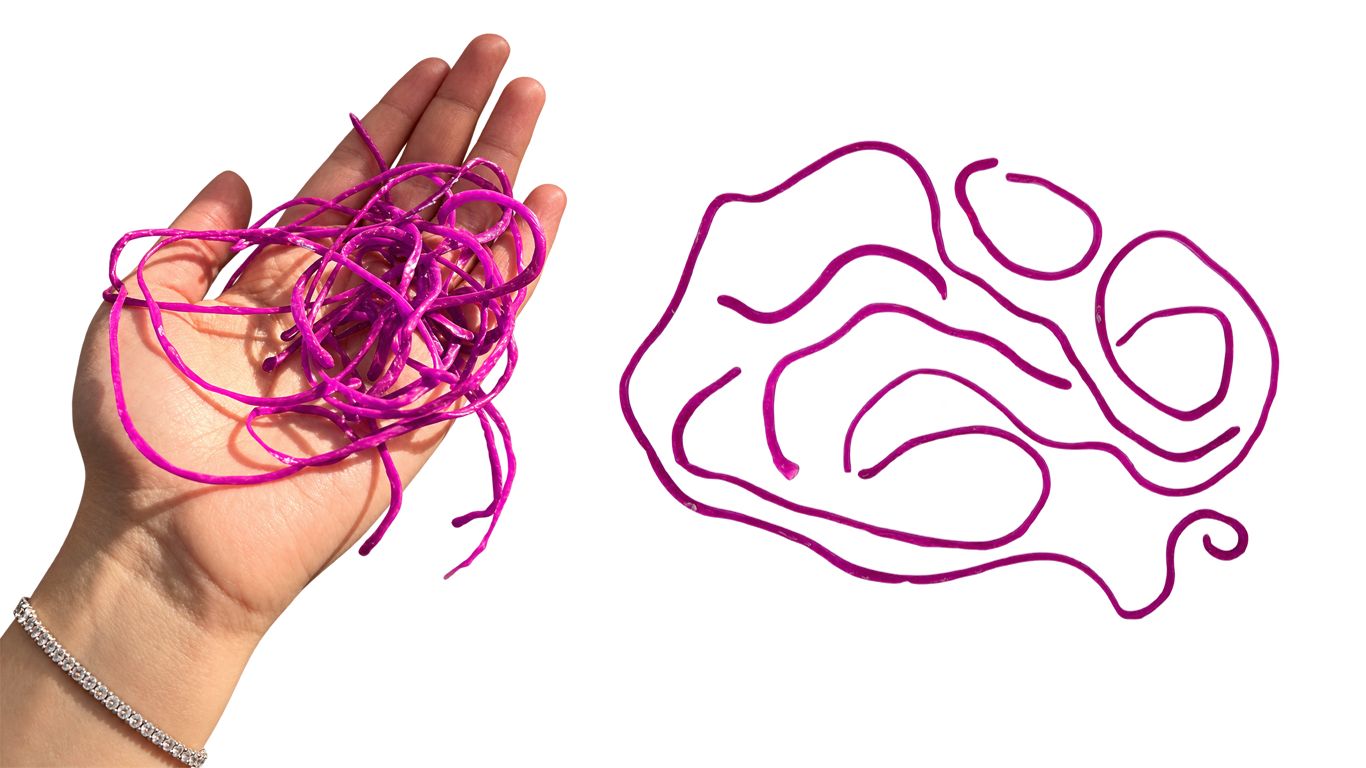
The yarn became darker as it dried, and its diameter decreased from 3.6 mm when wet to 2 mm when dry a shrink of approximately 44%.
Alginate BioSheet
Alongside the bioyarn, we used the same alginate mixture to create a biosheet. This allowed us to explore how one recipe could be shaped into both strands and a continuous surface.
1. Preparing the mould
Using a breathable mold and added fibers.
2. Casting
Poured the alginate mixture into the prepared mould and spread it across the surface.
3. Setting
Sprayed the exposed top surface with calcium chloride solution to help set the sheet from both sides and left the sheet in the mould until it was completely dry.
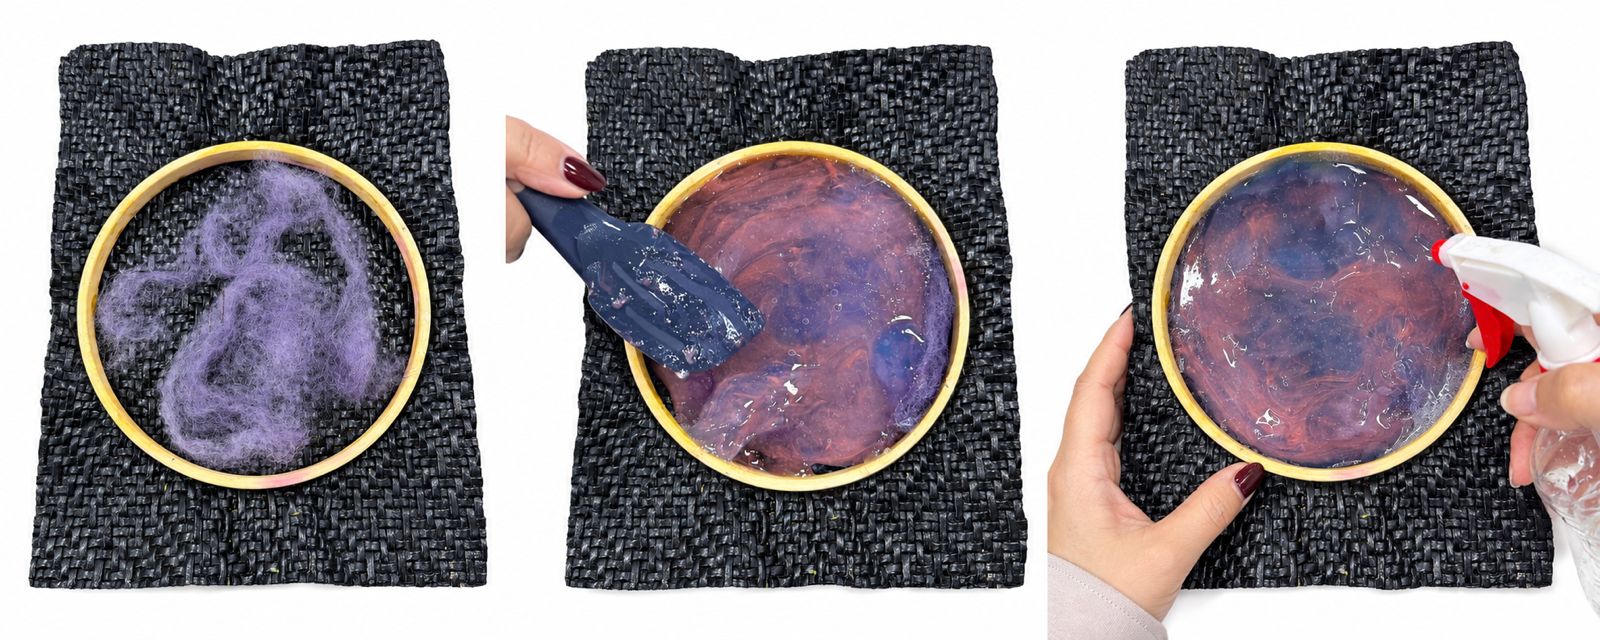
Alginate biosheet after drying completely
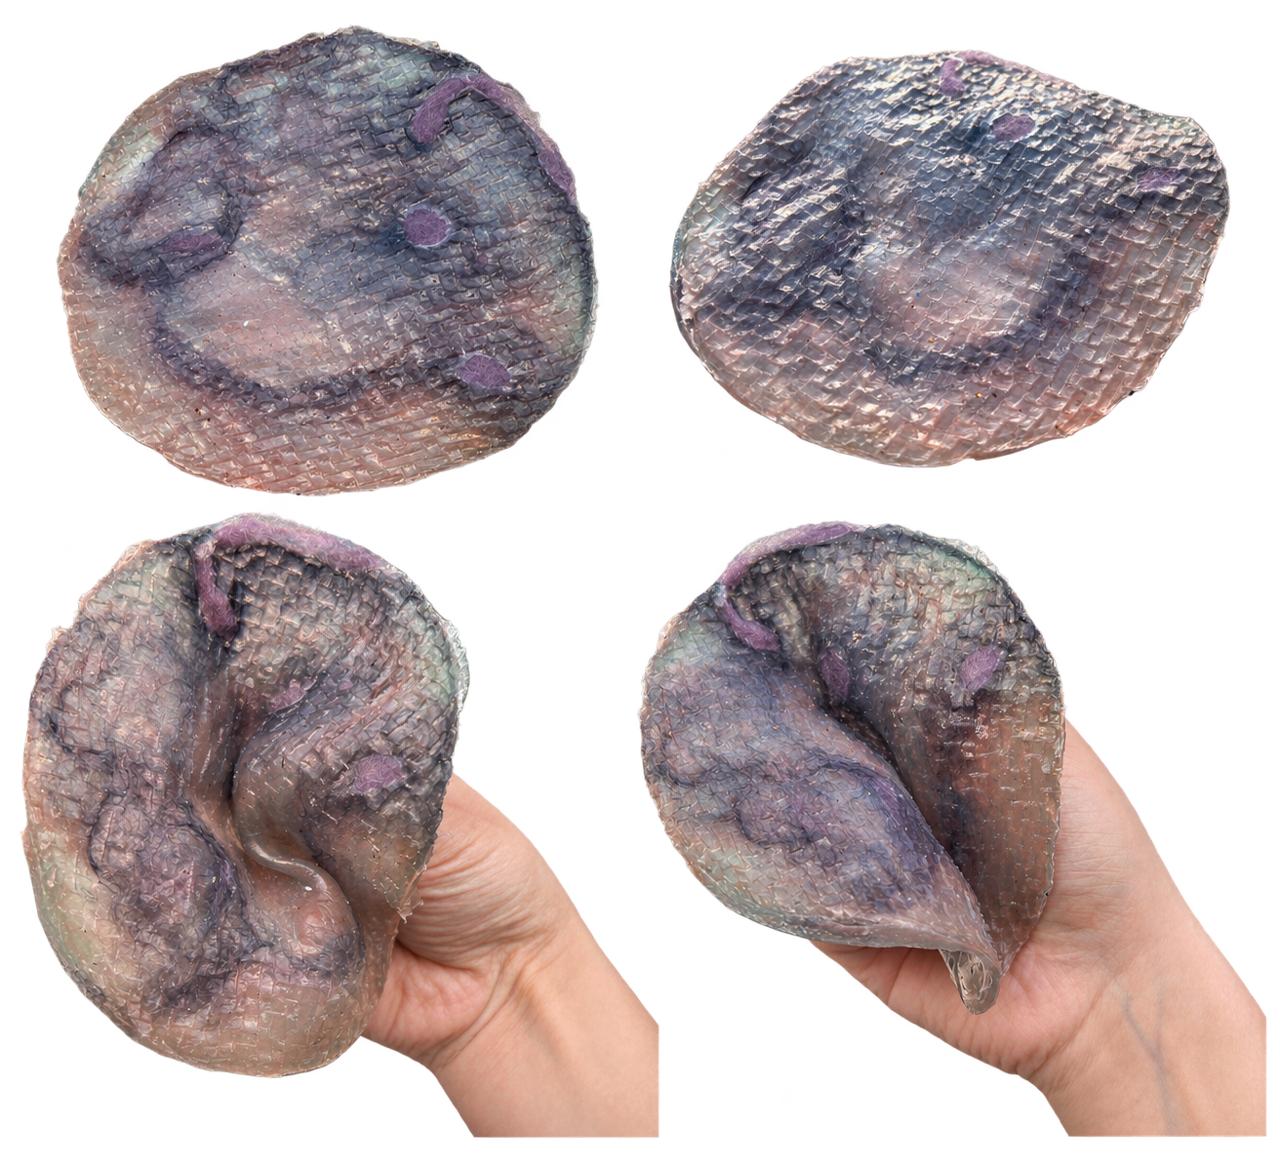
Material Properties Observation | Alginate Biosheet and Bioyarn
| Property | Alginate Biosheet | Alginate Bioyarn |
|---|---|---|
| Form | Continuous sheet cast in a mould | Long strands extruded through a small nozzle |
| Setting method | Calcium chloride solution applied above the cast and underneath the mould | Extruded directly into a calcium chloride bath, then rinsed |
| Wet appearance and texture | Gel-like surface | Gel-like strands |
| Transparency | Slightly translucent without fibres, added fibres reduced transparency. | Not Transparent |
| Flexibility when dry | bends easily | bends easily |
| Stretchability when dry | might breack when highly streached | might breack when highly streached alot |
| Shrinkage during drying | it shrinkes after drying | Approximately 44% in thickness compared with wet size |
| Drying time | 4-5 days | 2 days |
| Water response | Not yet tested | Not yet tested |
Bioplastics & Biofoils
After working with alginate, we explored gelatine and agar-agar to experiment with different bioplastic recipes and compare their material properties.
Gelatine Bioplastic
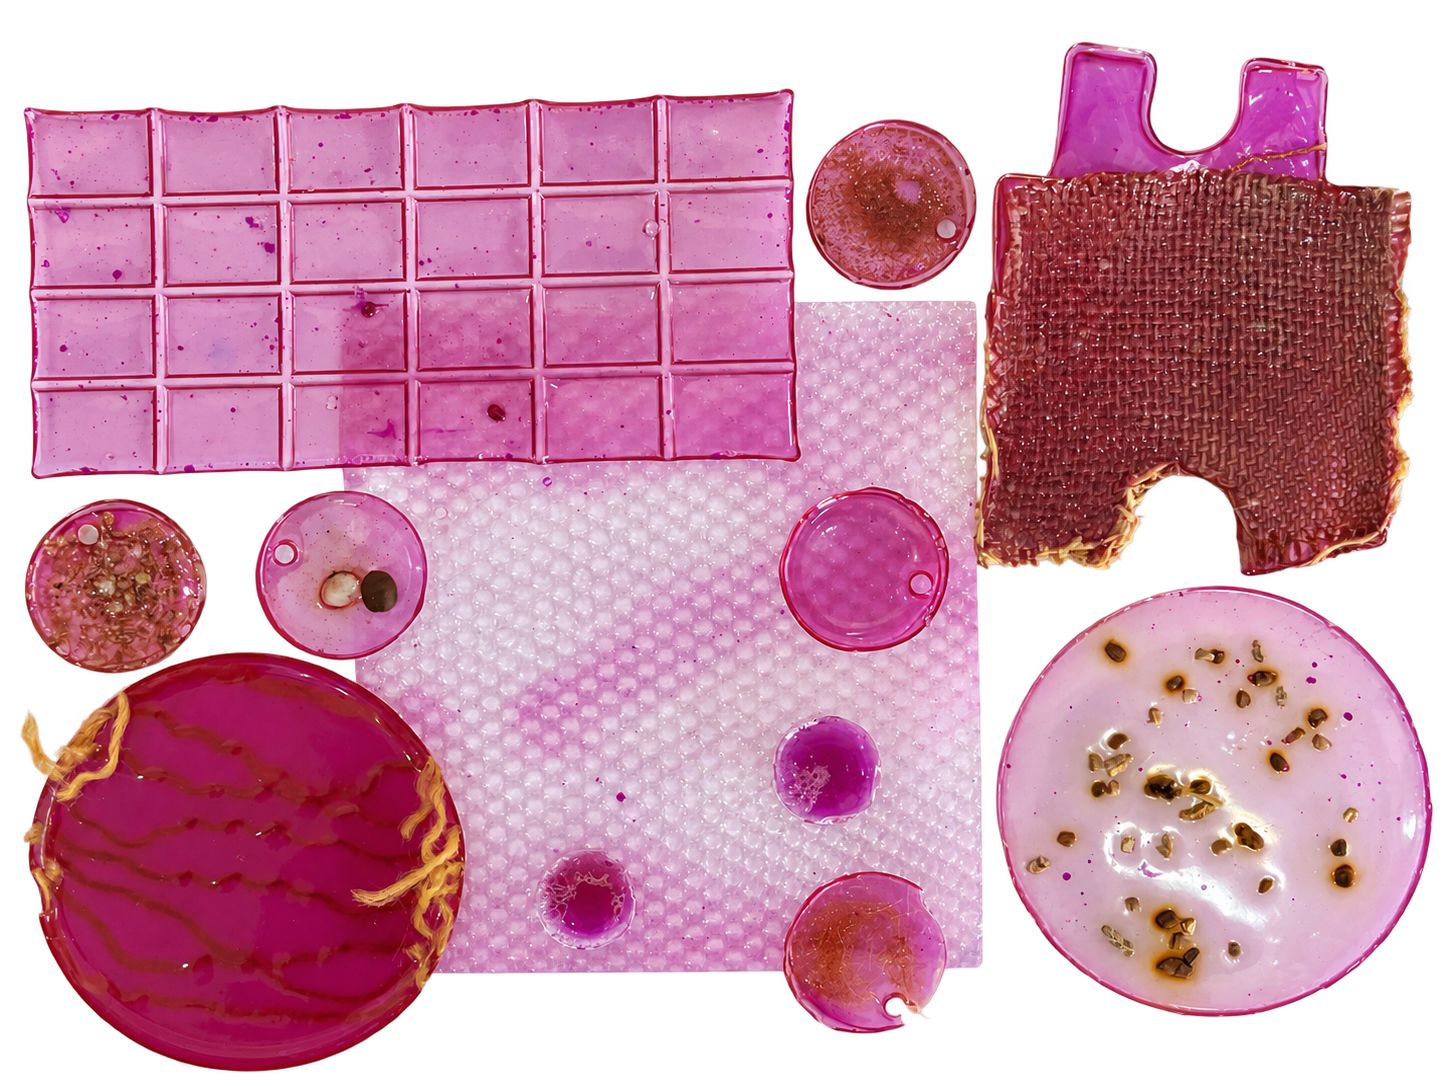
 Gelatine powder  100 g
 Glycerin 25 g
 Water 500 ml
 Mica powder
 Experimental additives
 Pot
 Spoon
 Whisk
 Stove
 Digital scale
 Mouldes or casting surfaces
 - Pour 500 ml of water into a pot and heat on the stove.
 - Weigh and add 25 g of glycerin.
 - Gradually add 100 g of gelatine powder while stirring.
 - Continue until the gelatine dissolves and the mixture thickens.
 - Add color or leave it uncoloured.
 - Pour into moulds, containers, and onto textured sheets.
 - Leave the samples until completely dry. Remove carefully from the casting surfaces.
Process and workflow
1. Heating the water
Poured 500 ml of water into a pot on the stove and began heating it.
2. Adding the glycerin
Weighed 25 g of glycerin, added it to the water, and stirred to combine.
3. Adding the gelatine
Weighed 100 g of gelatine powde and gradually added it to the mixture while stirring to help prevent lumps.
Preparation note: To help the gelatine dissolve evenly, it can first be hydrated, in a portion of the recipe’s cold water before being added to the warm mixture.
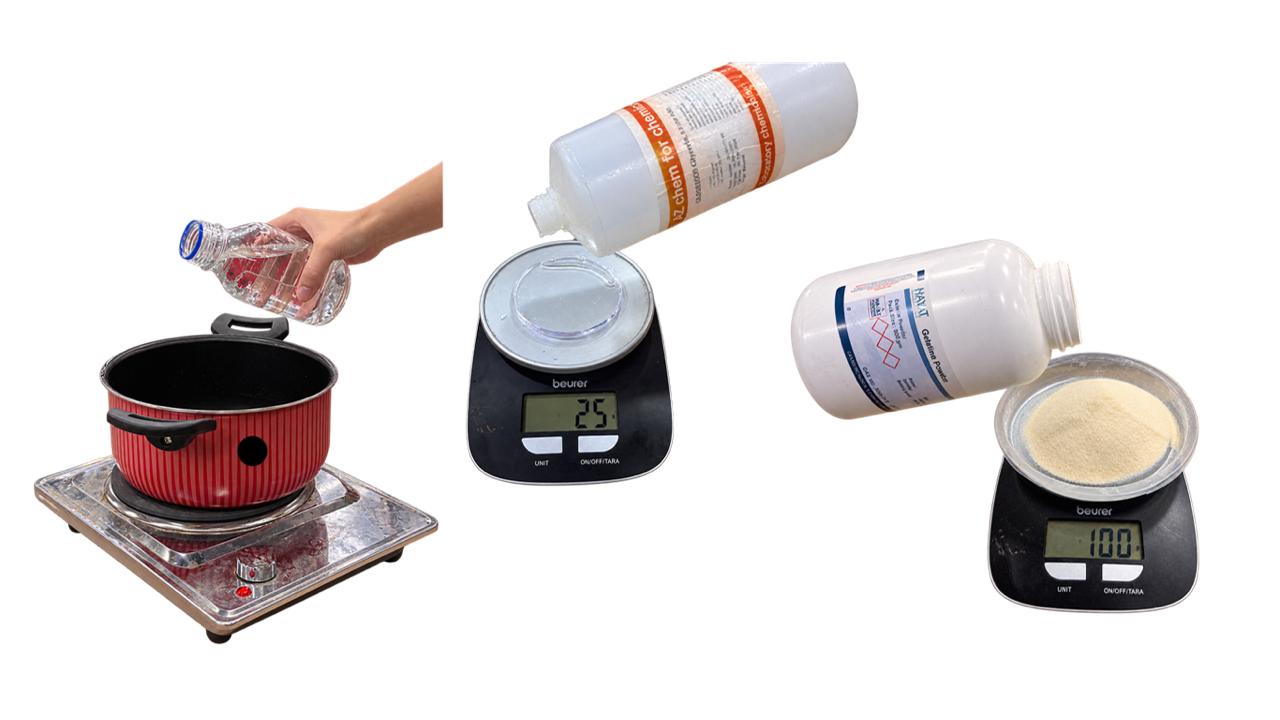
4. Heating and stirring
We continued heating and stirring until the gelatine had fully dissolved and the mixture thickened to a honey-like consistency.
5. Dividing the mixture
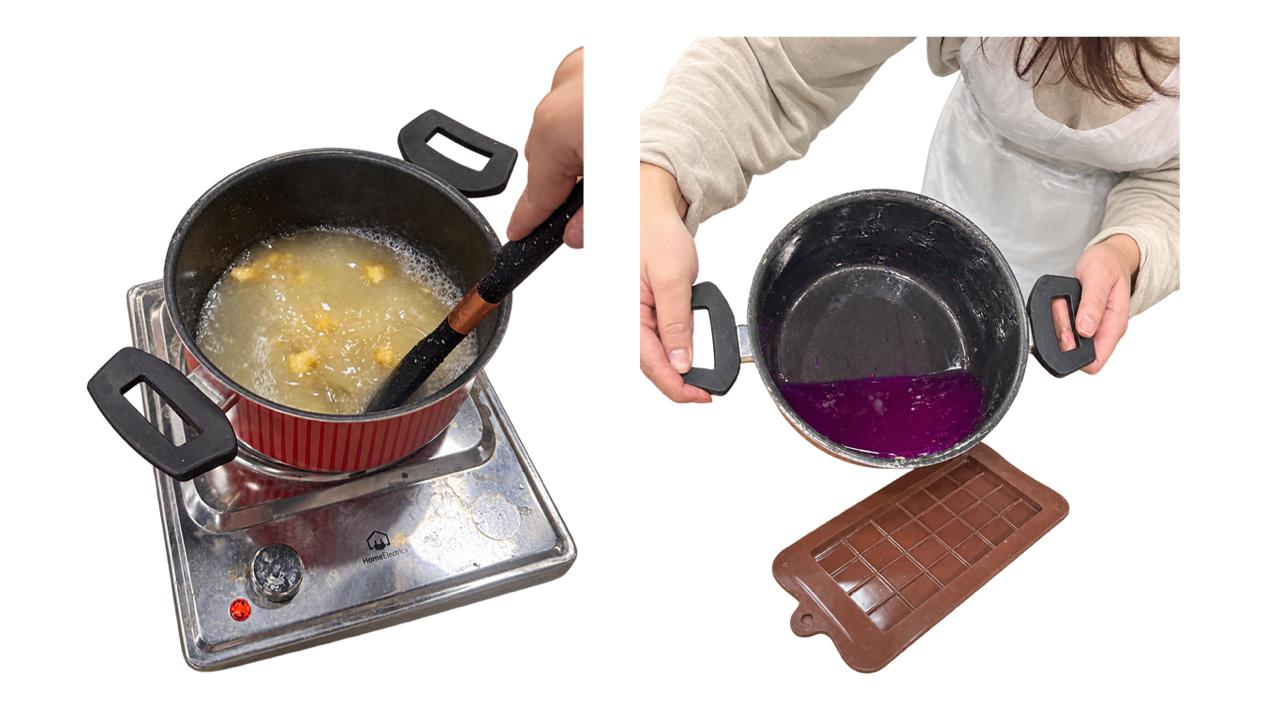
We divided the mixture into two portions. We added mica powder to one portion and mixed it until the colour was evenly distributed. We left the other portion uncoloured and explore different additives.
6. Casting and experimenting
We poured the mixtures into moulds, containers, and onto textured sheets to explore different shapes and surface finishes. We also added different additives to selected samples.
7. Setting and drying
We left the samples to set and dry completely for 4 days before removing them from their casting surfaces.
Setting and drying are separate stages: the mixture can become firm while still containing water, so we allowed additional time for that moisture to evaporate.
Gelatine Bioplastic Results
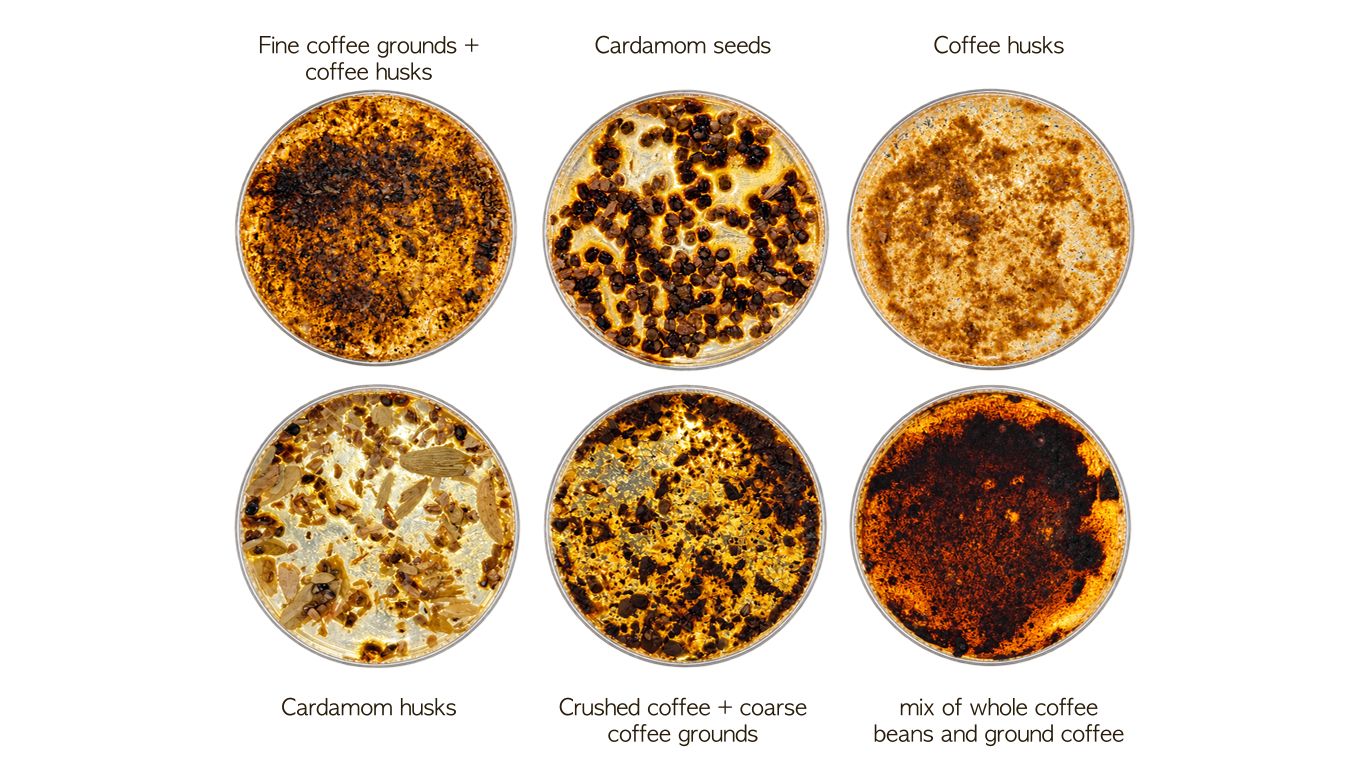
Gelatine Bioplastic and Coffee
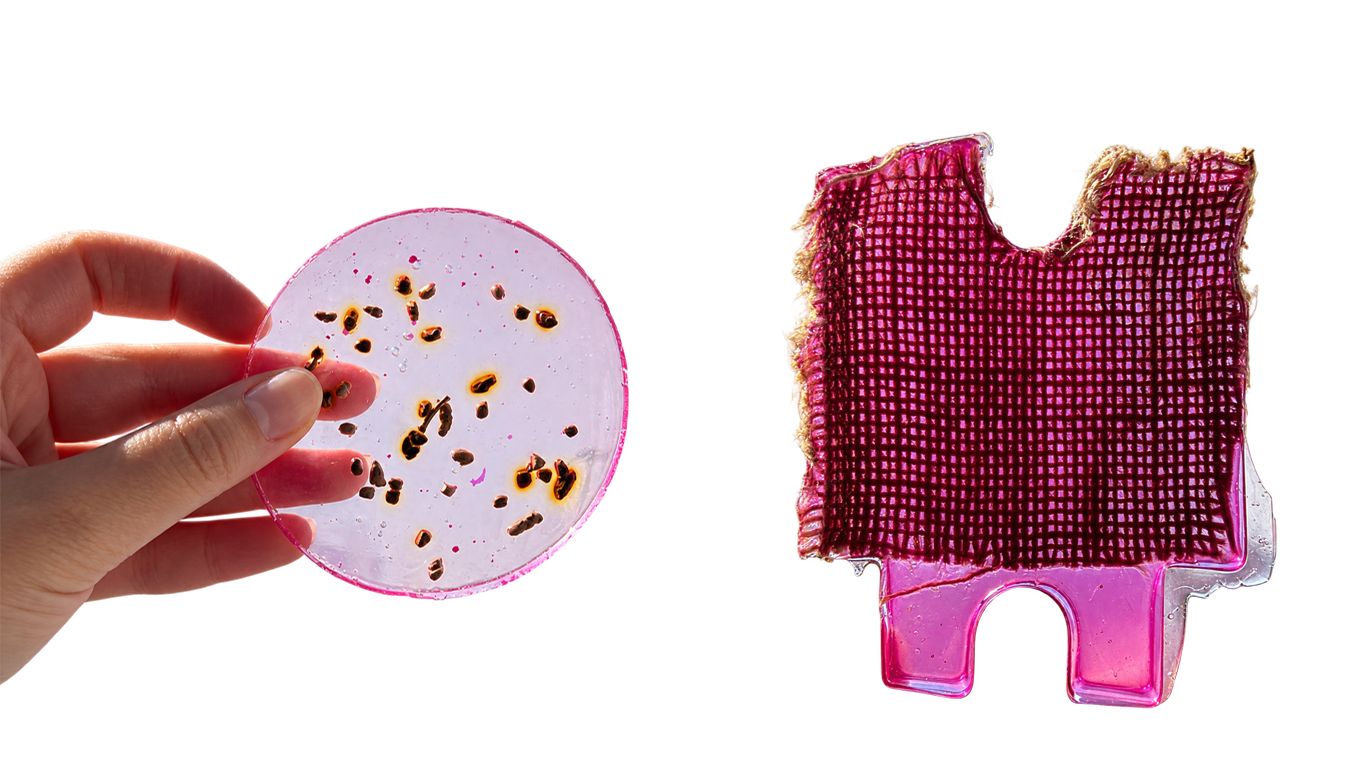
a. Gelatine Bioplastic with Cardamom seeds, casted in a petri dish | b. Gelatine Bioplastic infused with fiber mesh, casted in a silicone mould
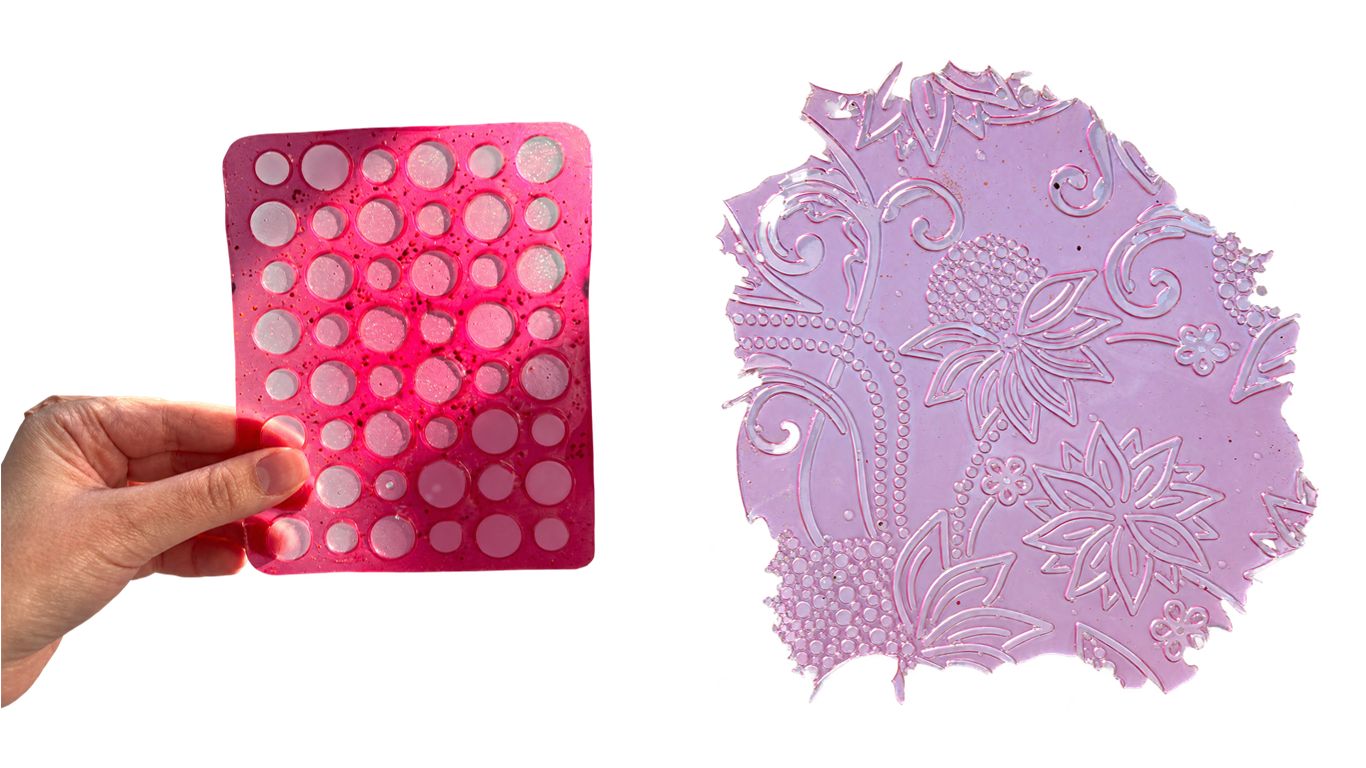
a. Gelatine Bioplastic Sheet, casted in a 3D printed mould | b. Gelatine Bioplastic Sheet, casted on a silicone sheet
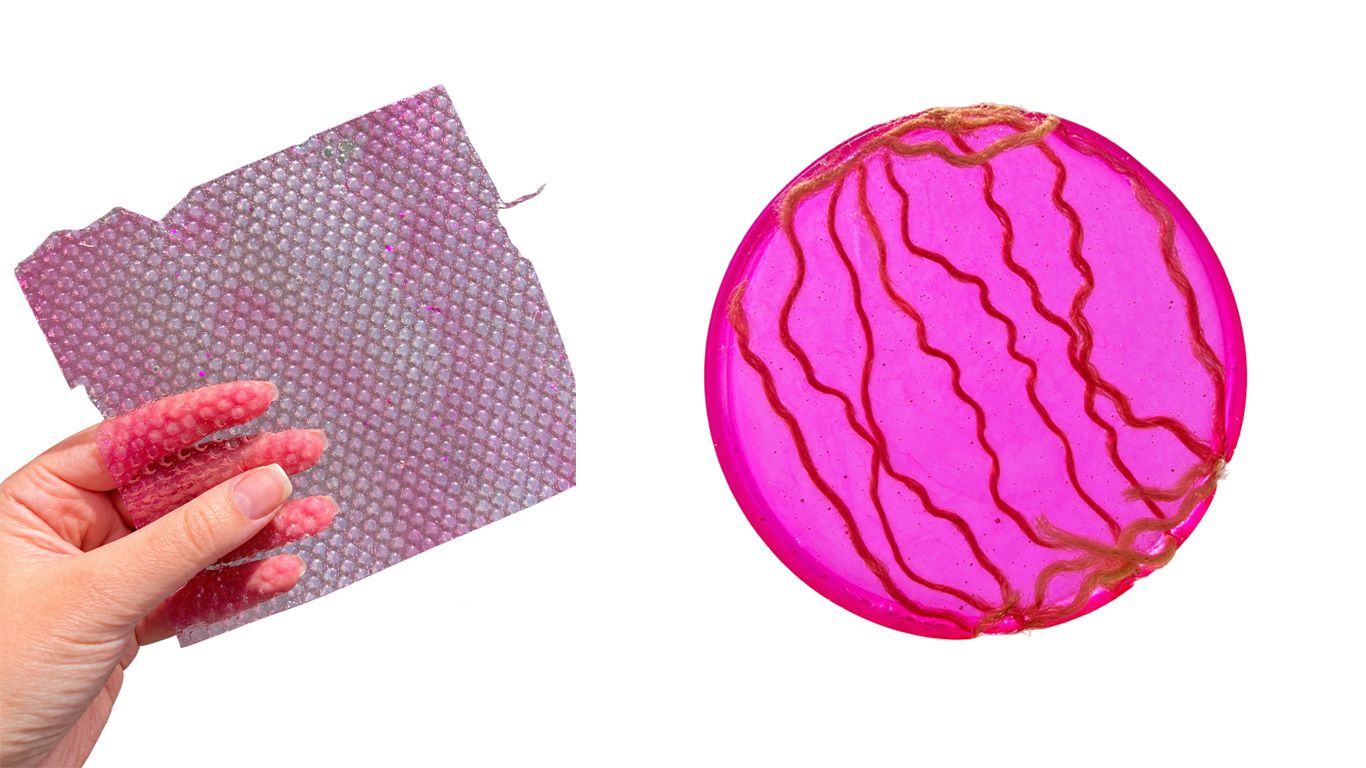
a. Gelatine Bioplastic Sheet | b. Gelatine Bioplastic infused with wool, casted in a petri dish
Material Properties Observation
| Appearance | Strength & Flexibility | Reversibility | Water & Sensitivity | Biodegradability |
|---|---|---|---|---|
| Translucent | High strength (when low on glycerine), Flexibility is adjustable (via glycerine) | Remeltable using warm water | Poor water resistance, will soften in humid air | Biodegradable, weeks (home compostable) |
Agar Agar Biofoil
Agar Agar is a plant-based, biodegradable alternative to petroleum plastics. It is made from agar-agar a gelatinous polysaccharide extracted from red algae.
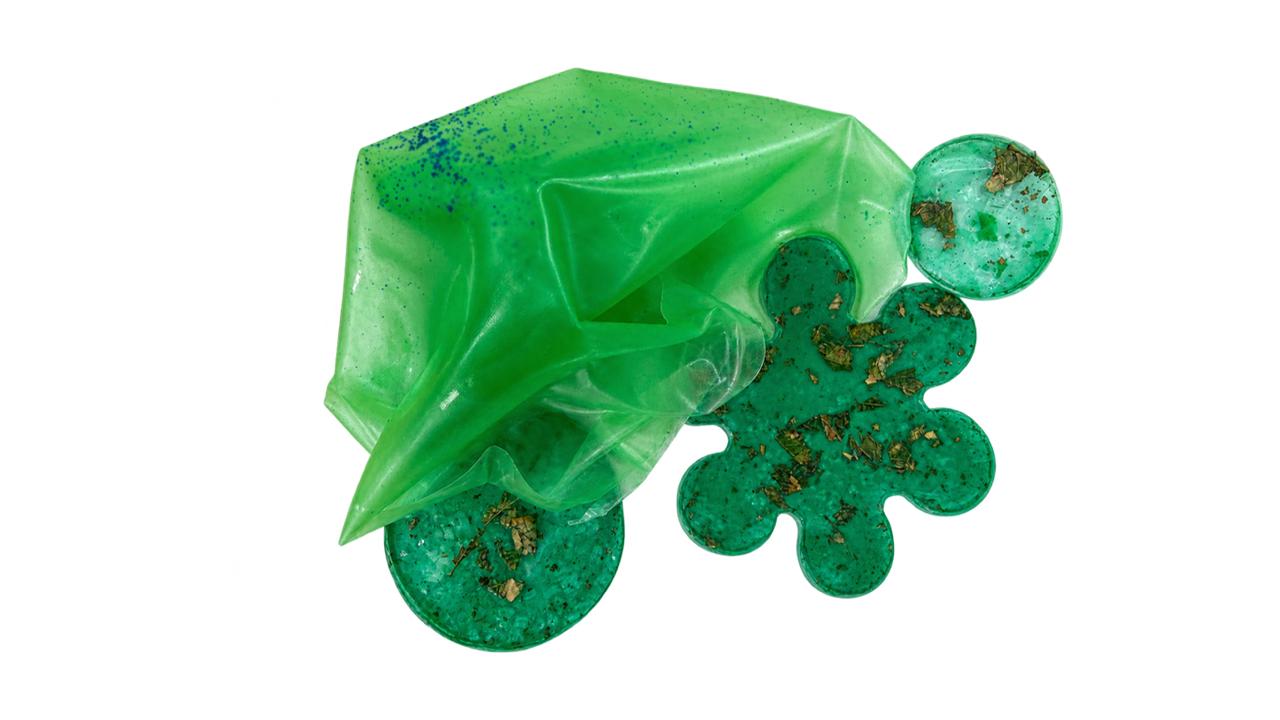
 Agar Agar 10 g
 Glycerin 25 g
 Water 500 ml
 Mica powder
 Experimental additives
 Pot
 Spoon
 Whisk
 Stove
 Digital scale
 Mouldes or casting surfaces
 - Warming the water in a pot to around 30–50°C.
 - Add the glycerin and stir well. It helps make the material more flexible, but adding too much can leave it sticky.
 - Gradually add the agar while stirring. Larger flakes may need more time to dissolve than fine powder.
 - Keep mixing until the mixture becomes smooth and evenly combined.
 - Continue heating gently for approximately 30 minutes, starting at 60–70°C and gradually increasing to a maximum of 86°C.
 - Pour the warm mixture onto the prepared mould or casting surface and spread it evenly.
 - Leave it to dry in a dry, well-ventilated room. The material may curl or change shape as water evaporates, and turning it during drying can influence the final shape.
 - Demould once completely dry.
Agar Agar Biofoil Results
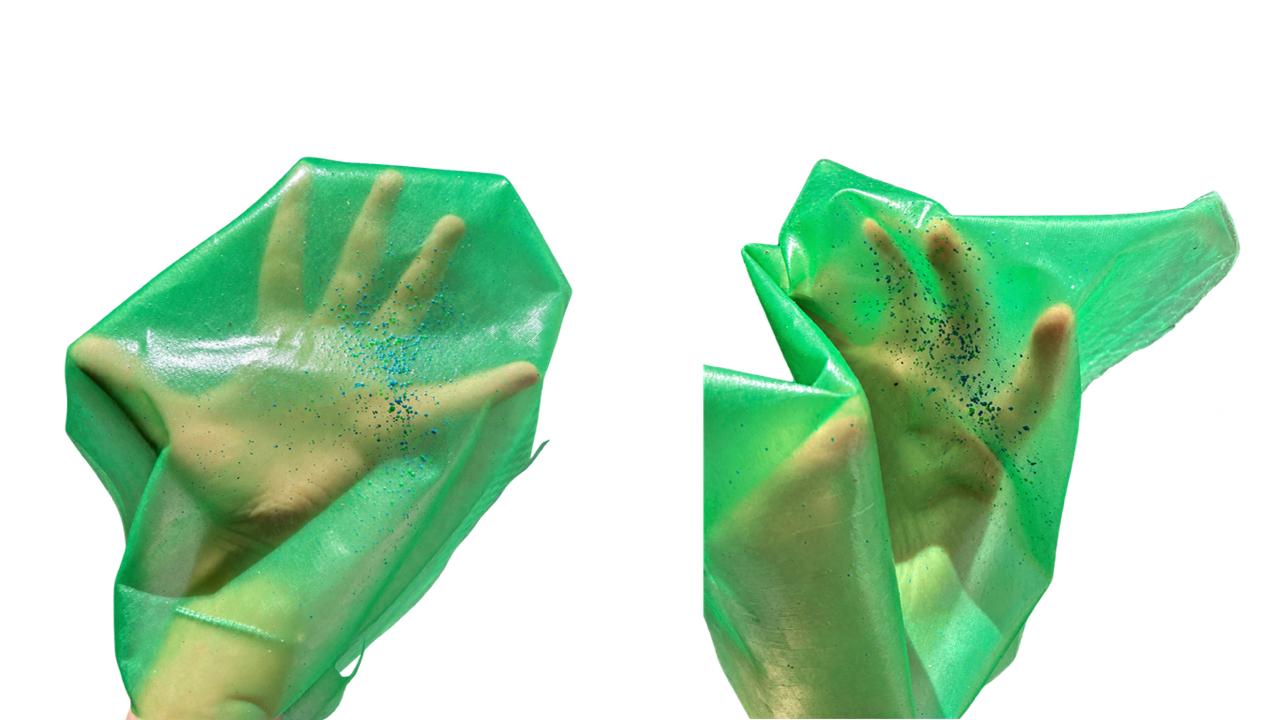
Agar Agar Biofoil, casted in thin layer on a tray
Material Properties Observation
| Appearance | Reversibility | Water & Sensitivity | Biodegradability |
|---|---|---|---|
| Translucent, slightly mattefinish. | Can be recycled by reheating with hot water or melting above 60°C. | hydrophilic, will soften or dissolve if exposed to water for extended periods. | Breaks down in soil or aerobic environments within 2 to 4 months. |
Bio Leathers
Bioleather is a leather-like materials made from biological sources or through biological processes These may include bacterial cellulose, fungal mycelium. In our experiment, we worked with bacterial cellulose grown during kombucha fermentation.
Growing Kombucha leather
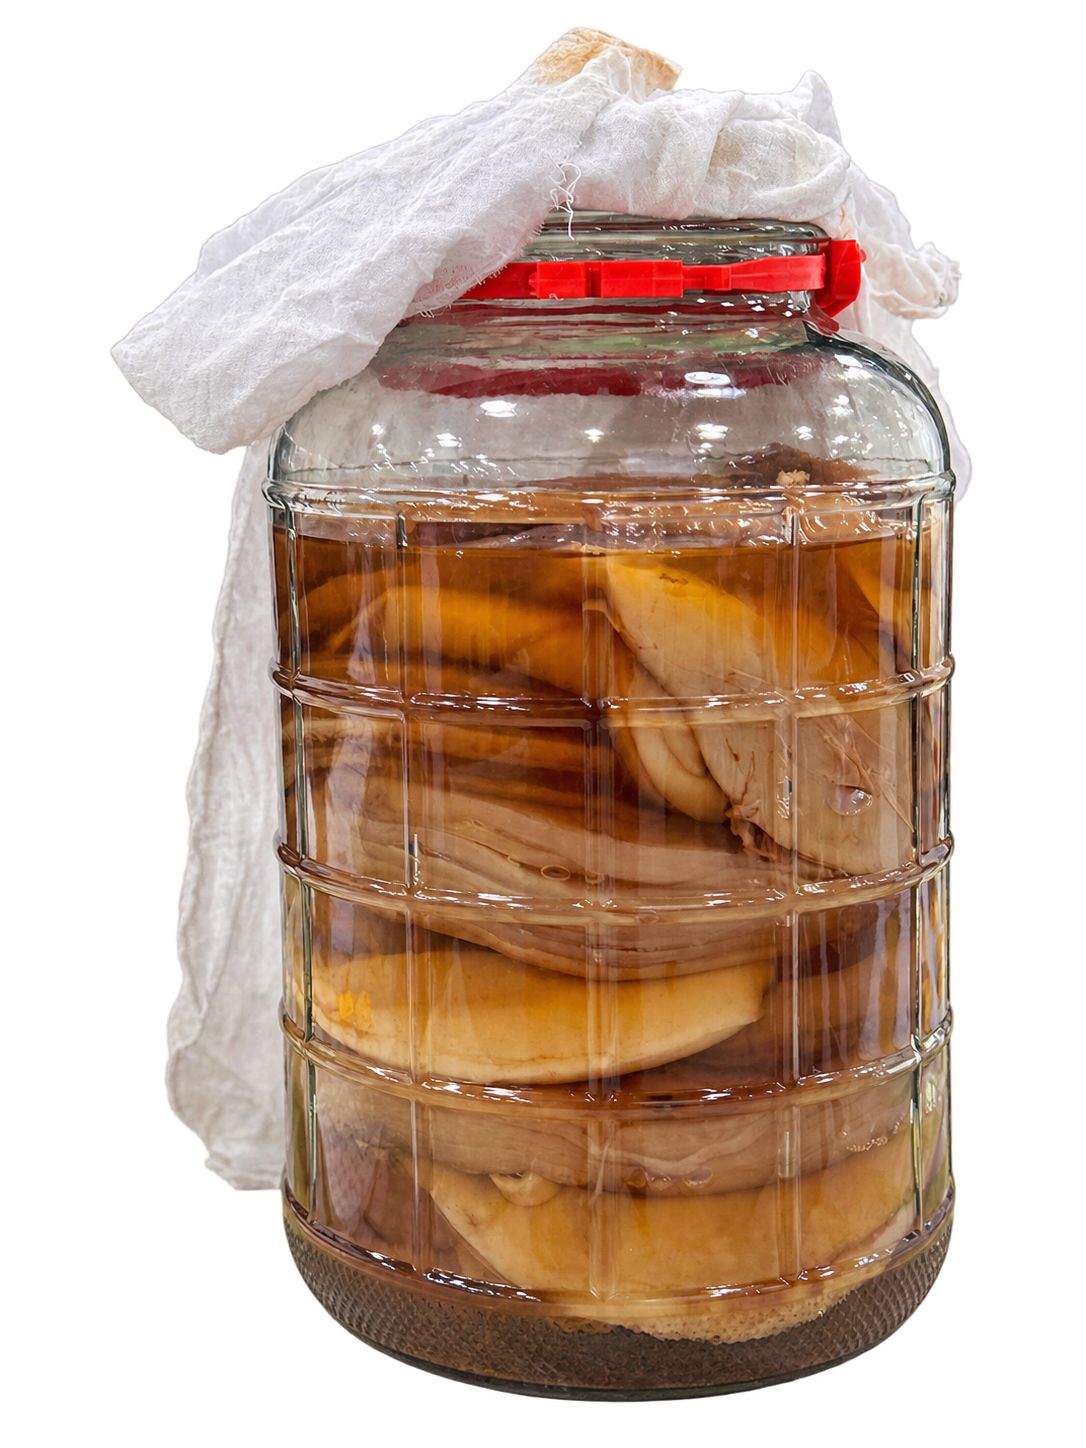
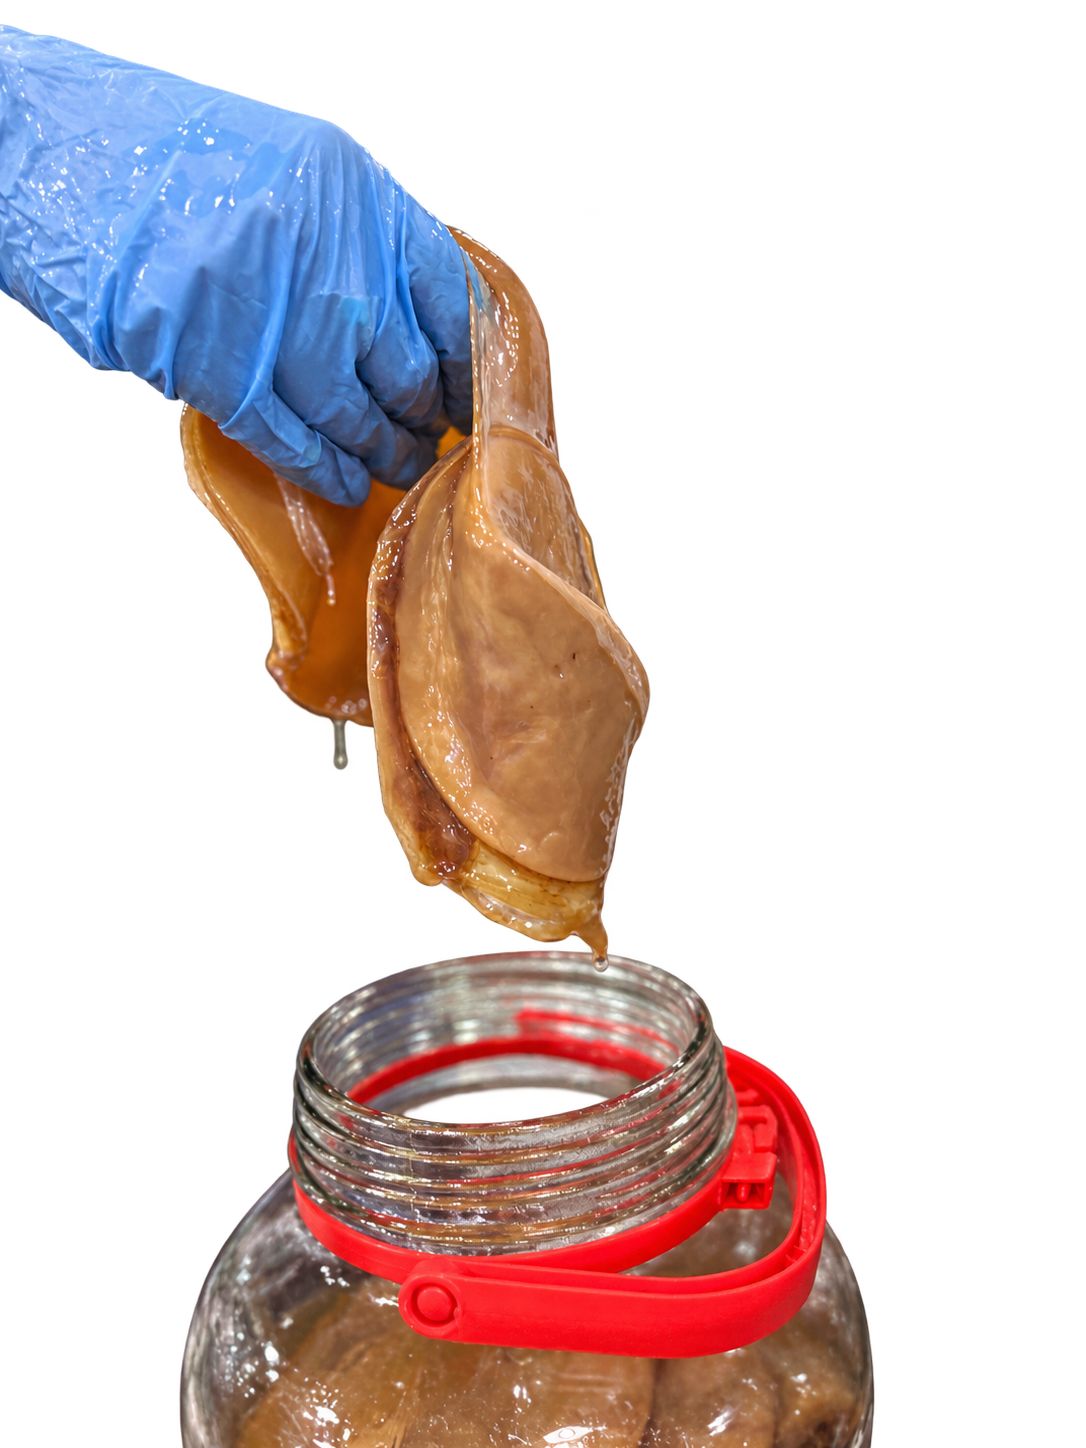
Kombucha leather is a leather-like material grown through the fermentation of sweetened tea using a culture of bacteria and yeast called a SCOBY. During fermentation, the bacteria produce a layer of bacterial cellulose on the surface of the liquid.
This layer can be harvested, cleaned, treated, and dried into a sheet. Its thickness, texture, and flexibility depend on the growing conditions and finishing process.
 Sugar  300 g
 SCOBY mother
 Water 3000 ml
 Tea  3 bags
 Vinegar 37.5 g
 Pot and stove
 Deep tray
 Measuring jug
 Digital scale
 Stirring utensil
 Coffee filter
 Clean, breathable cloth
 - Measure the tray, leave headspace above the liquid.
 - Prepare sweetened tea, 3 litres water, 300 g sugar, 3 tea bags, bring to a boil.
 - Disinfect the tray, allow the ethanol to evaporate completely.
 - Filter the tea into the tray
 - Add vinegar
 - Cool completely, bring the mixture to room temperature.
 - Add the mother culture.
 - Cover securely, use a breathable cloth.
 - Leave to grow and keep away from direct sunlight.
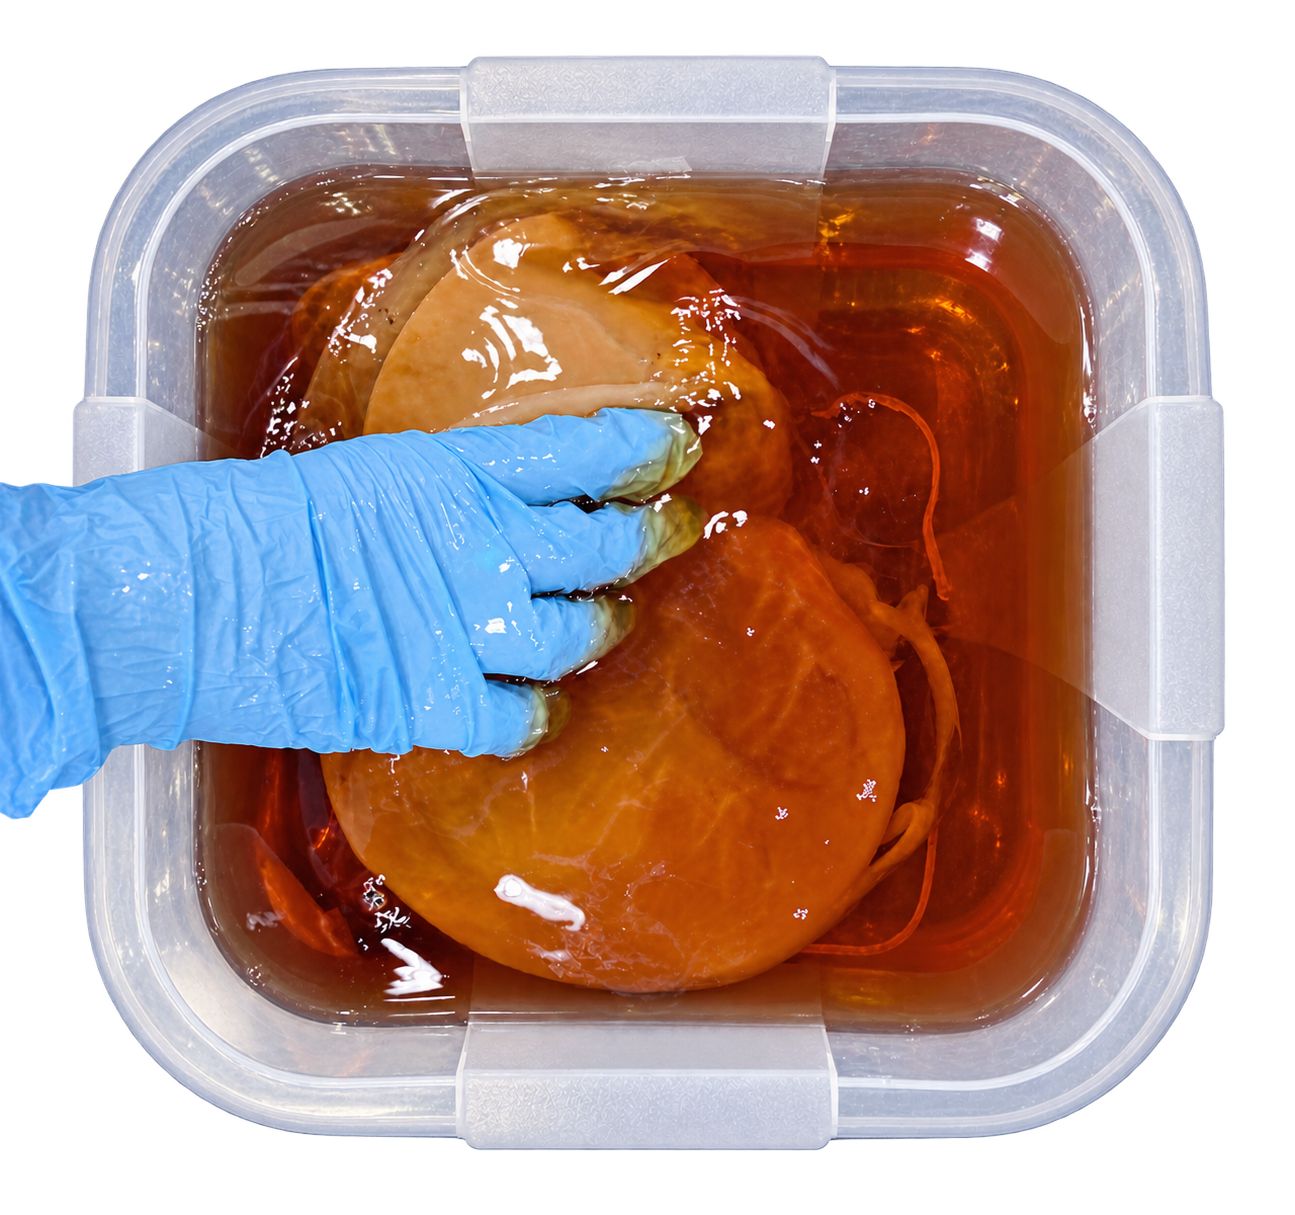
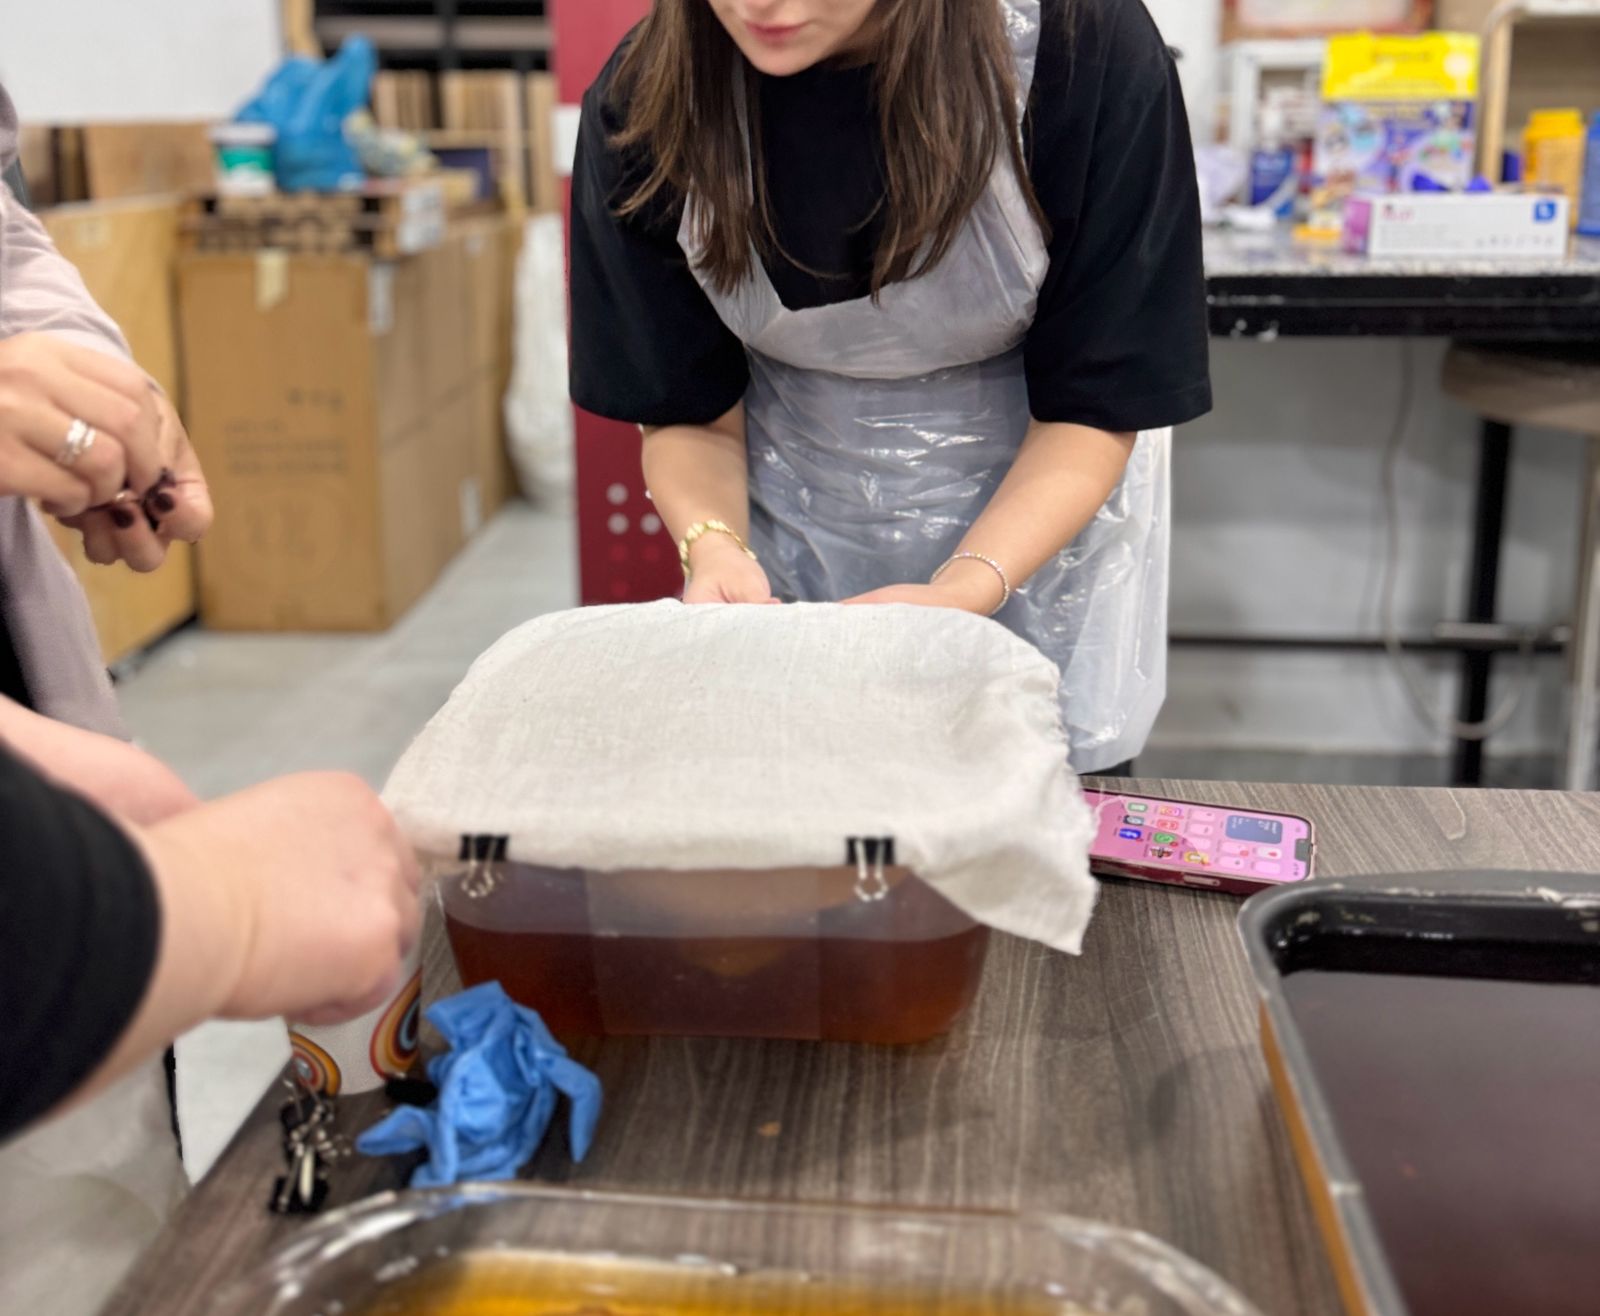
For this experiment, we prepared a sweetened tea medium to grow bacterial cellulose. Used a shallow tray as the growing container, allowing the material to develop across the liquid’s surface.
Process and workflow
1. Measuring the growing tray
I measured my tray, which was 23 × 23 × 9 cm. I left several centimetres of space above the liquid rather than filling the tray to the top.
2. Preparing the sweetened tea
I poured 3 litres of water into a pot and added 300 g of sugar. I then added 3 tea bags and brought the mixture to a boil on the stove, allowing the tea to infuse and the sugar to dissolve.
Water to Sugar Ratio: 10 g of sugar per 100 ml of water.
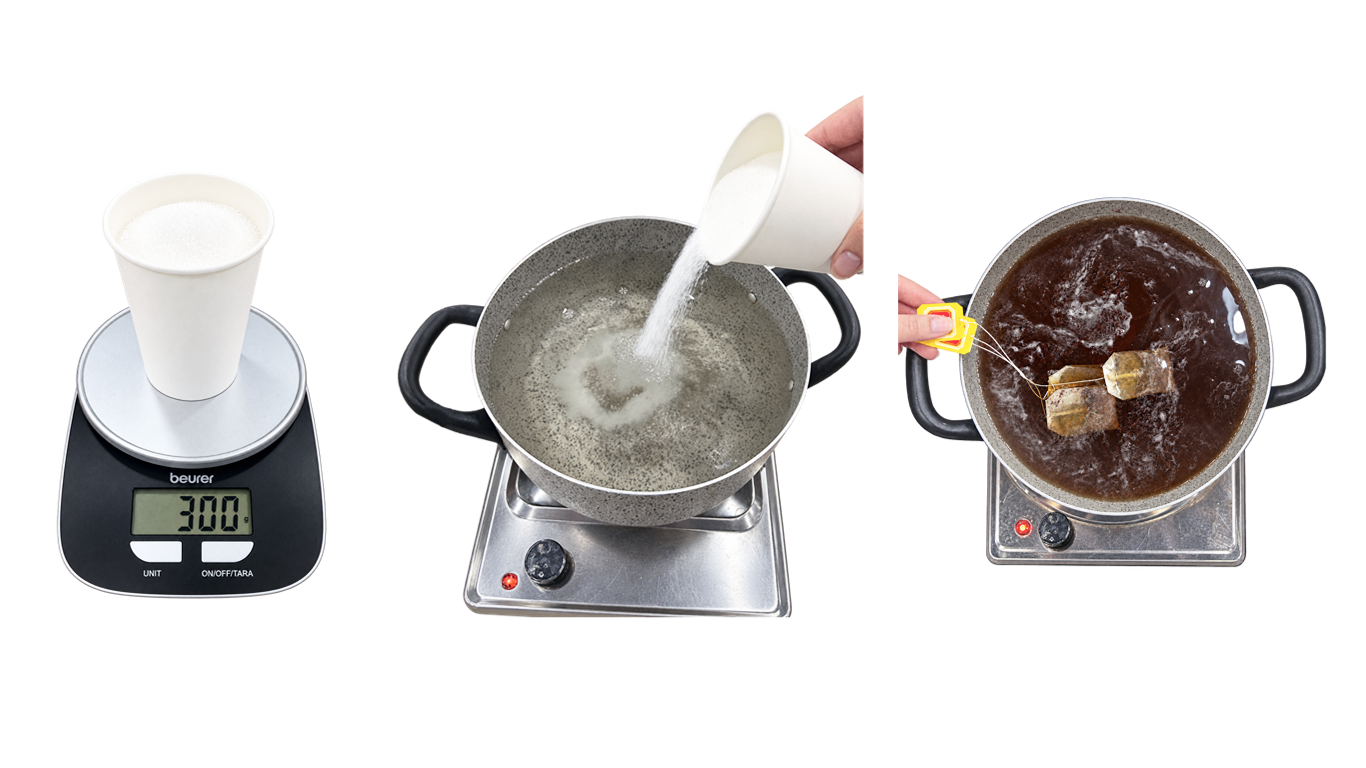
3. Preparing the tray
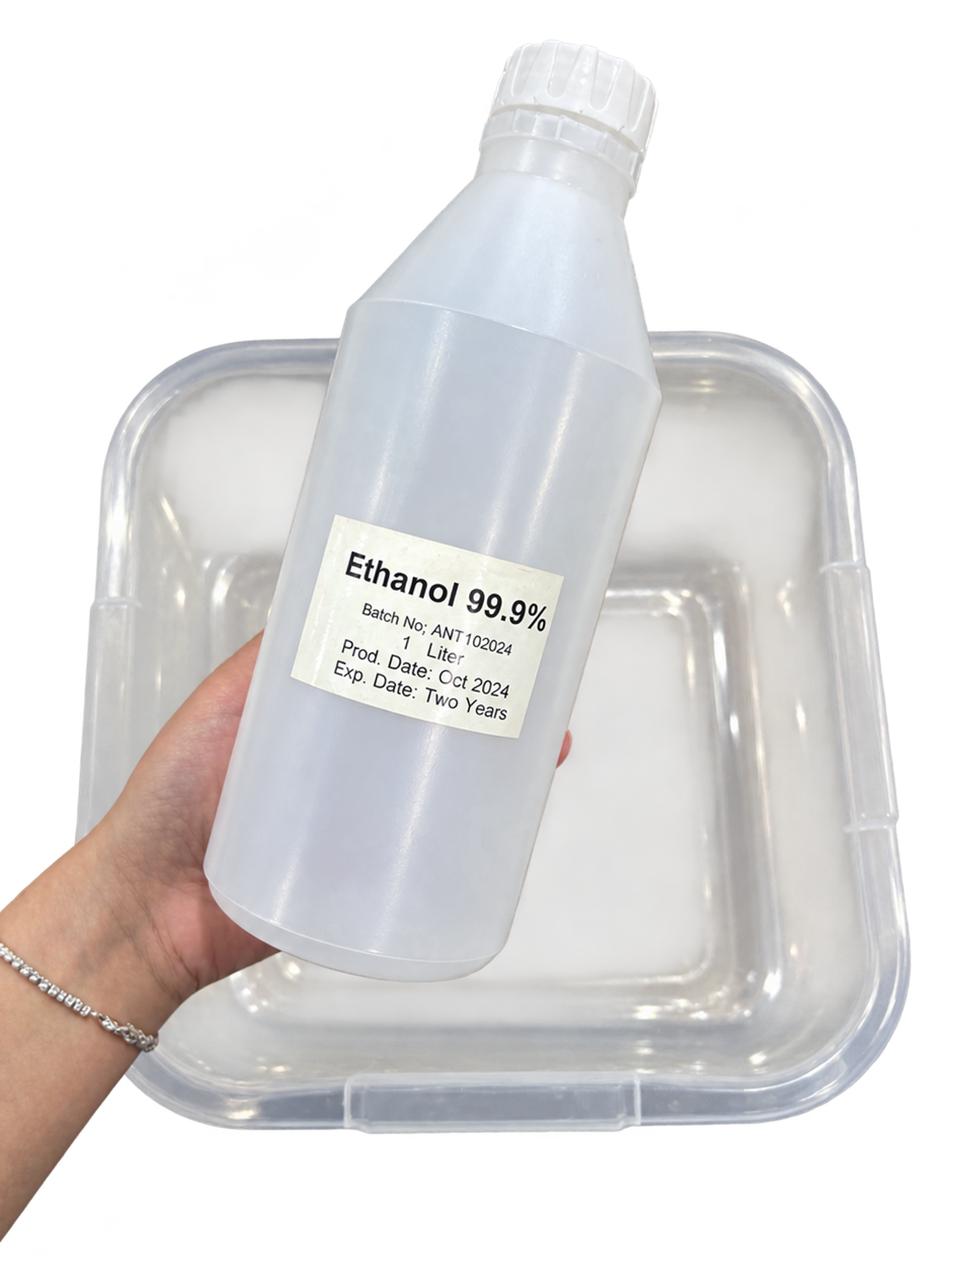
While the tea cooled slightly, I prepared the growing tray by disinfecting its inner surface with ethanol, making sure to cover the base, sides, and corners. I then allowed the ethanol to evaporate completely before pouring in the filtered tea. This step helped reduce the risk of contamination and provided a clean environment for the culture to grow and develop its bacterial cellulose layer.
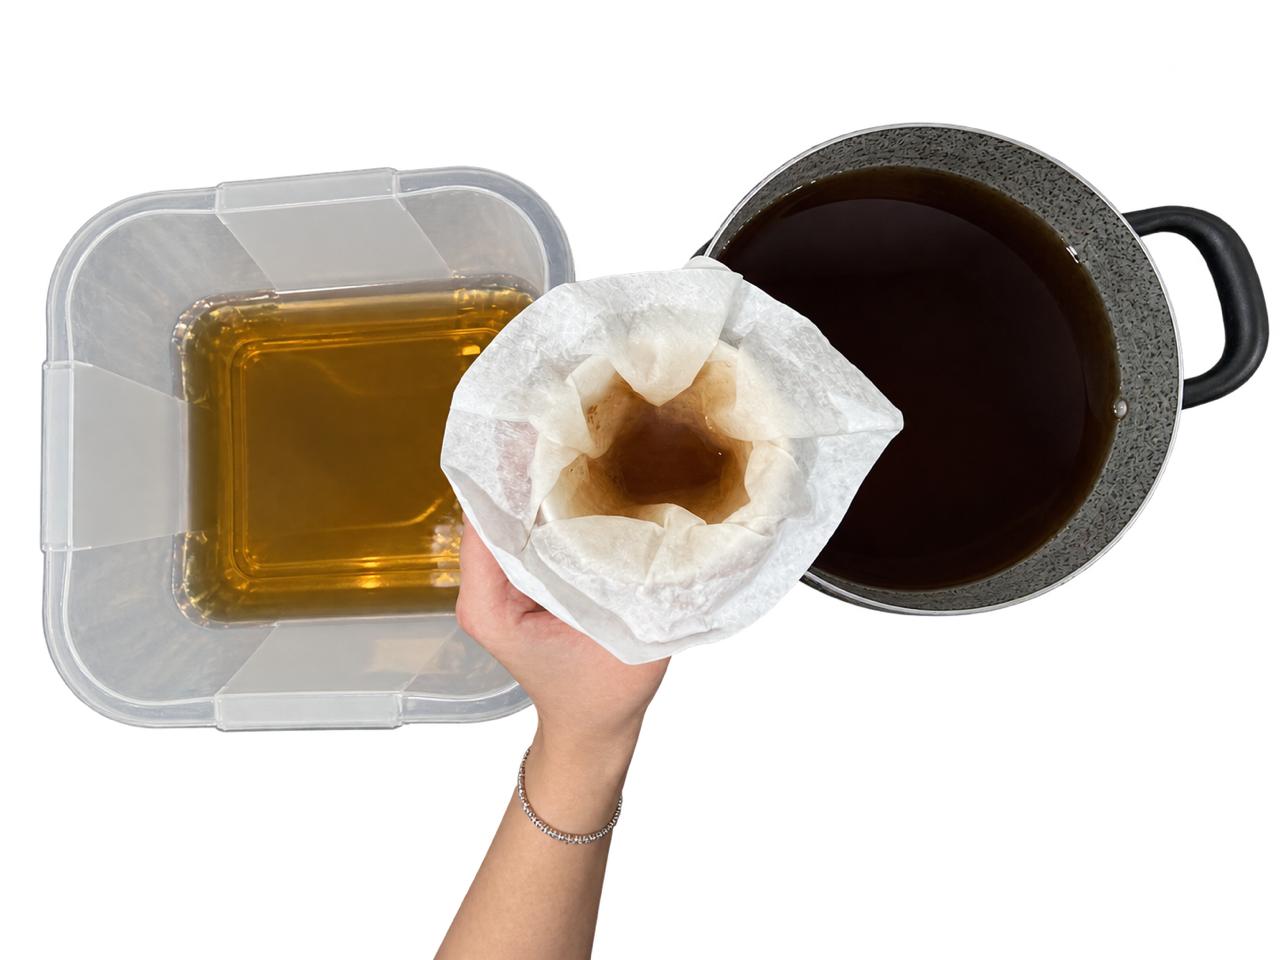
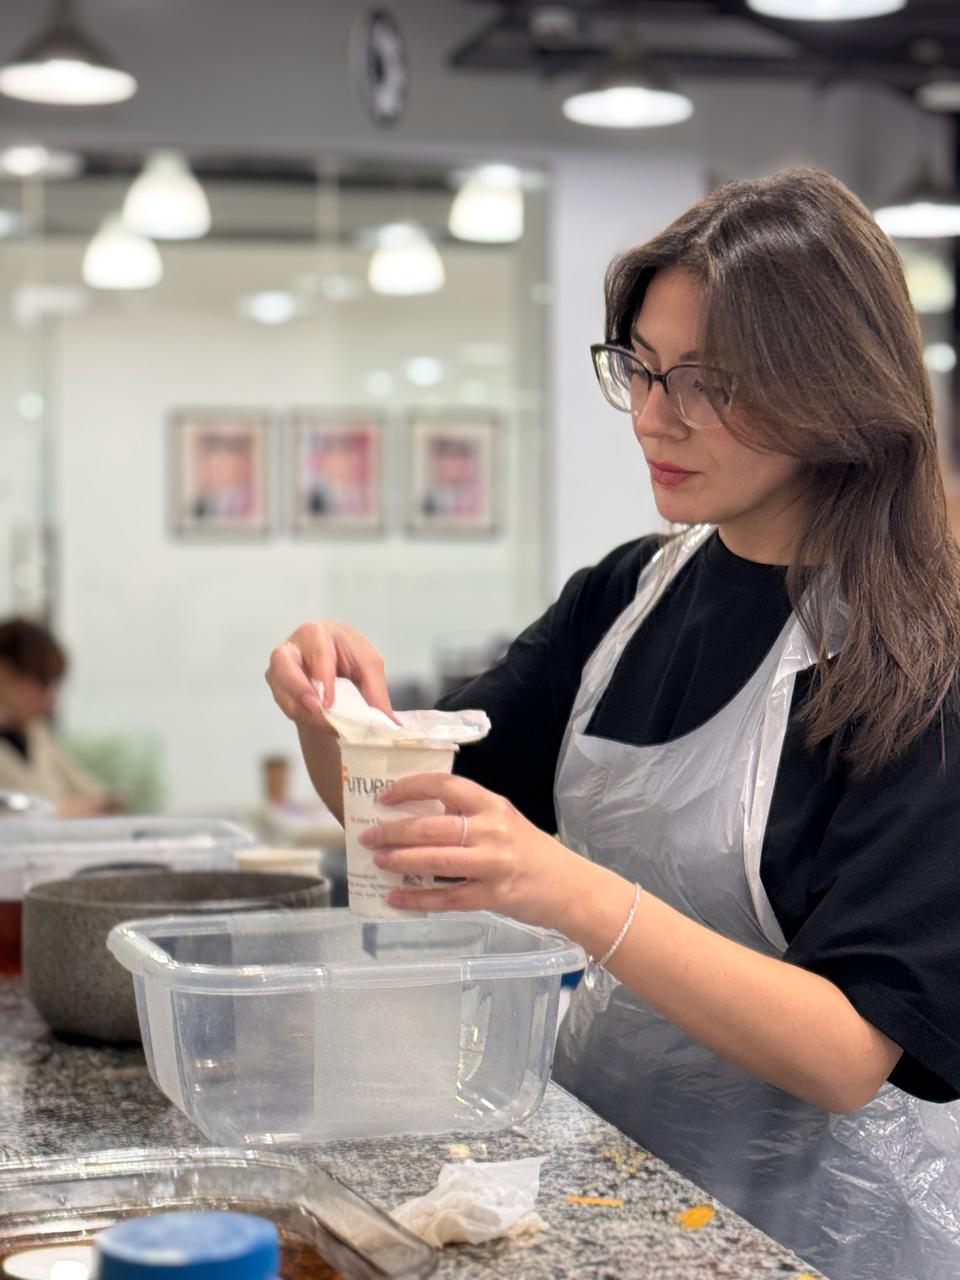
4. Filtering the tea
I poured the tea through a coffee filter into the prepared tray to remove loose tea particles.
5. Adding vinegar
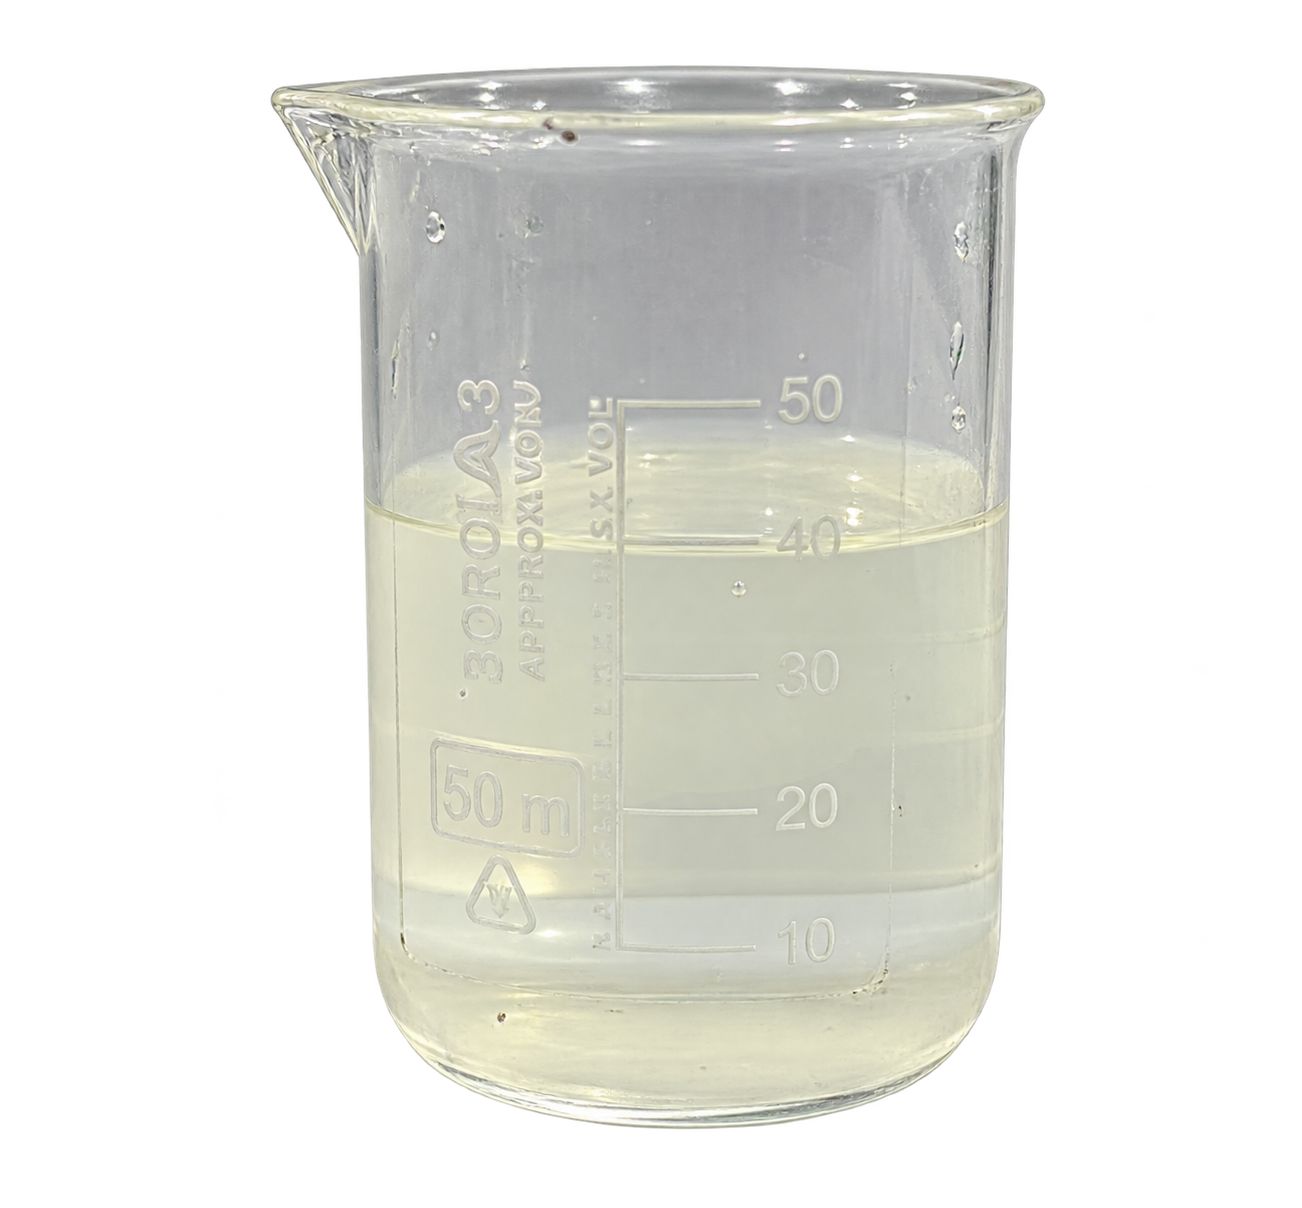
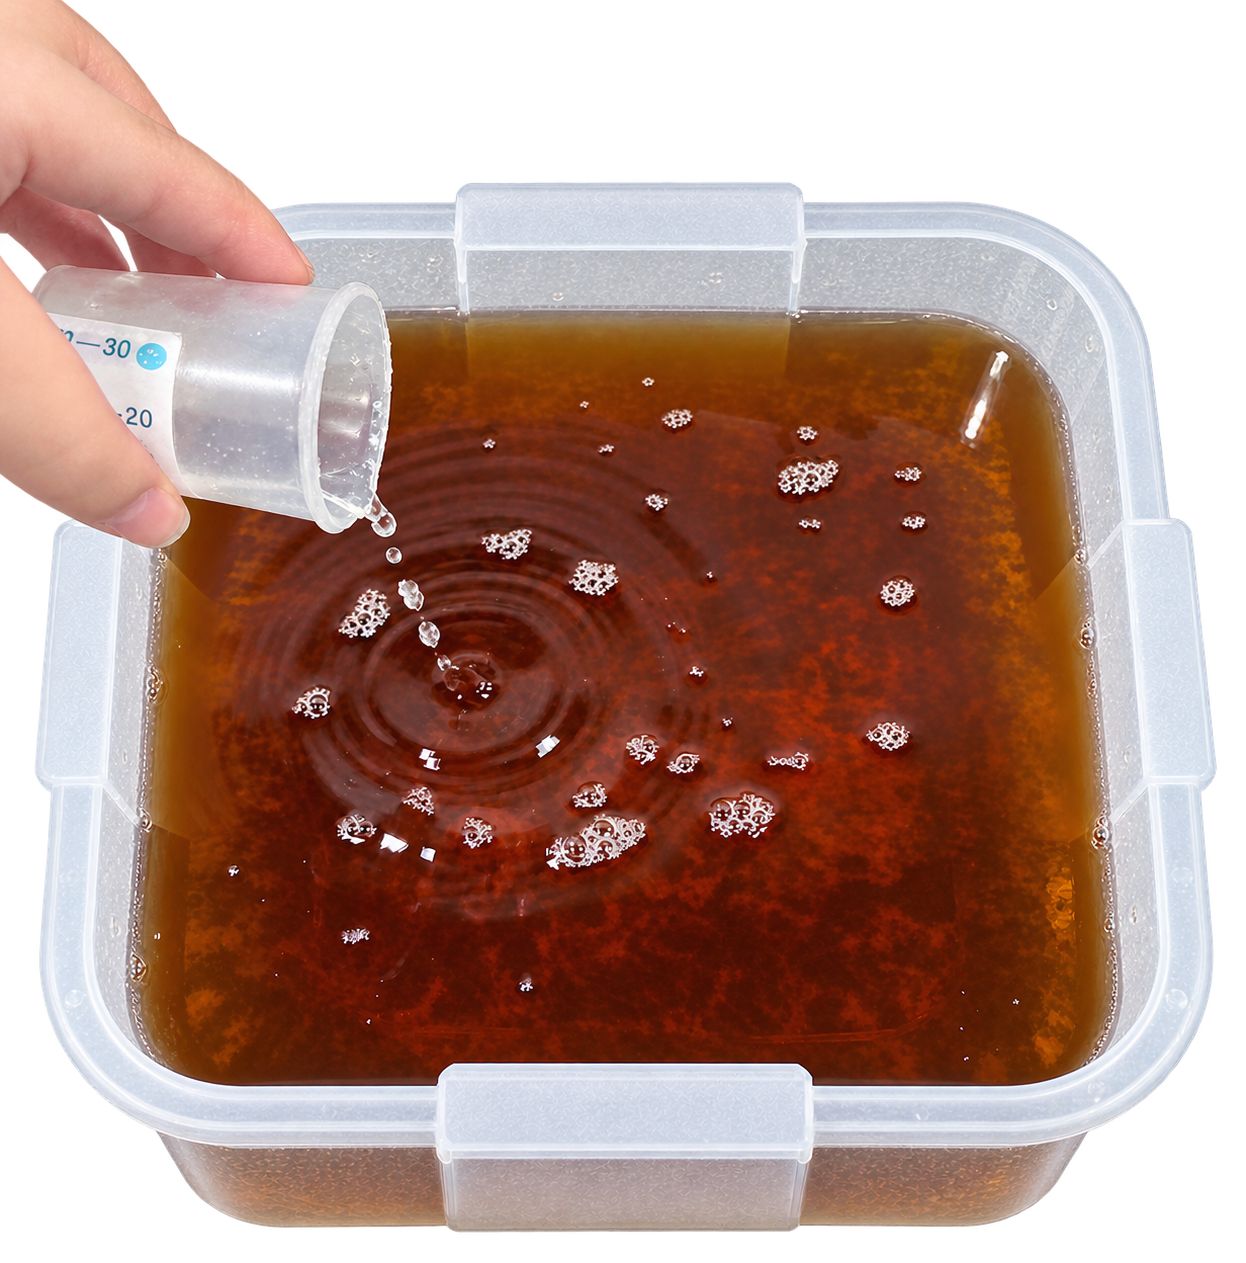
I added 37.5 g of vinegar to acidify the tea.
25 ml of vinegar per 2 litres of tea
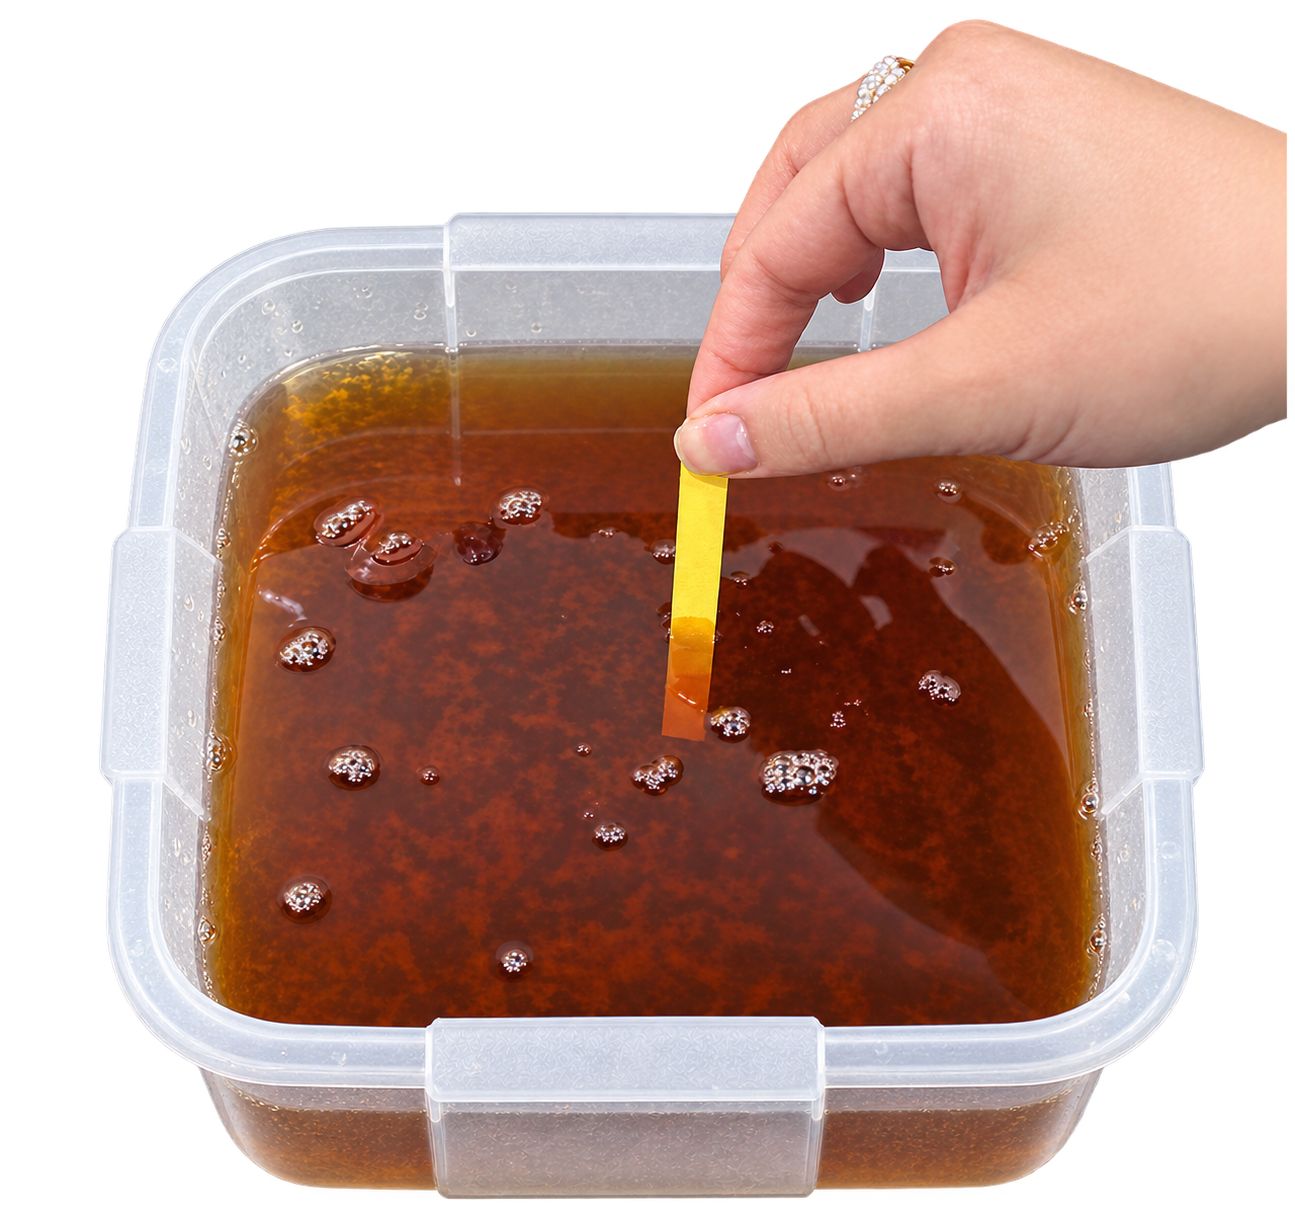
6. Cooling to room temperature
Allowed the tea mixture to cool completely to room temperature before introducing the SCOBY.
Adding it while the tea was still hot could damage the living bacteria and yeast.
7. Adding the mother culture
Once the tea had cooled, I gently placed the SCOBY mother culture into the tray to begin the growing process.
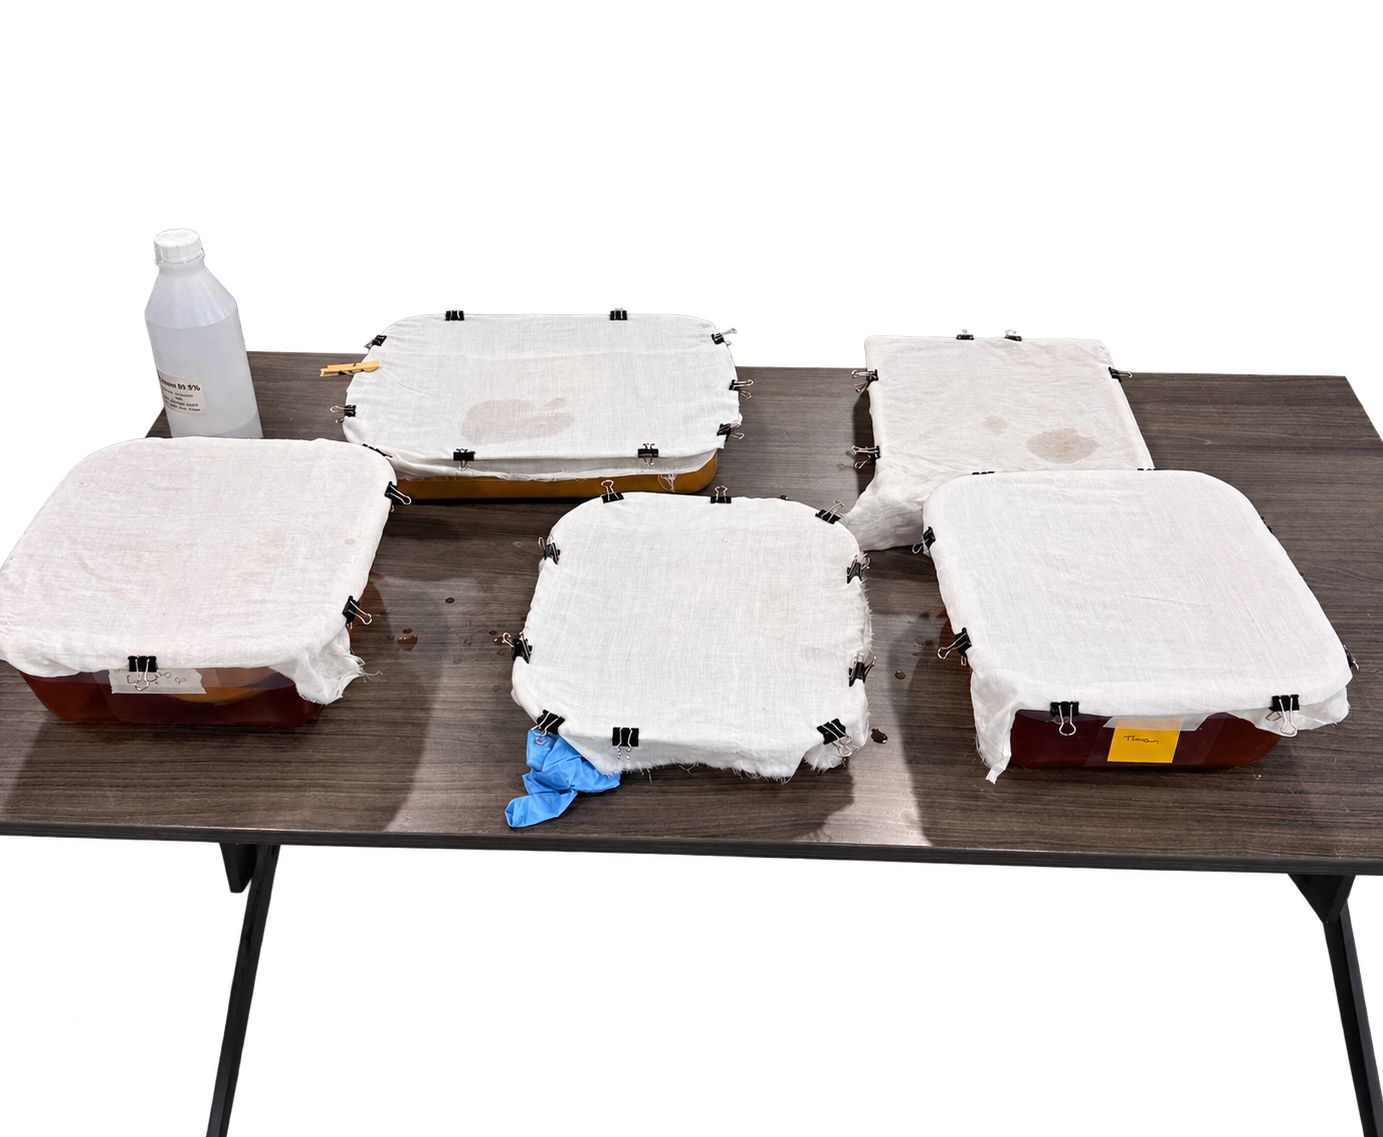
8. Covering the tray
I covered the tray securely with a clean, breathable cloth to protect the mixture from dust and insects.
9. Leaving the material to grow
Placed the covered tray in a dark, dry area away from direct sunlight and left it undisturbed to grow.
My Experiments with BioFabricating Materials
Experiment A | Compare dye baths and colors
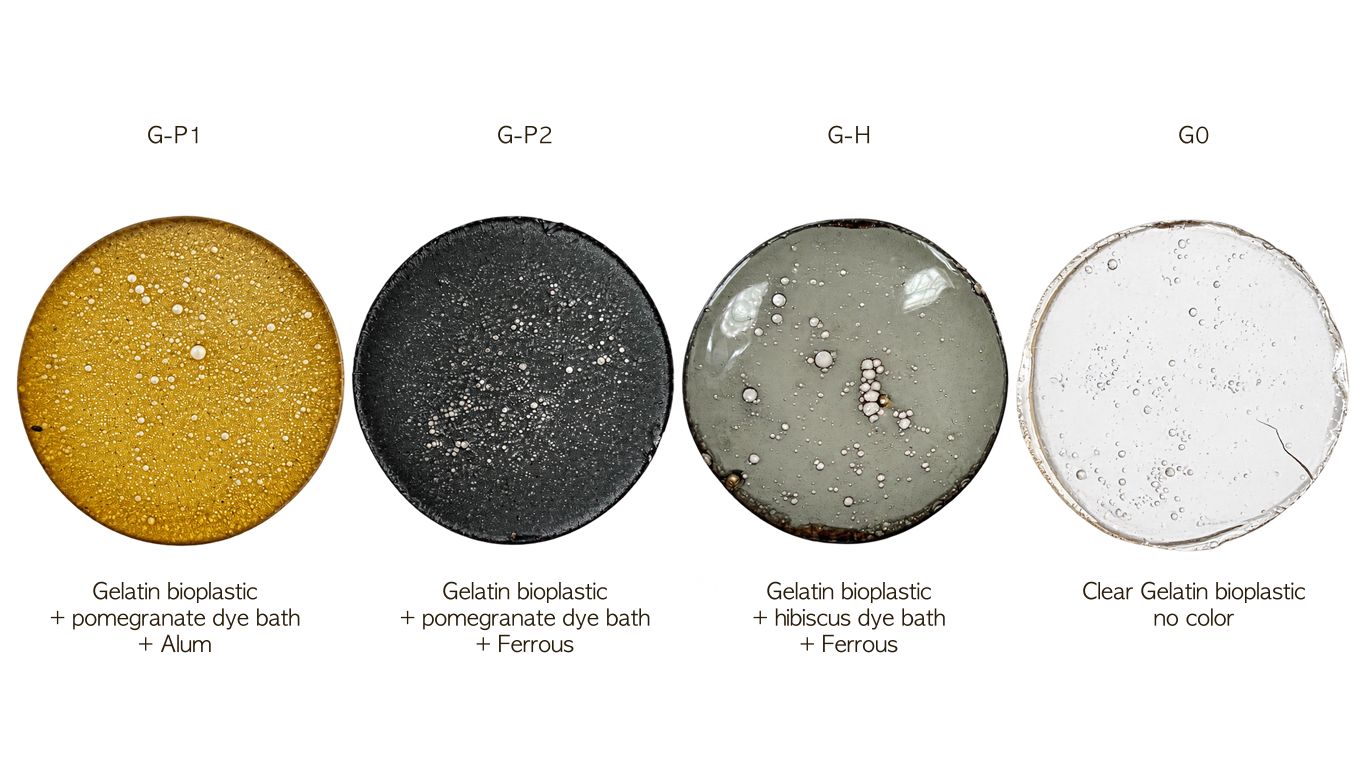
For my experiments, I want to reuse the dye baths I saved from Biochromes week. I will record any modifiers already present, such as alum, ferrous sulfate, or sodium carbonate, and explore how these differences affect both the colour and properties of the resulting materials.
Question: How do different modifiers in the dye baths influence the color and material properties of Gelatin and Agar based bioplastics?
| Sample | Liquid | Liquid quantity | Gelatine | Agar | Glycerin |
|---|---|---|---|---|---|
| G0 | Water reference | 50 ml | 10 g | — | 2.5 g |
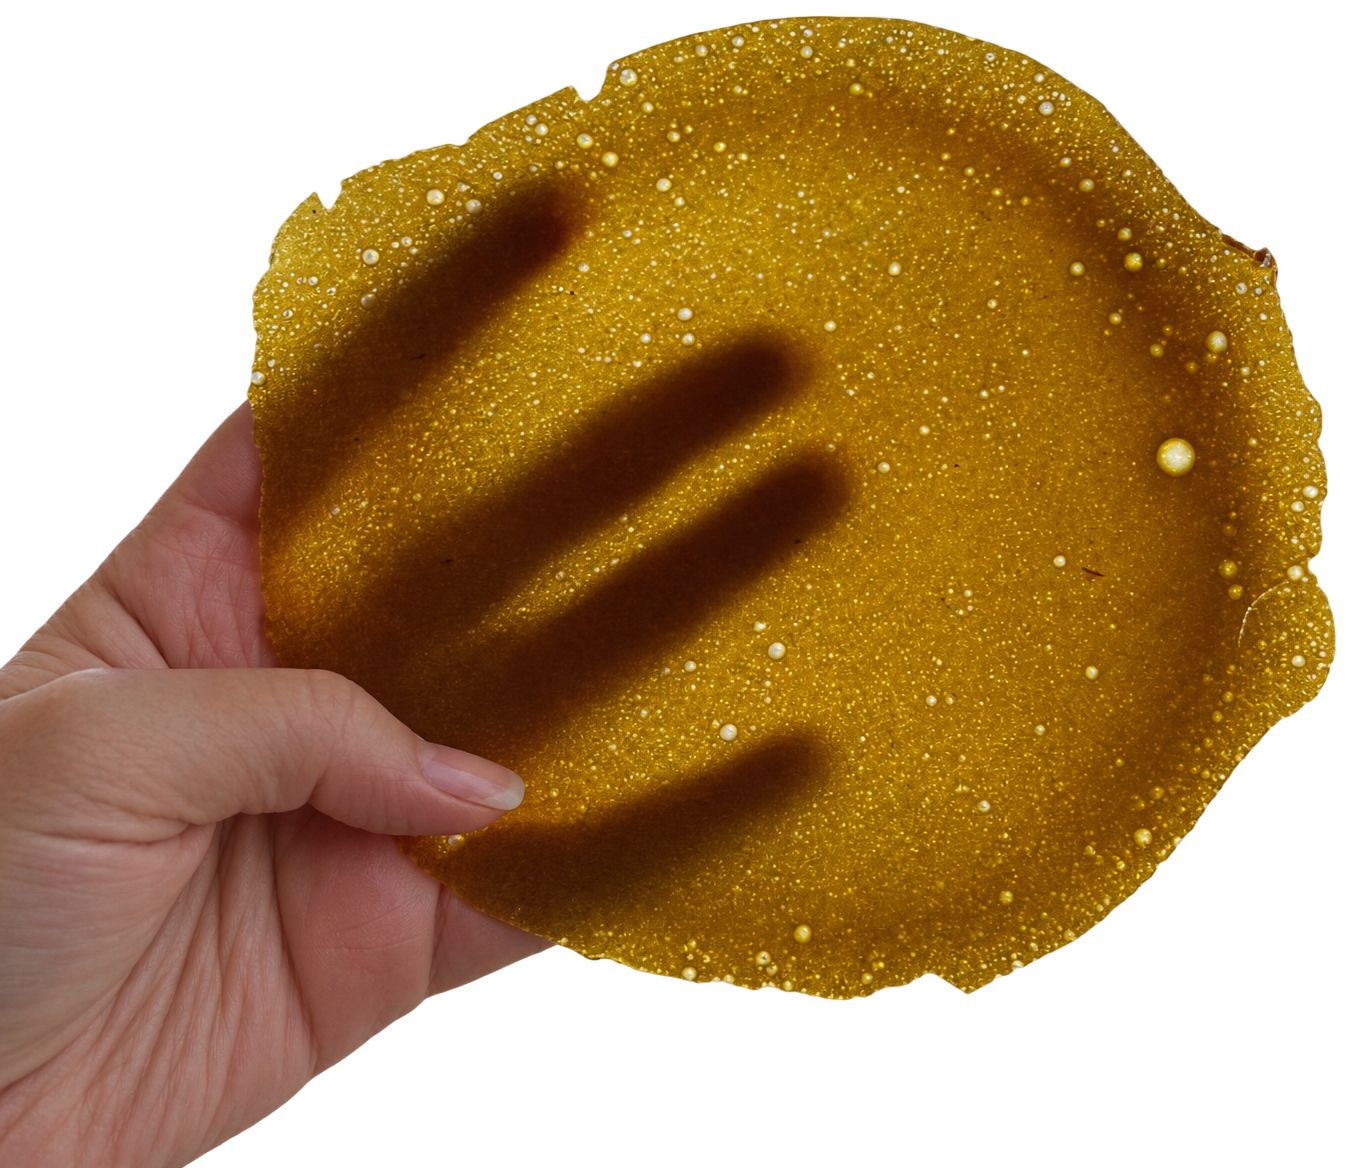
| G-P1 | Pomegranate P1 | 50 ml | 10 g | — | 2.5 g |
| G-P2 | Pomegranate P2 | 50 ml | 10 g | — | 2.5 g |
| G-H | Hibiscus | 50 ml | 10 g | — | 2.5 g |
Process and workflow
Dye-Bath Gelatine Bioplastics Results
Material Properties Observation | Comparison
| Property / Observation | G0 | G-P1 | G-P2 | G-H |
|---|---|---|---|---|
| Modifier present in dye bath | No modifier | Alum | Ferrous | Ferrous |
| Colour after drying | Clear | bright golden-yellow | Black | petrol green |
| Transparency | Transparent | Not Transparent | Not Transparent | Transparent |
| Flexibility | Not Flexible | Not Flexible | Not Flexible | Not Flexible |
| Stretchability | No Stretch | No Stretch | No Stretch | No Stretch |
| Stickiness after drying | a little bit stiky | Not stiky | Not stiky | Not stiky |
| Drying time | 1 Day | 1 Day | 1 Day | 1 Day |
| Shrinkage / curling | No Shrinkage | No Shrinkage | No Shrinkage | No Shrinkage |
| Bubbles, cracks, or uneven areas | visible bubbles + Cracked (when demould) | visible bubbles | visible bubbles | visible bubbles |
| Appearance when backlit | Transparent | Translucent | absorbed light | Transparent |
Experiment B | Clay Bioplastic Composites
In this experiment, I will incorporate plain, pottery clay into gelatine based bioplastics. I want to explore how adding clay influences the material’s texture, opacity, flexibility, and behaviour during drying.
 pottery clay  33.5 g
 Water 400 ml
 Gelatin 70 g
 Glycerin 32.5 g
 Dye bath to add color
 Pot (non-reactive), spoon, whisk, and stove
 Moulds, or casting surfaces
 Mesure cup
 Scale
 - Mix the wet clay into 50 ml of the measured water until smooth.
 - Hydrate the gelatine with the remaining 100 ml of cool water and let it swell.
 - Warm the hydrated gelatine while stirring until dissolved.
 - Add the glycerin and clay mixture. Stir gently until evenly combined.
 - Pour into shallow silicone moulds. Start at approximately 3–5 mm wet thickness.
 - Leave until dry, Once firm enough to handle, demould carefully and allow both sides to dry.
| Sample | Material | Water | Gelatine | Agar | Glycerin | Wet pottery clay | color |
|---|---|---|---|---|---|---|---|
| G1 | Clay Chunks + Gelatine Bioplastic | 250 ml | 50 g | — | 25 g | 21 g | — |
| G2 | Dissolved Clay + Gelatine Bioplastic | 150 ml | 30 g | — | 7.5 g | 12.5 g | Pomegranate + Alum dye bath |
Process and workflow
Clay Bioplastic Composites Results
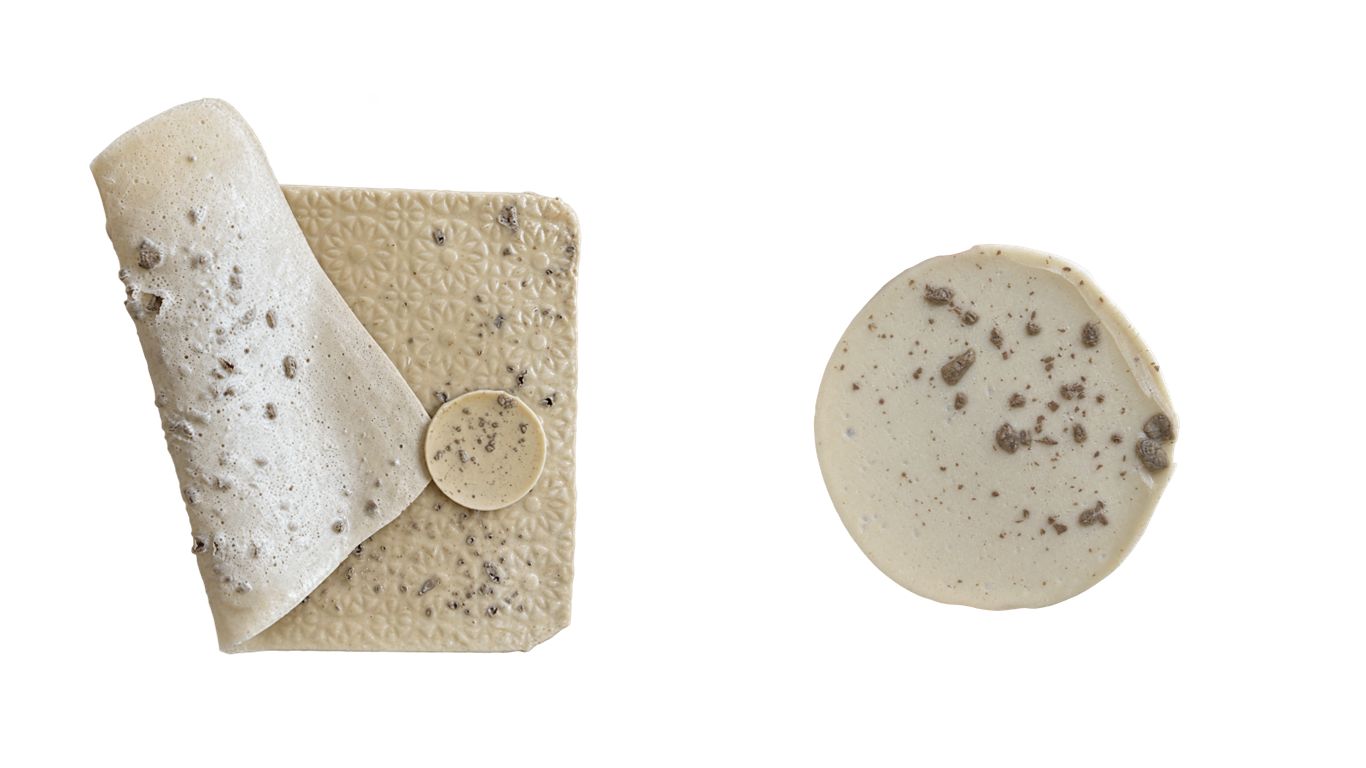
G1 | Clay Chunks + Gelatine Bioplastic
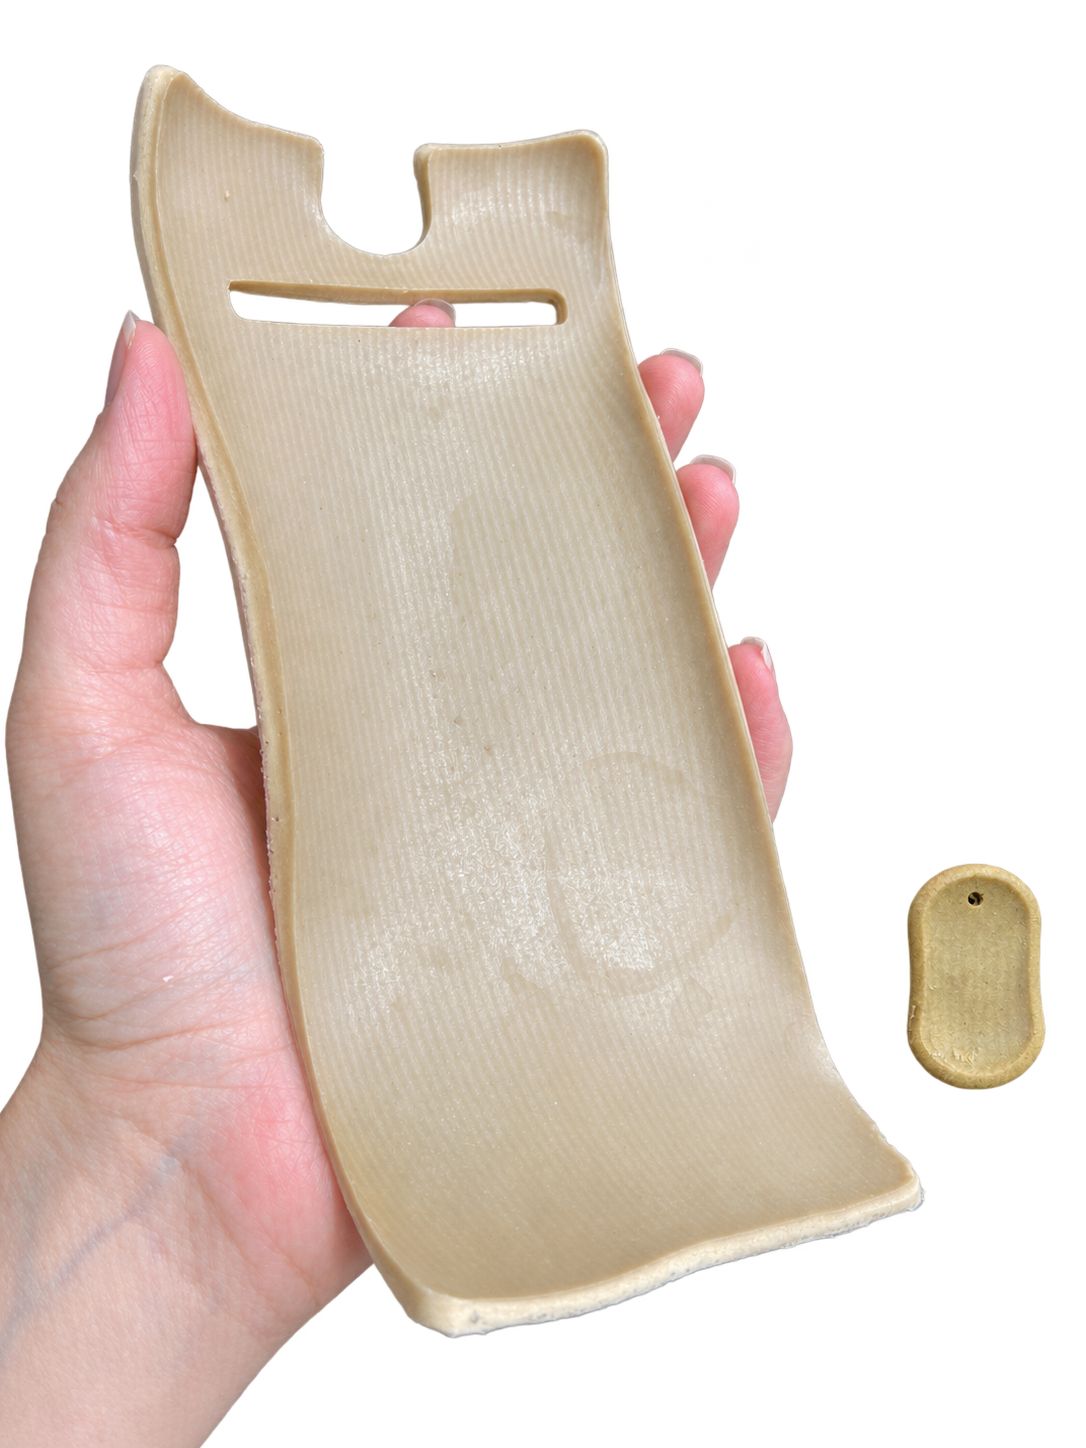
G2 | Dissolved Clay + Gelatine Bioplastic | the small sample contains Pomegranate dye bath + Alum
Material Properties Observation | Comparison
| Property / Observation | Dissolved Clay | Clay Chunks |
|---|---|---|
| Clay distribution | Clay evenly dispersed throughout the gelatine mixture | Clay retained as visible chunks within the gelatine |
| Light transmission | No noticeable light passed through | Slightly translucent |
| Hardness after drying | Very hard | Very hard |
| Shape after drying | Curled after being demoulded early, with slight shrinkage during drying | Maintained its overall shape, with slight shrinkage during drying. |
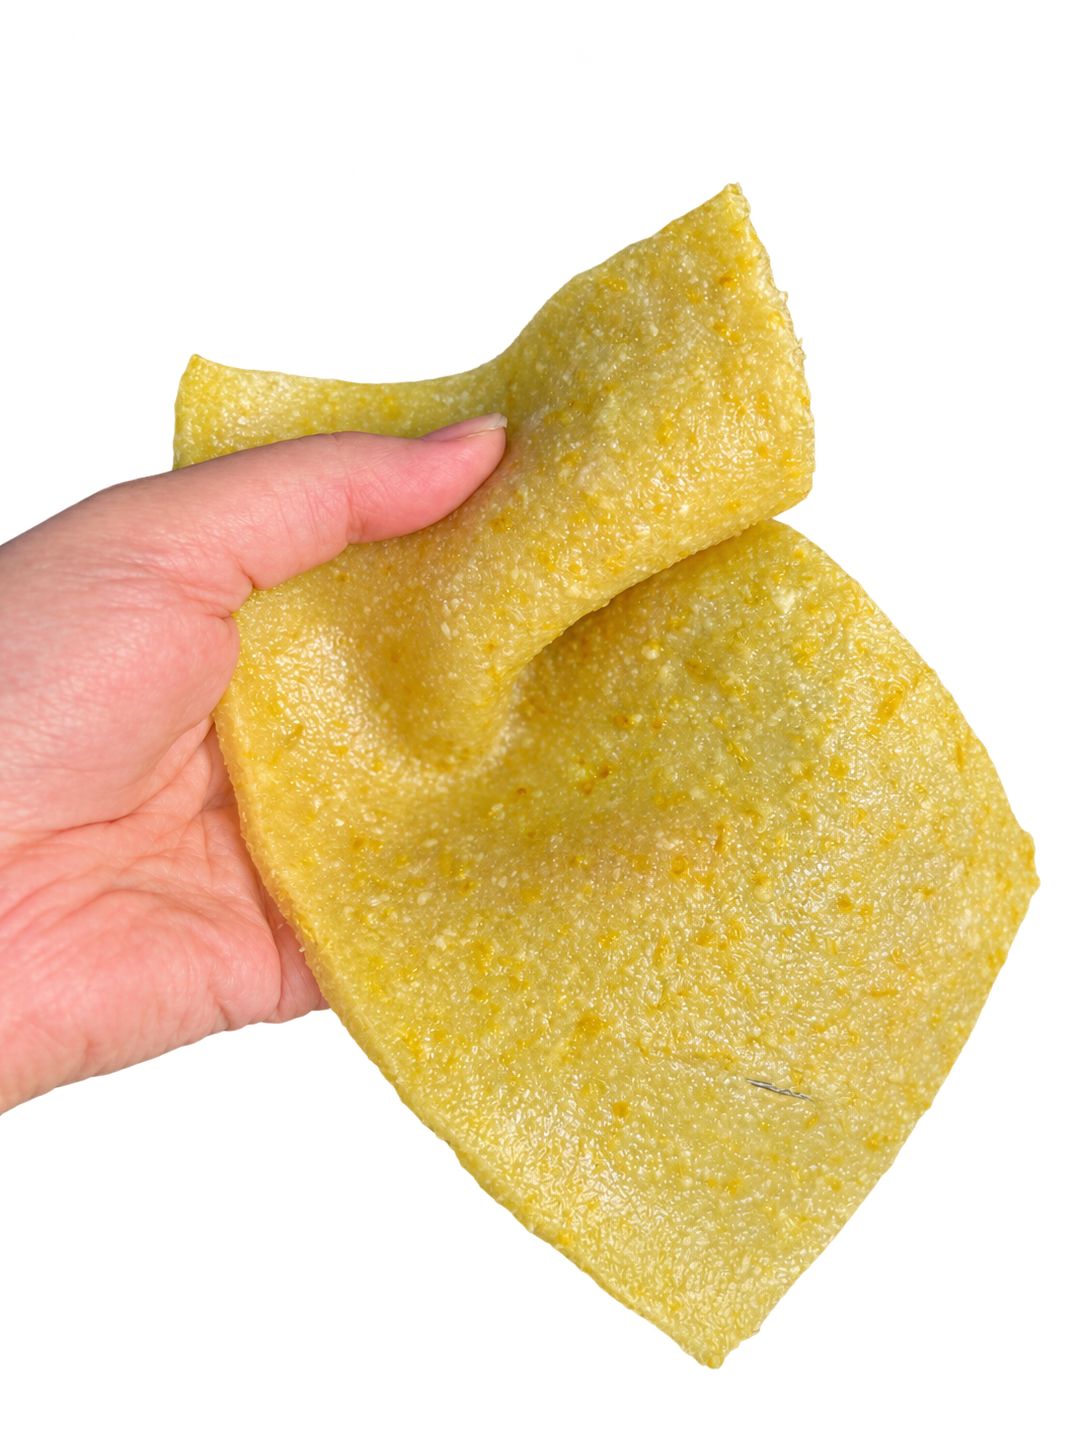
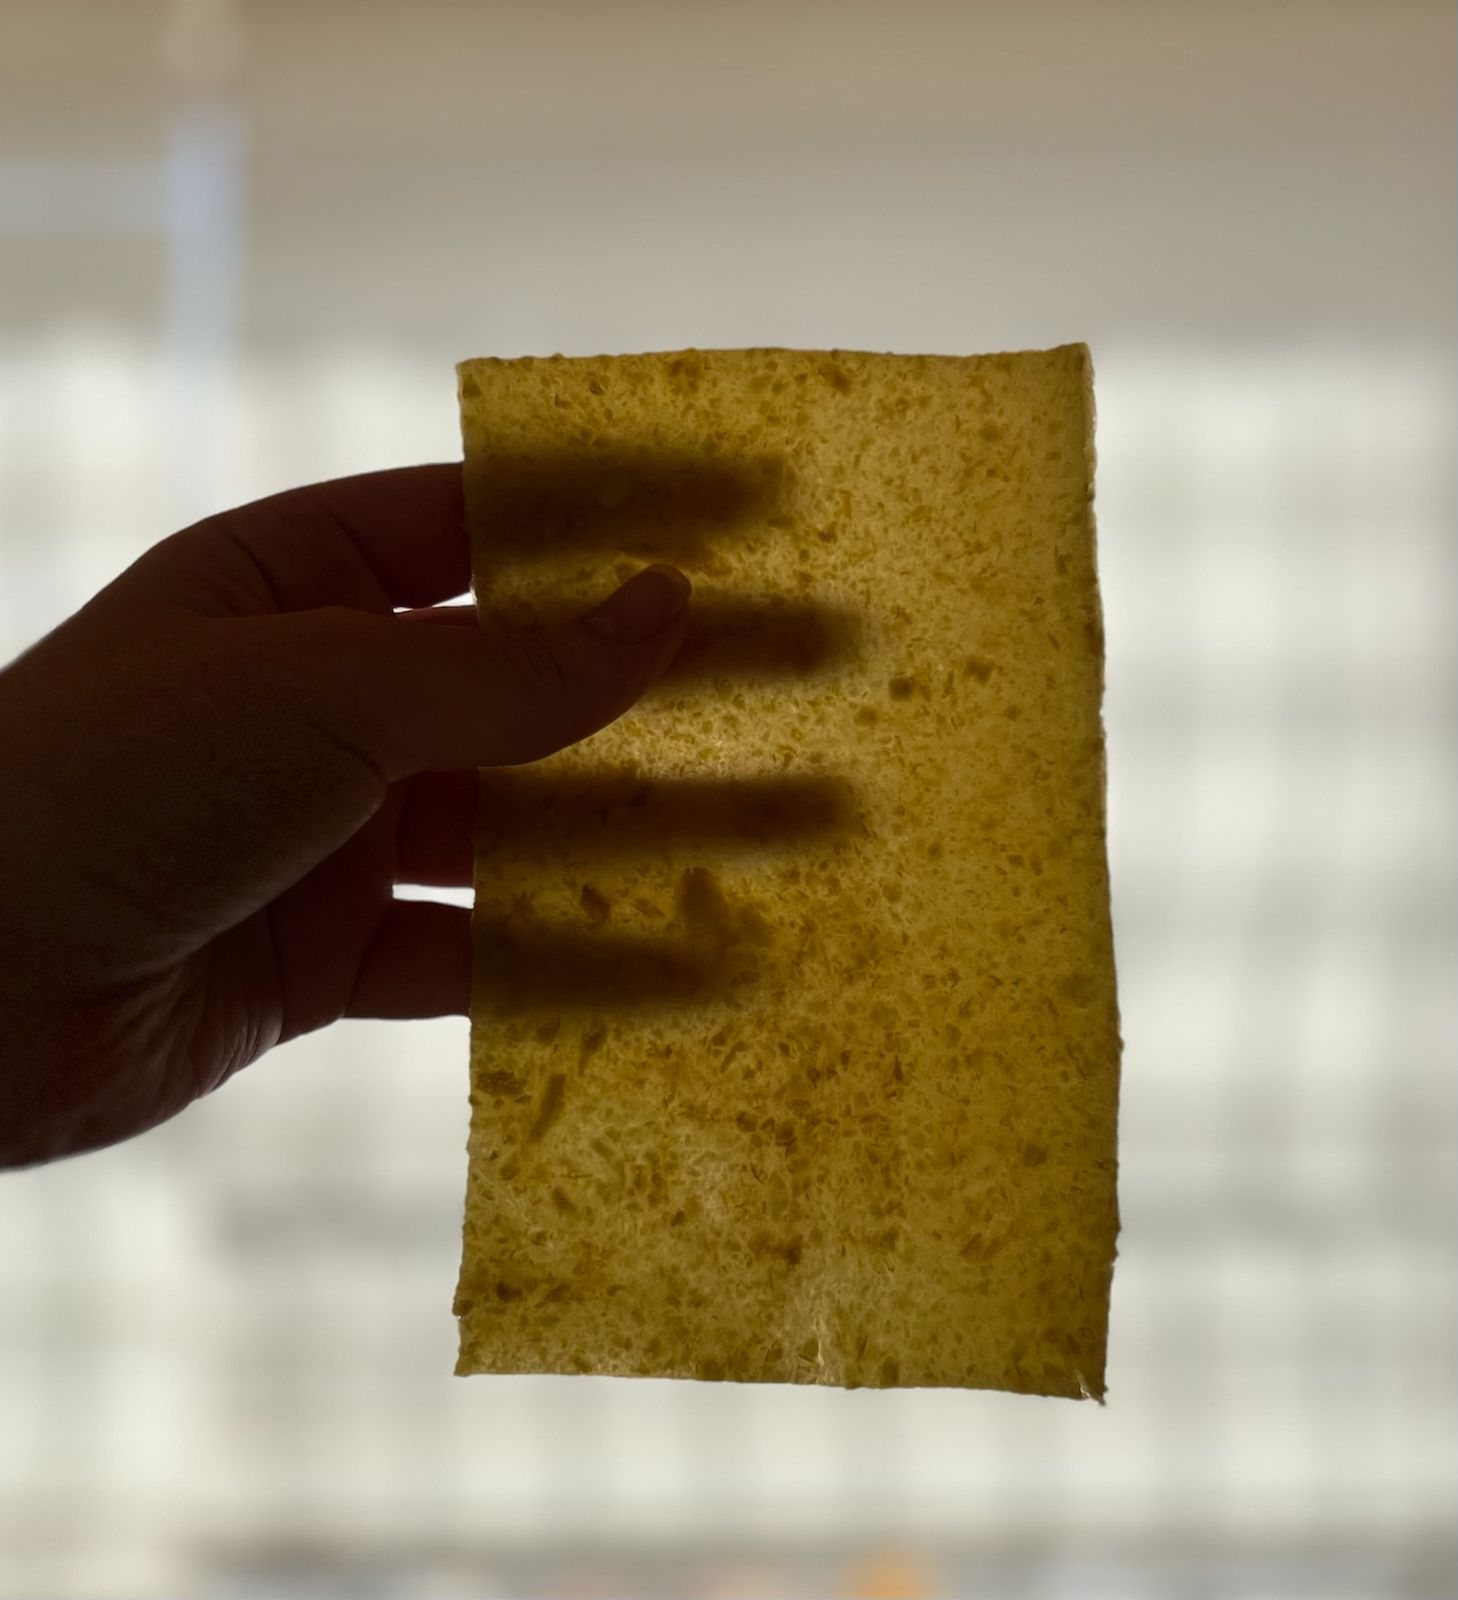
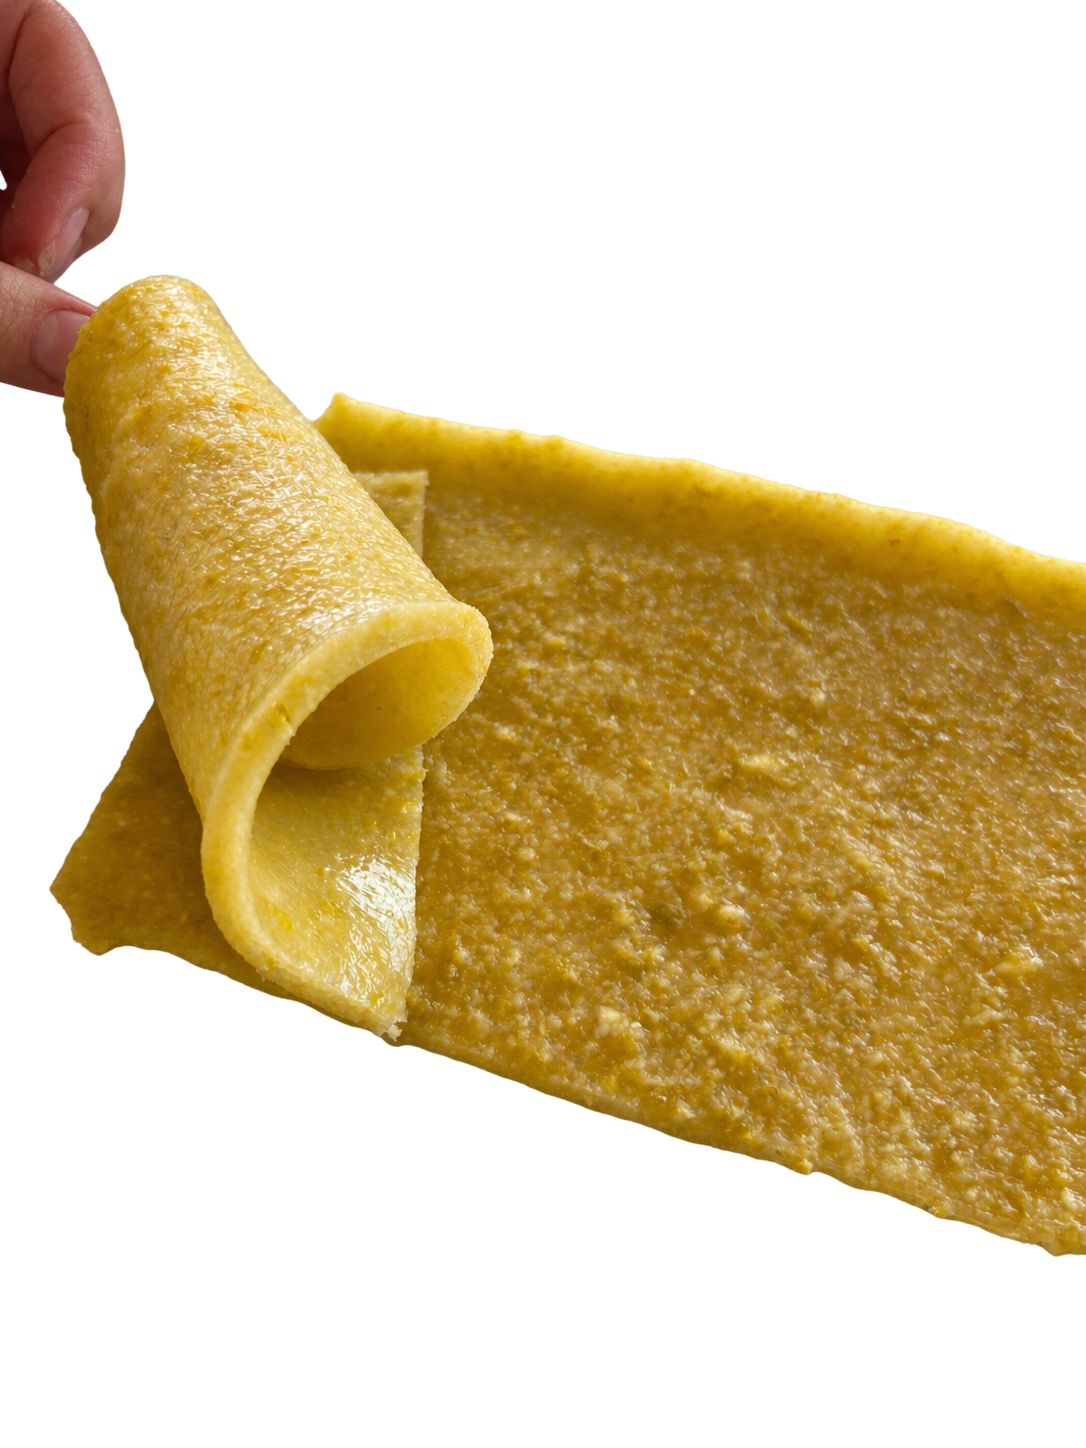
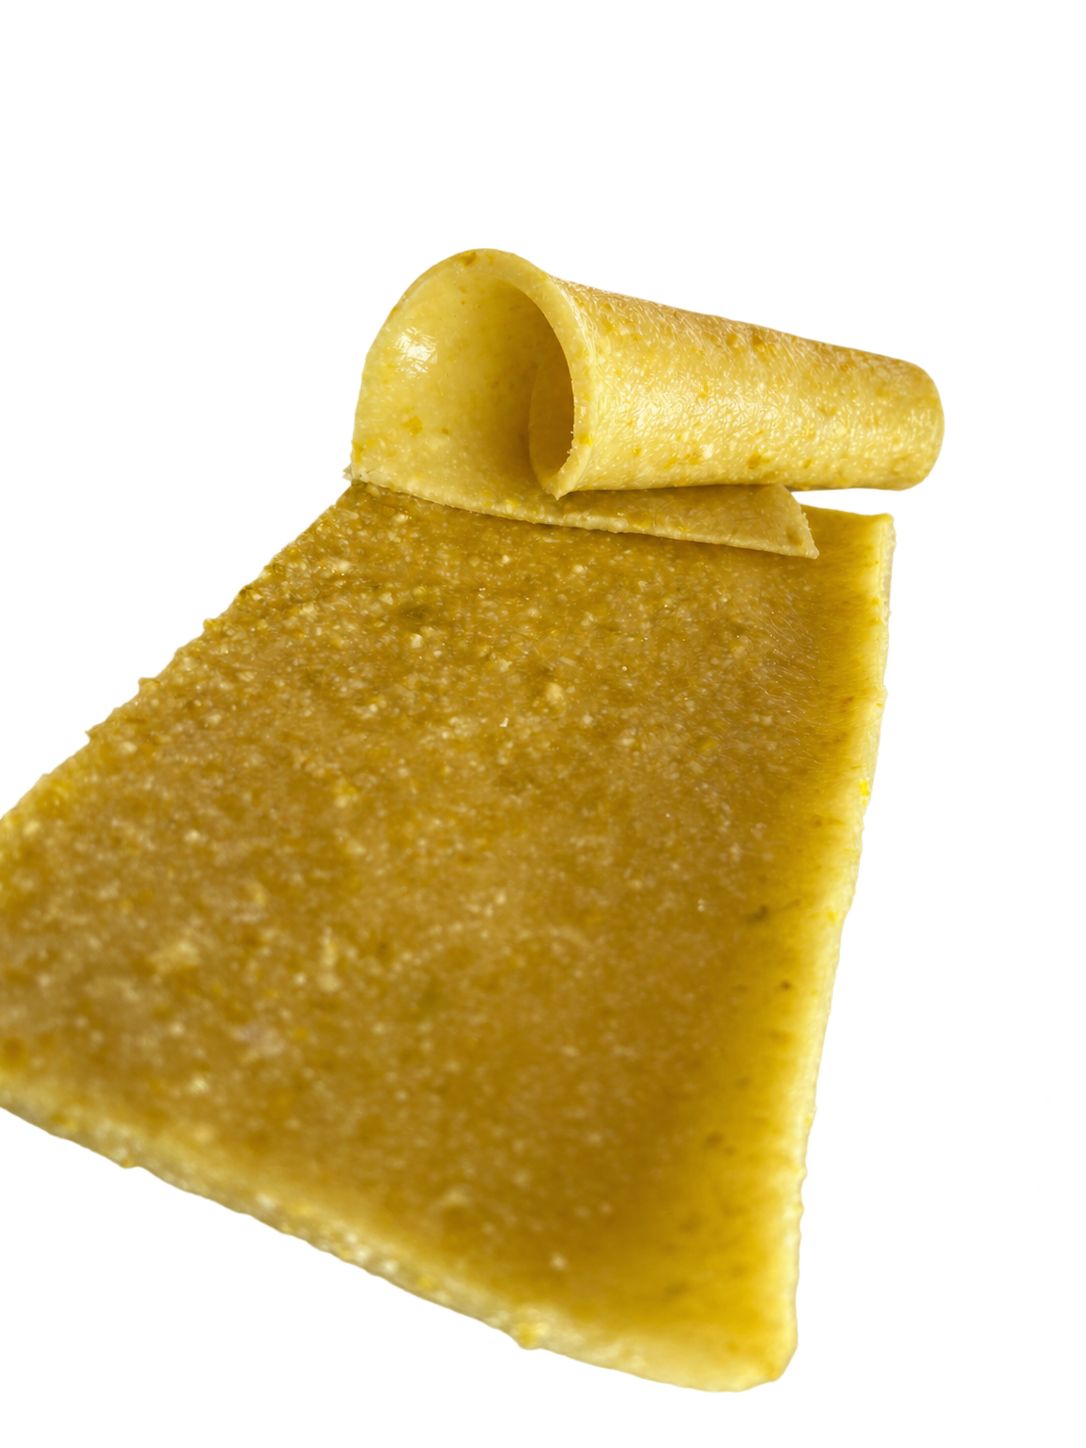
Experiment C | Orange-Peel and Gelatine Composite Bioleather
 Orange peels  68 g
 Water 200 ml
 Gelatin 30 g
 Glycerin 15g
 Pot (non-reactive), spoon, whisk, and stove
 Moulds, or casting surfaces
 Mesure cup
 Scale
 Blender
 - Wash, remove any remaining fruit pulp, and chop
 - Blend the peels with 200 ml of the measured water into the smoothest paste possible.
 - hydrated gelatine with 50 ml of cool water and allow it to swell.
 - Heat the orange paste, stirring, then add the hydrated gelatine.
 - Add glycerin and stir until the gelatine has dissolved and the mixture is evenly combined.
 - Spread into shallow moulds at approximately 2–3 mm wet thickness.
 - Leave with good airflow until dry.
Process and workflow
Orange-Peel and Gelatine Composite Bioleather Results
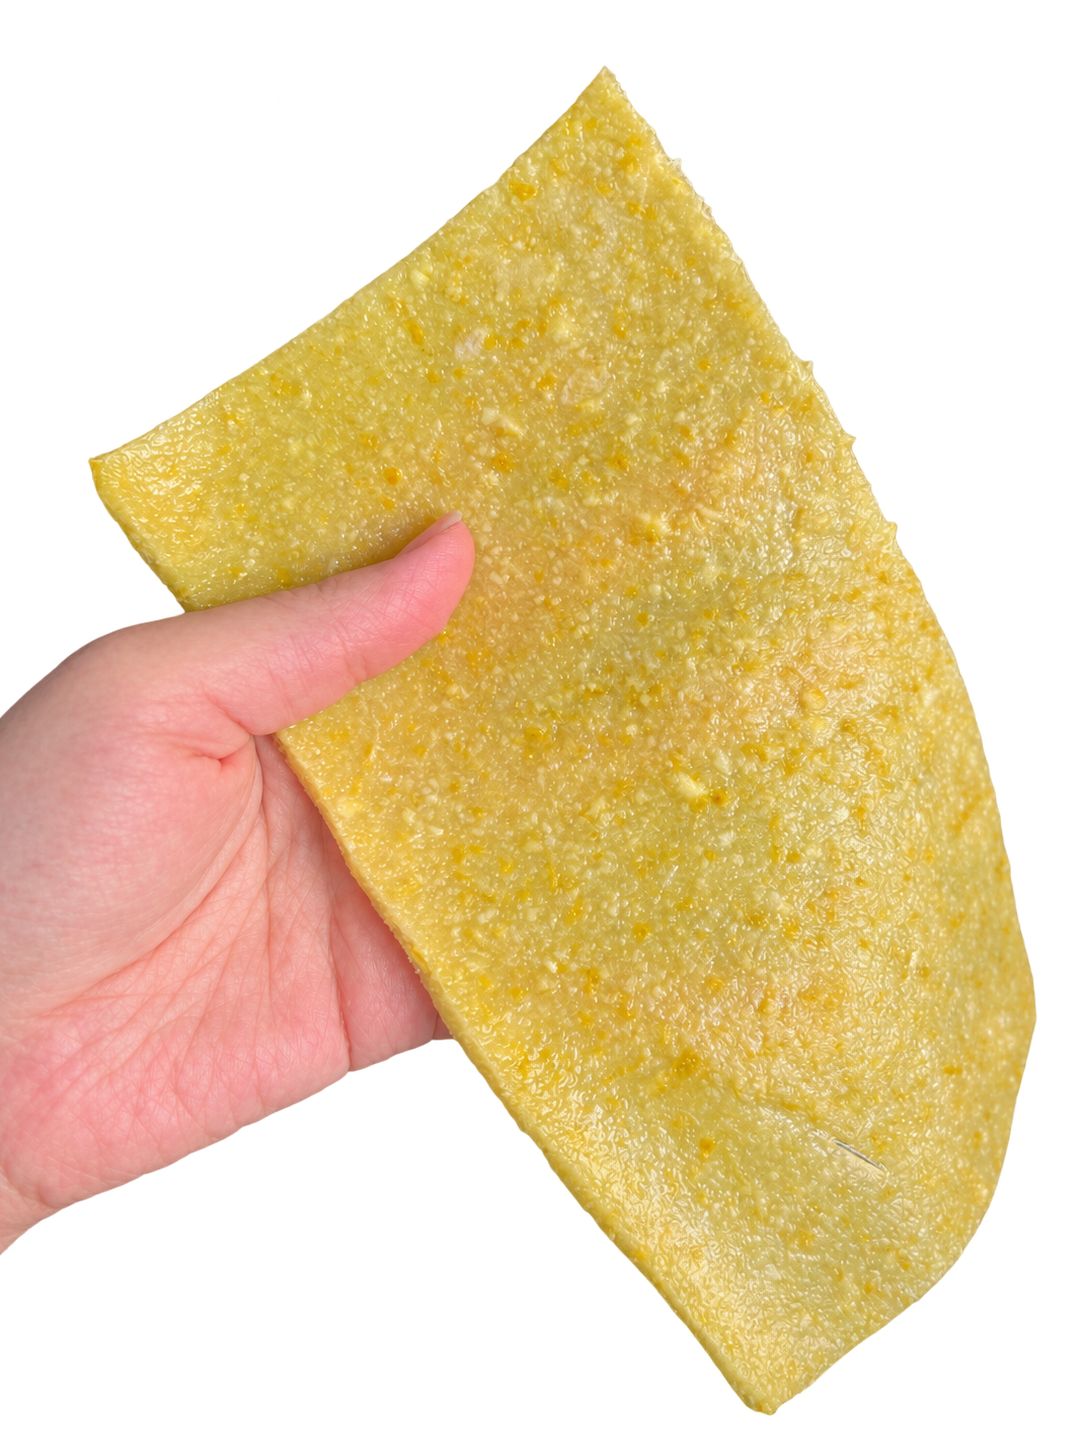
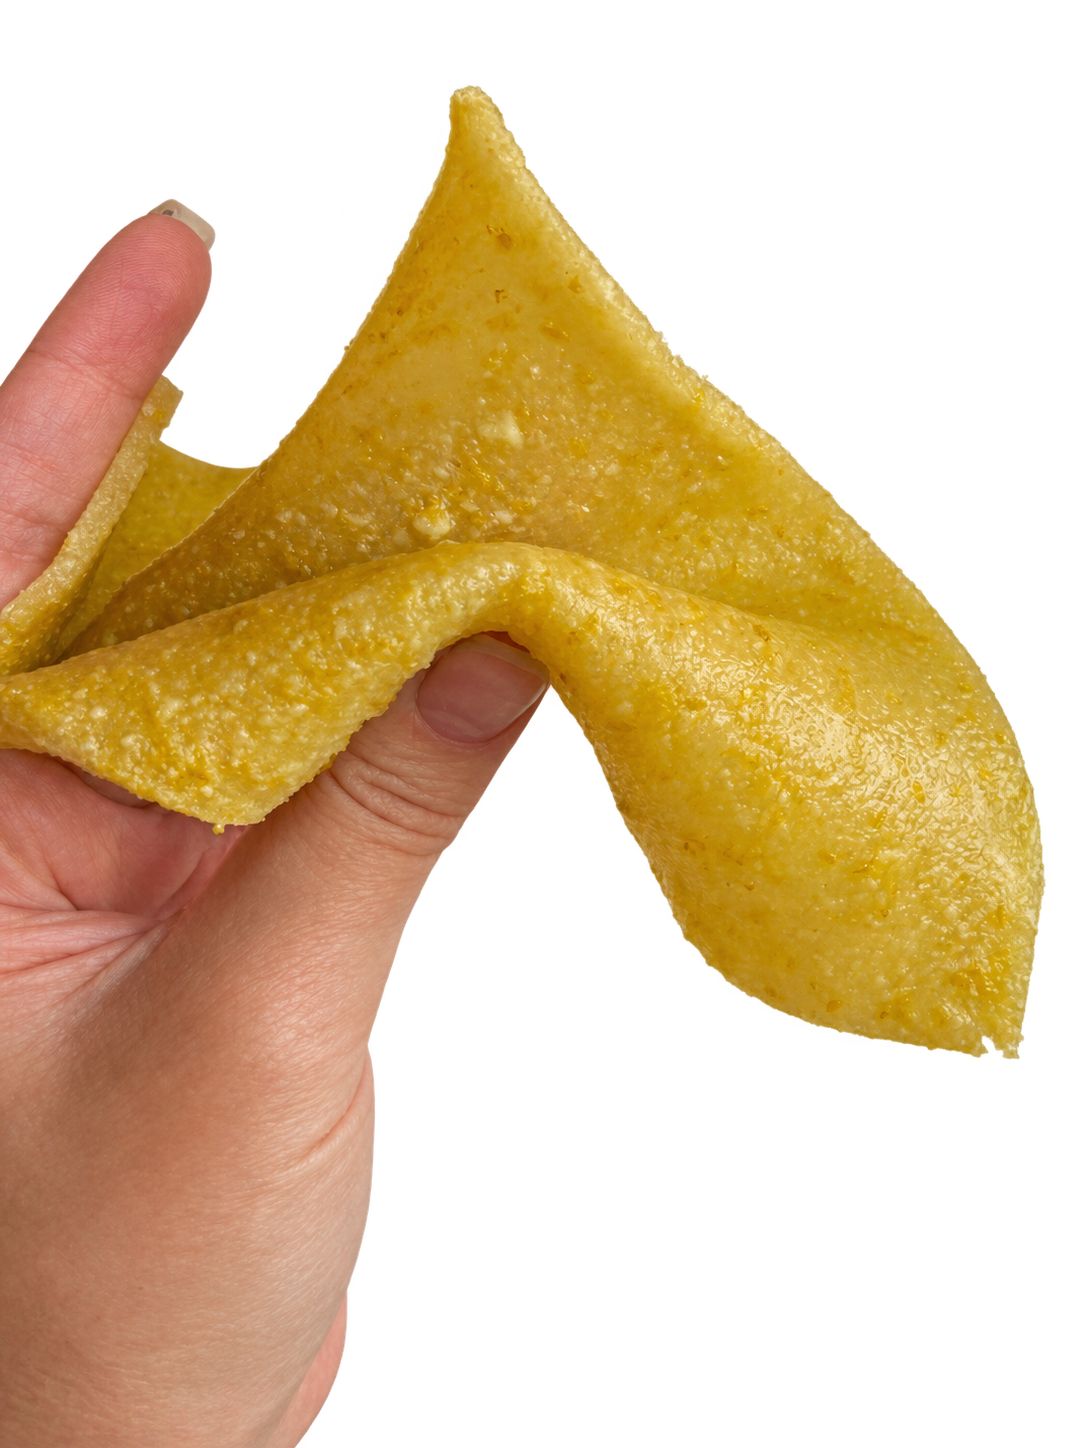
Documenting experiments in a table for comparison
| Alginate Biosheet |
Alginate Bioyarn |
Agar Agar Biofoil |
Gelatine Bioplastic |
| Orange-peel Bioleather |
Clay Gelatine Bioplastic |
Clay Gelatine Bioplastic |
Dye-Bath Gelatine Bioplastics |
Weekly reflection & critical thinking
Instead of working only with ready made materials, this approach allows me to become involved in making the material itself. By experimenting with recipes, proportions, and production methods, I can explore different textures, colours, thicknesses, and levels of flexibility, allowing the material’s behaviour to guide my design ideas.