Digital bodies
Initial thoughts
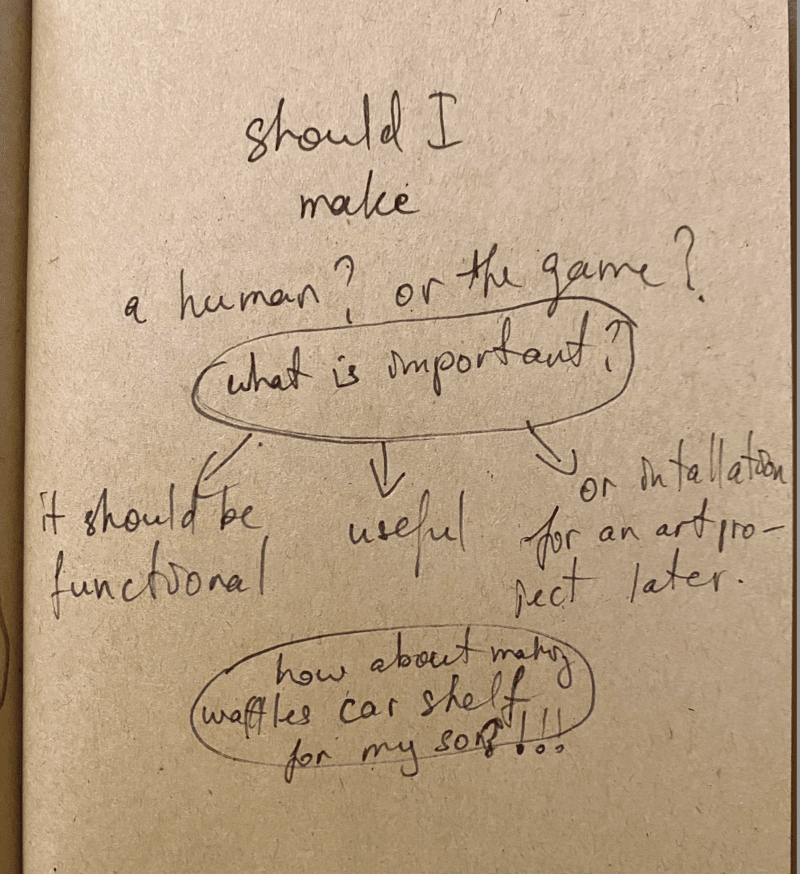
I have checked out the tutorials of this week about Blender and SLicer for Fusion 360, and saw the possibilites the softwares give, so I started to brainstorm what I want to make for my practical assignment. The axis I built my brainstorming was asking myself questions: What is IMPORTANT to me? Even though in the handbook of Digital bodies it was written the final product does not have to be a usable item, still producing/consuming materials to make something that I can not make a use of it did not resonate with my values. So, I start from that point of view: what can I make that I can use it anyhow. In the photo below you can see my final thoughts at that moment was to make a toy shape shelf for my son, however, at last I decided to go ahead with a complex design of a breastfeeding mother. This could be a great addition to my breastfeeding series I started after experiencing the healthcare system within, the propaganda of formula's instead of breastfeeding in social medias, even in the local hospitals. So, my ARTivism takes it's shape here, too. It resonated with my values. So I made my decision.
But the next phase, the practical one was almost scary, how to make that figure... I have always wanted to learn 3D design, now I have started that journey but I am worrying so much how I should make it being a complete beginner. But after the lecture, especially after the AI workshop I felt confident to make it. I also set my objectives to make it easier to go ahead with the week:
-
document the learning process, the failures and the success
-
master softwares, AI, online tools
-
research and try other programs too
-
brainstorm and maybe adjust my initial ideas
-
research other participants and artists who worked with human form, meaning, maybe see some installations from my artist collagues as well
-
go from idea to digital body creation then to reproduce it in the lab!! a very exciting moment to be!
Research & inspiration
There are artists who have been inspiring me for years by their conseptual and impectful approach to the body and it's meaning. Also, I did some research to enrich my perspective and get inspired. Indeed, I came across a lot of inspiring and impectful art works, various approaches to the body. Here I made a booklet where I write about my inspirations in details. Welcome to explore the artists'pages via the links I shared.
Tools (software, application, machine)
Tools:
Makehuman Blender extension
Slicer alternative created by Aslı Aydın Aksan
Power Point Presentation
Application:
3d scanner Kiri engine
Machine:
Laser cutter - Kimian 6040
Process & workflow
I started with a female figure made MPFB, which is the Makehuman software in Blender. It is more convenient for me to have it as an extension in Blender rather than having another software, Makehuman, work there then export and then import in Blender to work with. To make a shortcut, I added this extension to my Blender and avoided extra steps. Also it saved space in my laptop. Thanks to RICO Kanthatham's workshop I learned a lot about Blender, Makehuman functions, and added Makehuman extension and assets to my Blender. Thanks to Aslı Aydın Aksan's workshop I learned about a lot of new tools, felt more confident in AI tools. Here is my path overview:
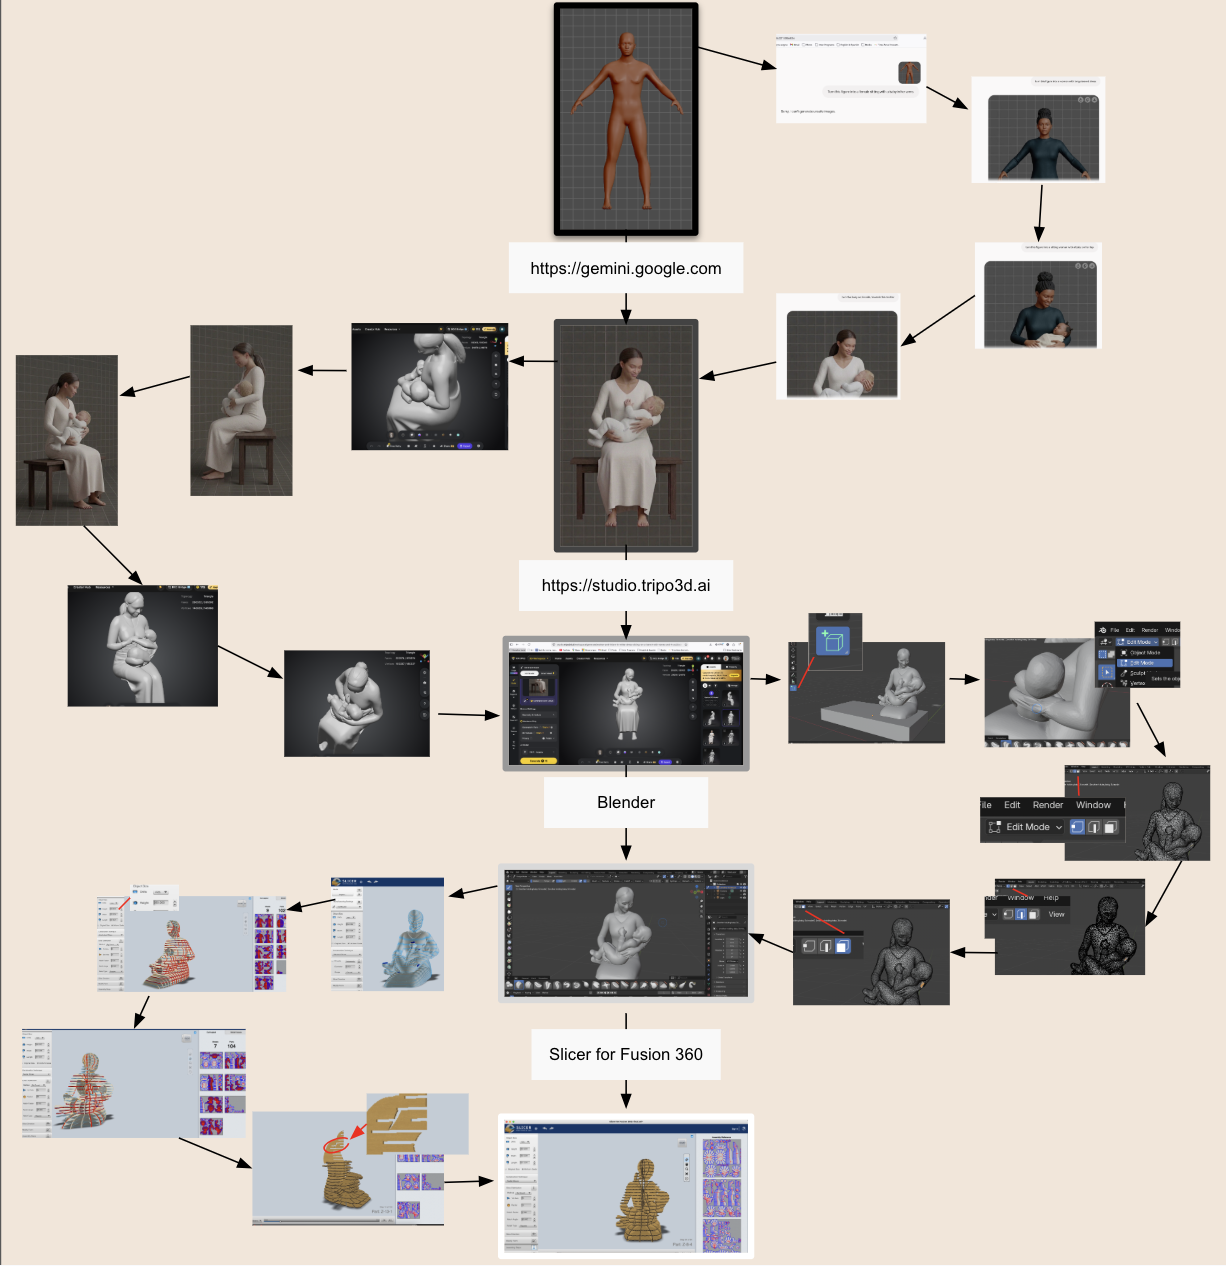
Now let's go through the steps one by one.
Step 1: MakeHuman, MPFB
Create a figure with Makehuman or in Blender with MPFB extension. Take a screenshot. Alternative: use your own image, remove the backgrond
I am sharing with you a link to our first Blender tutorial by RICO Kanthatham where he also shares how to add Makehuman to Blender. In addition to it, I am sharing a YouTube tutorial and an AI generated step by step guide below:
Step 1: Download the Required Files:
- Go to the MakeHuman Community MPFB Page.
- Download the MPFB2 Add-on zip file.
- Download the MakeHuman System Assets pack zip file (this contains essential items like base meshes, hair, and clothes). • Note: Do not unzip these files. Blender handles them as compressed .zip packages.
Step 2: Install the Plugin in Blender The method depends on how new your version of Blender is: Option A: For Blender 4.2 and Newer (Recommended) Blender 4.2+ uses an integrated Extension platform. 1. Open Blender and navigate to Edit > Preferences. 2. Click on the Get Extensions tab on the left. 3. Click the arrow/menu icon in the top right corner of the preferences window and choose Install from Disk. 4. Select your downloaded MPFB2 add-on zip file and click install. 5. Ensure the checkbox next to MPFB is enabled.
Option B: For Blender 4.1 and Older 1. Open Blender and navigate to Edit > Preferences. 2. Select the Add-ons tab on the left. 3. Click the Install... button at the top right of the window. 4. Select the downloaded MPFB2 add-on zip file and click Install Add-on. 5. Search for "MPFB" in the search bar and check the box next to it to activate it.
Option B: For Blender 4.1 and Older 1. Open Blender and navigate to Edit > Preferences. 2. Select the Add-ons tab on the left. 3. Click the Install... button at the top right of the window. 4. Select the downloaded MPFB2 add-on zip file and click Install Add-on. 5. Search for "MPFB" in the search bar and check the box next to it to activate it.
Step 2: Gemini, Flux
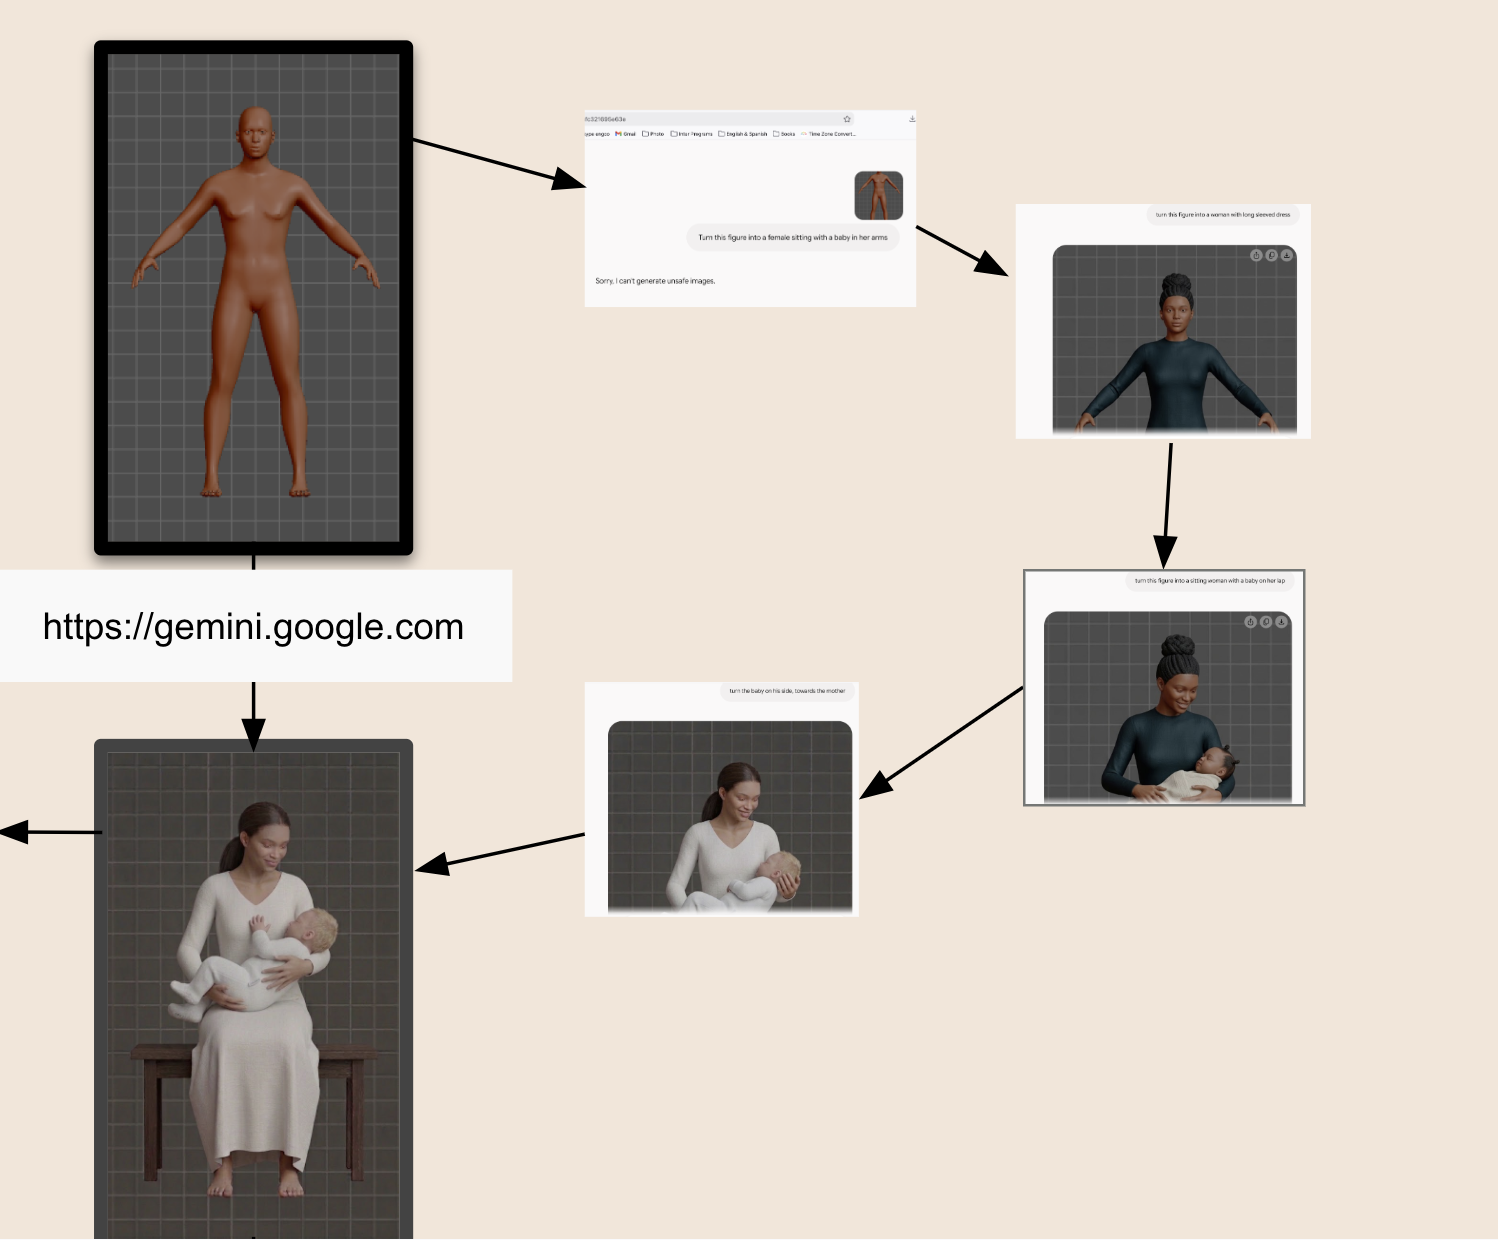
Use the generated image or screenshot of the figure from Makehuman to send to Gemini for editing with prompts. Alternative: use Flux instead of Gemini. PROMPTS here are key. I thought I can just describe what I have in my mind and it will make, but actually, it didn't. Just because my prompt was to turn the female figure into a breastfeeding woman, Gemini marked it as a sensitive content and refused to make. So, I started one change at a time. For example, first wear some dress, then change the color of the dress, then change the skin and hair, then change the position from standing to sitting, then adding a baby. Even though I haven't specified a baby boy or girl, it automatically chose a baby girl. But since the idea for me was to recreate my baby son and me in the final product, I asked Gemini to change the gender of the baby, change baby's hair and clothes. It started to look like more and more what I had in my mind. And then, I asled to turn the baby on his side and it really looked like a breastfeeding pose. It was exciting!! Also I asked to put the baby's hand on the woman's chest. Finally I didn't like that the woman was smiling widly and the teeth were visible, I asked Gemini to close the lips. First it did not understand did not change anything, so I paraphrased and added that it needs to show no teeth. And it worked!
Step 3: Tripo3d
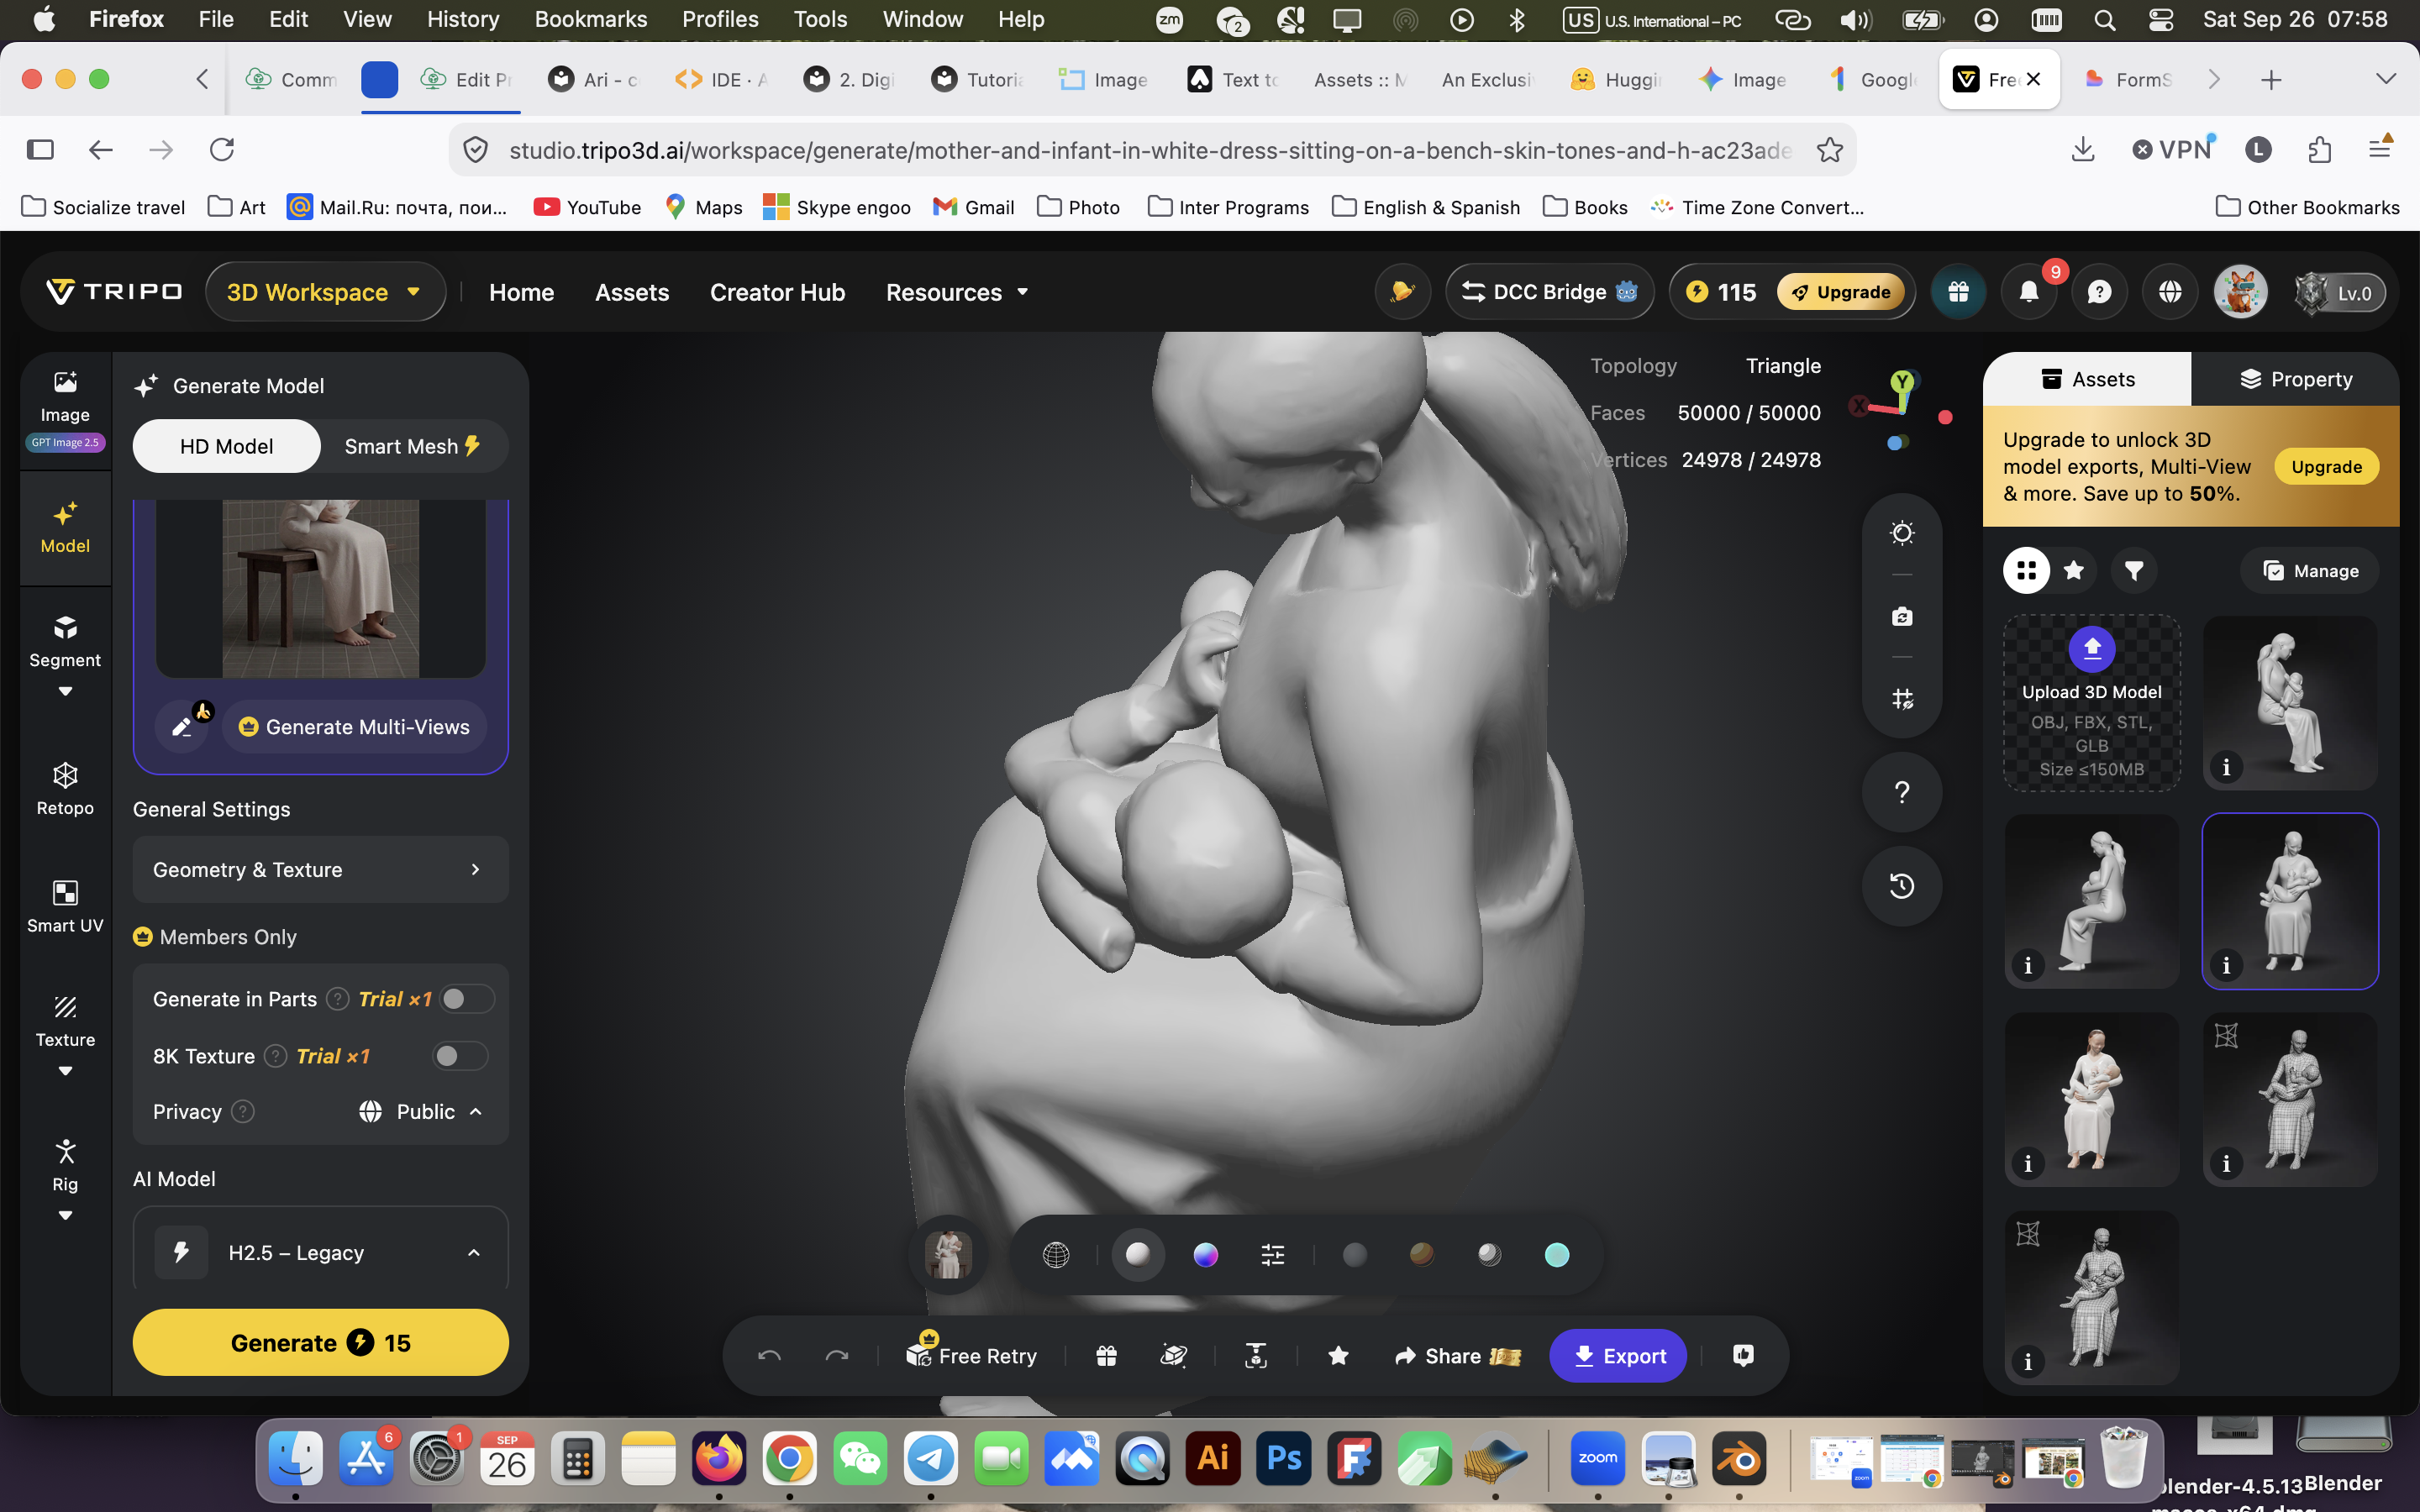
I got the image I wanted, it's time to convert it to a 3D model. I used Tripo3d to convert my image to a 3D model which I can later use in Blender to modify and better.
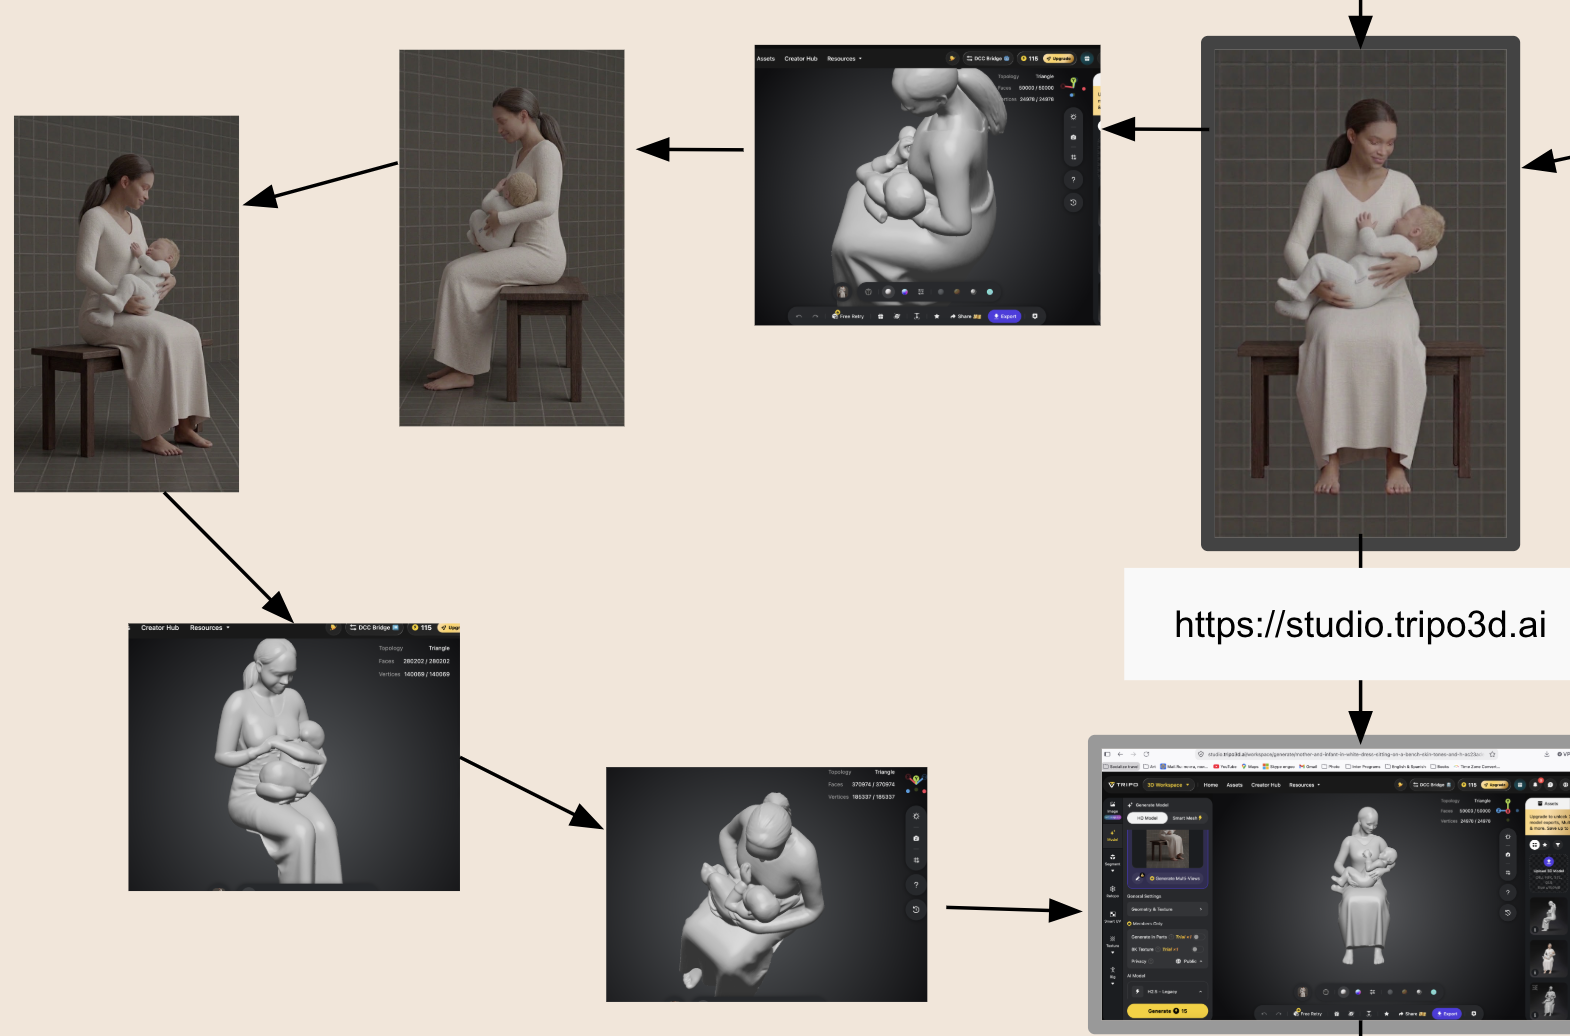
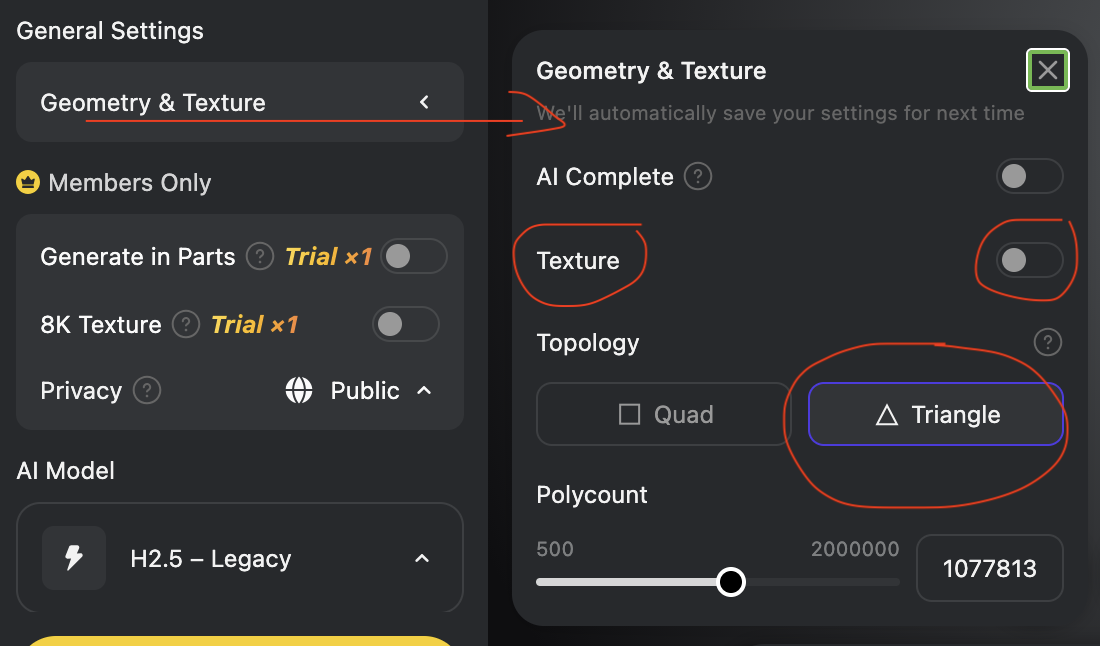
However, there in this website you need to choose certain parameteres to be able to exoort your model with a free version, othervise it requires to pay. So, before you export, make sure:
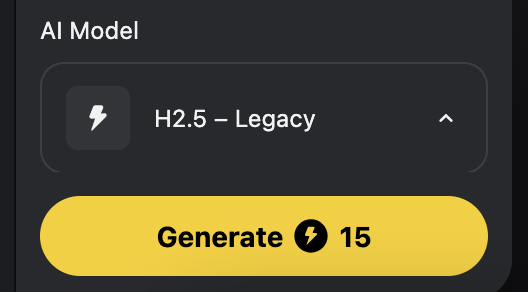
. AI model is H2.5 - Legacy
. Texture is turned off
. Topology is Triangle
. Polycount is not too high
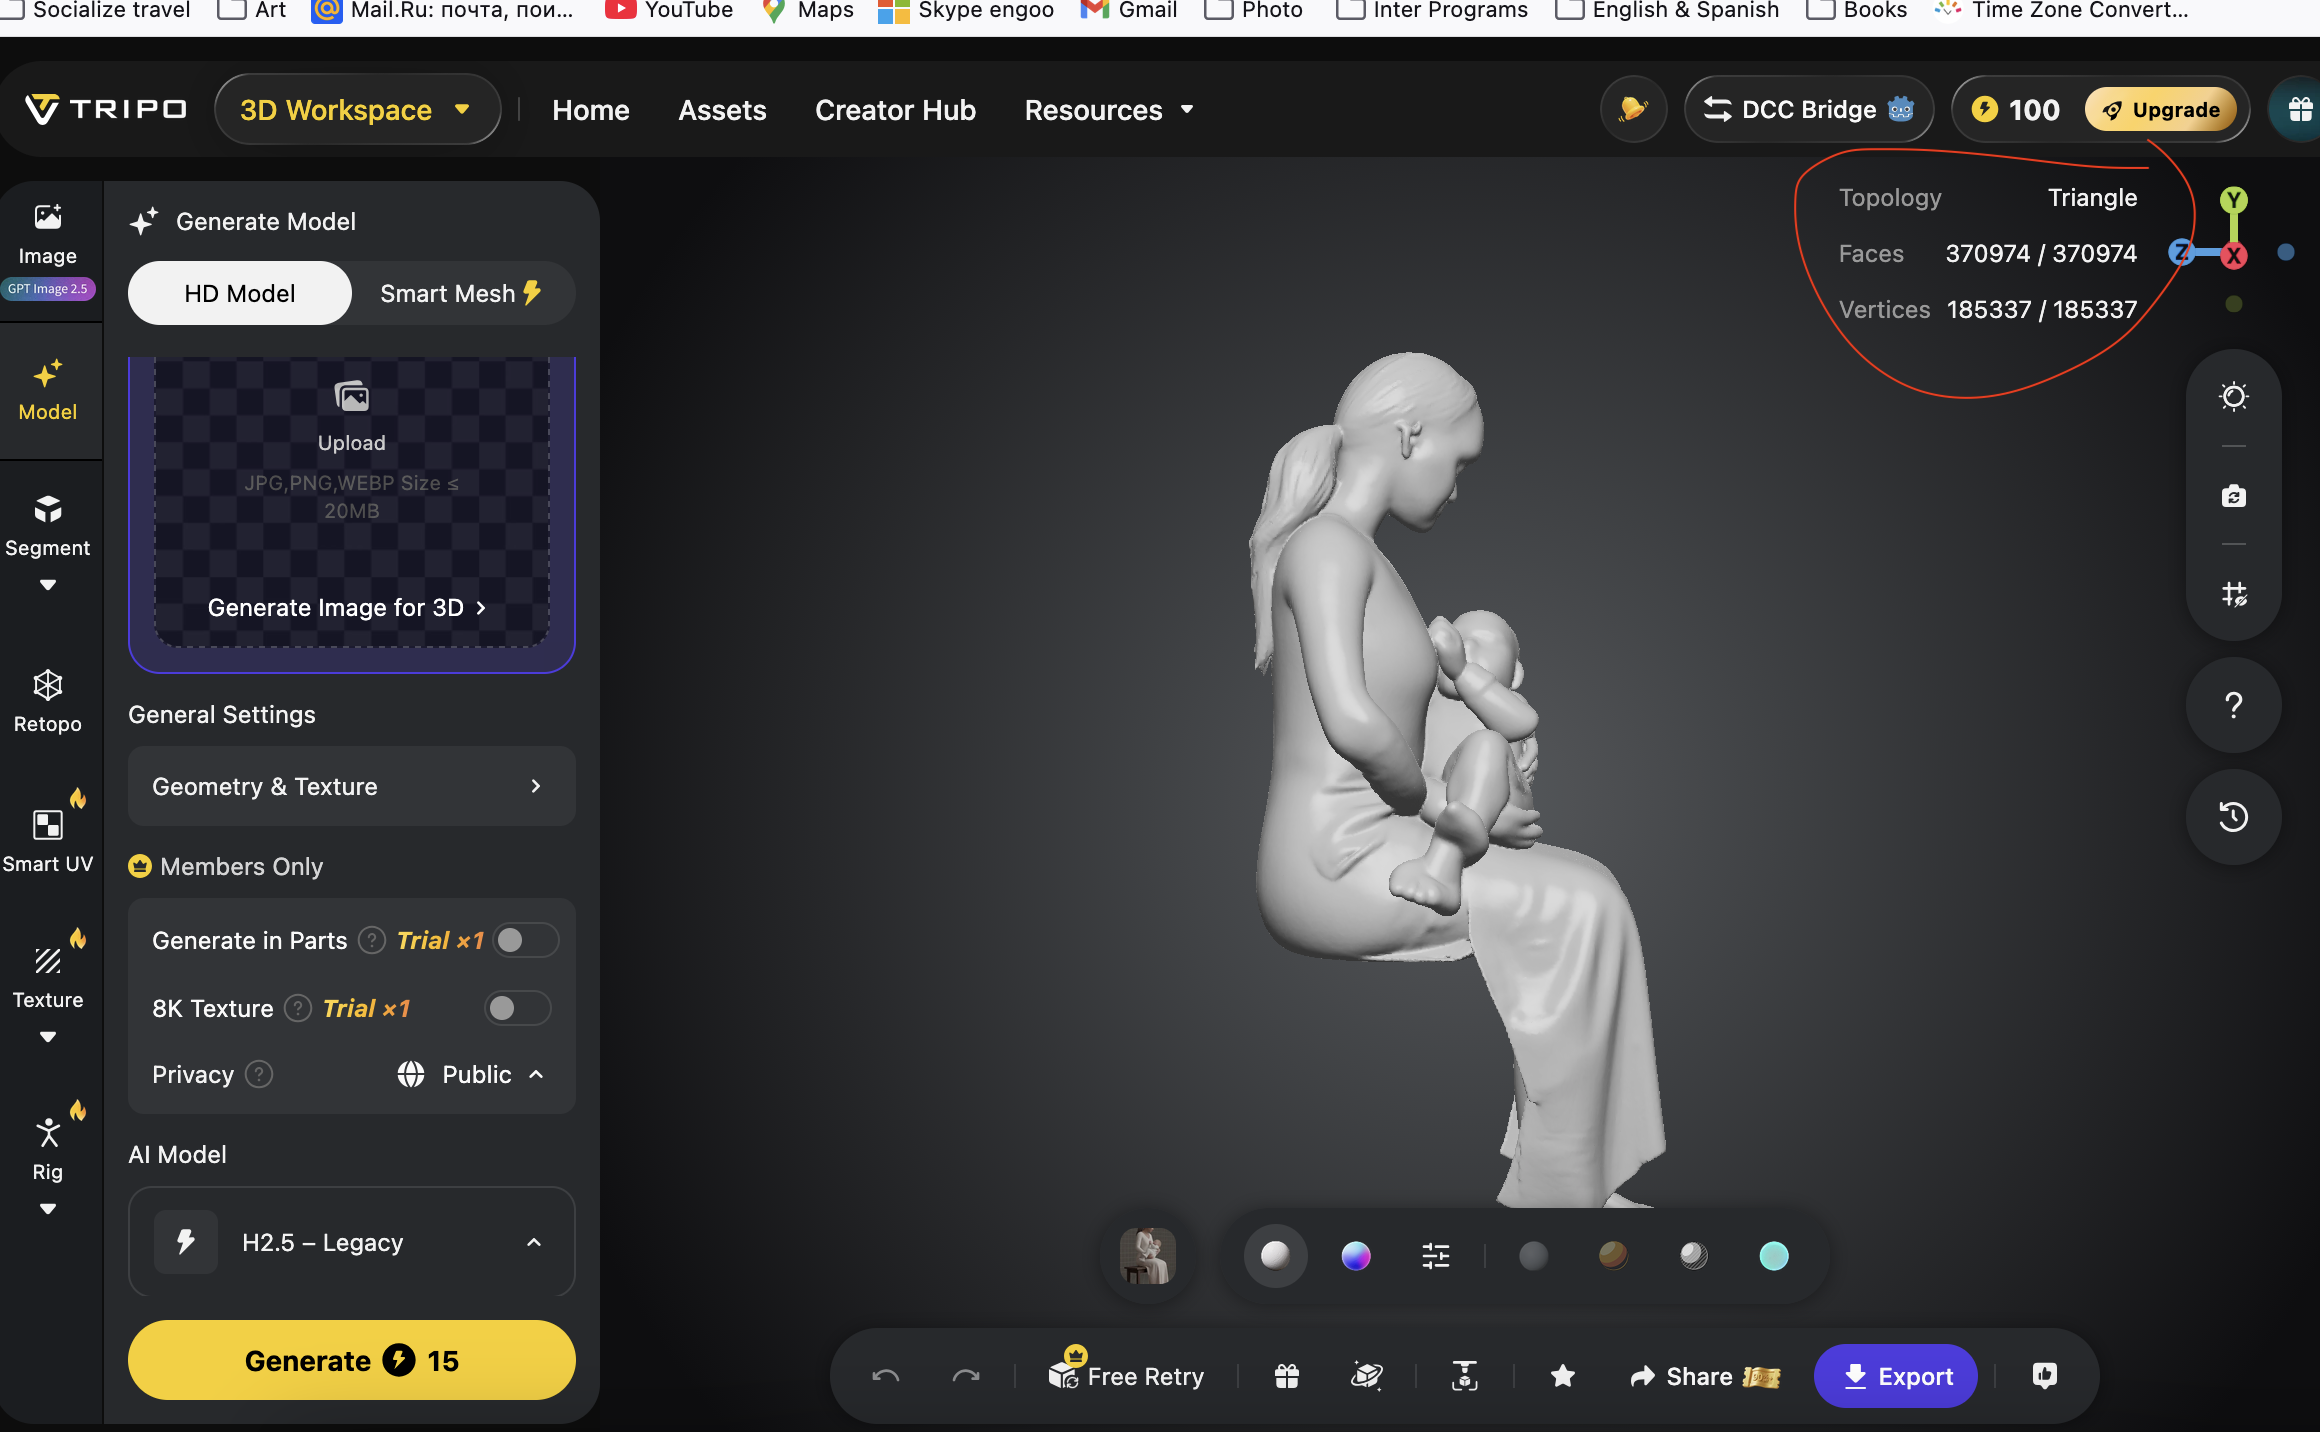
. Check one more time the parameters on the upper right corner:
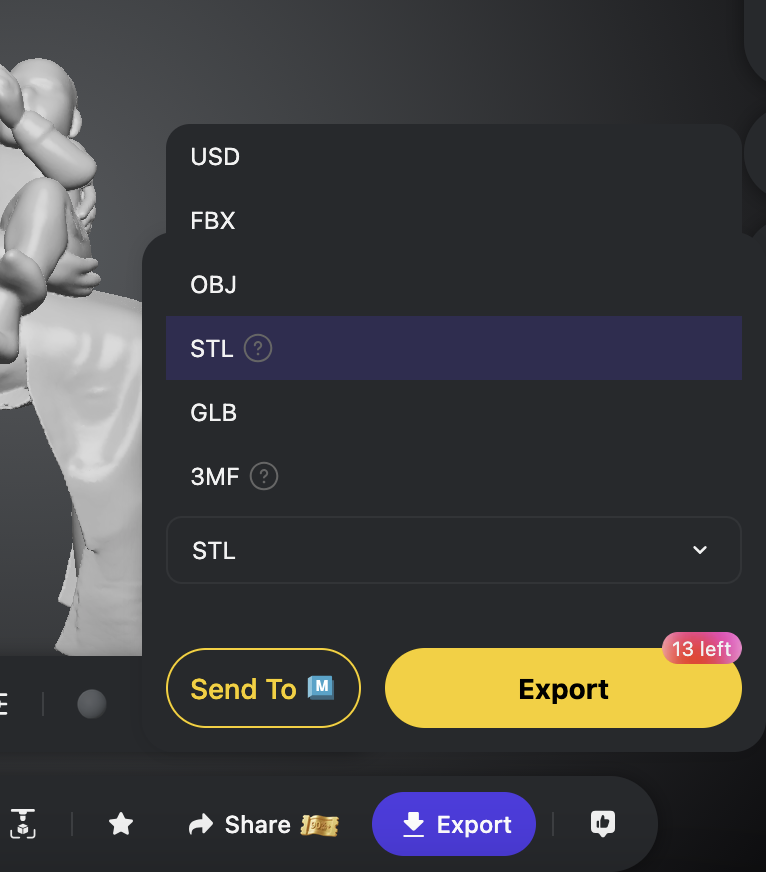
. Choose the file formate and EXPORT:
Step 4: Blender
It's time to make more detailed changes in Blender.
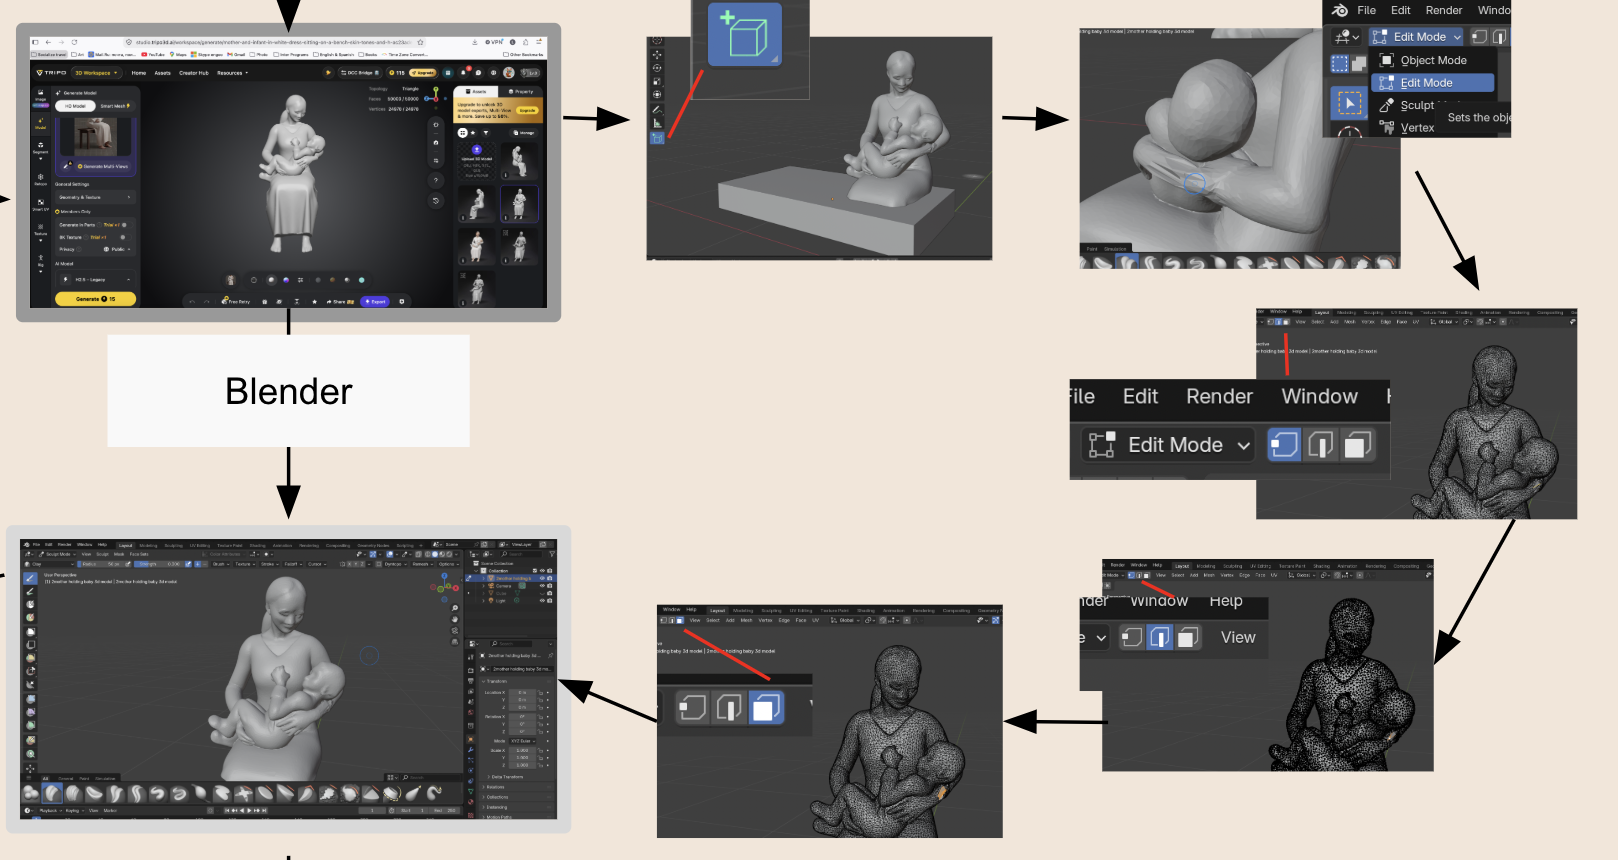
The model I generated in Tripo I liked, especially the baby's and mother's faces, their hands, the baby's head direction. However,there was a challenge for me: the mother's hand was inconsistent.
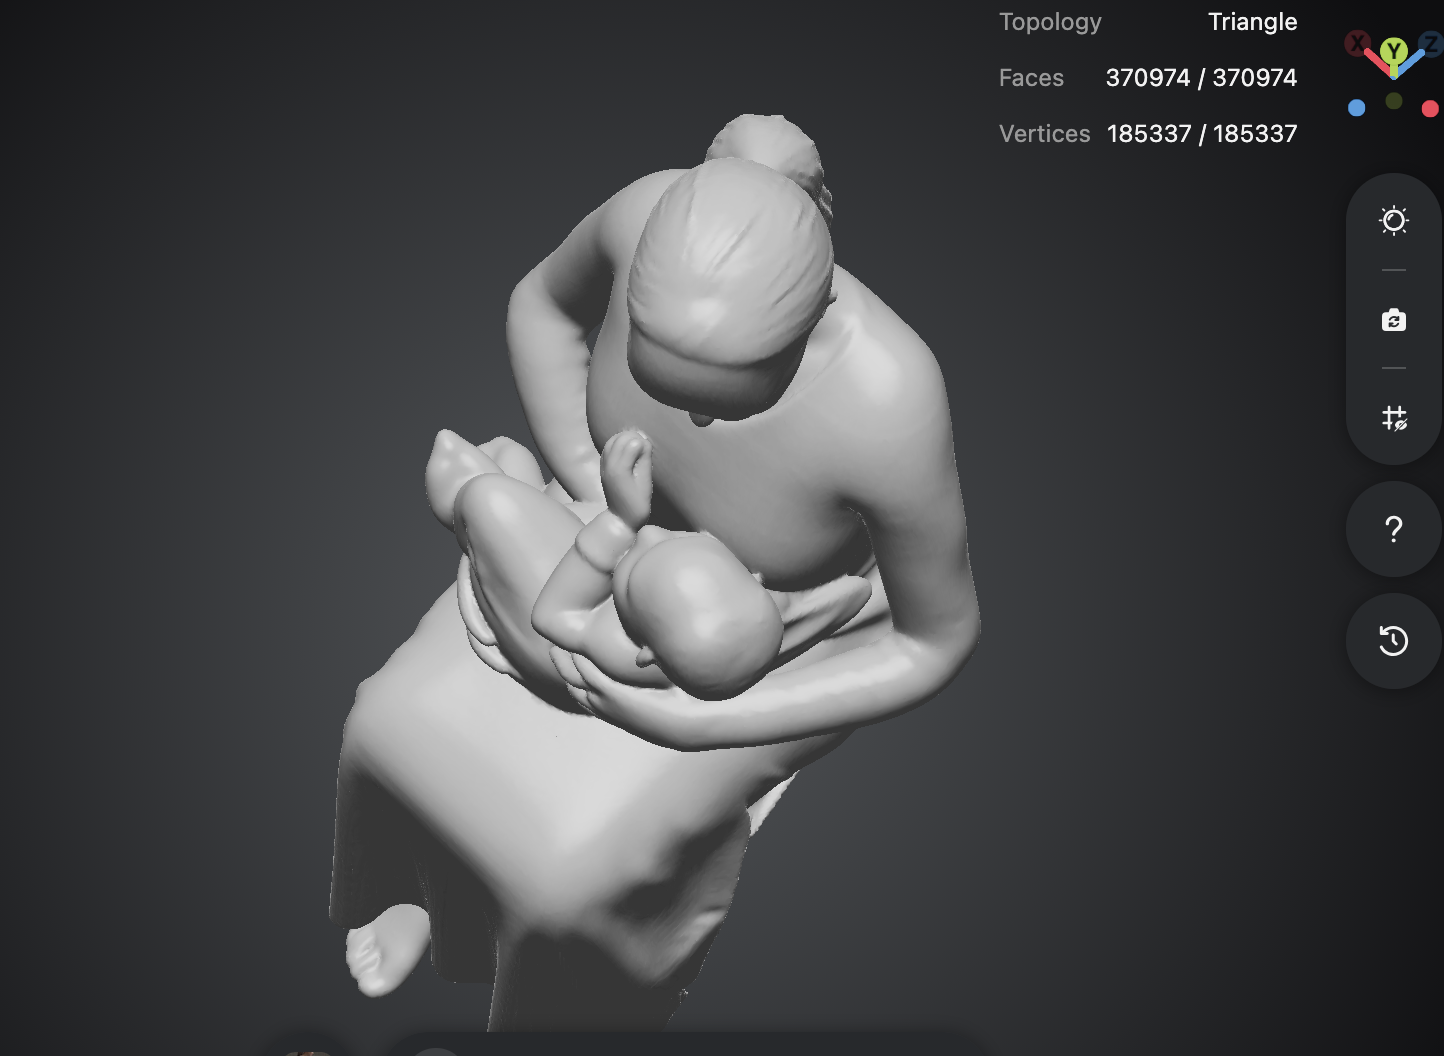
Even though there was another model I generated by changing the perspective of the mom in Gemini by asking: "give me this picture from right", then I generated a 3D model in Tripo with this new picture, I liked the outcome mostly, but the baby's head direction was very different from a breastfeeding direction.
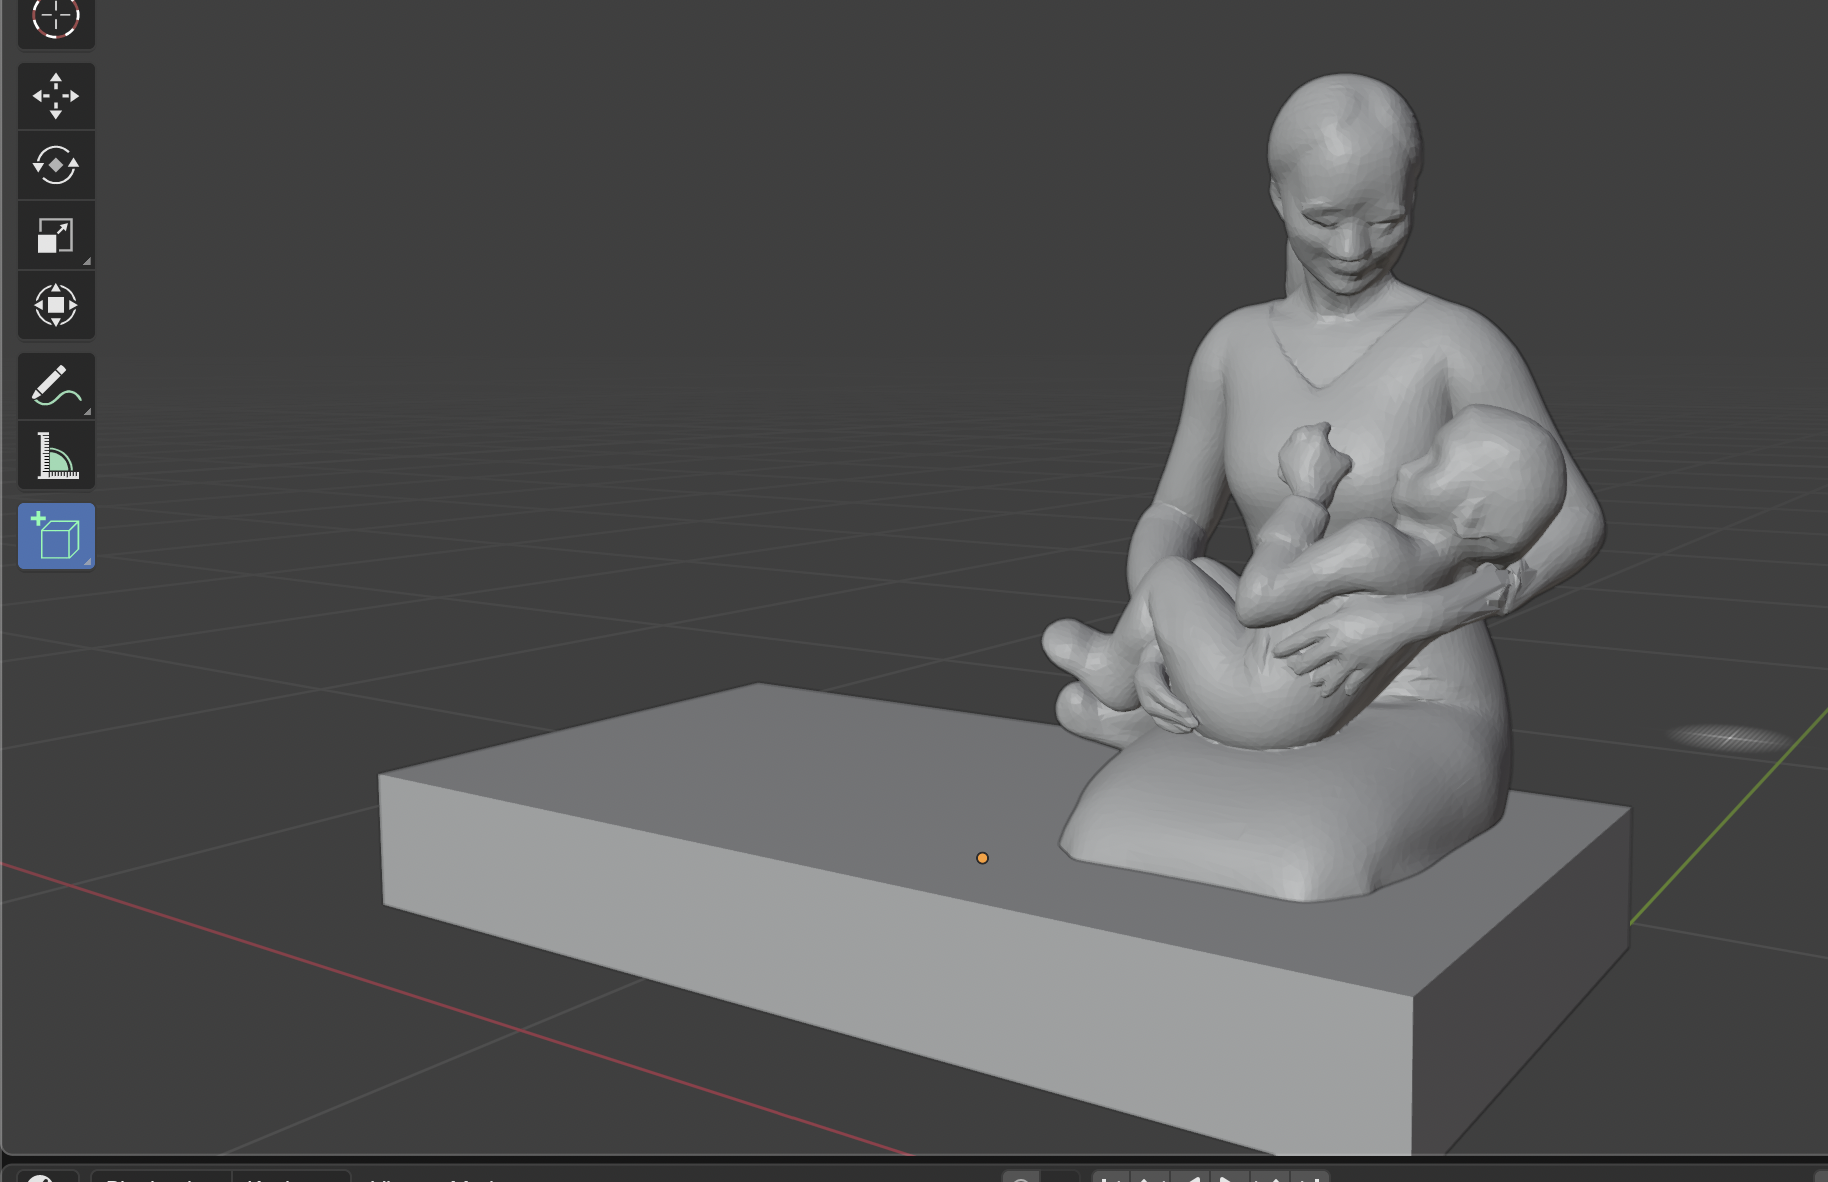
So, I chose to work in Blender and repair the inconsistent arm. First, I cut my model's legs by choosing the CUBE tool, placing it in a way to fit all the body parts I wanted to remove.
After scrolling and checking from all sides that the body parts all fit in the cube, and that the model is in Object Mode, I pressed on the model, then Add modifier, Generate, Boolean.
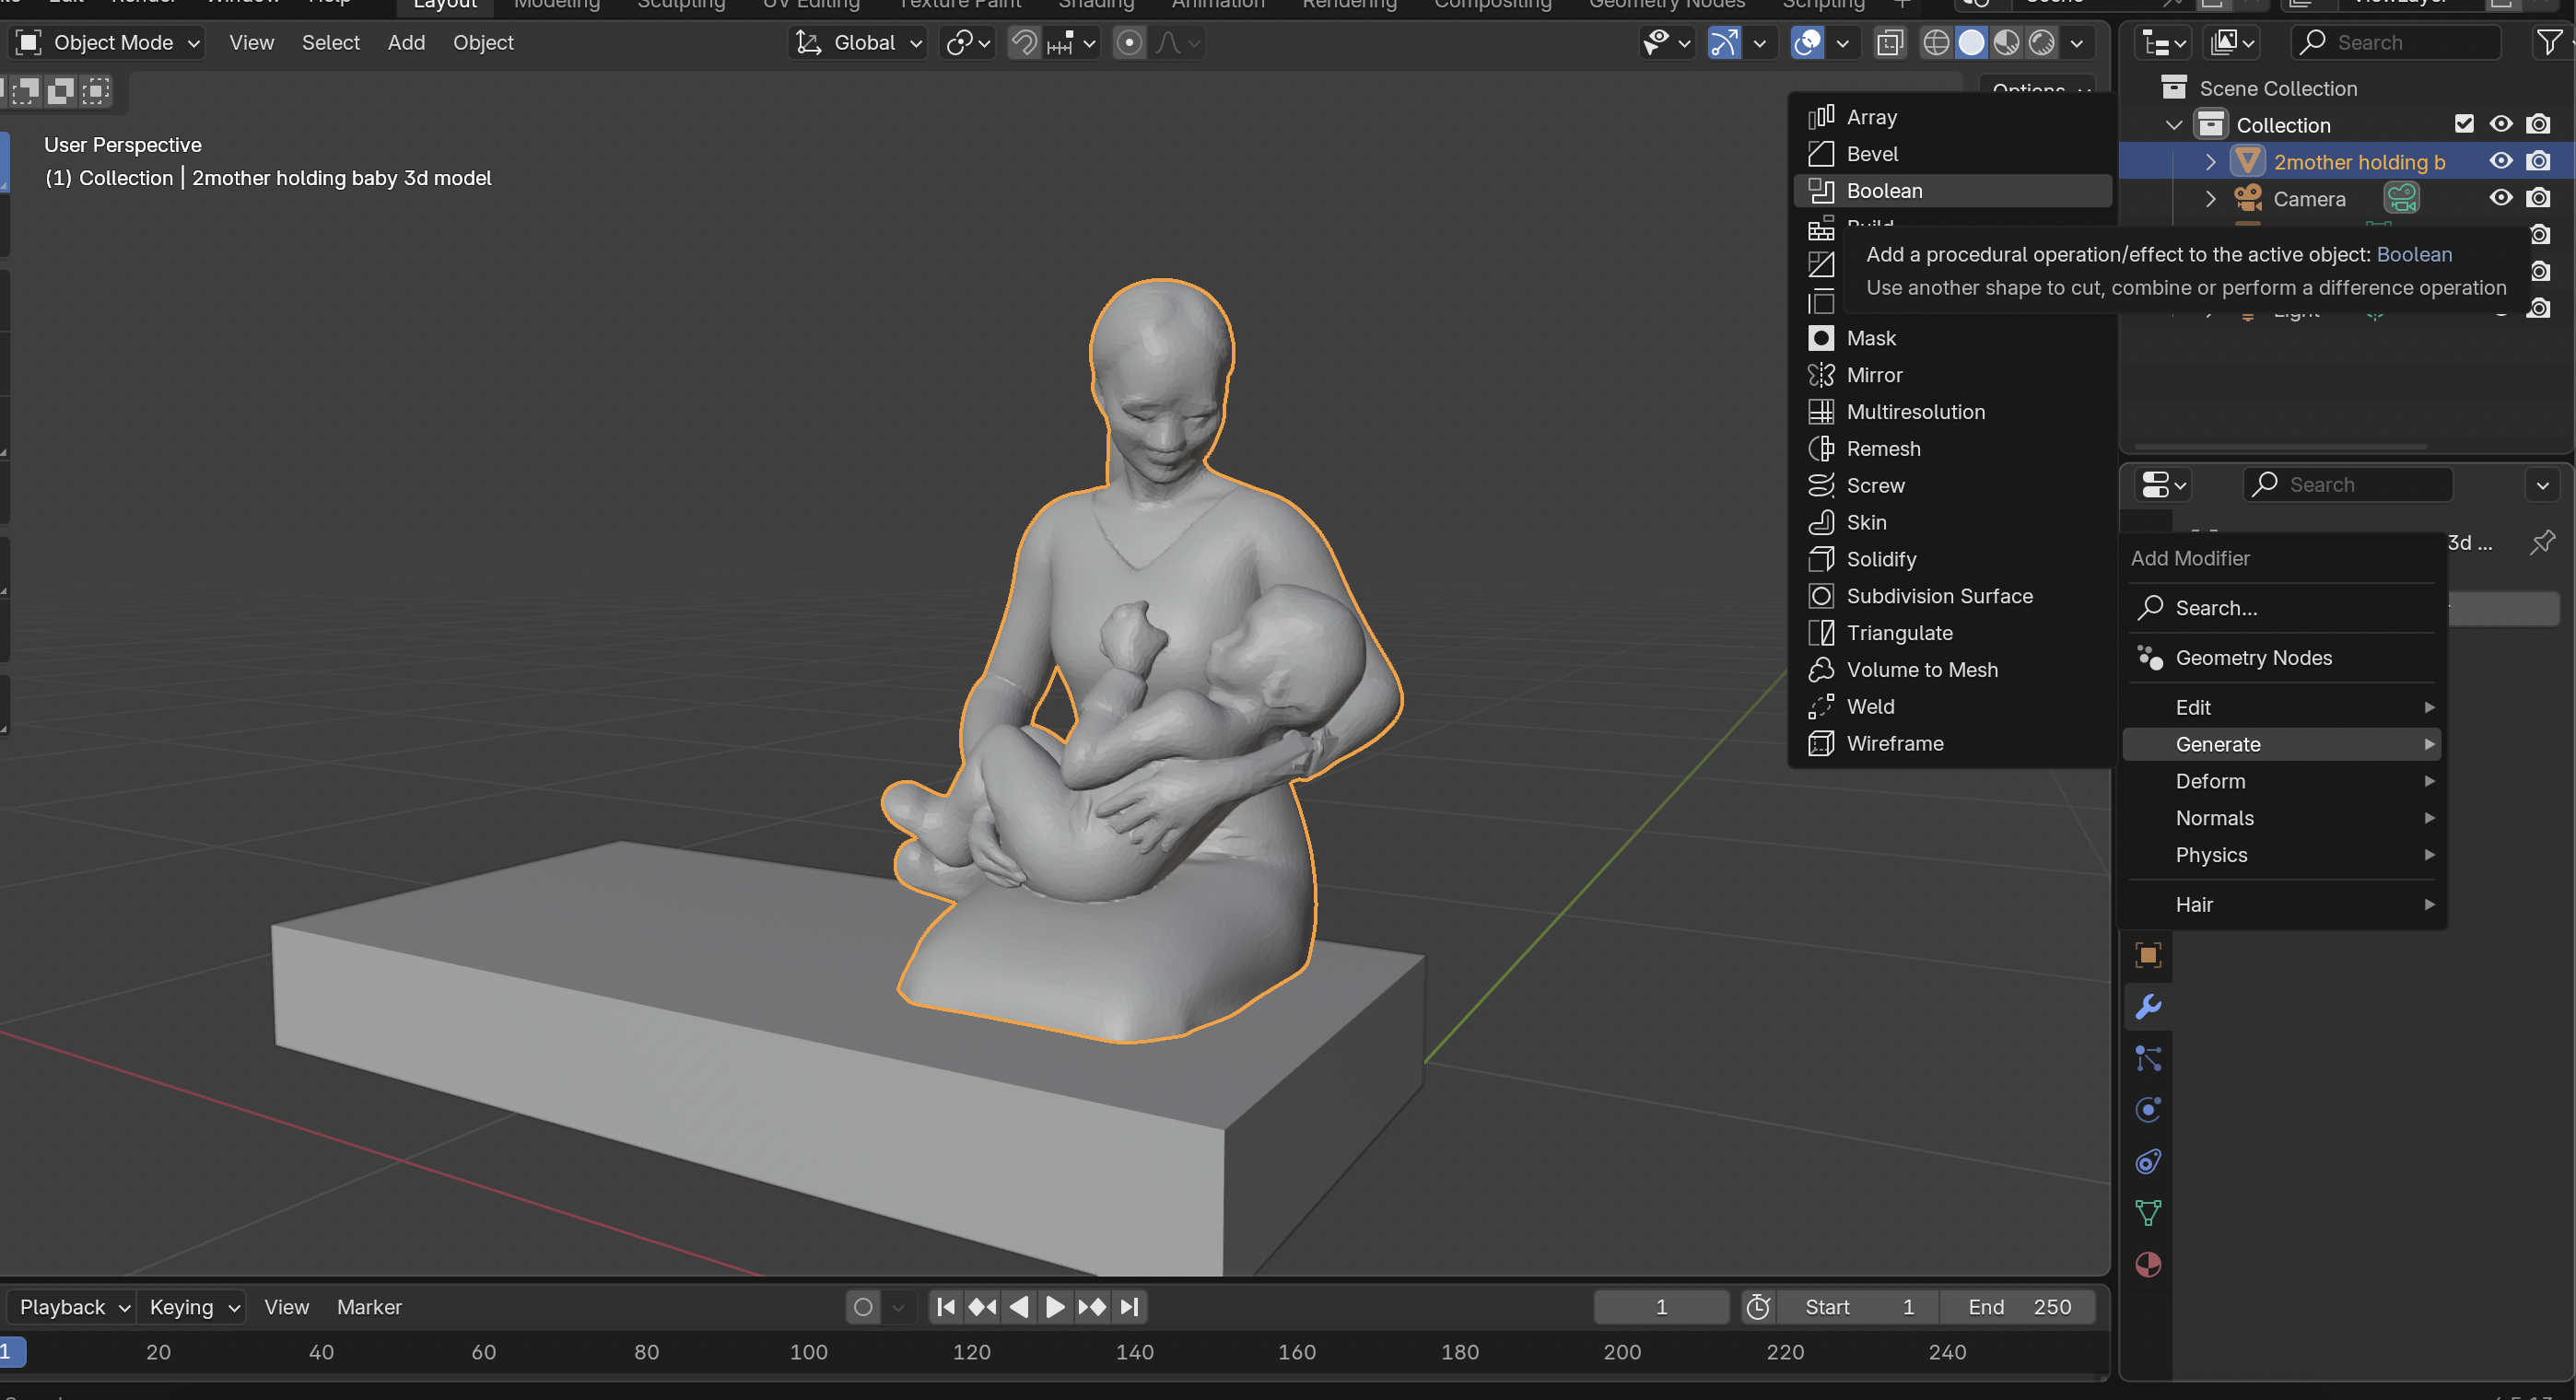
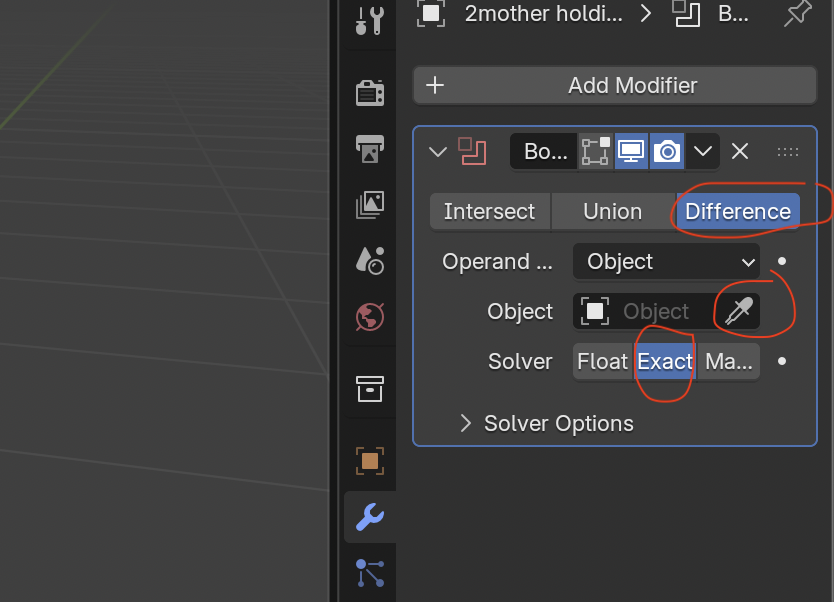
Then you press on the Droplit and click on the cube. Make sure the Difference and Exact modes are chosen and press DELETE. If you are using IMac, press X.
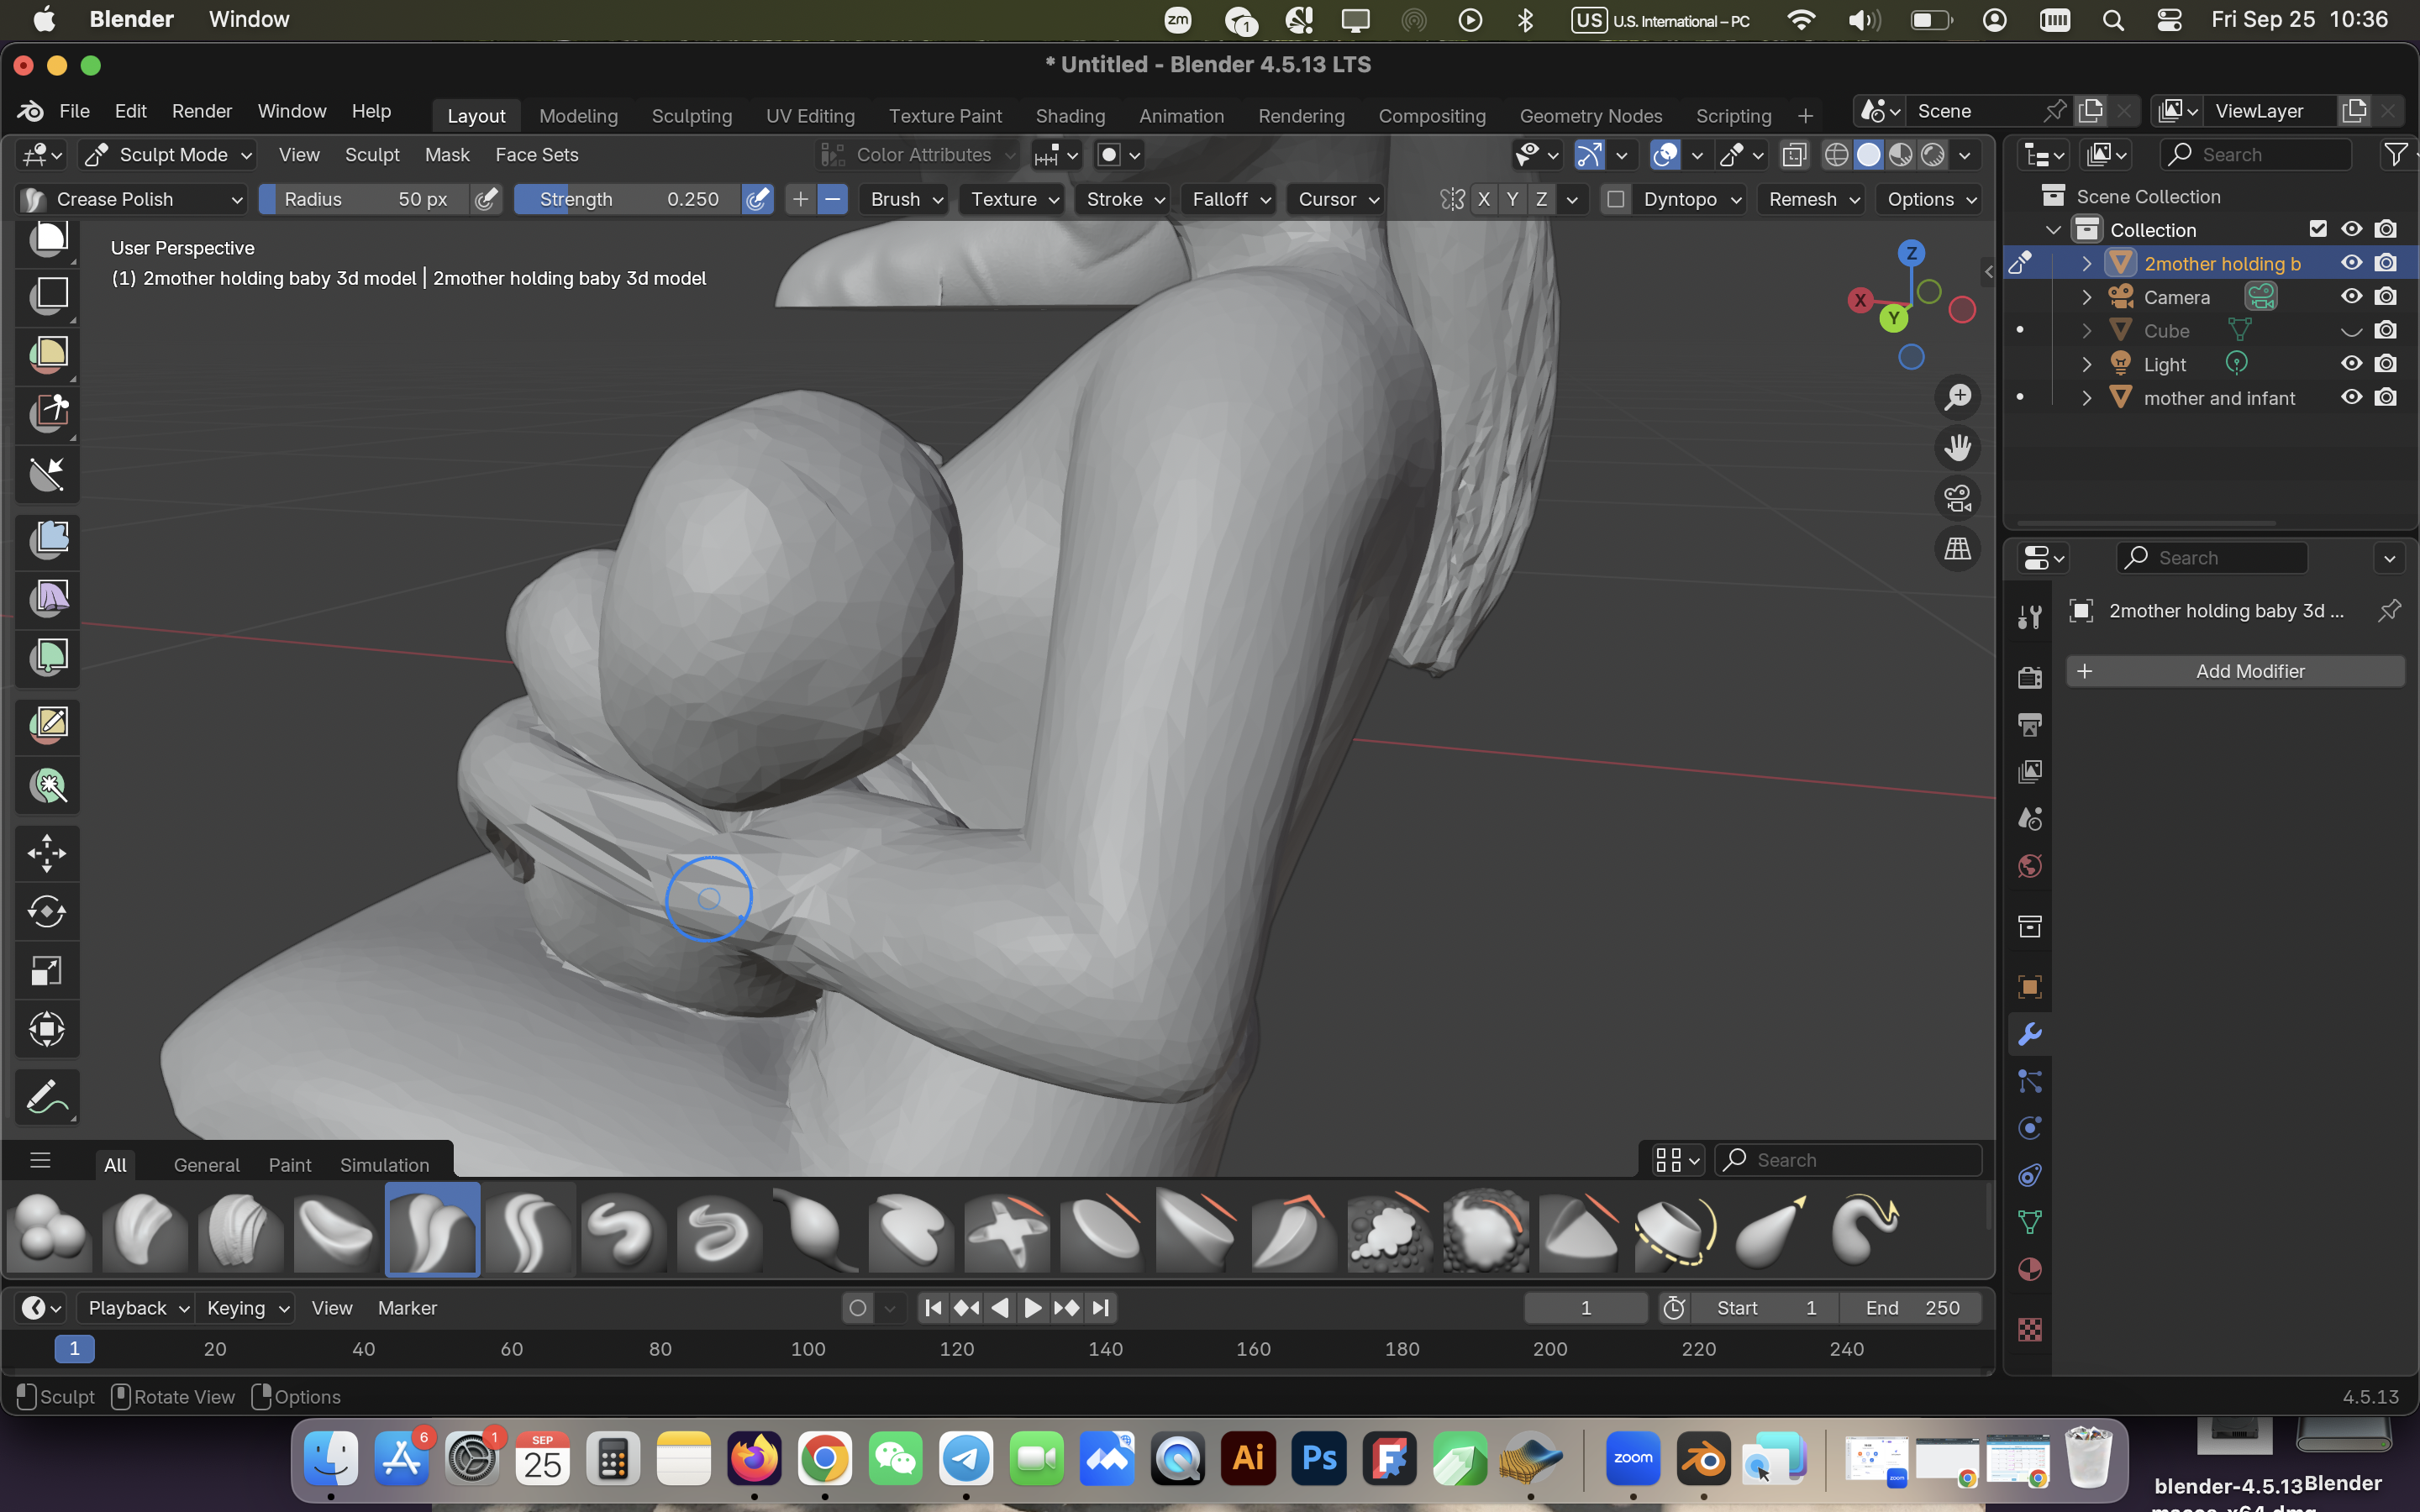
Then, I change the Object mode to Sculpt mode and chose Extension tool and just dragged the two ends of the arm, constantly changing my perspective by scrolling or touching the touchpad and making sure the two ends meet at the place I want. Finally I got it. However, the connection point was bumpy, so I learned 3 new tools to smoothen the connection. Those are on the upper left corner. Go to Edit mode and you will see three signs in squares. The first is the Vertex, the points on the model, and you can click on the dots and move them according to the desired direction.
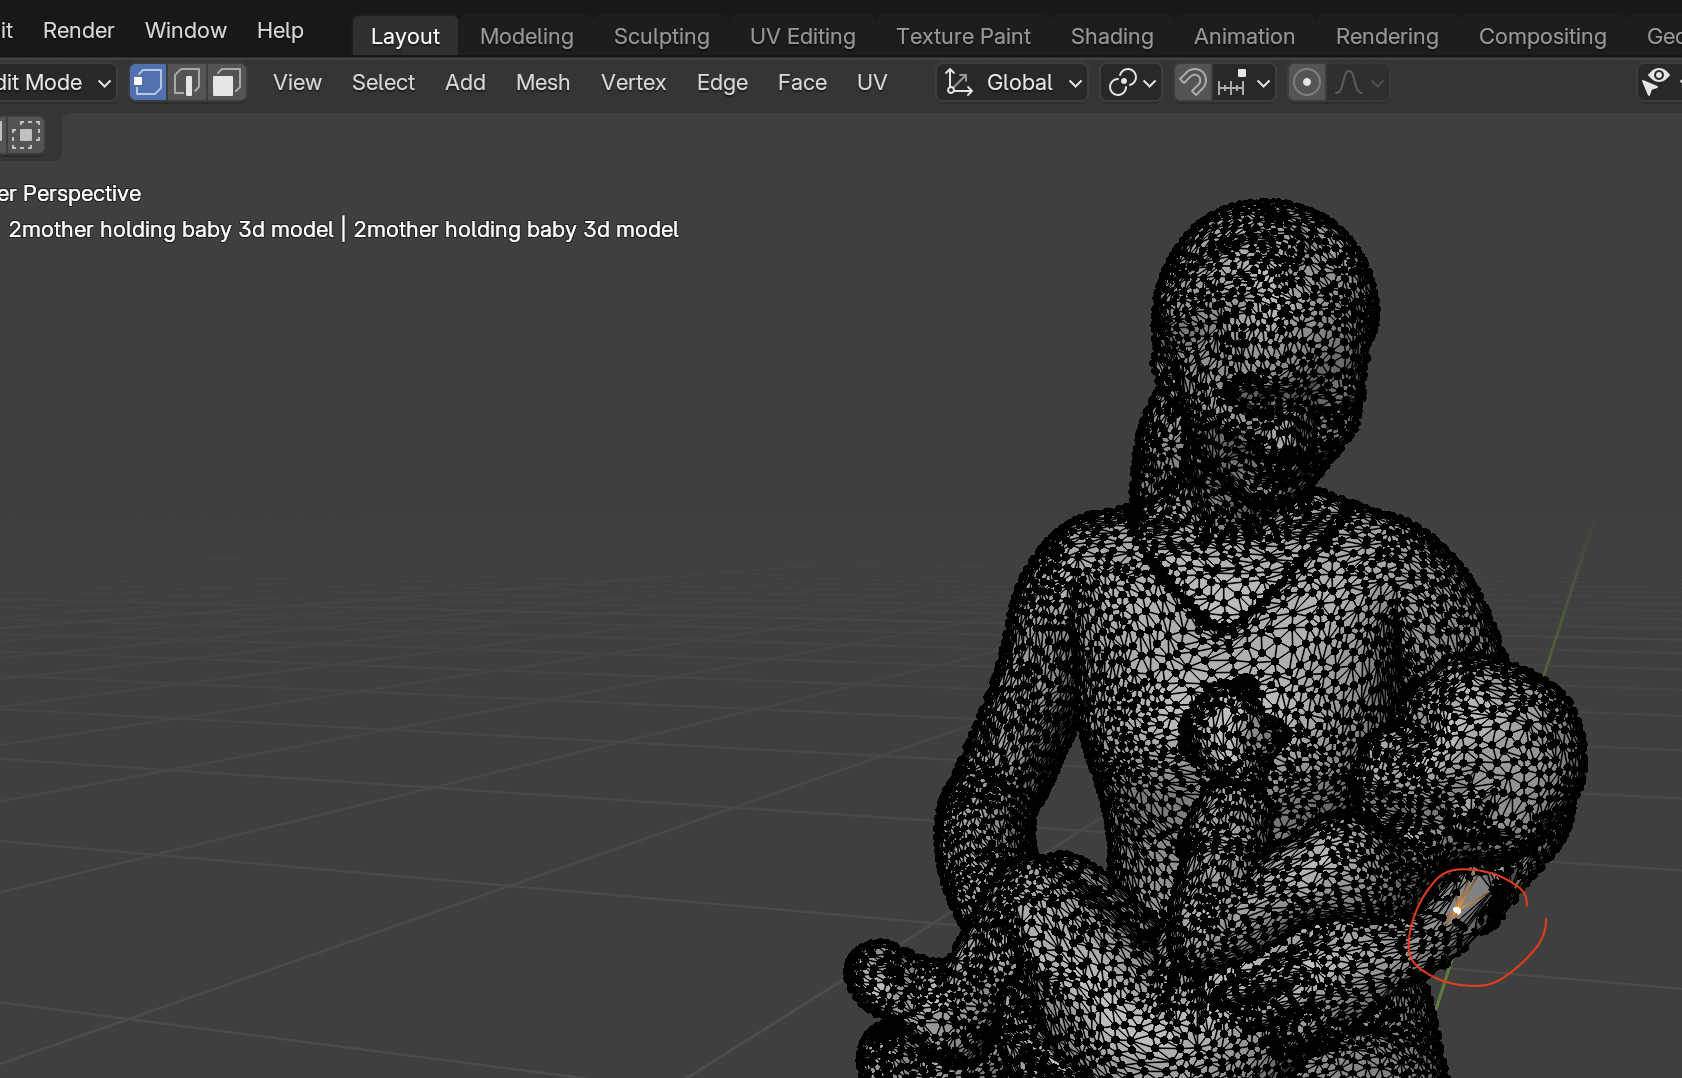
Then, you can also modify the edges, the lines that connect those dots by pressing on the second square Edge.
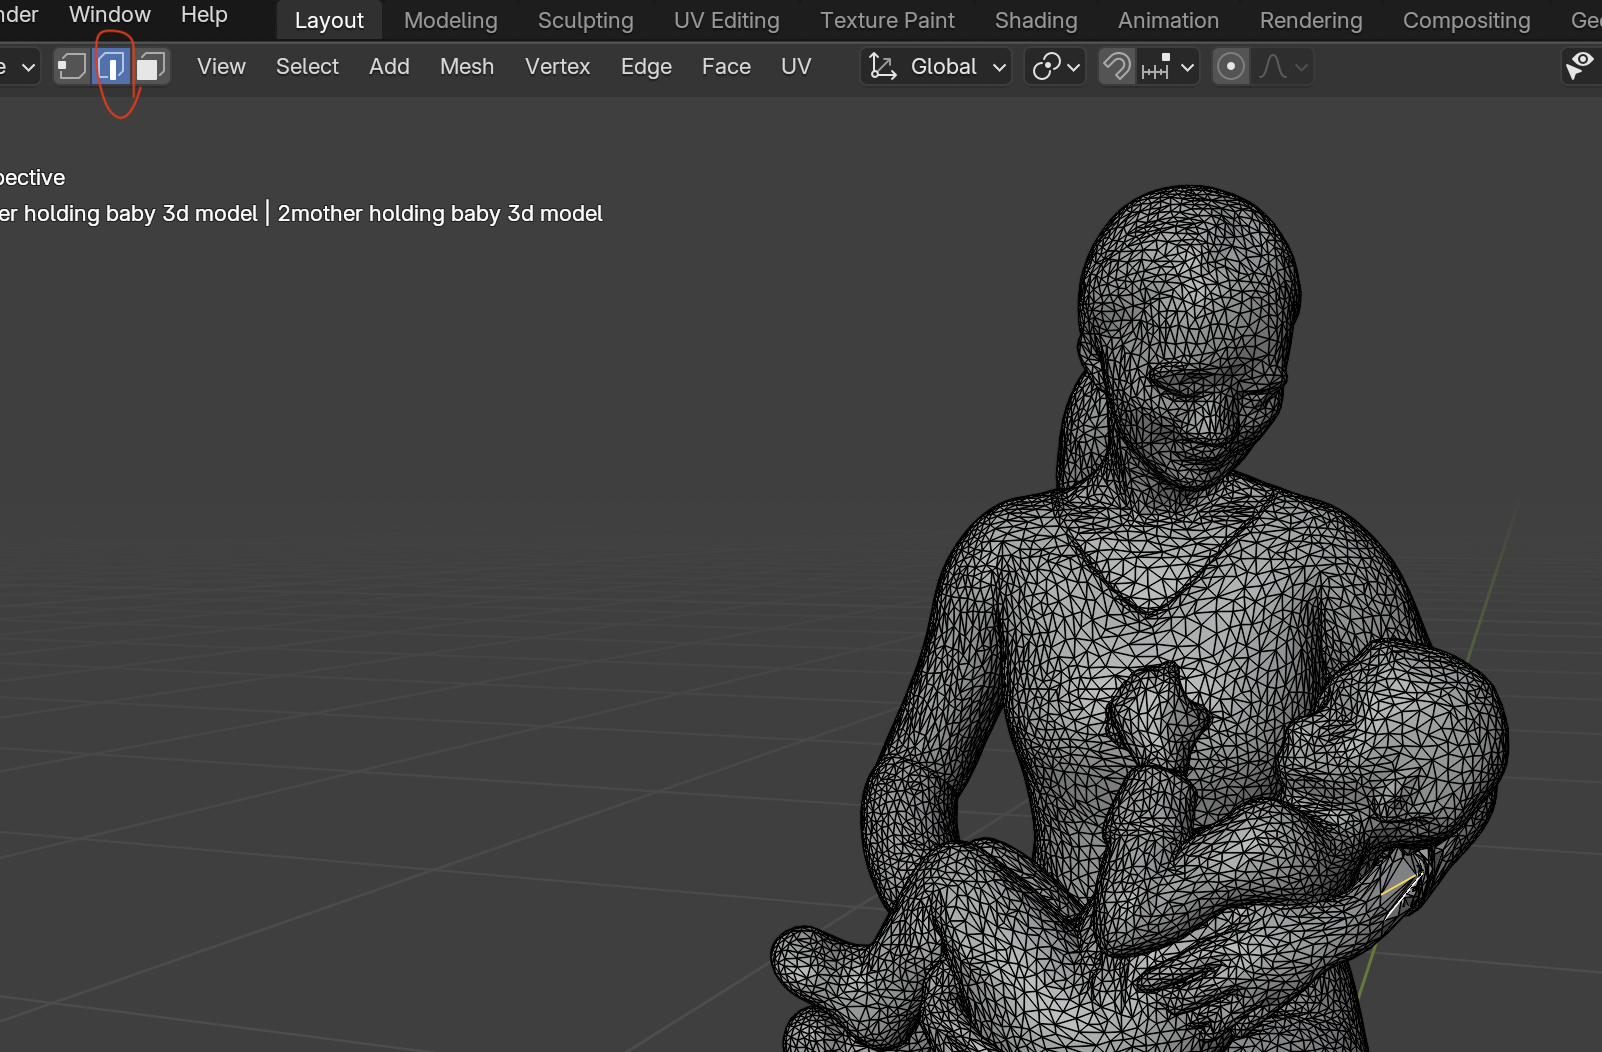
Also you can move the planes that is created by the dots and the lines by clicking on the third square Face.
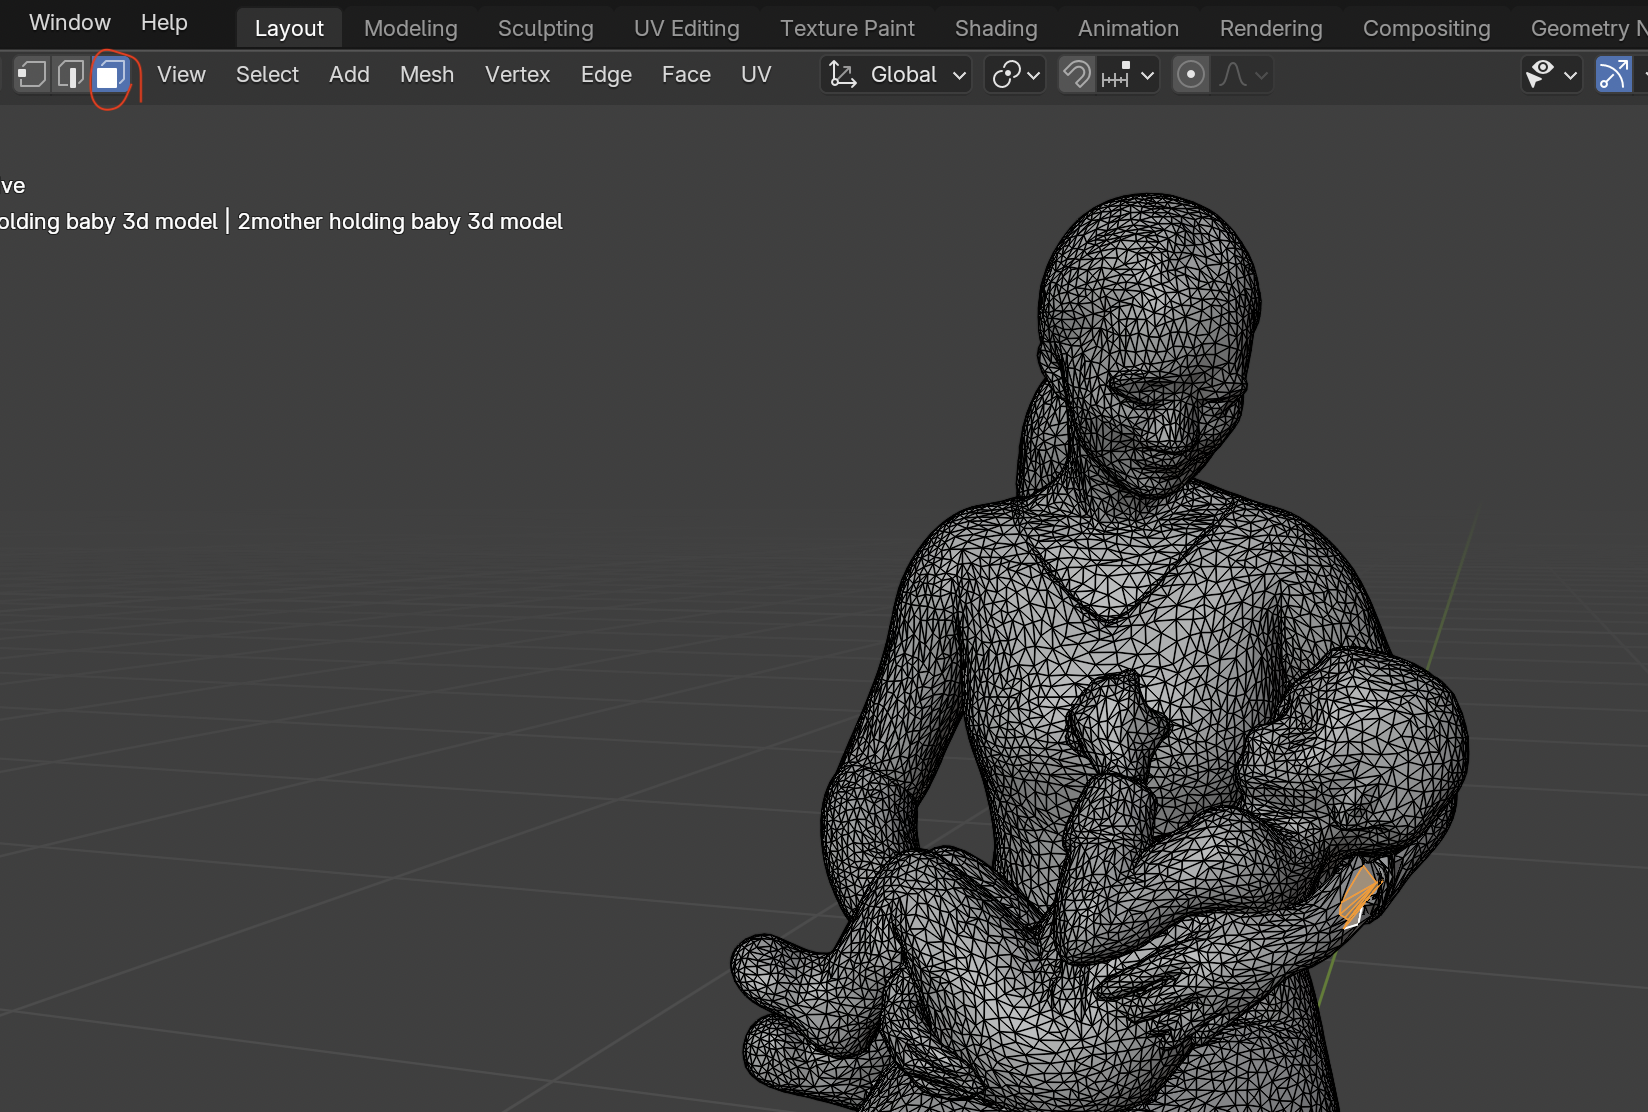
Eventually, I go the arm repaired, there were some little unsmooth part, which in the final slicer would not be a problem, so I moved forward.
Step 5 Slicer
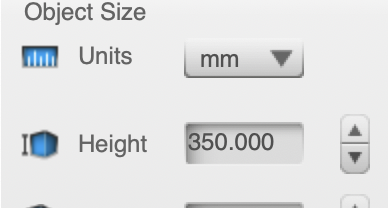
I exported the model in STL formate. I imported it in Slicer Fusion for 360 and edited the parameters for my model. I chose 350 mm for the Height:
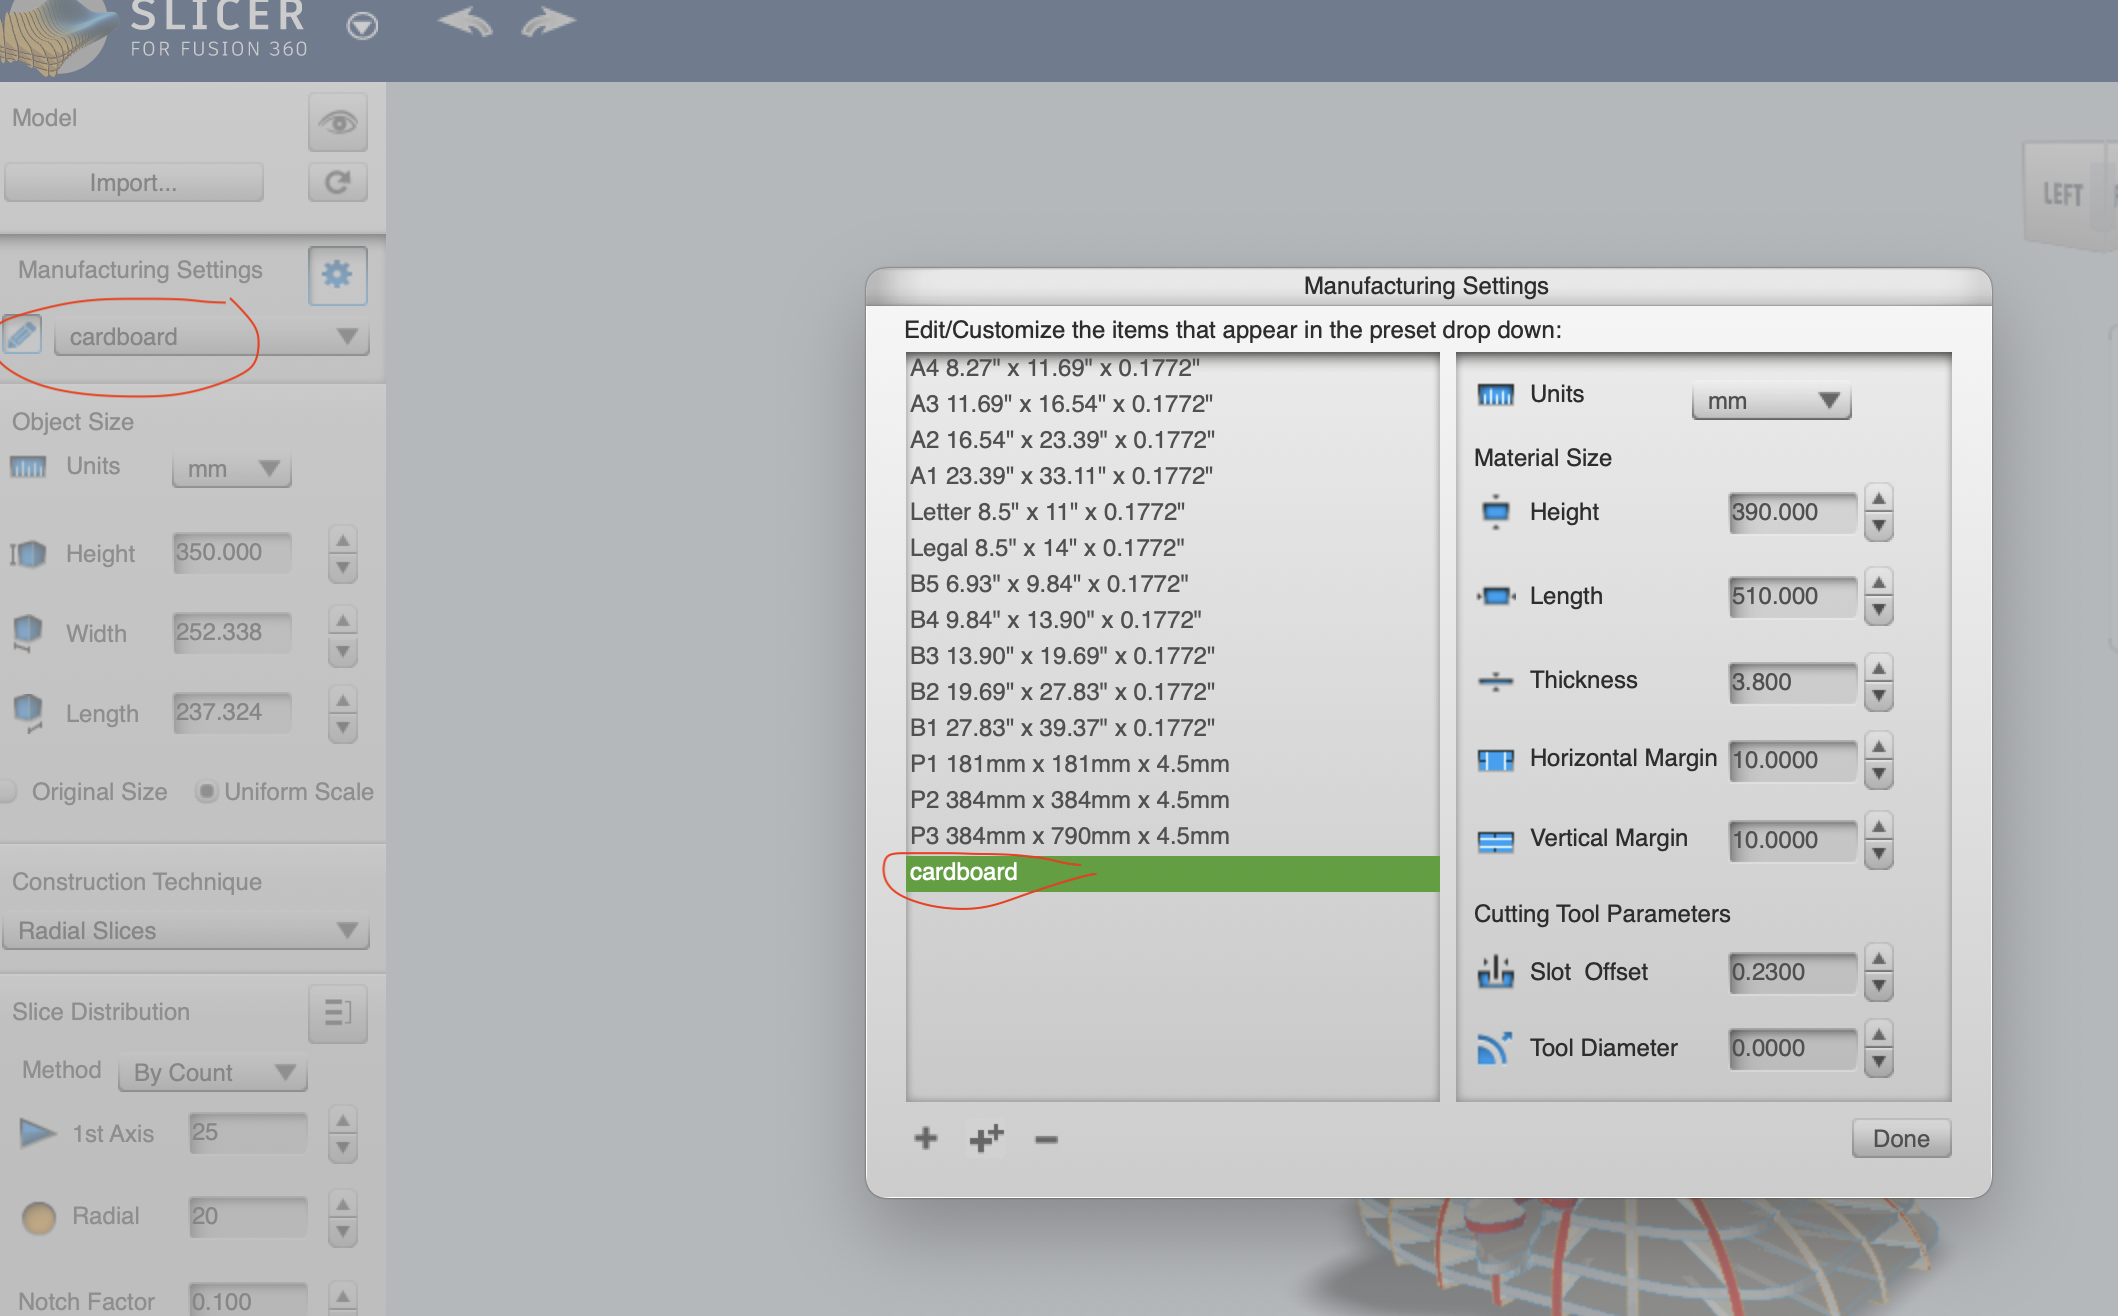
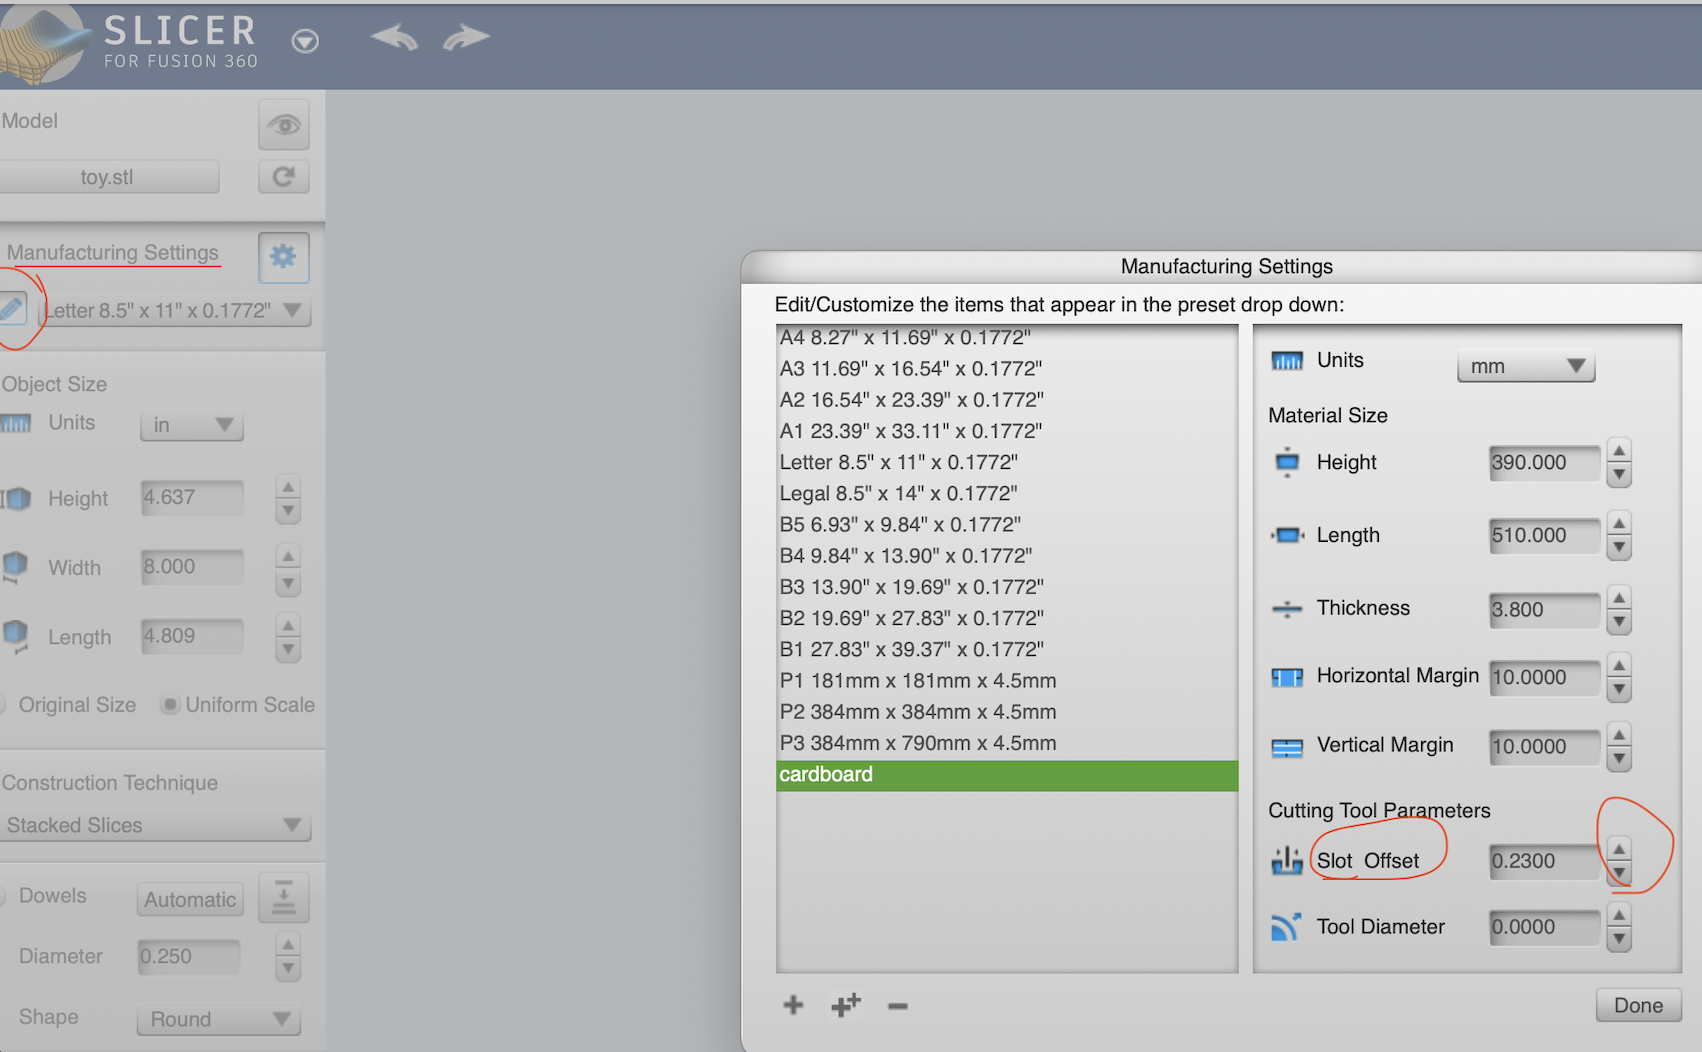
Then, I added my material type and sizes with the Edit button at the upper right corner:
I tried three versions of my model: Stacked slices, Interlocked slices, Radial slices and chose RADIAL slices because it created SUN ray like pattern, sun rays like a mother's love to the baby; love that is essential for the baby's growth, and breastfeeding represents the sacrifice a mother consciously chooses to make.
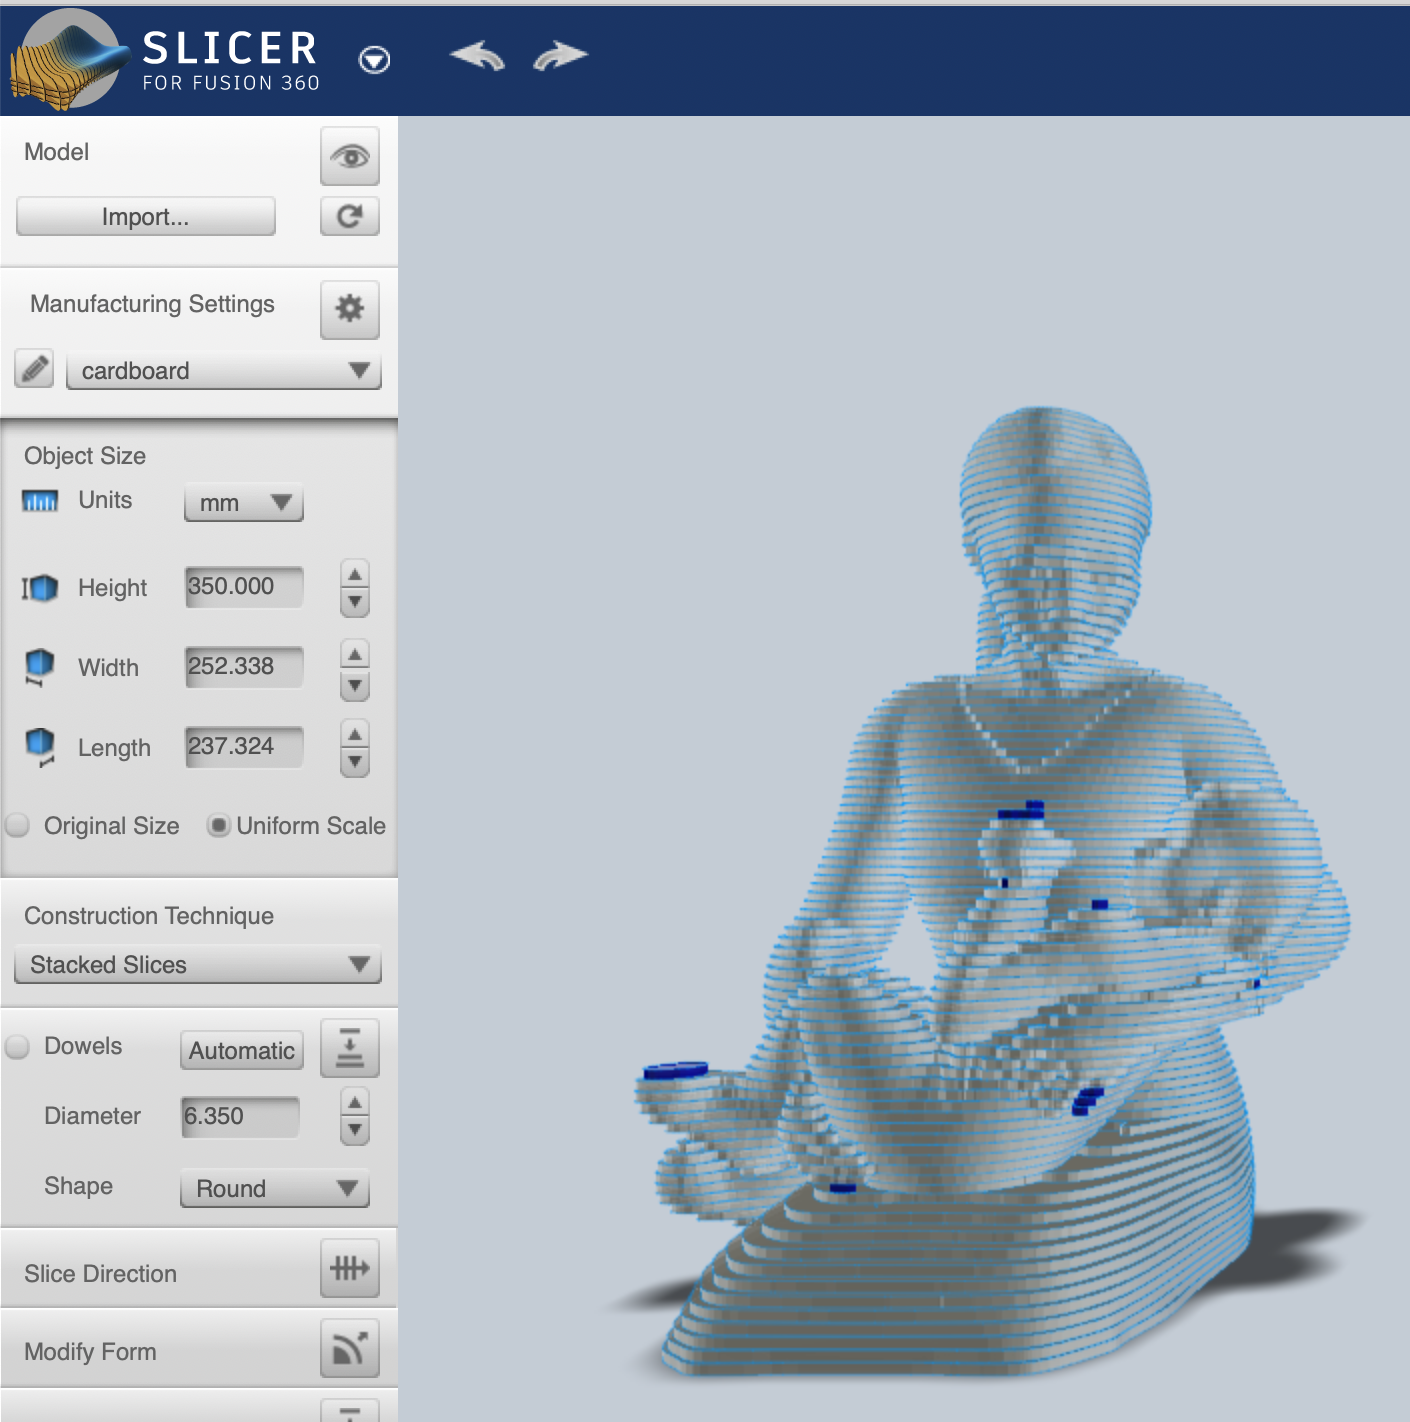
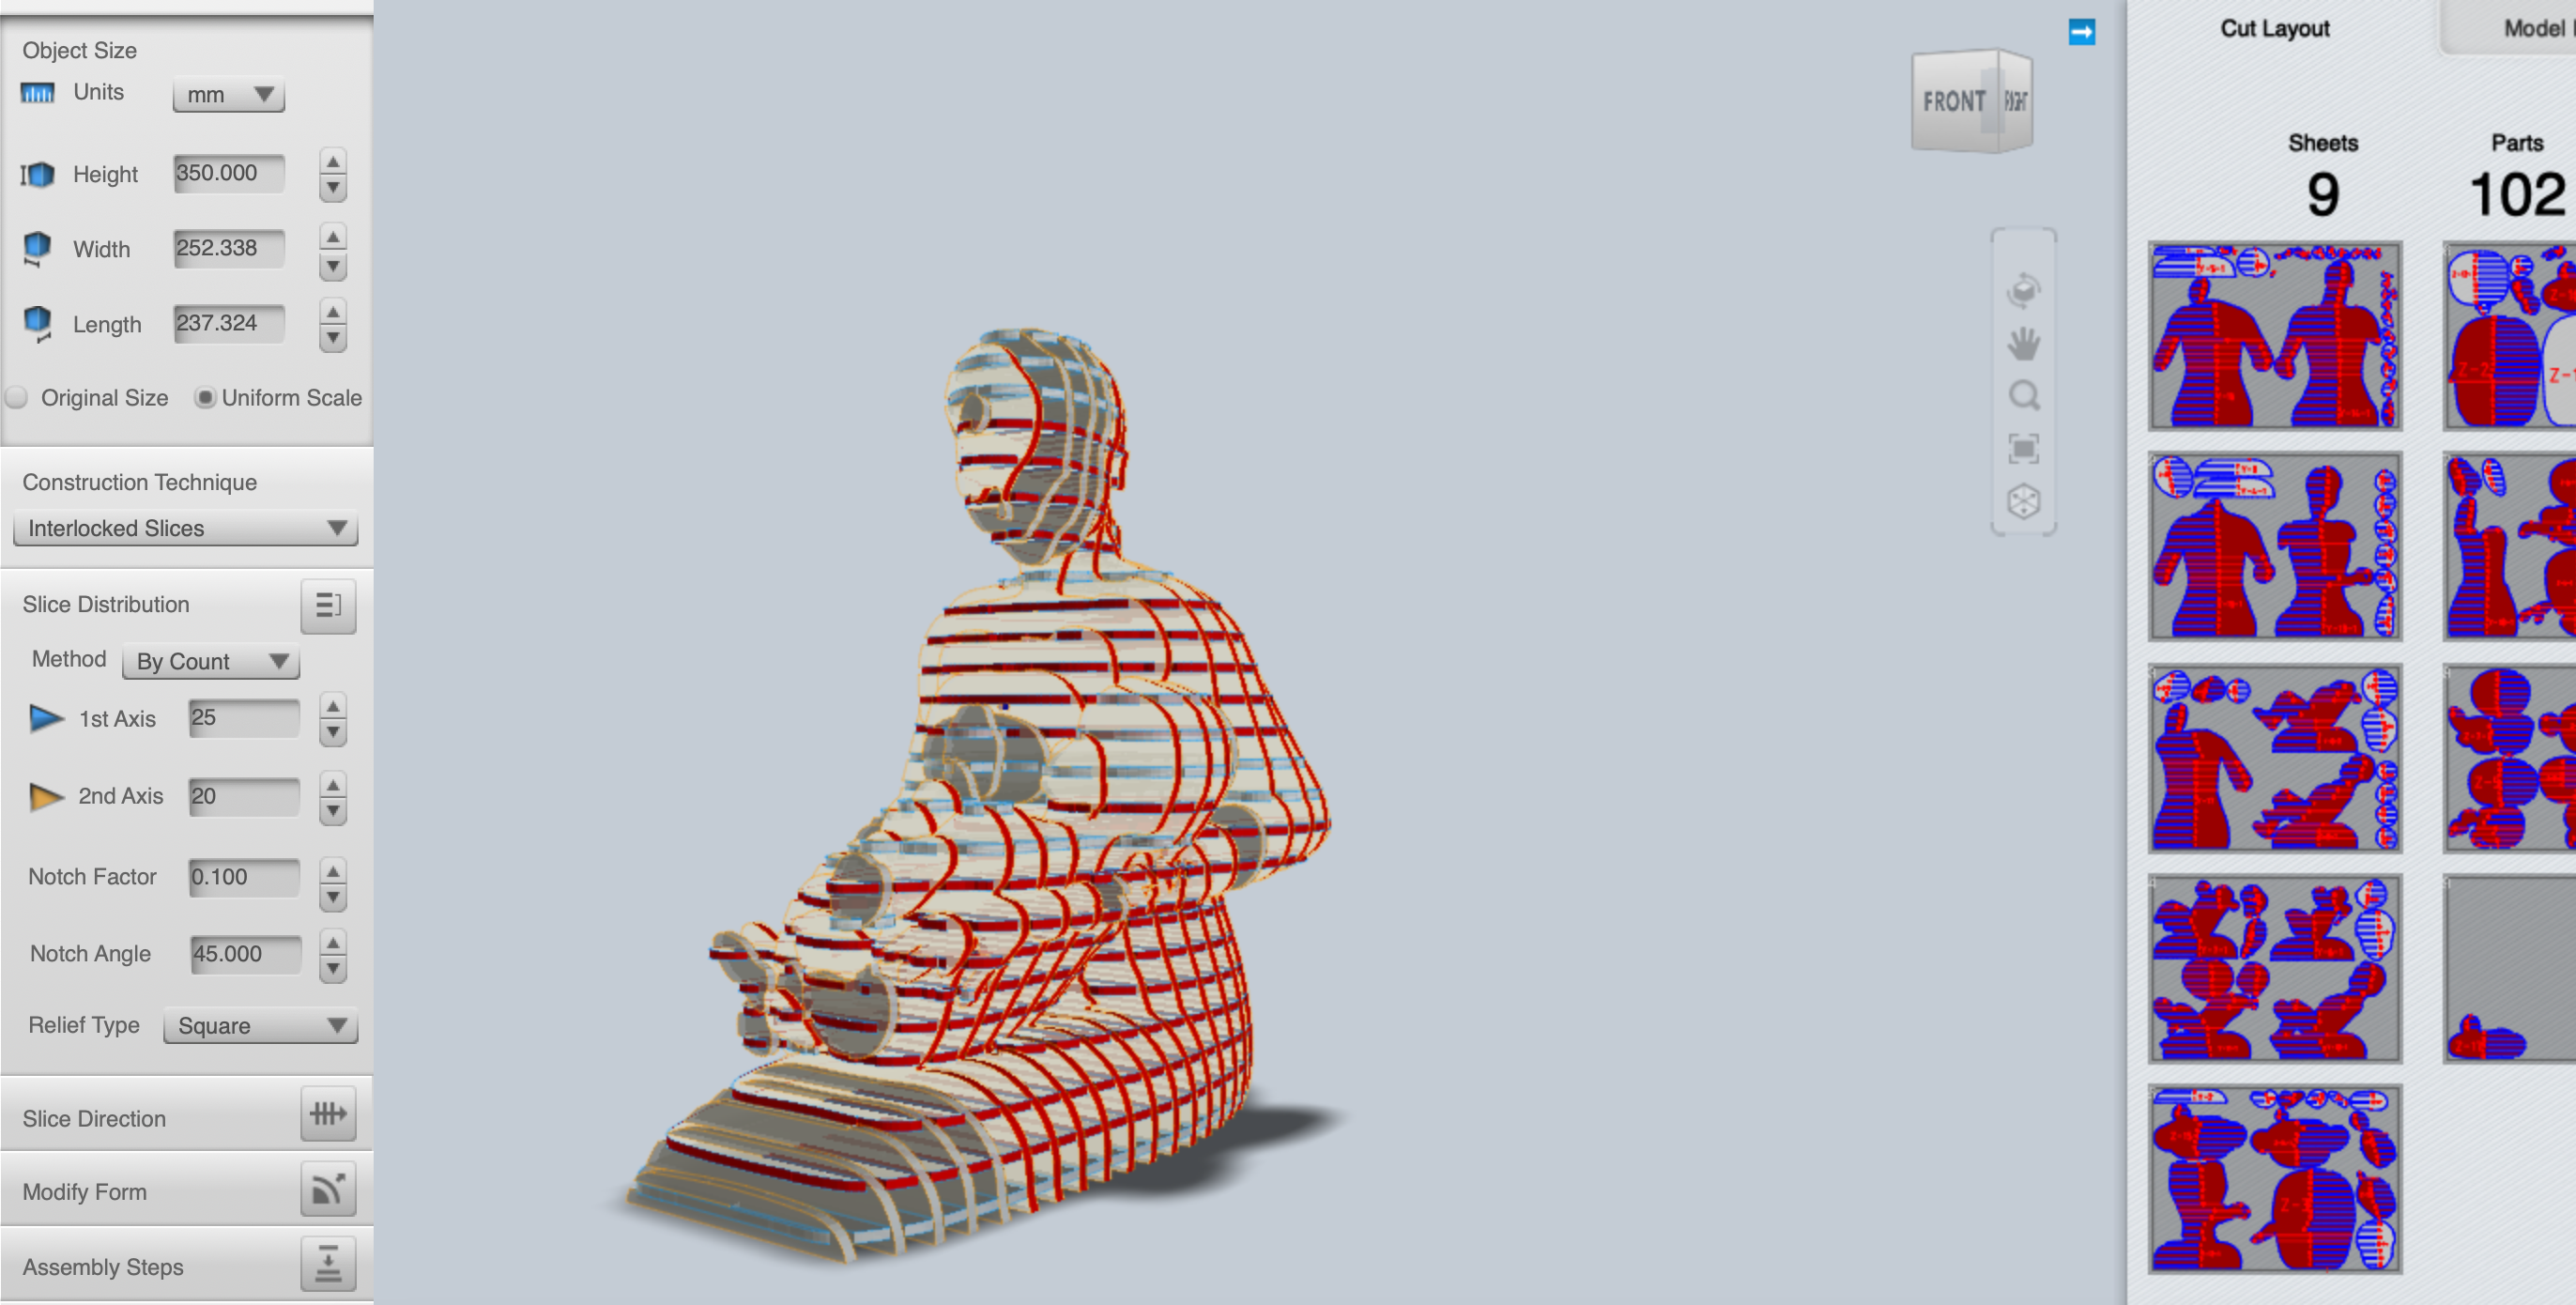
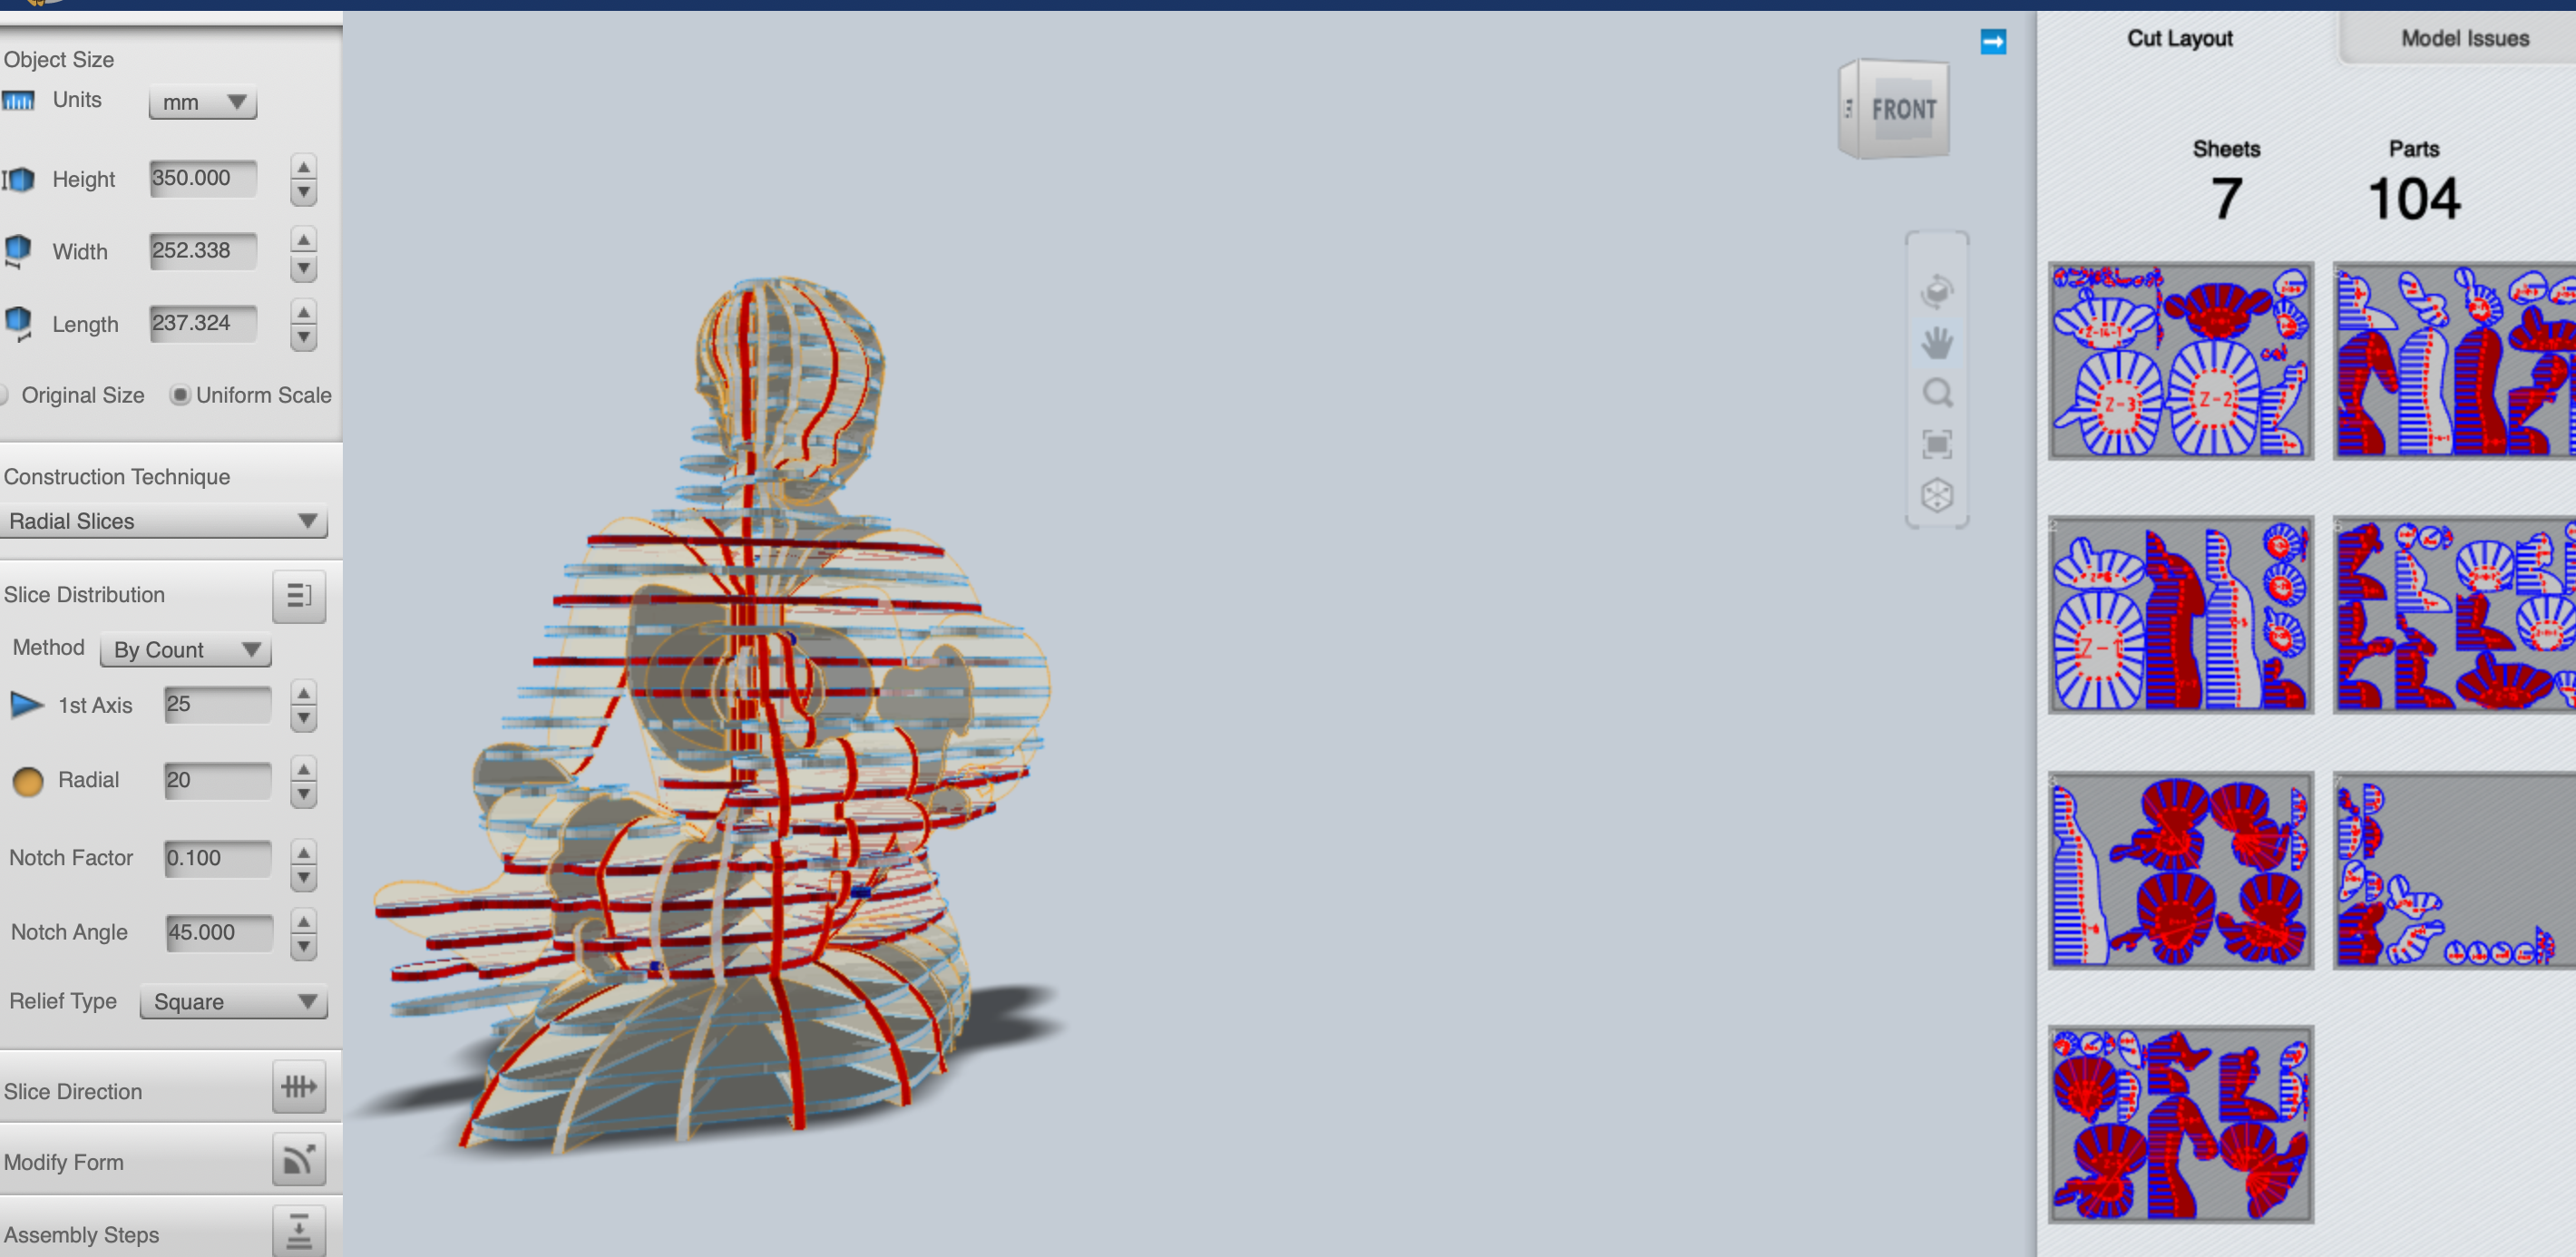
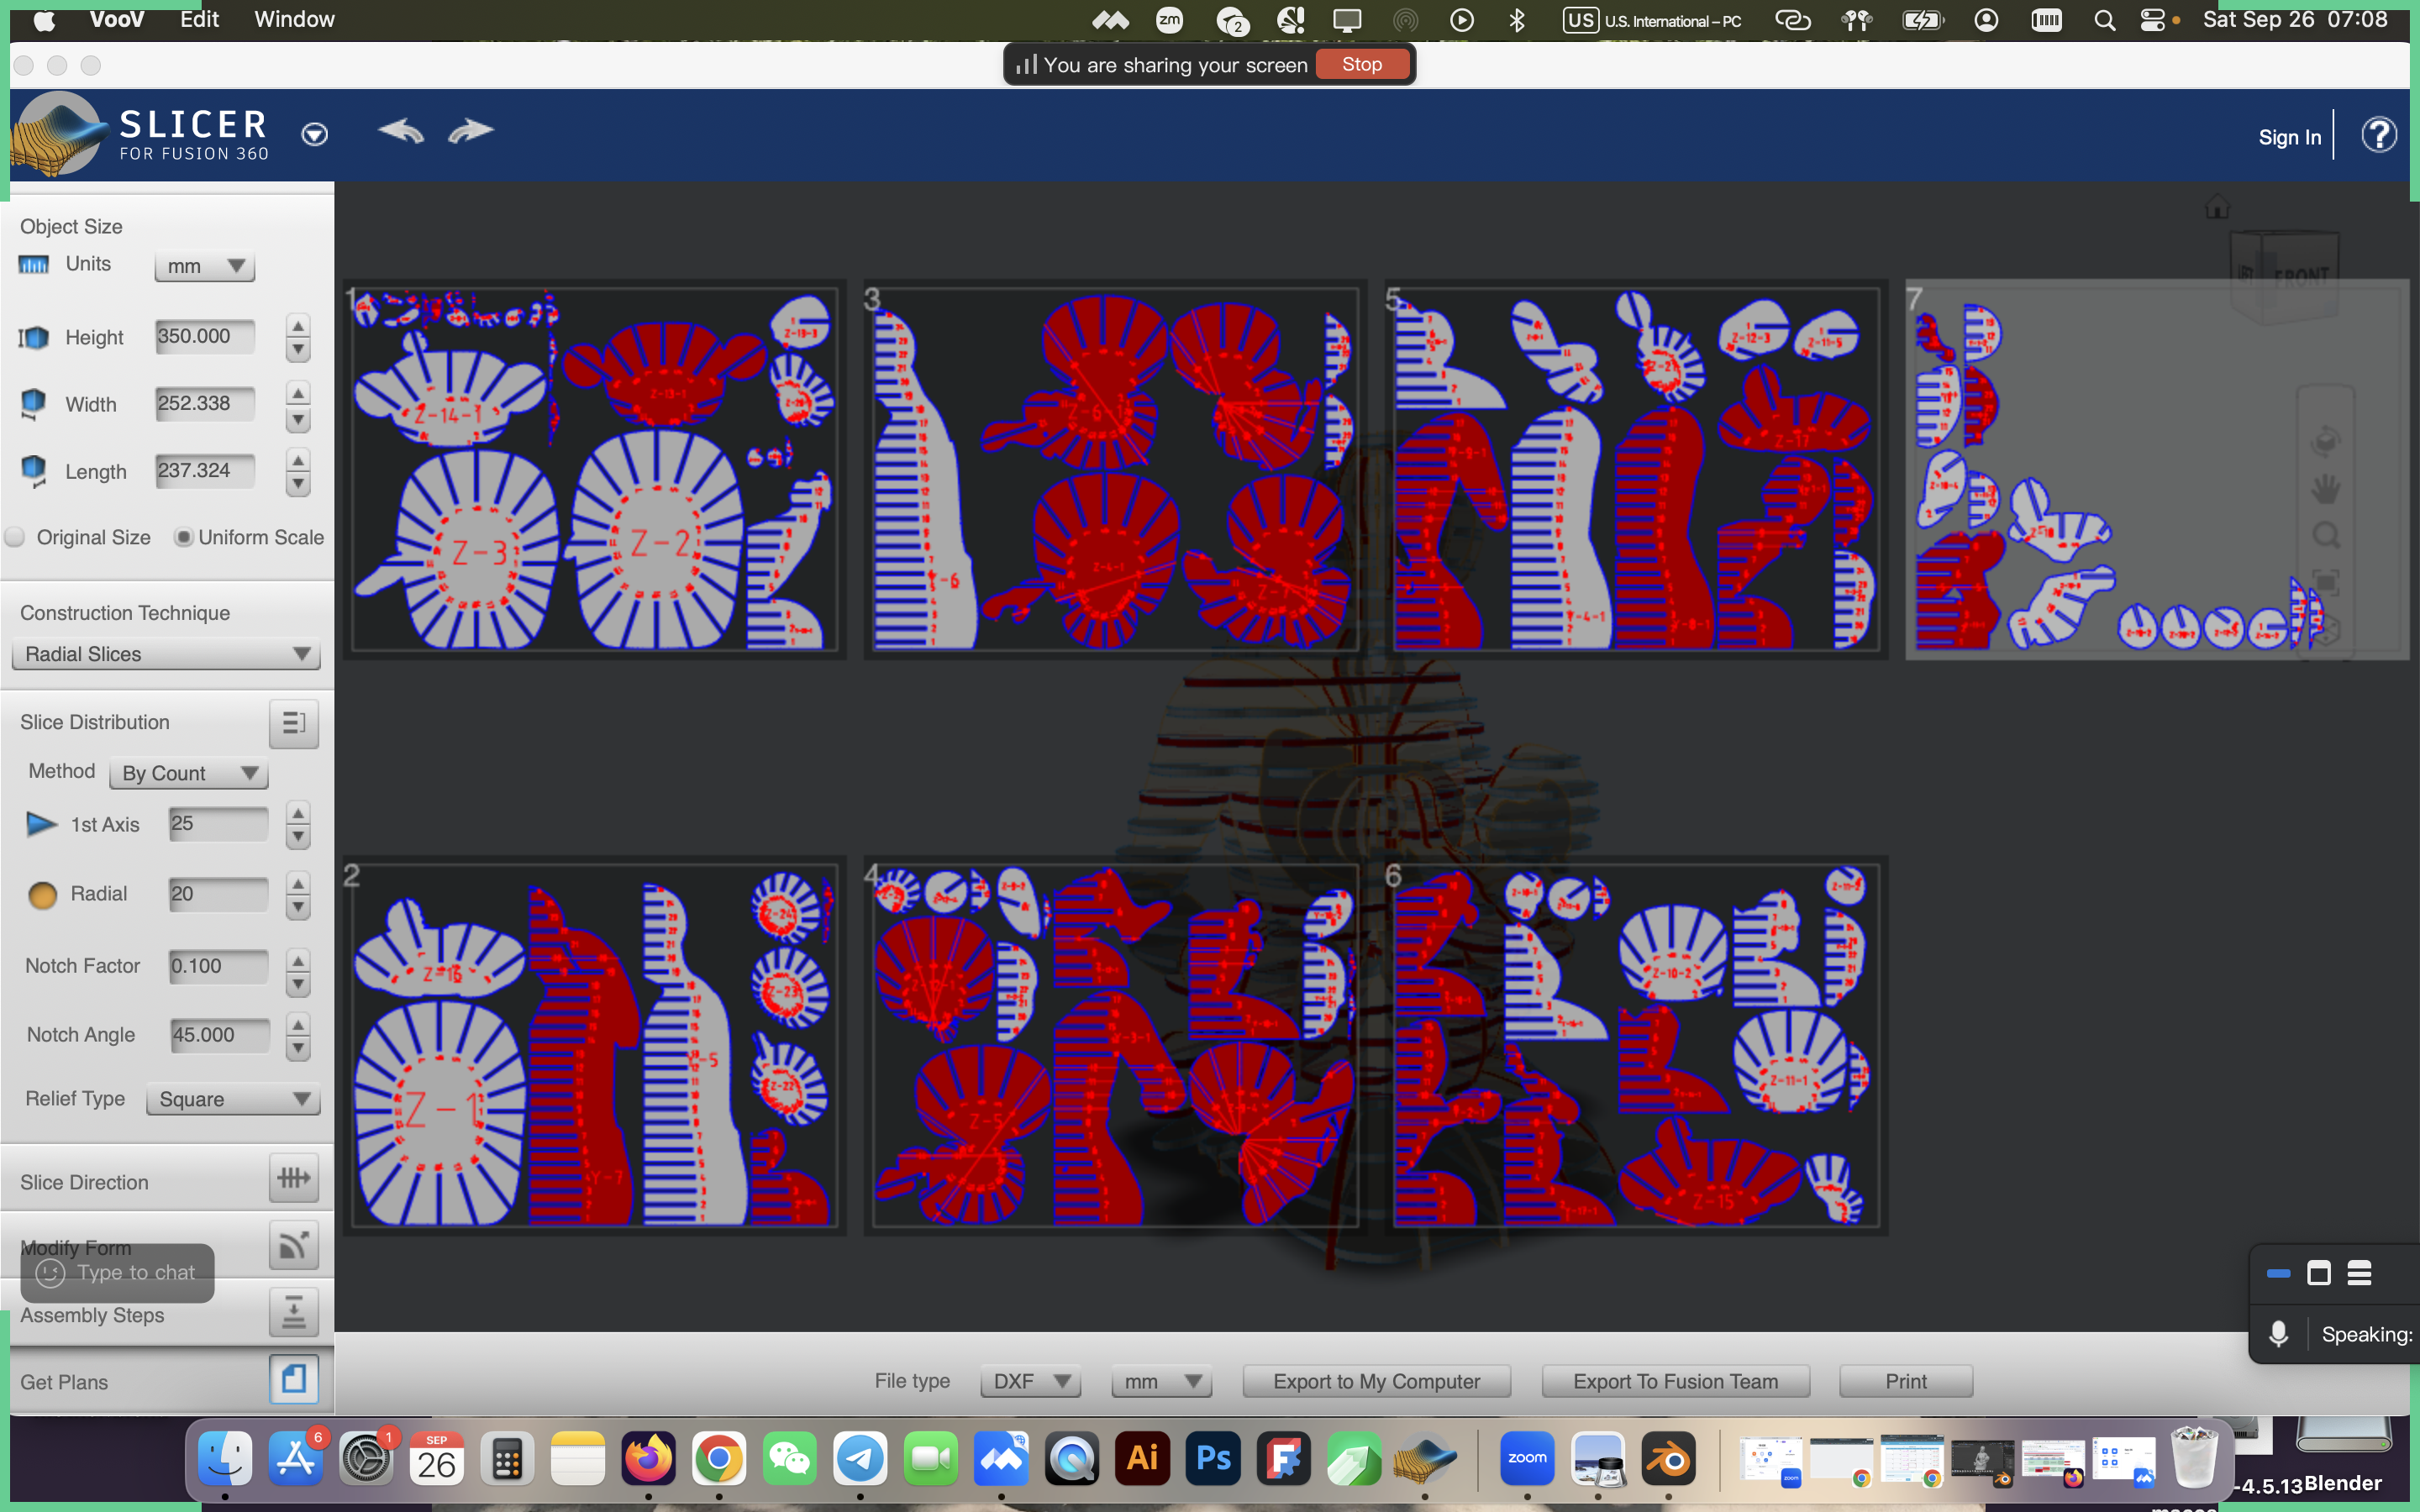
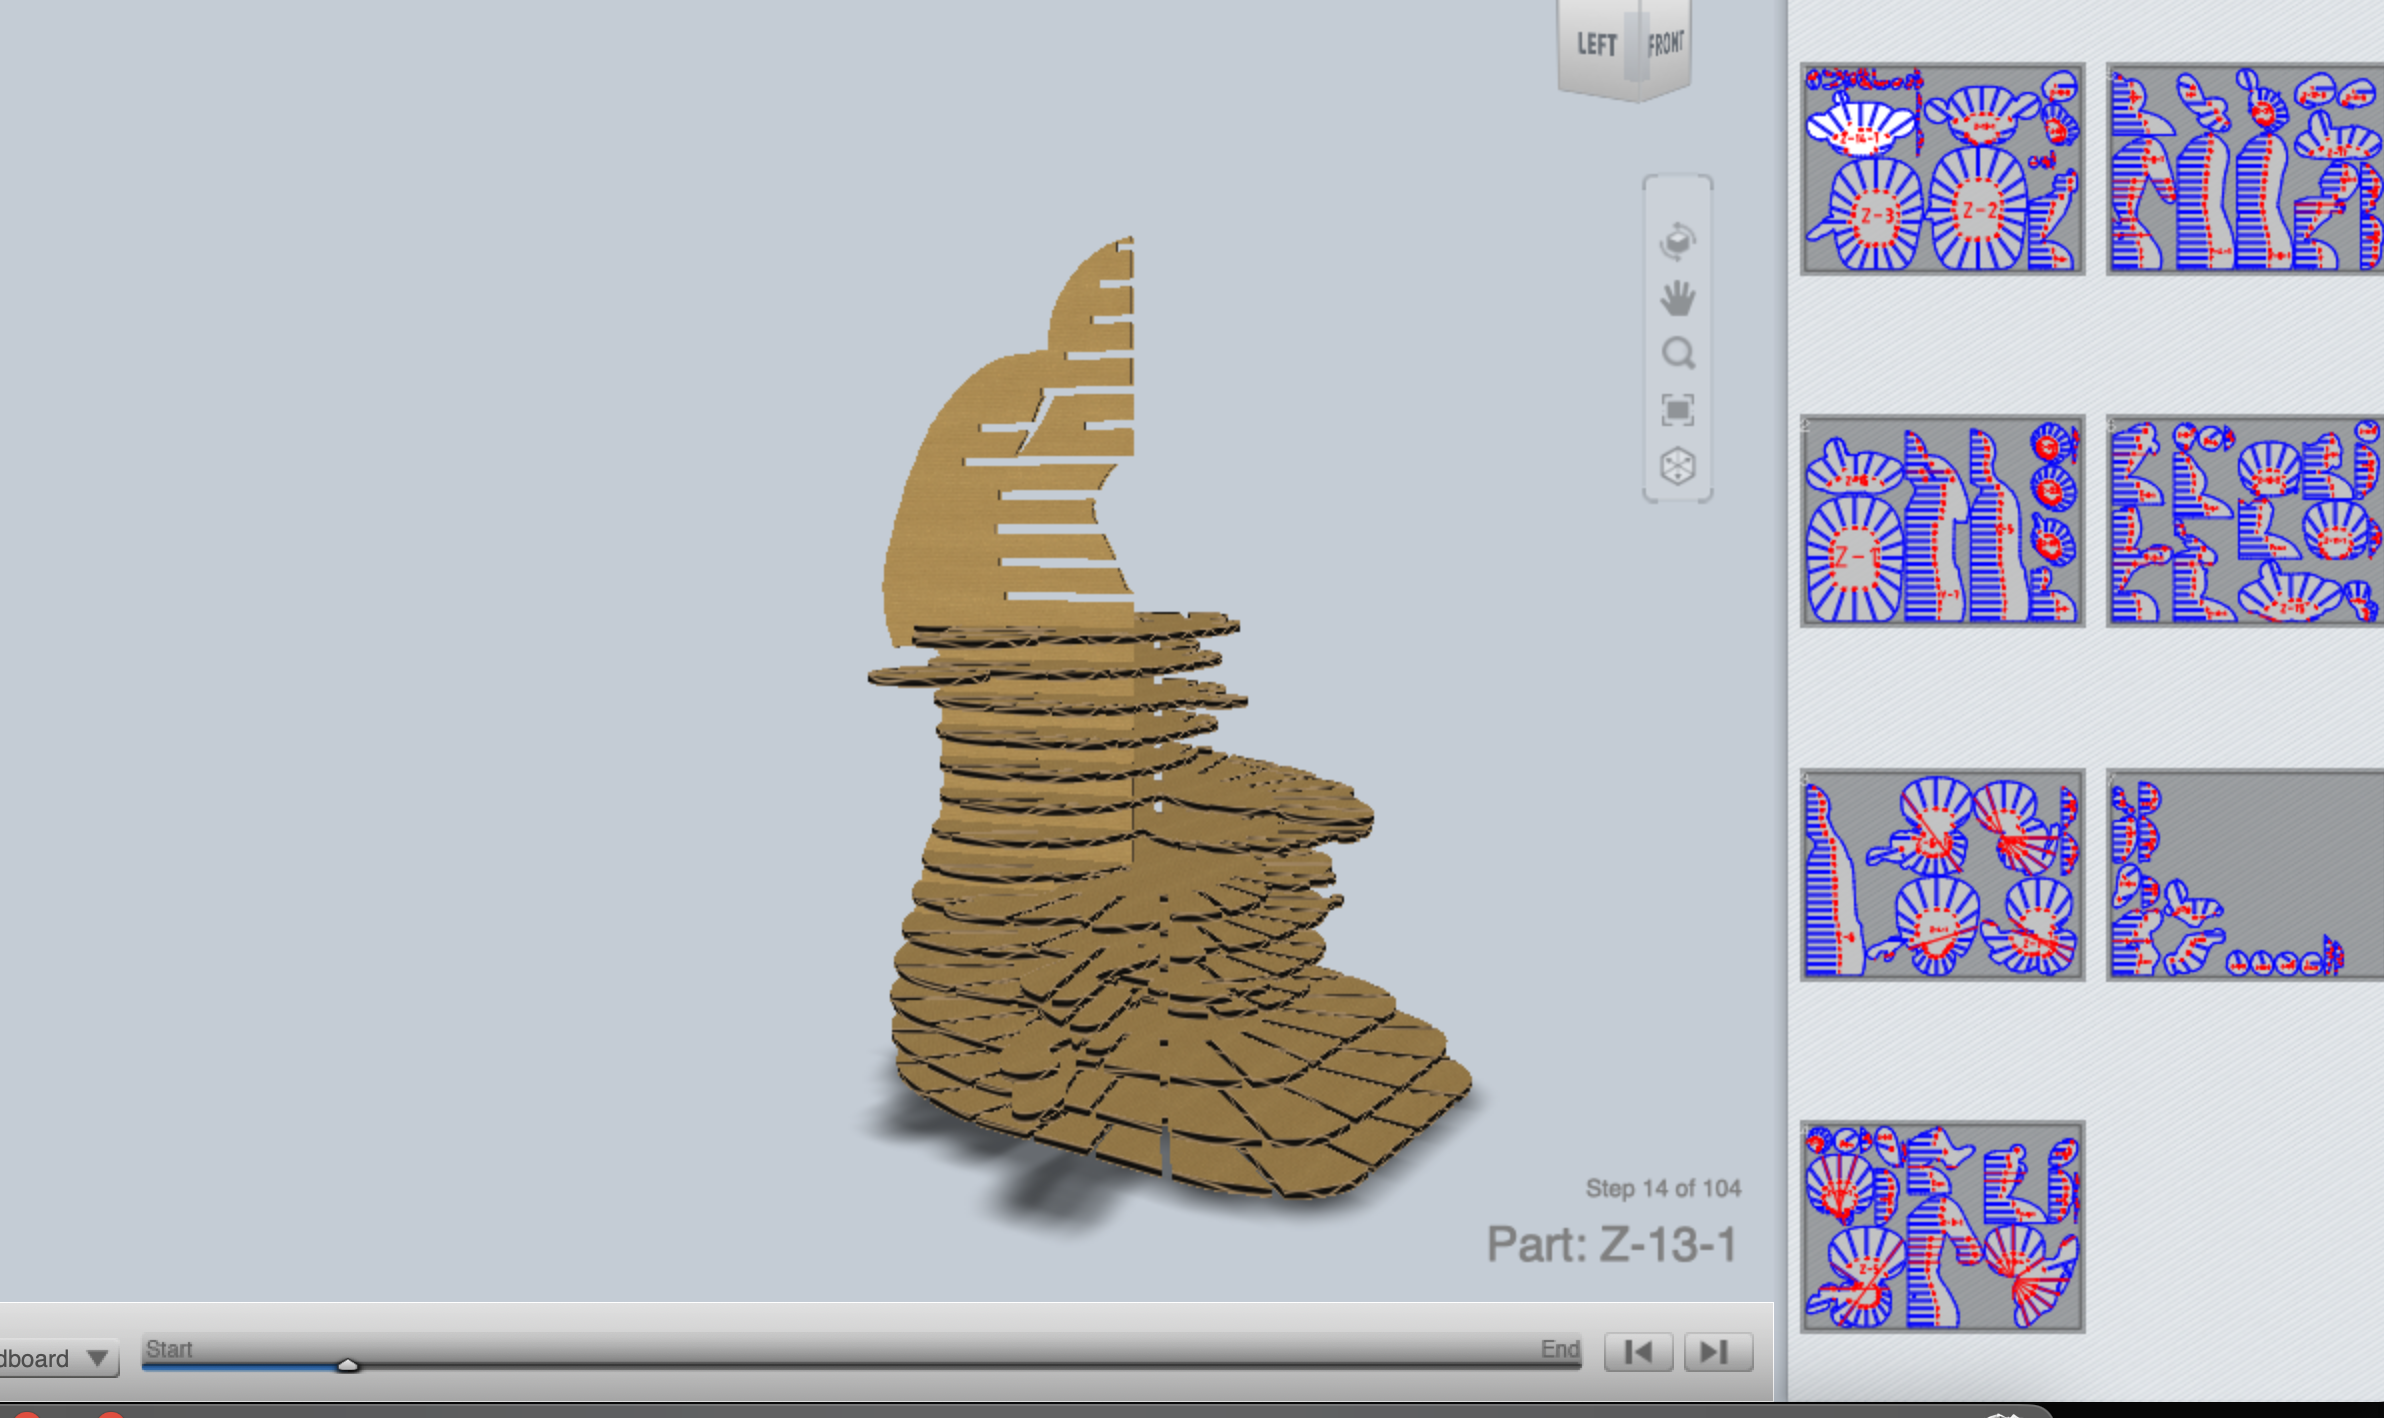
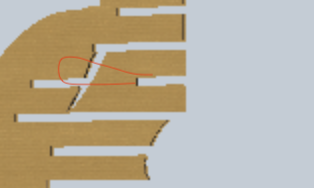
There were a lot of pieces marked red by the Slicer. So, I check the assembly steps of my model, especially the pieces marked red, in some cases there were real problems, however, I considered ways to solve them, for instance to cut in between the stripes or assemble small details before assemble it in the main big piece.
Step 6: Editing before lasercutting
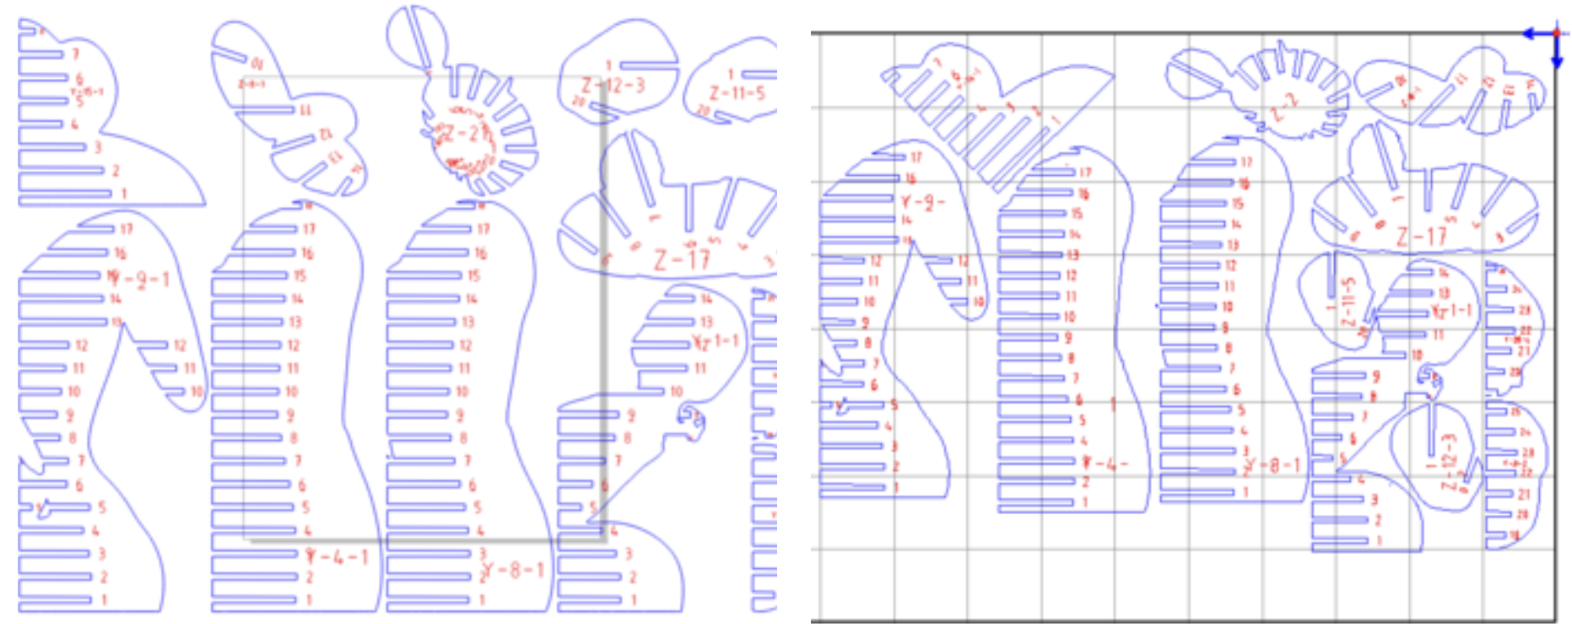
Time to slice and assemble! I used Corel Draw to reorder the outlines to save material. Here is a before-after image:
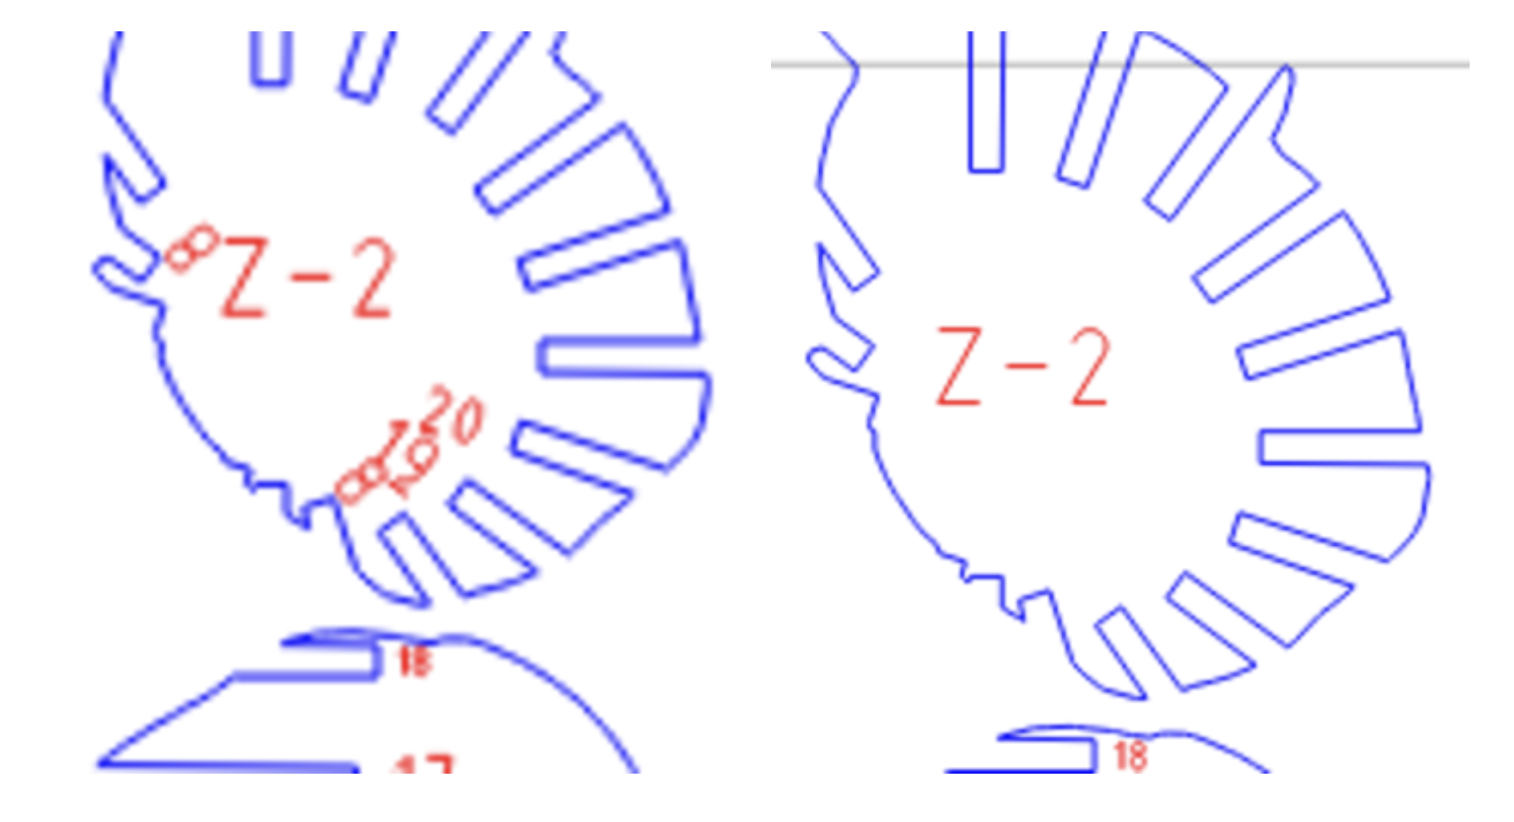
I deleted some overlaping numbers on the pieces to avoid burning or cutting the cardboard in the laser.
Step 7: Lasercutting and SAFETY rules
Please make sure to know the safty rules first:
-
know the order of turning on the laser (ask your mentor at the lab), each machine may have its peculiarities;
-
make sure the ventilation is on before the cutting process. Often it is loud and there is no need to turn it on while you are still placing your material or still editing some files;
-
check how the laser points on the material. It is crucial to have the laser focal point on the material surface level to have a precise cut. To insure it, the laser focal point should be at certain distance from the material surface and form a straight a 90-degree-angle with the surface of your material. Usually on the right side of the machine there are buttons to adjust the distance;
It is crucial to make test and choose the right force and offset for the lazer.
Offset is the distance between the width of the lazer cut in the stacks. It can be modified in the Slicer for Fusion 360 software:
For he first test I chose 0.15 for the offset but it resulted tightness and damage in the stack:
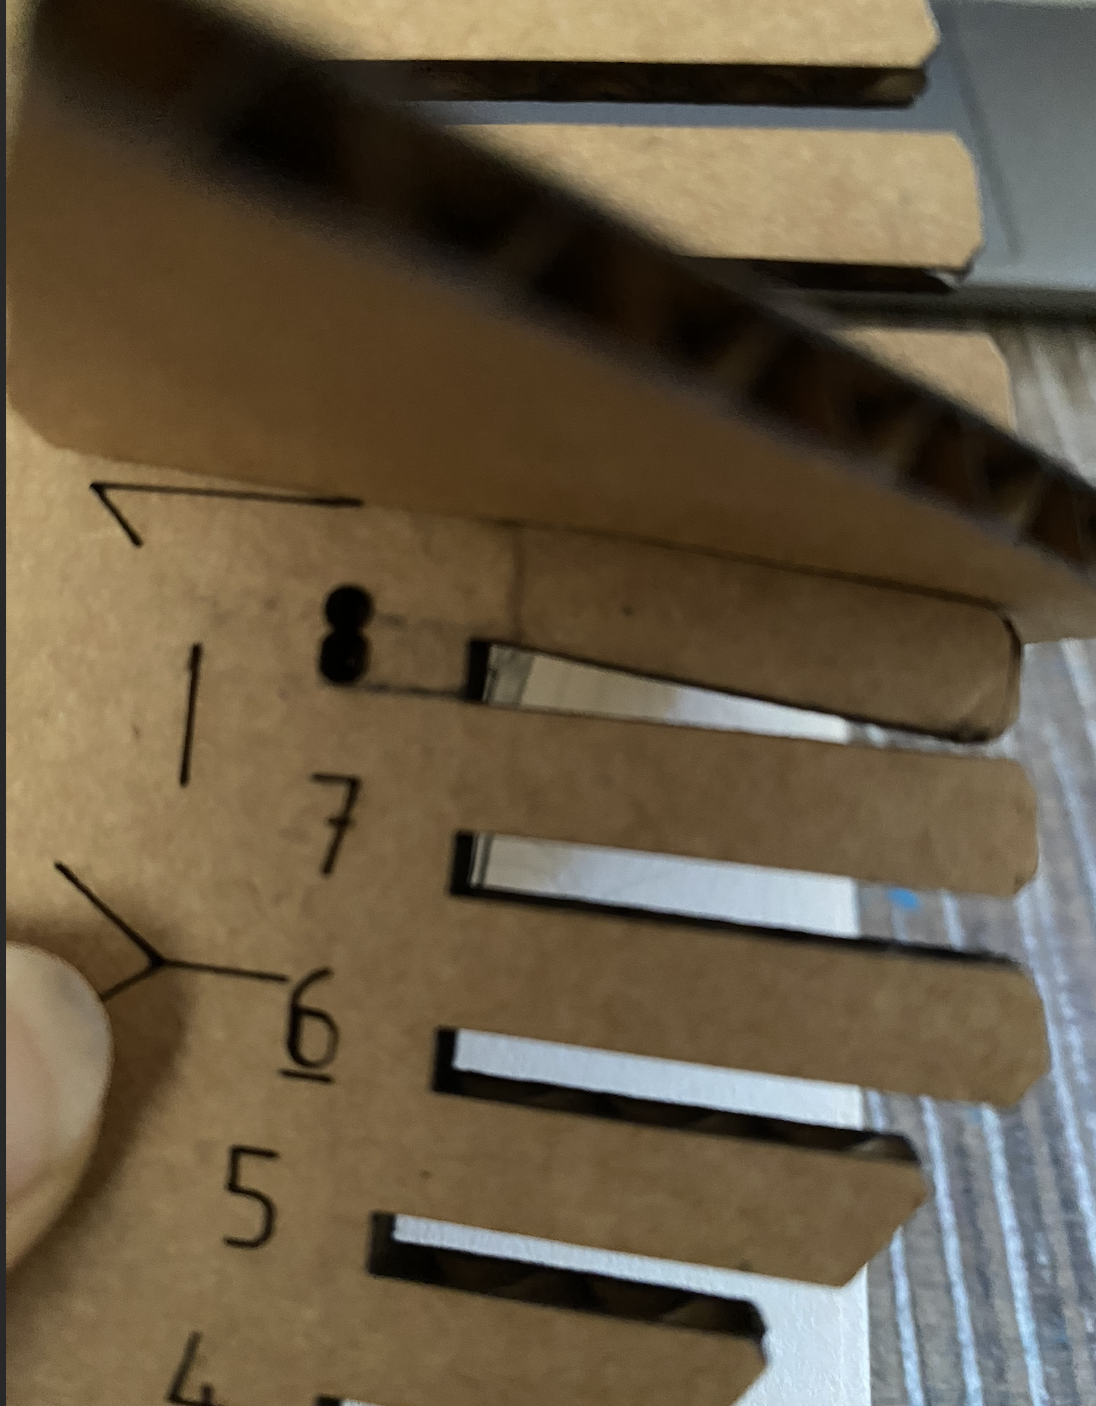
So, eventually I chose the following parameteres:
Offset in Slicer for Fusion 360: 0,23
For the laser cut:
Speed: 20 mm/s
MinPower: 88
MaxPower: 90
For engraving the numbers on the pieces I chose:
Speed: 150 mm/s
MinPower: 30
MaxPower: 30
Step 8: Kiri Engine - 3d scanning
I also tried 3d scanning app, Kiri Engine on my iPhone 11. I closely followed app instructions by: - choosing a mat and non transparent object,
-
placing a non transparent dark clothing under my object,
-
placing my object near the window but not under direct sunlight.
-
I made a 360 degree video around the object. After the making the video slowly as it was instructed, it took the app some 3 minutes to process it. Below you can see the result and option to change the shading.
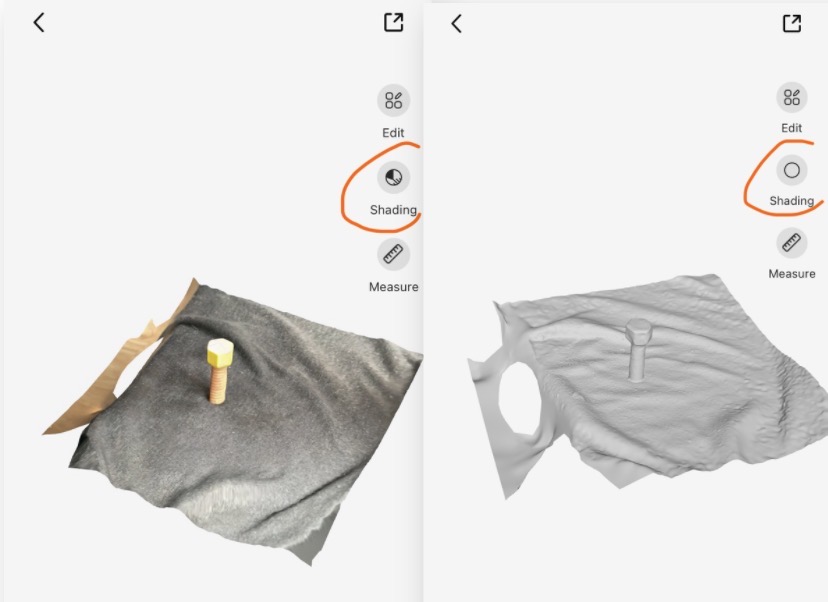 photo is by Luiza Naslyan on iPhone 11
- then I exported my file and sent to my email.
photo is by Luiza Naslyan on iPhone 11
- then I exported my file and sent to my email.
-
on my laptop I downloaded and imported to Blender.
-
I used the Plane tool to cut my object from the scanned background.
See the Blender version in Files below.
Results
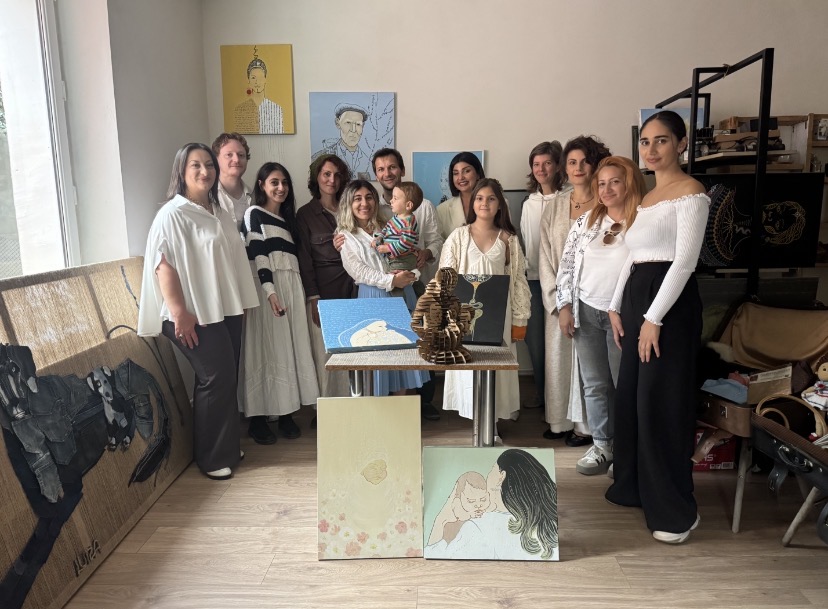
It took me almost 2 days to assemble my installation:
Installation to advocate tolerance of breastfeeding in public places:
Height: 350 mm
Material: Cardboard
Cardboard sheet size: height-390 mm, length-510 mm, thickness-3,8 mm
Cardboard sheets used: 7
Laser cut pieces: 104
Laser model: Kimian 6040
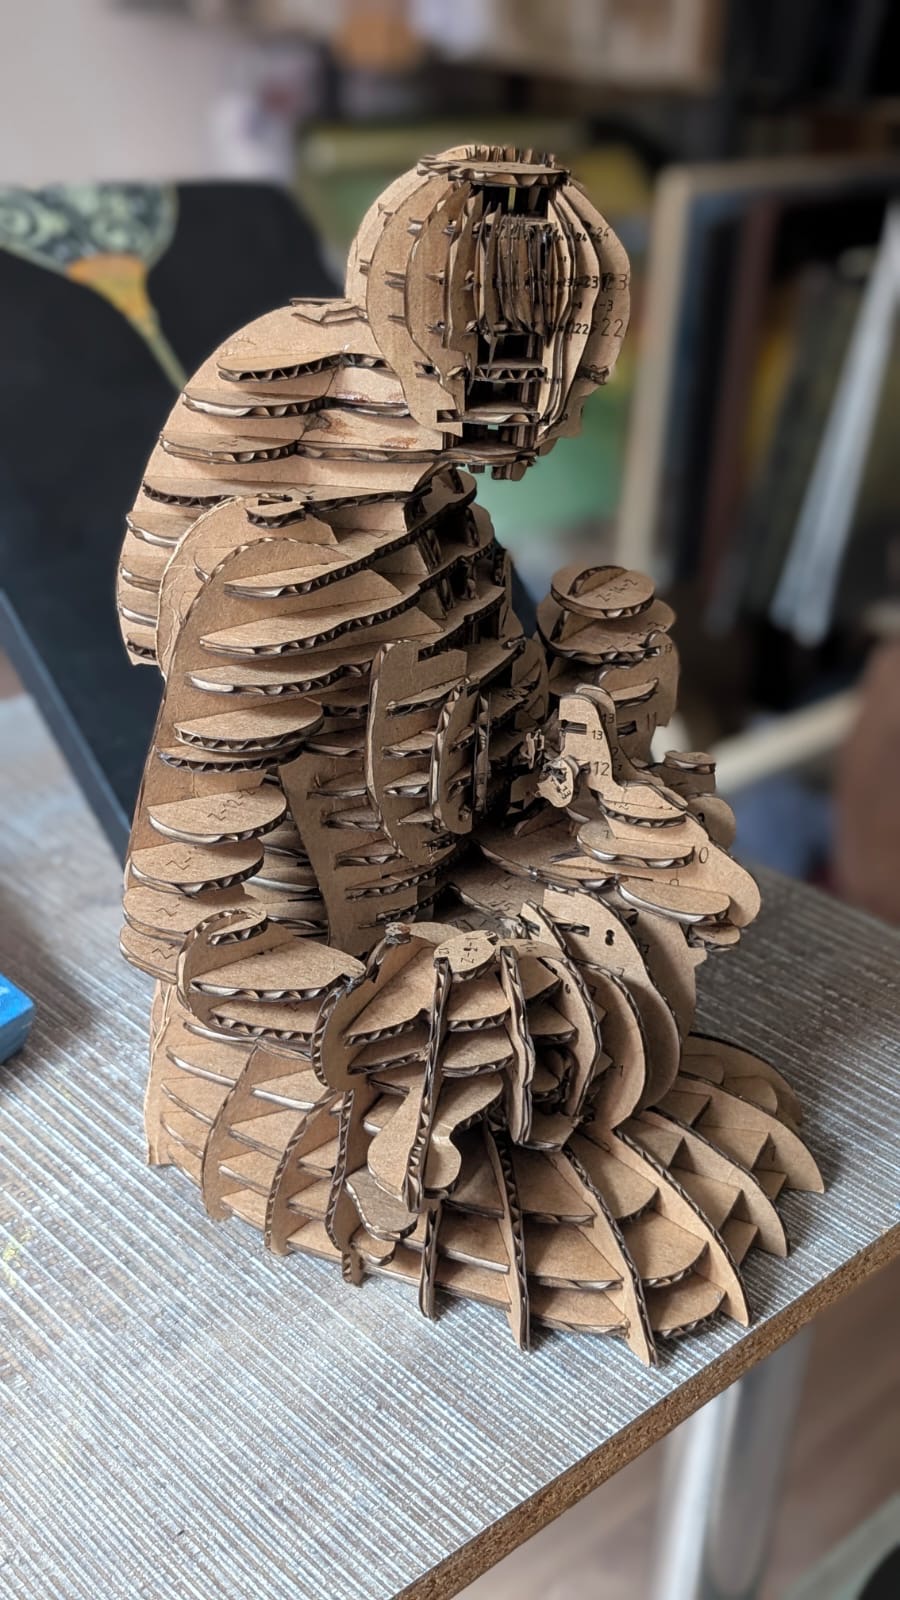
Photo by Anoush Arshakyan
The installation already took it's place around my canvases on breastfeeding and motherhood, and it was a part of a bigger project: the opening of my studio. Dearest people were invited to mark it. It was full of excitment, motivation, inspiration and sincere smiles!! Thanks to my Fabricademy mentor Anoush Arshakyan to be a part of this beautiful event The installation stole the eyes of the guests!
You can watch the assemble process at Fab Lab Armenia in Dilijan. The video is recorded with my iPhone 11 on a tripod in a selfie mode and uploaded to my YouTube channel.
Files
Please have a look at the file from Slicer for Fusion 360:
Here is the Blender file:
Here is the PDF file of the slices exported from Slicer for Fusion 360:
Here is the file from Kiri scanner:
Later, I imported it to my Blender and worked a bit on it with the tools that AslI showed us.
Final thoughts
- I learned that sometimes it is good to start all over again. You sometimes save more time like that then keep working on making a bad attempt better.
- I learned how the slices work and next time I will imagine better how the stacks work, and I can edit them in Corel draw for instance to make the assembly process easier.
- This is great addition to my series dedicated to healthcare problems for new moms and newborns, public intolerance regarding breastfeeding in public
- This knowledge I made I can use to make my final dance-carpet 3d model, as well as my game version in cardboard stacks.