6. Computational Couture
Initial thoughts
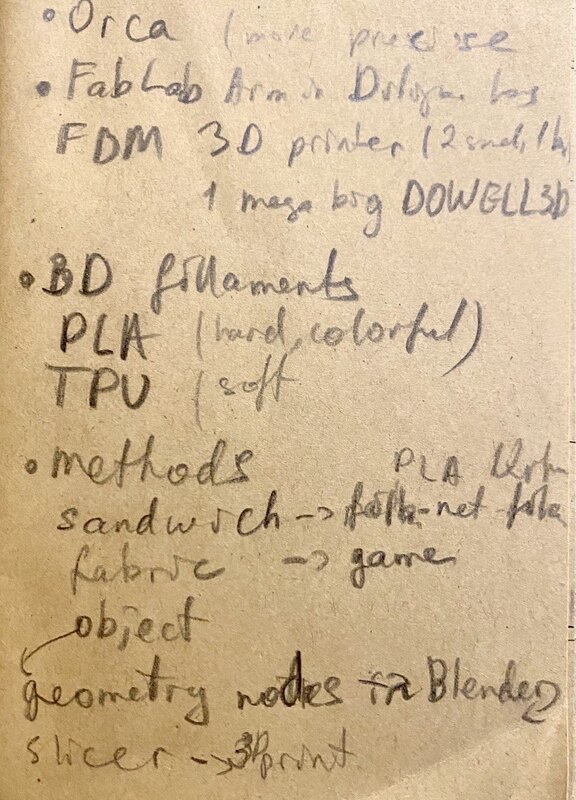
Photo by Luiza Naslyan
Based on our the 3D printing techniques (sandwich, on fabric, on the printer directly) filament types (PLA and TPU), and printers (Creality 3 and Elego Neptune 3 MAX), I finalized my assignments for these week:
Print a game with a manually adjustable FDM printer Creality and one more with an automatic FDM printer Elego Neptune 3 MAX; in this case I will have a completely usable object;
Print with a sandwich technique;
Print an object.
At this point, I don't know yet what to choose for the sandwich technique and for the object. I will let the process evolve and decide on the way.
Research & inspiration
Folklore and Nature to Haute Couture
Iris van Herpen
To talk about comutational couture and not to mention Iris van Herpen is a crime. Knowing well that a lot of students might mention and many have mentioned about her before, I could not help myself bring her aesthetics into my page.
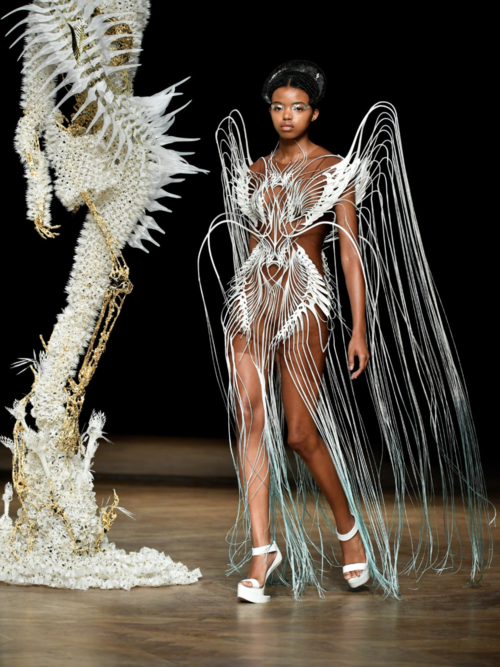 Iris van Herpen — Arachne bustier, ‘Meta Morphism’ collection, 2022. Polyester silk, mylar, tulle, Swarovski crystals, embroidery thread, stainless steel. Iris van Herpen Collection © Dominique Maitre
She is the ultimate trailblazer of computational couture, blending haute couture craftsmanship with cutting-edge technology. Her revolutionary work transforms science, architecture, biology, and heritage into wearable art using 3D printing, laser cutting, and algorithmic patterns.
For me, as a student of an inspirational course of Fabricademy, stepping into the world of 3D design, high-end machines, and computational fashion, Van Herpen is the ultimate source of inspiration.
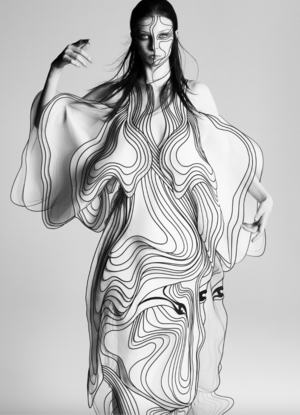
Iris van Herpen: Shift Souls
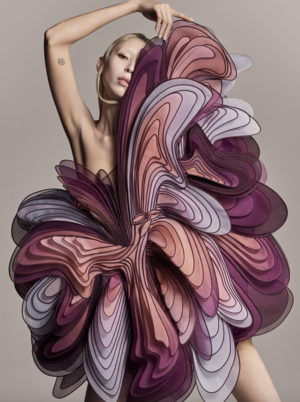
Iris van Herpen: Shift Souls
Her works prove that digital fabrication is not stiff or soulless, but rather a flow, organic, and meaningful. Specifically, her Shift Souls collection inspired me to delve into Armernian rich folklore and ritual heritage and, in the furture, give it a new contemporary approach leading it to a wider audience.
CreLab Tavush
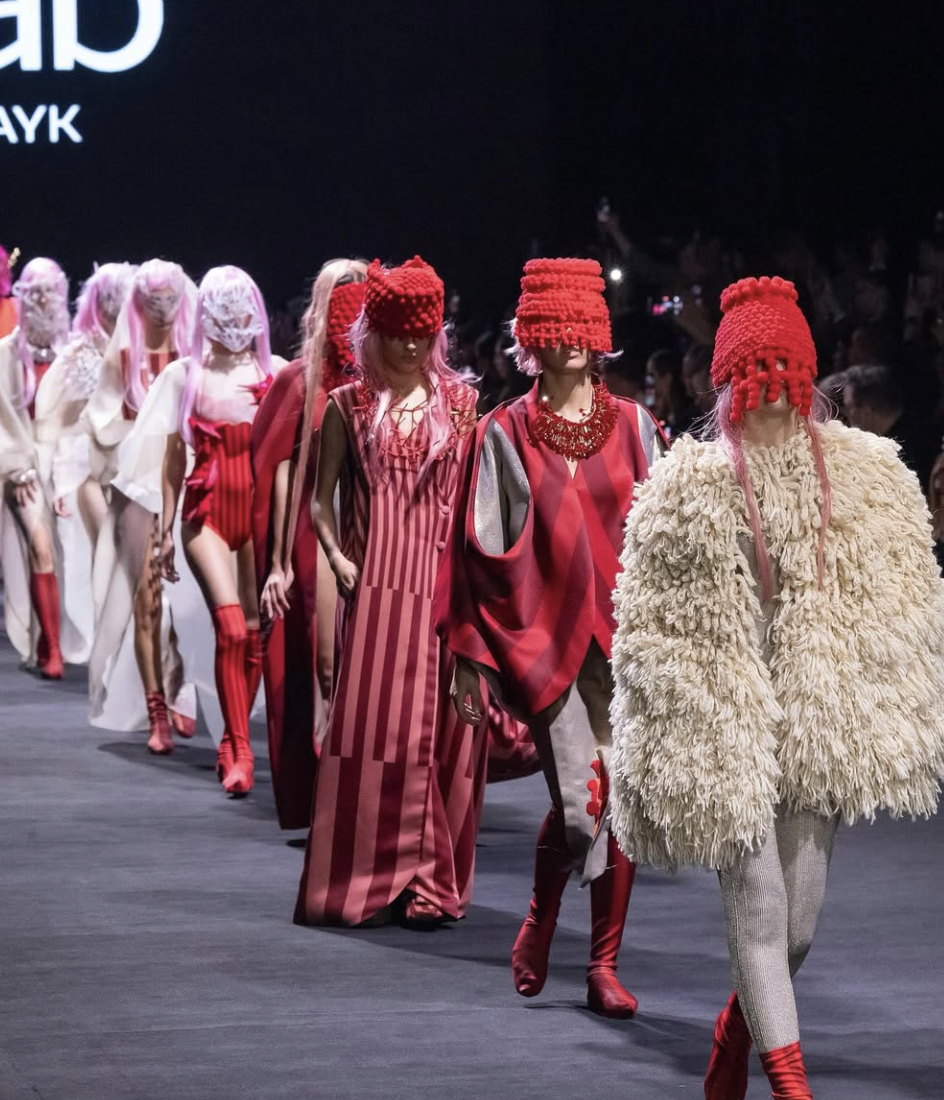 CreLab Tavush: "Septa-Cord" collection
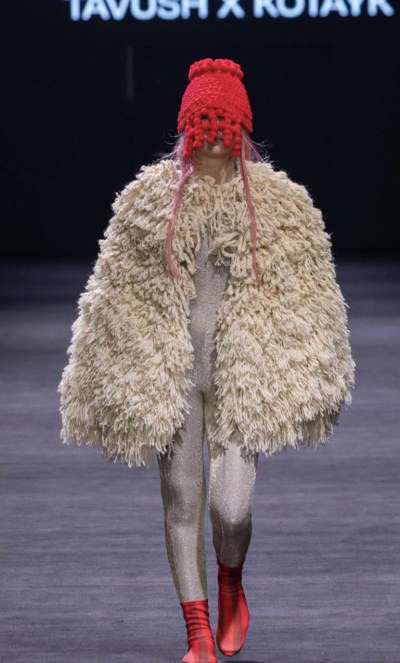
"Septa-Cord"
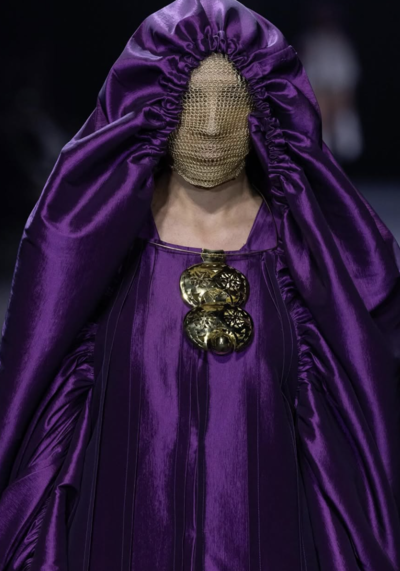
"Septa-Cord"
CreLab Tavush and Natacha Kalfayan are driving forces behind a creative social initiative that empowers women in rural Armenia through craftsmanship and sustainable fashion. Located in Dilijan, it operates as a multidisciplinary lab specializing in handmade garments, jewelry, and accessories. Developed in partnership with the Fashion and Design Chamber of Armenia, it trains local women, youth, and displaced creatives, providing them with mentorship and paths to financial independence. Here I am presenting two of CreLab Tavush collections, bto include folk ornaments and objects traditionally used to ward off evil.
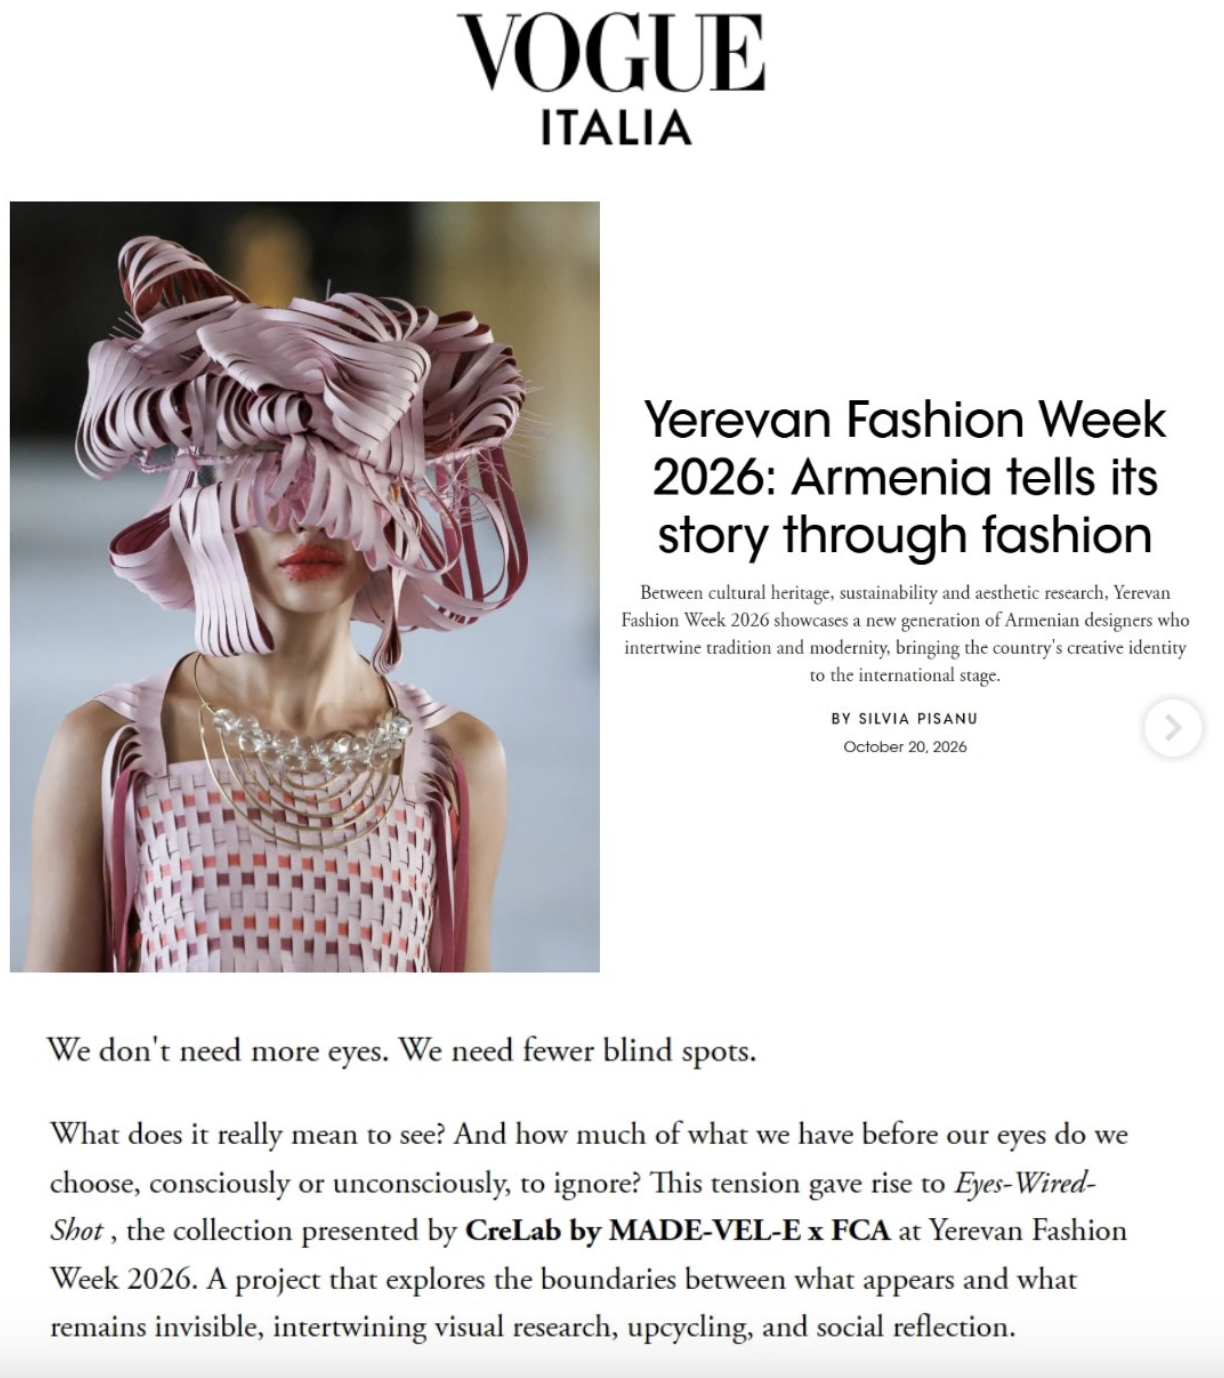 CreLab Tavush: "Eyes-Wired-Shot" collection
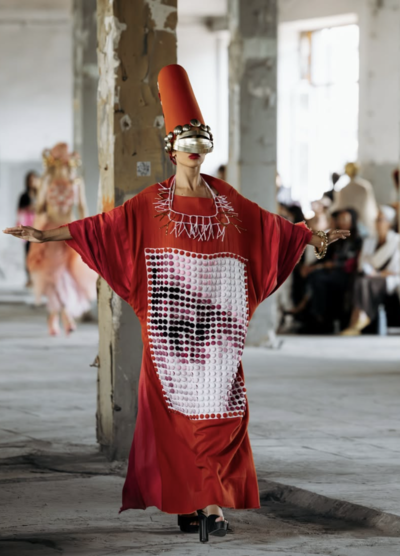
"Septa-Cord"
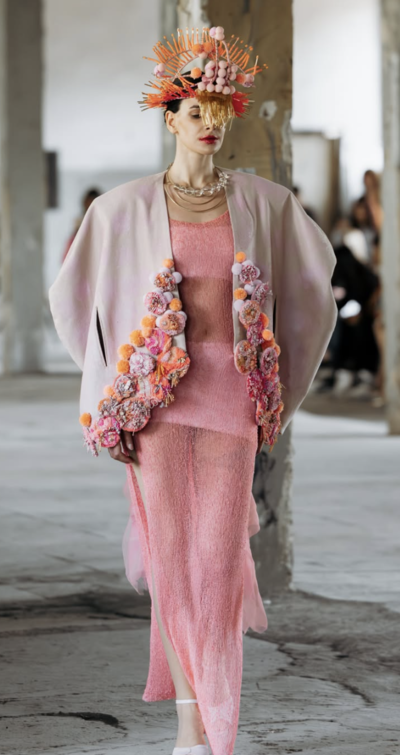
"Septa-Cord"
Sun and Fruits
Nature is life and energy to me. It constantly gives me motivation to move through hard times, to feel lively again and again. I highly get inspired by the Sun, the life engine of our galaxy: its warmth, its rays, the path of the heat waves...
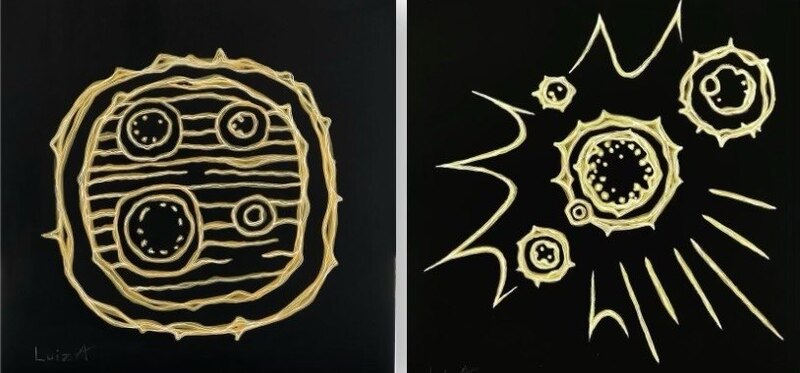
Years ago, relaxing at a beach in Myanmar, I looked at the sun, naturally half-closing my eyes, and what a microcosmic world opened before my eyes: the salty ocean water that still stayed on my eyelashes after swimming made a full spectacle showing all types of cosmic shapes. I kept looking and drawing with markers on my sketchbook quick enough to remember the structure, and looked again to see a totally new structure... Magic.. Sun is my forever inspiration.
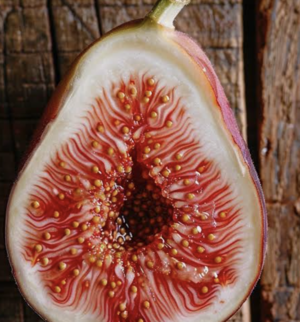
Fig image from Google
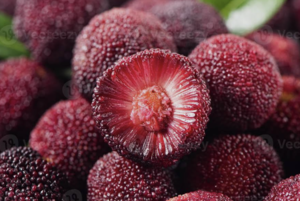
Bayberry image from Google
I found fig and bayberry structures inspiring too. They looked like sun rays and plasma waves that lead to a center of life. Unfortunately, I do not have a microscope to have had a closer look at them on cellular level, however, from the outer physical composition and colors they both are inspirational to me.
Software
Machines
Elegoo Neptune 3 Max (0,6 mm nozzle)
Creality Ender-3 (0,4 mm nozzle)
COP17
Video by Luiza Naslyan
I was honored to present "Games as a cultural dialogue" series at educational section of COP17. COP17 in Armenia is the 17th United Nations Biodiversity Conference. 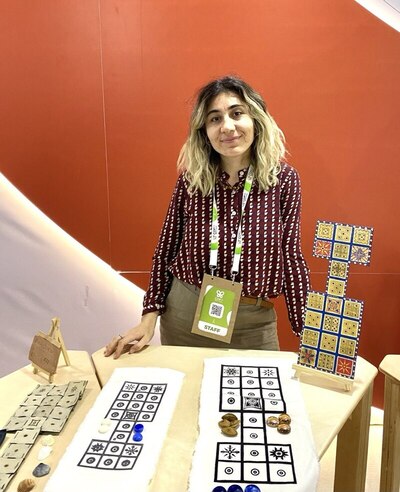 Taking place in Yerevan from October 19–30, 2026, it is a major global summit focused on nature conservation. It is the first global review to check if countries are meeting their 2030 targets to protect 30% of the world's land and sea ecosystems (the Kunming-Montreal Global Biodiversity Framework).
It has brought roughly 15,000 delegates—including world leaders, scientists, and activists—from 196 countries to Armenia's capital.
It the context of COP17 bringing delegates all around the world in one place, and in the context of sustainability and circularity getting the chance to be more visible and understood, it was crucial for me to present Fab Lab Armenia and Fabricademy to the guests and locals.
I see games as an offline, face to face communication means between people in the growing online world; as well as a way to learn about cultural parallels, history, folk crafts as a protest against the games of shooting and repeatative pattern that affects the brain, eyes, and focus.
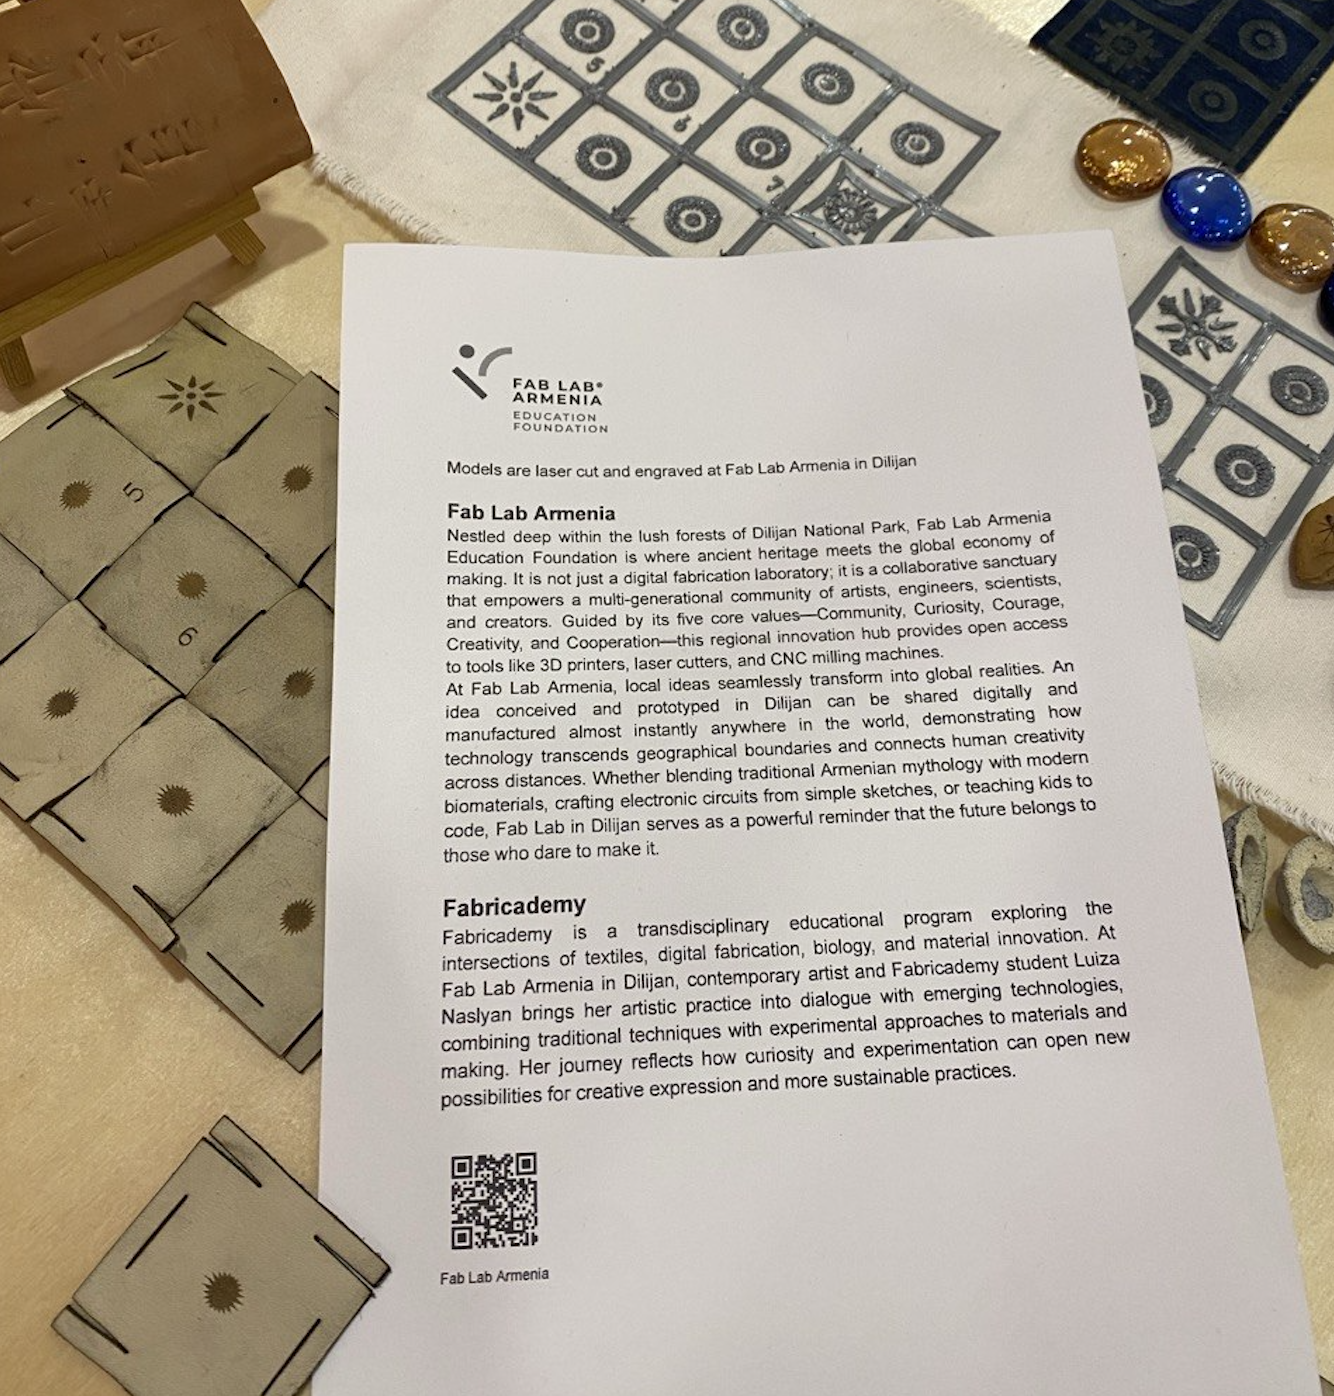 Photo by Luiza Naslyan
A respectable part of my exhibition were game varsions made at Fab Lab as weekly assignments of Fabricademy. Visitors from all over the world, including locals were impressed by the models. The information bookleat lead the visitors to be inspired by what Fab Lab Armenia and Fabricademy have to offer, get motivated to go out of a busy and noisy city to find high-end technology and peace with nature in Dilijan.
Process & workflow
The process for me always starts with attending the online meetings, doing research and finally brainstorming, asking key questions to myself: what is important in the workflow? Is it usable? Is there a possibility to make it sustainable and still fit in the timeframe?
Once I have answers to my questions, a clear vision of my assignment and the objects, I go ahead. This time as well, I studied the filaments at the lab, the printer options, the techniques to be able to achieve with an FDM printer, and concluded that I can make 3 prints.
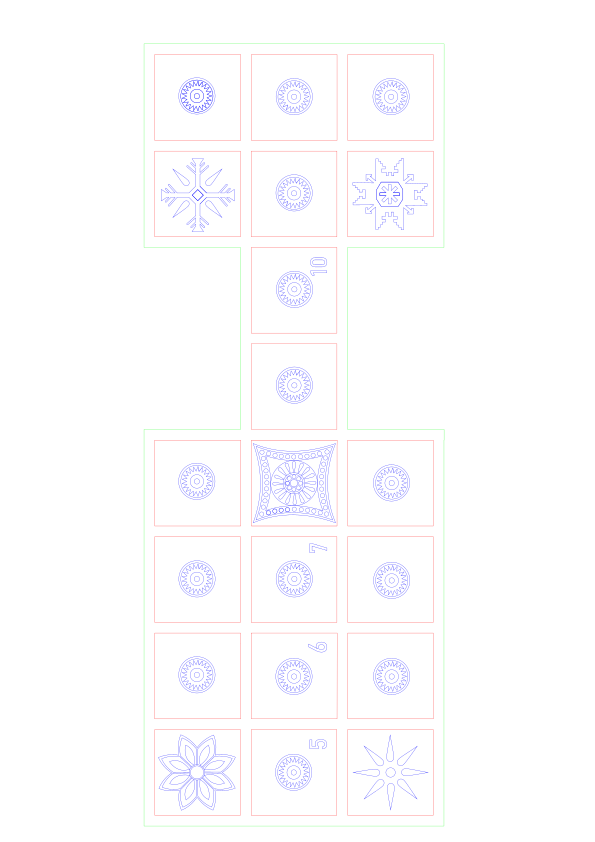
Game 1: Filafabric -> Orca -> PLA print with Creality printer
The aim was to print a game design obtained in FilaFabric and print on felt with Creality ender-3 FDM printer.
Since I already had an ancient game in a Corel draw file, I decided to try out the new website Filafabric by design researcher J. Luis Berna Moya. The website enables users to create textile patterns, change their density, import a file and make modifications to the design, and finally export it for 3D printing. It operates on 3 main colors which enables us achieve filled or empty areas in our design. It is still under development, hopefully soon we can use this amazing website with its full functions.
Video by Luiza Naslyan
-
First, I edited my file in Corel Draw, changing the colors of my design depending which areas I wanted to be filled or stay empty. I outlined my design with green, to make sure the lace pattern I chose was imprinted only within my design and whatever was outside of the green outline was eliminated by FilaFabric to ensure a clean print. The areas I wanted to be filled with filament on a 3D printer, I changed to red. The areas I wanted to see the lace through, I marked with blue.
-
Then I imported my SVG file to the website. Immediately, the lace pattern was eliminated outside of the game design and stayed only within the game outline, as it was marked with green. The patterns of the game were filled, since I marked them red. And the square of the game pattern showed the lace I chose for the background, because I changed them to blue.
-
I exported the file in STL format to be able to slice later.
-
Then, I imported into Orca and sliced, choosing the thickness of the walls, the fill pattern and percentage, and the temperature based on my filament instructions (PLA).

-
Next, with the help of wonderful Erlika Mirzoyan I got to know our Creality Ender-3 printer which operated with a 0,4 mm nozzle extruder.
-
I attached the power cord and turned it on. I could see the printer name and settings on the display.
-
Then I placed an A4 paper on the platform board and by moving the paper in between the nozzle and the board I could evaluate the distance in between. According to the tightness level I adjusted the board with 4 gears underneath the board at each corner. When it was adjusted, the paper was moving in between the nozzle and the board having some tightness enough for the nozzle to extrude the filament on the surface. If the nozzle is too high, the filament would be extruded in the air, creating wavy texture and ruining the whole design.
-
Once I was good with paper experiemnt, I placed the actual felt on the board to adjust the nozzle with the board for my felt. I made sure that the felt is cut the same size as the printer board.
-
then I pushed the microchip out of the printer and added my file to it. Placed it back to the printer.
-
From the display I set the temperature, the speed, and the file, pressed PRINT!
The model turned out to be smudged, with patterns printed not clearly, because the design was too detailed for the printer model, also it did not have a well regulated temperature system so the PLA filament was smudged over the edges. This was a good experiment to try a manually adjustable printer, to work with a microchip transfer.
Game 2: Corel file -> Orca -> TPU print with Elegoo Neptune 3 Max on cotton
For the second experiment I used an autometic FDM printer, Elegoo Neptune 3 Max, my dear instructor Anoush Arshakyan's personal printer which she generously lent me to use.
Video by Luiza Naslyan
-
the first step again was getting to know the printer, the board on the heat bed, the display, the nozzle (0,6). And autumetically adjusted the 0, the distance between the nozzle and the board;
-
fascened the cotton fabric on the board with clips, removed the upper wire handles of the clipps on the sides, so they w
-
I imported my Corel file in SVG format to Orca;
-
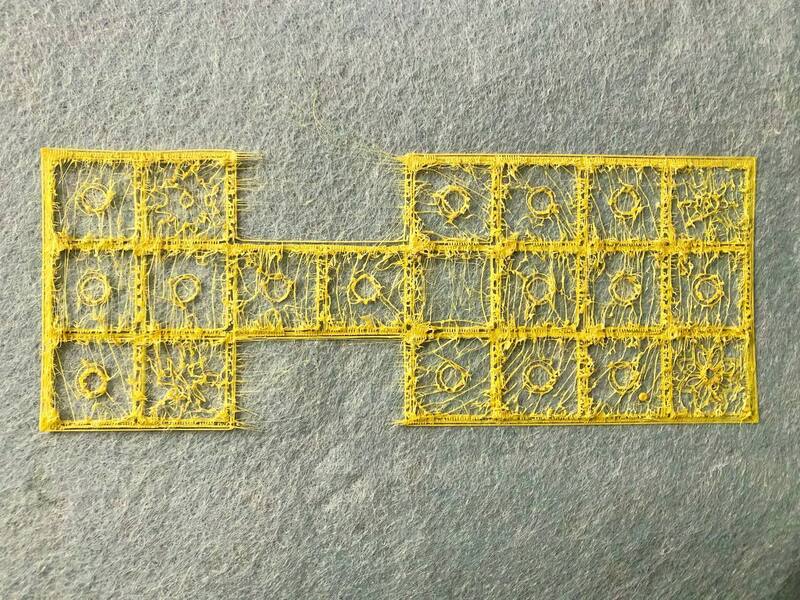
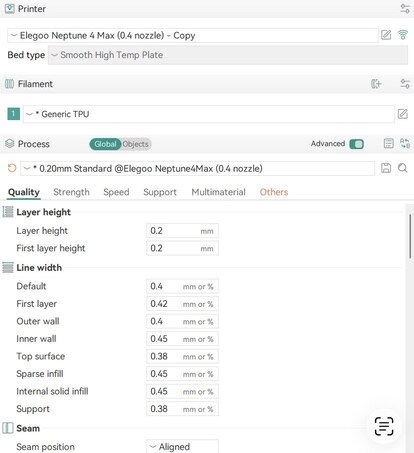
I chose the thickness of the walls, the fill, the temperature according to the TPU instructions, the speed;
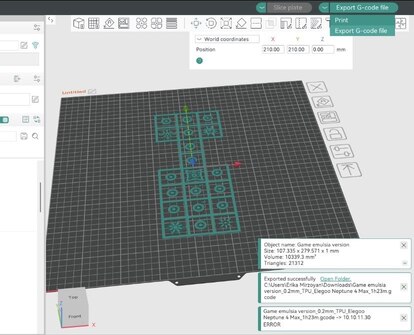
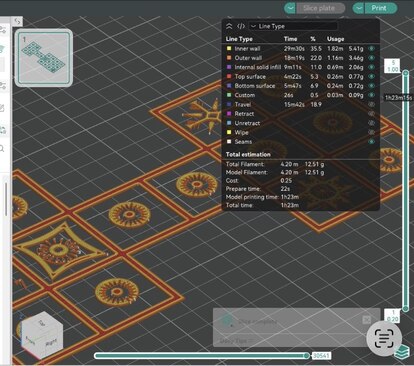
-
due to a not strong wifi connection, I was not able to print diectly, so I saved my file from Orca in gcode,
-
I checked the WLAN number of our printer (10.10.10.34) on the desplay setting;
-
google the number and pressed on Upload and print on the upper right corner;
Tote bag with scribbles -> Cura -> Sandwich with PLA with Elegoo Neptune 3 Max on cotton
Video by Luiza Naslyan
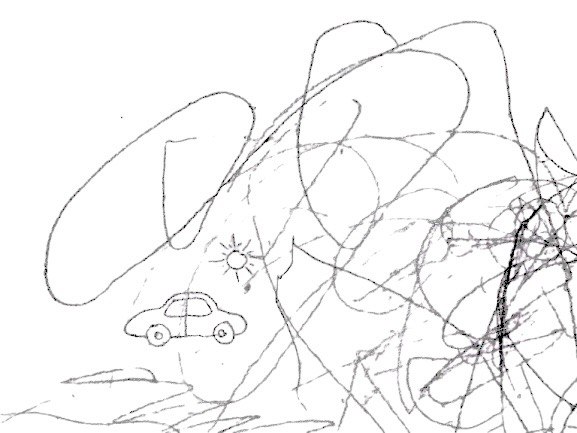
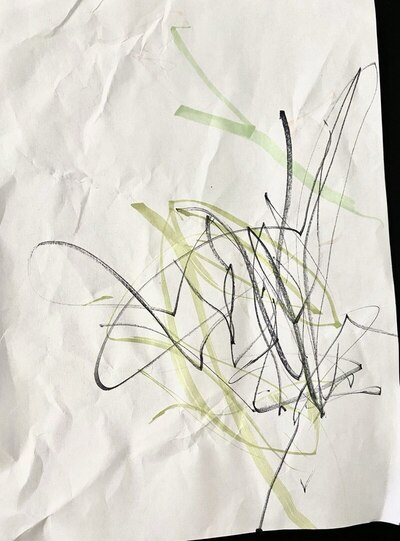
A little prehistory: in my childhood I was free to draw on several walls of our house. I am glad that my partner agreed to give freedom to our son to also draw on several walls of our house with coal pencil, chalk and crayons. We see how our son gets confidence in himself, how his motoric skills develop when drawing so much and he applies those skills in everyday life: peeling eggs, cutting his food with a wooden knife, etc. The idea itself was suggested by my instructor Anoush, and I loved it!
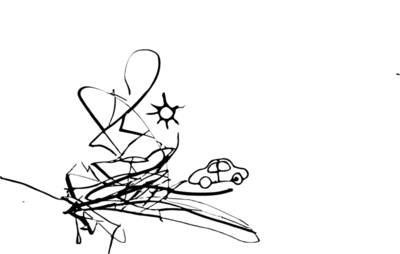
- First, I took pictures of his scribbles on our wall and on paper, and my cartoon drawings of a car and a sun which my son always asks me to draw for him;
-
removed the background online;
-
edited the image on my iPhone 11 - nullified the saturation to get a black and white image, added the contrast and black points, increased the brightness;
-
edited it in Ai -> dragging some lines to connect the gaps that were removed by the Remove background website-> clicked on Object - Expand -> Expand, then from Pathfinder window I chose -> Unite;
-
I exported in ... format to be suitable for Cura slicer;
-
sliced and chose the settings based on my PLA instructions;
-
exported from Cura in gcode;
-
cut some lace big enough to fit the printer board;
-
checked the display on the printer, made sure the nozzle is on the right distance with the board by clicking on Z to find the 0/zero;
-
uploaded my gcode to our printer IP (10.10.10.34), printed 2 layers, then paused;
-
placed the lace and fastened with clips, removed the wire handles of the clips on the sides to not hinder the nozzle while printing;
-
resumed printing and got my scribbles printed in PLA.
The result is beautiful, technical wise it is neat. I loved the result!
I had a hand sewn tote bag from 5 years ago, so I gave it a new life by cutting the printed lace the same size as the front of my bag, sew it with needle and thread to my tote bag, and fastened some wooden rings on the handles.
Buckle: Parametric at Blender -> Cura -> PLA with Elegoo Neptune 3 Max
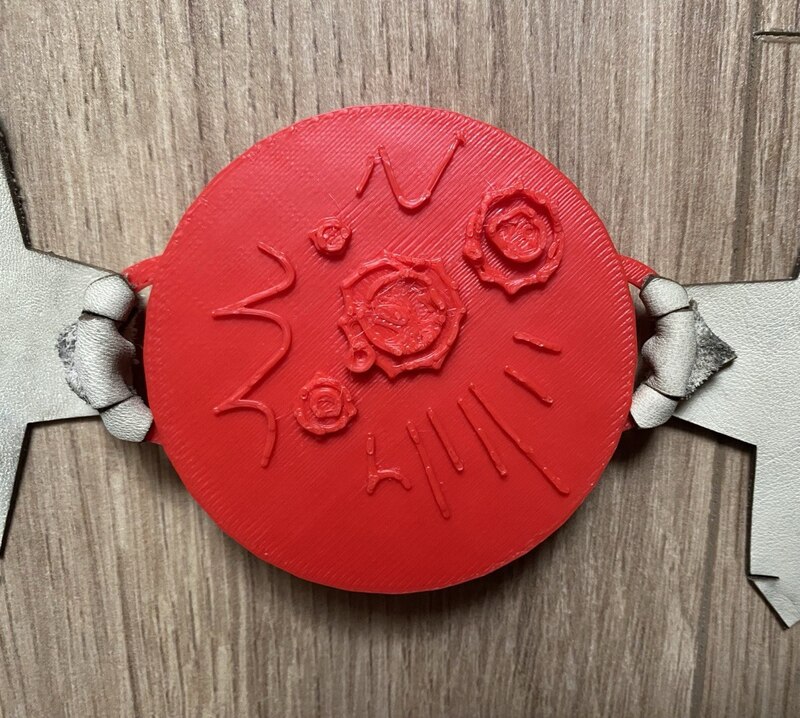 Photo by Luiza Naslyan
The third assignment was to create and object... as a result of my brainstorming, I decided to add a buckle to the belt I made during the OS Circular Fashion week as a prototype belt for the dress to be worn at my final project.
For the object, I was thinking to get inspired by nature. Next morning, while preparing breakfast, our sunny Dilijan offered sunrays on my eyes, very bright, warm, full of life. It reminded me of my series "Sunshine on my eyelashes".
-
I chose one from the series and used Gemini to generate a 3D model, then turned it into a mesh in Tripo;
-
Then I uploaded it to Blender.
-
Added a cylinder: from to left corner press Add -> Mesh -> Cylinder;
-
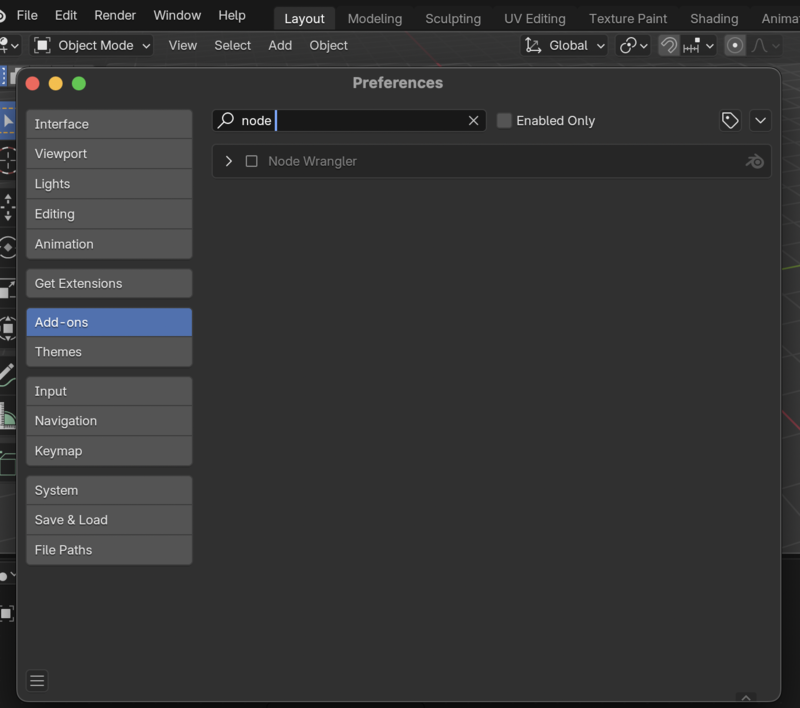
To make my object parametric, first, I needed to add Node Wrangler. From top bar I chose Edit -> Preferences -> Add-ons -> search Node Wrangler, it appeared, I clicked on the square to make a tick sign. It was added, closed it;
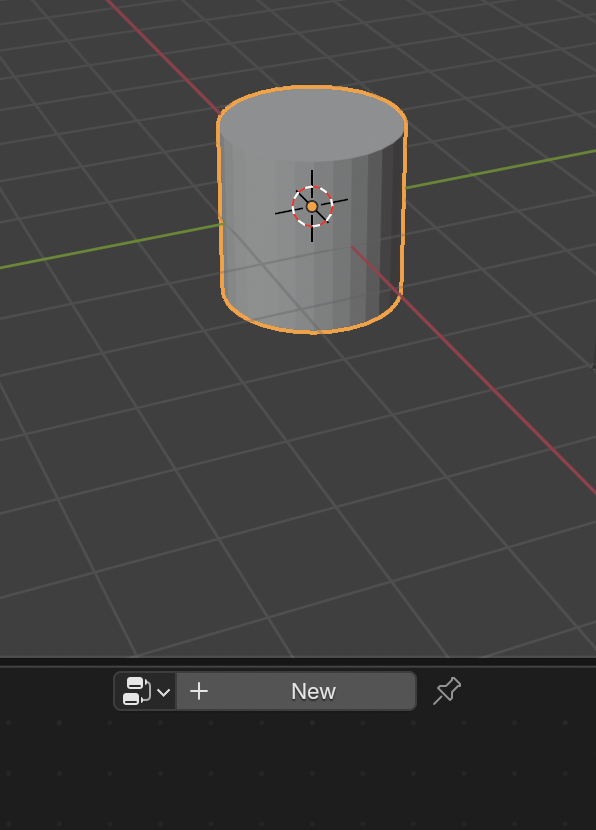
- I started to add parametrics to the cylinder I needed Geometrical nodes to know for example how much I move object to which direction, to what extend I add a modifier, etc;
- to find my geometry nodes, I pulled the lower line on my screen at Blender up and the time line appeared. I clicked on the left circular sign and chose Geometry Node Editor;
- Next, having chosen my cylinder I clicked on New and Pin to fix my object, pinning helps to not get my cylinder to disappear when I add more objects; Immediately, 2 nodes appeared: the input and output;
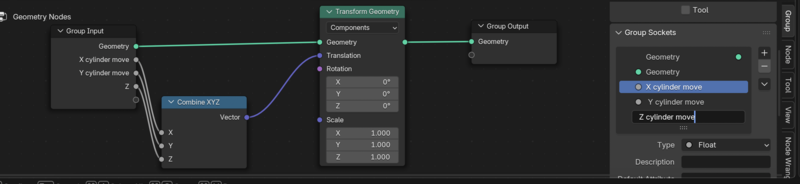
- clicked Shift A on the node area, and added Geometry Transformation, moved it in between the 2 nodes and it connected automatically. This was the first parametrics I applied to my cylinder. By changing the x or y or z here, it moved exactly the amount I wrote, I could also just move the object with my mouse, but whatever I moved I could see the distance on my nodes; -the next parametrics is to make sure to see the coordinates of the given object on the right side by pressing the Wrench icon. This will save my time to find this exact node for the cylinder later when I have a lot of nodes. To do so, I added Combine XYZ Vector by connecting the coordinates with the Translation section. Also, I renamed these coordinates to make it even easier to define. To rename each coordinate, I pressed N, chose Group on the right side bar, and chose Group sockets;
- placed the sun on top;
- added 2 cylinders: right click -> Add -> Mesh -> Cylinder;
- used the Boolean tool from Modifiers list to make a hole on the bigger cylinder to form a ring like shape;
- added a Plane: right click -> Add -> Mesh -> Plane;
- solidified the plane with Solidify tool from Modifiers list;
- rotated it to form a 90° with the ring, making sure it intersects with ring properly;
- used the Boolean tool from Modifiers list to cut the ring into 2 parts;
- pressed P to separate them according to the loose parts;
- placed each half of the rings on each side of the sun;
- marked all and unified;
- exported in STL format;
- imported the STL file to Cura, sliced it;
- exported a gcode file;
- printed via IP address of our printer.
I am a beginner in Blender, I can use it very slowly, and with my involvement in COP17, meanwhile being a mom, I could not take enough time to explore Geometry nodes well and understand the parametric design. So, I printed the buckle that I managed to do to go through the printing process, learn it. However, I had more time after COP17 to explore Blender more and finally I made a parametric design using geometry nodes.
Results
I am sharing with you the results of my 3 works for Computational Couture:
The Game is obtained in Corel Draw and printed with an FDM 3D printer Elego Neptune 3 Max with a TPU filament.
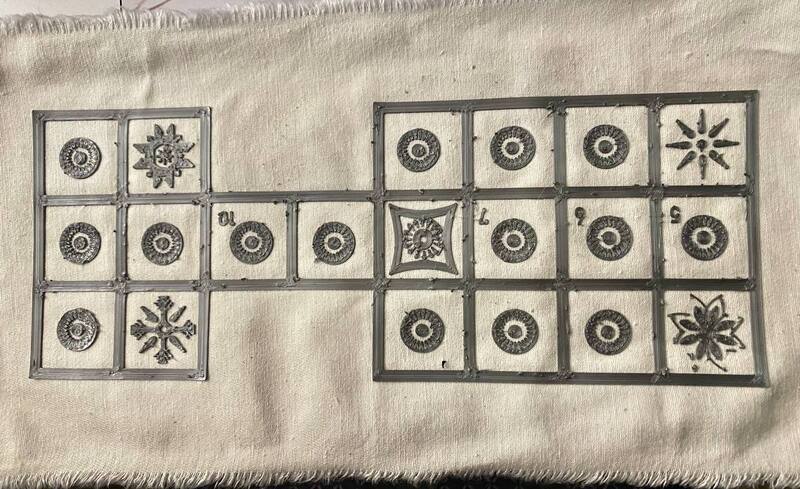 Photo by Luiza Naslyan
My son's scribble art is obtained by Ai, printed with an FDM 3D printer Elego Neptune 3 Max with a PLA filament and hand sewn to my handmade tote bag. The details are also available in MetaTextiles.
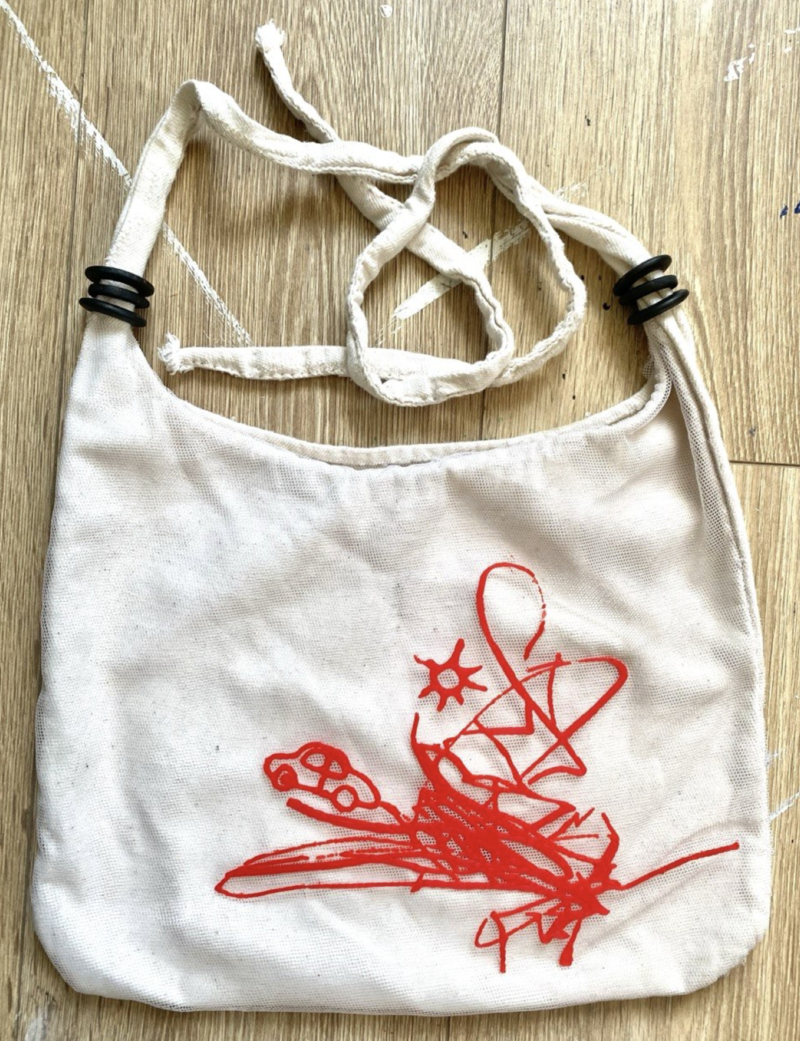 Photo by Luiza Naslyan
Video by Luiza Naslyan
The buckle of the belt is obtained in Blender, sliced in UltiMaker Cura and printed by an FDM 3D printer Elego Neptune 3 Max with a PLA filament.
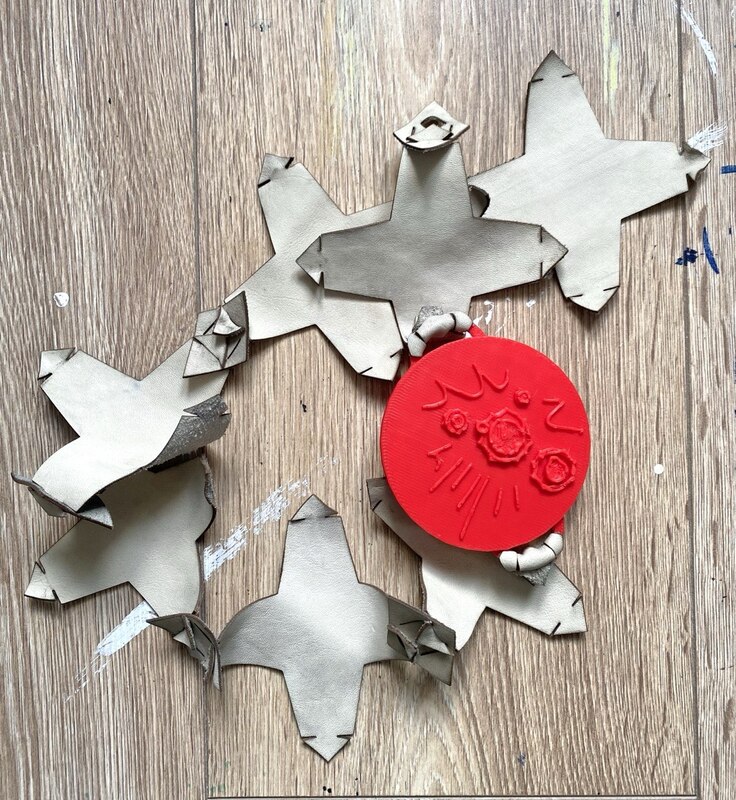
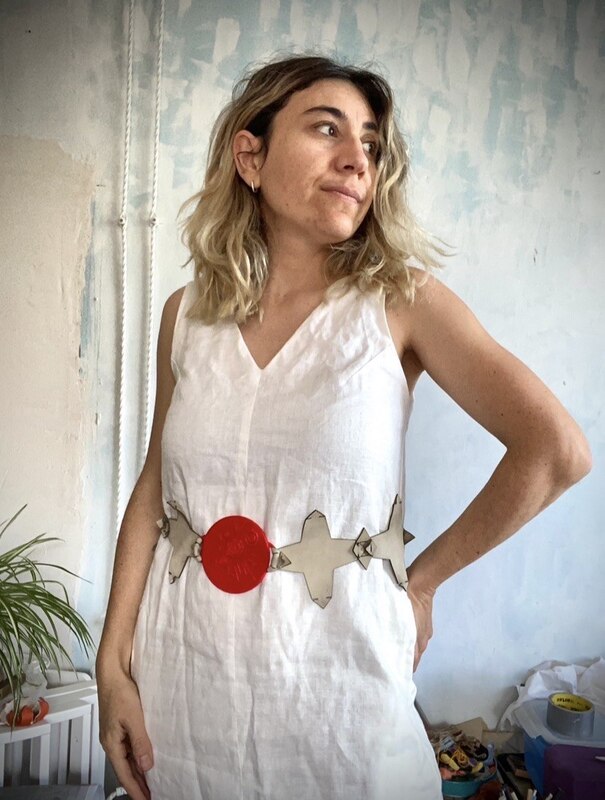
Photos by Luiza Naslyan
Here is my parametric design using geometry nodes in Blender inspired by the sun and bayberry.
Weekly reflection
- I got more competent in using Blender knowing new techniques.
- I would choose a simpler design for the buckle and feel more free to experiment in Blender rather than focusing on getting the design I imagined.
- The skills of this week will directly affect the result of my final dress fabrication.