BioChromes
Initial thoughts
This is a super exciting week ahead! I learned from my grandmother to recognize some local herbs and use them for medicinal purposes since childhood. Later, due to social media platforms and YouTube, I came across reels of fabric dyeing and fell in love with that magic. Now, I am about to learn it, to implement it! So, here are some thoughts before hands-on experience.
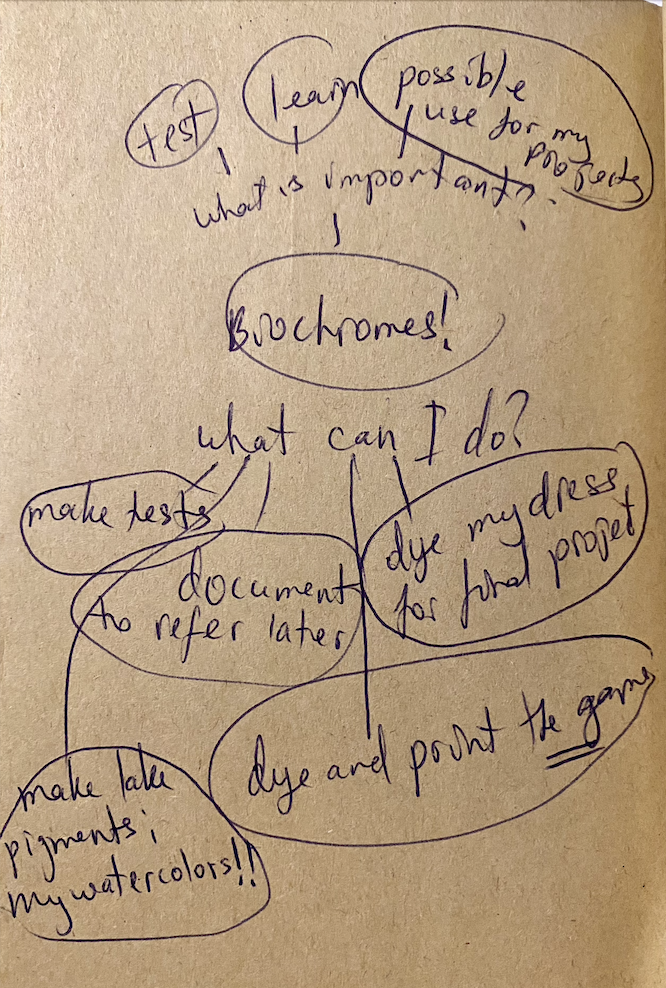
Once again I want to study and implement what I have learned while staying close to my values: make something out of this week usable for my art projects.
So, I set my goals:
- learn
- make dyes, inks, and pigments
- dye my fabric samples
- dye one bigger piece of fabric and screen print the ancient game version I designed on that fabric
- document them
Research & inspiration
Firstly, I want to say a heartfelt thanks to an outstanding Fabricademy graduate, dear Svetlana Khachatryan for teaching me, guiding me through all the processes, and for lending many of her materials. This is an act of kindness and openness. Thanks to dear Anoush Arshakyan for her involvement and encouragement.
Learning and acquiring information and taking notes helped me to start the magical process with more confidence and precision. Thanks to Cecilia Raspanti's and Svetlana Khachatryan's online lectures, I got my first professional knowledge on the values, sources, types, and techniques of natural dyeing. Doing more research was absolutely enriching and inspiring. I want to share two of my inspirations I came across while researching applications of natural dyeing. I chose them because of their very distinct approaches to natural dyeing: a psychological approach and embroidery.
Cara Marie Piazza is a New York-based artist with years of experience in natural dyeing and has amazing works with natural dyeing. Those pieces inspired me to look at pre-treated fabric as a canvas, freedom of self expression, and see the possibilities of making home deco usable pieces for my own home.
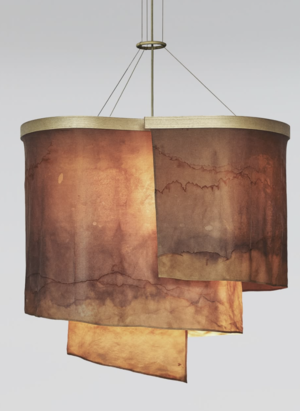
Chandelier by Cara Marie Piazza
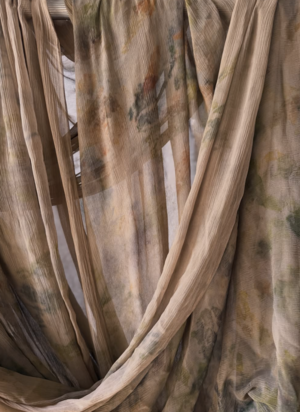
Installation by Cara Marie Piazza
However, the most inspiring part for me was the use of natural dyeing as a “slow, ritual process,” “a meditative approach to making, where drawing color from the natural world becomes a bridge between the subconscious and the conscious” in her studio that she called the “Fifth room”. In this room people can slow down, find a silver lining, and reconnect to their inner self by taking time and delving into a slow process of natural dyeing. This concept inspired me to think of organizing a workshop where I can share my knowledge on natural dyeing with the community in my recently opened art studio.
The next artist I chose is not only fascinating for her technique of incorporating sewing, stitching, and embroidery with naturally dyed fabric, but also for her courage to stop her occupation due to health issues and restart her life by finding a new passion in natural dyeing. I also got inspired by the idea of preserving the crafts of embroidery and stitching inherited from her grandmother via this new passion. She is Caroline Nixon and here are some examples of her fascinating art.
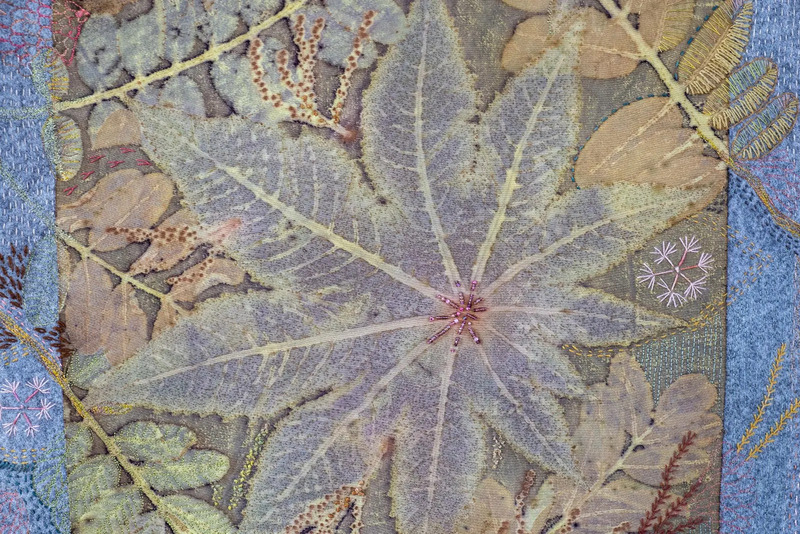 Photo from Nixon's website
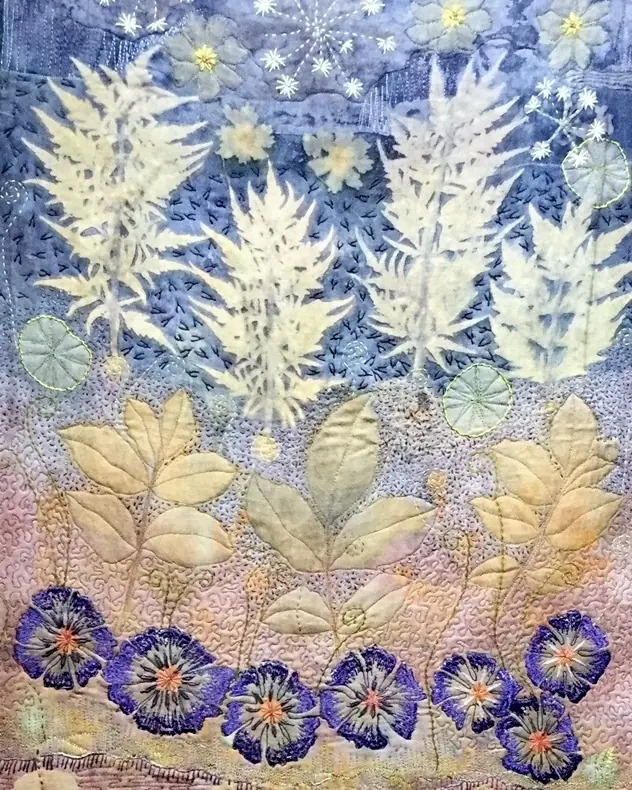 Photo from Nixon's website
Caroline Nixon's story inspired me to rethink my cultural heritage, the ways to bring it into modern life through new technology. For example, revealing the hidden sacred concepts of Armenian carpet and rug patterns through e-textiles.
My source and forever inspiration is the ancient Armenian culture with rich traditions of making natural dyes and weaving from carpets and rugs, to clothing and household fabrics. Especially the red from the cochineal and madder root take me back to ancient times. Thanks to one of the preservers of this tradition, Woolway, public has wide access to ancestral knowledge after being through a lot in history.
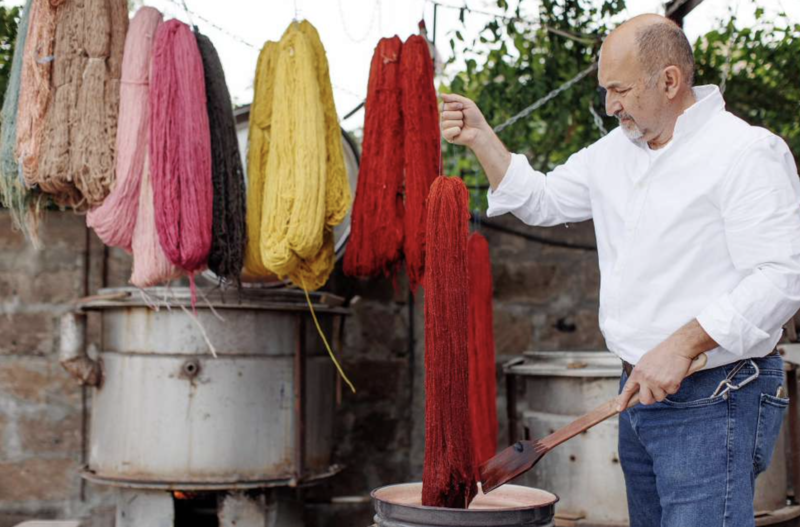 Photo is from Woolway website
Last but not least, a source of inspiration is the world's oldest rug: a bridge between cosmic origins and earthly life. Laboratory tests proved the red was dyed with cochineal, which was widely grown in the Ararat Valley by native Armenians.
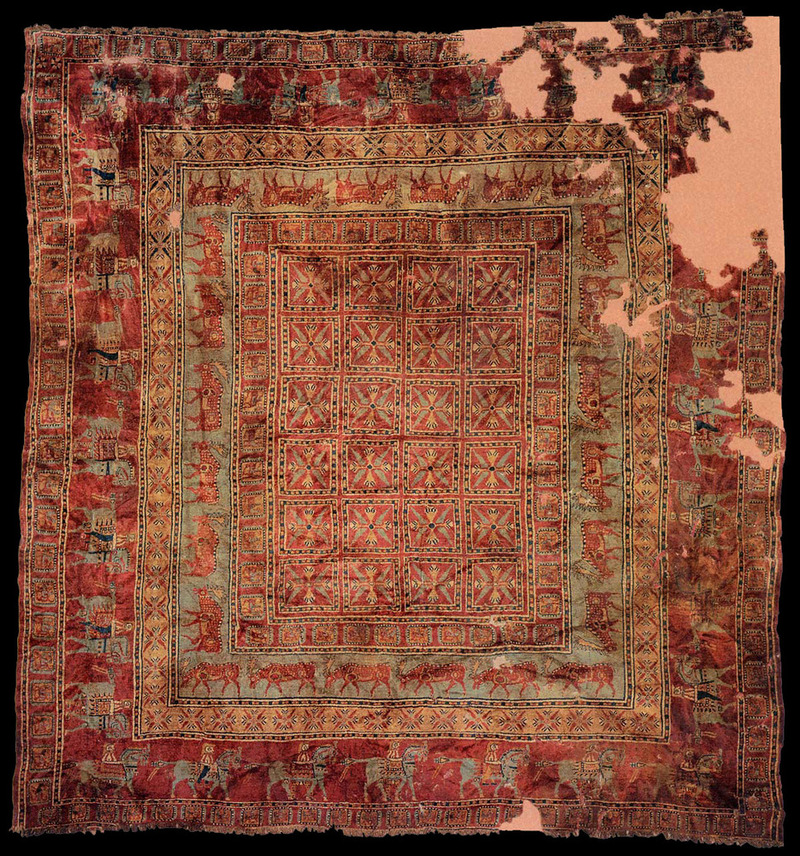
Links to my other research:
-
Dye book - Isobel Leonard - TextileLab Amsterdam Waag FutureLab
-
Inks & folds - Germarillis Ruiz - FabLab Bcn
-
Woven documentation matrix - Riley Cox - TextileLab Amsterdam
-
Comparison inks - Stephanie Johnsons - TextileLab Amsterdam
-
Documentation formats - Julia Karas - FabLab Bcn
-
Artistic intervention - Kate Reed - Dassault Systems
Tools
- stainless steel pots of various sizes
- scale
- measuring cup
- tongs
- whisk
- funnel
- sieve and muslin
- glass jars
- gloves
- mask
Sources
- Madder roots
- Marigolds
- Walnut hulls
- Sunflower seeds
- Onion skins
- Avocado pits
Materials
- Soda ash / Sodium carbonate
- Aluminum acetate
- Aluminum potassium sulfate
- Gum arabic
- Vinegar
- Iron liquor
- Lemon juice
- Sodium bicarbonate / baking soda
Process & workflow
It was an incredible week; I loved uncovering what lies behind a petal, a leaf, and a root particle. The knowledge and practice I gained during this week are precious. I chose to work with both types of fabrics: cellulose (cotton and linen varieties) and protein (silk). The whole natural dyeing process for me went like this:
-
making sure I had the tools and materials mentioned above
-
choosing the types of fabric
-
cutting the fabric into small, equal pieces
-
weighing the fabric and taking notes
-
calculating the amount of substances for scouring, mordanting, and modifying
-
deciding on and collecting some dyestuffs from my garden
-
scouring the fabric pieces separately (cellulose and protein)
-
making the dye baths, regularly checking the temperature
-
dyeing
-
making inks and pigments
-
constantly taking notes and photos
Here are the key steps:
Step 1: Weigh the fabric and dyestuff
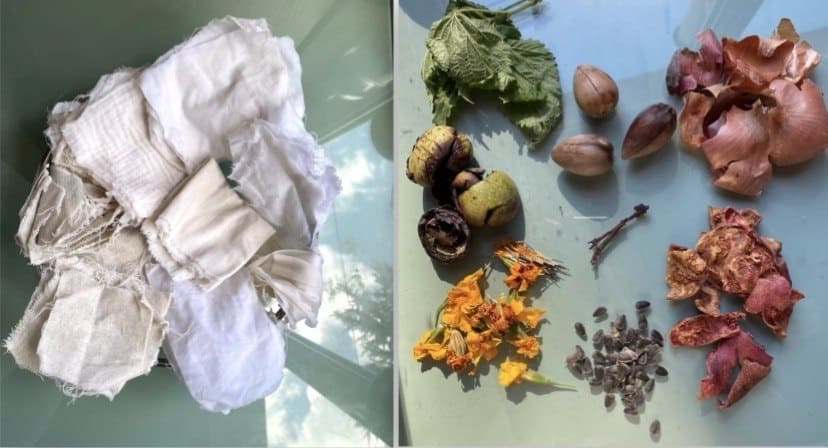
I chose 9 types of fabric both cellulose (e.g. cotton, linen) and protein (e.g. wool, silk), and cut pieces out of them. I weigh each type of fabric together then divided that number into the number of the pieces and took notes of their WoF (Weight of Fiber). Here is the list of the fabric samples which corresponds to the order of the dyed samples in the photos left to right.
| Fabric type | Total weight (gr) | Weight per piece (gr) |
|---|---|---|
| Unbleached linen | 7 | 1 |
| Muslin cotton | 14,31 | 1,4 |
| Silk | 3,70 | 0,5 |
| Bleached linen | 12,29 | 1,5 |
| Bleached linen tender | 11 | 1 |
| Cotton | 12,84 | 1,6 |
| Local cotton straight pattern | 36 | 2,25 |
| Local cotton diagonal pattern | 16 | 2,6 |
| Thick cotton for the game | 22,27 | N/A |
I chose 8 types of dyestuff, some from my own garden in Dilijan and some were provided by Svetlana and Anoush. I chose sunflower seeds that I grew, some walnut hulls right from our walnut tree, some nettles next to my terrace. The feeling of not exploiting, not buying and shipping from a far-by country, versus taking some from nature nearby was reassuring that the path I chose with my husband is the true one. To understand how much resource to use, I also calculated 200% of WoF of dye stuff:
| Material name | Total wright (gr) |
|---|---|
| Madder roots | 70 |
| Marigold flower petals | 36 |
| Avocado pits | 72 |
| Walnut hulls | 44 |
| Pomegranate skin | 35 |
| Red onion skins | 35 |
| Sunflower seeds | 37 |
| Nettle leaves | 38 |
I managed to simmer 6 of them into dye baths, and managed to dye my fabric with 4 of them.
Step 2: Scour with Soda ash/Sodium carbonate
Scour means to clean thoroughly. So, my goal at this phase is to clean my fabric or yarn from all the oil, dirt and debris so in further phases the fabric threads can be open and ready to bind with the dye.
For cellulose fibers it is recommended 2-5% Soda ash of WoF. Personally I did the following:
-
added 100 gr boiled water to 4% soda ash of WoF, mixed it until all the soda was dissolved
-
poured this mixture to the room temperature water in a stainless pot and brought to boiling
-
added the fabric pieces and kept boiling for 2 hours, then let it cool down overnight.
For protein fiber it is recommended to not use alkaline products like soda ash, instead use Ph neutral soaps. So, I did not use soda ash for my silk. Instead, I:
-
added 100 ml boiled water to 1 pinch of bio detergent Dust made in Armenia, mixed it until all the detergent was dissolved
-
poured this mixture to the room temperature water in a stainless pot and raised to 55°C
-
turned it off and let it cool down
-
once the water was cool, I checked the water temperature and rinsed the silk pieces with clean water of the same temperature.
Step 3: Mordant with Alum acetate and Alum potassium sulfate
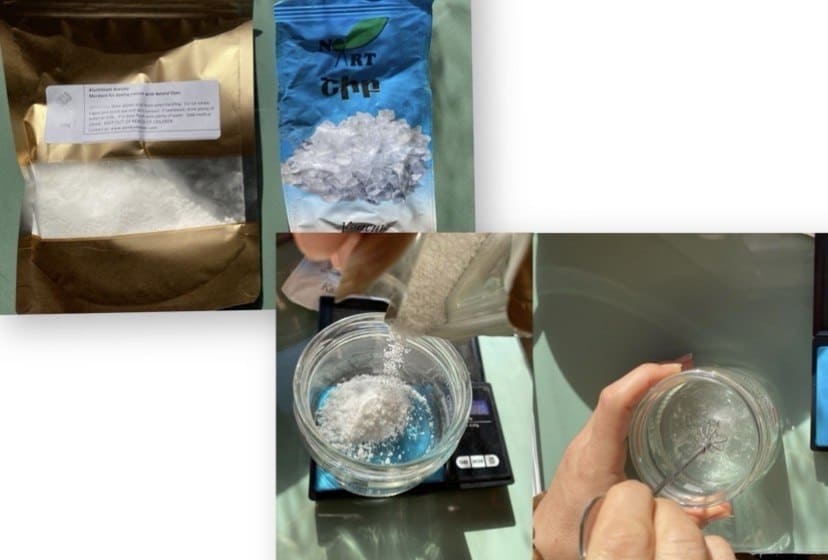 Photo by Luiza Naslyan
Mordant helps to fasten the binding process between the fiber and the dye.
For cellulose fibers there are 3 options for mordanting:
-
use 8% aluminium acetate of WoF
-
use tannin bath (e.g. black tea, oak bark, oak gulls, sumac leaves, myrobalan), then mordant with aluminium potassium sulfate , then tannin again
-
use aluminum triformate.
Because Svetlana kindly brought alum acetate, I went ahead with that one. So, I:
-
added 100 ml boiled water to 8% alum acetate of WoF and mixed it well until all the substance was dissolved
-
poured hot tap water in a non reactive bucket, added the mixture, mixed it well
-
finally, added the the fabric pieces and let it overnight (recommended 12-24 hours).
I rinsed all the pieces thoroughly in the morning with tap water.
For protein fiber it was recommended to use *aluminium potassium sulfate. So, I:
-
added 100 ml boiling water to 15% alum potassium to WoF, mixed it well until all the substance was dissolved
-
poured the mixture into room temperature water in a stainless pot and placed on the stove
-
raised the temperature slowly up to 65°C and kept it for 1 hour
-
let it cool down and rinsed with water of the same temperature.
Step 4: Dye
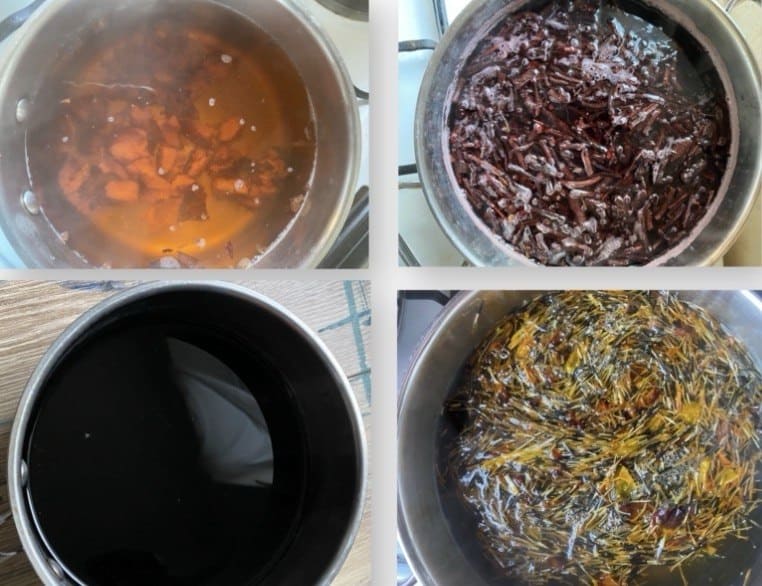
Out of 8 plants I chose (madder roots, marigold flower petals, avocado pits, walnut hulls, pomegranate skin, red onion skins, sunflower seeds, nettle leaves), I made 6 dye baths with madder roots, marigold flower petals, avocado pits, walnut hulls, red onion skins, sunflower seeds, and managed to dye with 4 of them: avocado pits, madder roots, walnut hulls, and marigold petals. I saved the unused dyebaths with red onion skins and sunflower seeds, and the excess dye bath with marigold petals in the fridge to use in future workshops in my art studio or for dyeing my dress for the final project.
The dyeing process is a magical one. I did the following:
-
put the dye bath in a stainless pot on the stove, raise the temperature slowly. For madder root up to 65°C, for the rest 80-85°C
-
added equal number of the fabric pieces in each dye bath
-
checked the temperature for each dye bath
-
once the temperature reached to the recommended one for each dye bath, I turned off the stove and closed the lids
-
I stirred gently every 15-20 minutes
-
checked the temperature again and turned on the stove again if necessary to keep constant temperature for 1 hour
-
turned off after 1 hour and let it cool down
-
rinsed with tap water slightly and already chose some pieces to modify them with iron and lemon acid.
More of thie process you can see in my Youtube video shared in Results.
Step 5: Modify with Iron, Lemon acid
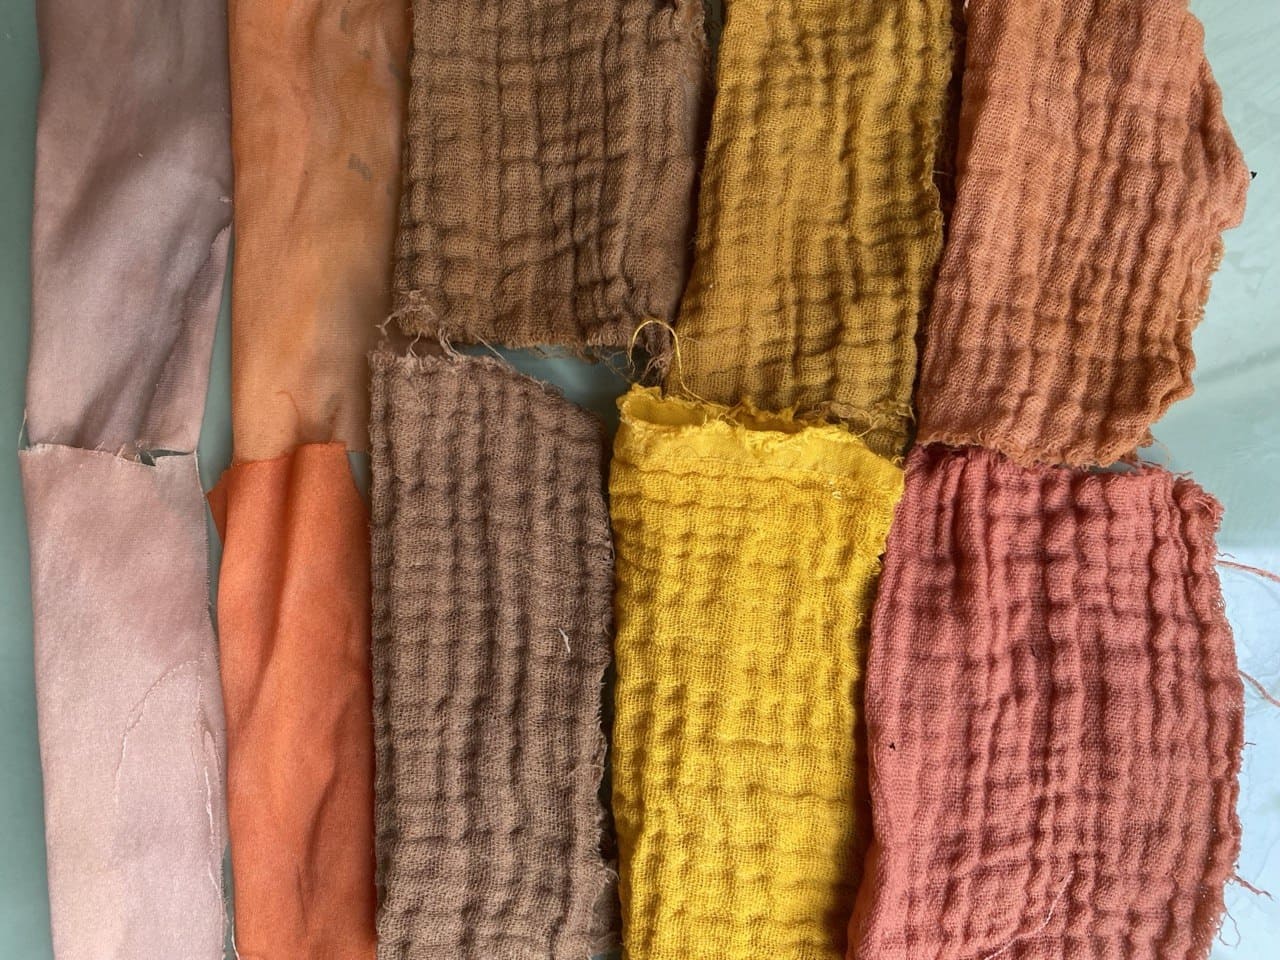 Photo is taken by Luiza Naslyan
Modifiers help us to achieve various shades with the same dye bath. I used homemade iron liquor and lemon acid to modify colors. I prepared the iron liquor several days ago before BioChrome week by adding rusty nails and tap water in a glass jar. The latter is a 500 ml jar and I filled half of it with rusty nails, so it was 50% concentrated liquor.
I took out my fabric pieces from the dye bath on a clean tray. Then, I warmed up 100 ml tap water in a stainless pot and poured 50 ml of iron liquor and submerged one piece from each color into an iron bath. But nothing really happened in 15 minutes, so I added 150 ml of iron liquor and let it sit for about 1 hour. The colors turned into warmer hues as you see.
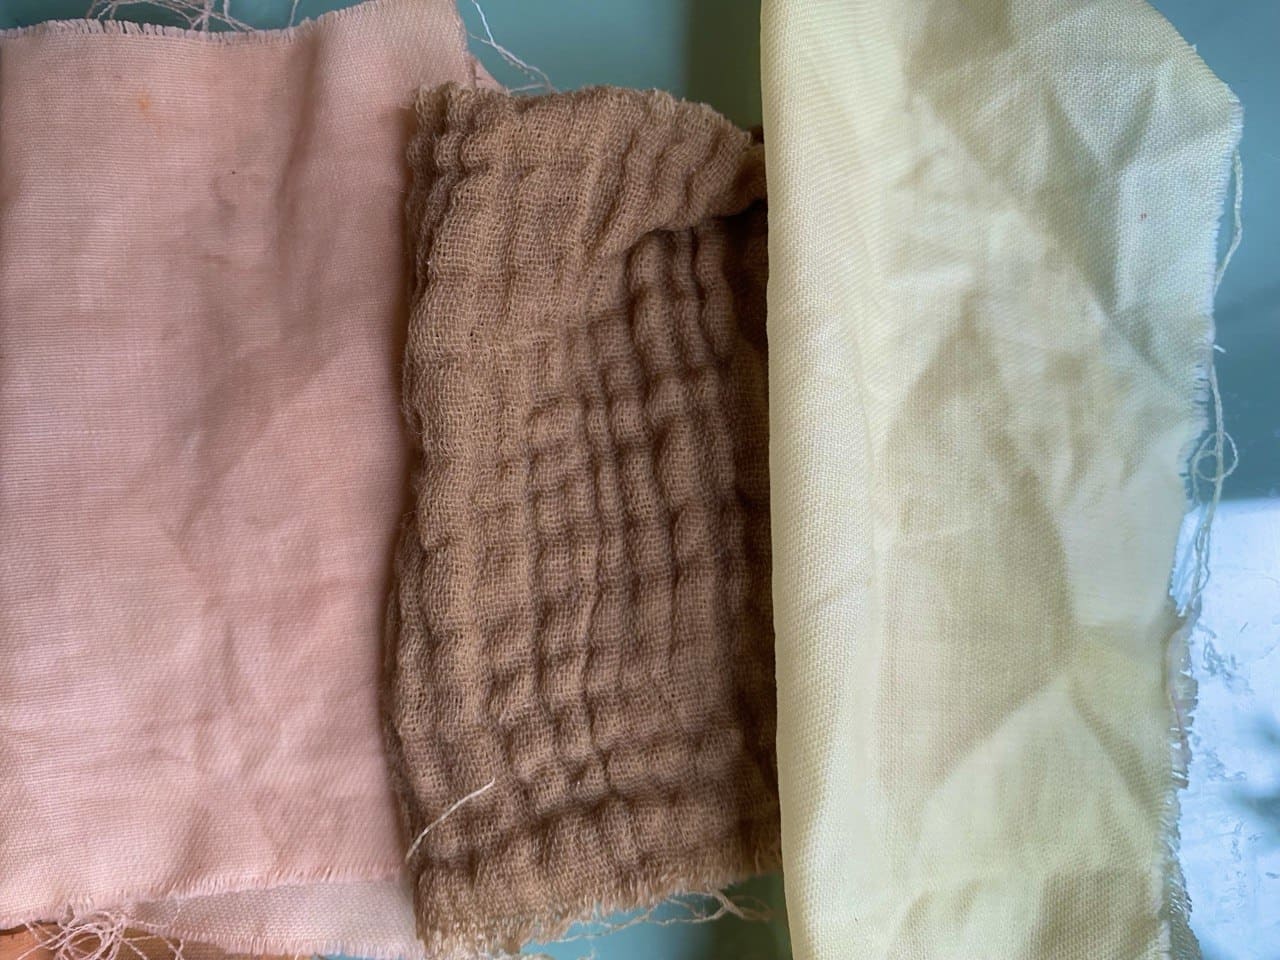 Photo is taken by Luiza Naslyan
I mixed 50 ml warm water and ¼ teaspoon lemon acid, then poured the mixture in a stainless pot with 200 ml hot water, mixed it well and added the fabric pieces. I kept them in a lemon acid bath for about half an hour. The colors dulled and shifted tones slightly.
Ink
I used both the excess dyebath and the rest of the dyebath with walnut hulls after dyeing to make dark brown ink, and I used some of the dyebath with madder root to get cherry red ink. I did some research and used this recipe:
-
poured 100 ml of walnut hull dyebath and 100 ml of madder root dyebath in separate stainless pots
-
warmed them up to 50°C
-
added 4 teaspoons of gum arabic in each pot, mixed and simmered for 20 minutes
-
then I let it cool down and poured it into glass jars with 2 cloves in each jar to preserve longer.
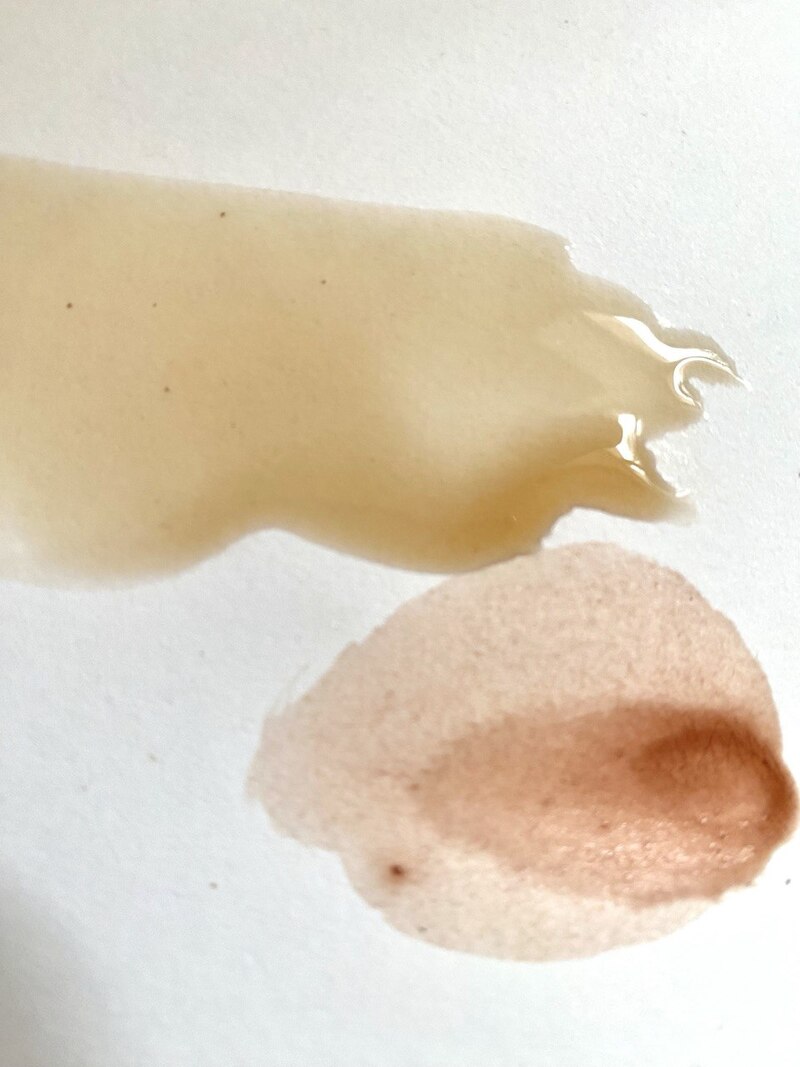
It was interesting that the madder root changed its color to dark ochre once I added gum arabic.
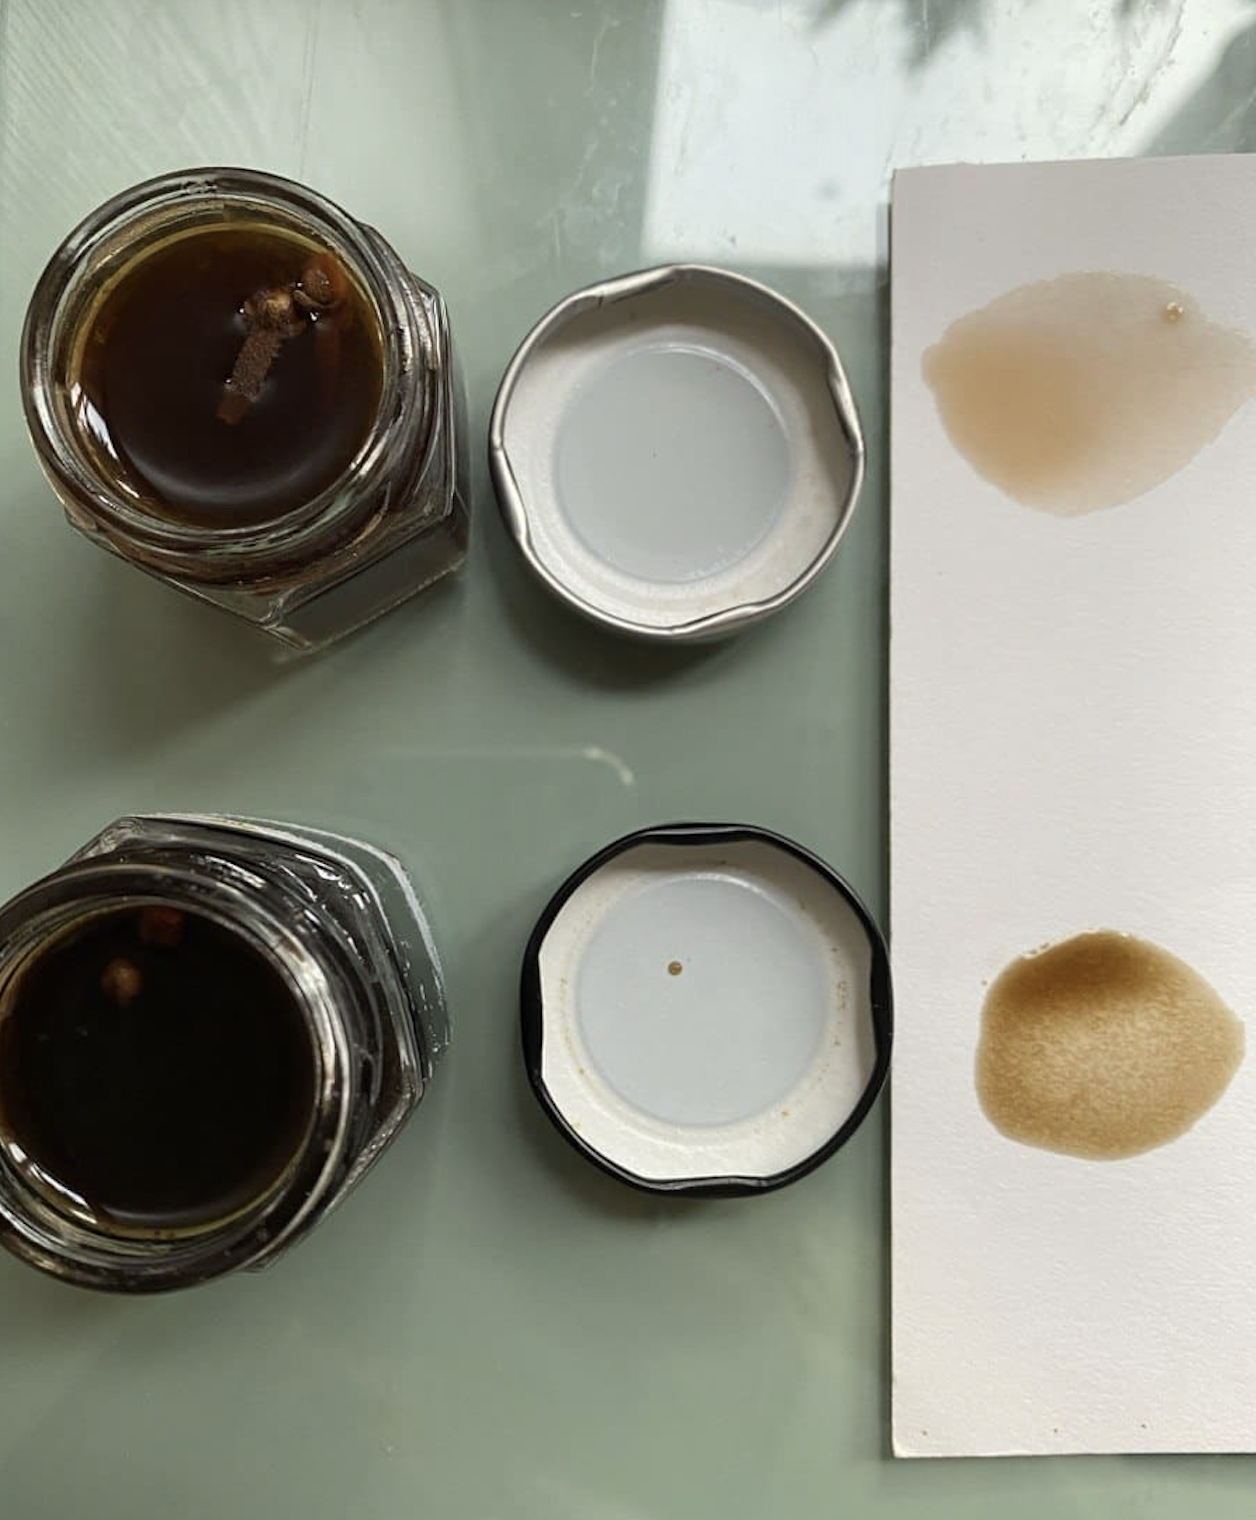
But once the ink on the paper dried it regained its cherry red hue. Wonderful chemistry!
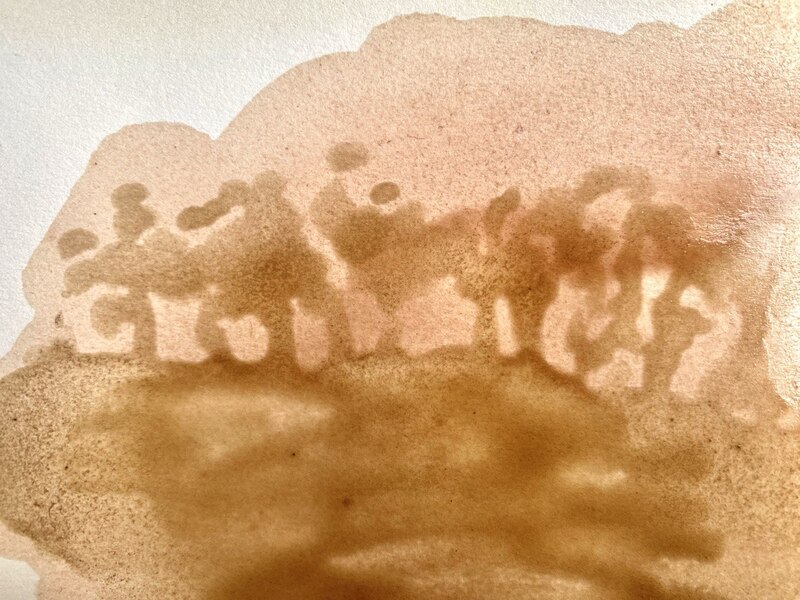
And here is some sketch I tried with the inks I made:
Pigments
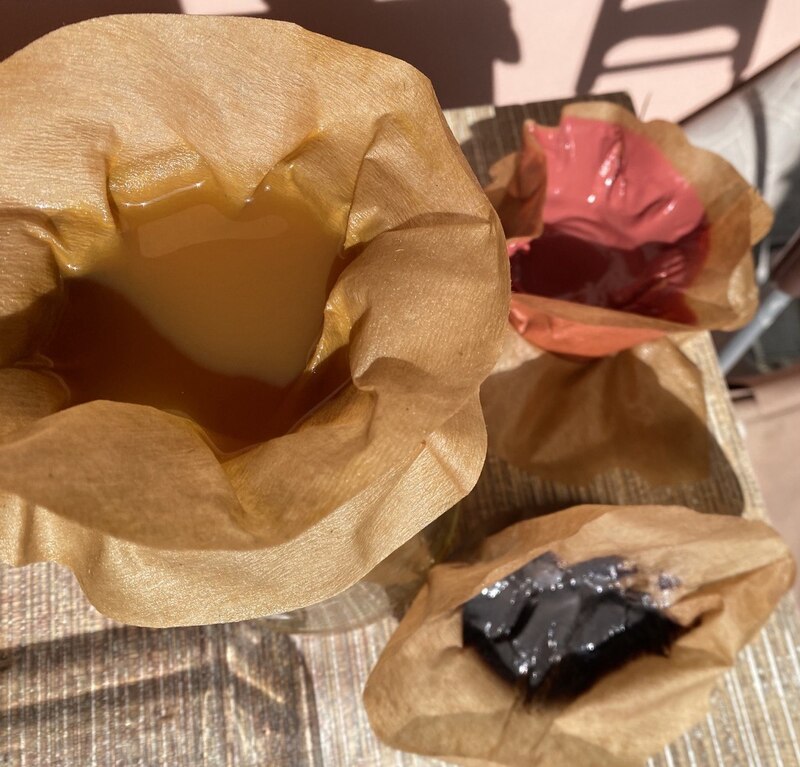 Photo is taken by Luiza Naslyan
I made 3 pigments in total: red, black and yellow. For the red pigment, I used both the unused and the rest of the dyebath after I was done with dyeing. It dries to a cherry pink-red color. For the black pigment, I used the unused dyebath with walnut hulls as well and the rest of the same bath after dyeing. it turned into mars black. For the yellow pigment, however, I mixed not only the rest of the dyebath with marigold petals, but also with that of avocado pit. And it turned a beautiful ochre yellow. For pigment making recipe again I did some research using Google and of course looked through Svetlana Khachatryan's and Germarilis Ruiz's pages. The general process is as follows:
-
prepare dye bath
-
heat it up to the recommended temperature for that very dye bath (e.g. madder root - up to 65°C)
-
add alum potassium sulphate which collects the pigment particles and separates it from water
-
then add soda ash
-
check the ph (should be neutral so the pigment can be separated from water as much as possible)
-
let it sit
-
filter
-
let it dry and use in it various ways.
We need 5-10 gr of alum and 5-10 gr of soda ash for a 400 ml of dye bath.
There are two different approaches to adding alum and soda ash: one is to mix boiled water and alum potassium sulphate together, pour this into the dye bath, then mix soda ash separately again and add to the mixture of dye bath and alum.
The other approach is to add the alum directly into the hot dye bath, mix until alum is dissolved, then add soda ash. The drawback for this approach is that you can't really see if the alum is dissolved because crystals take time to dissolve. However, this can insure for alum to collect more pigment and thus, the separated water can be more clear.
I chose the first option. Here is a short video of adding soda ash to the mixture of dye bath and alum:
After mixing well, I added the foamy dye bath into a glass jar and 4 hours later it got separated. I checked the ph with a yellow lakmus or litmus paper, and it was neutral. Then I poured the liquid into the filter. I used 2 coffee filters to fit one into another after testing with one filter and failing. The dyebath I poured into one coffee filter just dripped into the jar without leaving any pigment. My guess is the coffee filter was not dense enough and detached quickly. A lot of materials were generously provided by Fab Lan Armenia in Dilijan. Thank you!
Results
I am excited to share all in one picture: fabric pieces dyed with avocado pits, then walnut hulls, madder root and finally, marigold.
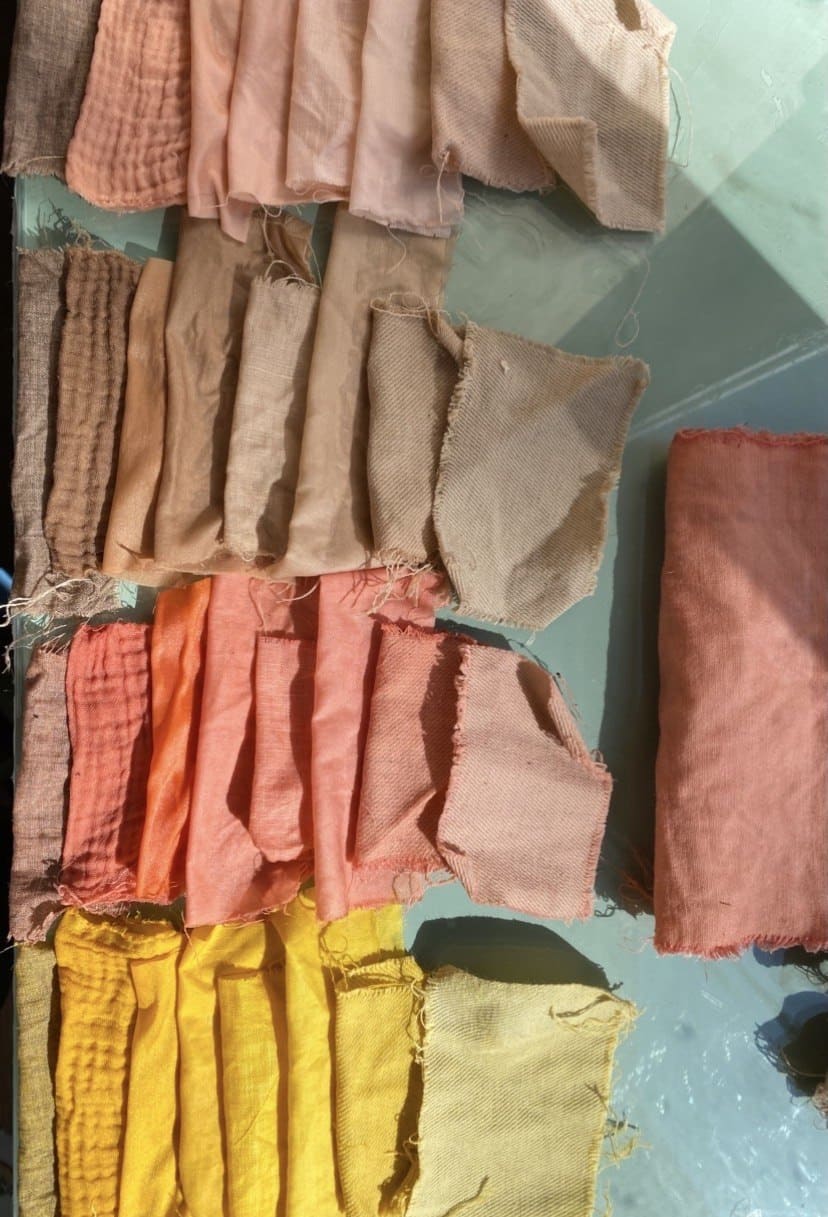 Photo is taken by Luiza Naslyan
The results are fascinating. I love the tones I achieved. Good results show that the whole process of scouring and mordanting went well. I learned a lot. My curiosity is sparked and I want to experiment with a lot more natural sources.
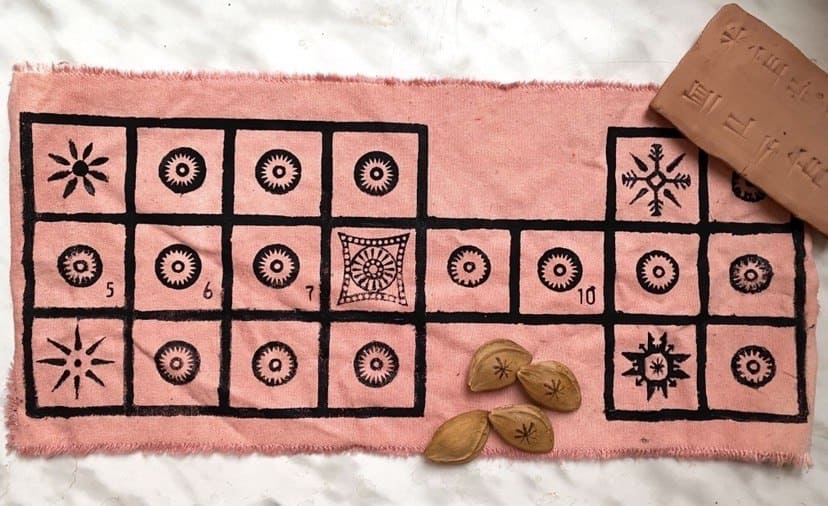 Photo is taken by Luiza Naslyan
I also dyed a bit of thick cotton for my game in the madder root bath. Why especially madder root? It is one of the most used dyes in Armenian carpet and rug heritage, and this is the last piece of the puzzle of the game version I reimagined: a version with sun-crosses / rosettes, sacred for Armenians in various rituals. It turned into a nice cherry red. After drying, I screen printed the game, made my authentic dice with apricot stones (apricot = in Latin prunus armeniaca = Armenian plum) to compliment the historic-cultural reference of the patterns I chose to re-imagine this game.
I made a table below to compare my experiments. In this phase, Google AI mode was very useful for generating the code to show the colors in circular shapes. Additionally, the Color codes website was extremely helpful for picking colors from my photos and then embedding them in the code I got from Google.
| Fabric type | Scouring agent | Mordant | Dye source | Modifiers | Resulting color |
|---|---|---|---|---|---|
| Silk | Bio detergent | Aluminium potassium sulfate | Madder roots | N/A | |
| Silk | Bio detergent | Aluminium potassium sulfate | Madder roots | Iron liquor | |
| Silk | Bio detergent | Aluminium potassium sulfate | Madder roots | Lemon acid | |
| Silk | Bio detergent | Aluminium potassium sulfate | Marigold petals | N/A | |
| Silk | Bio detergent | Aluminium potassium sulfate | Avocado pits | N/A | |
| Silk | Bio detergent | Aluminium potassium sulfate | Avocado pits | Iron liquor | |
| Silk | Bio detergent | Aluminium potassium sulfate | Avocado pits | Lemon acid | |
| Silk | Bio detergent | Aluminium potassium sulfate | Walnut hulls | N/A | |
| Linen | Sodium Carbonate | Aluminium acetate | Madder roots | N/A | |
| Linen | Sodium Carbonate | Aluminium acetate | Madder roots | Lemon acid | |
| Linen | Sodium Carbonate | Aluminium acetate | Marigold petals | N/A | |
| Linen | Sodium Carbonate | Aluminium acetate | Marigold petals | Lemon acid | |
| Linen | Sodium Carbonate | Aluminium acetate | Avocado pits | N/A | |
| Linen | Sodium Carbonate | Aluminium acetate | Avocado pits | Lemon acid | |
| Linen | Sodium Carbonate | Aluminium acetate | Walnut hulls | N/A | |
| Cotton | Sodium Carbonate | Aluminium acetate | Madder roots | N/A | |
| Cotton | Sodium Carbonate | Aluminium acetate | Madder roots | Iron liquor | |
| Cotton | Sodium Carbonate | Aluminium acetate | Madder roots | Lemon acid | |
| Cotton | Sodium Carbonate | Aluminium acetate | Marigold petals | N/A | |
| Cotton | Sodium Carbonate | Aluminium acetate | Marigold petals | Iron liquor | |
| Cotton | Sodium Carbonate | Aluminium acetate | Marigold petals | Lemon acid | |
| Cotton | Sodium Carbonate | Aluminium acetate | Avocado pits | N/A | |
| Cotton | Sodium Carbonate | Aluminium acetate | Avocado pits | Iron liquor | |
| Cotton | Sodium Carbonate | Aluminium acetate | Avocado pits | Lemon acid | |
| Cotton | Sodium Carbonate | Aluminium acetate | Walnut hulls | N/A | |
| Cotton | Sodium Carbonate | Aluminium acetate | Walnut hulls | Iron liquor | |
| Cotton | Sodium Carbonate | Aluminium acetate | Walnut hulls | Lemon acid |
Here is a video of the whole process:
Final thoughts
- I discovered that I slowed down in the process. Especially, having my husband's big support with our son, I do not hurry in the process and I enjoy and learn much more.
- I would try nettle and oak bark to get darker shades and experiment with it.
- I tried various fabrics and I will decide which fabric is best to dye for my dress for the video at the end of Fabricademy. Also, I made a new prototype for my game.
Recipe file
Recipe: download my recipe booklet here