Week 02 Digital Bodies
1. Introduction
In the beginning, technology was simply a tool that helped people get things done faster and more easily. Over time, it has become more than just something we use; it has become an important part of how we communicate, learn, work, and go about our daily lives. Then came the internet, opening up a new space for interaction, and with the appearance of social media, people became able not only to consume content but also to share their thoughts, photos, and experiences with others.
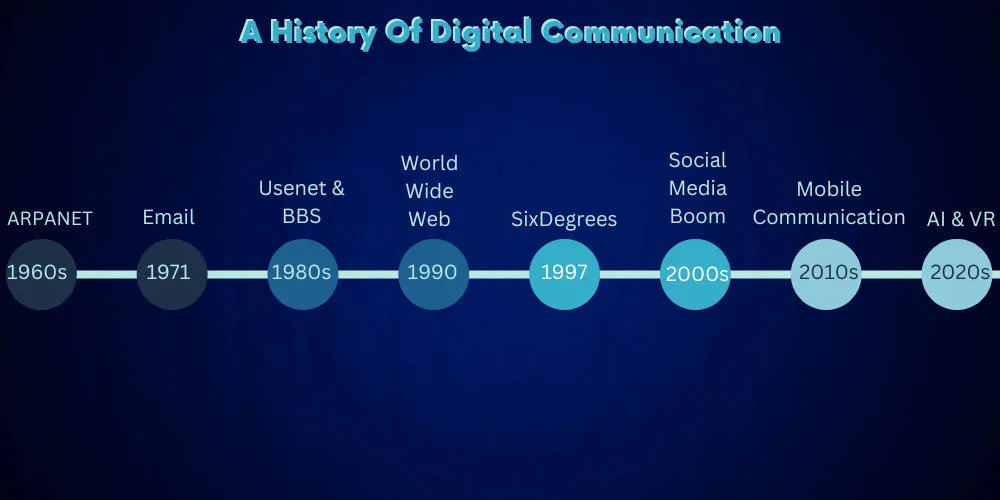 This image taken from source
Little by little, this digital world began to become more deeply embedded in our lives. We can now be present in places where our physical bodies are not, and we can choose how we appear to others and how we present ourselves through the photos, information, and content we share. However, the impact of technology does not appear to be the same for everyone; research indicates that the way it is used, the context, and the type of interaction can be important factors in determining this impact.
This is where our relationship with technology began to change from simply using a tool to creating a new kind of presence. People no longer exist solely in the physical world through their bodies; they now also have a presence, an image, and a representation within the digital world. This led me to ask:
What happens to a person when technology becomes part of the way they see themselves, present themselves, and interact with others?
2. Research & References
Over time, the digital image has become closely linked to a person’s identity and how they view themselves. The interaction a person receives from others—such as likes, comments, and shares—can become part of their experience on the platform and influence how they choose to present themselves. Furthermore, constant exposure to others’ images and experiences may lead people to compare themselves to others—whether in terms of appearance, lifestyle, or achievements. Research indicates that these effects are not the same for everyone; rather, they vary depending on how social media is used, the type of content, and the individual’s social context. For me, the question is no longer just how we use technology. but also how technology has begun to influence the way we see ourselves and present ourselves to others. This is where the idea came from to combine the human face and the smartphone in the sculpture, so that the face represents physical and human identity, while the phone represents digital identity and the space through which a person is now present in the digital world.
 This image taken from source
Interesting Articles About The Topic
- Self-disclosure versus self-presentation on social media — Ann E. Schlosser (2020) Read
- How online self-presentation affects well-being and body image: A systematic review — Bij de Vaate, Veldhuis & Konijn (2020) Read
- Emerging adults' social media self-presentation and identity development — Yang, Holden & Carter (2017) Read
Interesting Videos About The Topic
3. My WorkFlow
Introduction
In last week's lecture, I learned about the concept of “Digital Bodies” and how to design 3D models using software such as Blender and others. I decided to try out most of the methods mentioned and use the face as the basis for my design:
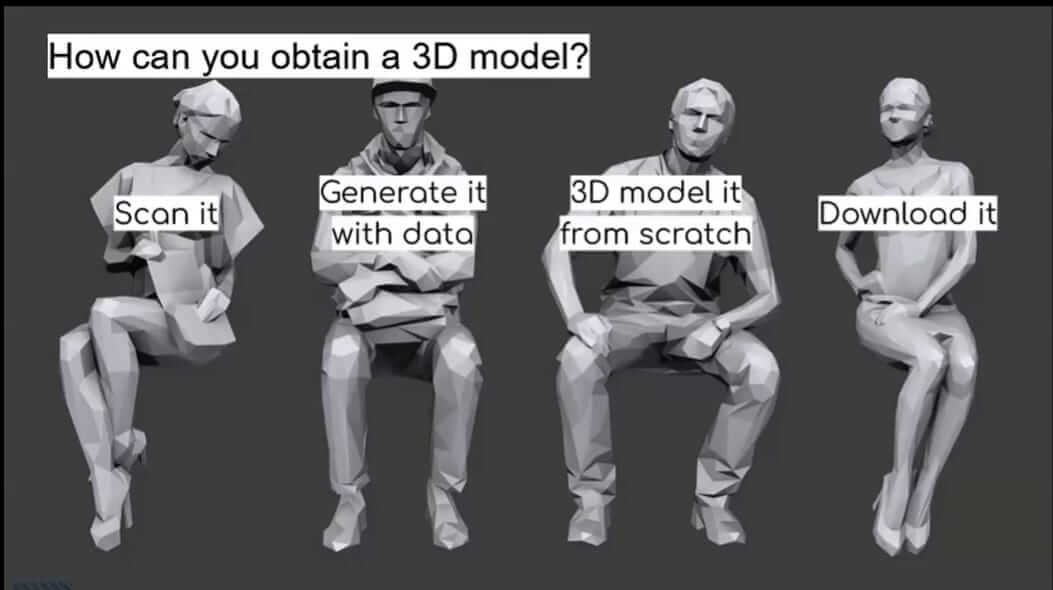
This image credited by Fabricademy
Laser Cut:
Step 1: Create Design
At first, I decided to focus on the head and face because they are the most important elements of the assignment, and I used artificial intelligence to merge my photo with the reference image I used.
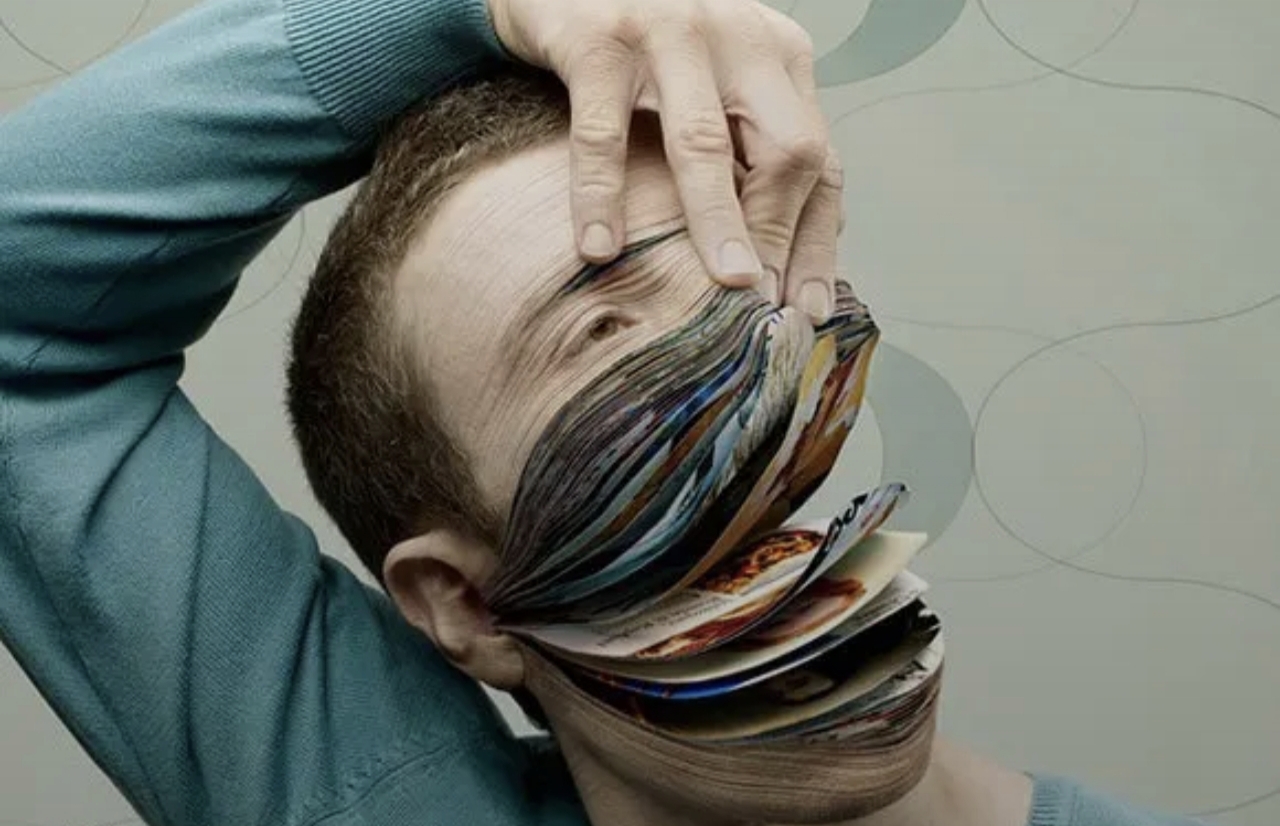
This image taken as reference from Pinterest
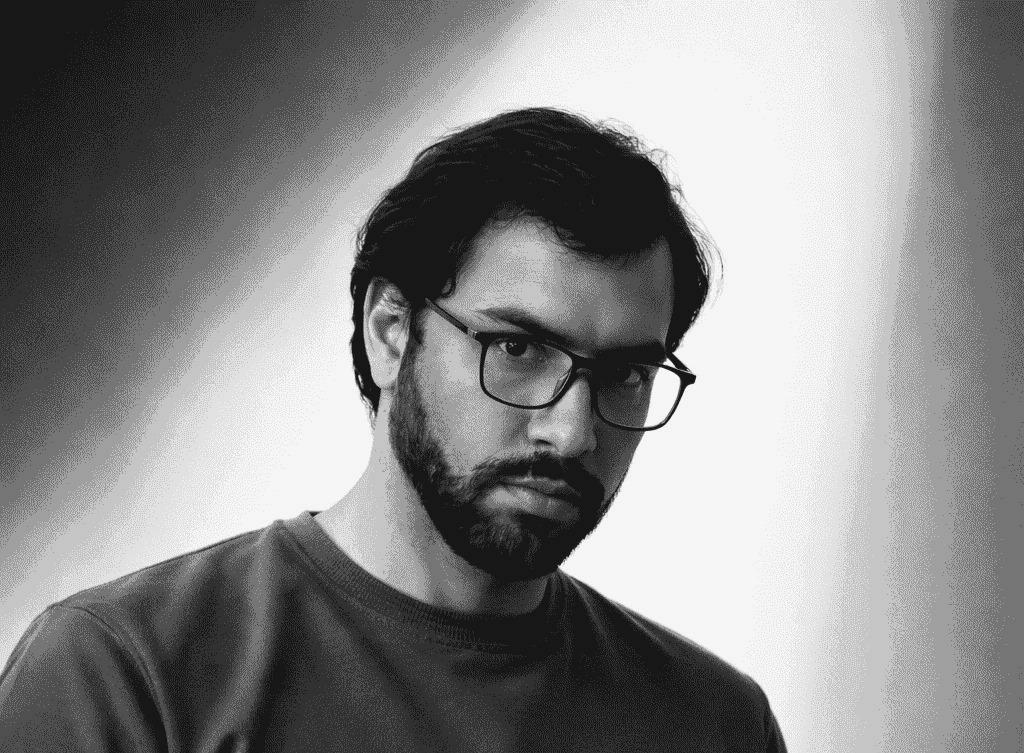
My Image
The result I got is:
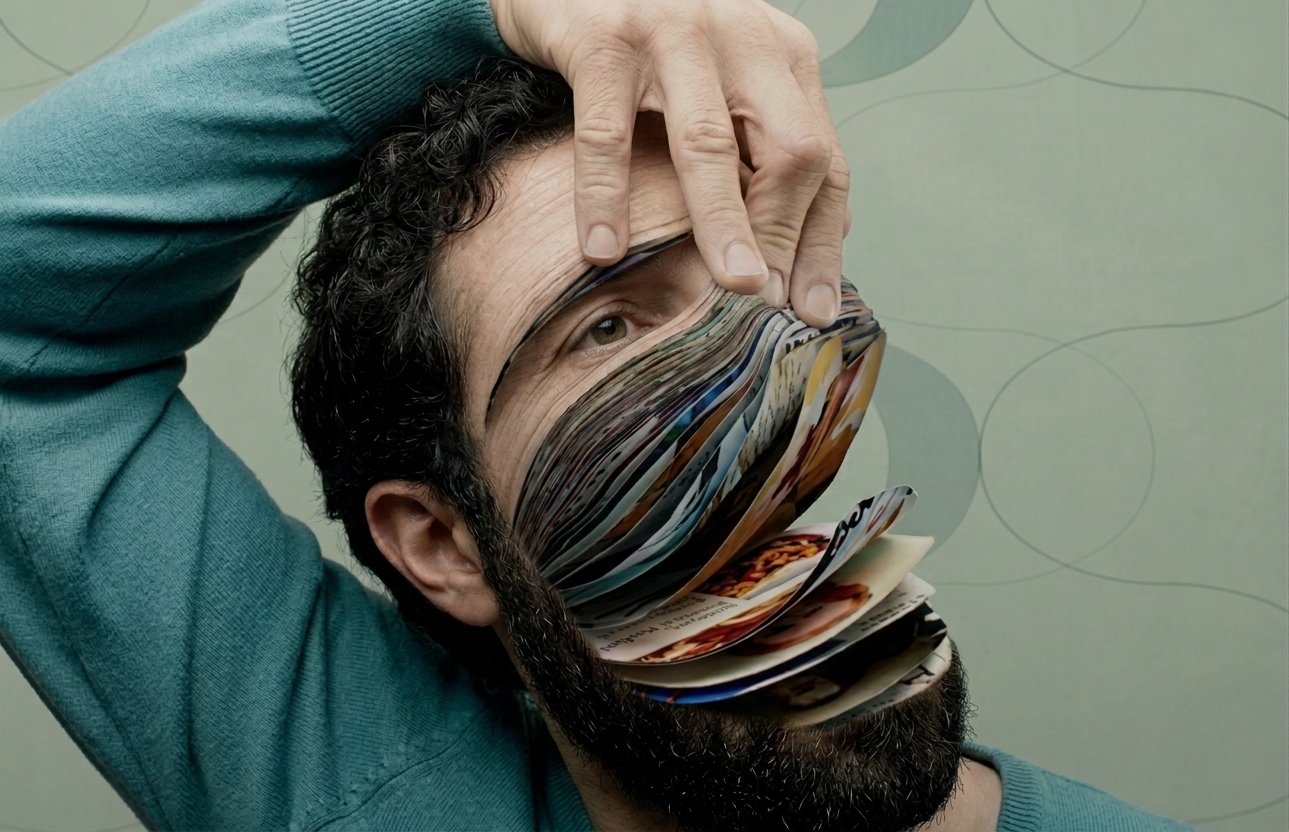 This image created by Gemini
After that, I used Blender to design it and convert it into a 3D model. This image shows the design process and the export as STL.
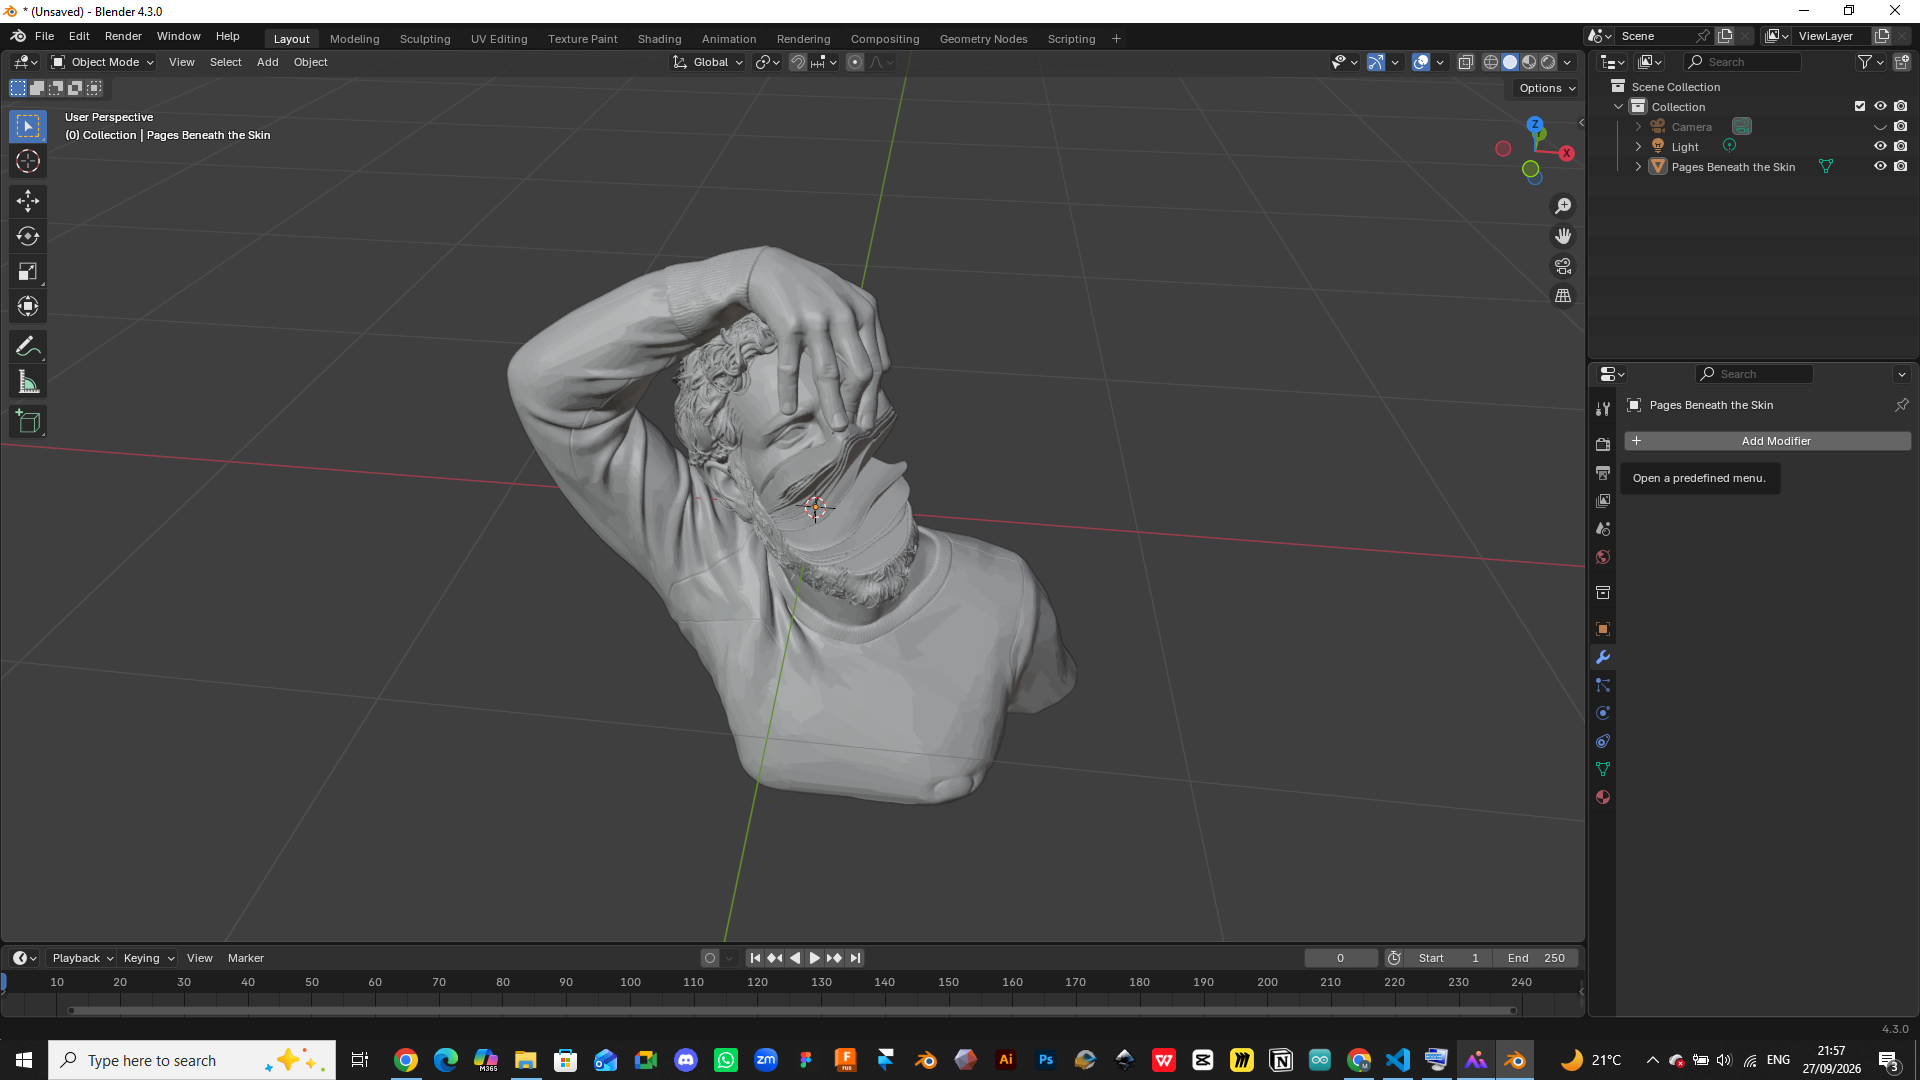
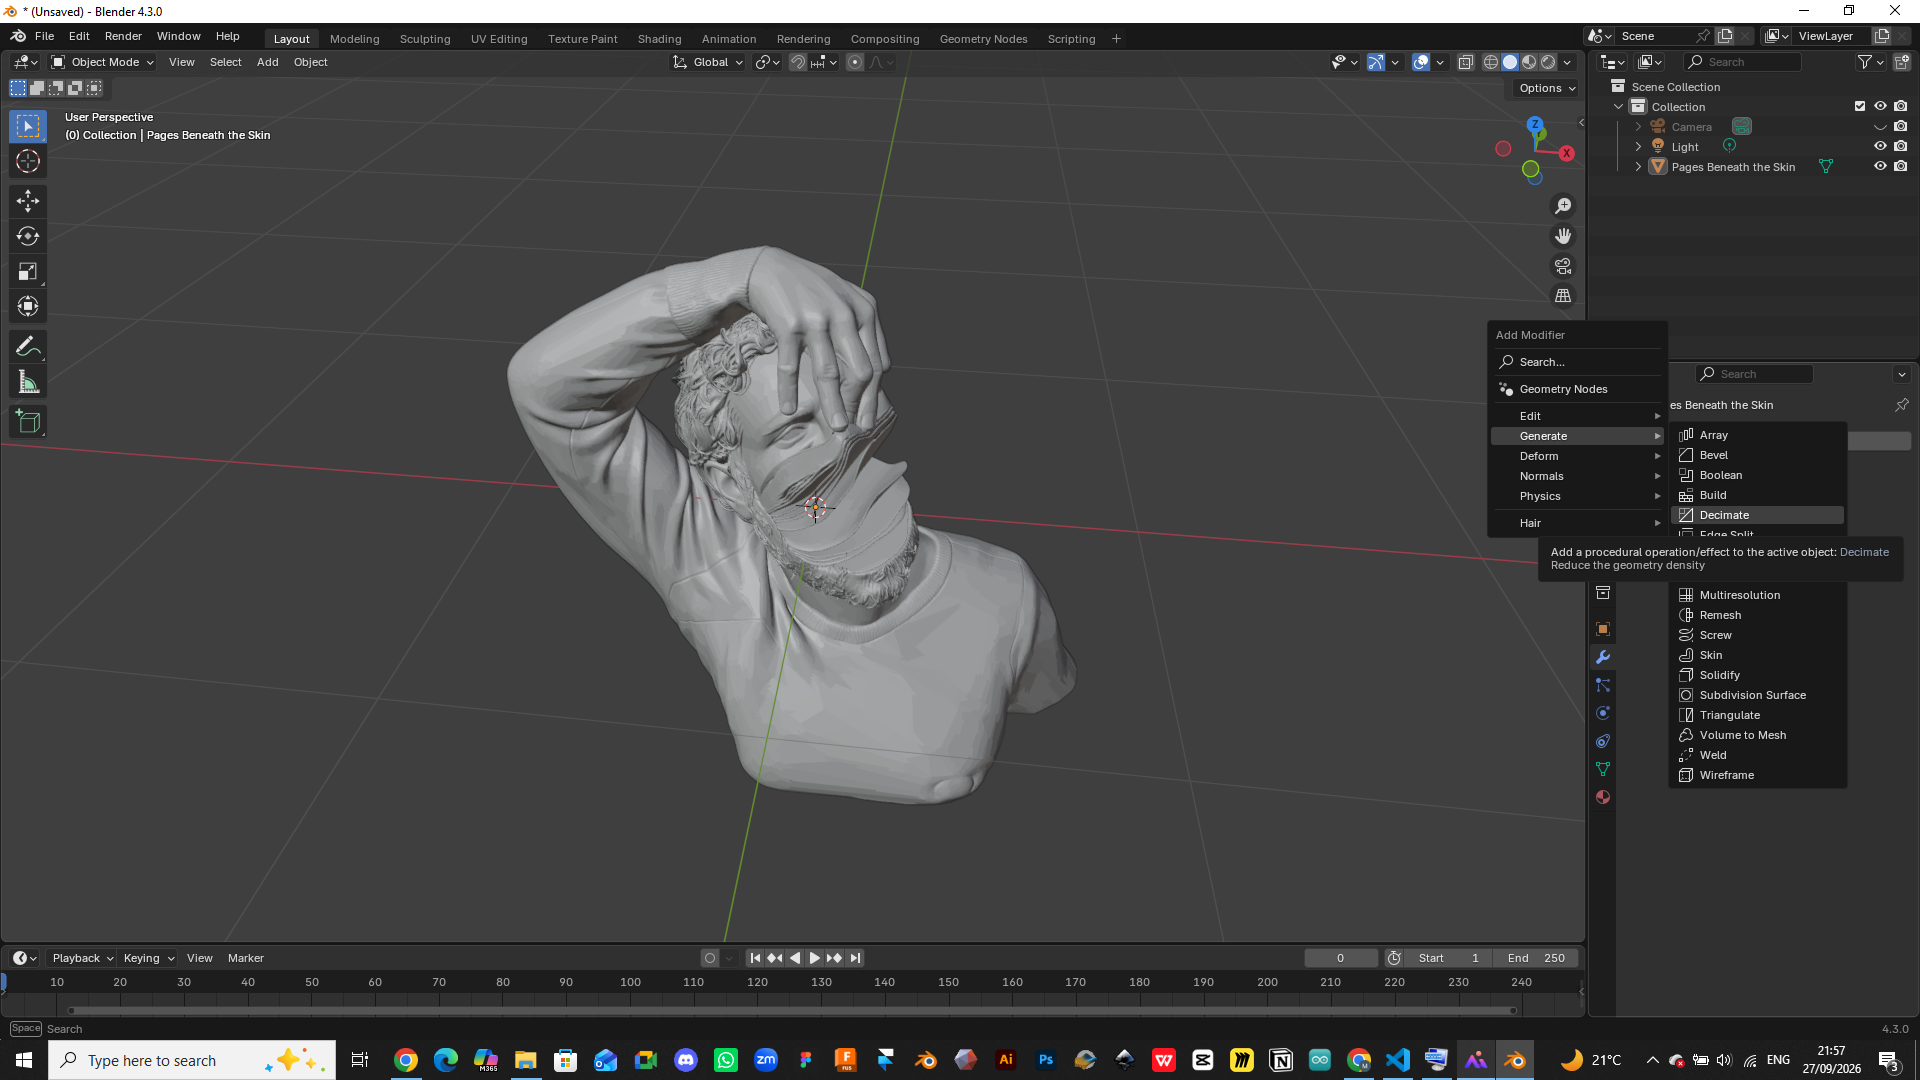
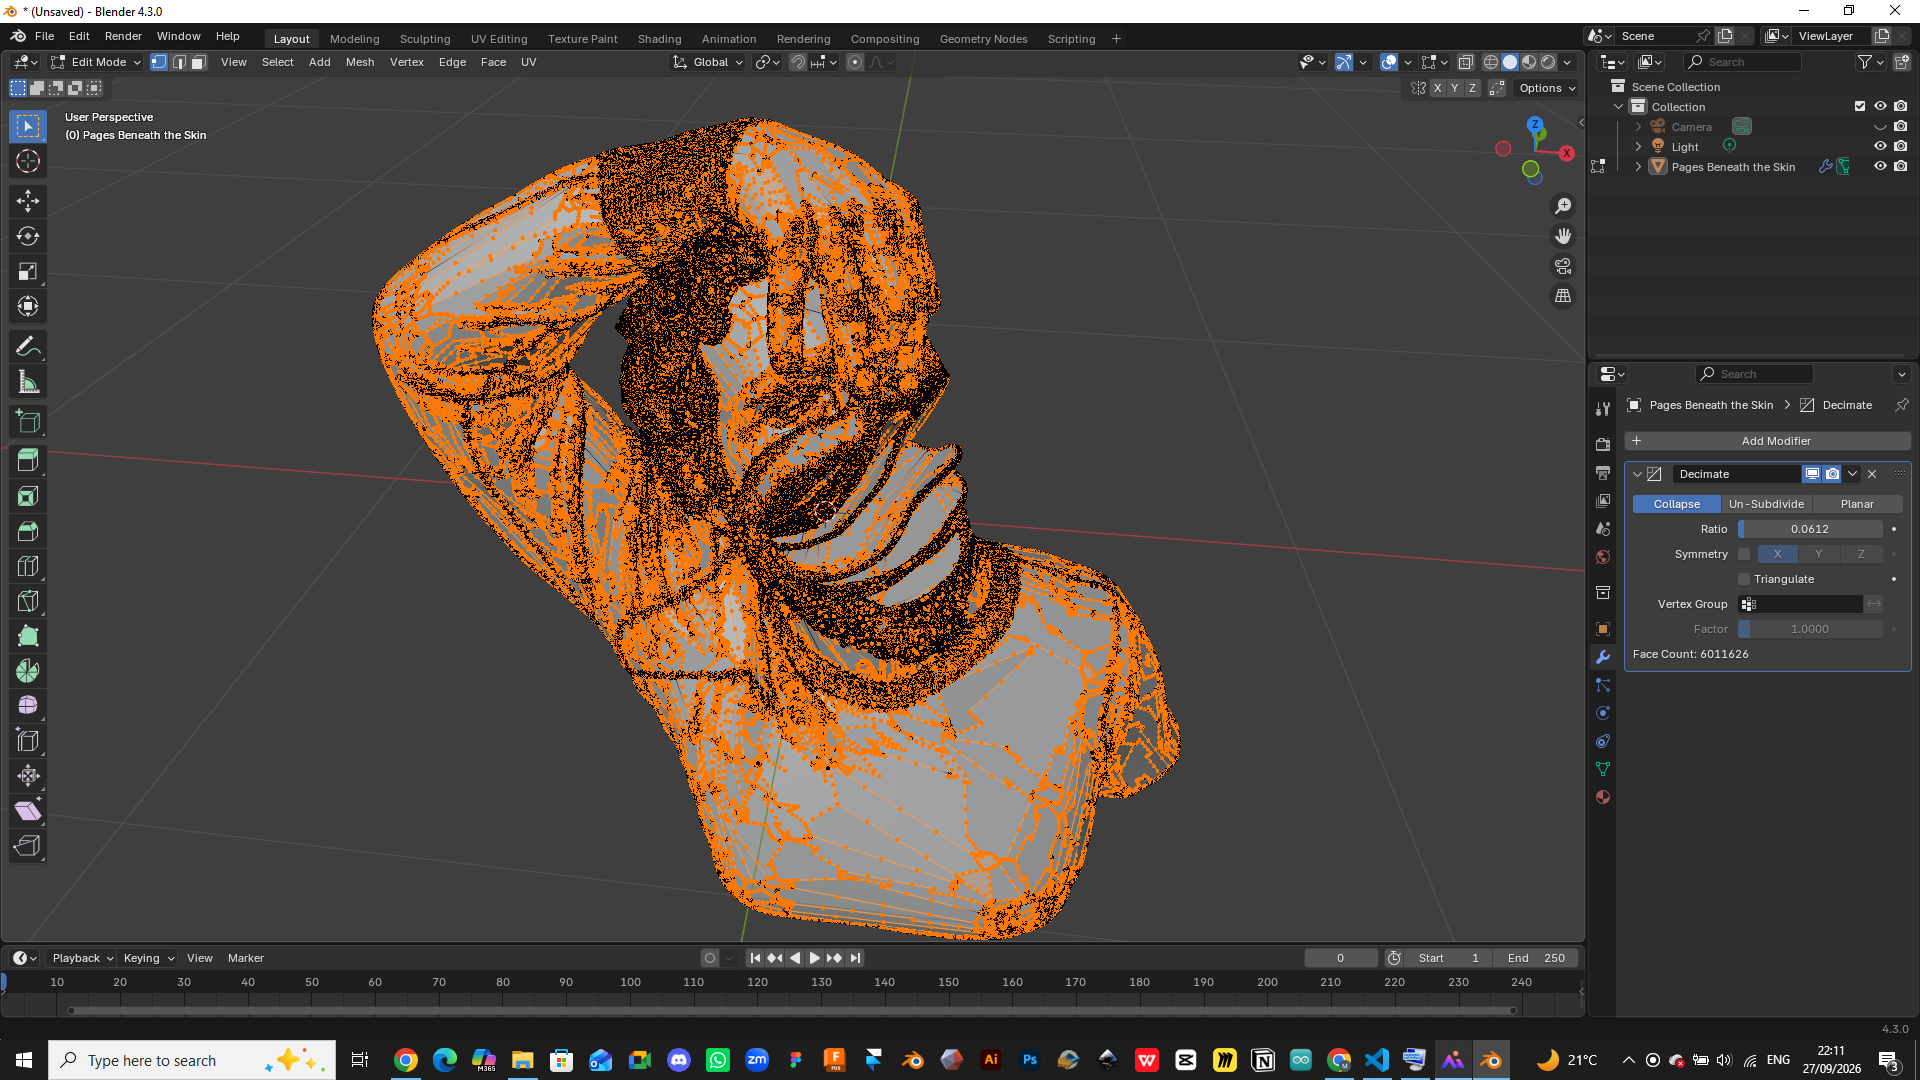
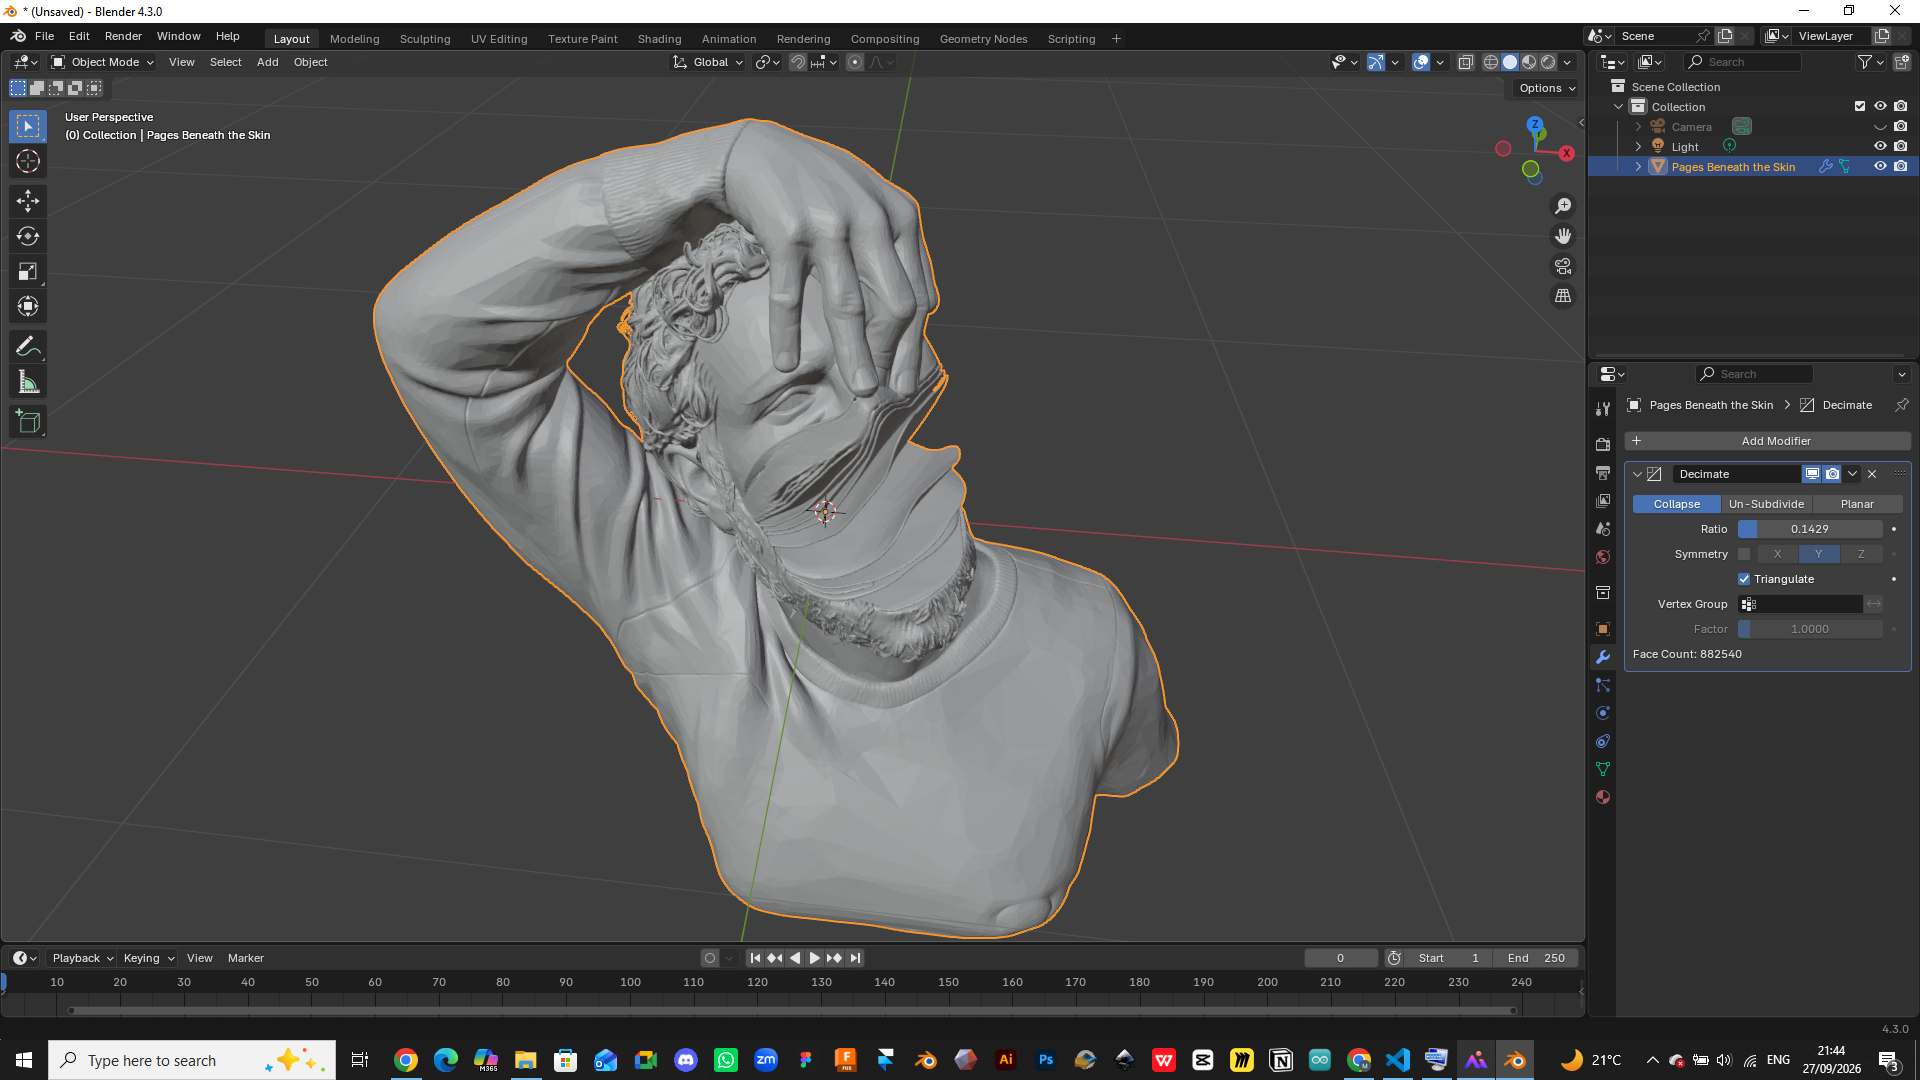
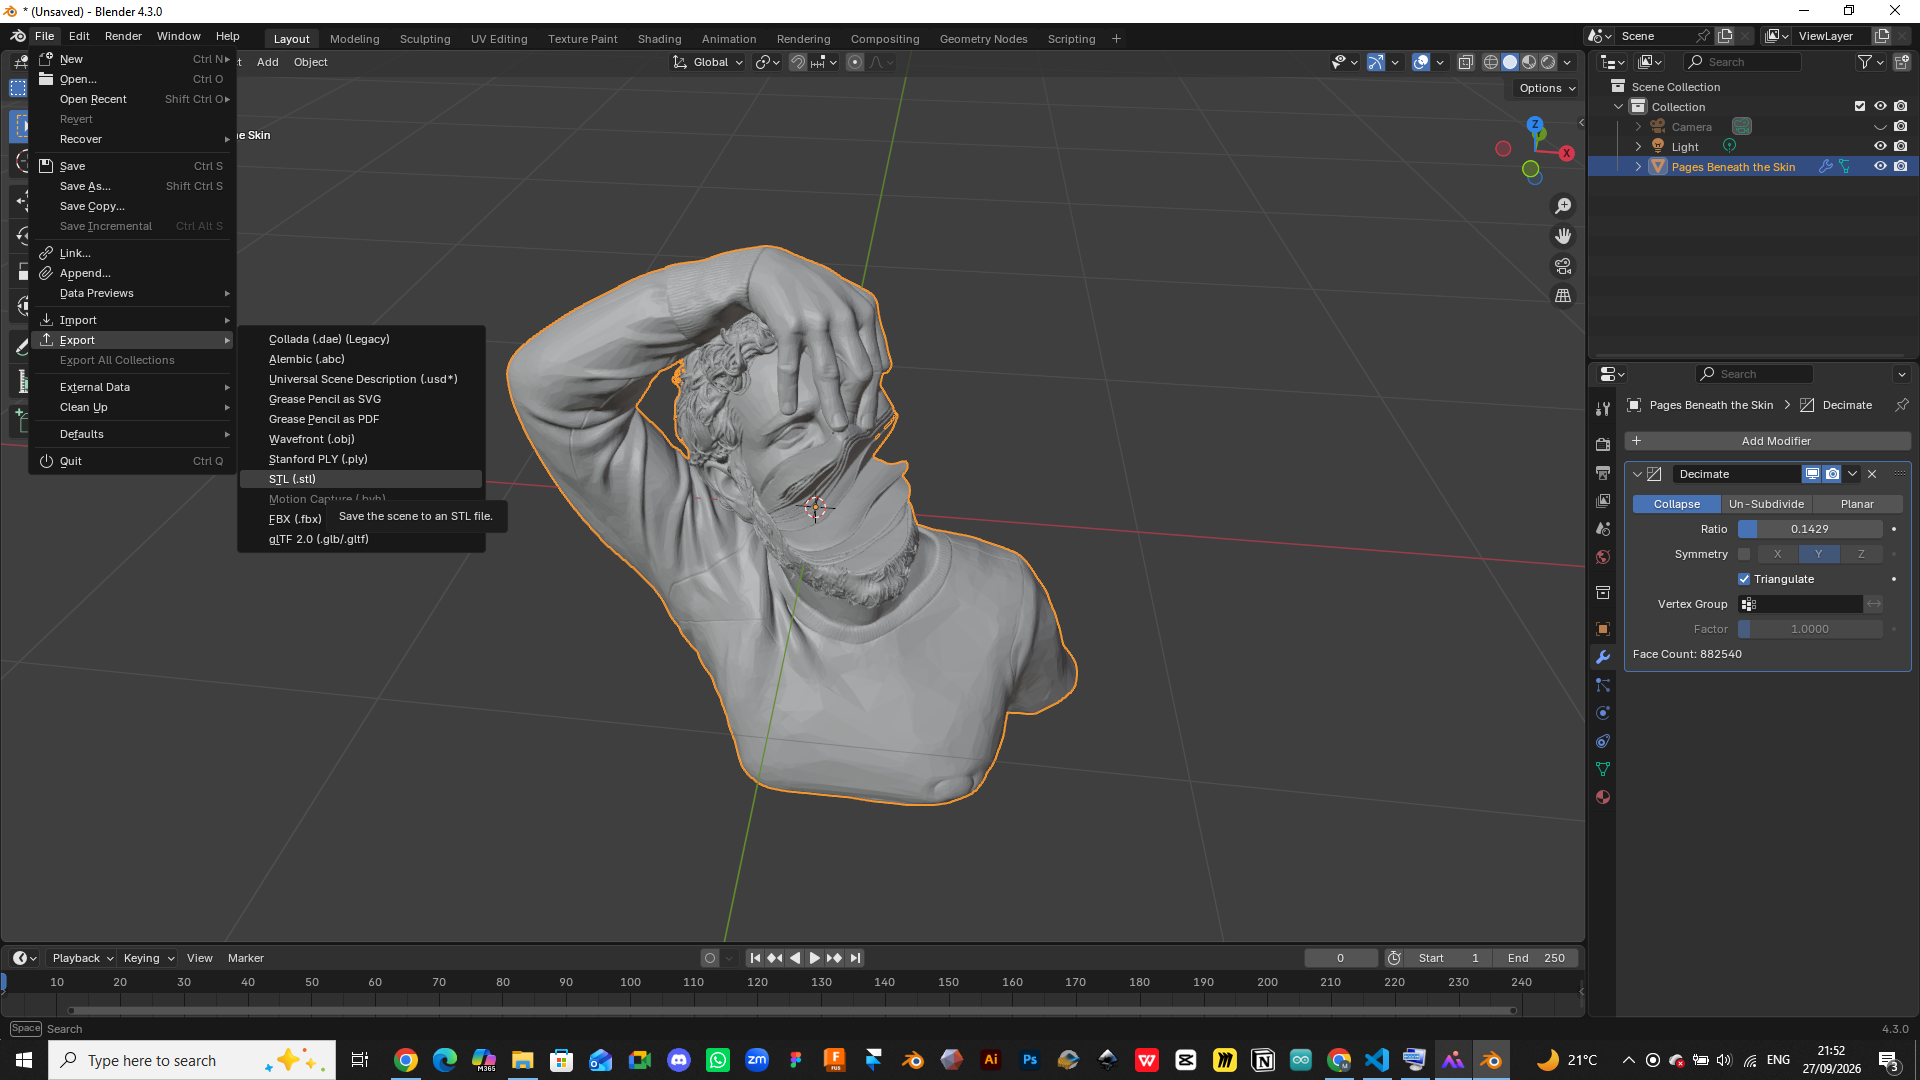
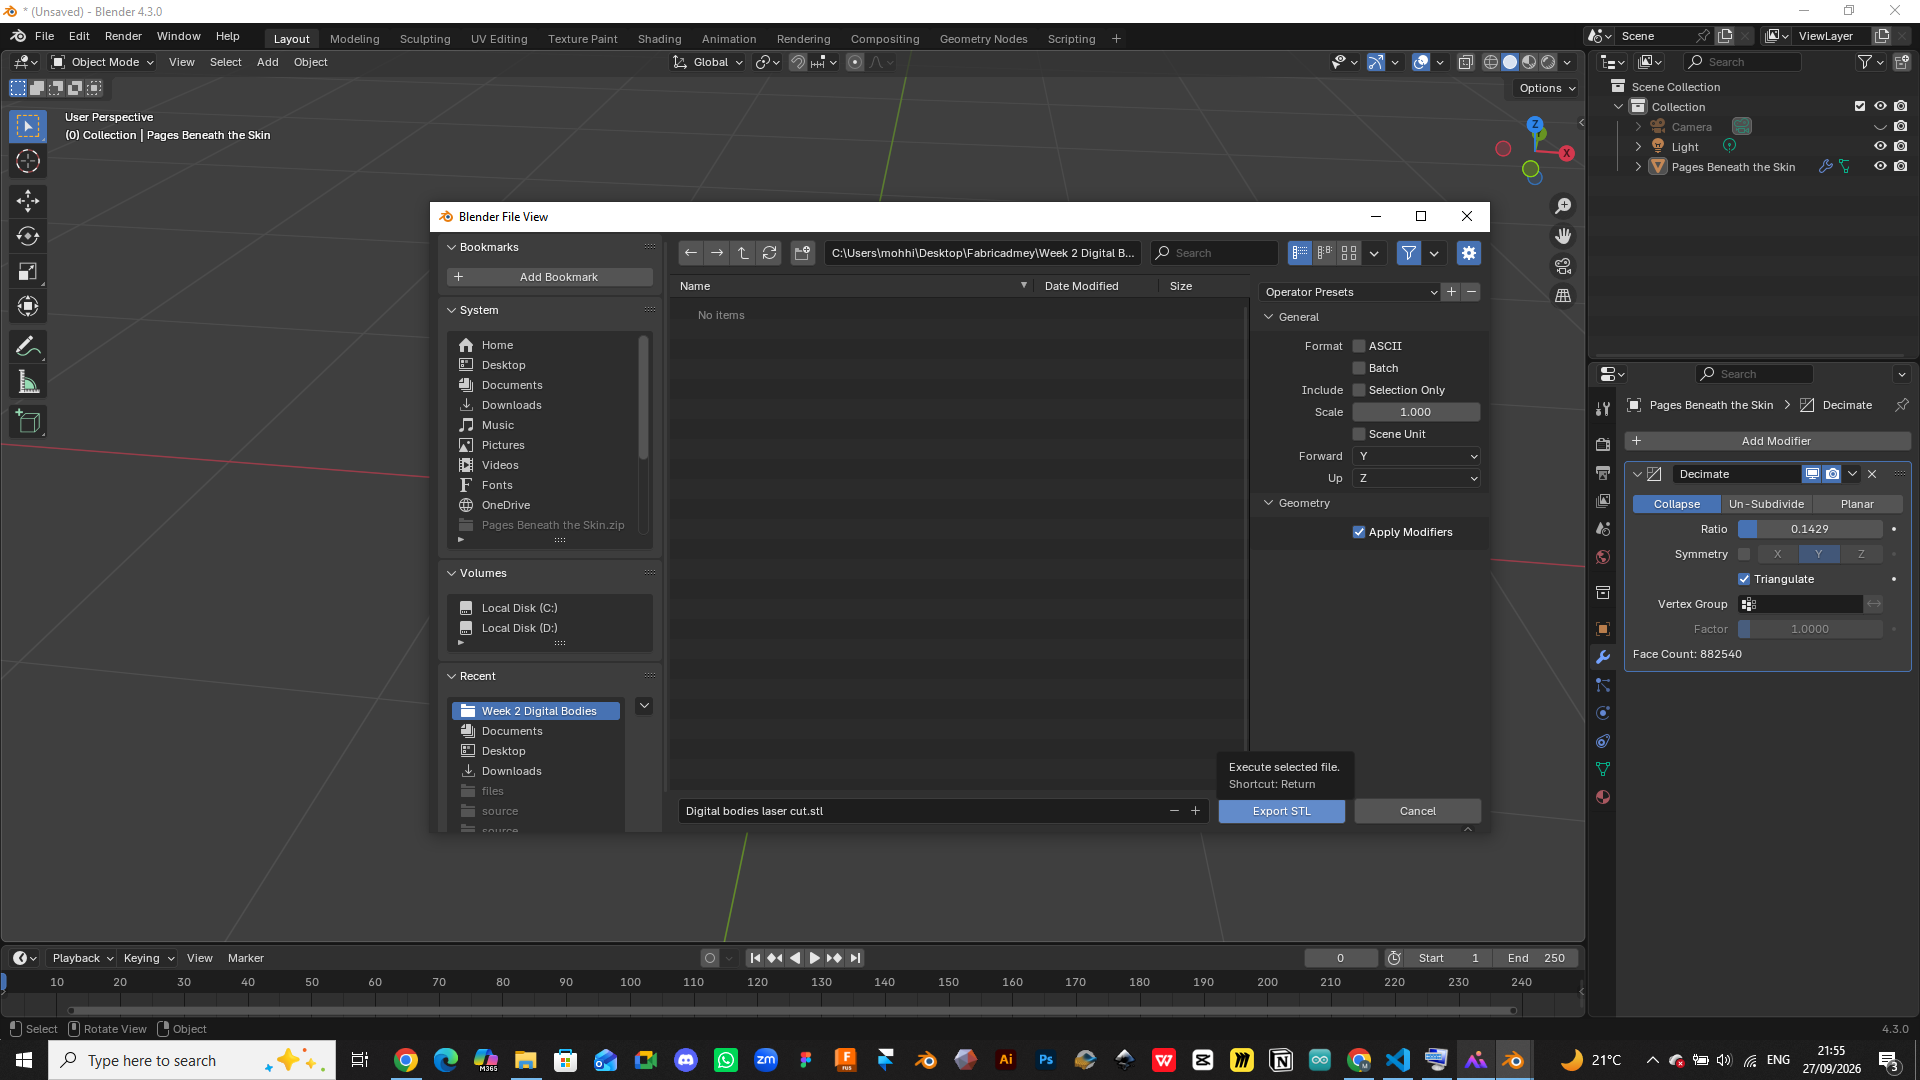
Step 2: Converting the design into layers
In this step, I used Slicer for Fusion 360 to convert my design into layers so I could cut it using a laser cutter. These are the steps I followed:
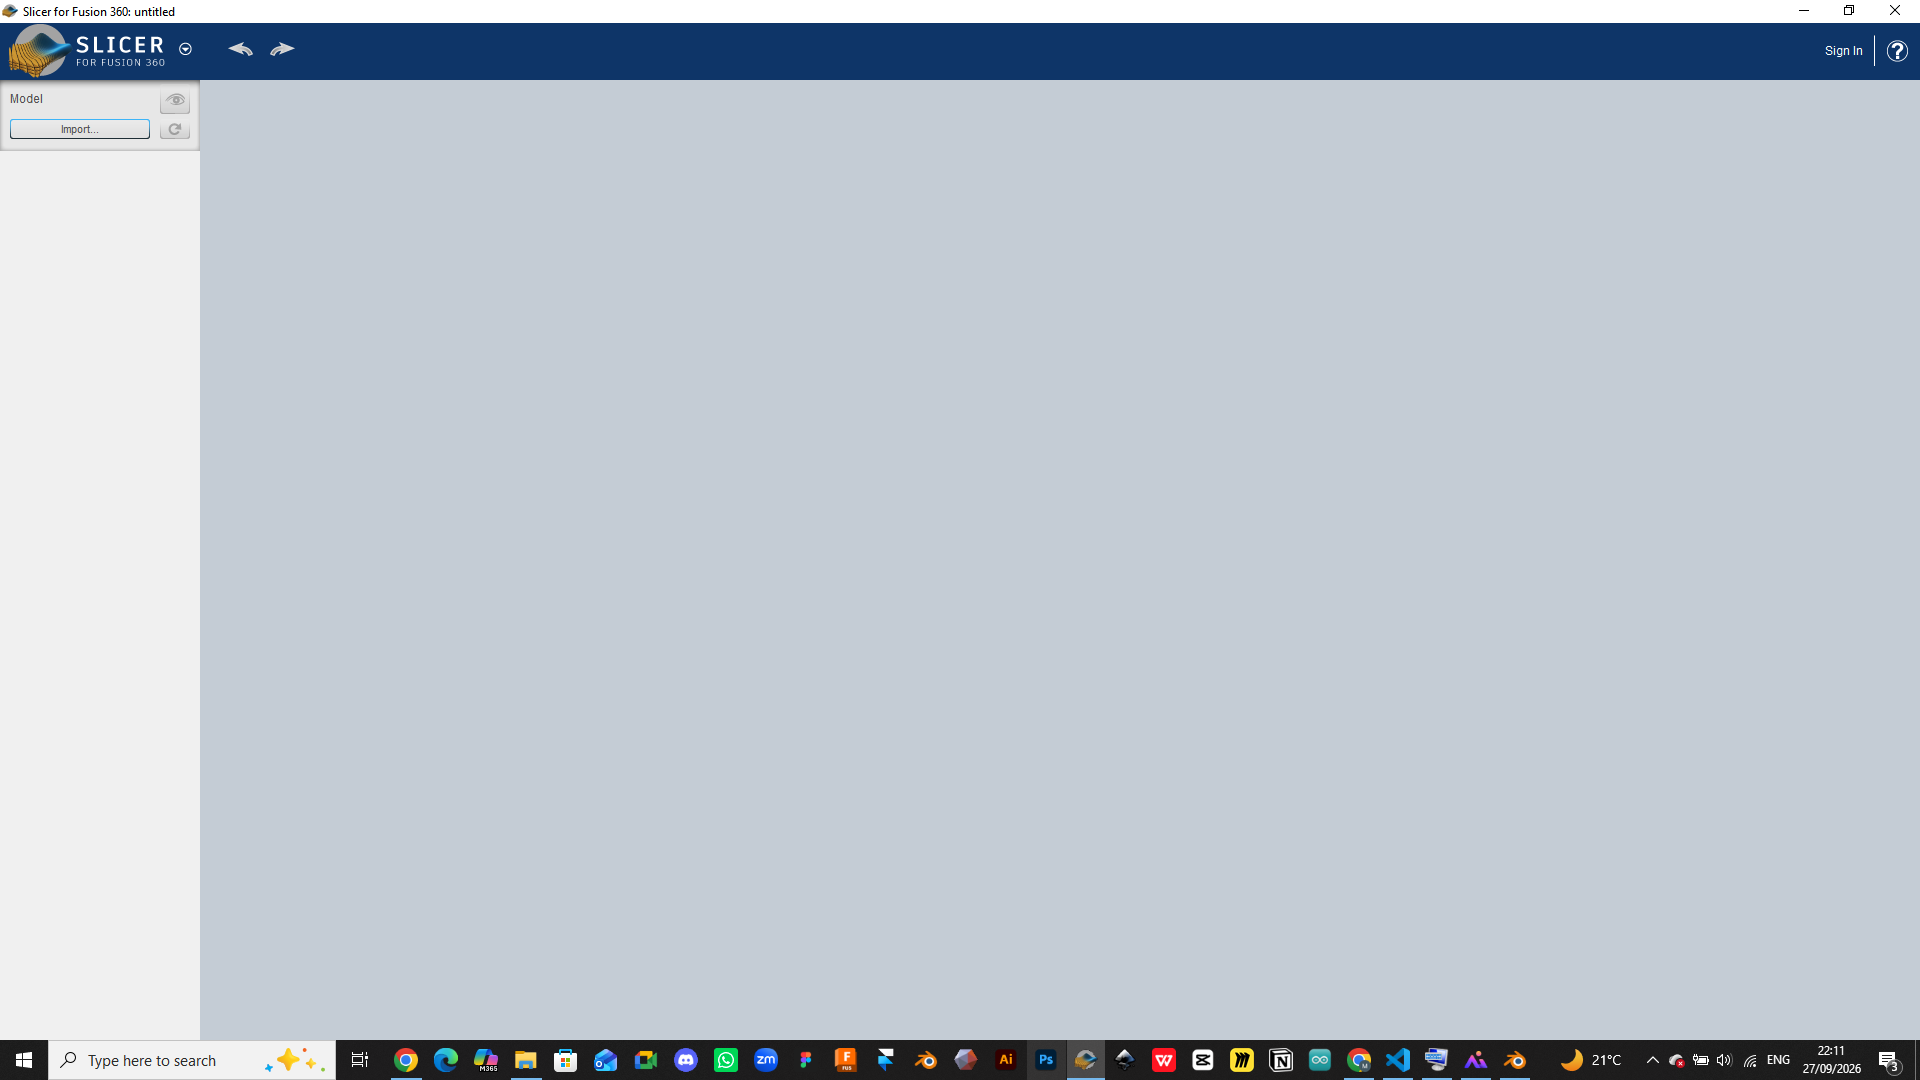
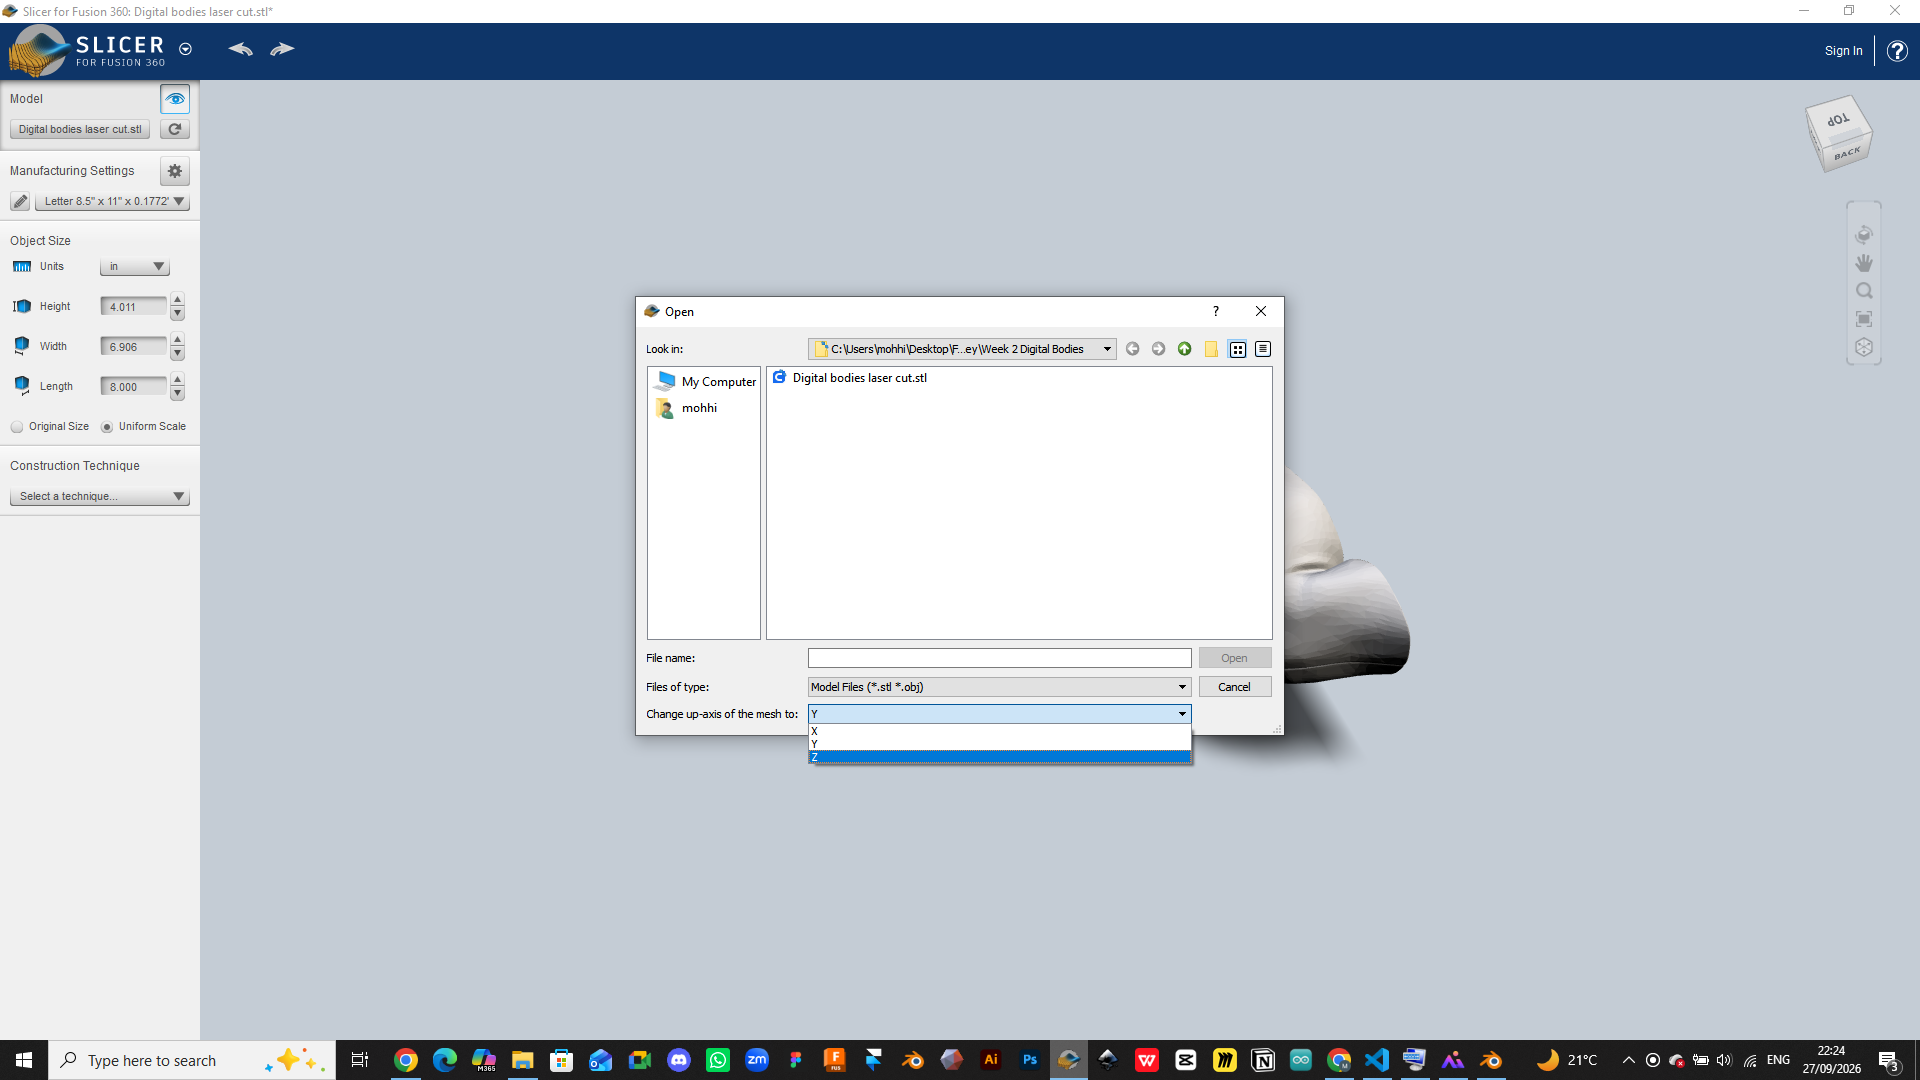
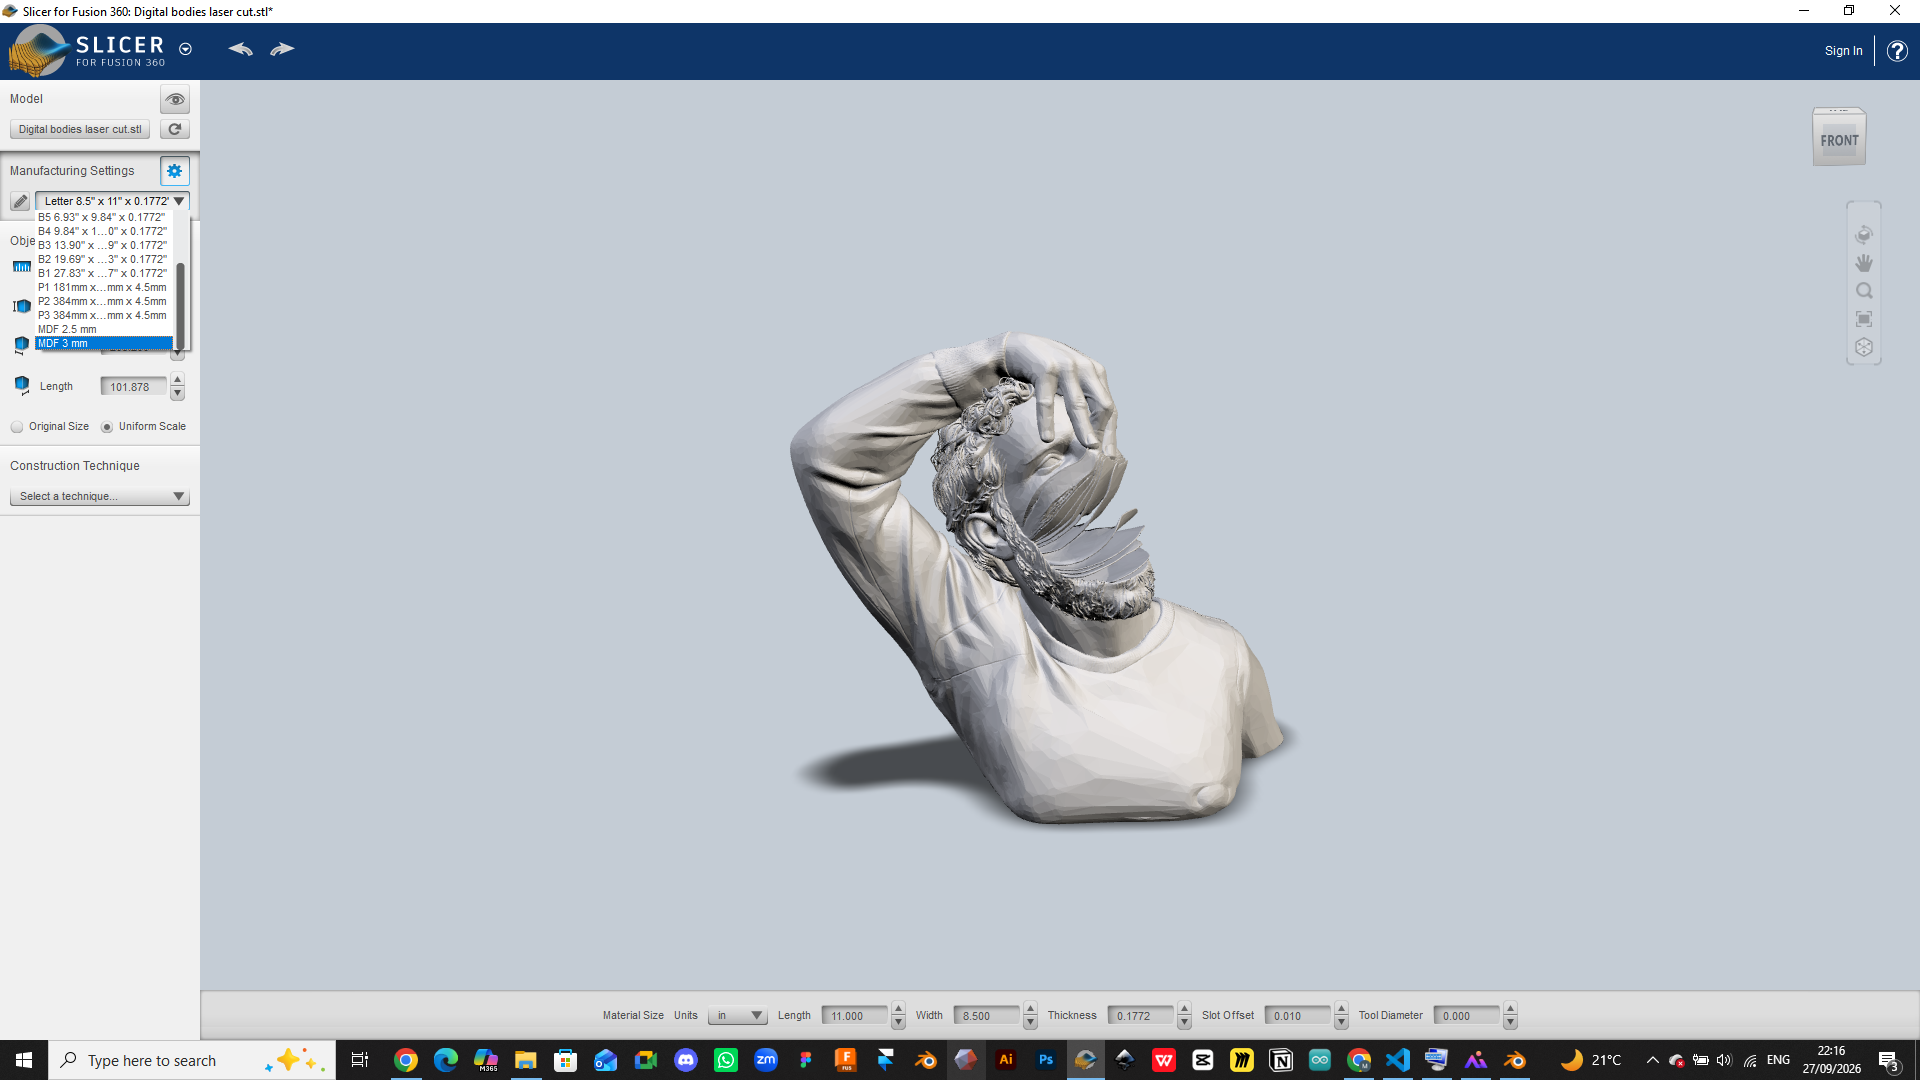
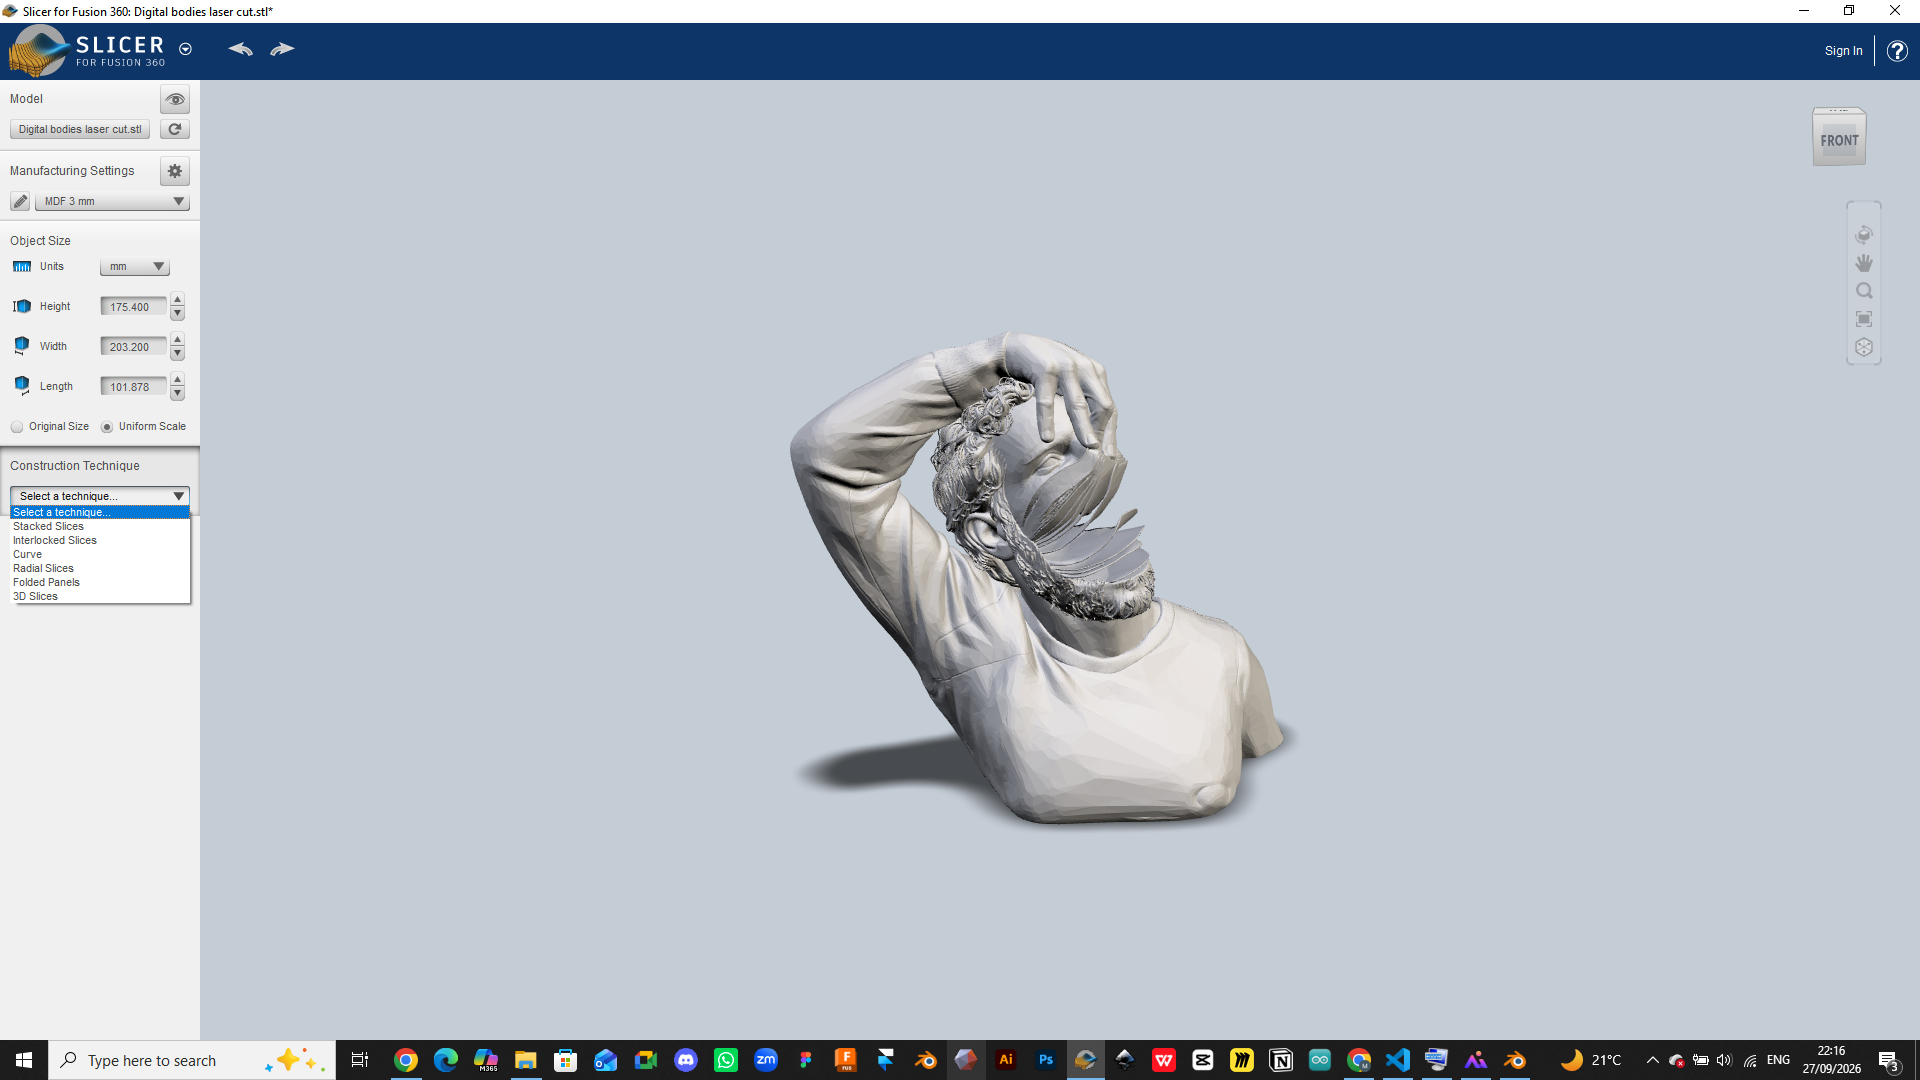
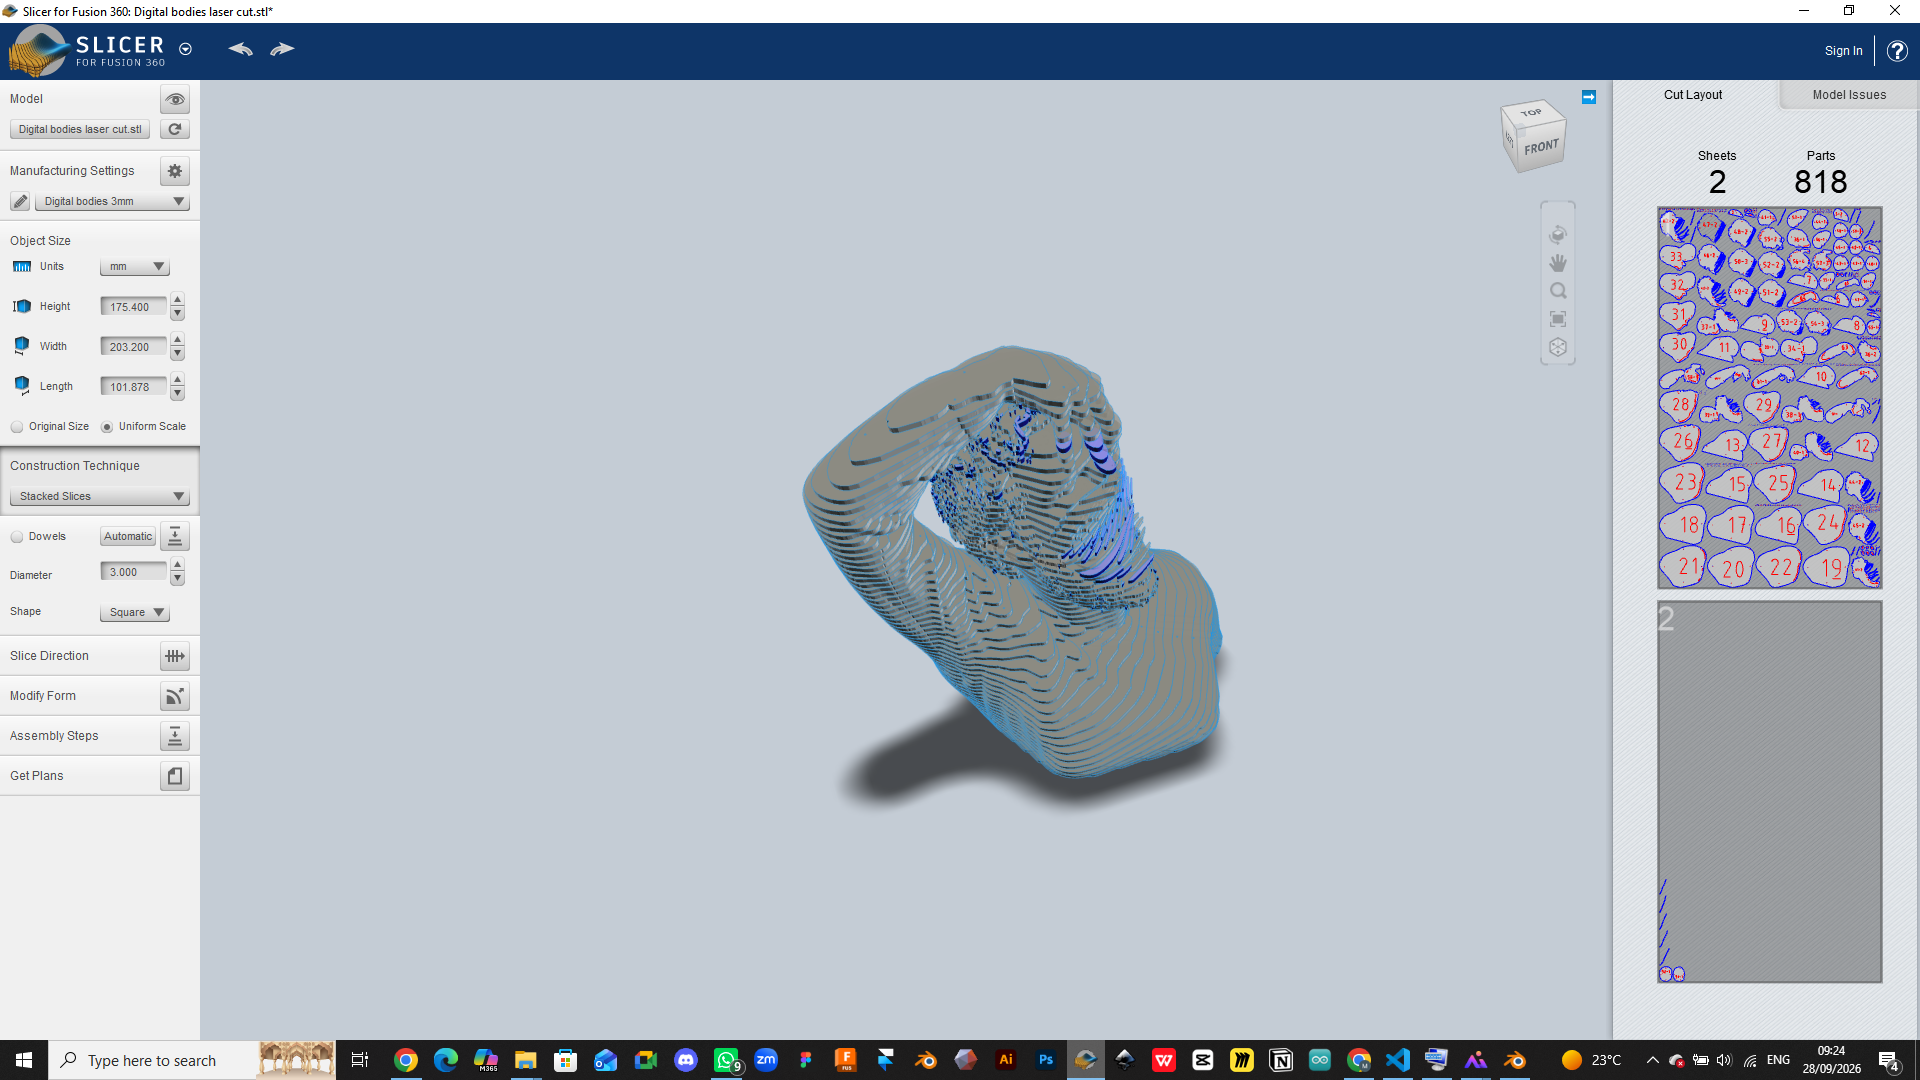
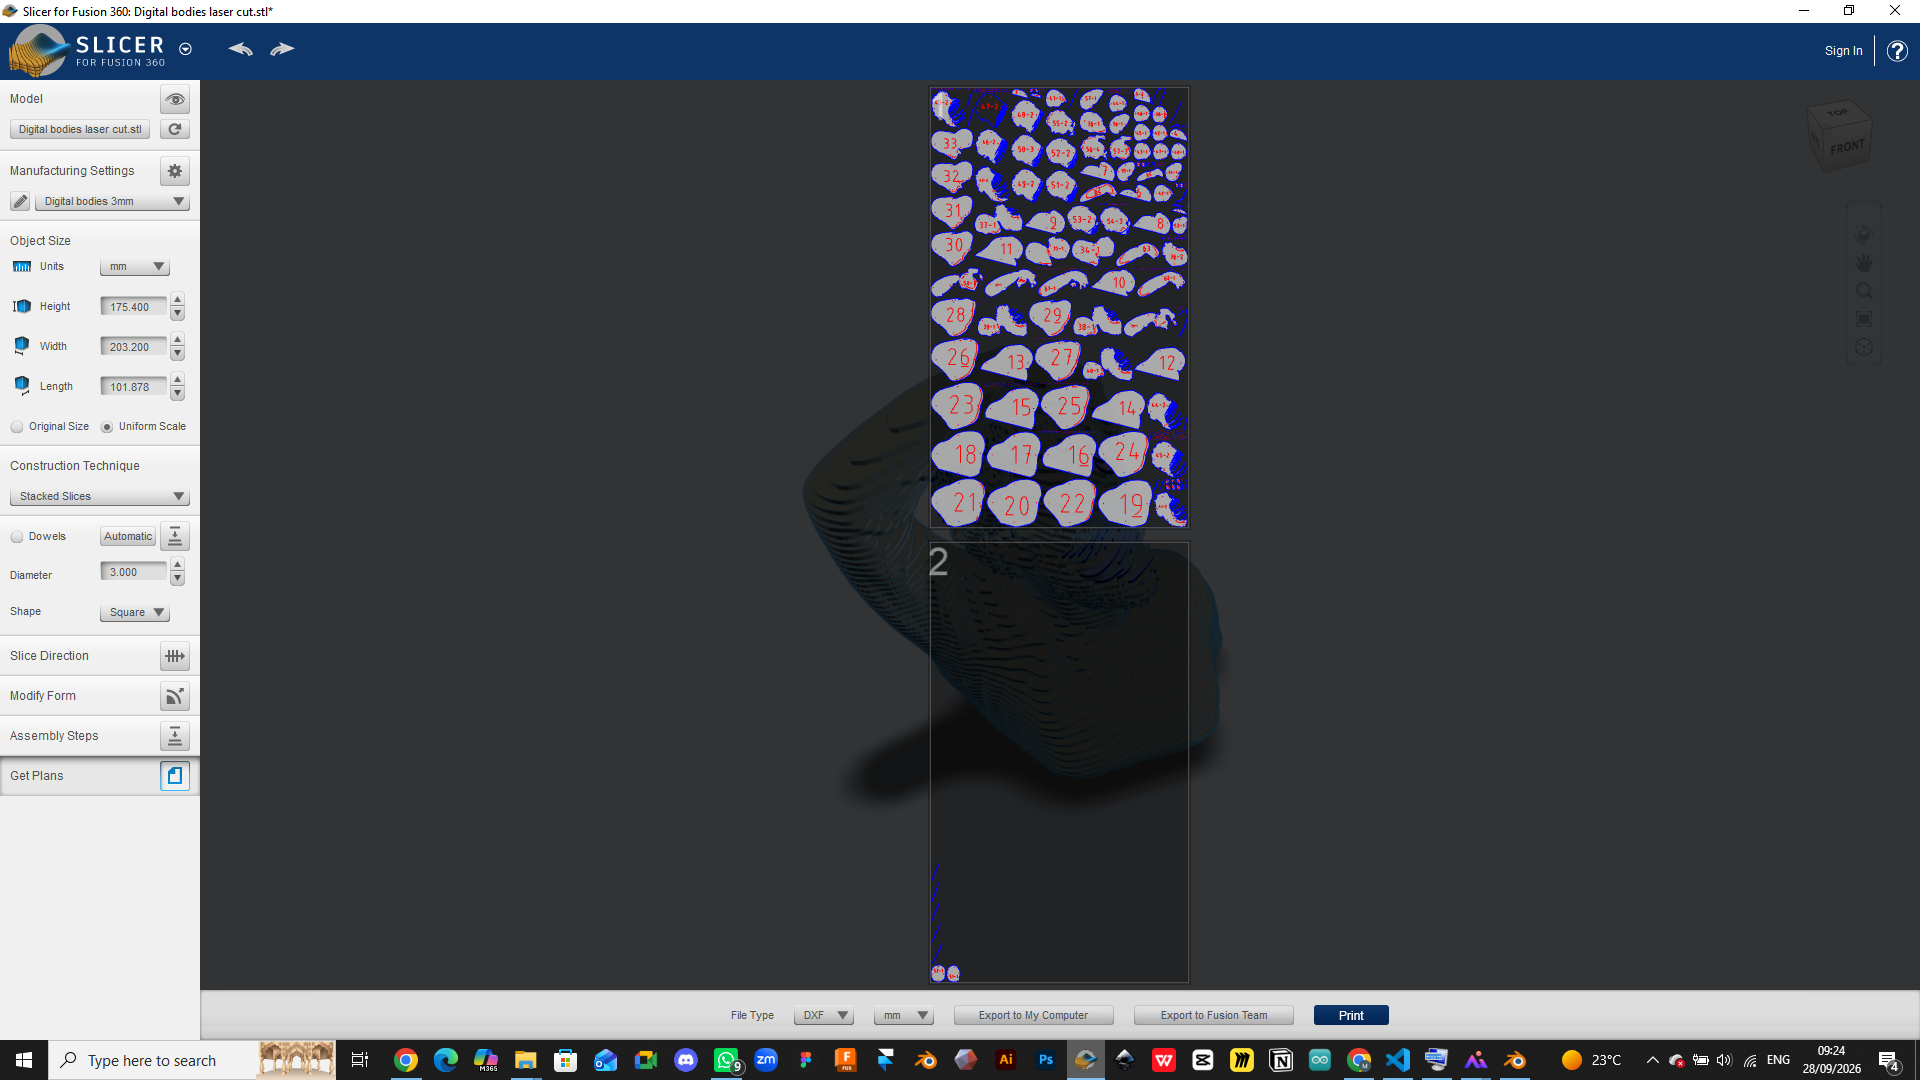
Step 3: Preparing the file for cutting by Laser Cutter Machine
In this process, I used Rhino to prepare the design for cutting with a laser cutter by using red colors for the cut (the machine is from Trotec). These are screenshots of the process, starting with Rhino, then Trotec, and finally the cutting process:
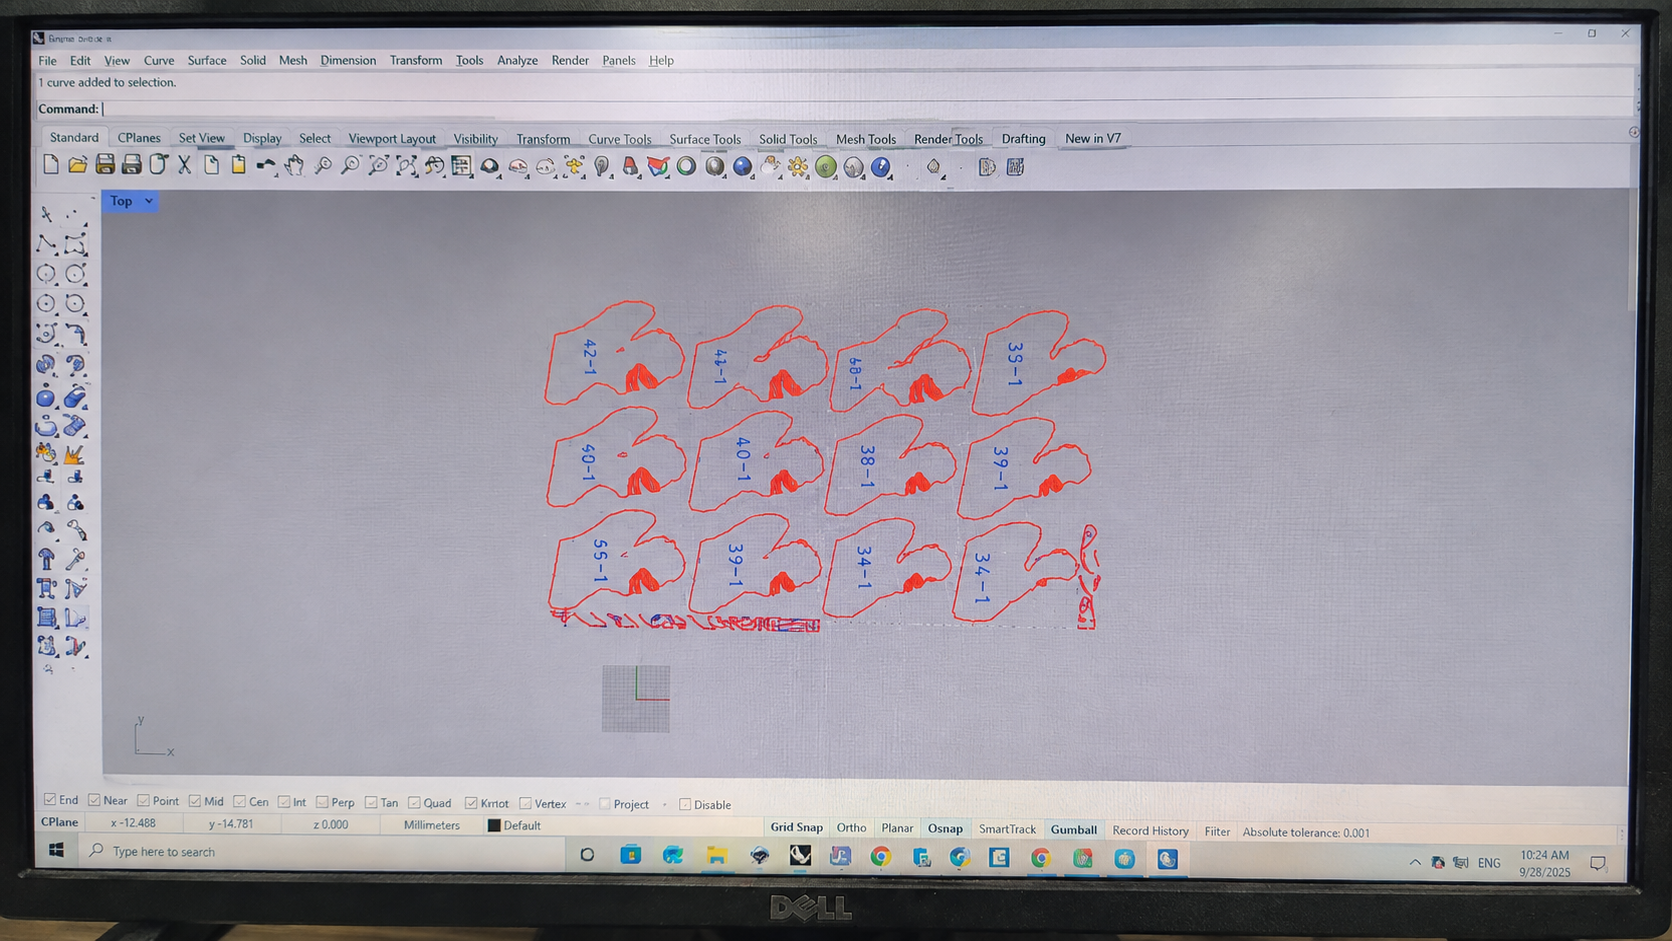
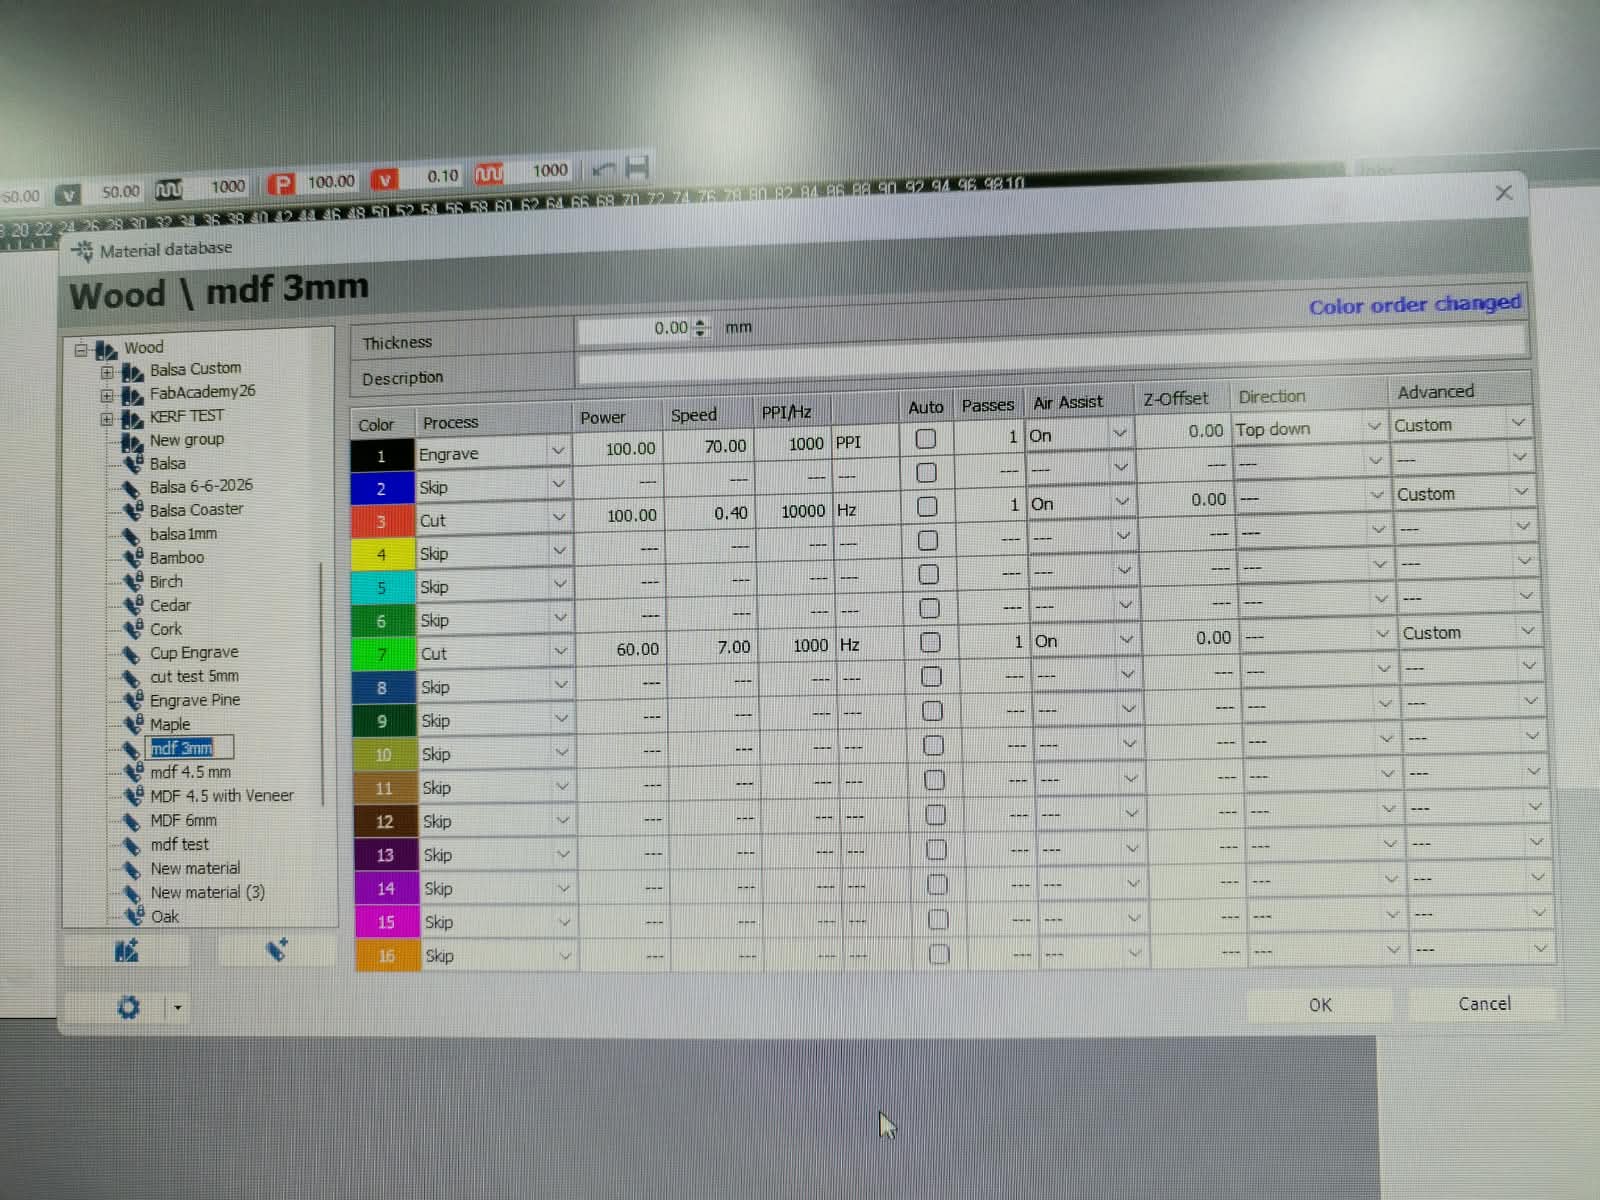
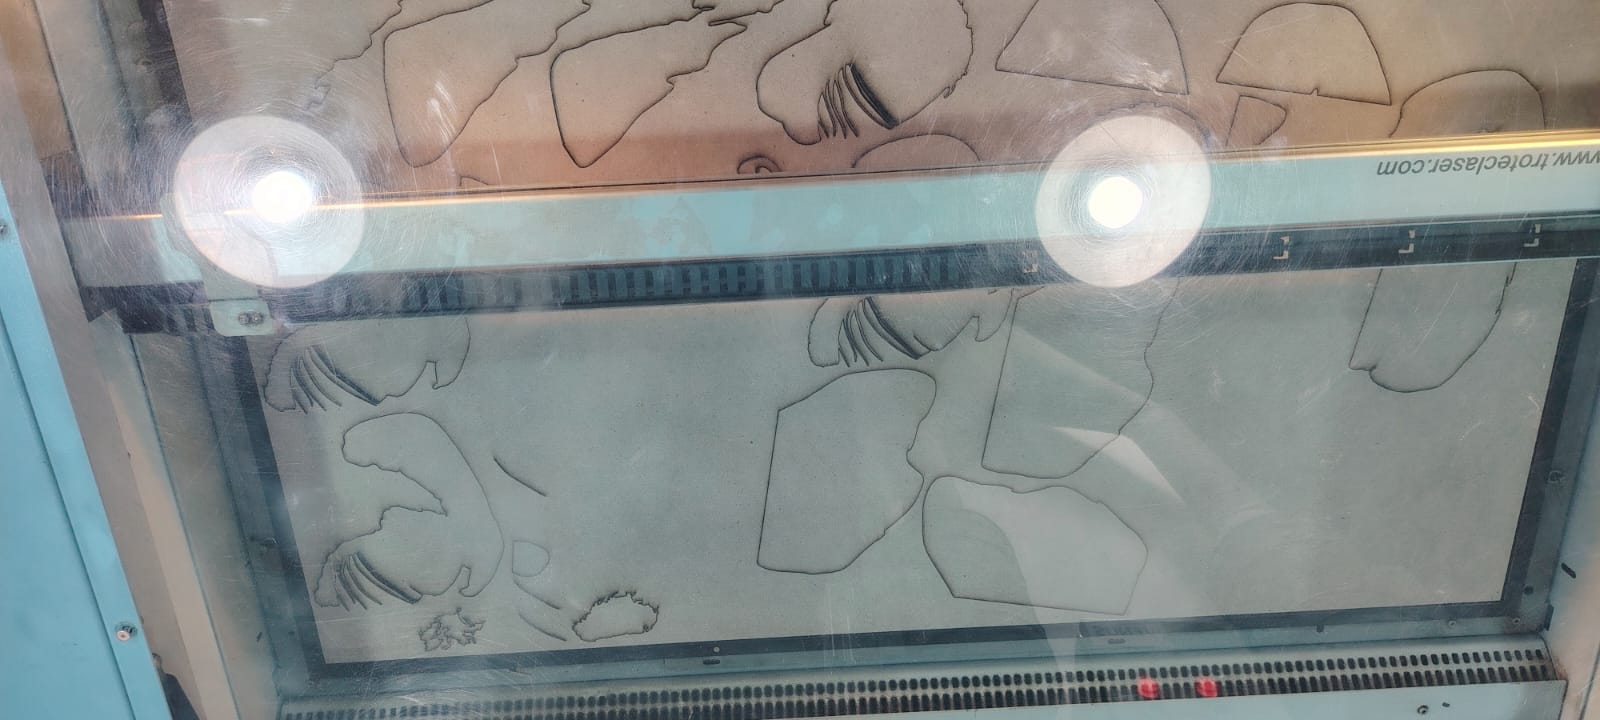
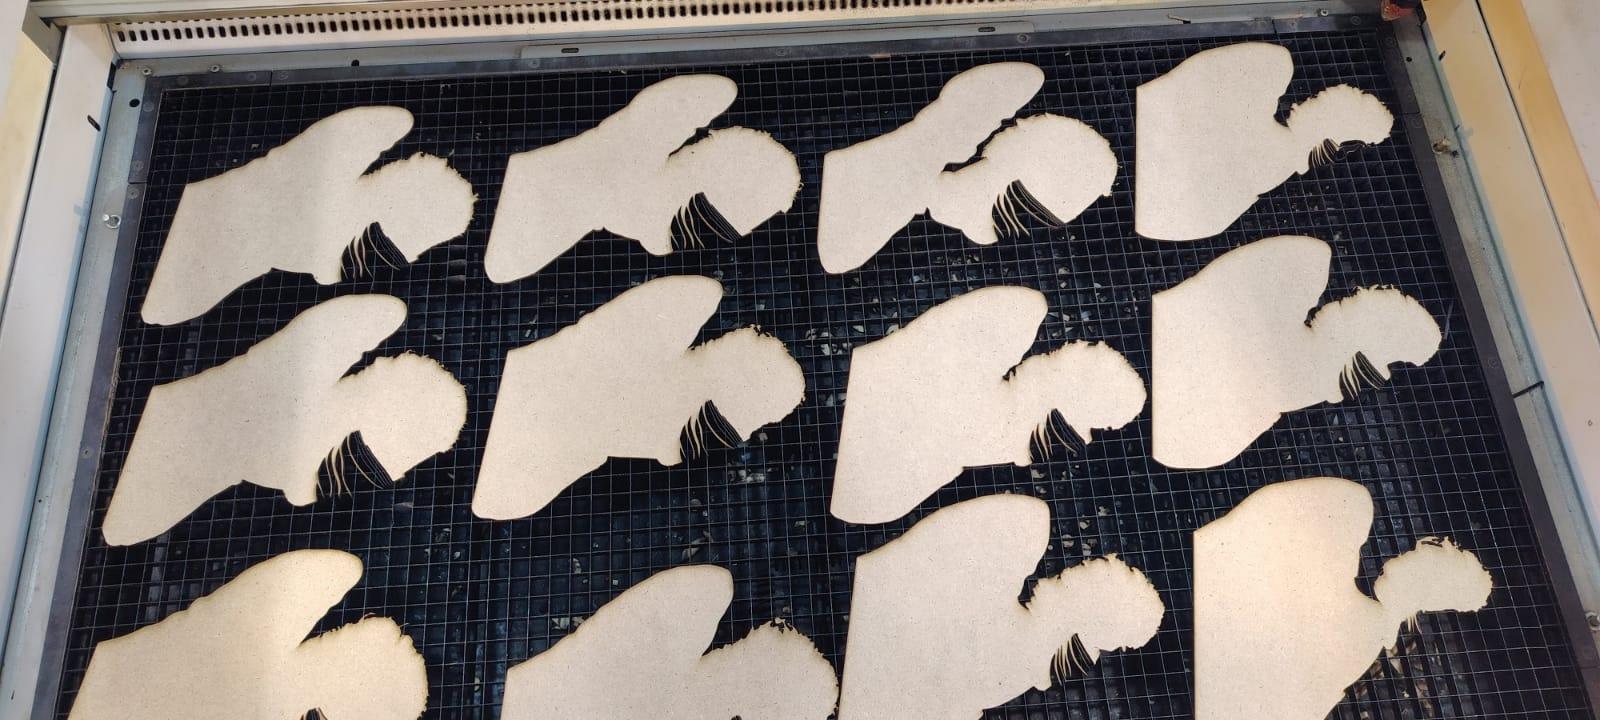
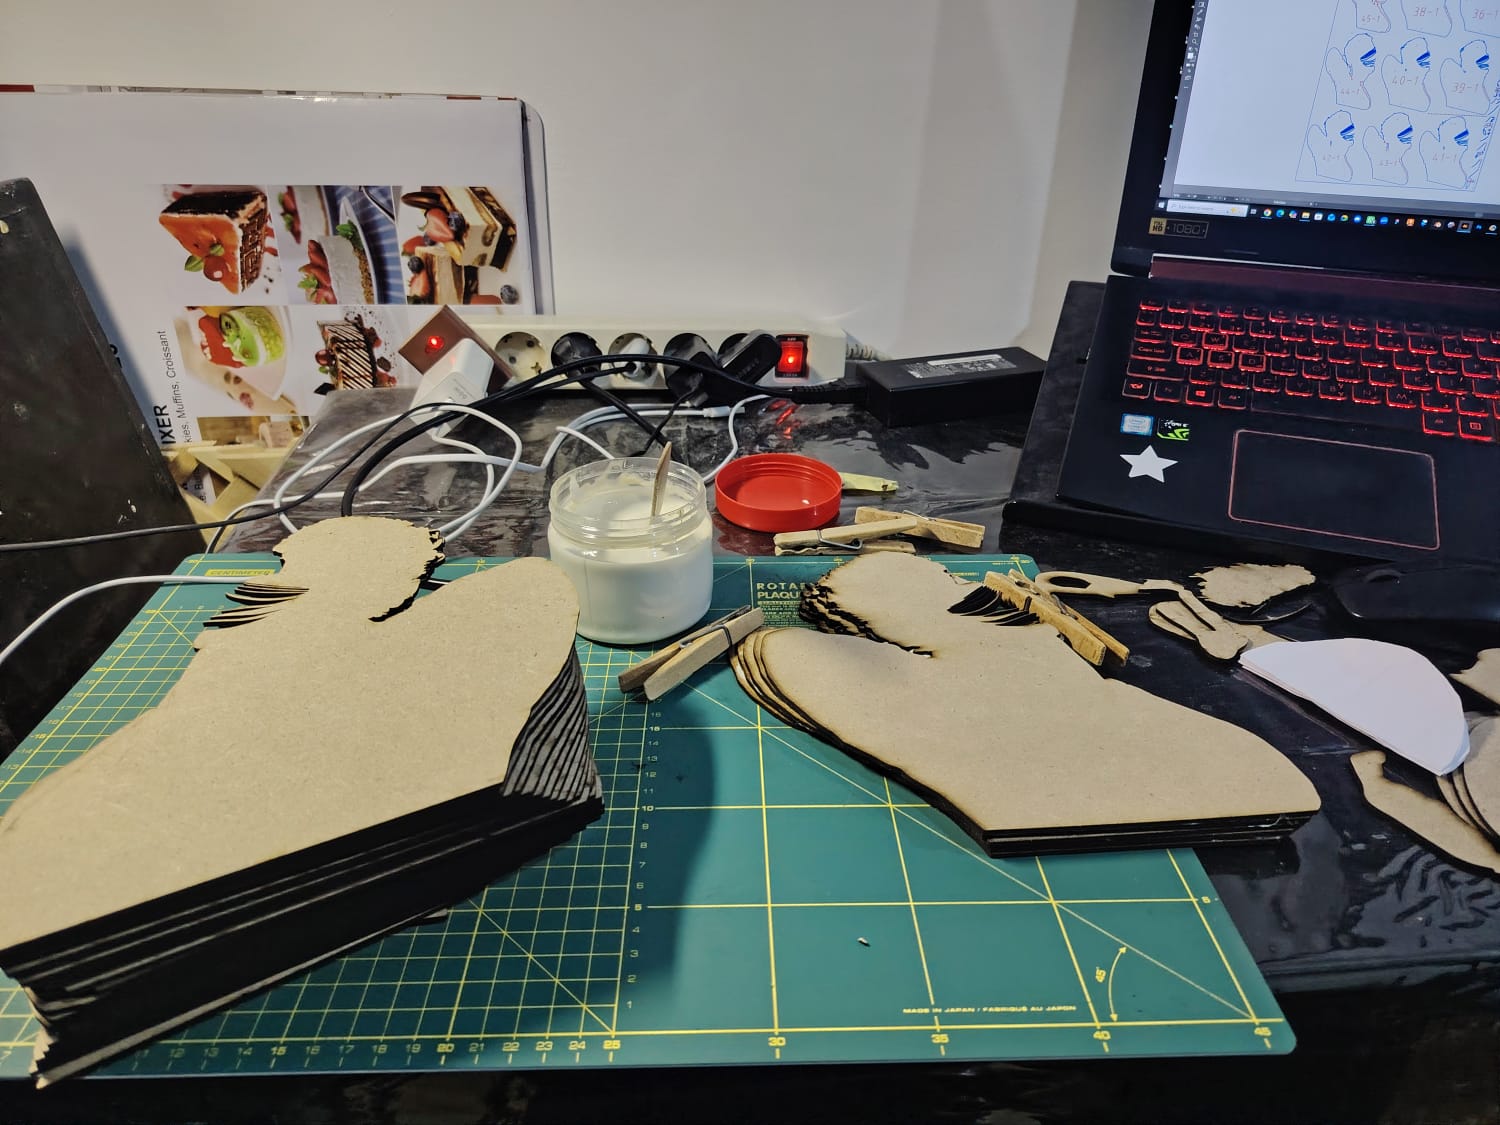
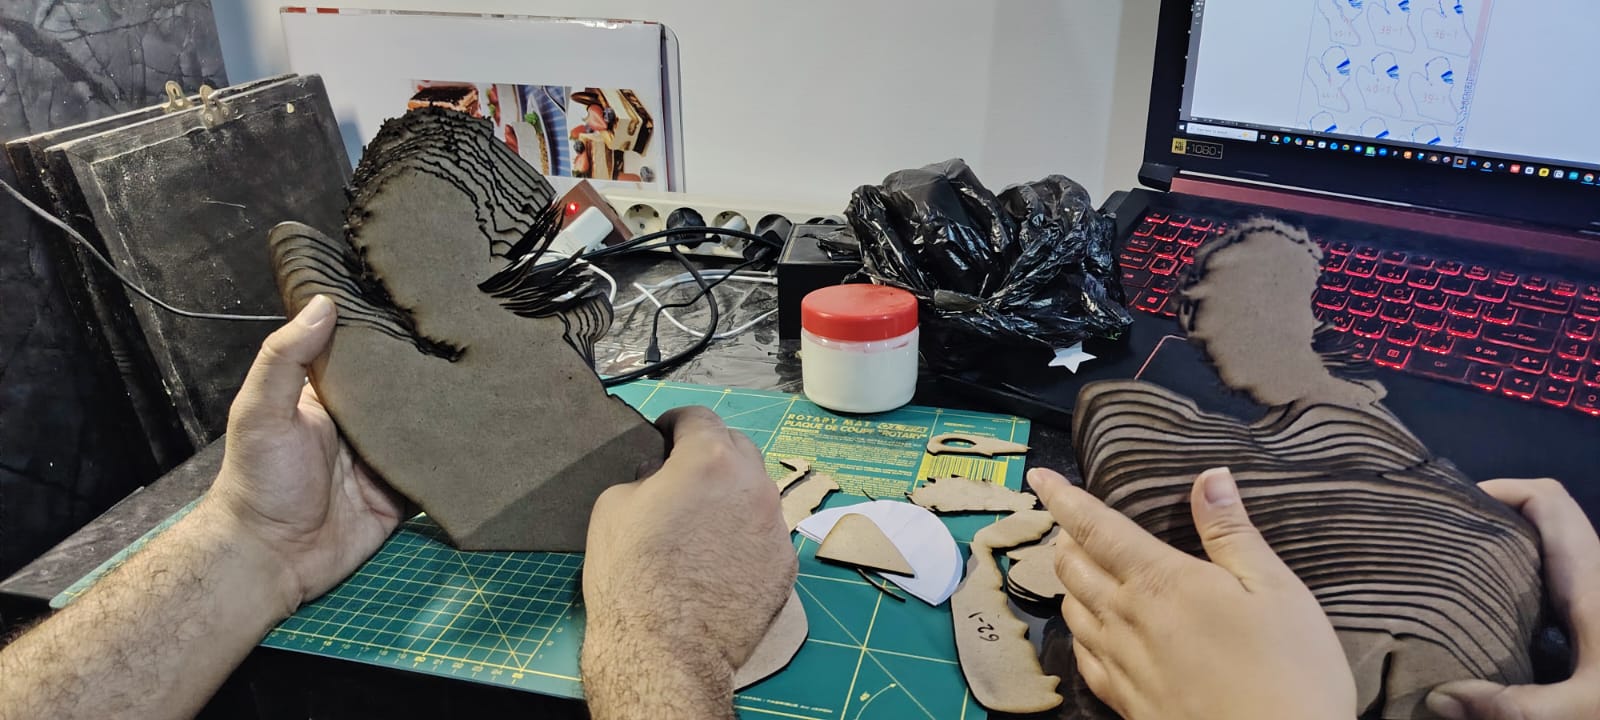
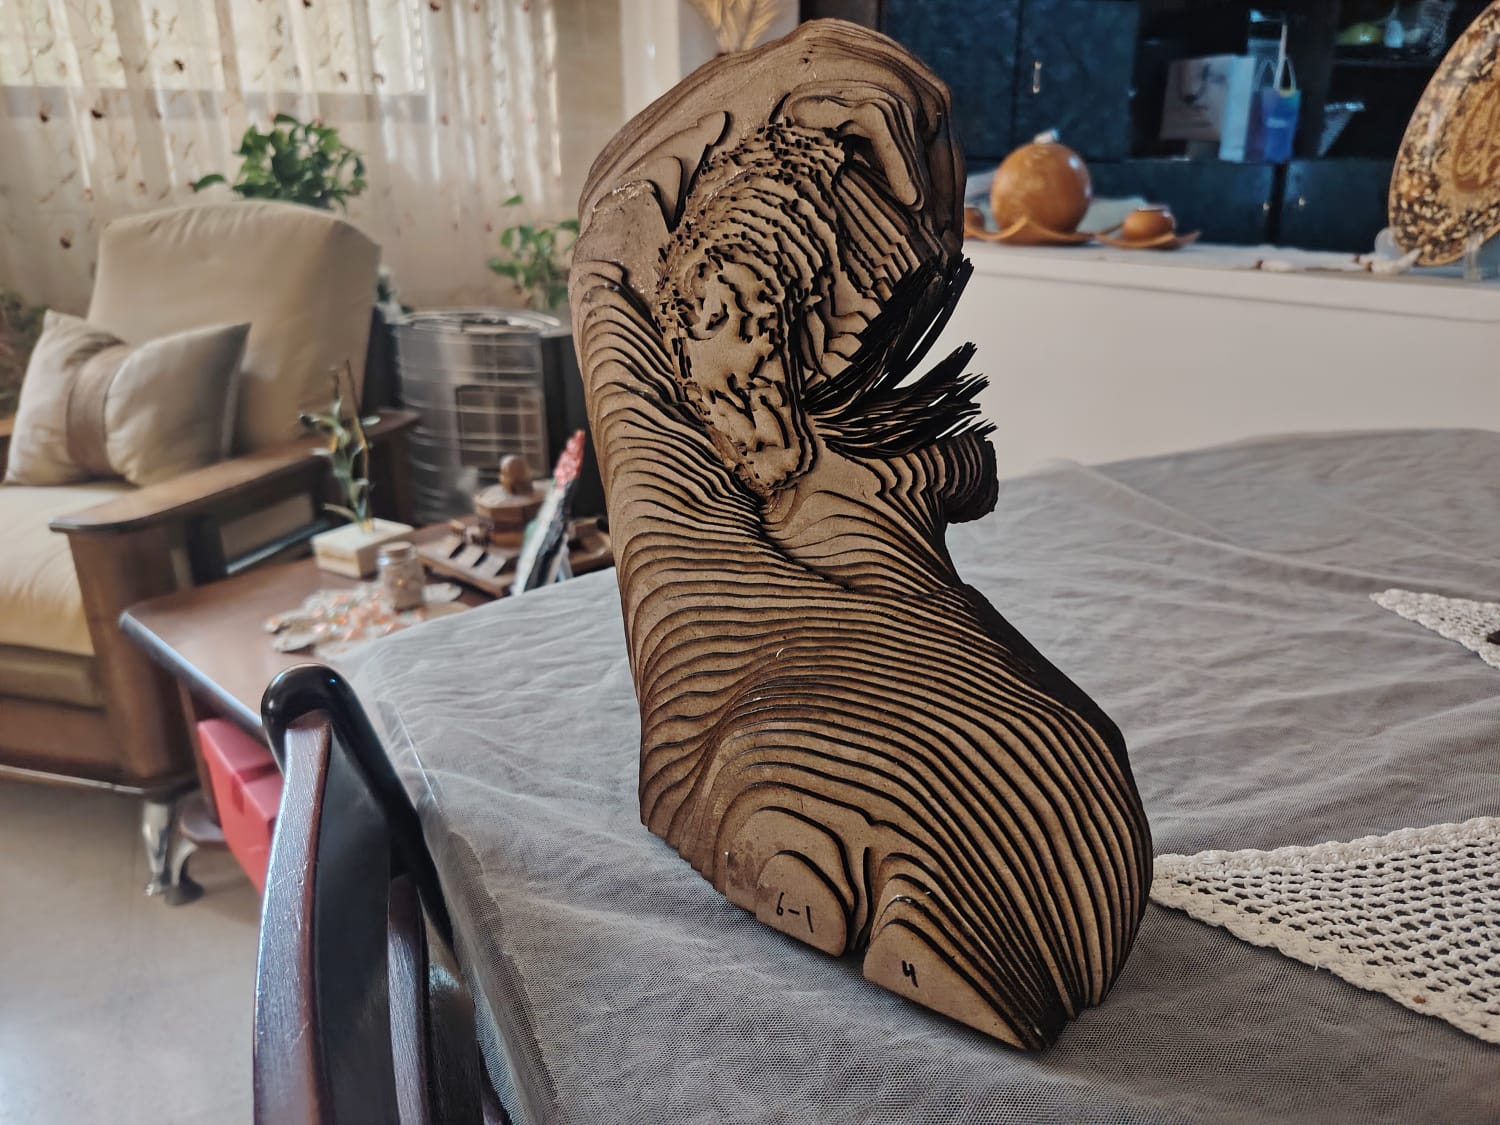
Step 4: Manufacturing and Assembly Phase:
In this stage, after cutting with the laser cutter, I assembled the pieces using wood glue. Here are photos of the process:
3D Printing
How-to compress a PDF BEFORE uploading it:
Use a compressor when uploading a PDF, you can use online tools such as ilovepdf or smallpdf
How-to encode a VIDEO BEFORE uploading it:
Use a video encoder when uploading a video it needs to be well compressed, you can download tools such as Handbrake or online tools such as this Video Converter
How-to ZIP/compress a large Fabrication file:
To zip a file on Windows, right-click the file or folder, select "Show more options," choose "Send to," then "Compressed (zipped) folder." watch On a Mac, select the file or folder and choose "Compress" from the context menu. watch
get inspired!
Check out and research alumni pages to betetr understand how to document and get inspired
-
Head portion - Betiana Pavon - FabLab Bcn
-
Artistic Slicing - Stephanie Vilayphiou - GreenLab
-
Artistic intervention - Kae Nagano - FabLab Kamakura
-
Exploration fabrication techniques - Hala Amer - FabLab Bcn
-
Electronics & DIY scanner - Naim Al-Haj Ali - CPF
-
Advanced - Grasshopper Slicing - Aslı Aydın Aksan - TextileLab Amsterdam
Add your fav alumni's pages as references

"Lorem ipsum dolor sit amet, consectetur adipiscing elit, sed do eiusmod tempor incididunt ut labore et dolore magna aliqua. Ut enim ad minim veniam, quis nostrud exercitation ullamco laboris nisi ut aliquip ex ea commodo consequat. Duis aute irure dolor in reprehenderit in voluptate velit esse cillum dolore eu fugiat nulla pariatur. Excepteur sint occaecat cupidatat non proident, sunt in culpa qui officia deserunt mollit anim id est laborum. Lorem ipsum dolor sit amet, consectetur adipiscing elit, sed do eiusmod tempor incididunt ut labore et dolore magna aliqua."
Caption for the left image
Caption for the right image
-
Download references Links to online reference files, PDF, booklets
-
or embed your own PDF as:
- Video references: Vimeo (only when not yours)
Sound Waves from George Gally (Radarboy) on Vimeo.
- Video references: Youtube (only when not yours)
3. Tools
4. Process and workflow
"Lorem ipsum dolor sit amet, consectetur adipiscing elit, sed do eiusmod tempor incididunt ut labore et dolore magna aliqua. "
How-to use footnotes for fabrication files
Fabrication files are a necessary element for evaluation. You can add the fabrication files at the bottom of the page and link them as a footnote. This was your work stays organised and files will be all together at the bottom of the page. Footnotes are created using 1 (without spaces, as shown in Step 1 & 2, and referenced as you see at the bottom of this page) You can reference the fabrication files to multiple places on your page.
4.1 Step 1
This model 3 was obtained by.. Lorem ipsum dolor sit amet, consectetur adipiscing elit, sed do eiusmod tempor incididunt ut labore et dolore magna aliqua.
4.2 Step 2
The laser cut nesting 2 was created using.. Lorem ipsum dolor sit amet, consectetur adipiscing elit, sed do eiusmod tempor incididunt ut labore et dolore magna aliqua.
4.3 Step 3
...
5. Results
Results & documentation
- Don’t forget to document the outcome including:
- Final result
- Photos from different stages
- Videos of movement or interaction, show how a material moves, something was assembled or the interactive
- Include measurements or a reference object to give a sense of size
- Describe the (material) properties or what you made
- Comparison between attempts, if you did multiple experiments or generated multiple files before fabricating / deploying. You can use a table as shown in week 4
5.1 3D Models
upload DOWNLOADABLE 3d models of your files such as MakeHuman, Final 3d modelled body, 3D Scans, etc. Make sure to make them DOWNLOADABLE.
6. Weekly reflection & critical thinking
- What did I learn? What did I personally find interesting or surprised me?
- What would I do differently? If something "failed" do I know how else to tackle it now?"
- How does this connect to my final project or my learning trajectory?
- What are implications and possible applications, think also from the ethical or environmental aspect, how it could connect to your practice and project?
NuEval — final step
Go to NuEval and fill in the checklist, when not complete notify your instructor.
7. Fabrication files & References
-
File: 3d modelling of mannequin ↩
-
File: Laser cut sheets ↩
-
Reference: Author; Title; Source; year ↩