2. Digital bodies

Assignment
Learning outcomes
- Research skills: the participant has acquired knowledge through references and Concept development
- Design skills: the participants has acquired knowledge on 3D scanning and modelling, mesh repair or manipulation
- Fabrication skills: the participant is capable of executing from file to production workflow, from slicer to laser cutting
- Process skills: Anyone can go through the workflow, understand it and reproduce it
- Final outcome: The assignment is assembled and either complete or tested
- Originality: Has the design been thought through and elaborated
Student checklist
- Include some inspiration: research on artists or projects that work with the human body
- Document the use of 3D scanner and software to acquire a 3D model
- Document the process of repairing and/or manipulating a 3D mesh and slicing it
- Document the process of file preparation for laser cutting
- Learn how to laser cut, document the workflow including the machine settings, material type and thickness
- Upload your 3D file (STL/OBJ) and your 2D files (DXF/PDF)
- Build and/or assemble a mannequin or body parts
-
Create a stop motion or step-by-step assemblying process and upload one picture (HIGH RES) of your mannequin (extra credit)
Research & Ideation
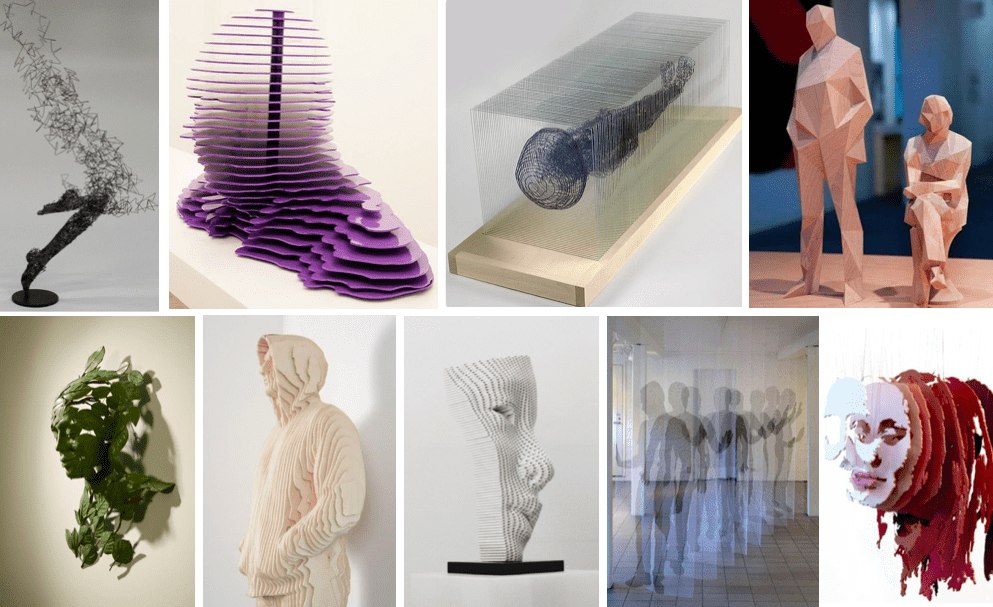
I researched many alumi pages, and I loved followings. Haneem Jaafreh expresses abstract concepts by extracting rather than showing all the parts. Saskia Helinska's work using UV Map is very attractive and makes me want to try it too. , Kate Reed's acrylic work beautifully represents the internal organs.Alessia Pasquini's work wasintroduced many times in class, and the curves of a pregnant woman's body are beautiful, and the expressiveness of her work, such as photographs, is excellent.
I also picked many images from Pinterest to expand my idea.
Link: 1, 2, 3, 4, 5, 6, 7, 8, 9
References & Inspiration
Through this class, I have been prompted to rethink what the body truly represents. It's not just the physical body we commonly think of, but also the inner self and the intangible aspects that intrigued me.
Ambiguous body boundaries
Our body's cells are in a constant state of renewal, with our skin completely replaced by new cells within just one month. Furthermore, various life forms such as plants, animals, and insects are continually updating their own bodies. It's a fascinating thought that our molecules are constantly intermingling in the air. Rather than seeing the skin as a rigid boundary, I aimed to capture the scene of an ongoing, invisible body.
This concept was born from my work in the Gastronomy project, where I contemplated the future of food. While insect consumption is being researched as a solution to food scarcity, resistance still exists. However, considering that we are already interconnected as living beings on this planet through the exchange of molecules in the air, I believe this perspective could help reduce resistance.
Tools
I tried following tools for this assignment.
- Photo Grametory Scan : Scaniverse
- Mesh Repair: Mesh Mixer
- 3D Model: MakeHuman
- 3D Model: METAHUMAN)
- Rig, Animation: miximo
- Rig : Blender
- CAD: Fusion360
- CAD: Rinoceros
- Slice: Fusion Slicer
- Cut: trotec laser
Process and workflow
Create Body
Make Human
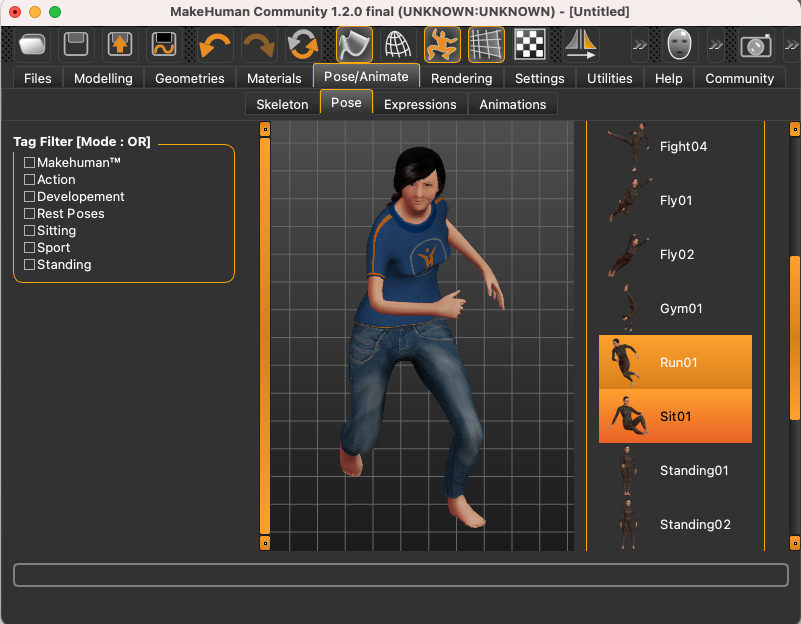
I installed Make Human app and designed asian femal.The basic model can be adjusted by age, muscle mass, proportions, ethnicity, etc. In particular, each part can be easily changed using the slider as shown on the left below. For example, by moving the body horizontally, it is possible to express the distortion of the body.You can also enter detailed values to make adjustments, as shown in the the right.

There were many pose presets, so I tried adding a runnig pose. I would like to try it out because I can insert rigs and run models created by importing them into Unity etc.
I tried setting up a Game Engine rig that can run models imported into Unity etc. I would like to try it in the next spiral.
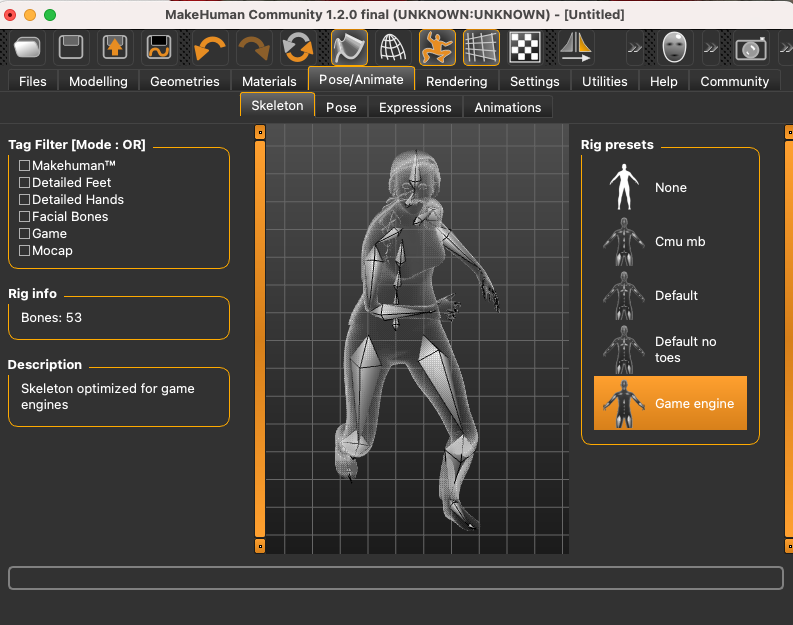
Then expoarted as STL and imported as mesh file to Fusion360 successfully.

META Human
META HUMAN is a service provided by Unreal Engine that allows you to create highly realistic digital humans.I requested to access from here, and after a while it was granted and I was able to use METAHUMAN Creator. First, choose a character base. At MakeHuman, the models were nude, but at METAHUMAN, the base were realistic models that are already fully clothed.


Blend function is very interesting and intuitive. You can select several models that you want to blend into the target model. Select the part marked with ○ on the face and select the model you want to blend. The UI is simple and interesting.
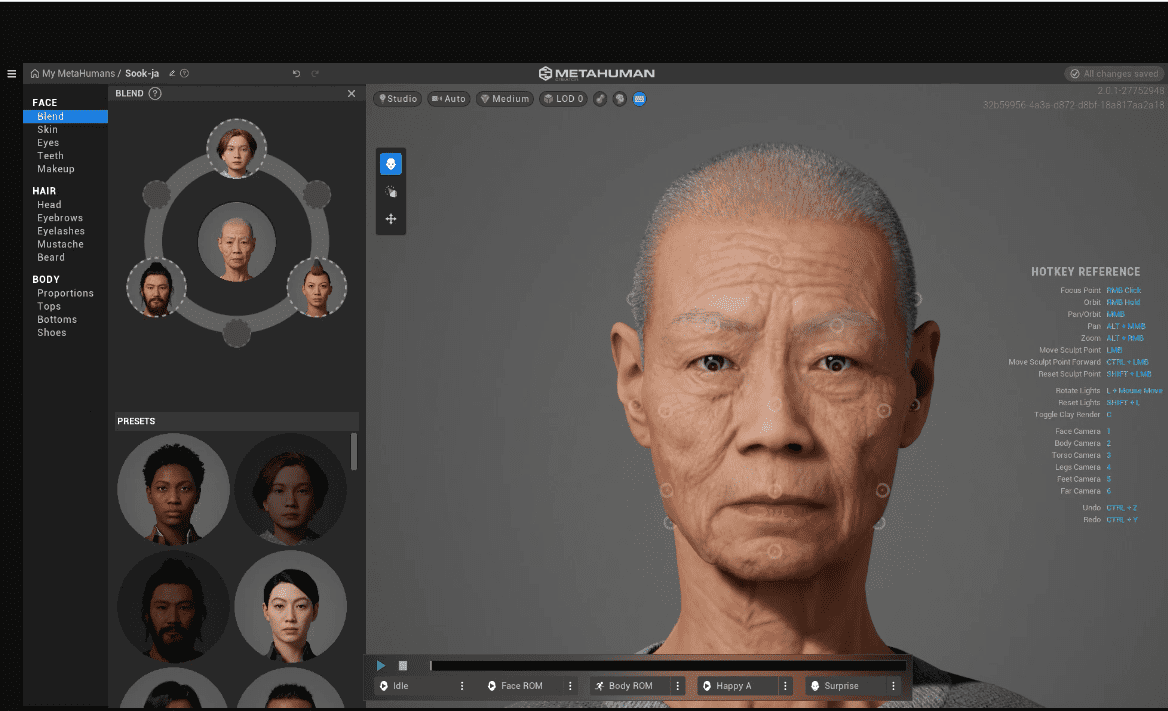
There are emotion presets such as Happy, Anger, fear, etc., and you can check the created model by moving it vividly. Like movie.
Scan my Body
To scan my body, I tried Scaniverse with my iphone. Free photogrammetory application. First I tried to scan small doll by myself, then I asked my family to scan me outside. It's easy to use. Just select " New Object > Medium Object", then rotate 360 degrees around the target. After capturing, it is good to delete unnecessary parts of the data within the app. The left image below is captured image, and I cropped like right images.
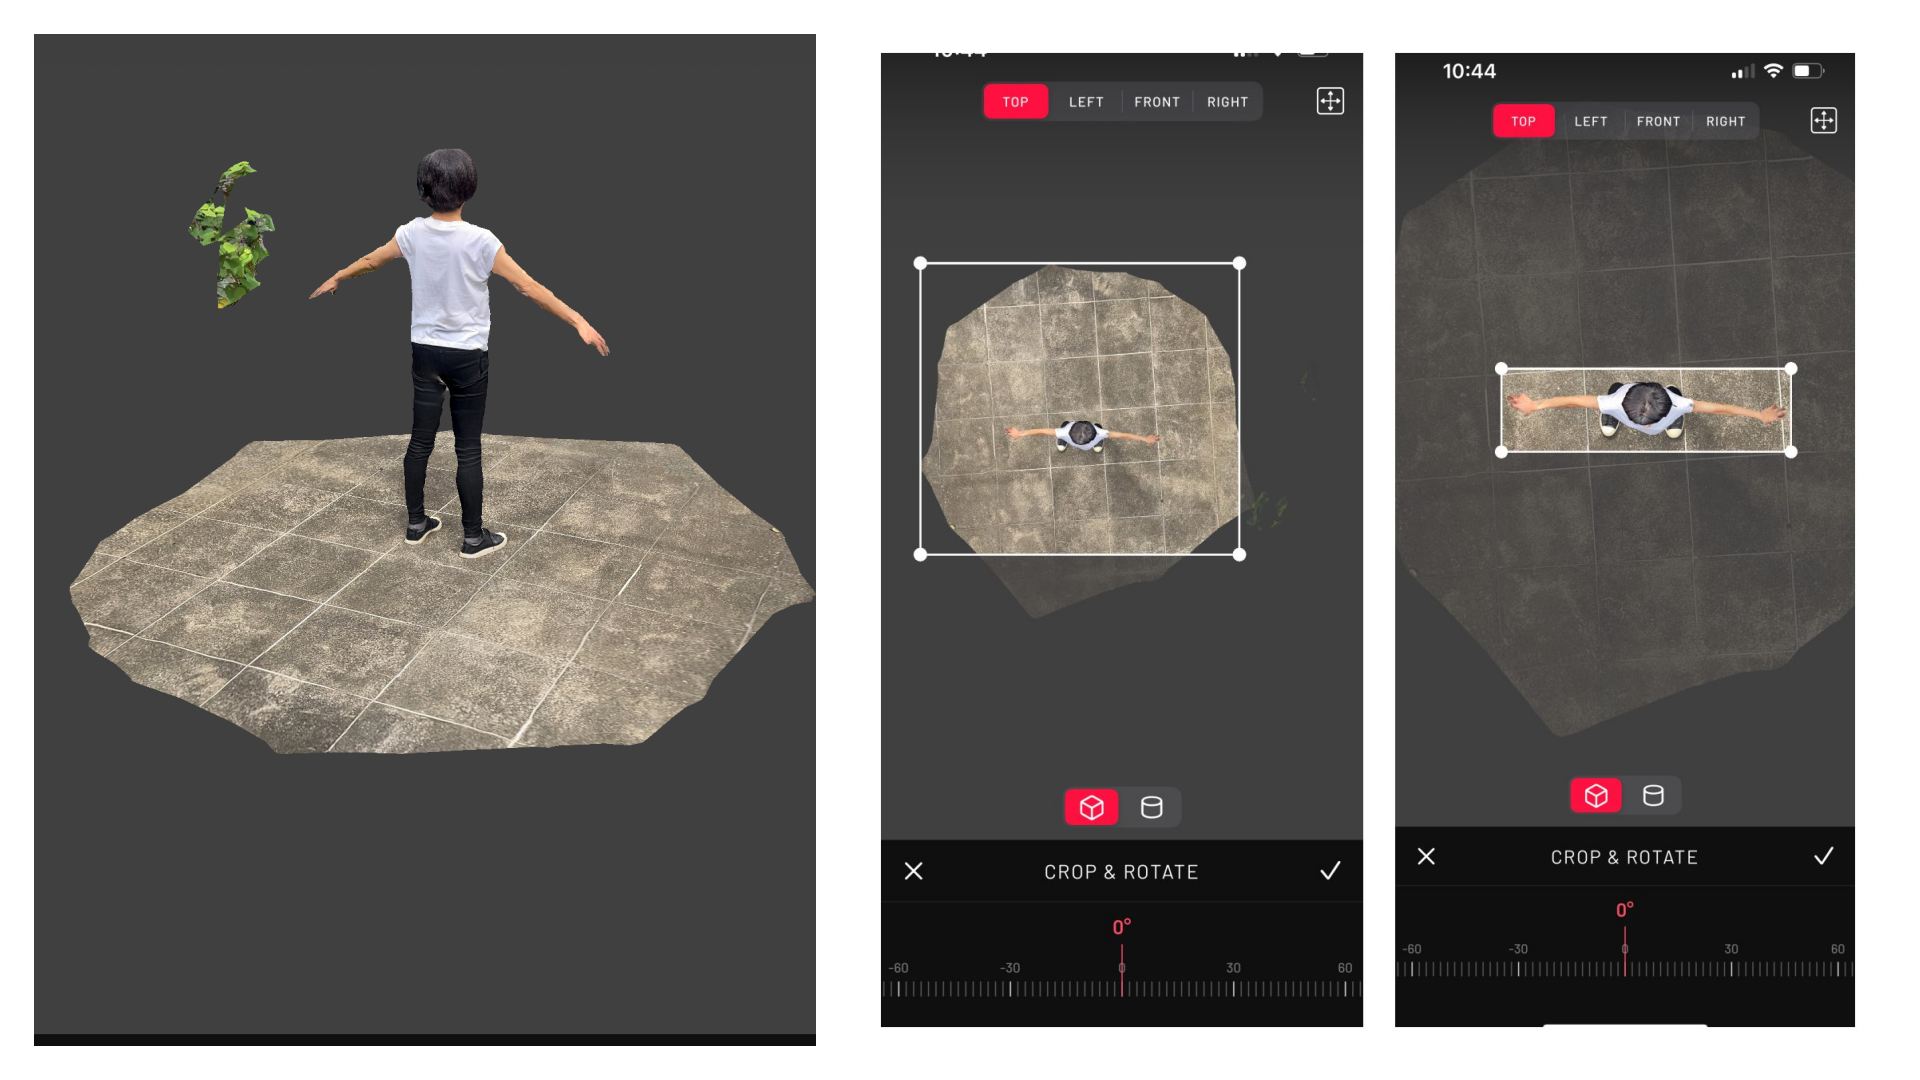
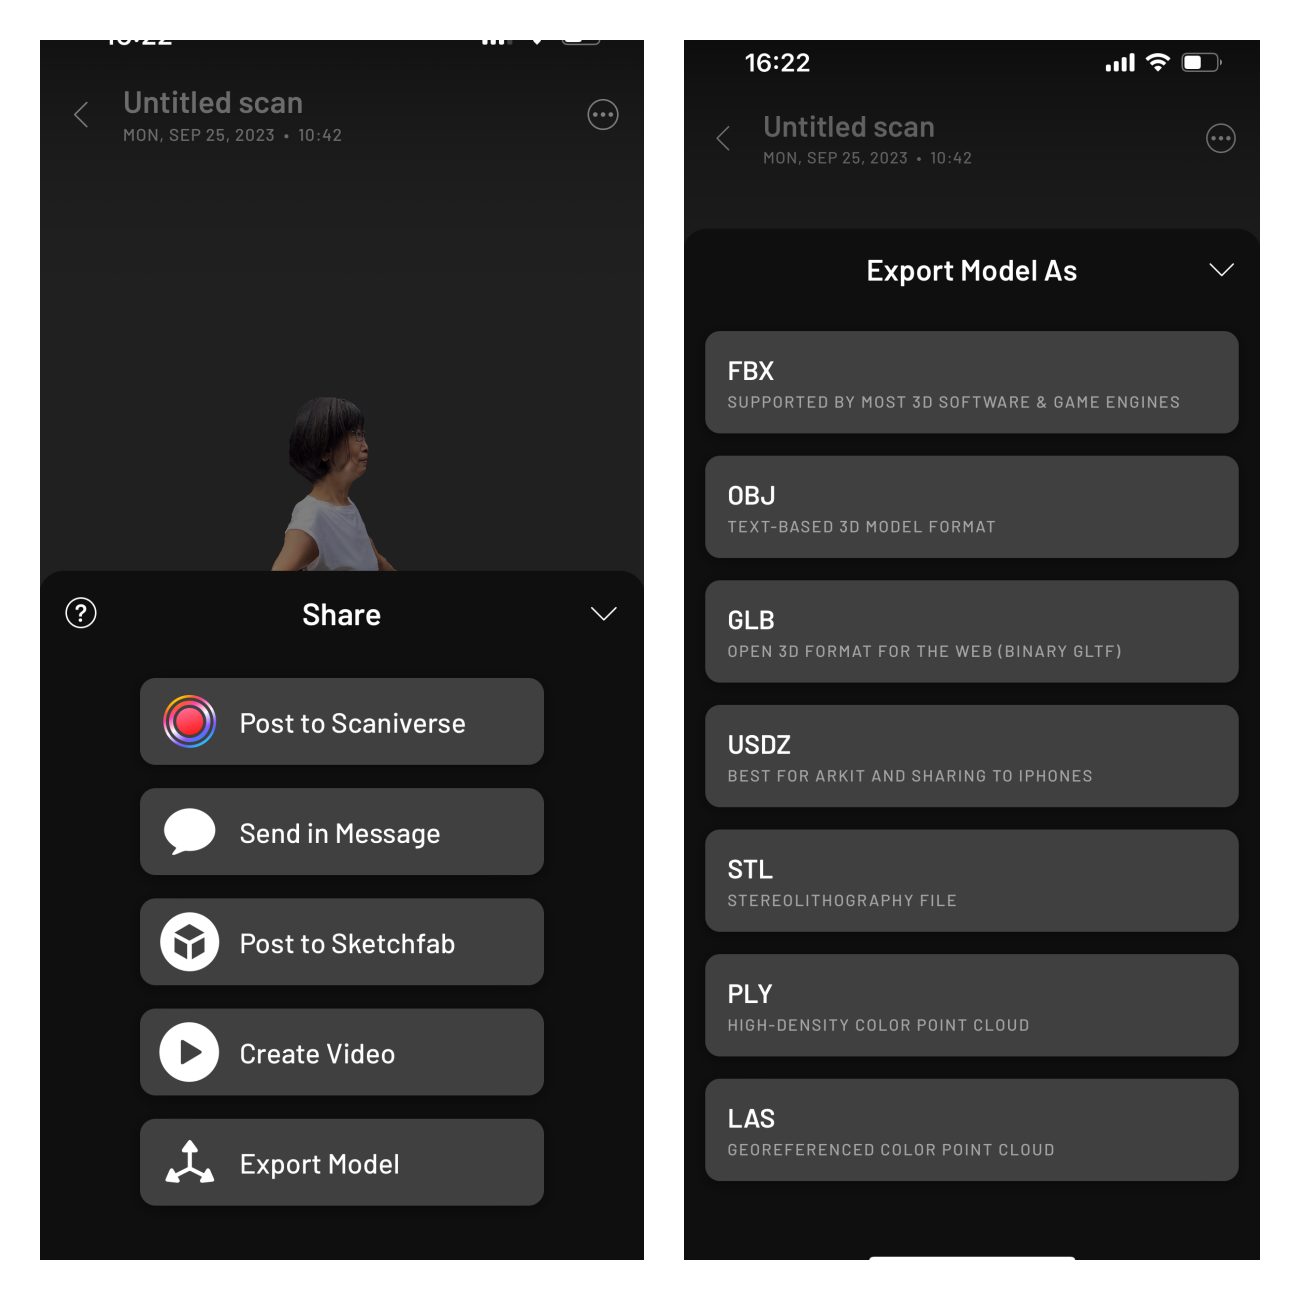
Then export the model in STL format. You can also select other format like FBX and OBJ.
Slice my Body
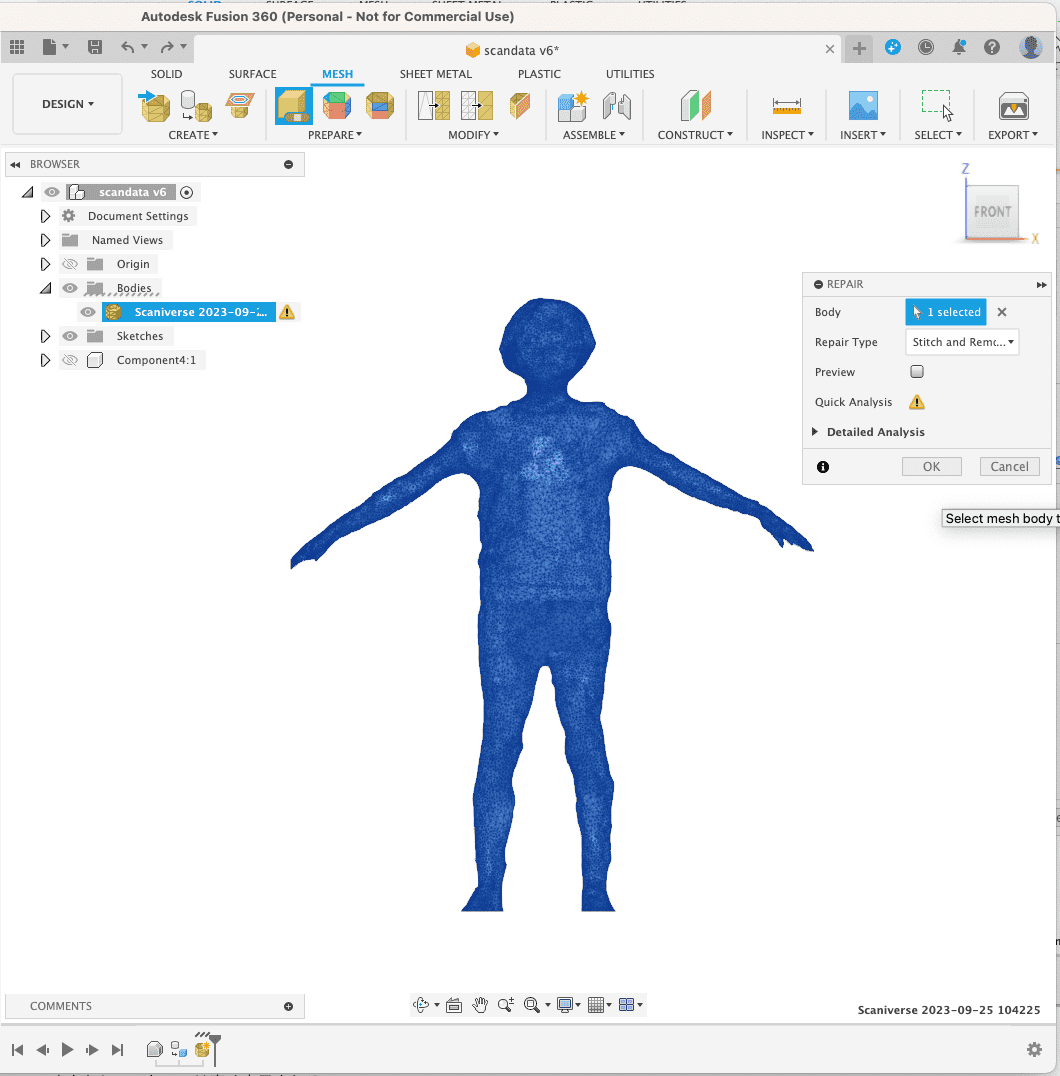
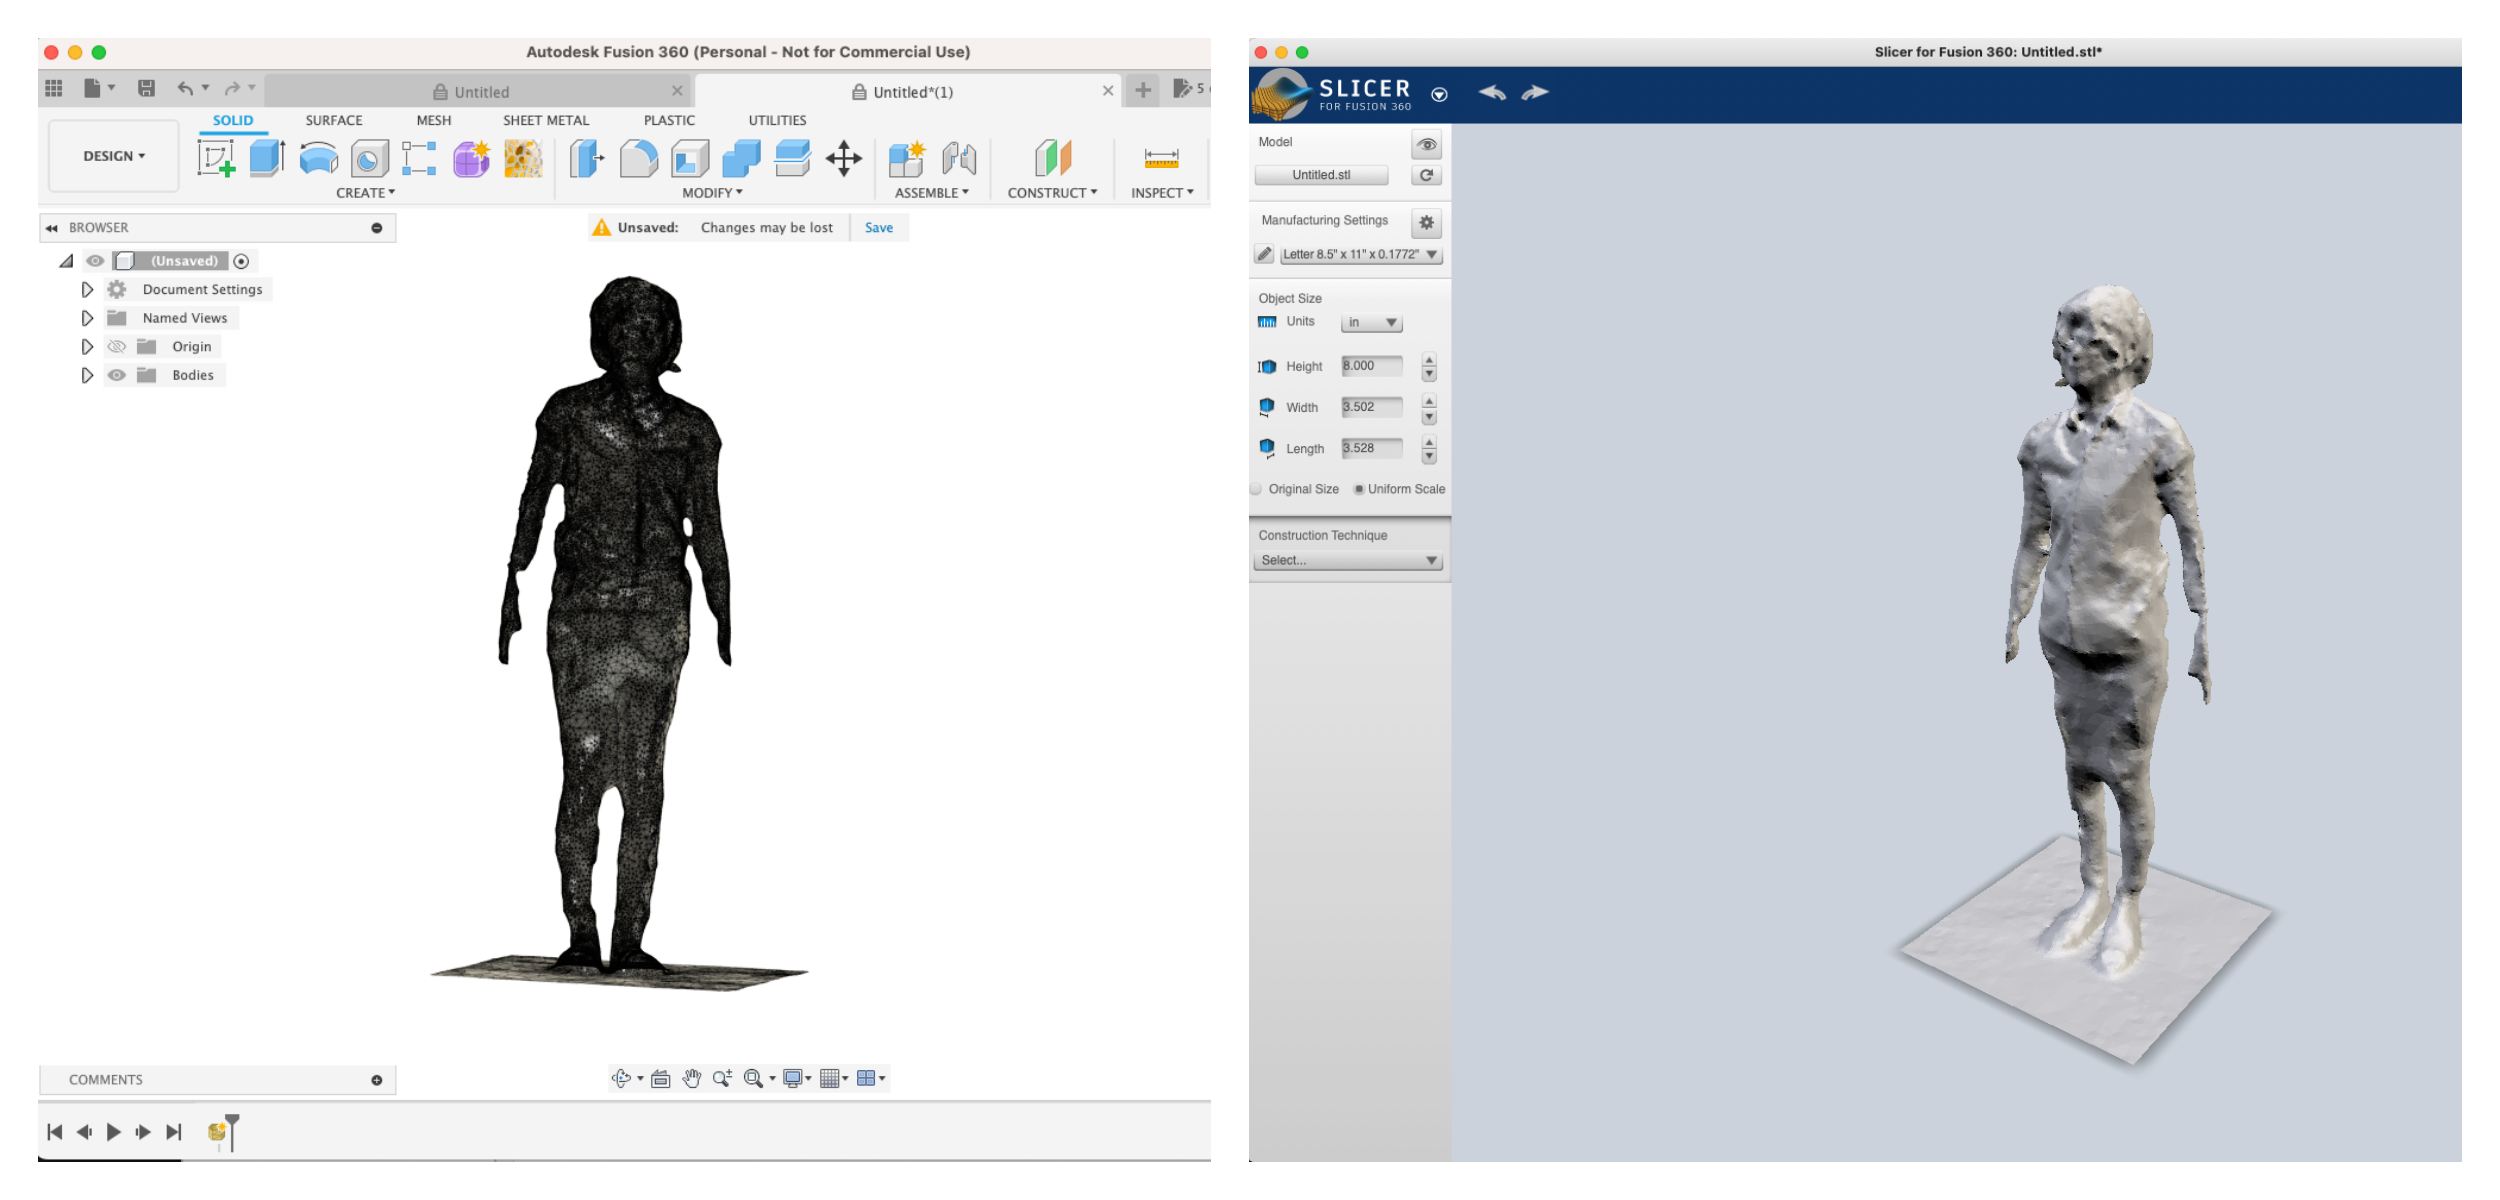
I imported the STL file into Fusion360. Select "Insert > insert Mesh".
I founed that the model is VERY small. The height was around 2mm. not real size, but there was relatively little noise.
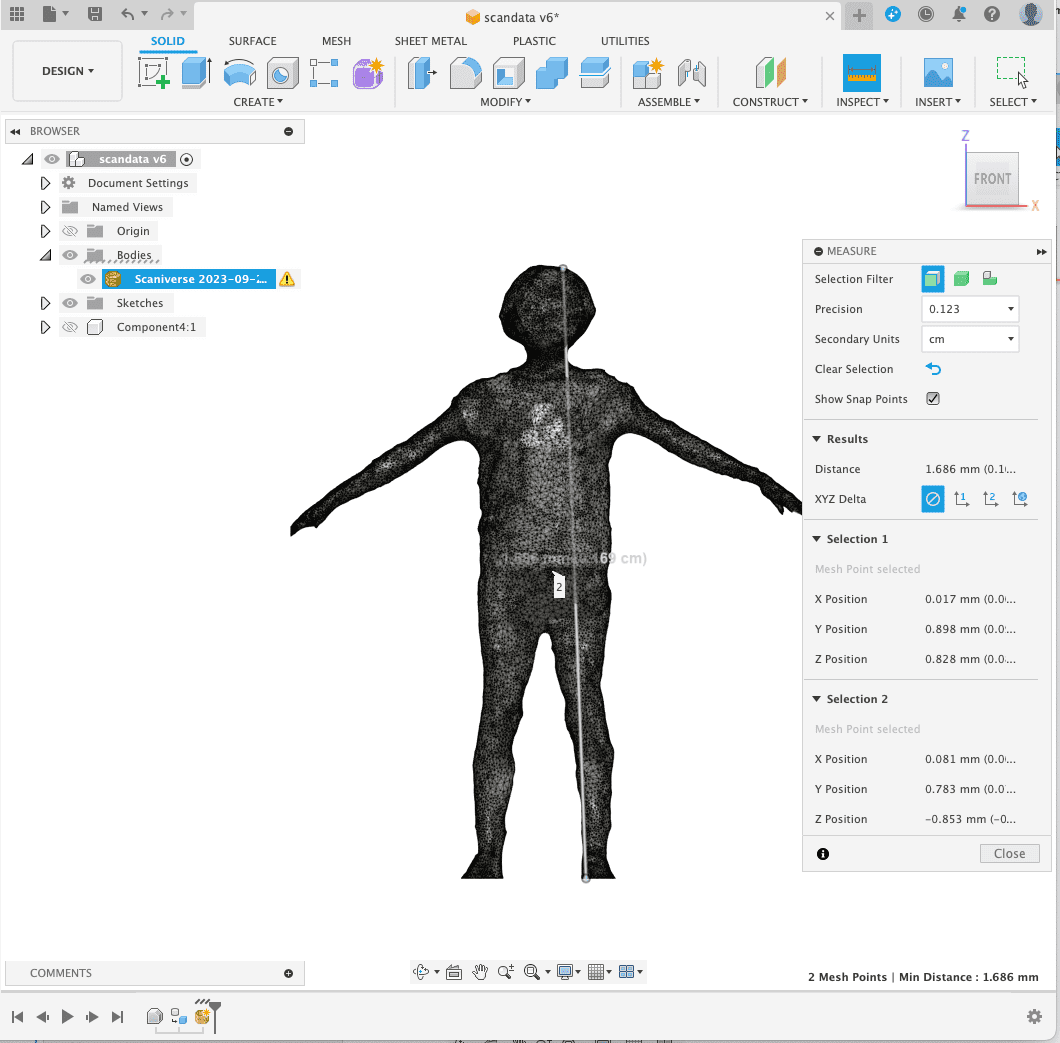
There was an icon to warn of holes, I used repaire tool as follows.
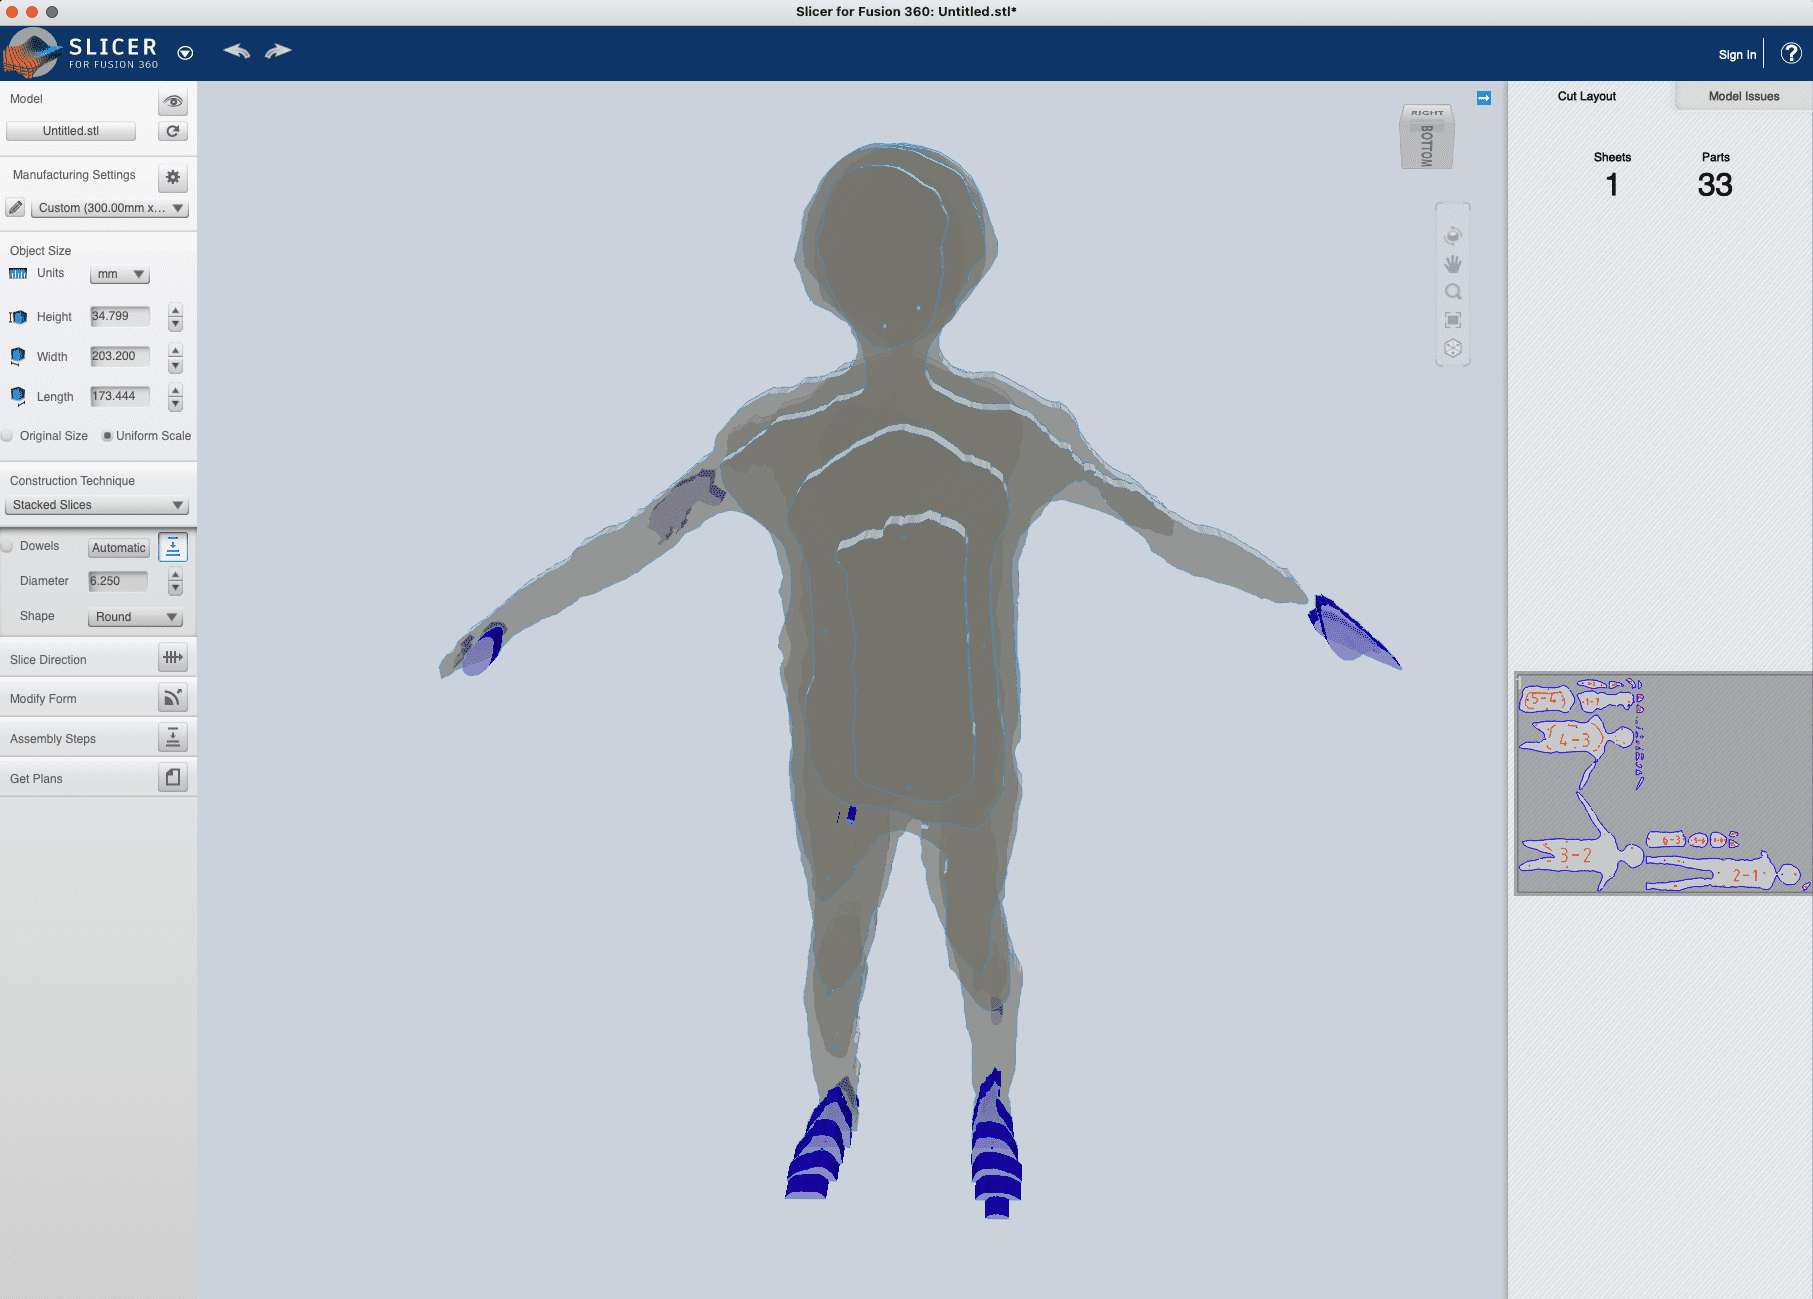
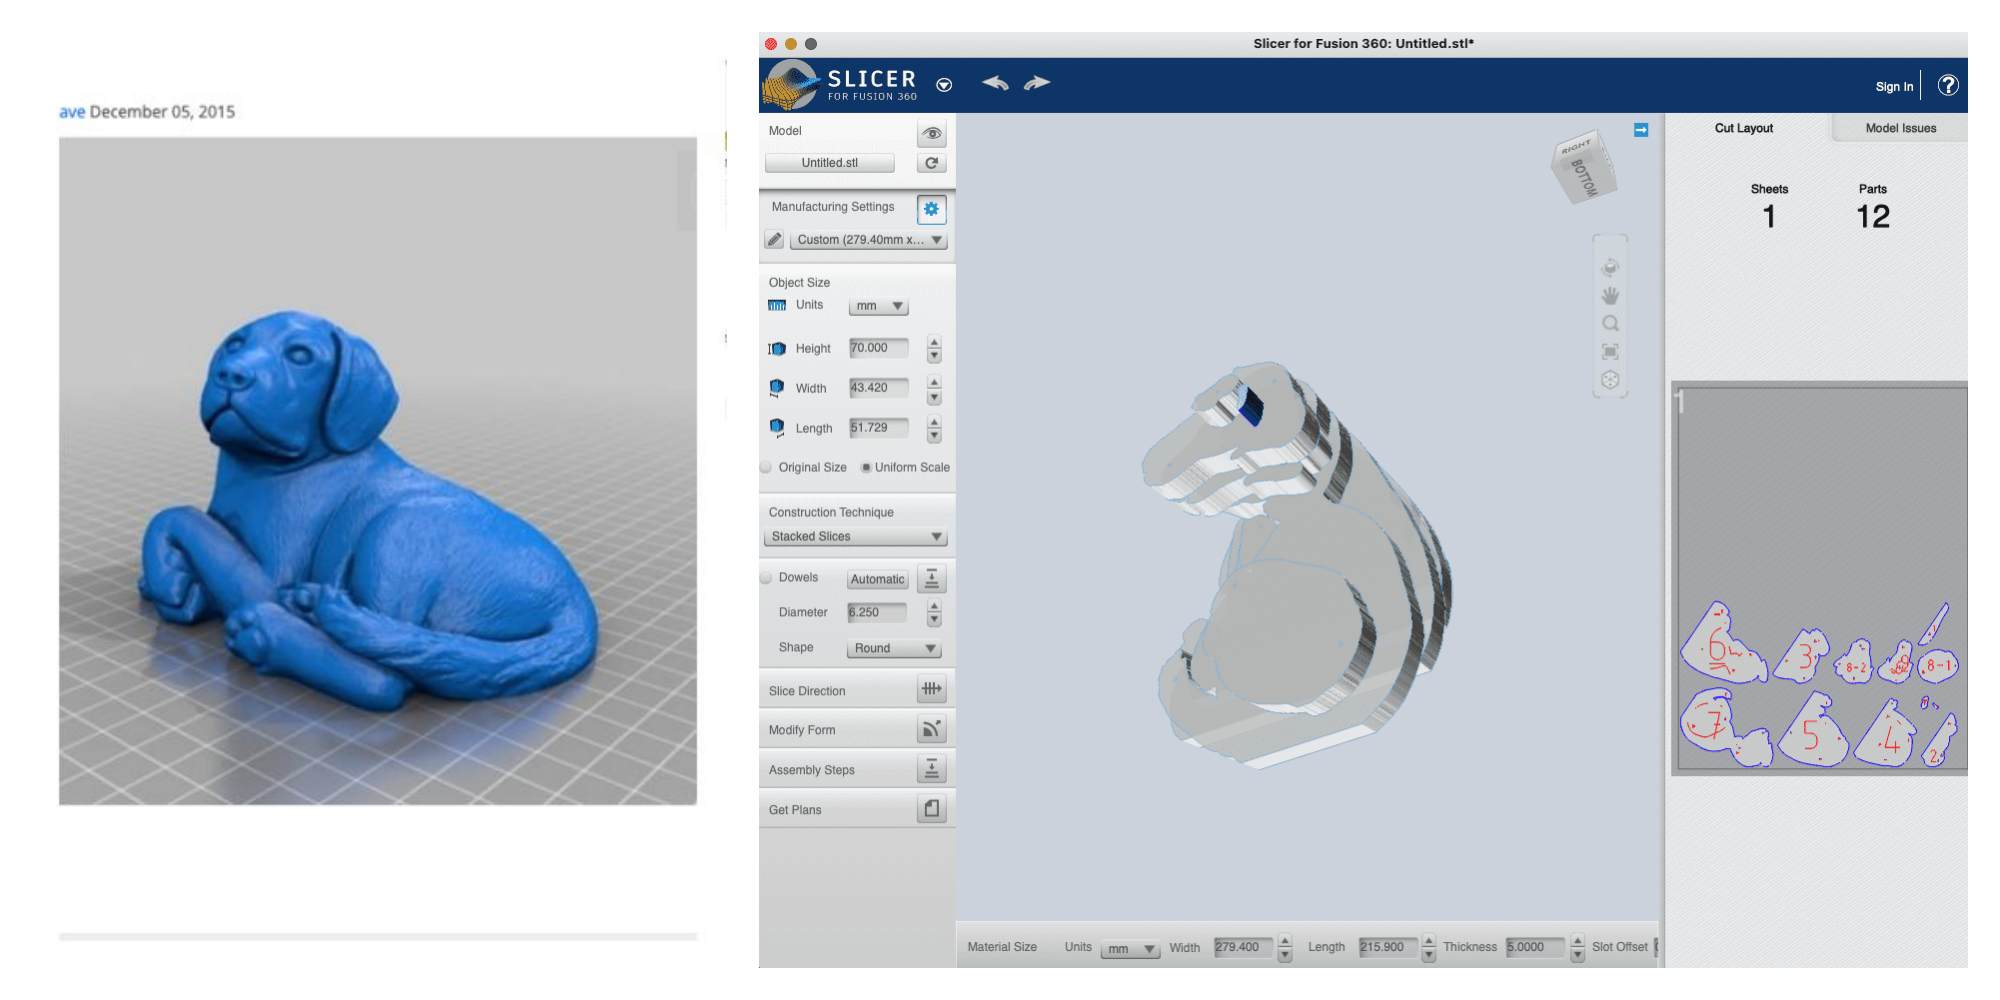
 After that, I selected " UTILITIES > MAKE > Slicer for Fusion360". I played around with the interesting tool,

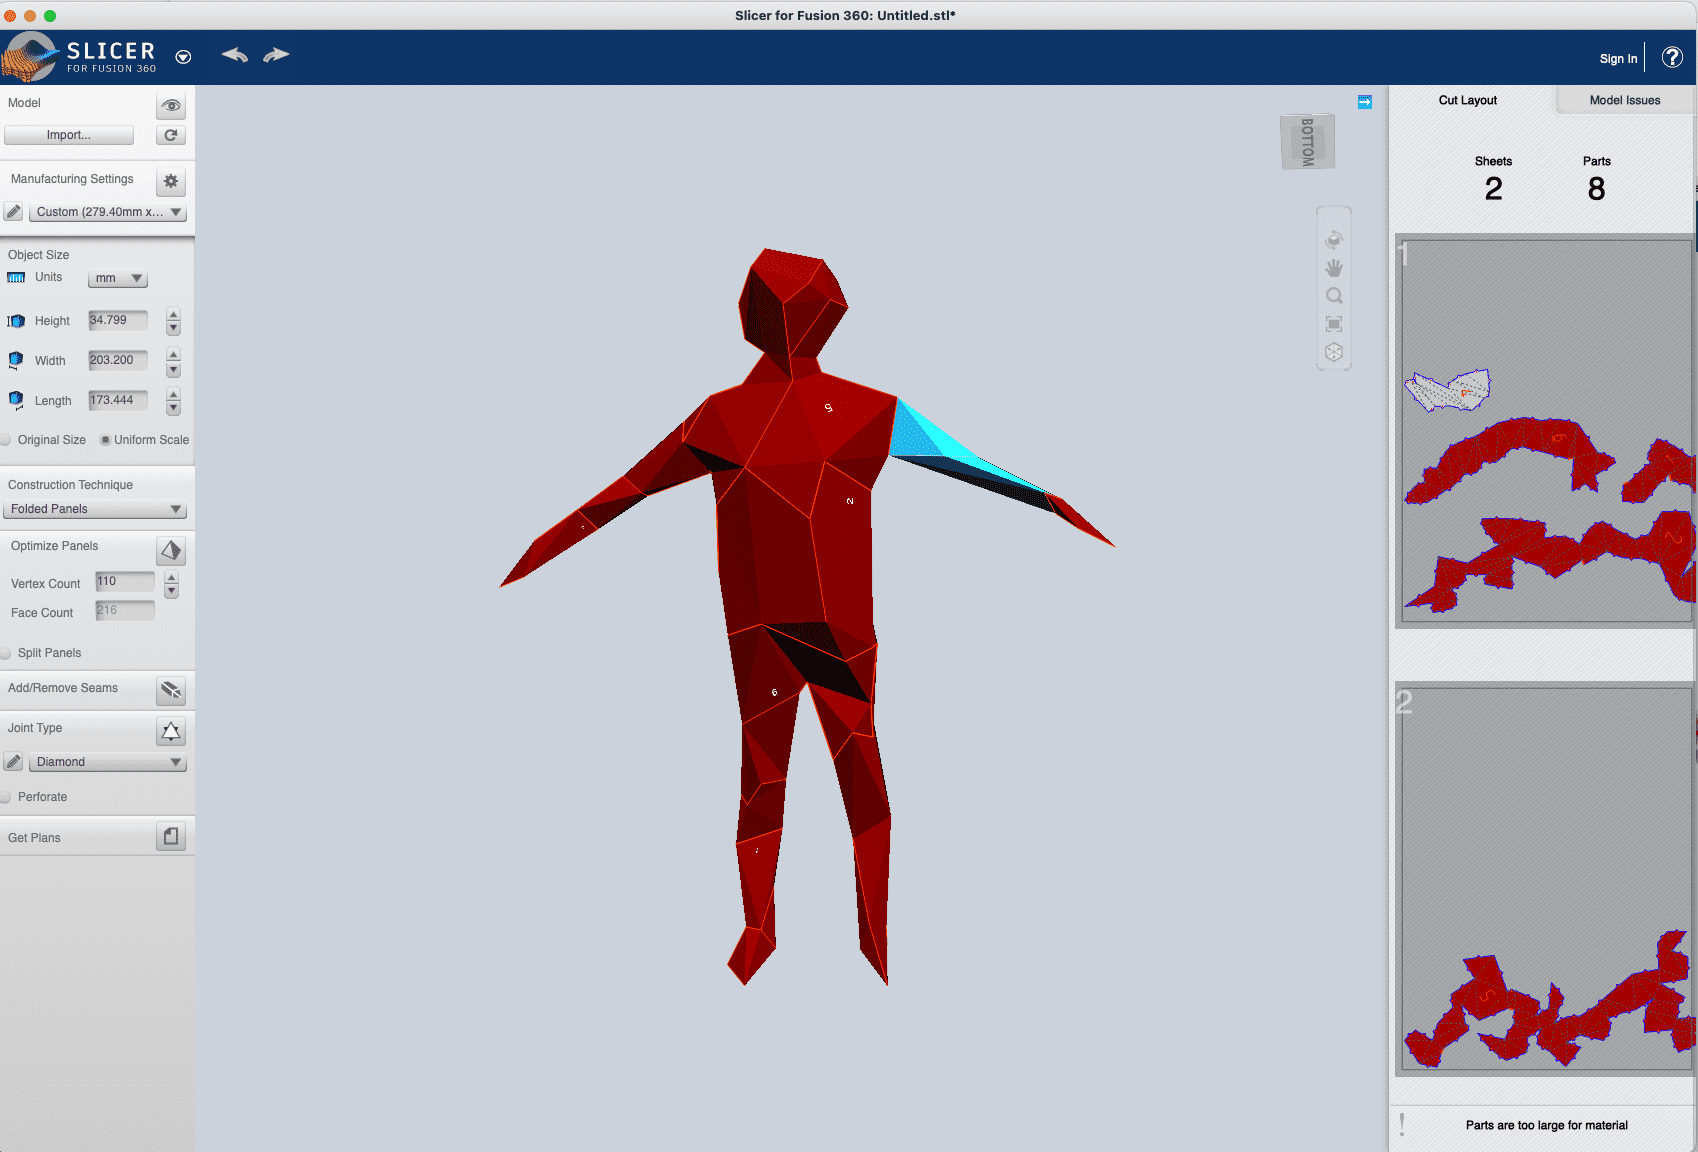
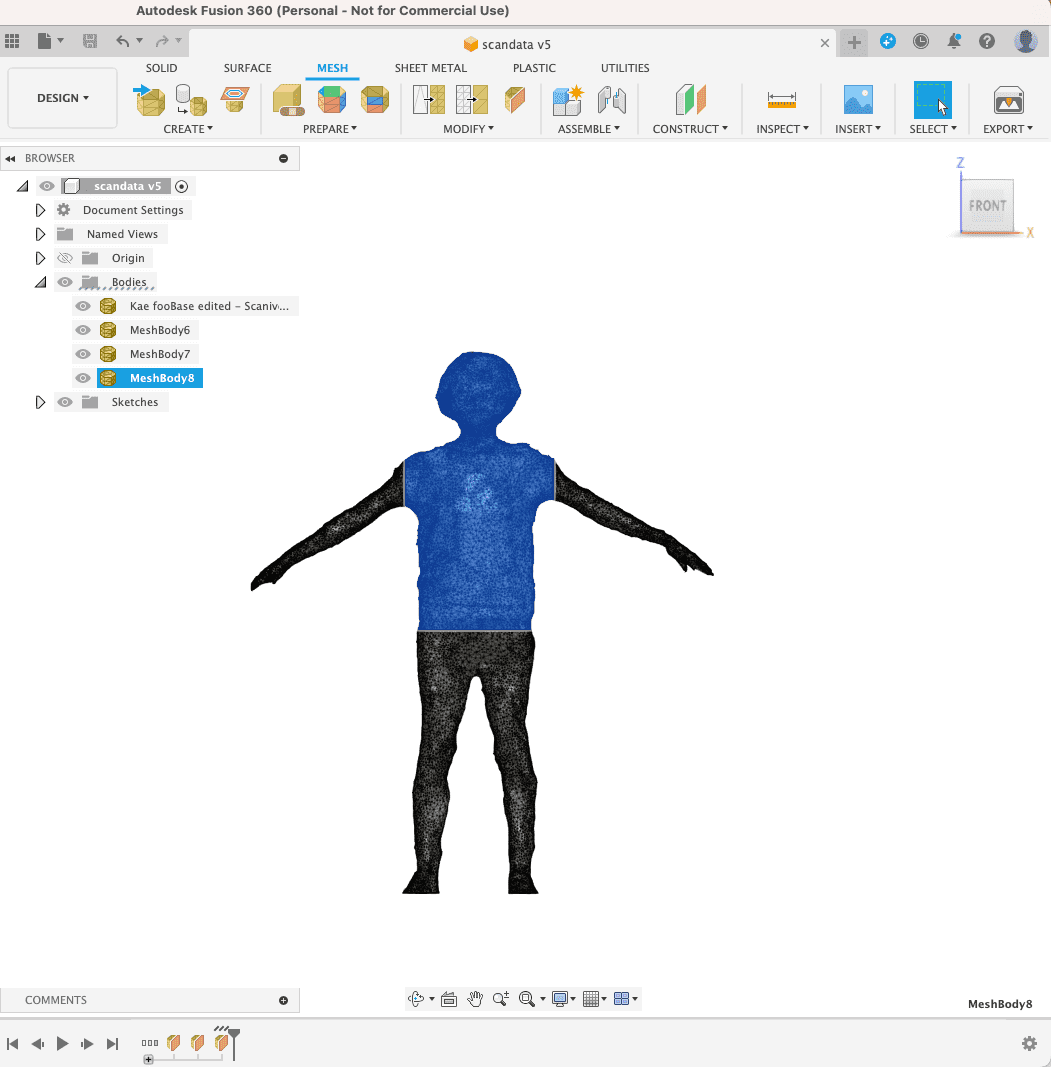
As first trial, I decided to make a simple torso. Using the "Mesh > Modify > Plane Cut" tool, the body and head parts were extracted as follows.
Rig & Animation
I tried to animate my Body. Imported the stl file to miximo, then selected five points, chin, wrists, elbows, knees, and groin to add rig. The default setting is symmetory, but I unchecked it as my scanned legs are not symmetory.
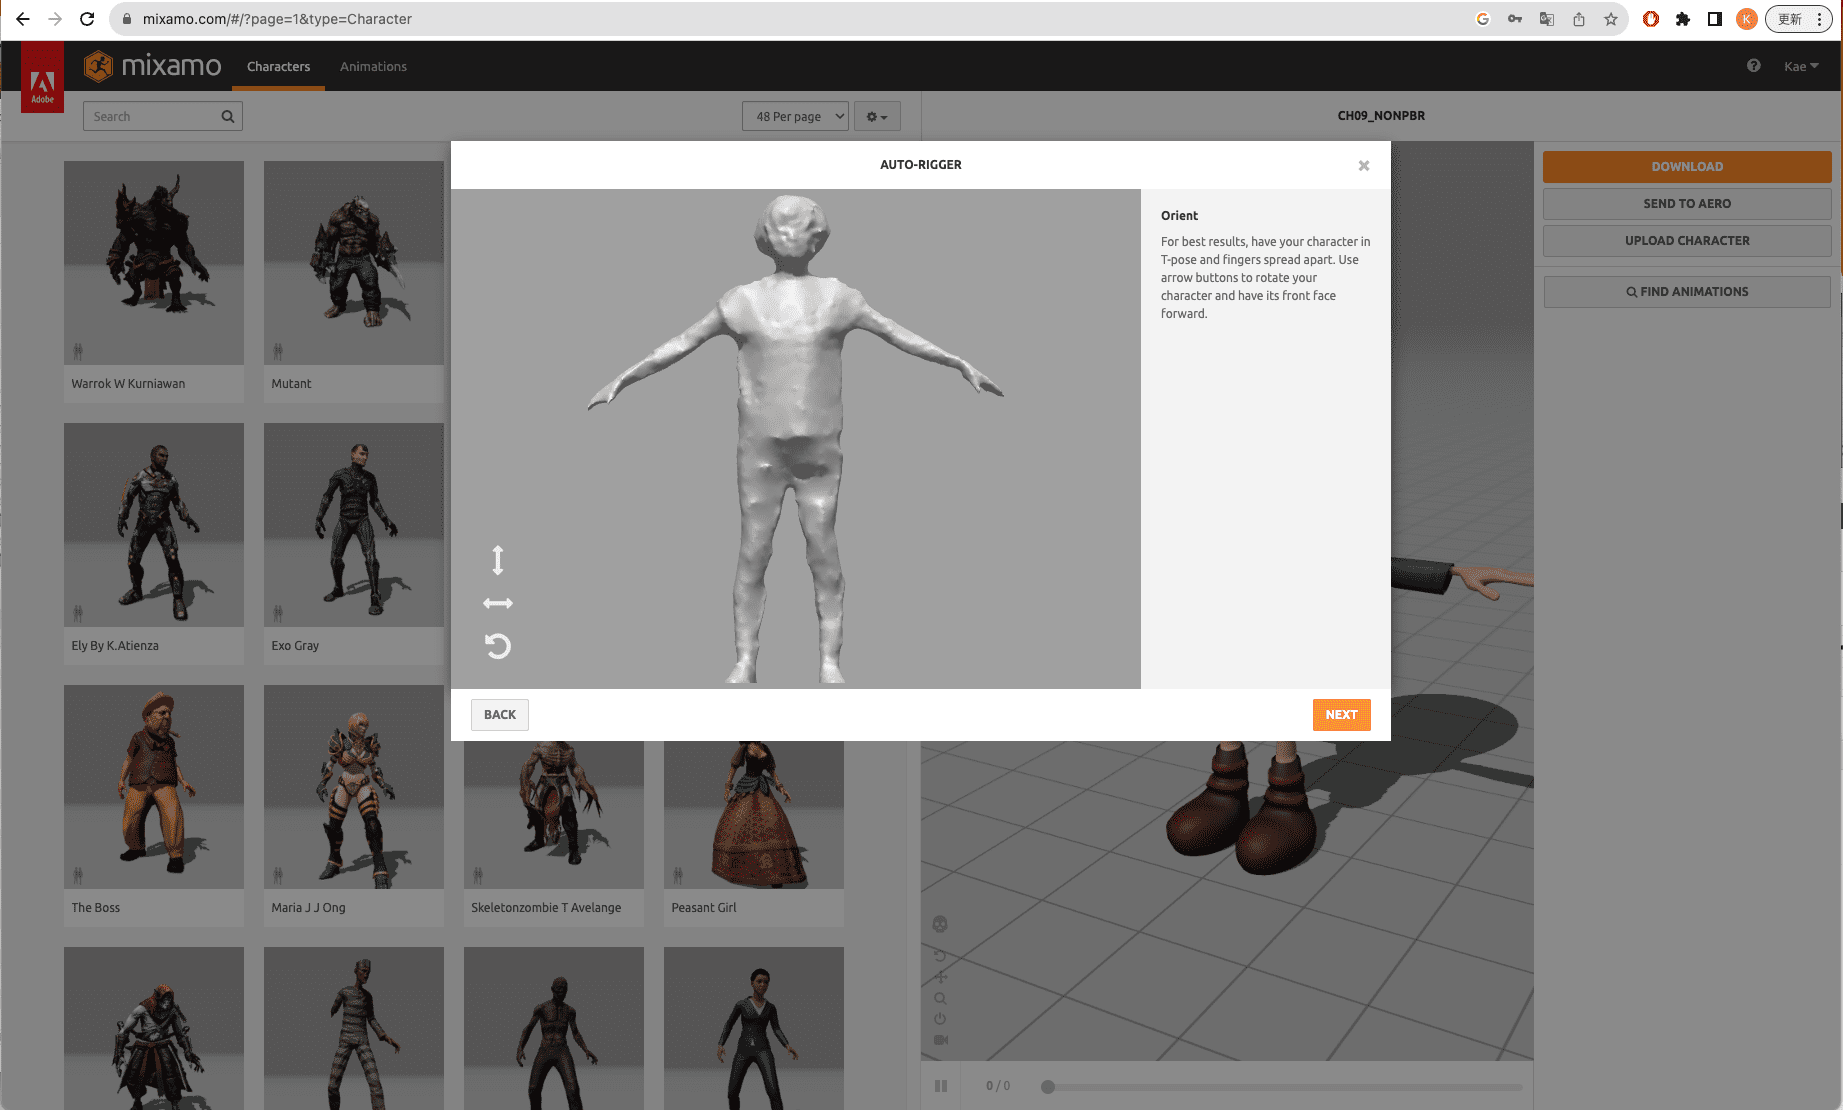

You can choose from many animation presets. It's very interesting to be able to add animation like this with a simple user interface.
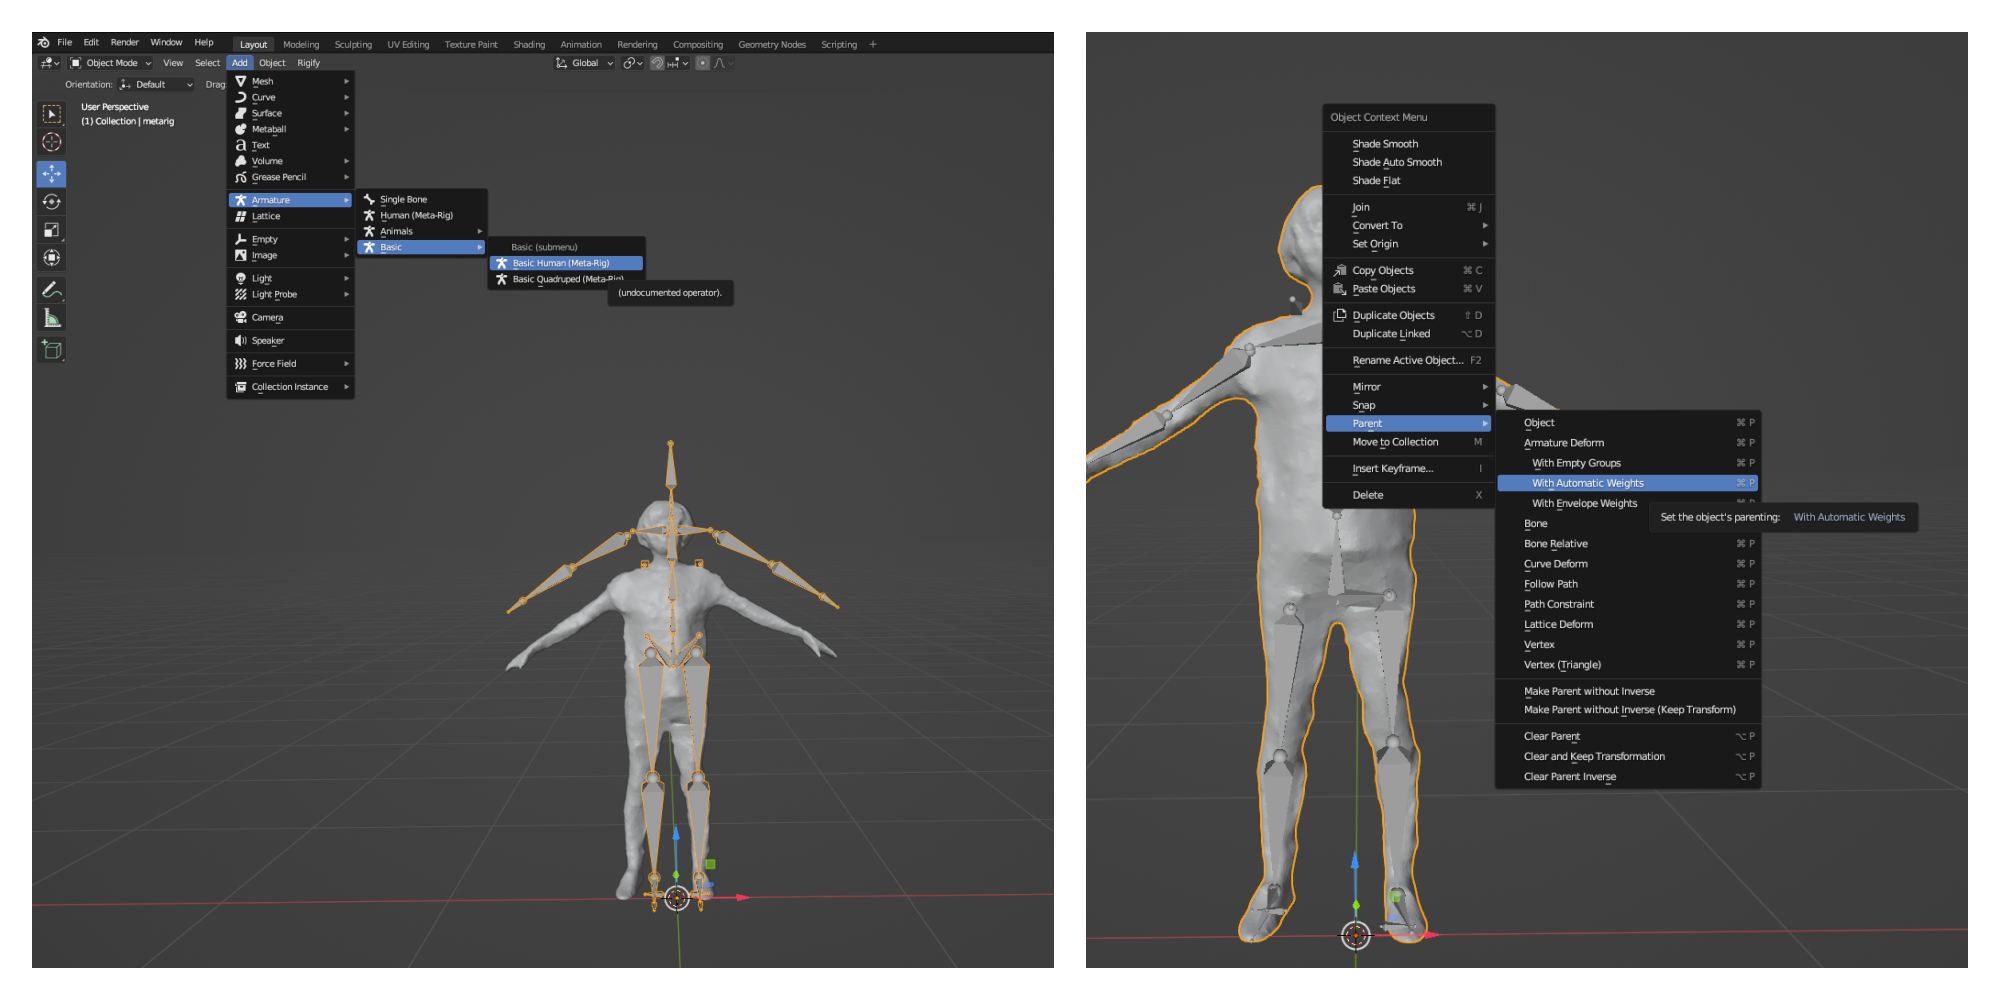
I also tried the Blender rig. The Rigify function is off by default, so enable it by " Edit > Preference > Addon > Rigging > Check Rigiing:Rigify". You also need to check "Run python script" in the "Save & Load" of the preference. I linked the Rig to the model, but it didn't work properly, so I'm still considering it.
Mesh Repair
Actually, in the first scan I tried, the area between my legs was buried, and I tried to repair it as shown below. However, I realized how difficult it would be to repair it. The second time, I captured it in a pose with my legs and hands spread out to improve the burying problem.
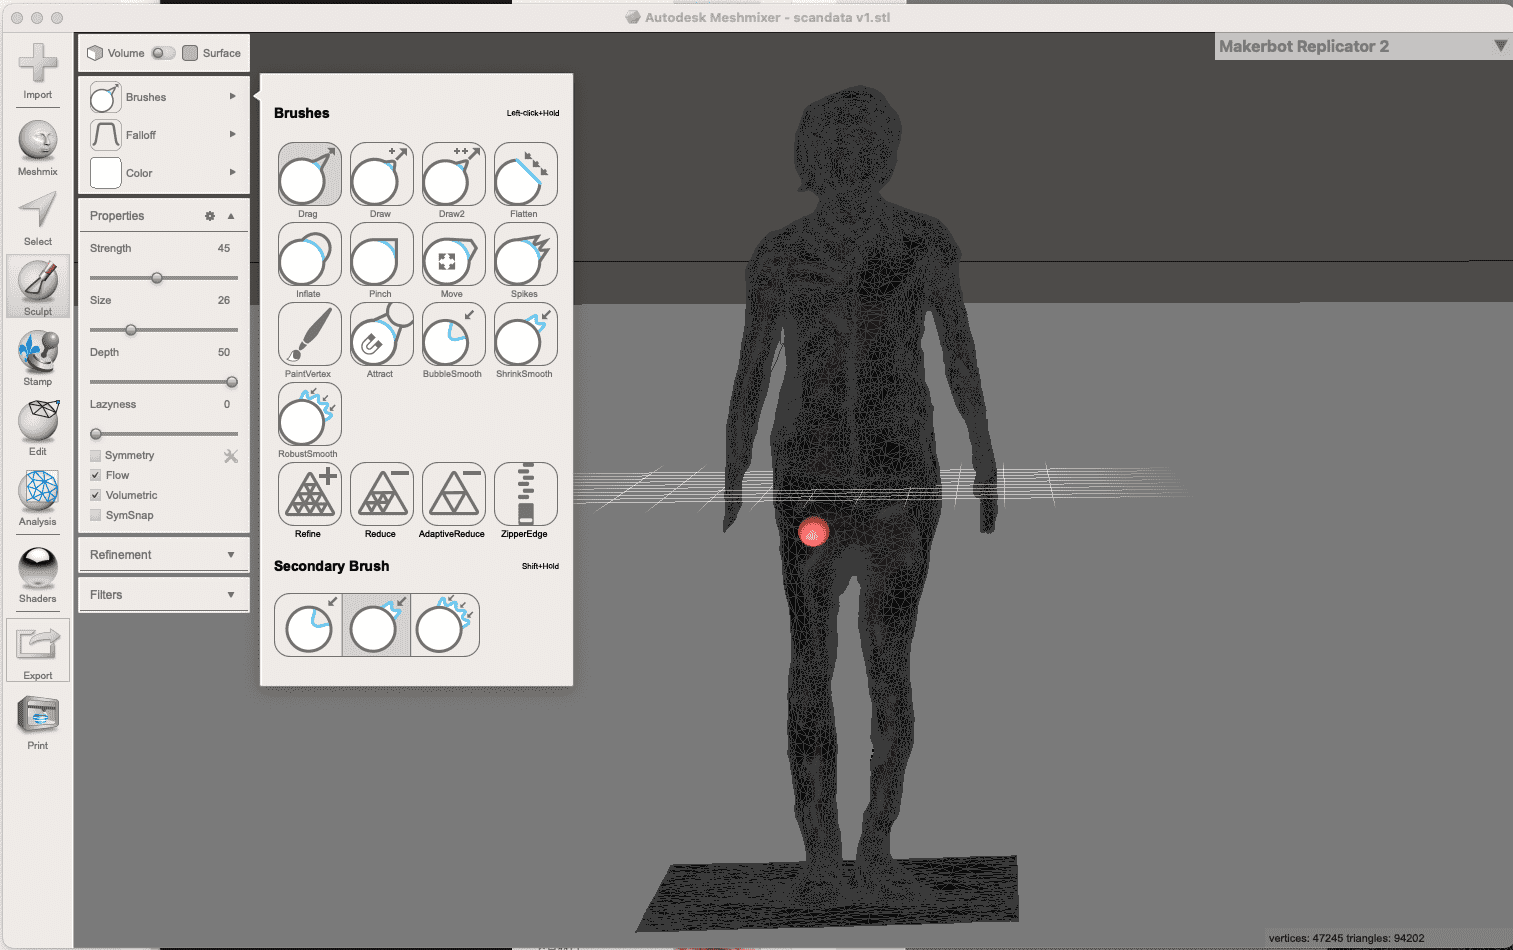
I imported the scanned model into Mesh Mixer and tried the sculpt function. As shown below, you can set the brush type, size, and depth of action. The modified area will result in a finer mesh, but there is also a brush that reduces the mesh. The brush icon looks convex, but when you press the command button (Mac), the effect is reversed.

The buried legges were repaired using Drag and flatten brushes.
Laser Process
I learned to use the Laser cutter @ Fablab Kamakura during FabAcademy. The document is here.
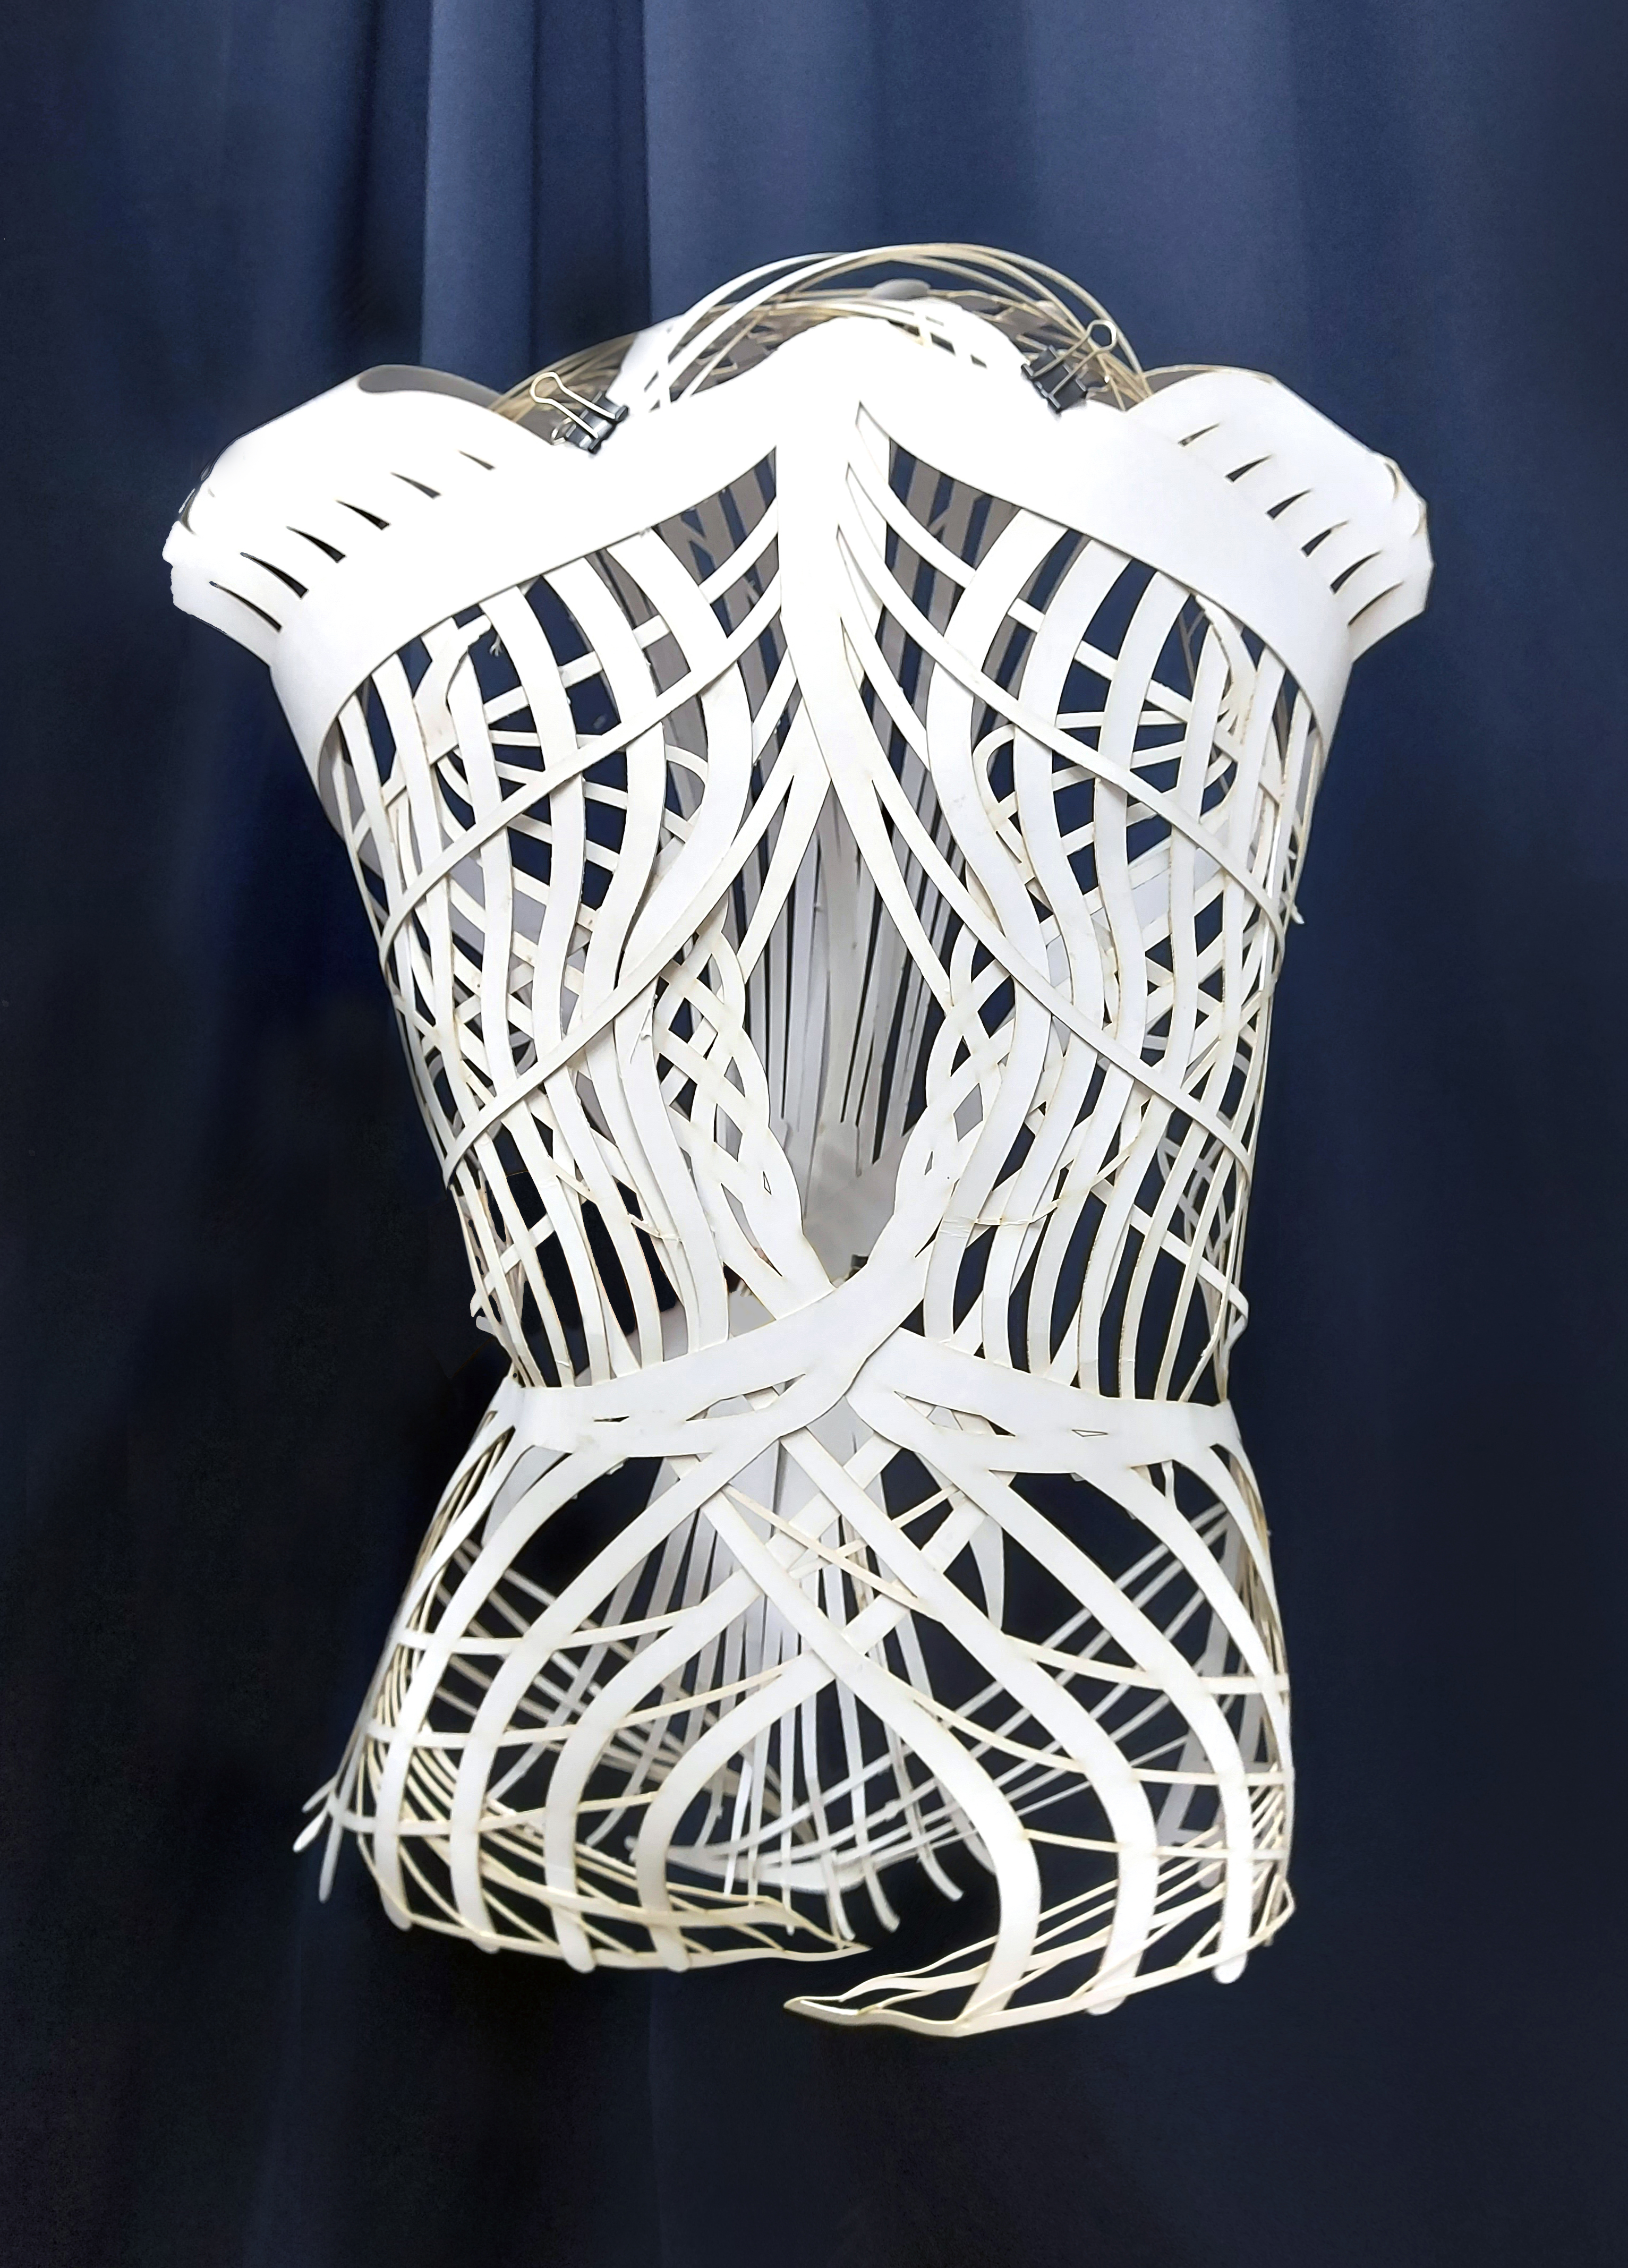
I Cut the sliced pattern using laser and assembeled as follows. But... I couldn't insert one parts at my sholder area. Ummm... I should have checkd carefully before cut.
2 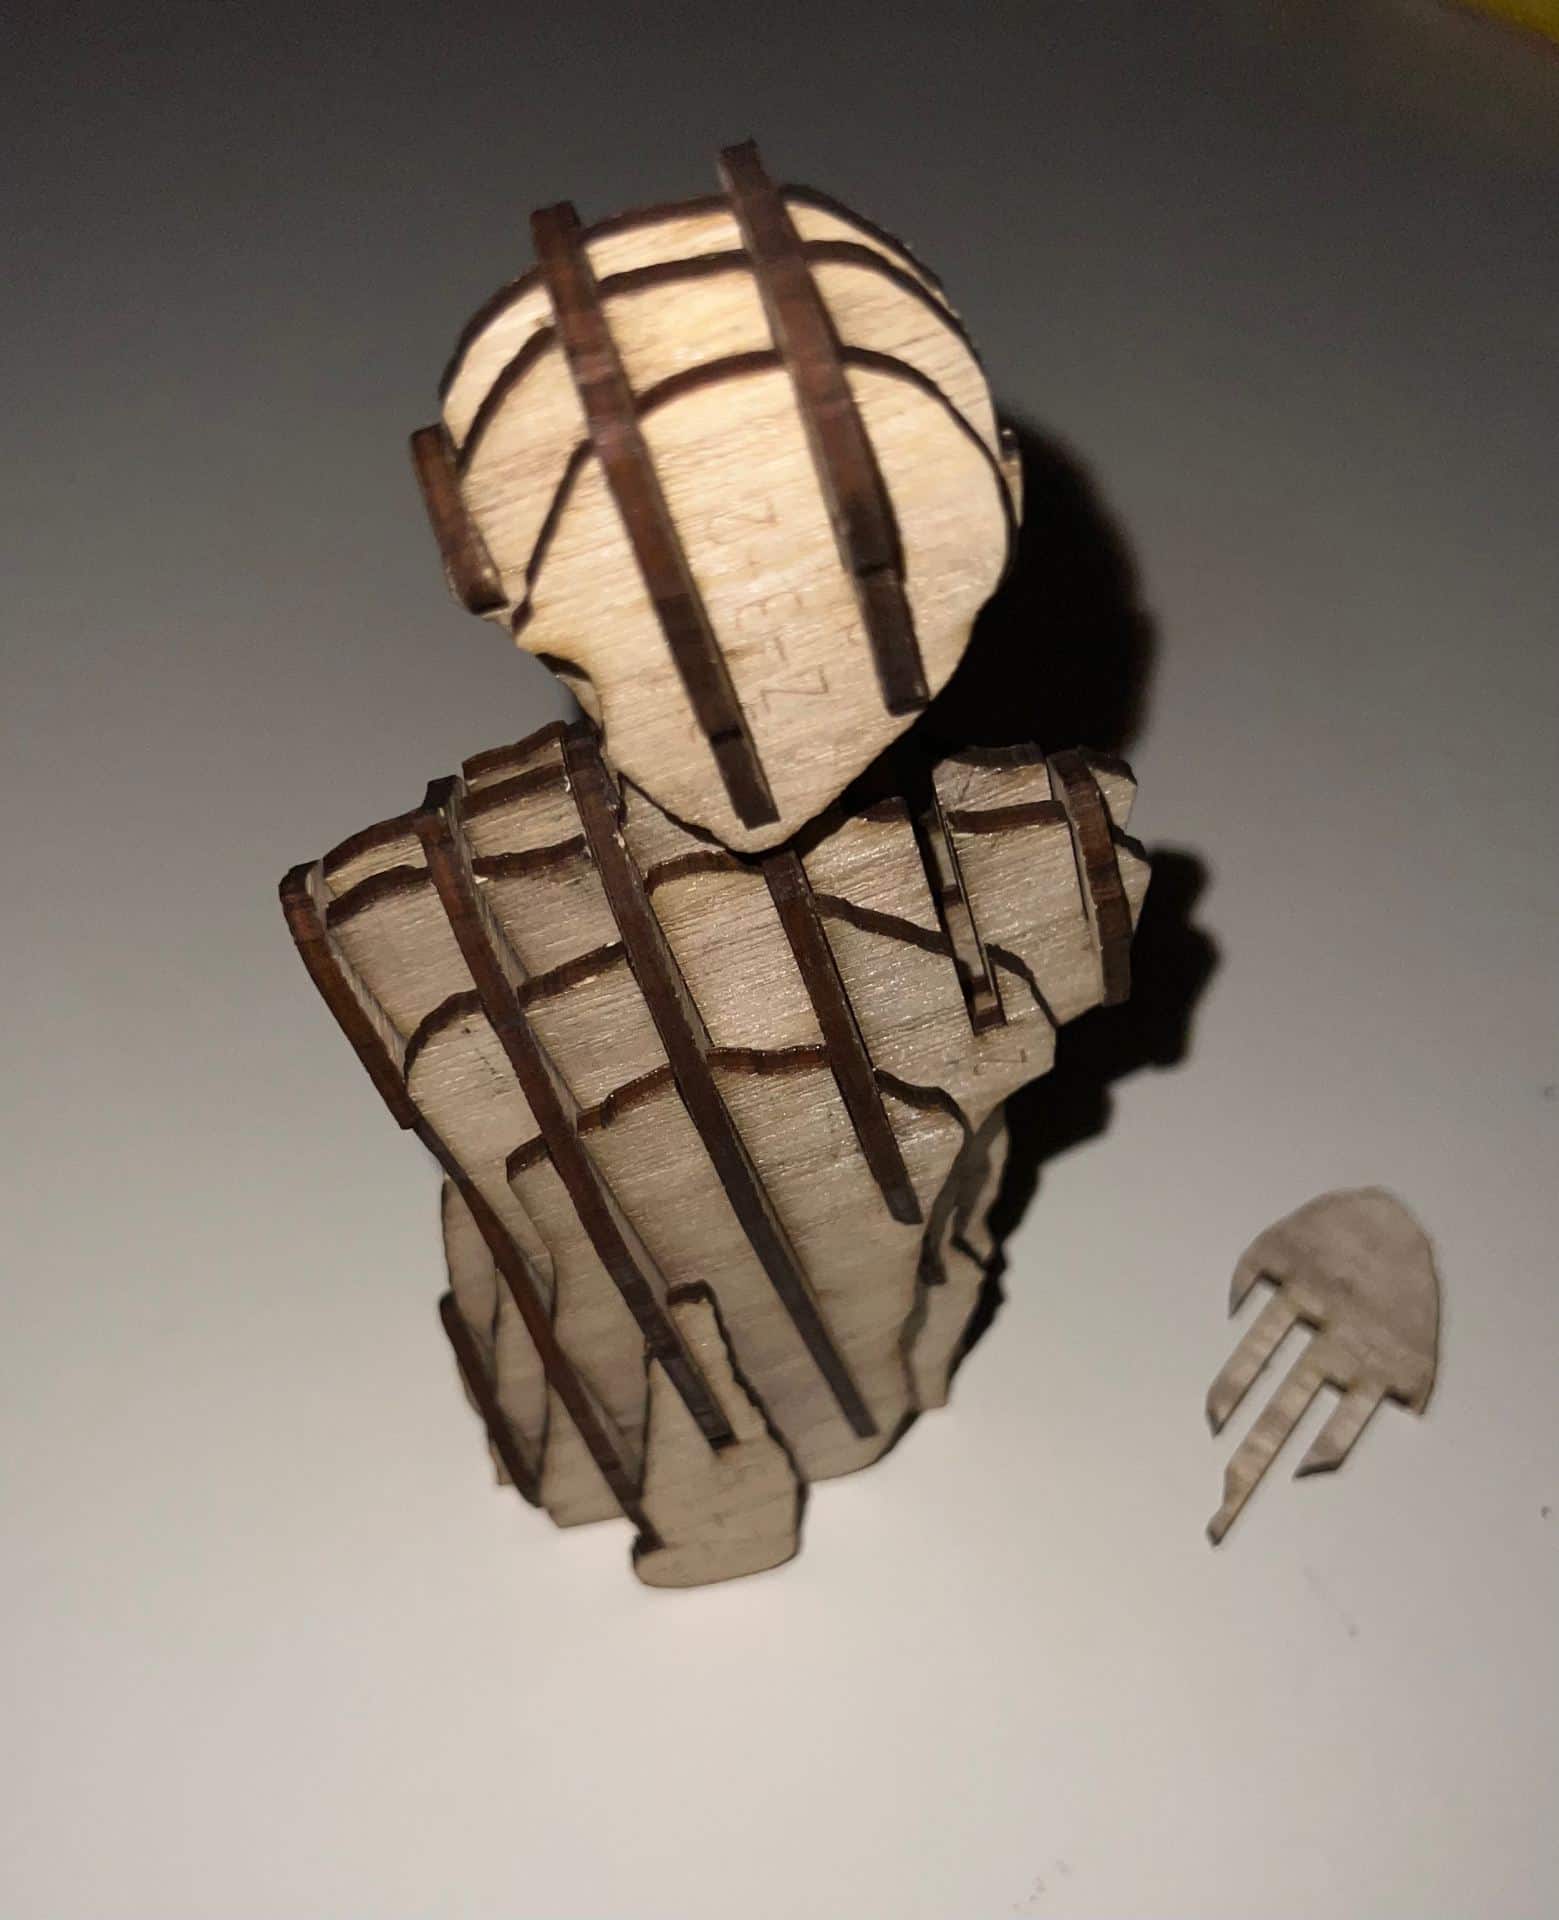
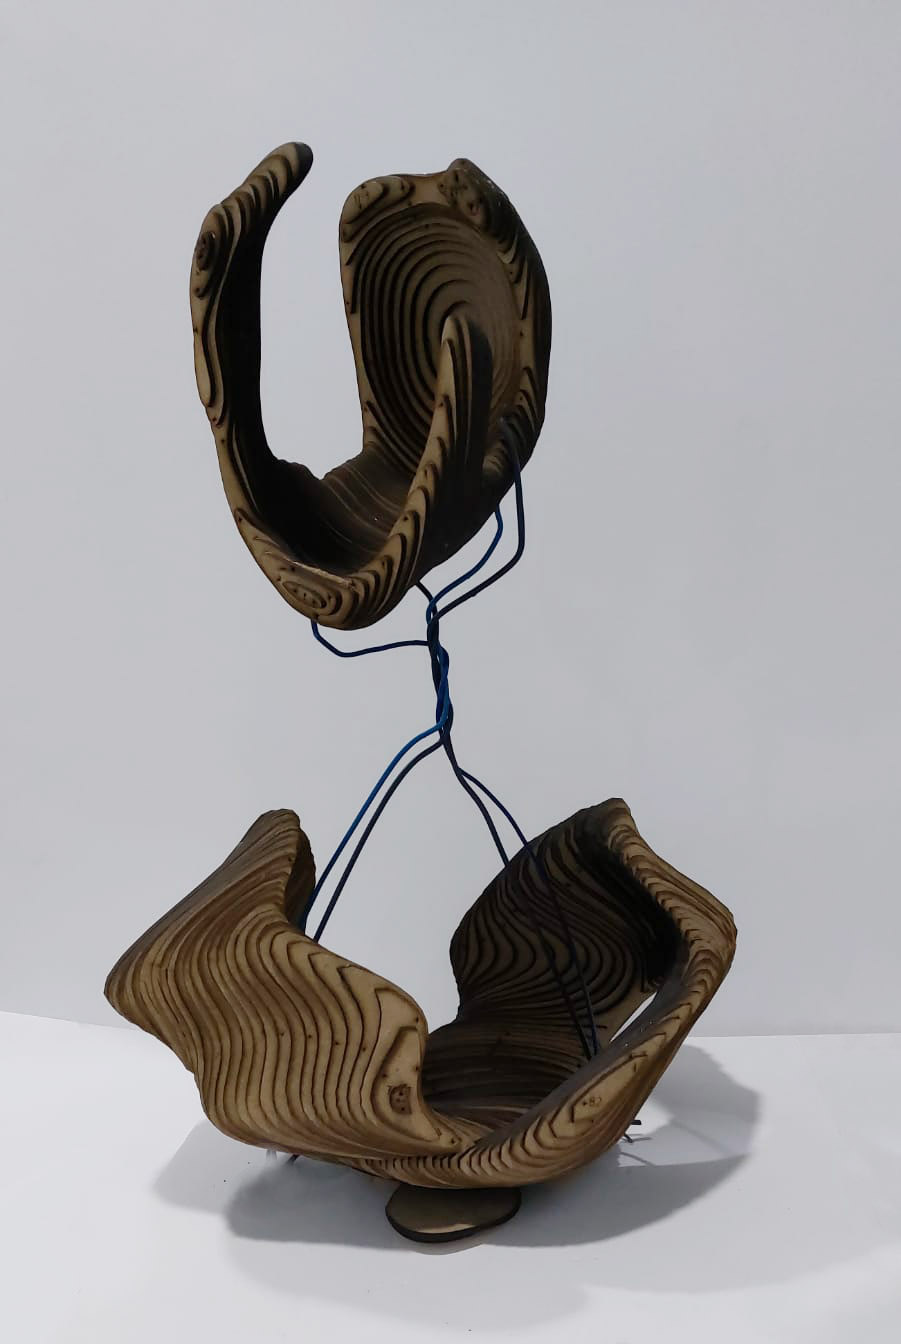
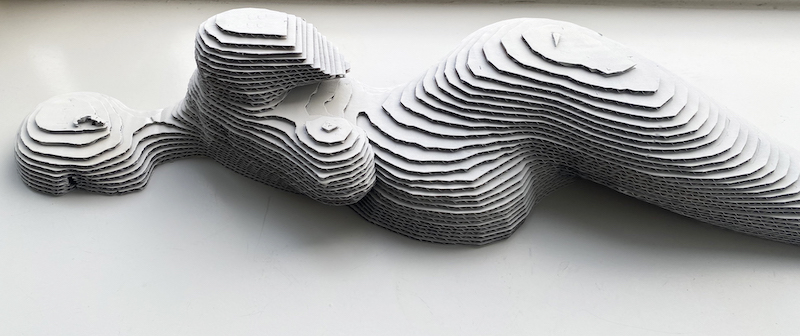
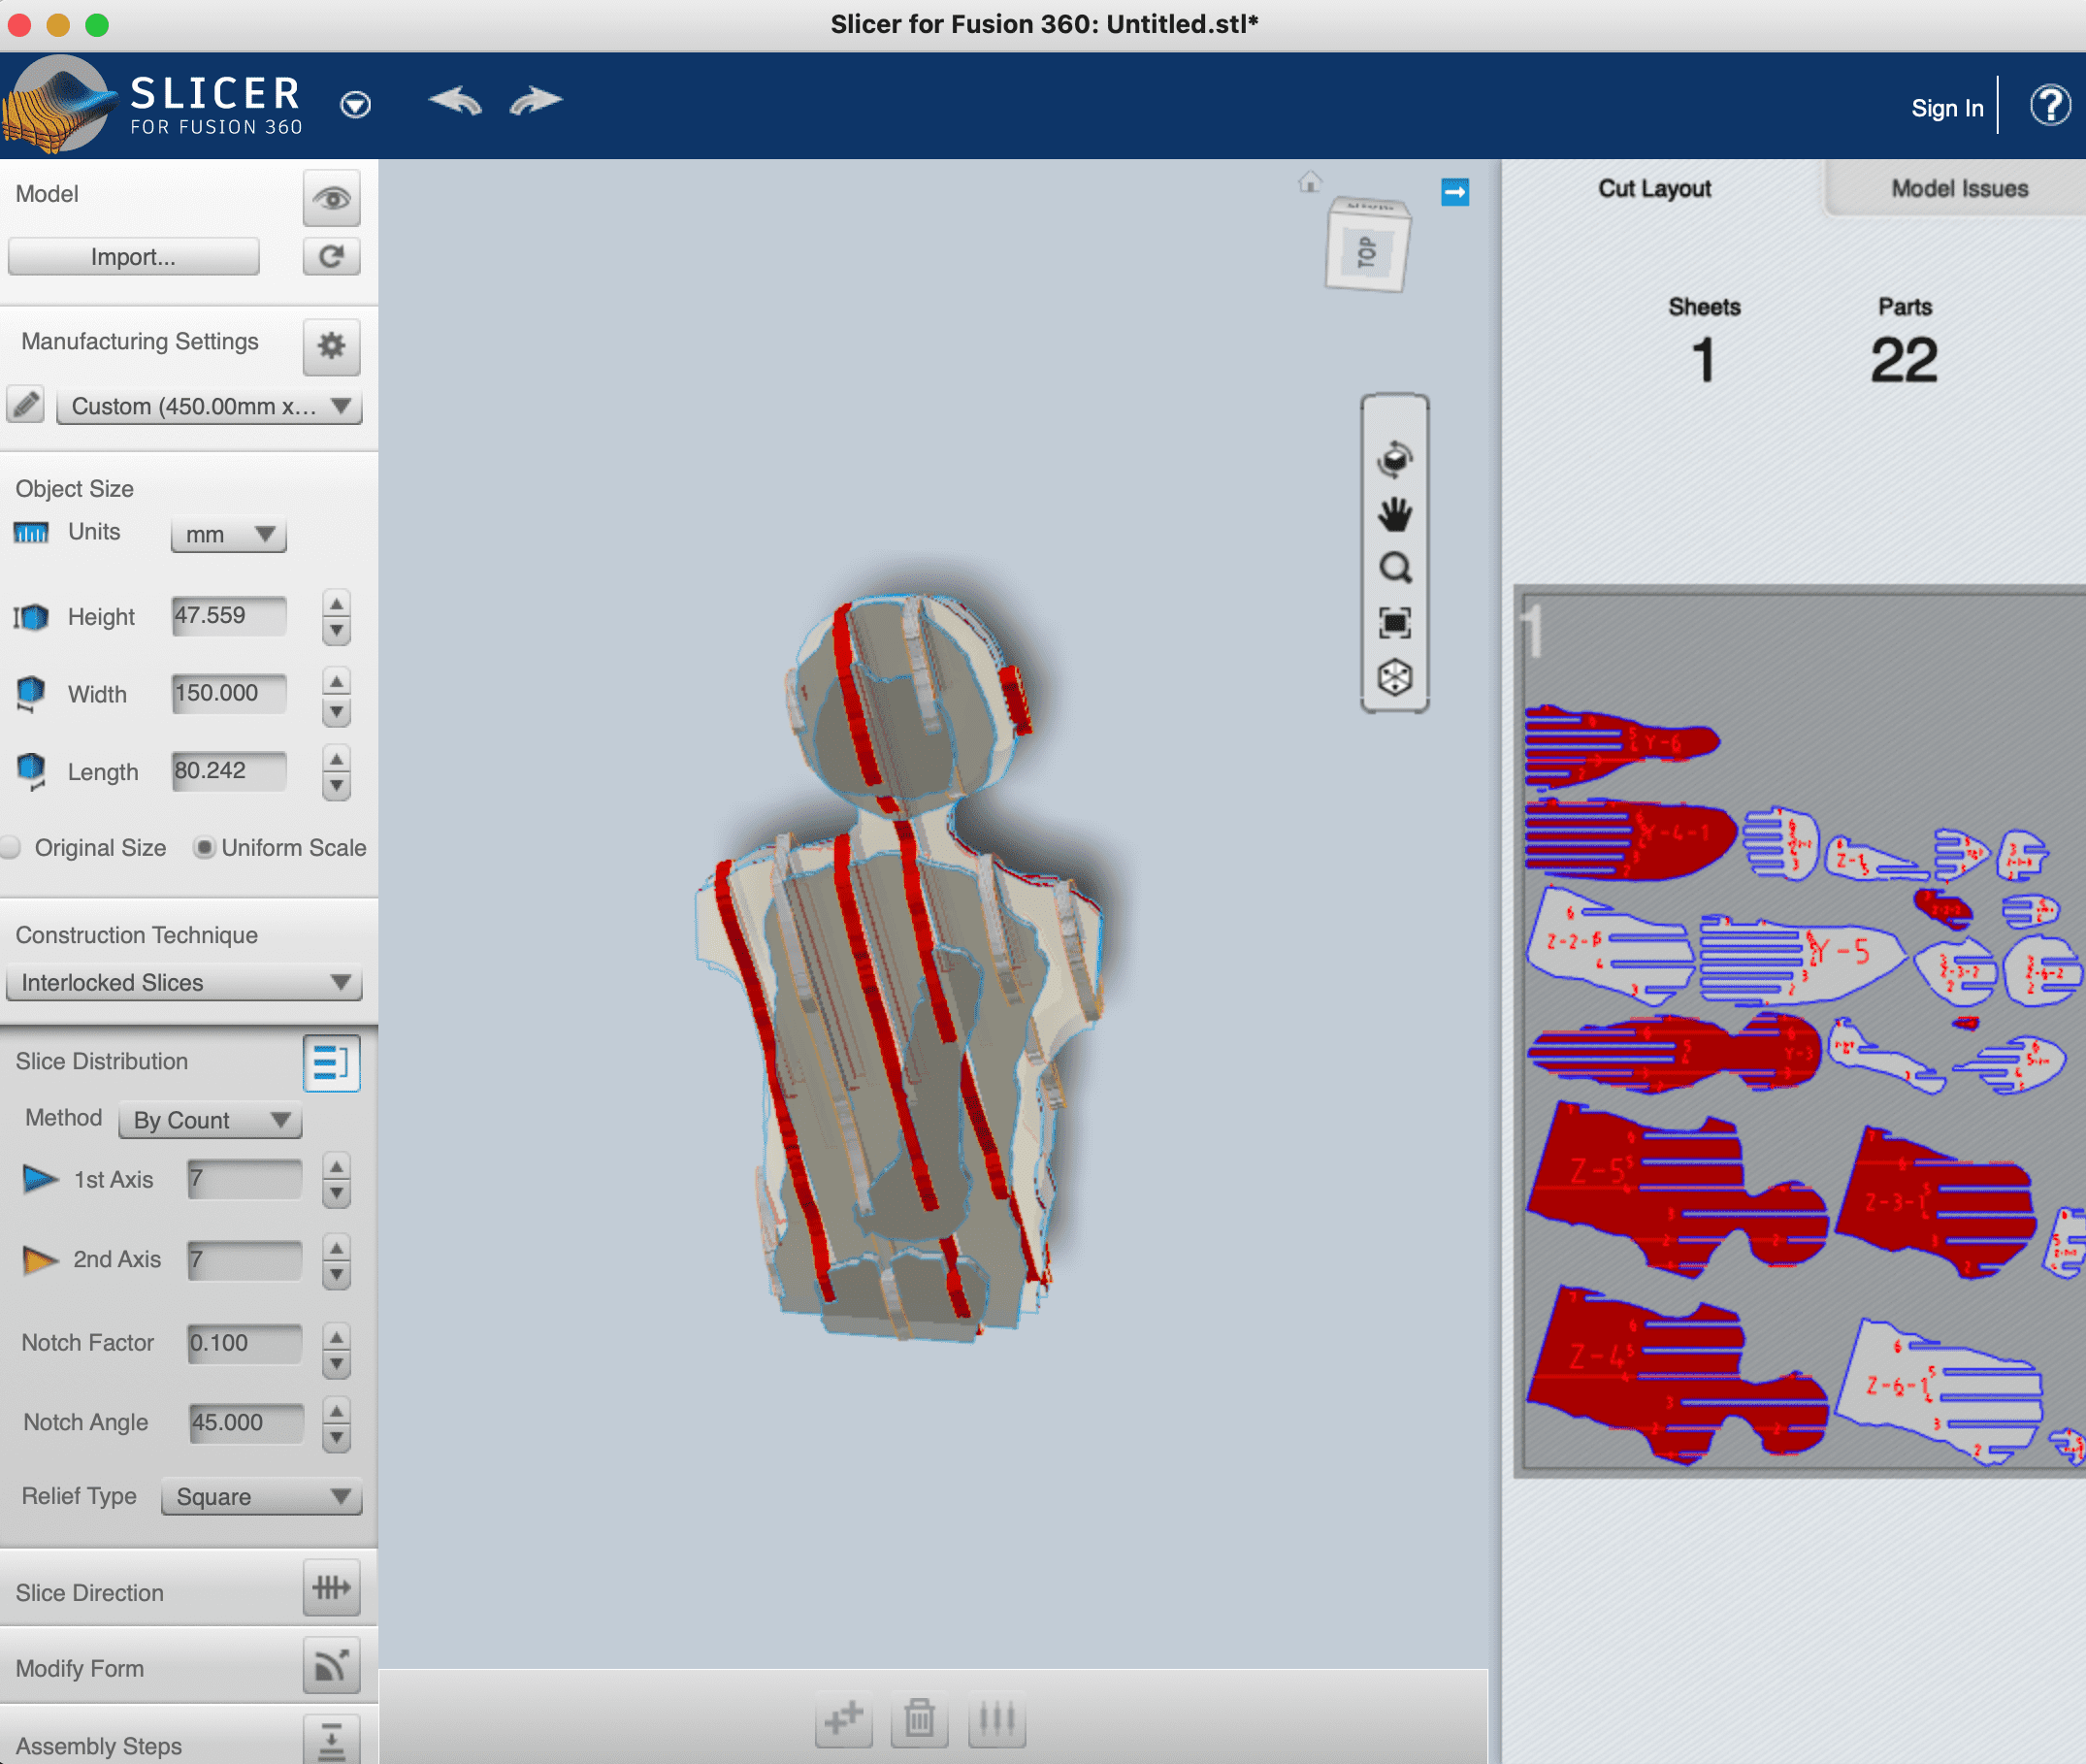
I tried Stacked Slice pattern.
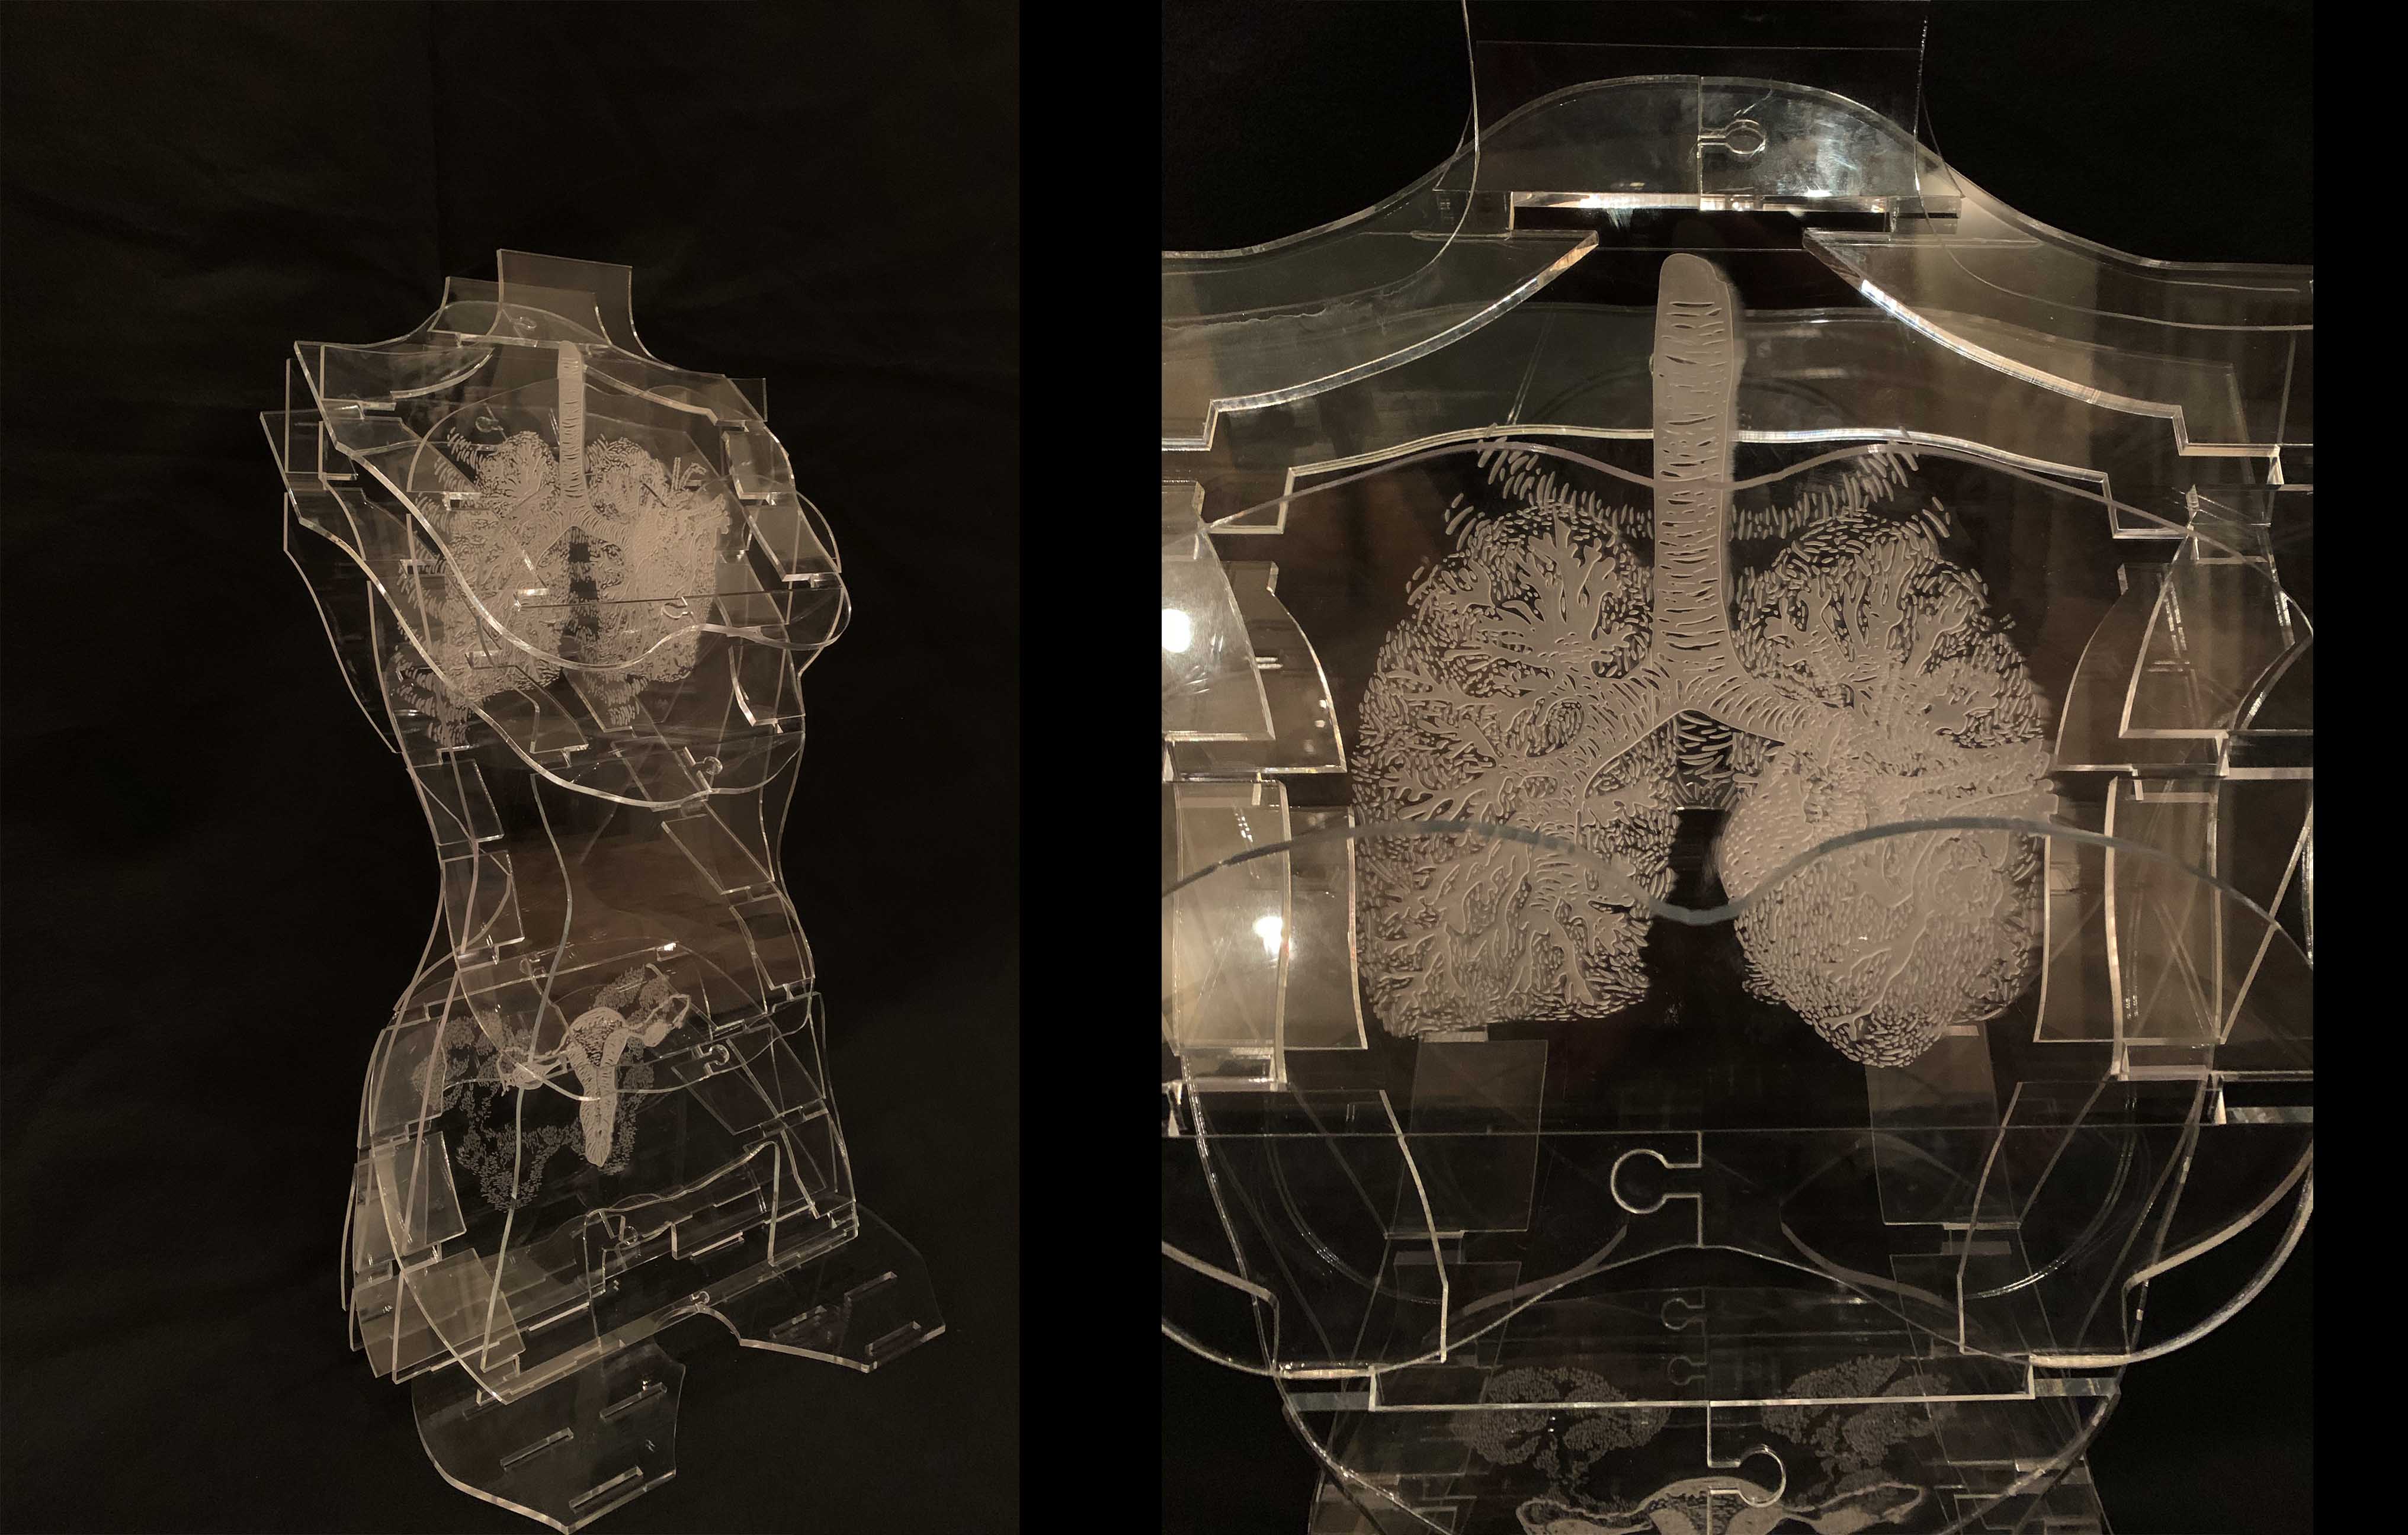
To show my concept, I expressed the skin boundary with Voronoi pattern using Rinoceros/Grasshopper.


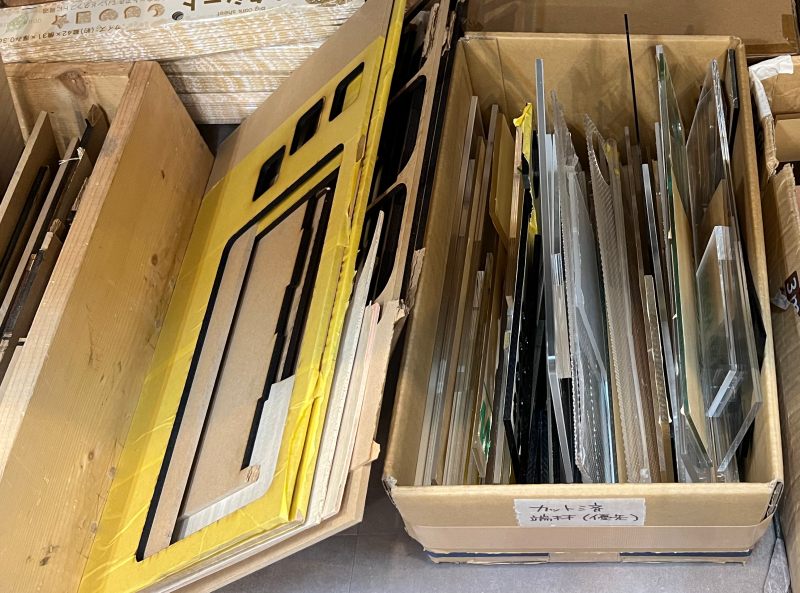
The material used was junk acrylic. During the Covid19 pandemic, offices used acrylic partitions between people, but now they are being discarded in large numbers.

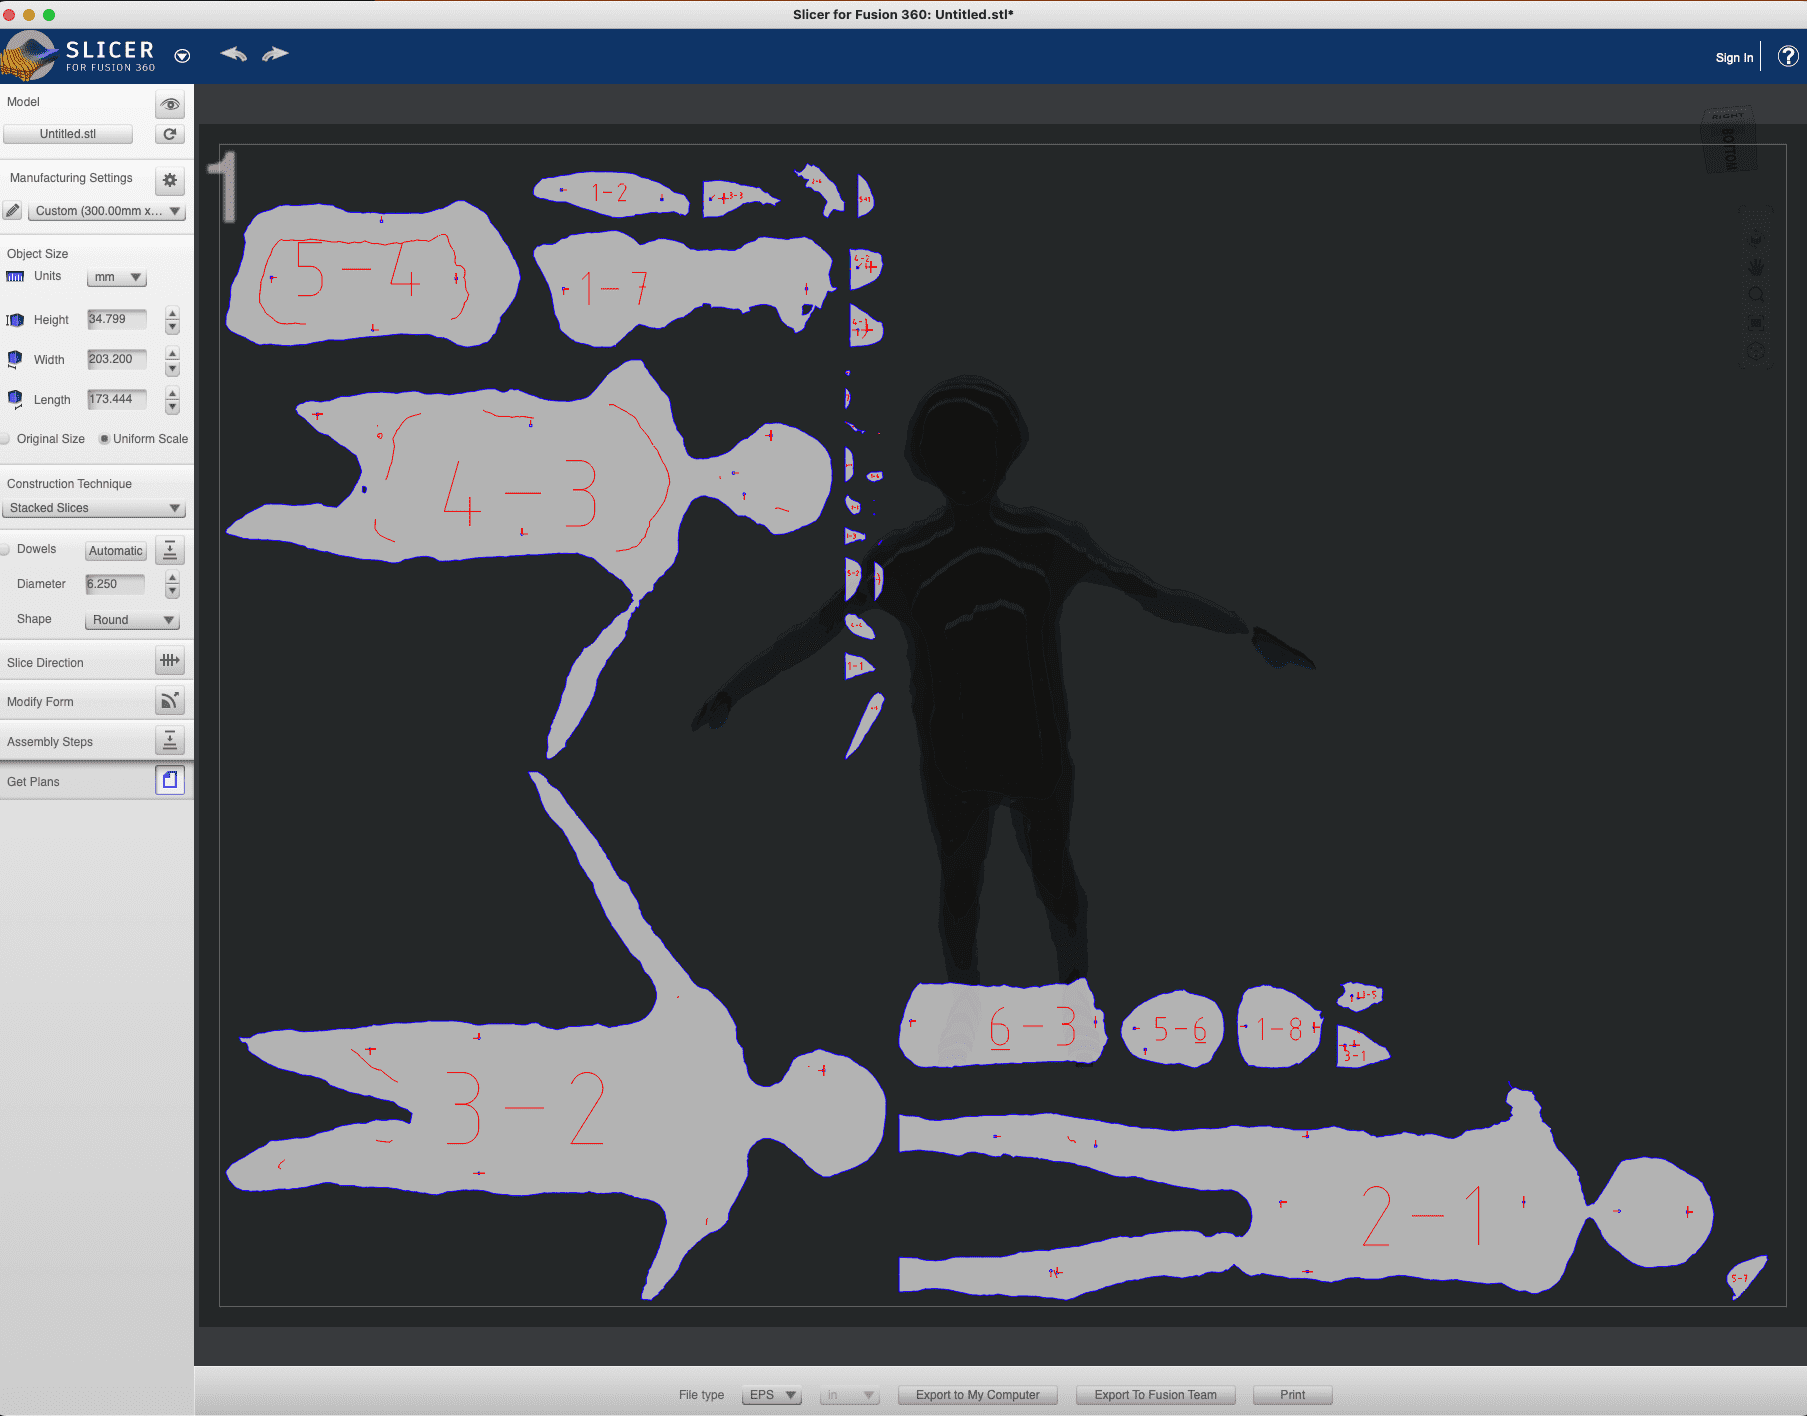
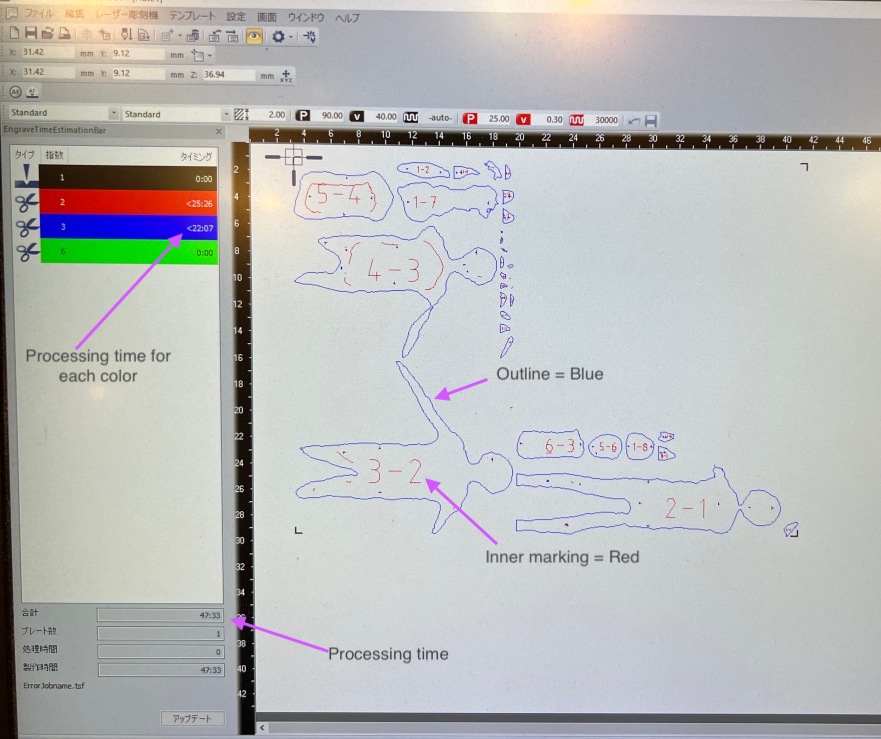
There are two types of laser processing locations as shown below. The blue line is the outline cut, and the red line is the stacking order and location marker. First, the blue line was cut in Vector mode, and the red line was engraved in Raster. However, I realized that Raster takes a long time, so I decided to weaken the power of Vector and mark it.
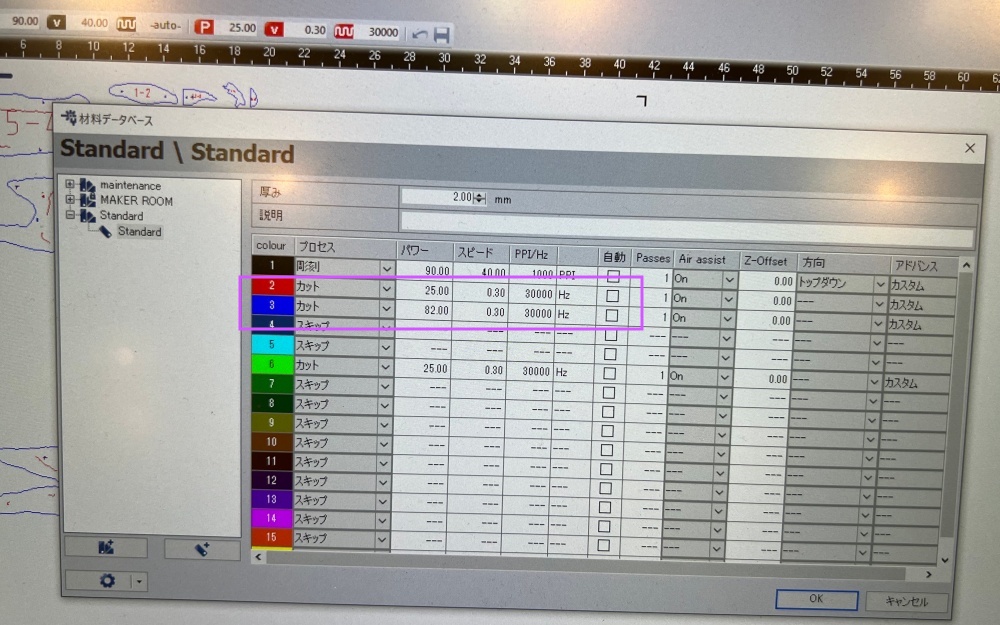
| Processing location | Material | Thickness | Mode | Power | Speed | Frequency |
|---|---|---|---|---|---|---|
| Outline cut | Acrylic board | 5mm | Vector | 82 | 0.3 | 30000Hz |
| Inner Marking | Acrylic board | 5mm | Vector | 25 | 0.3 | 30000Hz |
| Voronoi pattern | Acrylic board | 5mm | Vector | 25 | 0.3 | 30000Hz |
| Outline cut | MDF | 5mm | Vector | 80 | 0.46 | 5000Hz |
| Inner Marking | MDF | 5mm | Vector | 40 | 0.46 | 5000Hz |
You can check the time required for processing on the tool screen. In this case, the blue line takes 22.07ms and the red line takes 25.26ms. This time, I used the following junk box materials, so I didn't cut them all at once. In other words, because I selected and cut parts of the design to fit the free space on the material, the working time was longer than the time on the tool above.
Assembly
The slicer software makes marks to indicate where to overlap. Assemble using that as a reference.
However, in this work, the following materials are sandwiched in between, so the positions have to be adjusted while keeping in mind the overall balance.

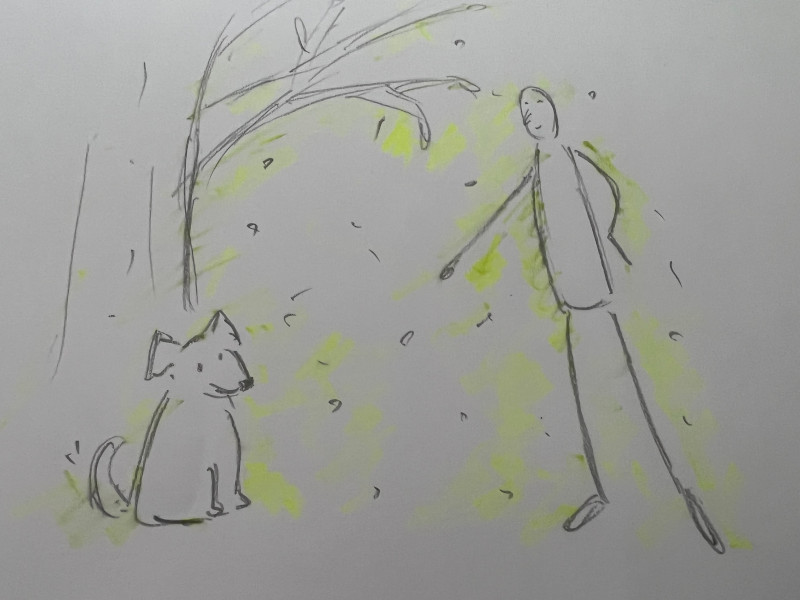
Gathered materials such as my dog's hair to create airy ambiguous body boundaries
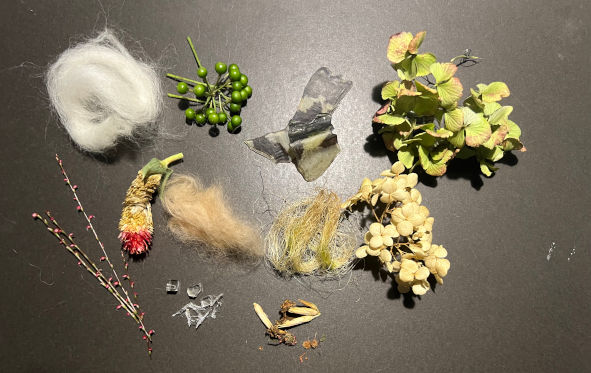
Tried to insert red acrylic board that shows energy, blood.

The triangle object in the right center of the photo is dog head. I download the dog model from Thingiverse and placed in the natural space.
I wasn't satisfied with the expression, so I tried combining it with wood.
- Material and Parameters of Laser cutter
- MDF thickness=5mm
- Outline cut
- Vector mode: Power=80, Speed= 0.46, 5000Hz
- Marking for stacking
- Vector mode: Power=40, Speed= 0.46, 5000Hz
Raster takes time, so I marked it with a vector with low power.
- Vector mode: Power=40, Speed= 0.46, 5000Hz
- Outline cut
- MDF thickness=5mm


Files
-
3D scanned file is uploaded to sketchfab ↩