9. E-Textiles and Wearables II#
Another interesting and accessible lecture by Liza Stark, with a good list of considerations when designing soft electronics, or E-textiles.
-
application: is it for a POC or runway/performance
-
durability: daily, body or mannequin
-
wearability: feel on the body, weight etc.
-
washability: necessary?
-
power: tethered or battery
-
circuit layout
notes & links#
This week we’re exploring state changes:
- visual; LEDs (neopixels, smd, thruhole etc), no of pixels x 40mA/1000 = amperage needed. fibre optics, pixie led adafruit 3W are good, end or side emitting, documentation for attaching to led. Maurin Donneaud thermochromic inks; Sparkfun. SFXC supplies for textiles and paper, Laura Devendorf, NeoPixel Generator
-
sound; fabric speaker tests on vimeo, useful sciency website, dfplayer mini, (watch out for the useless libraries) Sound Embroidery by Claire Williams.
-
motion; shape memory alloy, sma meets smocking workshop, crimp beads jewellery making no solder, Afroditi Psarra & Dafni Papadopoulou made a Culture Dress, flip dots, hematite beads, Stitching Worlds & the Embroidered Computer Irene Posch and Ebru Kurbak Drapery FM vibration motors, ERM vibration motors, adafruit haptic motor driver
-
attiny EMF detector Afroditi Psarra, attiny 85
Heat element: resistance = 2.5 ohm up to 15 ohm current = 0.8A up to 1.5A V= IxR
mosfet N
gate to IO pin source to GND drain to power
Gate reacts when there is a difference between voltage on pin and GND. VGS digitalWrite(pin, LOW) = no difference or GVS = 0 digitalWrite(pin, HIGH) = 5V or VGS = 5V
I’ve always found the Gate name confusing with Mosfets, but I try to remember its function as allowing the current to walk on the fence, not through the gate - if the gate was open it wouldn’t be able to tightrope walk across to the other side of the fence.
Attiny socket, sew onto fabric, pull out attiny whenever you want to program it.
things for the future#
testing some techniques#
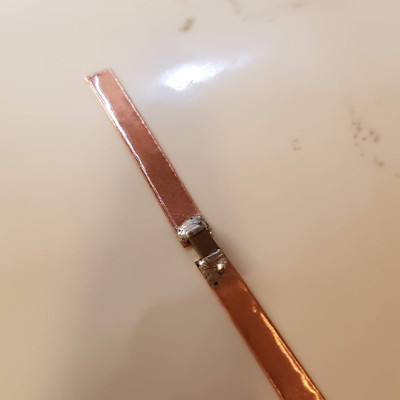
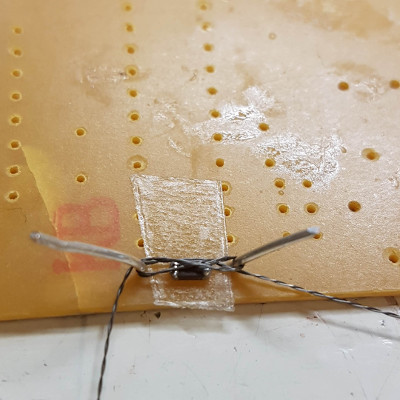
I haven’t soldered onto copper foil for a while, so I thought I’d warm up by trying that. I just cut a strip of it with scissors so I didn’t waste any. I also tried to work out if we had any solderable conductive thread, because I was sure that Cecilia had said there was some. I tried all the conductive thread I could find, but to no avail. I made a little jig to wind the thread around so that I would be able to solder it to a capacitor, and then cut the middle bit so that it was not longer connected, but as I didn’t find any solderable thread, I don’t know yet whether it is a good idea. A few days later when Cecilia returned, I remembered to ask her about that thread, and she told me where it was, so I got to use it for my wenduino instead.
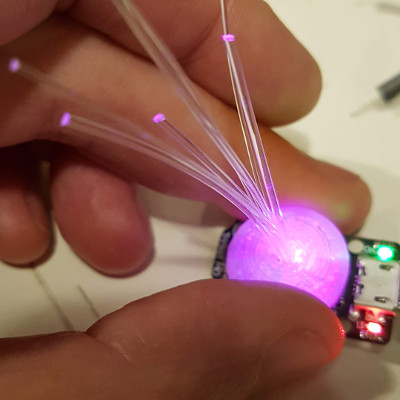
I also tested out the fibre optics - we have two different thicknesses, and I combined them in a little bundle (tried heatshrinking them together but that didn’t work so well) and put them in a 3D printed neopixel diffuser that Bella printed out, but I’m embarrassed to say that I can’t find it on Thingiverse to link to it. It worked nicely, and you can see it more clearly in the video in the next section.
pressure sensor continued#
I was having trouble with the circuit I made in the first wearables week, did a little troubleshooting, frankenhacked and had to cut out the trinket. I think I cooked the pin (I still have to test that), but you can see below, I put some other neopixels on a different pin, and all is working fine. I am very pleased to have begun using the sockets with the Attinys - it will make troubleshooting easier.
getting the vibe#
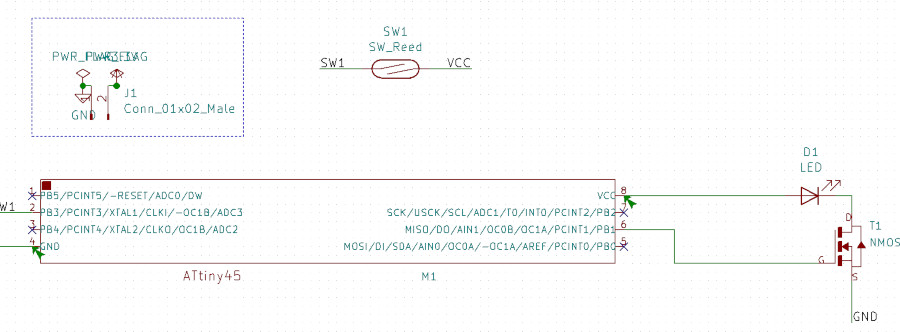
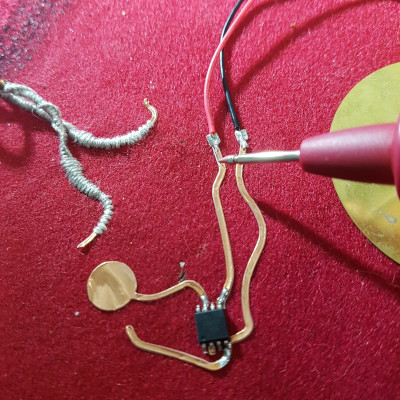
We had another great session with Emma, who got us testing out some piezos and vibration motors. I decided to make my own copper circuit for this one. As I’d never hand drawn one ever, I thought I’d try that. We were given a thruhole Mosfet to use while we were using a breadboard and the Uno, but I didn’t want to have such a big item on such a tiny circuit, so I used an SMD one instead, checking the mosfet datasheet before I did (their datasheet link leads to a dead end now).
I attached a small piece of copper foil onto a strip of epoxy sheet and cut it out on the vinyl cutter, and then weeded it. The epoxy sheet is a heat resistant material, which the copper foil sticks to really well, having two benefits - it cuts really well on the vinyl cutter, much better than when you cut the foil only, and it means that it’s easy to solder as well.
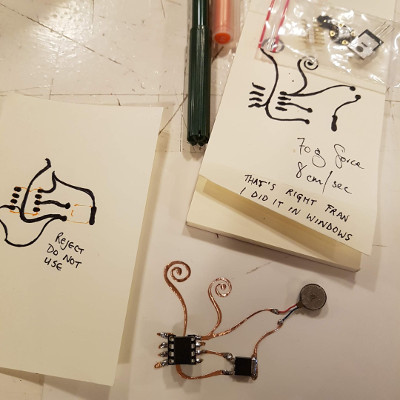
Even so, with the chunky Attiny 85 and its socket, I would design a circuit with an aesthetic more consistant with the form factor. The hand-drawn lines seem a little strange. It was fun though, and I’d do it again. Or alternatively, use an SMD Attiny and just press an ISP header on while programming, as we sometimes do with the hard circuit boards. I started to draw another, squarer version in KiCad and you can find it in the downloads section of this page, but I didn’t continue with this project any further.
the wenduino#
I shifted the content for this into the wenduino kit reserach page.
different vibes#
I decided to play around some more with making a vibration motor, this time with a different switch. I tested out my circuit using a seeeduino and a sheild first, then I started drawing.
drawing#
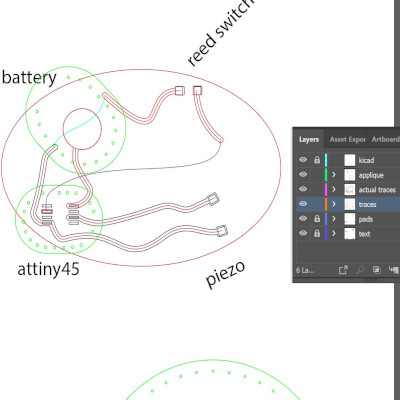
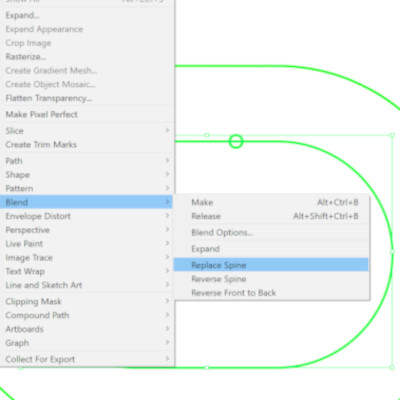
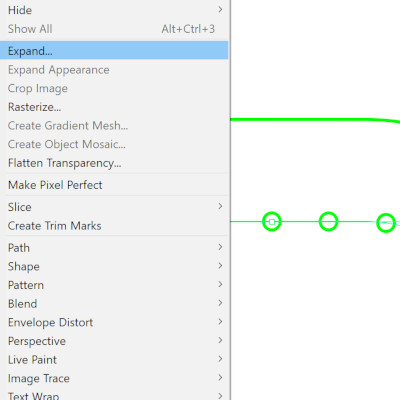
Once again, although I love KiCAD, it wasn’t quite working for me, so I switched to Illustrator - the layers were very handy, and it also meant that I could be a little more organic with my lines. You can see above the beginnings of my schematic, and below what I ended up drawing in Illustrator instead with the layers that I wanted… I think there’s a market for soft electronics software. Just saying…anybody? Anybody?
foiled again#
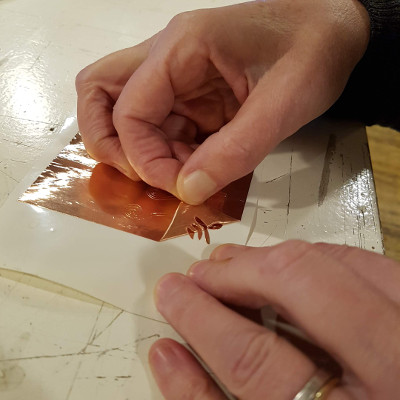
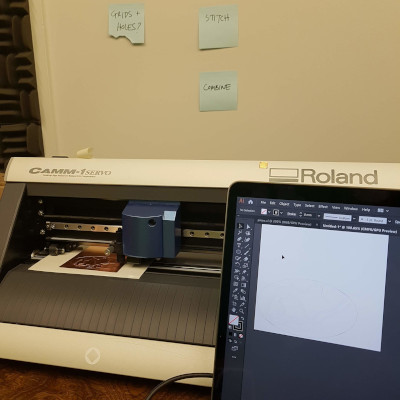
When I was happy with my design, I cut out the copper foil the same way as I did before, but actually, I’m back in New Zealand now - same vinyl cutter, different fab lab. I put the copper foil on epoxy film to make it easier to solder when it was on the fabric (less likely to burn the fabric) and set the vinyl cutter to cut through both the copper and the film. This takes a bit of setting each time, mostly because of the sharpness of the knife - this time I used a force of 160. I set the speed at 2cm/s because our vinyl cutter doesn’t slow down until it’s that low - any faster and it picks up the traces as it cuts.


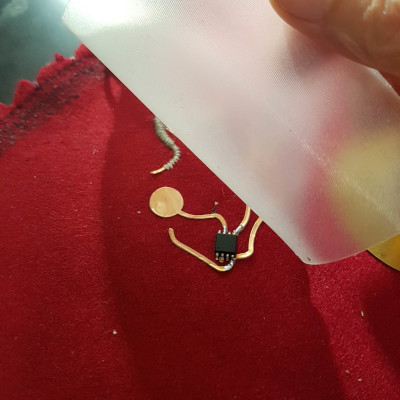
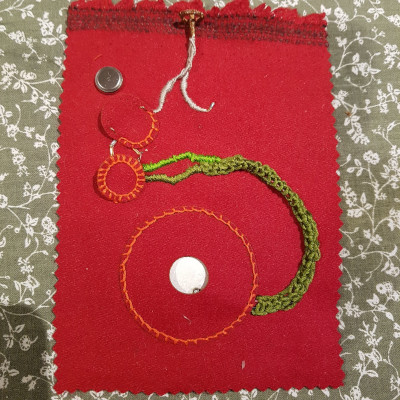
I used a clear transfer tape to pick up the copper, once I’d weeded out the excess material, and transferred the traces and pads to the red, woven and boiled, wool fabric I’m using for the swatch.
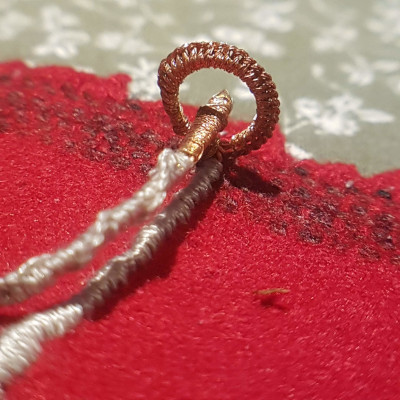
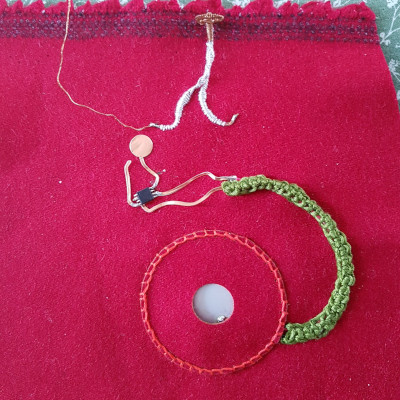
reed switch#
You can see below the reed switch I made for this circuit. I used enamelled copper wire to shape the two pieces and tested it once I’d burnt off the enamel, but the connection wasn’t strong/constant enough when I used a magnet to draw the central component to touch the ring. So, using a simple stitch technique, which I have no idea if it has a name, I sewed some awesome copper thread binding around both copper components. I visited Adriana Cabrera during the Soft Robotics and this thread was one of the materials in her lab which she gave me to play with.
fabISP or UNO as ISP?#
I had some pretty interesting troubles with programming my smd attiny 45 - I mentioned that I’m back in New Zealand. Well, I also got a new work computer, which is lovely, of course. I spent some time setting up all the software I needed AND I did what I said I’d do in Computational Couture week and I made a gist list as I went along so that it would be less time consuming the next time I do this. But it’s been pretty time consuming doing it this time.
After some hours of tearing my hair out trying to program my attiny, thinking that the issue was the new computer, I realised that my fabISP wasn’t actually my fabISP, it was another one masquerading as my fabISP.
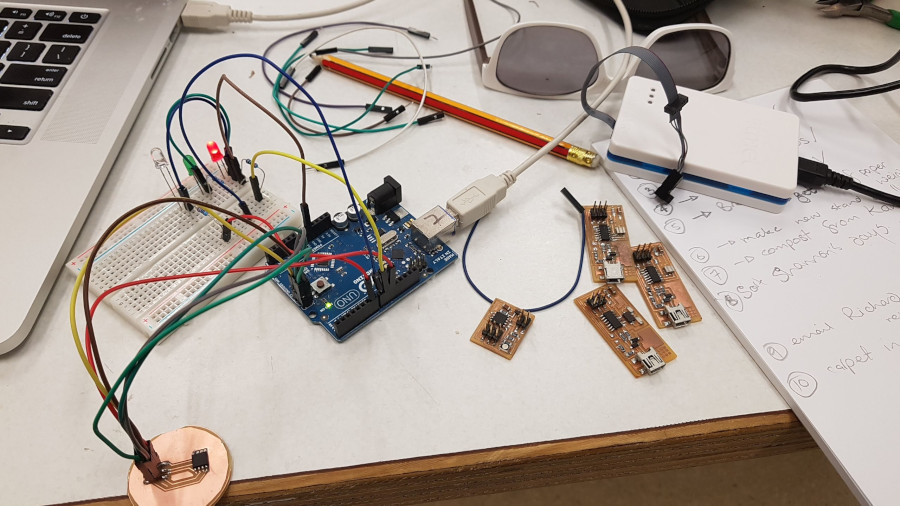
Before I discovered this, I tried a number of fabISPs that are around the Lab, as well as our atmelICE, even finding an ISP that wasn’t finished and thinking of finishing it off before I remembered that I didn’t have a working programmer to program a new one… doh! Many error messages later, I finally resorted to using an arduino UNO as an ISP.
On the bright side, it’s nice to have another new experience… I’ve not used the arduino as an ISP, and it was nice to finally have the attiny45 programmed. You can see below the programmers I tried, and the arduino UNO set up, based on this tutorial. Also, the programming board I made to sit the attiny on for programming.
that swings so cool…#
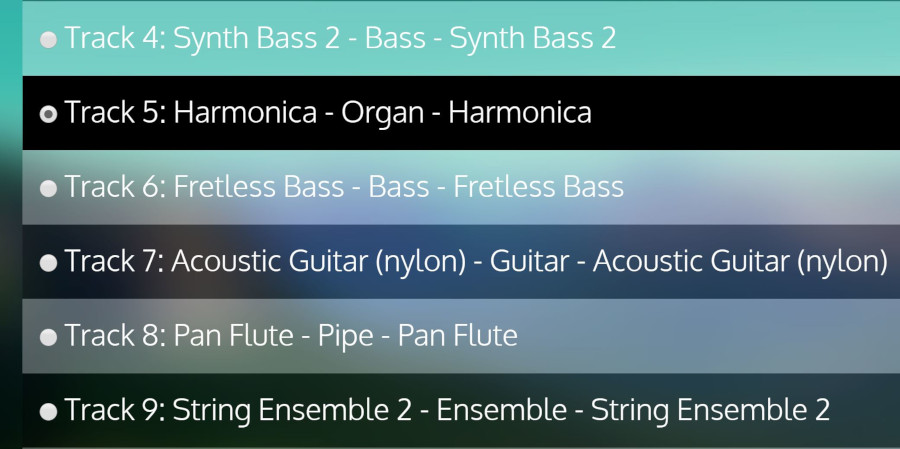
I found a song, girl from Ipanema, that I wanted to play and used this midi to arduino website to convert the sounds to code. It converts it into a number of tracks, and you have to choose which track of these you want - I had a fun time trying each track and annoying everyone else in the Lab with my sounds, until Harry, fearing for her sanity, downloaded this MidiYodi app that will play each track for you before you download it. I chose the harmonica track.
- a handy website for making your own tunes is this one that gives you the note frequencies.
- a website that tells you how long different notes are.
- a handy reference for ‘if’ statements
And here is a couple of tests I did of the Girl from Ipanema code I used.
It’s unrecognisably annoying, isn’t it? Wait, here’s some more…
crafty goodness#
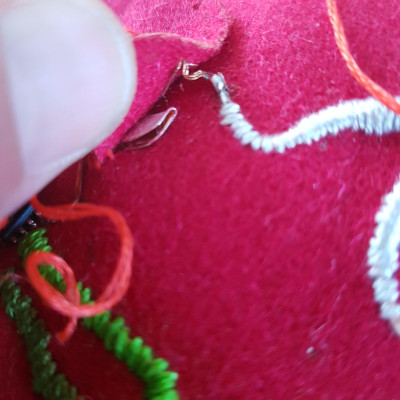
I’ve almost finished sewing it all together, still working on the applique - enjoying the hand craft - and it’s all coming together. Ensuring that the traces weren’t touching was a bit finicky - an SMD attiny45 is pretty small. Each time I soldered another connection, I checked with the multi-meter to ensure that I’d done it properly. I used arduino pin 3 to connect to the reed switch, and soldered some copper thread and ran it under the fabric to the switch, but it was pretty close to the trace running to the battery… tense moments…
You might also notice that the woolen disc covering the attiny is only sewn to the pocket at one point - I wanted to leave the attiny available for re-programming and troubleshooting without having to unpick the sewing.

I ended up sewing the battery holder too tight to allow the battery to slip into it easily, meaning that the copper plate for positive actually lifted off the surface of the wool fabric and folded over (see below) as I pushed the battery in. This meant that the battery didn’t complete the circuit, so I used some ripstop with fusing on it to hold it down, and attached some ripstop to the negative connection as well.

the ideal pocket alarm#
When you see the video a bit further below, you will see that I’ve coded the reed switch to be off when it is closed and on when it is open, meaning that if it was a pocket, when the pocket is closed there is no sound. The second that someone tries to open the pocket, the cheesy alarm goes off. Until the pocket is closed again. I have placed a magnet behind the pocket which is the trigger - when the reed switch is close enough to the magnet, the floating component of the reed switch is attracted toward the loop of the switch, touching it and closing the circuit.
This interaction has been coded via INPUT_PULLUP, in the code I have uploaded to the attiny 45, which is available, in full, from the download section, below the board files.
this code was put together by Wendy while participating in fabricademy 2018/19
*/

// my piezo is connected to pin 9 and the switch to pin three, so I'm declaring it here:
const int tonePin = 9;
const int reed_switch = 3;

void setup() {
  pinMode (tonePin, OUTPUT);  // the piezo is an output, making sound
  pinMode (reed_switch, INPUT_PULLUP); // the reed switch is an input, and I've activated the internal pullup resistor
If the video isn’t loading and says you have to download it, refresh the page instead…
See - it’s super-annoying, and would be an effective deterrent to someone taking what’s in your pocket. Or, it might stop you slouching, if your pocket opens every time you lean forward.
For more innovative and exciting electronics, please check out my final project page.
download files#
little programming board files