2. Digital bodies#
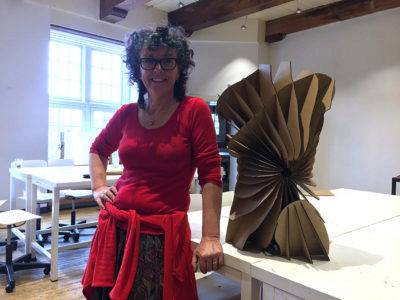
This week’s lecture with Anastasia exposed us to the variety of modelling software and processes that would help us to create our own mannequin. We saw a lot of inspiring examples of mannequins that are more artistic expressions of gender and form than the ubiquitous mannequin used in a studio or store. We were also challenged to do something that would be useful for the next FabTextiles exhibition in Egypt in 2019. Those of us who have used this machinery before were also challenged to extend ourselves by using other equipment and/or materials.
I haven’t found a place to live yet, accommodation is pretty tight here in Amsterdam.
MakeHuman#
I used MakeHuman, and wrote about it, during the bootcamp a couple of years ago to create my first mannequin, and this week I learnt a bit more about using it when we did a session with Cecilia about it. After the first time I used it, I thought it would be interesting to create a real scan of myself and compare the two mannequins, but I never got around to it - now I’m also intrigued to see whether the two MakeHuman mannequins are different. I’m not aware of any differences between my measurements now and two years ago, but maybe there are.
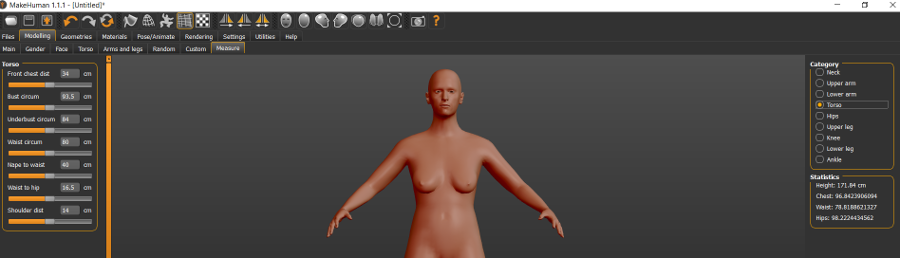
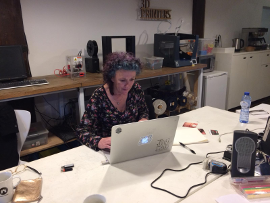
The software has a fairly easy interface - tabs at the top for different possibilities. I spent most of my time in the Modelling tab, and then going through the sub-tabs associated with it, adjusting measurements for different parts of the body. I didn’t spend any time on the face or hair or expressions, because I only intended to make a torso of myself. The image above shows me using the manual input of measurements, after taking these measurements from my own body.
I think this would be a very interesting tool to use with people with body dysmorphia. For people to modify the mannequin using the sliders to create what they think is their own body and then to input the measurements and see what their body ‘really’ looks like. Obviously, this workshop would need to be co-hosted by the appropriate professionals and hosted in a safe space.
3d builder#
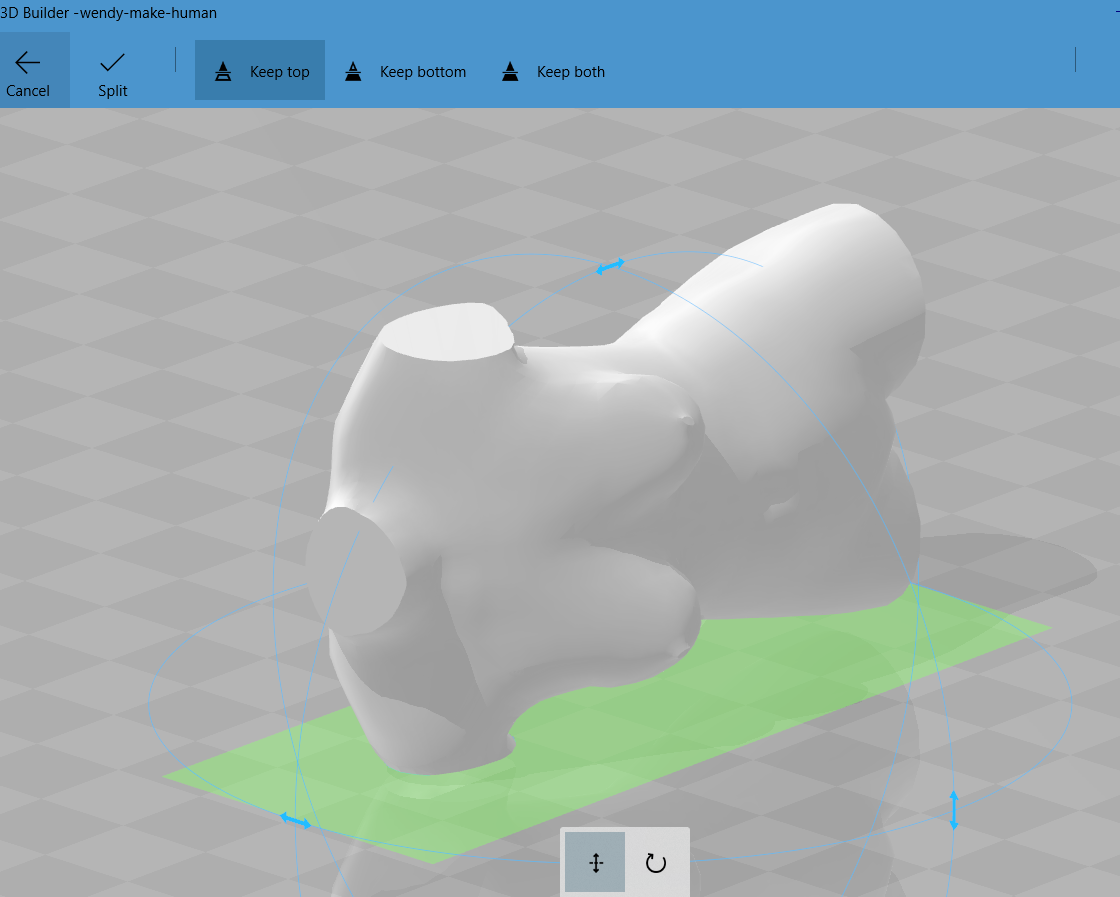
When I was satisfied enough with the model, I exported it as an .stl, and then imported it into 3D builder, which is a very simple software that sometimes comes standard with Win10. I used 3D Builder to slice off the portions of the model that I didn’t want to keep. This software is also useful for checking the watertightness of your model, similar to netfabb but not as diverse in all its capabilities.
slicer for fusion 360#
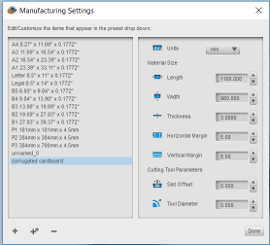
Then I moved to Slicer which is part of the Autodesk suite, to slice the model into something that could be cut on the laser cutter. Previously, this software was called 123D Make and it doesn’t seem to be any different since becoming Slicer. I imported my model and, using the panel down the left side, made all my settings. First I needed to customise the manufacturing settings - our cardboard dimensions and thickness.

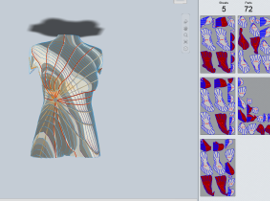
I played around with the different options, working in millimetres, with interlocked slices (I did that last time though, so I decided not to make that one), folded panels and settled on radial slices for this model. You can see in the image above that my radial settings had some issues - the panels in red - and so I had to play around a bit with the angle and number of slices until the angry colours went away.
adobe illustrator#
I saved the sliced layout as a PDF and then opened it in Illustrator to look at how the vectors were. It all seemed pretty good, apart from some very wasteful nesting, so I re-organised the layout of the pieces, then I legacy-saved the file to CS2 with no compression so that the laser cutter could read it.
laser cutter#
I’m not going to explain to you how the laser cutter works here - we had a session with Cecilia where she explained the features and the safety issues of it, and then we were able to go ahead with our own files. Every laser cutter has its own quirks, whether it’s the software or the hardware (or both). Power and speed settings are different for every material, and the combination of the two allows you to cut anything from chiffon to plywood and acrylic. Most Fab Labs don’t have laser cutters that can cut metal. The setting I used was Speed = 100 and Power = 60. As you can go up to 800 with speed for vectors and 1200 with speed for rastering, I’m guessing it’s not a percentage. In general, I try to keep speed as high as I can, and modify the power settings accordingly - if I ever have to pay for my laser cutting, then I know I’ve got an efficient file and, depending on the laser cutter, a sense of the cost. A reason that you can go faster with your raster settings is that it’s only working on one axis (usually the X) so it doesn’t have the same mechanical complexity as moving on the X & Y simultaneously. This laser cutter allows you to set the power (you would usually choose less) on the corners when you’re vectoring, whereas other laser cutters just slow down by default without allowing you to define the power yourself.
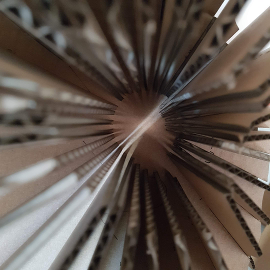
first mannequin#
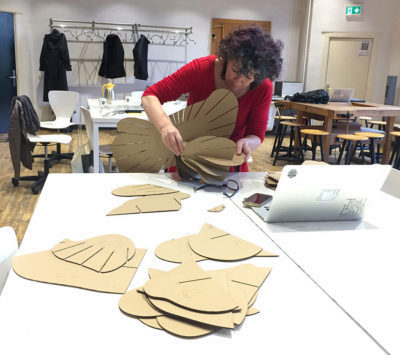
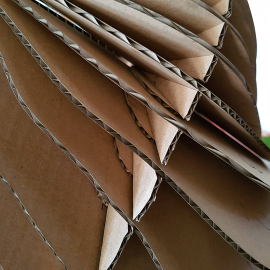
My model fitted into 2.5 sheets of corrugated card after I’d re-nested the components, so it was fairly fast to cut it out. That’s also a benefit of working in cardboard - fast to cut. Also, vector cutting and engraving are mostly much faster than raster engraving.
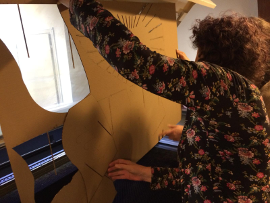
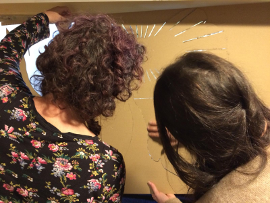
I watched the animation in Slicer to work out how to put the model together otherwise I would have been really confused - and thanks to Irene & Teresa I have some photos of me puzzling this out and then putting it all together…
scanning#
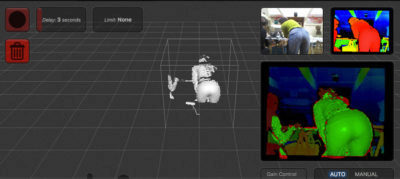
And now for the real thing! We have two scanners - a kinect and a sense - so I set up a funky system with the sense and did a couple of tests on my own, which were very entertaining.

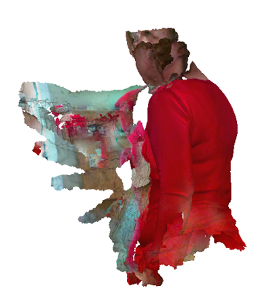
Apparently the sense scanner has a scan range of up to 1800mm but I found that I had to stand closer than that. There is no adjustment in the settings that allows you to specify distance, although I’ve seen it in other versions of this software. Anyway, generally you get better results if you move the object and keep the scanner in one place for a longer scan. On top of a woodwork bench I put an upturned plastic tub and then an empty cardboard box. The scanner was still a bit low on top of that, so Bella (above, with a bike pump) added a stack of paper and adjusted it until we had a reasonable scan range. I selected ‘body’ scan from amongst the three choices. Then I asked the lovely Bella, who is a fabulous fashion designer interning here, to help me. I stood on a rotating platform and she turned me slowly like a vertical spitroast. We did it a couple of times before we got something I was fairly happy with.
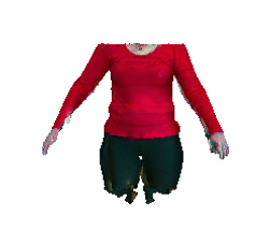
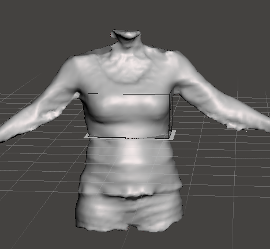
You can see above the first (before the stack of paper was added) and second scans - I chose the second scan to process (cut off the bingo wings etc), and the third image shows the .stl I exported from the scanning software and into meshmixer, another autodesk product.
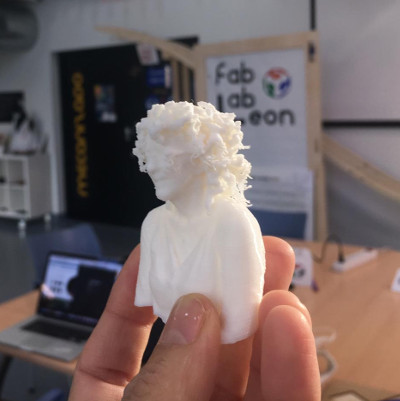
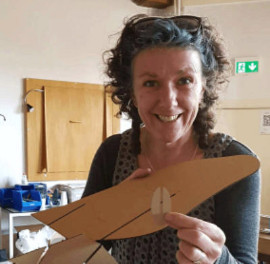
When I was in Leon with Nuria, we did a fast scan of me and then printed it out - it’s the first time in all these years that I’ve done that. I love the way it’s done my glasses.
meshmixer#
I used this software to fix my model instead of 3D builder - with some simple functions I was able to close the holes in my model and crop it to a similar shape as my first mannequin. I haven’t really investigated this software any further, but there doesn’t seem to be a lot of complexity to it.
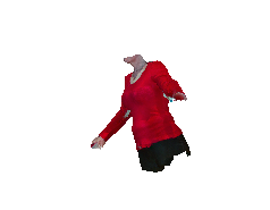
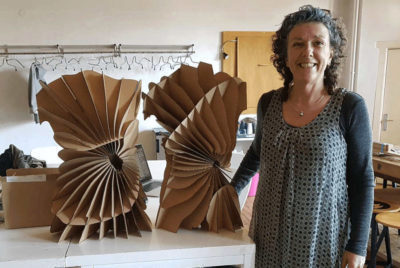
second mannequin#
I followed the same process as I did with the other model - exporting the .stl, cropping it, then importing it into Slicer and deciding all the manufacturing settings and cutting it on the laser cutter. Unfortunately, my settings defaulted to another template that I use for 4mm thick cardboard and I didn’t notice until I got to the laser cutter. I decided to carry on anyway, thinking I’d plug the extra width with another material. Or hot glue it together.
I found some 1mm synthetic felt that I tried first, but then Cecilia found some thinner corrugated card that works better so I made some spacers and put it together. I did a little test on the laser cutter to see if the cardboard needed a different setting, but apart from re-setting the Z axis, it was the same. Same amount of material, just less air in between. You can see the spacers in the above image on the left, not so much in the one on the right - that’s more of a mood shot. And here’s a clear shot next to it.
So interesting to see that the two mannequins do show differences, as I suspected. Make Human me is in the middle, looking very ‘tidy’. Real me has more ribs than MakeHuman me and is also constrained by clothes so is a different shape. I like Real Me the best because even though she’s constrained by clothes and lumpier, she’s recognisably real, the person I see in the mirror or shop windows (the second option is more frequent than the first).
shopbot playtime#
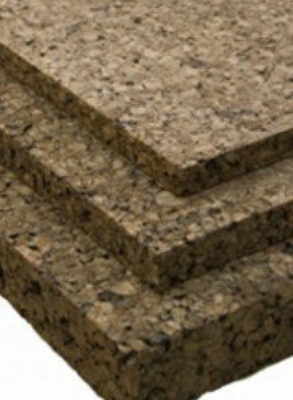
Next I’ll have a go at making a mannequin on the shopBot that I could actually use for fitting garments, probably out of expanded cork as I’ve wanted to 3D mill that for a while.

Henk has just put a new HDF sacrificial sheet on the ShopBot so I decided to help him out by surfacing it. They’ve got a 2 inch millbit for surfacing here so it only takes 20 minutes to run the file I made (9000rpm, 80mm/sec, 90% stepover). I don’t use the surfacing routine that comes with the shopbot software. I did a test cross to work out how deep to go and then set the cut depth to 0.6mm in my pocket toolpath. Even though I did the test, you can see in the image above that two thirds of the way through it started cutting air in places, so I’ll have to run a second, deeper pass.
third mannequin#
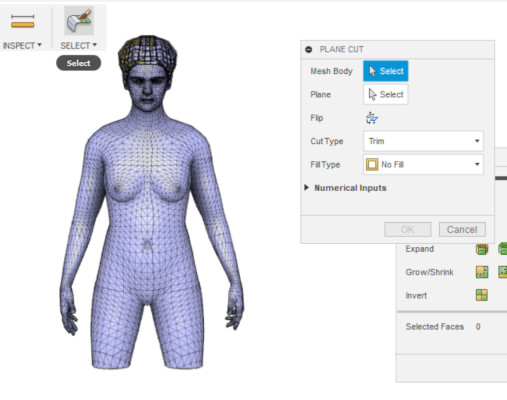
This time I made a model in MakeHuman with teeth and eyes and hair and everything, just for the fun of it. It turned out to be a poor idea, because I also decided to edit it in Fusion 360 and it was difficult to work out how to. In my first attempt to modify it, I ended up with thousands of BREPs (boundary representations) which meant a time consuming and frustrating edit process.
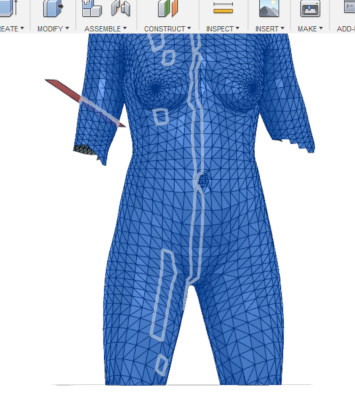
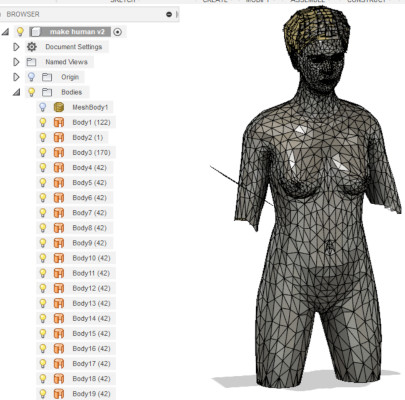
To do this, I followed a tutorial that meant I turned off design history, so you can’t see what I did to solve it, but I left some of the BREPs in the file below so you can see it.
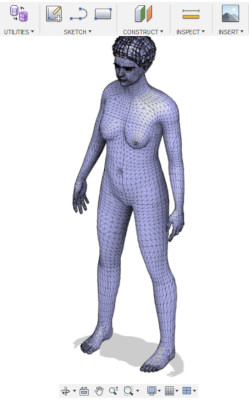
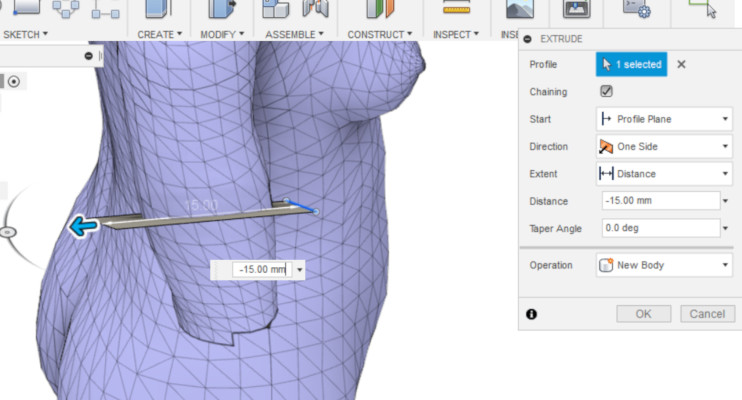
Meshmixer, as its name indicates, is definitely simpler for editing meshes!
I printed this out on the Ultimaker 2+ just to see what it looked like. You can probably see that it’s a little strange around the waist - the filament got stuck, but luckily Cecilia noticed in time and managed to get it moving again.

download zipped files#
bootcamp mannequin AI & PDF files
Scan STL & AI files & 3rd mannequin - this is where the slicer file is if you want to watch the assembly animation.
bonus section & recitation#
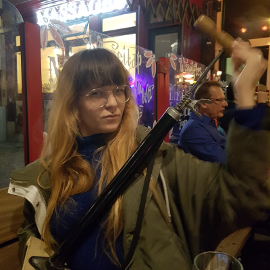
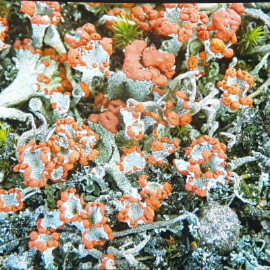
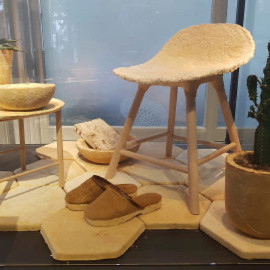
I went to the Micropia Museum on the weekend, which was fascinating and disturbing at the same time. Below are some highlights for you: bacteria samples from cell phones and door handles, products made from mycelium and a close up of some lichen. I recommend allowing a couple of hours if you decide to go there.

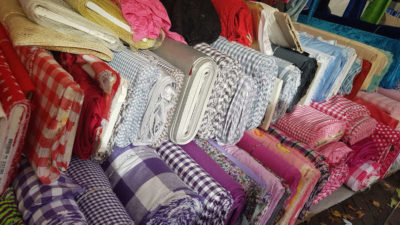
A trip to the Noorderkerk Market today, which is only on Monday mornings, was super-helpful to understand what’s available in the second-hand market as well as new fabrics and clothing. It was huge and also took about 2 hours to investigate.
The recitation this Monday was hosted by Sarah Savian and Zoe and was about parametric software for creating garment patterns. It was super interesting to hear about Seamly2D and the Valentina Project, which are both open source software, and to see it demonstrated by one of the creative team. I could really see the potential for it and I imagine that I will find it super useful when I understand how to make patterns.
I tried image compressor and tiny png this week, but the amount the images compressed and the quality of the images afterwards wasn’t as good as I hoped. Also, you can often only compress a limited number of images for free using these. I’m still using gimp and saving them as .jpg rather than .png, though my screenshots are staying as .png.
thanks for reading…
Must look at Sculptris