8. Open source hardware: from fibers to fabric#
I really enjoyed the lecture by Var & Mar, and also the review session with them the following week. I am interested to find out more about this project.
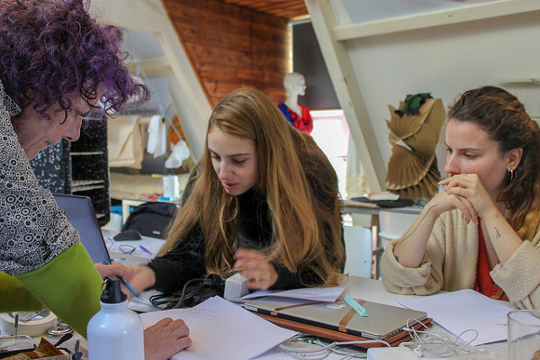
This week’s project is a group project and that’s always an interesting exercise. I wasn’t feeling very excited about making a machine/tool in a week, but I hoped that we would do something that I was interested in. It always helps to keep the enthusiasm going when you have a vested interest.
The first day was mostly spent getting our heads around what the project was and how we might achieve it. To see the full outline of our machine, please go to Our Awesome Group Page and also visit the pages of Jessica, Teresa, Stephanie, Irene & Scarlett.
things for the future#
the big decision#
I really wanted us to make an incubator, but I wasn’t sure anyone else would be inspired about that. First thing (by the local standard) on the Wednesday morning we got together to discuss our ideas. I suggested that we all write down our individual ideas before we started talking, so that we’d remember those ideas and not get swayed by the person who speaks the most. Then we went around the table and heard everyone’s ideas.
We had some good discussion about everyone’s ideas, and then came to the decision that we’d make an incubator. It seemed to match all of our interests, in that we hope to create an incubator that we could use for a range of processes. From growing bacteria/tempeh/mycelium to drying bio-plastics/fruit leathers to making yoghurt/kimchi and maybe even kumbucha, we were all going to find a use for it.
We drew up a basic table and added the variables - humidity, temperature and time - and discovered that we really could create something that would work for all of these, though not all at once. We prioritised for ‘have to haves’ and ‘nice to haves’ and made a loose Phase 1 plan. We considered making two incubators, especially as our group is so big. We could make a horizontal version and a vertical version, one more focussed on the humid processes, with an electronics system that will work for both.
the ultimate score!#
Then it was time for me to go down two flights of stairs and have a cigarette. And in a strange twist of fate, there was a delivery van outside. Always curious, I peeked inside and could see some interesting polystyrene boxes in there. Smiling winningly at the chap inside, practising my best non-NiuZilind accent, I asked him whether they were empty and he was throwing them away. He looked blankly at me, and with a slightly desparate look in his eye, said something in Dutch. Luckily Ista was there, and stepped in to respond in Dutch.
I carried on speaking to him in English, with a huge smile on my face, and he carried on answering me in Dutch with a smile on his face, with Ista doing a great job of interpreting. He gave me a box!!! It was quite a long conversation in the end, and I hope he will see the box next time he does a delivery here, so he can see what we have done with it.
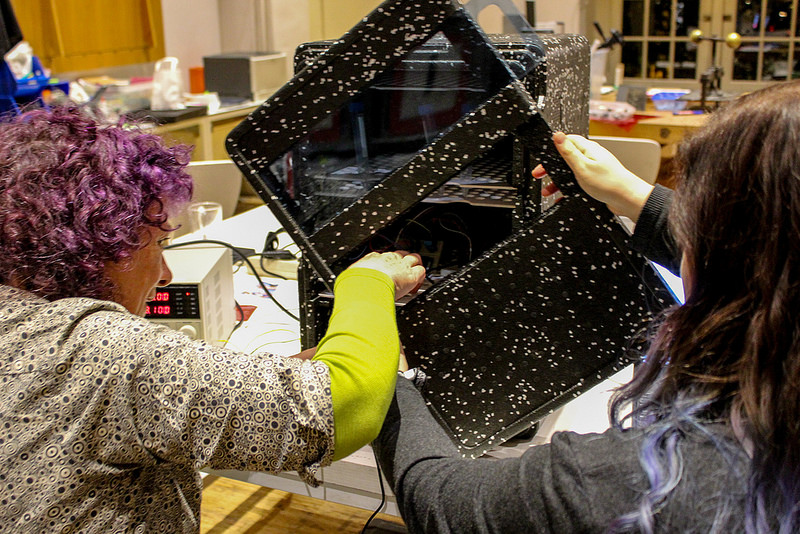
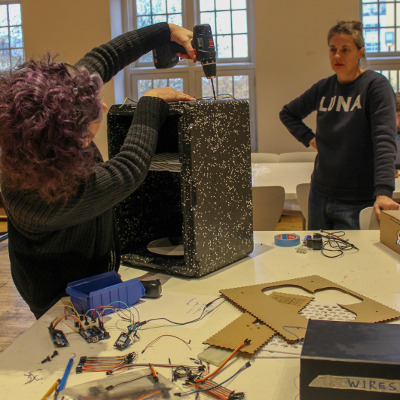
I raced upstairs and showed the others, and there was big excitement, and even more when we opened it to find the perfect shelves already inside it.
team unicorn-rainbows#
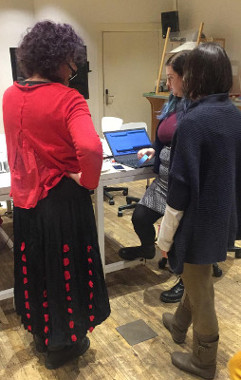
We got into pairs, and I worked with Jessica looking at the electronics of existing OS incubators. We weren’t planning to create anything from scratch, but to build on other people’s work. We also spoke with Henk, who has made his own incubators, and Roland, who leads the Open WetLab, and Emma, whose electronic expertise I’ve mentioned previously. We found some great resources online, and narrowed it down to a project we found on the Arduino website.
An absolute pleasure to work together in colourful hair syncronicity. Jessica definitely did all the heavy lifting code-wise. Great job!
curiosity & experience & guidance#
I’m curious about most things, even though I always say ‘I’m useless at maths/calculations’ etc, I’ll still try to work things out. I’ve been a practising designer|making for a while now, and I did Fab Academy some time ago - in the areas that I’m comfortable, it’s easy for me to develop experiments that either prove or disprove my concepts. From there I can decide whether to continue or to change direction. However, in areas where I don’t feel as comfortable, where I don’t have enough knowledge, I get stuck.
I think this is the same for everybody, or almost everybody. In a group project like this, what it meant is that the members of Team unicorn-rainbows had the breadth of knowledge and experience for most of this task and that we led it, allocating tasks and guiding the process - having the big picture/end goal in mind. However, when we didn’t have the knowledge/confidence, it meant that we got stuck. We’re both used to researching and evaluating information, so when we did get stuck, it was time to get some outside help. Lucky for us, Henk, Emma, Roland and a few others were able to spare time to help us out, which we both appreciated a lot.
the components#
Next we all had to find the components, and while quite a few were here and there in the building, we had a small list of stuff for purchase, which Cecilia kindly offered to do the next morning.
The second day was spent clarifying our ideas, working on the electronics system and beginning to hack the styrene box.
the door#
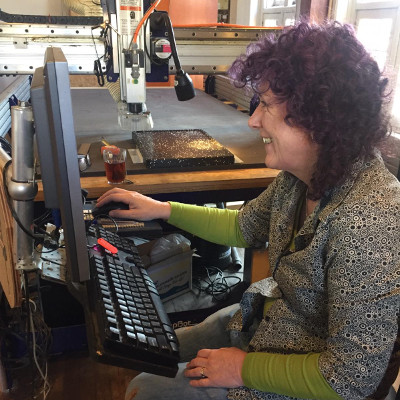
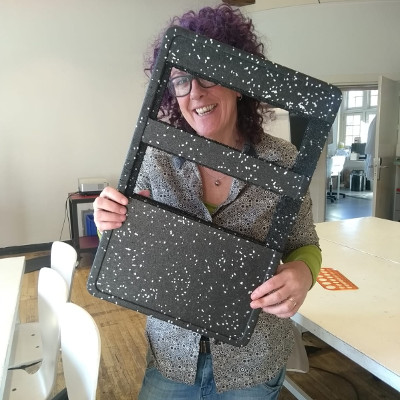
Because the seal on the door is so tight, we thought it wouldn’t be durable, so we all discussed a number of ways of dealing with that. We settled on putting two sliding doors on the original door, so that you’re only going to open the full door occasionally. The mechanics of that were pretty simple - so once Irene had drawn up a simple file based on the measurements she and Stephanie had taken and turned into an awesome 3D model, I took the lid to the ShopBot, made a couple of minor adjustments to the file, then generated and ran a quick 2D pocket toolpath and a cut toolpath.
the heatpad#
Solving the heatpad was quite challenging. We had been given a heating element for testing, but Jessica & I decided that we wouldn’t use it, because it was just a short-term loan. Instead we tested one from the WetLab. It seemed to work (continuity test) so it was worthwhile pursuing. I tried and tried and tried to solder some leads, but the large area of the pads was leaching the heat away and I had no success. I tried a gigantic spade end as well as turning up the heat, different areas, nada! In desperation, I asked Emma to have a go, but she had no luck either, so I scratched off the sealing layer and hooked up some alligator clips instead. We needed to find out what specifications we were working to, with no idea what voltage it would run or what amperage it would pull.
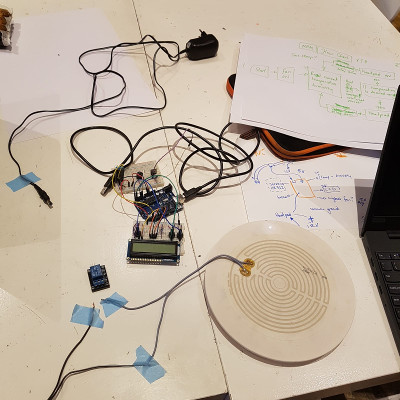
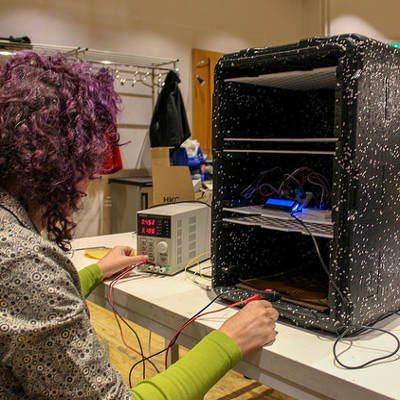
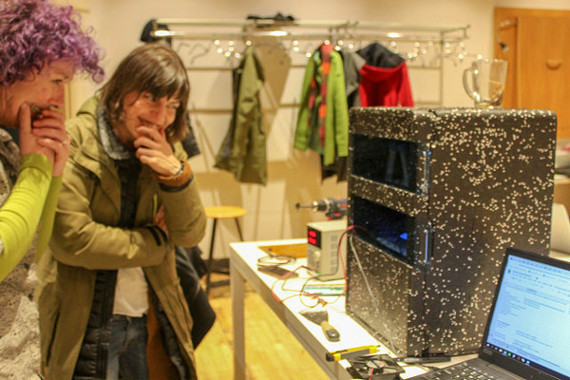
I tested the resistance and found it was 2ohms, so plugged that into an online calculator. You only need two values, so I put in 12V for the other one. It wasn’t looking good for the power supply that we had, which was 12V & 1A, as the calculator said that we’d need 6A… For 5V it said we’d pull 2.5A, so still not awesome. I plugged it in to the power supply to check (setting it at 12V and 1A) and we ran it for about 30 min inside the incubator, with Jessica’s awesome breadboarded system.
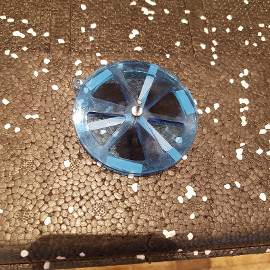
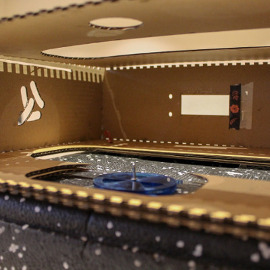
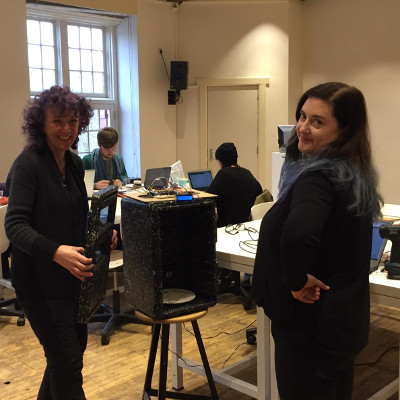
It was fun, because team rainbow-unicorn had decided to work in the open space on the first floor of the Waag building for a while, and everyone who was there did a collective ‘oooh’ and gathered around to see our awesome incubator. The translucent blue sliding doors, the black and white exterior, and the blue LCD screen glowing inside all added up to quite a fancy looking package.
It took about 30 minutes to get to 27 degrees, and was working at the full extent to do that, so Jessica & I hooked up another one that Roland had. It is smaller, round, with a silicon surface, so seemed more suitable as well.
The second heat pad was much faster heating the space, and within 11 minutes the temperature sensor was reading 28 degrees. We’re yet to add the fan, but it’s looking quite promising. It pulls a bit more than 1A on 12V (1.04A), but we will use the power supply with those restrictions and hope for the best, as when Emma tested the big power supply we found that it’s broken, or pukeru as is said in NZ.
the heatpad stand#
When the heatpad gets warm it warps & bows and moves around in the space. It has a sticky back on it, but I don’t know how effective that will be. Team rainbow-unicorn discussed our options and decided that it needed a base to attach to. I remembered the FormX resin/plaster that I used in Textile as Scaffold week. I looked around in the scraps drawer and found a piece of 6mm acrylic that had a ~220mm diameter circle cut out of it - perfect for a mould! I whipped up the mould by double-siding it to some polycarbonate that was lying around, found some tulle that had suffered on the 3D printer and four 15mm long 8 gauge bolts. I’ll be using those to keep the stand off the bottom of the incubator if it’s on the bottom (heating up the water in the tray above it), or off the surface of the tray (heating to dry, with the tray there to catch condensation).

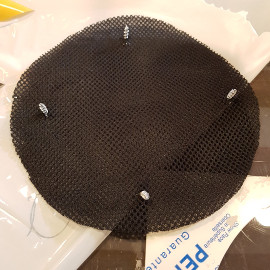
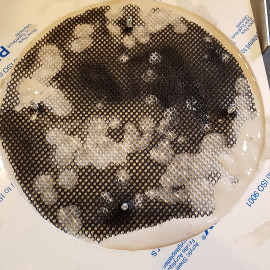
You can see in the images above and below how I did it, but I didn’t actually choose the same material - I didn’t look properly at the label (in my defense, it’s written in Dutch) and I chose another material instead. When I cast it, it broke. It still holds together, thanks to the tulle, and it looks a bit like marble but I decided to cast a second one, out of the material I wanted to use. This time I found 15mm screws, and used the net material I used in Circular Fashion week and for clay printing in Computational Couture. It will be much stronger as it’s a 3D material so the plaster/resin will really have a textile scaffold. And it turns out that it looks a little like bacteria… For the second one rather than putting strips of fabric around the screws (and poking a stick at them until they were submerged), I cut slits in the fabric that helped to position the screws.
I stuck the heatpad to the heatpad stand by removing the tape to expose the sticky, and then used my accurate eye to locate it centrally. There’s an image in the previous section showing a bit of detail of this. As the incubator will stay at the Waag, I guess the heatpad is still a loan from Roland - I hope he’ll find the incubator useful in the WetLab.
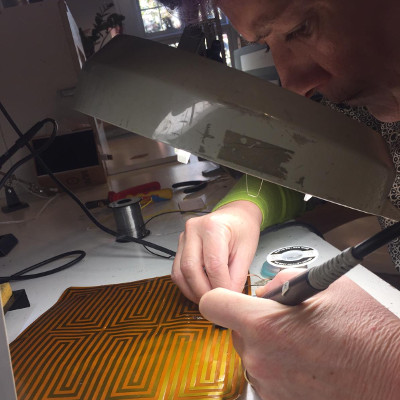
When we were wiring this up to the circuit Jessica had put together, we had to extend the wires we had, so I did that by tinning both ends of the wires, sliding some heatshrink over then soldering them together and heating the heatshrink afterwards. we also used a screw terminal for the end that connects to the power source so that it wasn’t a permanant/difficult to disconnect connection.
the vent#
While we were waiting for the incubator to cool down, I decided to drill the vent hole in the top of the incubator, so I found a forstener bit and a battery drill. The others got a bit anxious about me doing that and resisted for a while, but in the end they let me do it, but insisted on measuring where I would put it so that it was centred… They discovered that I already had it centred (good eye, aye?), and I drilled a ~25mm hole in the ‘roof’ for the air to leave. I placed it at the back, because that is the potential ‘dead zone’ - air will refresh easily at the front because of the doors.
Looking further at the electronics for the vent, Jessica & I realised that we needed to make two more holes and two pieces of acrylic to create the opening and closing system. I had a chat with Irene and Stephanie and we sorted out what we thought we needed, and there was enough of the 3mm acrylic from the sliding doors, so I cut the vent closures from that. Stephanie and I had fun sorting out the best setting for 3mm acrylic, but discovered that the laser cutter interprets anything that isn’t straight as a corner, so will be much more careful in setting the corner power in the future.
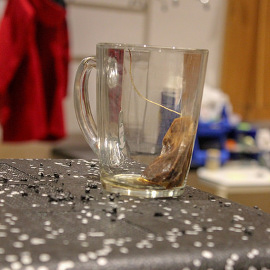
Below is a couple of photos of the vent in place, and of the temporary vent closure system we used when testing - one of my empty teacups comes in useful… Maybe you can see the vent is held there by an aluminium rivet. I heated up the long end of the rivet that’s usually waste and, while it was hot, used it to drill (melt) a perfect hole in the polystyrene.
the fan#
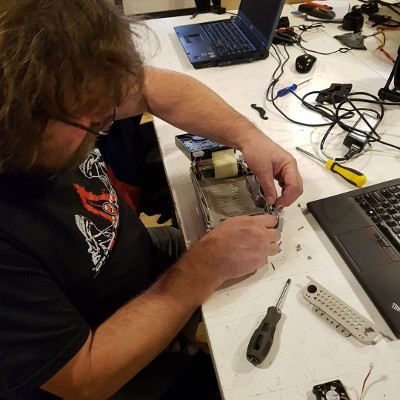
Ah, the fan. There was a rather large (~100mm) computer fan we could use, but it also pulls 0.19A from 12V which is not much compared to the heatpad, but makes it fairly blowy. We decided to test it. I connected it up to the power supply and ran it at 12V, tried out putting a resistor in to run it at 0.7A, but the resistor got hot very quickly, and then tried running it on 5V instead. That was a lot better, but I also asked Henk if he thought he might have some other smaller ones lying around. You can see him below, pulling apart what’s left of a computer that originally ran the internet in Amsterdam in the 1990s. A full 4G of hard drive to do that (cue sound of dial-up internet). So now, thanks to Henk, we have two smaller fans which are pulling 0.09A each. We’re considering whether we need one inside to move the heat around and one on top of the vent to pull the moisture out. Feature-creep!
Anyway, I stripped the ends of the wires and tinned them then handed the fans over to Jessica to add to her breadboarded circuit. Then we worked out that the power available meant that it would be better to have the larger fan and run it on 5V via the Genuino. I added some extra wire to the existing wires of the larger fan so that we could run them up the back of the incubator to sit with the arduino and breadboard on top of the incubator.
When Jessica and I were putting the whole system into the incubator, I drilled a hole in the back of the incubator for the wires from the heatpad and fan to come through to the outside. You can see above, once again, I’m heating a metal bit to help with smoothing the modifications on the styrene box. I used the pre-existing mounting holes in the fan structure to mount it on the back of the incubator. Once again, the rivets fit perfectly, so I used them and just pushed them in to the polystyrene.
the final countdown (endless testing)#
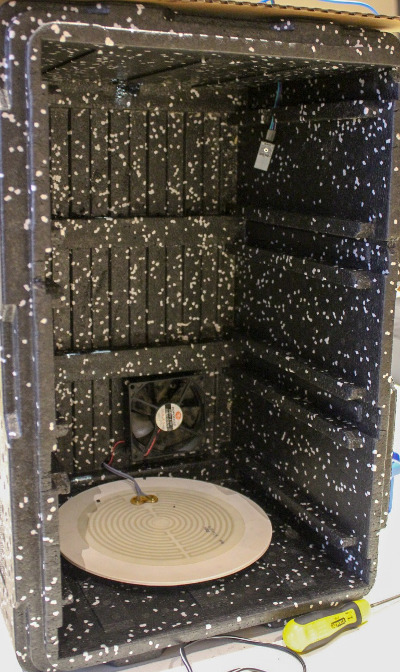
These are the components inside, after drilling holes and making a few mods to accommodate them.
If the video isn’t loading and says you have to download it, refresh the page instead…
big chats#
An important aspect of any collaborative project is keeping in good contact with each other. Our team was a normal everyday human team - sometimes we forgot to tell each other things, sometimes that meant we did things twice when we didn’t need to and forgot to do other things.
Also, with so many different design perspectives, languages and locations, often we would find it difficult to understand each other. Often the only solution was to pick up pencil and paper and start drawing when we were in the same place.
In any case, we rarely forgot that we actually enjoy each other’s perspectives, that a hug or some surprise snacks were easily provided, and laughter and a little silliness was essential to our progress. Also, many of the images have been taken by my co-fabricademicians - thank you for your awesome documentation.
I can’t remember why Emma and I are laughing so much/looking so scared… but we could all be very serious as well.
we made a thing!#
and it works. There are lots of other tweaks, and variations we can make, but in one week we made a working prototype of our Multi-Processing-Machine with some fairly comprehensive documentation. I’m so proud of us. We did plan to take a photo of us all together with the whole machine, but have gone straight into the next week’s project.
If you got to my Final Project Research page you can read about how I used the incubator for testing my ideas with tempeh.
bonus section#
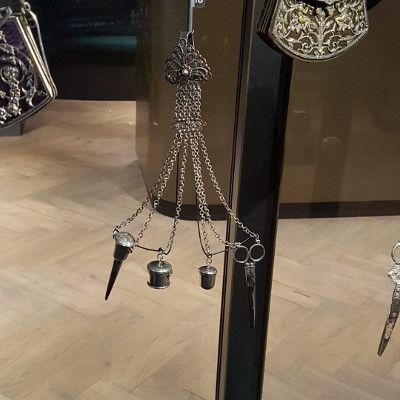
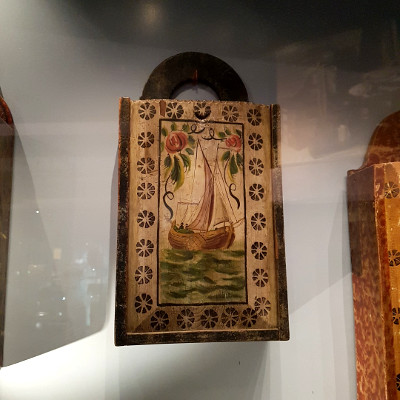
I visited the Museum of Bags and Purses this weekend, another great Museum here in Amsterdam. I loved the older stuff more than I loved the newer stuff, partly because there was so much handcraft in the older pieces. I watched a video on crochet beadwork and am keen to try it. I particularly liked the chatelaines - cute and useful things hanging off a brooch thingy - and the wooden schoolbags which double as a useful writing surface when desks are scarce.