Final Project#
If you’ve been following my progress, you might remember that my overall objectives were these:

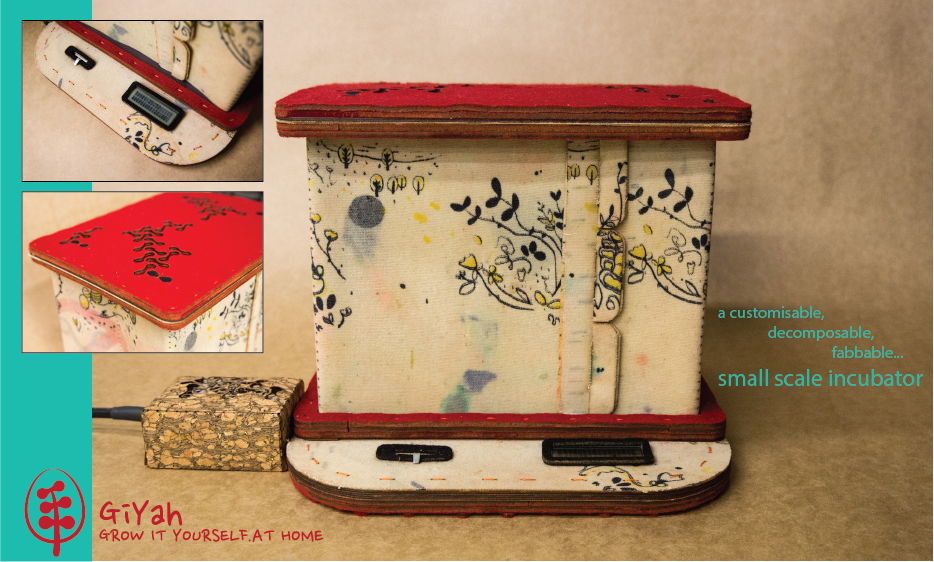
As you can see, I began by designing and making the first iteration of the giyah incubator kit. This has been a huge learning experience for me; with many iterations, lots of frustrating and eureka moments, and immense satisfaction with making a project that I could really focus on.
video#
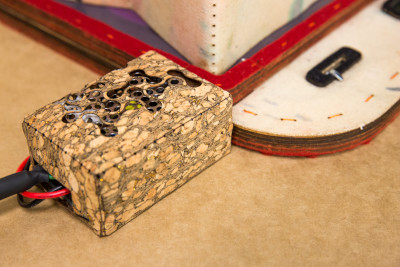
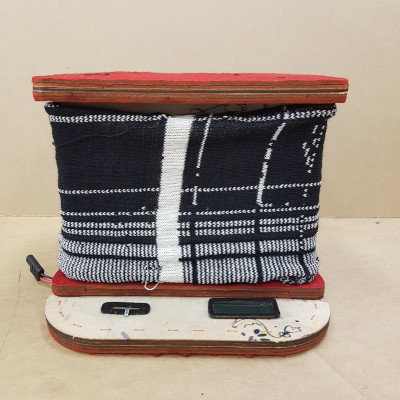
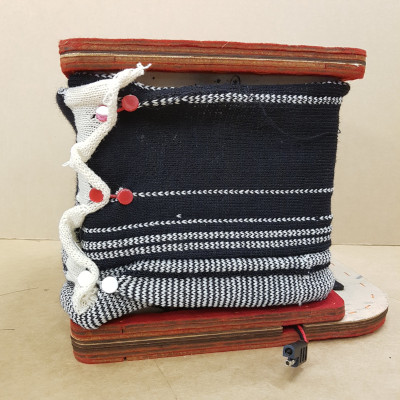
detail photos#
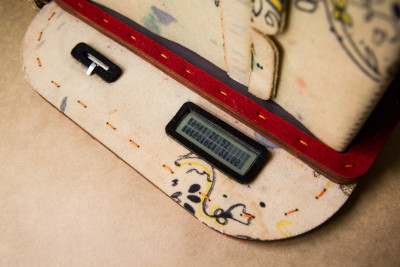
the LCD screen and the potentiometer
the sides joined and the power supply cover
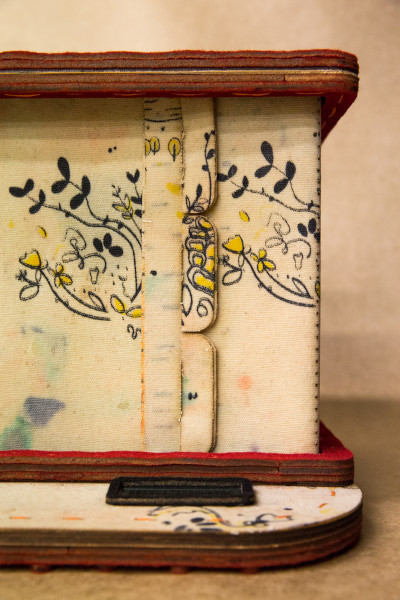
the insulating jersey is an optional extra, depending on your other materials. I didn’t need it, I just wanted to make it, and the buttons holding it together.
motivation#
Although there are a number of ways to make an incubator very simply - with a cardboard box and an incandescent lamp, for instance - I decided to make it this way for a number of reasons.
- to make a foldable, or packdown, incubator#
When I was at Art School, I learnt that electricity was introduced to the domestic environment as a way of selling the excess electricity produced for industrial purposes. The factories and businesses were only using 50% of the electricity produced, so rather than reducing production, they decided to seek new markets. Part of the consumption strategy was to create household appliances that were too big to fit into your cupboard, so that you’d leave them out on the bench and be more likely to use them, therefore consuming more electricity. I have very little ‘real estate’ in my kitchen, and I don’t wish to fill it up with ugly whiteware, so I decided to make the incubator compact and more compatible materially with a domestic interior.
- to make it from compostable natural materials.#
I chose to make the main fabric components from 3mm pure wool felt and re-using a heavy unbleached cotton canvas. Two natural materials, one strengthened by infusing beeswax into it. Both materials have excellent properties for the incubator. The wool is an insulator and is a natural fire retardant to 600 C, while the composite of the woven cotton canvas with the beeswax is strong, can be wiped down with a damp cloth or rinsed in warm soapy water, and is anti-bacterial. The wool felt doesn’t come with a MSD sheet, so I can’t be sure that it doesn’t have a pesticide in it, so none of the wool has any contact with the interior surface. The canvas is unbleached, but does have screenprinting inks on it. The process of applying the wax has set the colour and enclosed it so that it isn’t directly in contact with any food.
I have included bamboo plywood for extra strength. Although it isn’t Plyboo with a soy-based glue (this plywood isn’t available yet in New Zealand), it is still a fairly sustainable option compared to other plywoods, and the plywood I used does have an E0 glue, with no formaldehyde. I believe that bamboo plywood uses quite a bit of water in production, but the plant grows quickly, with minimal water and no fertiliser or pesticides are used. It is a caramel colour because it has been heat-treated so that the natural sugars caramelise.
The silicone is a foodsafe silicon, which is low/no allergy. I have added 8g of thermochromatic pigment which is fully encased in the silicon.
The stacked materials allow the incubator to be easily dismantled, and the materials can be used for different purposes upon disassembly. For this reason, the electronics are discrete rather than embedded, so that they too can be re-purposed or recycled. I would love to say that I used Fair Trade electronics, but I didn’t. I chose to use mostly Fab Inventory components, due to their availability in other Fab Labs that host Fab Academy. I used FR1 for the boards - a paper & phenolic resin composite that is much better than the FR4, as it has no fibreglass in it and the boards were cut rather than acid-etched.
- to make something that other people can make,#
and in doing so, learn and meet others, but also that enables people to keep experimenting at home. It’s an introduction to digital fabrication and DIYbio processes. I enjoy making things that I think other people will also enjoy making and using.
I chose to use mostly 2D processes, although I did make the base as a 3d model so that when others make it, they can go from Fusion -> 3D slicer and use the material thickness for the layers, matching the materials available to them. As is usual for me, there is a bit of handcraft involved in the design, which means that people can make elements of the incubator in a Lab, around other people, and then finish it at home, in their own time. Ideally, you could spend one day making the electronics, one day making the body of the incubator and then spend whatever time you want, putting it together. Each incubator will have its own personality, depending on the colours and types of materials chosen, but the same function - to grow experimental food and materials at home.
recipes#
The recipe for this has a few parts, so I have divided it up on the how to page to make it easier to create this yourself. Have a good look around my website - the links for useful pages are below. If you have any questions, or if something isn’t clear, please contact me, as I’d be happy to elaborate on, or fix, my descriptions. As much as possible, I’m using images and text, because it works for me. I am assuming that you are not an absolute beginner, and that you have access to a Fab Lab-type space and the associated support.
links to supporting pages#
All of the weekly projects have contributed to this final project in a number of ways, some more concretely than others. The page links below take you to my pages which have content specifically related to the project.
Research and development of the incubator, and growing tempeh as a food and a material
Research and development of the wenduino kit, a portable prototyping system
thanks#
I have so many people to thank for their support and encouragement during fabricademy, I hardly know where to begin. I start to write names, and then remember some fun times, or challenging times, then get distracted, worry that I’ll forget someone… maybe if I divide them into sections, that might help…
Everyone who I visited, or who visited, while I was based in Amsterdam - Nuria, Cesareo, Adrian, Adriana, Rafael, David, Jillian, Alex, Deanna, Janine, Ohad, Jens, Ulrike, Gabi, Rutger, Espacia, Cindy, Pieter, Jean-Marie, Szilard, Bella, Bas…
My family, fabbers and friends in New Zealand, Australia & further afield - Jenny, Stuart, Craig, Daniel, Harry, Gen, Ngaere, Saskia, Amy, Michelle, Lee, Sue, Mikyla, Henry, Jason, Robyn, Stuart, Maddie, John, Jasmin, Rachel, Joanne, Nora…
School of Design at Massey for allowing me the time to participate in this
Fabricademy staff and supporting guests for making this programme what it is
The Waag Society - Cecilia, Henk, Emma, Roland, Marlene, Conor, Isabel, Nicolas, Frank, the other fabricademy students, and everyone who was there…
the future#
I will continue to tweak the design of this incubator. The electronics are still a small tangle of wires which need to be encased in some way. The power supply is working to its fullest extent, and I will try carnauba wax with, or instead of, beeswax. I will also carry on with the wenduino project, which complements the incubator by providing a portable, soft, electronics prototyping space. I hope to start offering a course in making your own incubator & wenduino in the second half of this year.
Some projects fit very easily into either Fab Academy, Fabricademy or BioHack Academy. I think mine sits somewhere in between them all. I did Fab Academy while I was working full-time, and although I have been doing the same for the second half of Fabricademy, during the first half I was able to devote almost all of my attention to it. That was a real pleasure. The ability to devote chunks of time to learning is a huge privilege, even though it can mean living on very little money and very little sleep.