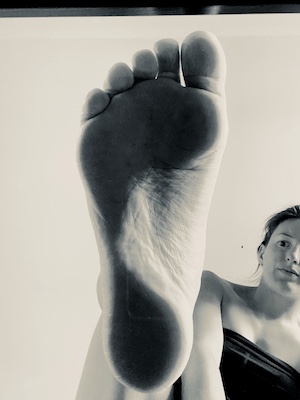
Like the Final project idea explain, this developpement page will document the process of creating a sol personalise to the foot of a person. Depending the need of the person, this sol can be made with different material to achieve different properties that the owner whant. I will take myself has the first user because the developpement time is short and with the covid situation the accessibily of a variety of feet is significantly reduce. So good luck to myself and let's beggin this journey!
The foot
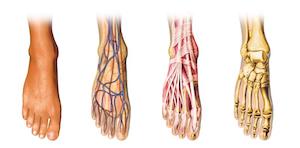
- Each feet are very complexe, it have 26 bones, 16 articulations, 107 ligaments and 20 muscles. This combo allow you to do wide variety of movement and contraint.
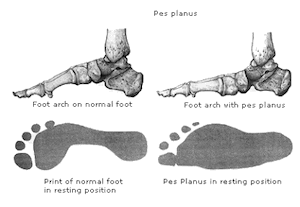
- The final shape of the foot will depend of your type of feet, your foot arches, your posture, if you have desise and your life itself. All your life you will put weight on them, you probably force them in tiny spaces like shoe and your feet will change shape depending of all these factors. They will grow at the beggining of your life, they can swell depend of your blood circulation, they can go wider depending of your activities. It's infinite the reason why your foot change and this is why you should take care of them. Here is a wikipedia page (in french per haps) on the foot anatomy if you want to understand more the complexity of it.
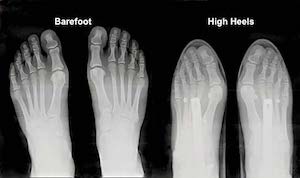
- They are alot of contradictiory theory that you can here during research on foot. You have to be barefoot vs you have to where shoe that will stabilise you feet and ankle vs you need minimalistic shoe.... So here a quick story, if you always walk with shoe until you are 3 years old to now, you LOST your ability to walk barefoot without hurthing yourself. The way you put your feet on the ground is completely different now, and you muscles and flexibilty are now probaly very weak. This is why if you wear shoe and you want to be barefoot, you need to train yourself, forgot everything you know about walking and learn it again. On the other side, if you grow up barefoot, becarefull, it take approximitly 6 month and your feet geometry, your posture and your walking movement will change if you put shoes. Knowing that I develope a love hate relationship with my shoes. Even knowing this, the shoe is quite usefull for manyreason this is why it's a very old invention. The main goal of the shoe it to protect you from the environnement. It's a tool that we built to helps us to go further and fulfill every activity we want.
- I want to think about a custom sol that can be personalise depanding of what you are walking on, the weather or the amount of protection you need. If you are training yourself to walk again barefoot, this sol could change has you progress, versus if you need more or less support on your arch you can change the sol to really respond to your need of movement, flexibility, absorbtion...


The beggining and inspirations
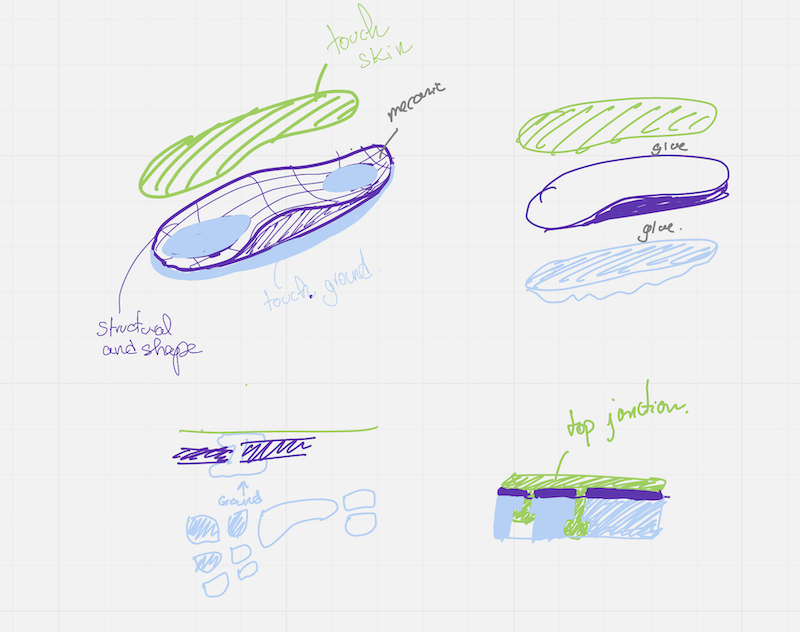
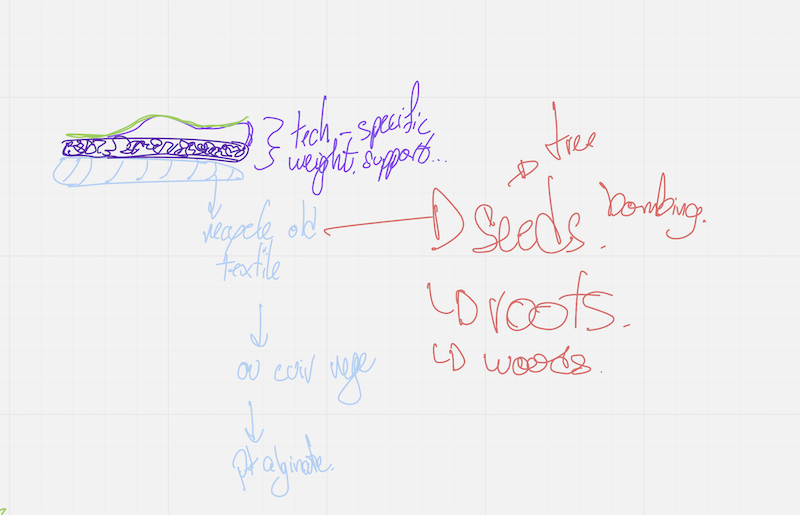
- I know that it have 3 main parts. One that is touching your feet, on that is structural and one that touch the ground. I put on Miro board the properties I want to tackle. On the other hand, I wonder witch fabricademy knowledge I will touch during this project. Has you can see, I create a process that I think I will use for the prototyping of the project. I know for sure that I will use the 3d scanning to digitised the foot, but the rest will depand of the evolution of it.
- On this same Miro board, I did a research of inspiration of many products and materials that was use for building shoes and soles. I was suprise that every modern shoe including modern moccasin have plastic in the composition and most of all in the outer sol that is scraching the ground. The best I found was natural rubber, but the EVA tree is quite at the oposite of where I am living ( Quebec,Canada ). I want to embrase the fabcity mindset and use local material if possible...is it possible?

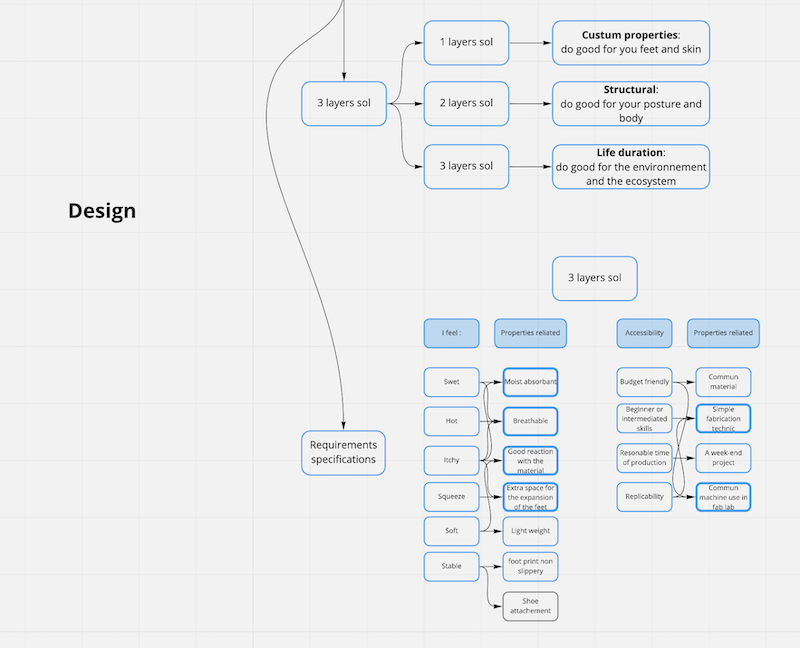
Starting with the layer 3
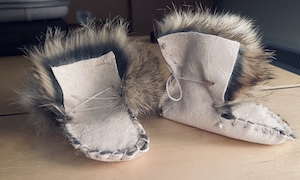
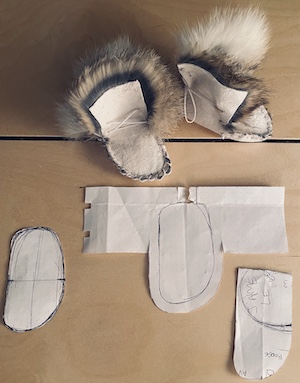
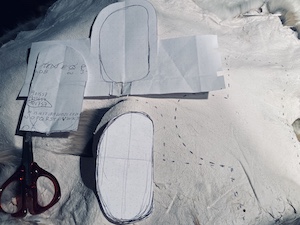
- I creat ruff sketch of possible main directions. I can create some mecanical jonctions or combine them with glue. But it's ver difficult to imagine, I never create a shoe and in my research it take hight skills to do one. Before creating anything I made a first approch of jonction and it influence on the confort. I create real baby moccasins. This model of shoe and sol exist for ever and was more use has a tool has esthetic. I compare them with real modern one of the Mukluks compagny.
- The pattern in relation of the feet allow some room for the toes, but the streaching leather helps to model everything. Some Moccasin dont't have right or left side for exemple and the feet create it own shape. The ultimate goal of the pattern is to make a offset of your feet to cover the hight of the toes box. rule of thumb 0.5 in but depend realy of you feet.
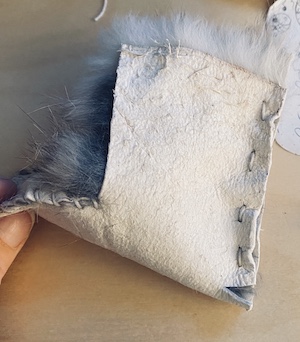
- Also, the jonction by sewing is quite easy if everything is mark, but if not, sewing in 3D is challenging. My model was small and sewing the heel was treaky
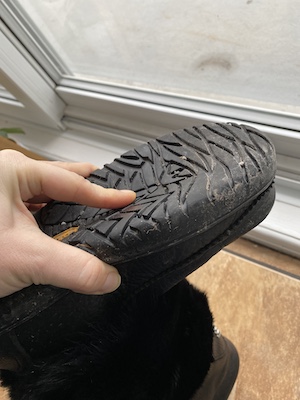
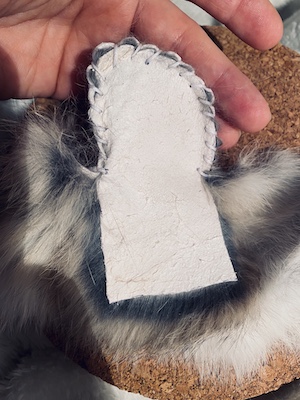
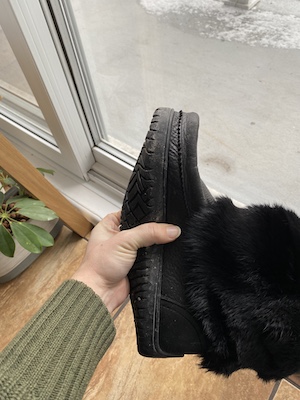
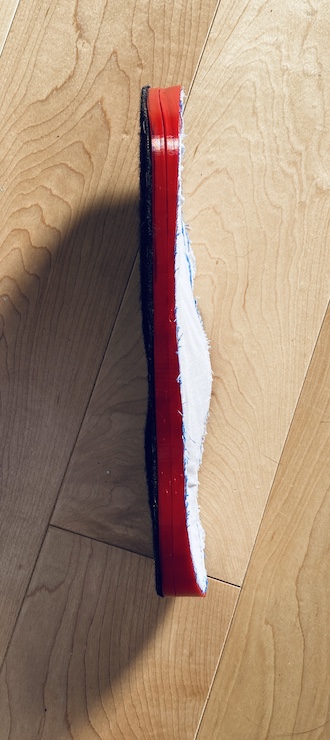
- When you walk in moccassins you feel the ground trought the leather or here in the case of my winter boots the rubber sol. It is made to walk in soft snow or in the forest, not on concrete.
- I explore the biomaterial, but I found really difficulties to found something flexible, that support a human, resist to water and that is not too heavy.
- While I explore possibilities, I have a really nice conversation with Troy Nashtingall that end up on a close box. The rubber and the plastic base foam achive perfect properties material for the sol that scratch the ground. It resist really well abrasion, weather and absorbtion. The only problem is the plastic base material or the extraction of the rubber. It's a non sens, this layer is meant to degrade in small particules and these particule are plastic base and will stay in the environnement for a really long time. I need to open the box.
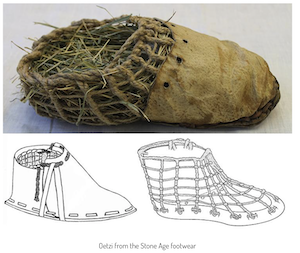
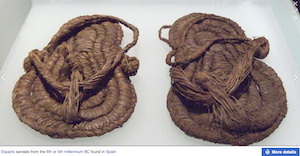
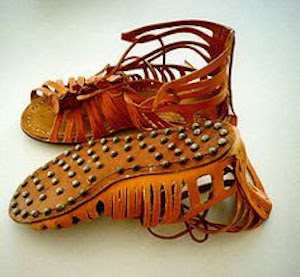
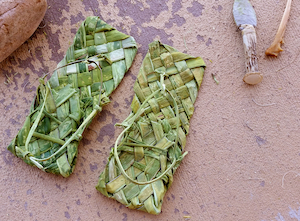
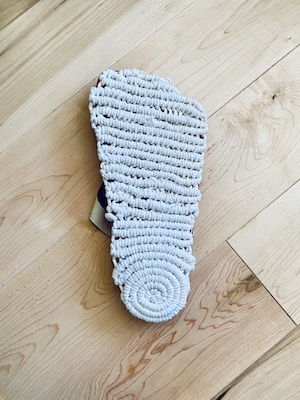
- I did a reaseach on shoes before plastic and rubber. Some was made in wood, other in leather et other in hight concentrated fiber. They can take some kind of hay or yucca and weave them. (Japanese, Waraji, Moggolon Yucca) It remind me our addirondack braided rug. It's impossible to go true these rug it last forever and it's scrap pieces of textile braided toghetter.
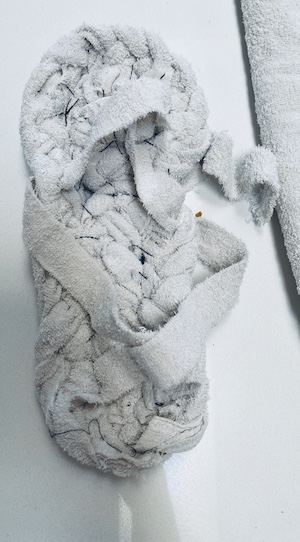
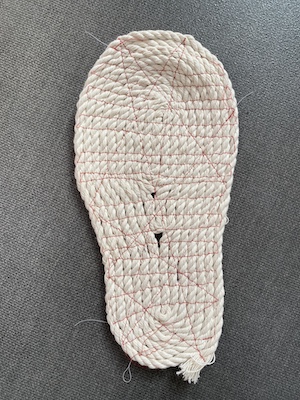
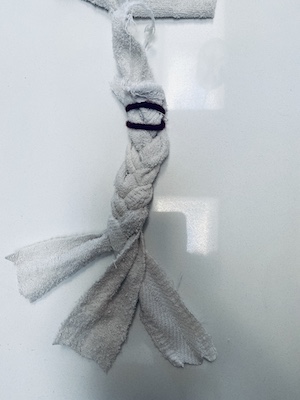
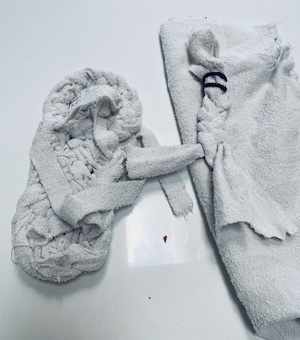
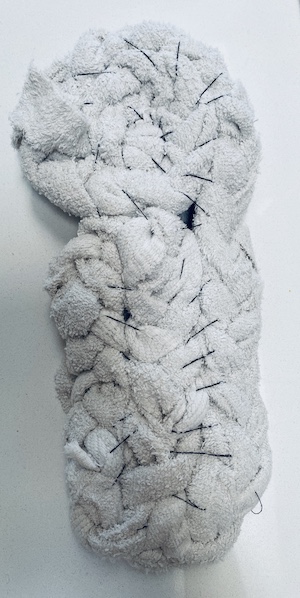
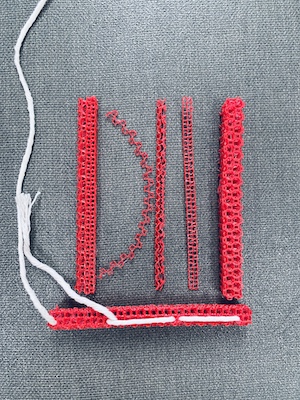
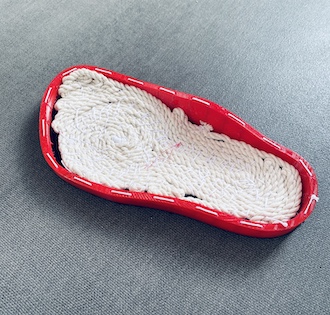
- I give it a try with a old cotton towel. The result is very thick but interesting. The weak point is the attachement bettween the braid.
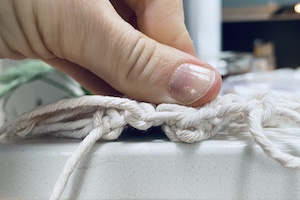
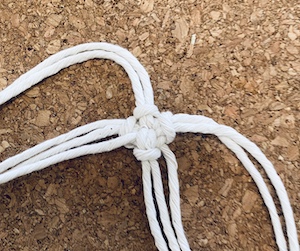
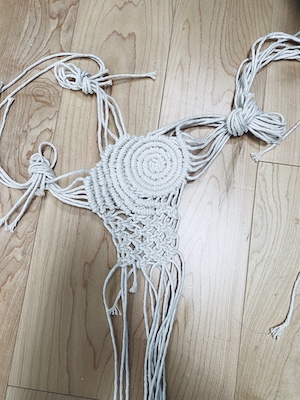
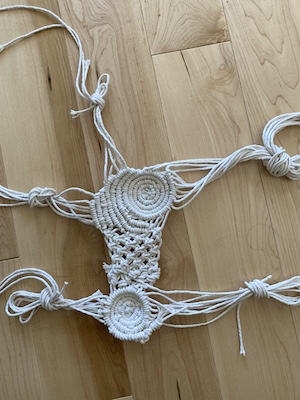
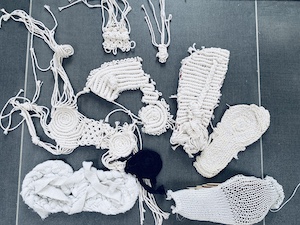
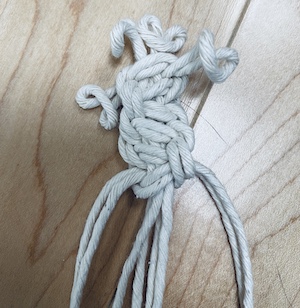
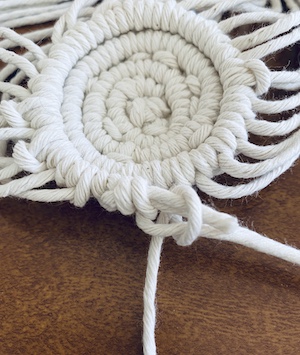
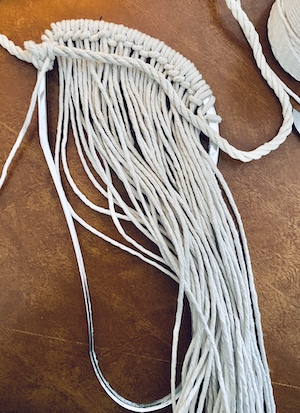
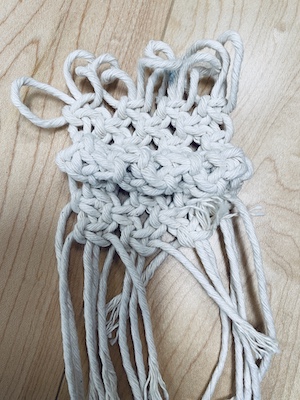
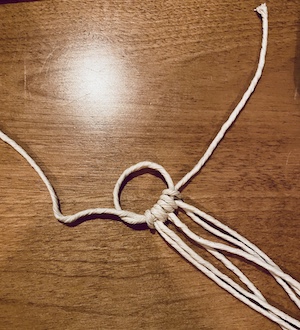
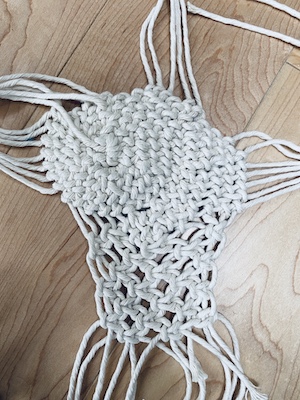
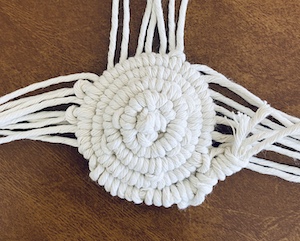
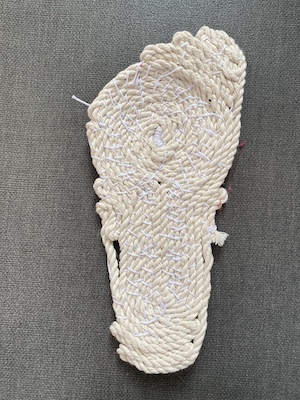
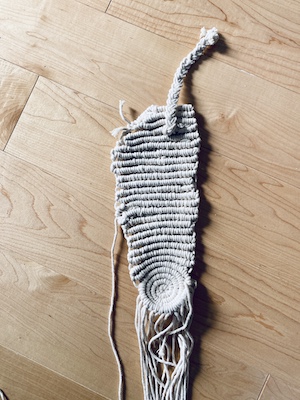
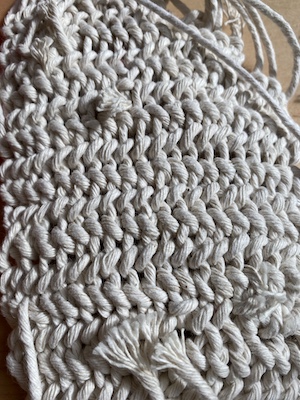
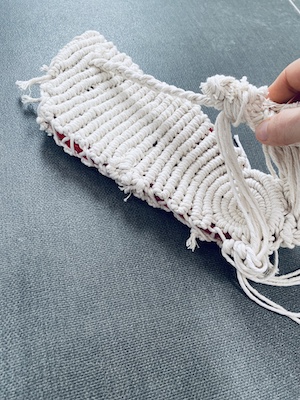
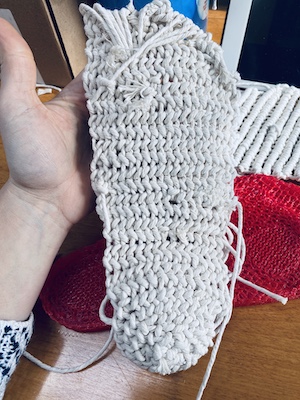
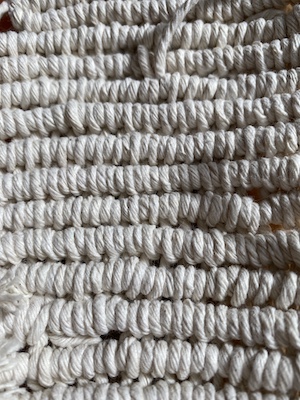
- Thinking about fiber, I when on the macrame path. Creating knots to create a structure. I both some cotton roap to experiment, but you can think about doing this technique with anykind of rope in natural fiber localy produce. If your in India you can do it in jute and if you are in quebec in cotton or linen for exemple. Even in distaff, I read that the fiber is really great.
- Luky me they have alot of tutorial on youtube to shoe you how to macrame. This macrame chanel is very usefull. This Macrame knots guides can help you with the name and the base. I use those videos to create the sample you see in the pictures
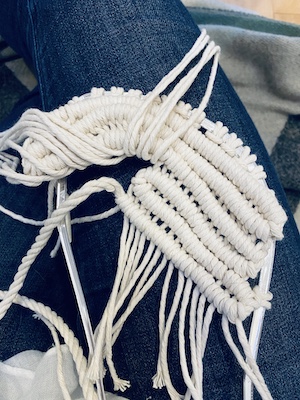
- It take approxymatly 3 hours each to make a sol in macrame. A bit long but in the scope range.The double half hitch is the knots that compress the most the fiber. It fallow a guide line that you can take something bigger or softer or denser and roll around. The knots is a compression knot that stay in place only if you do 2 half hitch. The texture is really interestiong and the touching feeling too. The mixt with the natural fiber and the geometry can be very interesting for the first layer too.
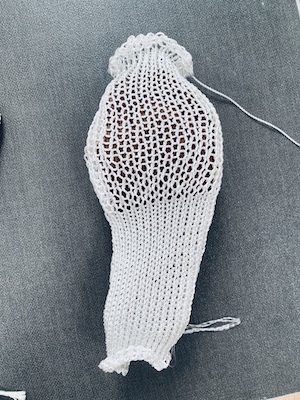
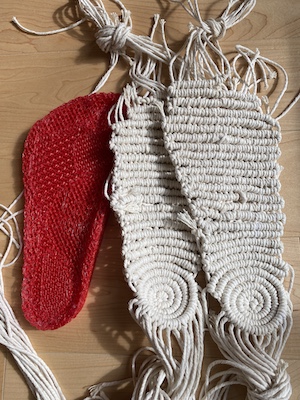
- I create other for the inspiration, another one knitting and 2 other one more like the espadrilles.

The structural layer 2
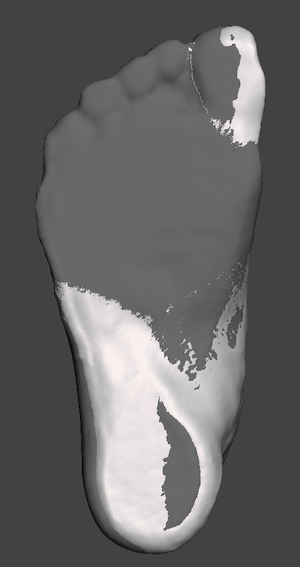
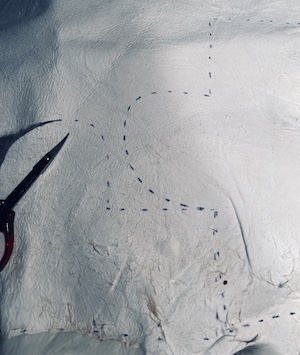
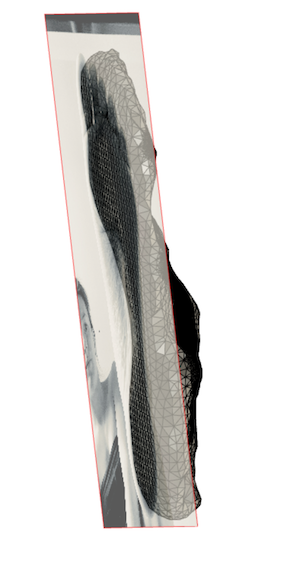
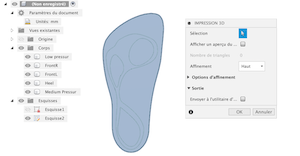
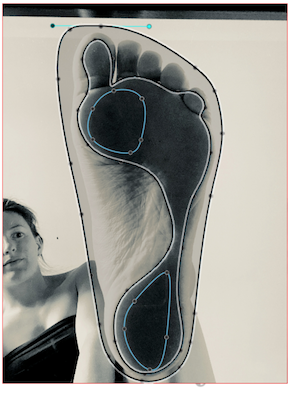
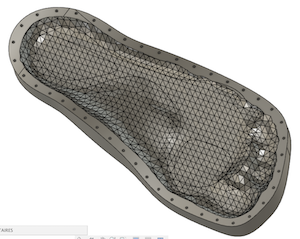
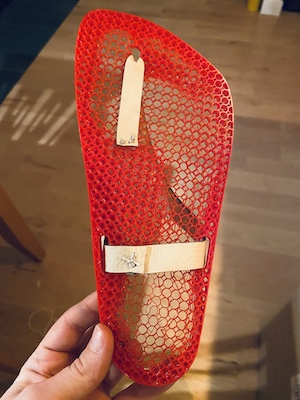
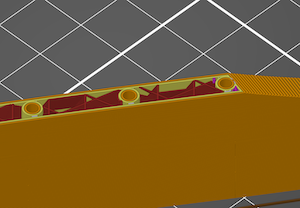
- Gyrobot documentation and on it's thingiverse page, you can understand the process that he use to generate a variable density insole. My turn to test it. I don't have a paper scan like him, but I try with my cellphone and the pictures filter blanc and white. I put my feet on a glass table and try to have the a good light to create has mutch has contrast has possible. Than I vectorise the images with inkscape, import it in Fusion 360 and generate seperate body for each area of pressure. The darker is your foot in a area the more weight you put. I acheive something similar in my e-textile I week where I did a pressure pad for the feet. It can be reusable to have more specific data.
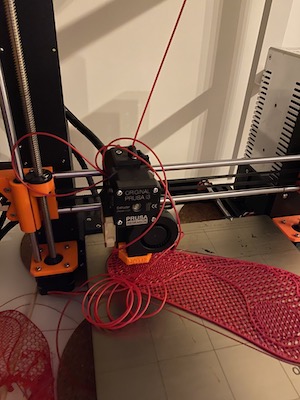
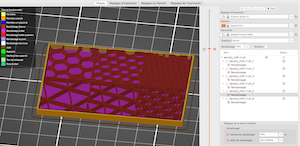
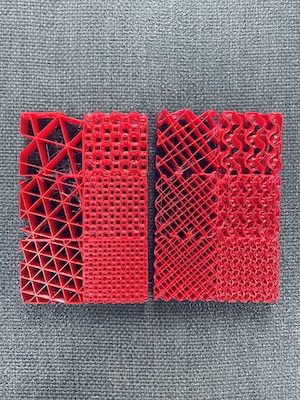
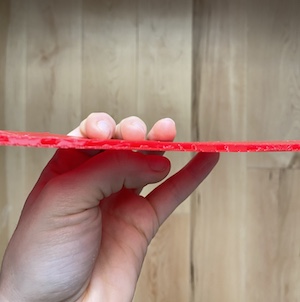
- I did a test with simple square. I generate 6 square side by side and when exported in .stl in Slicer 3R ( the slicer of Prussa) I seperate the object and than attribute differents parameter like the infill pattern and density. I print it with our Prussa 3D printer in TPU NinjaFlex. It's a 85 Shore A hardness NinjaFlex de NinjaTek informations.
- I use infill to support the roof filament, but I never use or considerate a mecanical usage of the infill. Here is a very interesting chanel: CNC Kitchen. He like to compare and do small analysis on the differents property of the infill this is only one video of him to understand the infill.
- The feeling of the thin layer printing is interesting but to thin. It's time to 3D scan
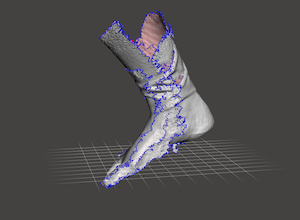
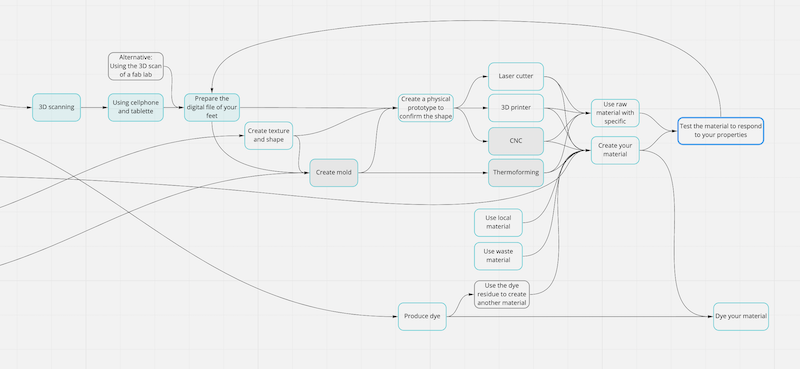
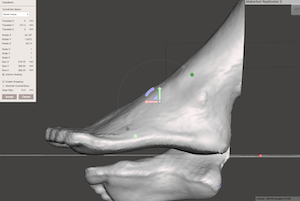
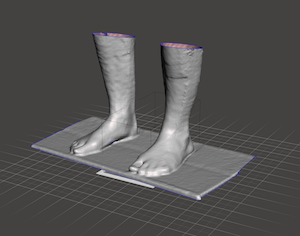
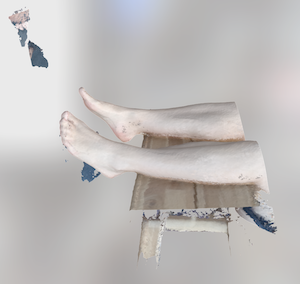
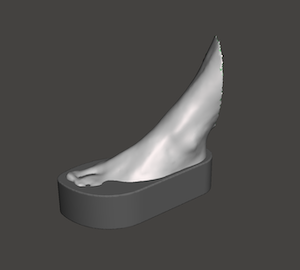
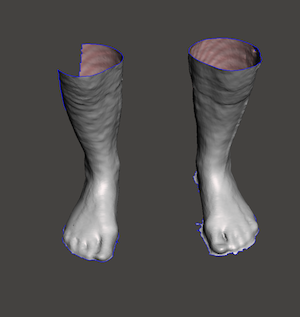
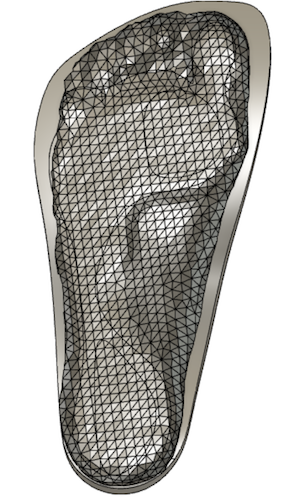
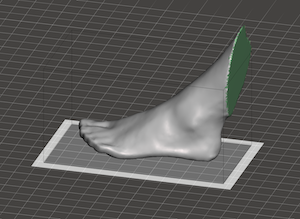
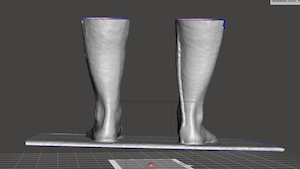
- Base on my previous work on the week 2, I found the application Scandy that use cellular and tablet to 3D scan. I use it to scan my feet. Thanks to my boyfriend, moving a cellphone to catch everything alone is complicated. It's better to have someone to help! I subcribe for the week plan at 2,89$ per week. You can export and save has many scan you can.
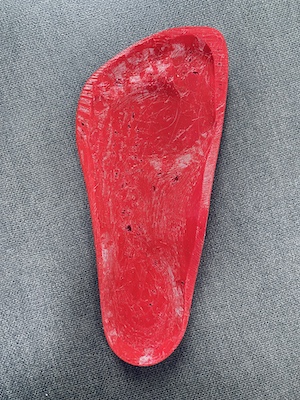
- I export them in mm in .obj and clean the scan on Meshmixer. You can refer to my week 2 to clean and trim everything. I also orient one of my feet on a flat surface so I can make a boolean sustraction with the future sol base I will create in Fusion 360.
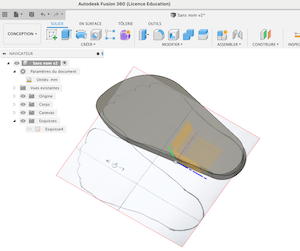
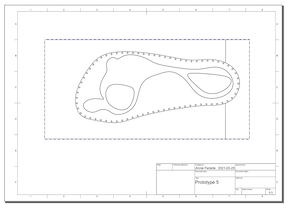
- I want a very accessible project for everyone, so Rhino is maybe not the best choice. I use Fusion 360 but it's basic actions so maybe your favorite 3D software will do. I import has a canvas a picture of my feet drawing that I put to scale. I extrude the outline and export in .stl
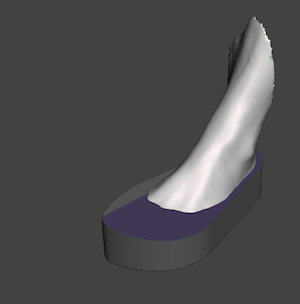
- Back in Meshmixer, I import this base and try to do the boolean...the result was bulky and we don't have alot of control on it.
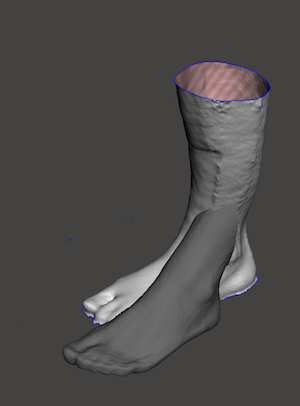
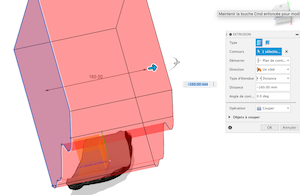
- I change my mind and export in .stl the 3D scan of my feet in Fusion. Stop the history by clicking right on the parent group, transform it in Brep and start again the history. If you don't do this process, you can not cut the scan.
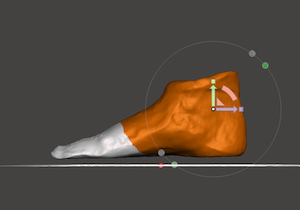
- To give the shape to the sol, create 2 lines in reference to your feet allowing the arch to be covert in the sol and use the fonction sweep to cut your sol.
- The result was good, but the scan is made with a relax foot position. When you put your weight down, your feet is larger. I did the same process but with a scan where I am standing. I try to fit both scan togheter but the size is not merging.
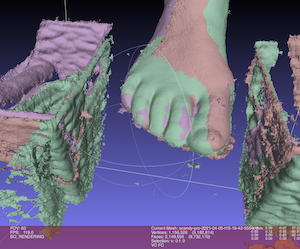
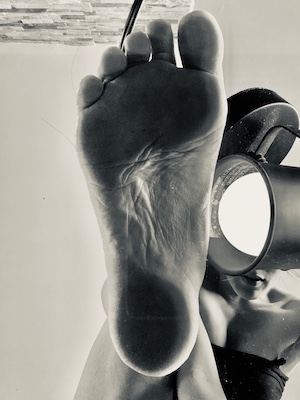
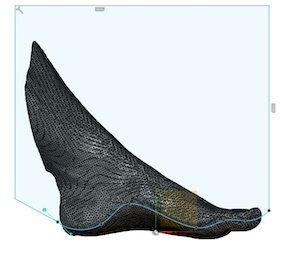
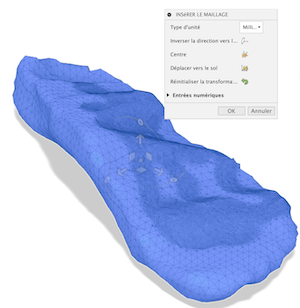
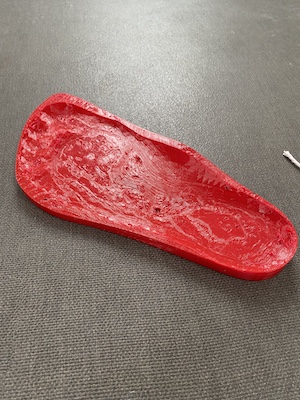
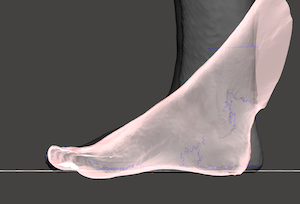
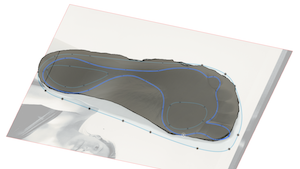
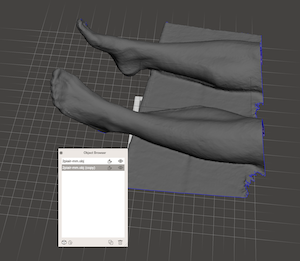
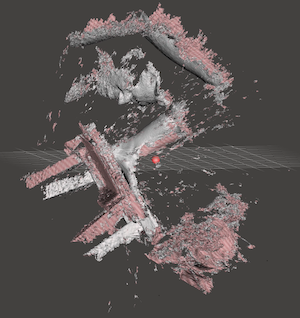
- I try another time, but this time, I put my feet on a transparent acrylic and I was able to capture only the underfoot and alot of stuff around has you can see in the picture. Can you see the face of my boyfriend too ;). When everything was clean, I create a solid with the underfoot and export in .stl into Fusion 360.
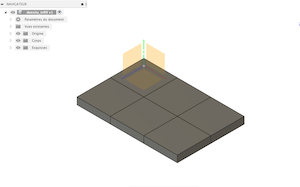
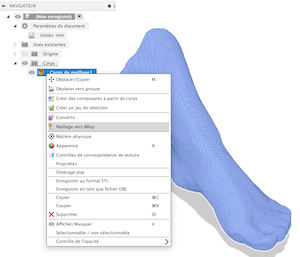
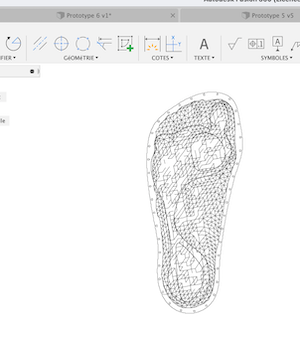
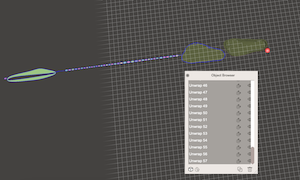
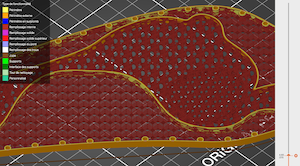
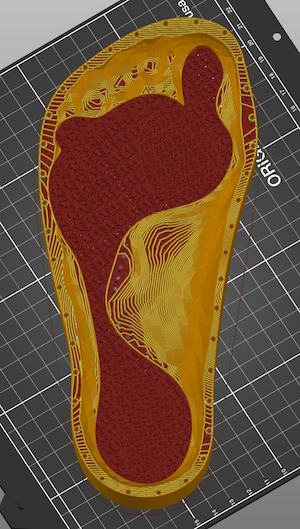
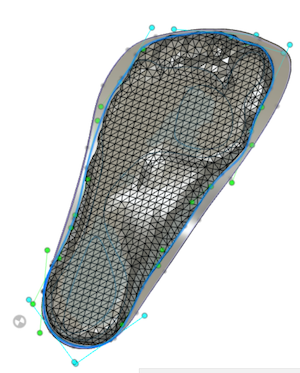
- I stop the history, and trainsform the maillage into a b-rep, start again the history. I align and resize the picture of my underfeet with the 3D model and draw on a sketch the density zone. Extrude these zones and cut use the feet has a tool to cut them. The same way we did before. You should end up with multiple bodies that represent each zone.
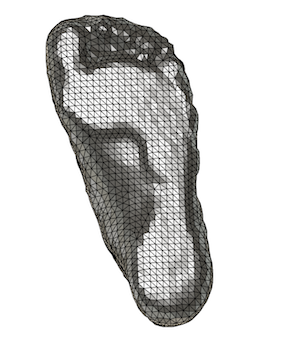
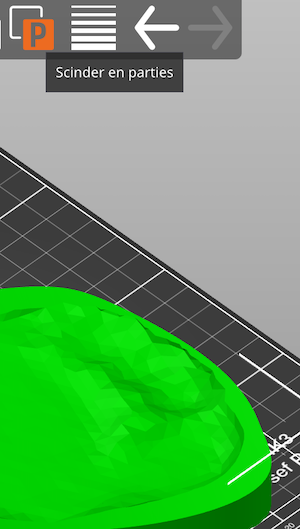
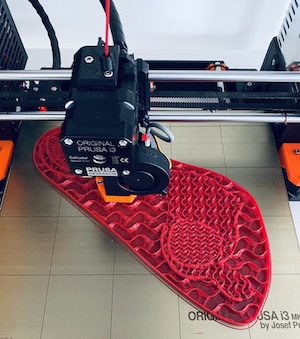
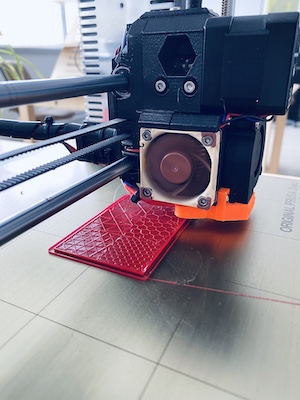
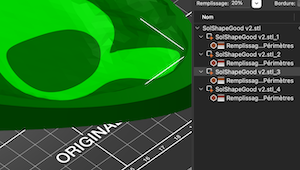
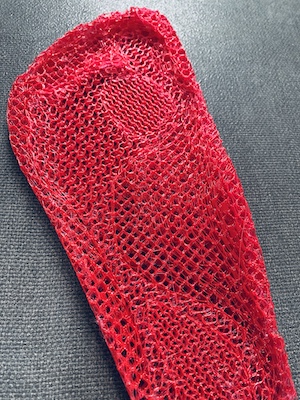
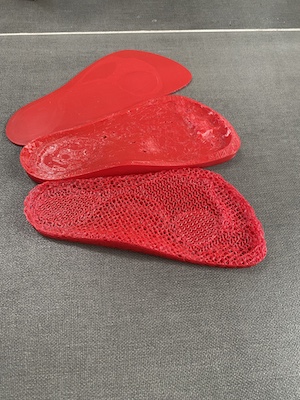
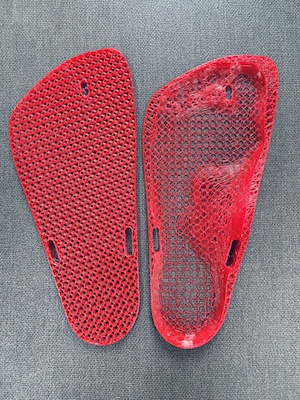
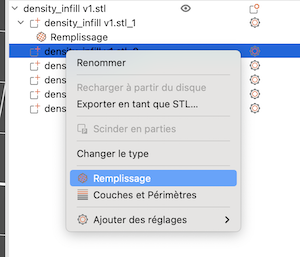
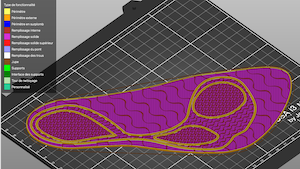
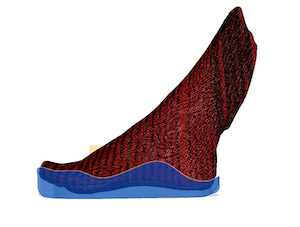
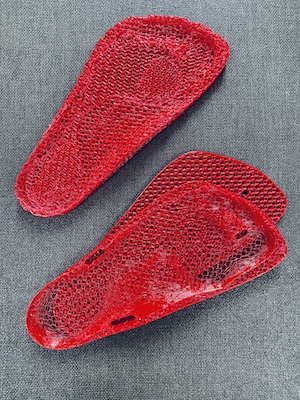
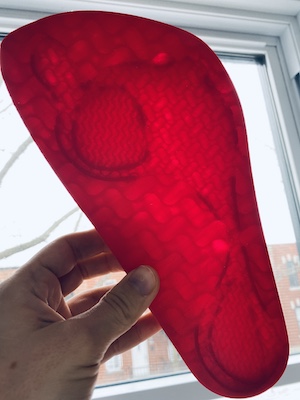
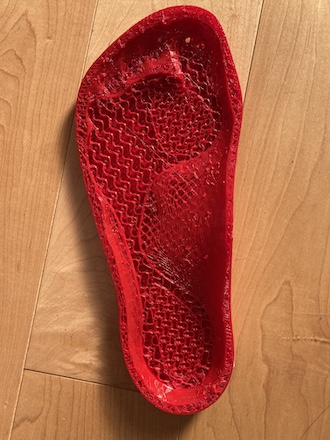
- When you will import in Slicer you can seperate each part and attribute different parameter to each one of them. Base on my previous test on infill density, I try the first one with the Gyroide. I take 13:20 to print my first entire sol! The feeling is soft and supportive in the same time it's not perfect but I have something interesting.
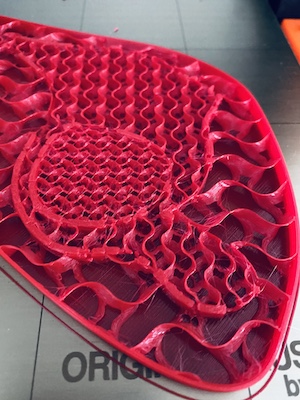
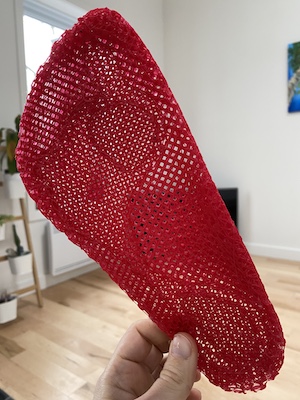
- I did some test of 3d printing only infill. Each vertical wall act like a constraint ans made the model rigid and non breathable. Every infill with only vertical wall have a good strength in compression verticaly but not on the side and the 3D infill is a litltle more equal but not totally. I chose this time honeycone and gyroide and 3d print the old shabang with only infill and I drop my time to 7:40 hr and the texture was event more interesting.
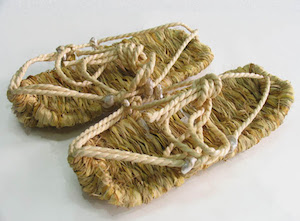
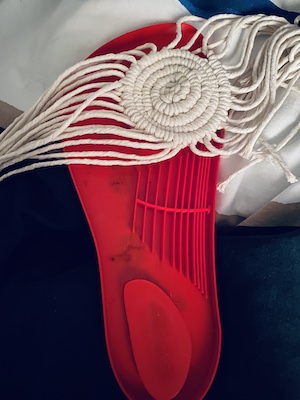
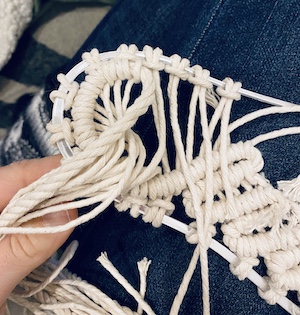
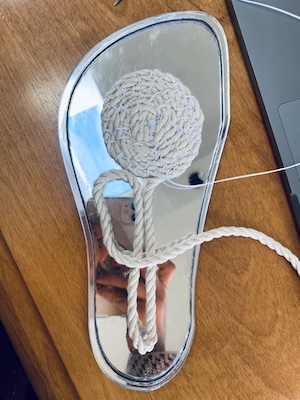
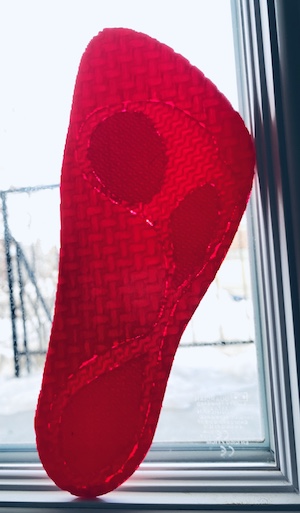
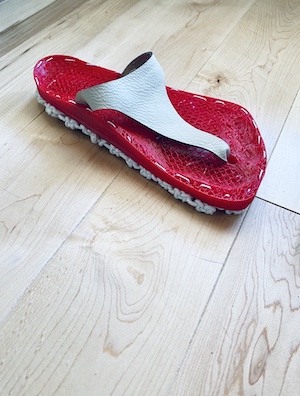
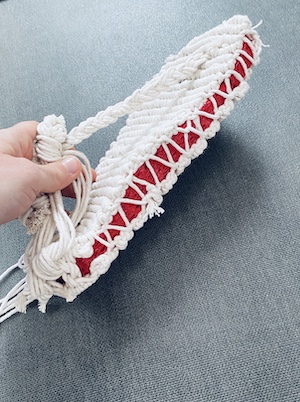
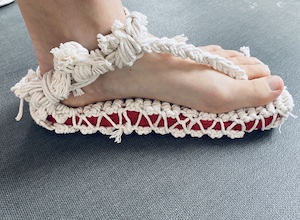
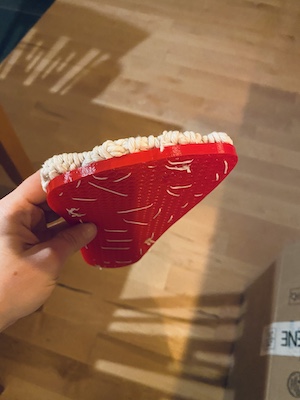
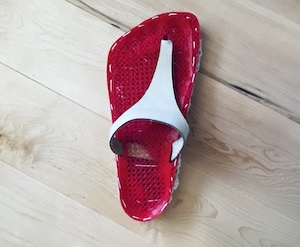
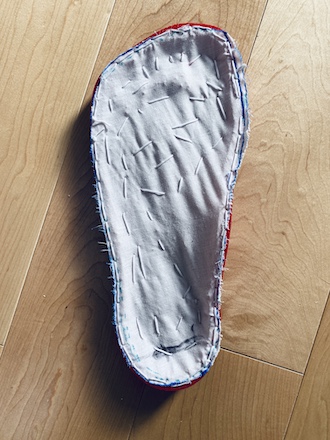
- I assemble it with 2 macrame sol that I stick toghetter on the side. The esthetic is terrible but the feeling is so nice!! I transform them in sandal so I can wear them.
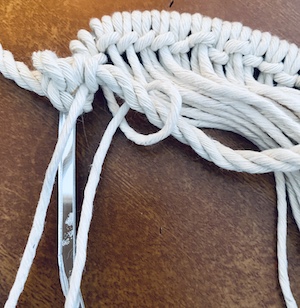
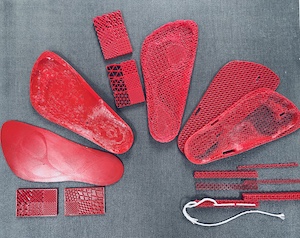
- The biggest challenge is to creste the jonction bettween all. In the group session we arrive with this idea of creating macrame around the 3D printed rope in infill. I try to 3d print some section, but The more I experiment on that direction the more I was thinking about the replacement of the bottom layer. It's not rubber, so you will need to change the bottom layer sol probably before changing any of the other 2 other layers. So I go with this technique I need to undo everything and the structure. To a point of you of practicality and discouragement I don't think that I will continue in that direction. I don't want to unbuilt a complete shoe for changing a sol. On the other hand, I sow true the holes of the infill. Sewing in 3D without mark is quiet challenging, to make is easier you need to mark everything. I beggan but adding some space to make a better jonction with sandal strape. I also 3D print it in 2 sections: the section with the absobant (4h) and the 3D section(3h).
- So if you need less, you can 2D print only one part, or doing one in the laser cutter and the other one 3D printing.


Fonctional prototypes and improvement
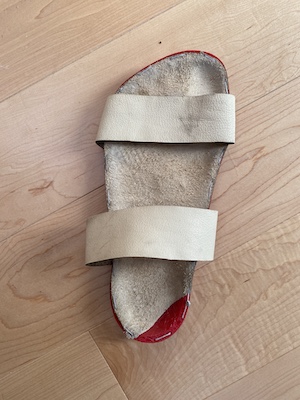
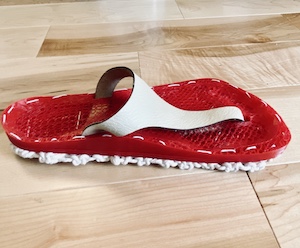
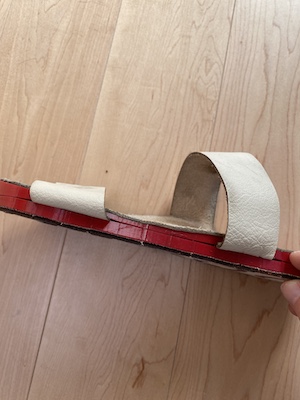
- Has you can see in series of first pictures, I assemble 2 sol of macrame around a 3d printed sol with no wall. I sew them with a DIY needle and braid the rest of the ropes so I can where it to test. it. It was so comfy and very nice touching feeling, but the esthetic is lacking big time. I not where this in the street. The point of this hole project is to make a sol so I can wear in sandal or shoe eventualy. It's not supose to be a fashionnable statement, just a normal wearable everyday.
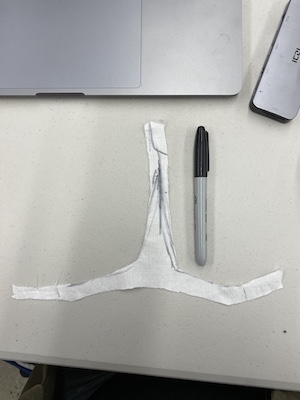
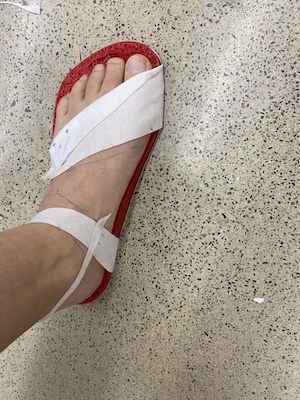
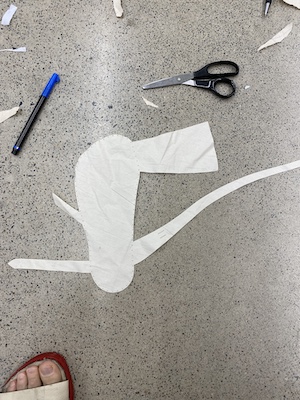
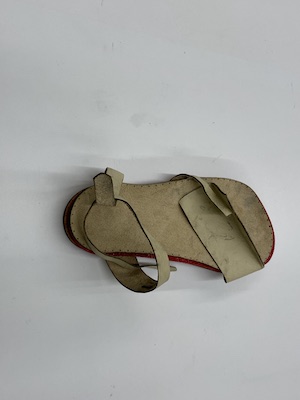
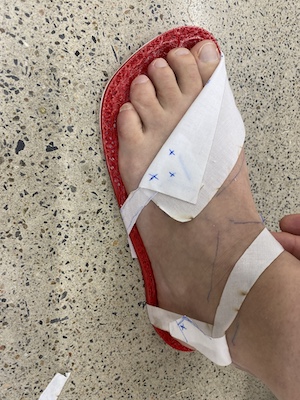
- The next step was to think about the jonction of this future sandal or shoe, how will it be attack. I put a cloth on my feet draw a basic sandal shape. Took a picture and trace it on inkscape. Than I laser cut old sofa leather to have the attachement. I sew it on the geometry sol part and I sew the macrame sol on the other part and sew everything togheter. Very impressive comfort. It miss the layer inside but the rest of it is nice.
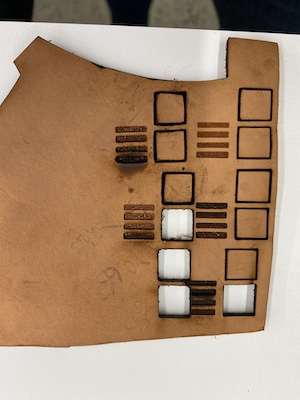
- How to improve this protype. First add some hole on the outside to make it easier to sew everything in place without skills. Also add some different density to the bottom part of the 3d printing. Also I refine the sol to be more delicate. I 3D print at the beggining sol where I offset 3mm from the border of the feet and make a pattern of hole of 2mm. In total, the outside border was 6mm and it create a bulky esthetic. I reduce it to 4mm. I can not go smaller because I need at least 2 layer wall around the hole and 2 layer wall each side to make sure that it will not break.
- I did some additional research also on the type of fiber and the abrasion resistance of the rope fiber use in macrame. More the rope is twist, the more abrasion resistance it is, but if water go in, it can mold. In sock for exemple they always use nylon in the natural fiber to help for the abrasion. For the espadrille in spain, they use fair and recycled fiber that they mecanicly braid. Fair come from india. So the water and the abrasion is still a problem.
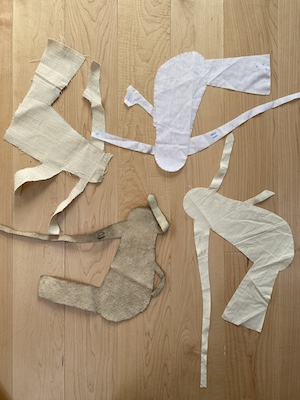
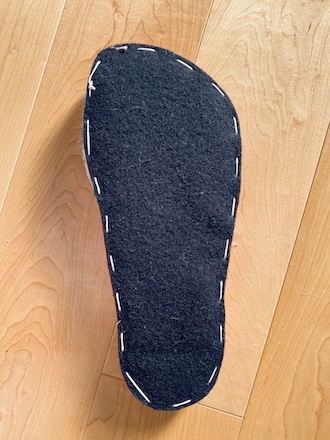
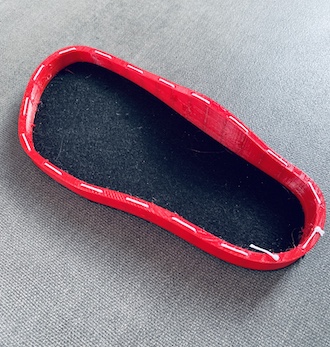
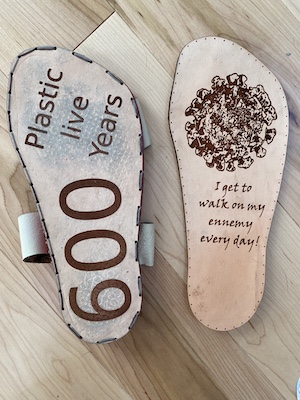
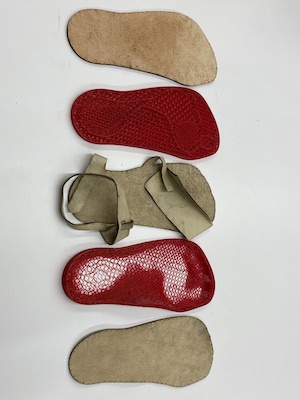
- I decide to do a prototype in leather. It's also use for a very long time, still natural fiber and will creat friendly particul. Maybe less straction, but it will last for a long time, it will not mold and its very good in abrasion. Why I didn't think about it before it was so ovious maybe. For now I will simulated it with felt and when the shop will open I can replace it.
- On the top it will be the layer that will touch the skin. I try to finish the border of a woven or knitting piece, but you whant to do it by hand the serger you definitly need skill, not so simple. I think I will go with the embrodery machine. You can definitly go with a felt for exemple or leather that you can laser cut or embrodery your pattern and stitch it to the sol and upcycle your old clothing.
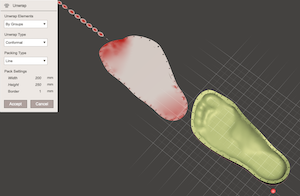
- I try the fonction unrap in meshmixer to create a better pattern for the top layer, but it,s not very accurate. I prefert to take the outside line and streach it.
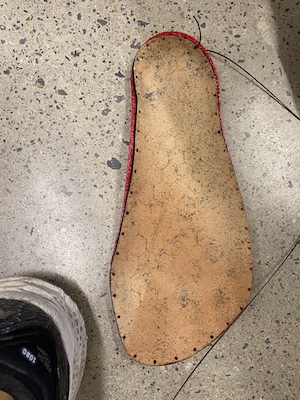
- I create another prototype with the bottom in leather vegetal for the bottom layer. Laser cutting it wet give better result I take the parameter P:100 S:0,6 for cutting and P:100 S:20 for engraving.I assemble the top layer, integrating the sandal


Finalising the first loop of the spiral project
- After all theses tests, the 3D printer head was halt block and the filament had difficulties to go out. You can see in the first picture that the filament, because it's flexible, bend and go out on other hole. You can do a cold pull to clean the nozzle and you should be good to go again.
- Next, if you are not able to create one scan of you feet, I experimented the assembly of the multiple 3D scan on meshlab. It's very simple, I put the video tutorial in my second week assignement, the Digital Bodies. I assemble the right foot. Don't forget to check the accuracy of the assembly ( it's in the video). Tips and trick: clean your scan before assembling everything.
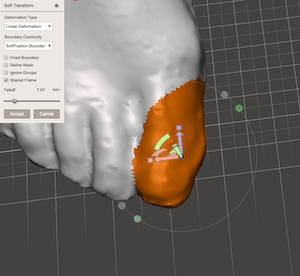
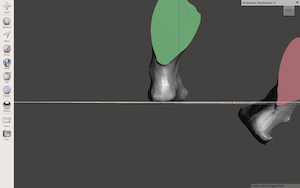
- I play also with Meshmixer the modification of the posture of the feet. After selecting a part you can go in smooth transformation and when you move, becarefull to be on the W setting (it change the center point of the transformation) I also make a change for the big toes. I create a bigger room for my big toes to move freely using the same technique of the heel.
- I 3D print both feet with this impovement and made a file that can be reuse and modify on Fusion 360. You just need to insert your scan and picture and modify the lines. Don't erease anyline, juste push them, because the extrusion are link togheter.
- For the other layers, the goal is to give possibilities that are the best for the environnement. So for the layer in contact with the ground, we have right now tow possibilities, in macrame with a rope 100% organic and localy produce or vegetal leather 2.5 to 3.8 mm thick that you can laser cut. For the inside layer and the sandal it self. You can upcycle a object already use. A old sofa in leather, a old pair of jeans, a old shirt...up to you.