3 | Circular fashion
"LESS IS MORE"
Objetive
For this project, I will take into account the following concept:
- Seamless
A seamless garment is a garment that can be manufactured without sewing, seams and stitches. With certain shapes and cuts, it can be obtained different types of functional garments or accessories: skirts, t-shirts, dresses, necklaces, rings, bags...
- Zero Waste
It is a concept which means, in the fashion sector, clothing that doesn’t generate textile waste in their production. If it generates it, reuse that waste by giving it a second life.
Zero Waste Design Online is an international community of designers that aims the knowledge on zero waste design processes through online education teaching construction, pattern cutting, design methods and innovative use of technology.
- Modular
A modular garment is one that can be disassembled into different parts, or modules, and reassembled at the wearer’s will.
With a modular design, creativity is the limit. You can design whatever you want and at the scale you want: from a earrings pouch to a scarf.
Also, a modular design allows you to create clothes that are comfortable, fit, sustainable and more economical.
Here is an interesting post about Modular Fashion explaining its future.
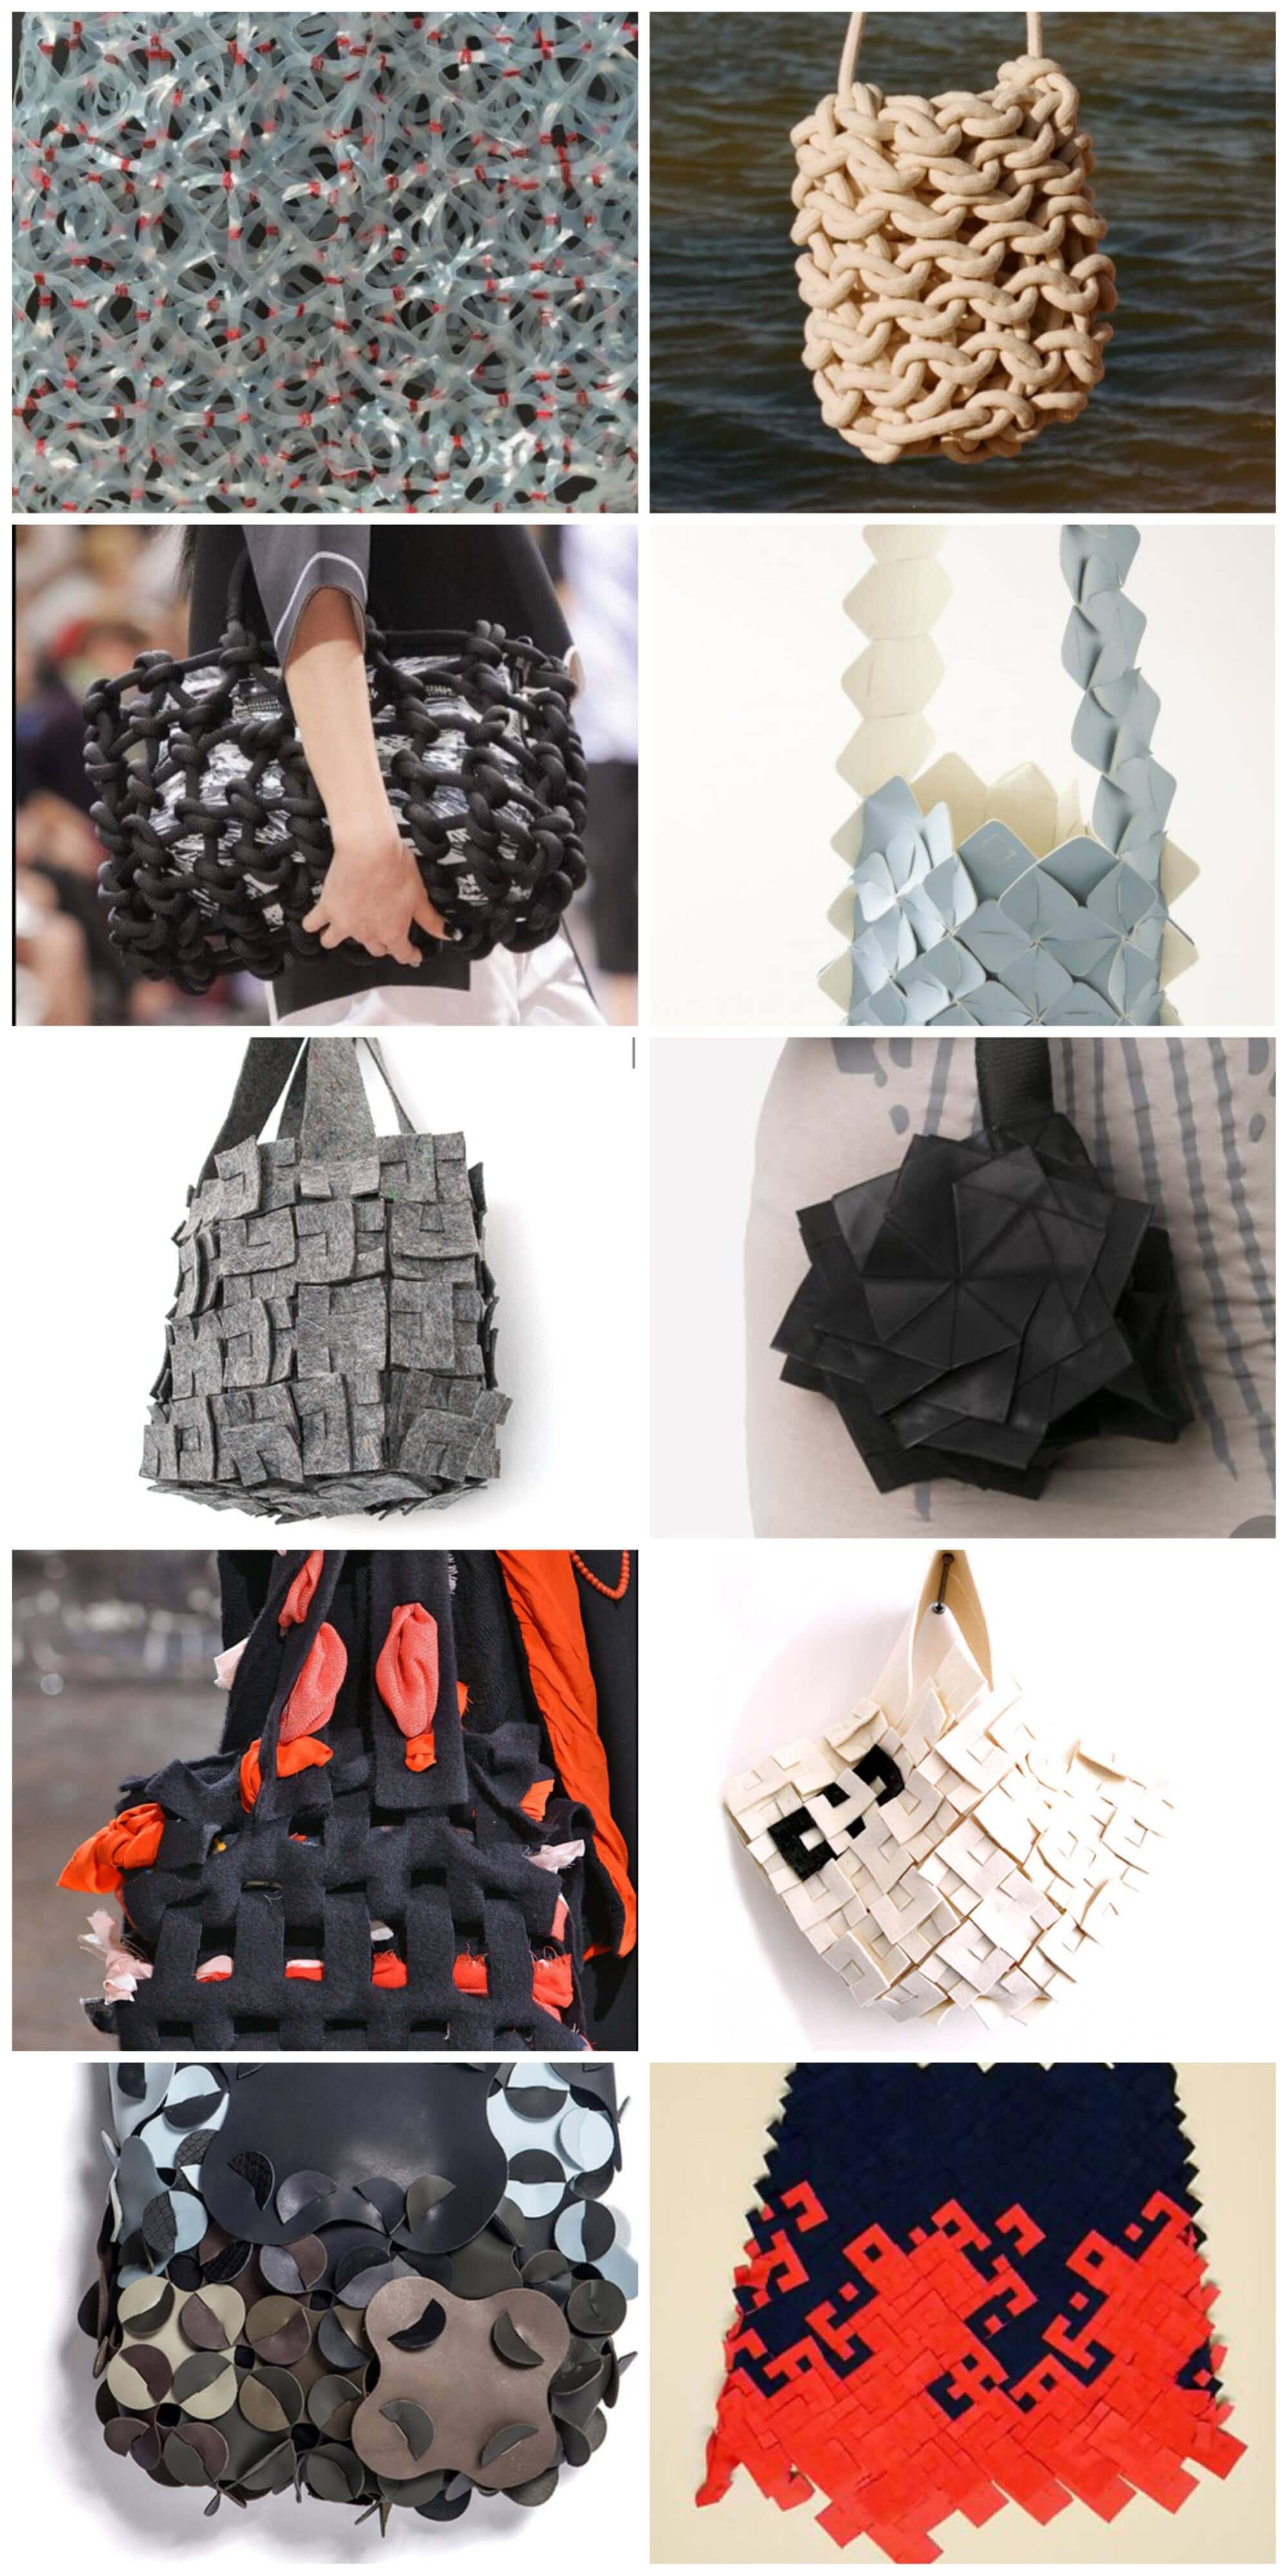
Inspiration
I was interested in developing bags, tote bags or pouches that could be scaled to create pouches to store jewellery. Here is a moodboard which inspired me.
Process
This time, to my surprise, my initial idea worked. I call it efficient design. Obviously, it would have a refinement phase.
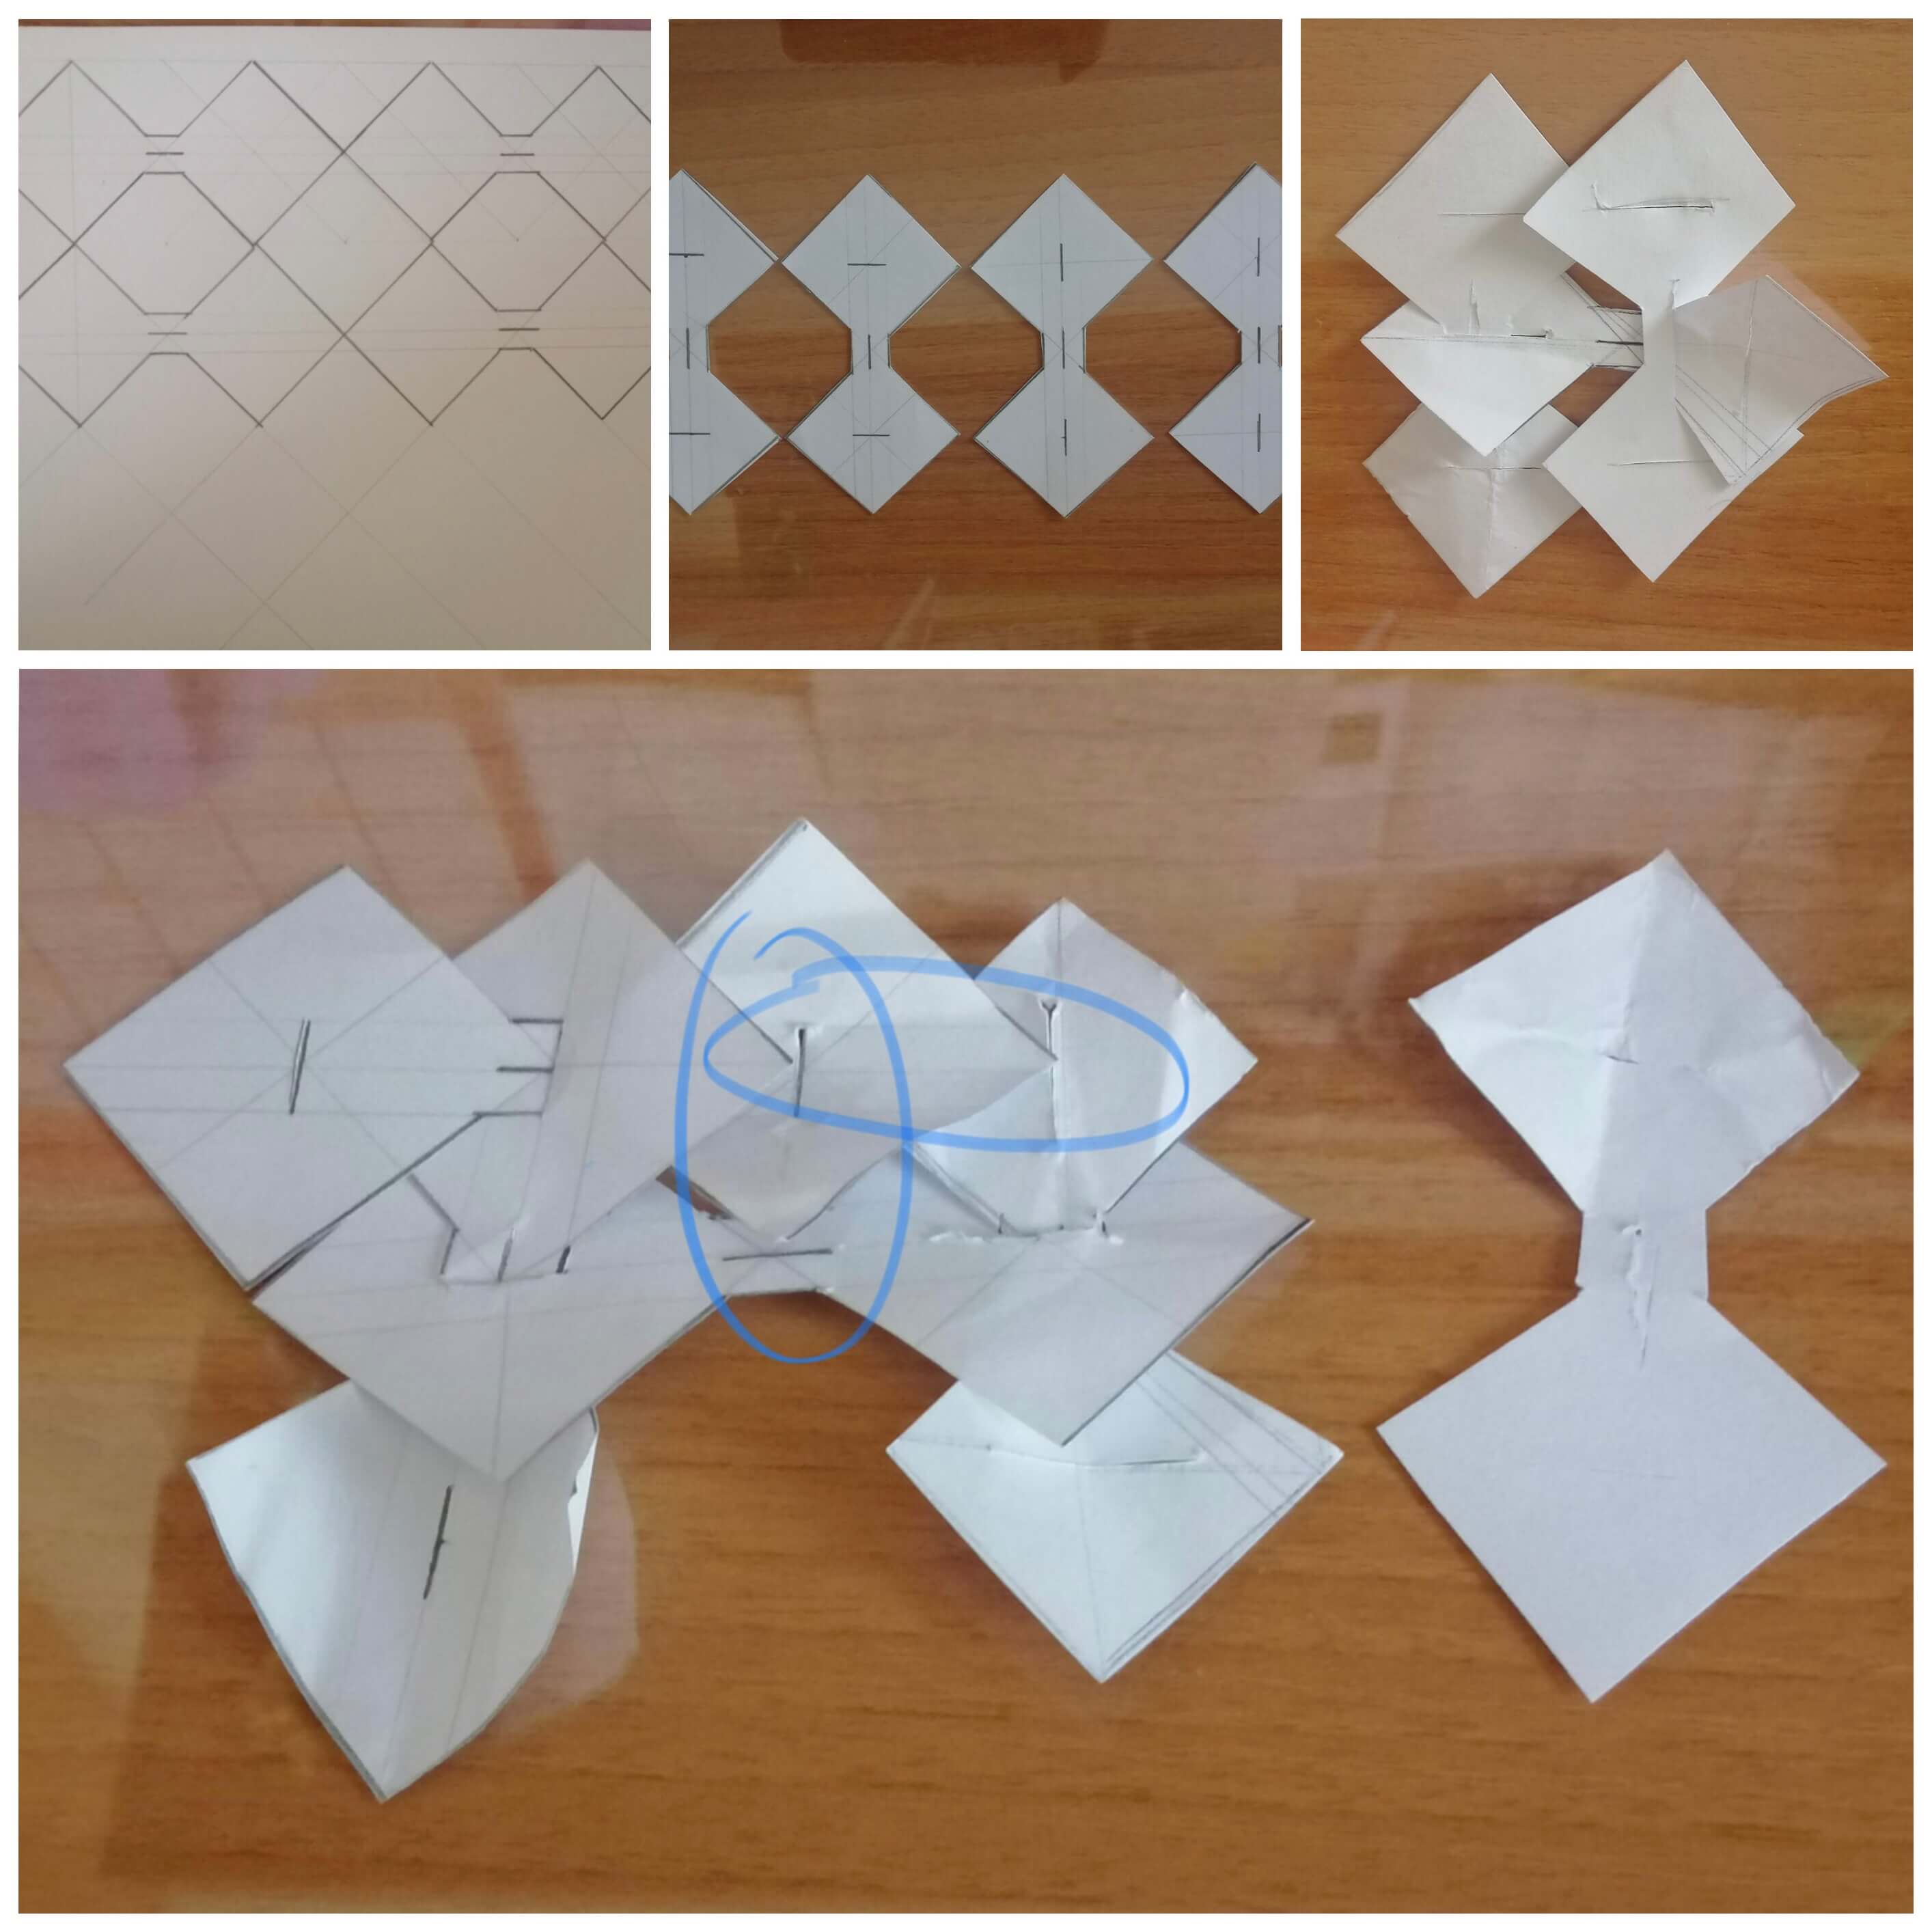
I've been thinking about geometric shapes that optimise space. I decided to focus on the square. I wanted a simple way to assemble it, too. This is how I got the first pattern.
However, I developed more patterns, but without any successed. This was one of them. Its problem was that no more pieces could be joined thoger. If I cut in different directions (X-axis and Y-axis) the lines inside the rhombus, the pieces could be joined together. Despite this, the assembly is complex and it tooks too much time.
Paper prototype
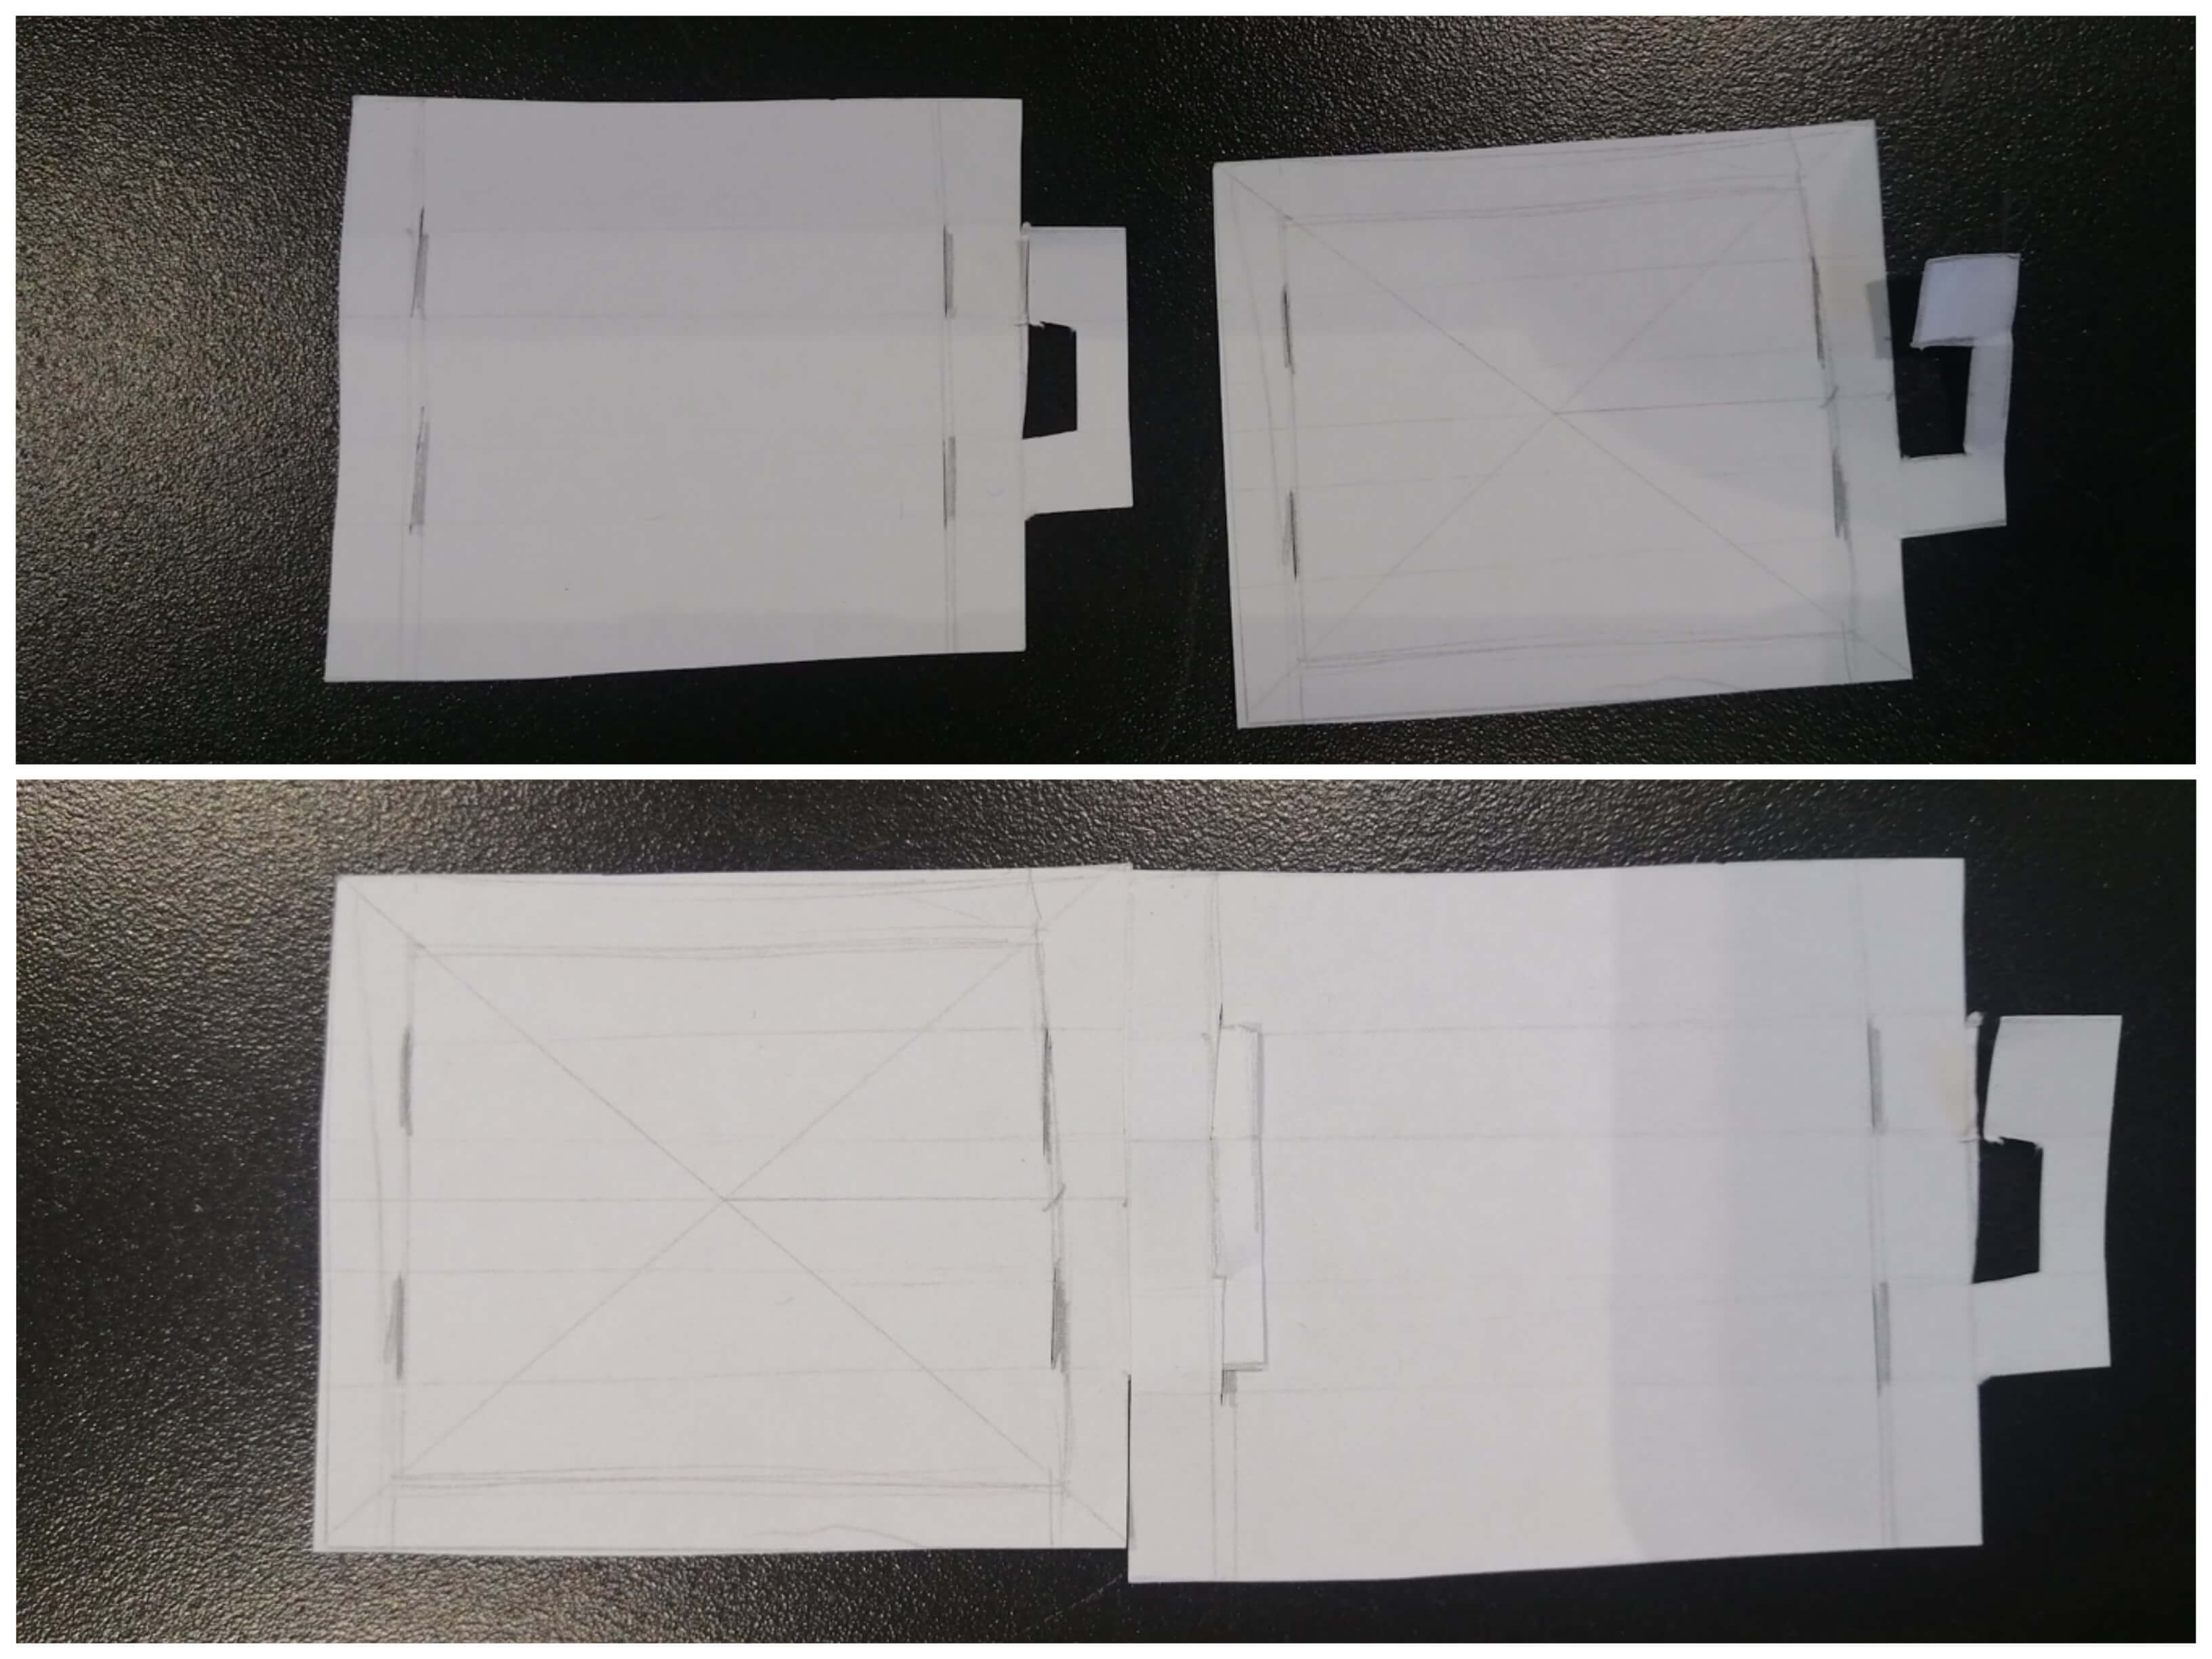
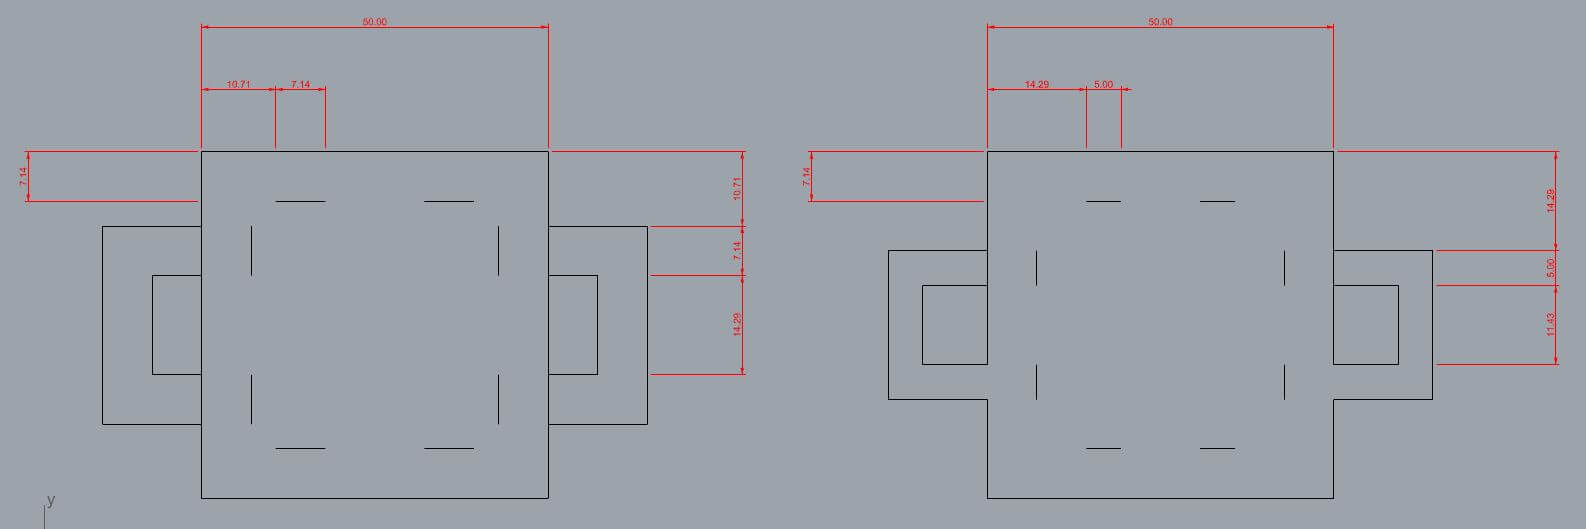
I took the first pattern and I did it in Rhinoceros with measures and adding cutting lines on each side. I tried to distribute the figure to reduce waste, but I still had it.
So I edited the hooks to reduce their size. Here is a comparison between the first one and the optimized one.
Before further optimising the pattern, I wanted to know if it would work, so I cut it with laser cutting. I used a thicker paper (0.5 mm) than ordinary paper (0.125 mm). Other mates had just cut this material, so I used the same parameters.
I still don't know why, but the paper burnt!!!!
To cut, it’s important to consider:
All lines must be joined
There cannot be a duplicate lines
I reduced the power 5 points and it was cut without a problem.
I assembled them, in less than 2 minutes and easily, and I got this:
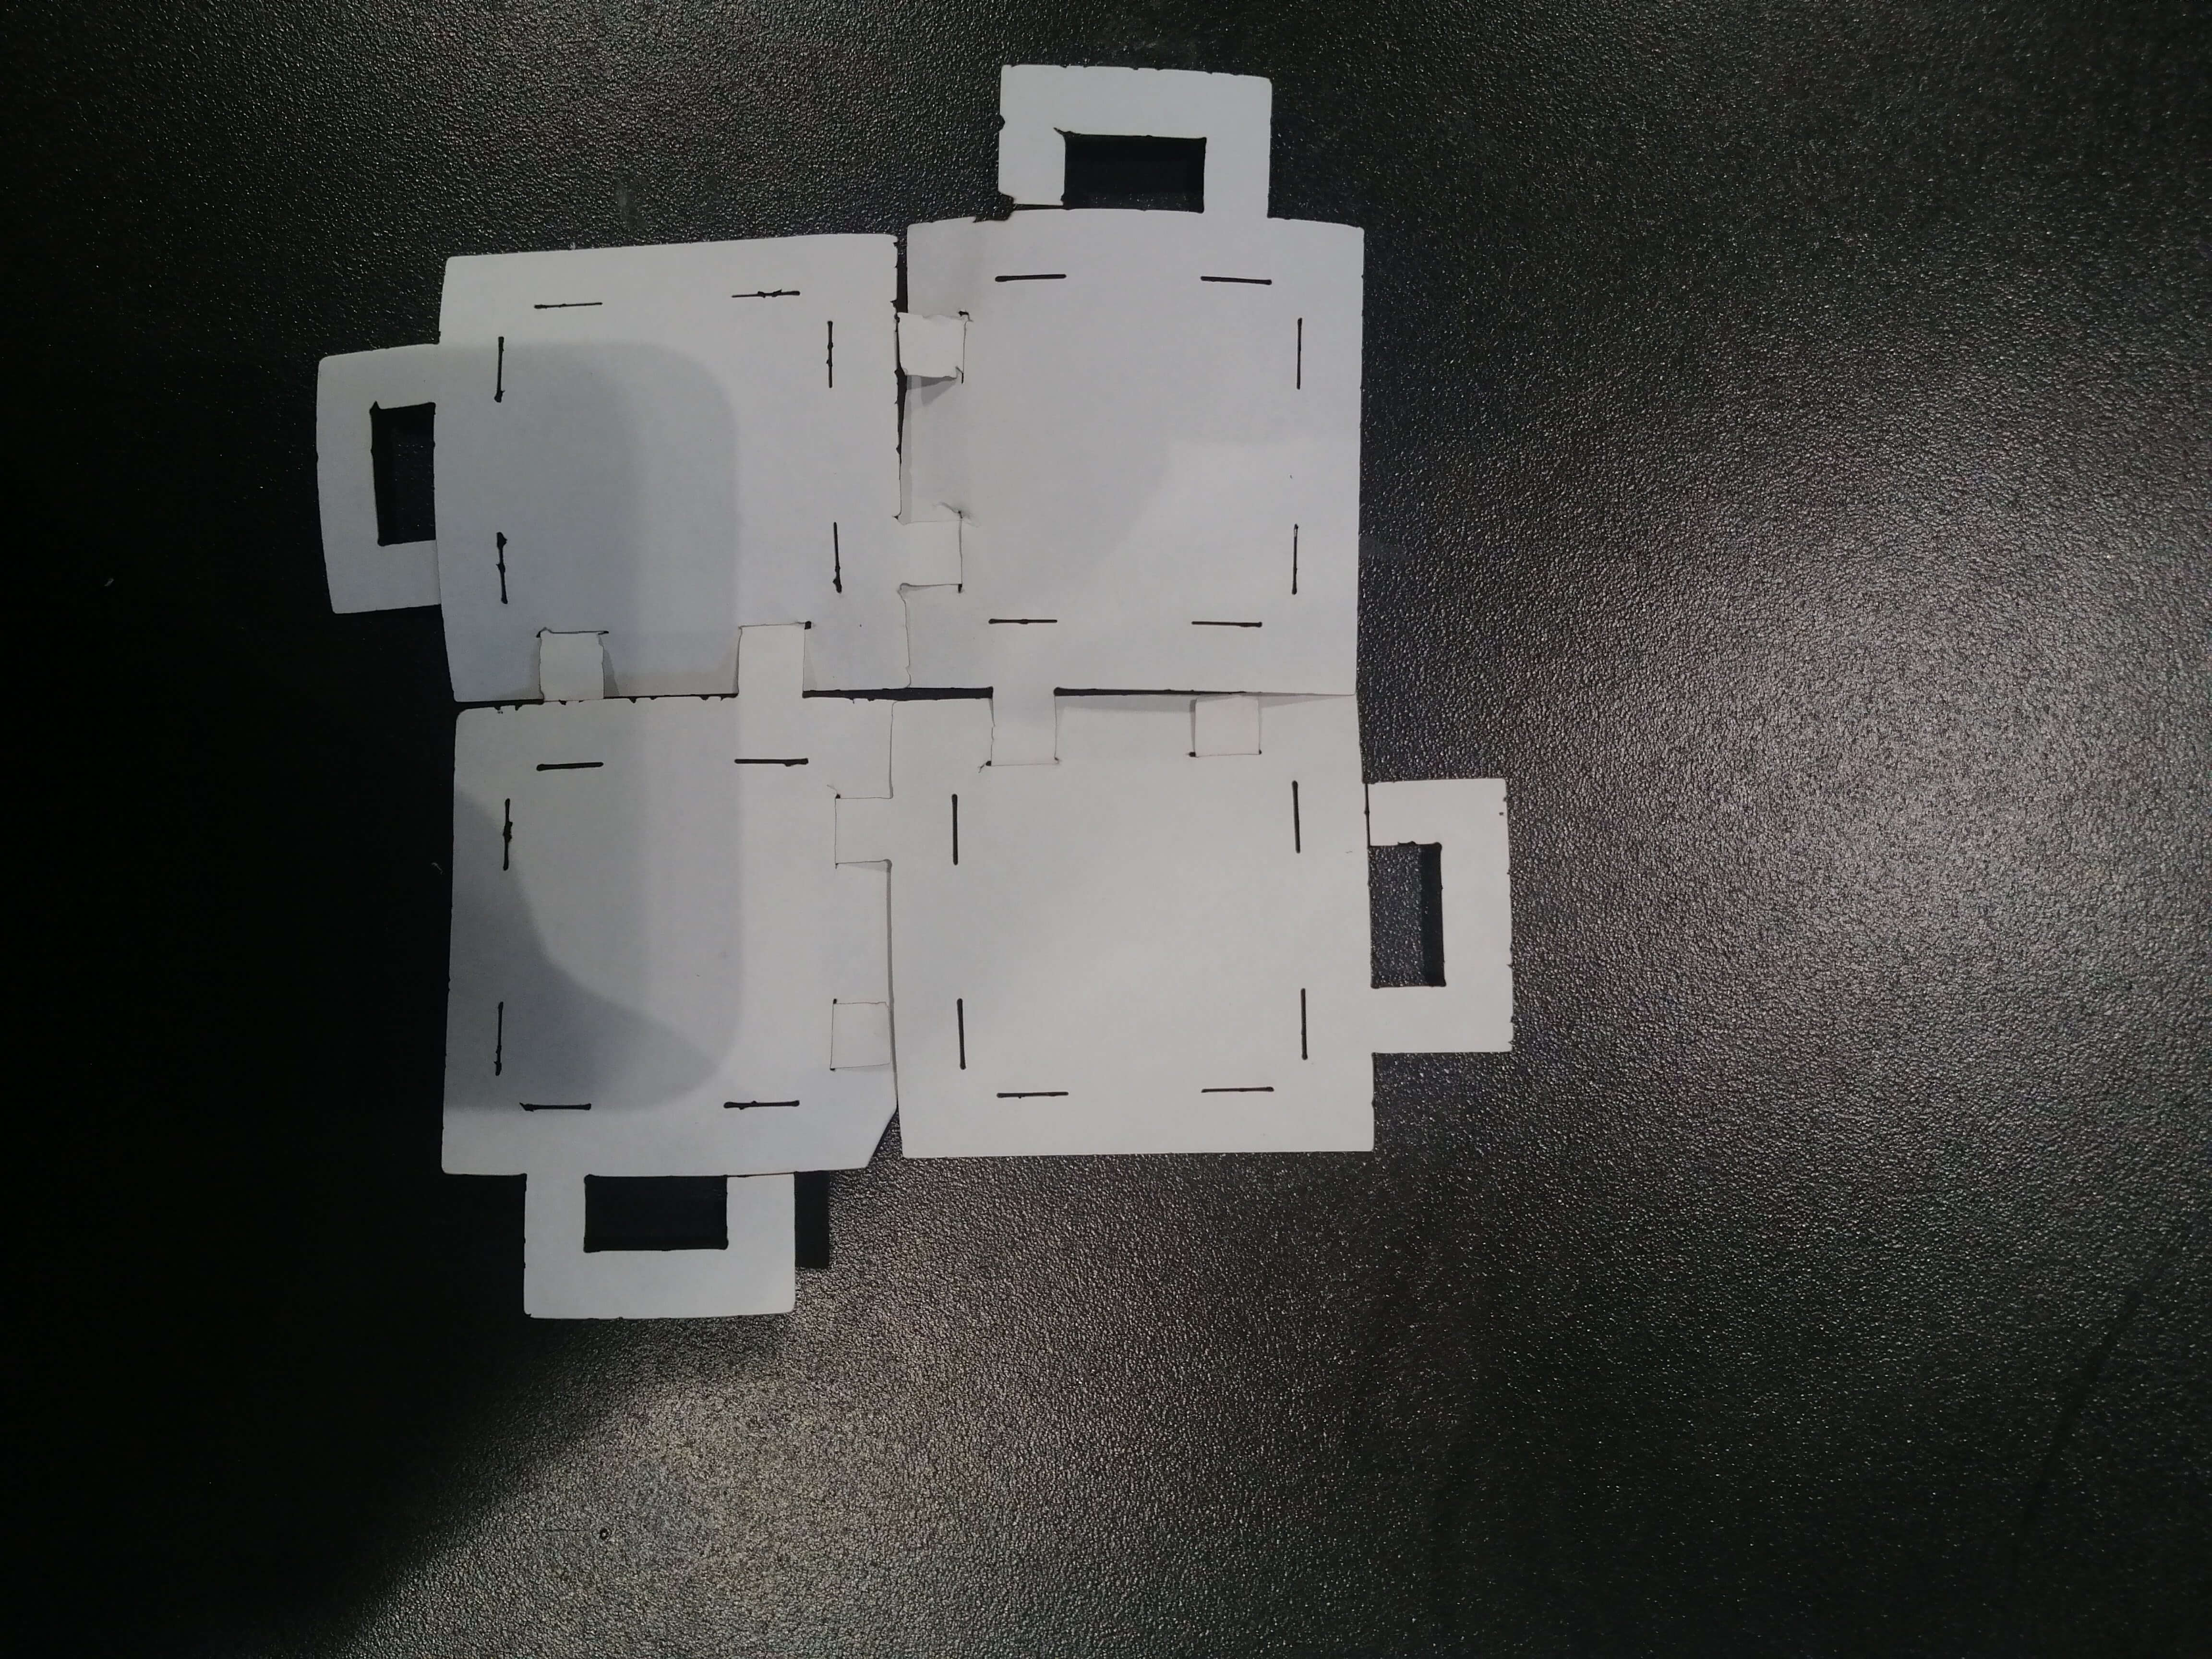
Leather prototype
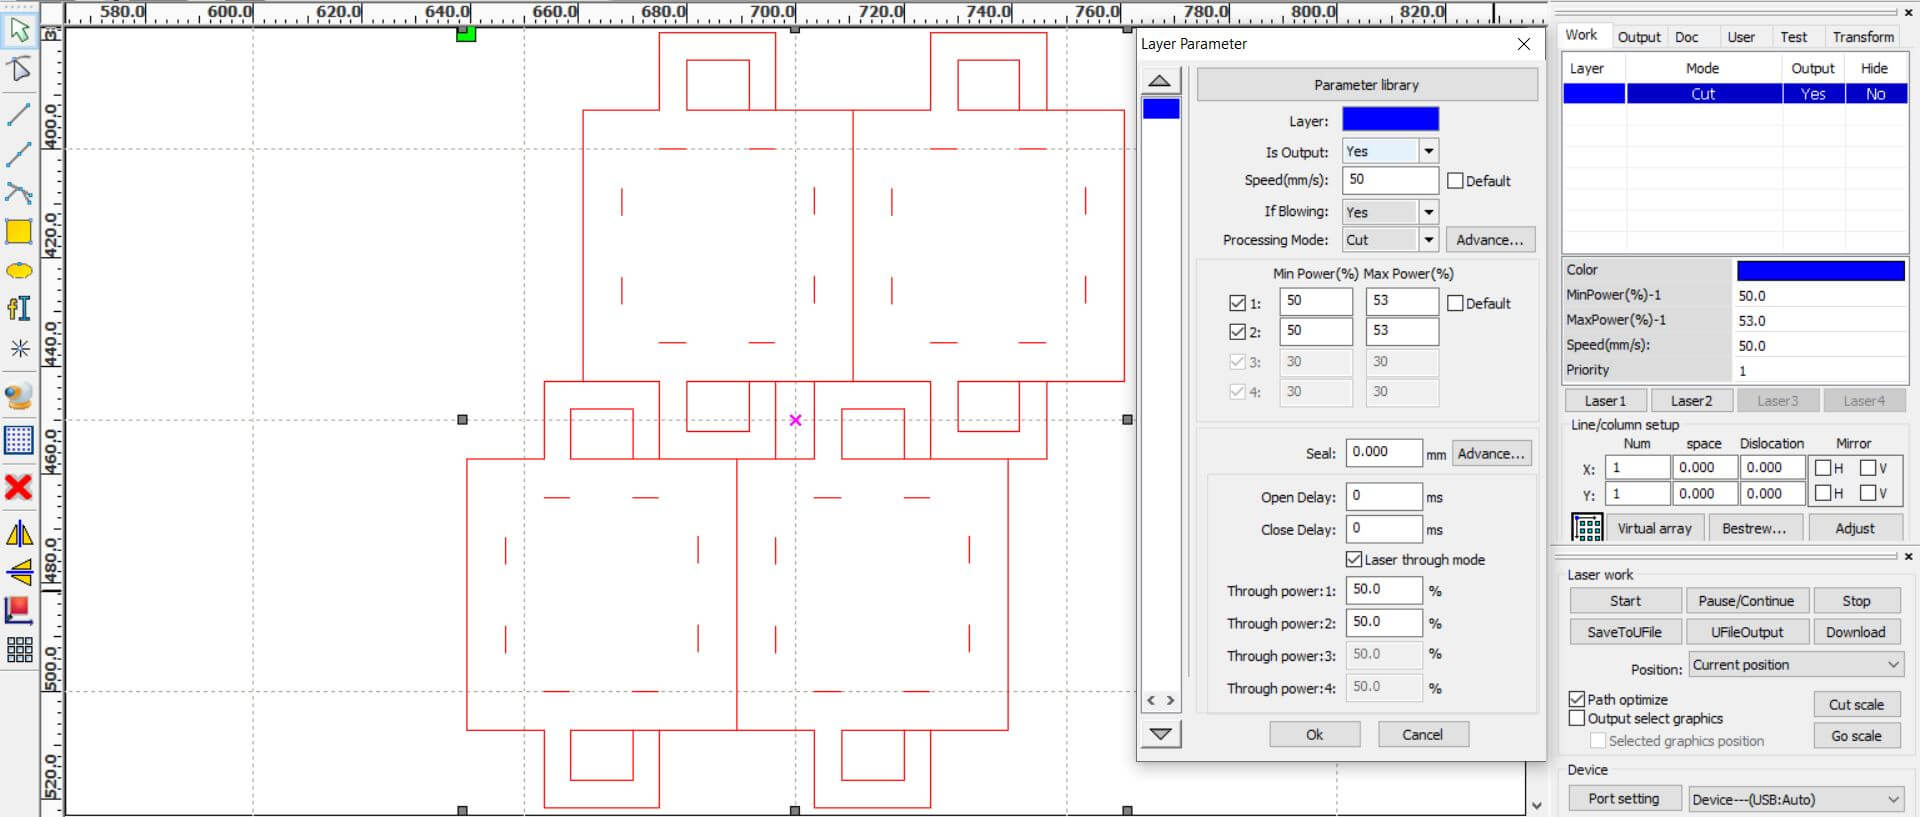
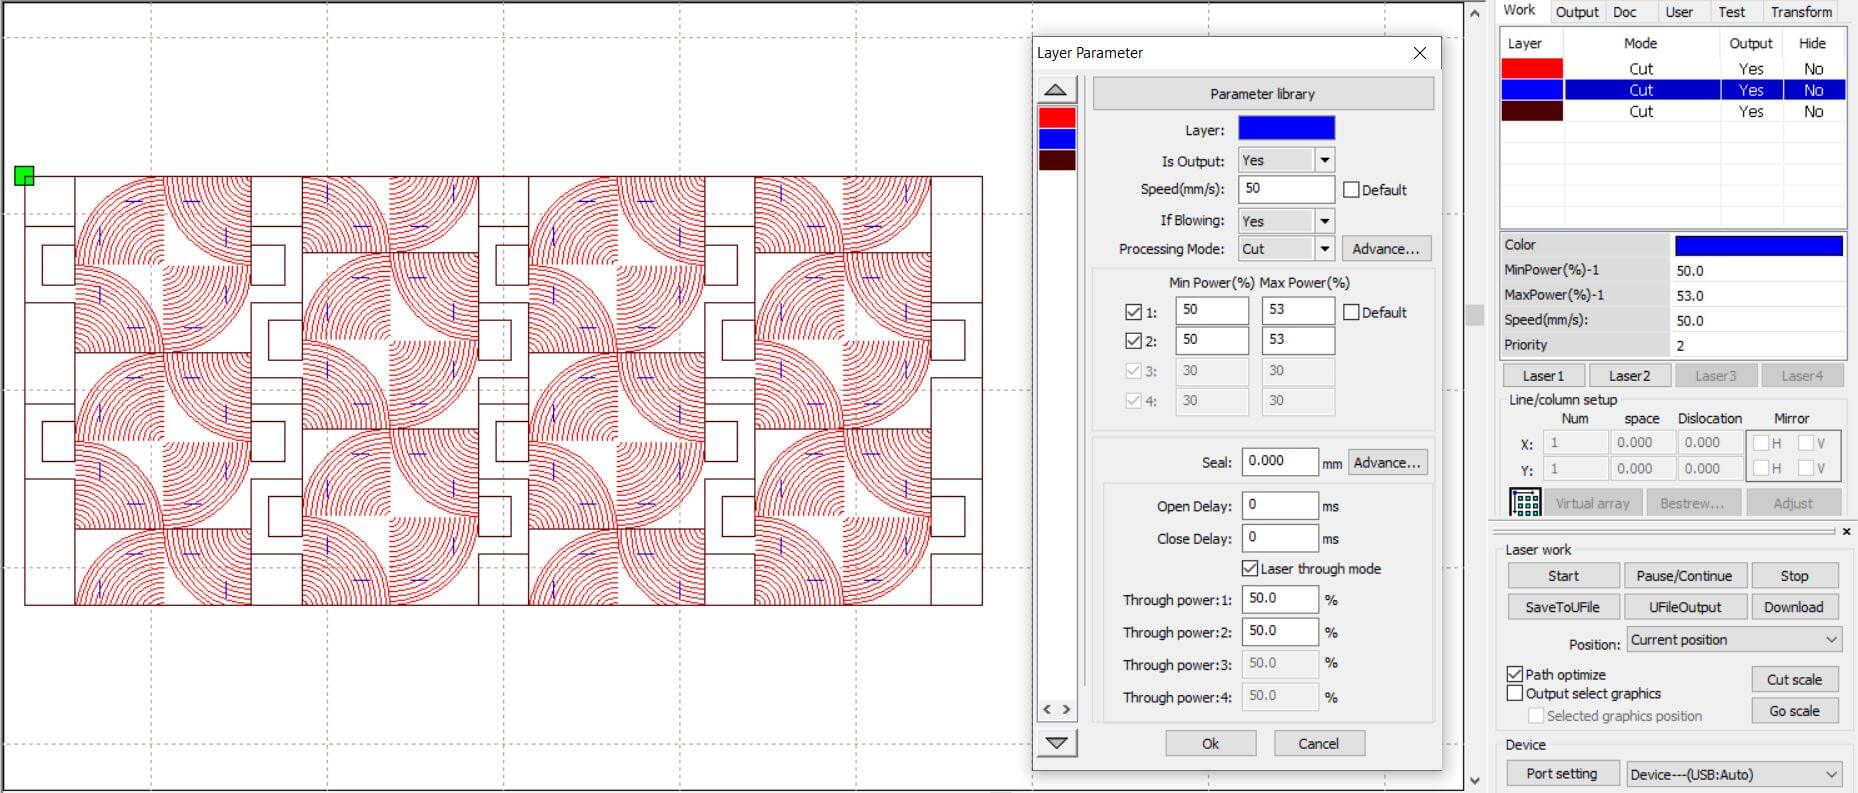
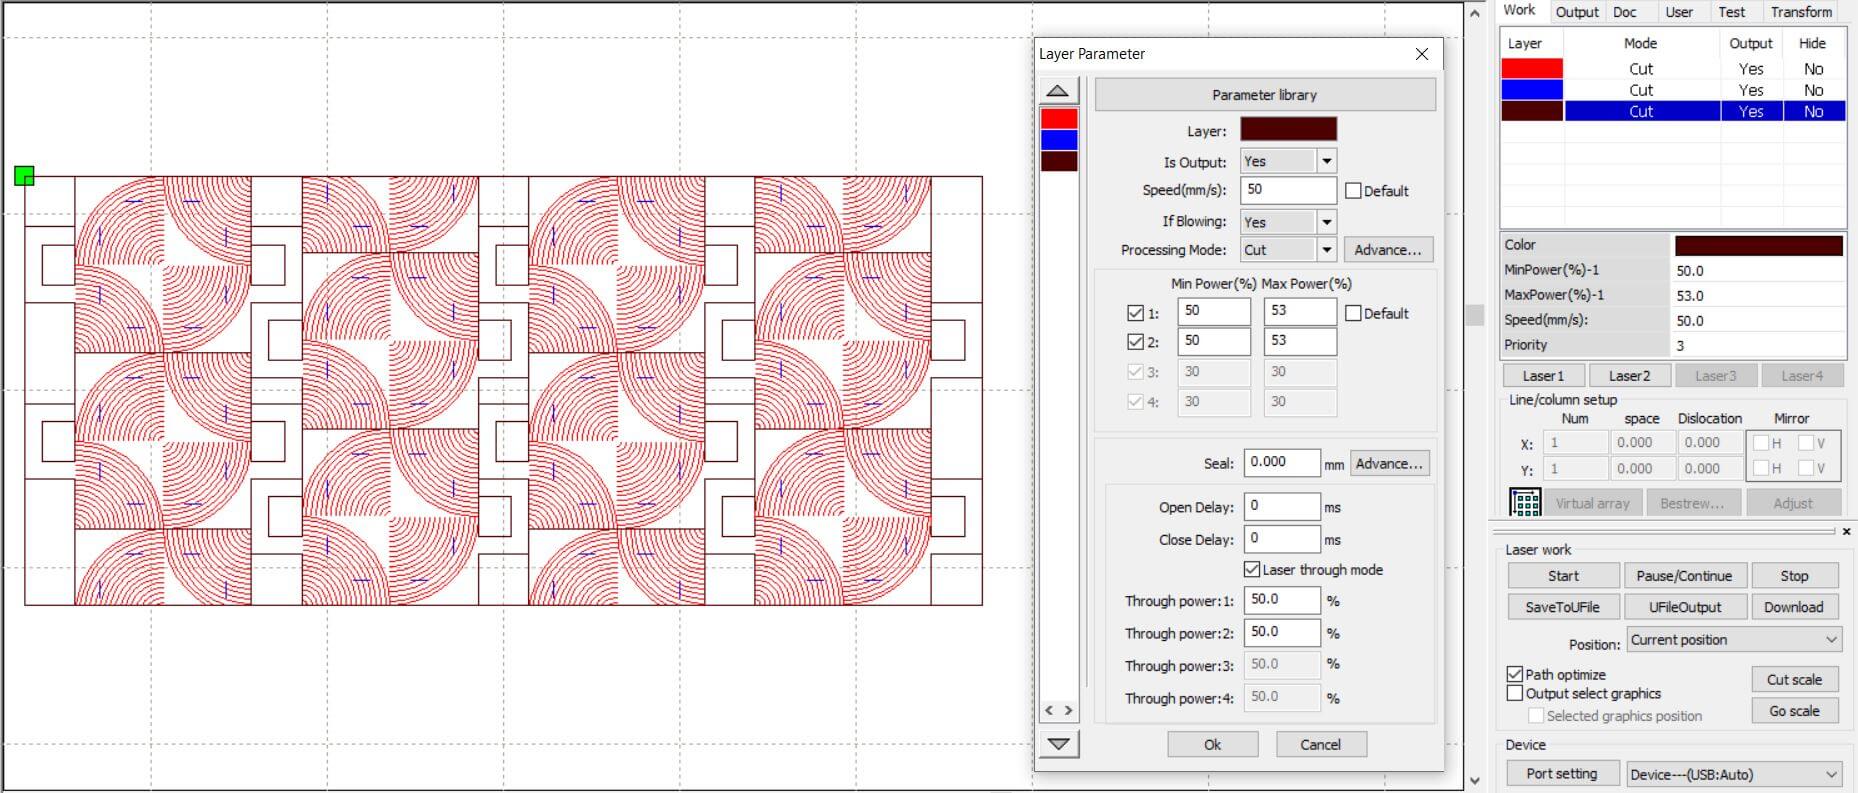
Once I checked that it worked, I went on to cut it into the final material: leather of 1.5 mm of thickness. I used the following parameters to cut it.
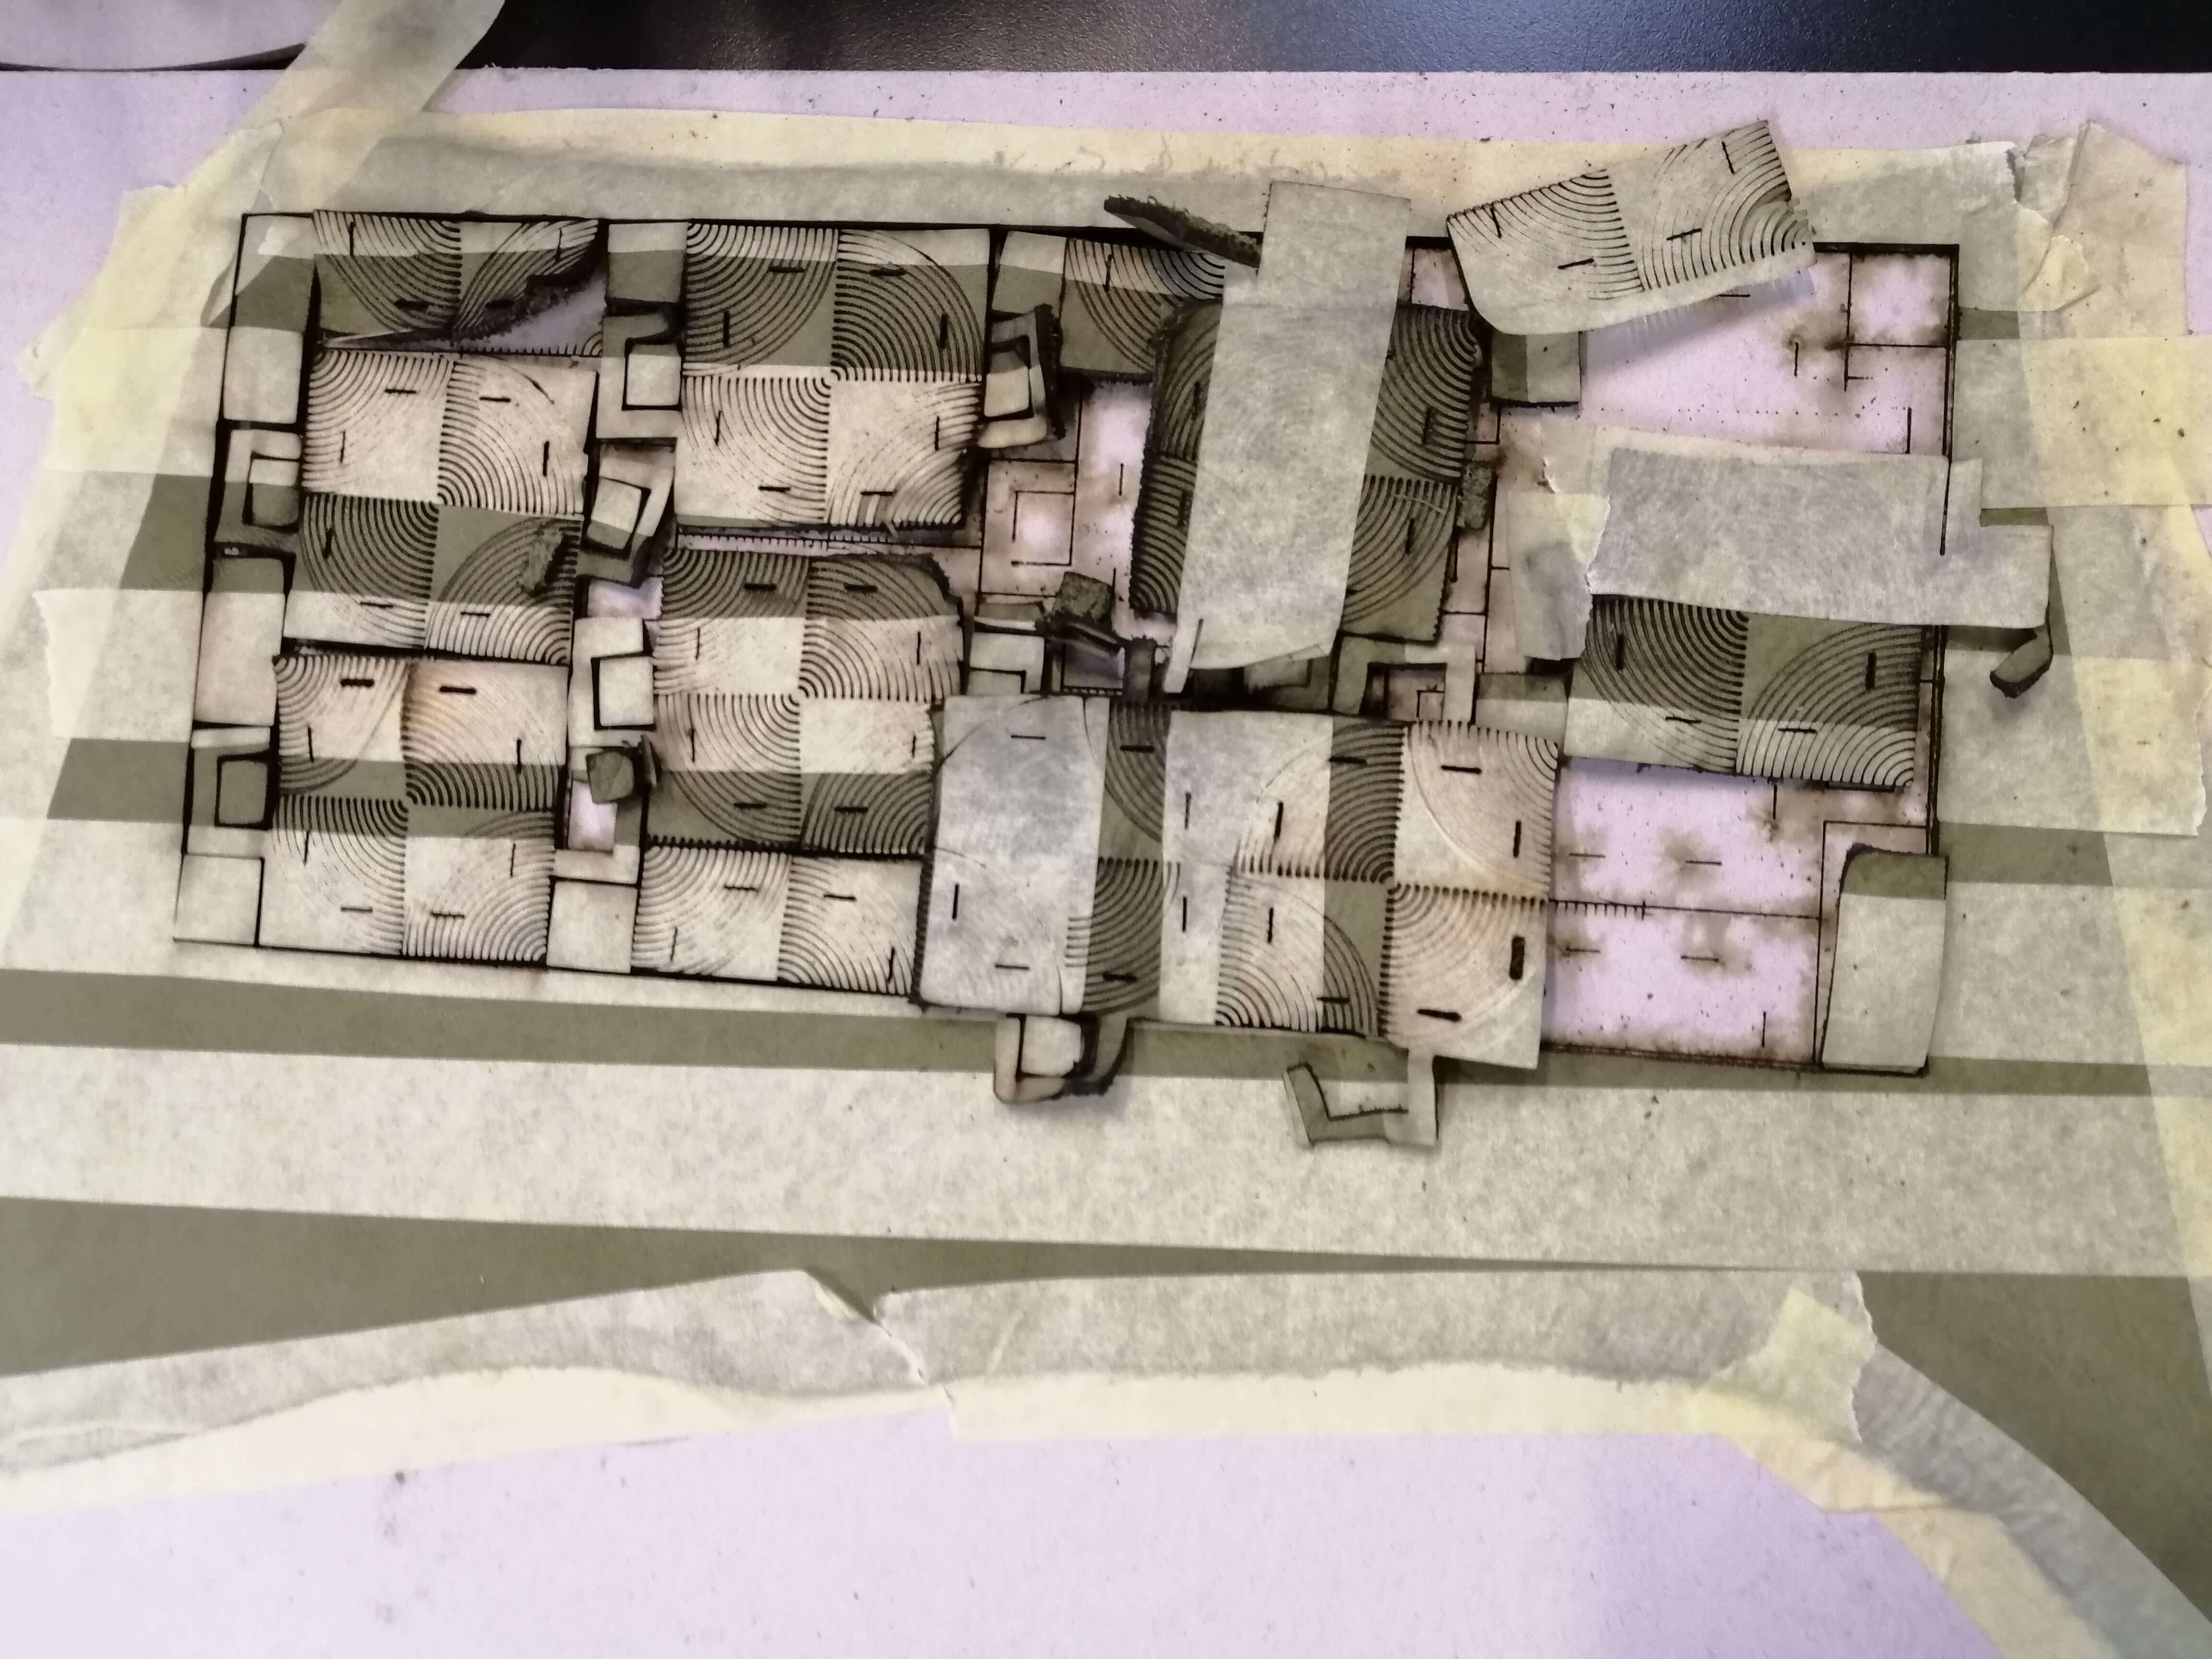
Due to the material had folds in it, the cut was irregular. I used masking tape to stretch the material as much as possible.
Even so, it was enough to do the test.
The smell was very strong and unpleasant when it was cut, therefore, it was considered to use other materials.
Final prototype
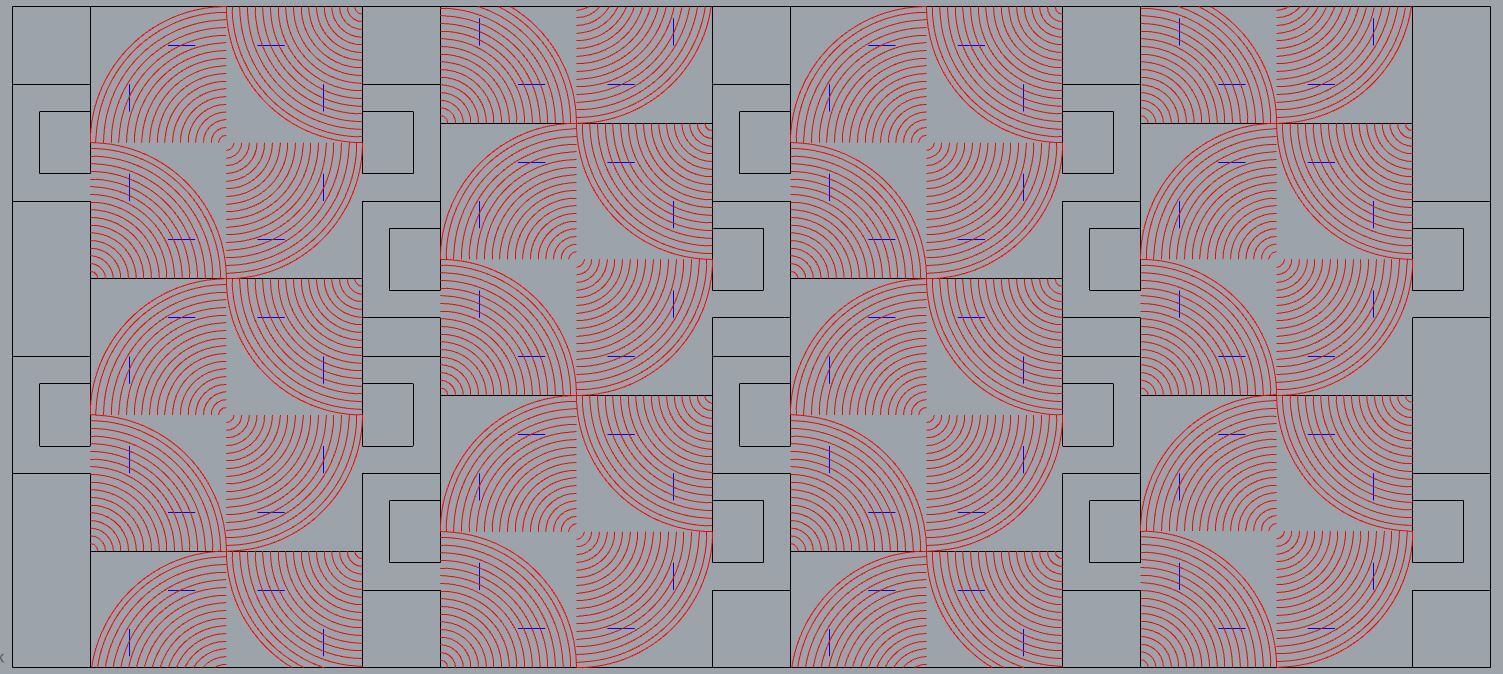
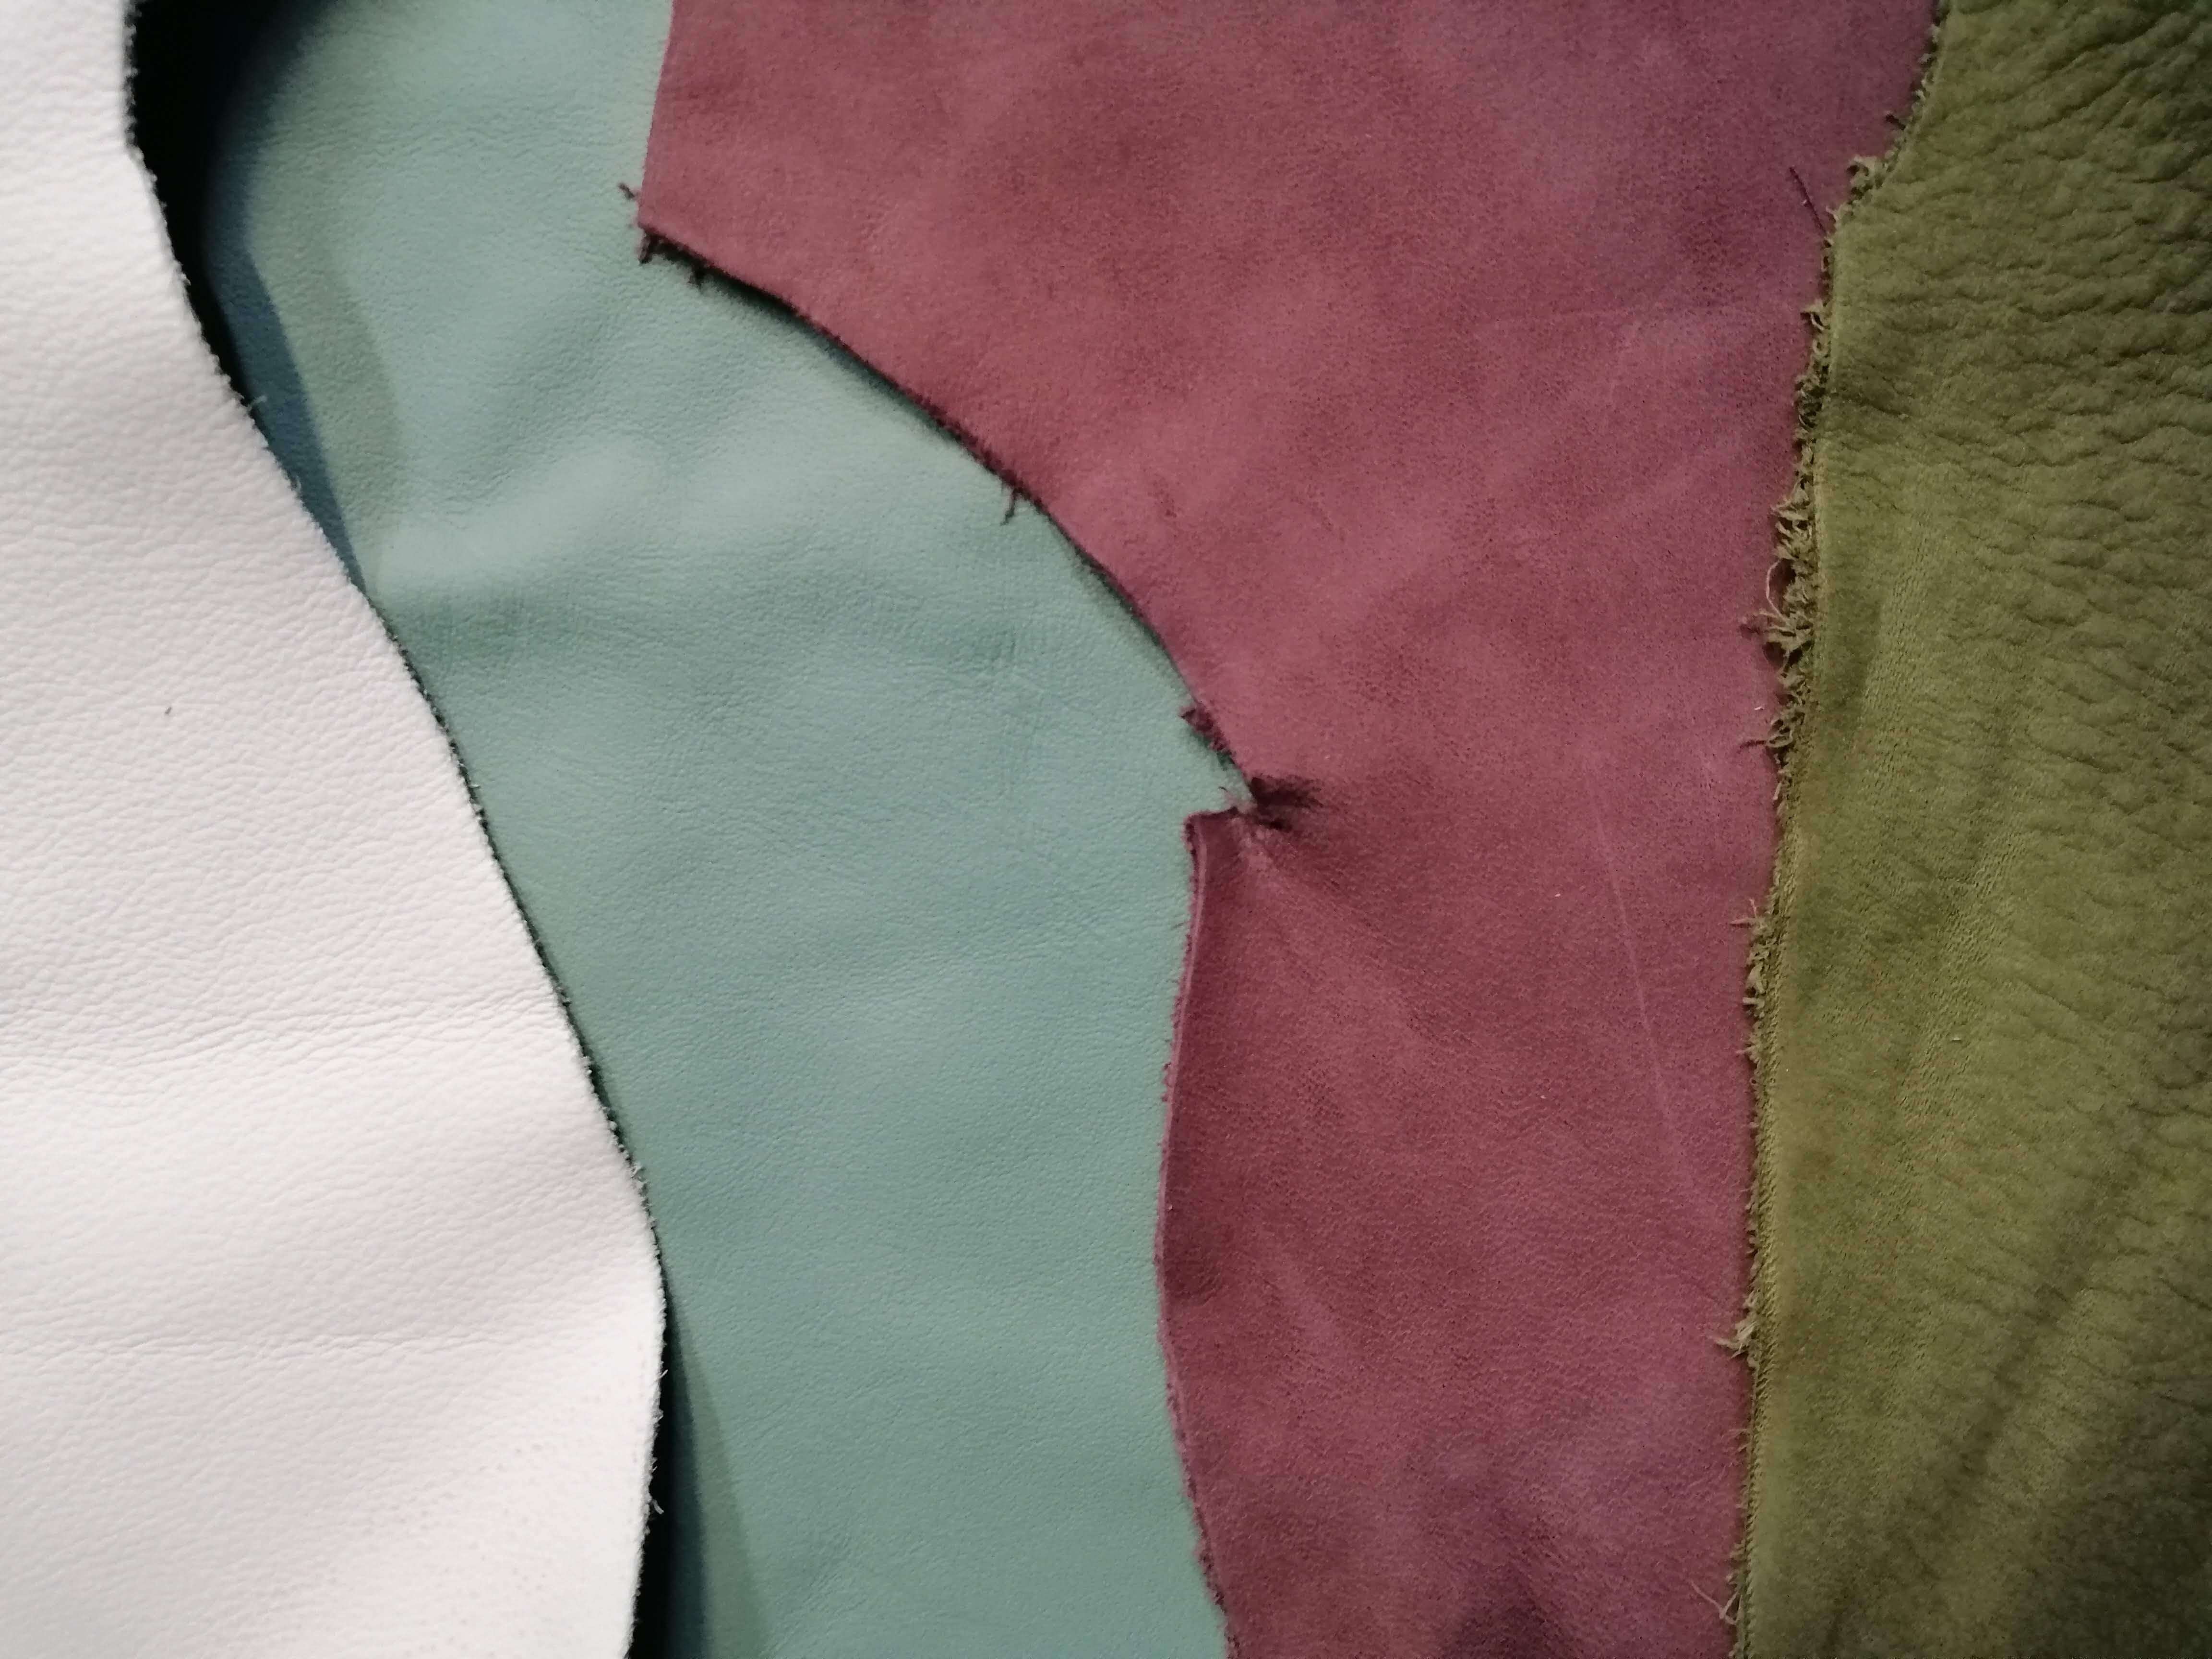
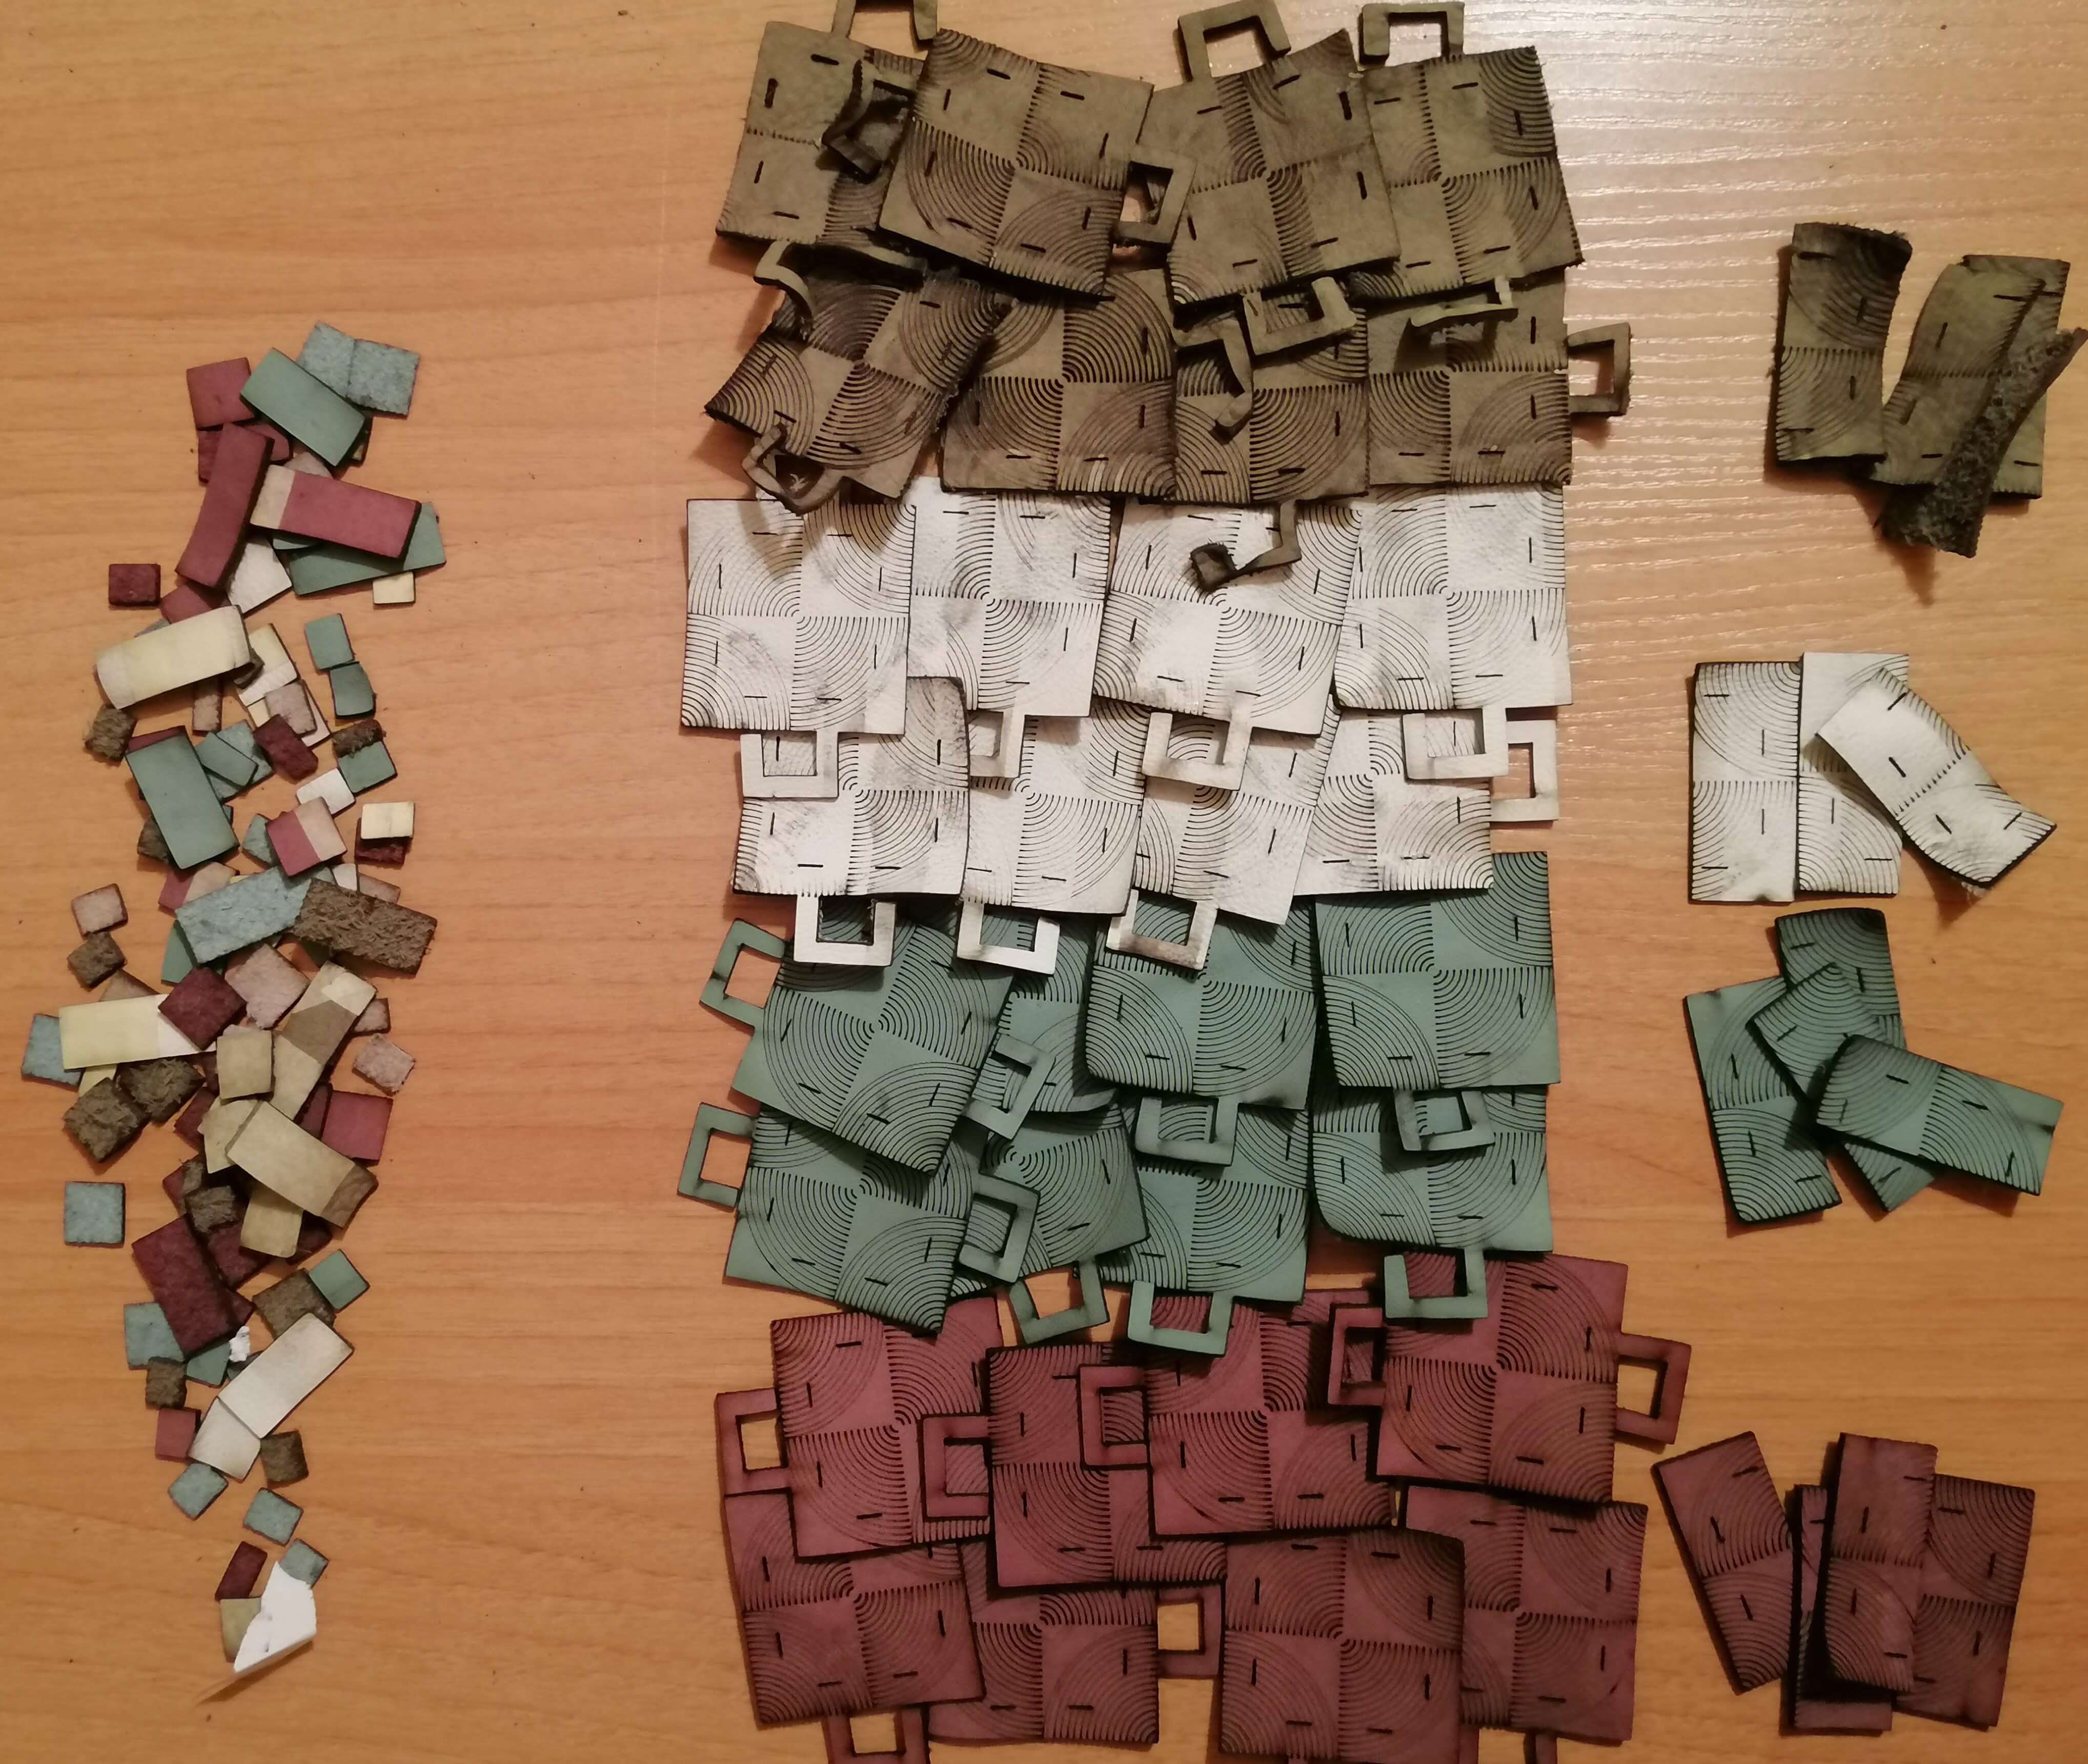
To the final file, I added an engraving. Also, I decided to use leftover material that has already been used before: different types and colour of leather.
Here you can download the patron's file.
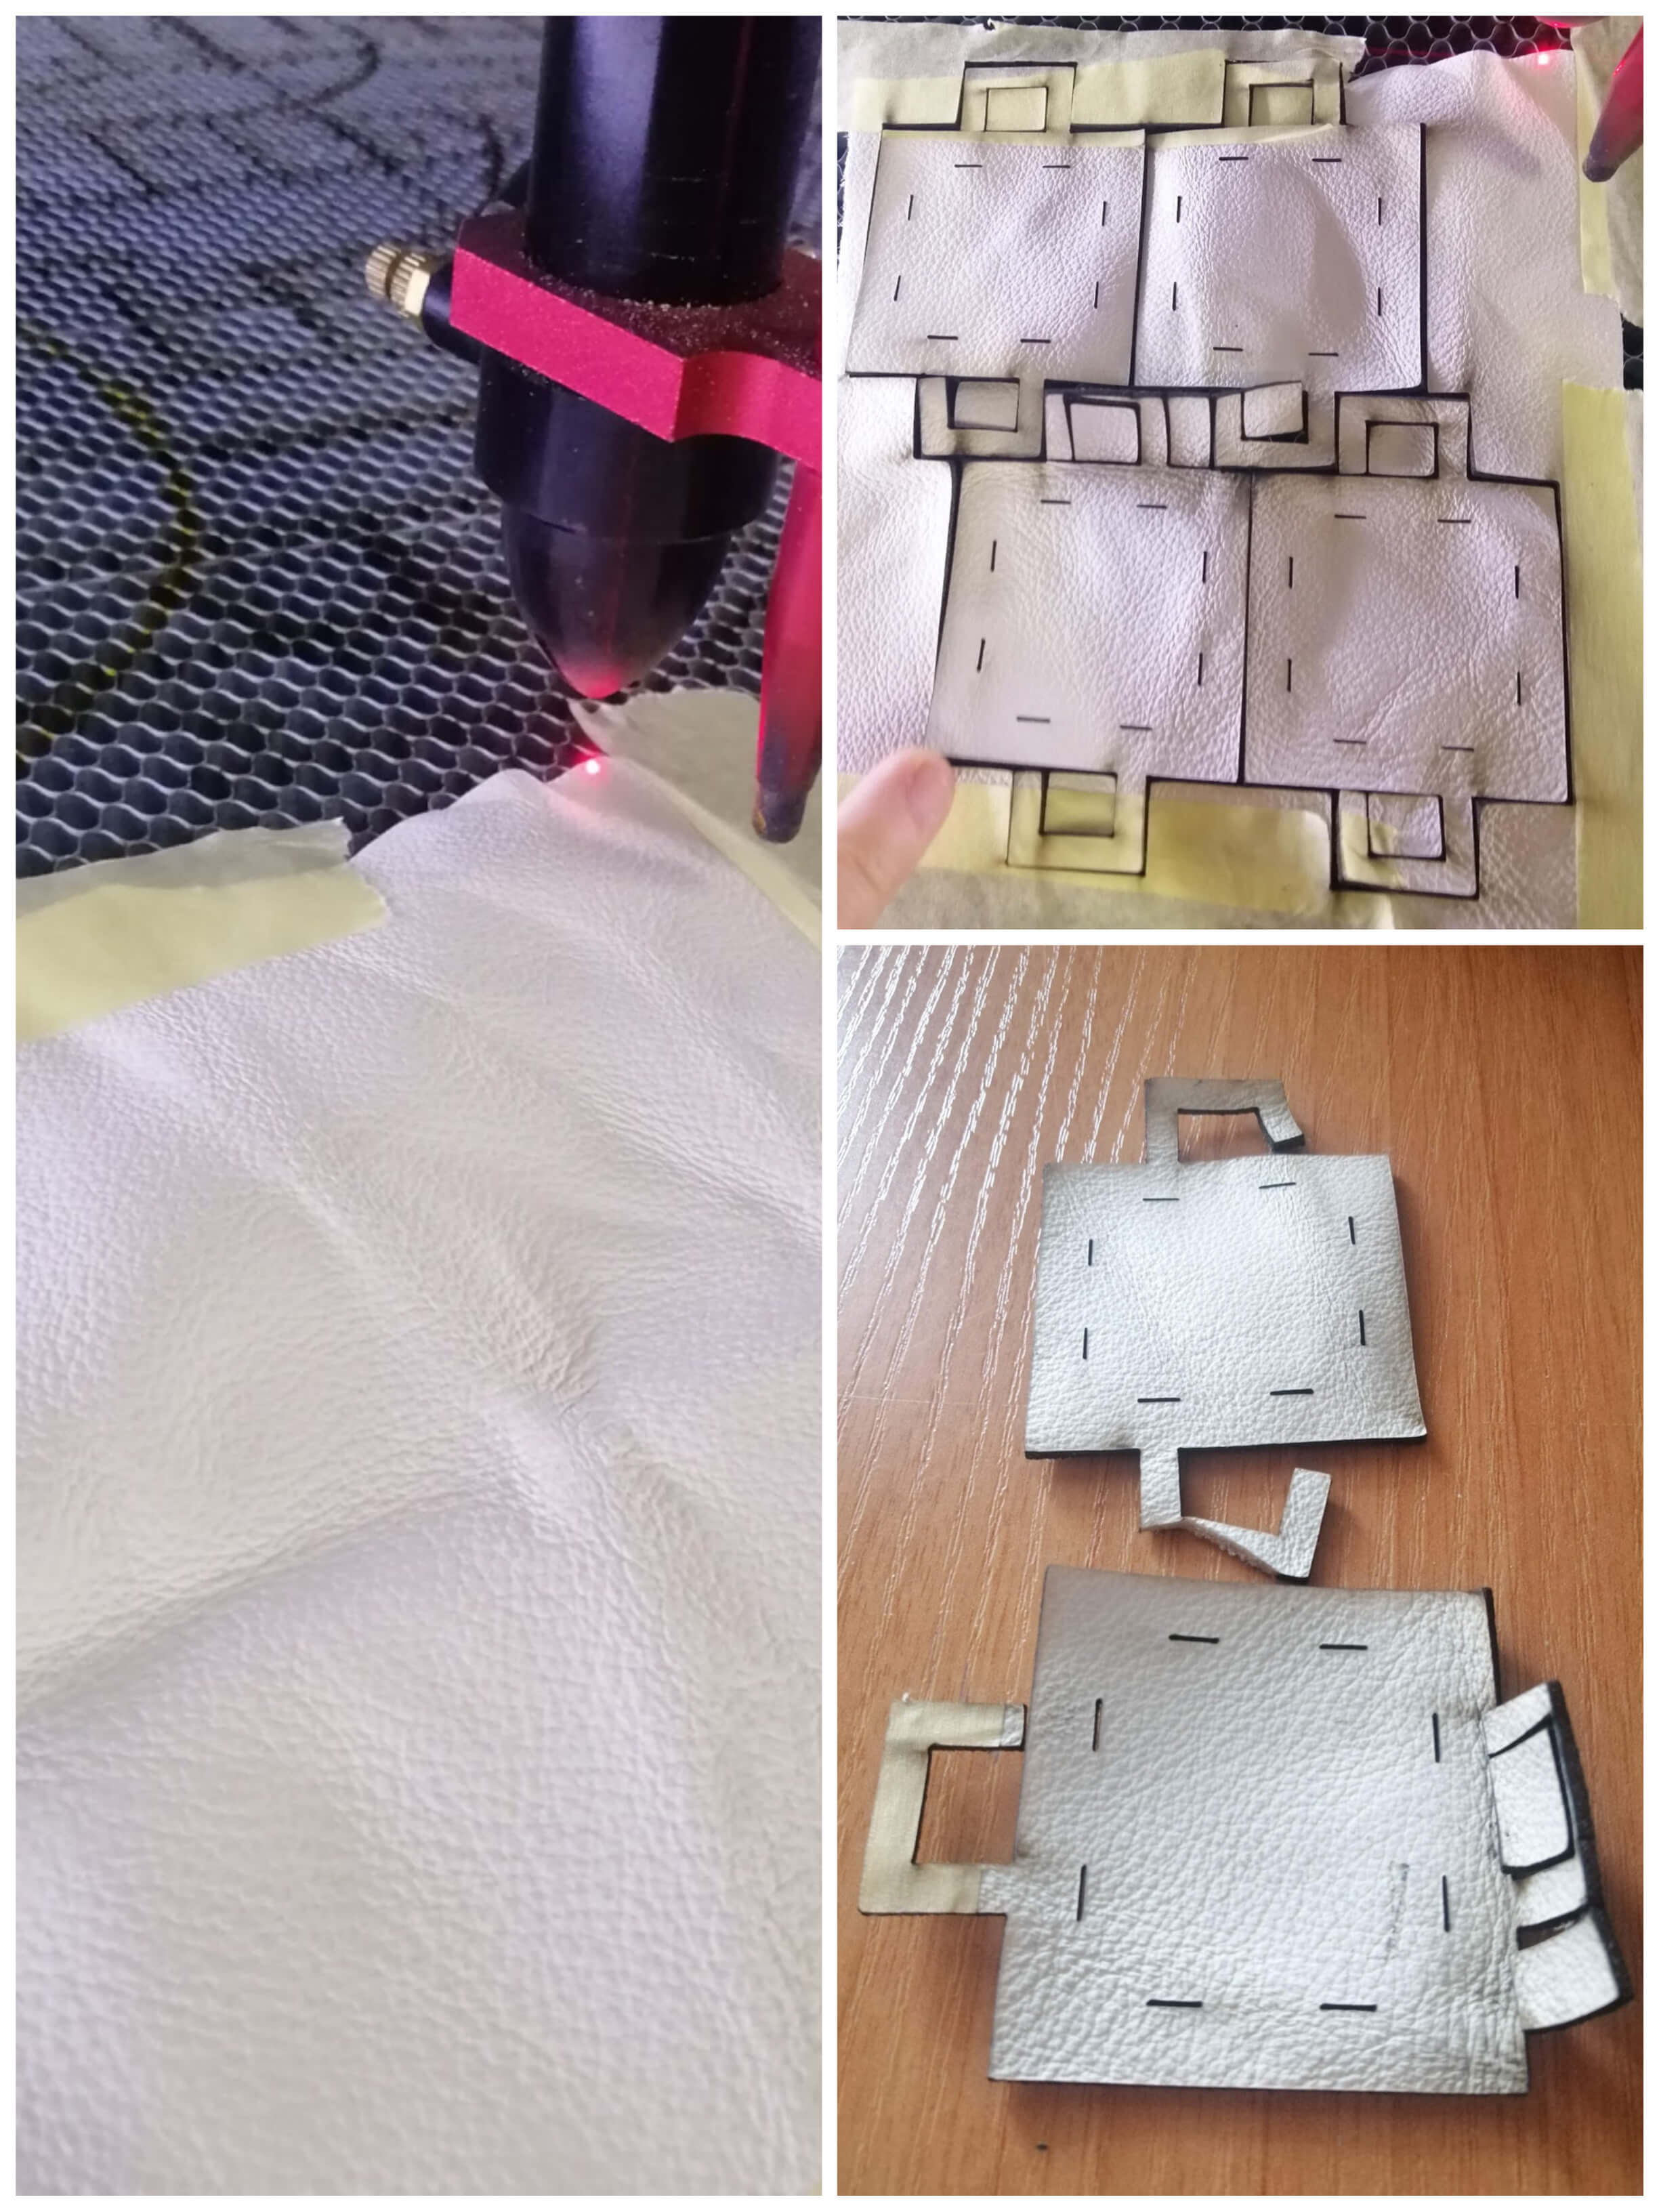
Here is the process of how I used the laser cutting by myself.
It had to be cut in 3 phases:
For the engraving, the laser had to be in cutting mode but with the engraving parameter.
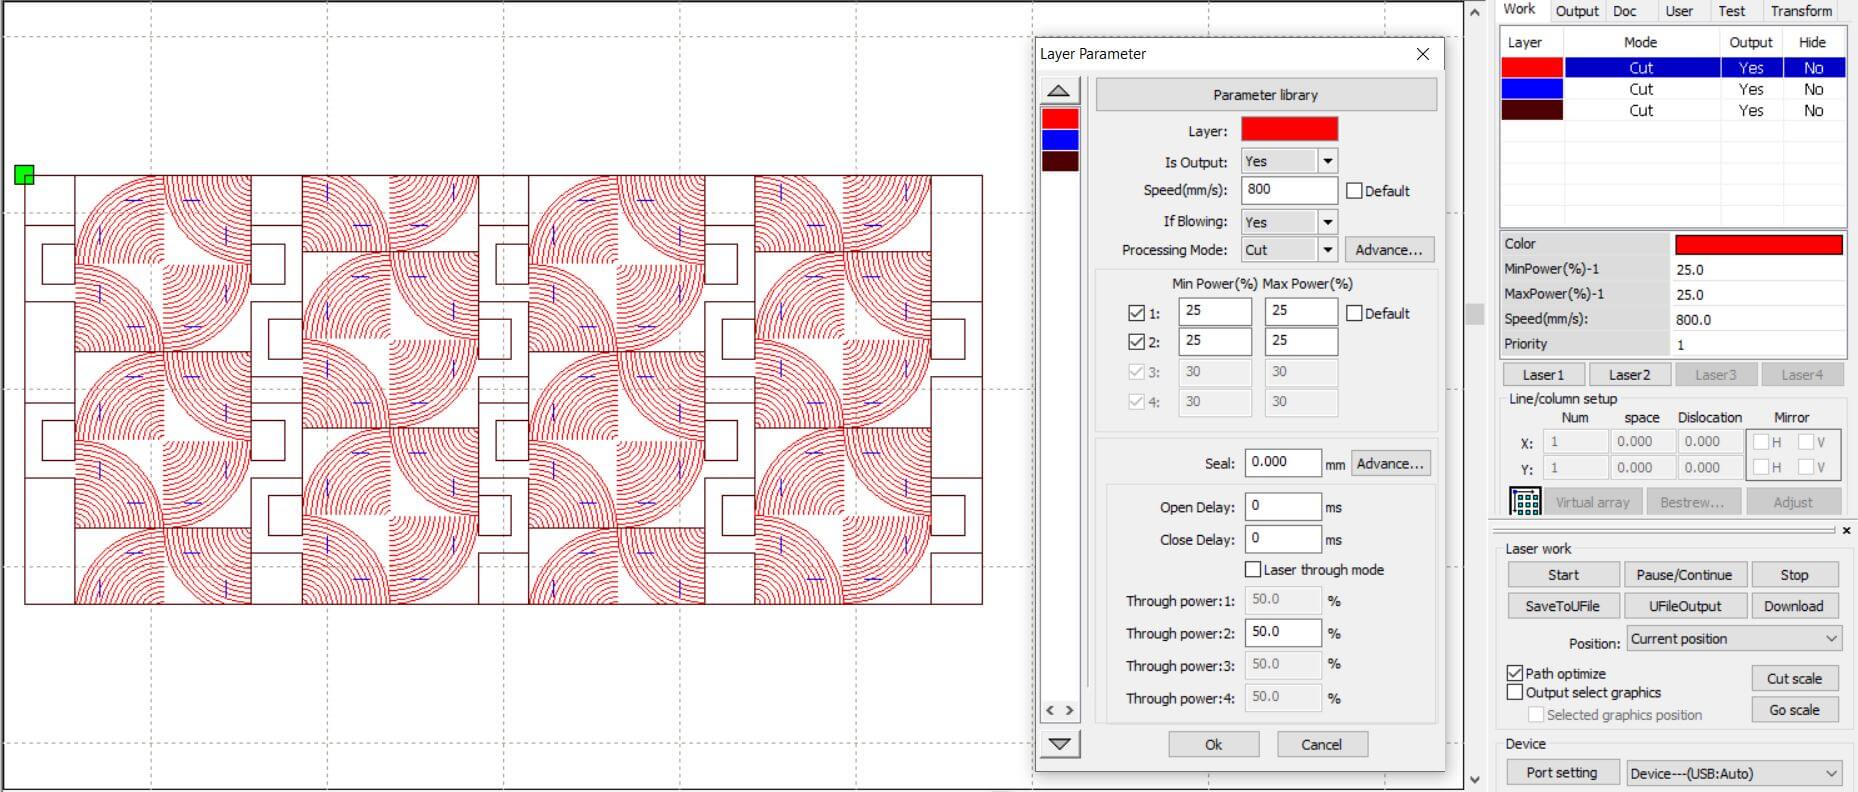
Internal cuts
Perimeter
I placed the leather with a bit of masking tape to stretch it and avoid wrinkles. In spite of that, there were some of them, so there were irregular cuts. Fortunately, they didn’t affect the assembly.
For the last 2 pieces of leather, I had to put masking on top of it to prevent it from contracting and making a bad cut.
Here is the waste it generated. I will use them to make rings, bracelets or necklaces. Those were the results.
Assembly
Before starting to assemble, I clean the parts that have been dirtied by the burnt material. I used cotton with alcohol.
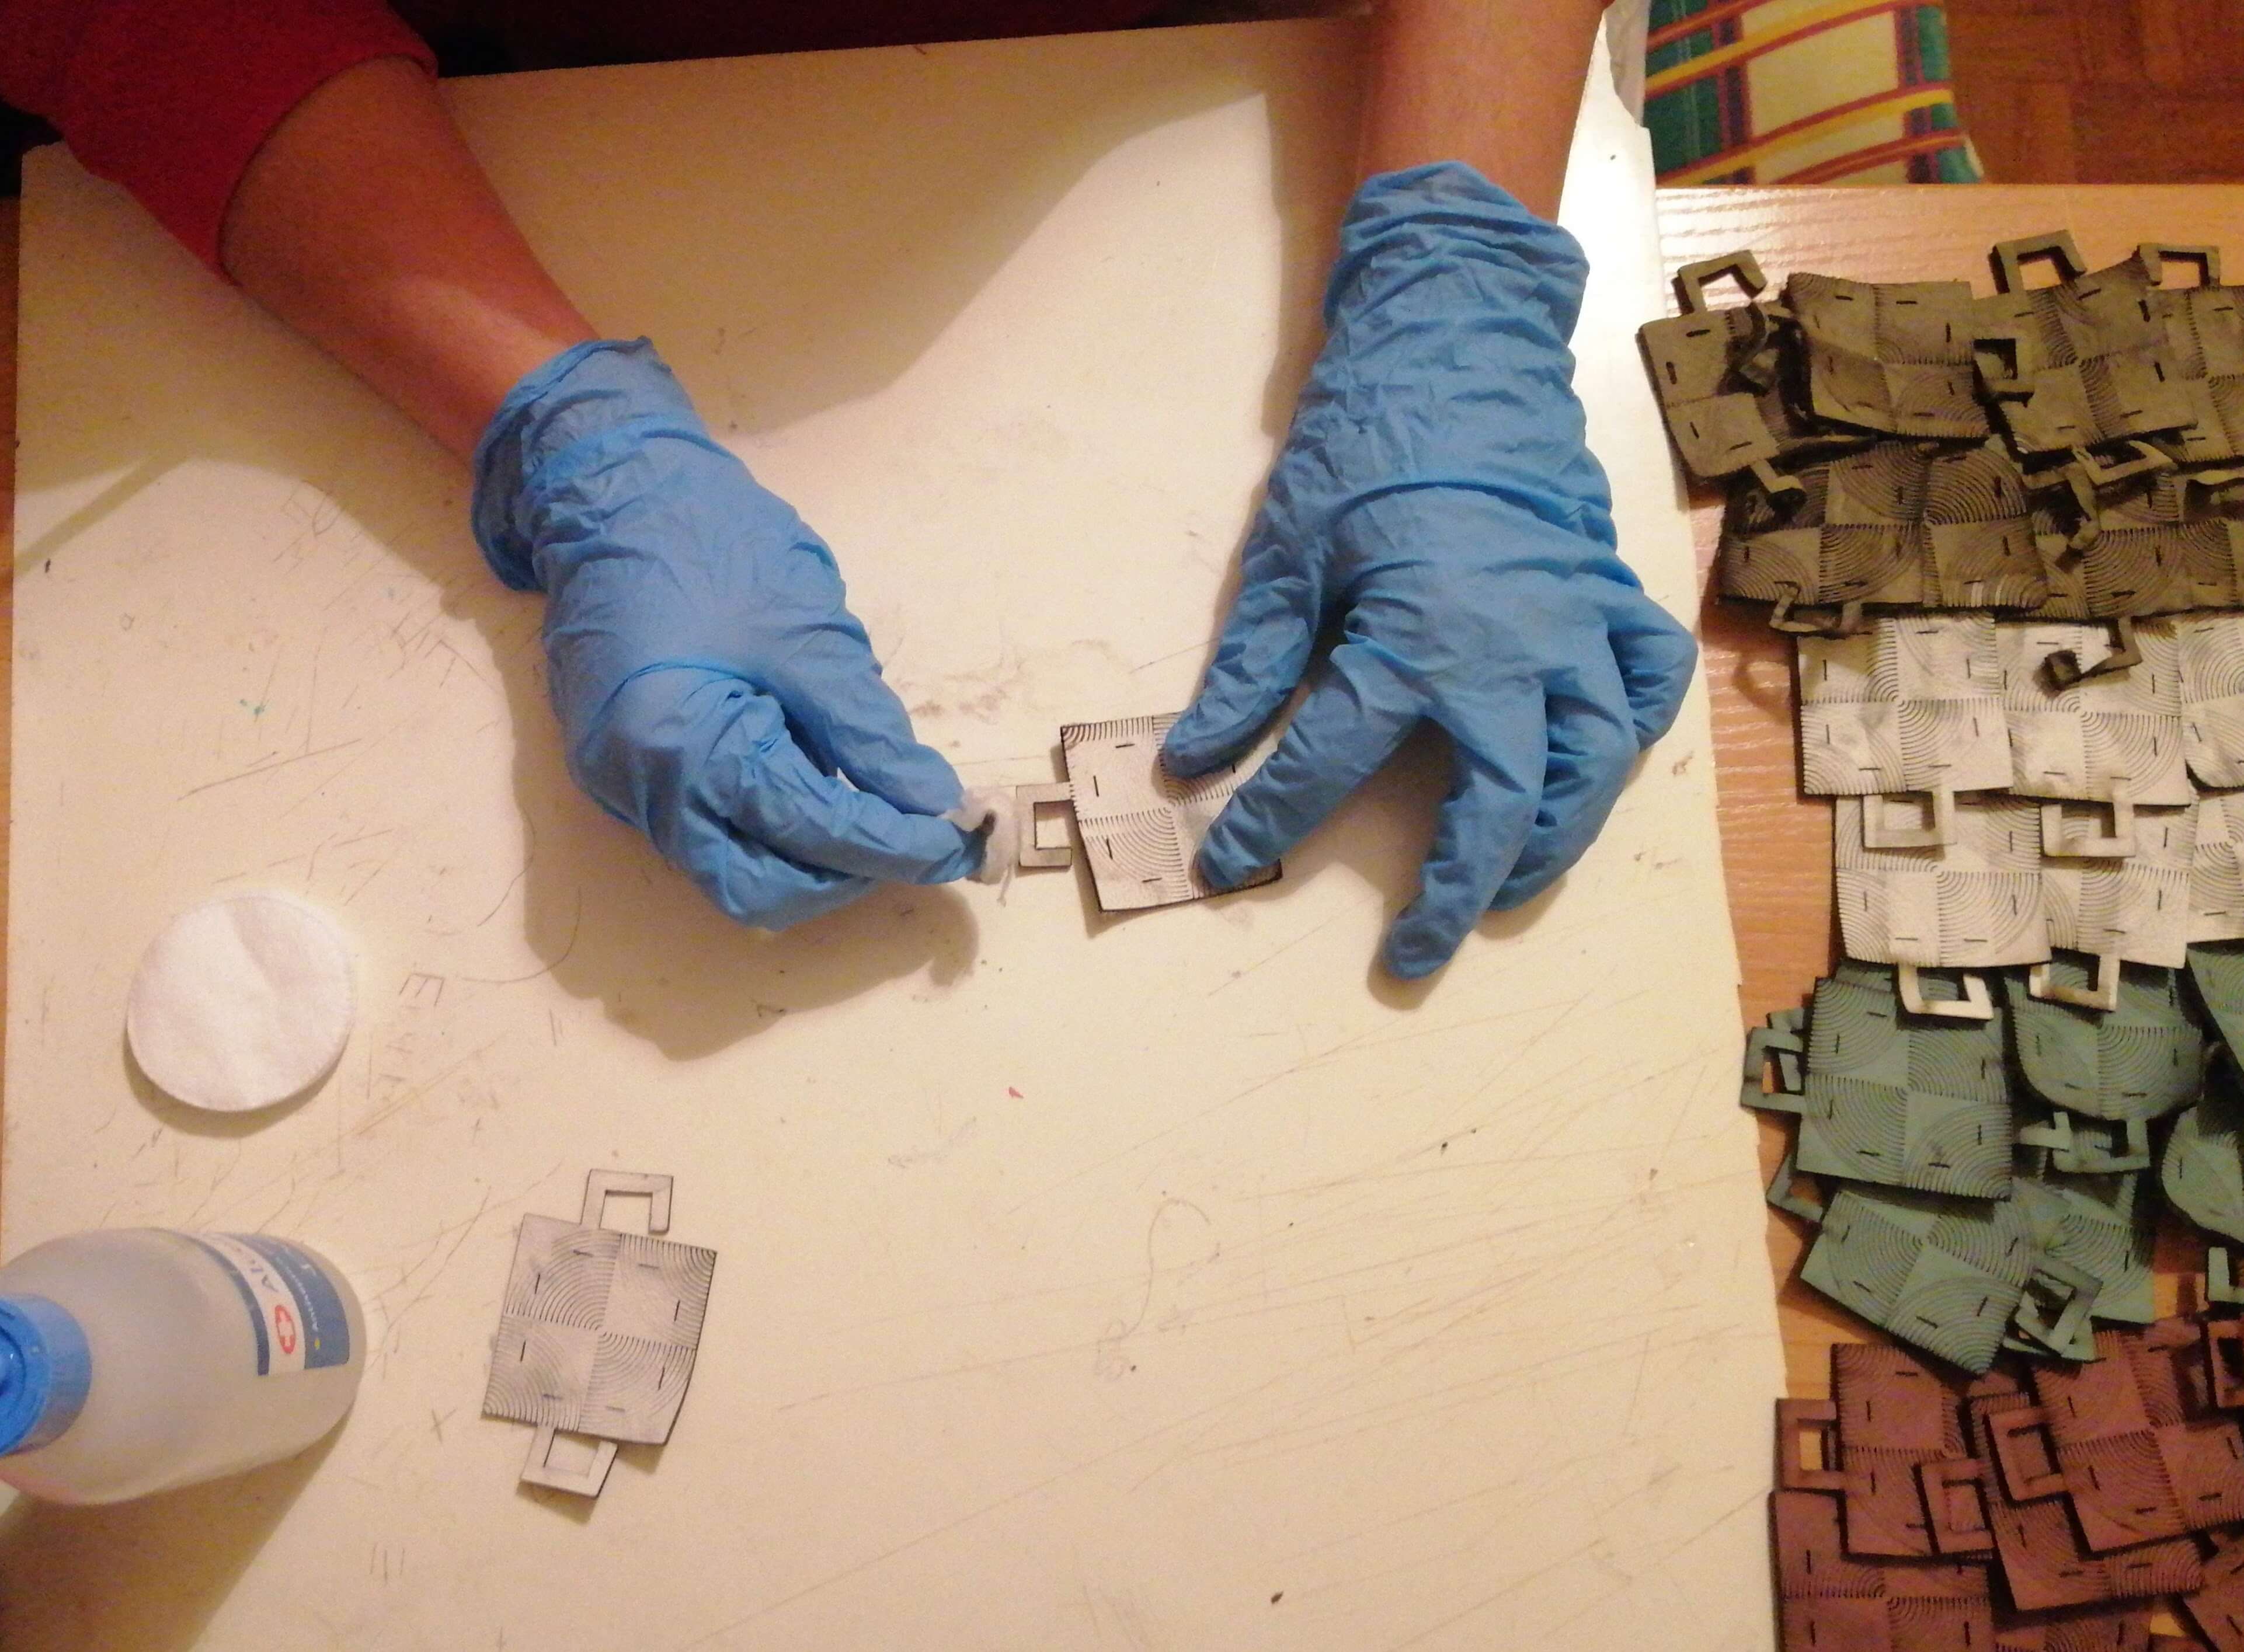
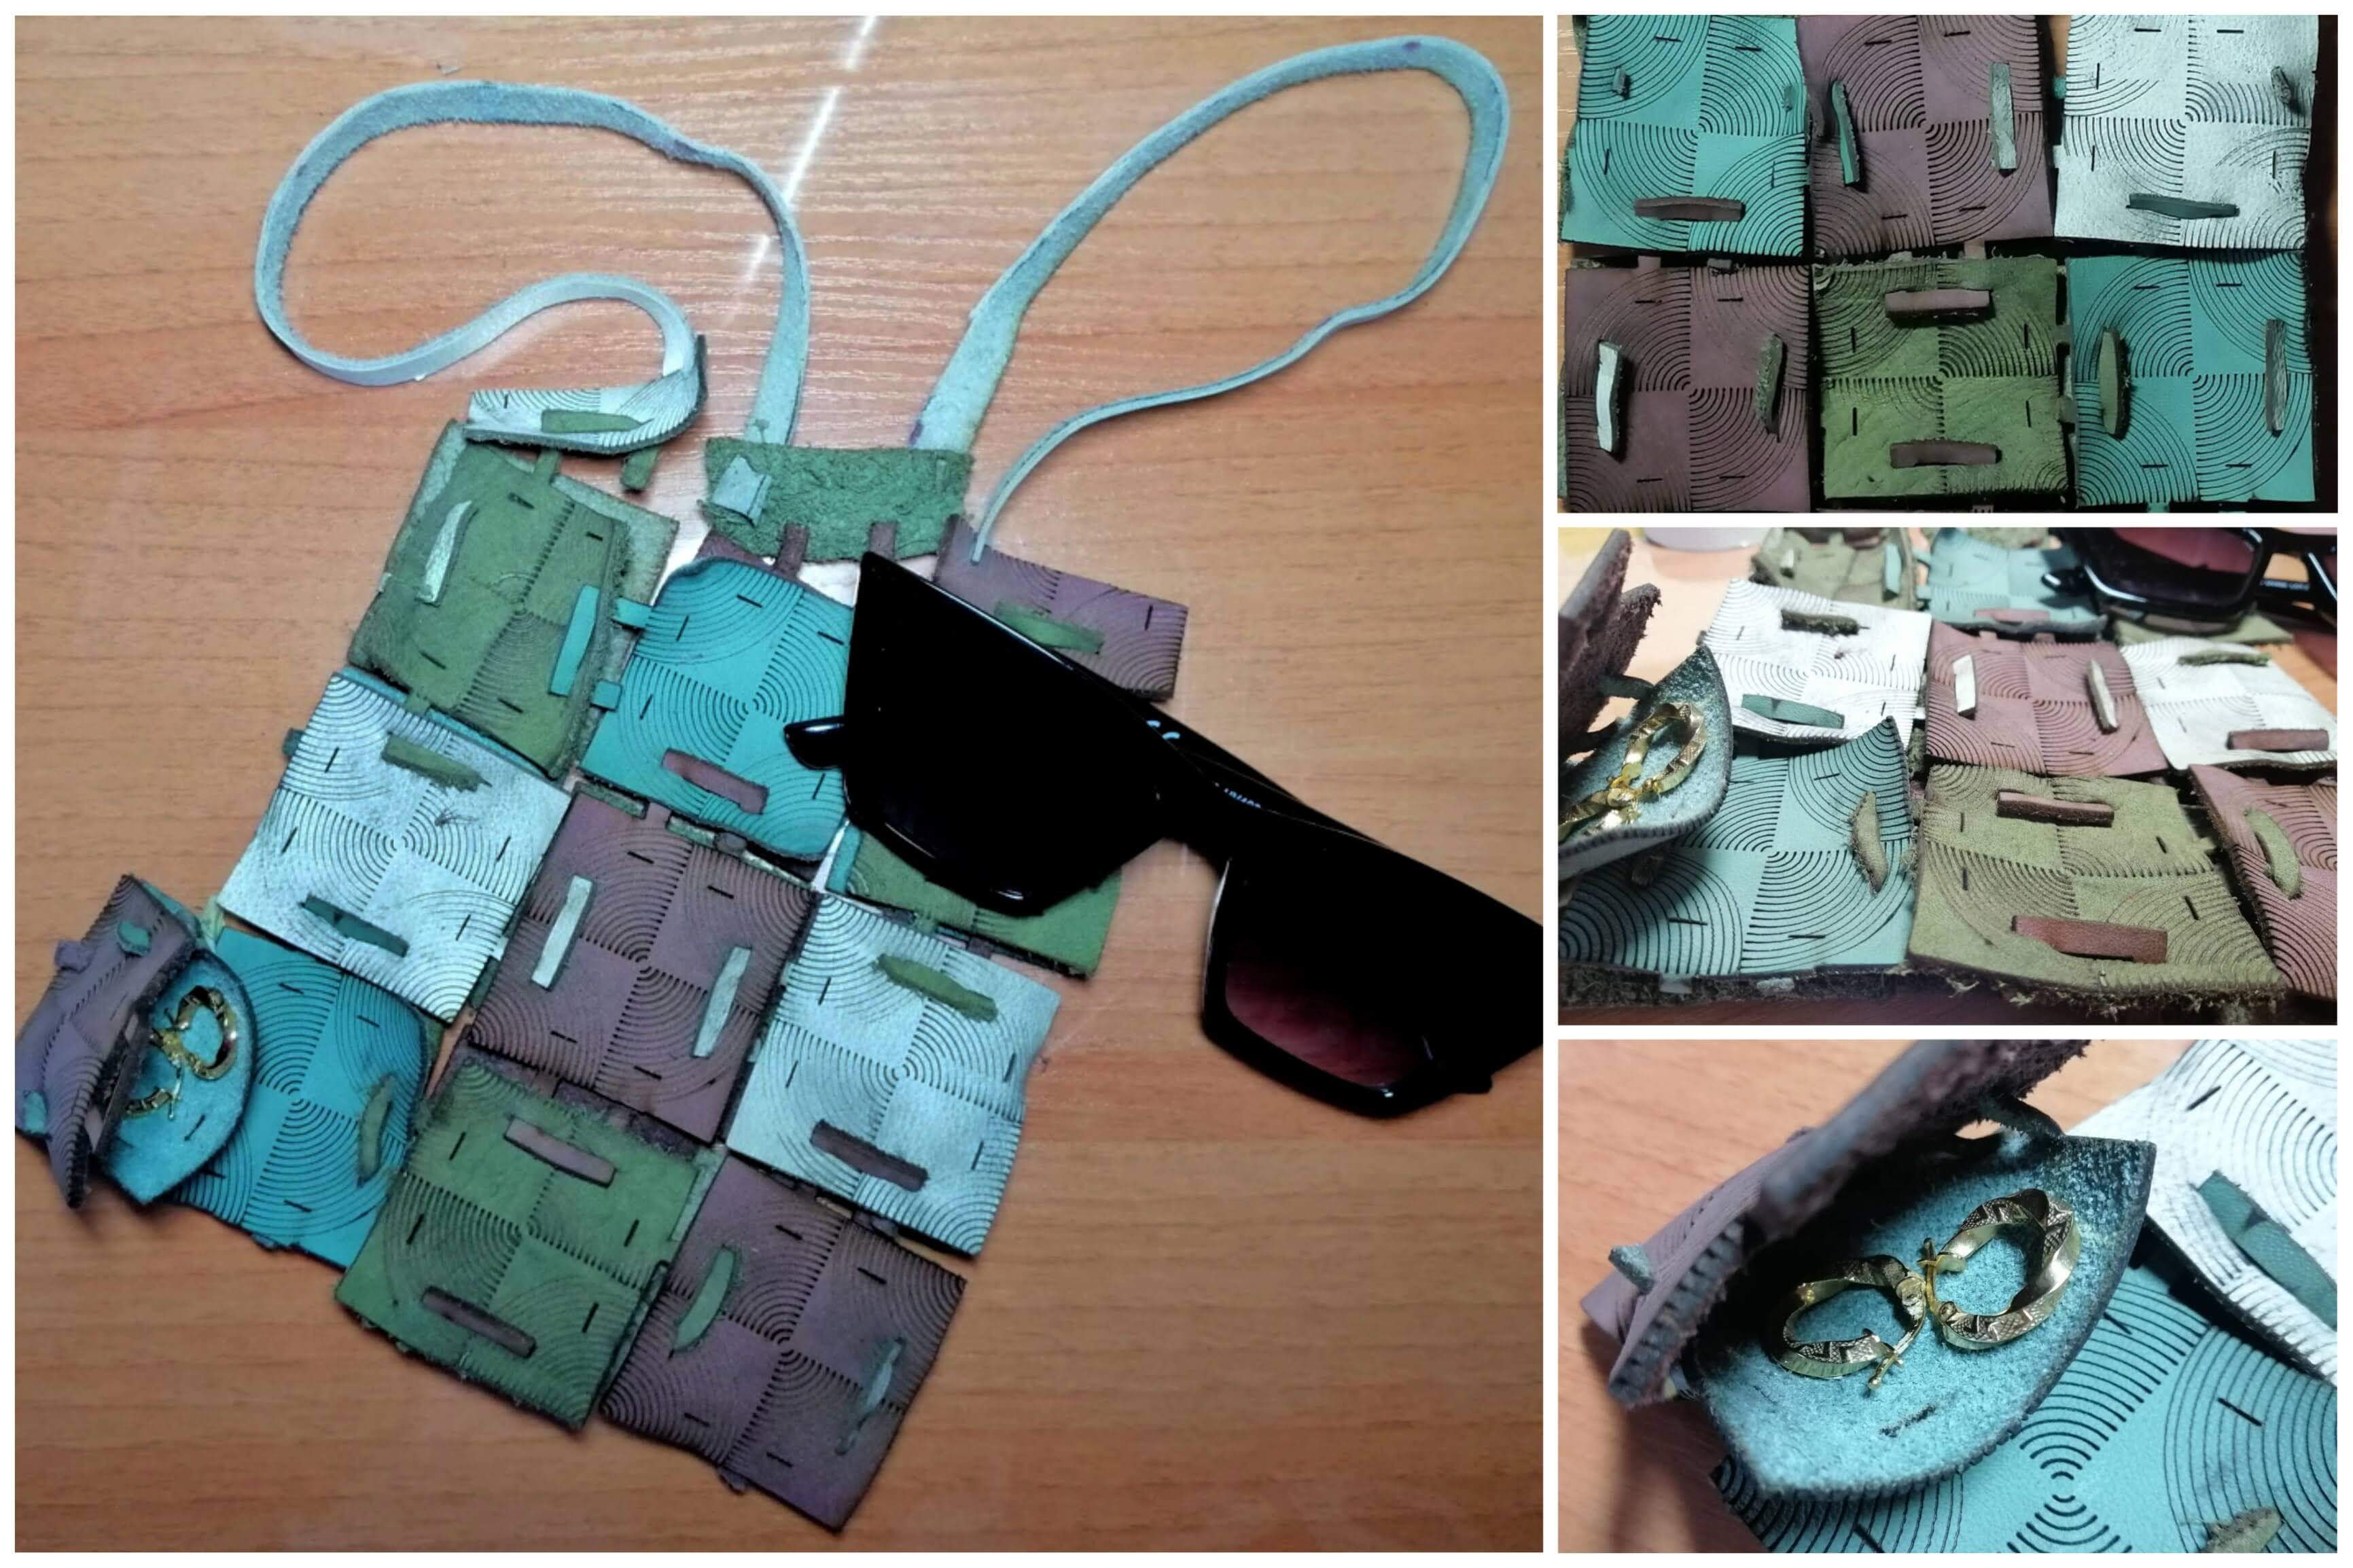
Assembling the leather wasn’t as easy as with the paper, especially when you do it from the textured side to the non-textured side. It took me 1 hour to assemble the base of the bag. With the waste material I made some handles, another 15 minutes.
For the bag, I used a pattern of 3x3 pieces, for each side, combining different colors. In total, I used 18 pieces. And, for the accessories, only two pieces are needed.

On the Open Source Circular Fashion web site you can find the download file.
Tips
Anastasia gave me her feedback and some tips for the next time I want to laser cut leather:
-
Cut it at a lower speed and a lower power output, so it will need to cut 2 twice.
-
By placing the leather on a moistened wooden board, prevents the leather from staining.