12 | Soft robotics
Inflatables: Vinyl
The variations and combinations are infinite. You can create different types of movement depending on the design of the pattern: “fold”, roll up, inflate…
To fold
I was interested in the bending robots that Adriana Carrera showed us in the lecture, specially this one:
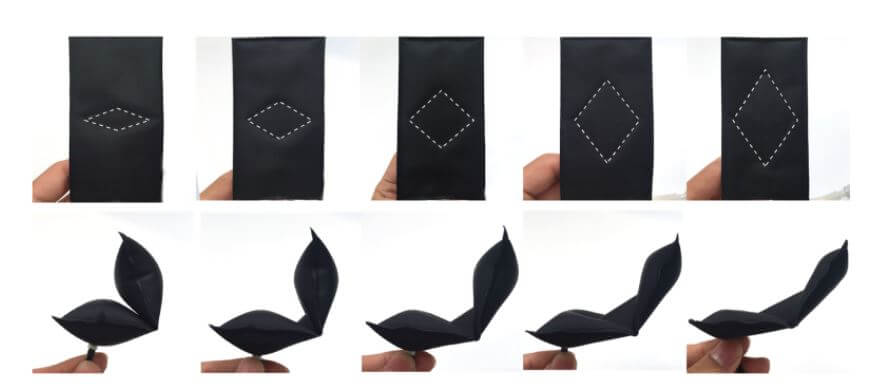
So, I tried to replicate them but in my own way, as they were my first inflatables I wanted to do something simple. I did it in 2 different shapes: with a hole and without it.
I drew and marked where I had to cut so I wouldn't make a mistake. I checked that everything fit together. Finally, I ironed the two sheets of vinyl with a heat press machine.
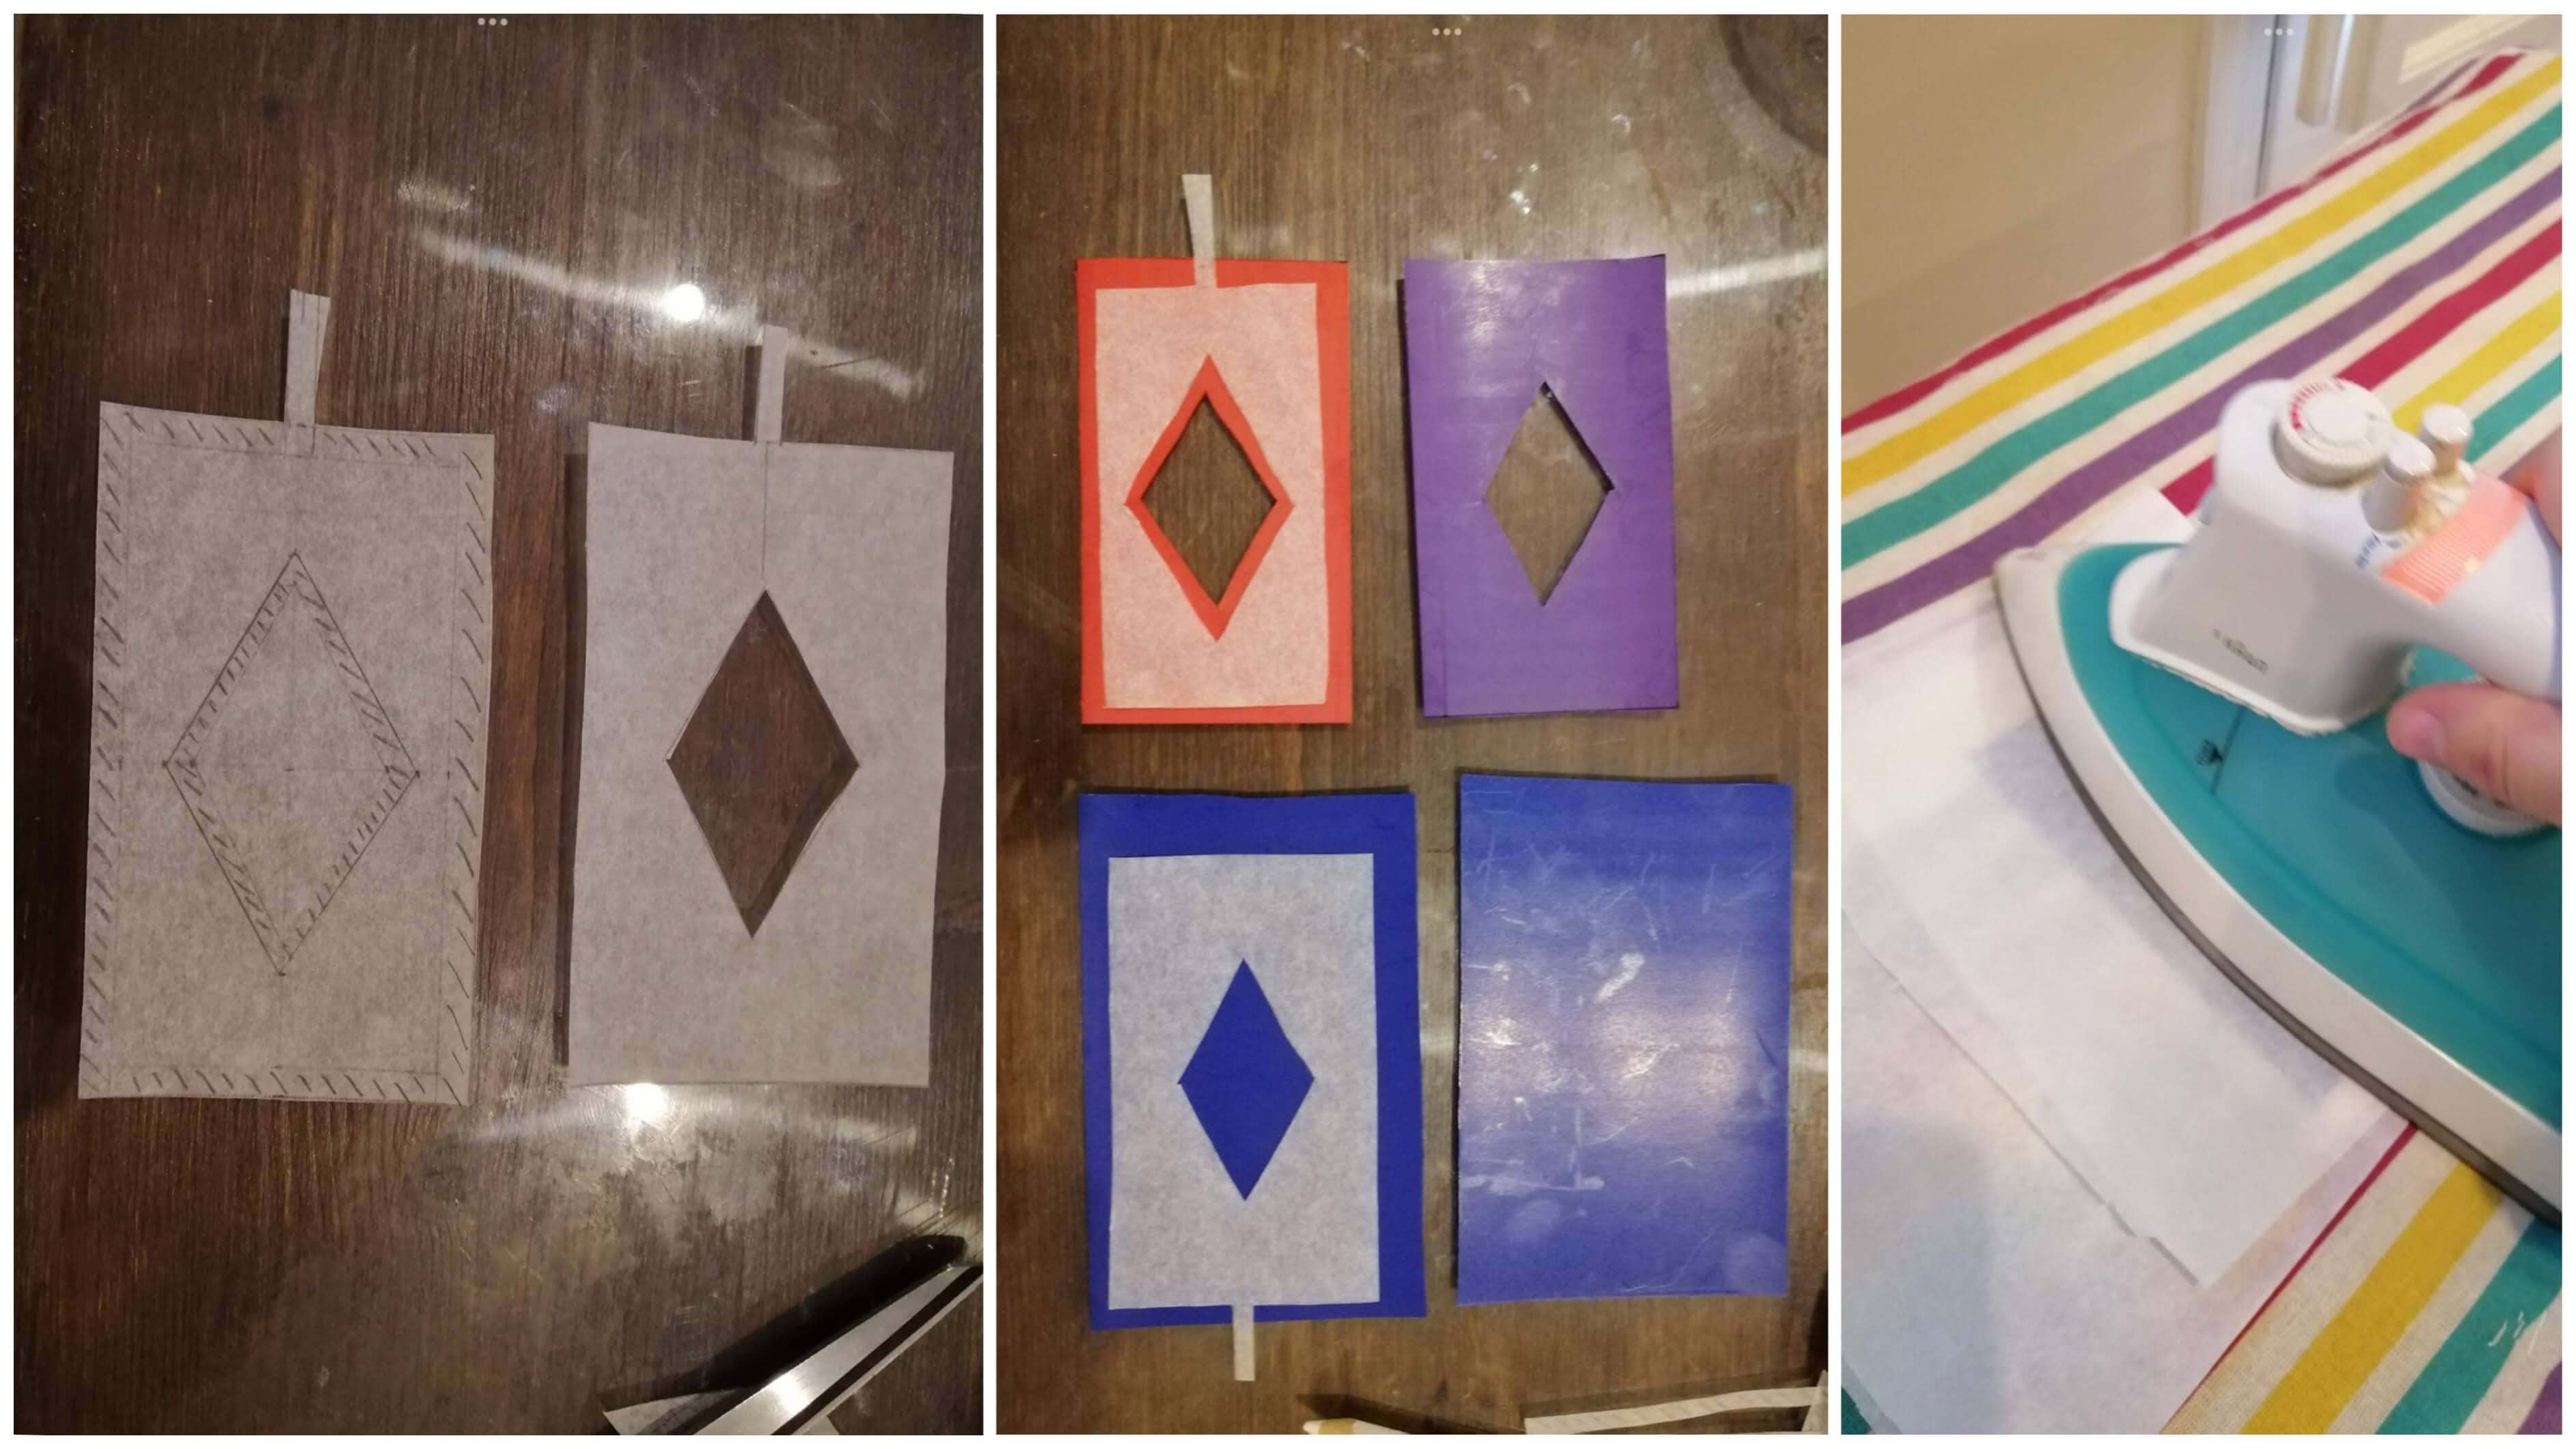
To iron it, I put the two sheets of vinyl between two sheets of baking paper.
Pattern
Once I knew how it worked, I wanted to create something more complex.
Design
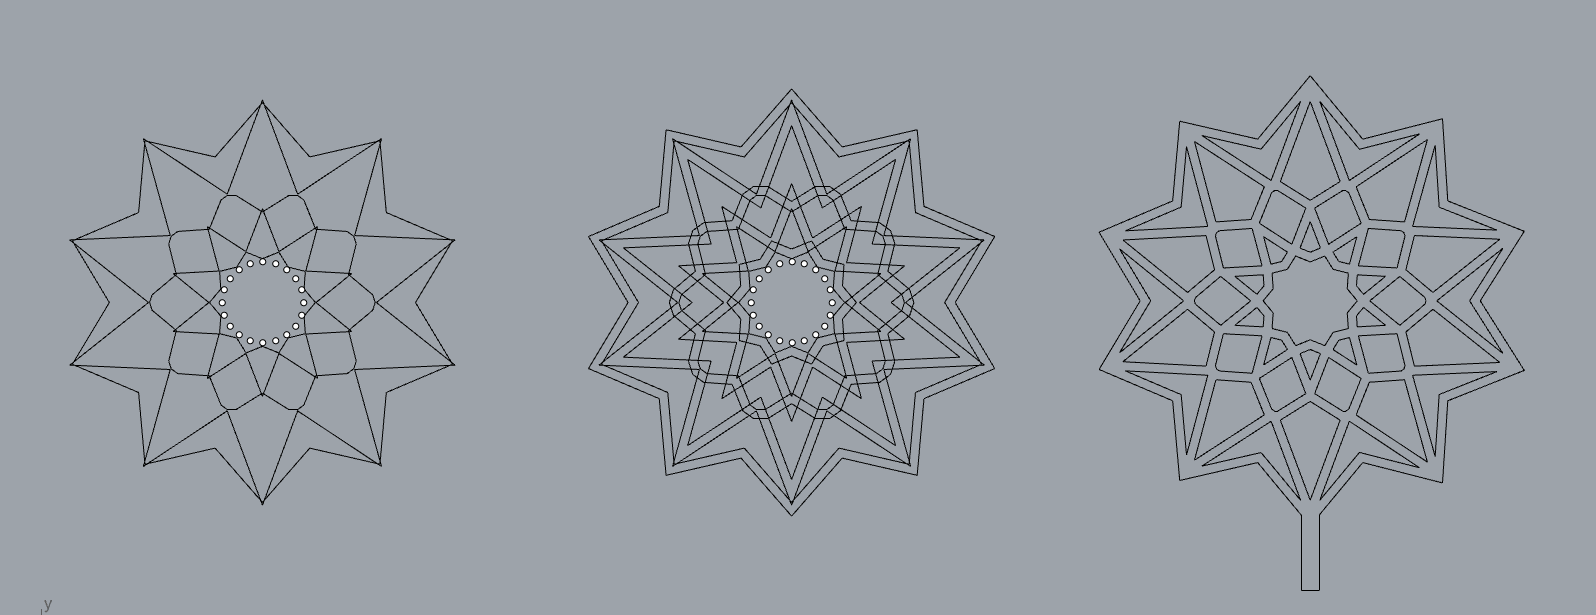
I followed this tutorial. I used to obtain the curves of that pattern. This was the code that I used in grasshopper:
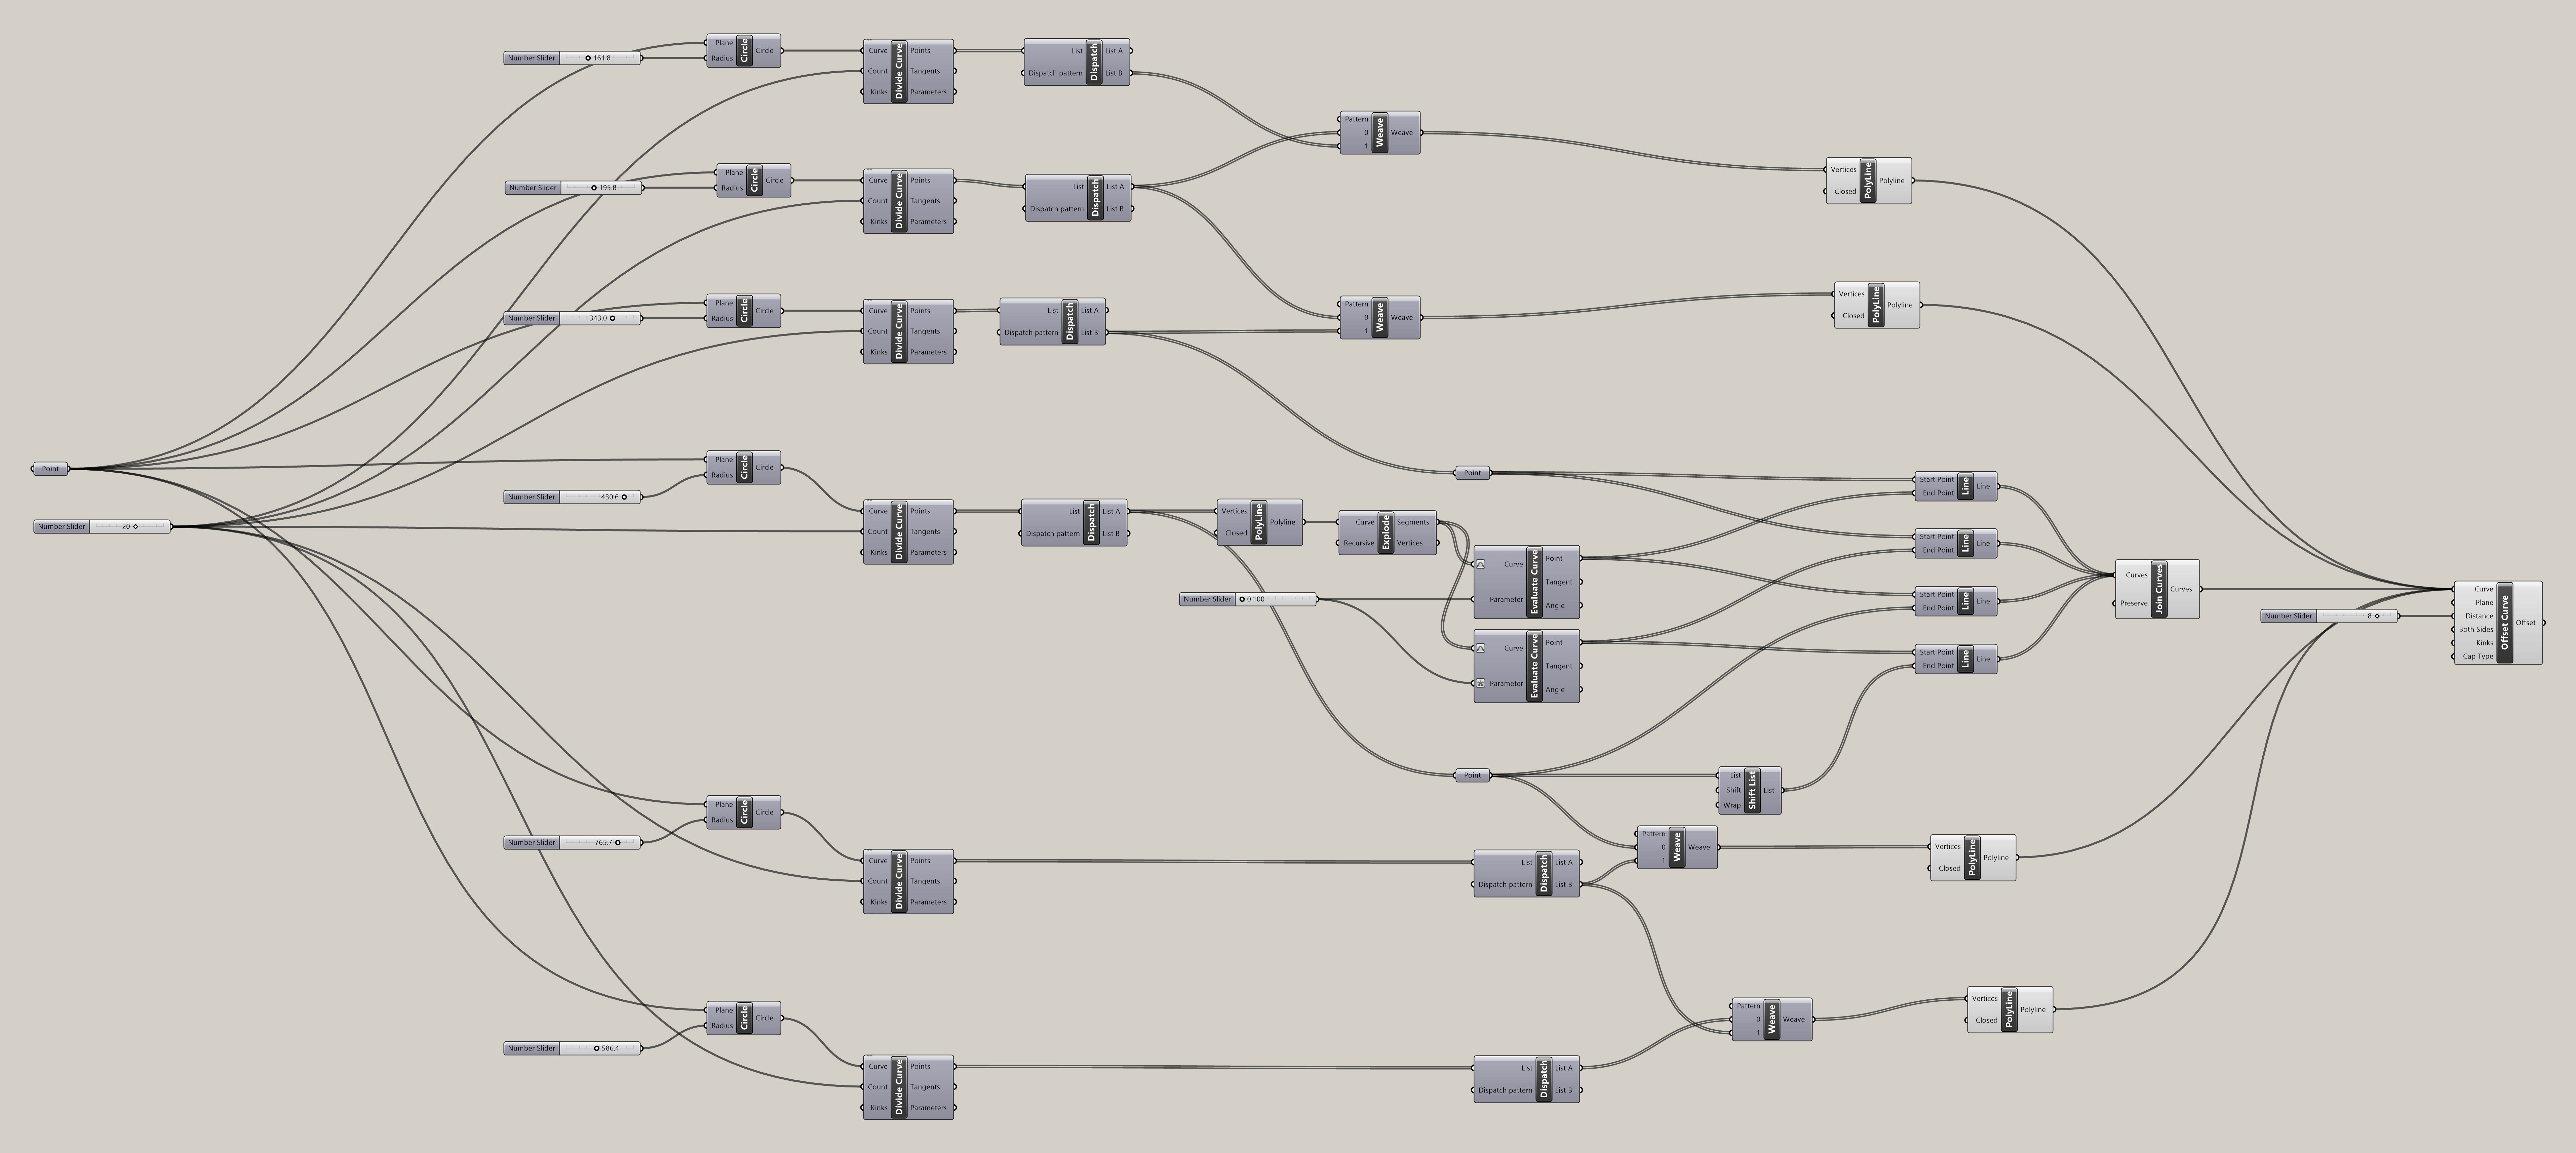
I baked it and I got curves of the pattern. I made an offset to all of them in order to obtain a thickness of 2 mm. Some lines intersected each other, so I had to trim them to have one “channel” for the air.
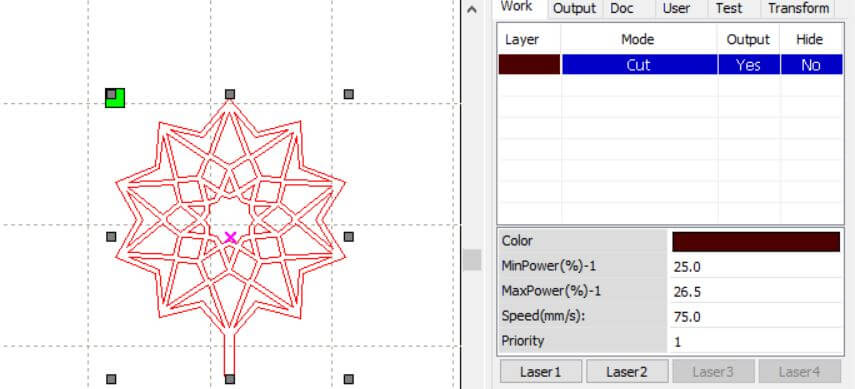
Laser cutting
Obviously, I used the laser cutting for this shape because if I cut it by hand, I could spend days cutting and I would break it for sure jajaja. I saved the file as an .stl and I uploaded to RDWorksV8 programme to cut it.
I cut it in baking paper. At the beginning, I used the settings for a paper of 0,5 thickness:
Speed: 75 mm/s
Min. power: 50%
Max. power: 53%
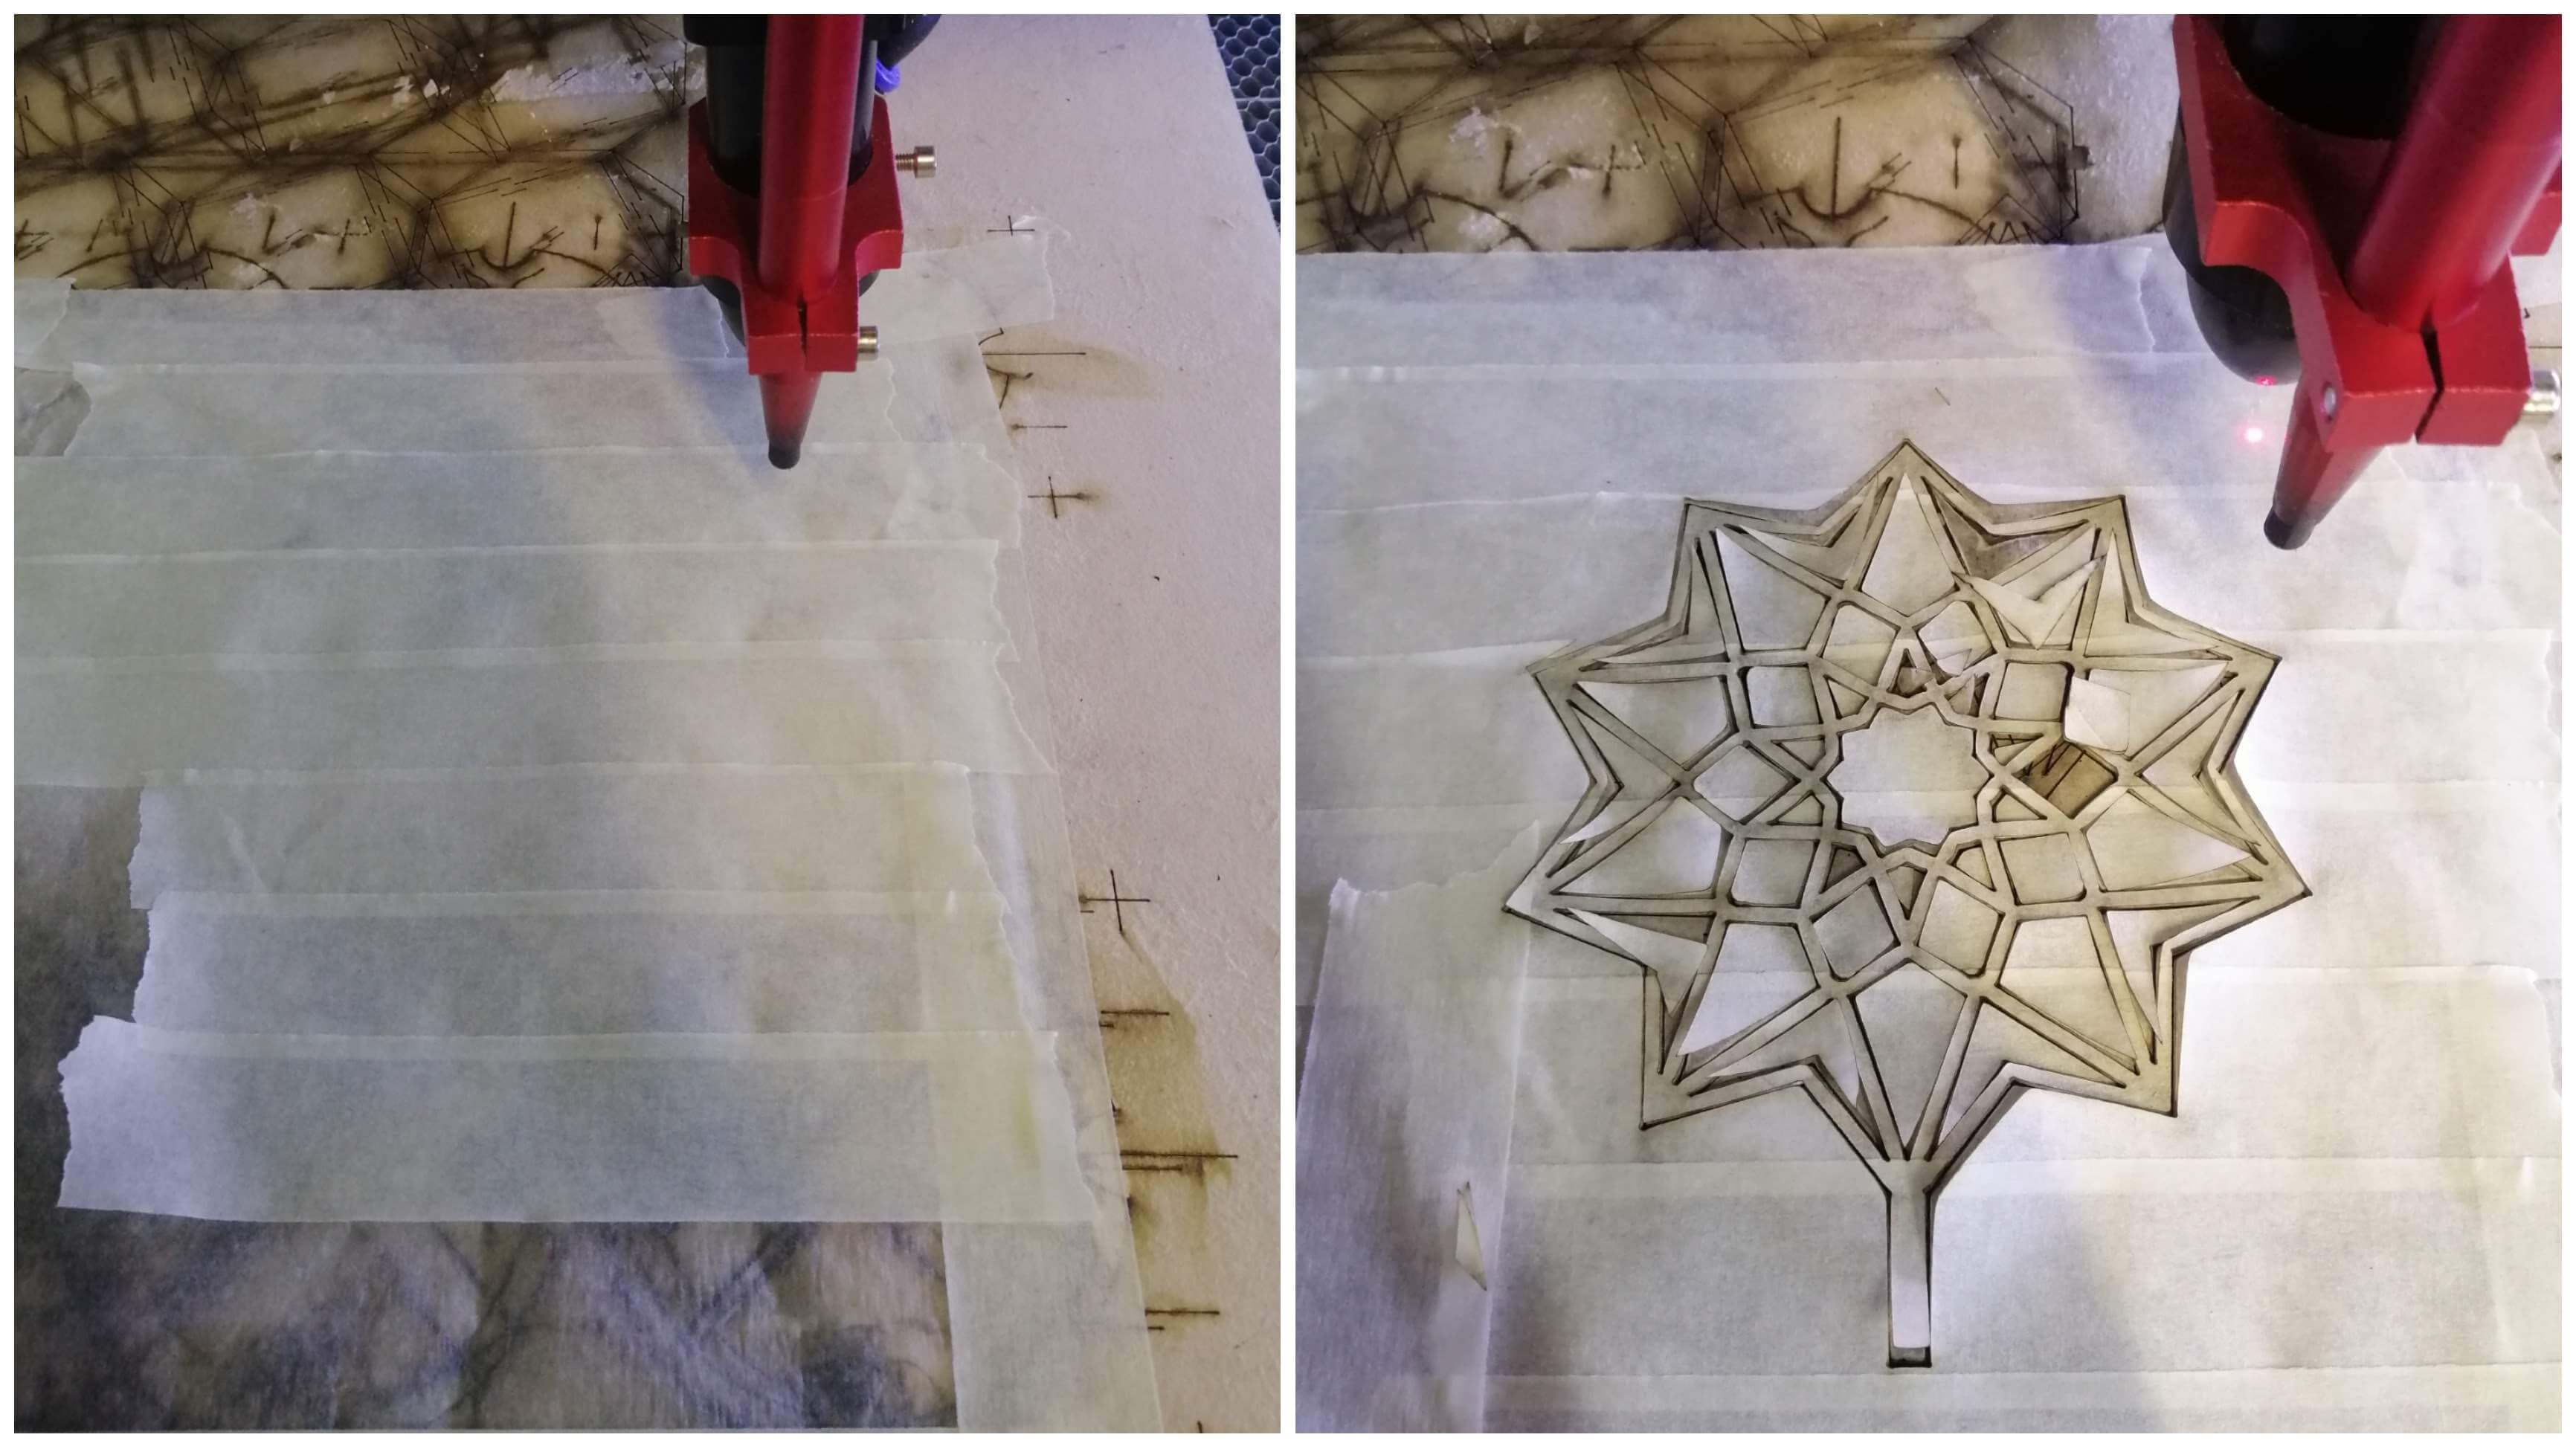
The power was too high, so the paper burned… I decided to reduce the power and I put masking tape over the baking paper to prevent it from rising.
It worked perfectly and the pattern came out easily.
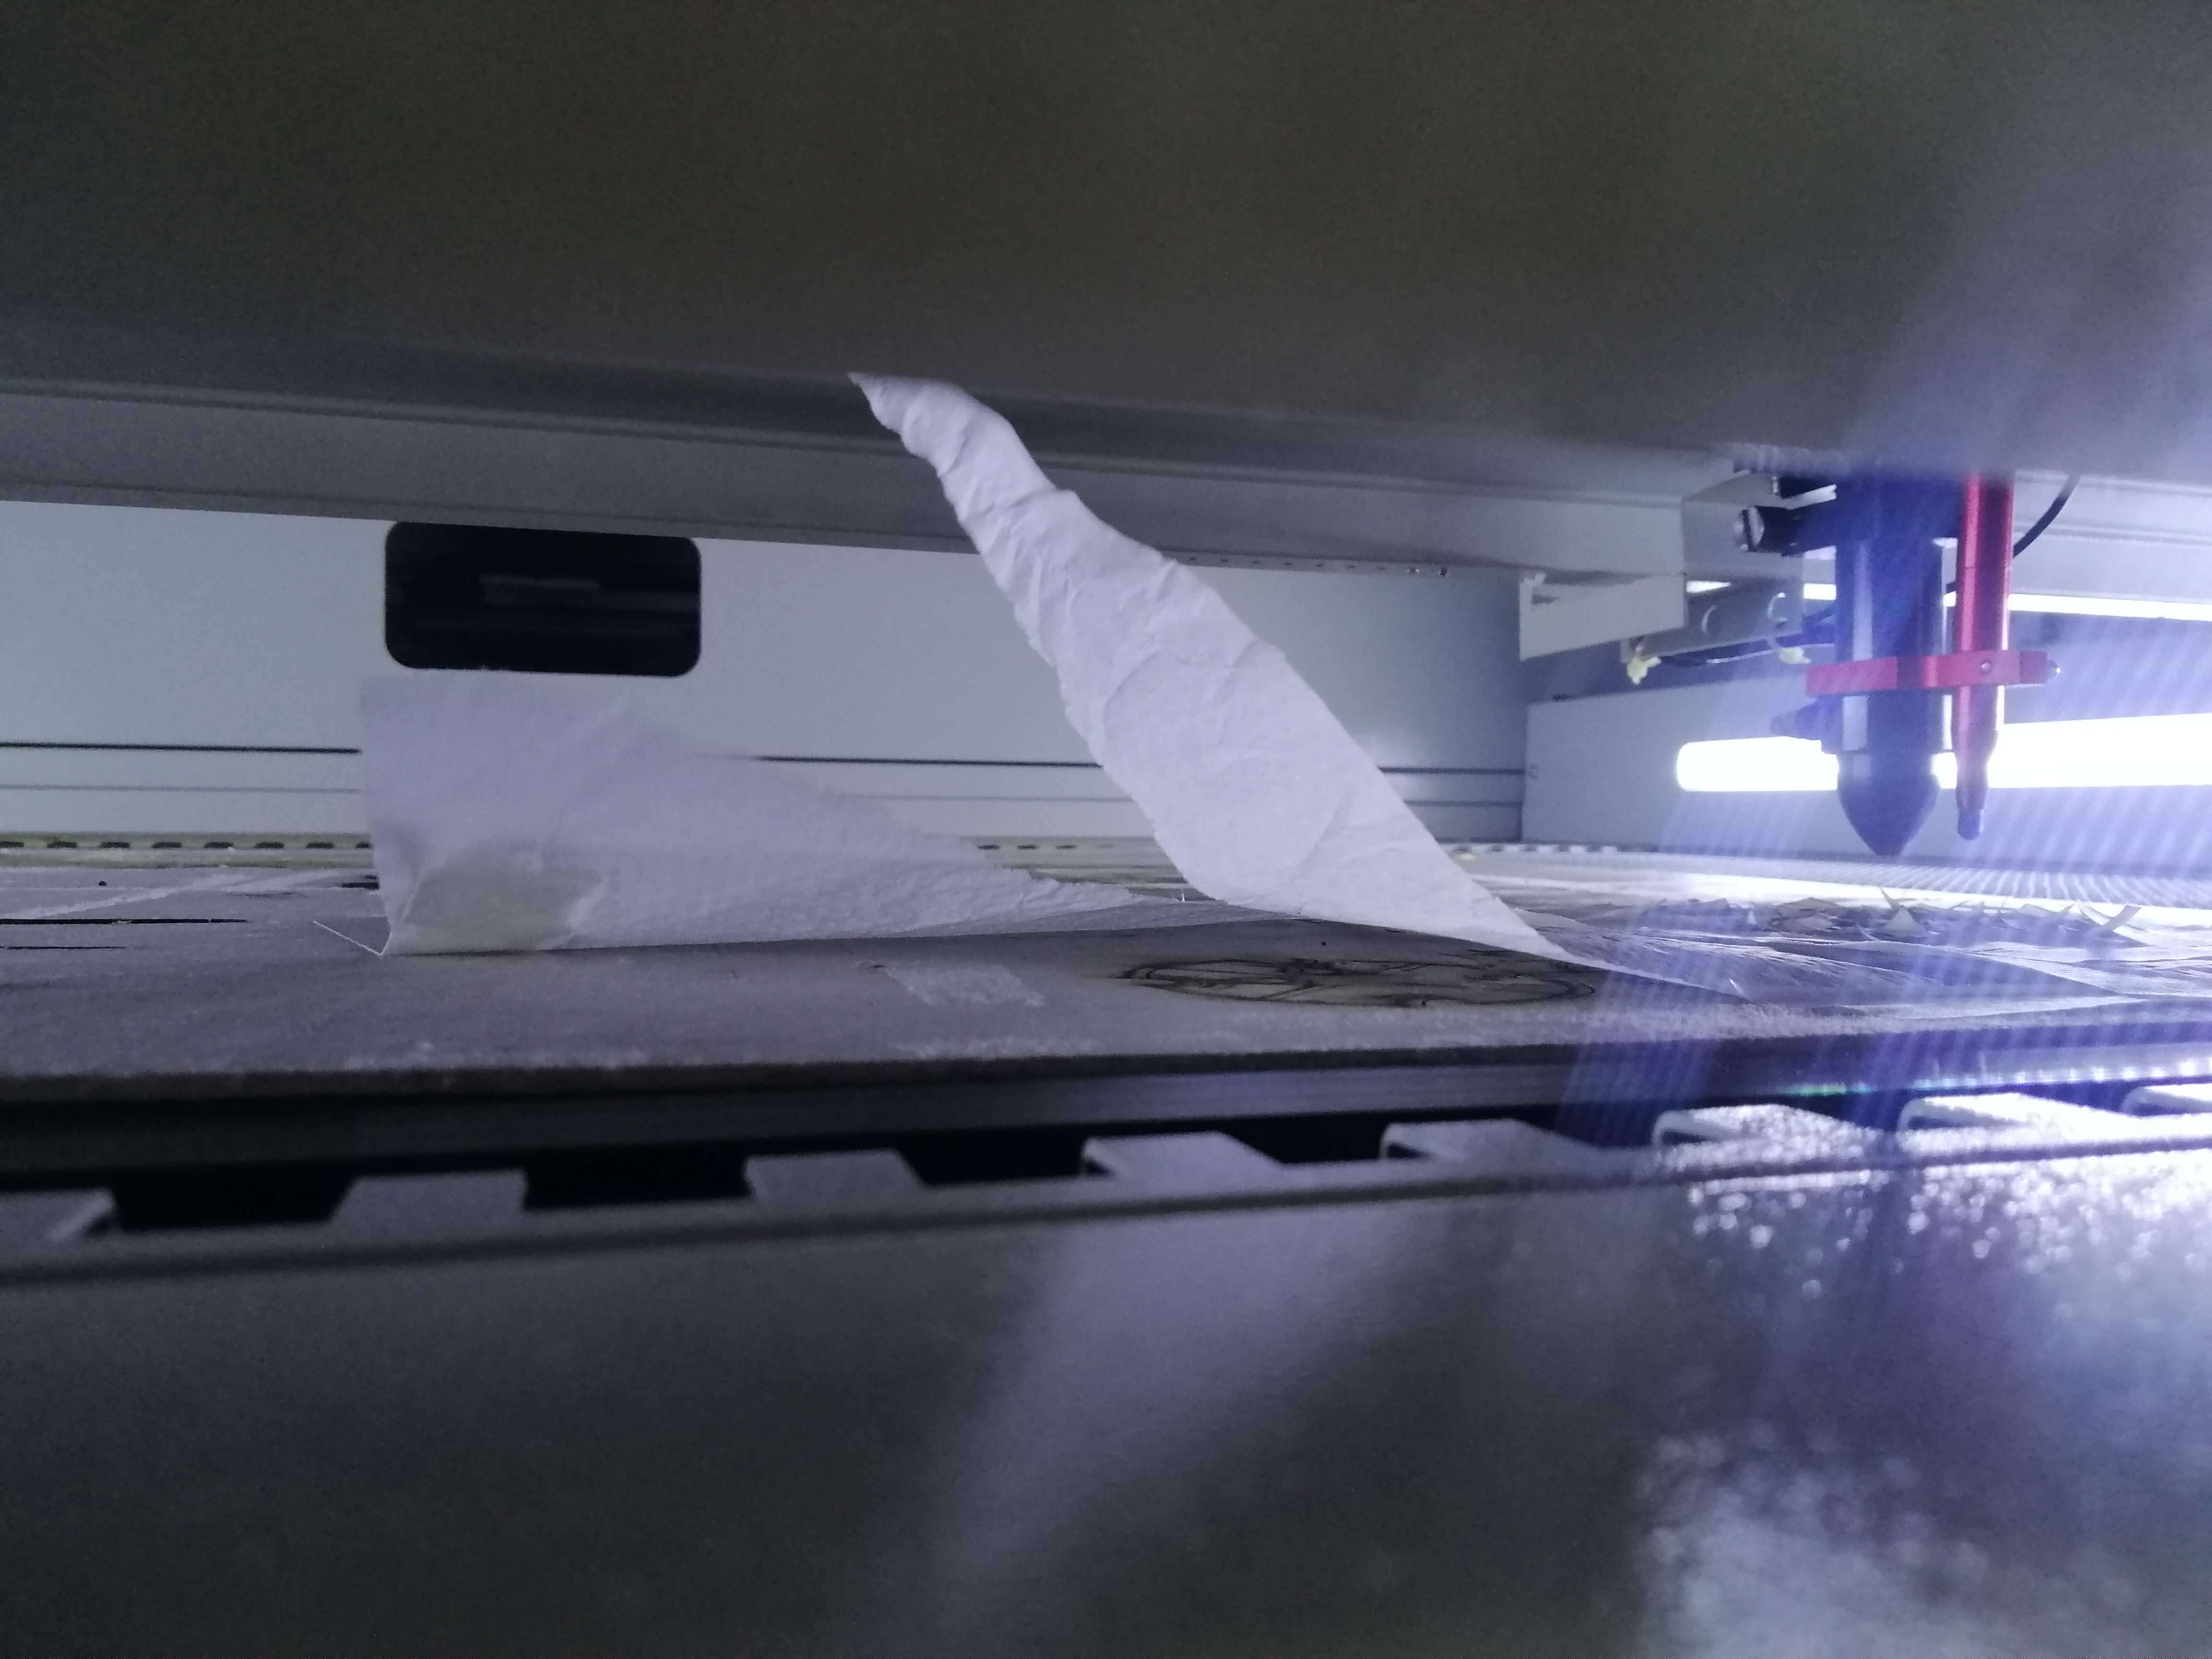
The extractor has to be switched off to prevent it from flying out. If not, this can happen:
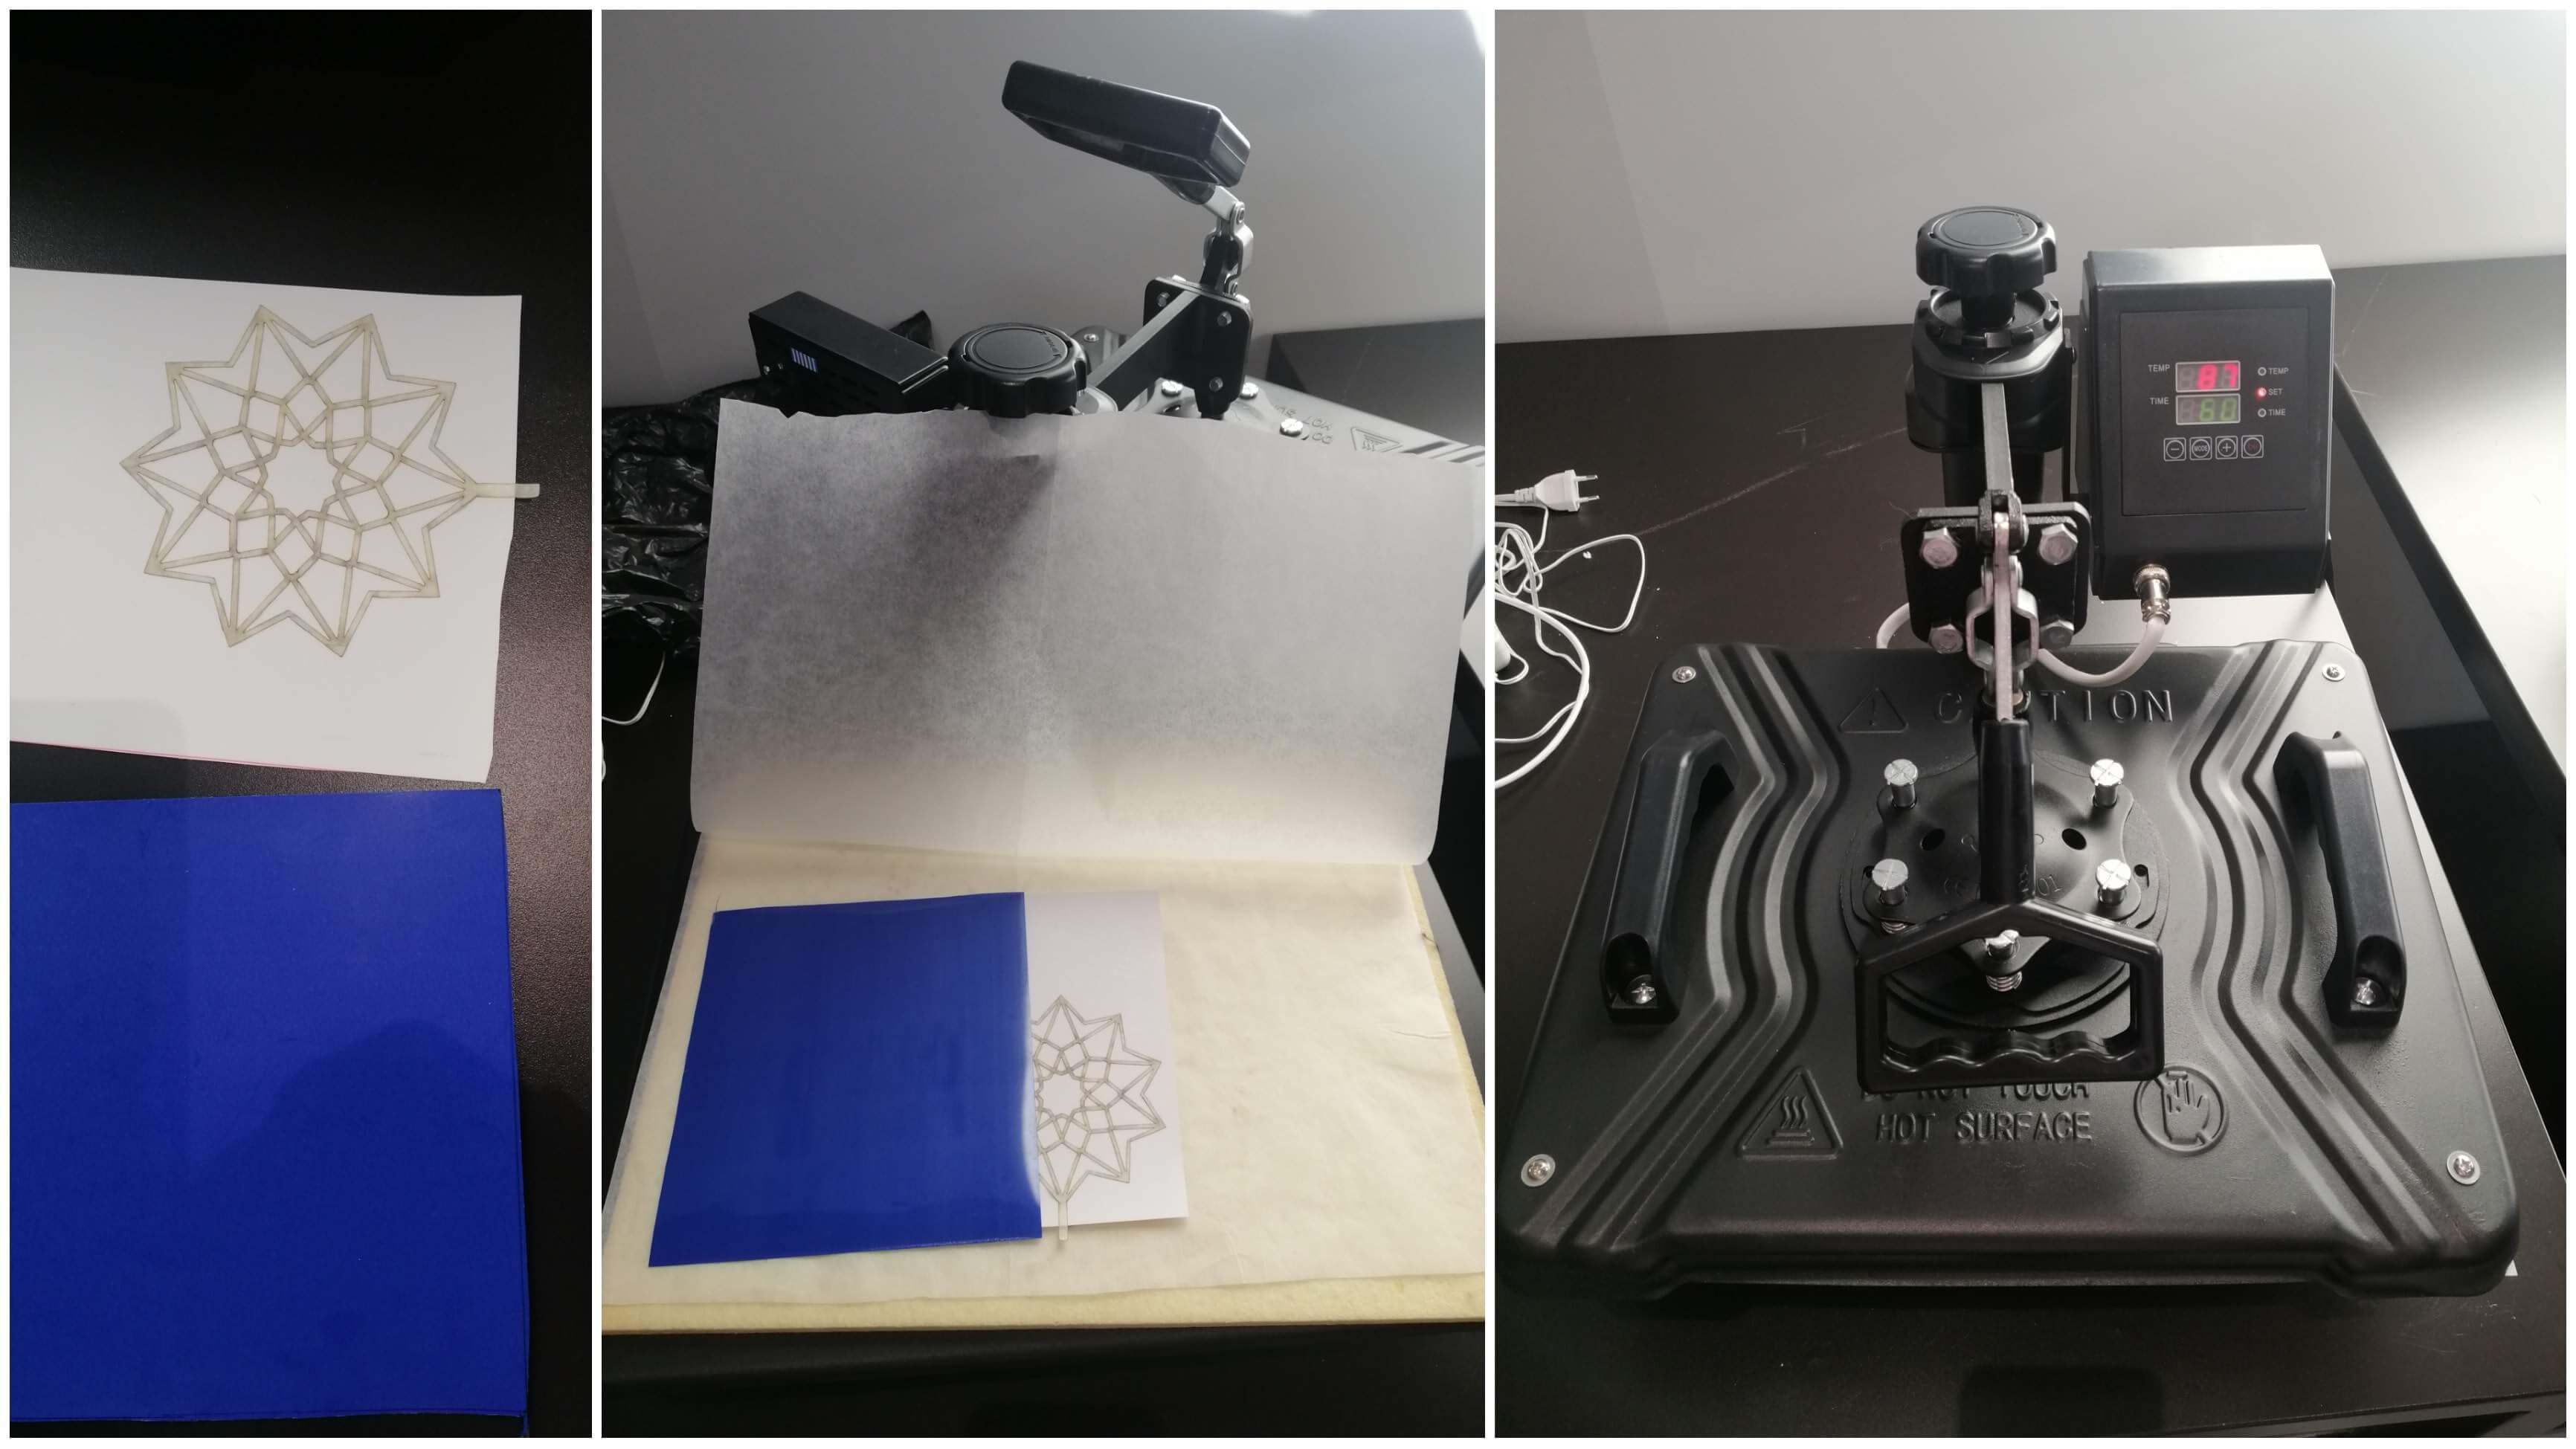
Heat press machine
This machine is quite easy to use, it’s very intuitive. First of all, I put the baking paper between 2 pieces of vinyl.
The vinyl has 2 faces, one it’s shiny and the other one it’s mate. To stick them, the mate face has to be in contact with the other mate face.
I put the vinyl sandwich between 2 pieces of baking paper (to protect it) and I closed the machine. I put the machine at 230ºC for one minute.
 I removed the shiny layer and I cut the leftover material. Then, I inflated and I was impressed with the result.
Soft robots: Bioplastic
I haven’t said yet, but we had to do this assignment at a colleague's house because of the weather conditions (it rained and rained so much…). For that reason, we made all together bioplastic soft robots.
We took some already made moulds to make sure they work. Knowing that, we decided to make the robots out of bioplastic and save silicone for our robots.
Agar
Recipe:
- Agar 25 g
- Glycerin 25 ml
- Water 250 ml
We poured them into a casserole, heated it and mixed it until it was a homogeneous mixture. Try to avoid bubbles because in those parts there are more possibilities to break the material.
We poured it into the moulds and we left them dry. Unfortunately, the agar shrunk too much and ended up breaking.
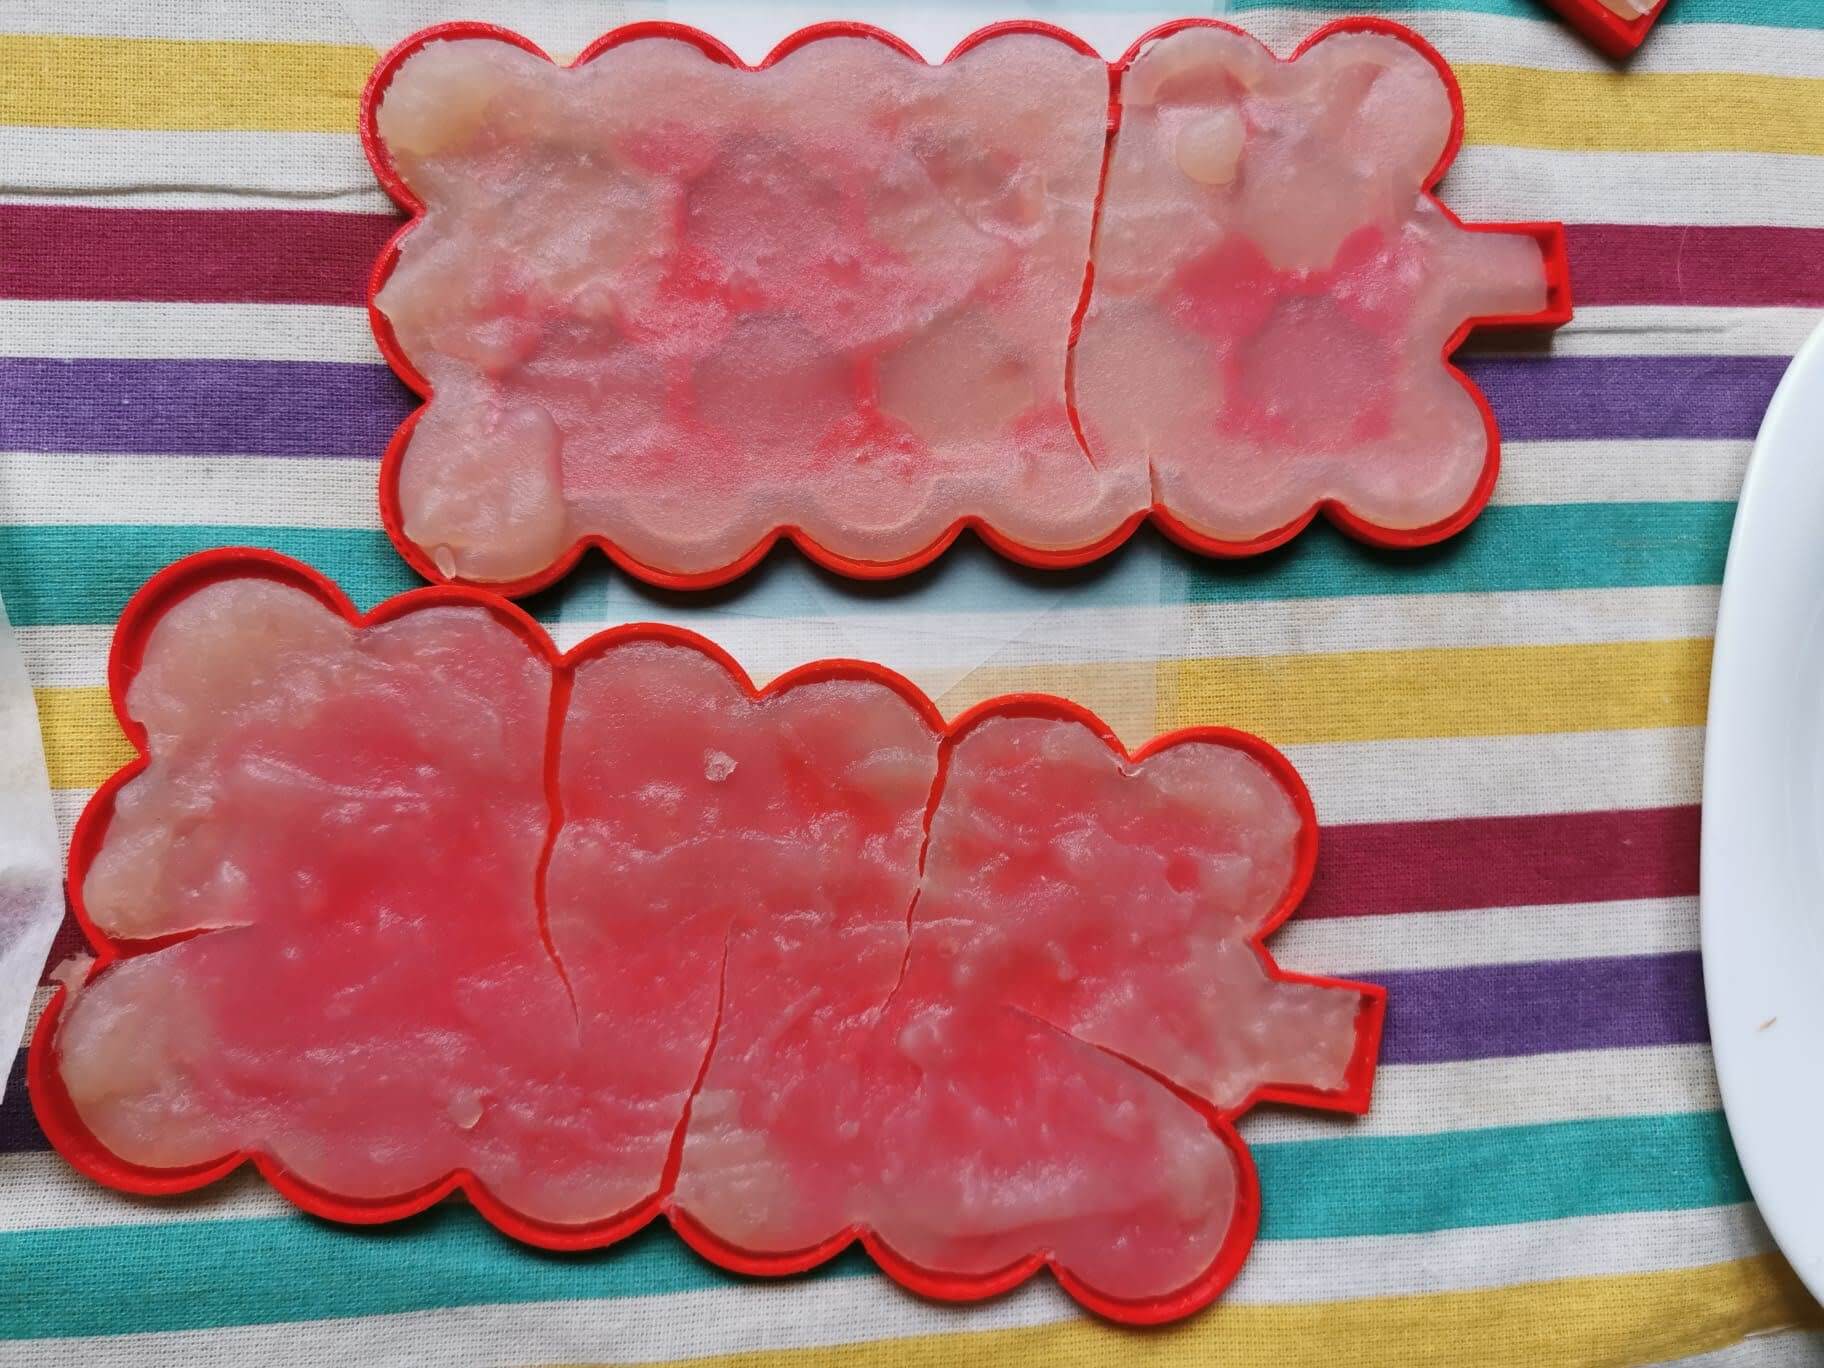

Gelatin
Recipe:
- Gelatine 50 g
- Glycerin 25 ml
- Water 25 ml
We did the same process as with the agar bioplastic.
Hopefully, these results were much better!
Soft robots: Silicone
I wanted movement! When I think about soft robots, the first character that comes to my mind is their movement. Looking for inspiration, I saw the fins movement of the fishes and I wanted to replicate that smooth movement, at least try it.
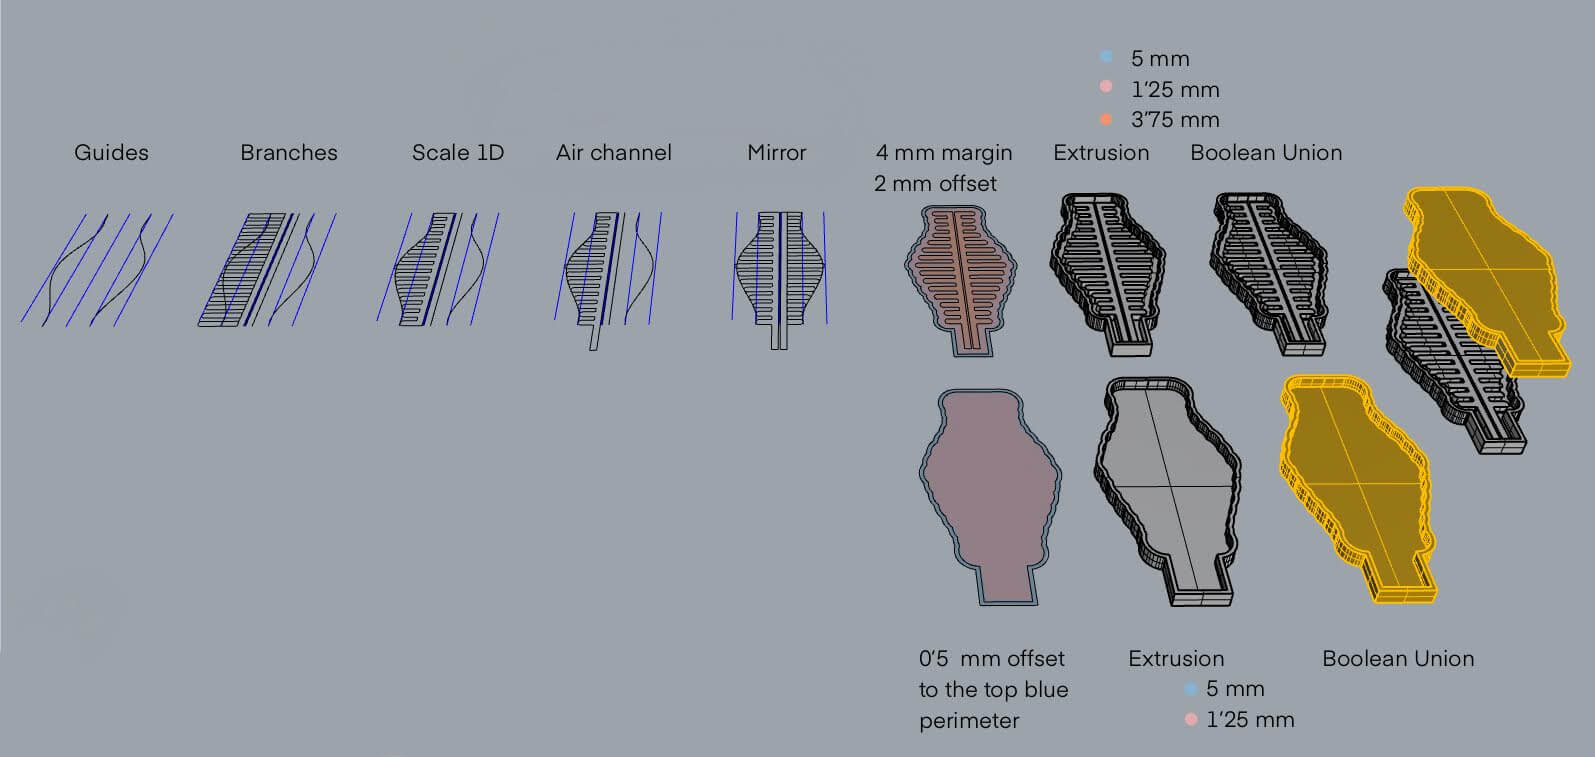
Design: Rhinoceros
This was the process to design the mold:
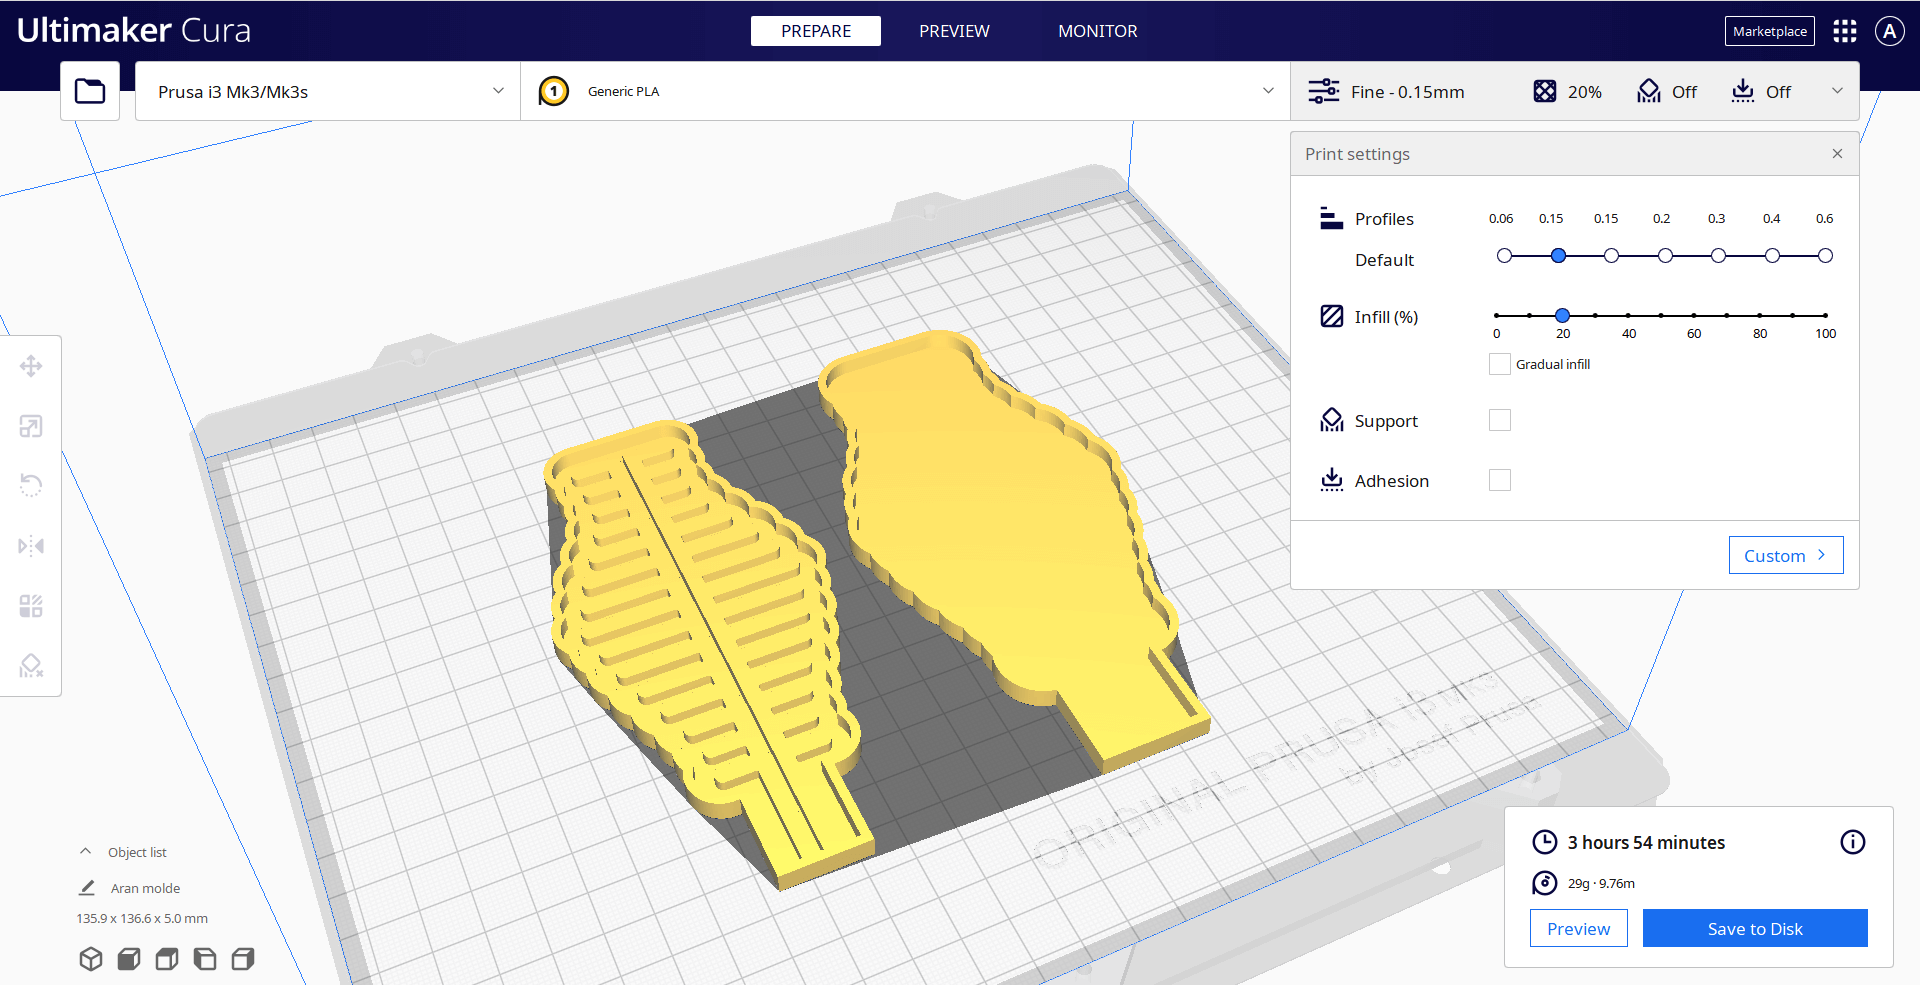
Mould: 3D printing
Those were the settings:
Silicone
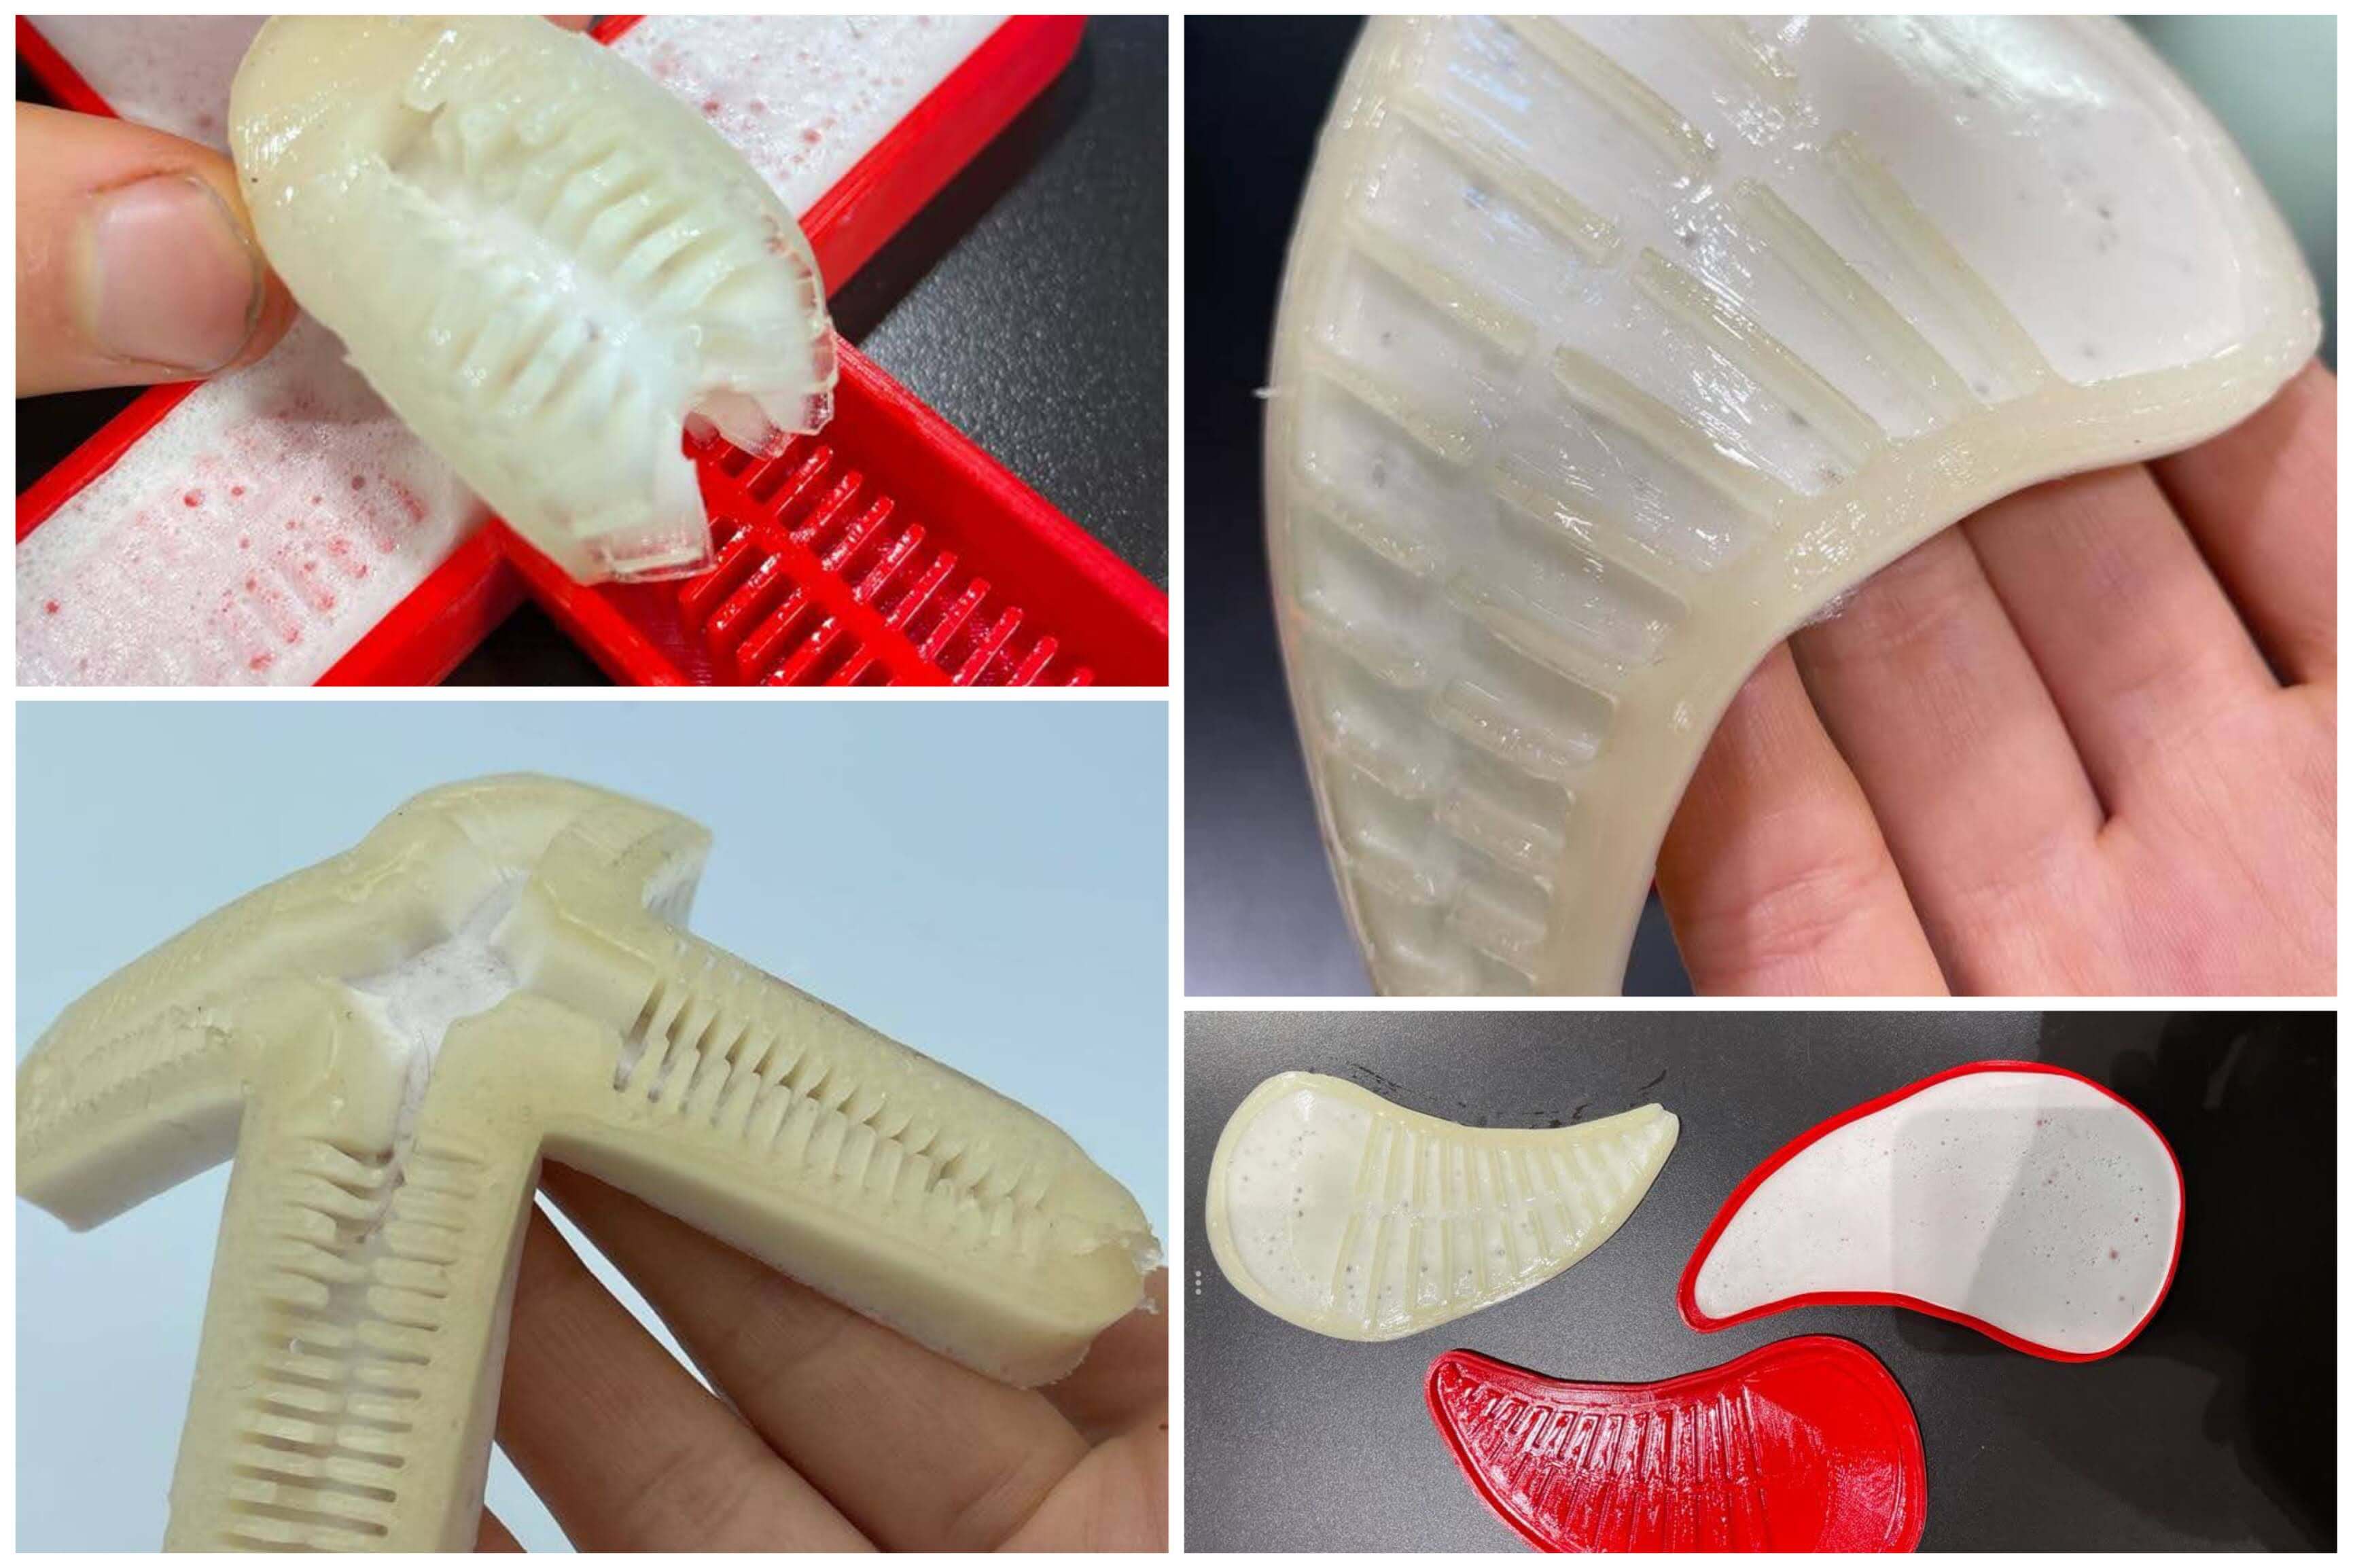
It was time for the final step. The structure is made of silicone which consists of mixing 2 components in equal parts. You mix them until there aren’t any bubbles. Then, non-stick spray is sprayed into the mold, clean the leftover spray and then the mixture is carefully poured into each mold. I left it to dry for a day.
It was so satisfying remove the silicone from the mold
I had two parts, so I had to stick them with silicone. I did it carefully because silicone could not enter the canals, otherwise it would clog them.
This was the final result
Download links
- Mosaic: rhinoceros and grasshopper
- Mosaic .dxf