Process
All this time I was looking for project ideas. My searches led me towards reducing the impact of environmental pollution by the textile industry.
The aim of my project is to create new clothing products without bringing a negative impact on the environment.
More data on the negative impact of the textile industry on the environment can be seen on my page Implications and applications.
To verify this idea, I interviewed a group of potential consumers. The interviewees filled out a paper form. Filling out the form took about 15 minutes. The results showed that each of the interviewees has clothes that they no longer wear, in particular at least a pair of jeans that is somewhere stored or discarded, thus becoming textile waste.
My project is aimed for teenagers who always want to be in step with fashion. Why teenagers? Because they are the ones who lead an active nightlife and always want to have some fashion in their wardrobe.
In my country there are no technologies for recycling textile things and the incineration method is not applied. The only way to recycle used clothes is upcycling (translation from eng. - recycling, also known as creative reuse). Upcycling is the process of converting by-products, waste materials, unnecessary or unwanted products into new objects or products with better quality and environmental value. The most sustainable wardrobe is the one you already have!
Ideation & sketches
To begin with, let's define what is upciclyng.
“When you upcycle an item, you aren’t breaking down the materials. You may be refashioning it — like cutting a T-shirt into strips of yarn — but it’s still made of the same materials as when you started. Also, the upcycled item is typically better or the same quality as the original.” What is upcycling?
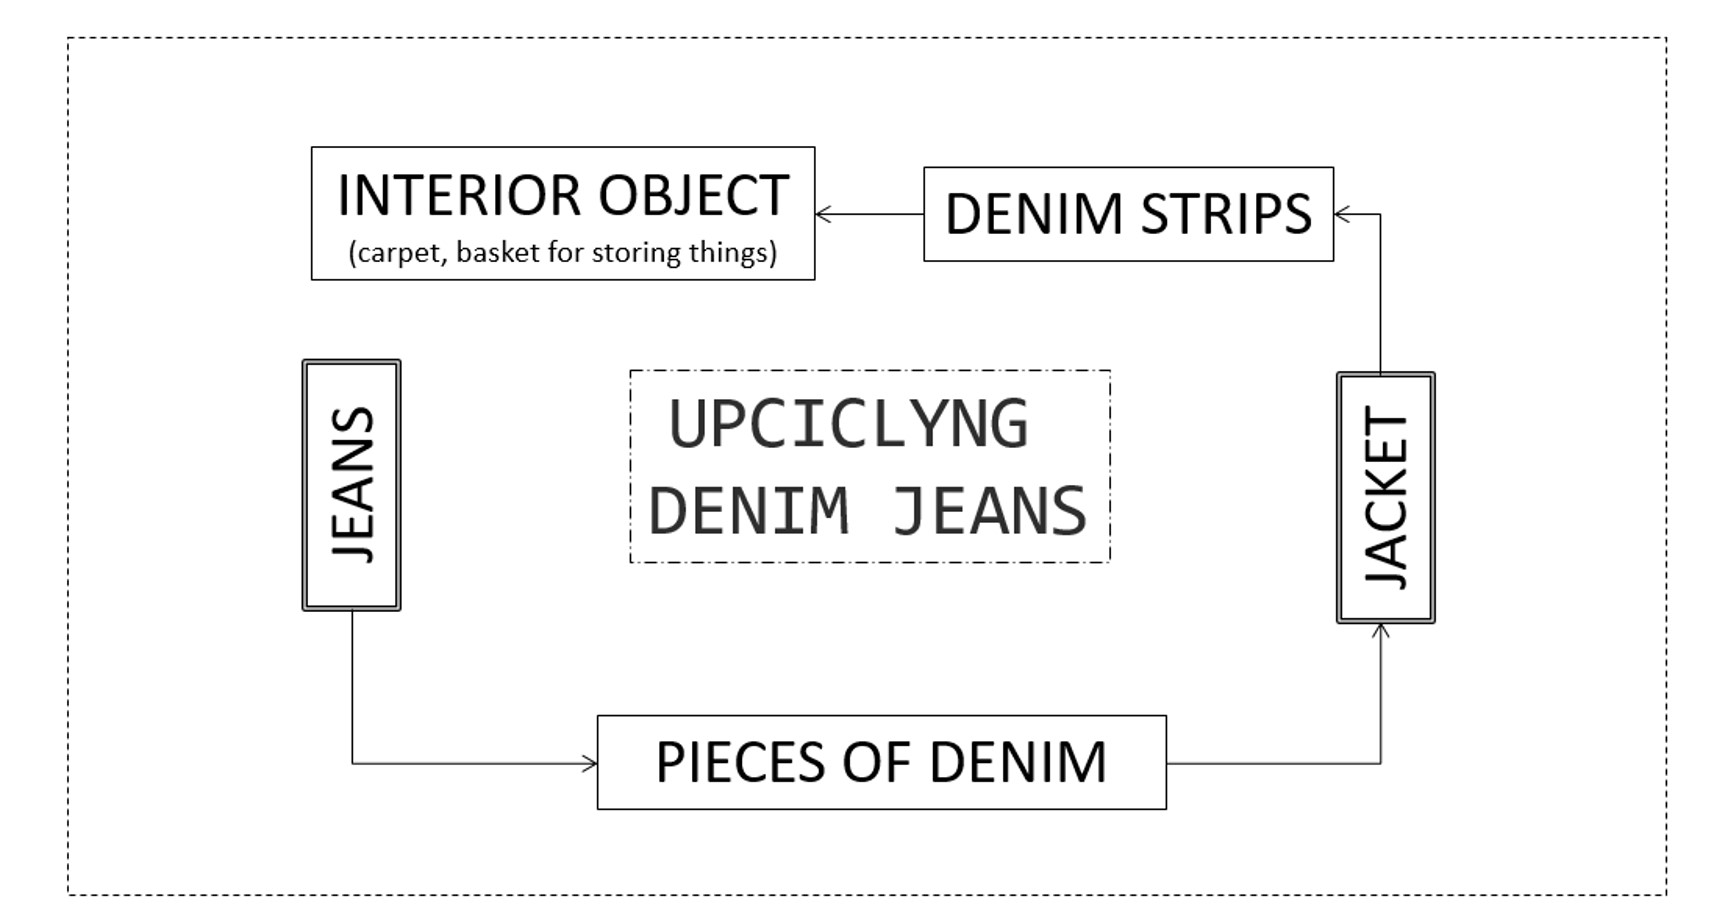
At this stage I thought about the upcycling process. Based on the ideas that appeared in my mind. I made the diagram of the upcycling process, as I propose to be implemented in my project.
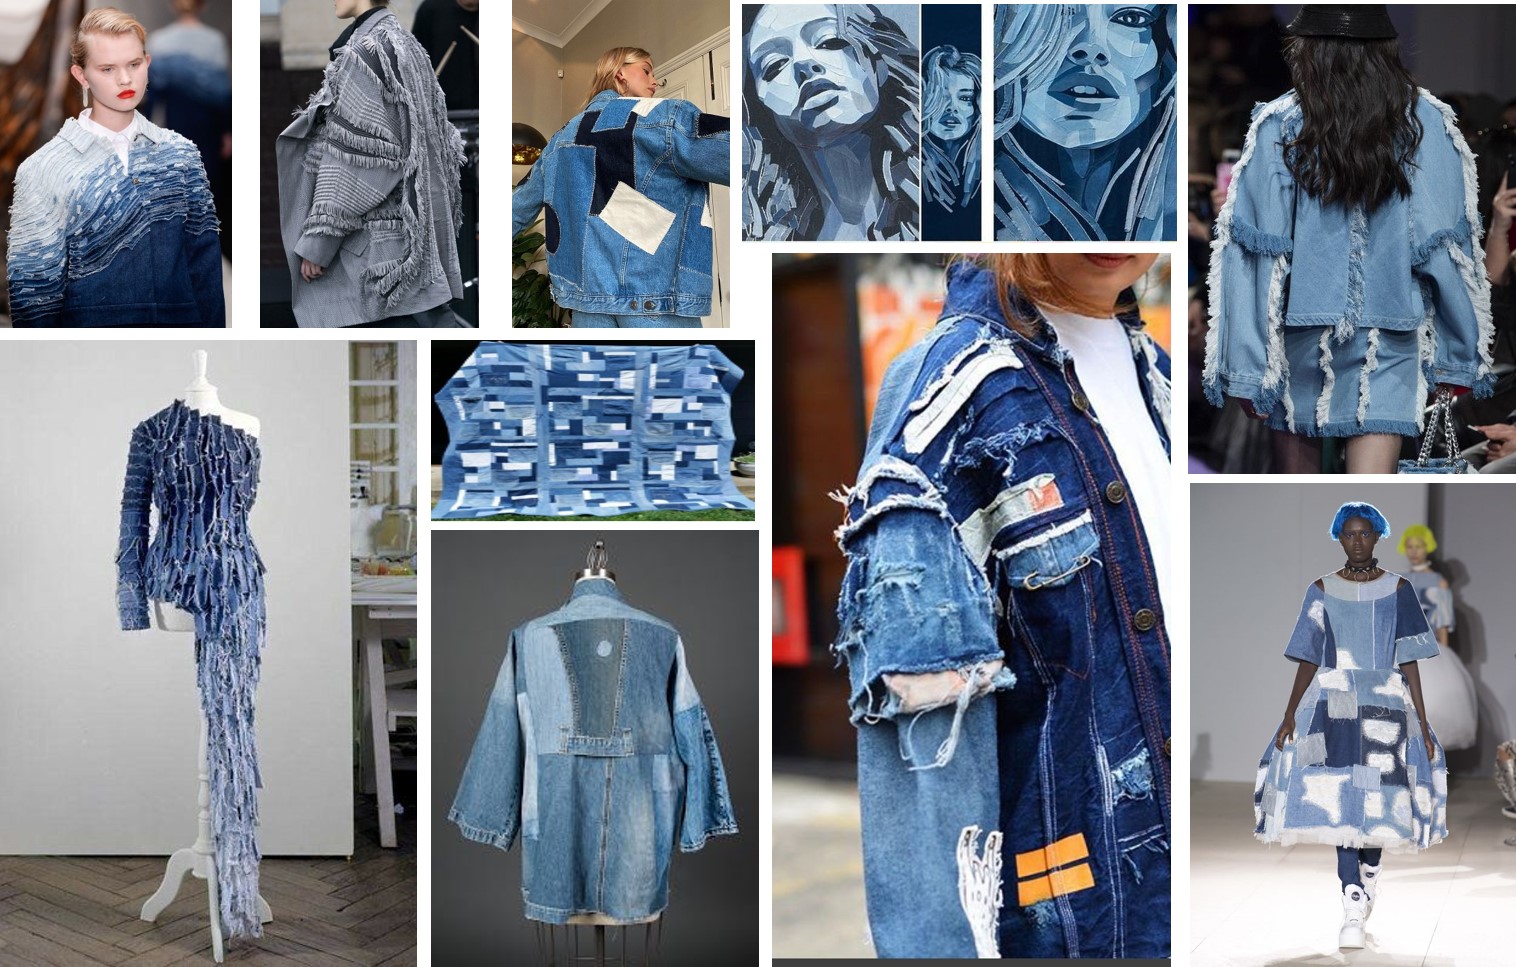
In search of ideas for the design of my project I turned to Pinterest.
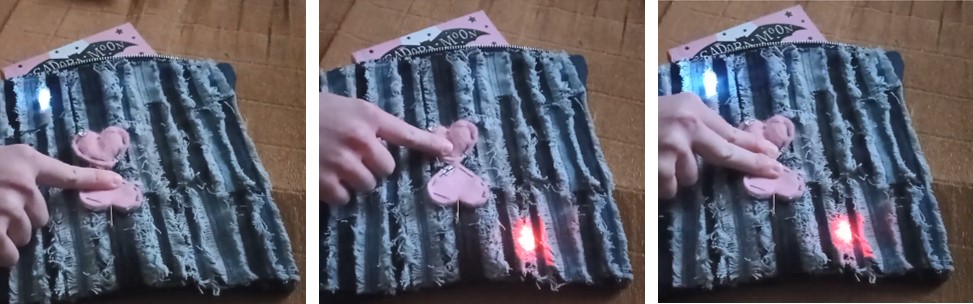
I was also inspired by this bag I made for e-textile week.
For the part of electrical circuits, the main source of inspiration is the final project of Final Project: Stitch Synth - Jessica Stanley
First sketches
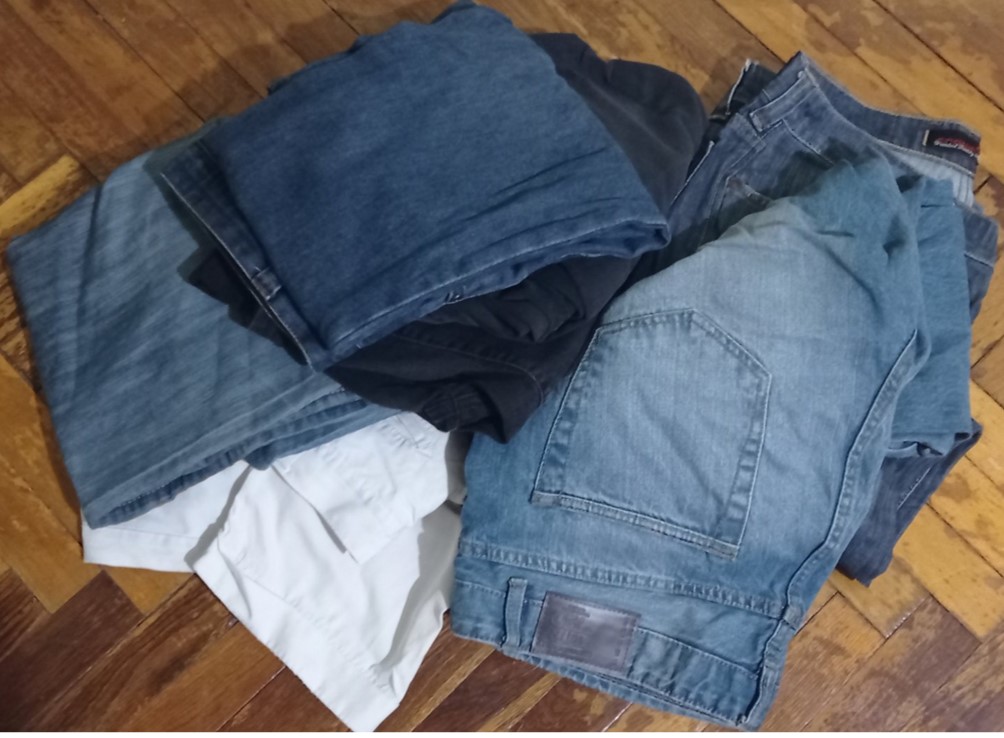
Collecting old jeans
At the same time as looking for ideas and sketches, I started a mini-company collecting old jeans. To this end, I contacted friends who have teenage children and urged them to become part of my project.
First real prototype
The manufacture of the first real prototype included the steps described below.
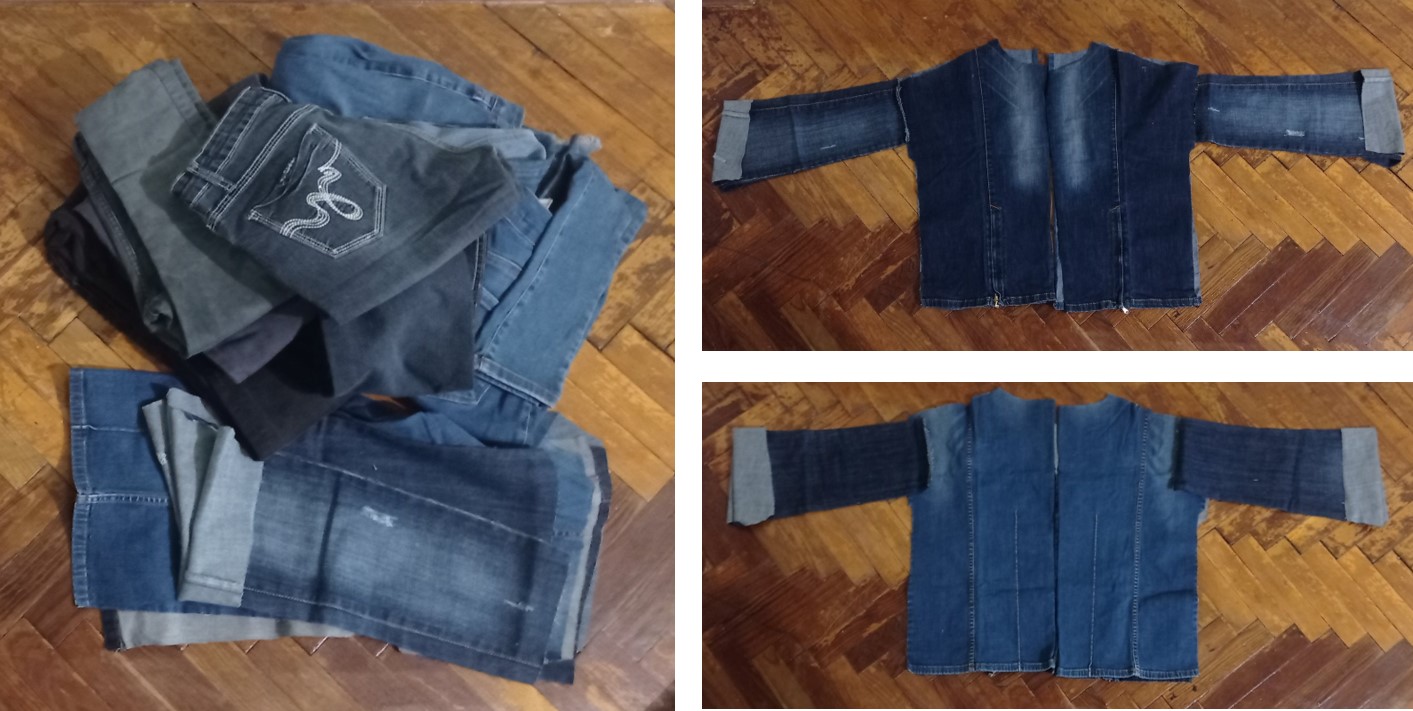
Selection/ preparation of jeans
To make this jacket (the first prototype), I used 3 pairs of jeans and some scraps of other jeans that were used for other projects.
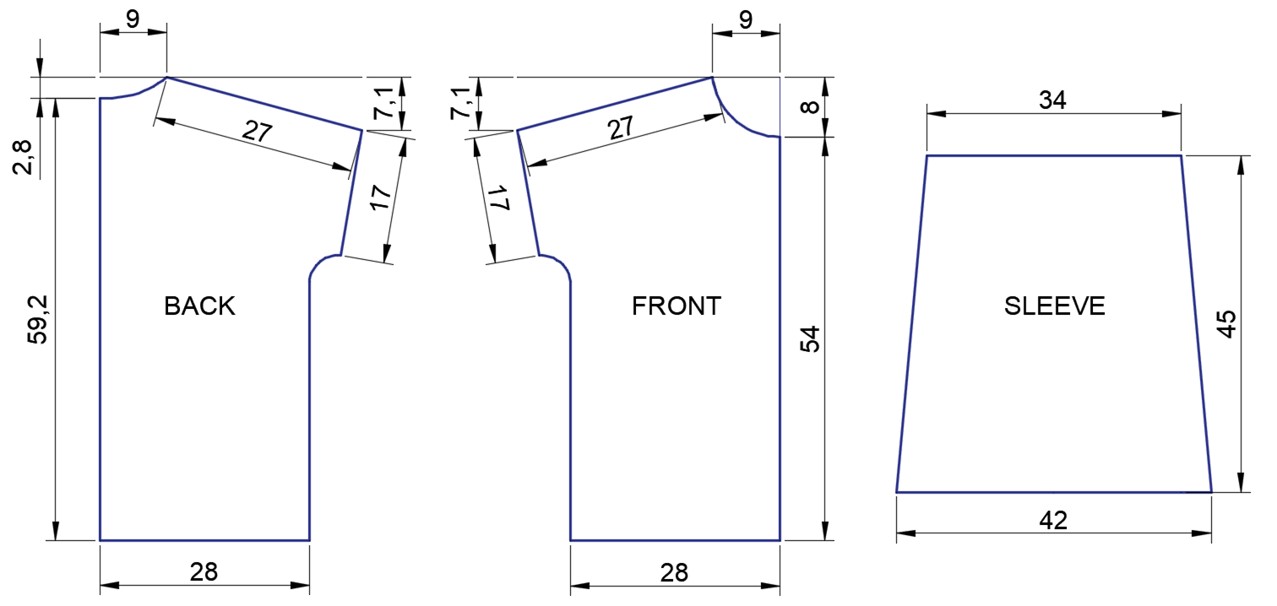
Tailoring
I tailor the jacket according to the following scheme.
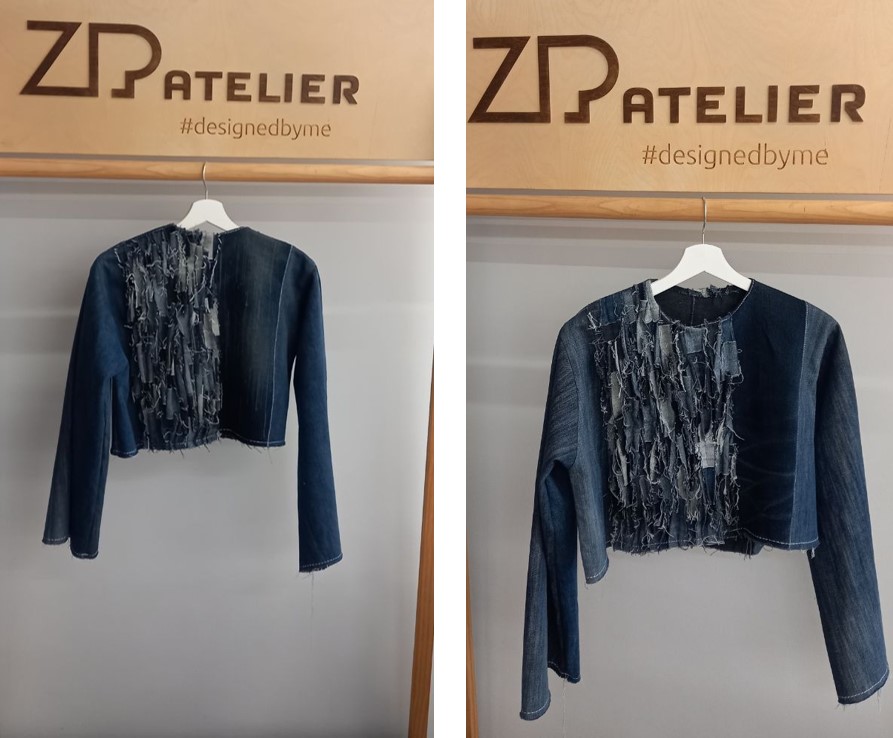
Create sample, assembly
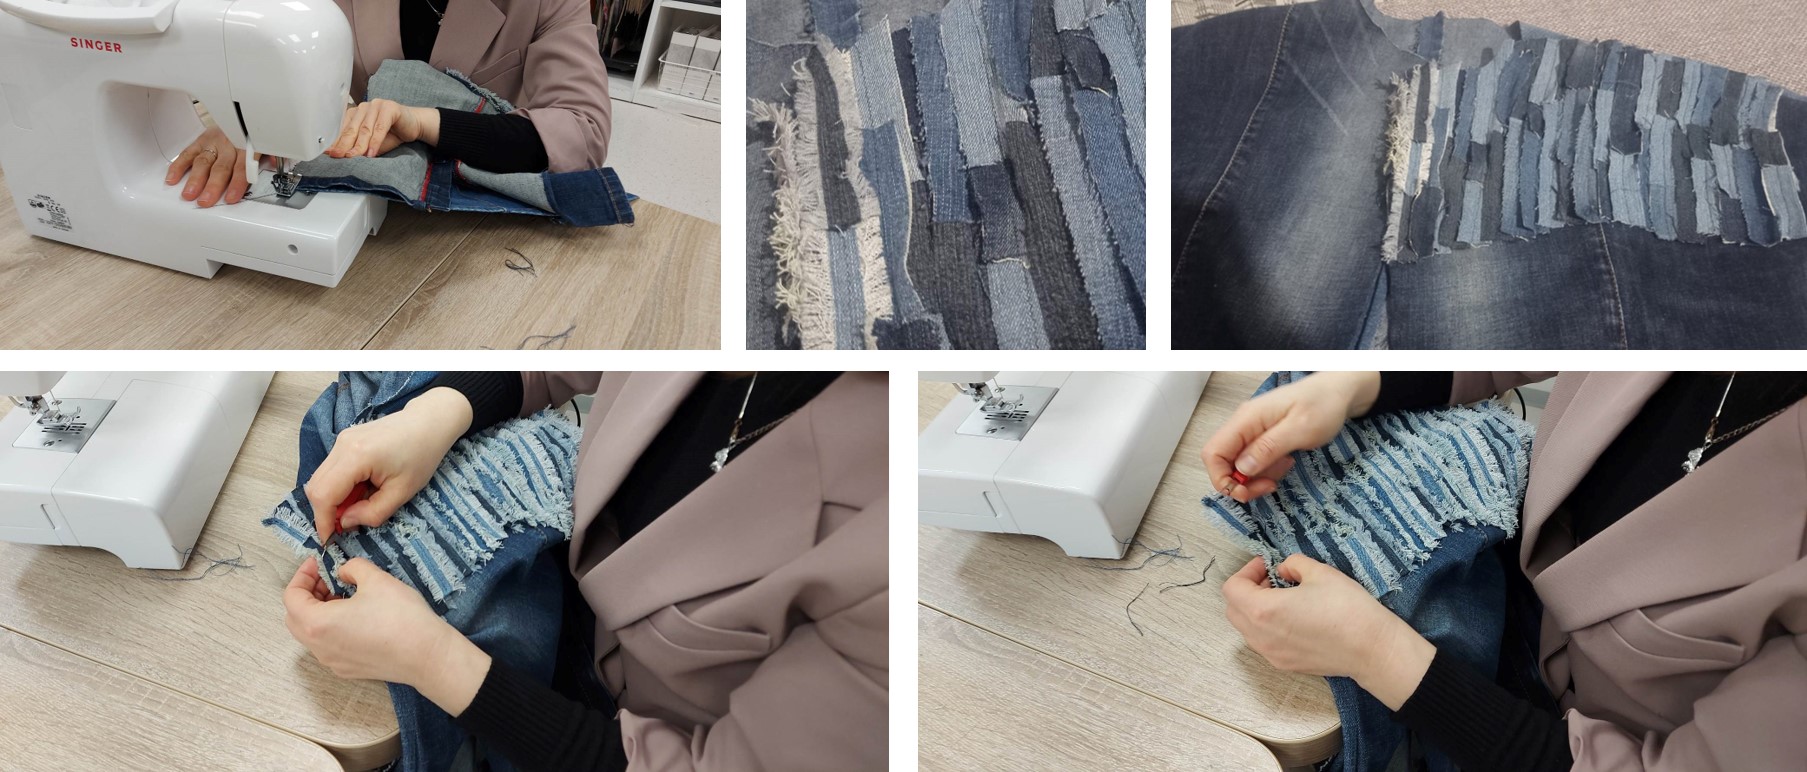
Landmarks were sewn to each other, after on the upper left side front I applied strips from scraps of jeans. After application, the strips from the remnants of jeans I unraveled. So I got a new bill where I'll hide the lights.
Denim is a material that unraveled very easily. In order not to become break-up a disadvantage, I considered capitalizing on this property.
The following picture shows the prototype obtained, at this stage without lights.
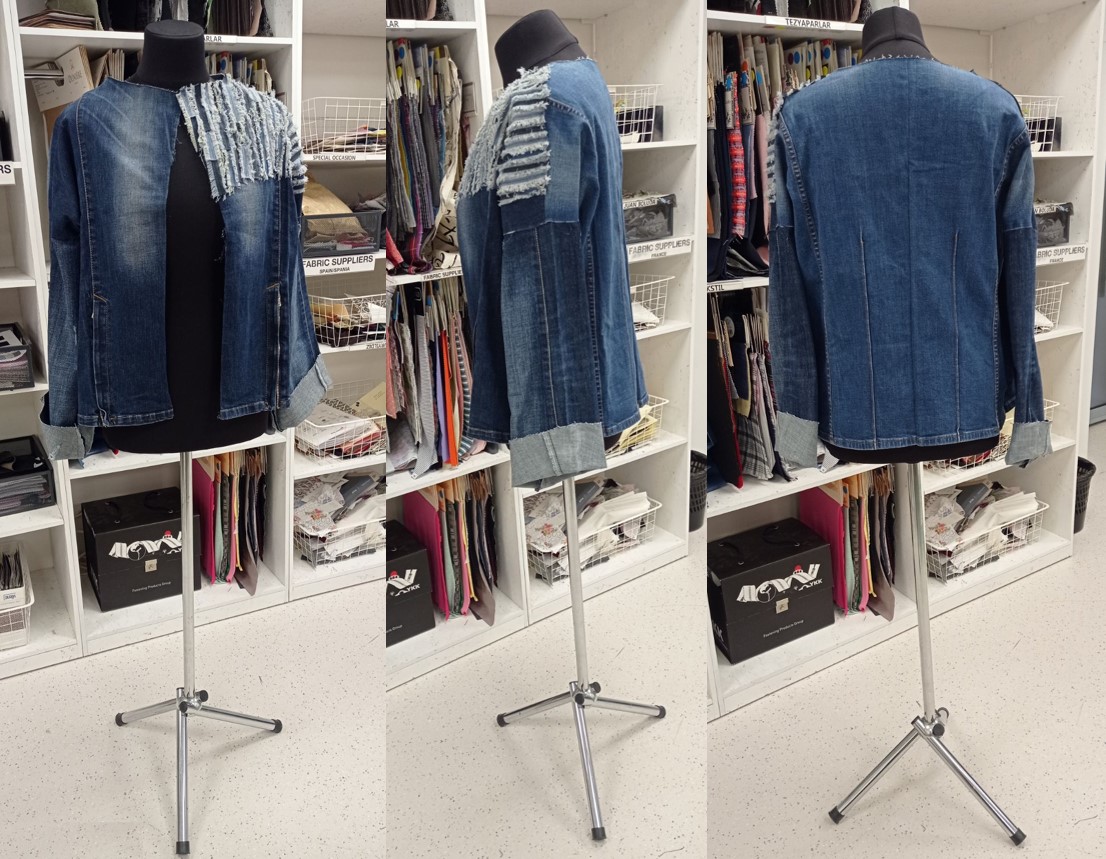
Circuit creation and integration in the created prototype
The next step in creating the first physical prototype was to create and integrate the circuit into the jacket.
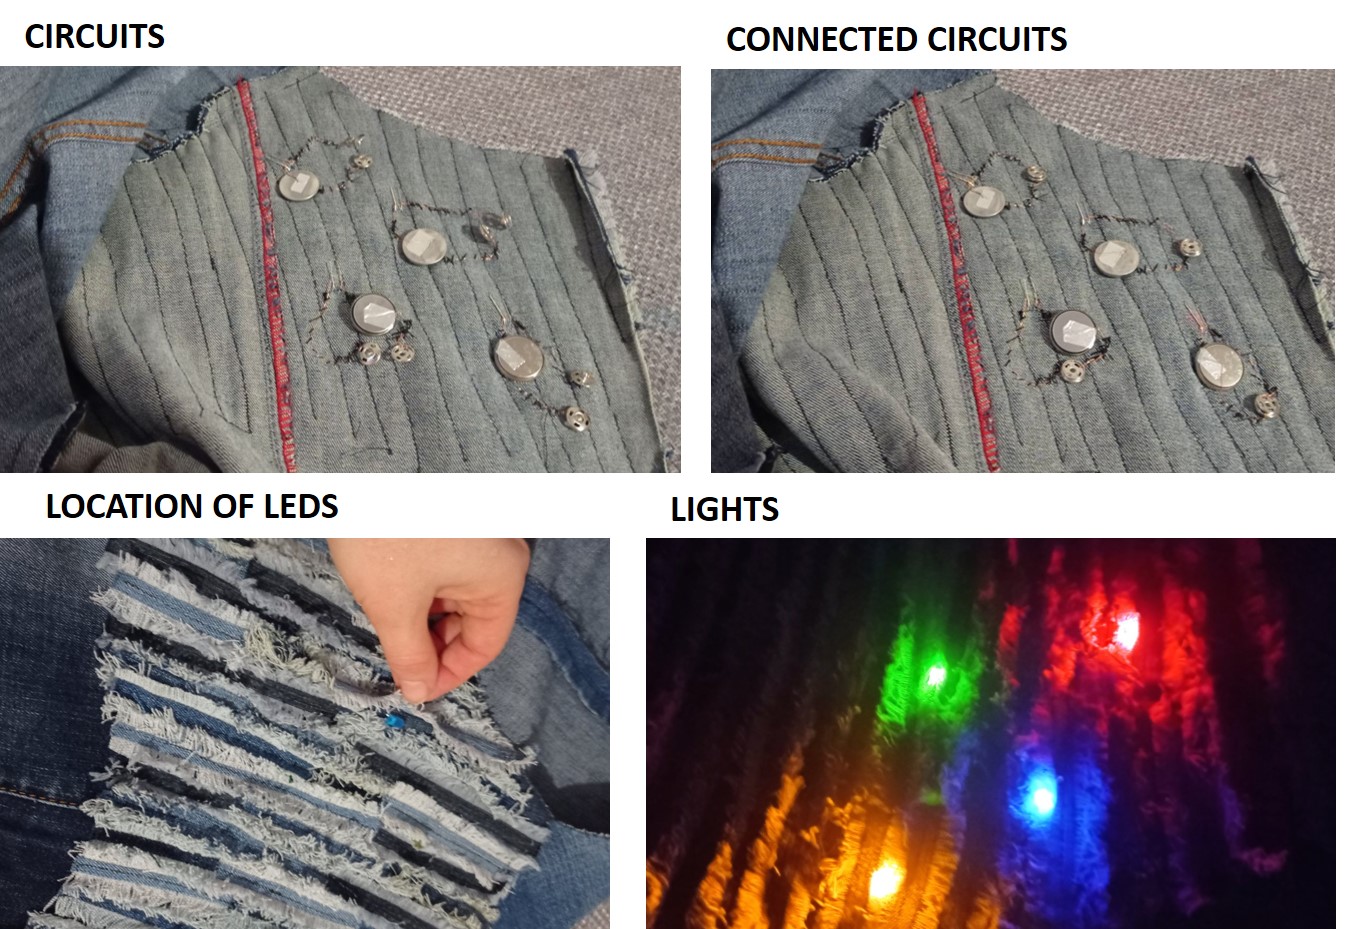
To realize the final idea, I need some materials that are not yet purchased. So at this time I made two simple circuits that I integrated into the jacket.
The placement of the LEDs and the integration of the circuit are shown in the following picture. In this example the connection of the circuit is made by means of staples (buttons).
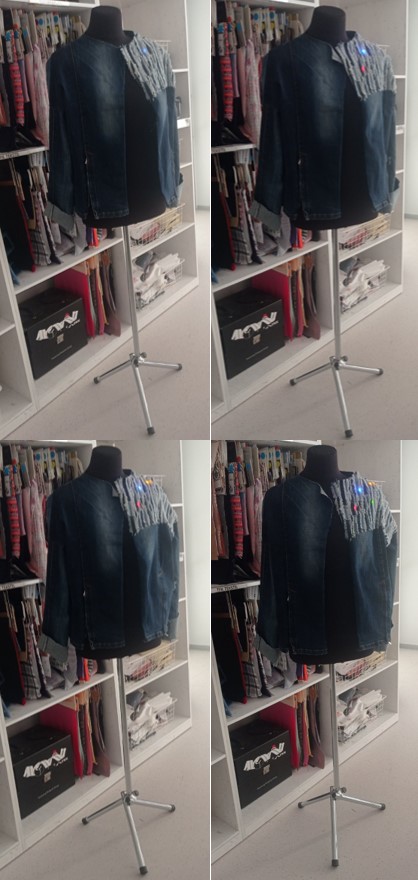
... and the final picture and video of the first physical prototype.
My conclusions for first prototype
- I tried to keep as many stitches as possible from the jeans used, but for more interesting design I will develop the idea of using smaller pieces and new stitches.
- I'll try other samples of new surfaces.
- The created and integrated circuit is just an example to make my idea understood. For the final prototype, I intend to create a light-sensitive circuit that will shine brighter when it gets darker outside.
In search of the final concept idea
In search of the final design of my project idea I drew 2 of the sketches I had in mind.
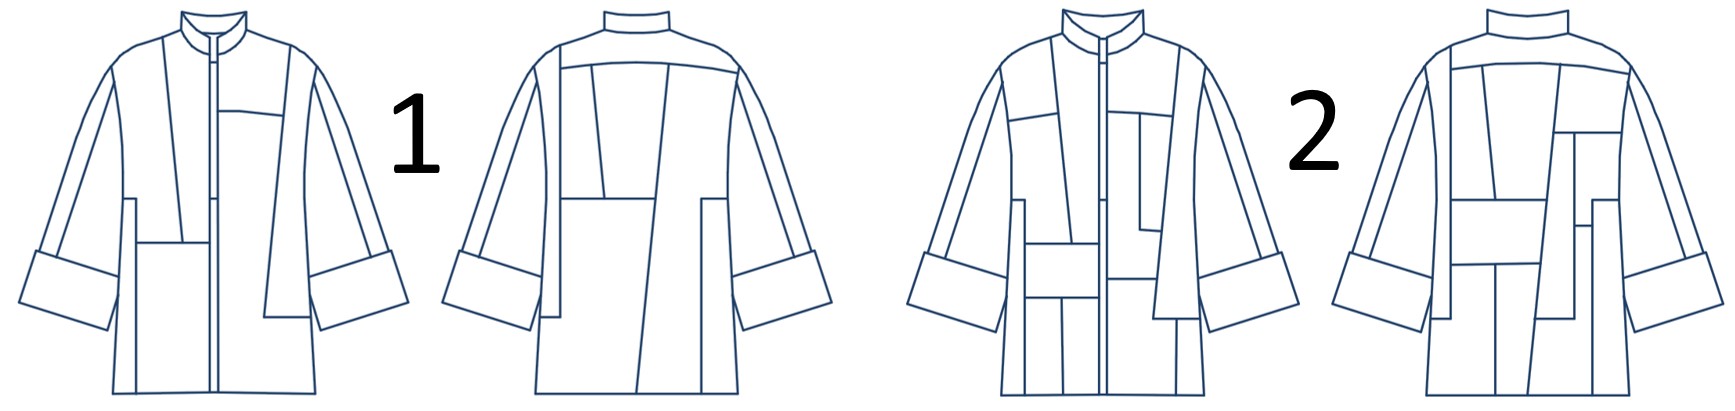
Consulting with colleagues, designers, I decided to make as the final prototype model 2. For this I made the technical drawing without detachable parts, as well as the technical drawing in color.
3 D simulation
I made the selected model for simulation and construction of the pattern in CLO 3 D software.
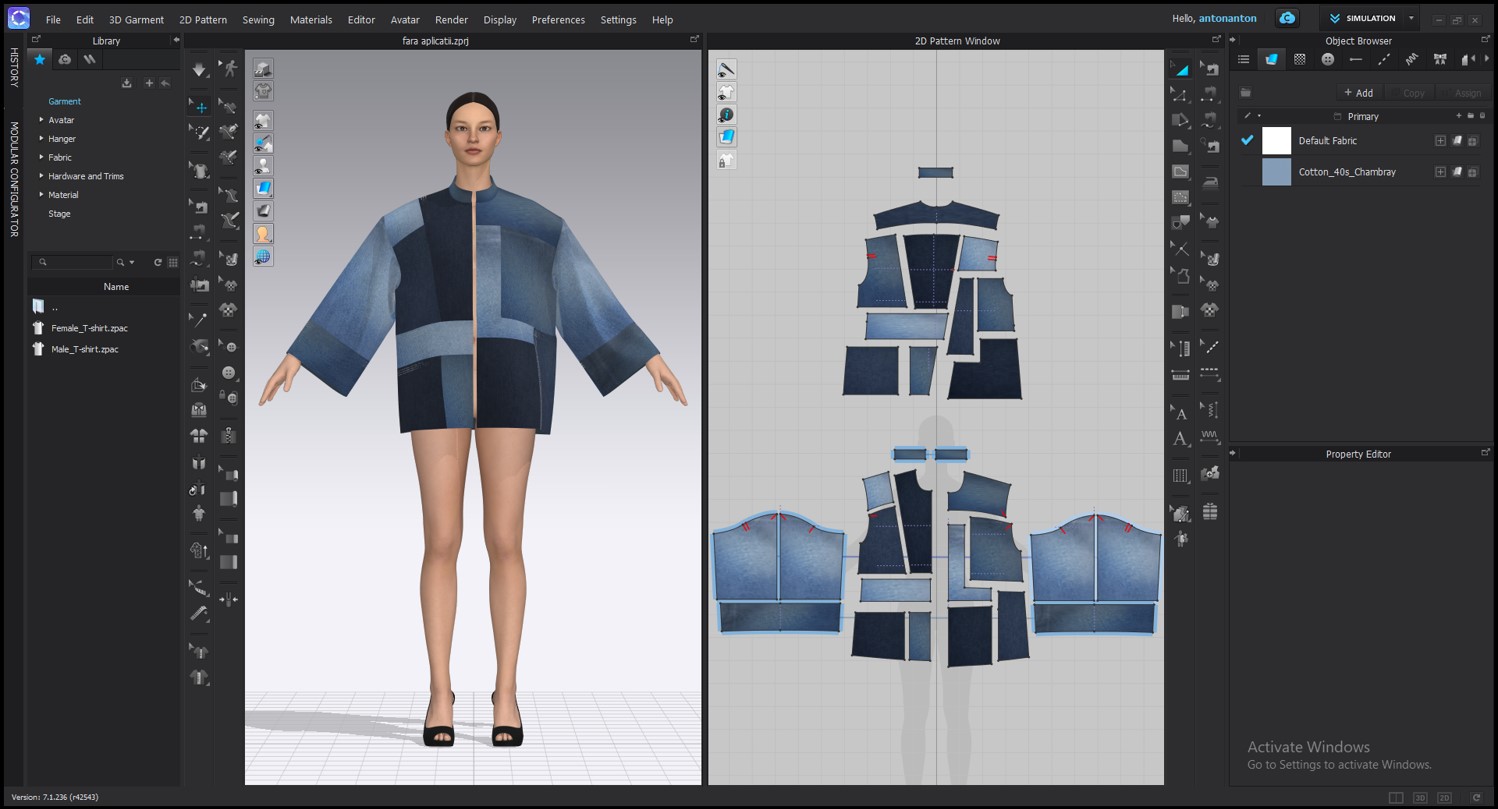
Now I have the pattern exactly ready for the tailoring stage.
Initially I designed the pattern and determined exactly the place of the dividing lines according to the pattern. Next I designed the detachable parts. Removable parts will be fixed to the product by snaps buttons. In the detachable parts I will integrate the circuit. The last snap buton will act as a switch button.
Mentoring notes
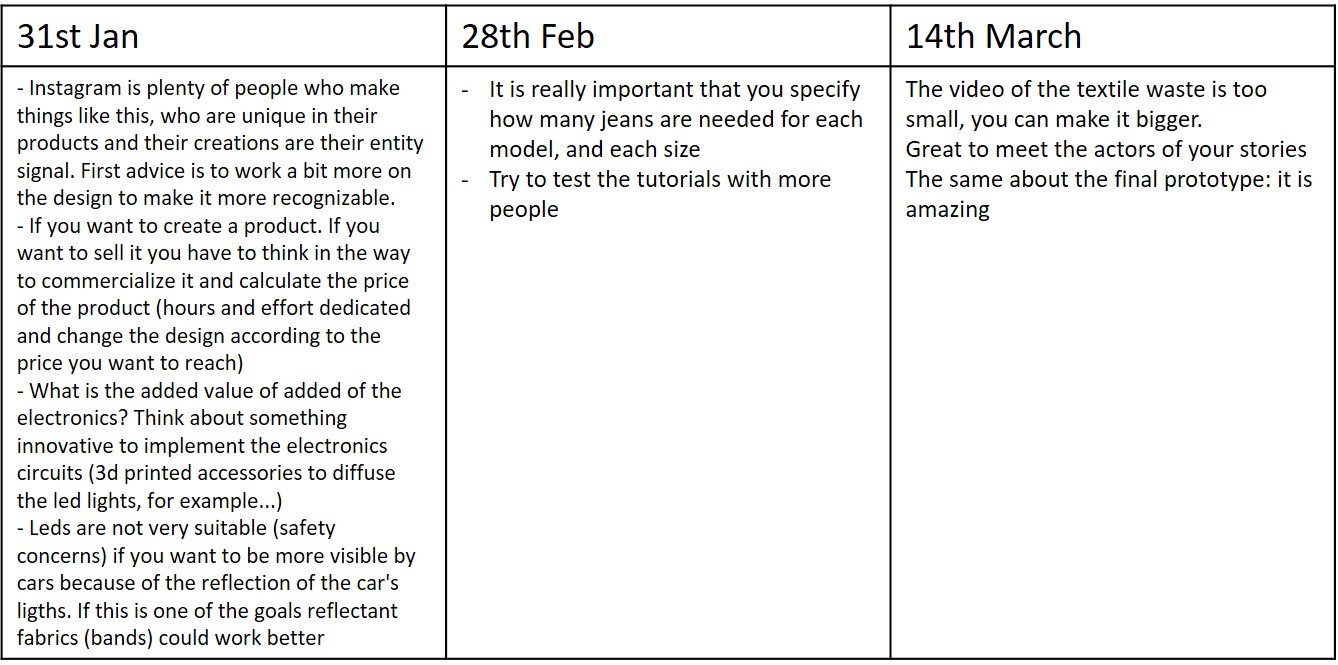
After the presentation of the project idea
MENTORING GROUPS with Nuria Robles and Zoe Romano
Development of the final project idea
After the mentoring session from January 31, I reanalysed the idea and I decided to change the concept of my project. E-textiles do not add value to a sustainable clothing product, only add additional costs. This makes a sustainable product expensive and unaffordable for future wearers. So I will present my project as it is now unfolding and the progress on this project.
My project is organized according to the principle of co-design. Co-design is a design-led process that uses creative and participatory methods.
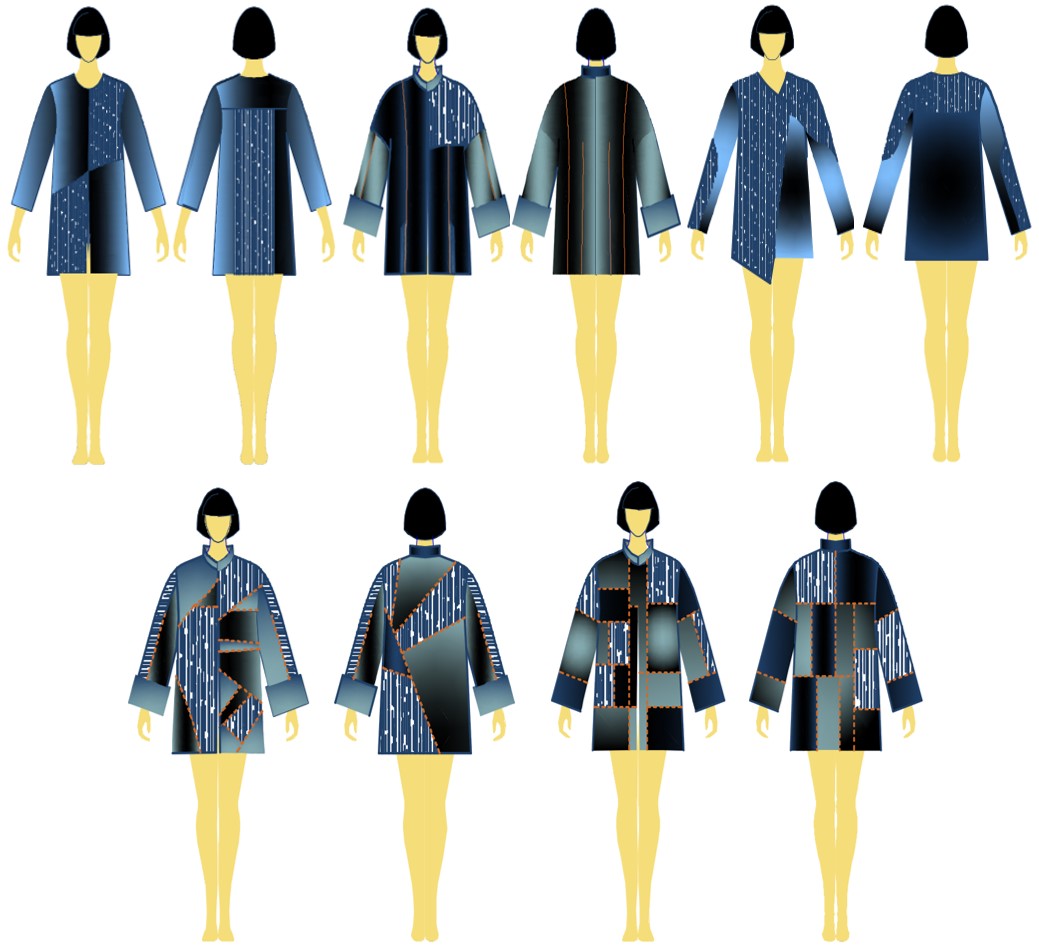
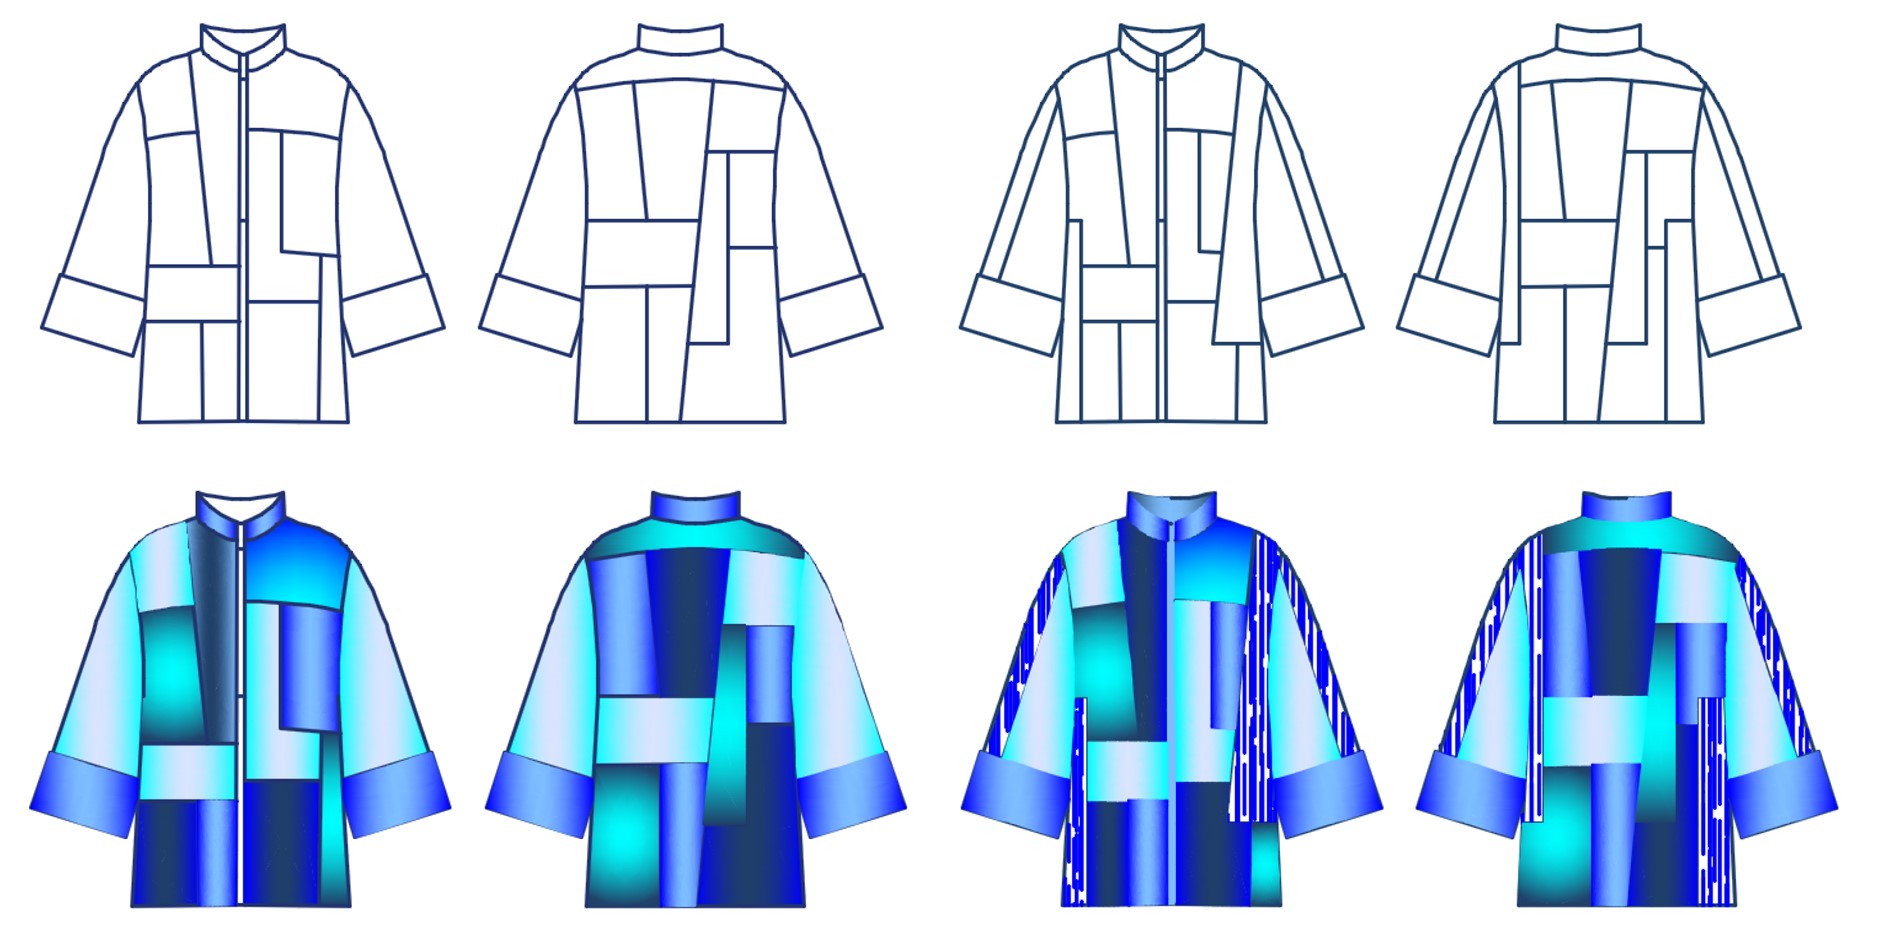
In parallel with the project partner search stage I developed the catalog according to the modular design principle. I drew some patterns of the front, back, sleeves and collars.
Design by Aliona Raru
In the video below you can see how together with the future beneficiary we establish the model, selecting the product elements from the catalog created by me previously.
In the case of the first beneficiary, but also for the following beneficiaries, I will make the 3D prototyping. so the future wearer can see exactly what the garment will look like on their individual body. Also in Clo 3D I realize the patterns.
3D prototyping includes:
-
Avatar customization (by wearable sizes).
-
Pattern construction.
-
Assembling details.
-
Checking the positioning of the garment product.
-
Texture placement on the fabric.
-
Designed clothing product simulation.
How to achieve 3D prototyping you can see in the video what follows.
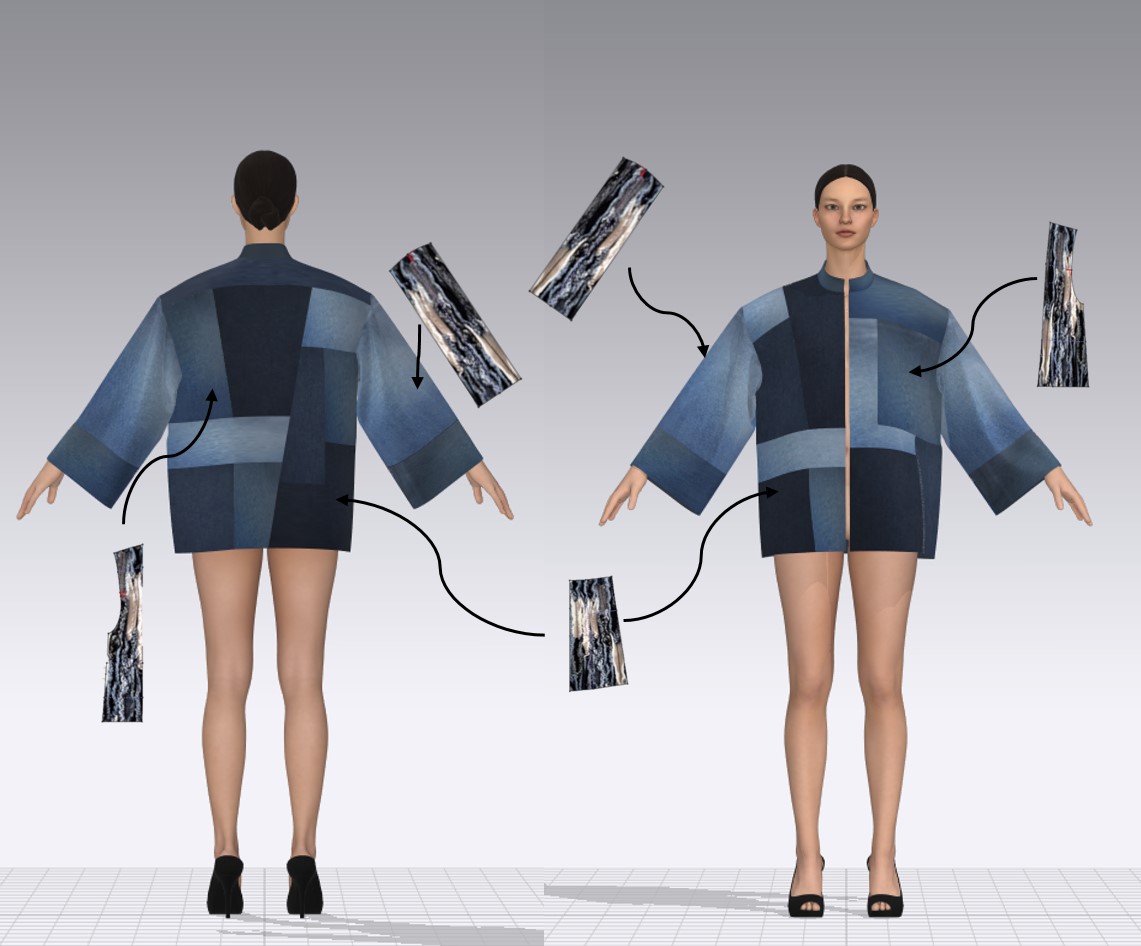
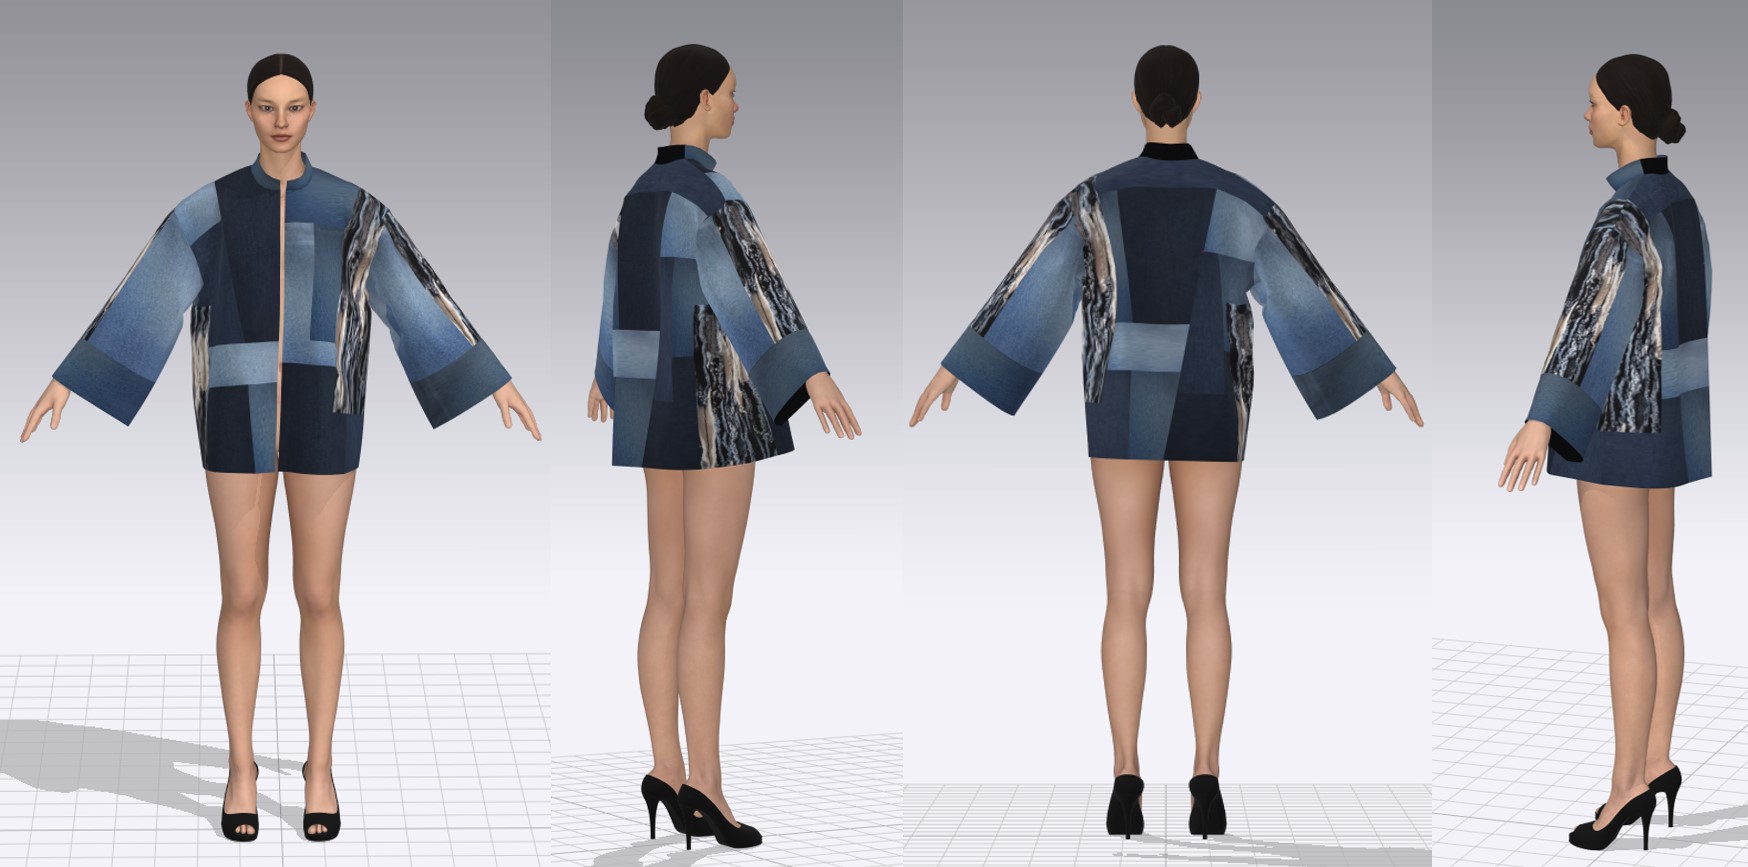
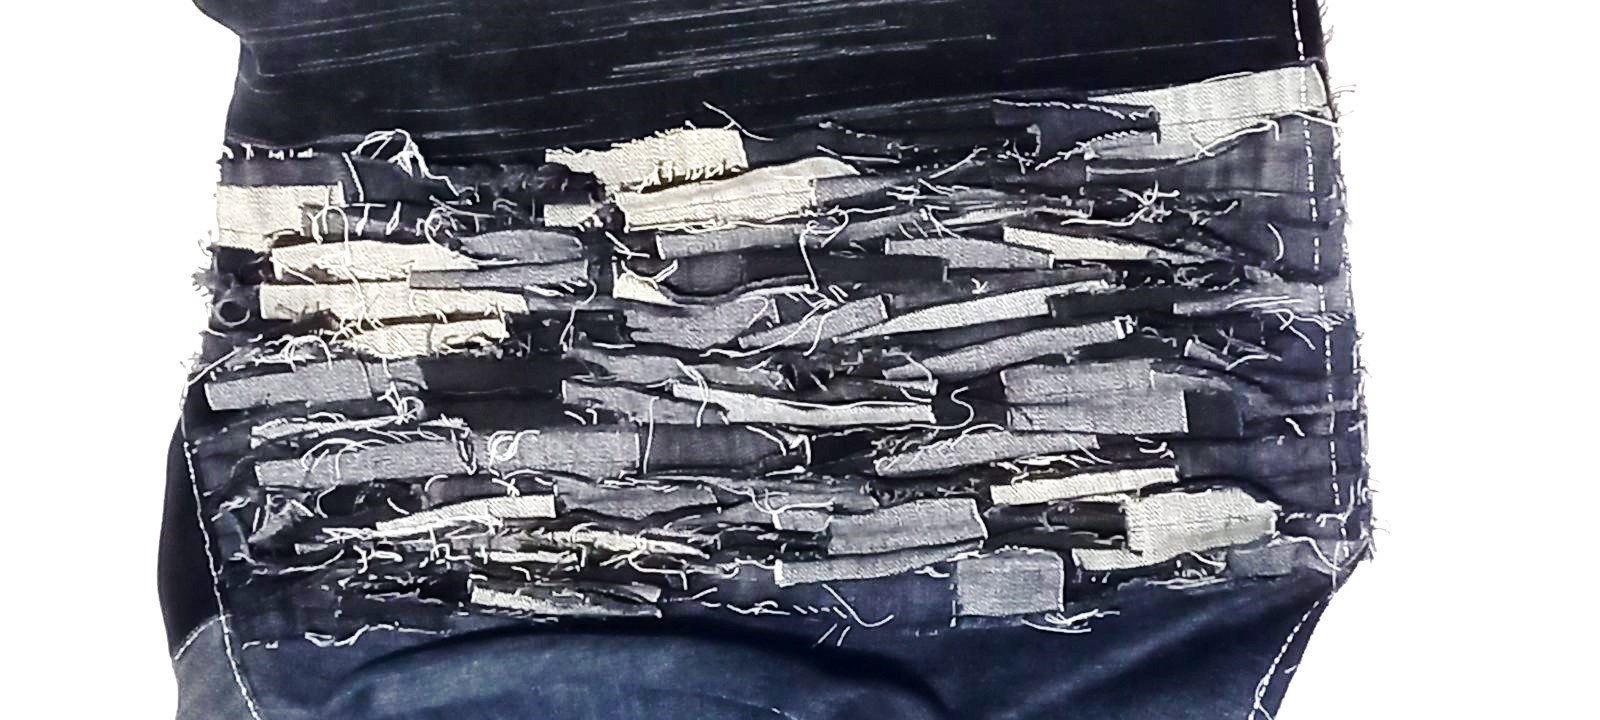
This model, is customized as the beneficiary wanted, through applications from scraps from the jeans used on the back and front. On the back, we also have a light decor - laser engraving.
The laser engraving process was a fascinating one. The settings are shown in the following image.
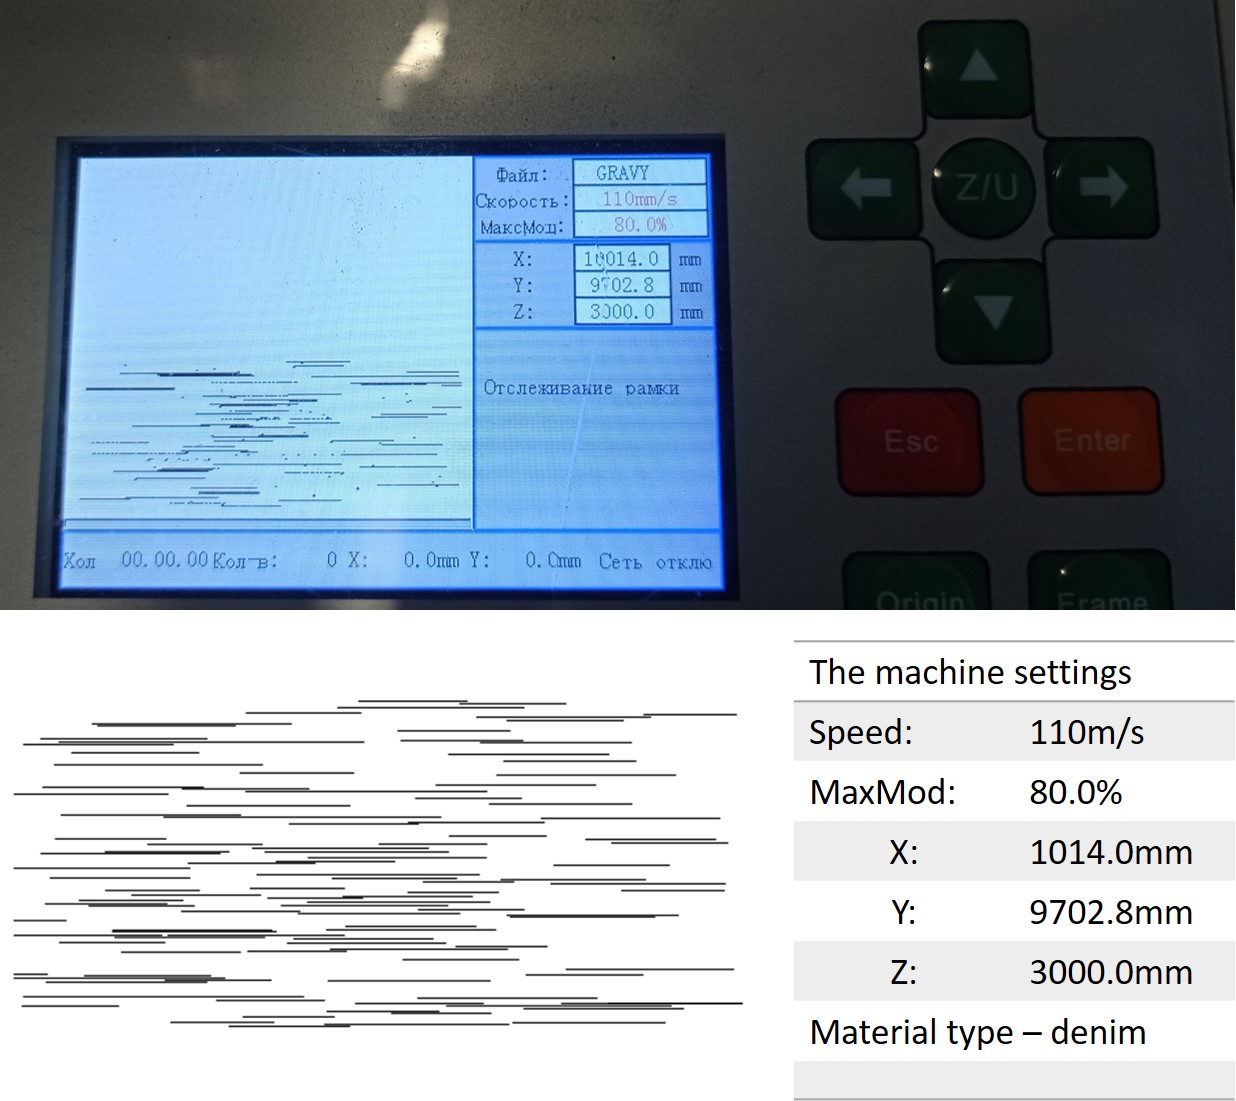
Laser engraving have the concern of giving an interesting aspect to the back of the jacket.
During the sawing and assembling, we decide to save the scraps of remained jeans and to made and abstract decor. The result was as expected!
Other steps that were followed to achieve the final prototype:
-
Pattern & basic details - prepare jeans for tailoring and tailoring.
-
Assembling the details of the front and back - overlay face-to-face details; assembling the details and process the edges; iron the accomplished seam; apply a decorative seam, at a distance of 1-2 mm from the edge of the seam.
-
Assembly of jacket parts - applying sleeves to the jacket; assembling the jacket on the upper lines (shoulder lines and upper sleeves lines); assembling the jacket on the side lines and lower lines of the sleeve.
-
Closing system - the locking system is of a hidden type; the reserve of the left side of the locking system is fixed with two snaps with a diameter of 0.5 cm; to close the product, on the inner edge of the fastener (front left and front right) we sew 3 snaps with a diameter of 0.8 cm.
-
Dress and wear.
In the aim of promoting my idea, I made an Instagram page where I post stories from the lab and tutorials of the model @_friendlyfashion
Half-fabrication file
-
File: pattern first prototype ↩