5. E-textiles
In this week textiles interfere with physical laws. And if I thought I wouldn't need to know how to make an electrical circuit, now I had to remember, to learn.
Research
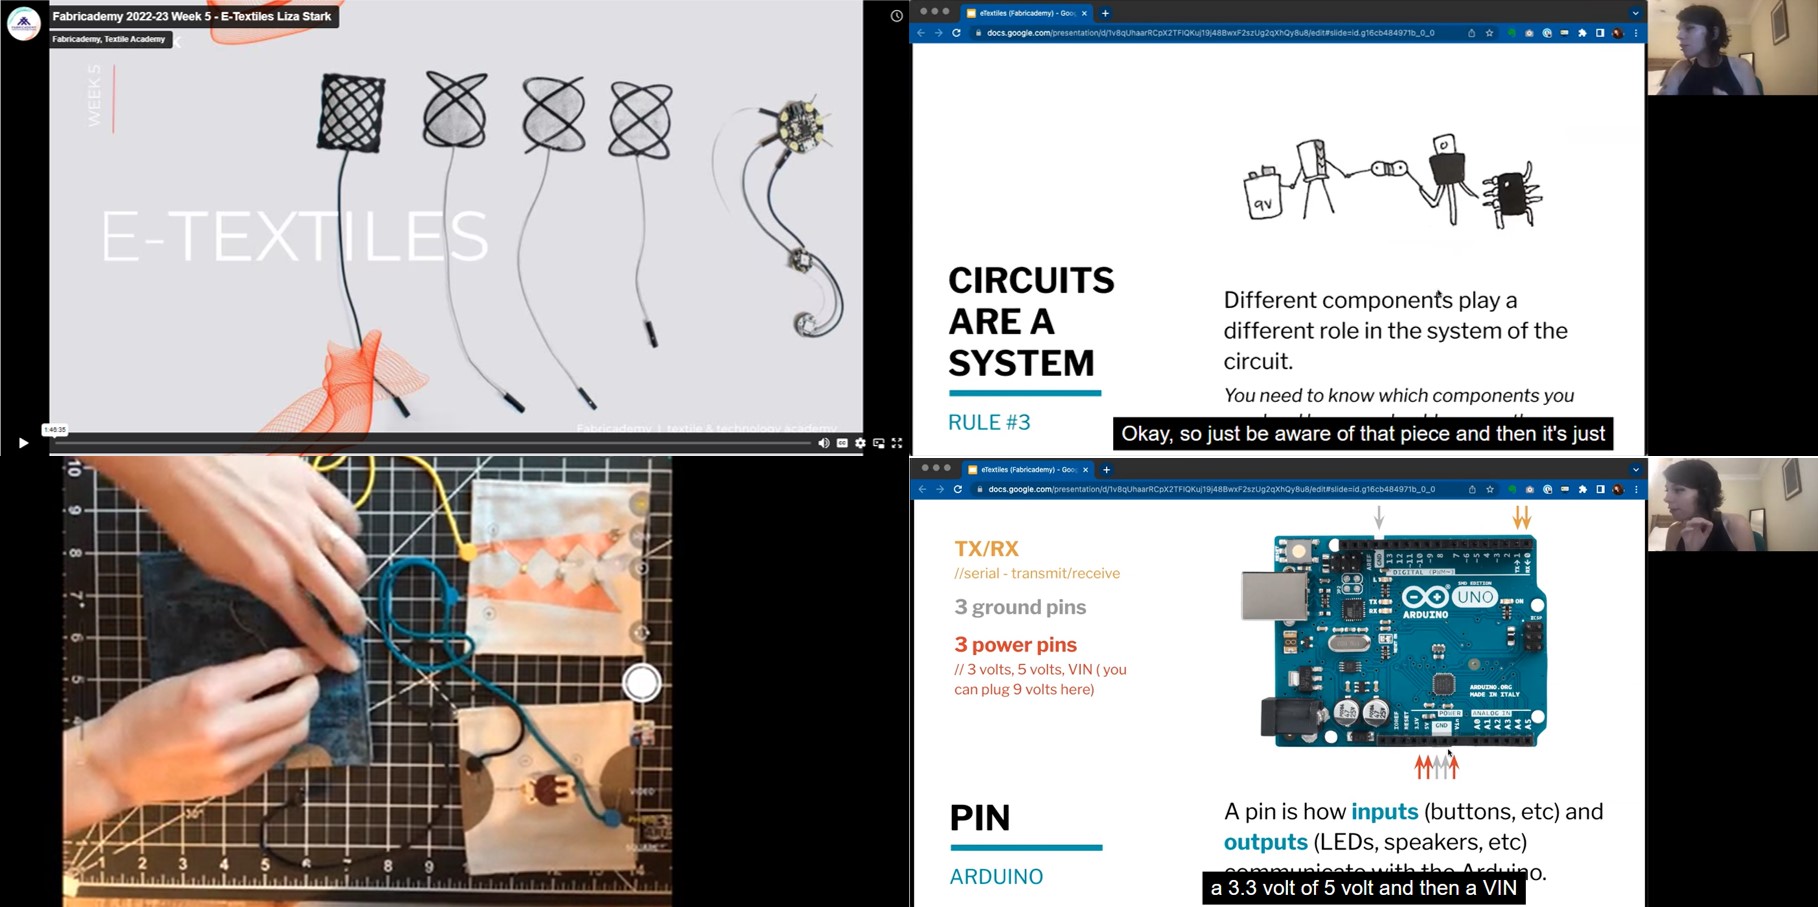
The week beggin with a lecture on e-textiles delivered by Lisa Stark.
Next I search information for the construction of the electrical circuit.
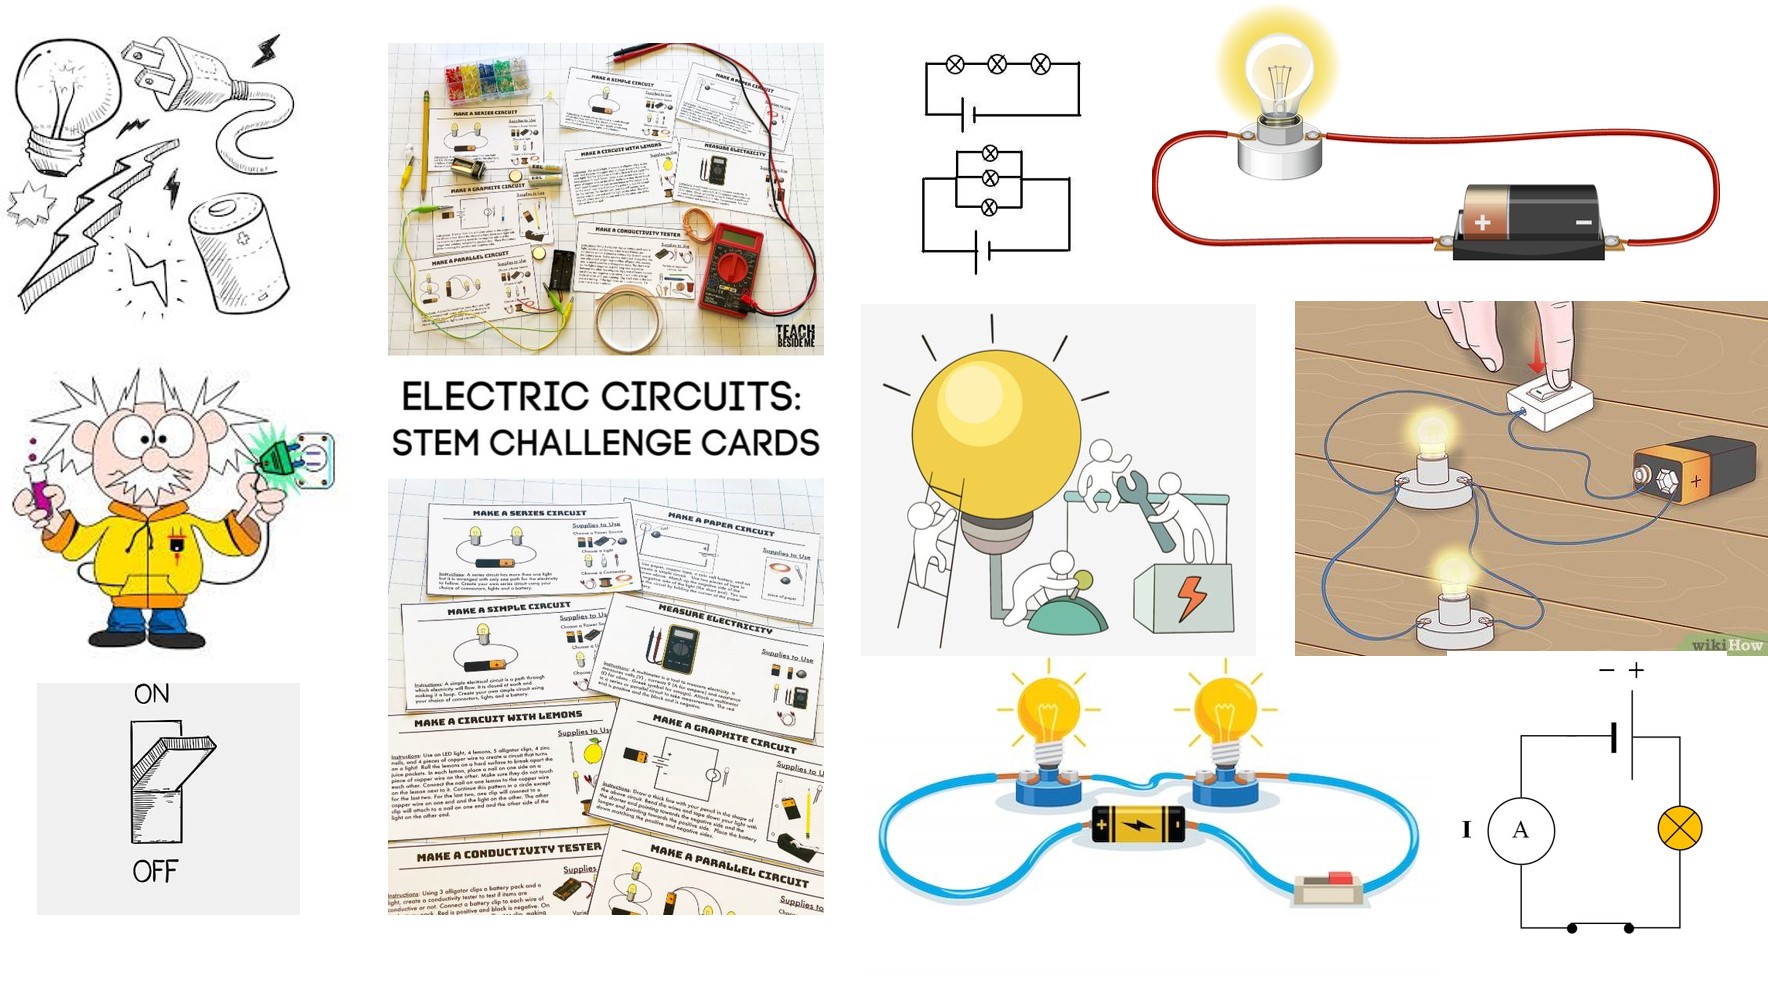
Electric circuit, path for transmitting electric current. An electric circuit includes a device that gives energy to the charged particles constituting the current, such as a battery or a generator; devices that use current, such as lamps, electric motors, or computers; and the connecting wires or transmission lines. Two of the basic laws that mathematically describe the performance of electric circuits are Ohm’s law and Kirchhoff’s rules.
Electronic textiles (e-textiles) involves the combination of electronics and textiles to form "smart" textile products.
References & Inspiration
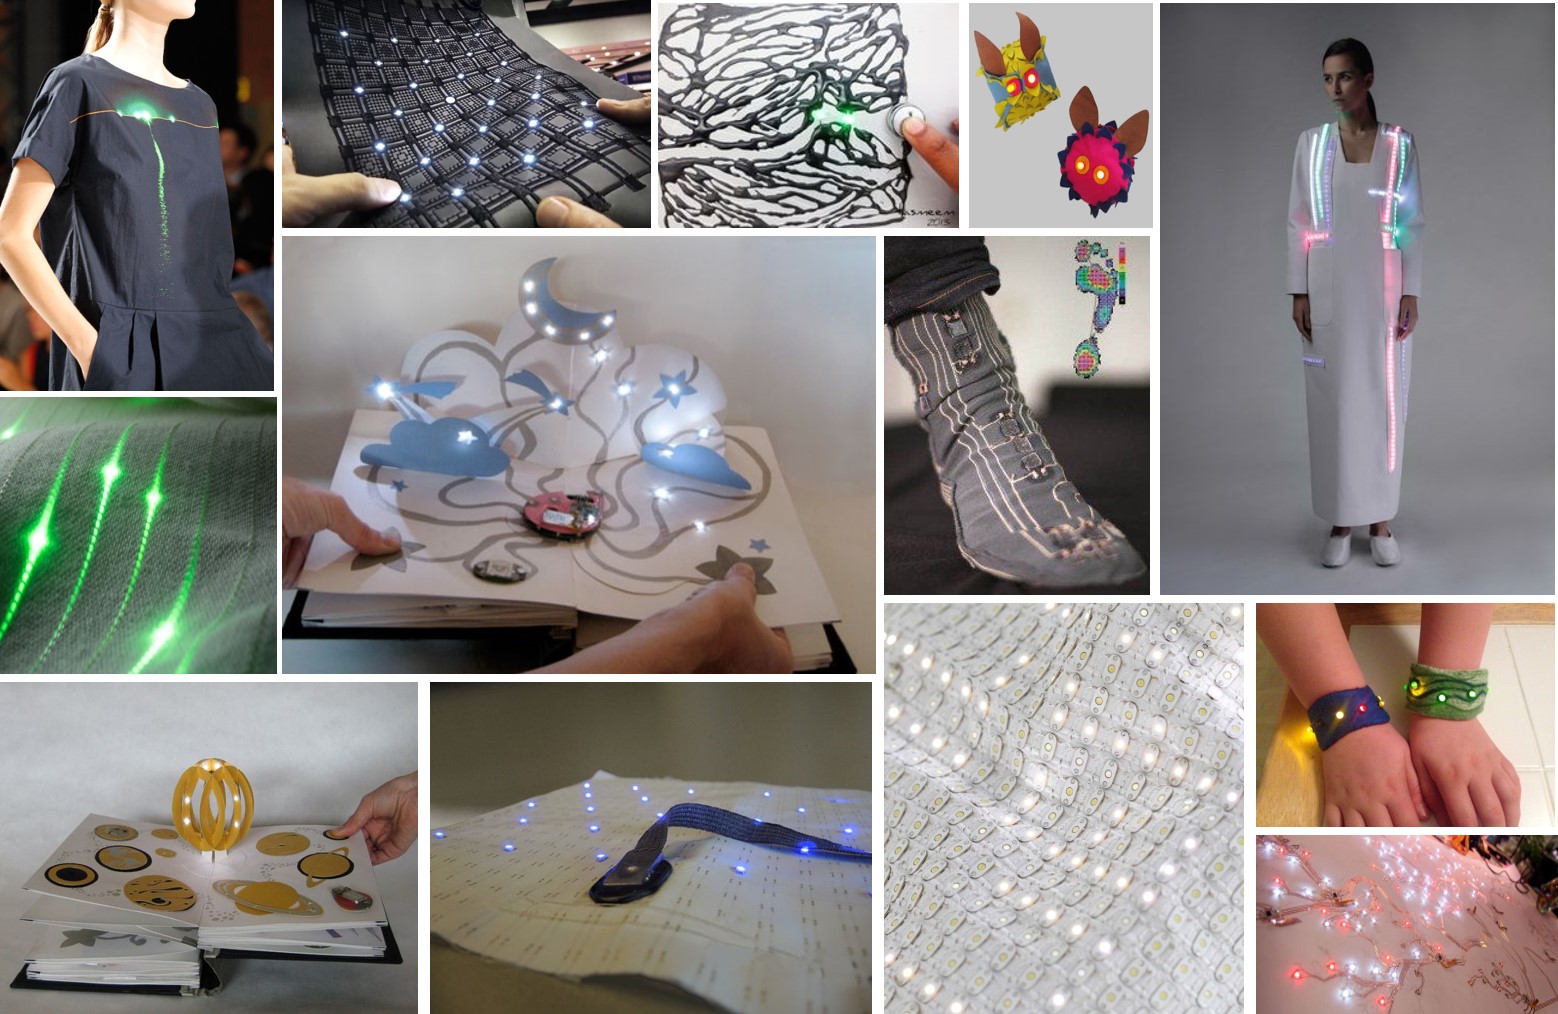
Searches continued with watching of tutorials from last year about E-textiles and searches on Pinterest.
Process and workflow
As being a part of ZIPHOUSE team, I participate at the creation of circuites, their testing and the creation of codes.
Helped by our local microlab instructor, together with the team we have completed the tasks for this week.
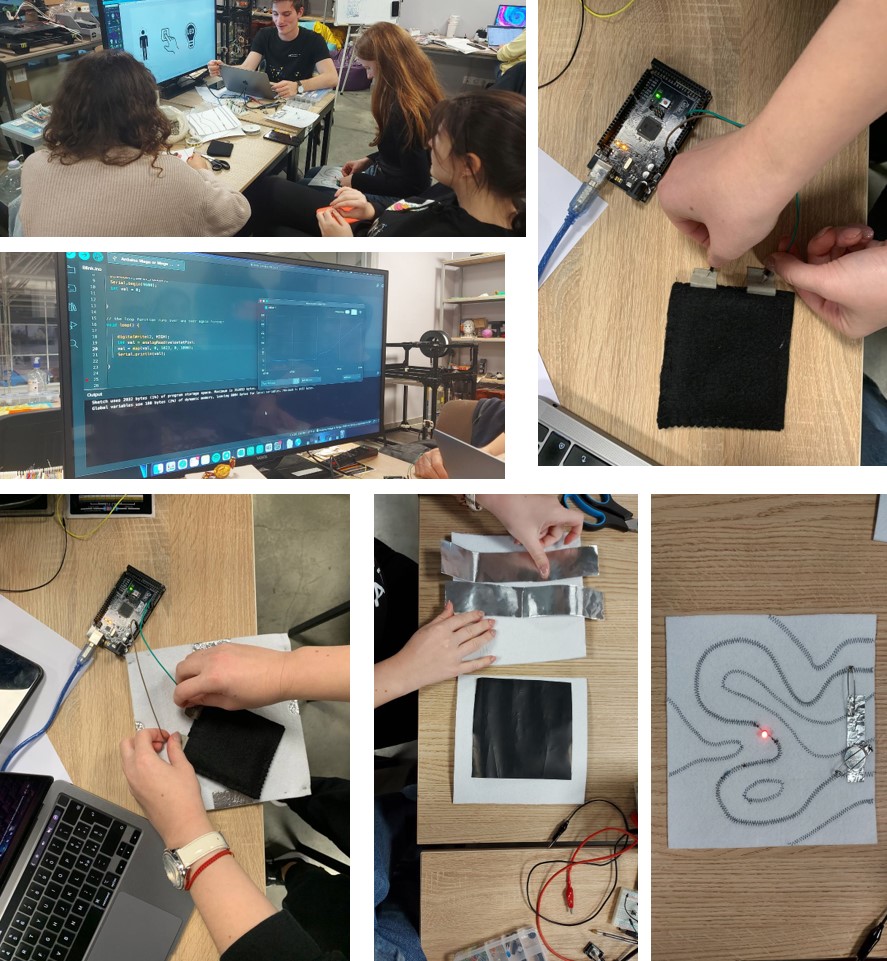
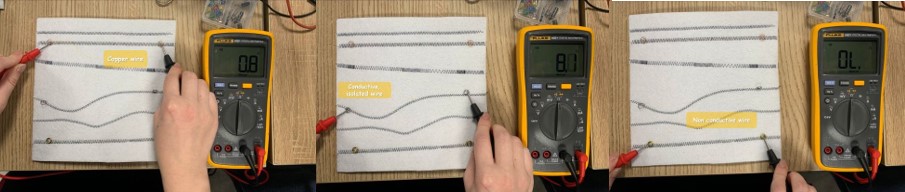
Testing different material and wires, because we didn't have the conductive thread so we had to substitute it with other materials.
Create a basic circuit usig the led and the breadbord. after that we connected it to the arduino and then created the nececery code.
Thank you Valentina Frunze for the collage of pictures. Valentina Frunze
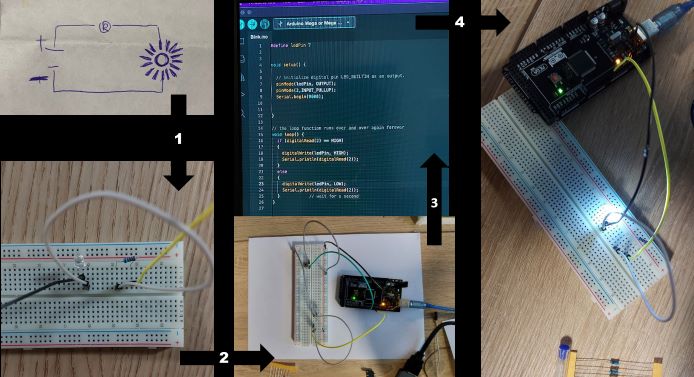
Follow code on the example of Arduino and led
#define ledPin 7


void setup() {

   // initialize digital pin LED_BUILTIN as an output.
   pinMode(ledPin, OUTPUT);
   pinMode(2,INPUT_PULLUP);
   Serial.begin(9600);


}

// the loop function runs over and over again forever
void loop() {
   if (digitalRead(2) == HIGH);
   {
     digitalWrite(ledPin, HIGH);
     Serial.println(digitalRead(2));
  }
  else
  }
     digitalWrite(ledPin, LOW);
     Serial.println(digitalRead(2));
  }
}
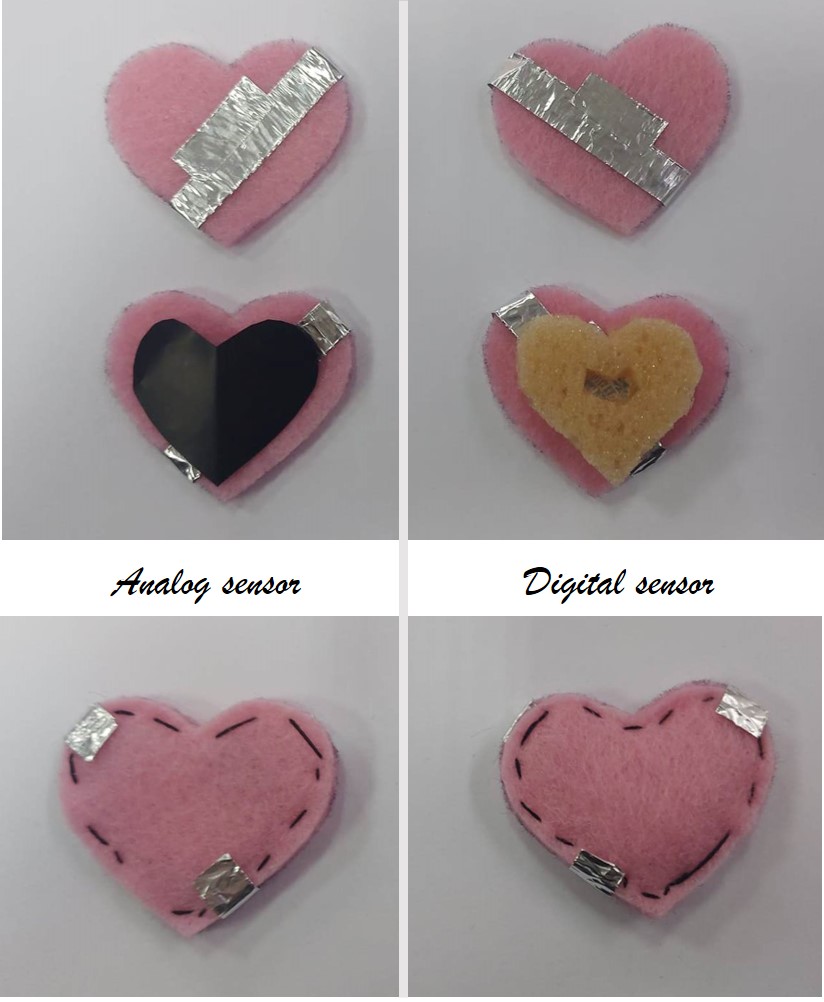
Made an E-Textile Continuity Tester. In our case we used felt as the base, conductive wire and tape, coin battery, safety pins, led, resistor and a needle.
Create a digital sensor. We used felt, conductive tape, velostat, double sided tape and some safety pins to keep the sandwich together.
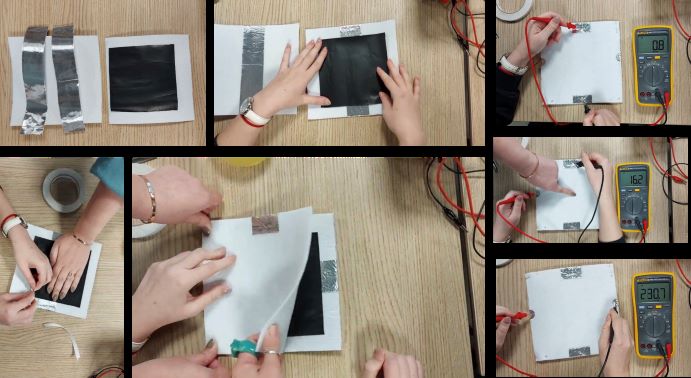
We are testing it.
After we used the Arduino to see the code needed and the different values a pressure gives it.
This code maps on the Serial Plotter the Analog values taken from the velostat swatch.
#define velostatPin A7


void setup() {

   // initialize digital pin LED_BUILTIN as an output.
   pinMode(velostatPin, OUTPUT);
   inMode(2,INPUT_PULLUP);
   Serial.begin(9600);
   int val = 0


}

// the loop function runs over and over again forever
void loop() {

   digitalWrite(2, HIGH);
   int val = analogRead(velostatPin)
   val = map(val, 0, 1023, 0, 500);
   Serial.println(val));

}
Based on this one we created another digital sensor, but this time we used a conductive material and the sponge.
The created analog sensor and digital sensor were connected to an Arduino and an Led strip.
Analog sensor- prototyping
Digital sensor- prototyping
Individual work and Rezults
Part 1 - the bookmark
With the aim of test my knowledge accumulated during the week, I created an other article: a bookmark.
To create the circuit I used: 3 batteries of 1.5 V power, electrical cables, insulation tape, 1 LEDs of 4.5 V power, 2 aluminum plates for the switch.
For the bookmark I needed felt, needle and sewing floss, scissors, pencel, pen, papers for sketches.
First I created the electrical circuit, then I fixed it on a layer of felt, prepared the necessary shapes from the felt and sewed them together. Then, having prepared all the components, we sew them between them.
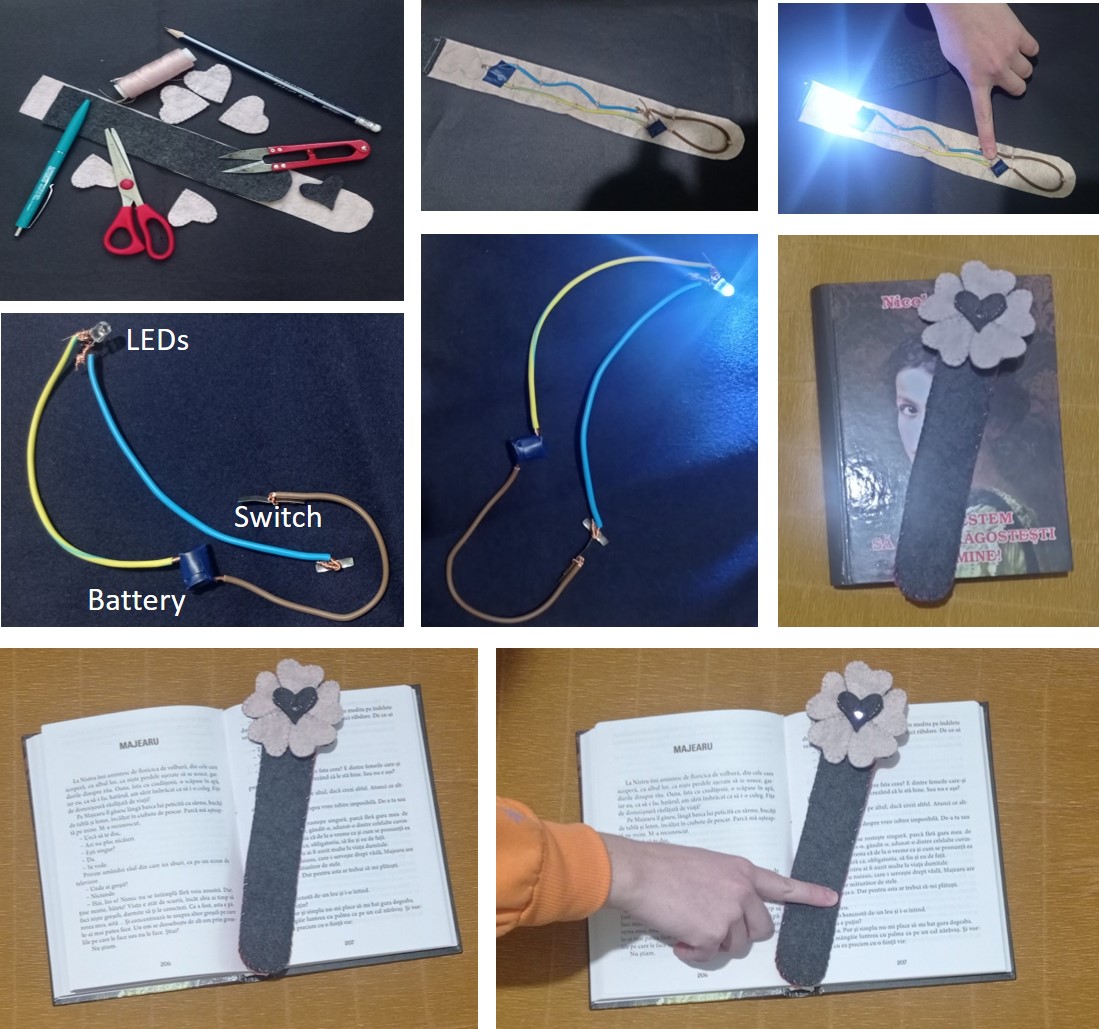
The feeling of happiness ... the joy that engulfed me when the light bulb, even now he has not left me!
Part 2 - the bag
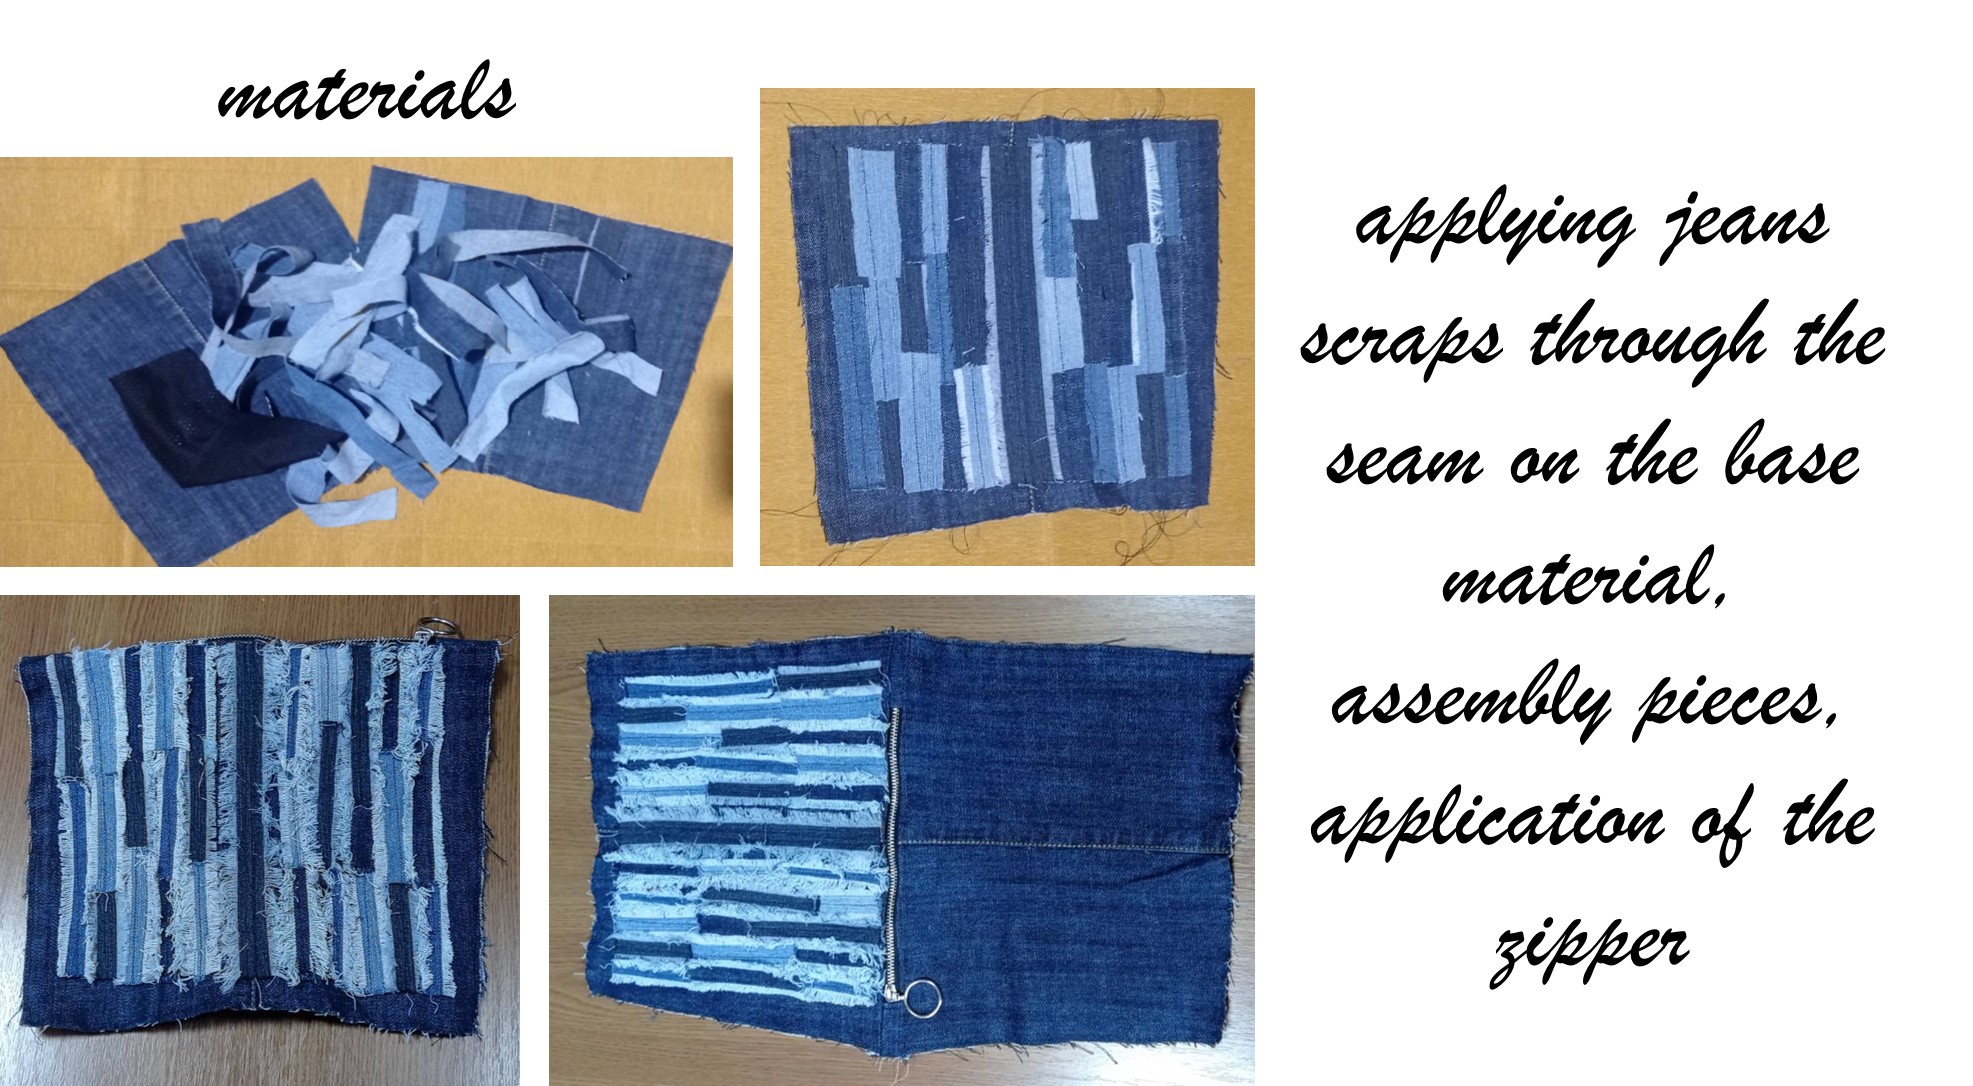
I continued the individual work with the creation of a bag from scraps of old jeans.
The material sheet required for this prouect is presented below.
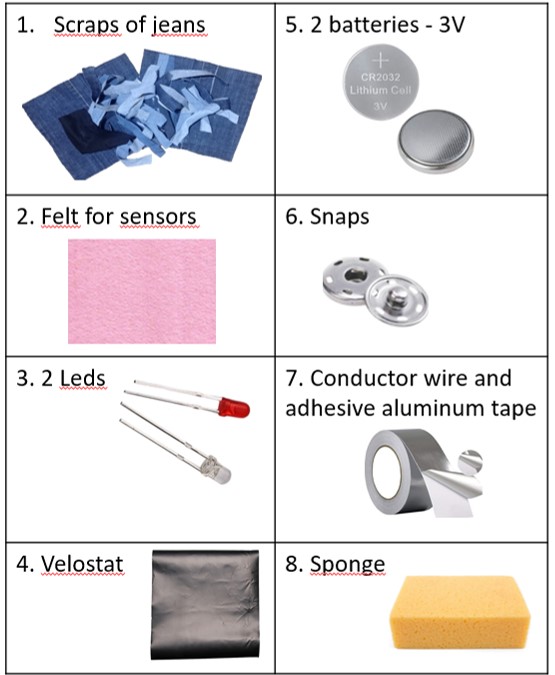
Necessary materials and work process
Analog and digital sensors
Next, I created an analog sensor and a digital sensor. Sensors were created similar to those previously created for group work. Details can be seen in the following pictures.
For the analog sensor and the digital sensor I measured the resistance.
Analog sensor
Digital sensor
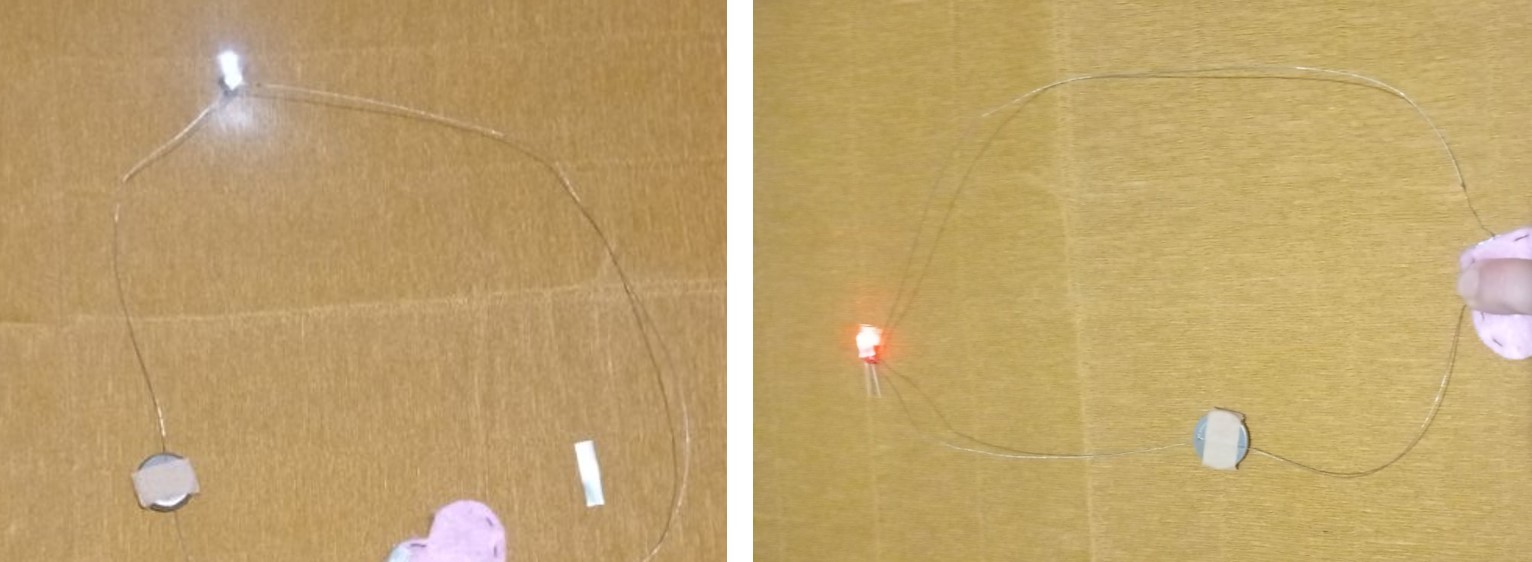
Circuit
Next, I created the circuits. For this I needed: leds, conductive wire, batteries and sensors created before.
Sensor reading in arduino
In the following picture we see the sensors reading in Arduino.
Analog sensor
Digital sensor
The code is the same for both sensors.
void setup() {
   // initialize serial communication at 9600 bits per second:
   Serial.begin(9600);

}

void loop() {
   // read the imput on analog pin A1:
   int sensorValue = analogRead(A1);
   // print out the value you read:
   Serial.printIn(sensorValue);
   // delay in between reads for stability:
   delay(1000);
}
Connecting the soft sensors to a fabric swatch
The circuits and sensors created was integrated into the stitched bag. The result can be seen in the pictures and videos below.
The sensors were decorated with scraps of jeans. Sensors attach to the bag with snaps. To the bag and sensors I sewed snapes with conductive thread.
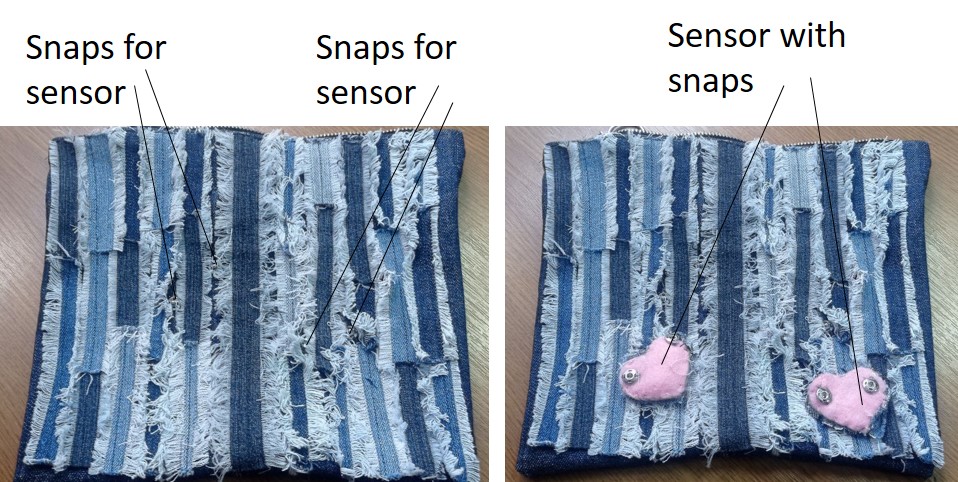
The final result is shown in the following pictures and videos.
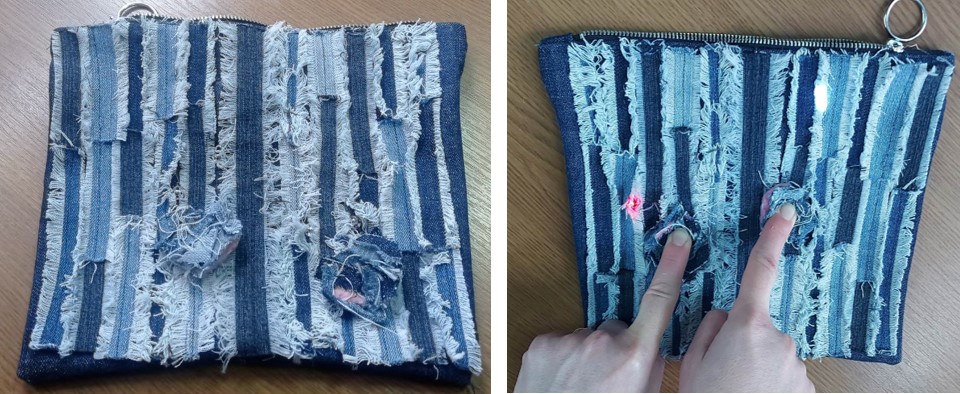
The digital sensor is connected with the white LED.
The analog sensor is connected with the red LED.