13. Skin Electronics
Week 13 _ Christmas!!!
The last week of this term. Many thoughts related to this week's theme. In parallel, we have to work on the idea of the final theme. Will I be able to fit in on time? But...
Research & Ideation
As in every week, researching begins with Fabricademy's tutorials at the assignment Skin Electronics week by Katia Vega. This week we must feel the spirit of the holidays. We have to create a story.
I was impressed by the video below, and I decided to do something similar.
I decided that I will create a similar circuit that will be placed on the hand. Only 2 colors will be used: BLUE and CYAN.
Code
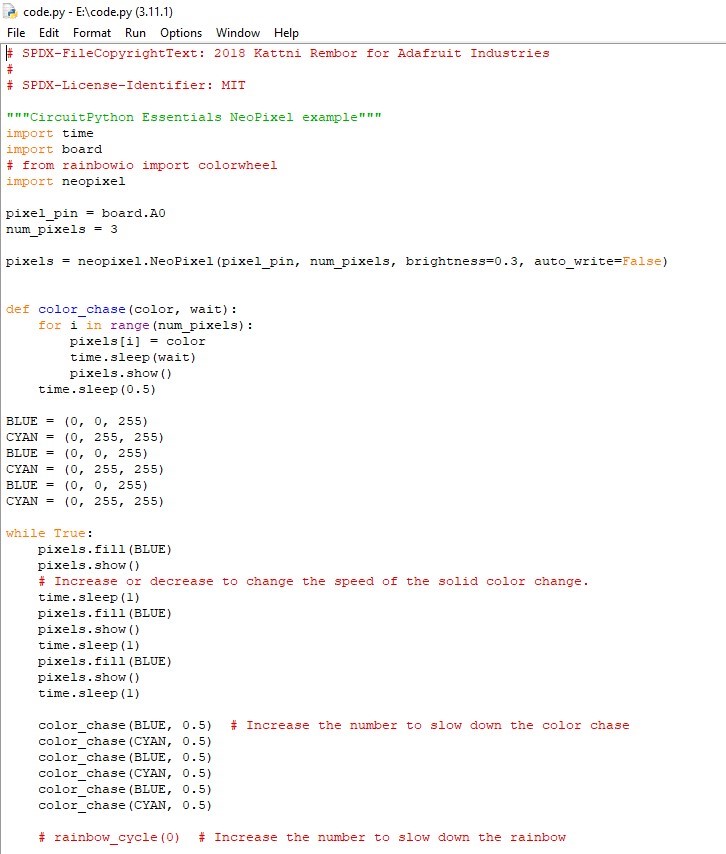
For this circuit I modified an existing code. I placed only the colors BLUE and CYAN.
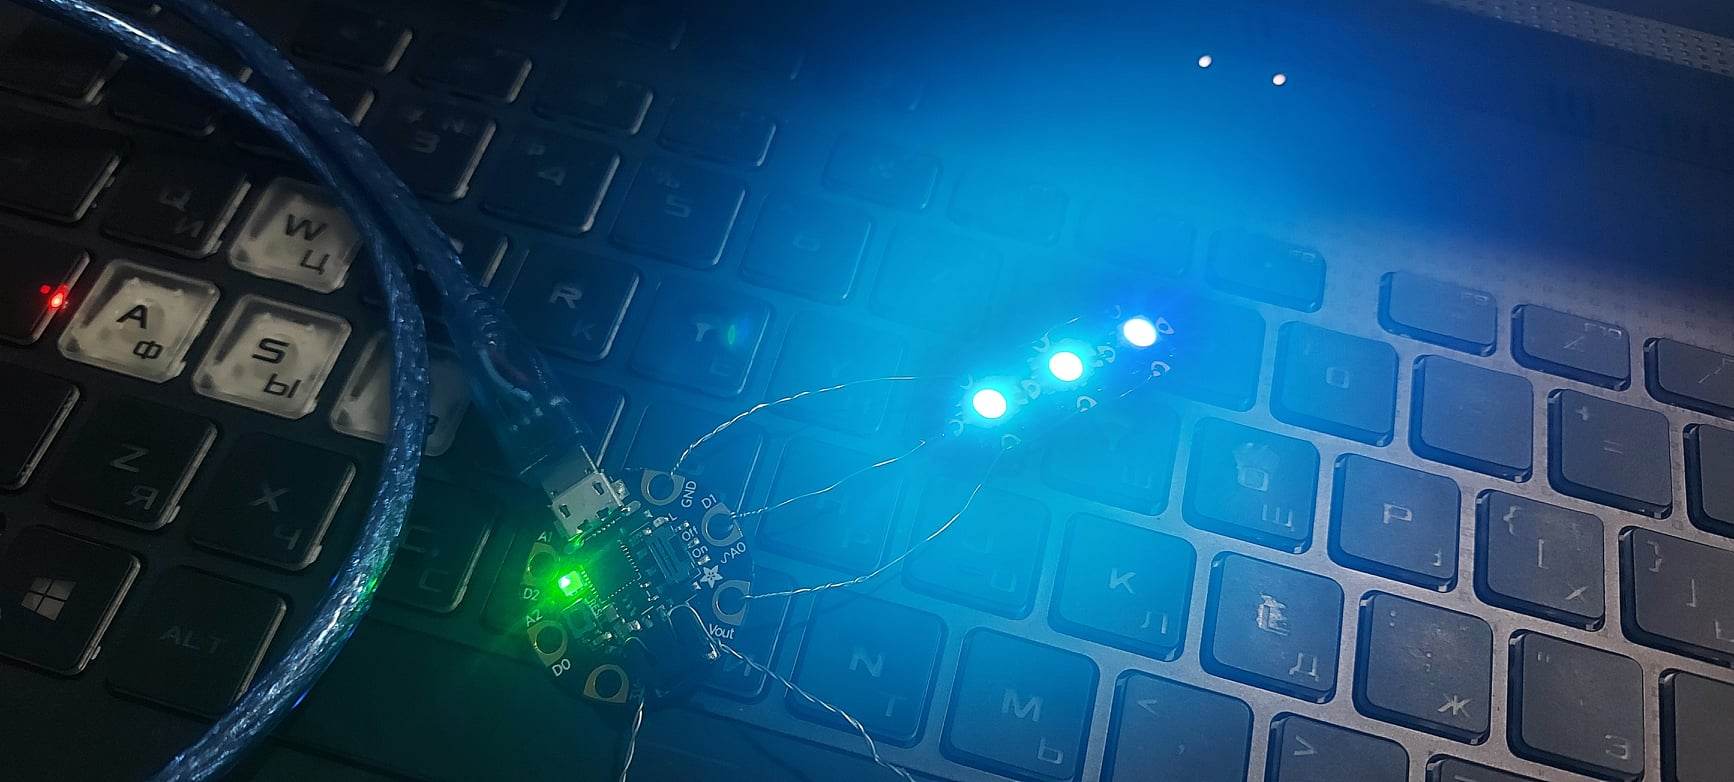
Testing
I made some attempts to make the code work. I placed the code and connected it to the computer.
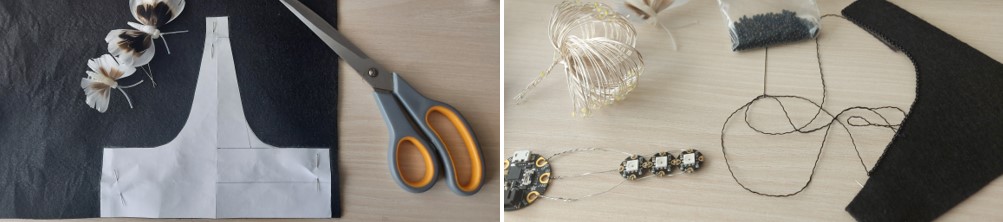
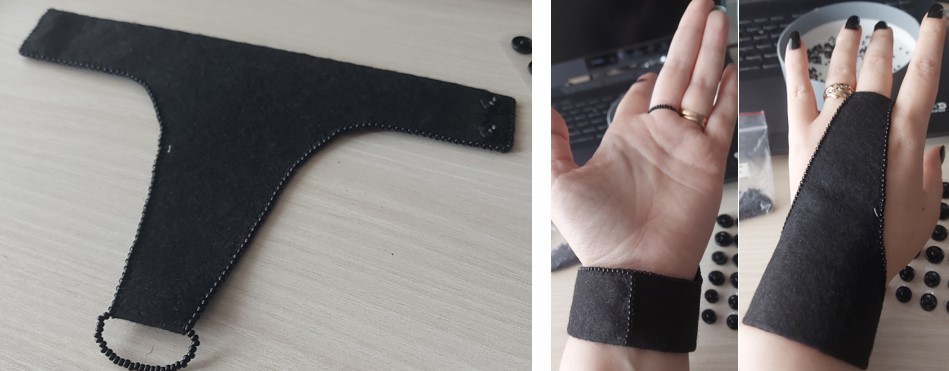
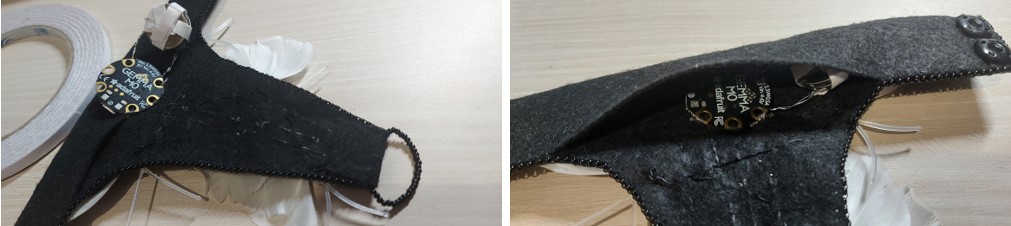
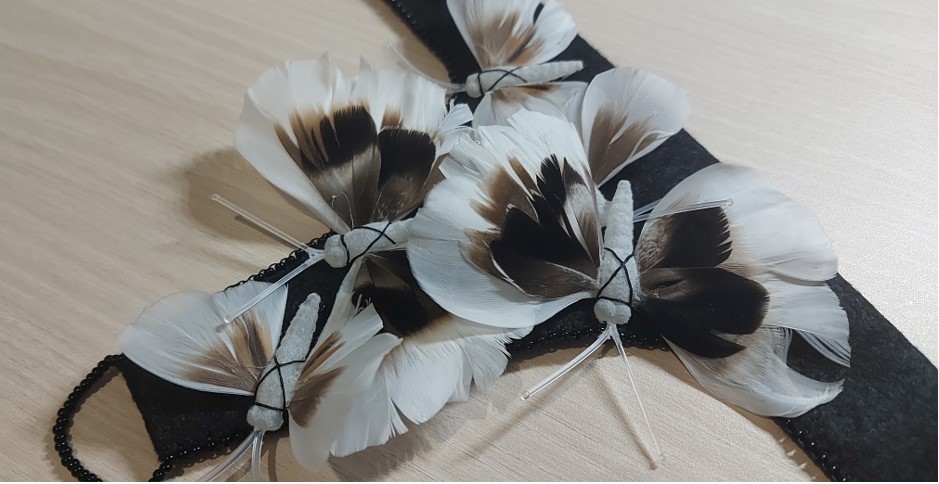
The circuit was going well and I decided to make the hand accessory. I created a pattern, cut the detail from 1 mm thin felt and processed the edge with pearls.
At the end of the edge processing, 2 buttons were sewn and it was worn on the hand.
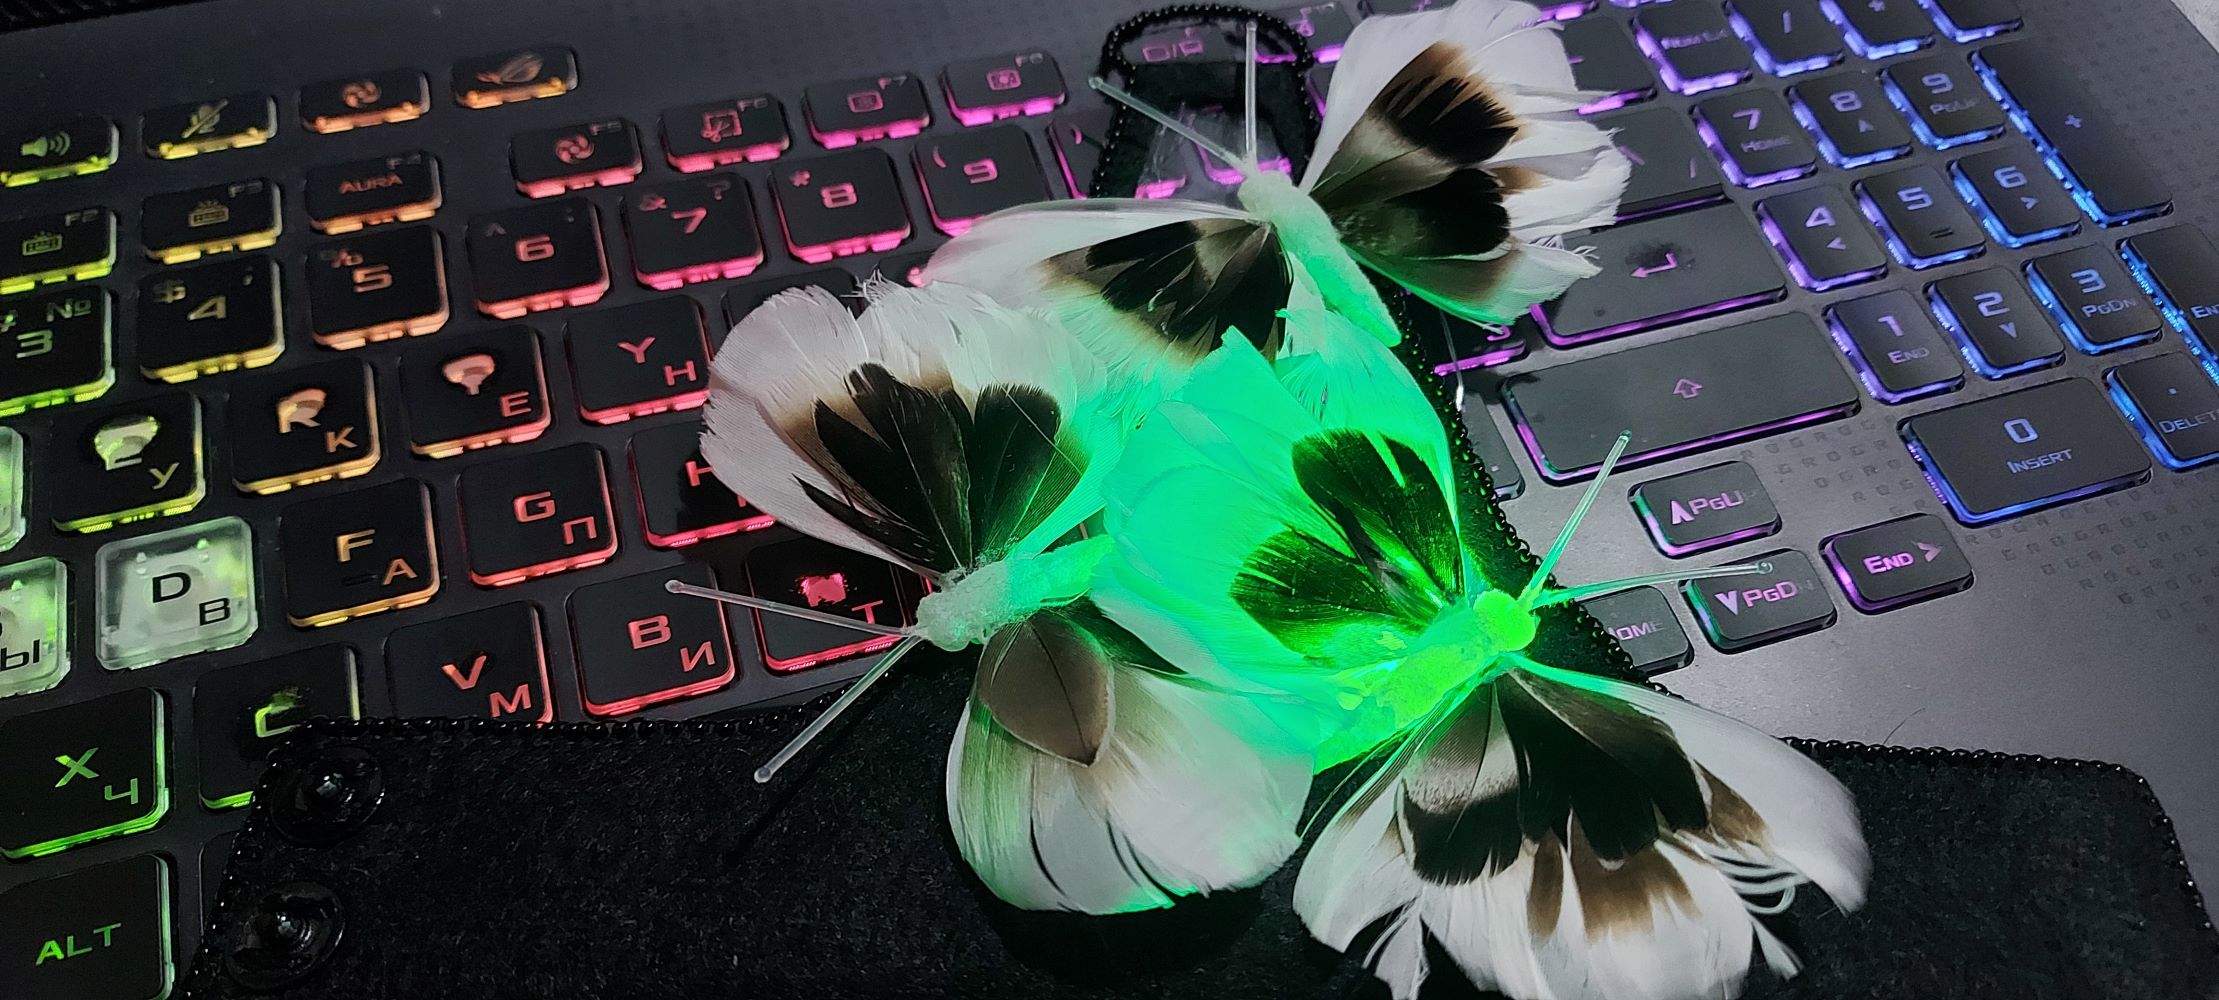
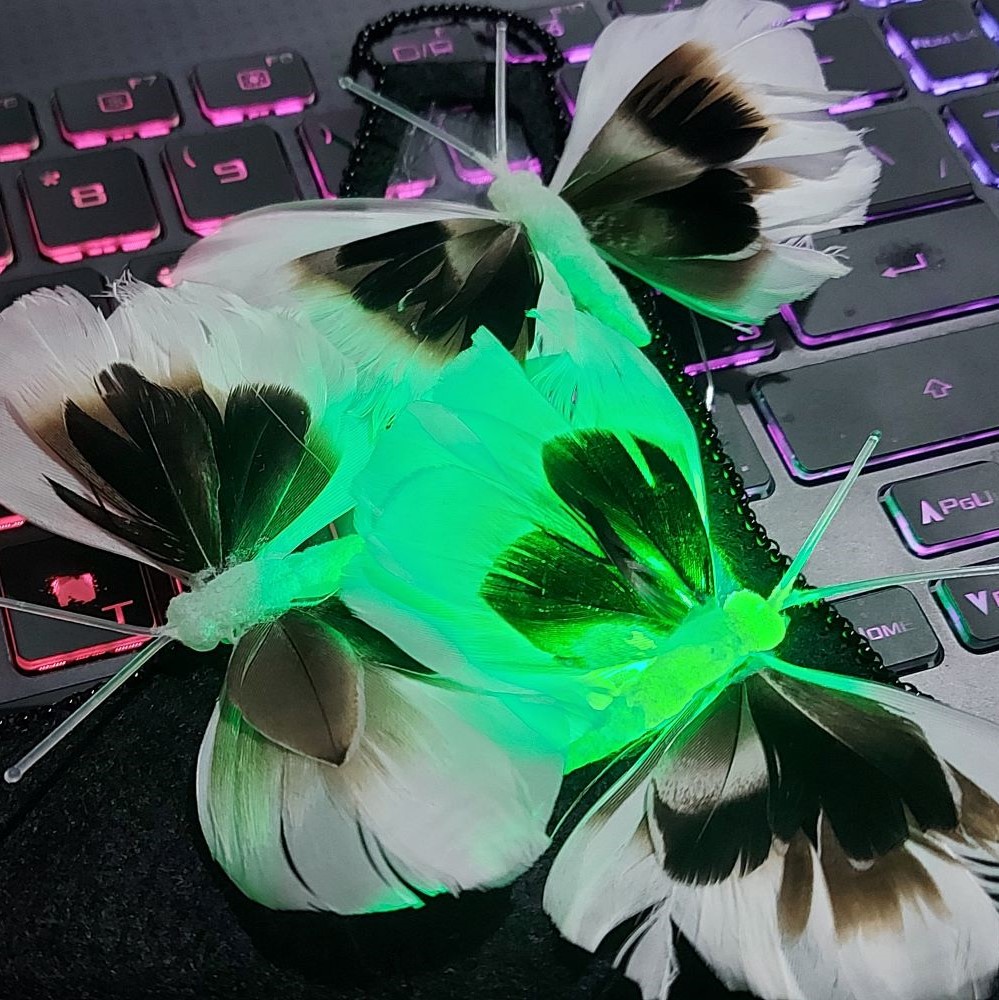
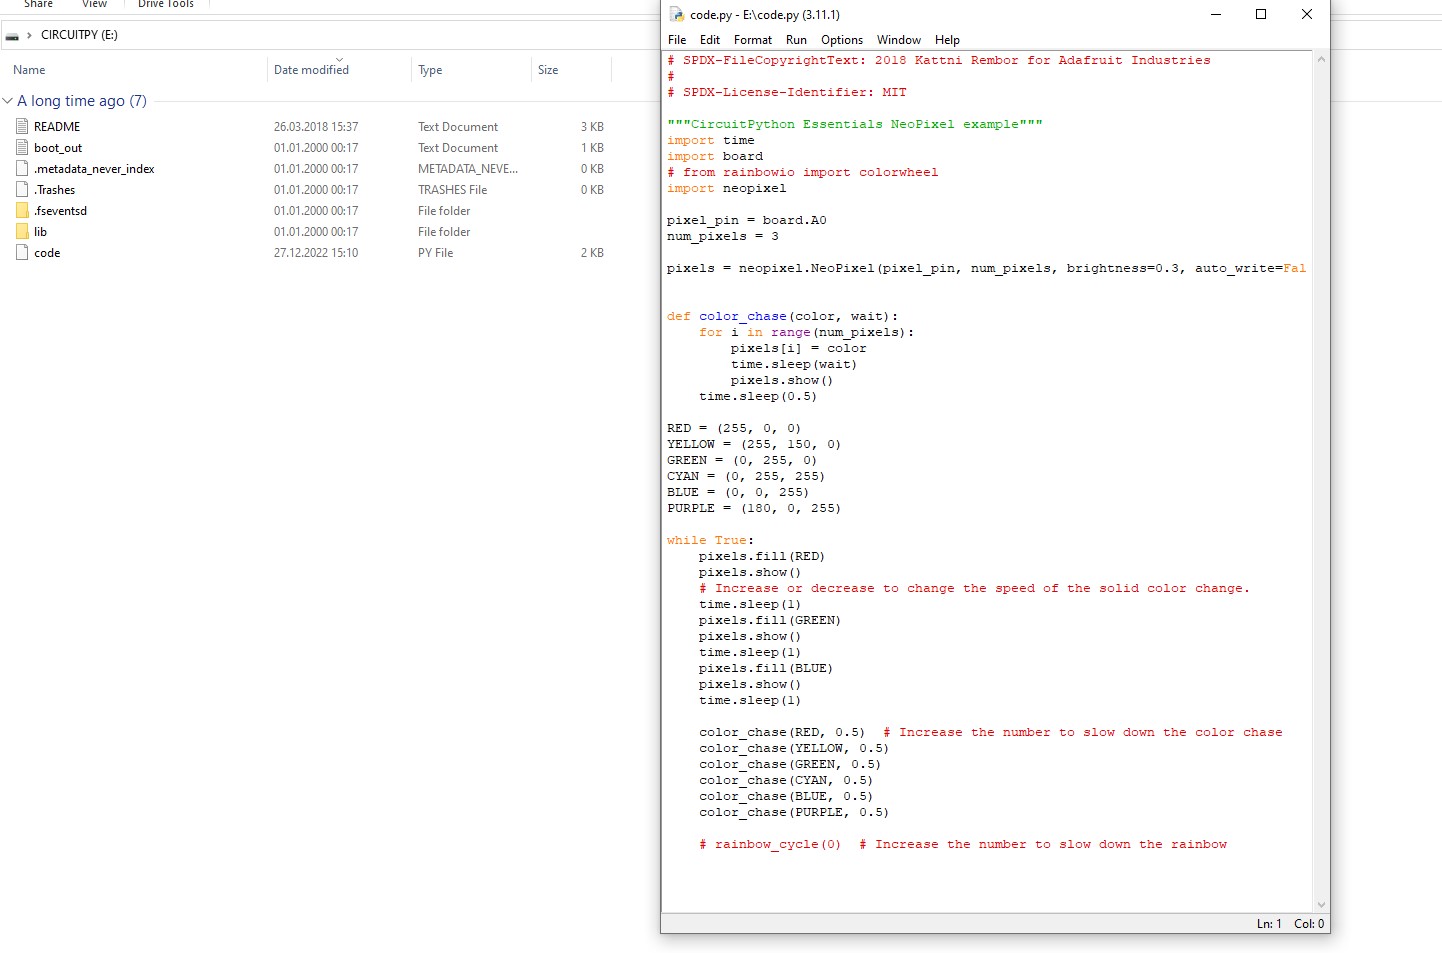
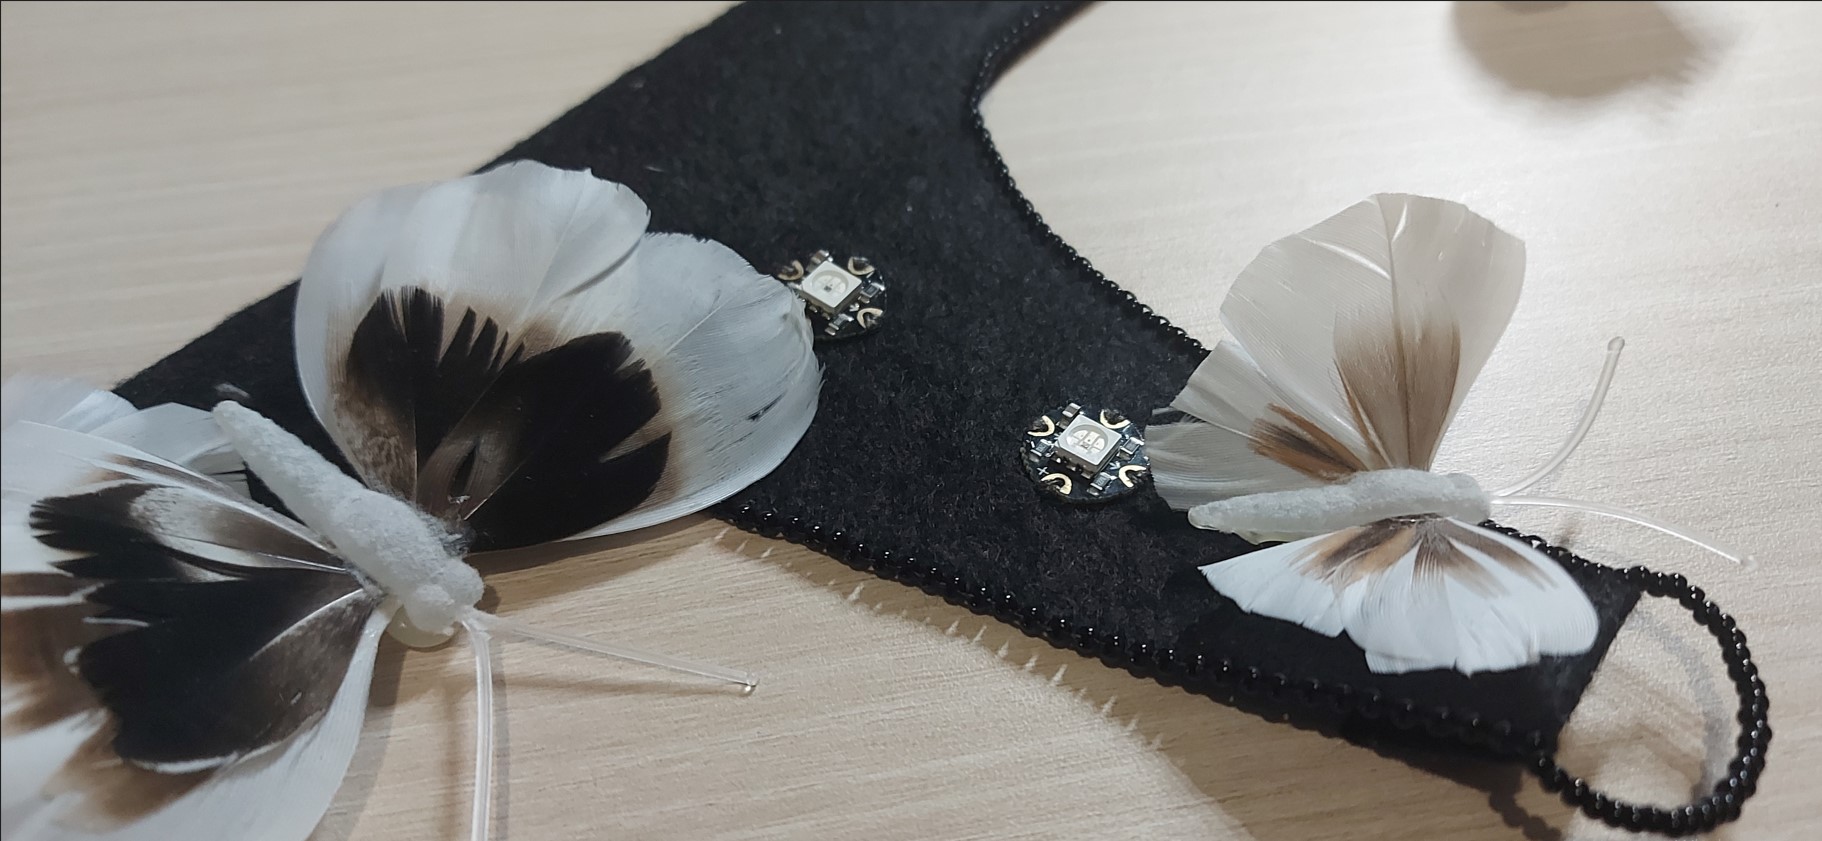
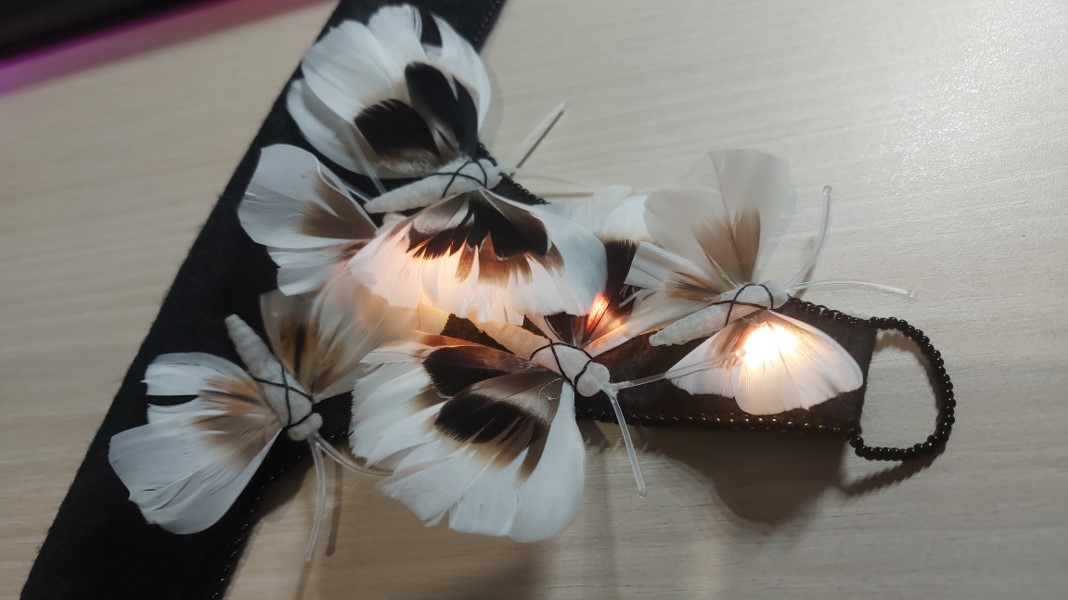
The code was working fine. But in combination with the ornament (butterflies made of feathers), the blue lights seemed boring. I modified the code in multicolored lights. I also managed to insert the circuit into the accessory. I chose to sew it with conductive thread.
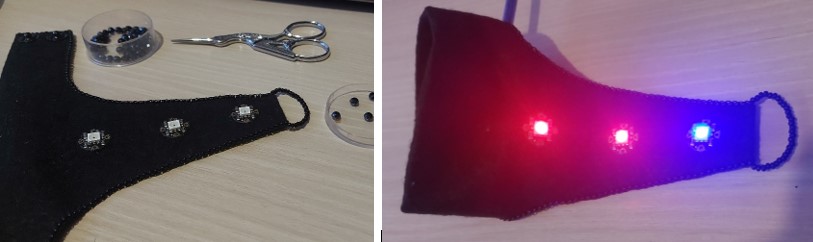
This is what the code looks like with multicolored lights.
This is the schematic of the circuit.
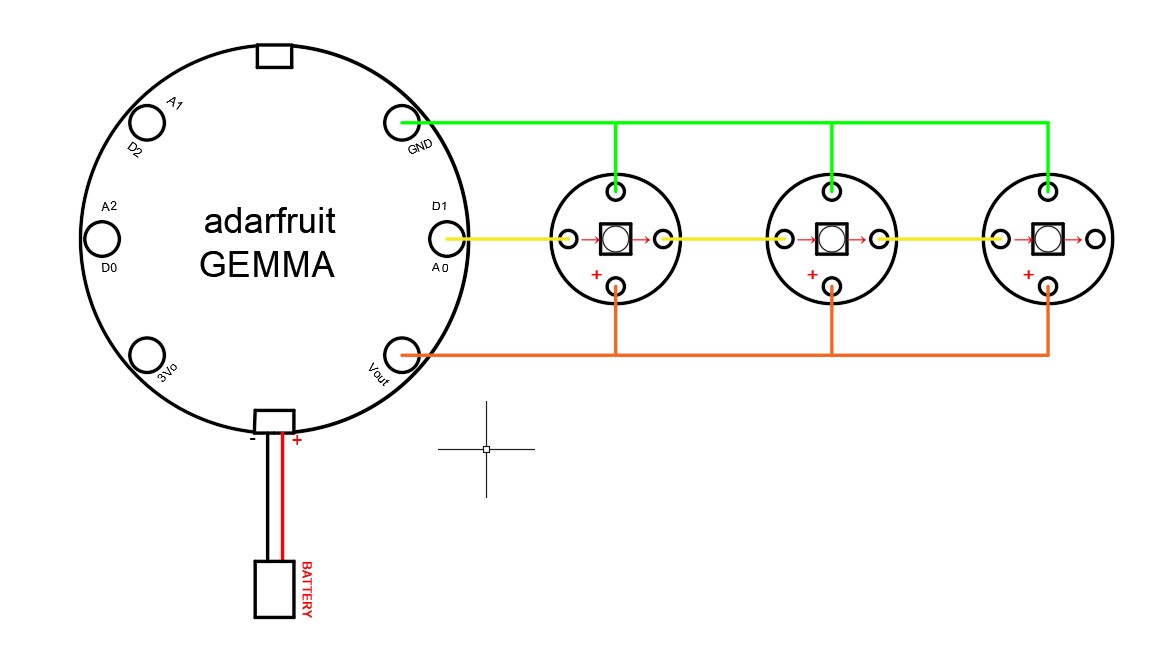
After checking the code and circuit, I assembled Gemma with 2 batteries and decorated the accessory with butterflies. Gema and batteries have sheets hidden in the pocket of the accessory.
Results
And here is the result :)
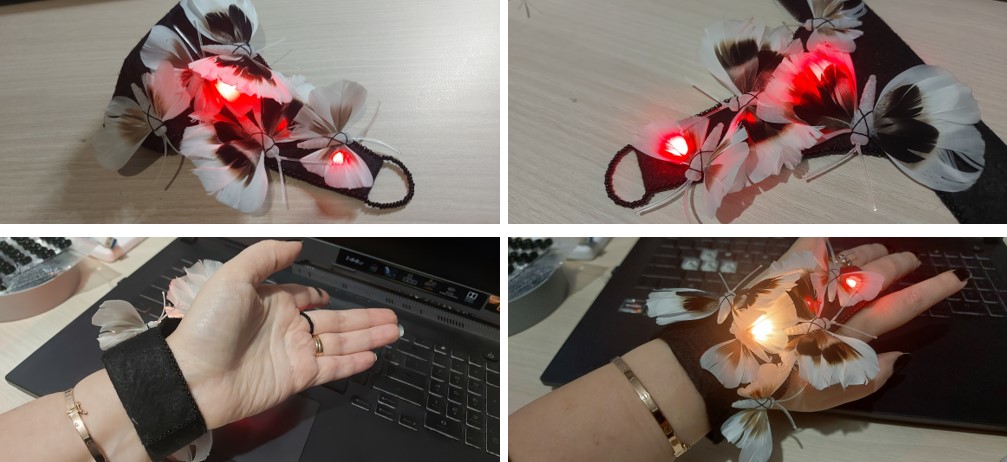
But the theme is skin electronics, and the elaborate glove does not really correspond to the theme. I decided to make some changes in appearance, but not in functionality. I cut the felt layer and placed a colorless film layer.
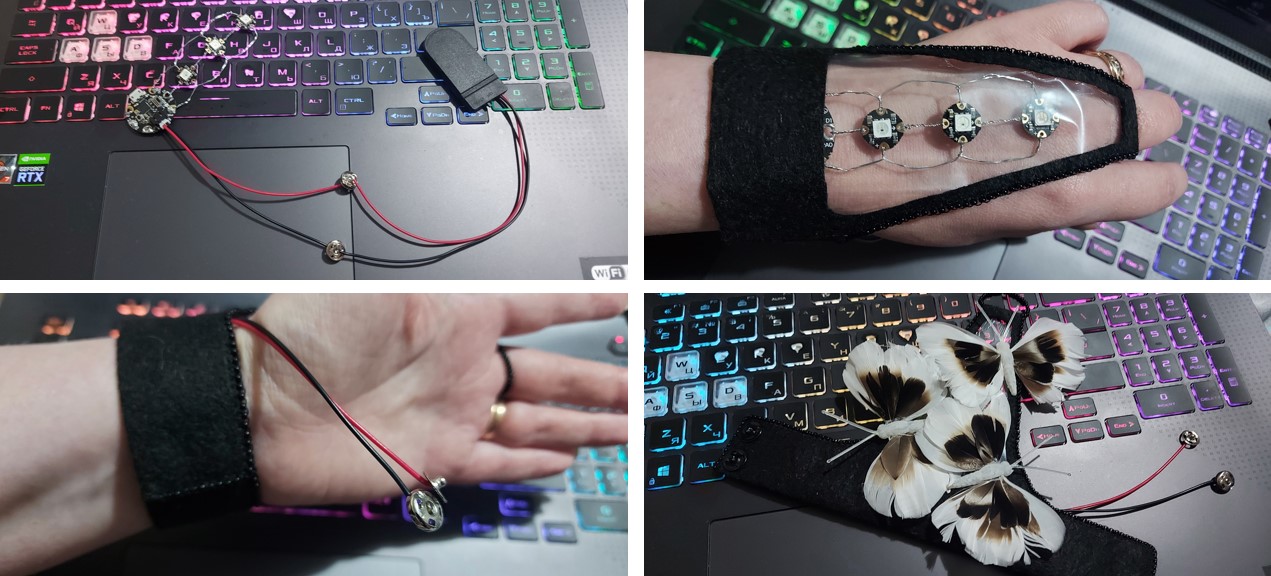
The code and the circuit remained the same, I just put metallic conductive wires.
# SPDX-FileCopyrightText: 2018 Kattni Rembor for Adafruit Industries
#
# SPDX-License-Identifier: MIT

"""CircuitPython Essentials NeoPixel example"""
import time
import board
# from rainbowio import colorwheel
import neopixel

pixel_pin = board.A0
num_pixels = 3

pixels = neopixel.NeoPixel(pixel_pin, num_pixels, brightness=0.3, auto_write=False)


def color_chase(color, wait):
    for i in range(num_pixels):
        pixels[i] = color
        time.sleep(wait)
        pixels.show()
    time.sleep(0.5)

BLUE = (0, 0, 255)
CYAN = (0, 255, 255)
BLUE = (0, 0, 255)
CYAN = (0, 255, 255)
BLUE = (0, 0, 255)
CYAN = (0, 255, 255)

while True:
    pixels.fill(BLUE)
    pixels.show()
    # Increase or decrease to change the speed of the solid color change.
    time.sleep(1)
    pixels.fill(BLUE)
    pixels.show()
    time.sleep(1)
    pixels.fill(BLUE)
    pixels.show()
    time.sleep(1)

    color_chase(BLUE, 0.5)  # Increase the number to slow down the color chase
    color_chase(CYAN, 0.5)
    color_chase(BLUE, 0.5)
    color_chase(CYAN, 0.5)
    color_chase(BLUE, 0.5)
    color_chase(CYAN, 0.5)

    # rainbow_cycle(0)  # Increase the number to slow down the rainbow