4. BioChromes
Week 04 _ magic
The fourth week started in color. Everything seemed so simple and easy, but ...
Research
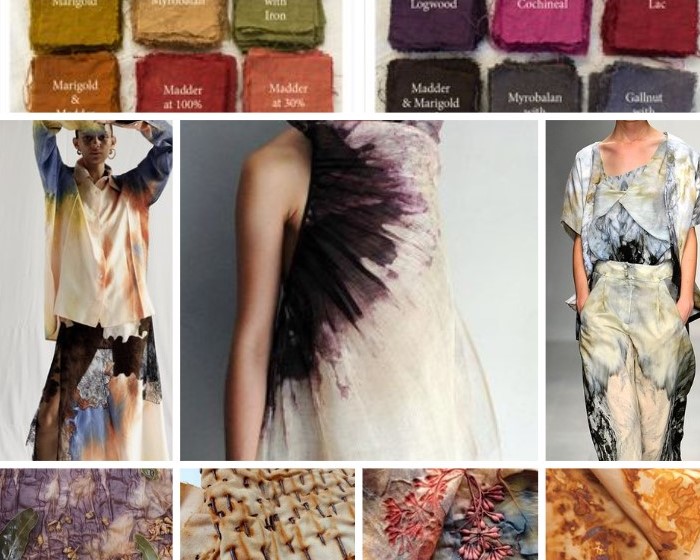
The first step is as always to view Cecilia Raspanti's lecture on BIOCHROMES and her tutorials. We followed the instructions in the presentation and started doing the lab work. Of course, we started to admire the multitude of works placed on the Internet. Different colors, different techniques... and everything united in special creations.
Initial preparation
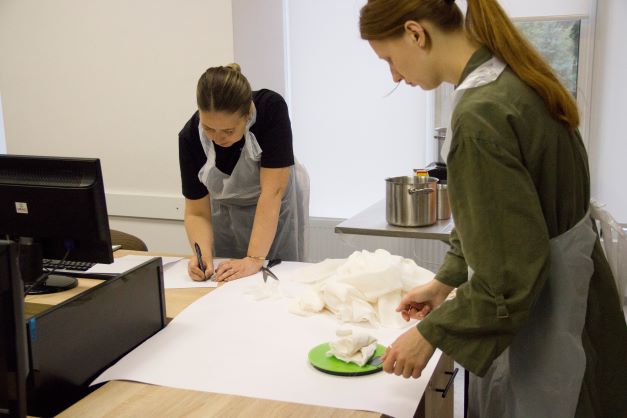
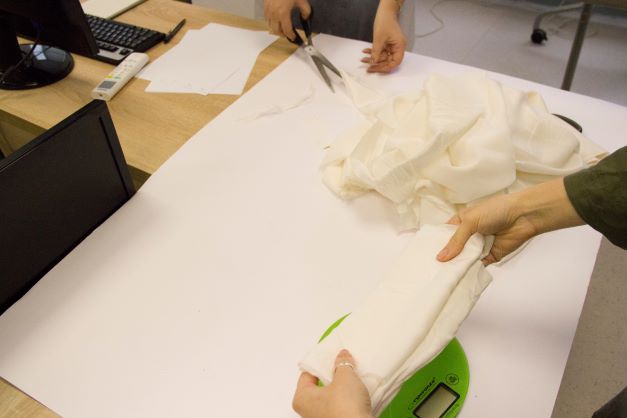
In order to obtain a large range of colors, we decided to work together. Each of us had no experience in this field, but we were ready to try. So, we started to do the work in our lab ZipHouse. We did it by rewatching the tutorials. After that we started to prepare the textiles. We had 4 types: cotton, unbleached, linen, wool, and silk. We devided the textile in needed parts, weighted them and then started to prepare them for the first step which is scouring. Scouring is a process in which we clean our fibers. For the vegetable fibers, unbleached cotton and linen, we did this process by using sodium carbonate. For the animal one, wool and silk we gave them them a warm bath.

Mordanting
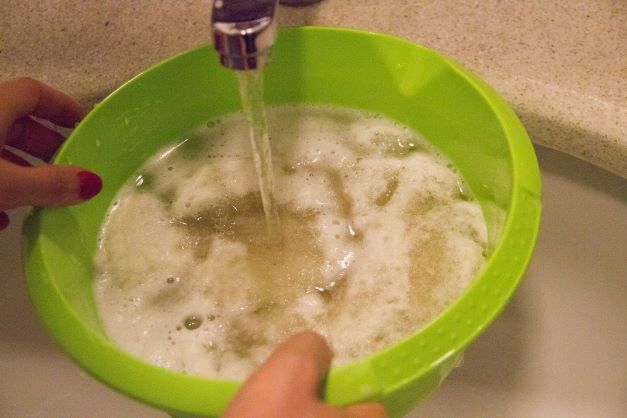
The next step which is Mordanting. Mordant is a substance, typically an inorganic oxide, that combines with a dye or stain and thereby fixes it in a material. We used Alum as our mordant, and by following the instructions provided to us we prepared the textile for the dyeing process.
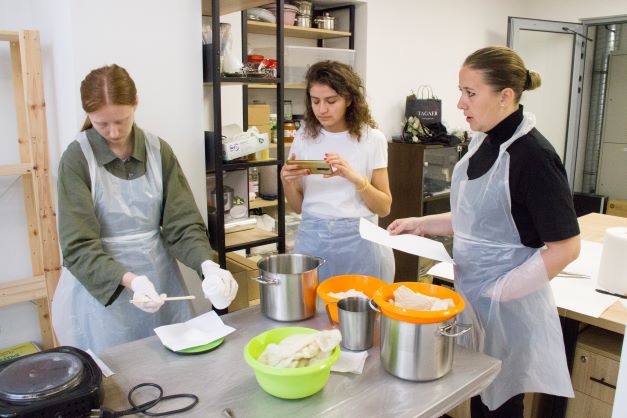
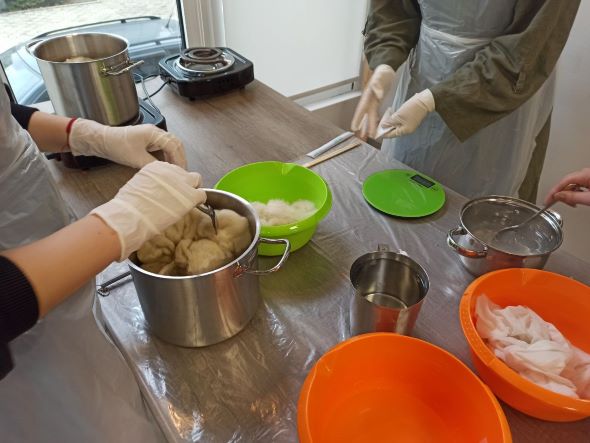
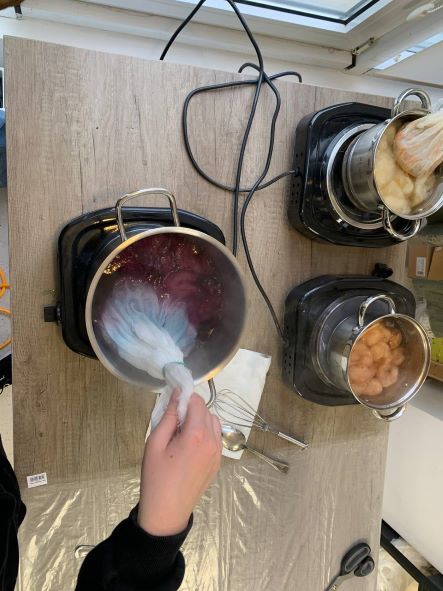
The dyeing process - in a group
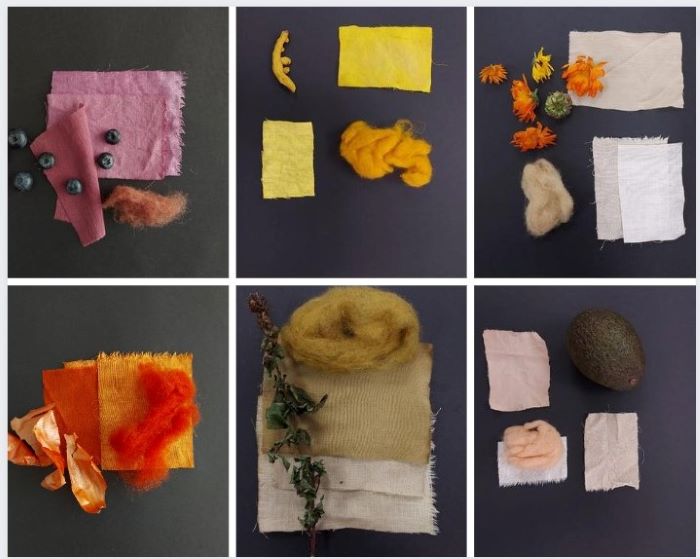
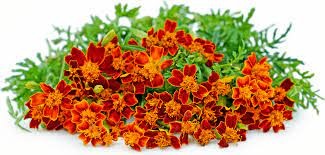
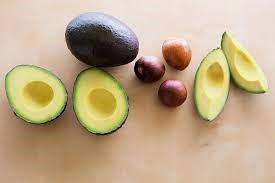
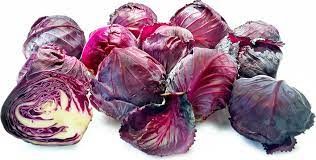
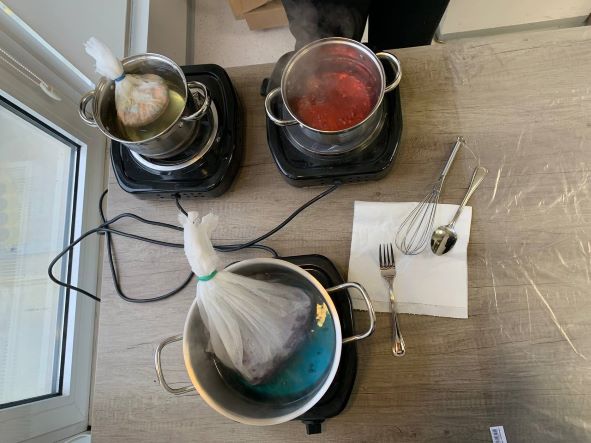
After the preparation we started to prepare the ingredients for the dyeing process. In the lab we decided to do 3 ingredients: avocado pits, marigold flowers and red cabbage. After this, we put the textiles and the ingredients to boil.
The dyeing process - individual
The result was special, that's why we decided to color 2 more ingredients individually.
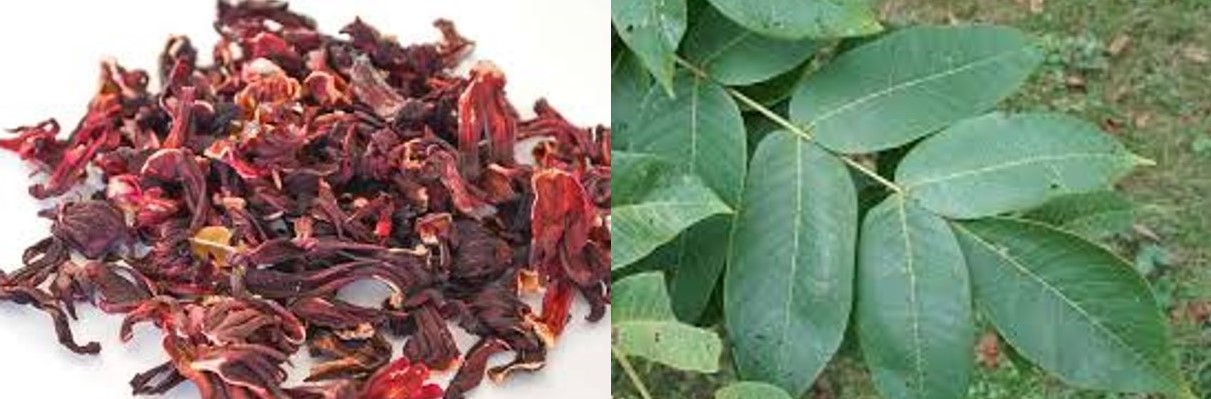
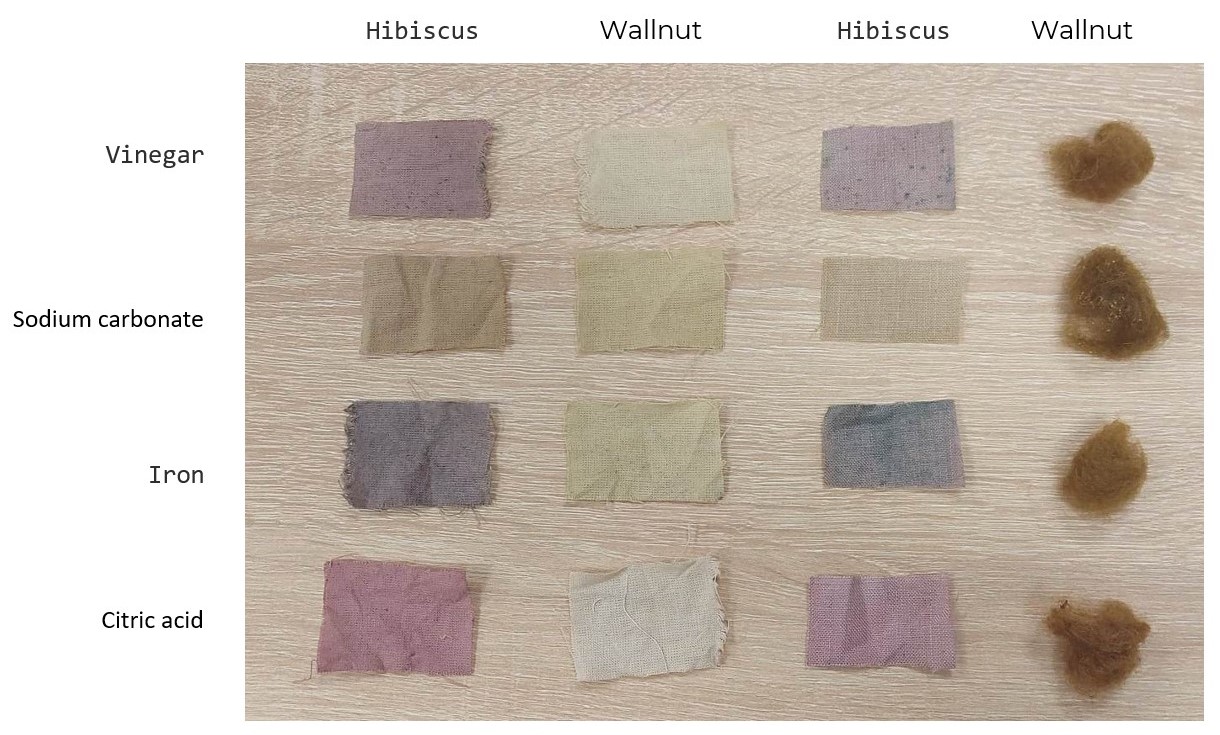
The ingredients I used were hibiscus tea and walnut leaves. These are the results I got after 30 minutes, 2 hours and one night.

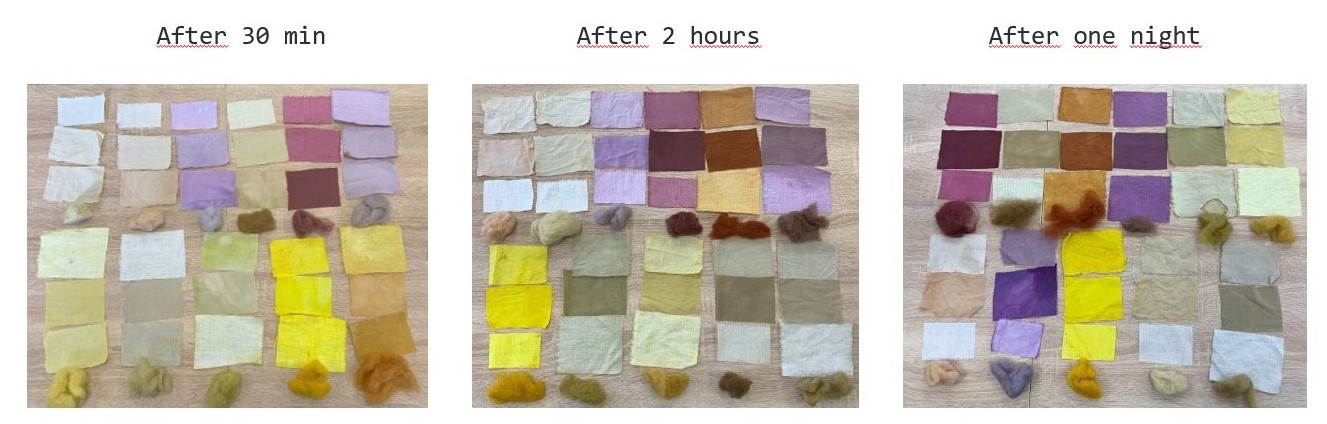
In groupwe obtained eight more types of coloring. The ingredients used were: walnut leaves, hibiscus tea, blackberry, chives, dried lavender, turmeric, saffron and spearmint. We decided to do coloring that depends on the type of materials used in the colored water. I obtained colored samples at 30 minutes, 2 hours and samples that stayed in the colored water all night.
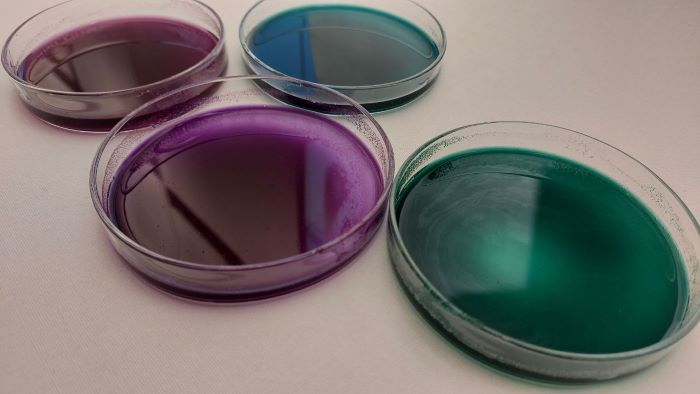
Coloring modifications - in a group
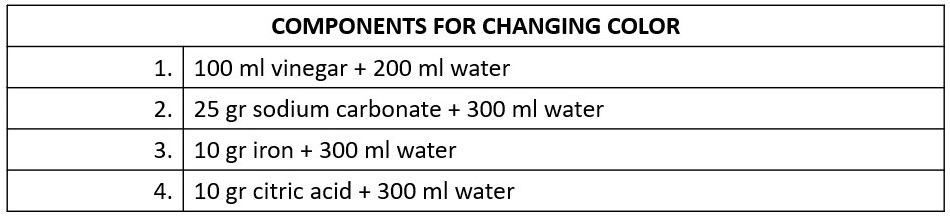
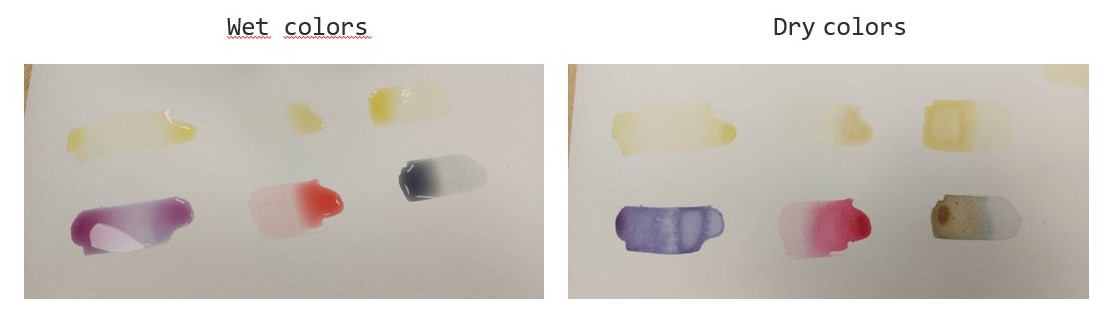
We did the color modification by using 4 diferent mediums: vinegar, sodium carbonate, iron and citric acid. here are the results for diferent types of textiles. Here is the recipe we used to create the modifiers
Here are the results for different types of textiles.
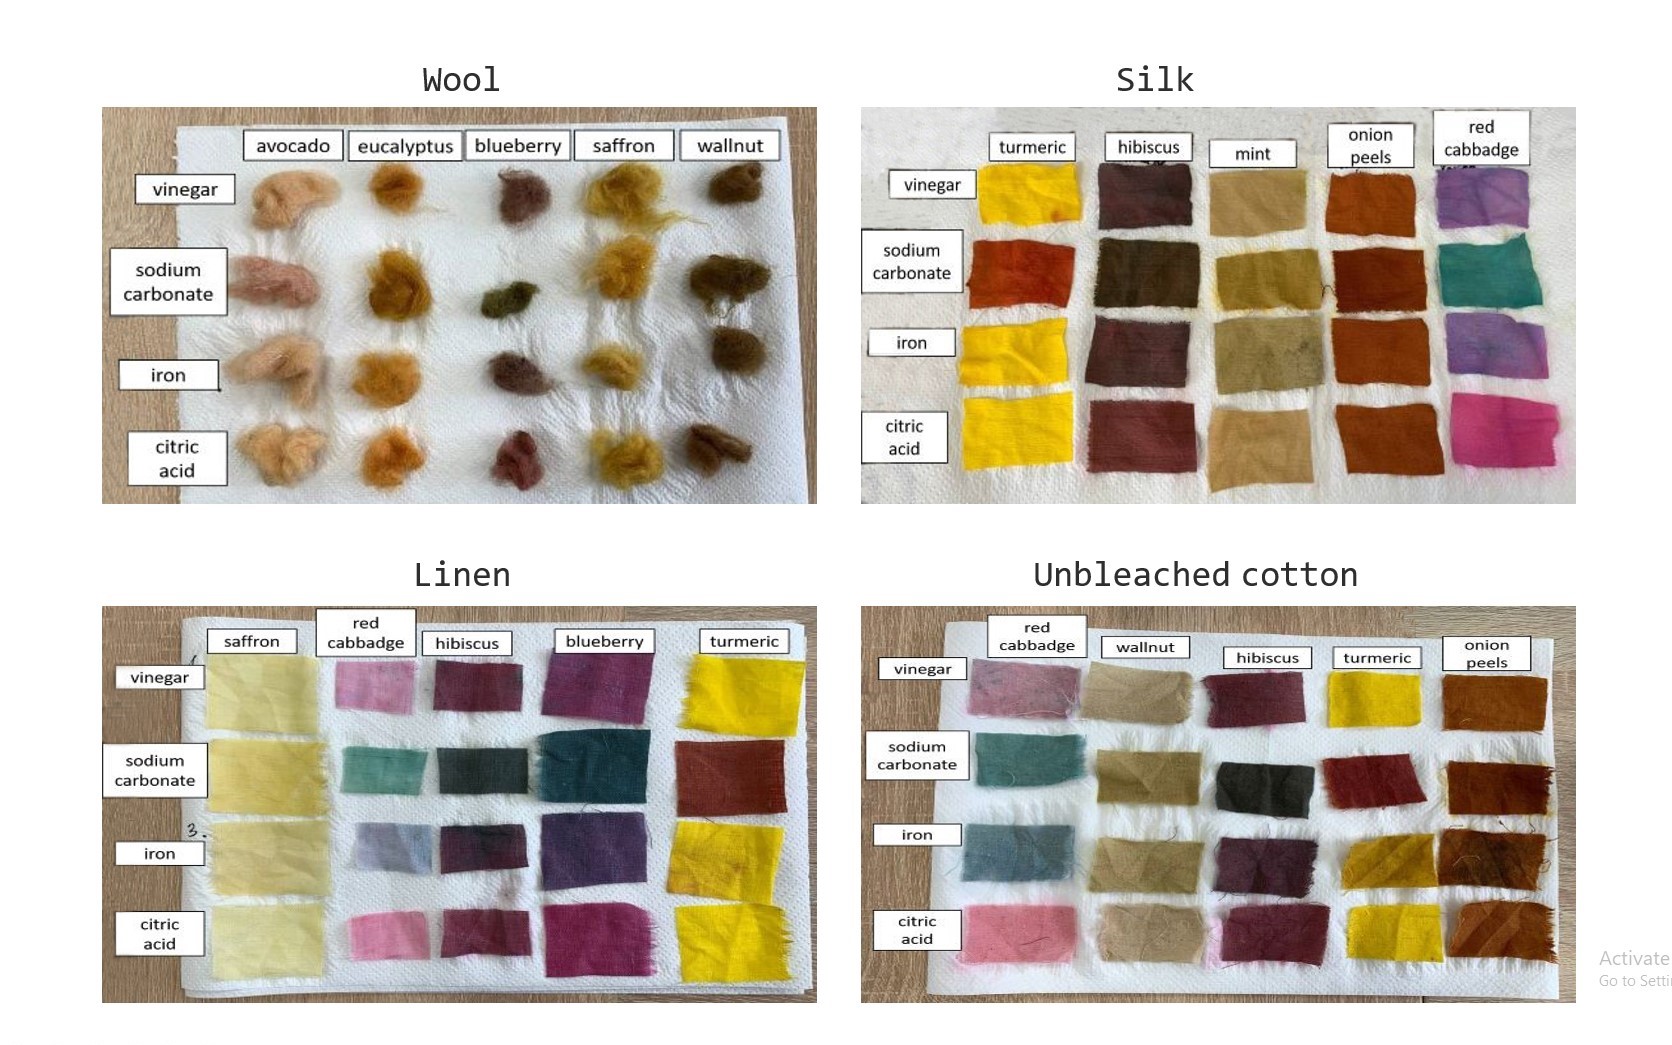
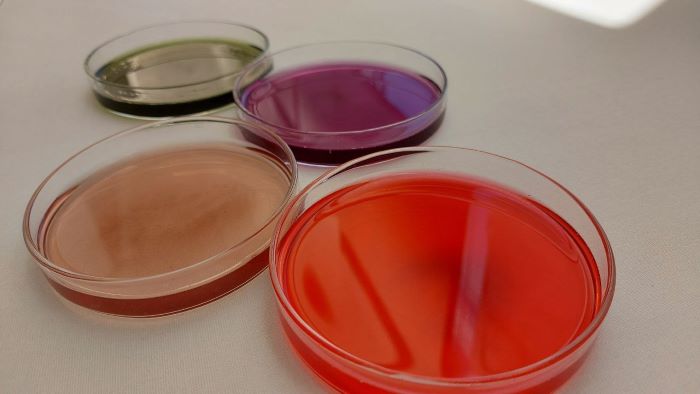
Coloring modifications - individual
The same components were used for the individual group. Here are the results obtained.
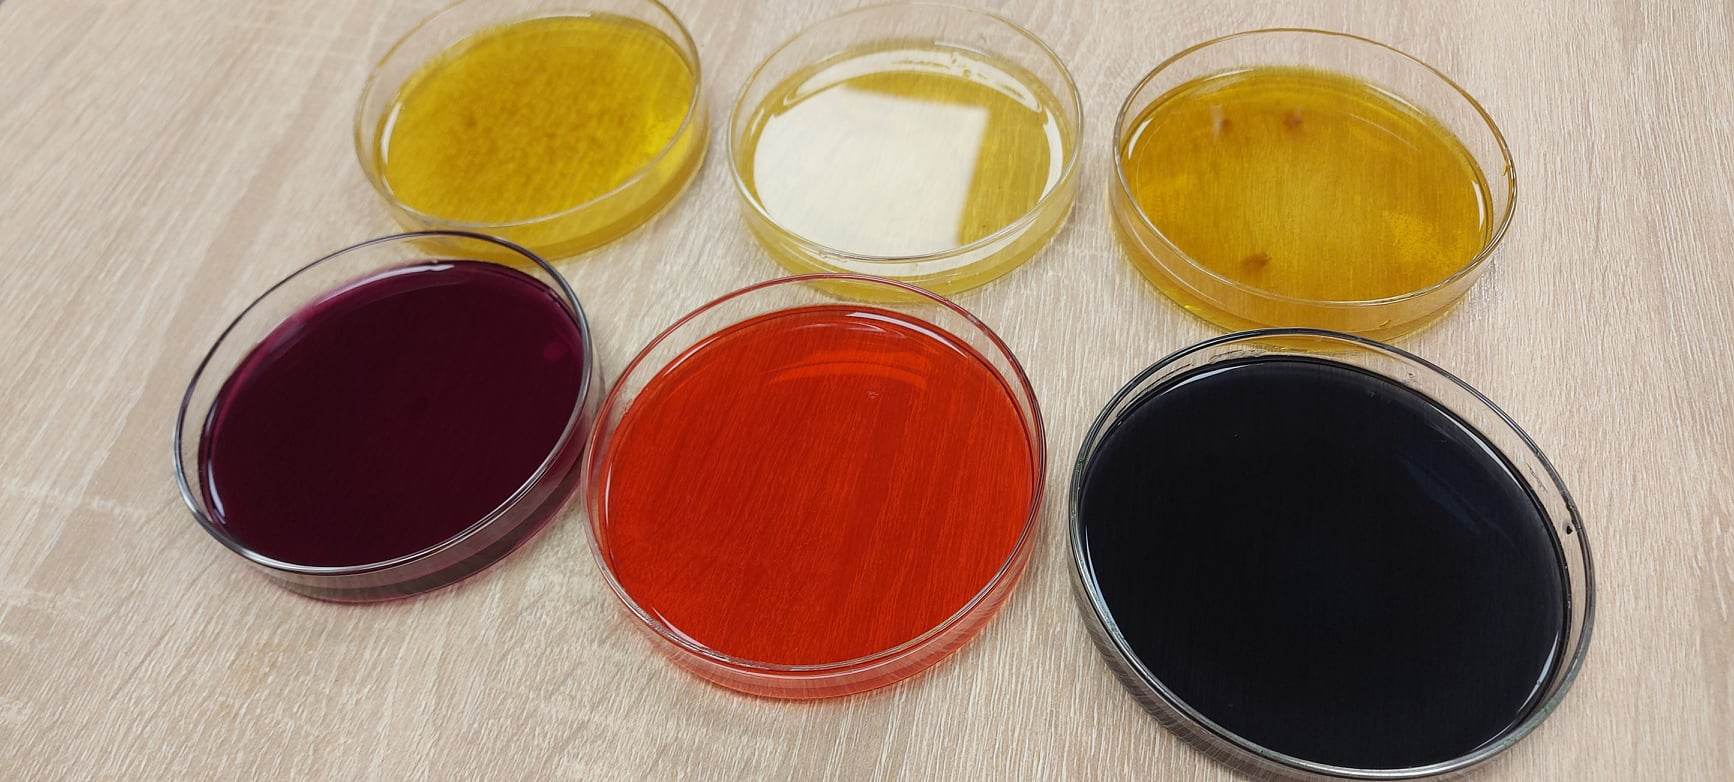
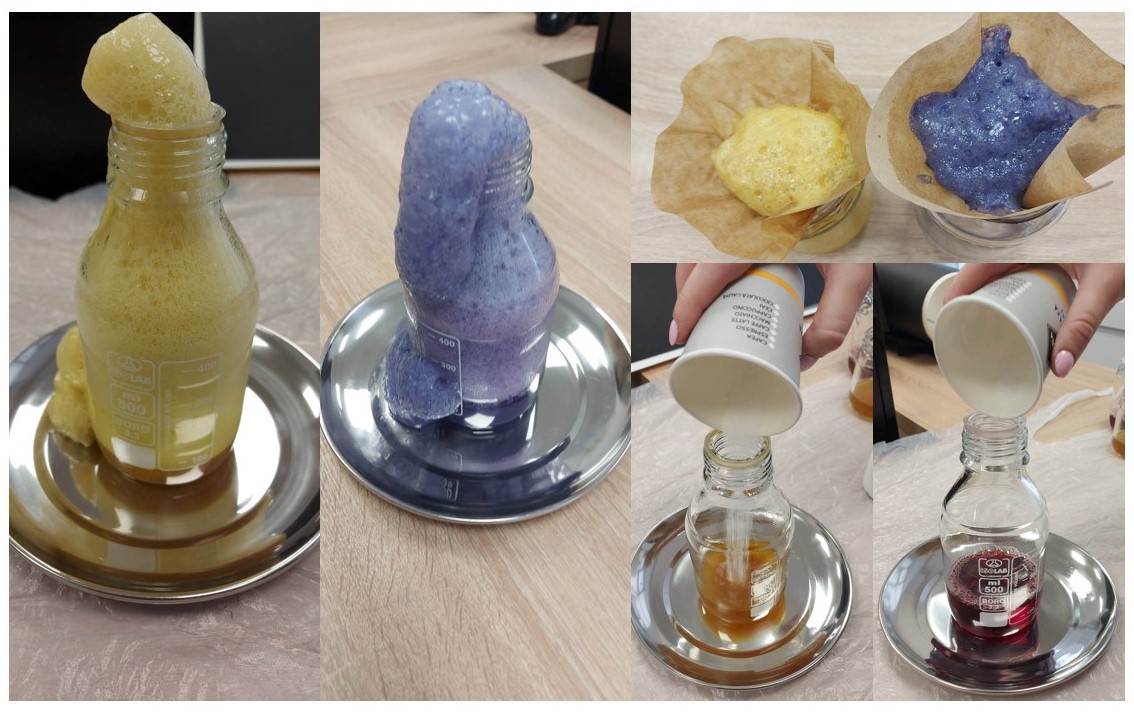
Recycling the dye into inks and pigments - in a group
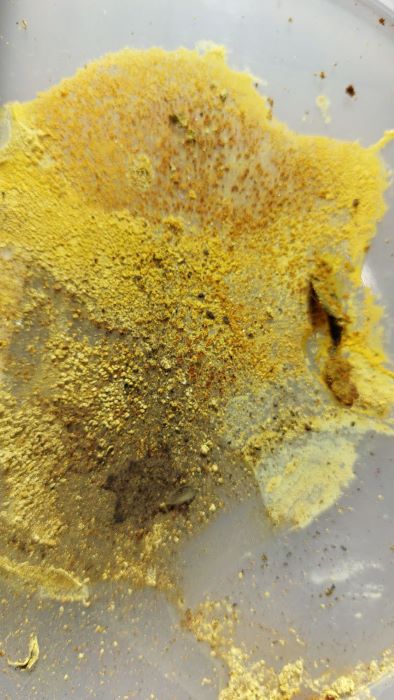
Using the left dye, we divide it and used it for the inks and pigments. For creating pigments we used about 300 ml of dye and did the 2 alum to 1 sodium carbonate ratio. First we put in the alum dissolved with hot water and mixed the jar. After that we carefully added the sodium carbonate dissolved with water in the jar. After the "volcano" effect we used a coffe filtre to poure the mixture and let everything dry.
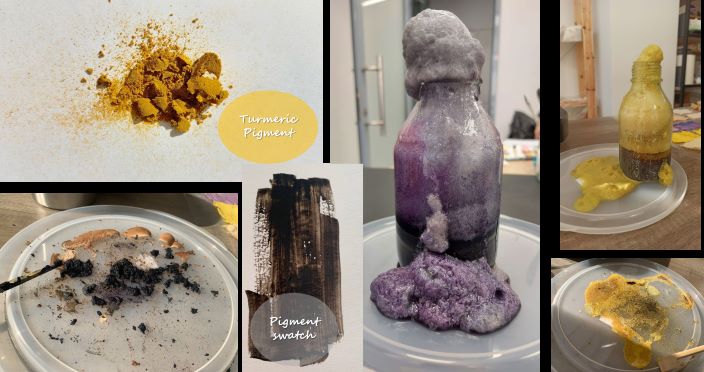
Recycling the dye into inks and pigments - individual
I used the same sequence, as when working in a group, to create the inks and pigments. I used hibiscus dye and walnut leaf and these are my results.

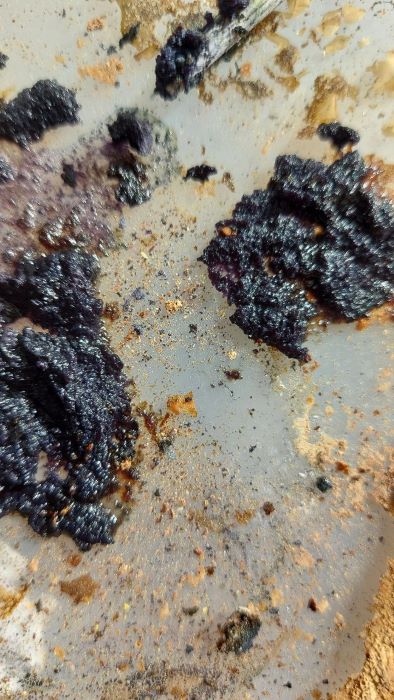
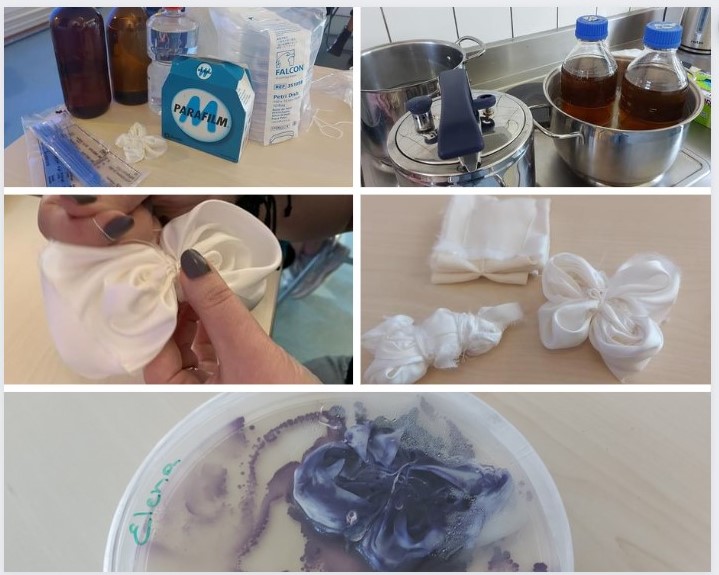
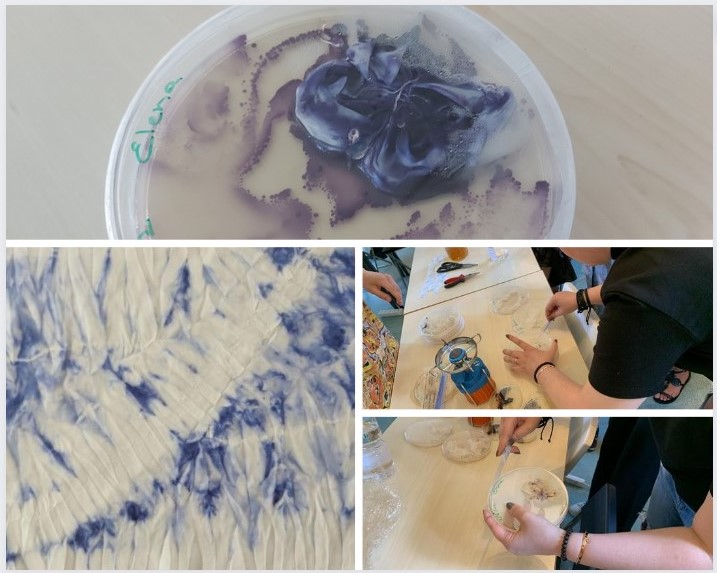
Bacterial dyes
At the ZipHouse, this year we did not have the oppurtunity to do the bacterial dye, but i had the amazing opportunity to participate in the Fabricademy Bootcamp 2022 GENEVA, were we did the bacterial dye. Here is the process and the final result obtained.
The final result
In the end we obtained a beautiful library of materials dyed with natural dyes and many special pictures taken by our colleague Elena Bannaia