2. Digital bodies

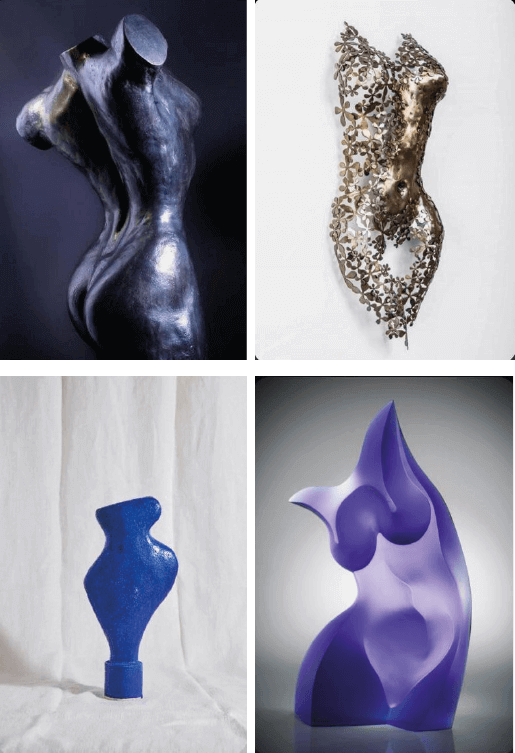
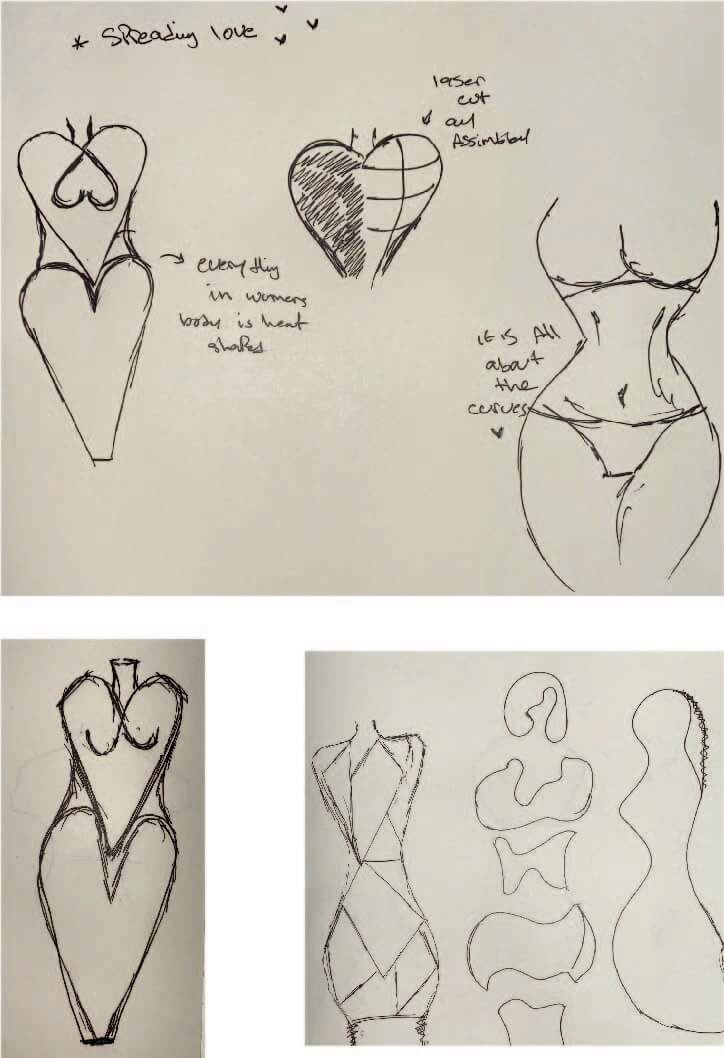
Sketches & Inspiration
I was inspired by the beauty and power of women's body
- Credit goes to
- Habata Detroit
- Jane Waksman
- Nimrod Messeg
It Is All About The Curves
Showing the beauty in the curved shape of female body, our body is so special it is shaped by 3 hearts as shown in the sketches and it spreads love all over, the way the mannequin is constructed shows how sold and strong women are at the same time the gaps between the strong sold walls is allowing air, light and feelings to pass by and make changes
Process and Workflow
Model 1
MakeHuman
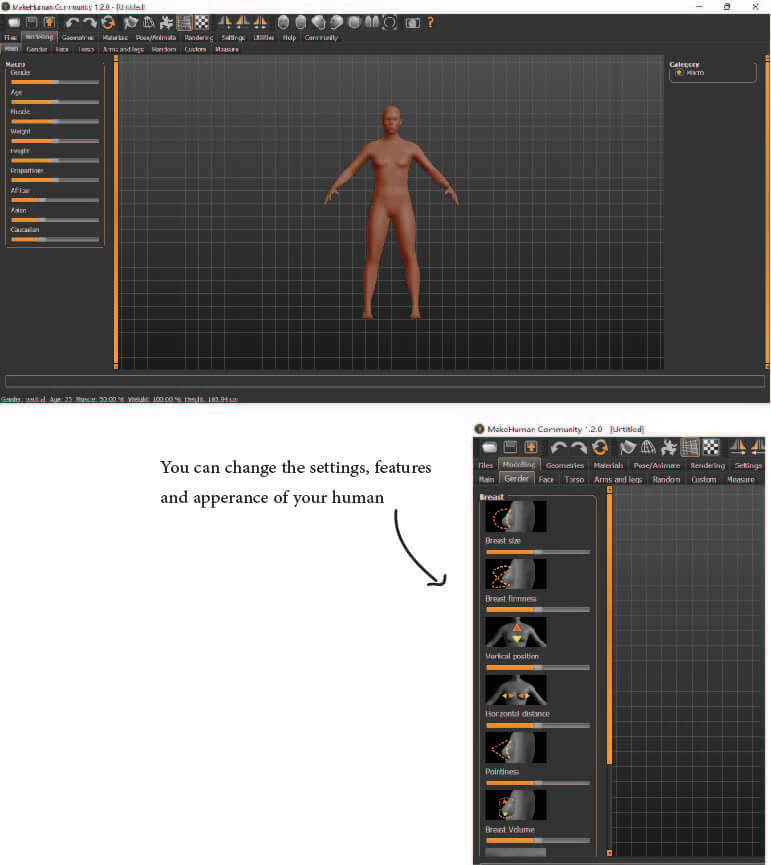 Make Human is a modeling software, that allows you to customize your model, for instants you can add your own body measurements from the custom tab or you can just randomly change the scale, gender and appearance.
Save you file as an STL or OBJ file to be able to edit on other software like Rhino
Make Human is a modeling software, that allows you to customize your model, for instants you can add your own body measurements from the custom tab or you can just randomly change the scale, gender and appearance.
Save you file as an STL or OBJ file to be able to edit on other software like Rhino
Rhino
I used Rhino to cut the unwanted parts as shown in the picture then Select the parts you want to exported. Click on 'File' Select 'Export Selected' choose STL and press save

I used the CAP command to close the shape
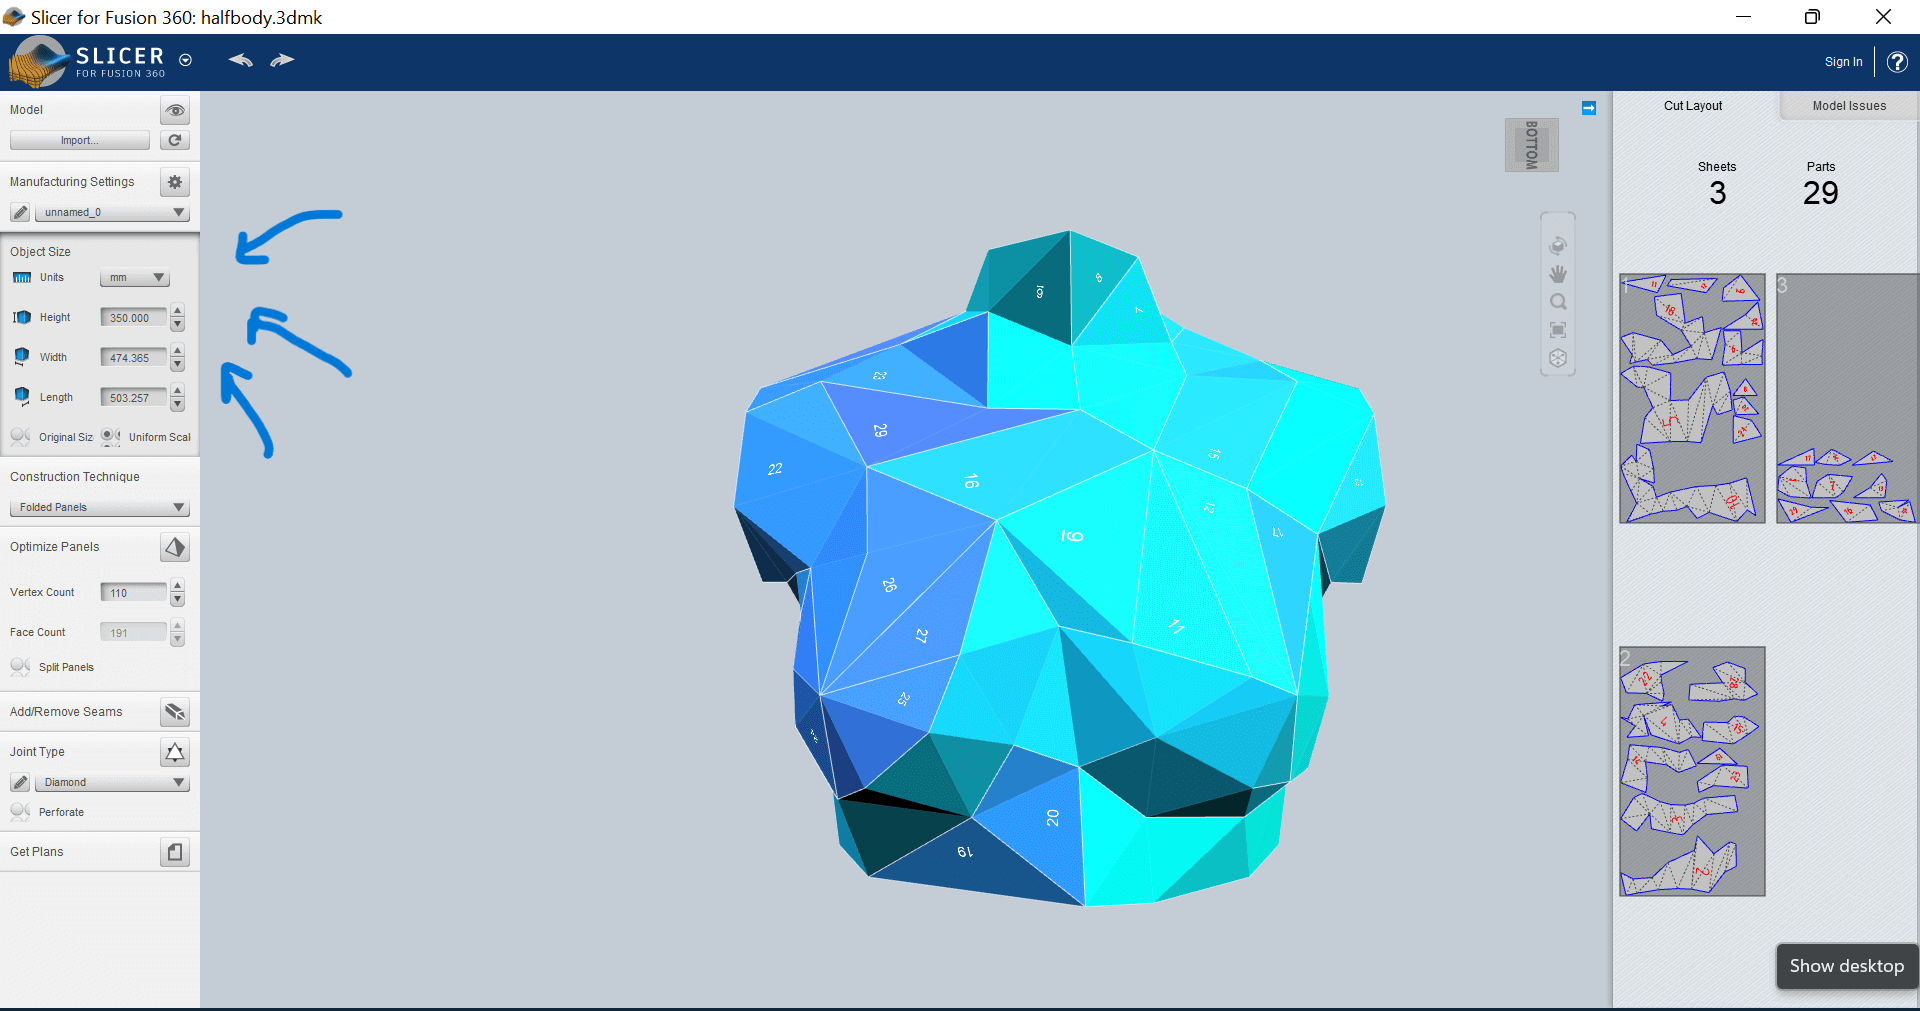
Slicer for Fusion 360
Is a software slices and converts 3D models into 2D patterns that you can laser cut out of any flat material
After editing in Rhino export you STL file to slicer for fusion 360
Edit the dimensions of your body: (hight,width,thickness)
Pick your construction technique: I used folding to get the shape in the picture you can edit the 2D slices, if they were red it means something is wrong in the folding or the assembly after cutting
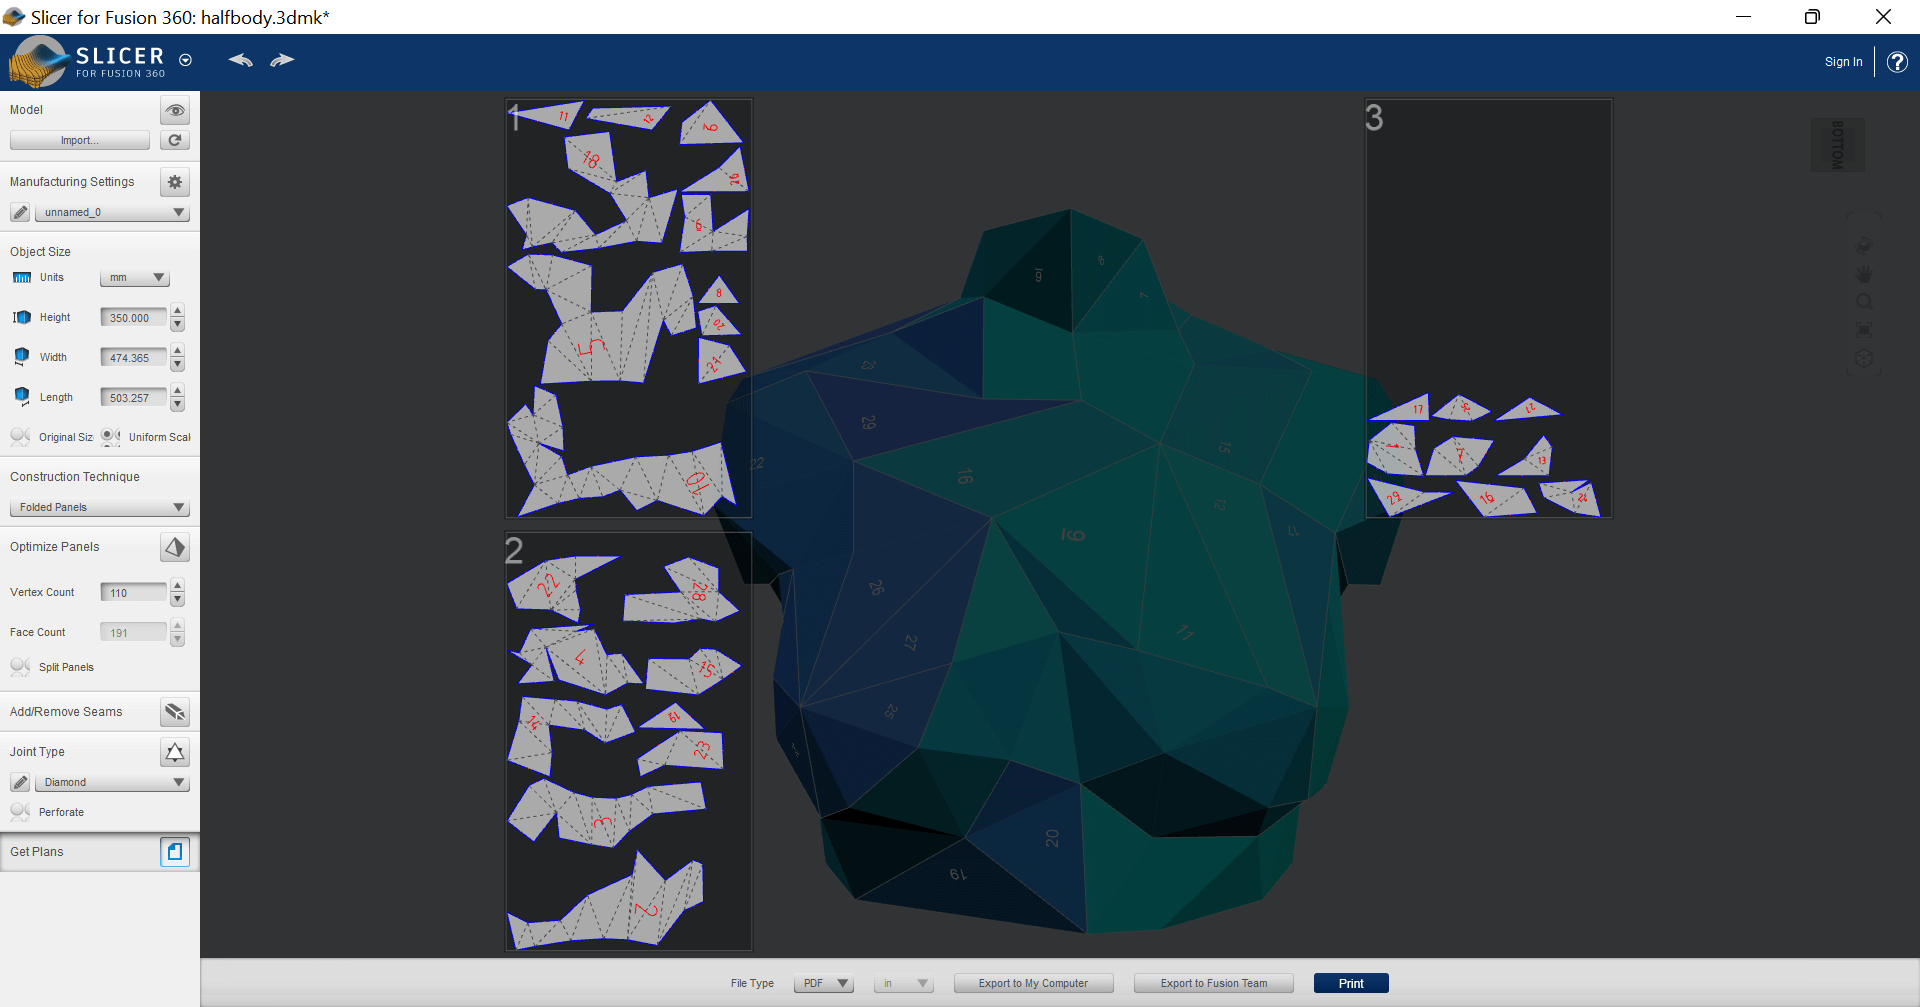
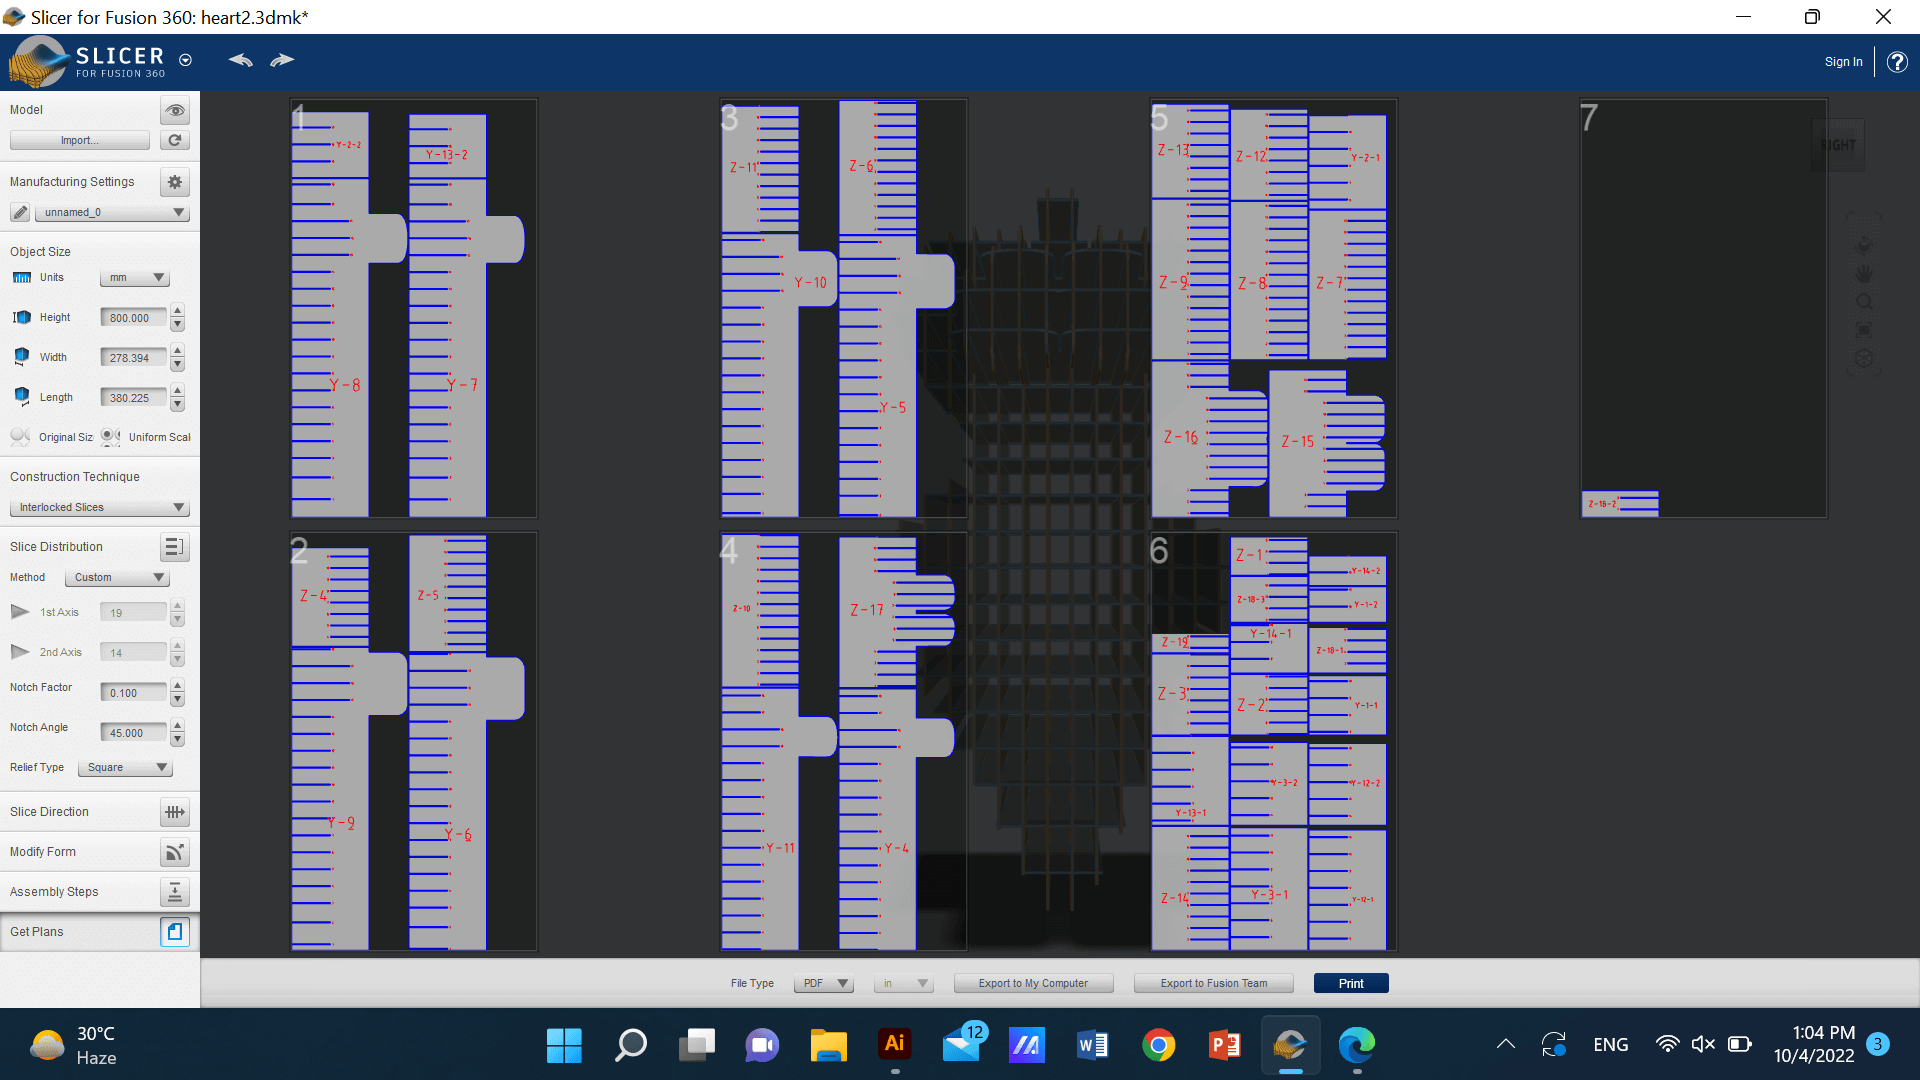
assembly steps: slicer for fusion 360 marks you 2D design with tiny numbers to make the assembly process easier and shows a tutorial in 3D how to successfully assemble your object
you can get your plan by clicking on get plan save it as PDF or DXF and open it using Inkscape to edit it for laser cutting
I decided to leave this for some other time and experament with another model
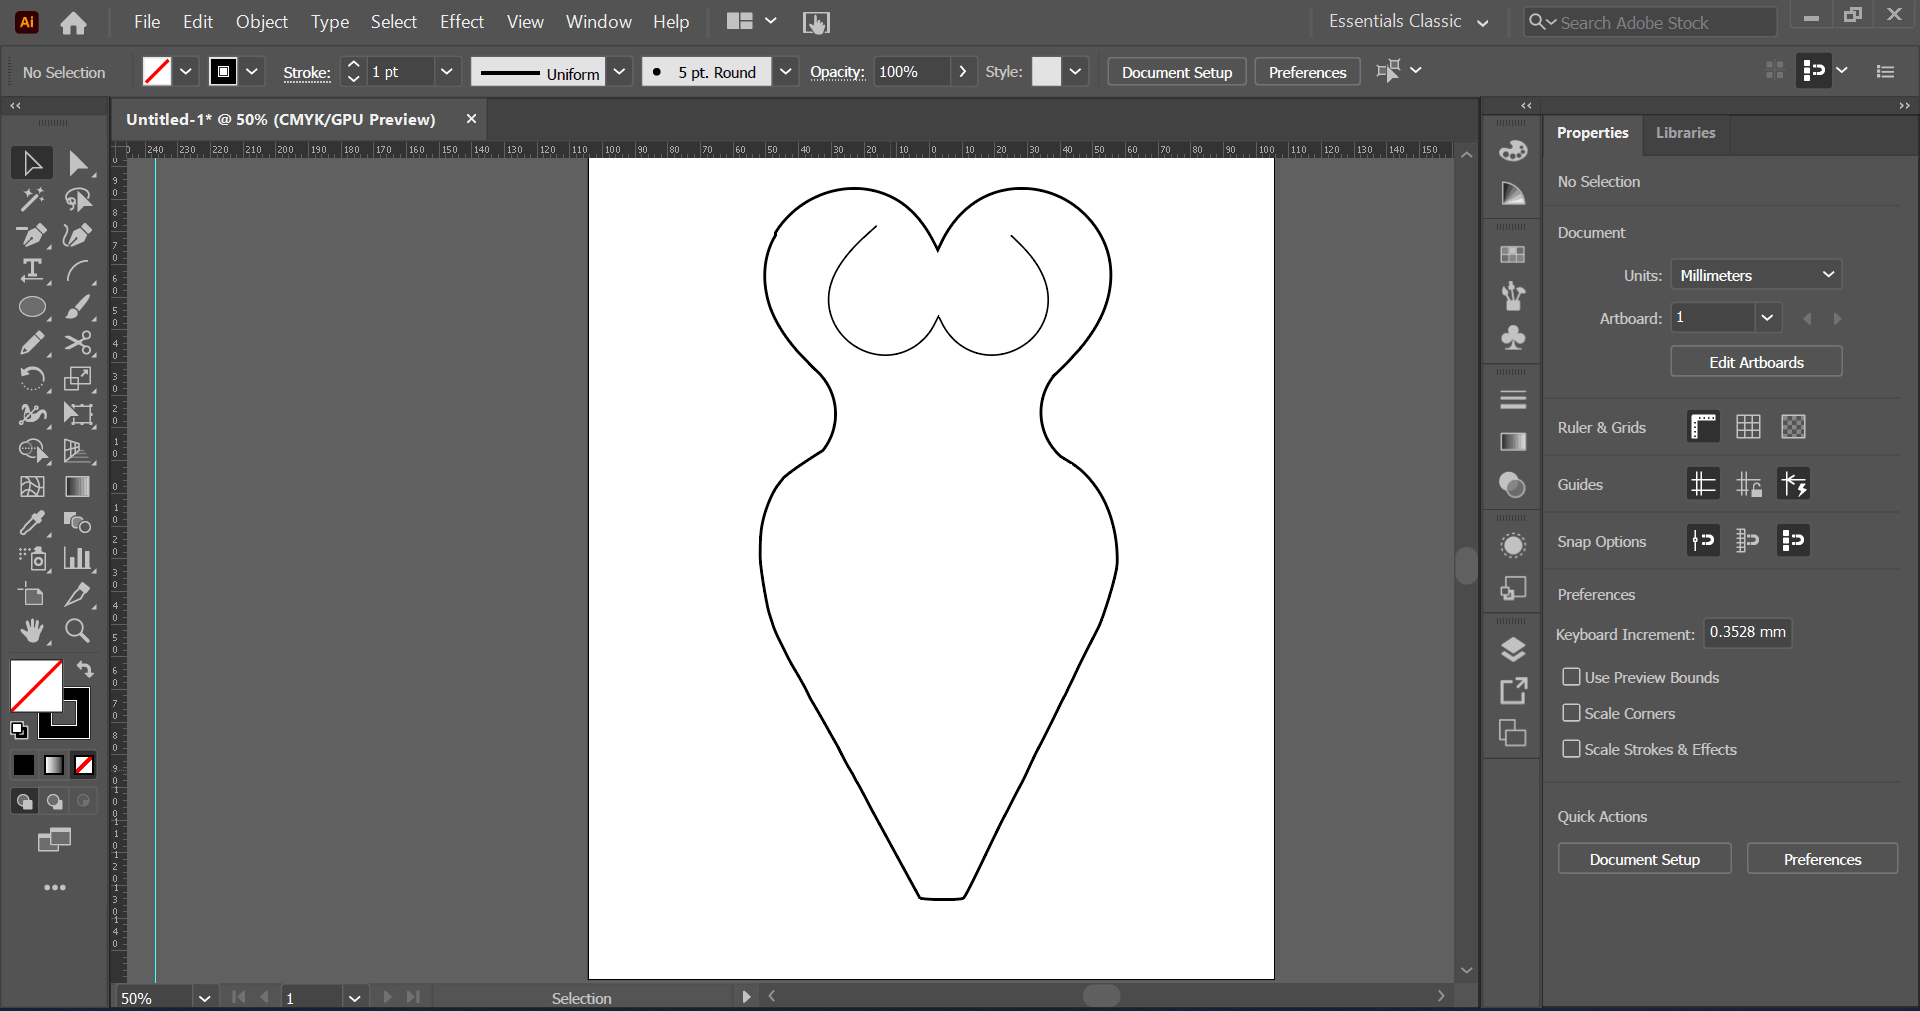
Model 2
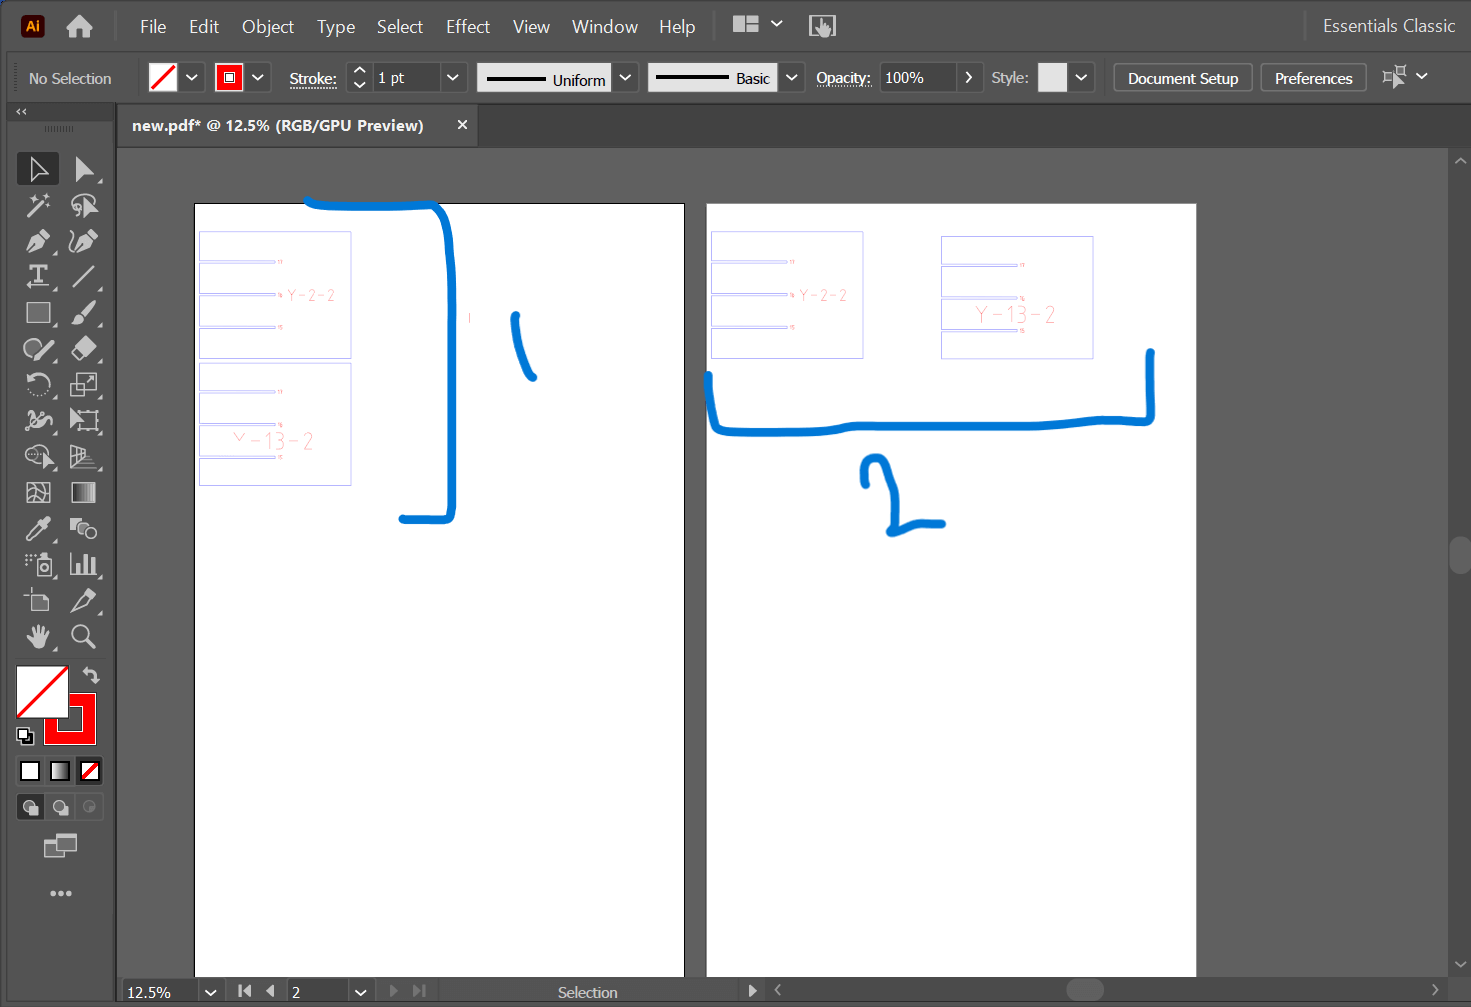
You can design your object using a lot of software for me I used Illustrator to design my mannequin because it handles vectors best and it is user friendly
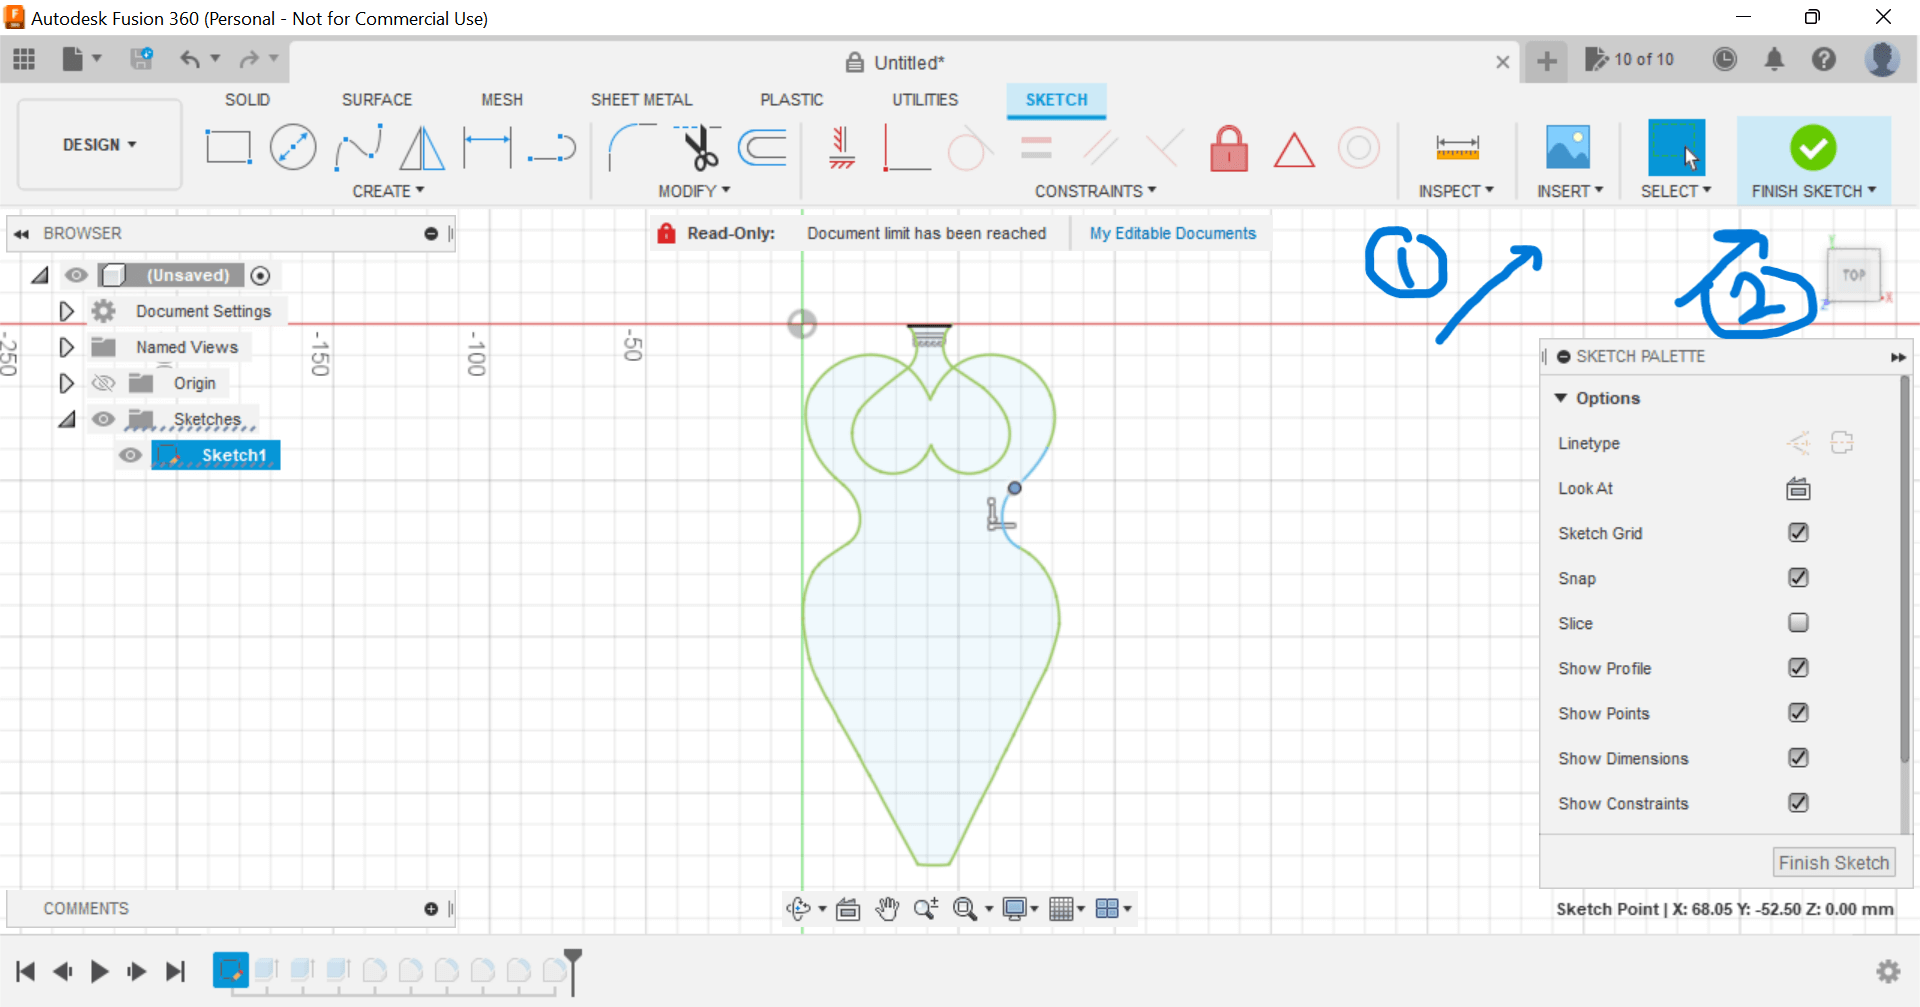
Saved the file as SVG then imported it in fusion following these steps:
- GO to insert tab
- click on insert SVG
- Choose your file
- You can edit the skitch
- Extrude you skitch, I extruded mine 80mm and the overall Hight of my mannequin is 90cm
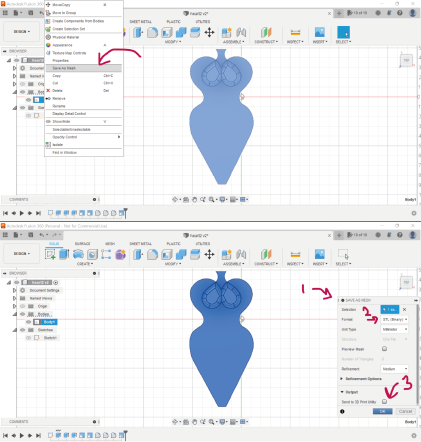
To save you file in Fusion follow these steps:
- Click on body
- Click on Save as mesh this will open a small window on the right
- In this window choose STL from format and Millimeters from unites
- click OK
Open slicer by fusion 360, Go to import and choose your STL file and follow the steps mentioned above under Slicer for Fusion 360
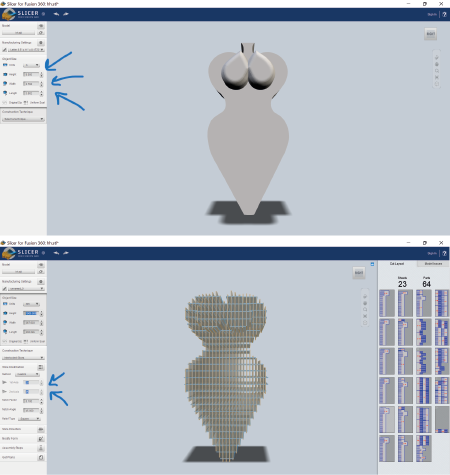
- Here I chose Interlocked slices as my construction technique
- In slice distribution I Chose by count method to change the number of horizontal and vertical slices
DO NOT FORGET!
change your laser cutter settings before getting you plan because it changes everything make sure that the dimensions of you laser cutter are right and do not forget the thickness of your material
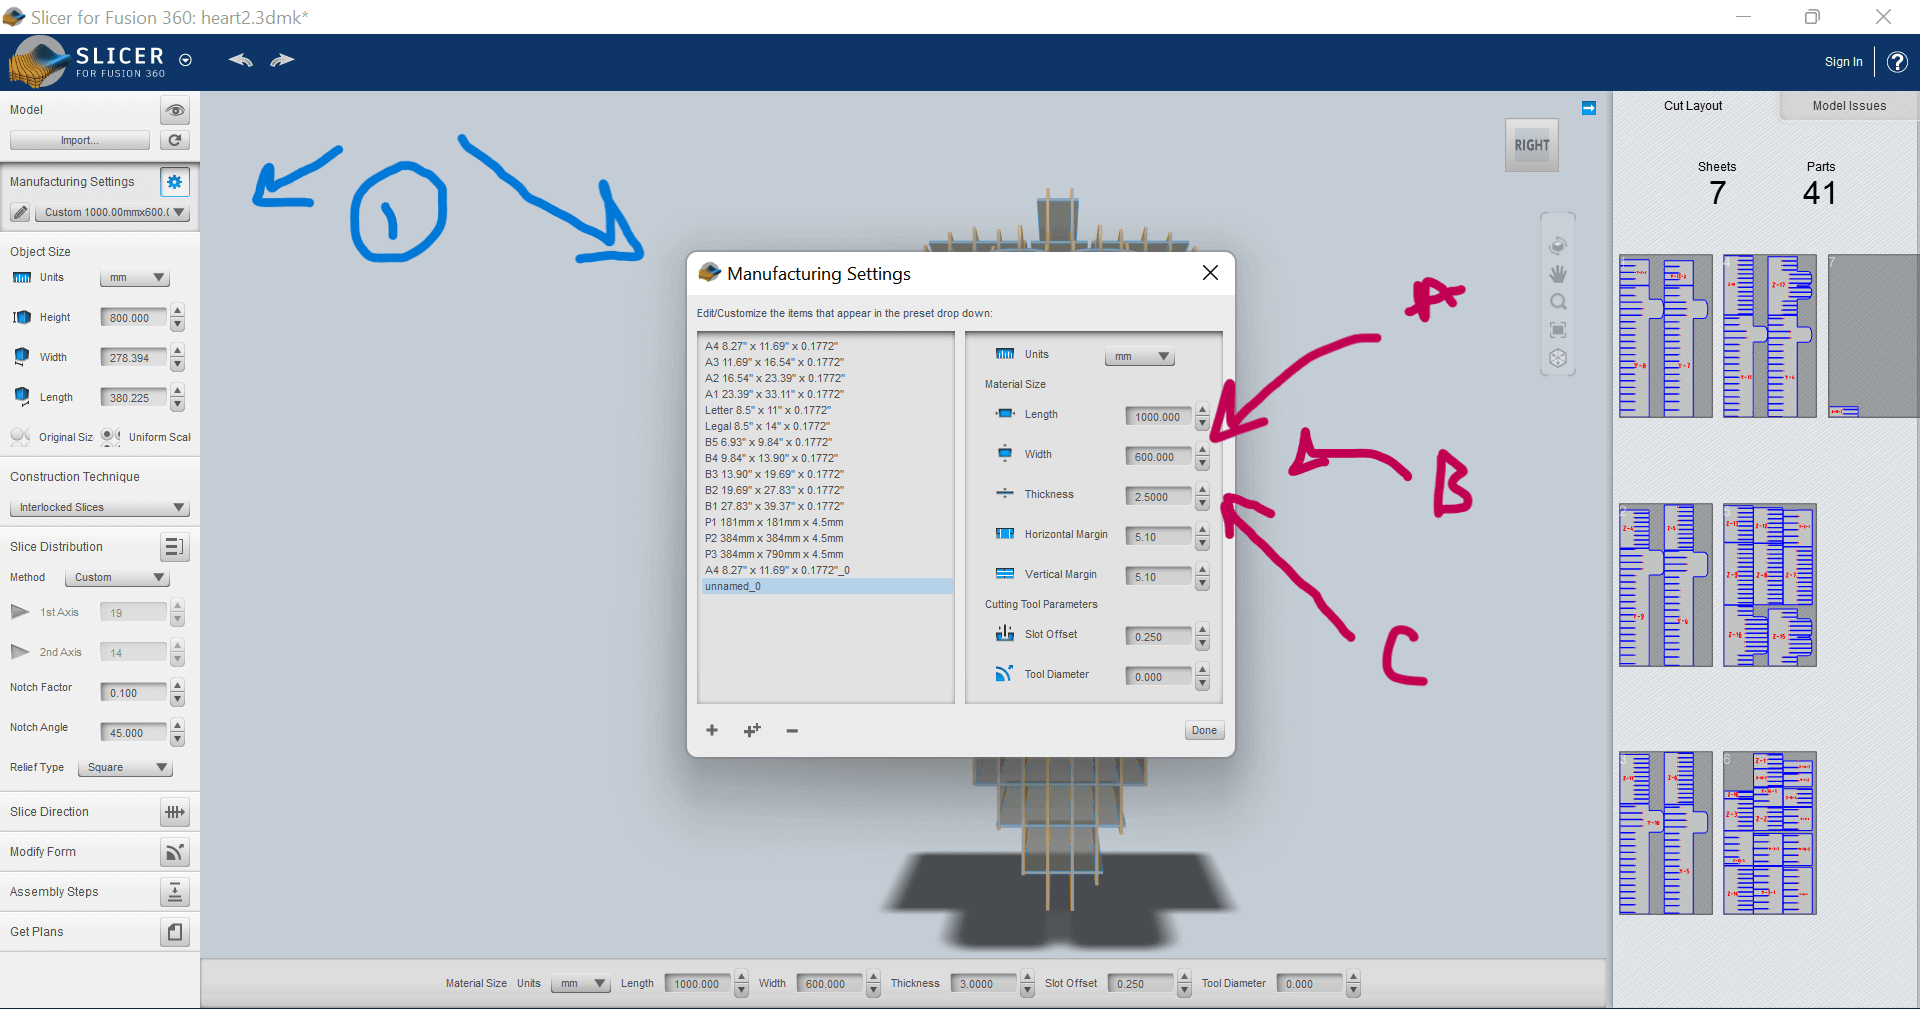
At last you get your plan save it as PDF or DXF open it using AI or Inkscape
Before cutting you should make a test to make sure your pieces interlock perfectly not too tight not too loose by changing the power and speed of the laser cutter
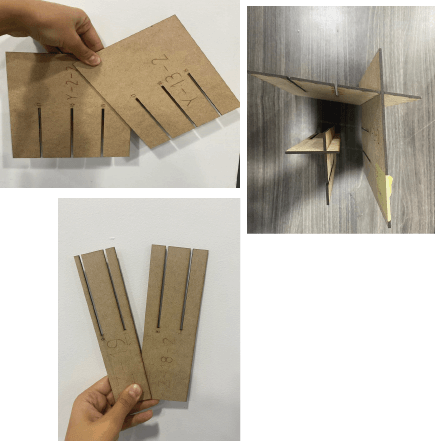
The pieces should make a 90 degree angel
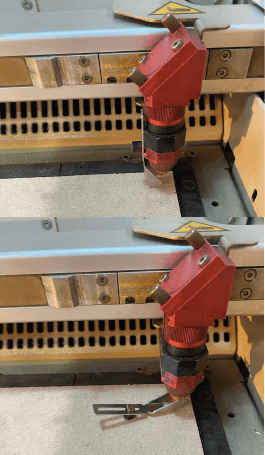
Fabrication
We are using Trotec laser cutter machine, Tortec is a simple easy to use machine that is being manufactured in Austria.
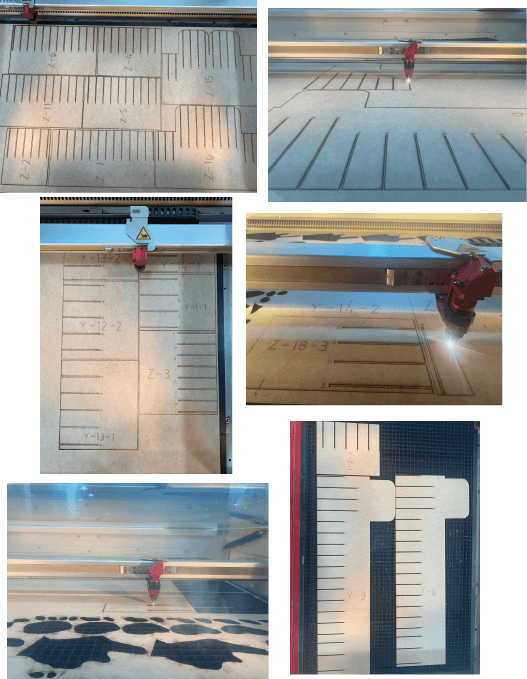
Start Cutting
First Thing First measure your bed Hight it differs from one material to another, We use a metal magnetic tool to do that, keep leveling the bed up until the tool fall this will be the right level for your material
Change colors The laser cutter uses colors to differentiate between cuts so you use different colors for different commands for example RED is for cutting in a low speed and high power to go though to material and BLUE is for engraving only high speed low power
laser cutter settings
power 100
speed 0.50
color red cut
start cutting
after making sure everything is set you can start cutting
Assembling
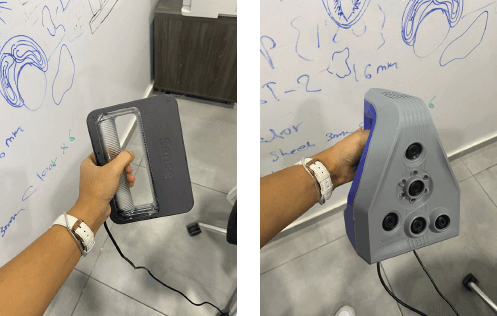
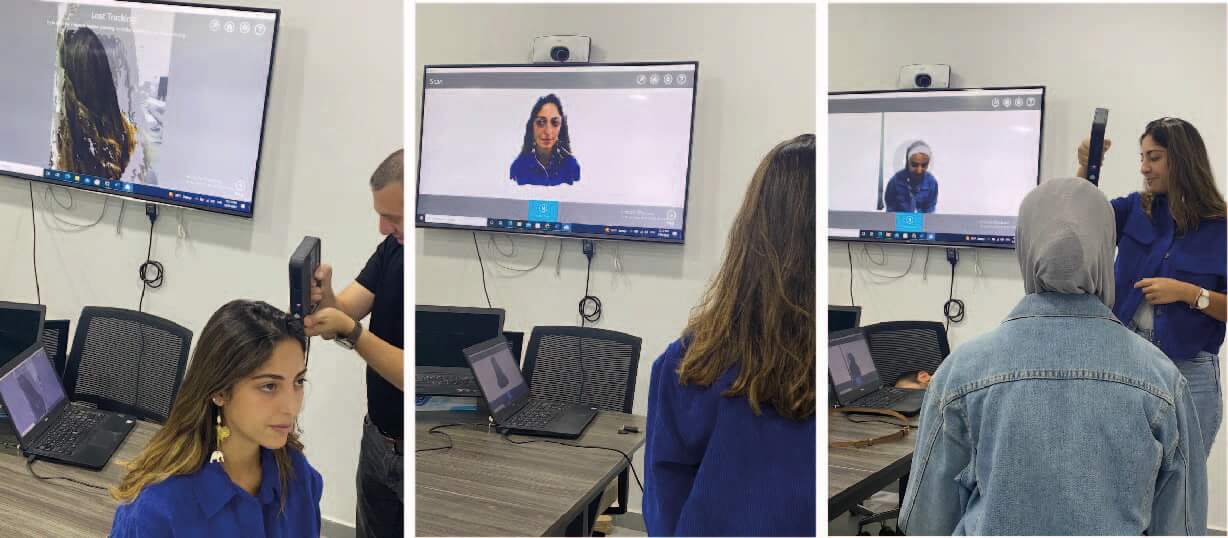
3D Scanning
3D Scanning is another way to get your design done you can either start from scratch or you can just scan you object save the file as STL or OBJ export it to your software to edit
To scan an object you need to go through all the details of the object with the scanner if you don't or if you leave a point the software will fill it up randomly and ruins your scan , move slowly, try not to lose track and always give the scanner a point to go back to when you lose track
Here we used a rotating stool so we can move slowly and keep the scanner still as much as possible
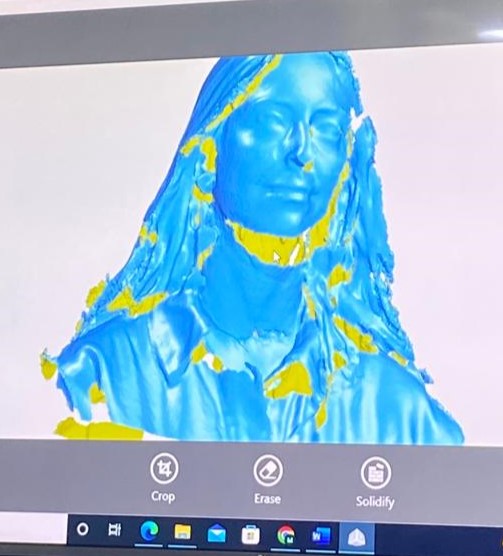
This was the first 3D Scanning result
The yellow parts are the parts the scanner could not see or the ones we forgot to scan
In TeckWorks We Used Two Types Of Scanners
You can read more about them by clicking on the one you want to know more about
Sense
Sense is a handheld laser 3D scanner able to capture full-color images
Features:
-
can scan objects at 1 mm resolution and close to 1 mm accuracy.
-
The color resolution of 1920 x 1080 provides good color texture mapping.
-
The depth sensor shows a 640 x 480-pixel resolution
Artech Space Spider
High precision, portable metrological 3D scanning solution based on blue-light technology, perfect for capturing small objects with intricate details
Features: - Up to 0.1 mm 3D resolution and up to 0.05 mm 3D accuracy
-
Wide range of applications in reverse-engineering, quality control and more
-
Fast capturing speed and no need for targets