8. Wearables
In this week we are employing E-textiles in wearables
References & Inspiration

Process and workflow
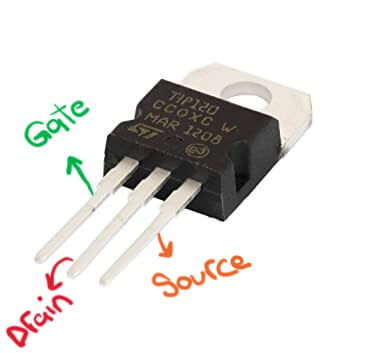
A transistor is a semiconductor device used to amplify or switch electrical signals and power.
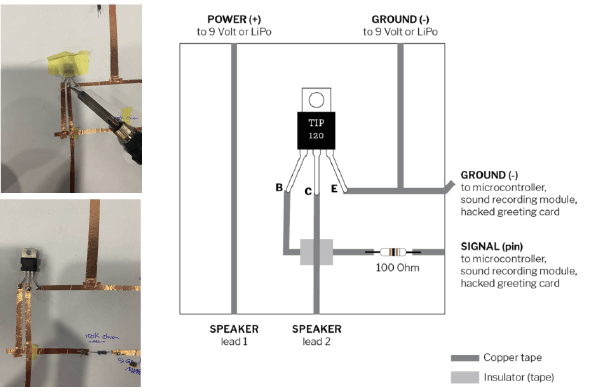
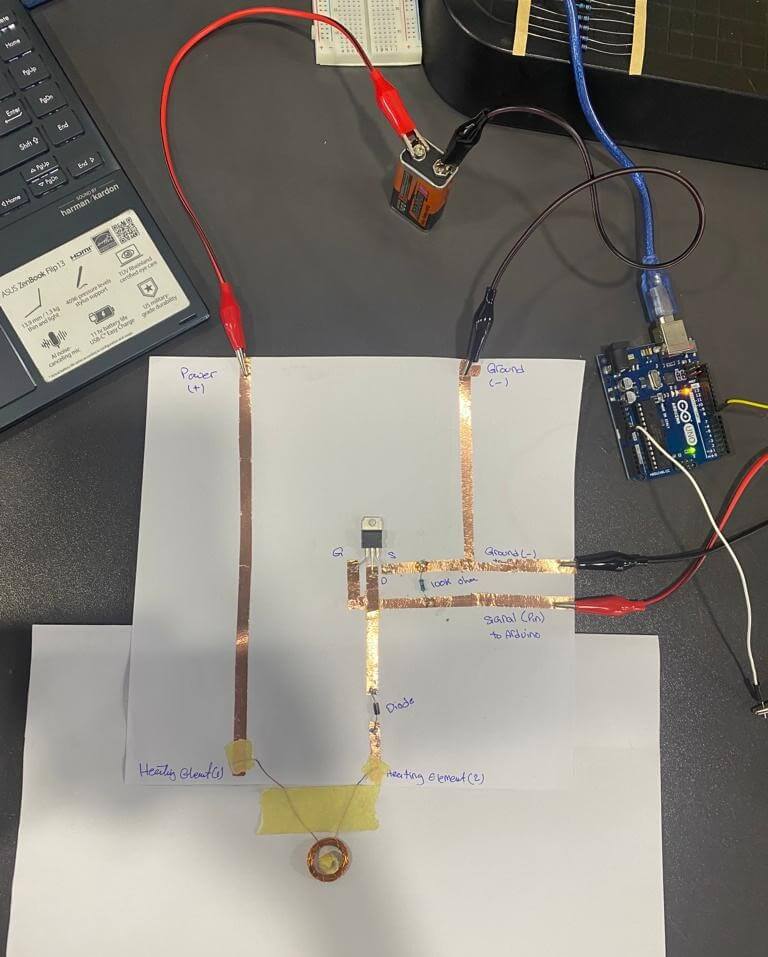
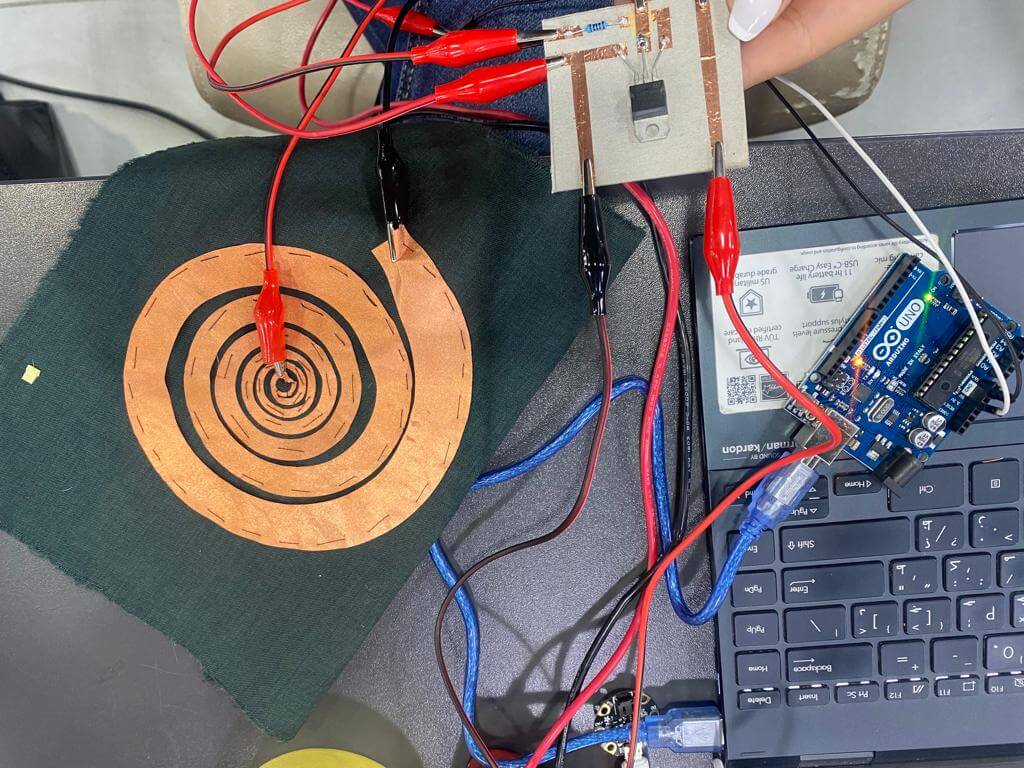
I made two different circuits to make things work with Arduino, the first one is used for the heat sensitive colors and the other one is slightly different and it is used for sounds and soft speakers

Flipping ball
The flipping ball is a strong magnet inside a copper coil with a two unipolar legs connected to a source of power (a 9V battery), when you switch the alligator wires the magnetic field changes flow direction and the magnet flips
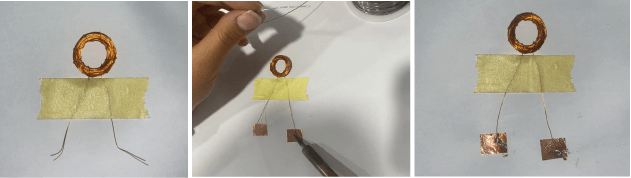
To make one follow the steps below:
- wrap your copper coil around a marker or so
- leave two legs one from each side
- tape it to a paper or sew it to a piece of fabric to stay in place
- but the magnet inside the coil
- connect it to a power source to create a magnetic field then switch the cables to change the direction of the field to make the ball flip
Conductivity
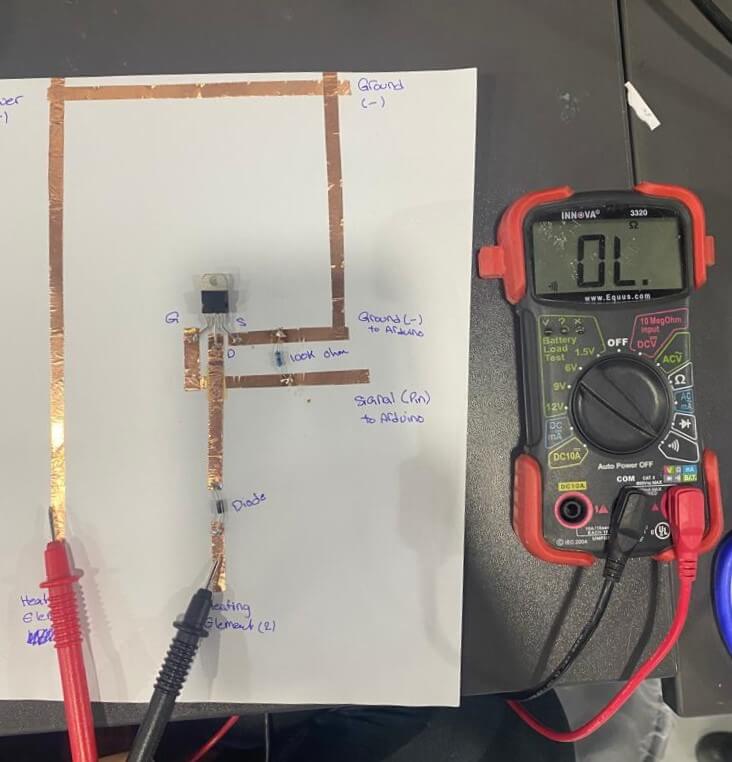
to make sure your circuit is working you have to check conductivity using your best friend the millimeter by touching the sides that are supposed to be connected and the millimeter should peep
Connecting The FlippingBall With Arduino
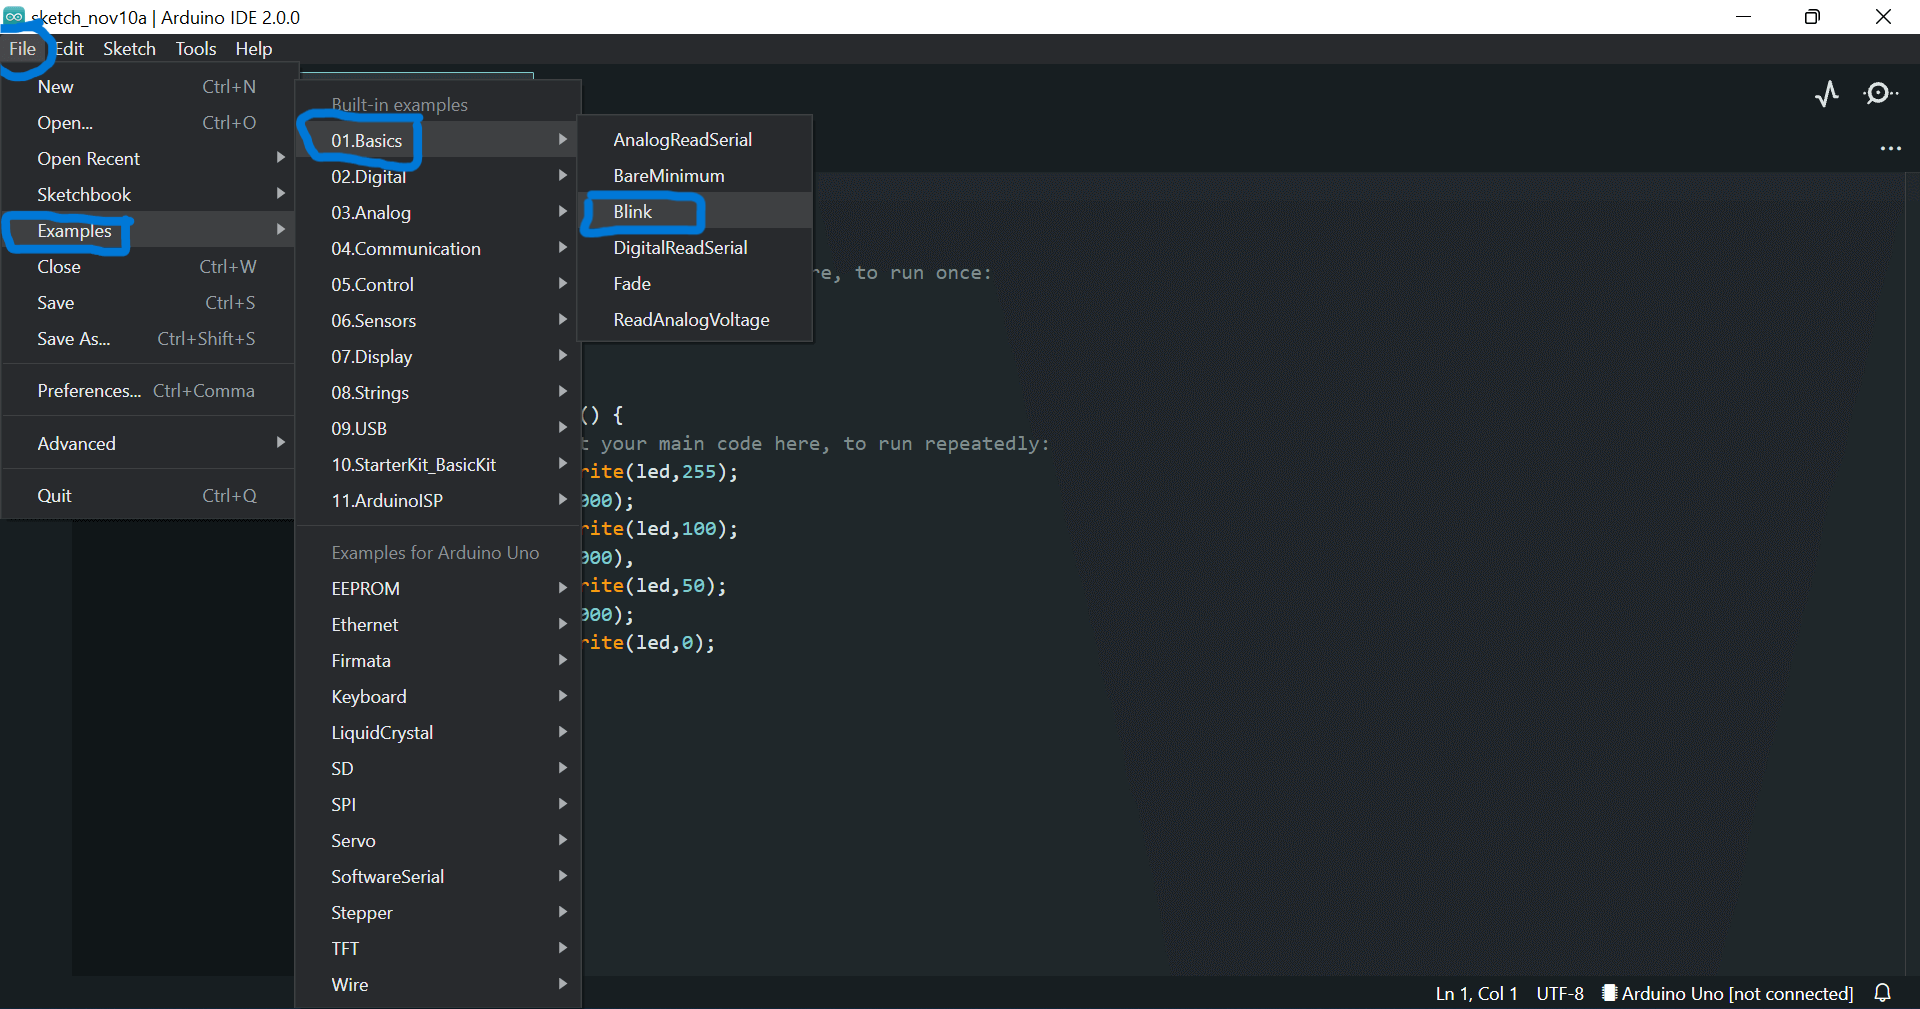
- go to file
- Examples
- choose 0.1basics
- then Blink
- and add the code example below
Code Example
Use the three backticks to separate code.
// the setup function runs once when you press reset or power the board
void setup() {
  // initialize digital pin LED_BUILTIN as an output.
  pinMode(LED_BUILTIN, OUTPUT);
}

// the loop function runs over and over again forever
void loop() {
  digitalWrite(LED_BUILTIN, HIGH);   // turn the LED on (HIGH is the voltage level)
  delay(1000);                       // wait for a second
  digitalWrite(LED_BUILTIN, LOW);    // turn the LED off by making the voltage LOW
  delay(1000);                       // wait for a second
}
After making sure my circuit is all connected and my Arduino bored it coded I connected my flip ball, to the Arduino and the circuit and it workedd :)
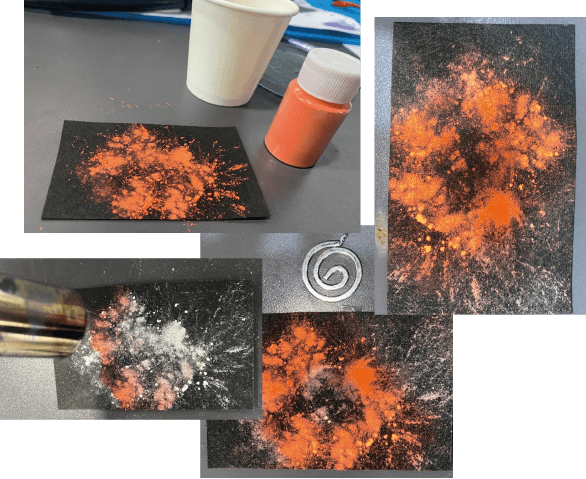
Heat Sensitive Colors
These colors are heat sensitive they change or disappear when exposed to a heat or electrical source, I used the powder ones on a piece of EEONTEX heater fabric, a patented product from Adafruit, You can find more about it HERE, when I blew hot air to the orange color it turned white you can also connect it to the circuit shown above the one for heat and it well change color as soon as the electric current starts flowing
It was fun experimenting with such colors
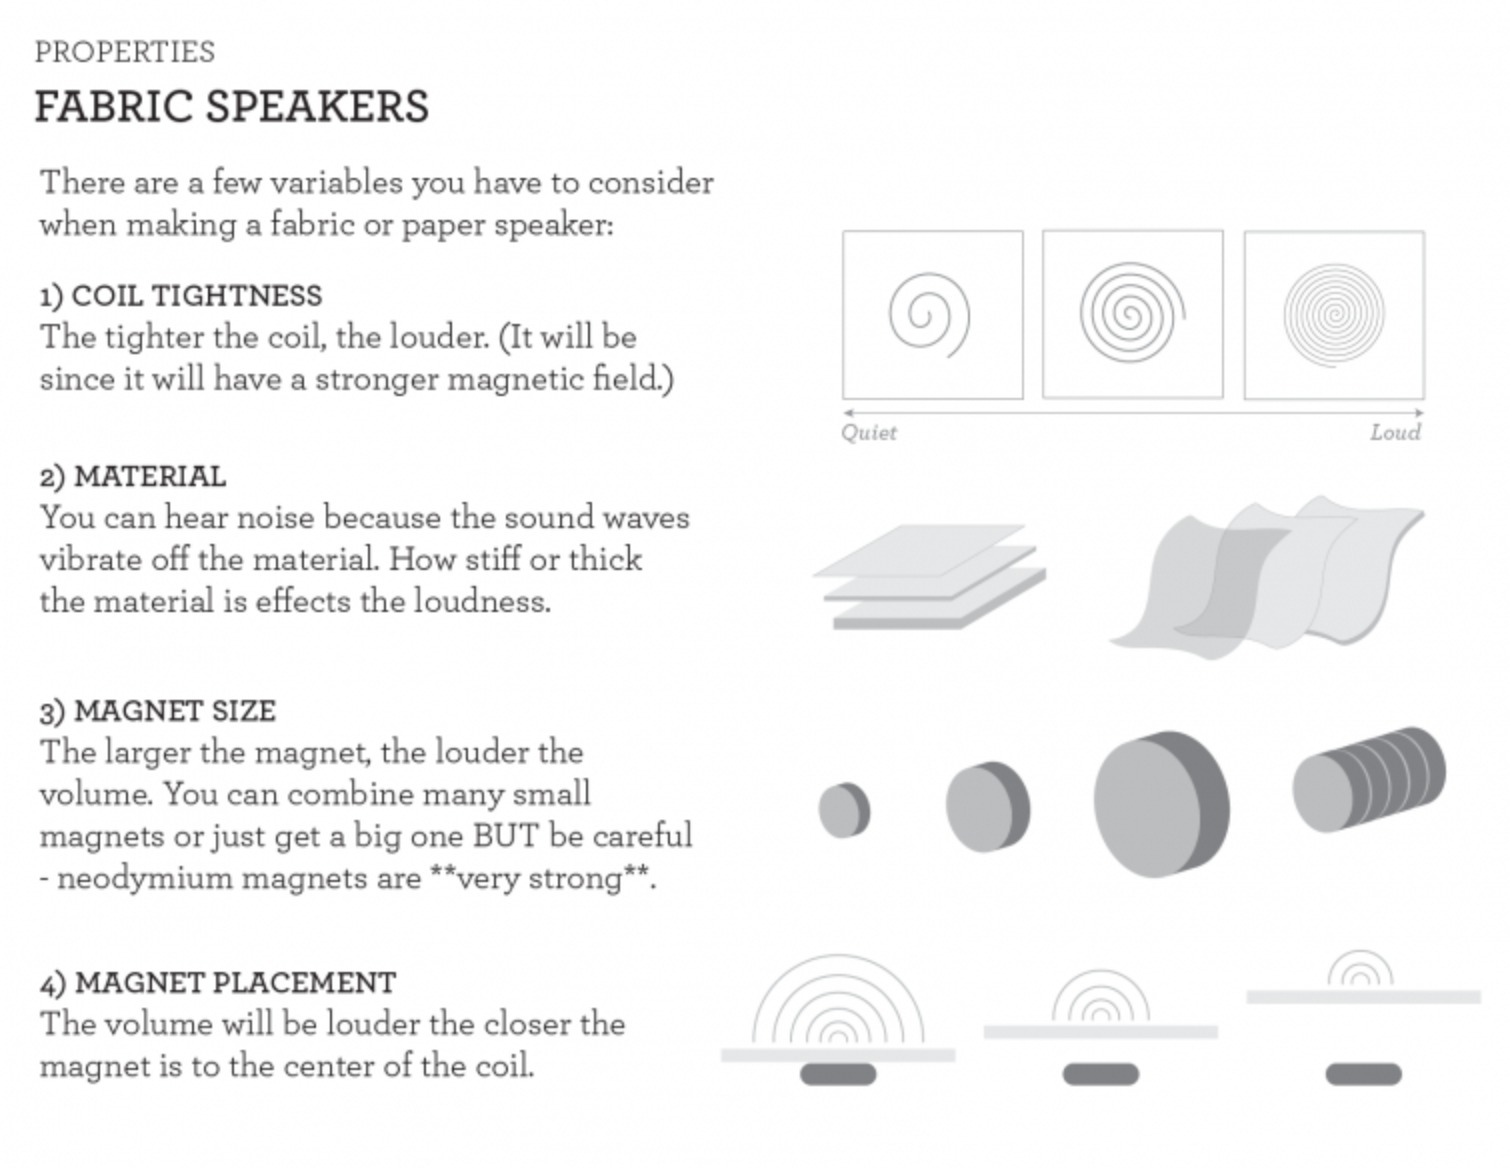
Soft Speakers
It makes it possible for pieces of fabric to be turned into fully functional speakers
You can explore more here FastCompany
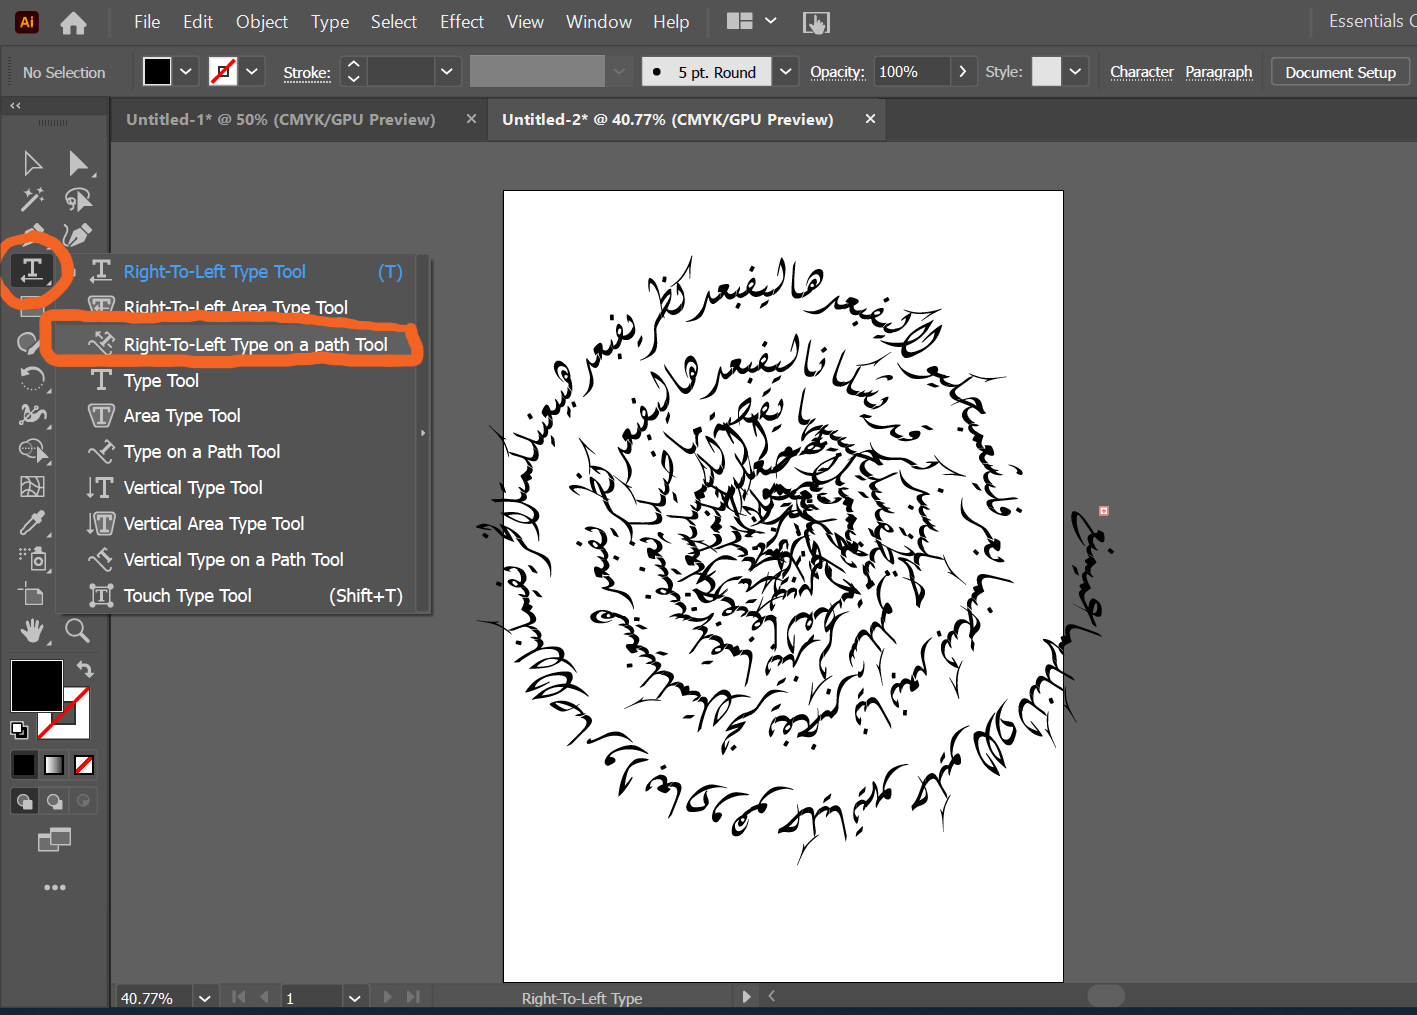
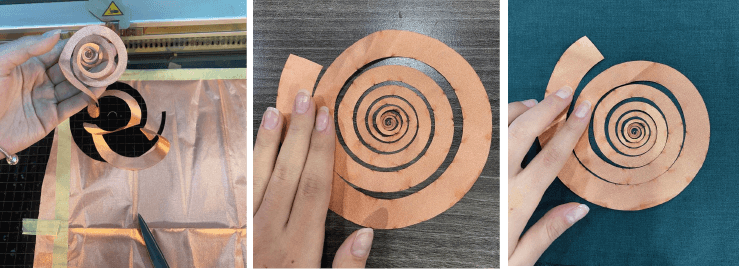
I started with drawing a spiral using illustrator from toolbar right click on the line tool and choose the spiral tool, draw one and then click on it to adjust the Decay, segments, style and radius

Now to toolbar again right click on the typing tool and choose write on path click on the spiral and start typing
Fabrication
I used copper fabric to make the spiral shape because it is conductive and it is cut easily
I tapped the copper fabric to the laser cutter bed to make sure it wont move the changed the settings to:
- material : textiles\ felt
- power : 50
- speed : 80
and I got this nice spiral shape, now I am going to iron it to a piece of fabric and make the speaker
BOM
- Copper sheet
- Piece of paper or cotton fabric as a base for the circuit
- Transistor TIP 120
- cables
- 100 Ohm resistor
- soldering tools & equipment
- strong magnet
- conductive thread or glue
Code Example
In Arduino go to files, examples, digital then choose toneMelody and you well fine a code ready to be used, this is the code example I uploaded on my Arduino Uno board
#include "pitches.h"

int melody[] = {

  NOTE_C4, NOTE_G3, NOTE_G3, NOTE_A3, NOTE_G3, 0, NOTE_B3, NOTE_C4
};

// note durations: 4 = quarter note, 8 = eighth note, etc.:
int noteDurations[] = {

  4, 8, 8, 4, 4, 4, 4, 4
};

void setup() {

  // iterate over the notes of the melody:

  for (int thisNote = 0; thisNote < 8; thisNote++) {

    // to calculate the note duration, take one second divided by the note type.

    //e.g. quarter note = 1000 / 4, eighth note = 1000/8, etc.

    int noteDuration = 4000 / noteDurations[thisNote];

    tone(8, melody[thisNote], noteDuration);


    int pauseBetweenNotes = noteDuration * 1.30;

    delay(pauseBetweenNotes);

    // stop the tone playing:

    noTone(8);
  }
}

void loop() {

  // no need to repeat the melody.
}
you can take a look at this from Liza stark it clarifies better the troubleshooting
Fabrication files
Tools
- [Arduino UNO]

- [Arduino IDE]