13. Skin Electronics
This is the last week of experiments :)
Research
Skin electronics is making circuits to be as close as possible to the human skin and this is what we are doing this week
References & Inspiration
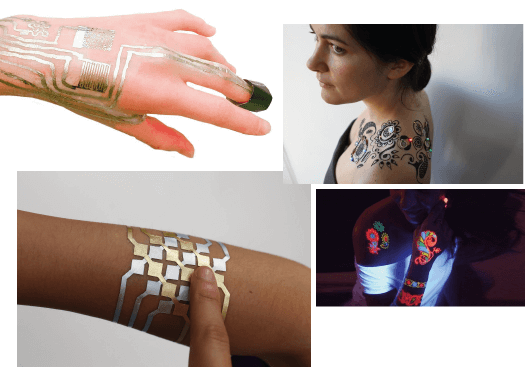
Tattoo that can control smart phones
Process and workflow
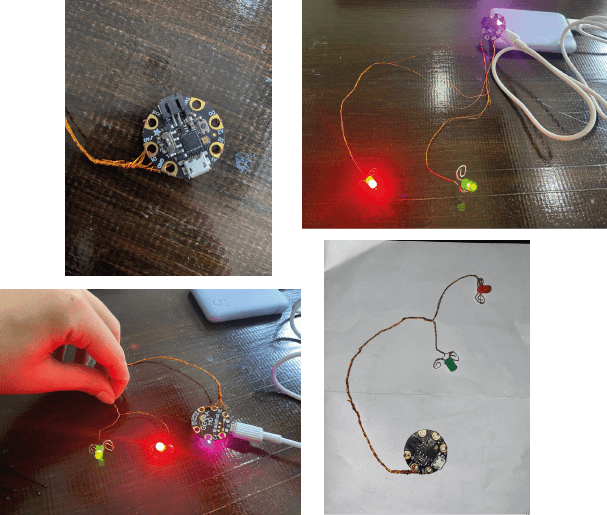
I started my project with writing a code on Arduino, test it using the breadboard and LED lights then uploading it to the Gemma M0 chip
Arduino
Arduino is and open-source Prototyping platform that allows users to create an interactive electronic object, Arduino code is written in C++
To use Arduino you will need a microcontroller board based on a microchip that reads Arduino, a breadboard, jumper cables, resistance and LED lights
-
Connect the Microcontroller to your laptop and start prototyping a circuit on your breadboard
-
Write your Arduino code and test it

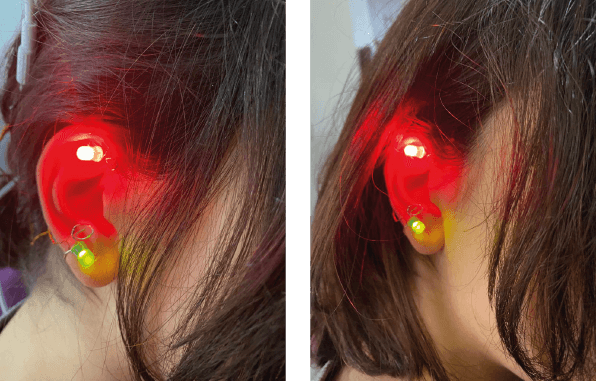
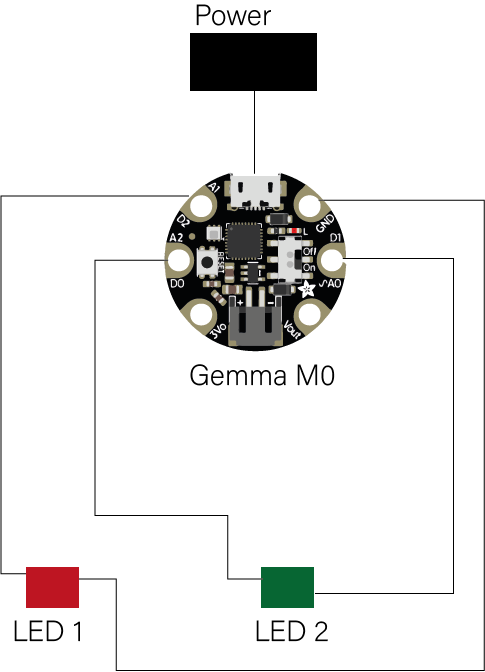
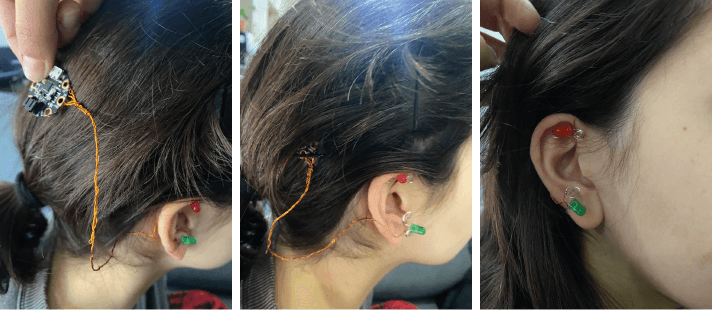
What I am making this week is an earring that lights up I used the Gemma M0 chip, copper wires and LED lights.
After uploading the code to the Gemma I burned the copper wires ends using a lighter to make the ends conductive then connected them to the right ends make sure you are connecting the positive side of the LED to the positive part of the Gemma and the negative side of the LED to the Ground on the Gemma
I used a power bank to test everything is working then started twisting the wires to make the earring shape
Code Example
// the setup function runs once when you press
 reset or power the board
void setup() {
  // initialize digital pin LED_BUILTIN as an output.
  pinMode(A1, OUTPUT);
  pinMode(A2, OUTPUT);
}

// the loop function runs over and over again forever
void loop() {
  digitalWrite(A1, HIGH);   // turn the
     LED on (HIGH is the voltage level)
  delay(1000);                       // wait for a
     second
  digitalWrite(A1, LOW);    // turn the
     LED off by making the voltage LOW
  delay(500);                       // wait for a
     second
  digiralWrite(A2, HIGH);  // turn on LED1
  delay(1000);

  digitalWrite(A2, LOW);  // turn off
  delay(500);

}
BOM
- Gemma M0 board
- 2 LED lights
- Copper wires
- power source (powerbank + USB wire)
Results
It feels like christmas when it lights up :)
It can be used in a performance or for a costume