12. Soft robotics
Research
Soft robotics is a subfield of robotics that concerns the design, control, and fabrication of robots composed of compliant materials, instead of rigid links, they are used in a variety of fields such as surgery, prosthetics, pain management, and space exploration
And it is a sandwich of two materials that has a gap for air of water to flow through the design making a change in shape
References & Inspiration
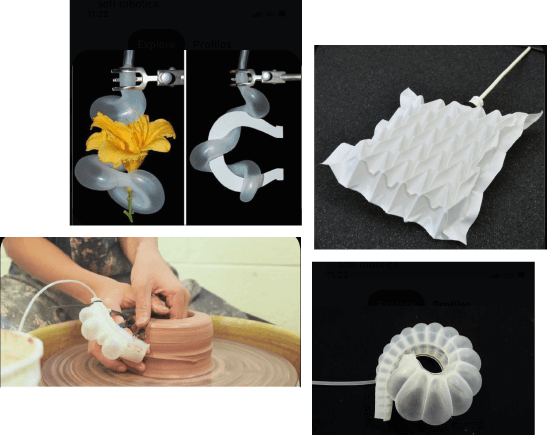
Credits:
Process and workflow
We experimented in two different materials
- Thermo Adhesive Vinyl
- Silicon
Vinyl
Thermo Adhesive Vinyl is a type of PVC sheets that are sensitive to heat, so when you heat press it, it sticks to each other
To make a soft robot out of vinyl you should use another material that does not stick when heated so we used baking papers
-
cut the baking paper in the way you want, keep a distance minimum 1mm for air to flow and try to avoid sharp edges, you can check this account from fabricademy it is an open library of patterns that shows how a certain pattern would react when blowing air in it Saskia-Helinska
-
put it in a sandwich on vinyl

-
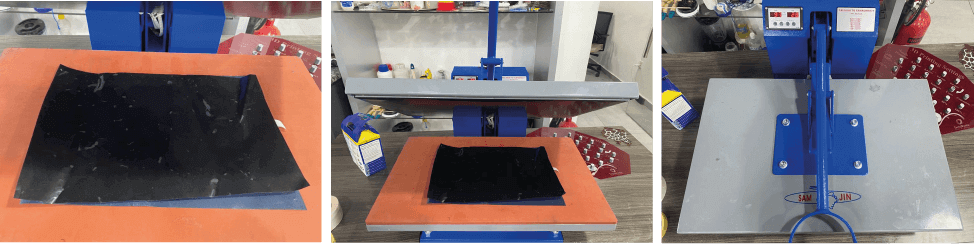
put it in the heat press
-
make sure you put the vinyl in the right face the shiny surface should be up
-
change the heat press settings: we used
- TEMP.: 90
- TIME: 30sec
-
press down the handle and wait till it peeps
-
peal the shiny protection sheet off
-
cut the extra parts
-
insert a needle with a pump to see the change, I used a hand manual pump like the ones used to measure humans blood pressure
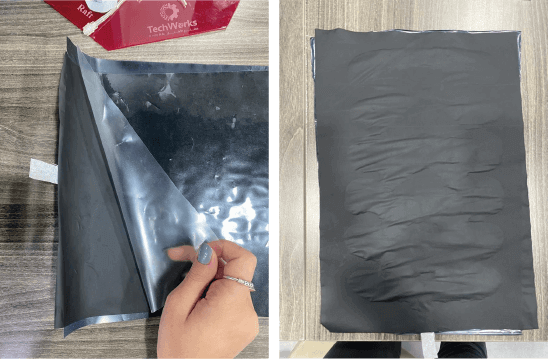
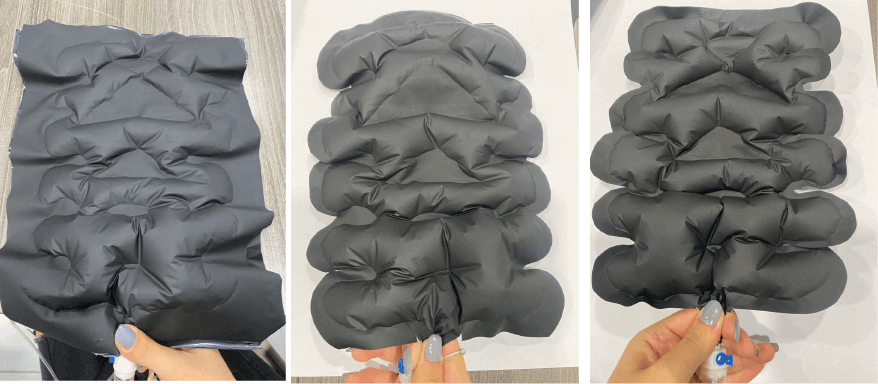
Result
This shape shrinks when air flow inside
Silicon Mold
We need to design a mold, laser cut it or 3D print it to cast silicon in it, I designed my mold using Fusion 360 and then 3D printed it
The design should take this into consideration and it applies for both experiments:
-
it should be made of two silicon layers, one with the design and the second one is the cover
-
the design should have a pattern that is empty so air can flow, the minimum distance for air to flow without popping the silicon is 1mm and that was my panels width
-
the pattern should be connected with a panel
-
avoid sharp edges
Follow The Steps Below To Design One:
TOP MOLD
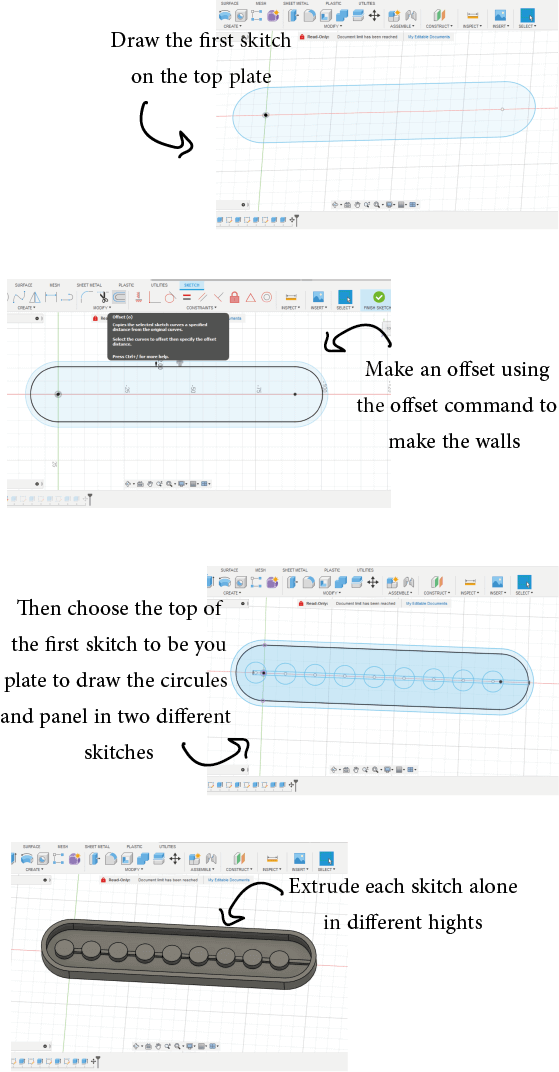
Extrusion Heights
* Base: 1mm
* Walls: 5mm
* Circles: 2.5mm
* Panel: 1.25mm
BOTTOM MOLD
The bottom mold should be a bit bigger than the top so we can make an offset to the first body 2mm bigger, use the project command to keep the two bodies link
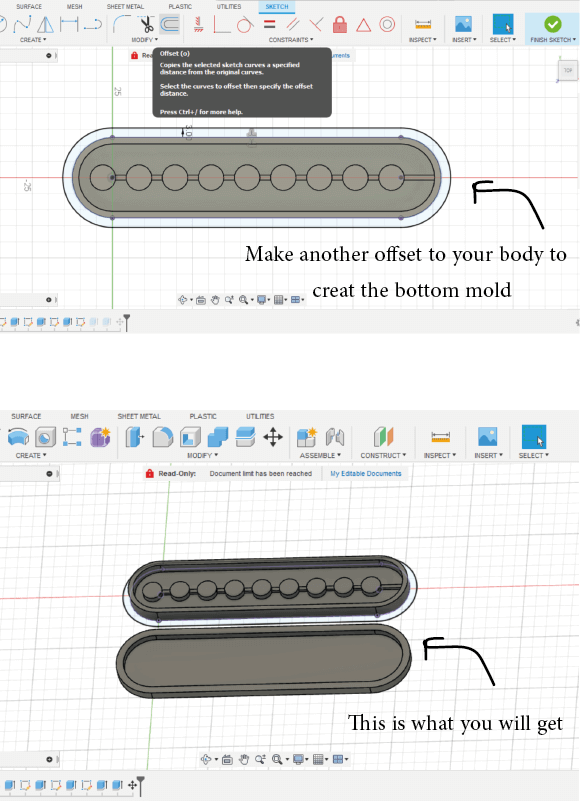
Hide the first body, extrude the second one then move it away from the first body so you can see both
Extrusion Heights
* Base: 1mm
* Walls: 3mm
Save each body separately as an STL file by clicking on the body, save mesh as, make sure it says STL then save
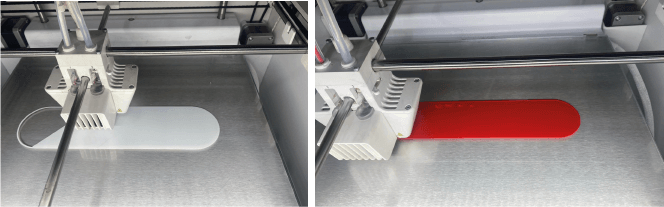
3D Printing
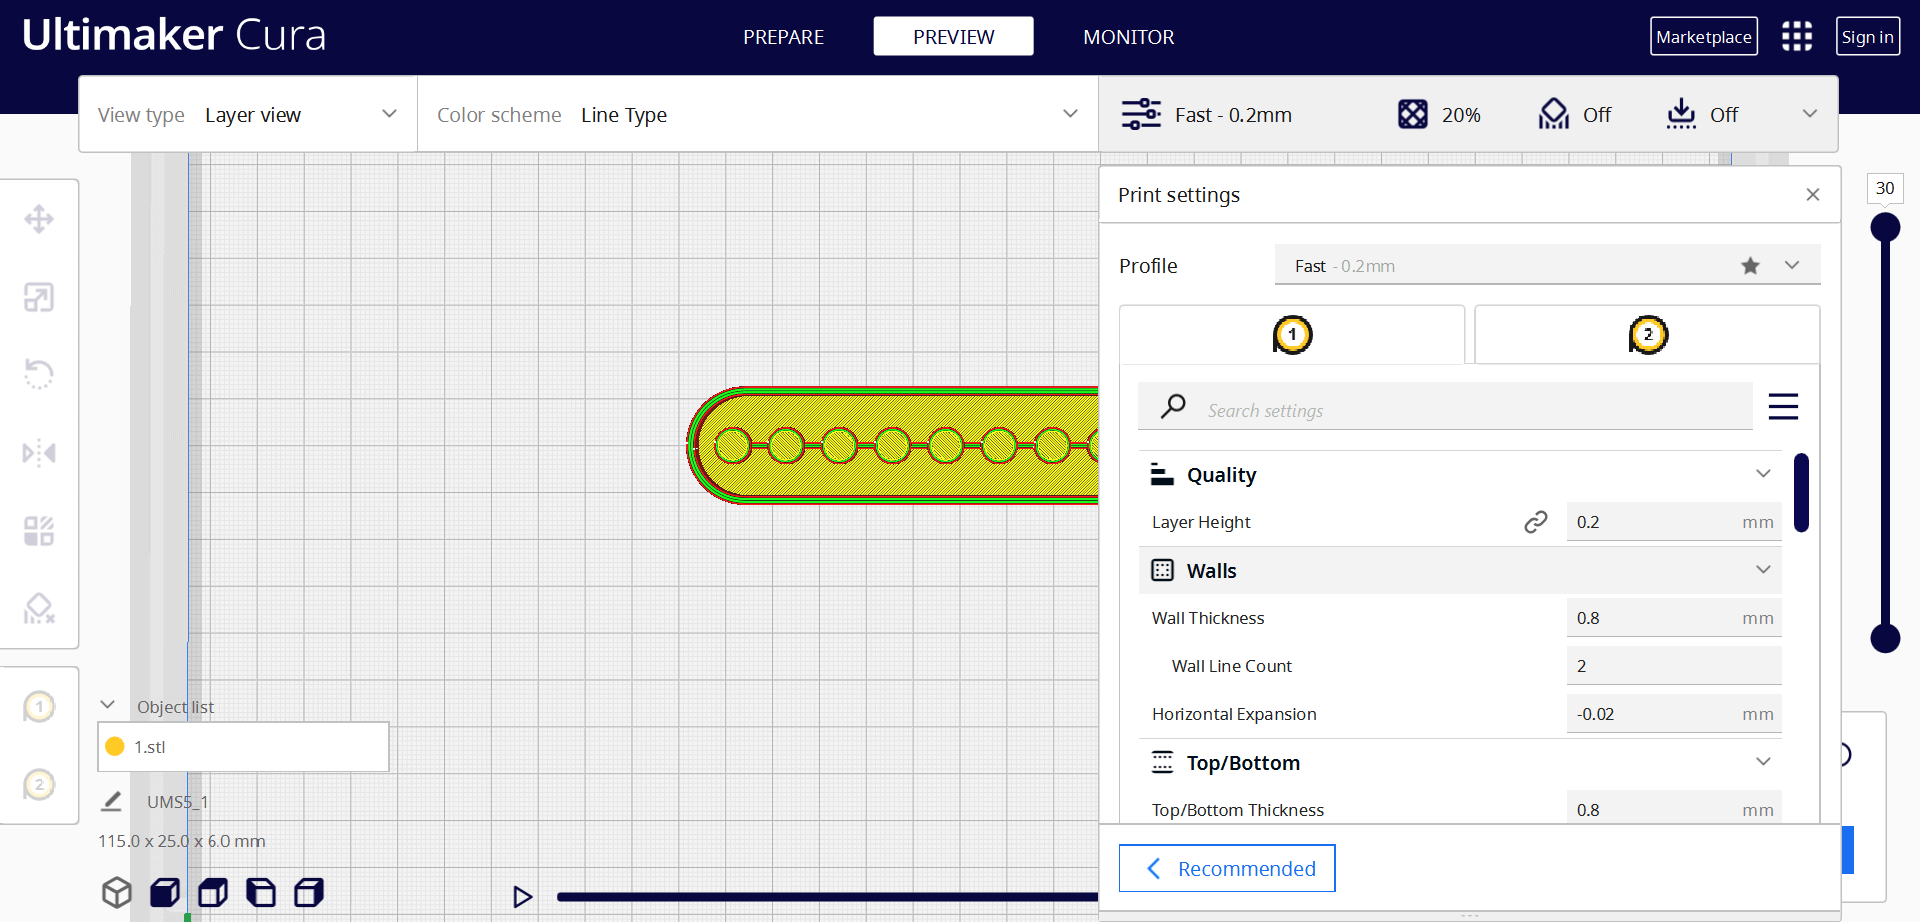
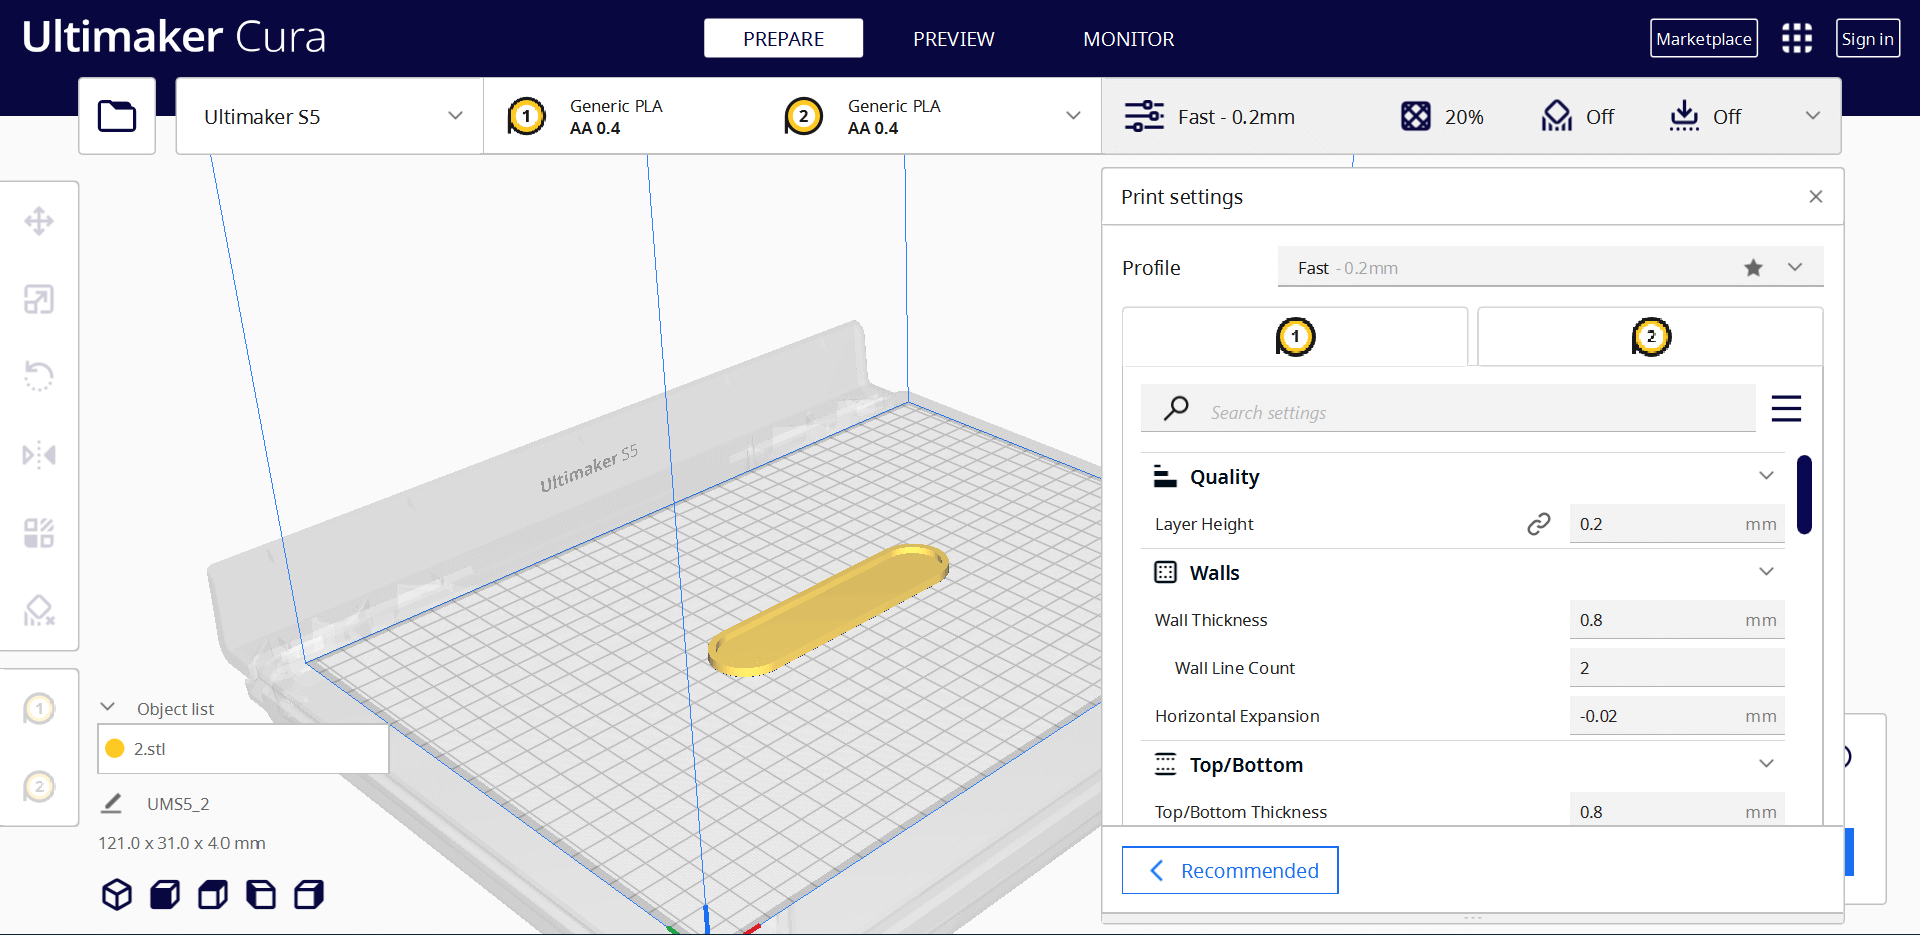
open each file using cura to change the setting as desired
My Cura Settings
* Layer height: 2mm
* Wall Thickness : 0.8mm
* Infill: 20.0
* Infill Shape: Lines
* Plate TEMP.: 60
* Adhesion: Non
* Support: Non
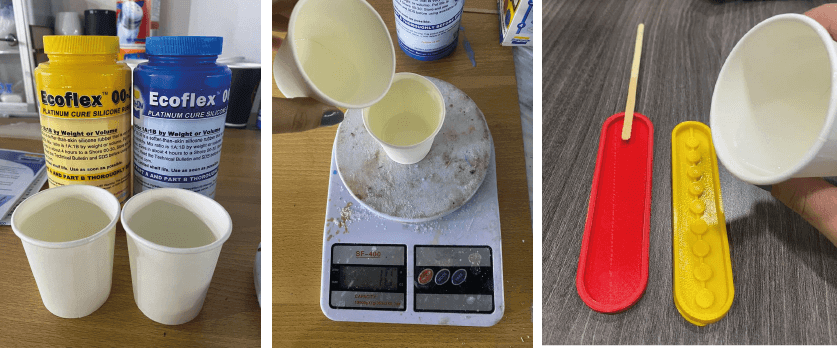
Silicon Casting
I used Ecoflex silicon to cast in my mold, it is made of two components A & B, the ratio is 1:1, my mold is 11cm long, 3.5cm in width and 0.5cm height we calculate the volume in cm3 using this formula ( Length * Width * Height ) witch equals (19.25cm3) convert it to grams then start measuring for this mold size I used 20g for silicon 10g A and 10g B
You can convert from cm3 to Grams using this link
Learn more about Ecoflex HERE
- Measure you components
- add A to B and mix gently for 2 minutes try to get rid of the bubbles
- cast in you mold do not pour from too high distance and try not to be too close
- leave for 4 hours then unmold
- glue you two pars together
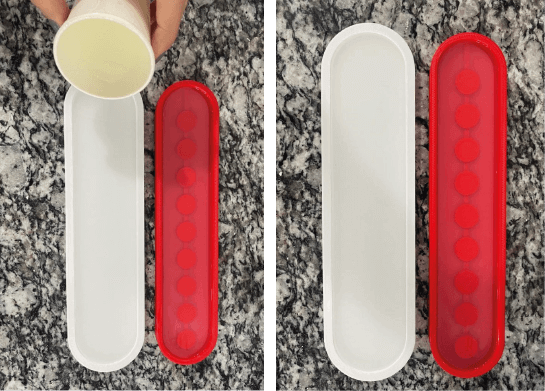
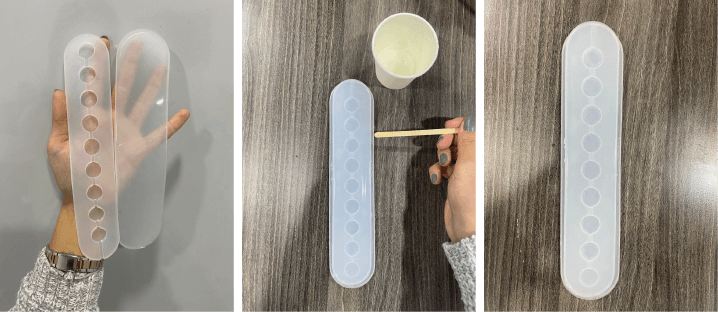
After 4 Hours
I unmolded my silicon and started gluing, silicon stick to silicon so I made another mixture of silicon 2gr A and 2gr B, with a wooden stick started added glue on the parts that I want to be glued, put the other part on top and leave for half an hour
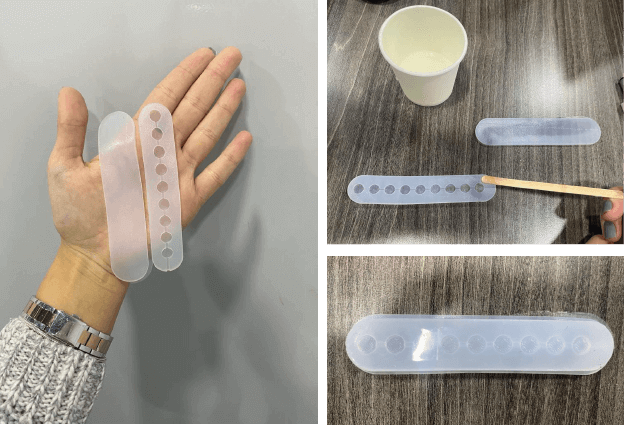
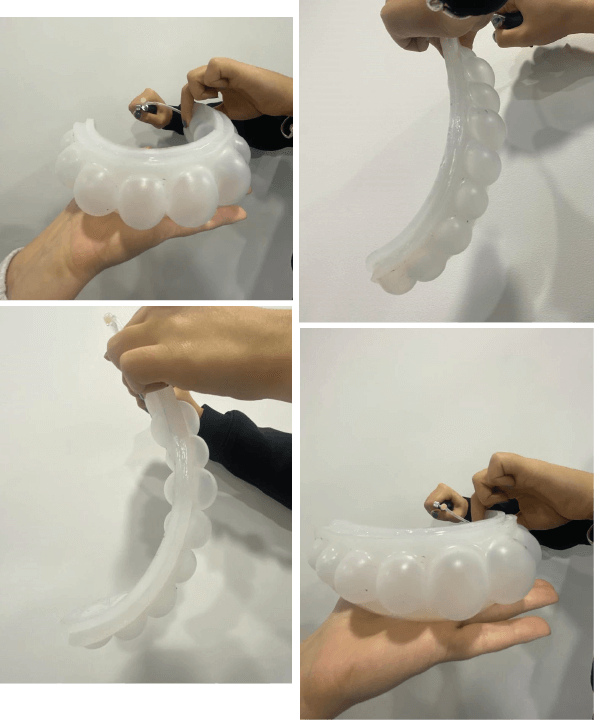
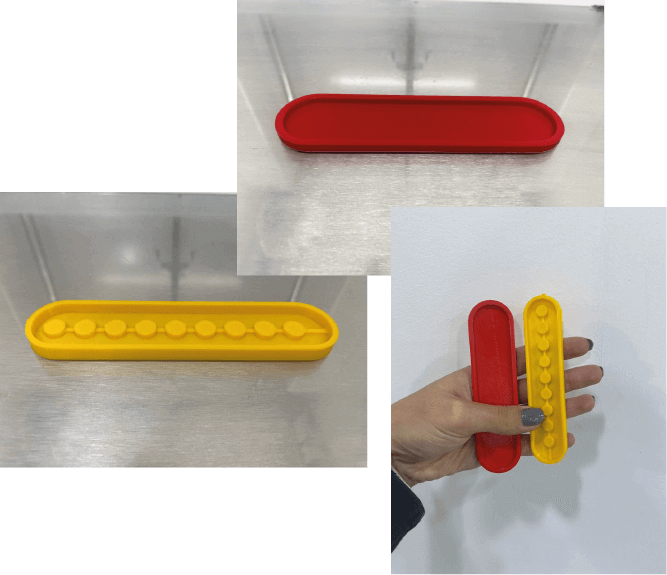
Result
After half an hour I Attached a 3V mini pump to my soft robot connected it to power source and this was the result
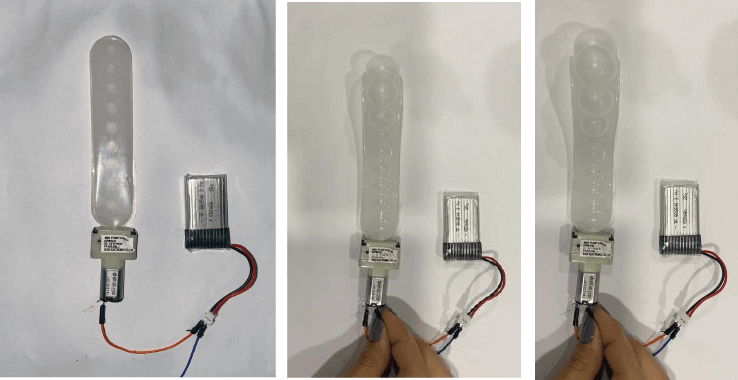
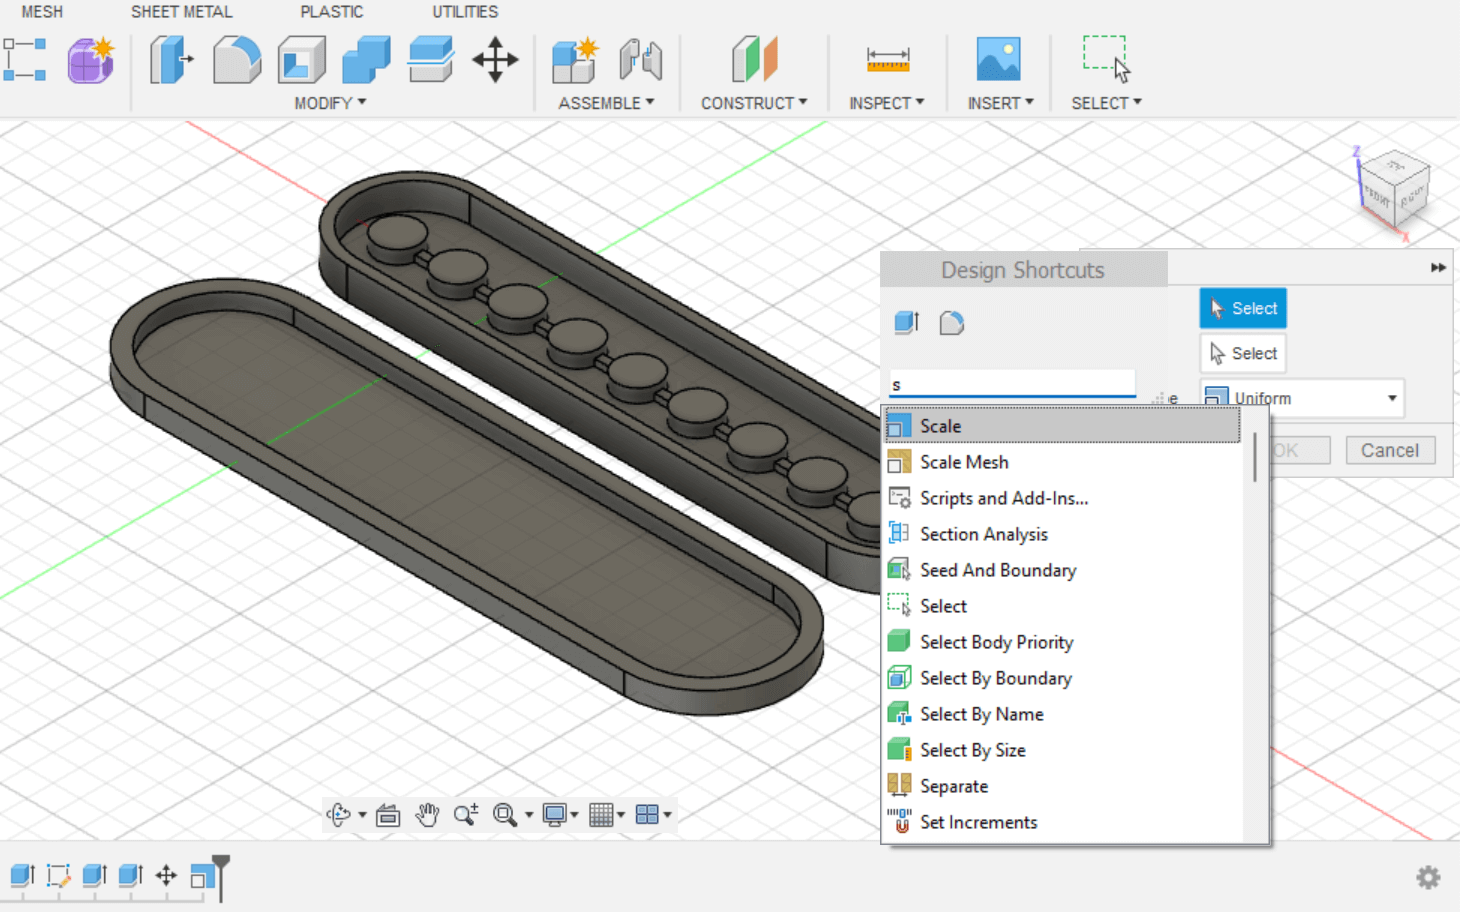
I felt it was a bit small Afterall so I decided to scale my design up and reprint it
To change the scale of a design in fusion 360 use the command scale, select the body or part you want to scale and type the number of example I typed 2 to double the size
3D Printing The New Mold
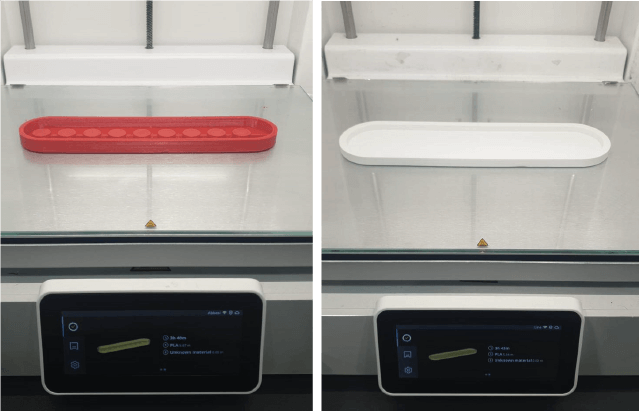
Casting In The New Mold
Since this mold is twice the size it took quadrable the amount of silicon 40gr A & 40gr B, mix them, cast and leave for 4 hours
Results