9. Textile Scaffold

This week was comprehensive we employed a lot of techniques that we leaned in the past weeks and explored more than one material or one tool to make designs
Crystallization
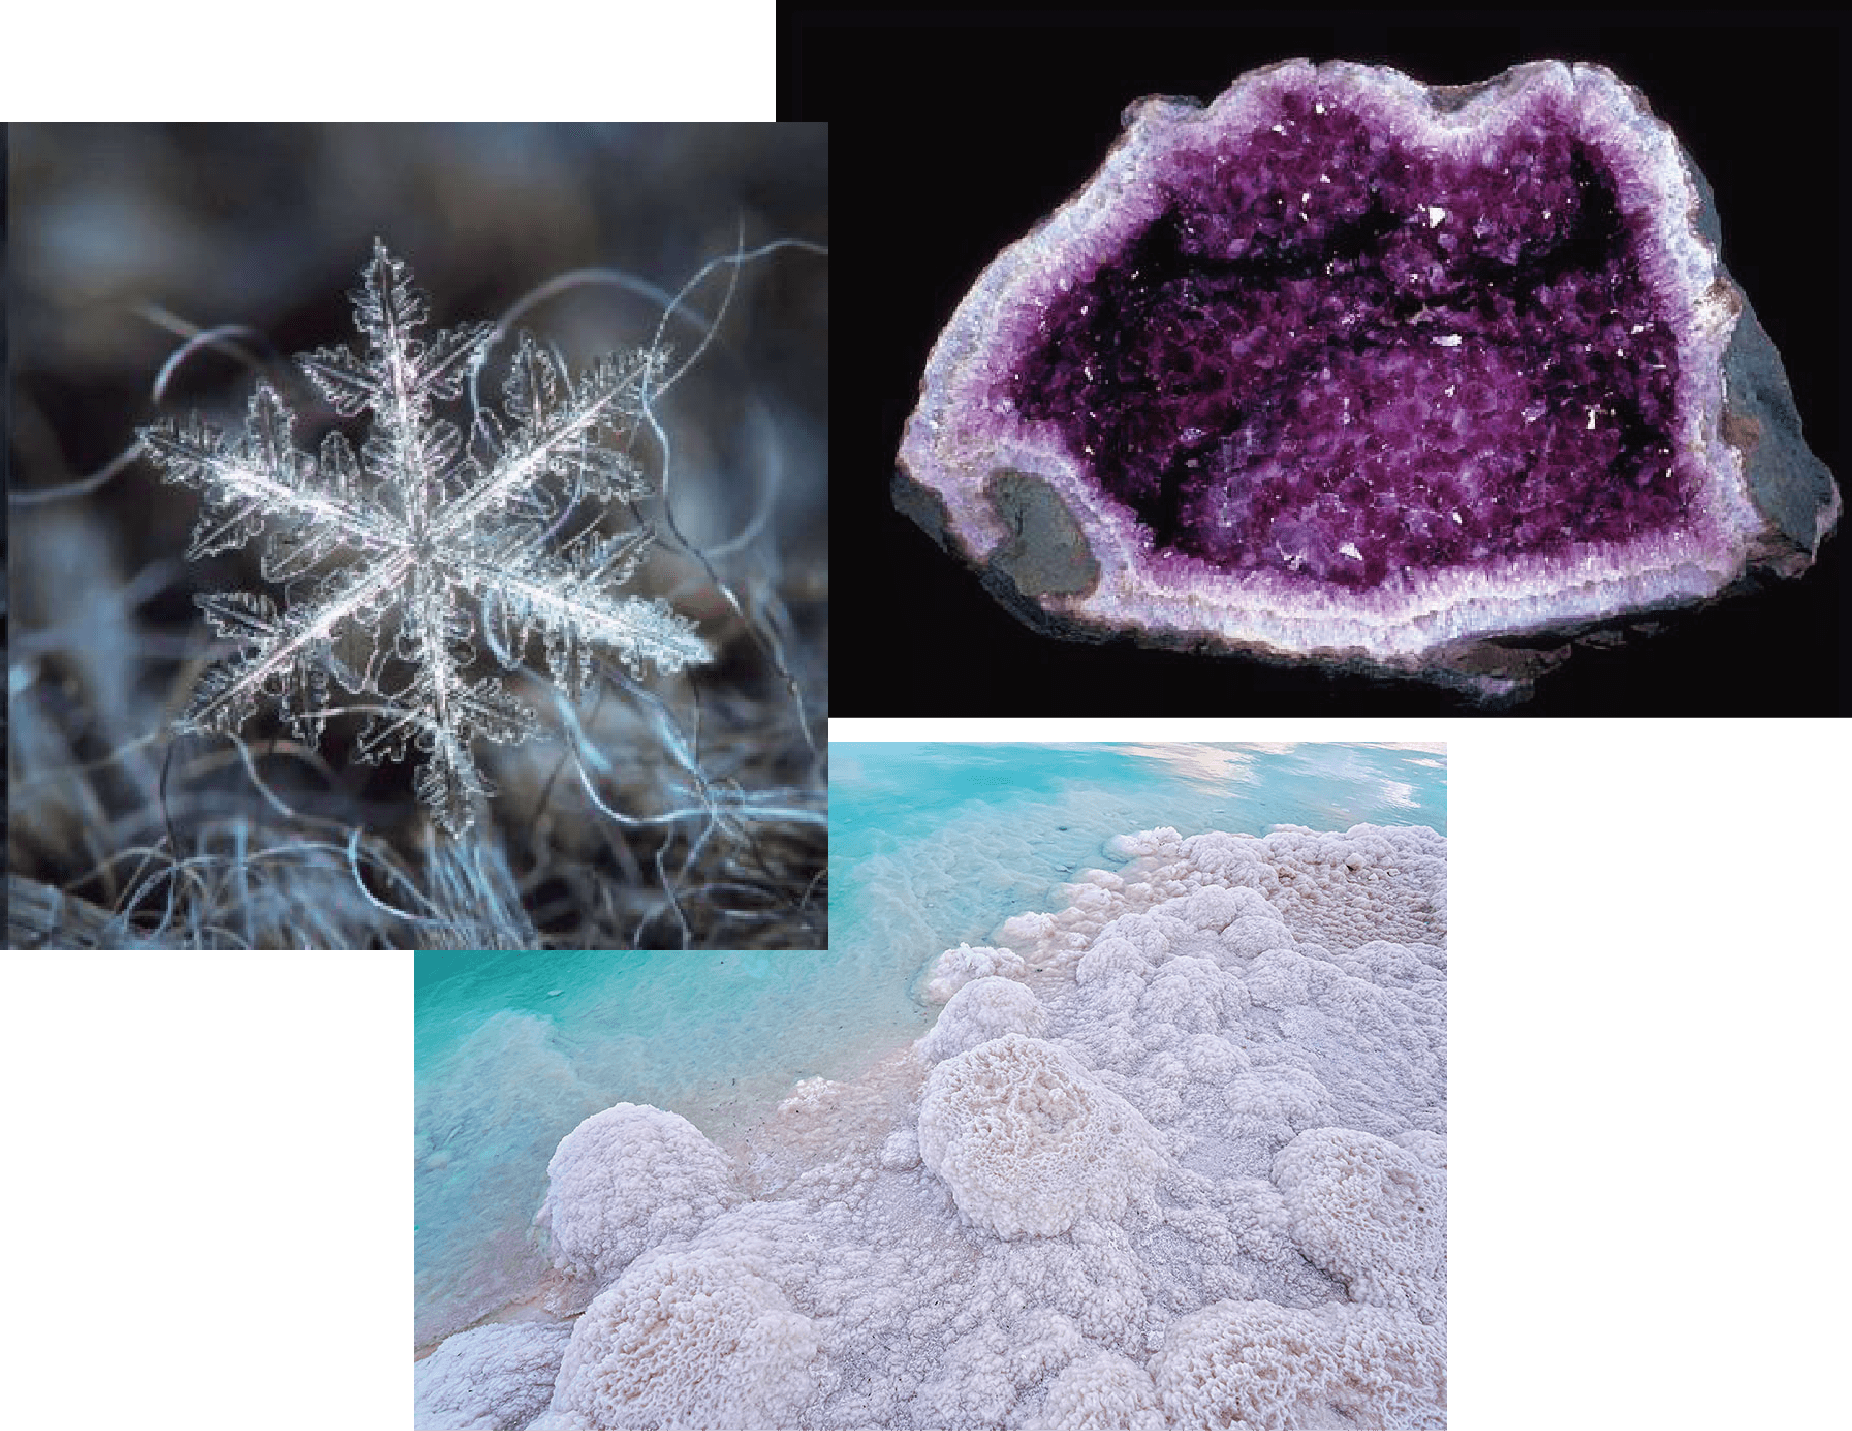 Crystallization in Nature
Crystallization is the physical transformation (phase transition) of a liquid, solution, or gas to a crystal, which is a solid with an ordered internal arrangement of molecules, ions, or atoms
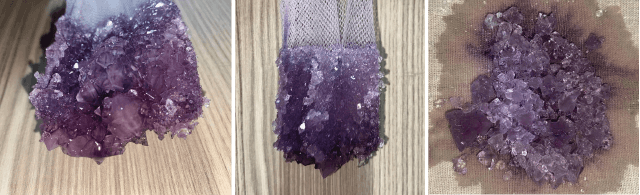
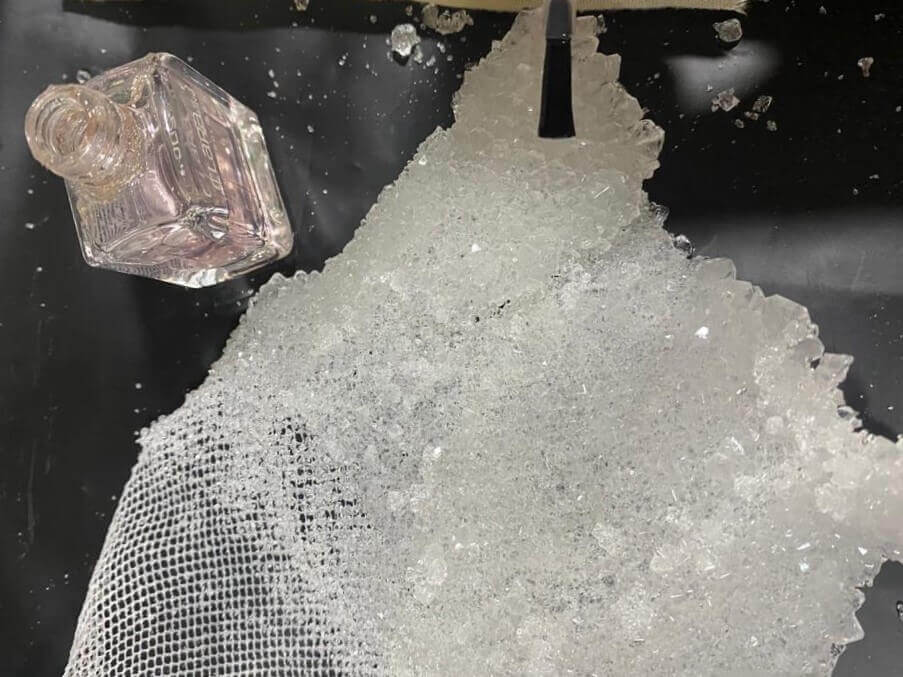
ALUM
Alum is one of the best components to form Crystals I used Tull Fabric as a scaffold to grow my crystals on
Prepare this recipe by collecting the ingredients necessary, to be found in the list below:
Ingredients
    * 190gr Alum
    * 300ml Water
Tools
    * Pot
    * Coffee Filter
    * Jar
    * Threads or fabrics to grow crystals on
    * wooden stick
    * Foil Paper
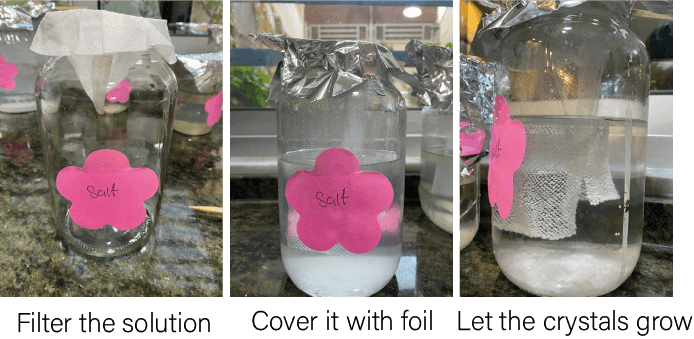
The Process is simple but needs attention
-
First heat the water and start adding alum and stir
-
when the water boils and you still have some particals that means your solution is supersaturated nd you are ready to go
-
filter your solution
-
Add the object you want to grow crystals on
-
cover your jar with foil paper
NOTE: DO NOT MOVE THE JAR & MAKE SURE THE SCAFFOLD
 IS NOT TOUTCHING THE SIDES OR THE BOTTOM OF THE JAR
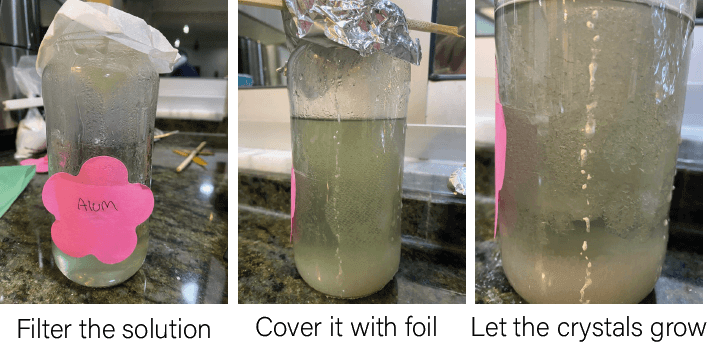
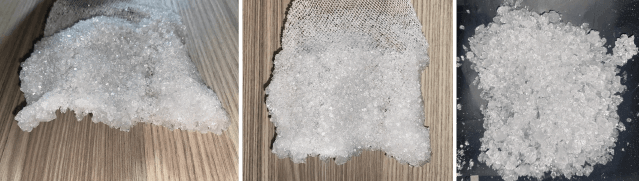
After 24-48 hours you will see this, it is magical
RESULTS
Alum Crystals Using Cabbage Dyebath
I repeated the process above but with cabbage dyebath instead of water and used Tull Fabric as a scaffold as well, I prepared the dyebath according to the recipe in week4 BioChromes

In this recipe I added a little bit more Alum to the dyebath because I felt it was not super supersaturated
Ingredients
    * 250gr Alum
    * 300ml Dyebath
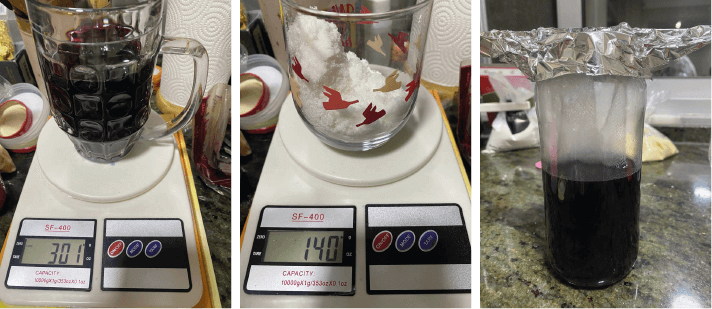
RESULTS
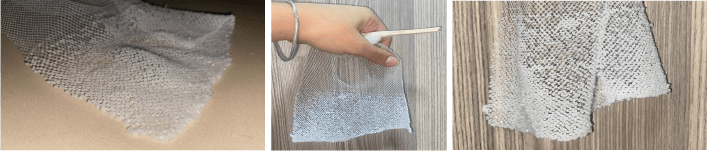
SALT
Like the crystals we see in the Deadsea, Salt can form a very nice crystals this was my experiment using salt
Ingredients
    * 280gr Salt
    * 600ml Water
Tools
    * Pot
    * Coffee Filter
    * Jar
    * Threads or fabrics to grow crystals on
    * wooden stick
    * Foil Paper
RESULTS
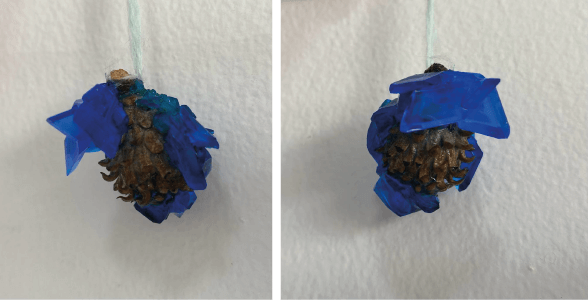
COPPER SULPHATE
It is a blue component that dissolves in water, it is toxic so be carful when using it do not touch or smell, but it forms a very nice blue crystals, I used Acorns as a scaffold
Ingredients
    * 200gr Copper Sulphate
    * 300ml Water
Tools
    * Pot
    * Coffee Filter
    * Jar
    * Threads or fabrics to grow crystals on
    * wooden stick
    * Foil Paper
    * Mask & Cloves
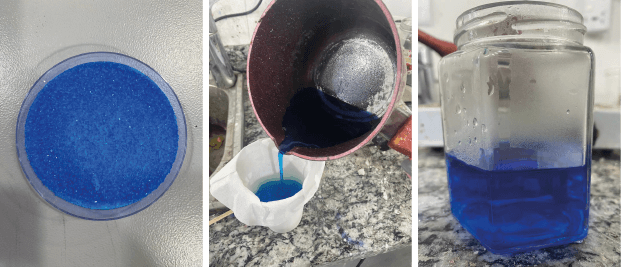
RESULTS
To protect your crystals you can use transparent nail polish
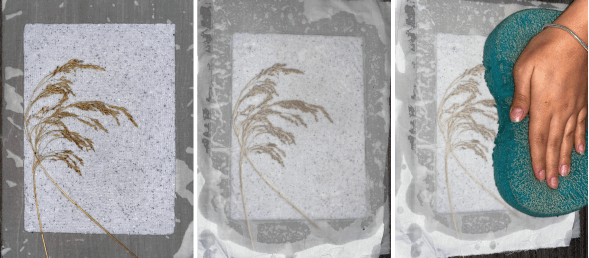
Paper Making
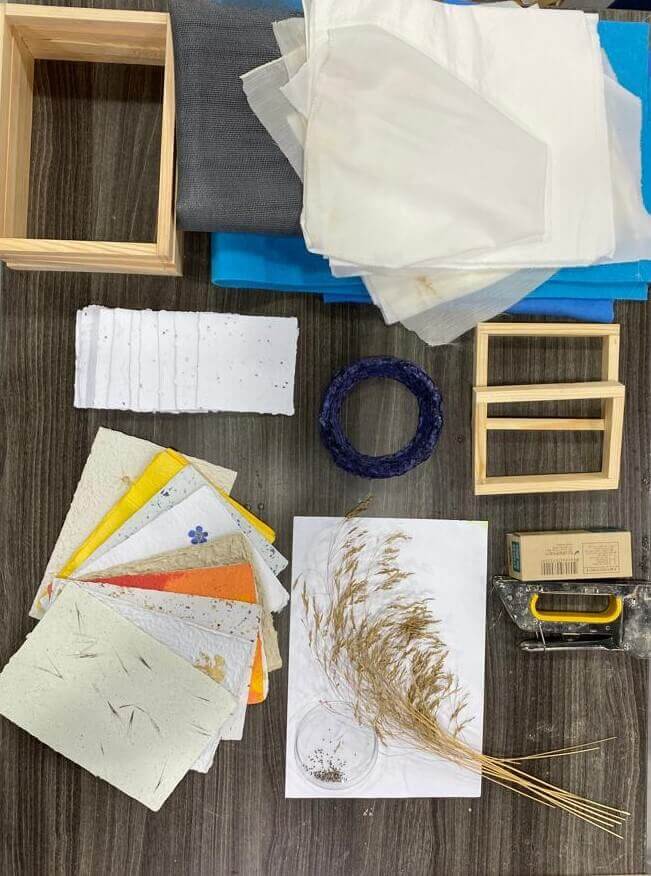
I really liked what Ala'a Janbeh is doing with paper you should check her out
We recycled used papers to make new ones but in our way!!
Tools
    * 2 containers
    * used papers
    * wooden frames 2 for each size
    * sieve
    * cotton fabrics
    * blender
    * stapler
    * sponge
    * additives ( coffee, seeds, spices, dried plants,.... )
-
First you need to make your frame according to the size you want using wood, make them two
-
put sieve on one frame and tight it well using a stapler
-
shred your used papers
-
put in the blender with about half liter of water
-
use a larg container filled with water to cast you mixture in(the water should reach half of the second frame when put on top of each other )
-
pour you mixture into the frame then take it of the water
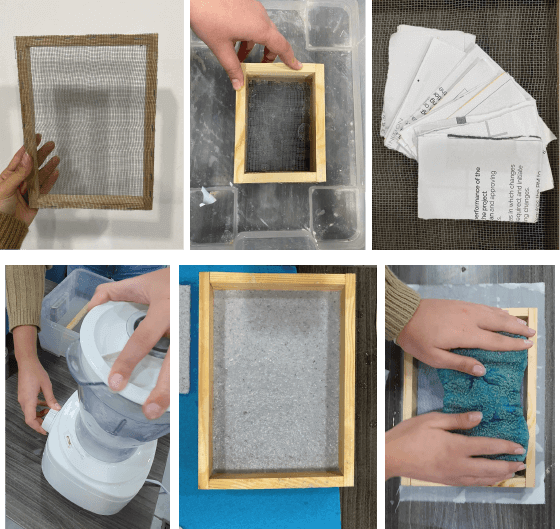
- put you paper on a piece of cotton or wood to dry
- use big sponge to take the water off you paper
- you can use additives like coffee, safflower or any organic ingredient( put them in the blender for a better attachment )
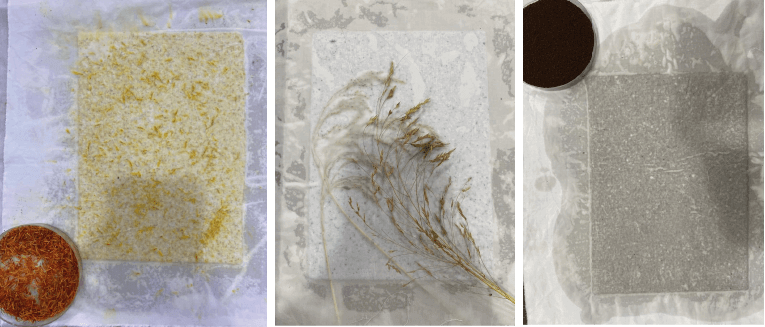
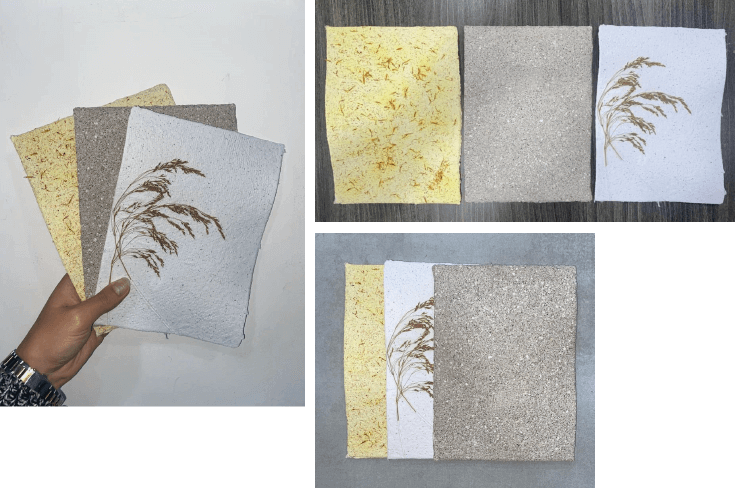
RESULTS
COMPOSITES
A composite is two or more materials combined together to form a new material with new properties
Bio Silicon Cellulose Composite
I used the cabbage dyebath again, and modified it this time using vinegar and soda to dye cellulose
Ingredients
    * 48gr Gelatin
    * 24gr Glycerin
    * 240ml Water
    * 5-6 Cellulose Tissues
    * 100ml Cabbage dyebath
    * vinegar
    * Soda
Tools
    * Pot
    * Plastic Container
    * wooden stick
    * Spoon
    * Small cups for measuring
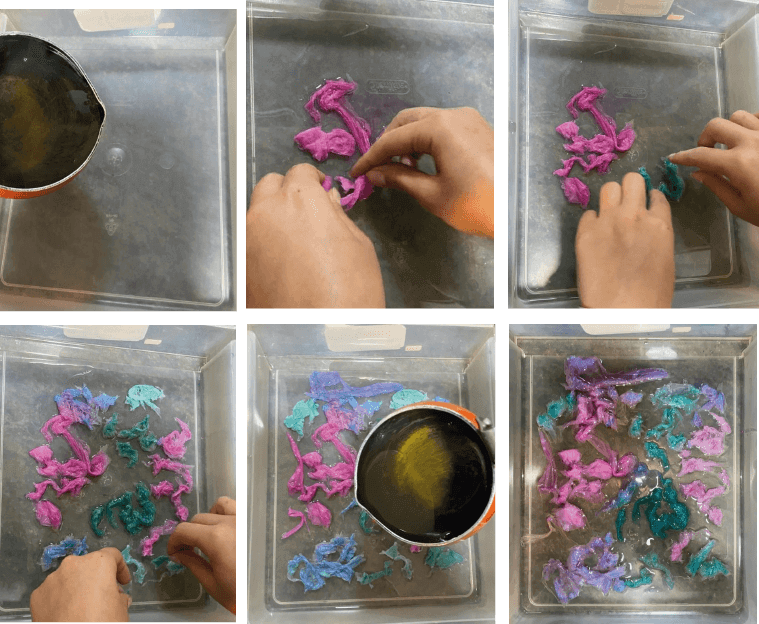
- Make the Bio Resin following the recipe and process explained in week6 BioMaterials
- Cast half of your Bio silicon in the container
- add the cellulose tissues
- cover them with a second cast
- you can add pressure for a better result like covering them with another plastic sheet and use clamps for the pressure
- leave to dry
RESULTS
I unmolded this after 2 days when I made sure it is completely dry
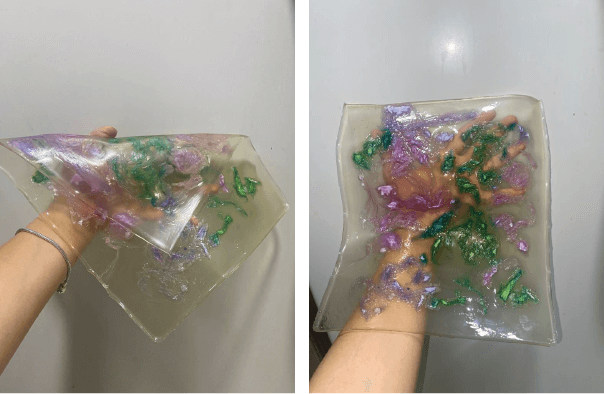
This material is flexible, stretchy, the spots with cellulose are rigid
Some extra work and expermentation
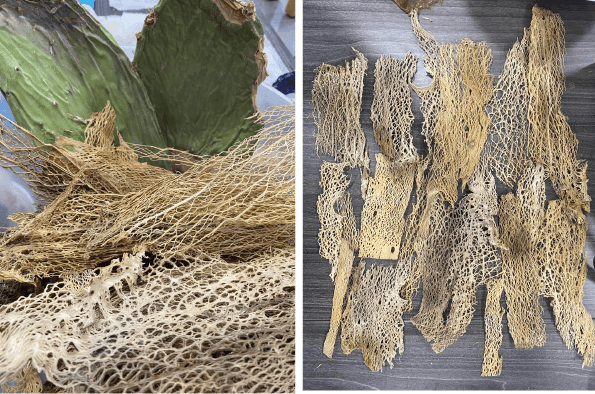
Bio Resin Cactus Fibers Composite
I was surprised by this... Those are the dried fibers inside the cactus and I am intending to make a side table out of them using bio resin
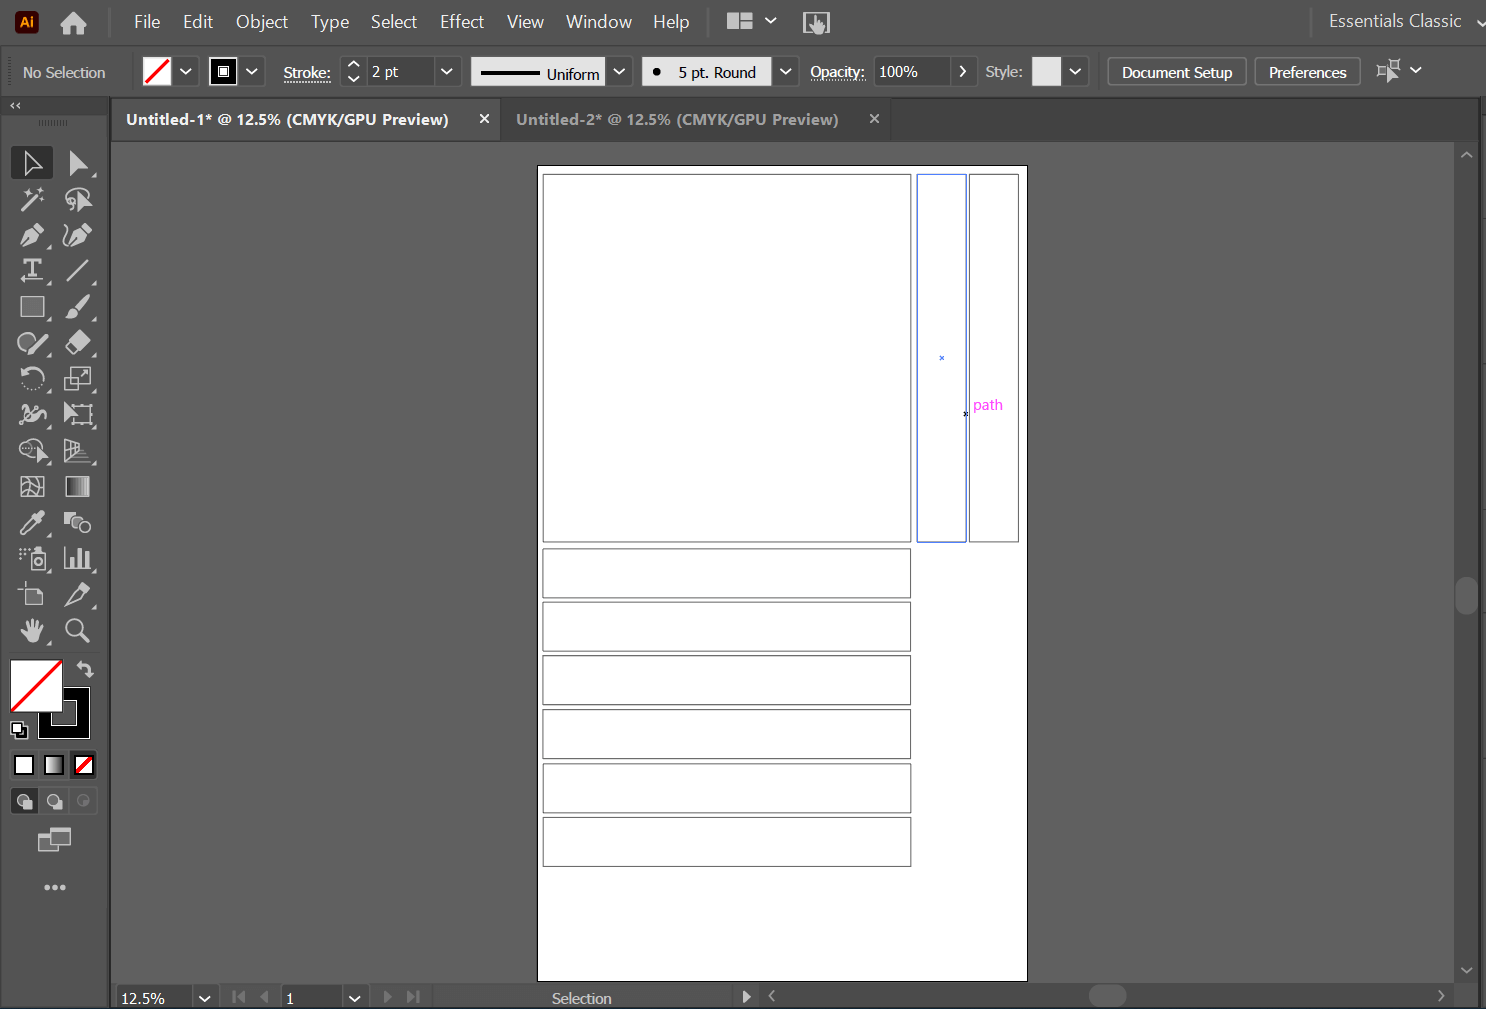
First I have to make a frame to cast in so I designed my frame using Illustrator saved my file as SVG and I am ready to laser cut
Fabrication file
laser cutting
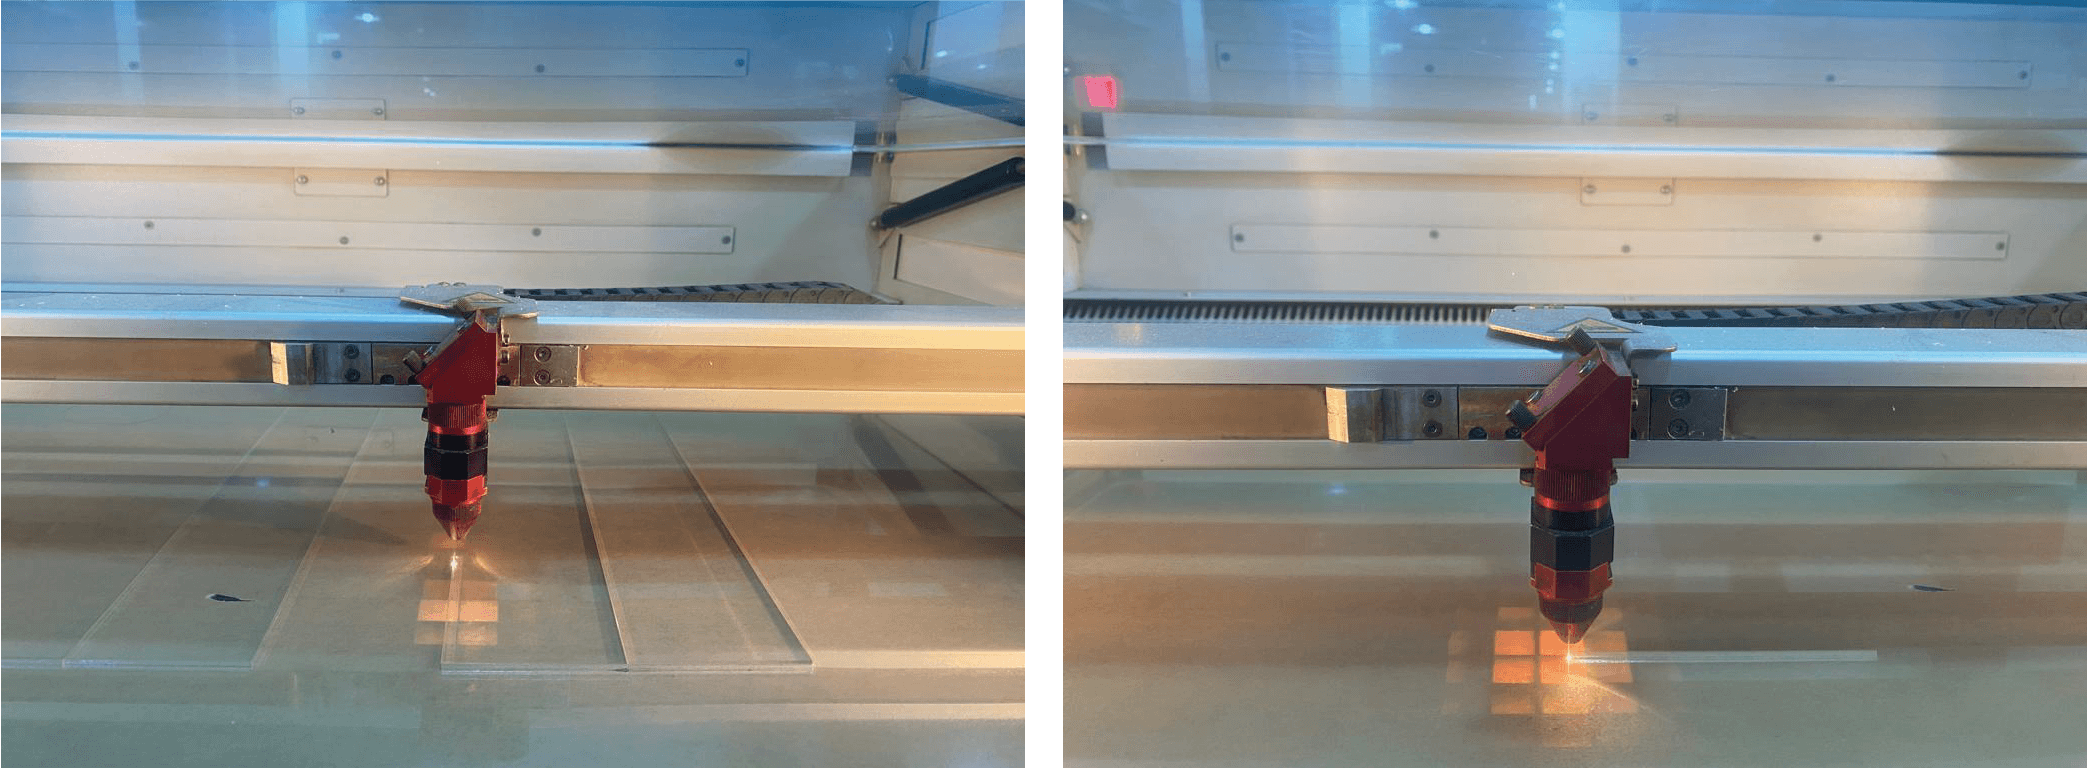
Laser settings
    * power: 100
    * speed: 0.20
    * material: palsitc/ Acrylic 5mm
Assembling
The pieces are cut and ready for the assembly I used A-B glue to glue them it is a glue with a hardener to dry faster, To make sure your pieces are accurately aligned I used a 90 degree ruler inside the frame while gluing
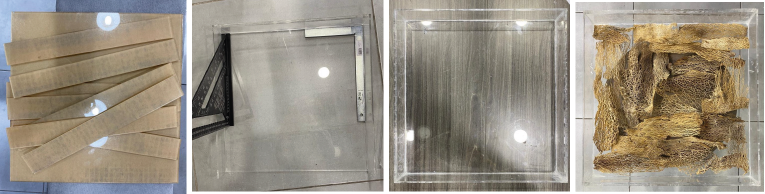
Now the frame is ready, I arranged the fibers in it and I am going to cook my bio resin
Cooking Bio Resin
Ingredients
    * 1.5kg Gelatin
    * 250gr Glycerin
    * 8L Water
Tools
    * A very lage Pot
    * wooden spoon
    * cups for measuring
    * scale
Still working on it .. :)
CNC Milling
CNC (Computer Numerical Control) machining is a subtractive manufacturing technology: parts are created by removing material from a solid block using a variety of cutting tools each tool is used for a certain application.
Things To Know
RBM
RBM is the (Revilotion Per Minute) and usually we keep safely at 14K depending on the material we are cutting and the tool we are using we refer to it as (n)
Cutting speed
cutting speed is (vn) and usually it is between 200-300 mm/minute
Cutting Diameter
cutting diameter is (dc) and it is the ..
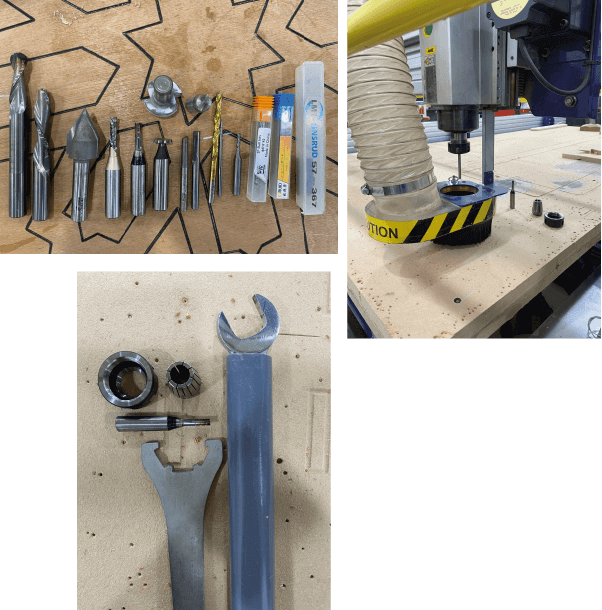
Cutiing Tool
We have alot of cutting tool each tool has different applecation
-
Drill: has only one axis has no side cutting areas
-
End mill( falt\square - endmill ): is the most common used tool it cuts from its end and from the sides, it is used for making holes
-
Bullnose: it has a half circle end shap it is used for 3D machining, half circles making and finishing
-
Face mill: it is used for facing larg areas
-
V Tool: it is a very ssharp tool used for finishhing corners, hand writing and making orniments
-
Radice Tool: is used for making rounded corners (fillits)
-
T Cutter: used to make slots
Cutting direction
We have 3 different cutting directions for different applications
-
Up Cutting: is pushing the material upwards when cutting, uased for metals and plastics
-
Down Cutting: is pushing the matterial downwards when cutting, used for foam, wood, and MDF
-
Straight Cutting: is pushing the material behind and it cuts in one direction only, can be used for wood and MDF
Cutting technique
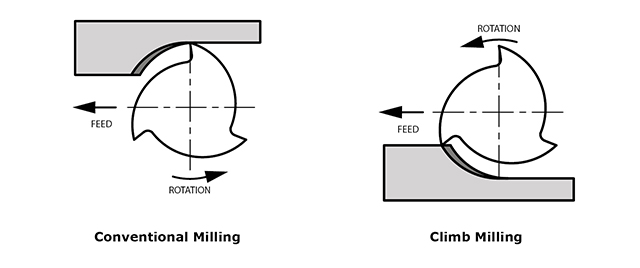
We have two cutting techniques to be used depening on the material and the tool we are using
-
Climb Milling: It is cutting from the thick area to the thin, it pushes the material towards the tool and it produces a very low friction and heat, used for soathing and finishing
-
Conventional Milling: It is cutting from the thin area to the thick, it pushes the material away from the tool and it produces more friction and heat, and have a bad finish comparing to the climb milling, but it advantage is that there will be no big prusser on the piece and it is used for cutting very thin walls
I learned alot about the CNC machine this week and I am going to use it next week