Experiments
Research phase
Find inspiration
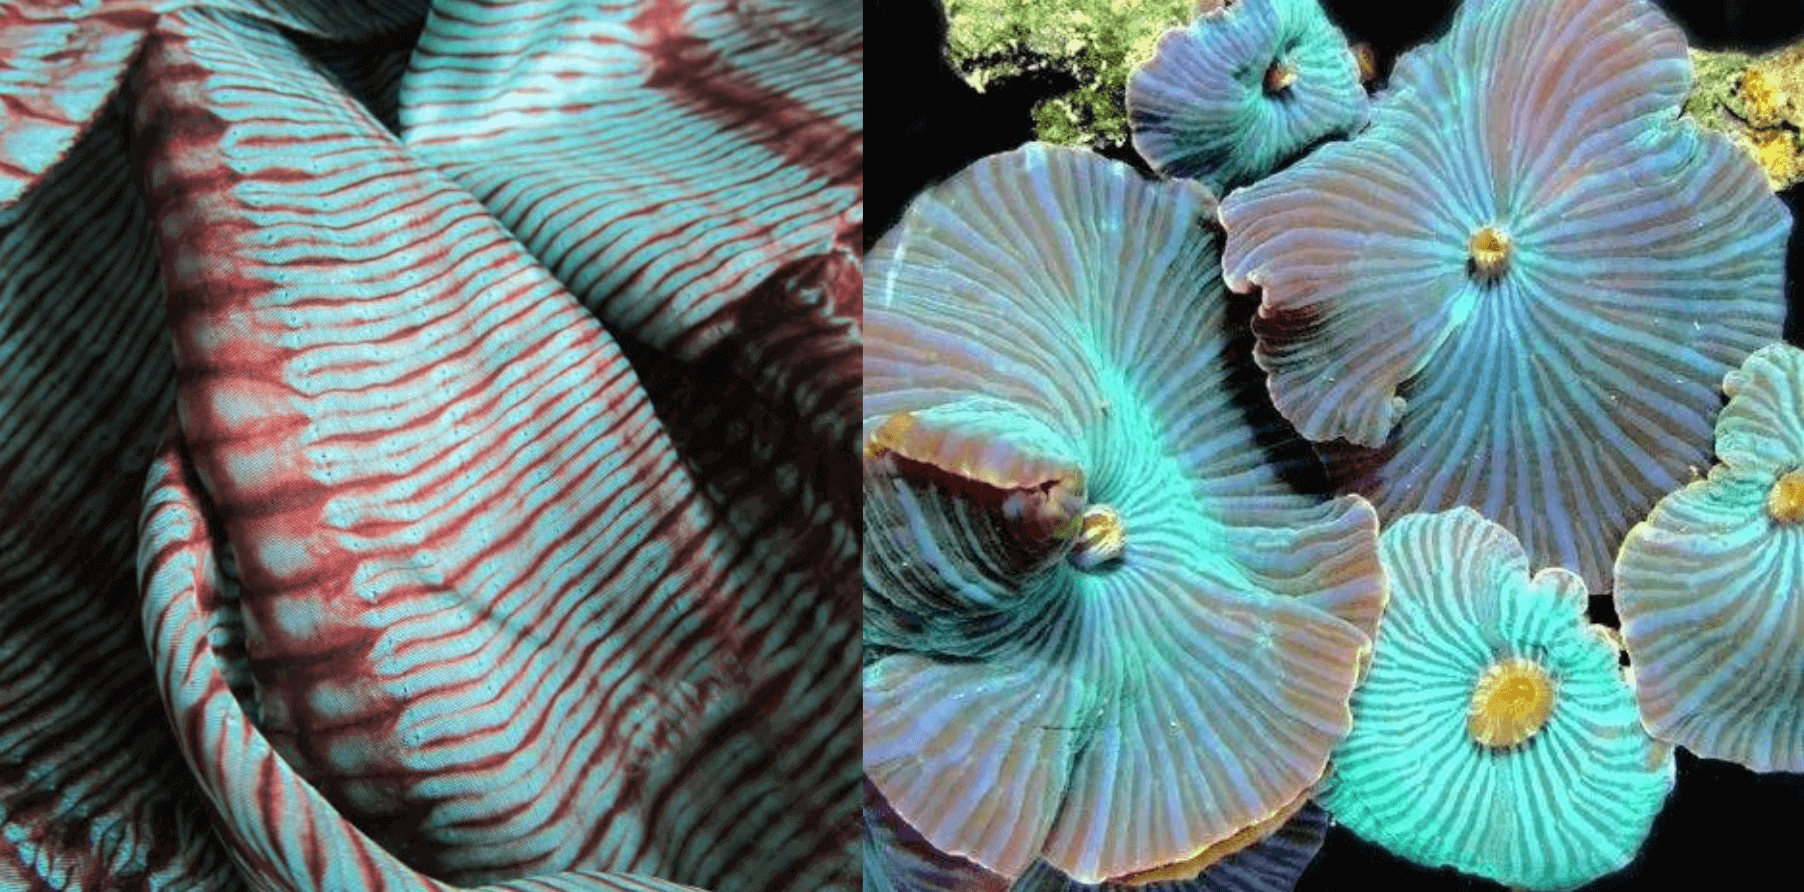
The first thing I did was to gather a lot (really A lot) of coral photos. To impregnate me of all the possibilities of shapes and colors.
There is this contrast between this multitude of colors: red, blue, purple, orange pink with the whitish color of the skeleton that we see appear at the death of the coral.
There are its various forms that offer many possibilities: layering, organic patterns, tree organization, etc.

Pattern Research
- FIRST PATTERN
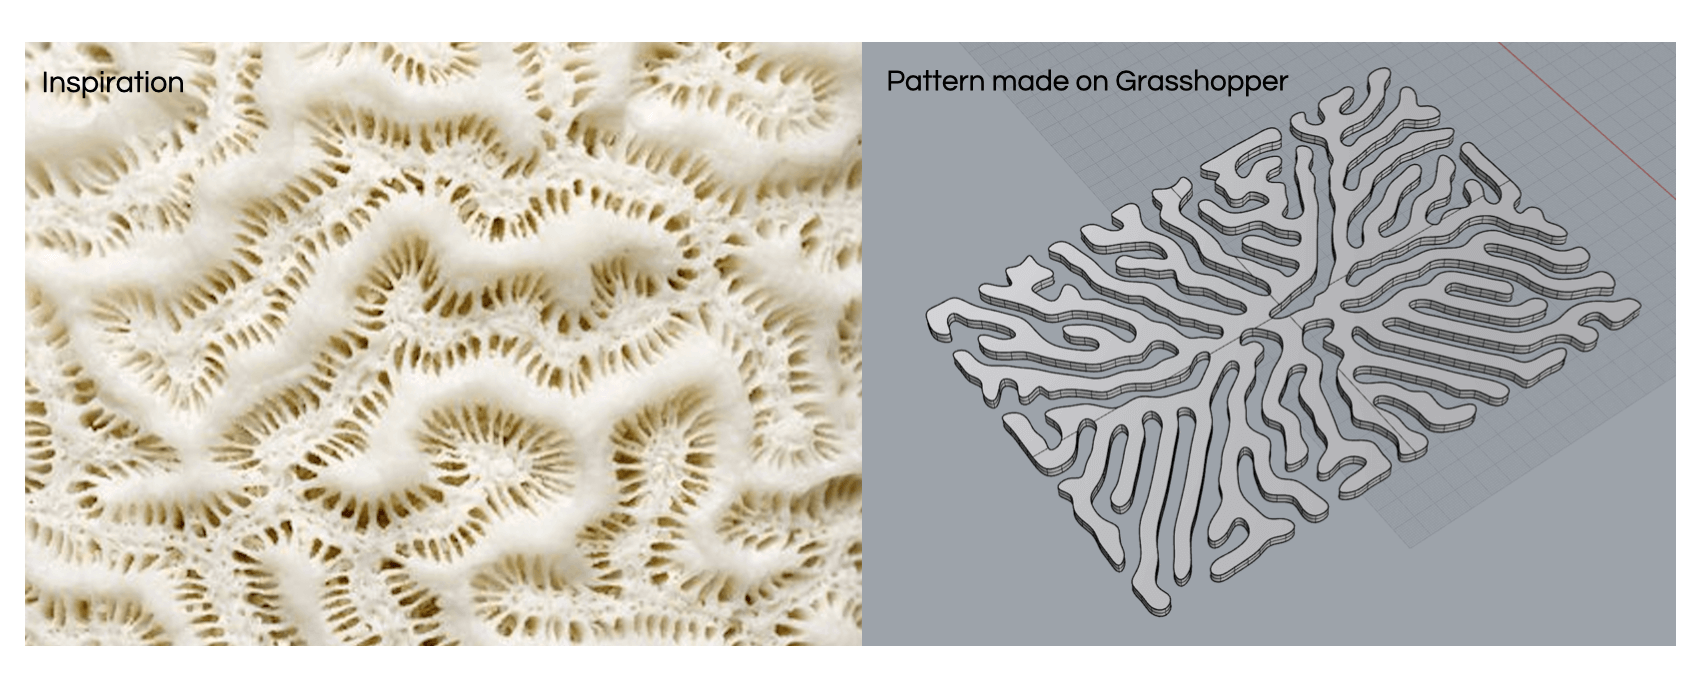
The most difficult phase for me is the one on Rhino3D and Grasshopper.
I wanted to get patterns inspired by this picture, organic and repetitive.
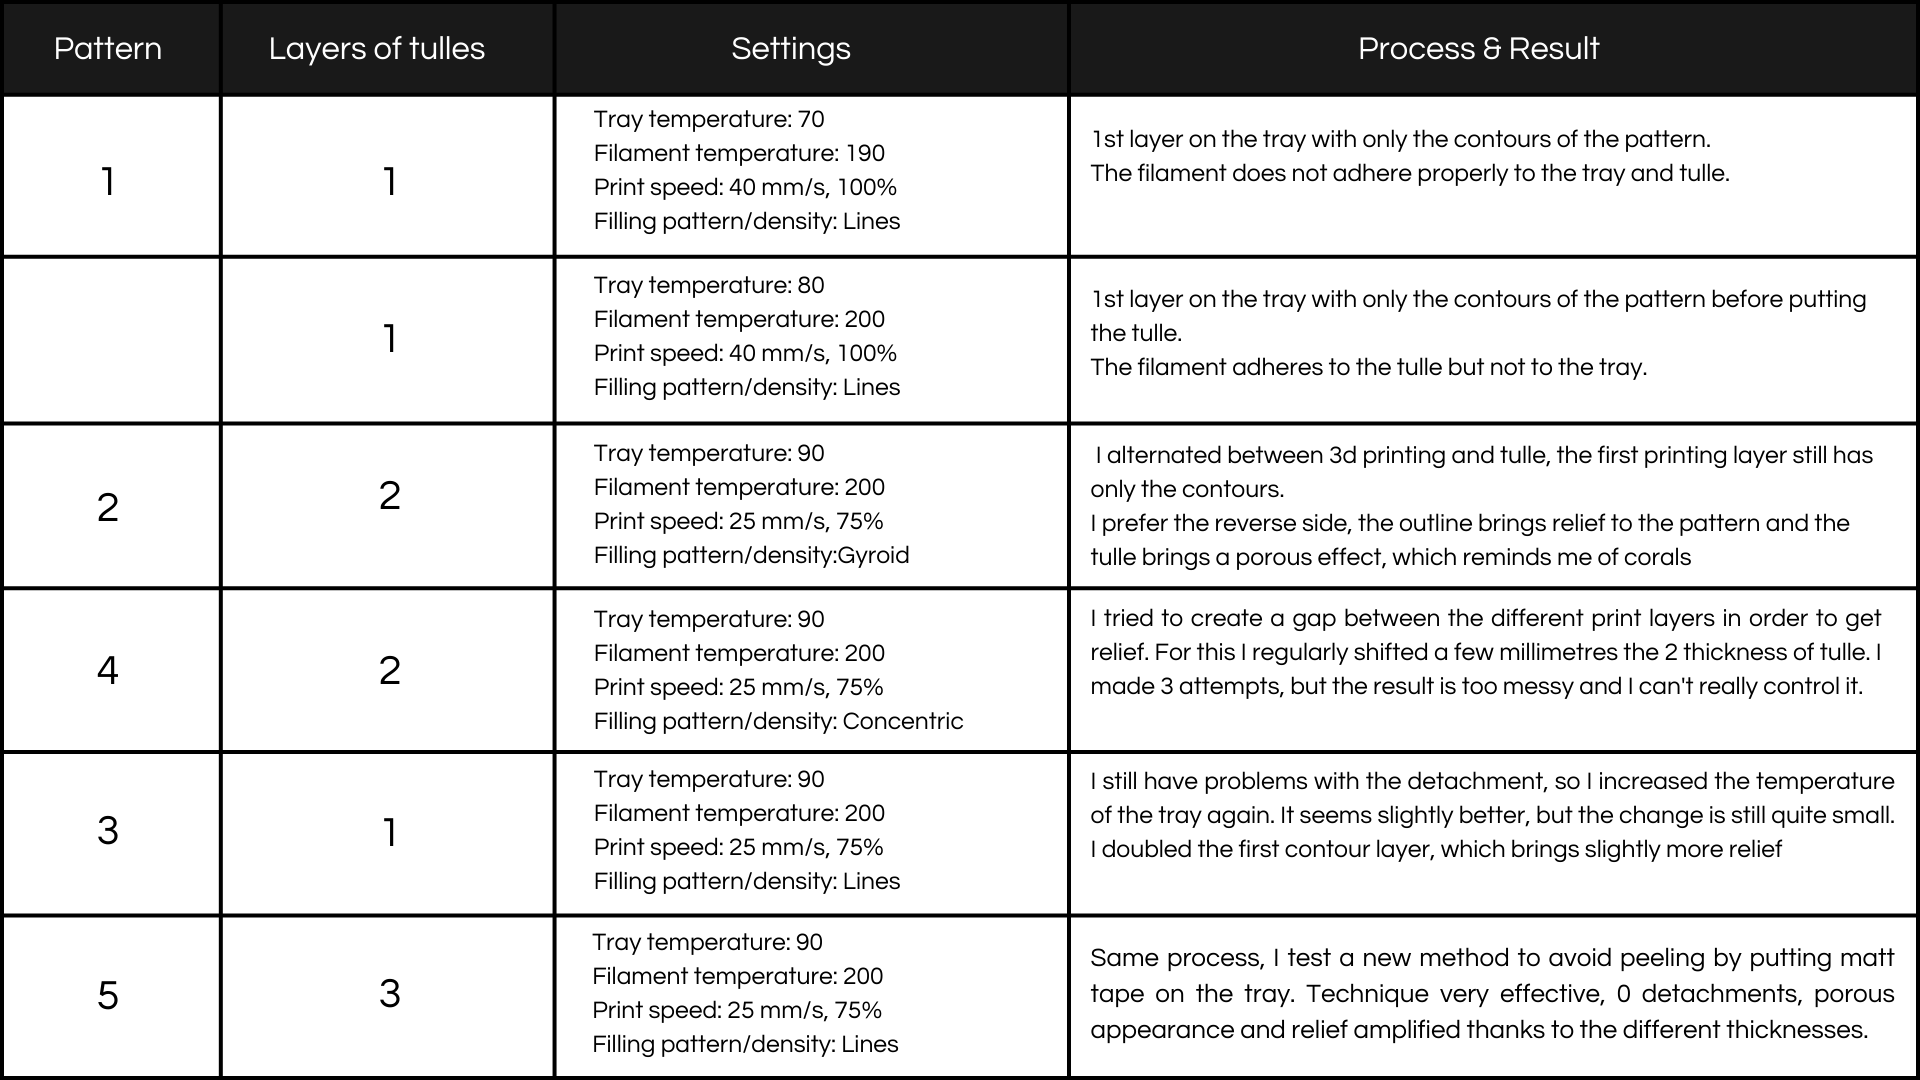
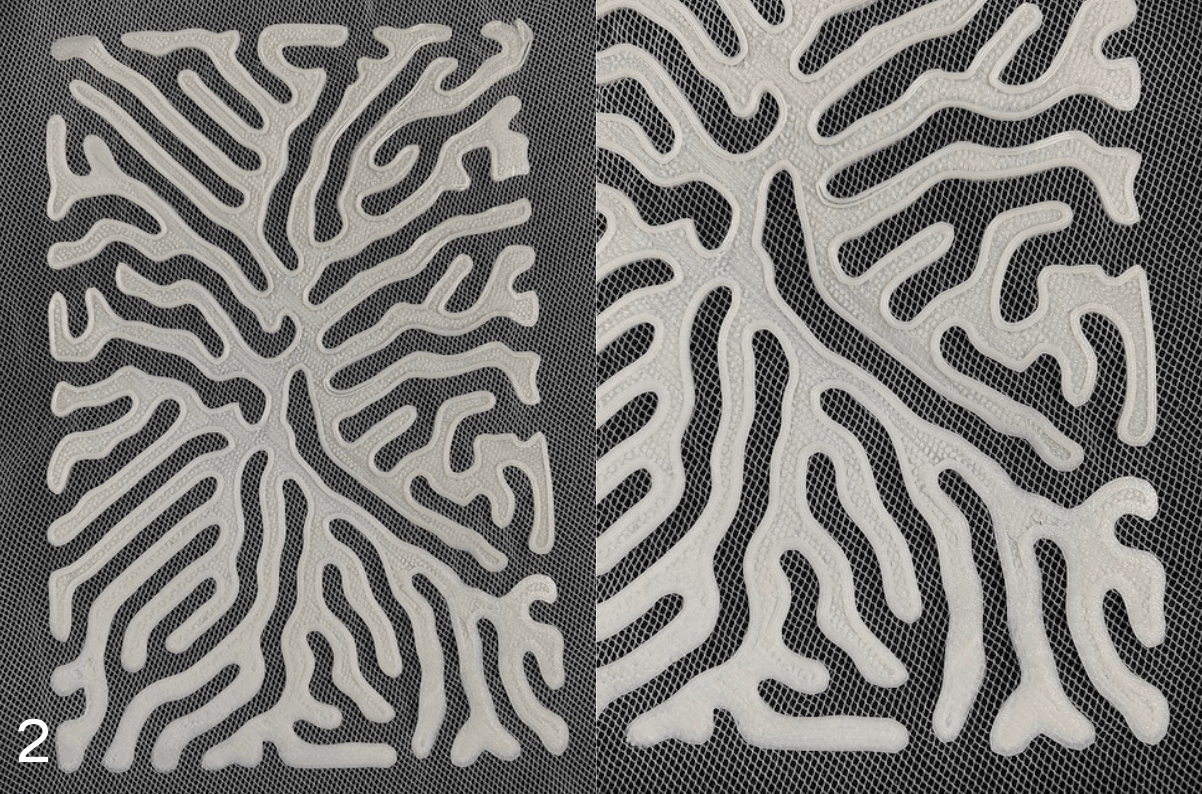
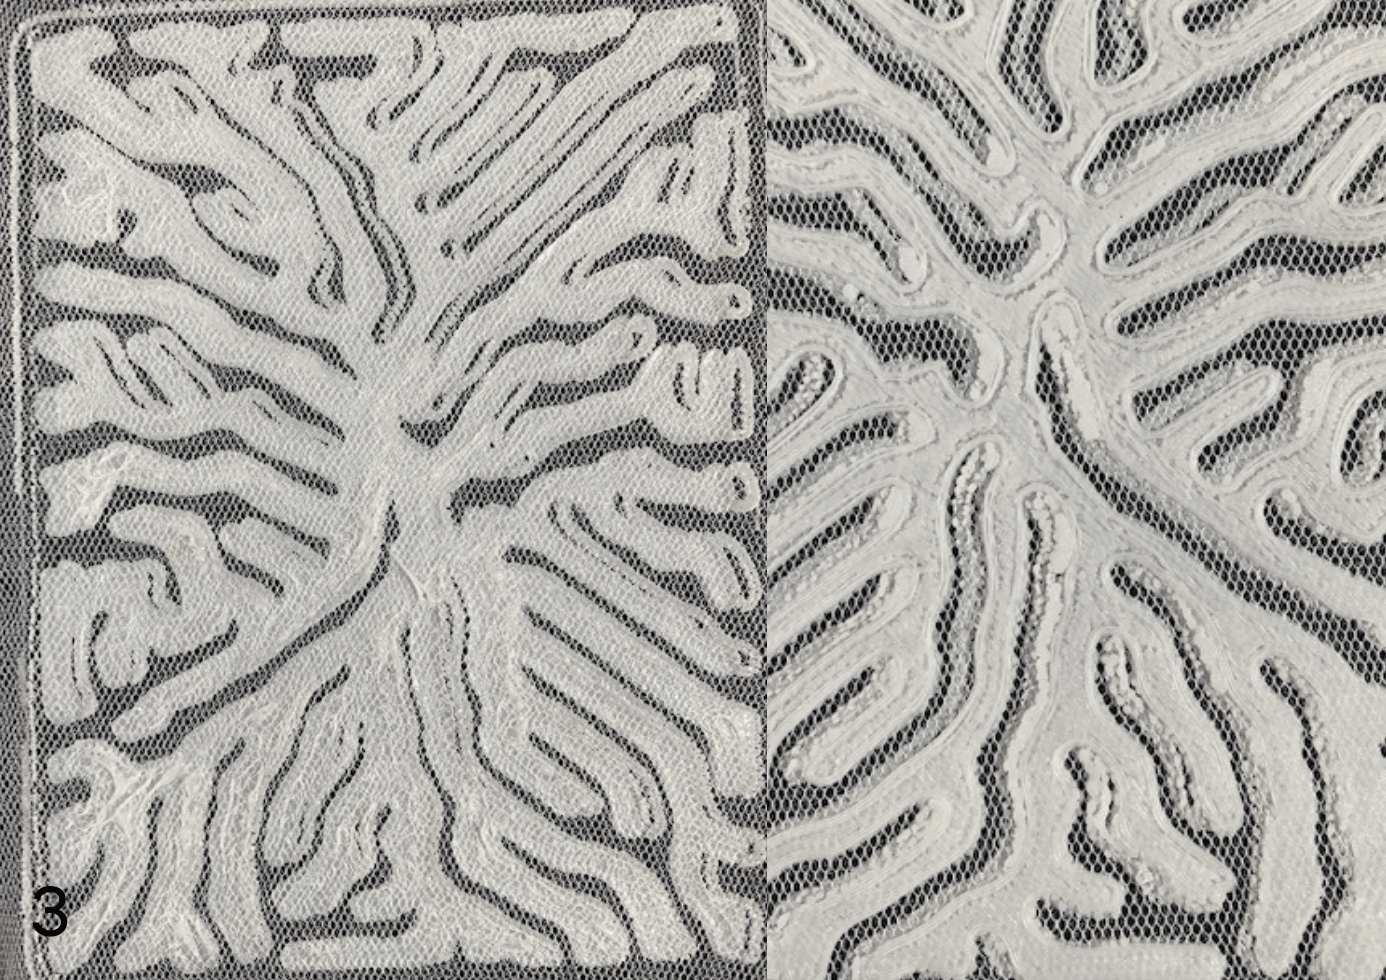
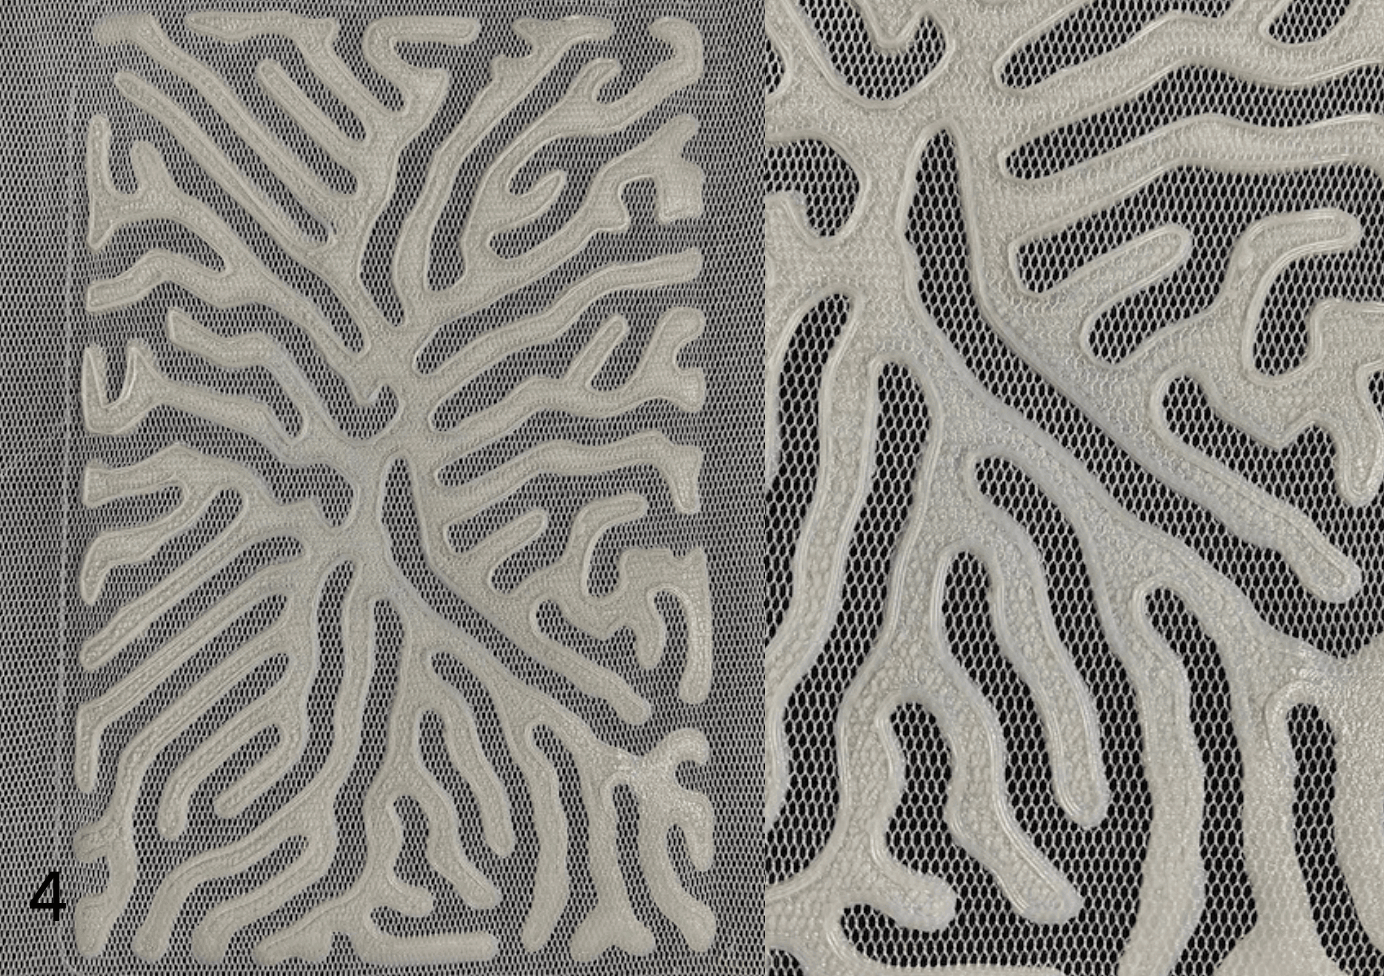
I performed my first tests on tulle and with a flexible filament. It took me a few tests before I found the right temperature of the filament and tray, as well as the right calibration, as the filament was loosening slightly.
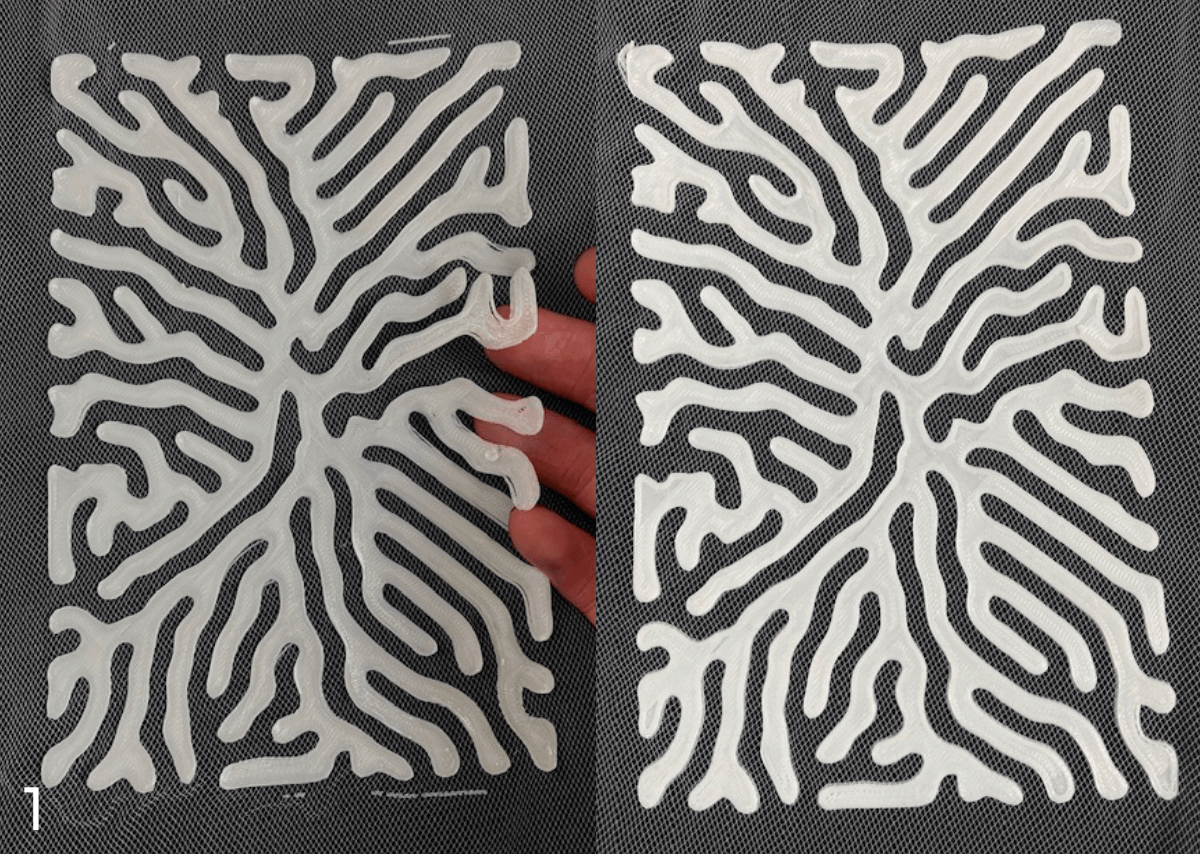
Here is a table of the main tests I performed with this pattern, with the description of the process and the result. In the «Pattern» column is the number of the corresponding photo.

File: Pattern
These experiments allowed me to quickly realise the different constraints I had:
The 3D printer tray is 20x20cm, so I have to think about different ways of connecting several pieces to each other to get the final garment.
I'm thinking about two possibilities:
-
Modules that assemble, inspired by the Circular Fashion week, the advantage is that they allow to modulate the garment.
-
Sew the different pieces together, and think about a way to fit this aesthetic assembly.
- SECOND PATTERN
I did this other pattern that I unfortunately failed to print correctly. I think this is due to the fact that there is no flat surface below because the pattern is made of pipes and therefore totally rounded. I haven’t been able to fix the problem yet. However I like very much the first pattern so I prefer to put this one aside for the moment and maybe take it back afterwards.
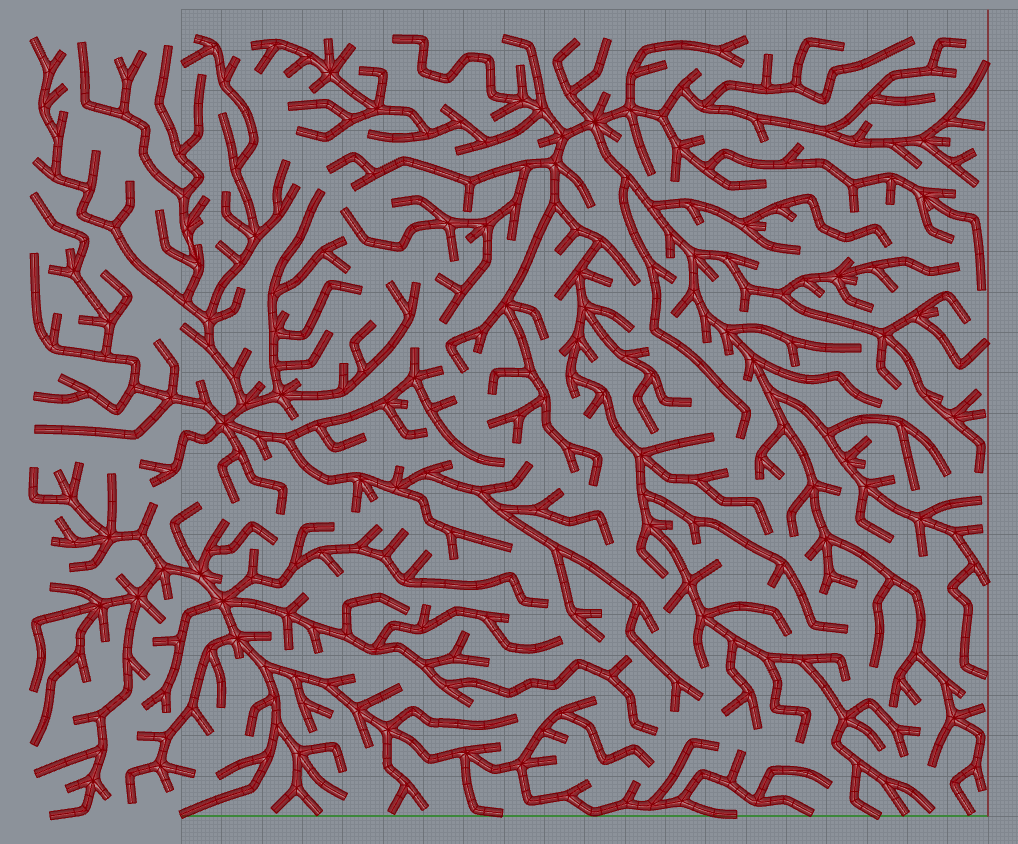
File Pattern
Layering research
- FIRST EXPERIMENTATION
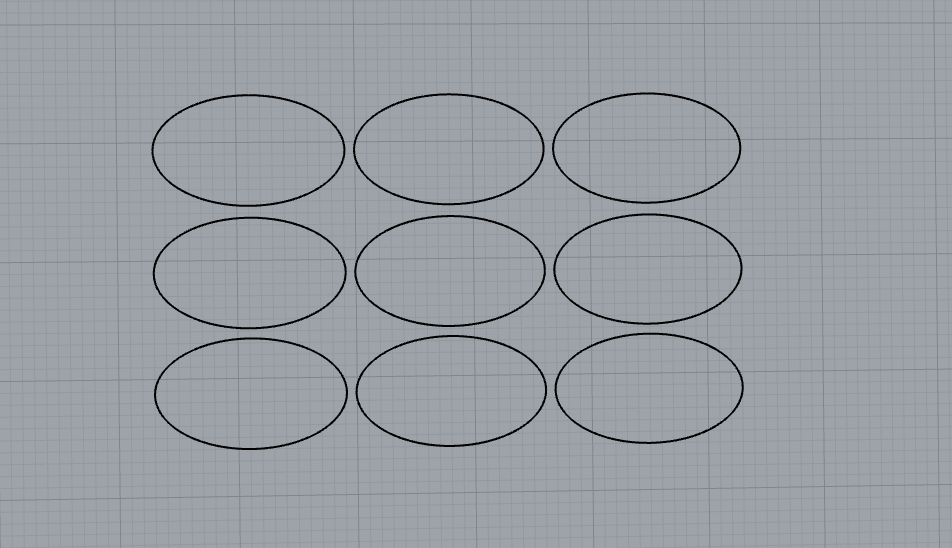
Layering is characteristic of many corals. Inspired by this superimposition effect, I first had the idea of using laser cutting to create small oval pieces that would then be assembled and sewn on the tulle as in the photo below. Knowing that the 3D printer tray measures 20 by 20 cm and that I can therefore not create large pieces at once, the advantage is that this could allow me to hide the seams if I were to assemble different pieces together.
- SECOND EXPERIMENTATION
During this experiment another idea came to me, inspired by a dress by Iris Van Harpen:
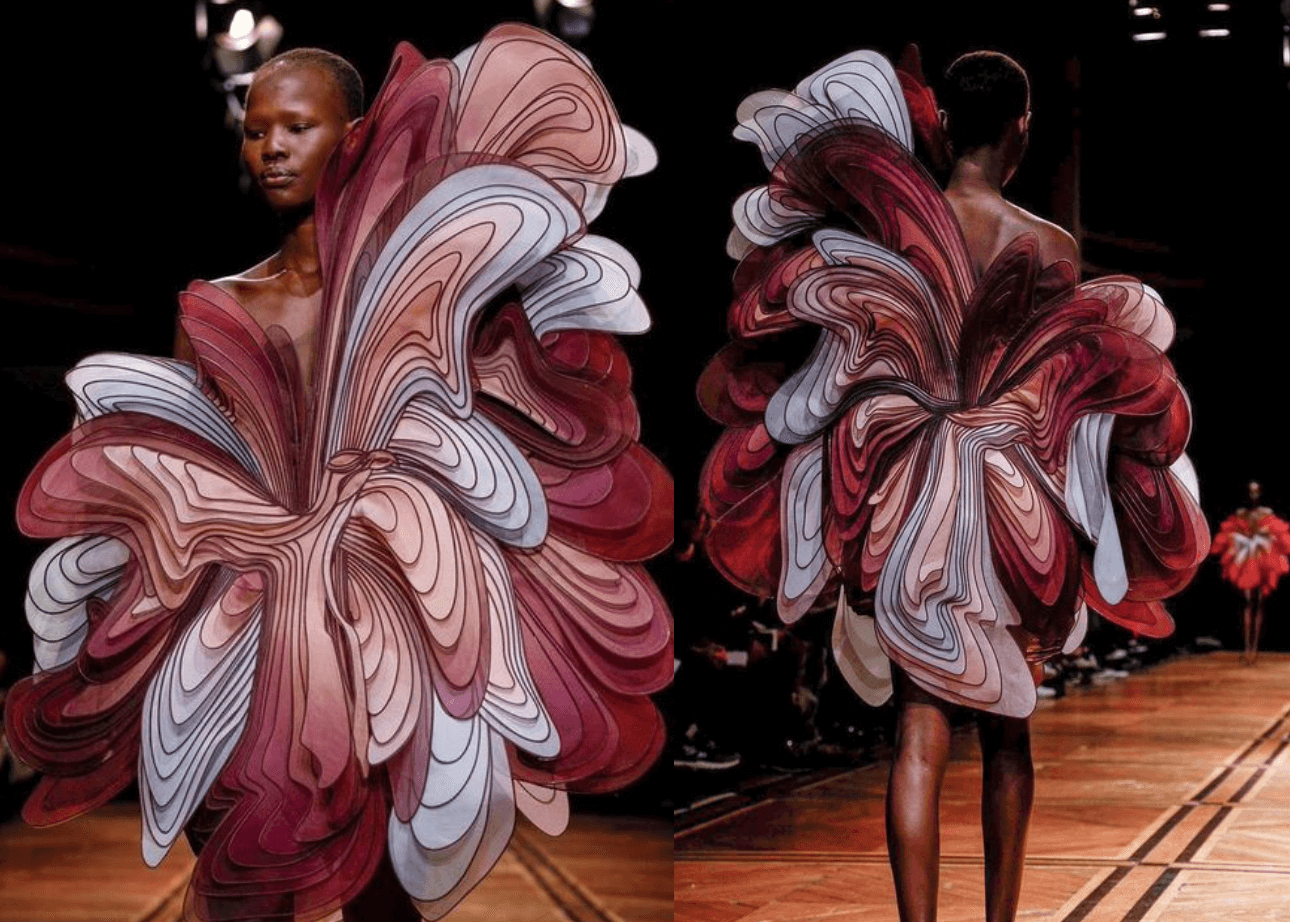
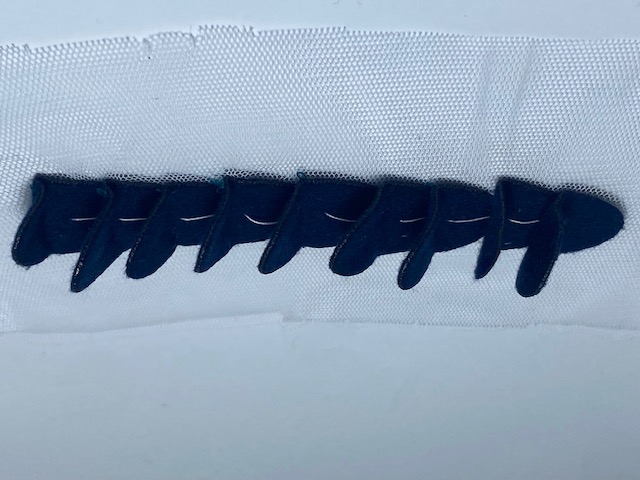
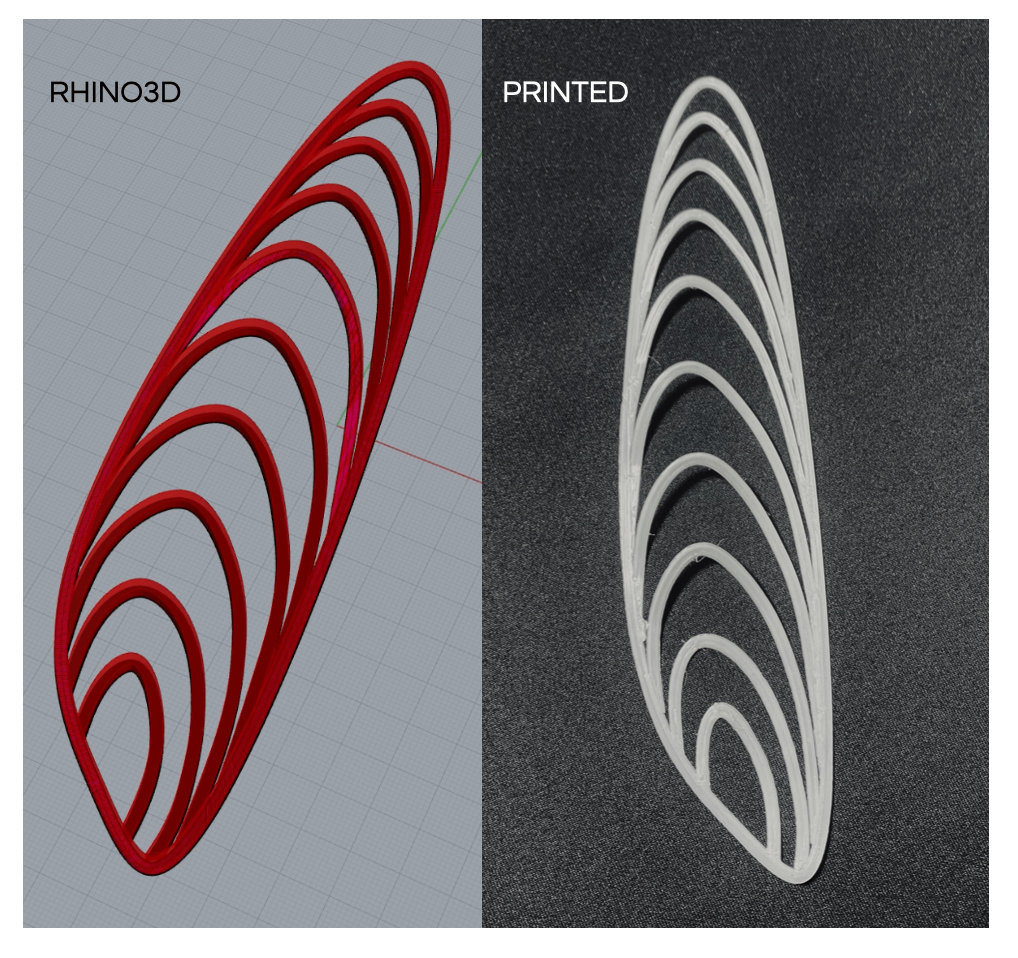
I wanted to keep this idea of superimposing modules as before, but with a structure made in 3D printing and with a fluid fabric fixed on this structure. I started by creating my structure on rhino, which I then printed in 3D. Then I took an old fabric scrap dyed with indigo, which I cut and glued and on the structure.

I also made a try by cutting my fabric beforehand to the laser cutting, only I do not find that it saves me time because it makes it harder to glue afterwards.
Here is a video of the entire process:
Files: 3Dmodule
I really like the result, and it inspired me a lot for the future. It was not intended but I like the rendering offered by these different shades of colors, which led me to think that it would be interesting to experiment different dyes, especially with shibori which allows to obtain interesting and organic visual renderings.
Fabric dyeing
- INSPIRATIONS

Arashi Shibori process.
Shibori fabric next to a coral.
- PLAY WITH COLORS
I would like to make people aware of the impact that climate warming can have on this ecosystem, drawing inspiration from the coral bleaching process. When the temperature of the water becomes too hot, the corals expel the microalgae living inside their tissues, and these microalgae are necessary for their survival and give them their bright colors, which is why when a coral dies, it loses its color to become white or brown, hence the term «coral bleaching».
I would like to play with color changes, so I did research on thermochromic and photochromic pigments, but also on thermoactive 3D filaments. The goal is to change the color of the garment according to an surrounding factor in order to make the individual wonder about the impact we can have on nature. After comparing the advantages and disadvantages of each of them, I chose to focus on thermochromic pigments, which are more accessible and offer more possibilities. Thermochromic 3D filaments are rare, expensive and mostly not flexible.
- PIGMENTS
Photochromic pigments:
They change color according to the intensity of the luminous radiation, if I used them, it would therefore be necessary for me to alternate between a room inside, without UV and an outside with sun exposure. This seems difficult to control, the rendering will depend of the weather, and the dress inside will be more difficult to film. In addition, there would be no clear agreement with the message related to water heating.
Thermochromic pigments: They change color according to the temperature, which seems more interesting and in adequacy with my concept. It should be noted that they both have the ability to withstand about 20 wash cycles, which suits me because my dress is made for artistic performance and is therefore not made to be worn every day. The idea then came to me to create an artistic performance in part outside, in part in water, which would allow me to easily master the temperature and make sense with my message because water is the natural environment of corals.
As I deepened my research, I identified several characteristics to take into account when purchasing pigments:
-There are different types of thermochromic pigments: those where the color change is reversible, those with memory effect, and those where the change is irreversible.
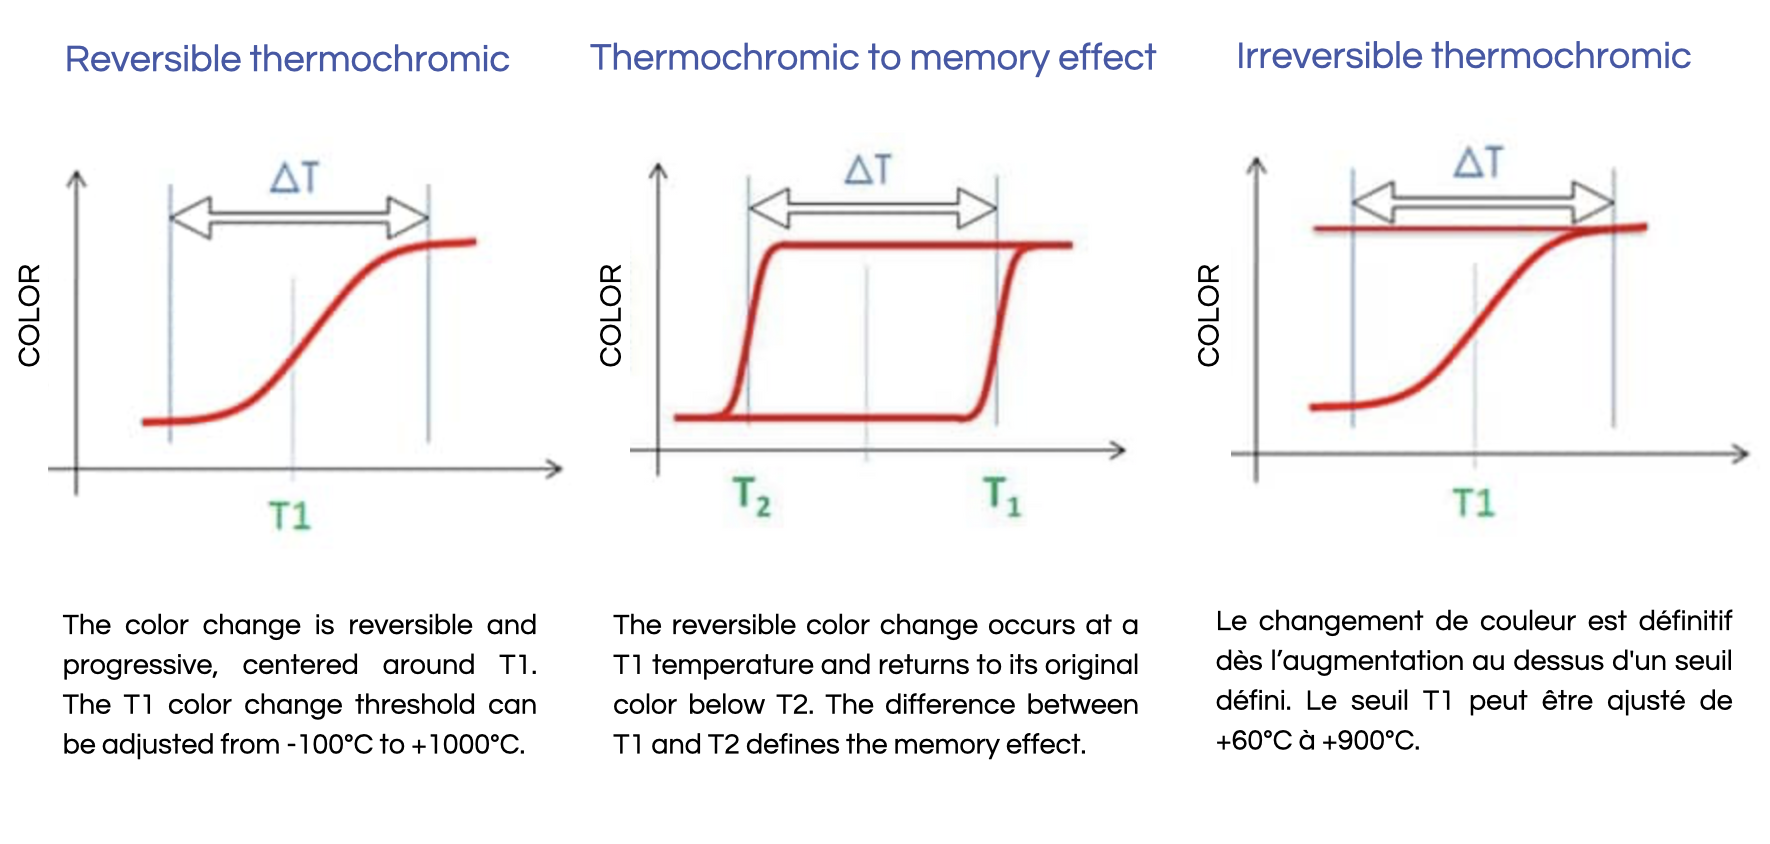
-Not all pigments react at the same temperature. For some the color change is at 22°C, others at 27, 31, 45 or more.
-Some become transparent when the temperature increases, for others it is the reverse. Some completely change color, others simply become lighter or darker.
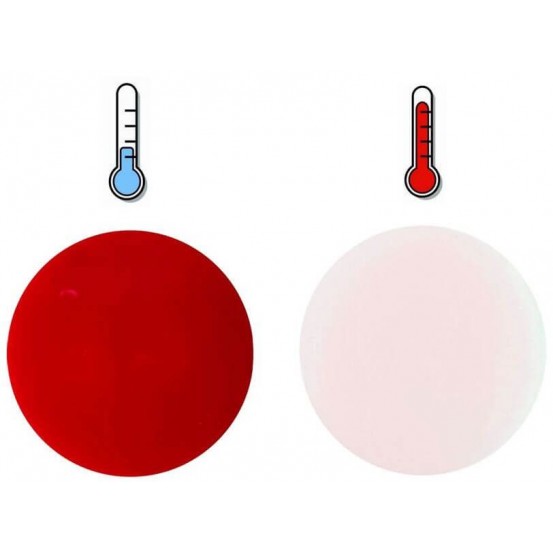
Being aware that these are not really environmentally friendly products, I decided to use only a few of them by making a shibori with 2 colors. The first will be a natural dye, approaching the colors presented after the bleaching process (brown). It will therefore be present whether the temperature varies or not. The second will be based on thermochromic pigment and deposited in a few places on the fabric. The color will only be present when the temperature does not exceed 25°C (depending on the pigment) and will become translucent when the heat increases.
- DYEING
Having done some research on the place of coral in history, red coral (Corallium rubrum) is the one that comes back most often.
In Greek mythology, the origin of coral is linked to the legend of Perseus. After having triumphed over Medusa, this hero would have put the head of the gorgon on a cushion of algae. This one, flooded with blood, would have petrified to give birth to the coral.
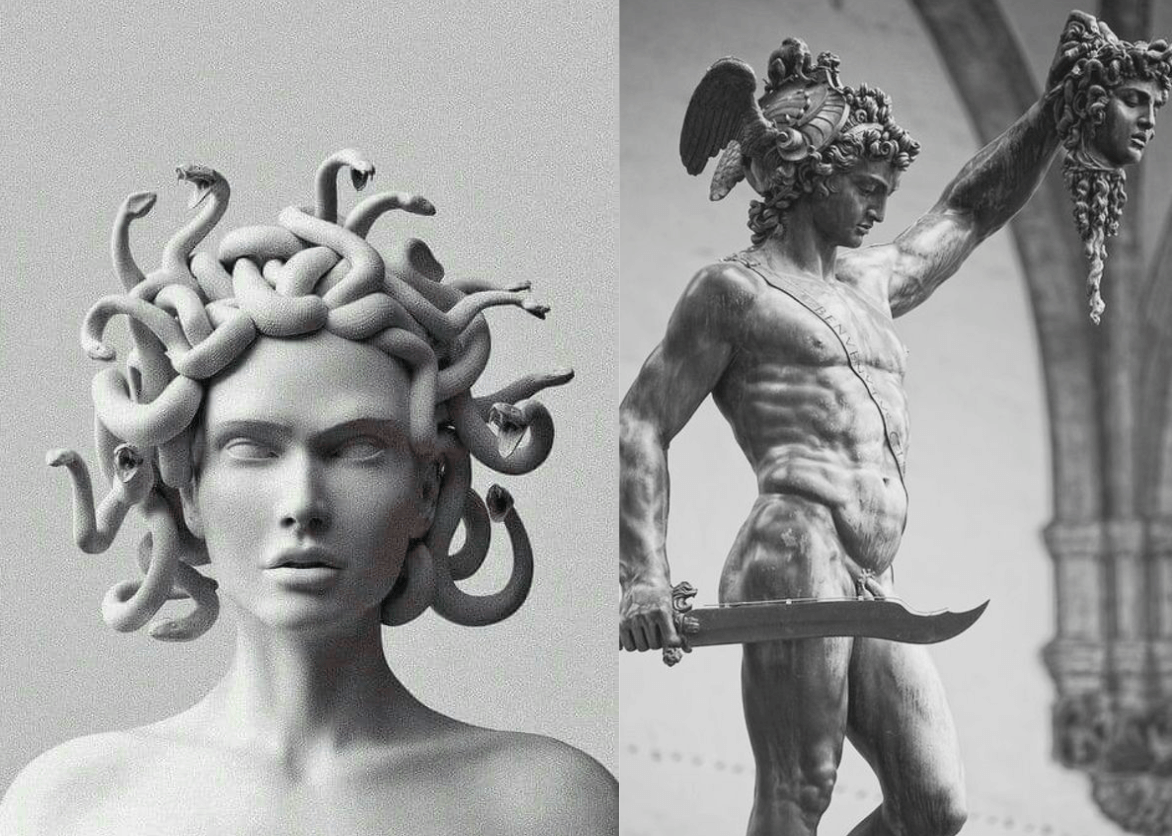 Perseus holding the head of Medusa (Cellini)
In the Mediterranean, red coral has been fished since ancient times to make objects and jewelry. Indeed, having a coral branch is synonymous with good luck, and would have therapeutic properties.
In the Middle Ages, coral was believed to have magical properties and was used as a talisman against witchcraft, as a protection against black magic, jealousy and manipulation.
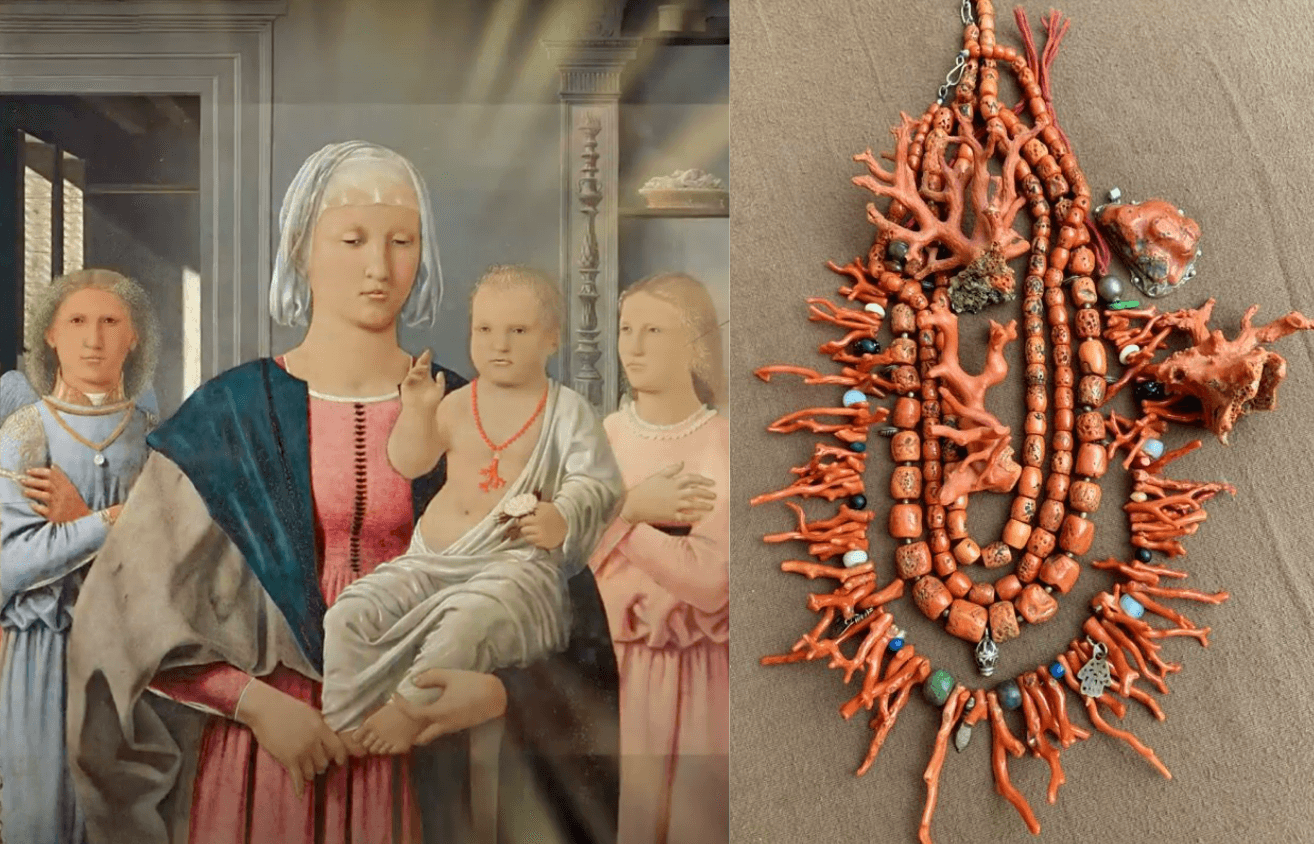 Paintings of the famous "Quattrocento" where the Child Jesus is represented with a coral necklace ended by this protective red branch
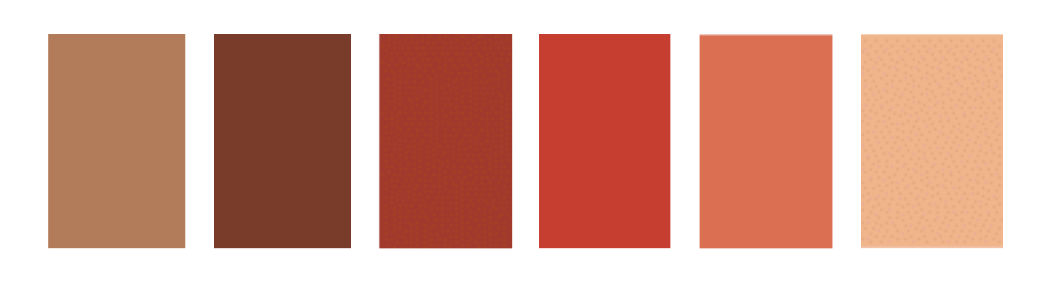
Even today, it is the coral that is best known. That’s why I wanted to use a red-orange color palette.
To support my decision, I asked 8 people what colours they had in mind when I mentioned the theme of corals. 6 people answered me red or orange, 1 person answered me pink and another...«Avatar colors».
So... here’s my color scheme.
- PROCESS STEP BY STEP
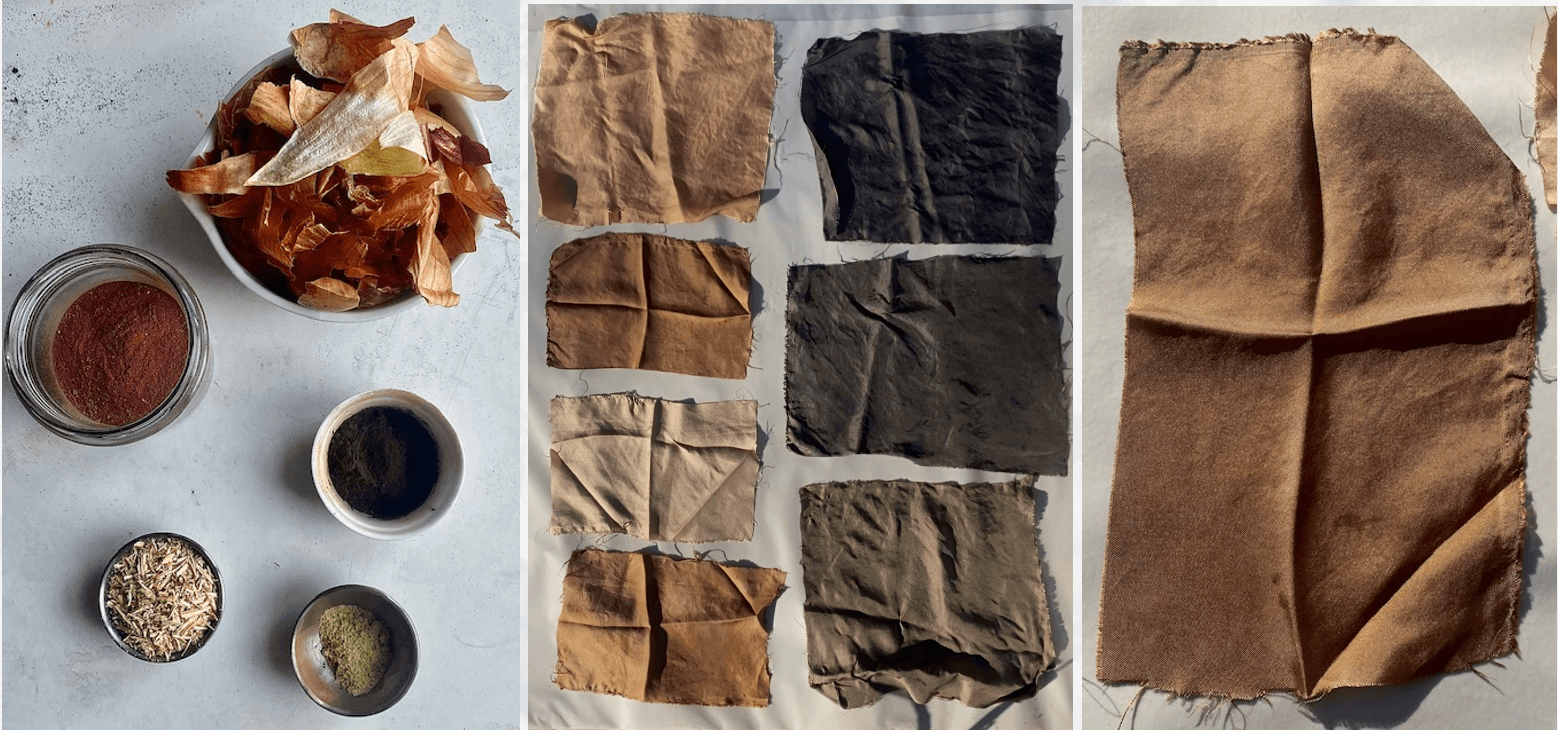
1)Finding the right recipe First, I had to find the ingredients for the natural dye. I would like a brown in reference to the coral skeleton. Here is a table with all the recipes I tested. The percentage is calculated in relation to the weight of fibers and the green column corresponds to the recipe that I will keep for the future.

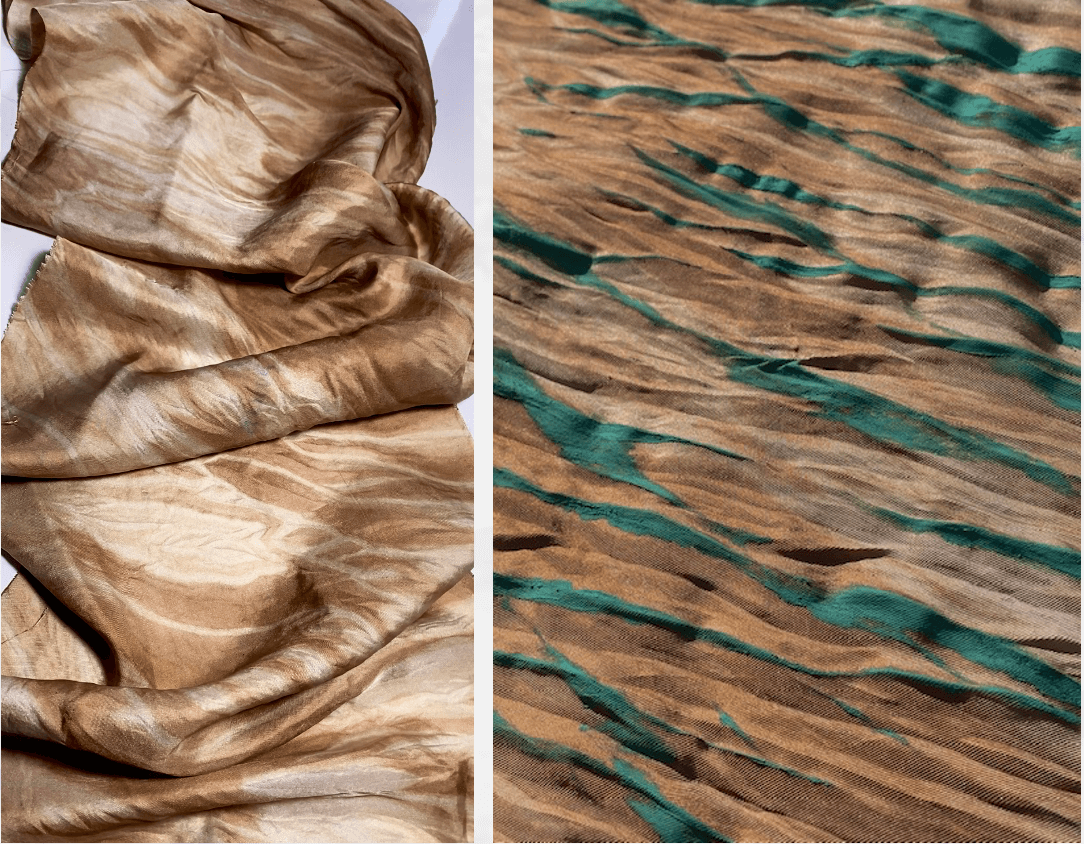
2) Arashi Shibori Then I tried the shibori technique. I first wrapped my fabric around a pipe to dip it in the dye, unfortunately I didn't have enough onion skins to get the brown I got in my recipe search earlier. Then I rolled it a second time to apply the thermochromic pigments. For the thermochromic pigments, I made the same mix that Laurianne did during the Wearable week: -10g of white acrylics -0,6g of pigments
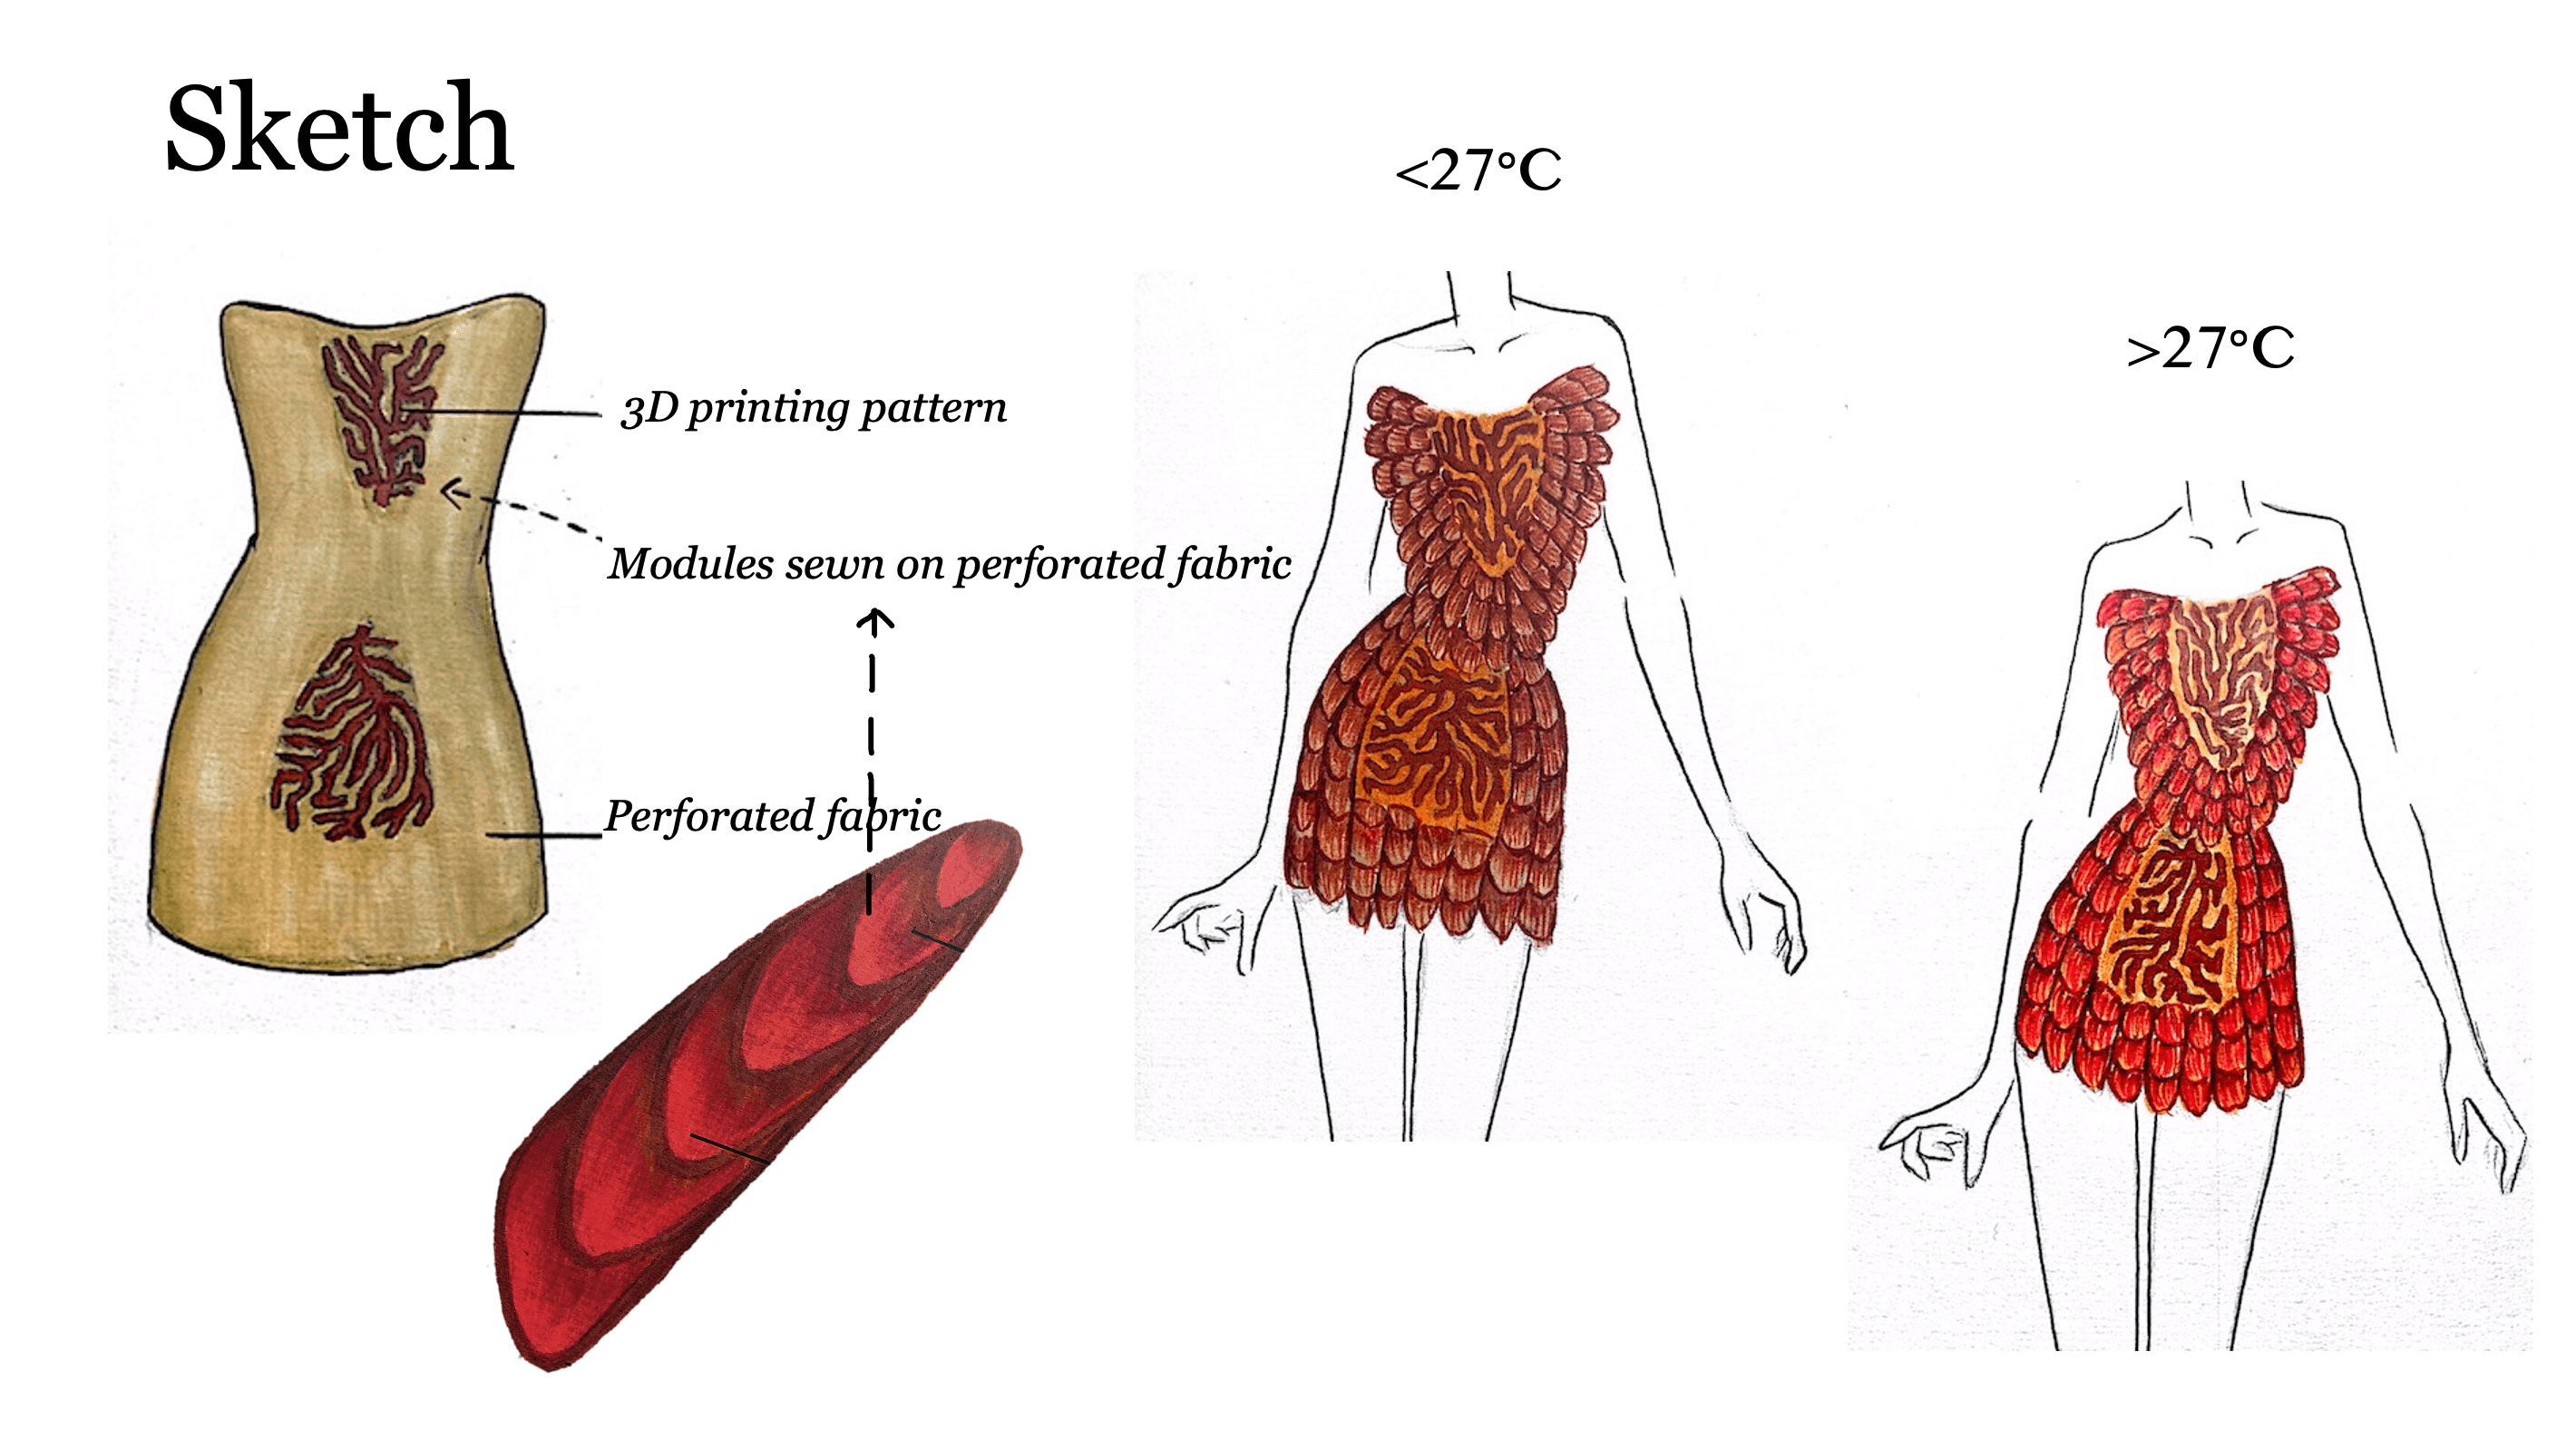
First sketches
The dress would be designed first in an openwork fabric and close to the body. In the center of the bust and at the level of the hips, there would be the pattern printed directly on the fabric. On top of that, the different modules would be hung and layered. I will probably make some modifications to create a less simple design than this one, but it is a first idea.