12. Soft robotics
REFERENCES
Unlike rigid robots we are mostly used to, soft bodied robots have similarities and performance characteristics similar to living organisms or the human body. Soft-robotics are based in Bio-inspired design or biomimicry and have applications in wearables, rehabilitation prosthetics, surgical robots, rescuing and others.
Medical application:
Soft robotic gloves by Harvard Biodesign Lab:

They are lightweight, affordable and easily customized to a given application. These actuators can be rapidly fabricated in a multi-step molding process and can achieve combinations of contraction, extension, bending and twisting with simple control inputs such as pressurized fluid.
Performance application:
Sense of future /Seismic Sense by Adriana Cabrera:
Sense of Nature is a project that approaches the relationship of understanding the earth’s activity and reflecting through wearable technologies to connect people with natural phenomena as the Seismic activity that they cannot normally perceive with their senses.
EXPERIMENTATION
1- Soft robotic with silicon
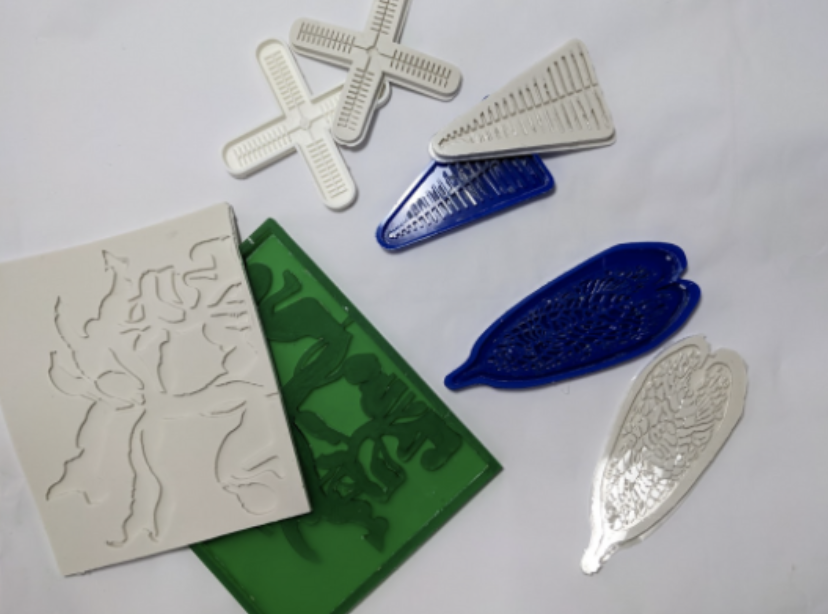
I was able to experiment with silicone with the moulds made by Amandine Fery and Laora Guillerm with laser cutting. For this we simply mixed 100g of silicone RTV 181 with 5g of PRO R30 and poured the mixture into the moulds. Care must be taken to avoid as much as possible the bubbles, for this it is preferable to pour the mixture from high enough (higher than on the photo), and then to raise the bubbles by tapping the mould on the work surface and drilling them with a needle for example.
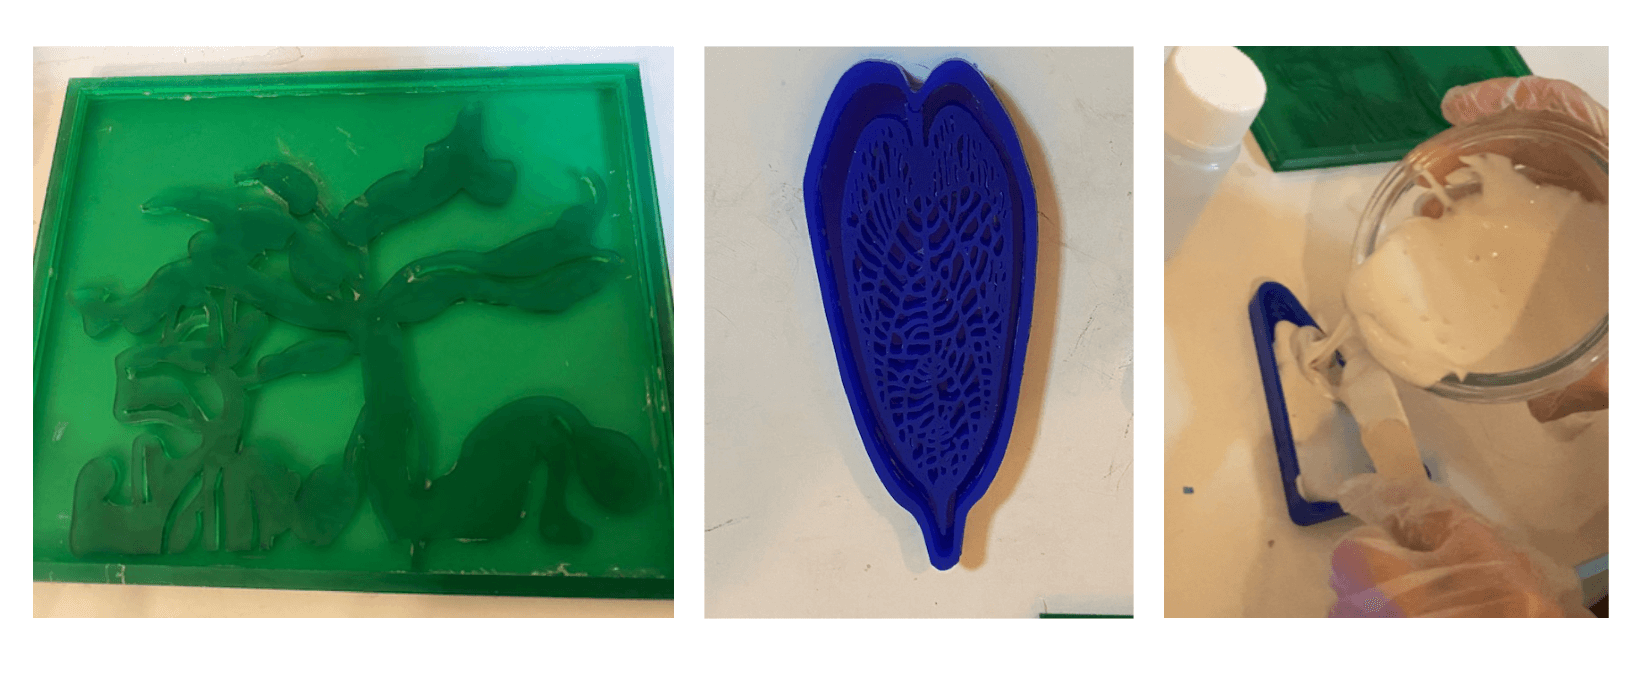
The silicone needs 24 hours to dry, we then unmolded them but they were still not completely dry, we therefore have not yet continued the experimentation.
But here is a video of the entire process while waiting.
2- Soft robotic with vinyl
To better understand how it works, I started with a rather simple form: A leaf.
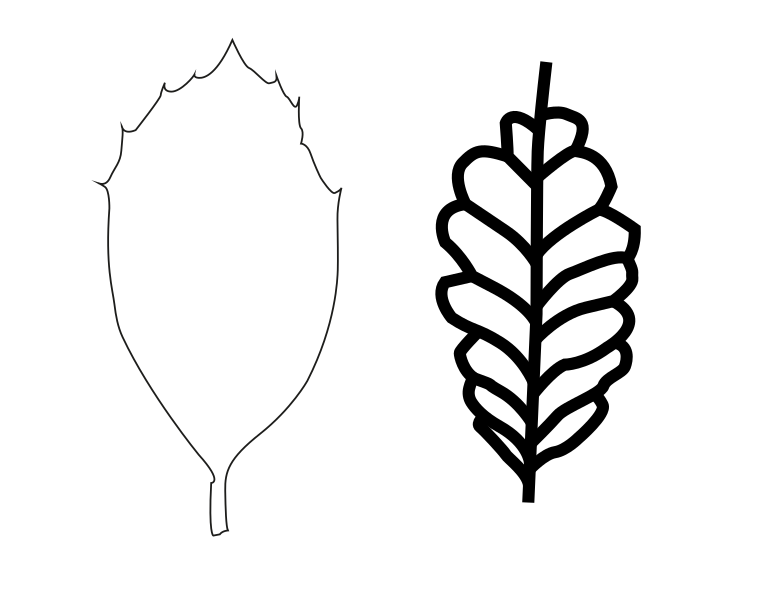
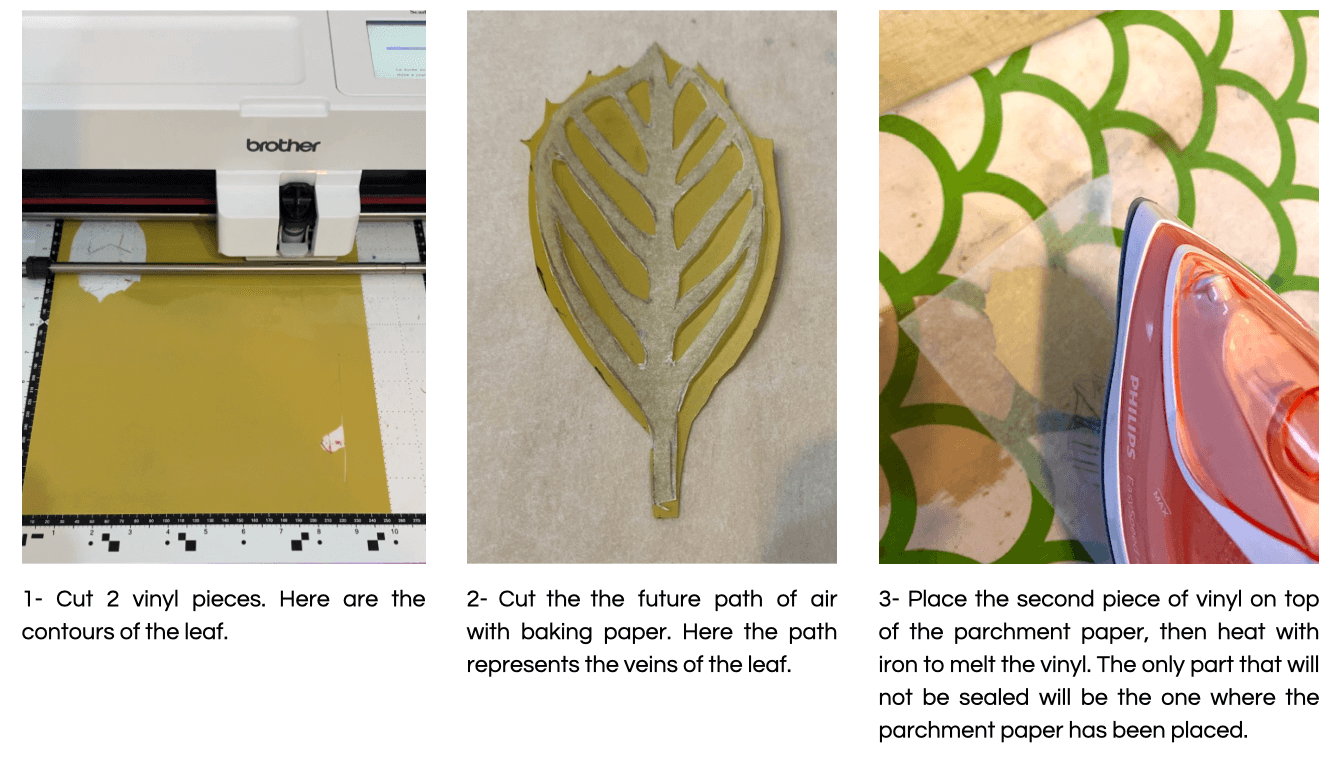
All that remains is to insert a pipe to make air pass along the way. Unfortunately I think I damaged the path during ironing because as you can see on the video below, the air circulates only in the left half of the leaf. For this first test I simply blew into the pipe to inject air. But it is also possible to use an air pump.
Epileptic hat
- What's epilepsy?
Being an epileptic for several years, I wanted to find an idea to help people suffering from the same disease as me.
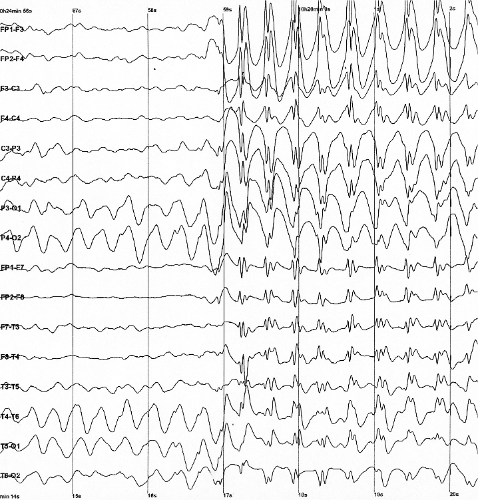
To quickly define the disease, it is a chronic disease characterized by the occurrence of epileptic crisis, which can be partial or generalized depending on the person. These epileptic crisis reflect a sudden and transient disruption of the electrical activity of the brain that suddenly and disorderly increases.
This disease affects about 60 million people worldwide, 1/3 of whom do not respond to available treatments.
Tonic-clonic seizures like I had result in a loss of consciousness resulting in a fall and convulsions, they affect only a part of epileptic people.
The main problem of people who do this type of crisis regularly is the fall. Indeed if the crisis is not necessarily dangerous in itself, the fall can be very dangerous depending on the environment in which we are. Not being able to anticipate the crises, I spent my high school years chained up the bruises on my forehead and the bumps on my skull, fortunately I had the chance to have only superficial wounds.
- Hat design.
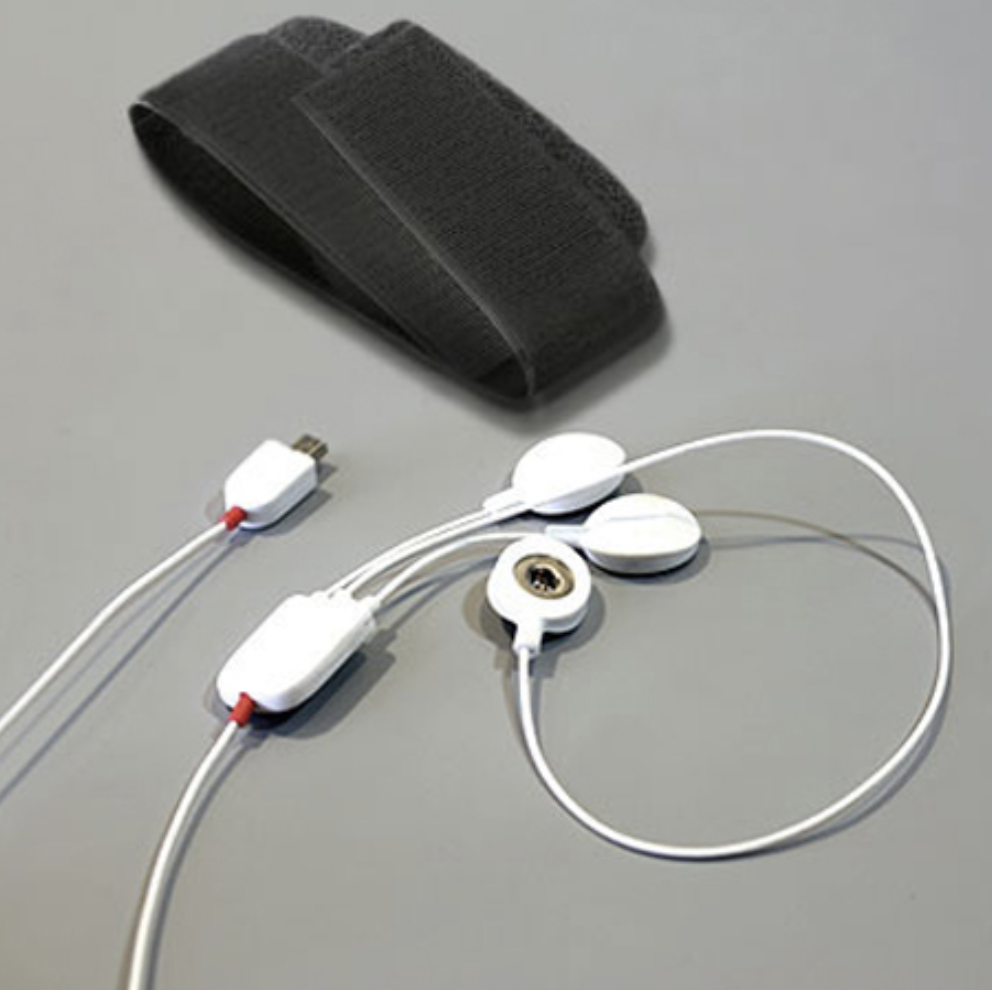
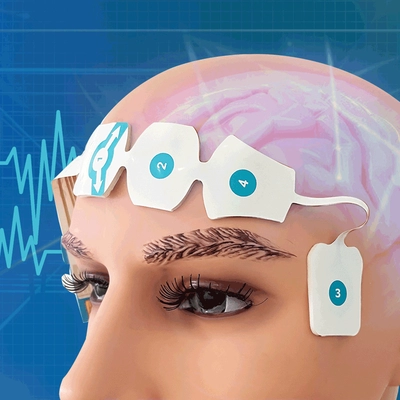
I therefore thought of a hat or cap in which would be integrated an electroancephalography sensor (EEG) to measure the electrical activity of the brain. This sensor would detect brain abnormalities and release the swelling of the cap just before the fall in order to cushion shocks and avoid injuries.
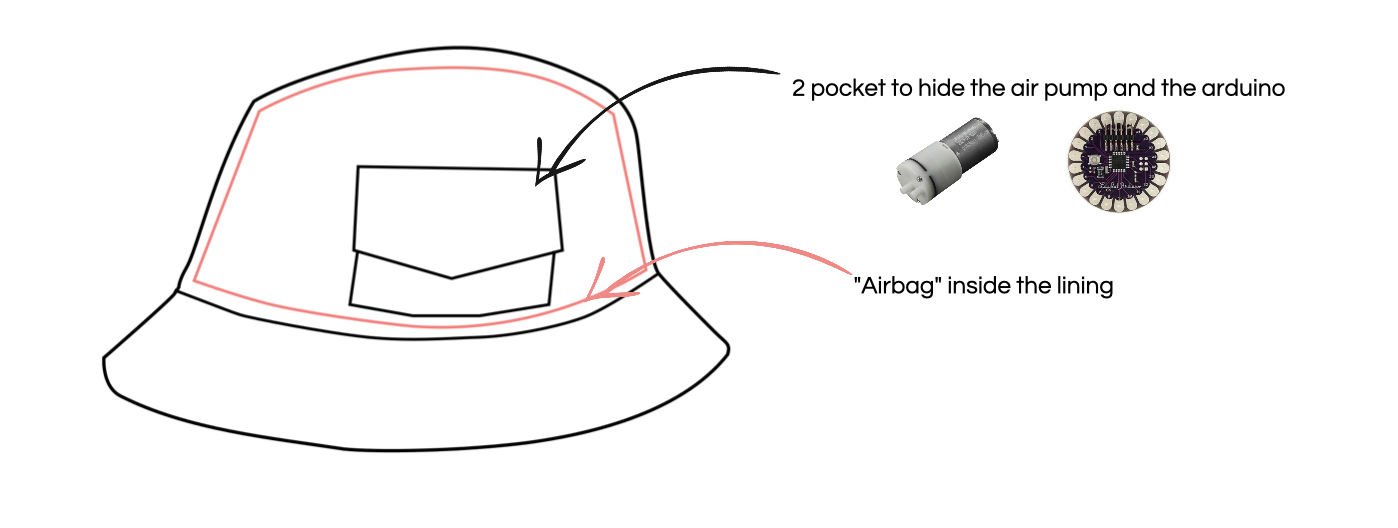
Obviously, the project is too complex to achieve in a week, especially because I don’t have an EEG sensor. I also looked if it was possible to get it easily on the internet, I found it rather easily but the price is quite high, around 100 euros. So I tried to imagine the design and realize the inflating pocket that would be inside the hat, in the lining.
When I started to think about design, I met a prolematic: the cap will require several materials including an air pump, an arduino, an EEG sensor, an air hose and several cables. To hide all this material, I was inspired by one of my own hats, which has 2 pockets on the sides. This pocket would hide the cylinder, the arduino and the cables. The hose would start from the air pump in the pocket, go through the fabric to reach the airbag inside the lining.
Electrodes are necessarily in direct contact with the skull.
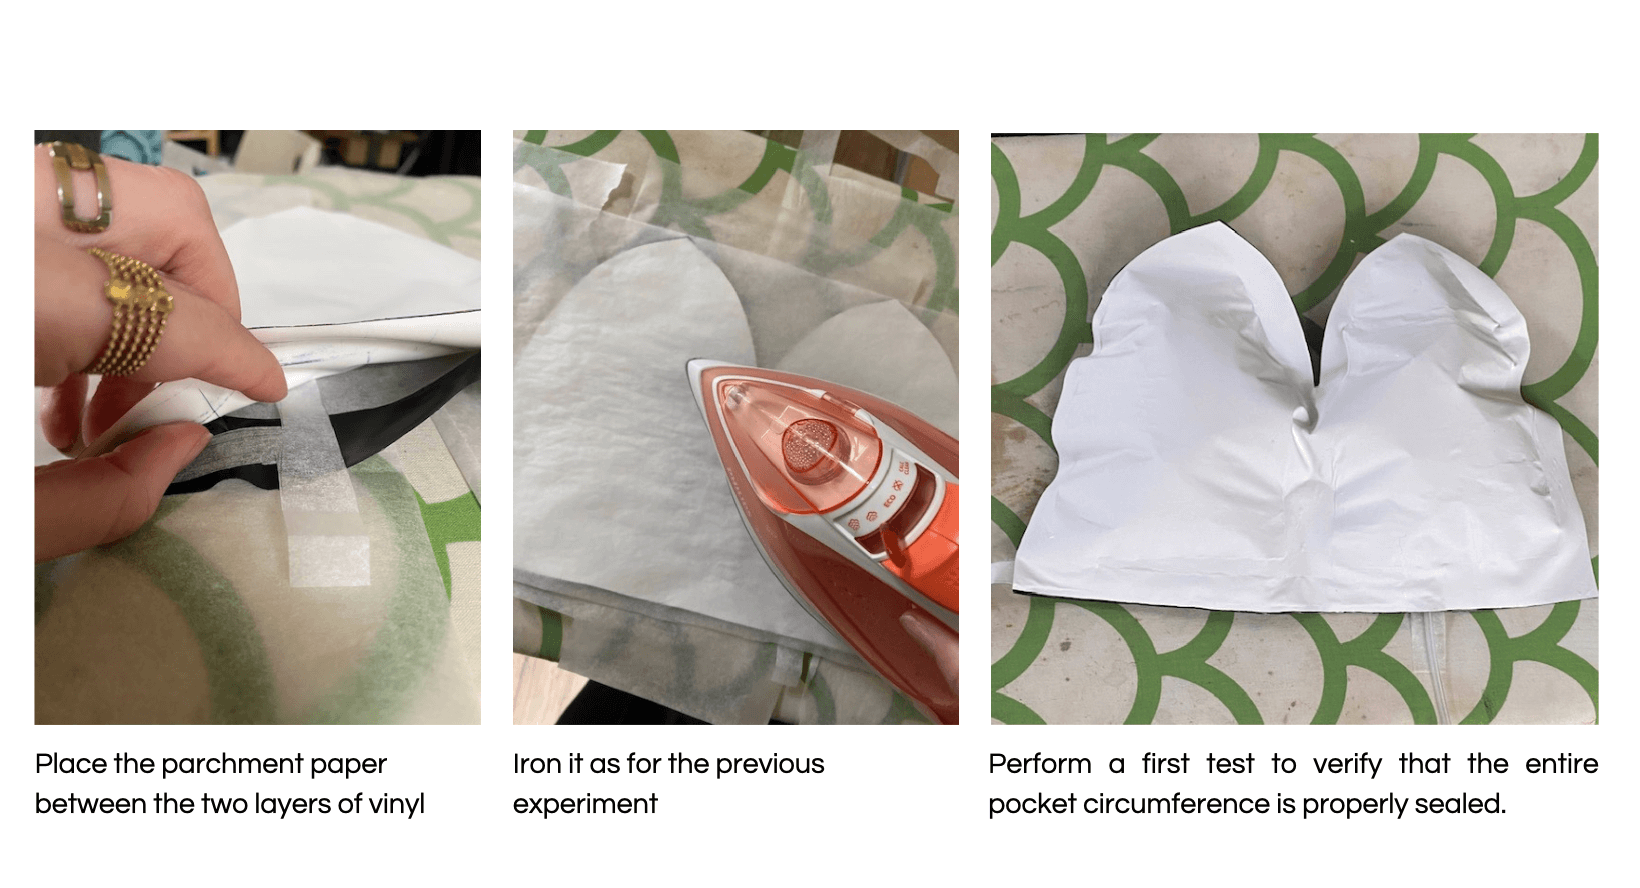
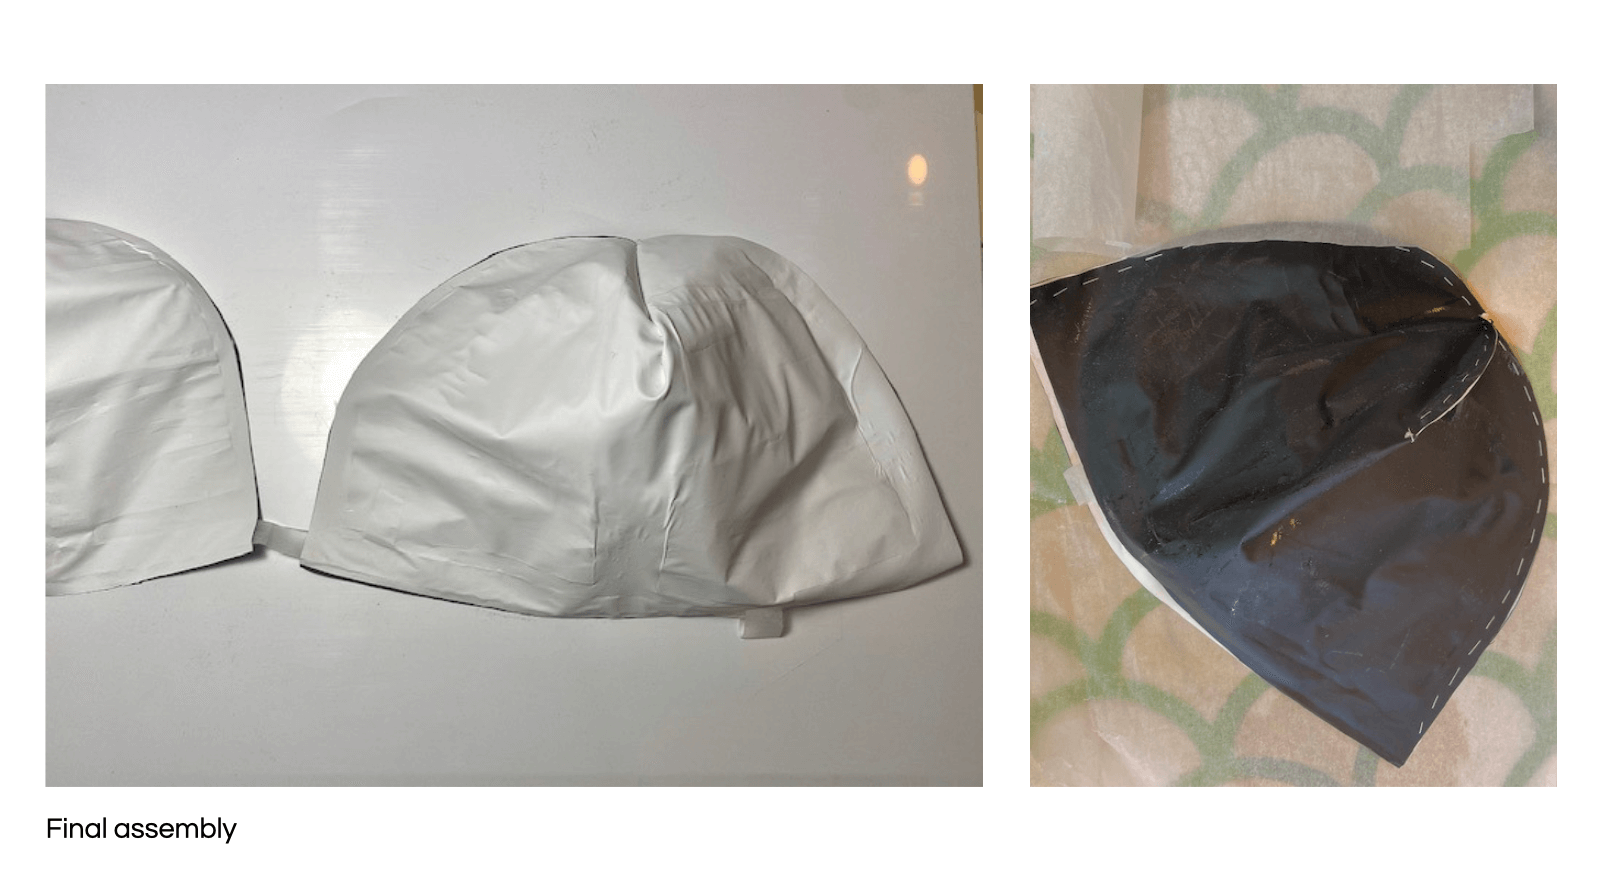
- "Airbag" process
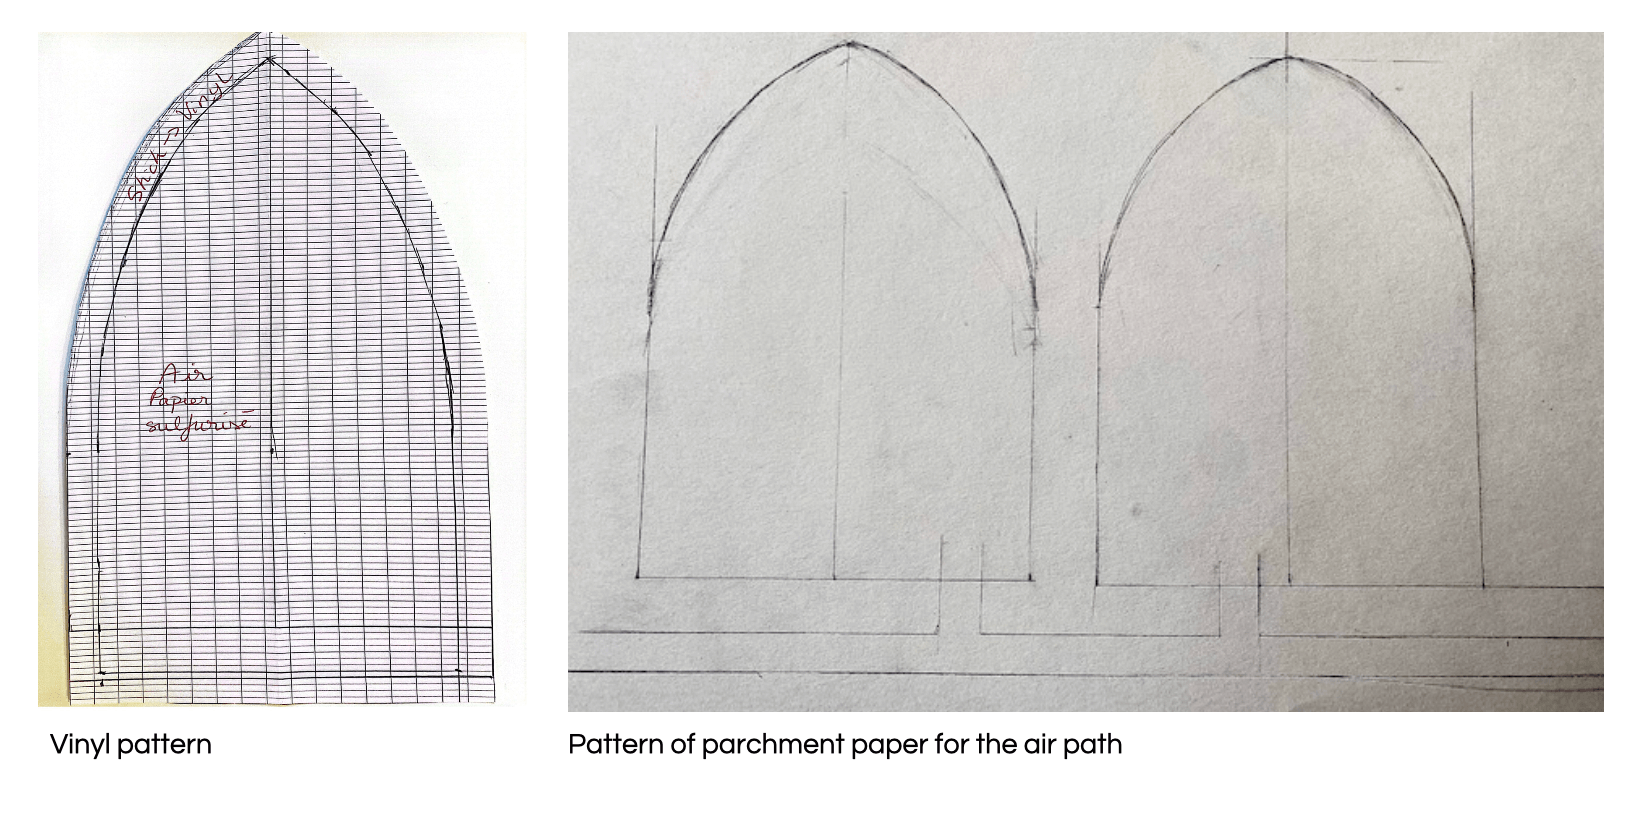
We had vinyl sheets A4 size, so I had to adapt my pattern, which caused me some problems afterwards. When assembling the pieces, I had to sew at the place where was the air path and therefore, the air could not circulate all around the cap but it would not have been the case if I had cut the pattern at once.
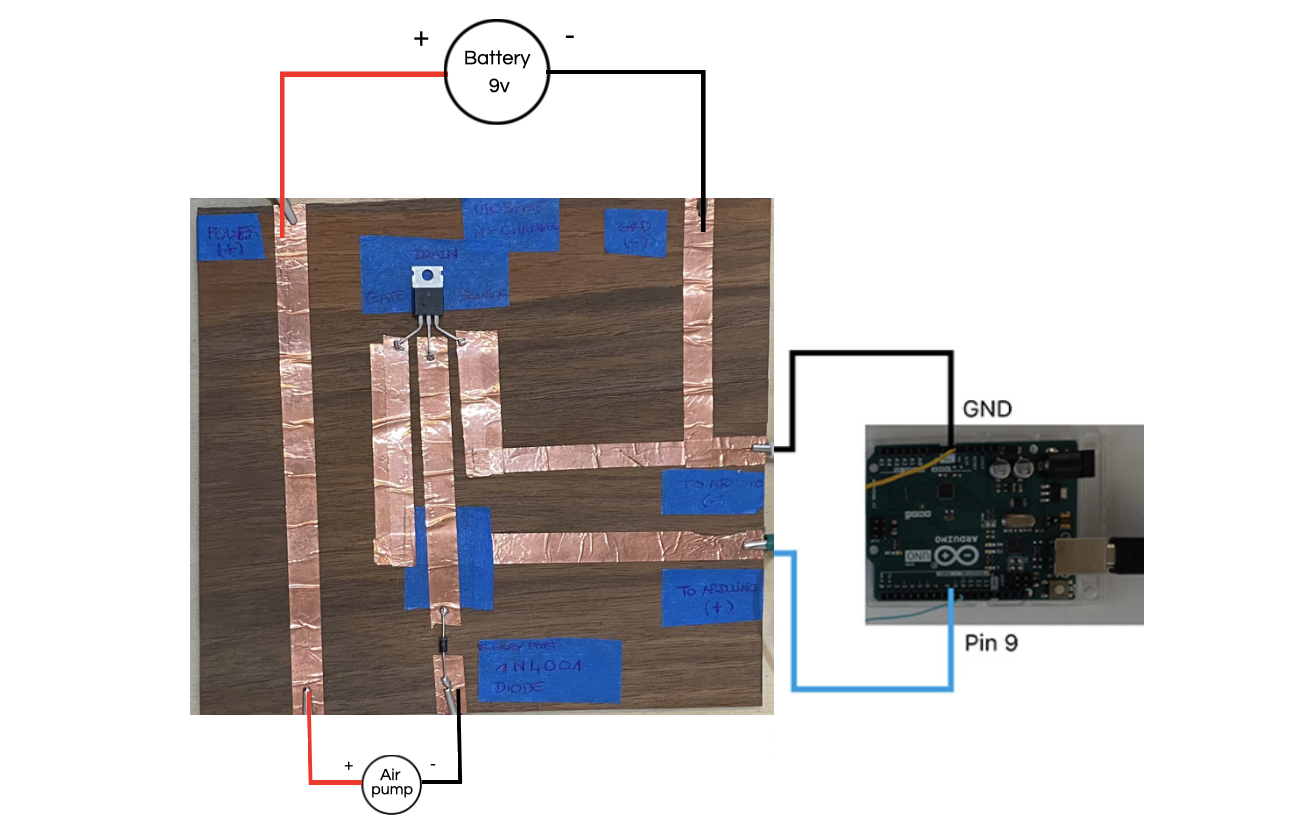
To test the cap I used arduino code below to which I simply changed the duration.
/*
  Blink

  Turns an LED on for one second, then off for one second, repeatedly.

  Most Arduinos have an on-board LED you can control. On the UNO, MEGA and ZERO
  it is attached to digital pin 13, on MKR1000 on pin 6. LED_BUILTIN is set to
  the correct LED pin independent of which board is used.
  If you want to know what pin the on-board LED is connected to on your Arduino
  model, check the Technical Specs of your board at:
  https://www.arduino.cc/en/Main/Products

  modified 8 May 2014
  by Scott Fitzgerald
  modified 2 Sep 2016
  by Arturo Guadalupi
  modified 8 Sep 2016
  by Colby Newman

  This example code is in the public domain.

  https://www.arduino.cc/en/Tutorial/BuiltInExamples/Blink
*/

// the setup function runs once when you press reset or power the board
void setup() {
  // initialize digital pin LED_BUILTIN as an output.
  pinMode(LED_BUILTIN, OUTPUT);
}

// the loop function runs over and over again forever
void loop() {
  digitalWrite(LED_BUILTIN, HIGH);   // turn the LED on (HIGH is the voltage level)
  delay(1000);                       // wait for a second
  digitalWrite(LED_BUILTIN, LOW);    // turn the LED off by making the voltage LOW
  delay(1000);                       // wait for a second
}
This is the circuit diagram I used to test the hat, the next step would be to add the eeg sensor.