7. Computational Couture

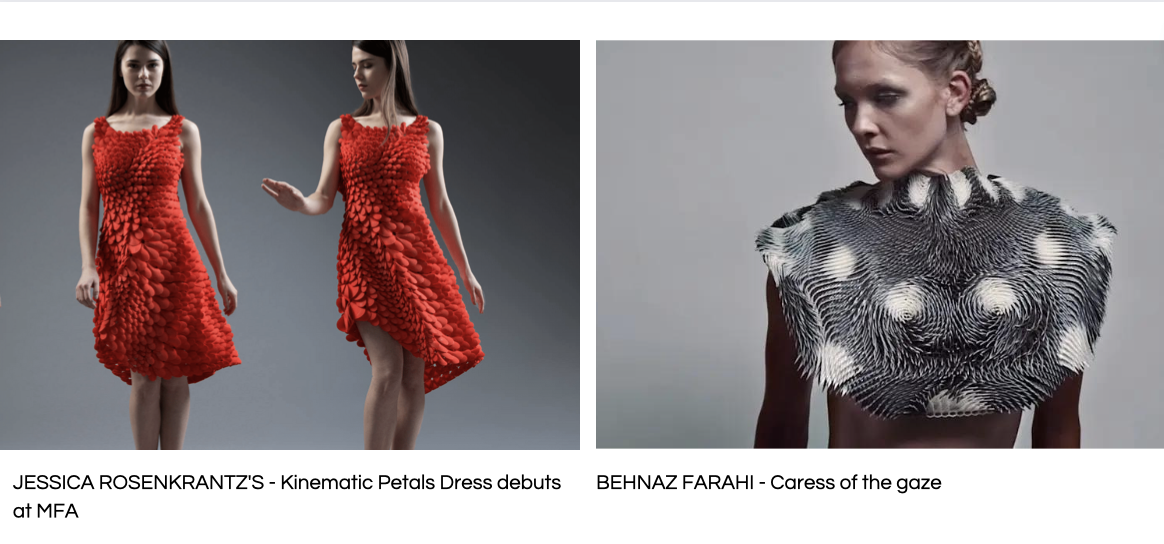

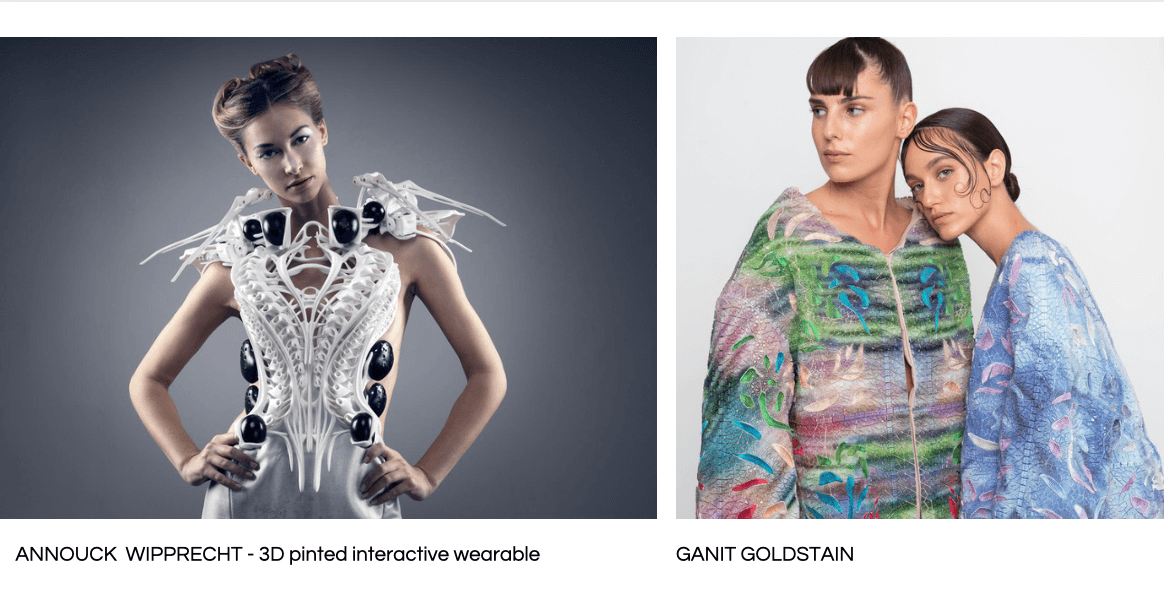
Links to designers' websites
What is computational couture
During this week we will explore computational design methods towards a new reinterpretation of cloths, garments and accessories for fashion design, inspired by a new digital design methodology. This class requires basic knowledge of Rhinoceros, Grasshopper
Disciplines as programming and electronics become highly interconnected, blurring old boundaries and merging different fields of knowledge. Fashion has been already affected by this radical change. Therefore, clothes, shoes and other accessories can now incorporate elements of hardware and software, generating a peculiar mix between fashion and computation that is incredibly fertile and inspiring. Data becomes Beauty, Interaction becomes Emotion. As a result, a new aesthetic is emerging. In this class we will explore computational design methods towards a new reinterpretation of cloths, garments and accessories for fashion design, inspired by a new digital design methodology.

Rhinoceros 3D
Rhinoceros 3D is a CAD software including a multitude of complex 3D modeling tools, which allows to create a multitude of shapes, with great precision and a lot of detail, whether from a drawing, a sketch or even a 3D scan. The software allows to work from curves or from mathematical formulas capable of accurately describing a 3D shape. Based on the geometry NURBS (Non-Uniform Rational Basis Splines), this surface modeling software is commonly used for architecture, prototyping, engineering, jewelry and industrial, graphic, naval and automotive design.
Grasshopper 3D
Grasshopper is a plug in on Rhinoceros software, it makes it possible to create programs visualized by a diagram of nodes that describes each of the mathematical and geometric relationships of a three-dimensional model. One of the main advantages of Grasshopper is the ability to create parametric shapes, that is to change the geometry almost infinitely by simply changing the parameter values.
Plug-in for GrassHopper
Flexhopper / Bifocals / Bowerbird / Chromodoris / Kangaroo / Anemone / Weaverbird / Cocoon / Marching Cubes / Mesh Edit / Mesh+ / Mesh tools / Lunchbox / VR-Edge / Mesh analysis To get some of these plug-ins, just type 'Package Manager' in the command bar. For other plug-ins like Bifocal, there is a site called Food4rhino which allows to installed them.
3D printing process
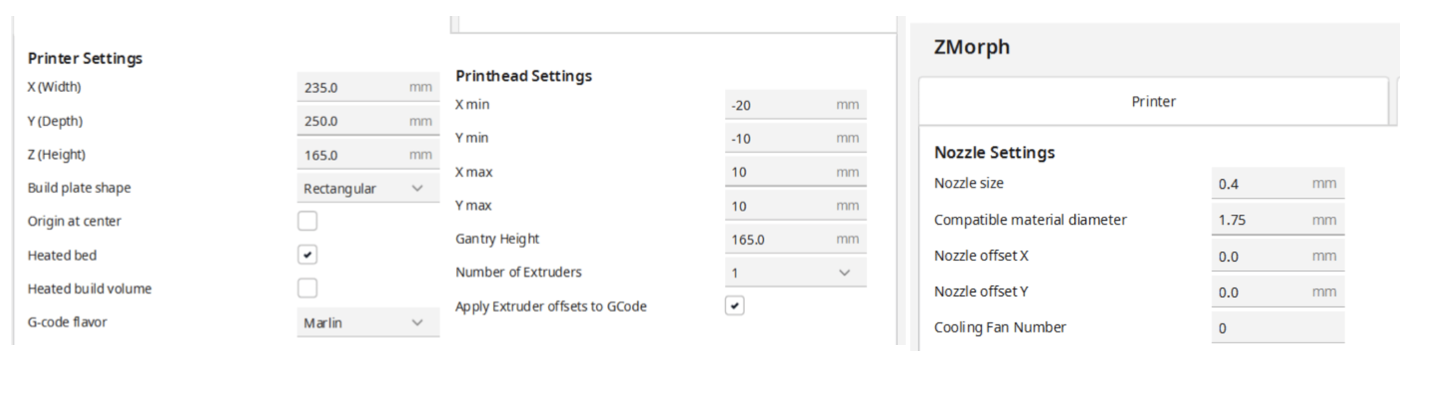
To the Textile Lab in Lyon, we work with a Zmorph 3D printer with Buse 0.4 - Filament 1.75 and we use a software called Cura.
- Add the printer in Cura and specify the following machine settings
-
Prepare the file in Cura: Import the 3D model in .obj or .stl.
-
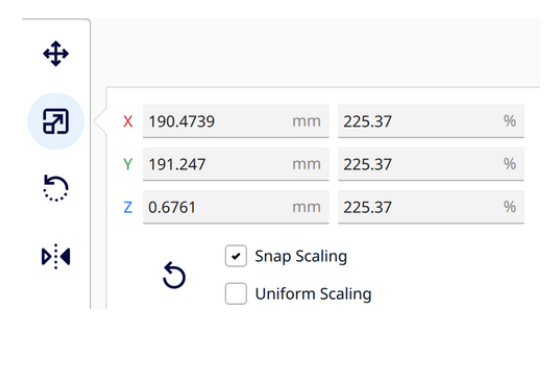
Check the positioning of the model and its scale.
-
Check useful parameters like: Quality, Infill, Material (temperature), Speed, Travel, Build plate adhesion (skirt to create two contour lines around the part to prime the filament.
-
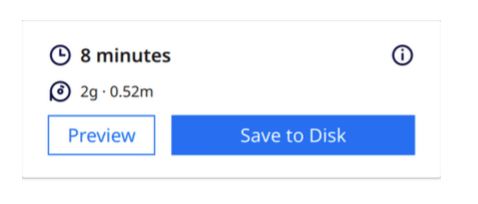
Click “Slice” at the bottom right. Once this is done, the printing time and the amount of material used will be displayed. Then click “Save to removable device” to save to the sd card.
-
Insert the sd card and calibrate the printer
-
Prepare the tray
-
Once the tray is hot, start printing
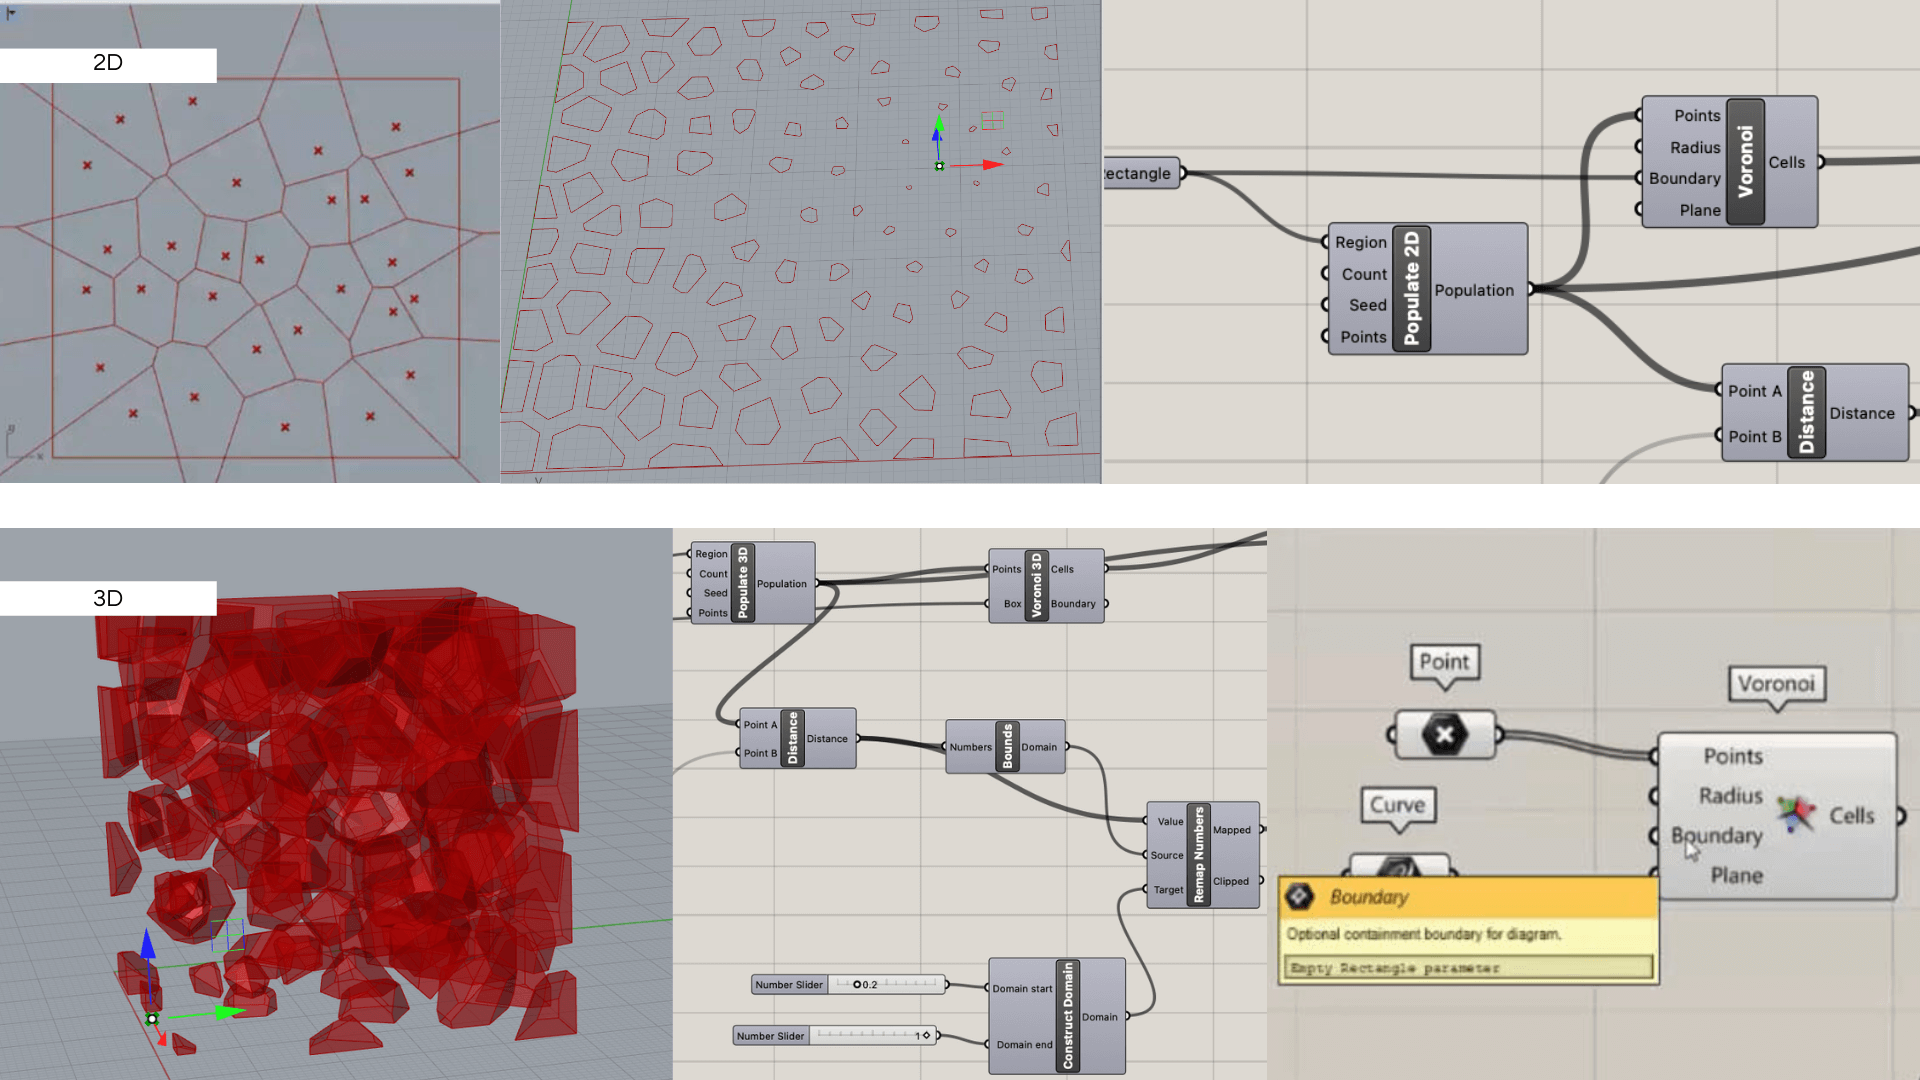
Attractor point pattern
Having never used grasshopper and having a little trouble understanding its logic, I started with very simple tutorials on YouTube. The first one was «Learn how to create simple attractor point patterns in Grasshopper.»
In this tutorial, I learned how to use the tool called «Populate 2D or 3D» to populate a 2 or 3 dimensional region with points.

I also learned to use the Voronoi diagram, which is a paving (cutting) of the plan into cells (adjacent regions) from a set of points, here called the populate.
Then, thanks to the tools «distance», «construct domain» and «remap numbers», I was able to create a variable parametric contruction according to the positioning of one point in relation to the others.

Parametric lamp design
In this second tutorial I could create a lamp with a parametric design, I learned to use commands like seam, loft, deconstruct Brep and mesh surface.
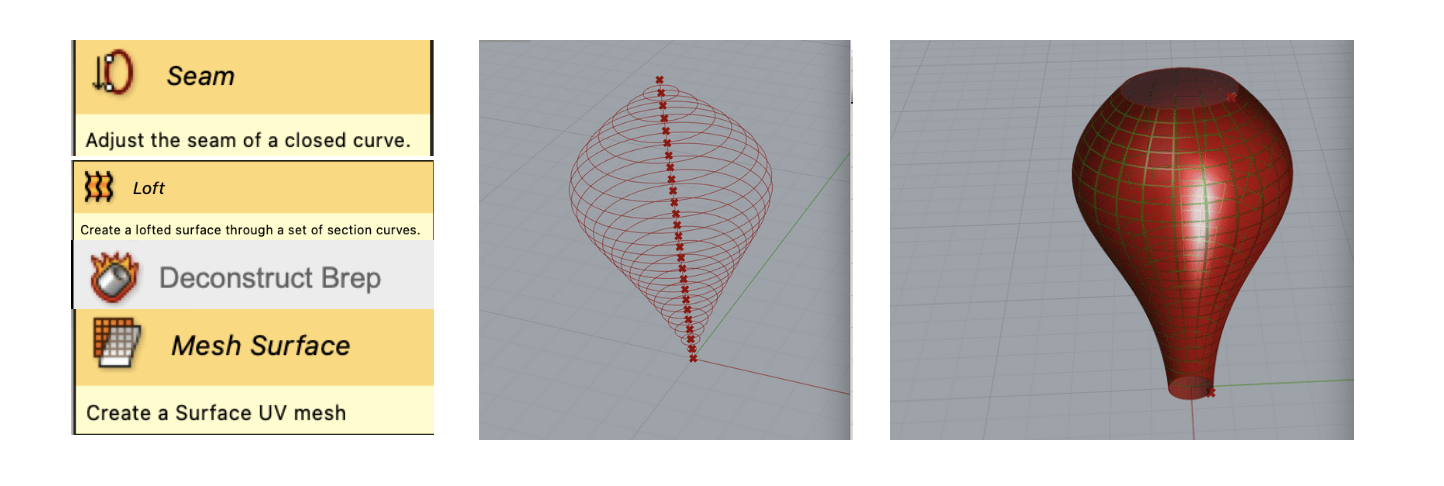
To create the design of this parametric lamp I then had to install the weaver bird plug-in, which allow to computes a new mesh with higher genus, where each face has a new hole in the center and resembles picture frame. The resulting mesh always consists of quad surfaces

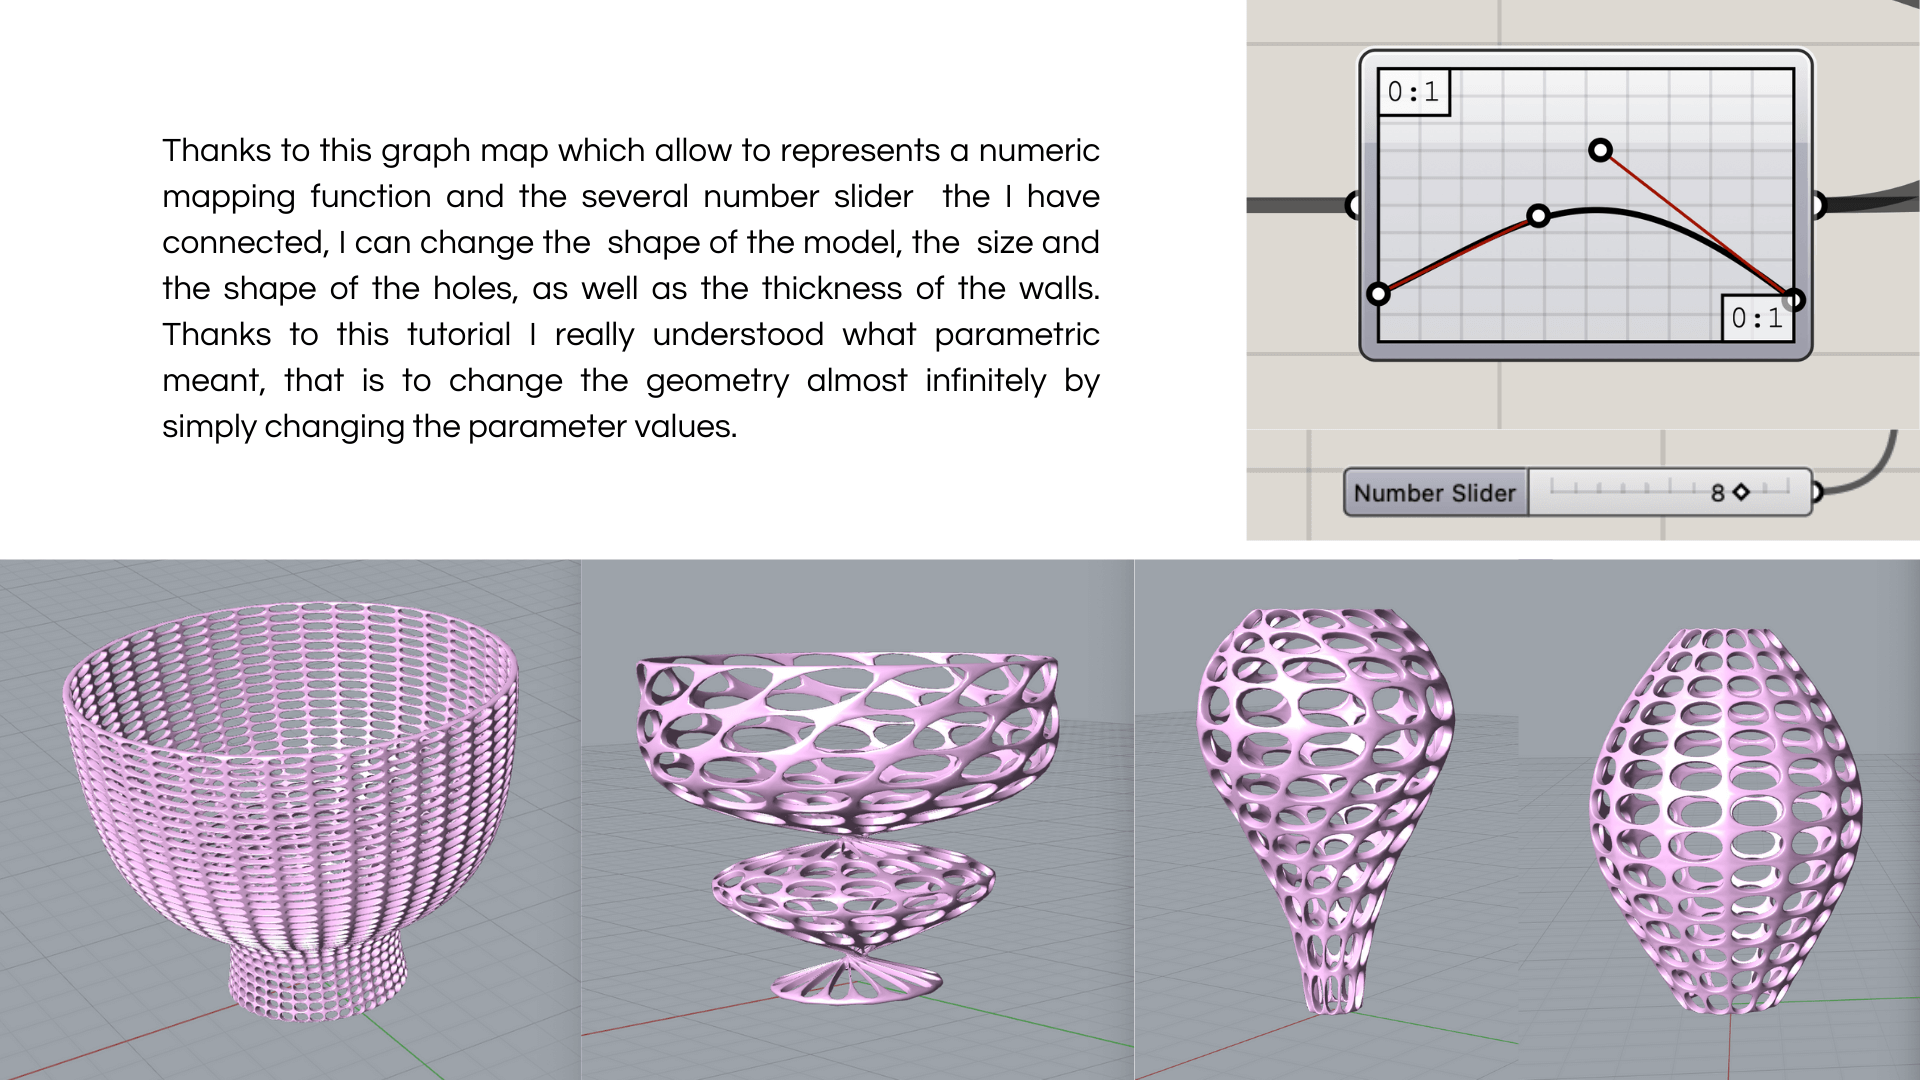
Basic pattern array on grid
In this last tutorial, I was able to learn how to create a parametric pattern with a 2d grid thanks to the square command. Indeed with this command I could move the polygon I did according to the points placed at the center of each grid square. Moroever the polygon command in association with number slider allow to change the number of polygon segments and corn as well as the radius (distance from center to tip)

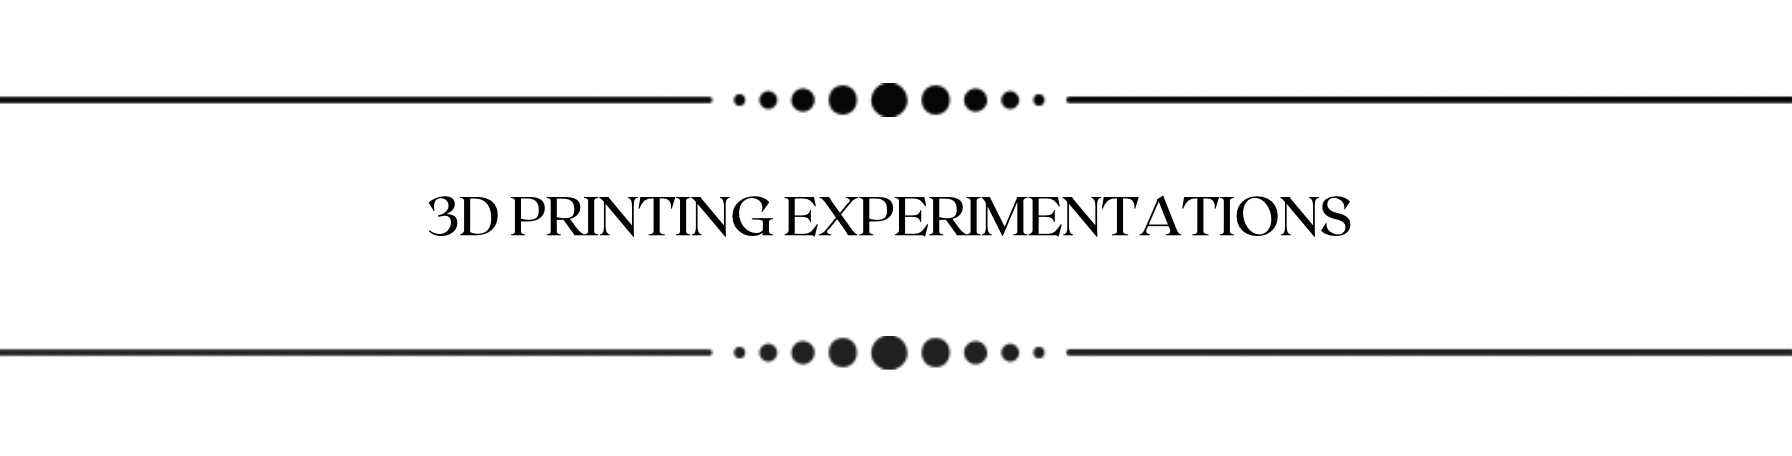
Create a pattern from field line definition
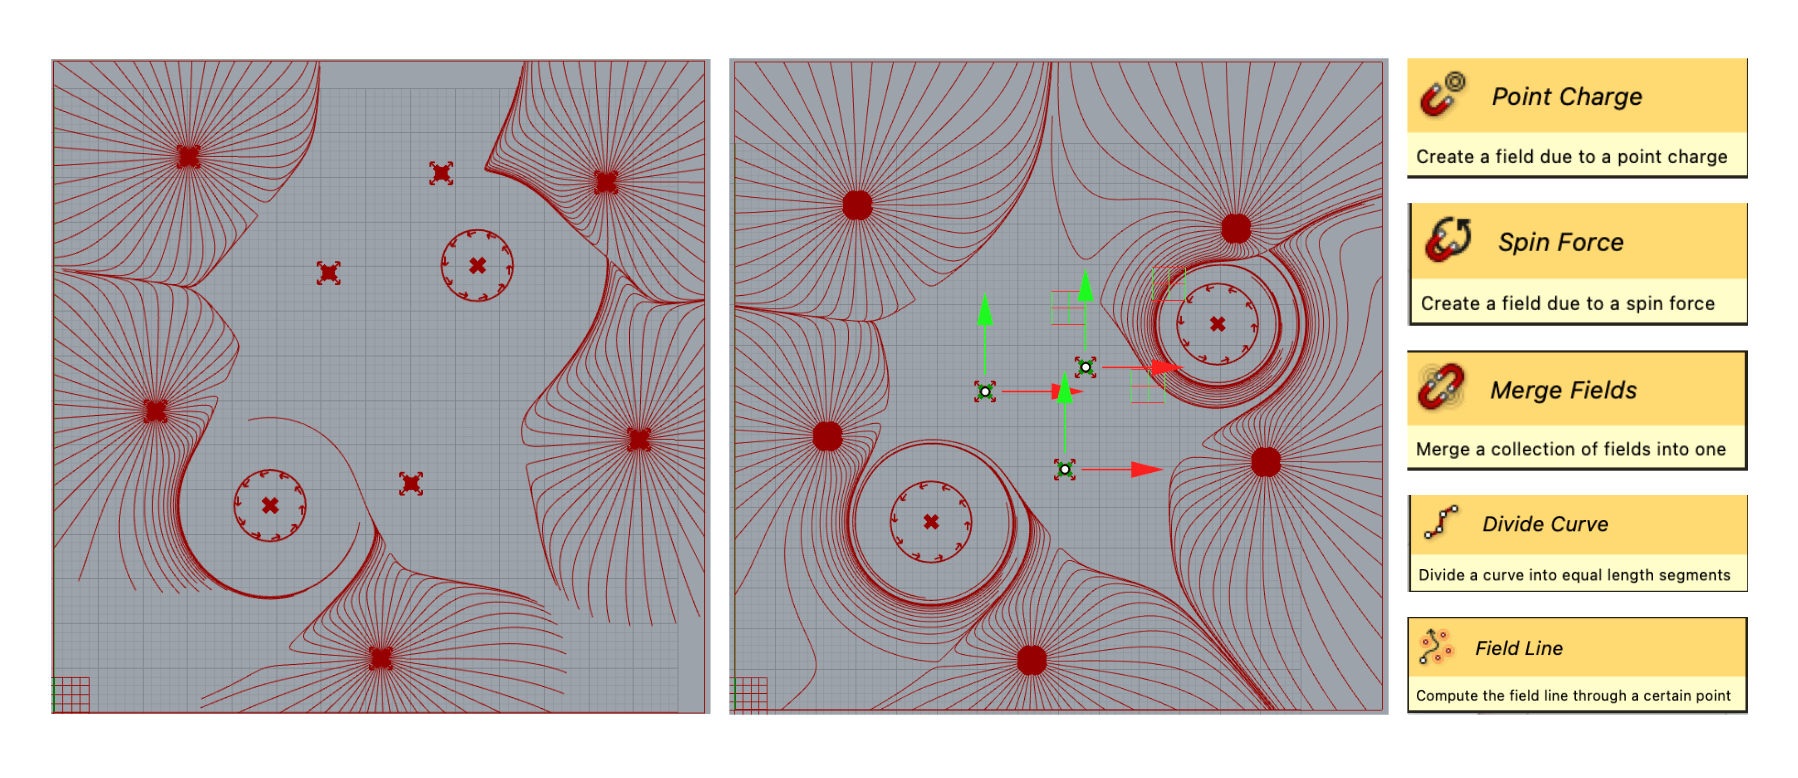
This tutorial allowed me to create a pattern responding to a more or less strong attraction of the lines to certain points. These lines are formed by the divide curve command. It is possible to change this pattern to infinity by simply changing the location of the points, the rotational force or the number of times the curve will be divided.
First test
After practicing on grasshopper, I decided to go for a first 3D printing trial. I used the parametric pattern I made from a grid and a hexagon. I wanted to print it on a stretch fabric so I could stretch it with pliers, and see how the fabric would react after printing. I decided to use a a mesh fabric based on polyesther and elastane. I thought I could get some volume but it didn’t work, it would probably take more distant shapes and stretch the fabric more.

temperature: 200 degrees for the filament and 50 degrees for the plate
thickness: 0,8mm, which corresponds to 4 layers of filament (each layer measures 0.2mm)
Observation: I thought I could get some volume but it didn’t work, it would probably take more distant shapes and stretch the fabric more. Furthermore, the material is not very well fixed to the fabric, I think we should increase the temperature of the plate.
File: Polygon
Second test
My goal was to create volume by stretching an extensible fabric during 3D Printing so that the material can then be retract to certain places and create ripples. So I wanted to test this by creating a pattron with small strokes at regular intervals and I was especially careful to stretch the fabric better than the previous time. I used lycra and 3D printing therefore did not adhere to the fabric, we can see on the video that one of the lines already begins to take off.
temperature: 200 degrees for the filament and 60 degrees for the plate
thickness: 0,6 which correspond to 3 layers of filament
Observation: I used lycra and 3D printing therefore did not adhere to the fabric, we can see on the video that one of the lines already begins to take off. I think this is really complicate to do something solid with this fabric but I could try with a higher temperature
File: Small Lines
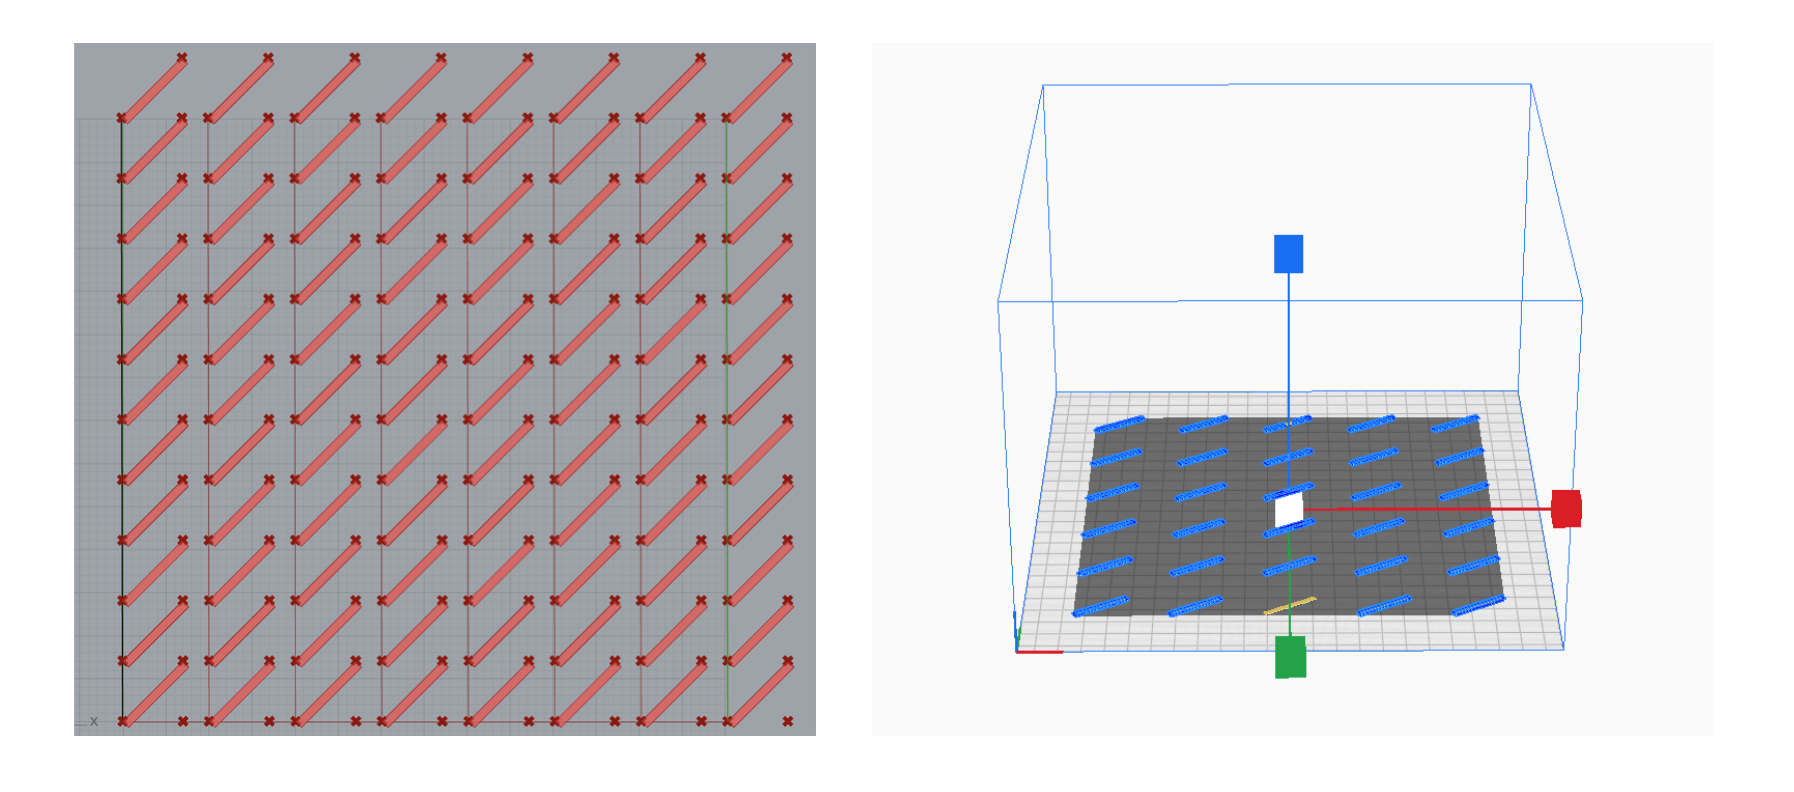
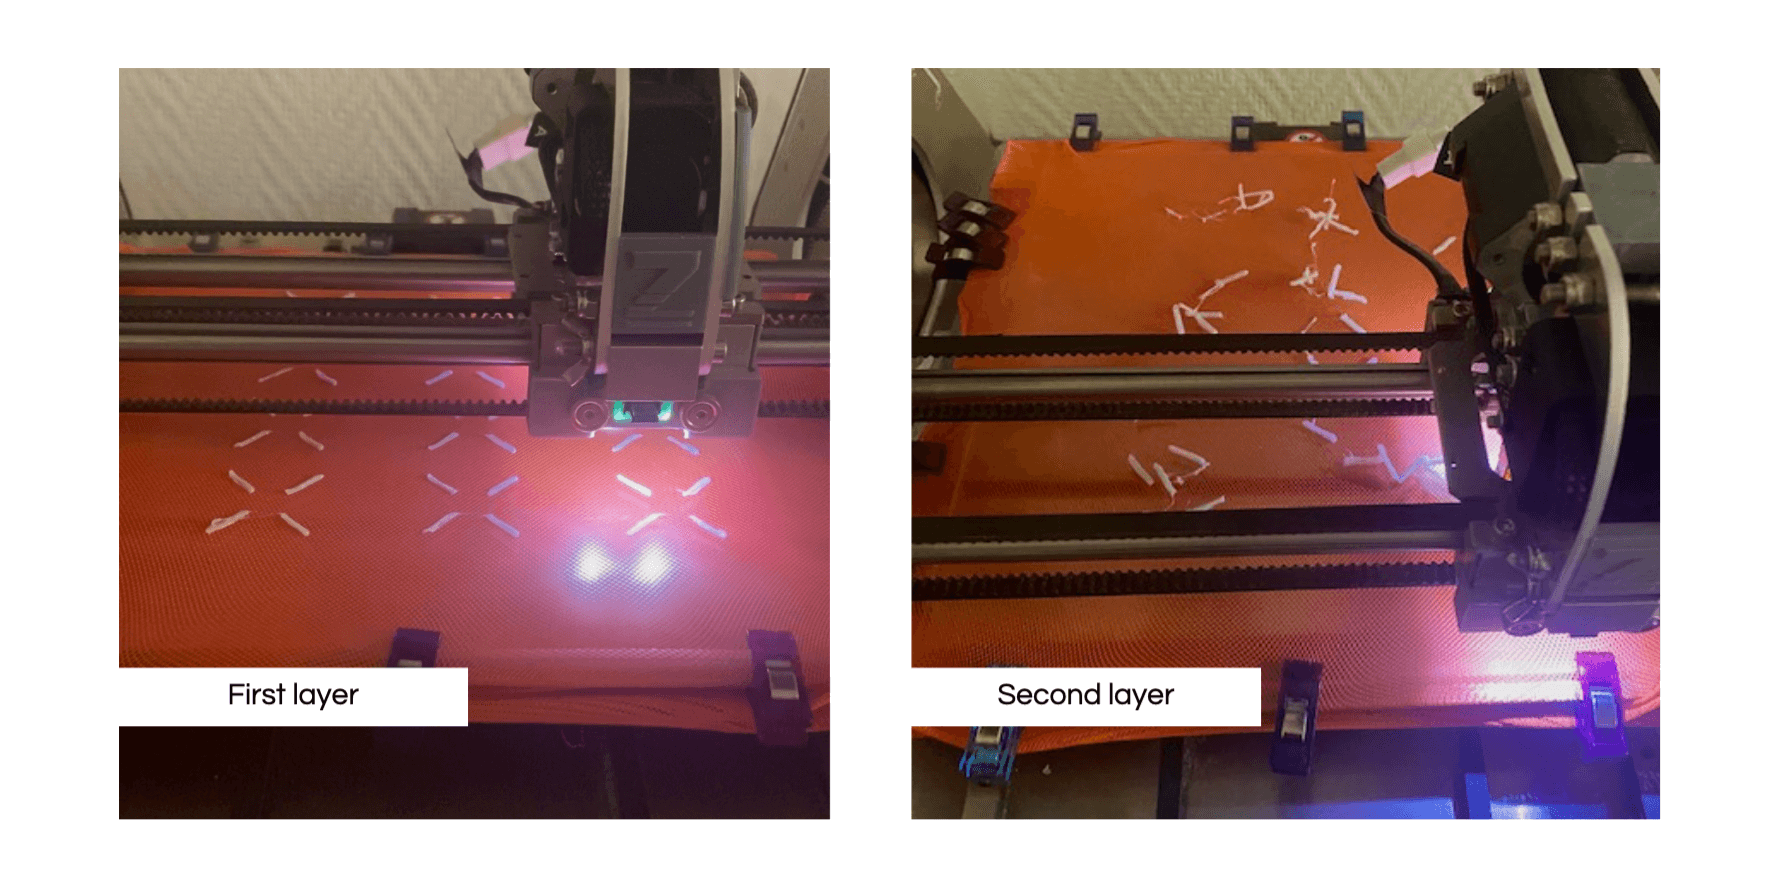
Third test
Always looking for volume, this time I wanted to be inspired by a creation made thanks to the 3D printer. So I created a cross-shaped pattern and stretched the fabric to the maximum on the plate with pliers.
-
To reproduce this volume, I'll just have to feel around and wing it. I decided to use the orange fishnet I used for the first test and not the lycra to reduce the difficulties of adherence and to repeat the same parameters as before.
Temperature: 200 degrees for the filament and 60 degrees for the plate.
Observation: During Printing, the crosses were completely detached from the fabric from the second layer. I will therefore try to put more lacquer and increase the temperature of the tray, from 60 to 80 degrees, As well as calibrate the printer so that the filament is closer to the fabric. -
Temperature: 220 degrees for the filament et 80 degrees for the plate.
Observation: No change, the filament still does not adhere, I guess then that it does not come from the temperature.
File:
Cross
I didn't had time to continue my experiments this week, but I invite you to visit my project page where you can find my work with 3D printing on fabric.