10. Open Source Hardware - From Fibers to Fabric
REFERENCES
VARVARA AND MAR - Neuroknitting.
They have plotted brainwave activity into a knitted pattern. Using a wearable, non-invasive EEG headset, they recorded users’ affective states while listening to Bach’s “Goldberg Variations”. Three main features were measured: relaxation, excitement, and cognitive load. After recording, those features were converted into a knitting pattern. This work interests me because being epileptic, I do electro ancephalograms regularly and I have always been intrigued by this machine, I also often asked myself the question of how to link this interest with the textile. In my idea the eeg could be incorporate in a garment like in a bonnet to measure the brain activity and alert when the activity become unusual to anticipate the crisis.

KADI PAJUPUU AND MARILYN PIIRSALU - RailReed.
She create RailReed, this is consists of five modules that enable the user to adjust warp density while weaving. You can use warp density as an extra creative avenue, create new structures and even change the width of fabric while weaving.
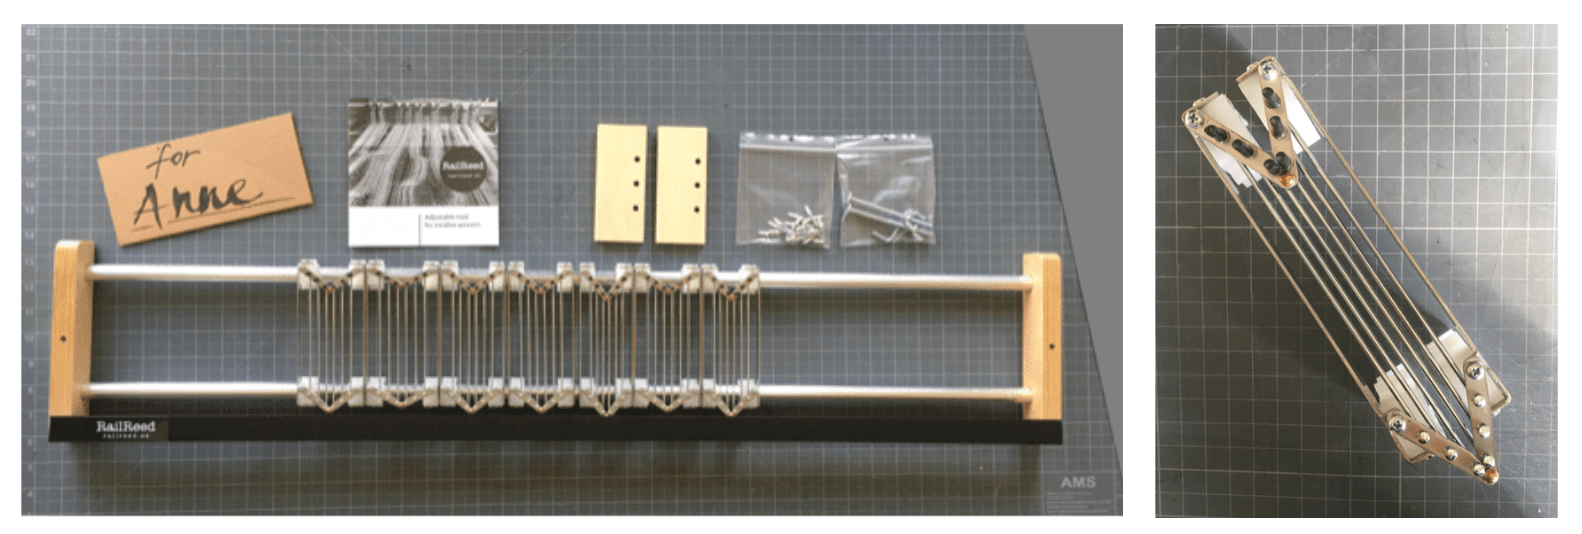
The weaving width depends on how the weaver moves the modules on the rail and whether the modules are in the wide or narrow position. She sell her creation on her website.
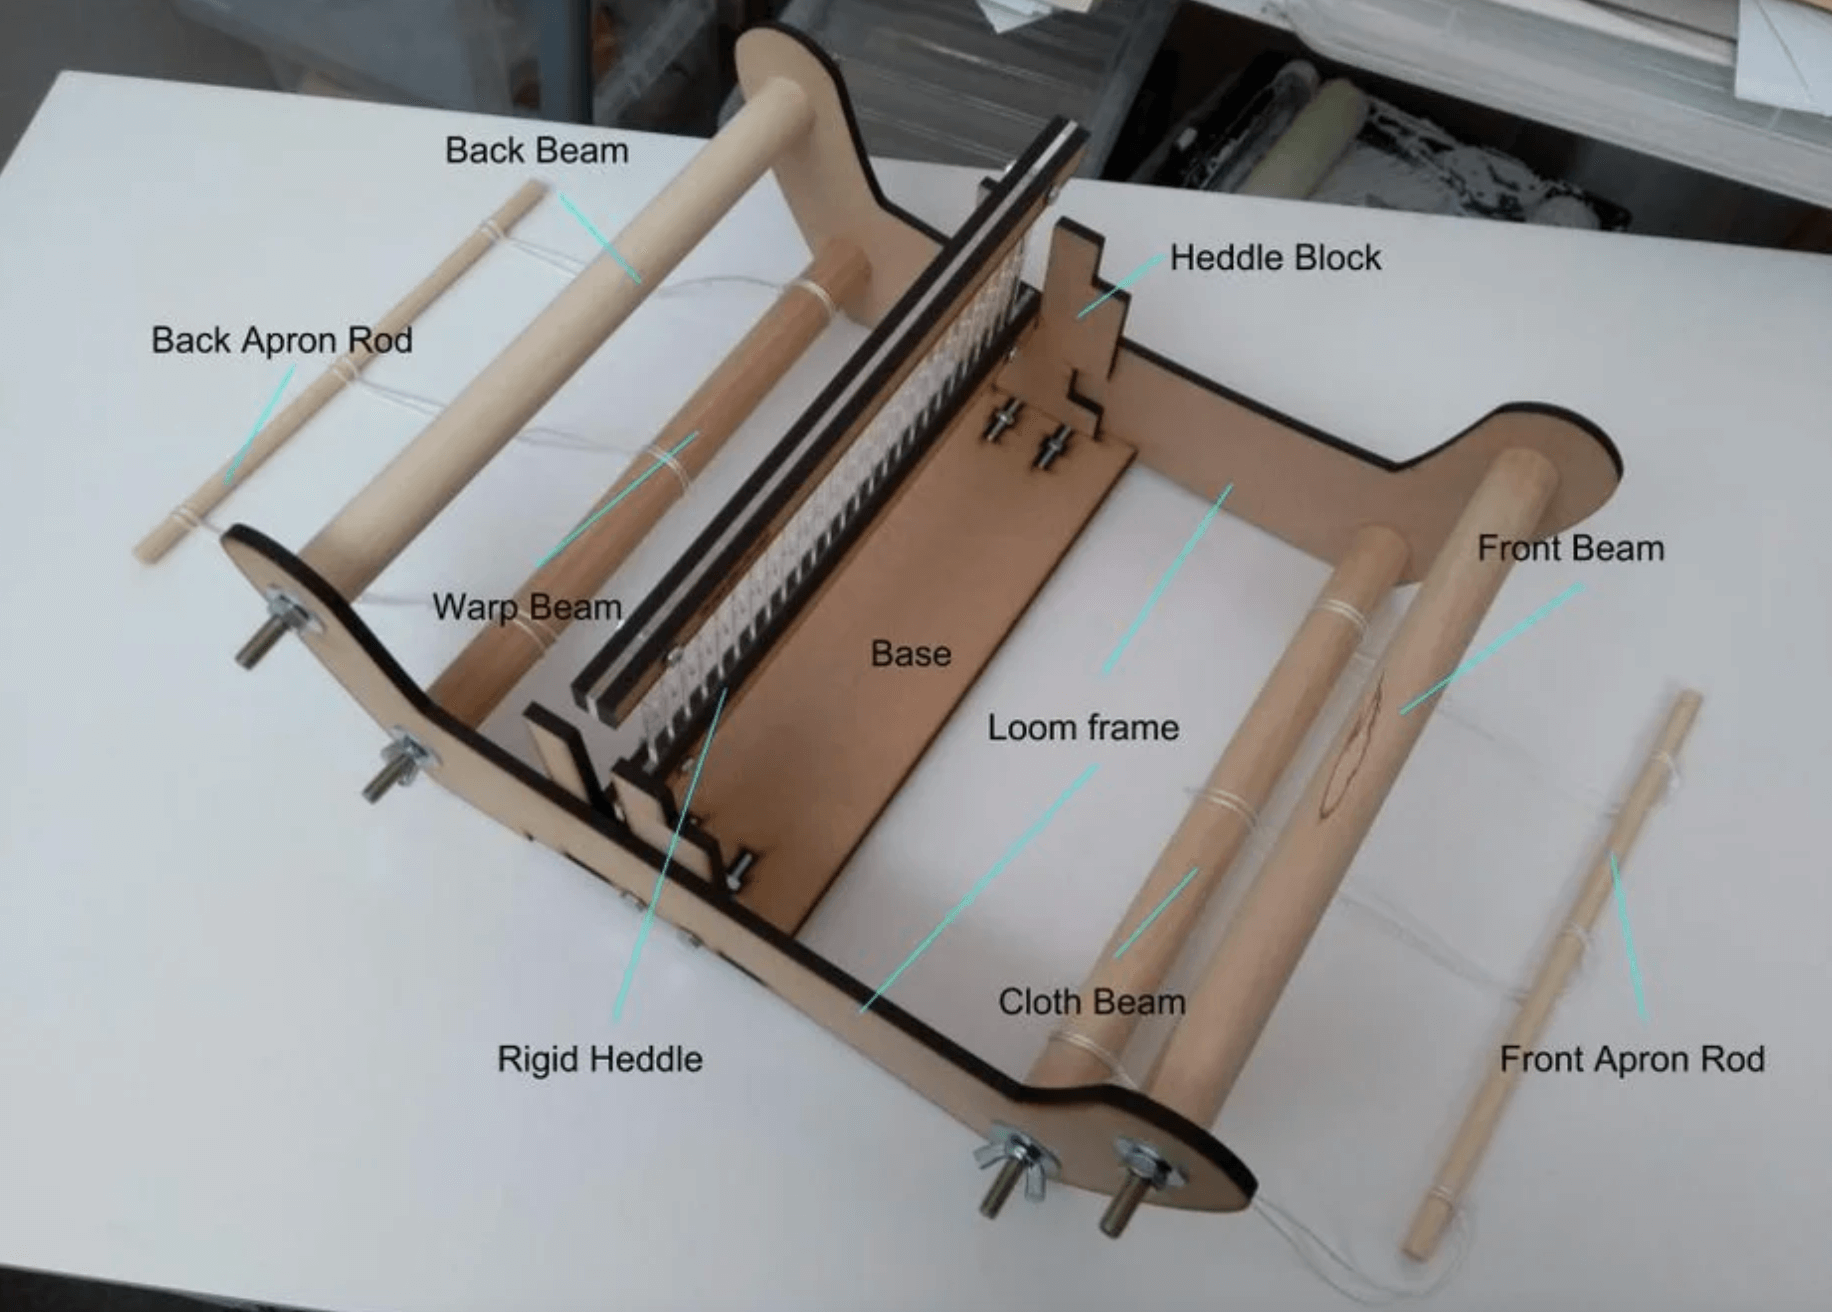
EXPERIMENTATION WITH A LOOM
With Camille Barot and Berenice Courtin we were interested in weaving.
What is a loom?
To understand a little better how this machine worked, having never seen it in my life, I just started by typing weaving in google. I found some interesting technical and historical information:
Despite mechanical progress, basic operation has remained the same for centuries : the loom fastens the warp threads according to the desired tension, while allowing the passage of the weft threads, perpendicular, between the warp threads.
The first cloth looms were however vertical. (about 1000 before JC).
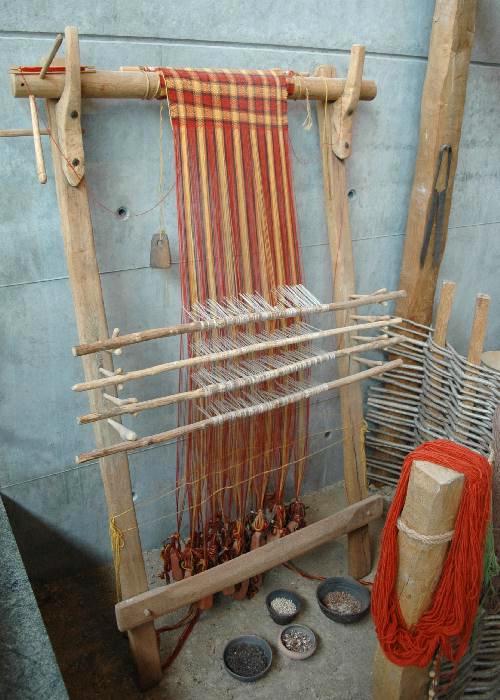
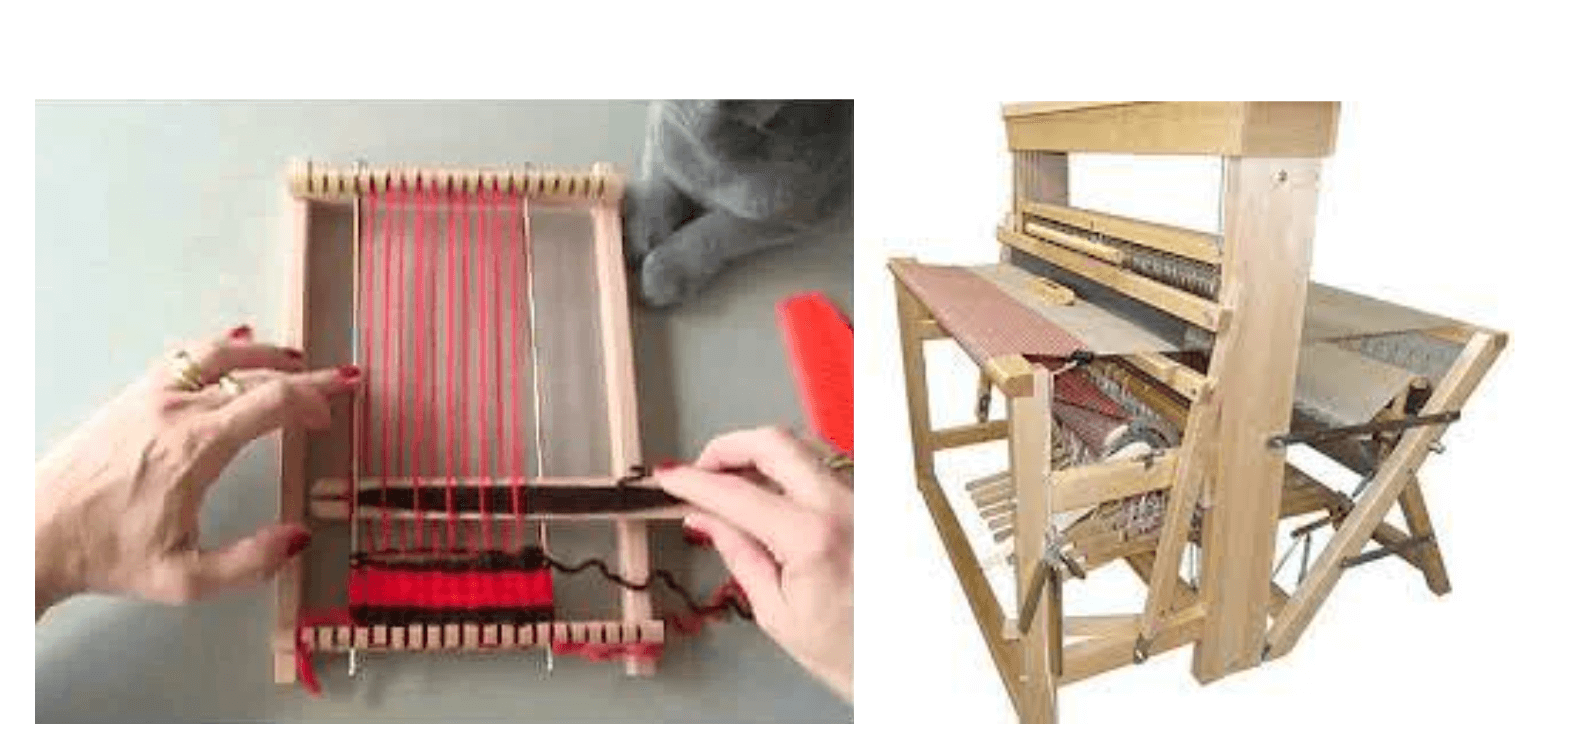
There are craft looms.
 .
.
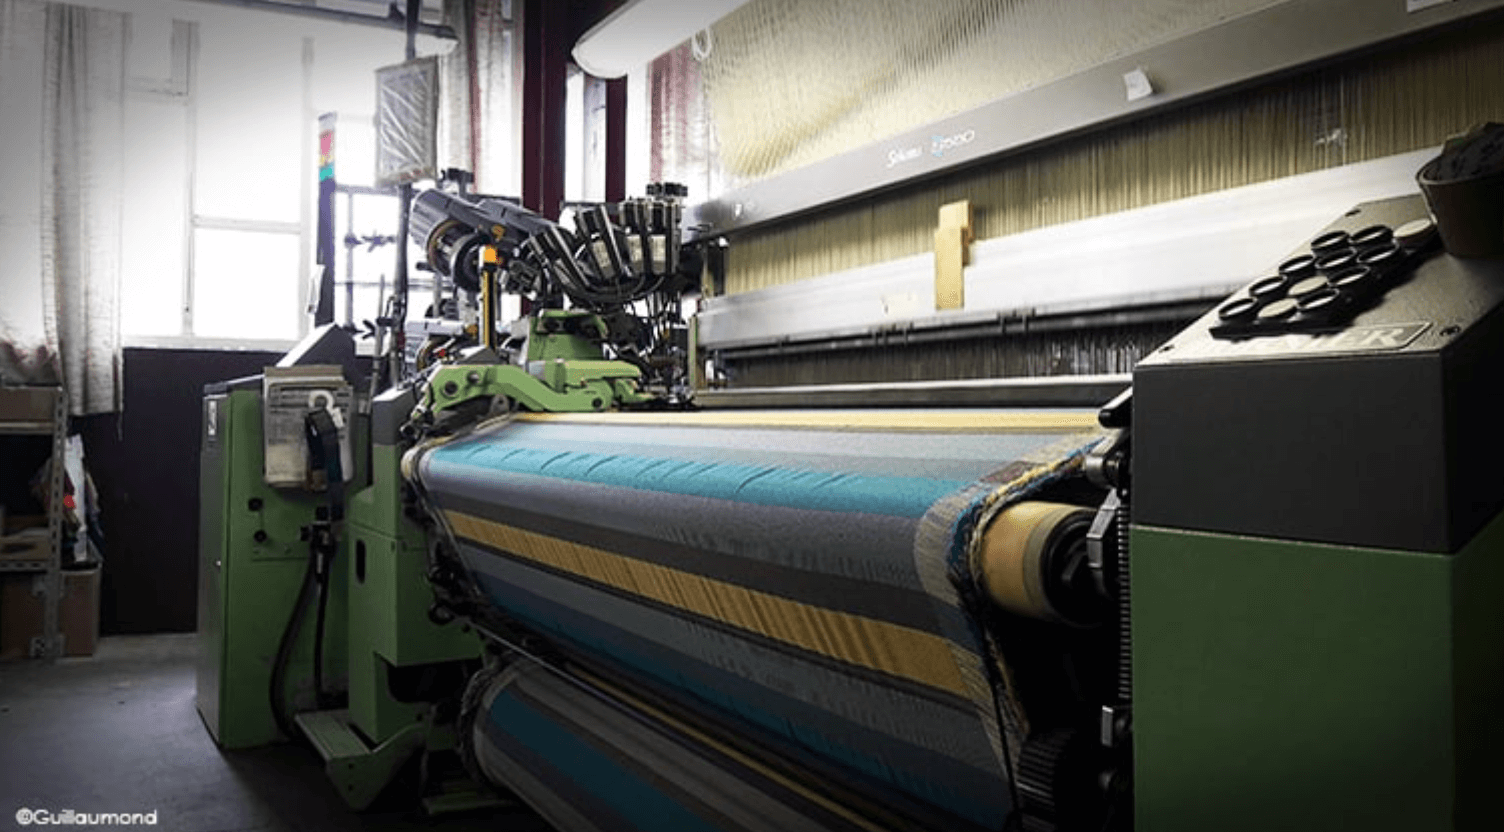
And there are also mechanical looms used in industry.
 .
.
How it works?
Then we looked at the loom we had in front of us, trying to figure out what thread had to go where, and why. So we did a little puppet game that helped me understand why to lift the frames, why to put the wires in such and such a way, or pass the coil etc.
 .
.
Then we wanted to try with the weaving machine that Louise Massacrier, Surzhana Radnaeva and Segolene Charaven made last year, I found a diagram in the diy they followed that shows what a weaving machine is.
However we quickly noticed what we could try to improve. To better understand here are a few theories and some schema made by Camille Barot to see more clearly.
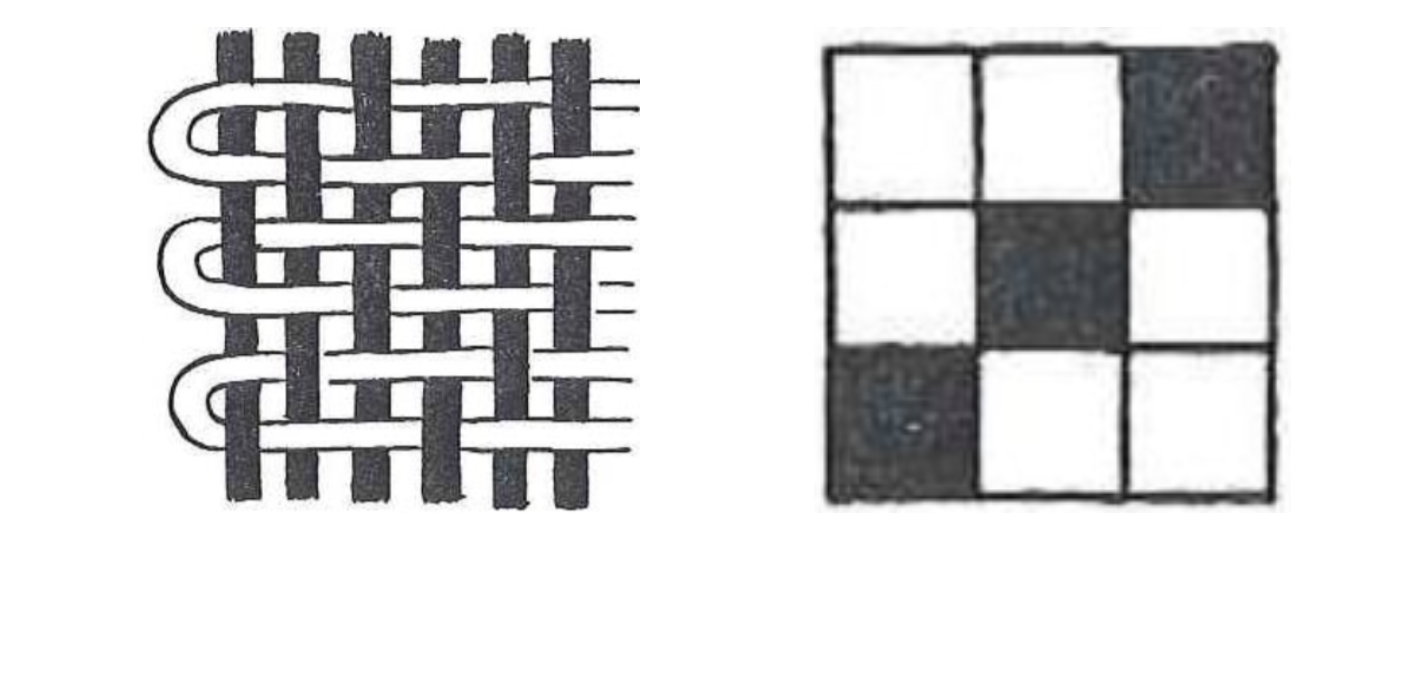
A loom consists of one or more frames composed itself of what are called heddle, they are mostly metallic and allow to pass the threads. There are 2 possibilities, you can pass the wire in the eyelet, or in the space between each heddle.
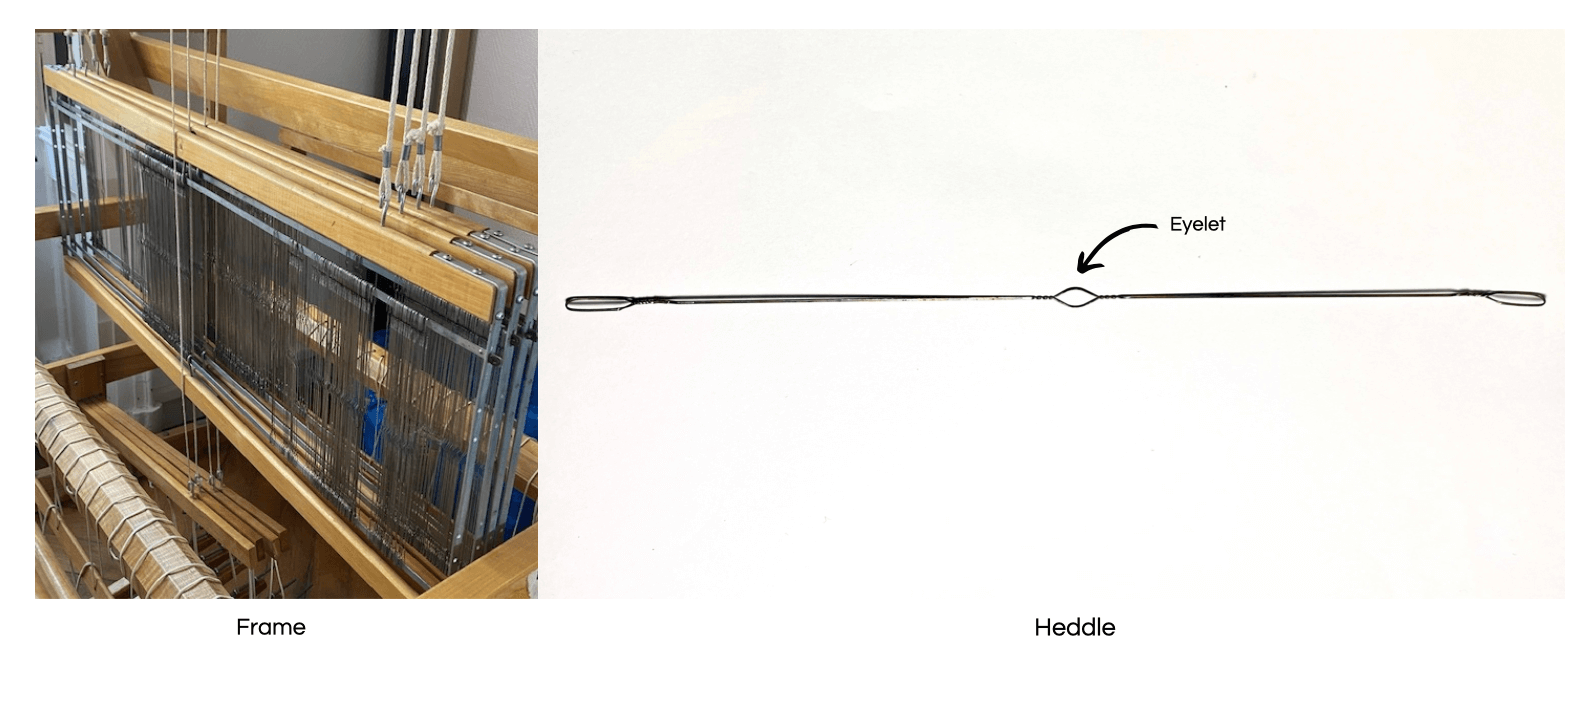
In this way, when we lift a frame, the threads passing through the eyelet will rise, and those who do not pass through a eyelet will not move and will therefore be lower than the others, This allows us then to pass the coil of wire between the wires of the top and the wire of the bottom, then it remains only to paint everything to be either.
Once we have understood this, we then understand that there are different possible combinations, depending on where we pass the threads, depending on the number of heddles and the number of frames that the loom has.
On a single frame loom like the one presented in the diy, there are already several possible committees. Here are some examples.
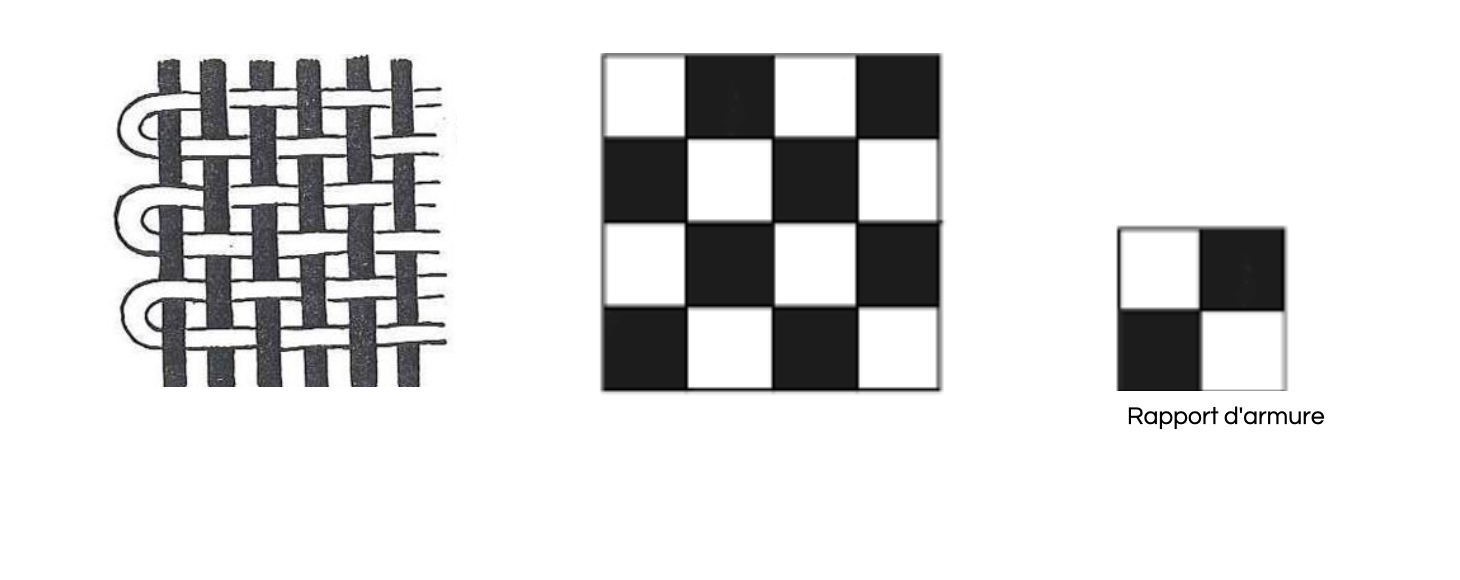
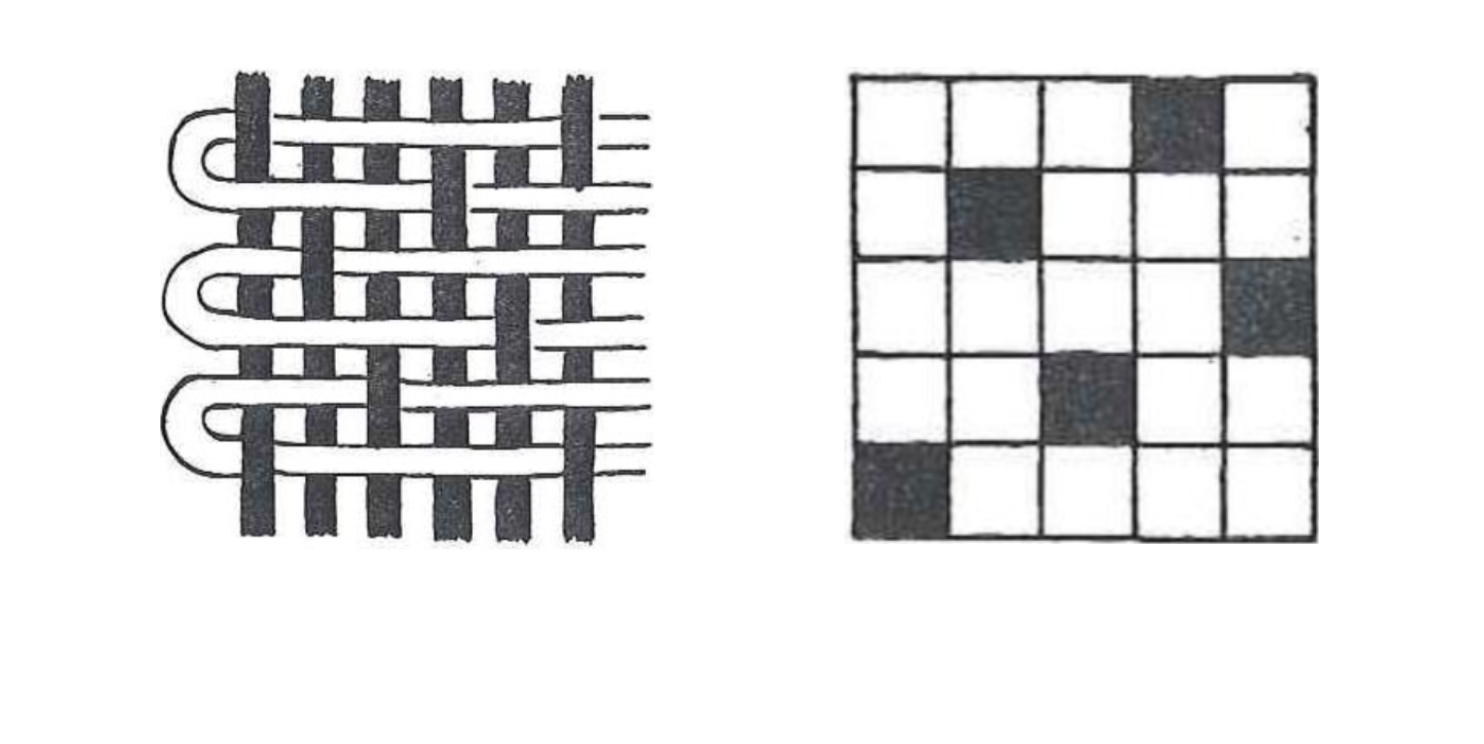
THERE ARE THREE BASIC WEAVING WEAVES WHICH SERVE AS THE BASIS FOR ALL TYPES OF WEAVING:
- PLAIN WEAVE.
The simplest weave is the plain weave, the weft yarn passes alternately on and then under a warp yarn, and reciprocally.
- TWILL WEAVE.
The weft yarn passes under one, then over three other warp yarns by shifting one yarn each time, hence the oblique effect on the area of the fabric.
- SATIN WEAVE.
It is characterized by the fact that the interlacing of the wires does not give rise to diagonal lines but to spaced and evenly distributed points. On one side of the fabric, we can see the effect of weft, since there are almost exclusively weft threads, and on the other side, we can see the effect of warp.The bundles (warp and weft crossing points) are distributed so as to conceal themselves to present a smooth and often shiny surface on the right and matt on the wrong side.
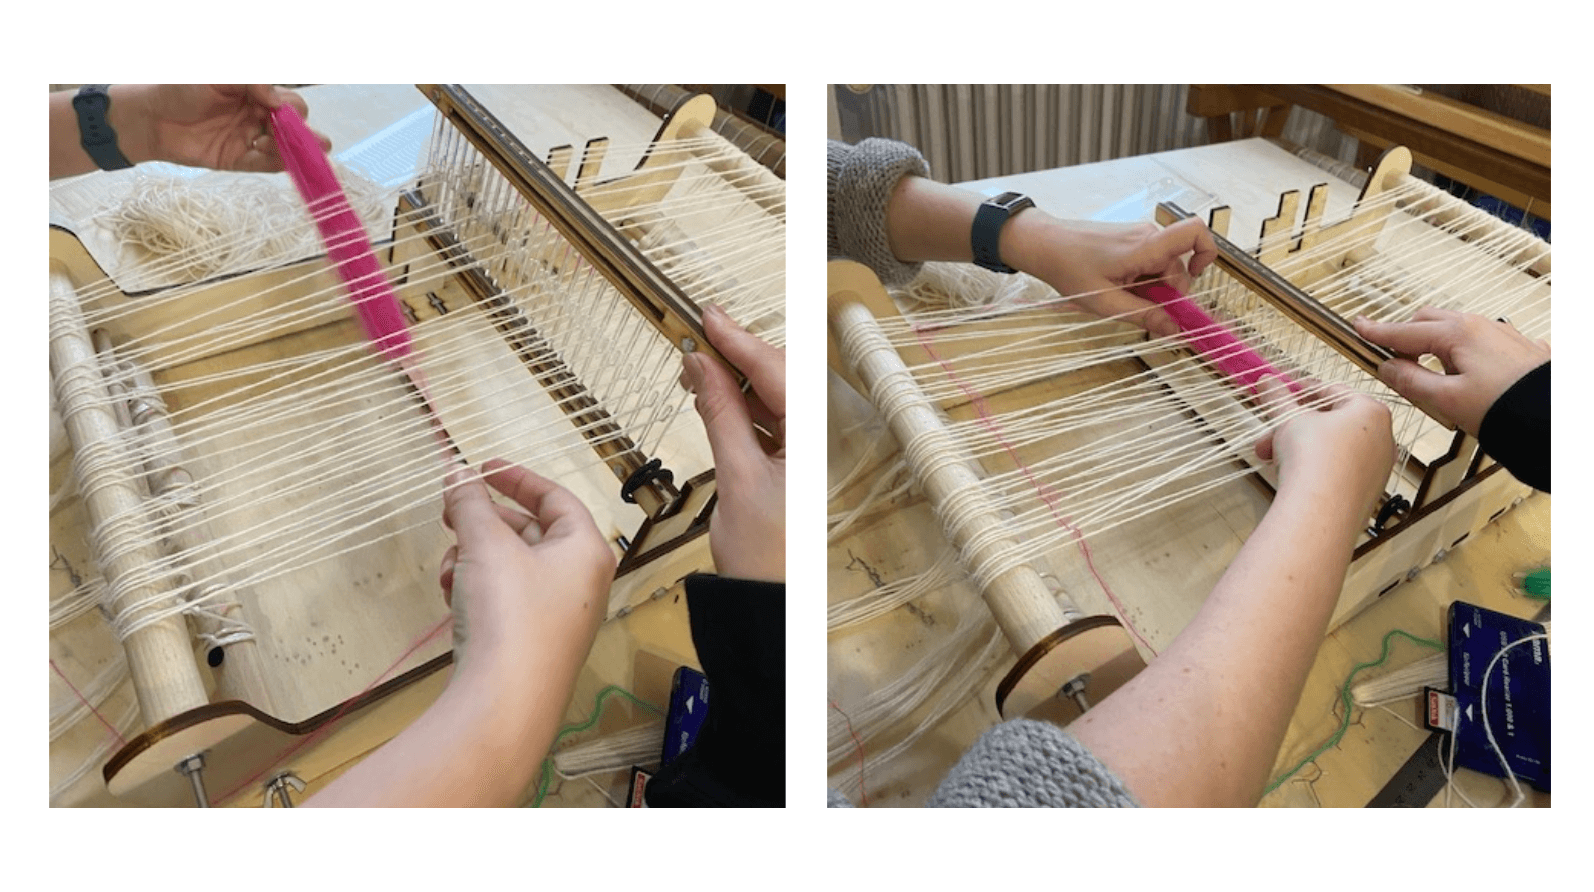
To make a plain weave for example, simply put a thread in a grommet, then the next thread in the slot, a thread in a grommet, a thread in the slot etc.
In this way, when you lift the frames, the red yarn that pass through here in the grommet will be above the green yarn, and below when the frame is lowered.
The green wire on the other hand will not move.
In the neutral position, all the wires are at the same height.
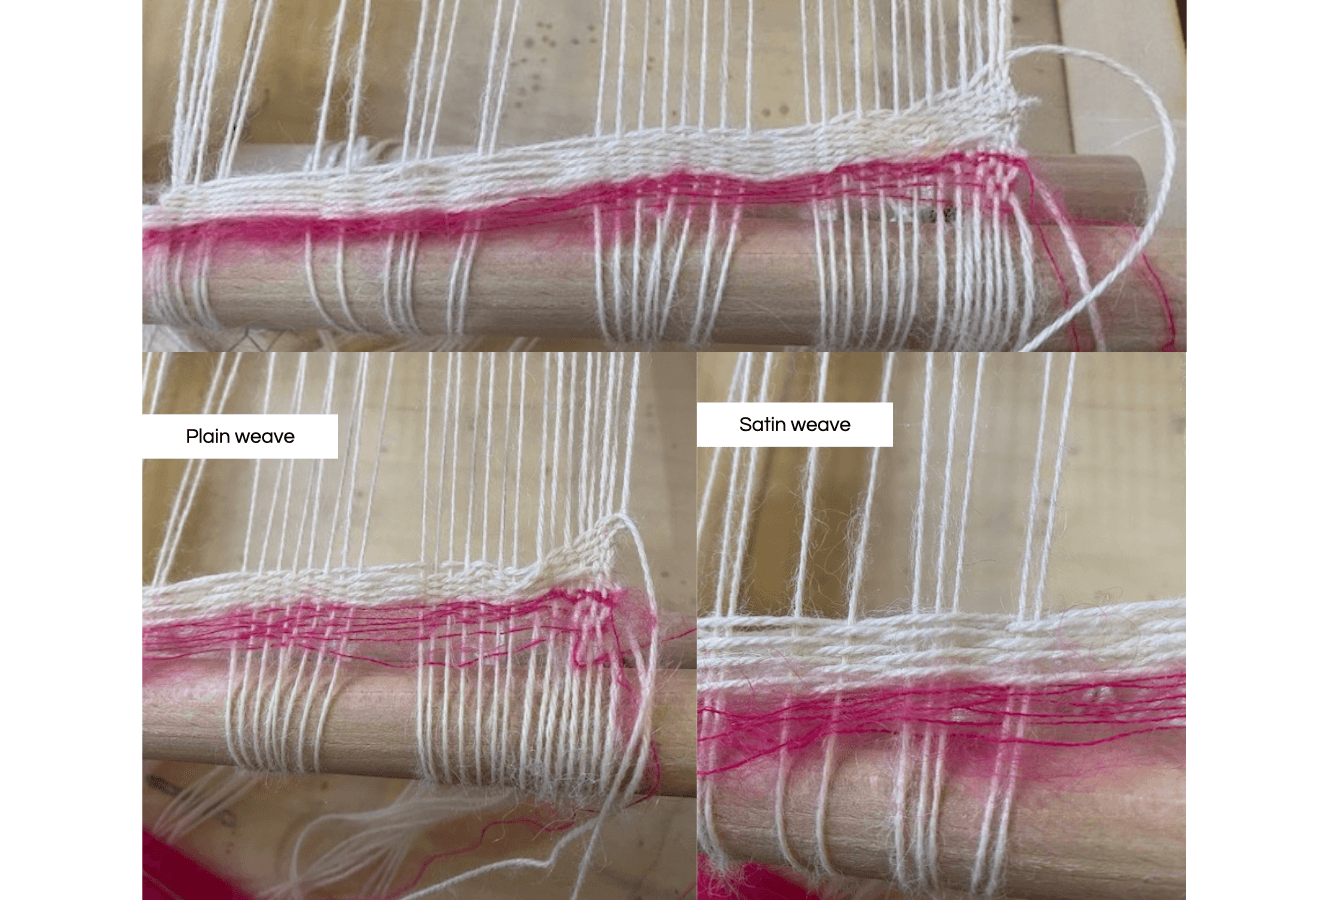
So we tried to weave on a few rows by doing half satin weave, half plain weave, here’s what it gives.
By observing the loom they had made last year and their documentation. We understood that they had tried to add a frame in order to multiply by 2 the possible combinations and to obtain a kind of pattern. Only it didn’t work, so we decided to look at it then.
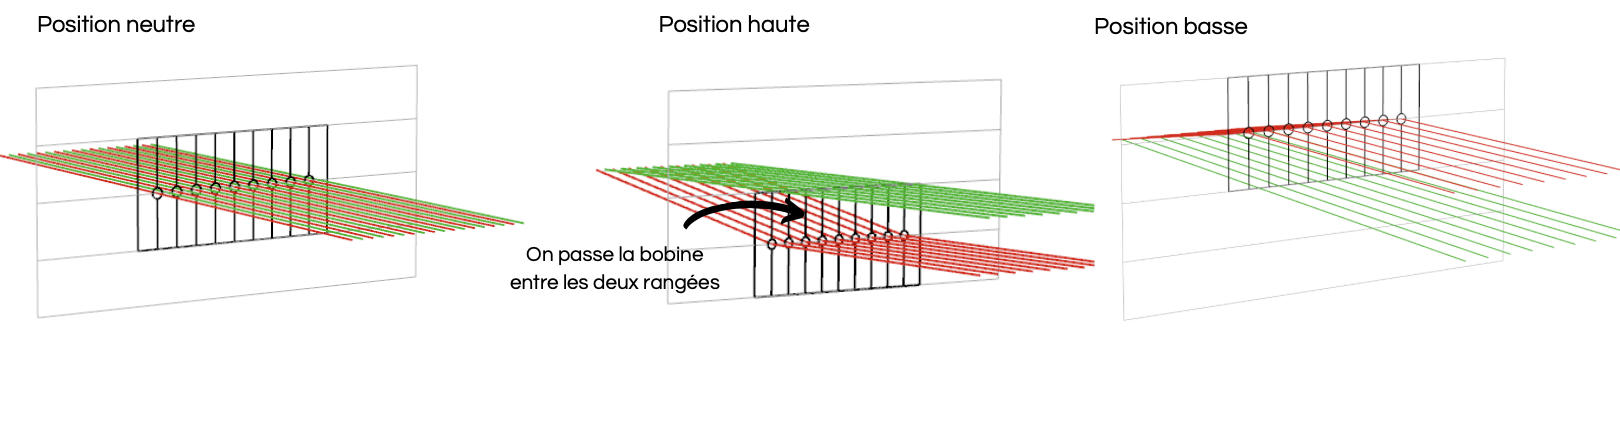
How does a multi-frame weave work?

Neutral position, all wires are at the same height, whether placed in the eyelet or in the slot.
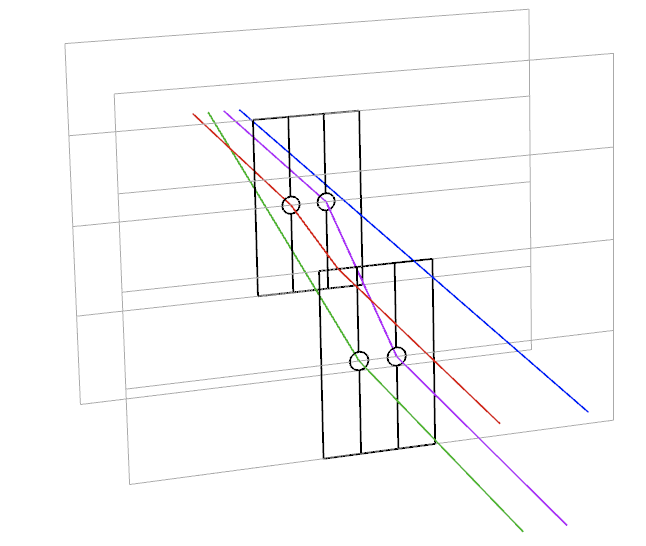
- The blue yarn: It is higher because it is in the slot in both frames.
- The red yarn: It is in one in between, the first frame lifts the thread because it is in the eyelet, but the thread then goes down as it is in the slot.
- The purple yarn: Lifts thanks to the 1st frame because it is in the eyelet, then goes down to half-height because it is placed in the eyelet in the 2nd frame lowered.
- The green yarn: In the slot and thus at half height for the first frame, then It remains at half height because also placed in the eyelet in the 2nd frame.
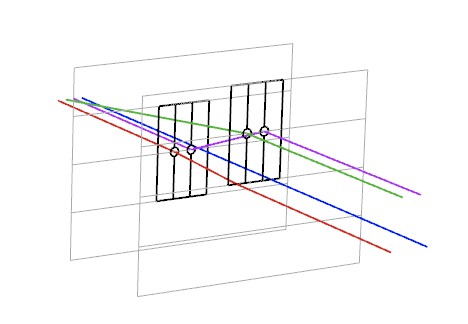
- The blue yarn: Stays halfway up. Is not driven by the lifting of the 2nd frame.
- The red yarn: Also stays at half height, is not driven by the lifting of the 2nd frame either.
- The purple yarn: Lifts thanks to the second frame because it is in the eyelet.
- The green yarn: Lifts because it is in the eyelet when the 2nd frame is in the high position.
Conclusion:
Adding a frame certainly increases the number of cominaisons possible, but less than what the former students had imagined. There will be 3 possible combinations for each frame, not 4. Indeed, as seen on the previous schema, when frame 1 is lifted, the yarns passing through the eyelet in the 2nd frame behave alls in the same way, no matter whether they are in the Eyelet or in the slot in the 2nd frame.
Conversely, when the 2nd frame is raised, it is the yarns that are in the slot in the 2nd frame that will behave in the same way, no matter whether they are in the grommet or in the slot in the 1st frame.
The loom and the robot arm.
We then began to see how we could improve the work to weave, first of all, the first difficulty we saw is the positioning of the frames, it is difficult to hold the frame in a high position, the notches not being sufficiently adapted, and the transition from high to low is not obvious. If we wanted to weave correctly using the two frames, we would have to be 2 or 3, one person to pass the coil and comb, and one or two to lift the frames.
And that’s when we had the idea of working with Audrey Kalic who rode a robot arm this week.
What if it was the robot arm that controlled the height of the frames? It would facilitate the weaving and there would no longer need to be several on it.
Only a few adjustments are necessary.
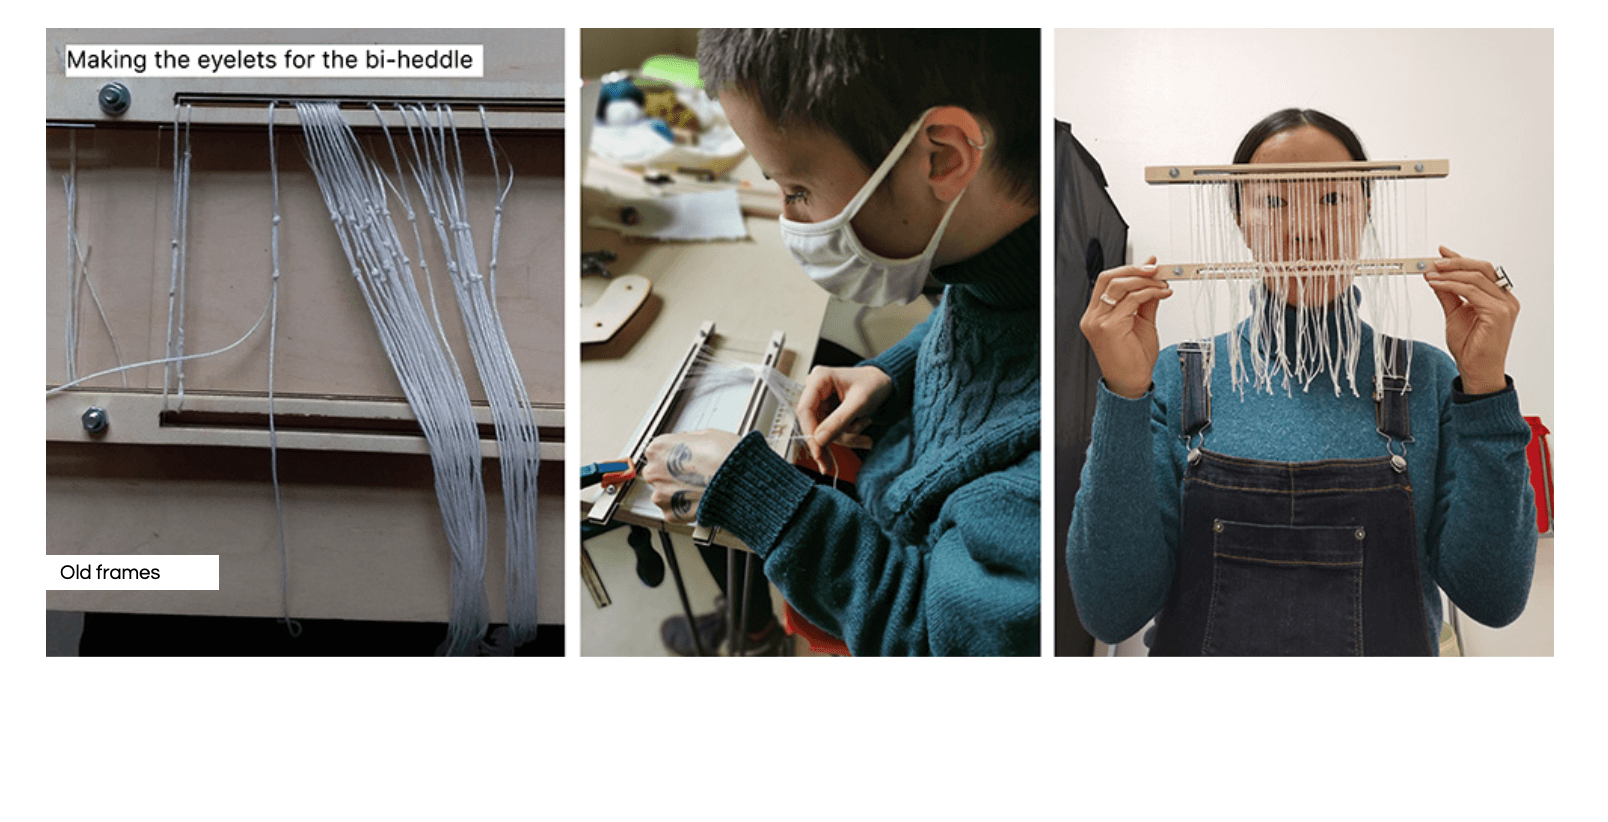
The old frames were made up of yarn, l'advantage is that they allow to add and remove as many rails as we want, however the thread used tended to hang and was not very practical.
We then tried several things, first we cut acrylic frames, in order to obtain stronger and more practical frames, we made several which are not all made up of the same number of rail. However, we had some problems with laser cutting. When we tried to set the power to 100 and speed to 2, the acrylic plate was not properly cut and we could not detach the pieces, however as soon as we tried to put a speed below 1, the heddles deformed.

We then tried to create 3D printing rails, which would have made it possible to add as many as we want, we spent one afternoon doing tests, to see how we could hang them and try to solve the problems we had with the 3D printer.
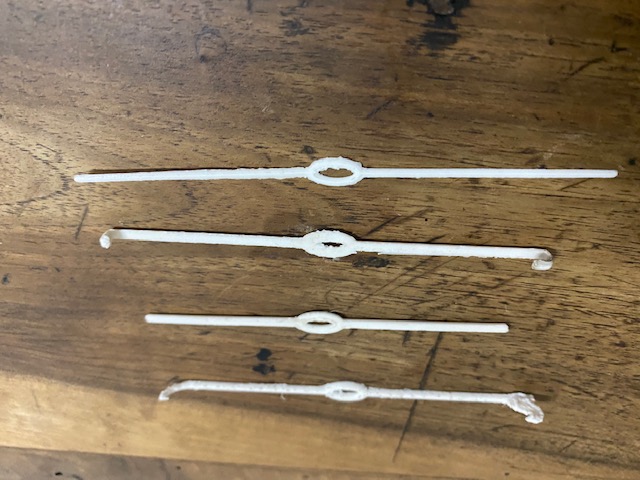
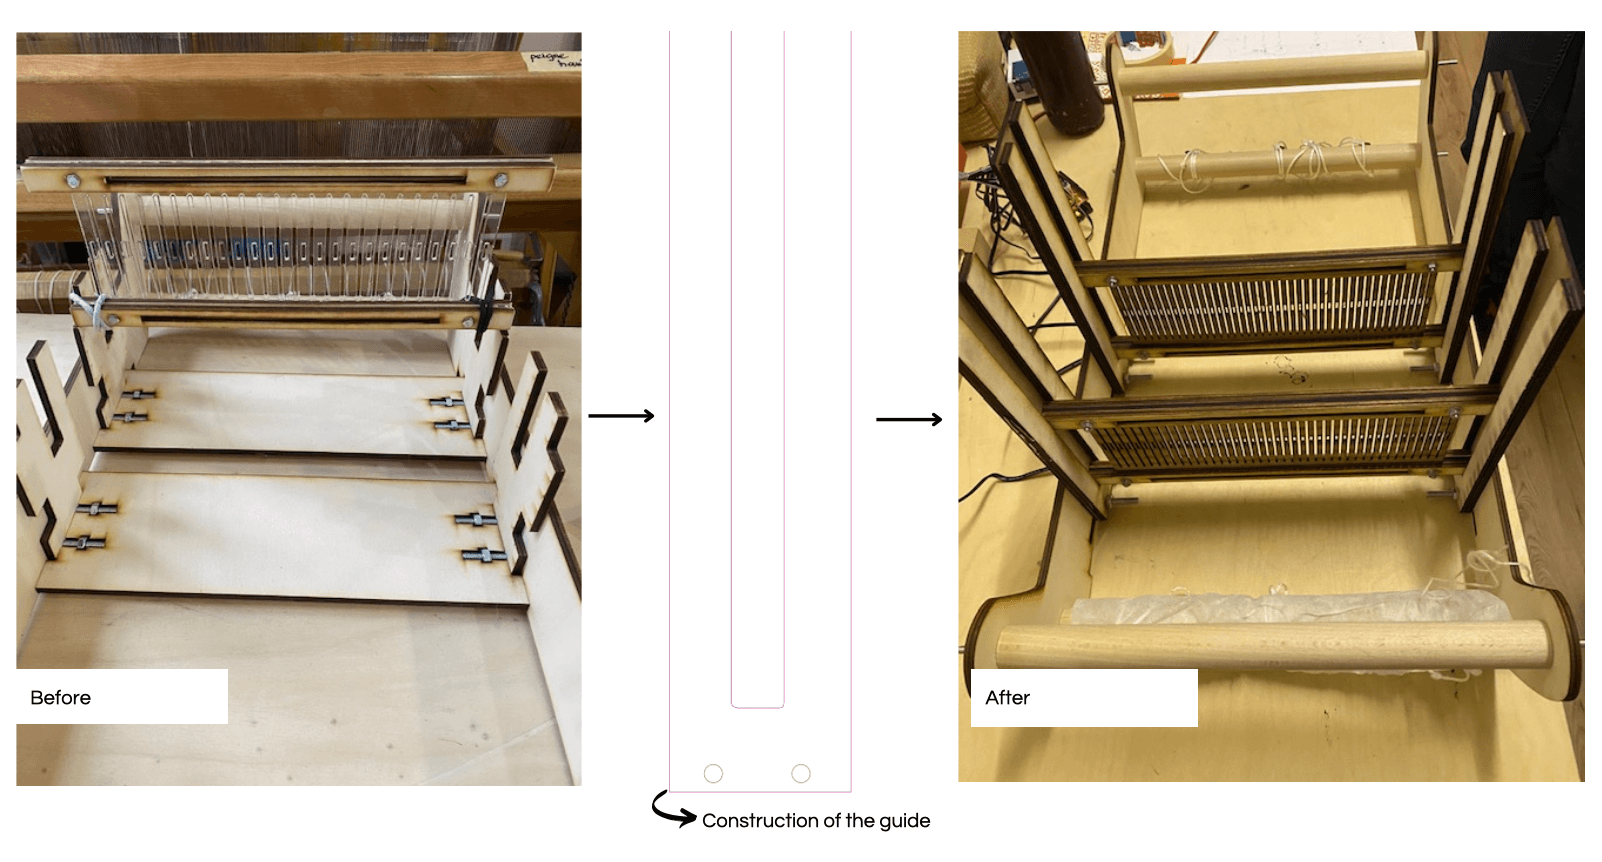
After some time of relentlessness, we concluded that this was perhaps not the main point and that it would perhaps be smarter to remake frames with laser cutting but in another matter. We decide to cut the frames in wood, and put as many rails as possible, this time the cutting goes well and the pieces detach easily.
File: Heddle Heddle 2 Heddle 3
Once the frames are done we must create guides, which will allow the robot arm to slide the frames from bottom to top inside a «rail». We therefore unscrewed 2 pieces of the loom that we replaced with laser cut guides.
Once the guides and frames were installed, we did a first test with the robot arm attached to a single frame. Audrey Kalic took care of the Arduino code. The code below allows you to lift the frame at three different heights: High-Middle-low.
// Braccio robot is raised up by 26 cm

#include <Braccio.h>
#include <Servo.h>

Servo base;
Servo shoulder;
Servo elbow;
Servo wrist_rot;
Servo wrist_ver;
Servo gripper;

void setup() {
  //Initialization functions and set up the initial position for Braccio
  //All the servo motors will be positioned in the "safety" position:
  //Base (M1):90 degrees
  //Shoulder (M2): 45 degrees
  //Elbow (M3): 180 degrees
  //Wrist vertical (M4): 180 degrees
  //Wrist rotation (M5): 90 degrees
  //gripper (M6): 10 degrees
  Braccio.begin();
}

void loop() {


 //Position neutre M5 à 0°C
                      //(step delay  M1 , M2 , M3 , M4 , M5 , M6);
 Braccio.ServoMovement(20,          90, 0, 100, 90, 0, 10);

  //Wait 1 second
delay(9000);

 //Position neutre M5 à 90°C
                      //(step delay  M1 , M2 , M3 , M4 , M5 , M6);
 Braccio.ServoMovement(20,          90, 0, 100, 90, 90, 10);

  //Wait 1 second
 delay(9000);


 //Position neutre M5 à 180°C
                      //(step delay  M1 , M2 , M3 , M4 , M5 , M6);
 Braccio.ServoMovement(20,          90, 0, 100, 90, 180, 10);

  //Wait 1 second
delay(9000);


//Position neutre M5 à 0°C
                      //(step delay  M1 , M2 , M3 , M4 , M5 , M6);
//  Braccio.ServoMovement(20,          90, 0, 100, 90, 0, 10);

  //Wait 1 second
//  delay(9000);

//Position entre neutre et haute M5 à 0°C
                      //(step delay  M1 , M2 , M3 , M4 , M5 , M6);
//  Braccio.ServoMovement(20,          90, 0, 120, 70, 90, 10);

  //Wait 1 second
  //delay(9000);


}
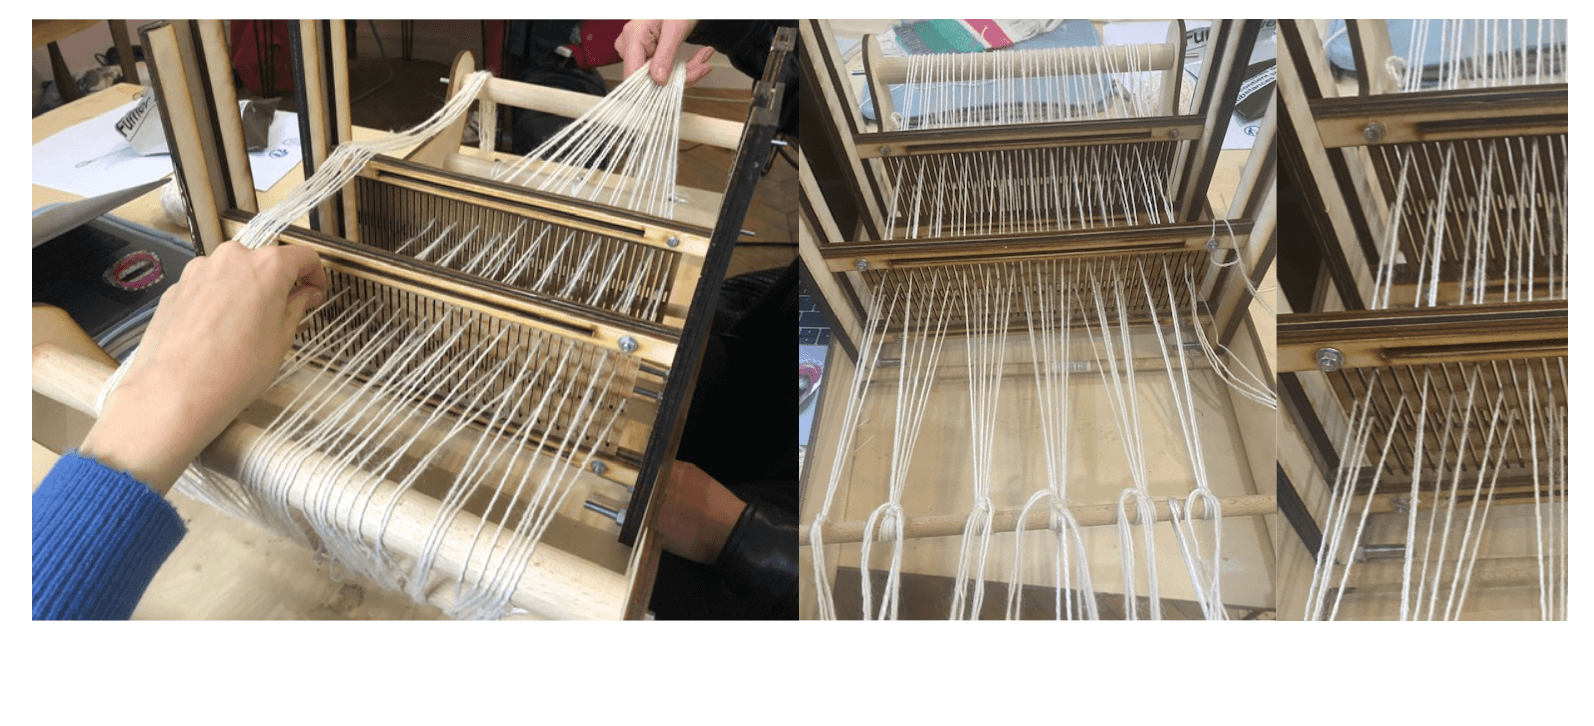
For him to lift two arms, it is however a little more complicated, we mainly doubted the strength of the robot arm. The wooden frames are quite heavy, and once the loom has threaded there will be in addition the resistance of some threads due to tension. I did the test right away, I put on the loom with Berenice Courtin by helping me with the same diy that Surzhana Segolene and Louise used last year in a precise order:
First thread in the eyelet of the first frame and in the slot of the second frame
A second thread in the slot of the first frame then in the eyelet of the second frame
A third thread in the slot of the two frames.
The second difficulty was how to orient the robot arm and how to attach the frames so that the hand could alternate between the different heights.
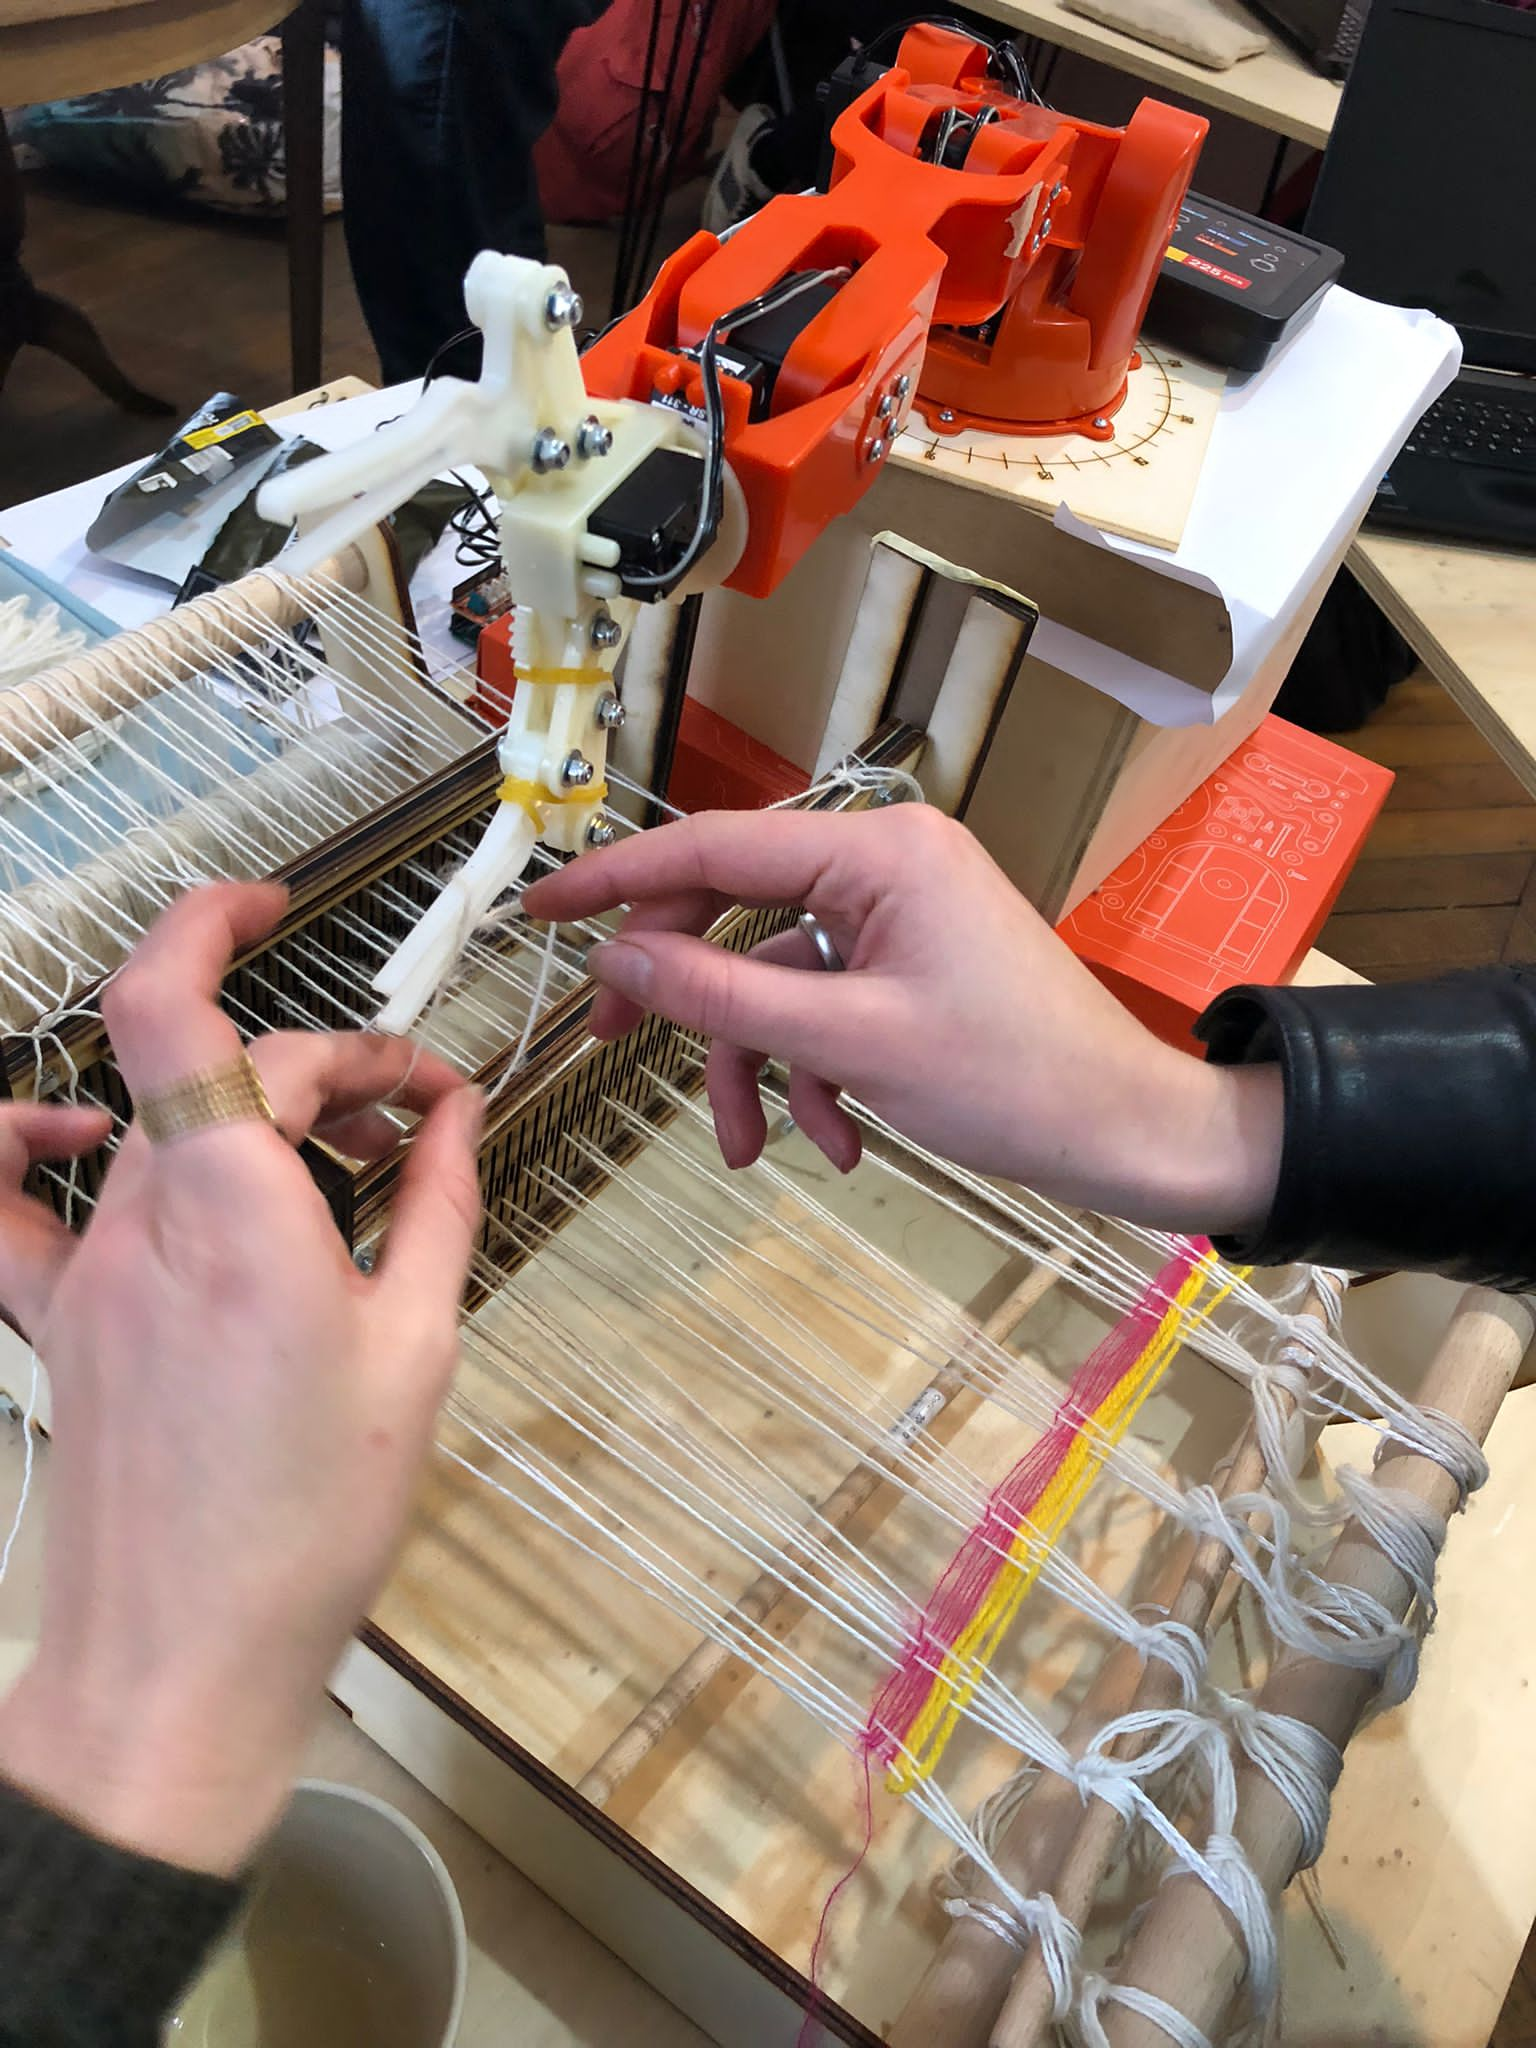
We did some tests, I hooked a first frame to a clamp of the robot, being careful that the frame lifts without bending, it works, you have to put the robot in height and a weight on its base so that it does not fall. However, I am beginning to see that the robot arm has some difficulties in lifting the frames at the top, probably because of the weight of the frames and the resistance of the wires as I had supposed at the start.
I still tried the experience for the two frames by alternating low for frame 1 and high for frame 2 then reciprocally, but as I expected, a single robot arm does not have enough power to lift the two frames, However I think that if we had a second one it would be quite possible.
So, just to finish this week, I started a weave with the robot lifting a single frame.
Audrey Kalic made sure that we have 9 seconds each time to pass the coil between the wires, and sometimes it is not obvious to distinguish which threads are above and which thread are not because the robot arm has trouble lifting the frames up, it is therefore easily possible to make mistakes, to take extra yarn, or less. Finally, it’s a bit like the robot decides and I find it fun to explore.