7. Computational Couture
Helloooooooooooo!
What a week! I can't believe it's here already. Taking part in computational couture week was a dream come true for me.
Please feel free to explore the grasshopper scripts and also the grasshopper basics learnings in this grasshopper documentation.
Inspiration
Here are some of the most inspiring designer's and artist's works that have inspired and motivated me to explore the world of computational design.
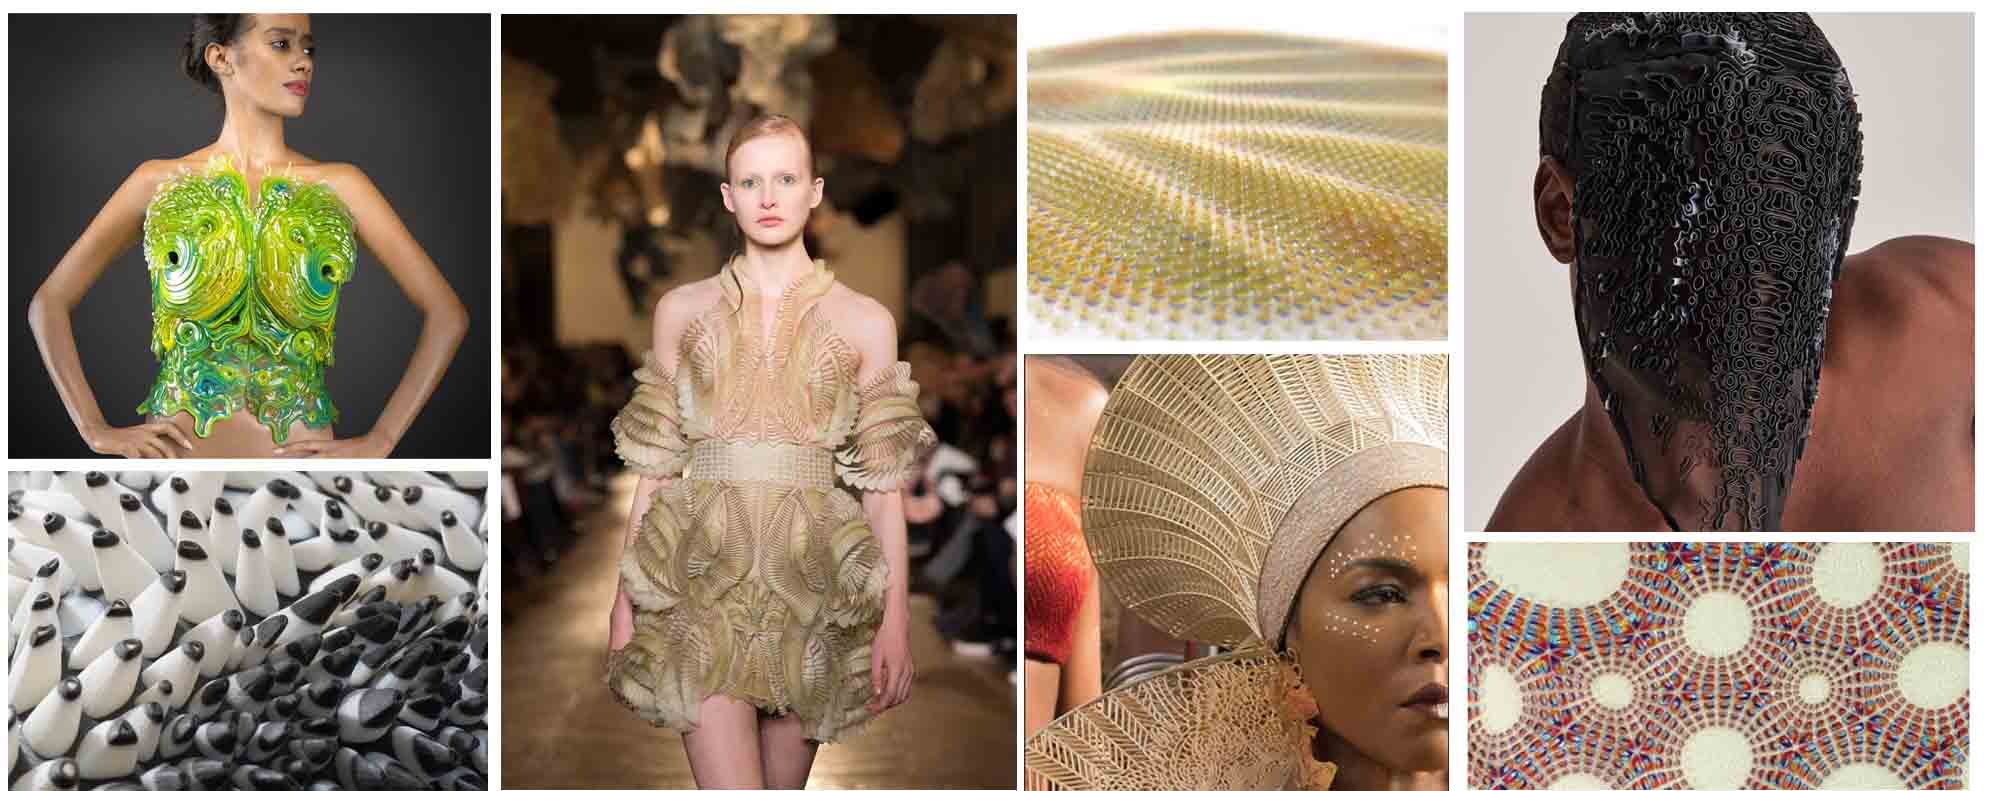
1- Julia Koriner 2- Iris Van Herpan 3- Filippo Nassetti 4- Neri Oxman
You can also checkout more product inspiration and 3d Printing technology in detail here in fabricademy 2023 global lecture.
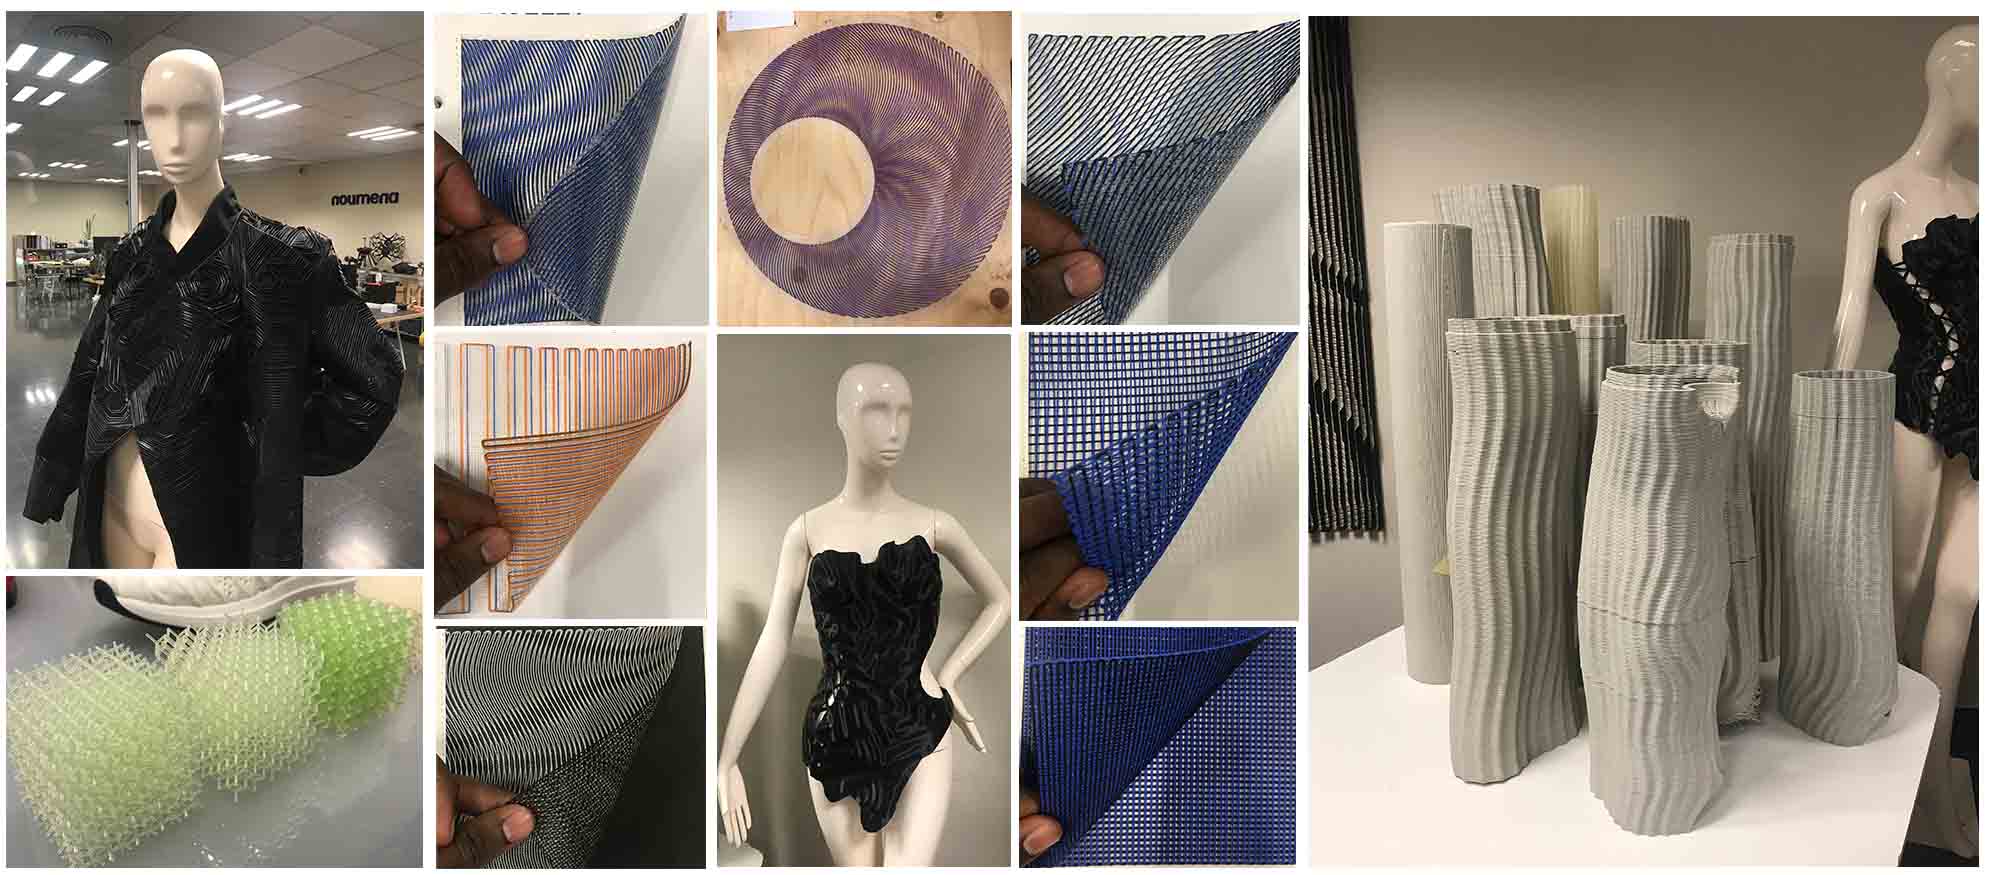
Noumena Visit
This week we started by visiting the Noumena Headquarters. Below are some images that we found inspiring. As a result, we felt that it was a great trip, it opened our minds and gave us direction with regards to our designs and thoughts.
Computational Design
Computational design is a design method that uses a combination of algorithms and parameters to solve design problems with advanced computer processing. Every step of a designer’s process is translated into coded computer language. The software program uses this information alongside project-specific parameters to create algorithms that generate design models or complete design analyses. Once the initial programming is completed, design becomes a dynamic and repeatable process.

Software
Grasshopper Plugins
3D Printing
3D printing or additive manufacturing is a process of making three dimensional solid objects from a digital file. It is also the opposite of subtractive manufacturing which is cutting out / hollowing out a piece of metal or plastic with for instance a milling machine.
3D printing enables you to produce complex shapes using less material than traditional manufacturing methods.
Subtractive Manufacturing

-
It gives better surface quality
-
Generally Expensive
-
Excess waste of materials
-
suited for mass production
-
Good for long-term use
-
Time-consuming
Additive Manufacturing

-
Zero or minimal waste
-
Very cheap material and operational costs
-
Fast and user friendly
-
Complexity and design freedom
-
Lack of strength in the Z-axis
-
Suited for prototyping, short term and mass customization
3D Printing Technology
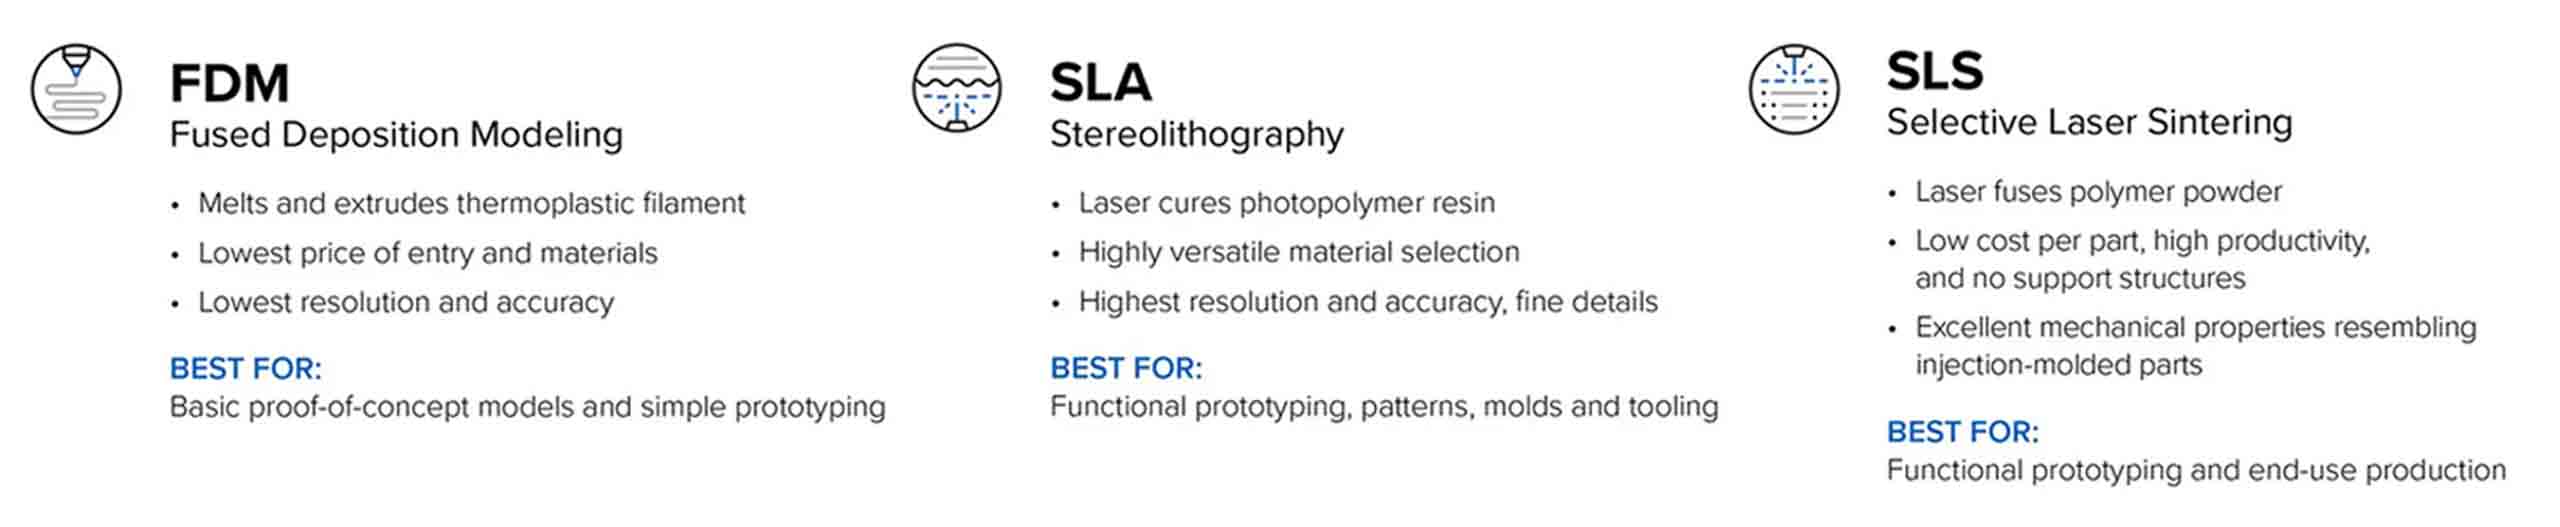
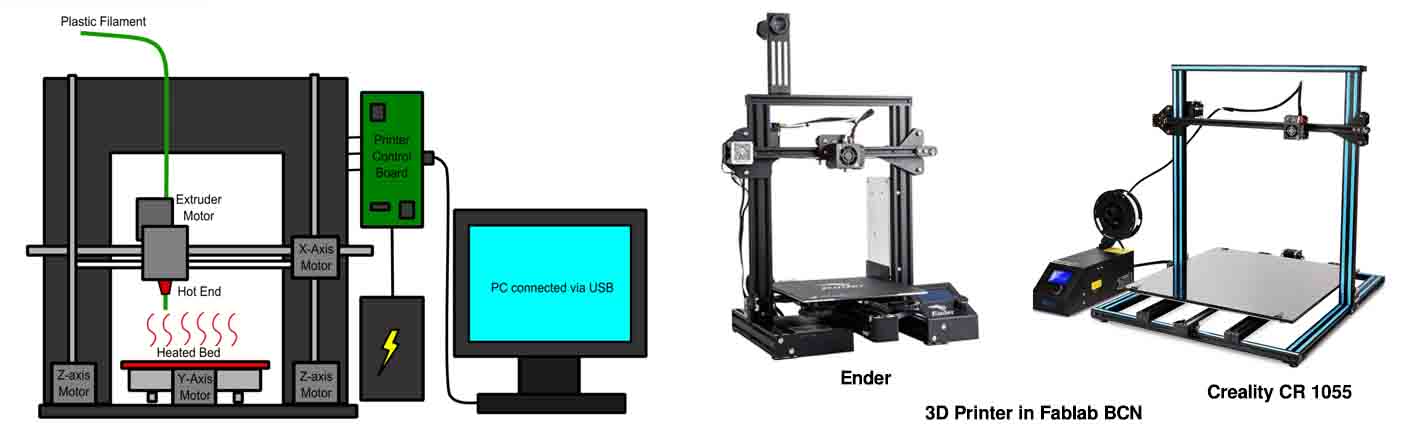
3D Printer
3D Printer details and the printer we used in Fablab BCN are Creality CR 1055 and Ender
Types of Extrusion
There are two types of extrusion in 3D printer, Direct Extrusion and Bowden Extrusion.
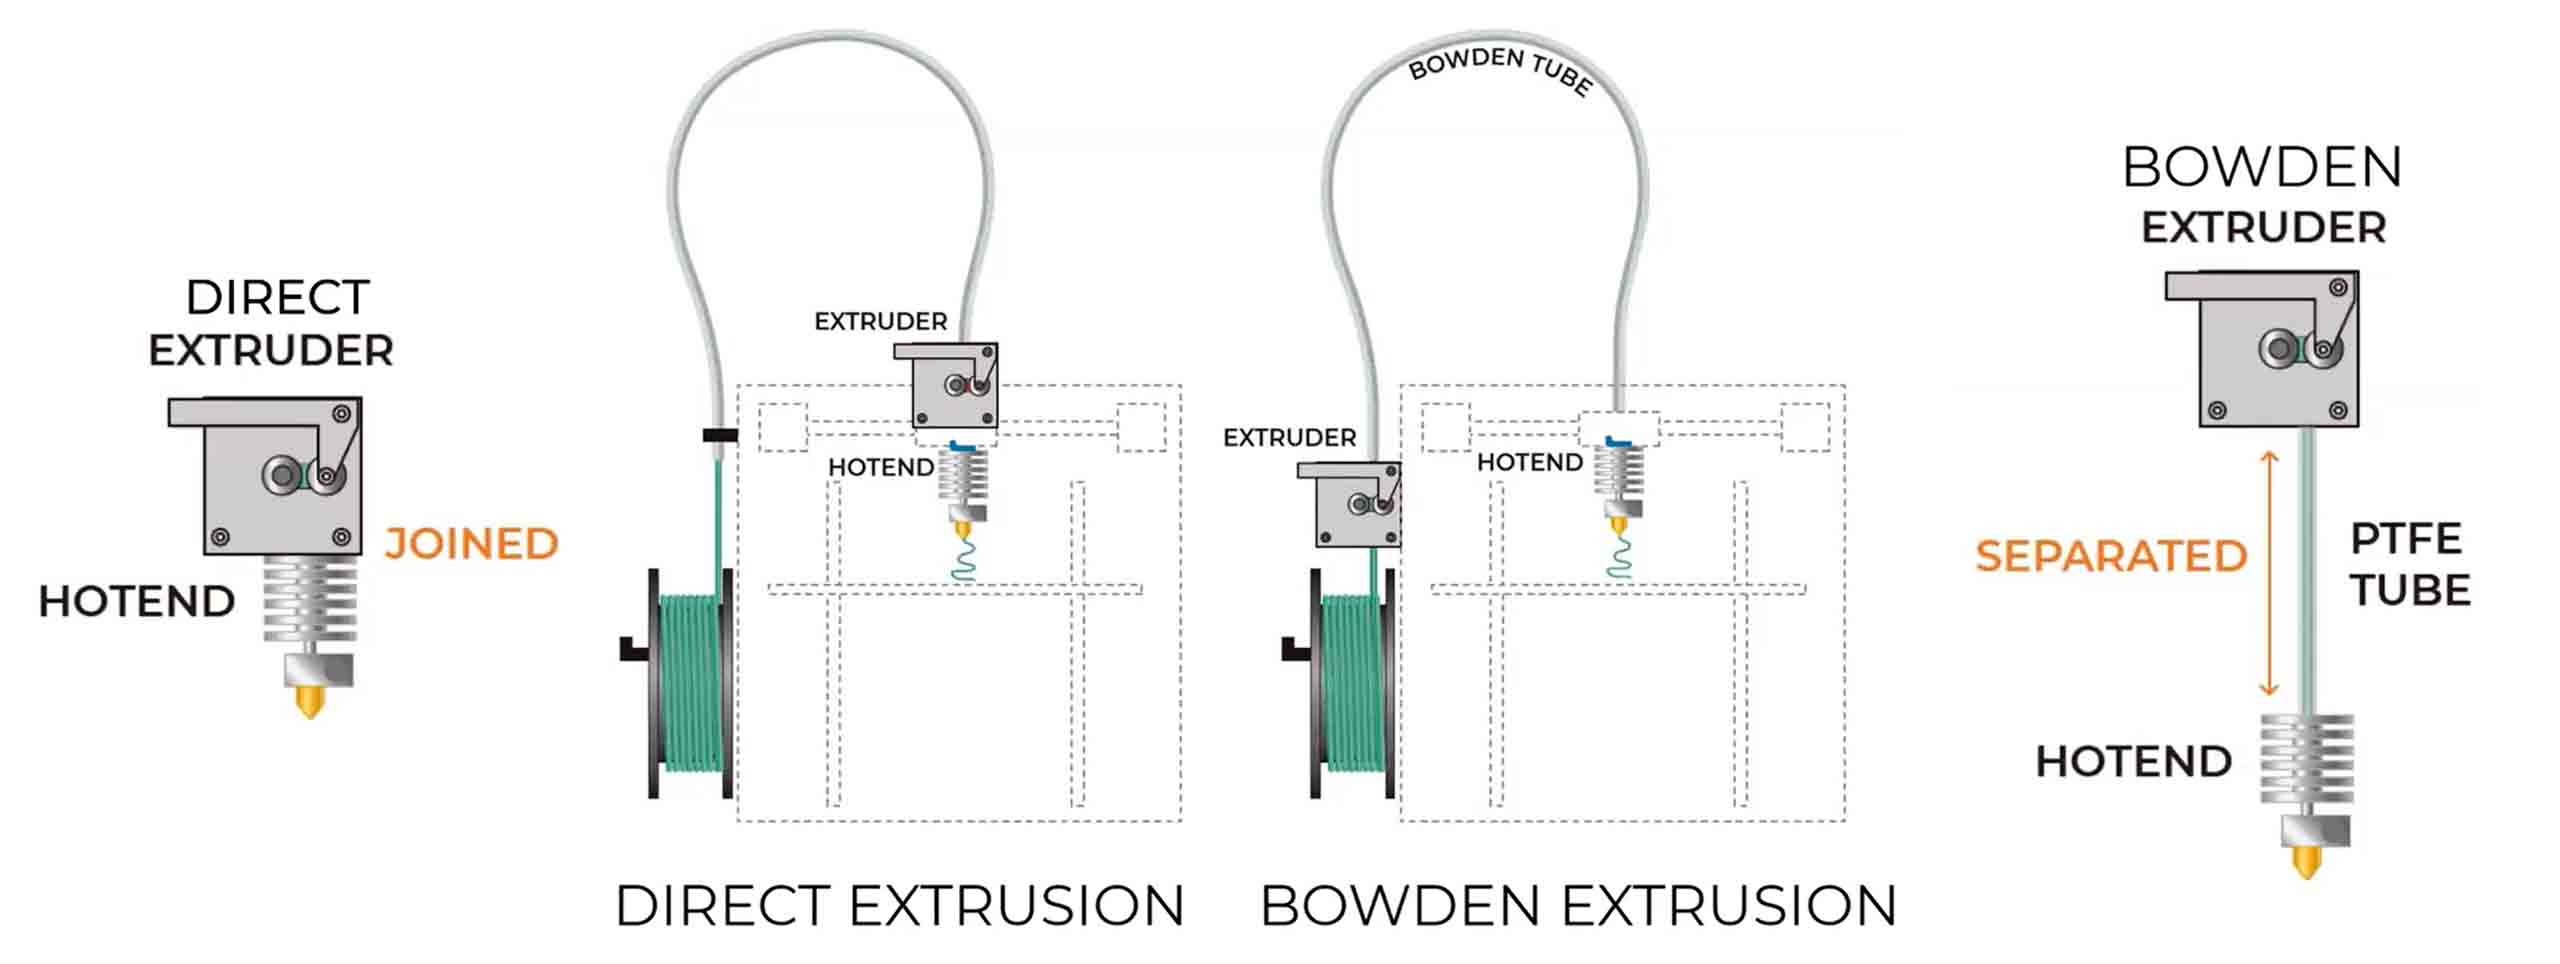
Direct Extrusion : The extruder pushes the filament directly into the nozzle.
-
Reliable extrusion
-
Better retraction
-
Less-powerful motor
-
Direct extruder is generally considered to be more compatible with flexible and abrasive materials.
Bowden Extrusion
-
Cleaner movements
-
Larger build volume
-
Required more powerful motor
-
Some flexible and abrasive filaments can easily bind or wear in Bowden tubes.
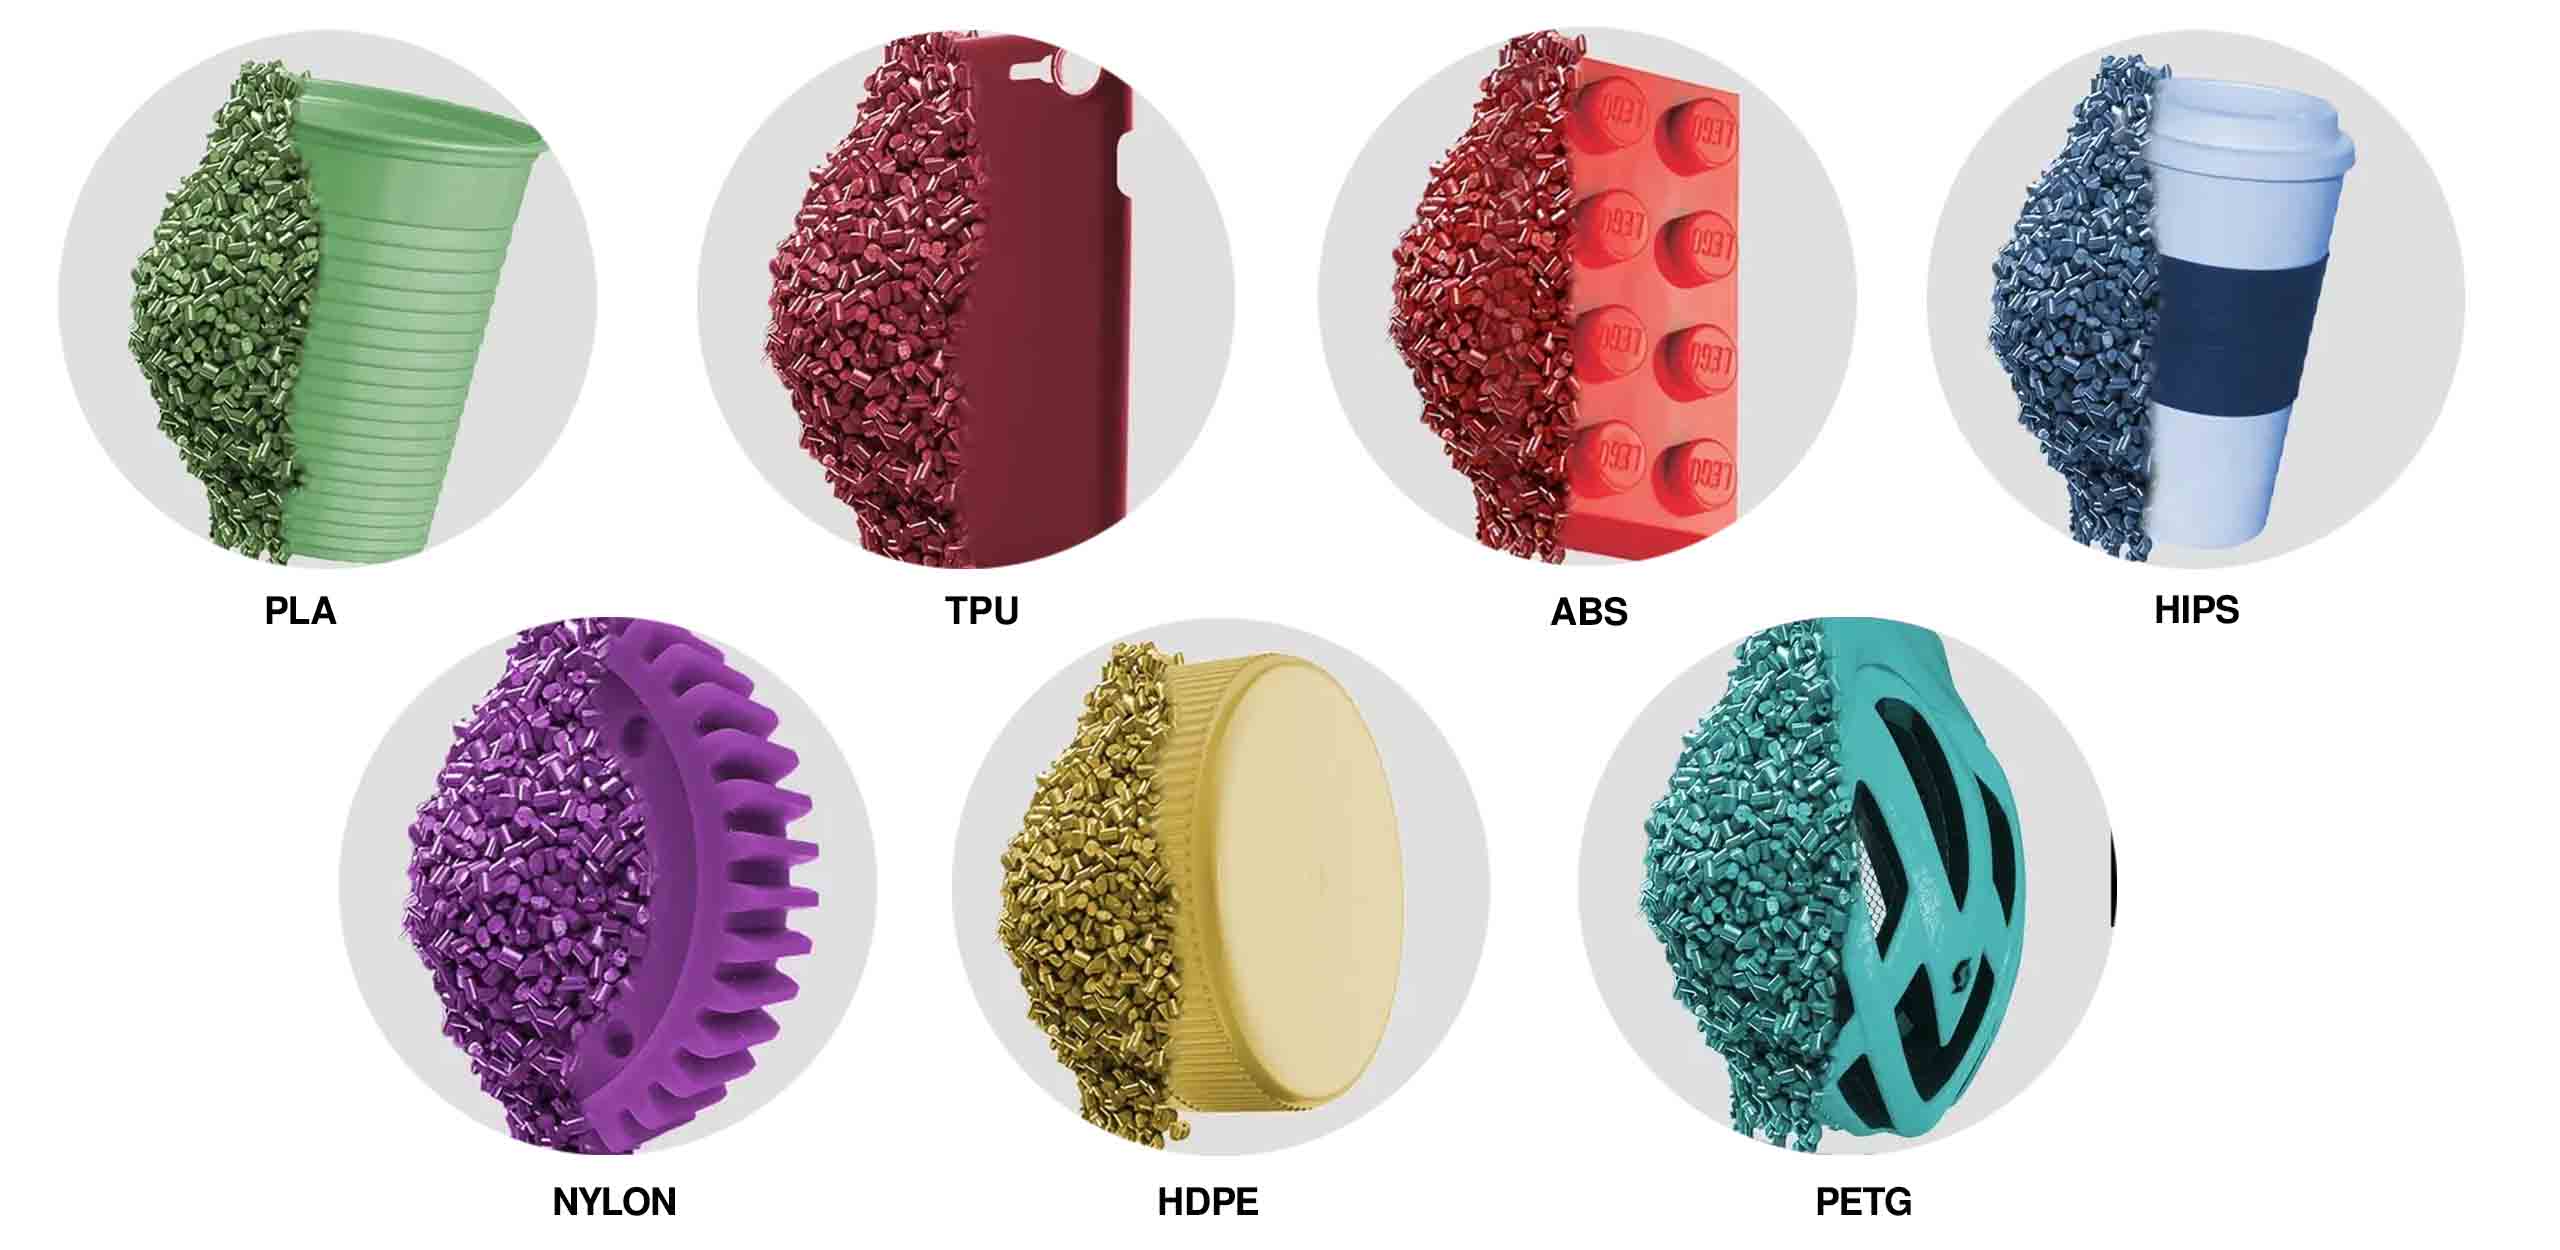
3D Printing Materials
A very useful site for a material understading. here
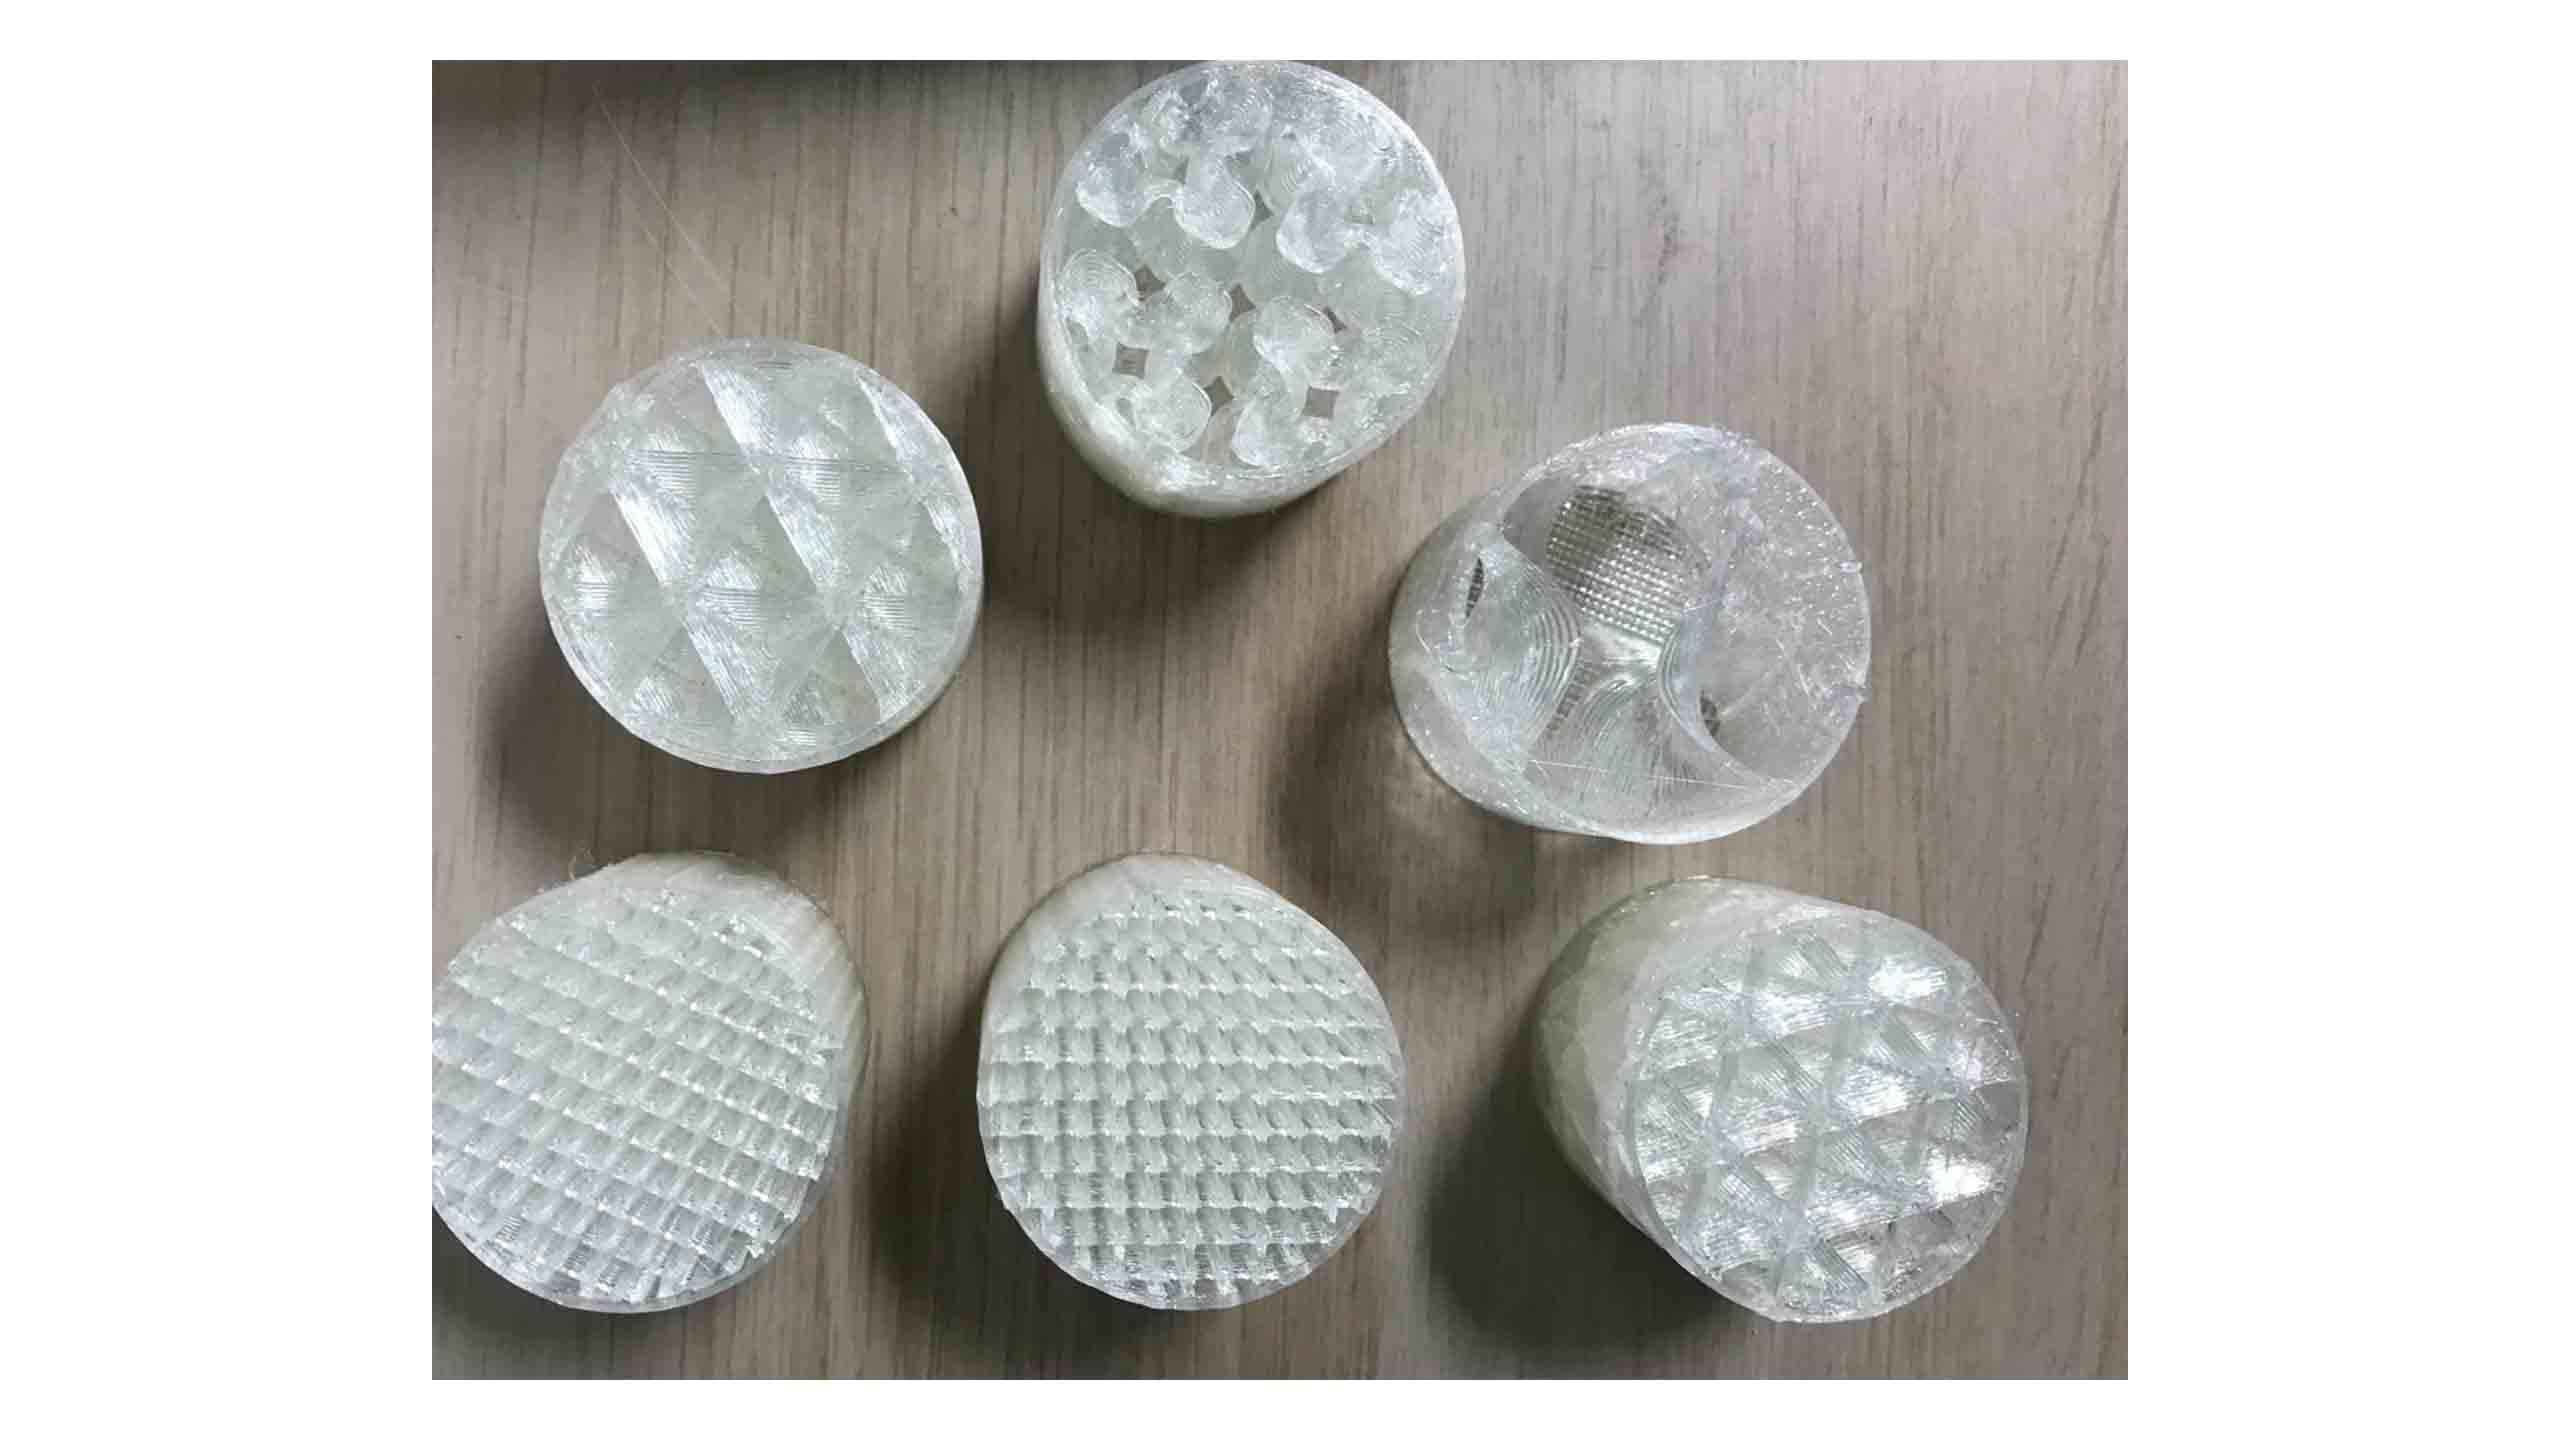
Infill examples
Infill is basically internal structure of the 3D print.The infill density defines the amount of plastic used on the inside of the print. A higher infill density means that there is more plastic on the inside of your print, leading to a stronger object.
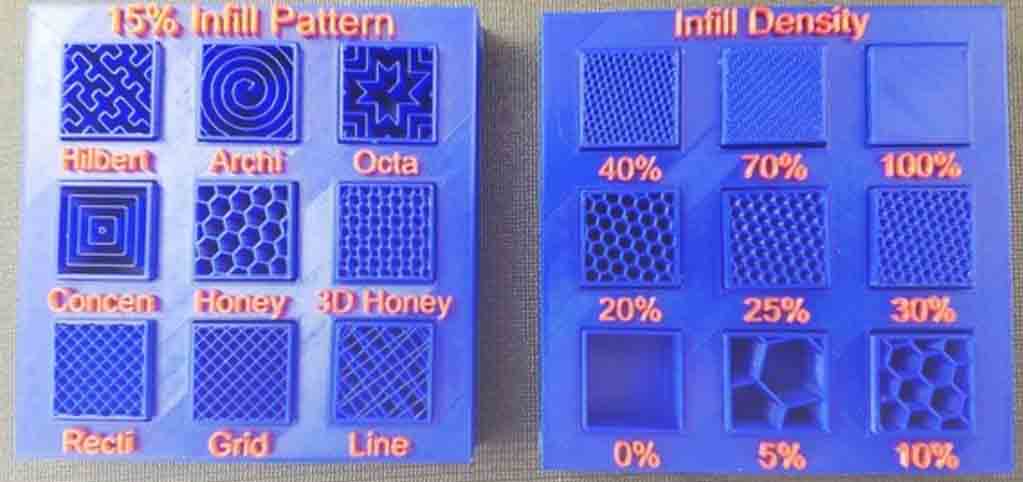
Below are the Infill exaples we have saw in our workshop visit to footwearology
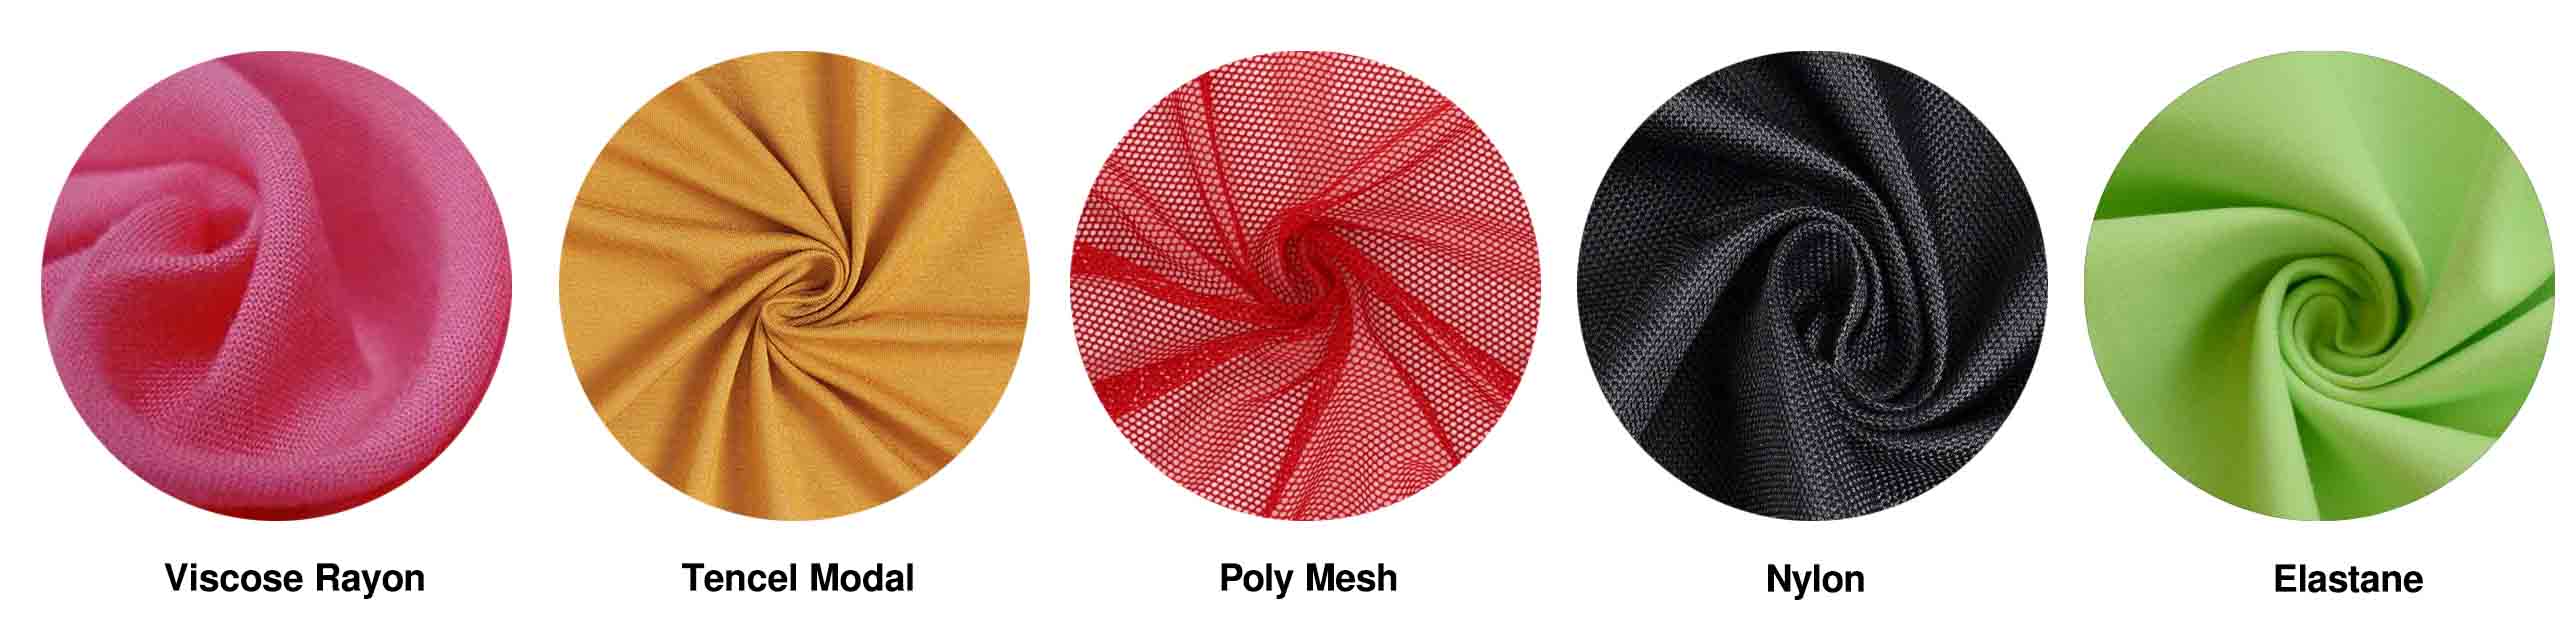
3D Printing on Fabrics
Fabric with composition of polyamids facilitate filament adhesion.
Material possibilites
Class work exploration
The following is the file we learned about the point and attractor in the grasshopper class. For learning the printing process, I modified the script and the shapes.
Design process
Grasshopper Script
Here is the Script Files you are welcome to download and explore.
Printing process
Final Look
Design Exploration-1
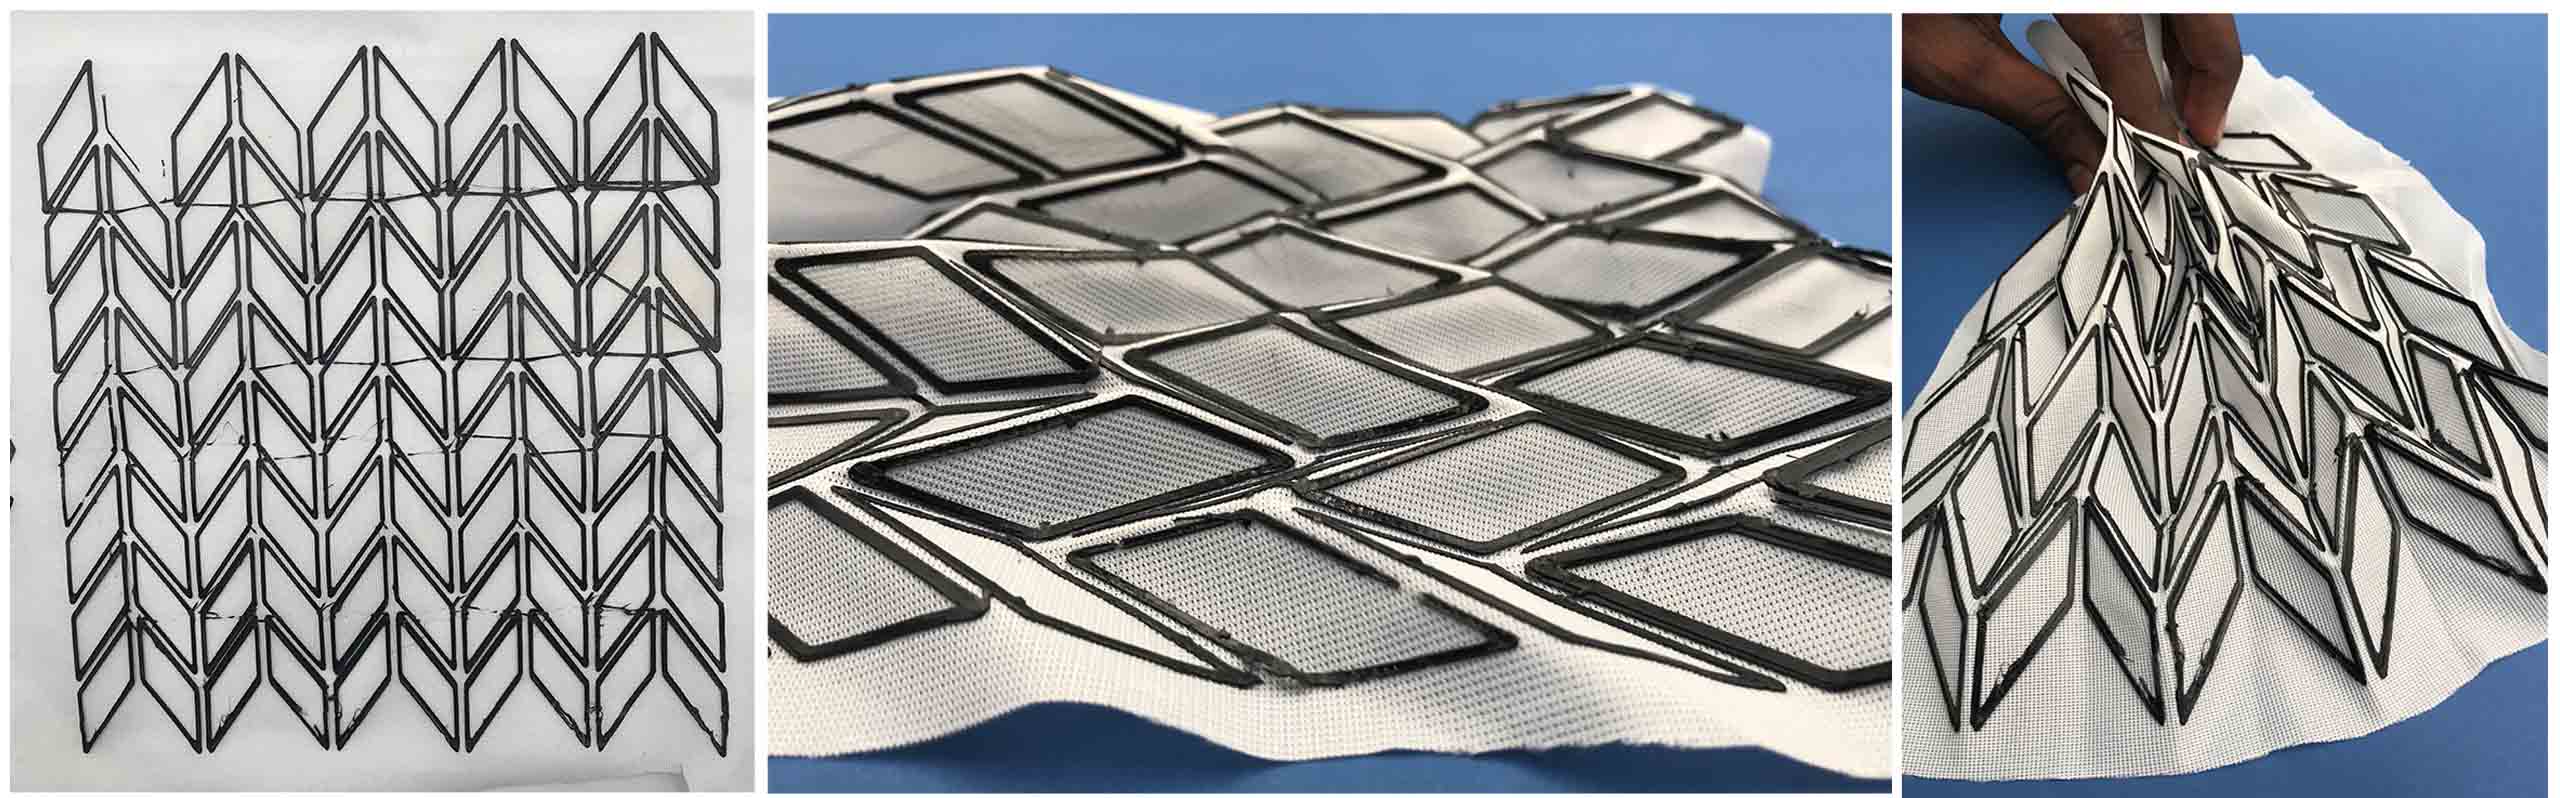
Origami
Here I would like to continue my Origami exploration from week 3 in 3D Printing.Origami documentation
Designs
I have created the following designs on Illustrator that I would like to 3D print on textiles.
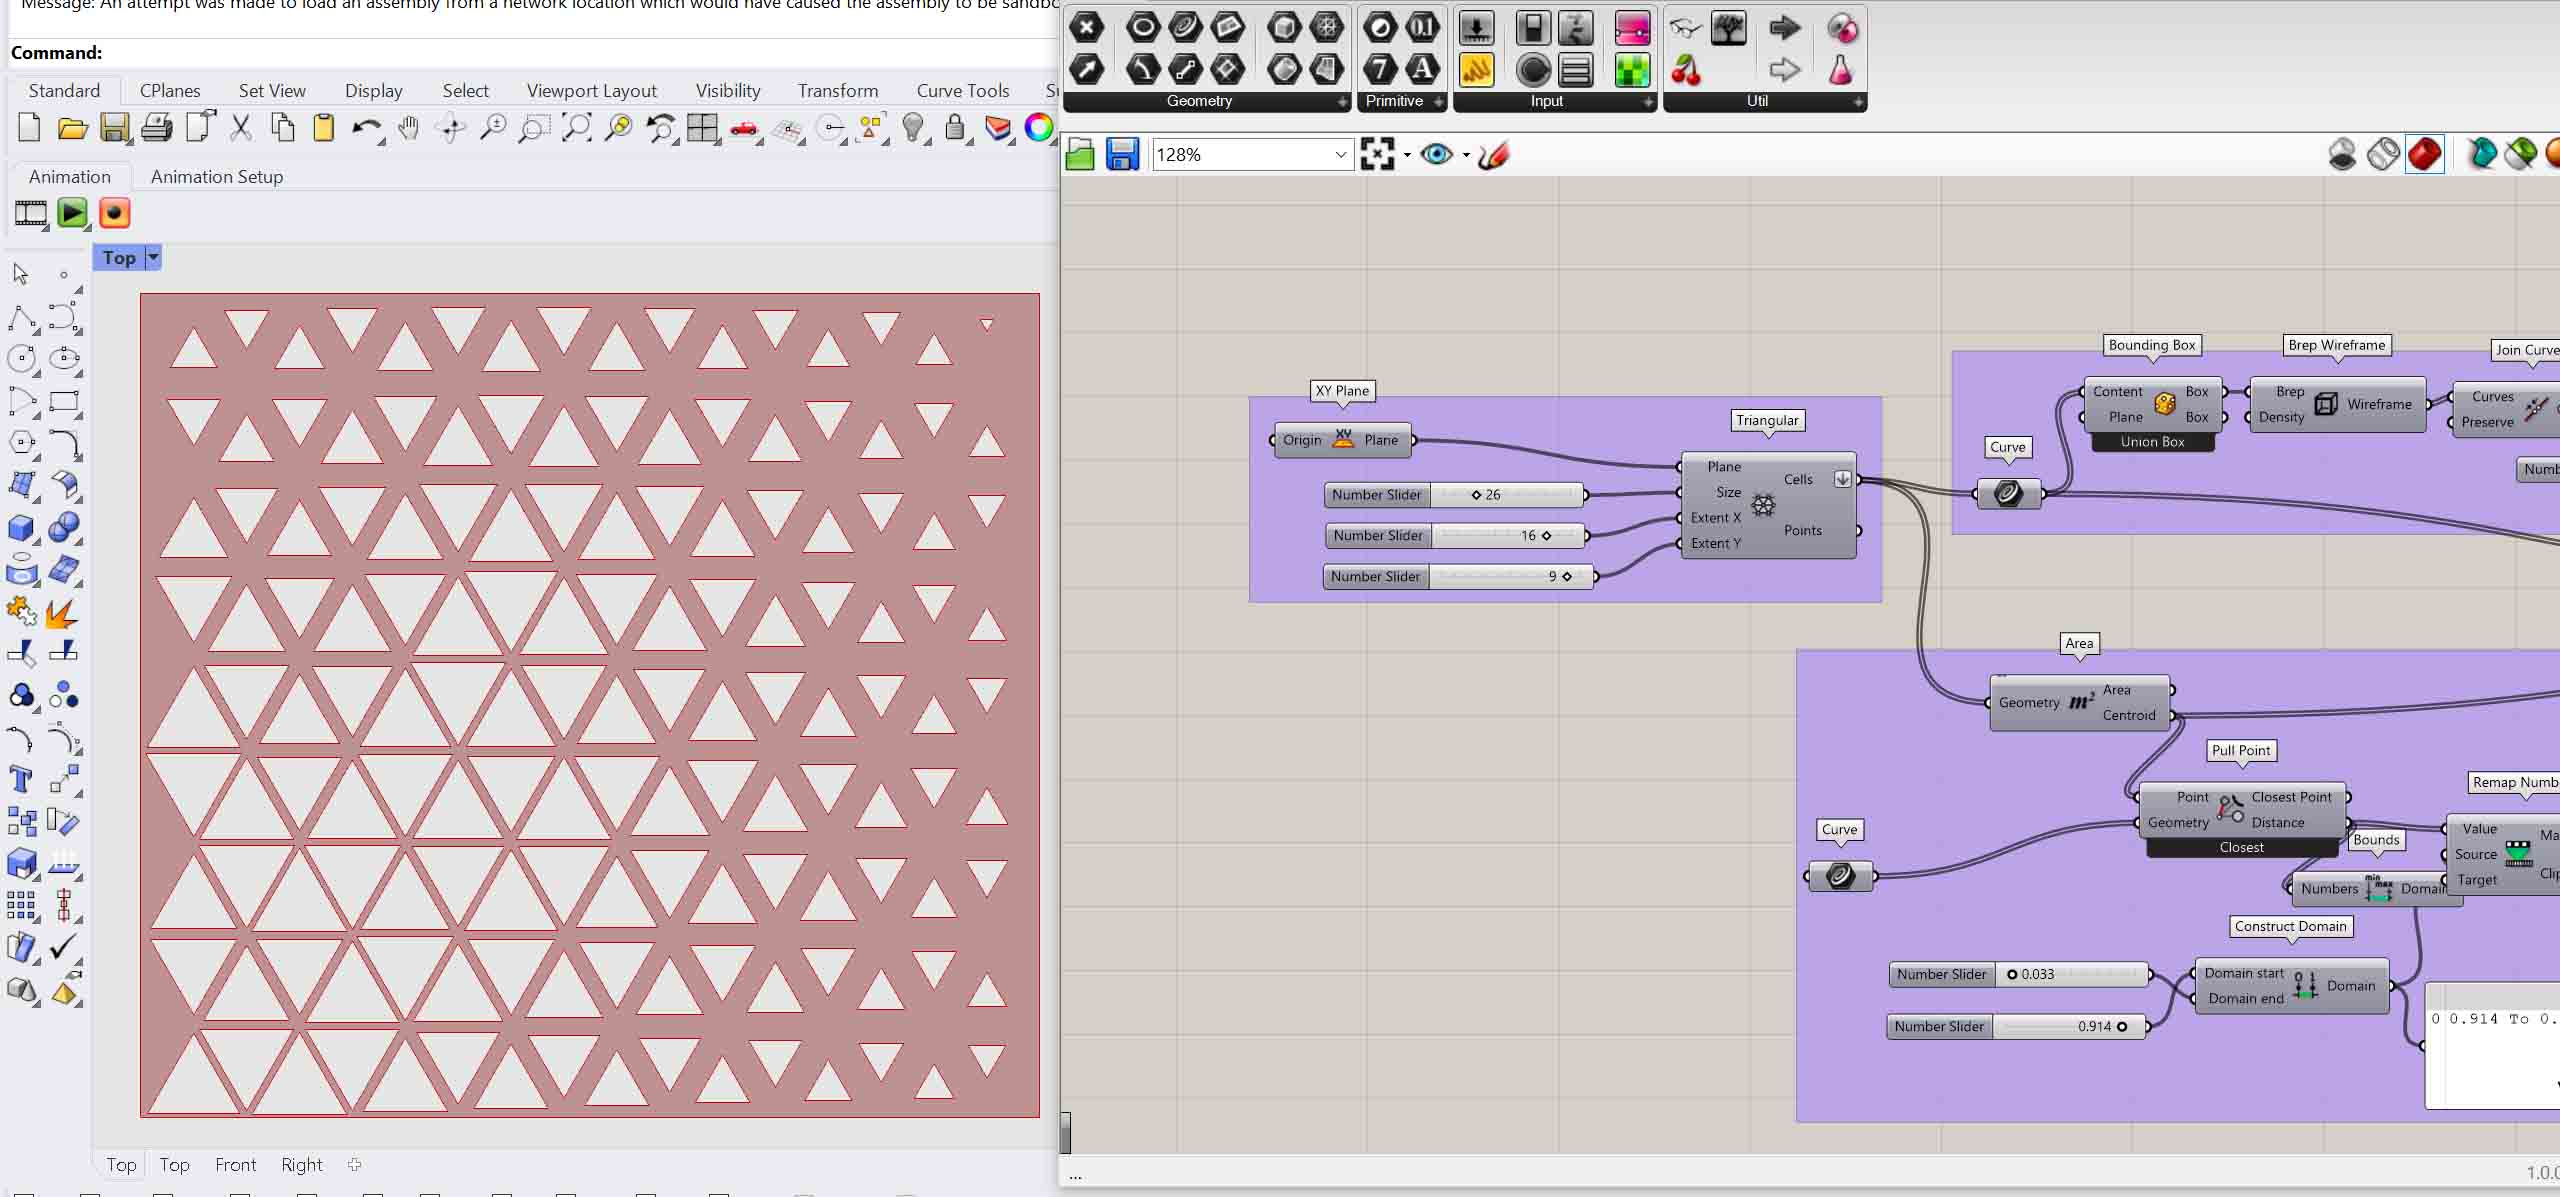
Upon exporting to Rhino, it did not fit as expected to extrude in Grasshopper. In grasshopper, I have created an origami pattern using the array command based on the basic shape.
Design Generation
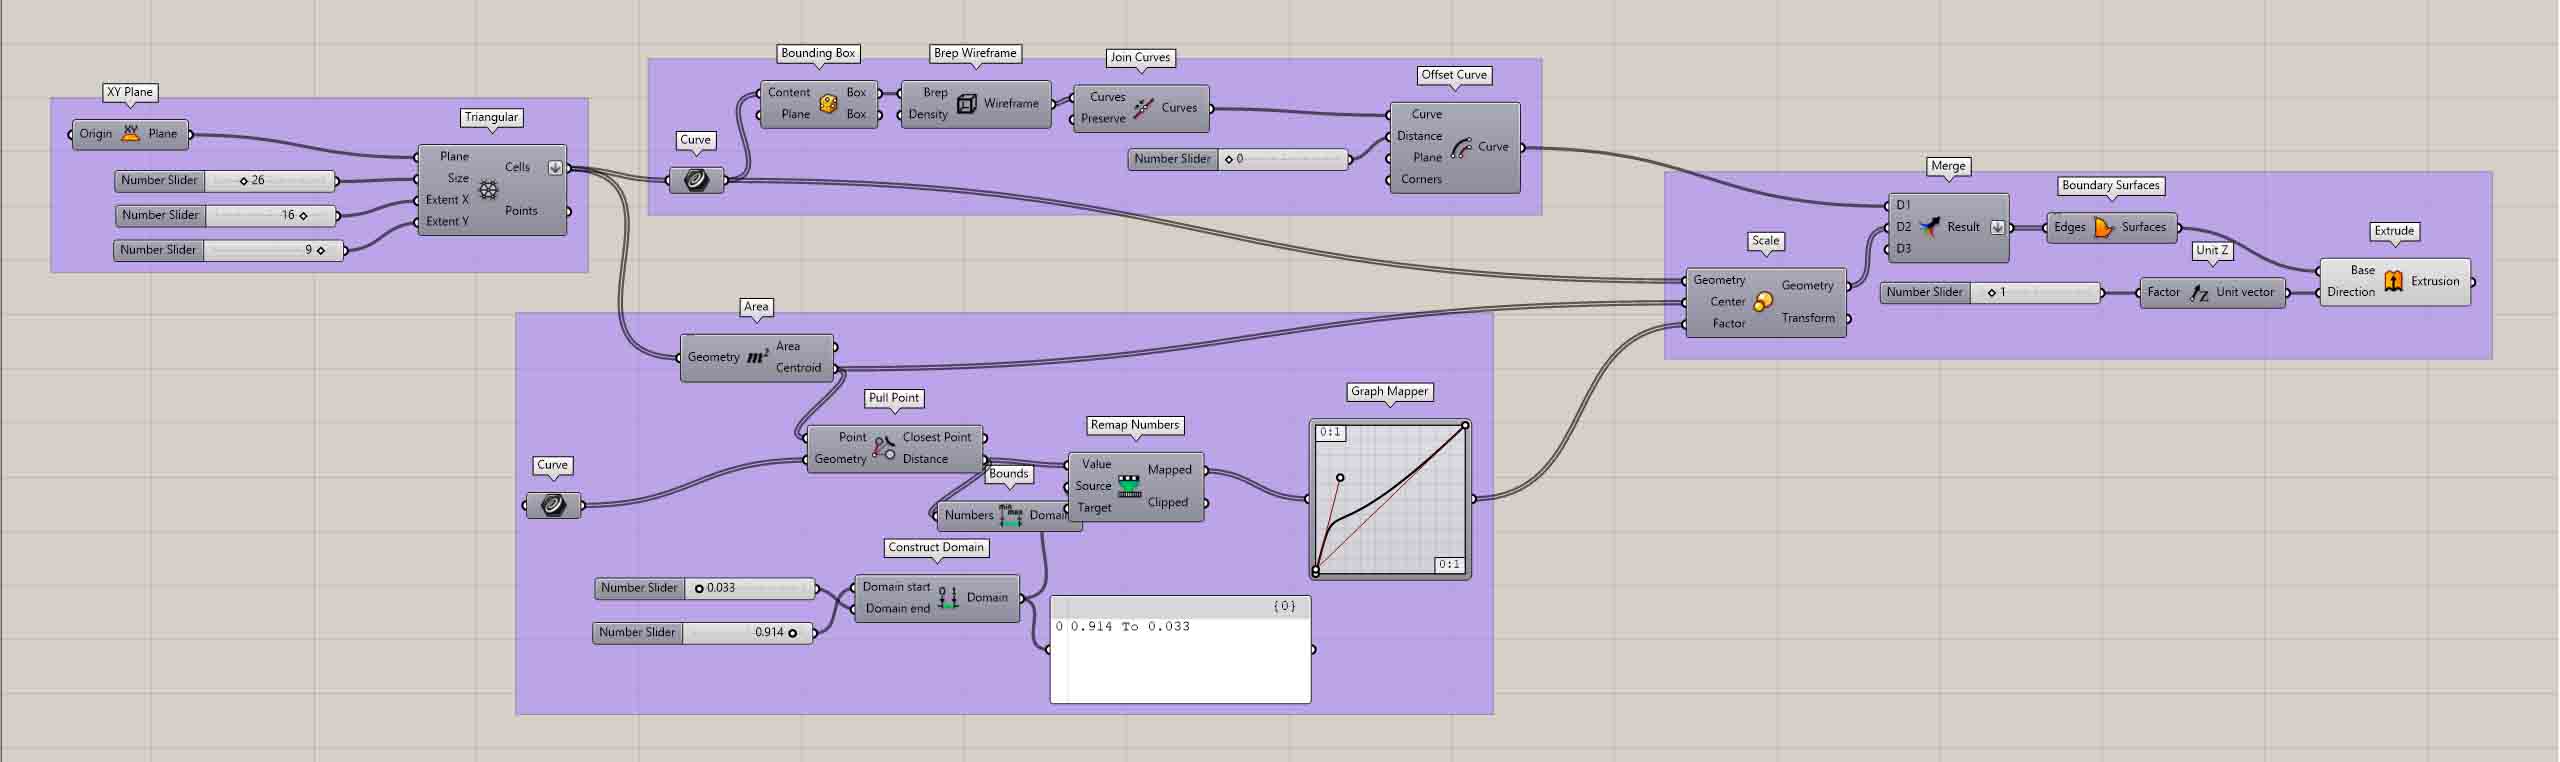
The below visuals show the step-by-step process for generating the designs.
Design
Grasshopper Script
Here is the Script Files you are welcome to download and explore.
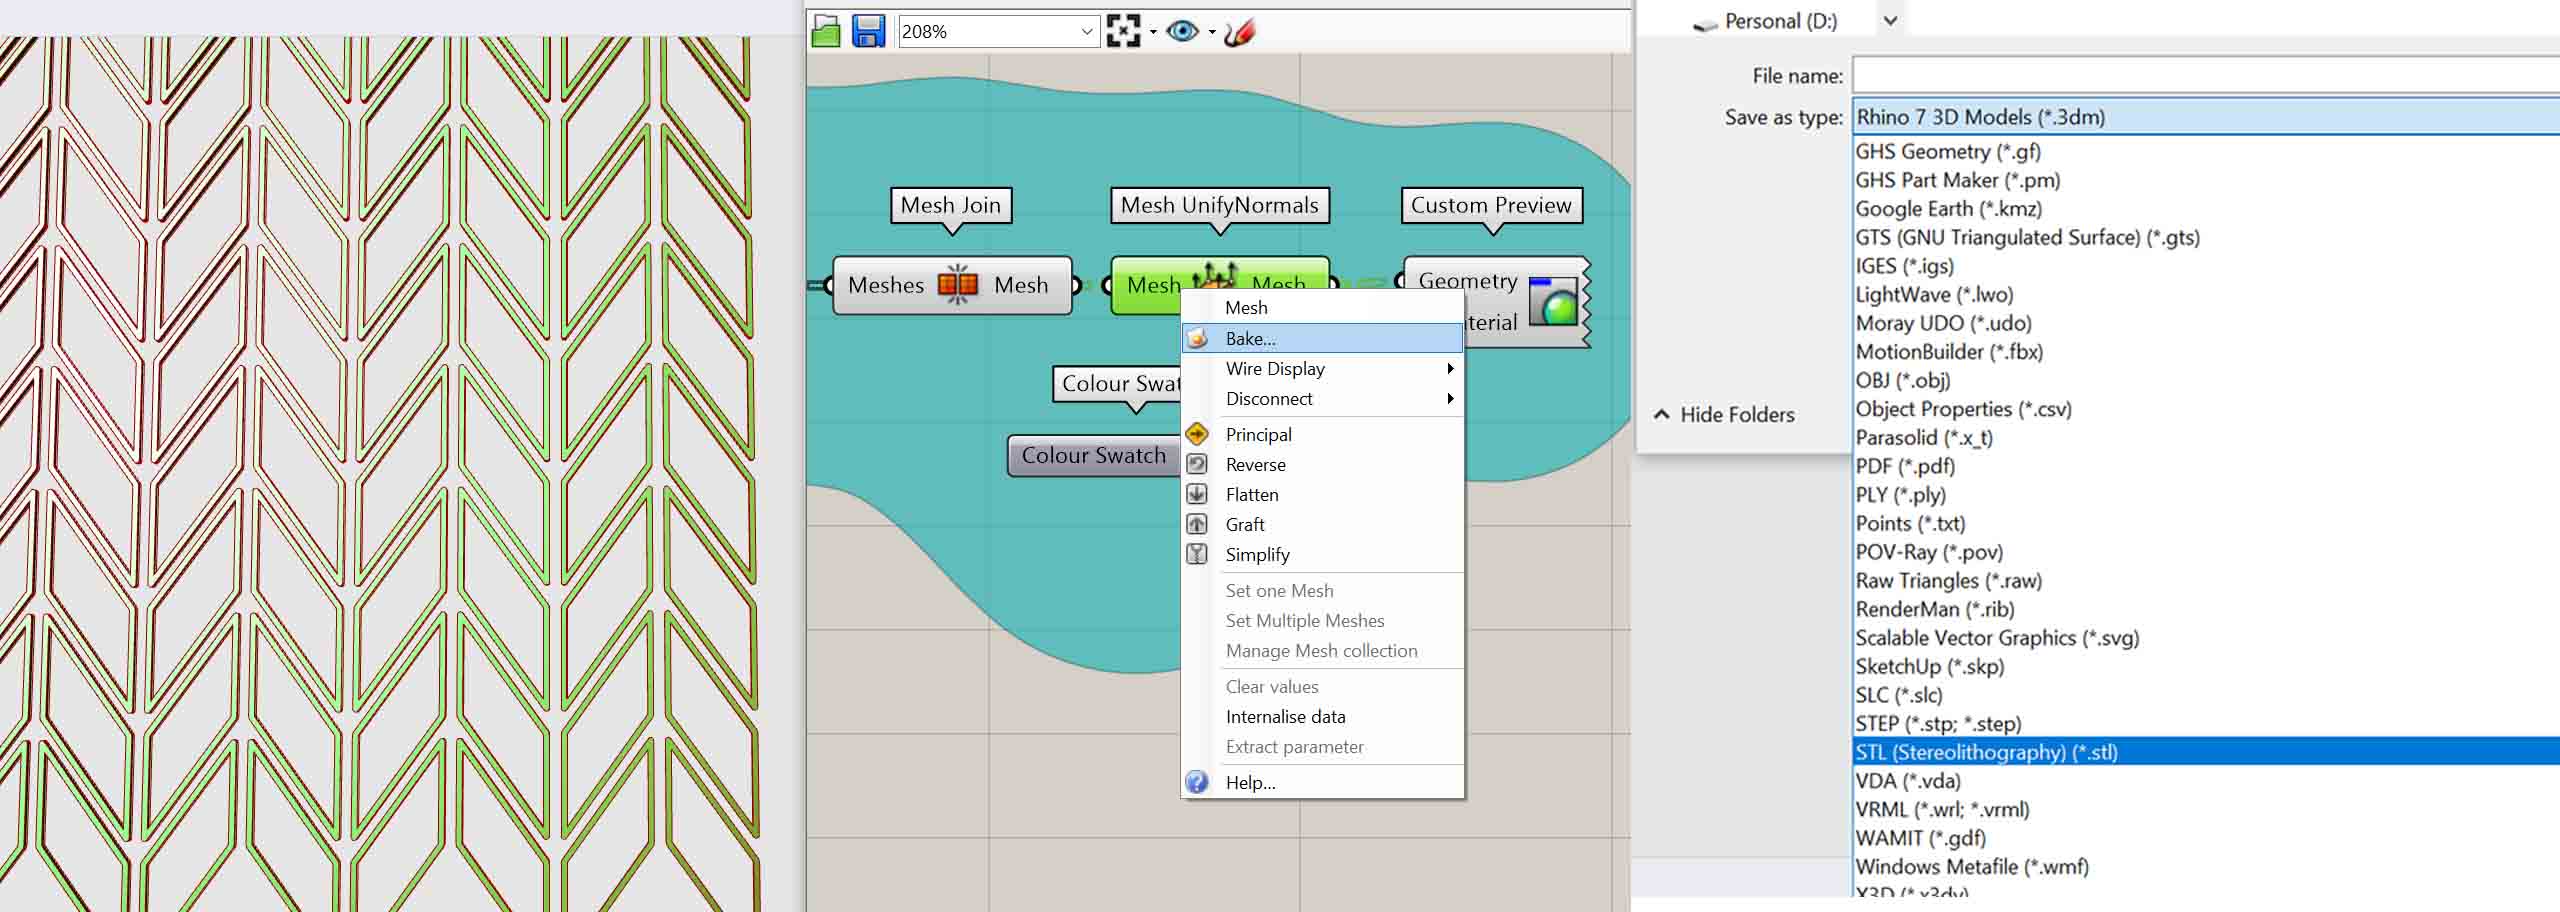
Baking and Exporting process
To bake from grasshopper to rhino- Select the file and right click to bake the object.
To Export the file from rhino- Select the object- Export selected- export as STL.
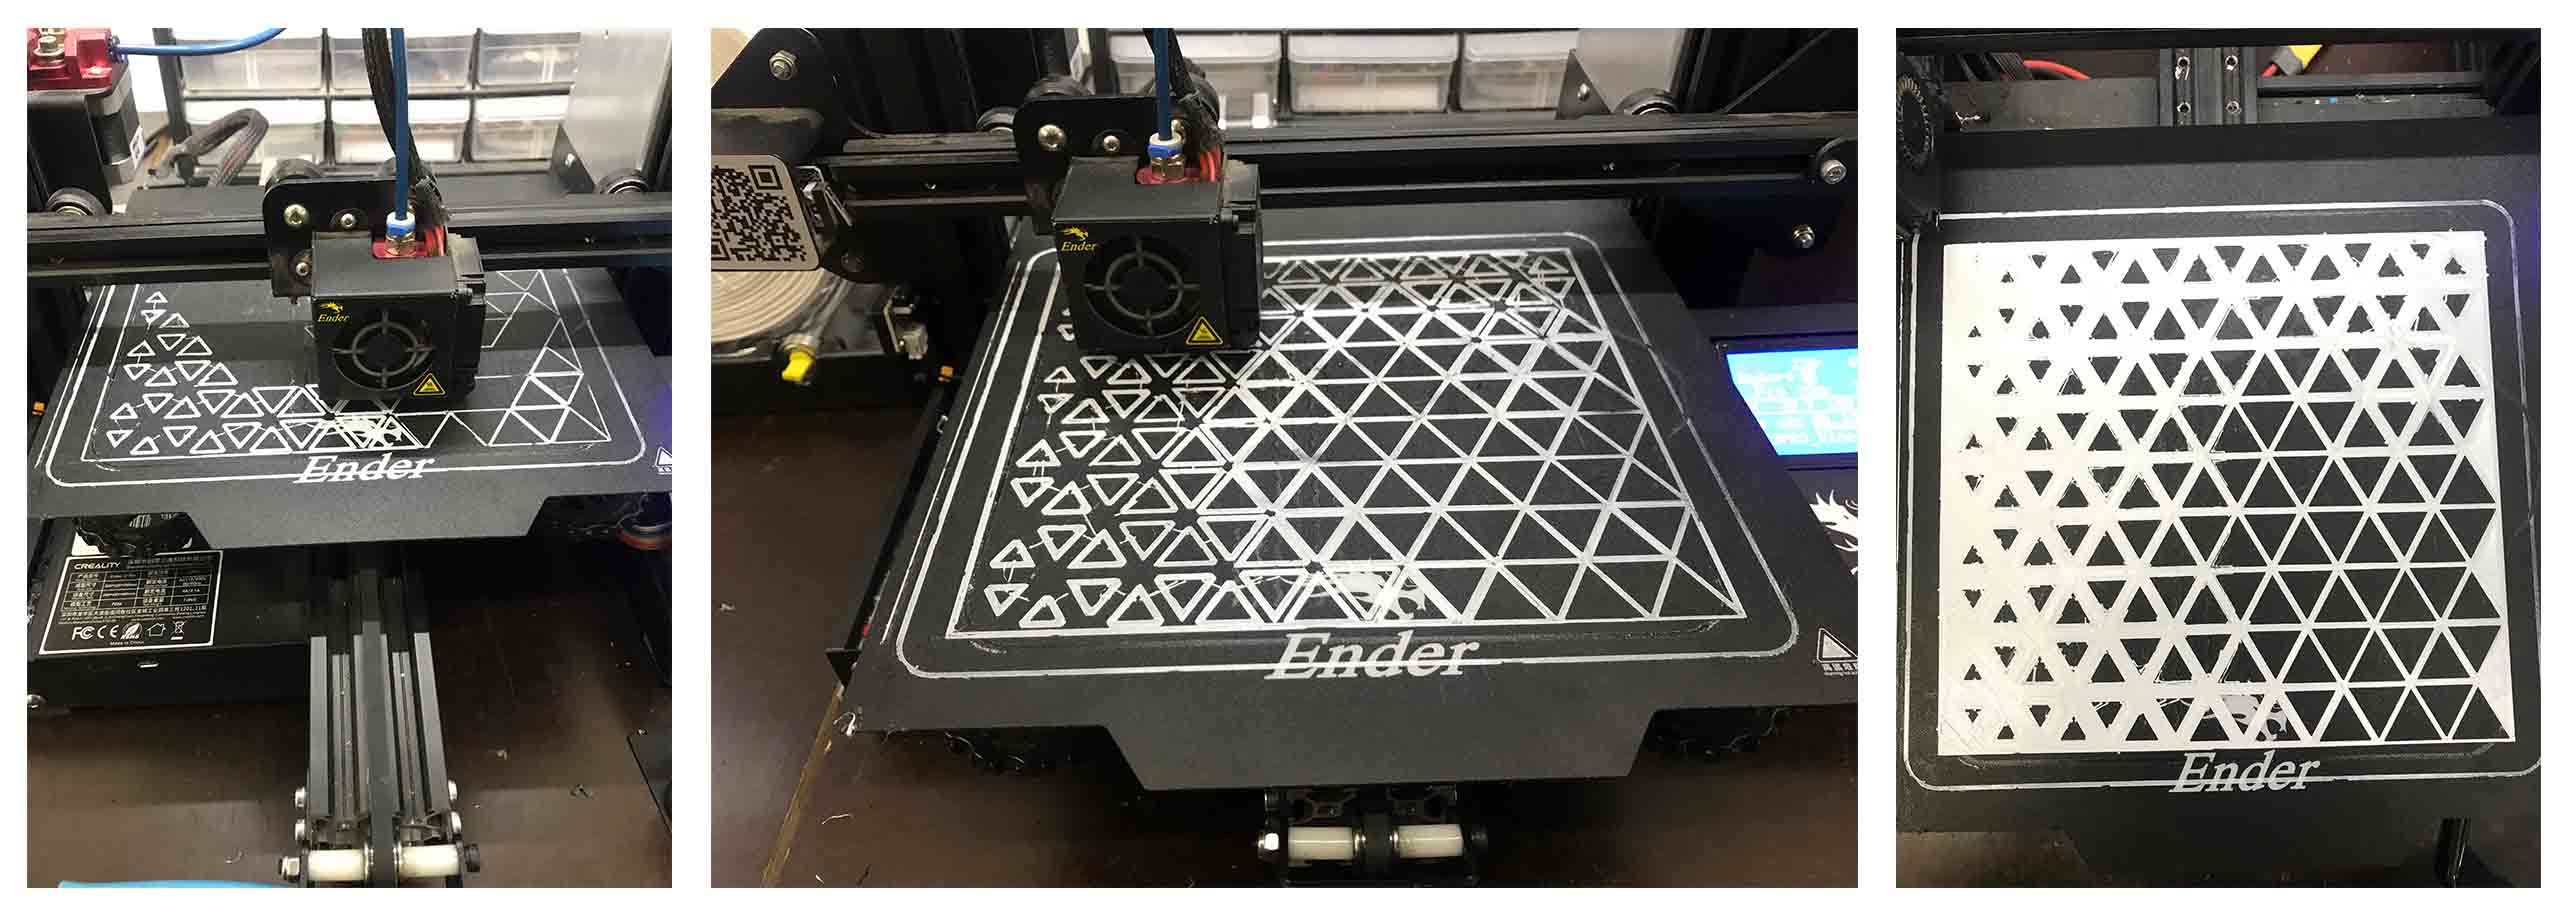
Machine settings
Printer Settings
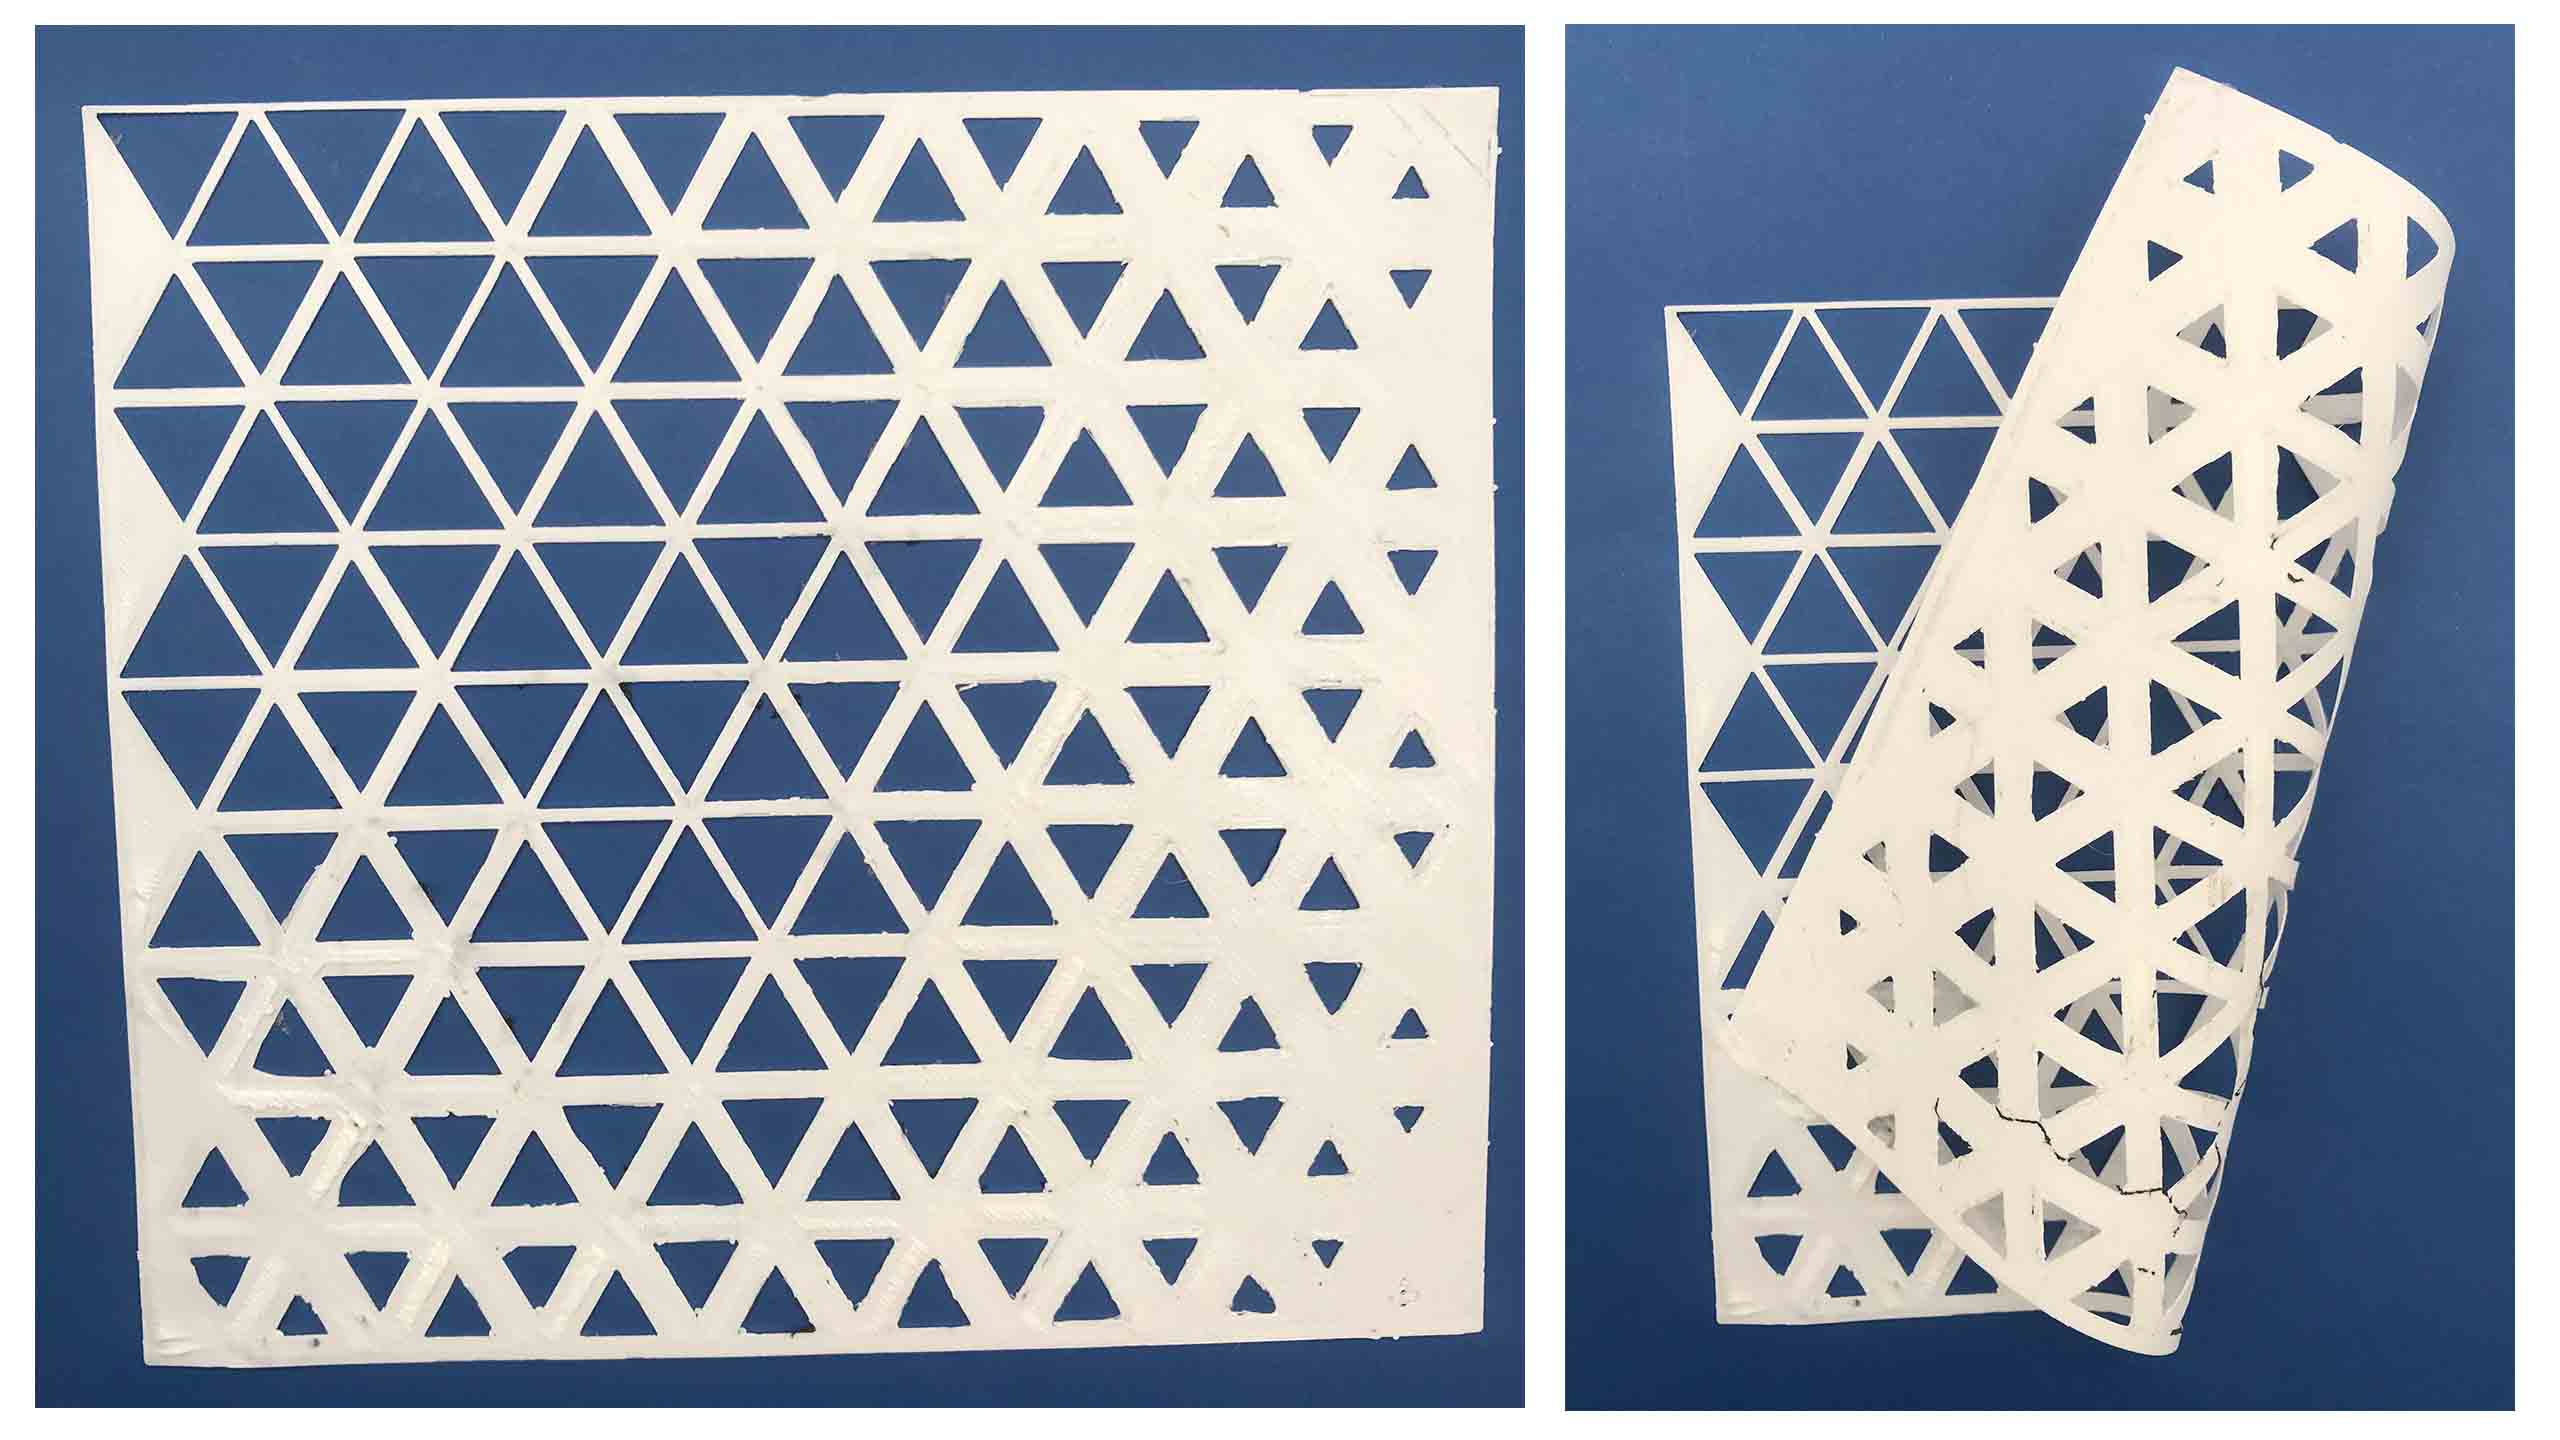
Final look
-
The final outcome isn't as I expected, because I used Poly mesh fabric and the creasing didn't hold up. Perhaps cotton fabric would have held the crease lines better.
-
While polyester does hold creases, it requires a heat-setting machine and 3D printing wasn't great with TPU material. I would explore different materials and fabrics in the future.
Design explorations-2
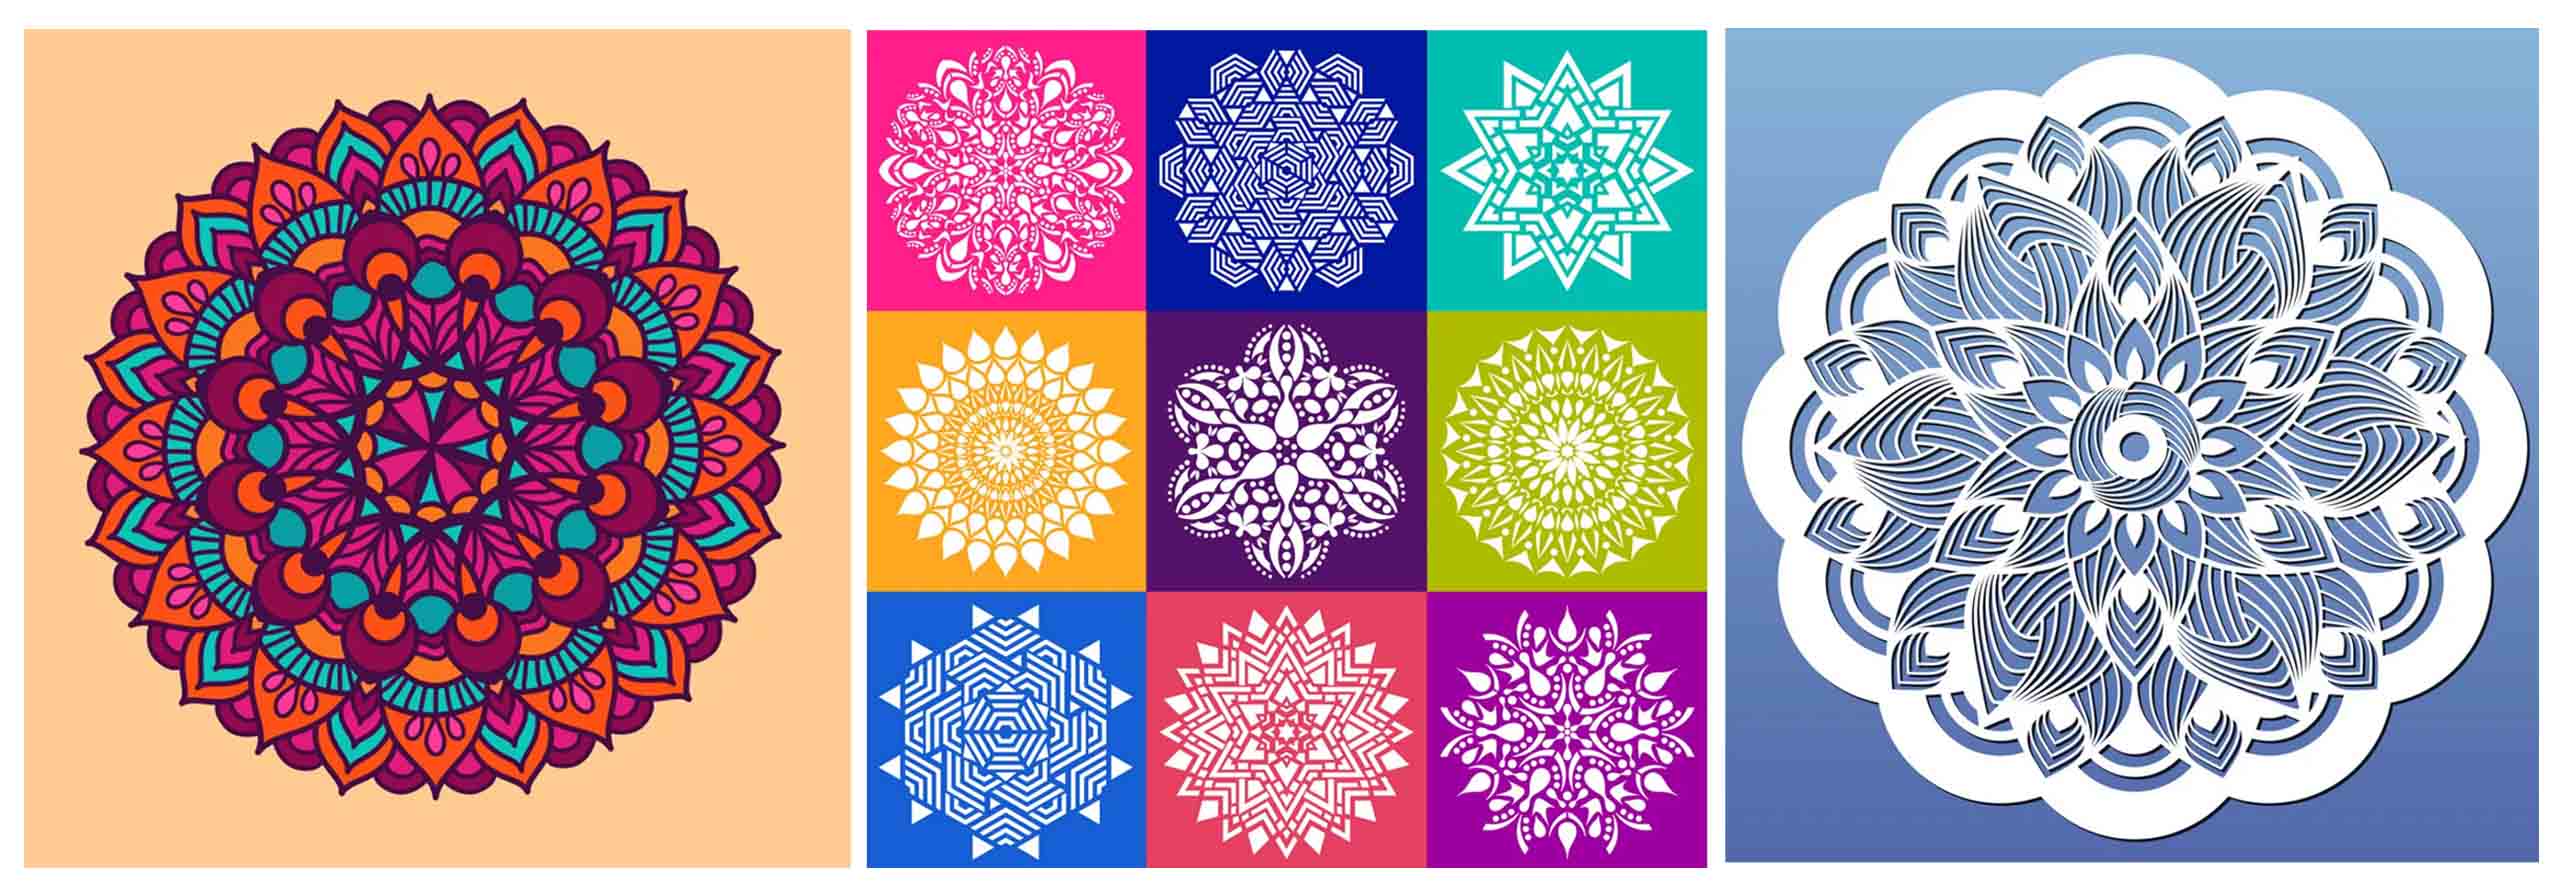
Geometric shapes
To explore geometric shapes, I took inspiration from the geometric mandala and used the Parakeet plugin for the grasshopper. It is so much fun to work on this plugin, generating new patterns by changing just patterns and counts.
Design Generation
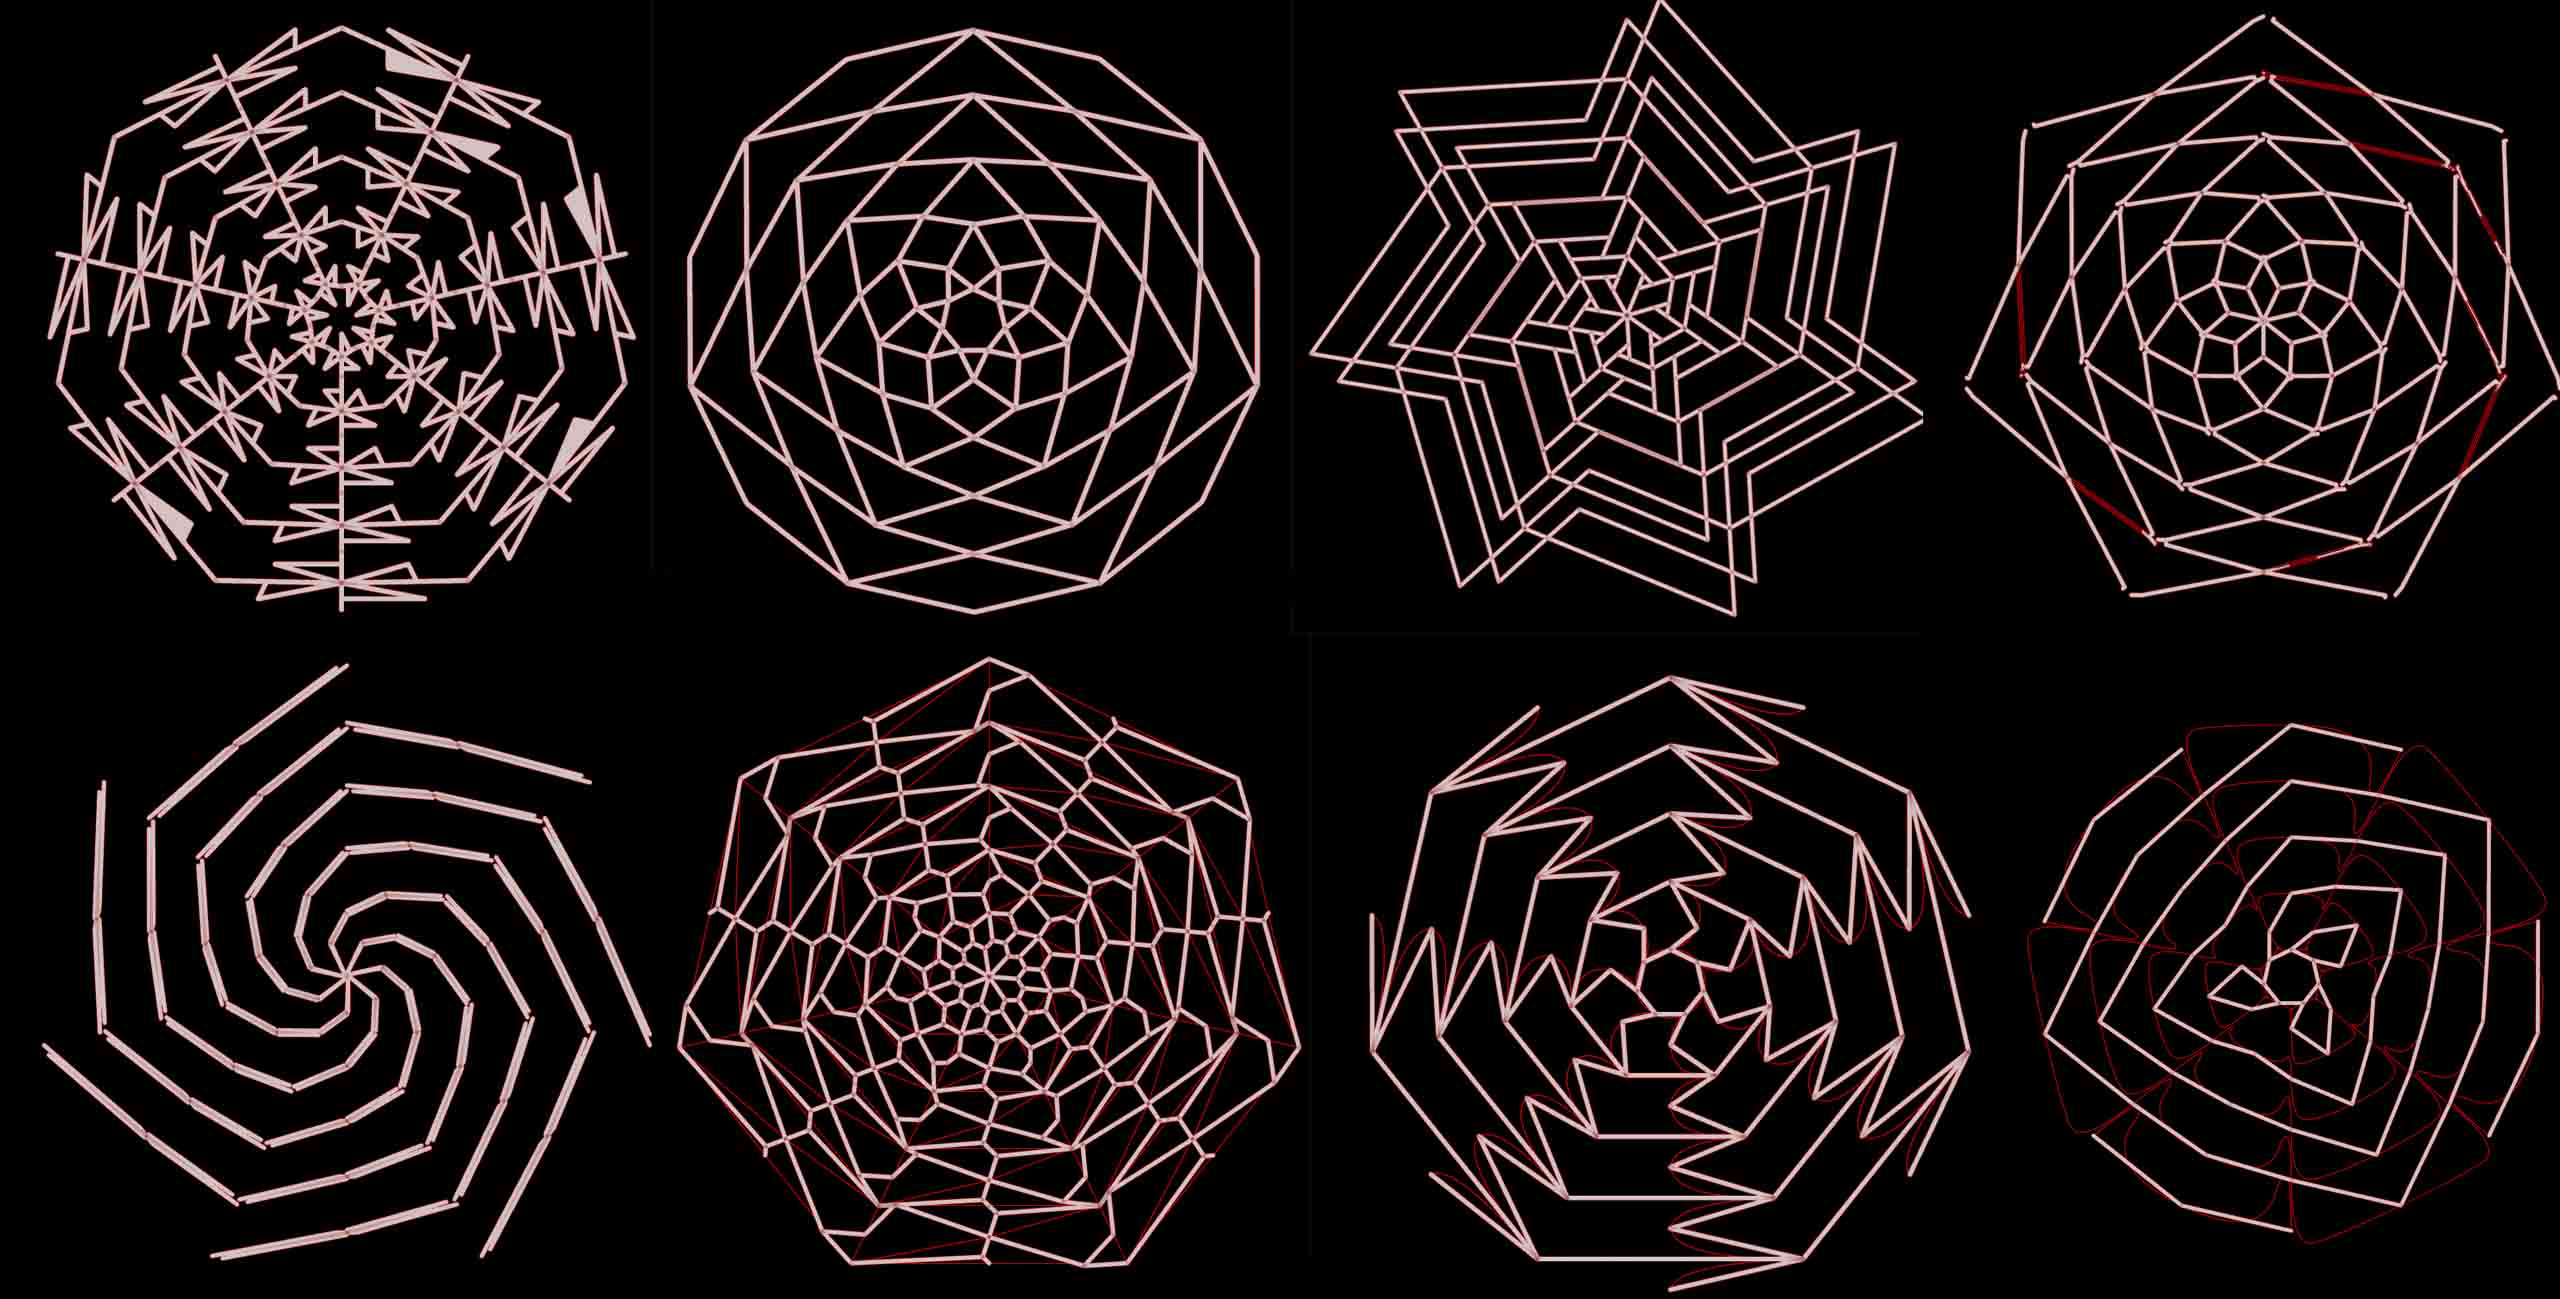
Using point parameters and Radial components with parakeet patterns, I created all the below designs.
Grasshopper Script
You can find the script below.

Here is the Script Files you are welcome to download and explore.
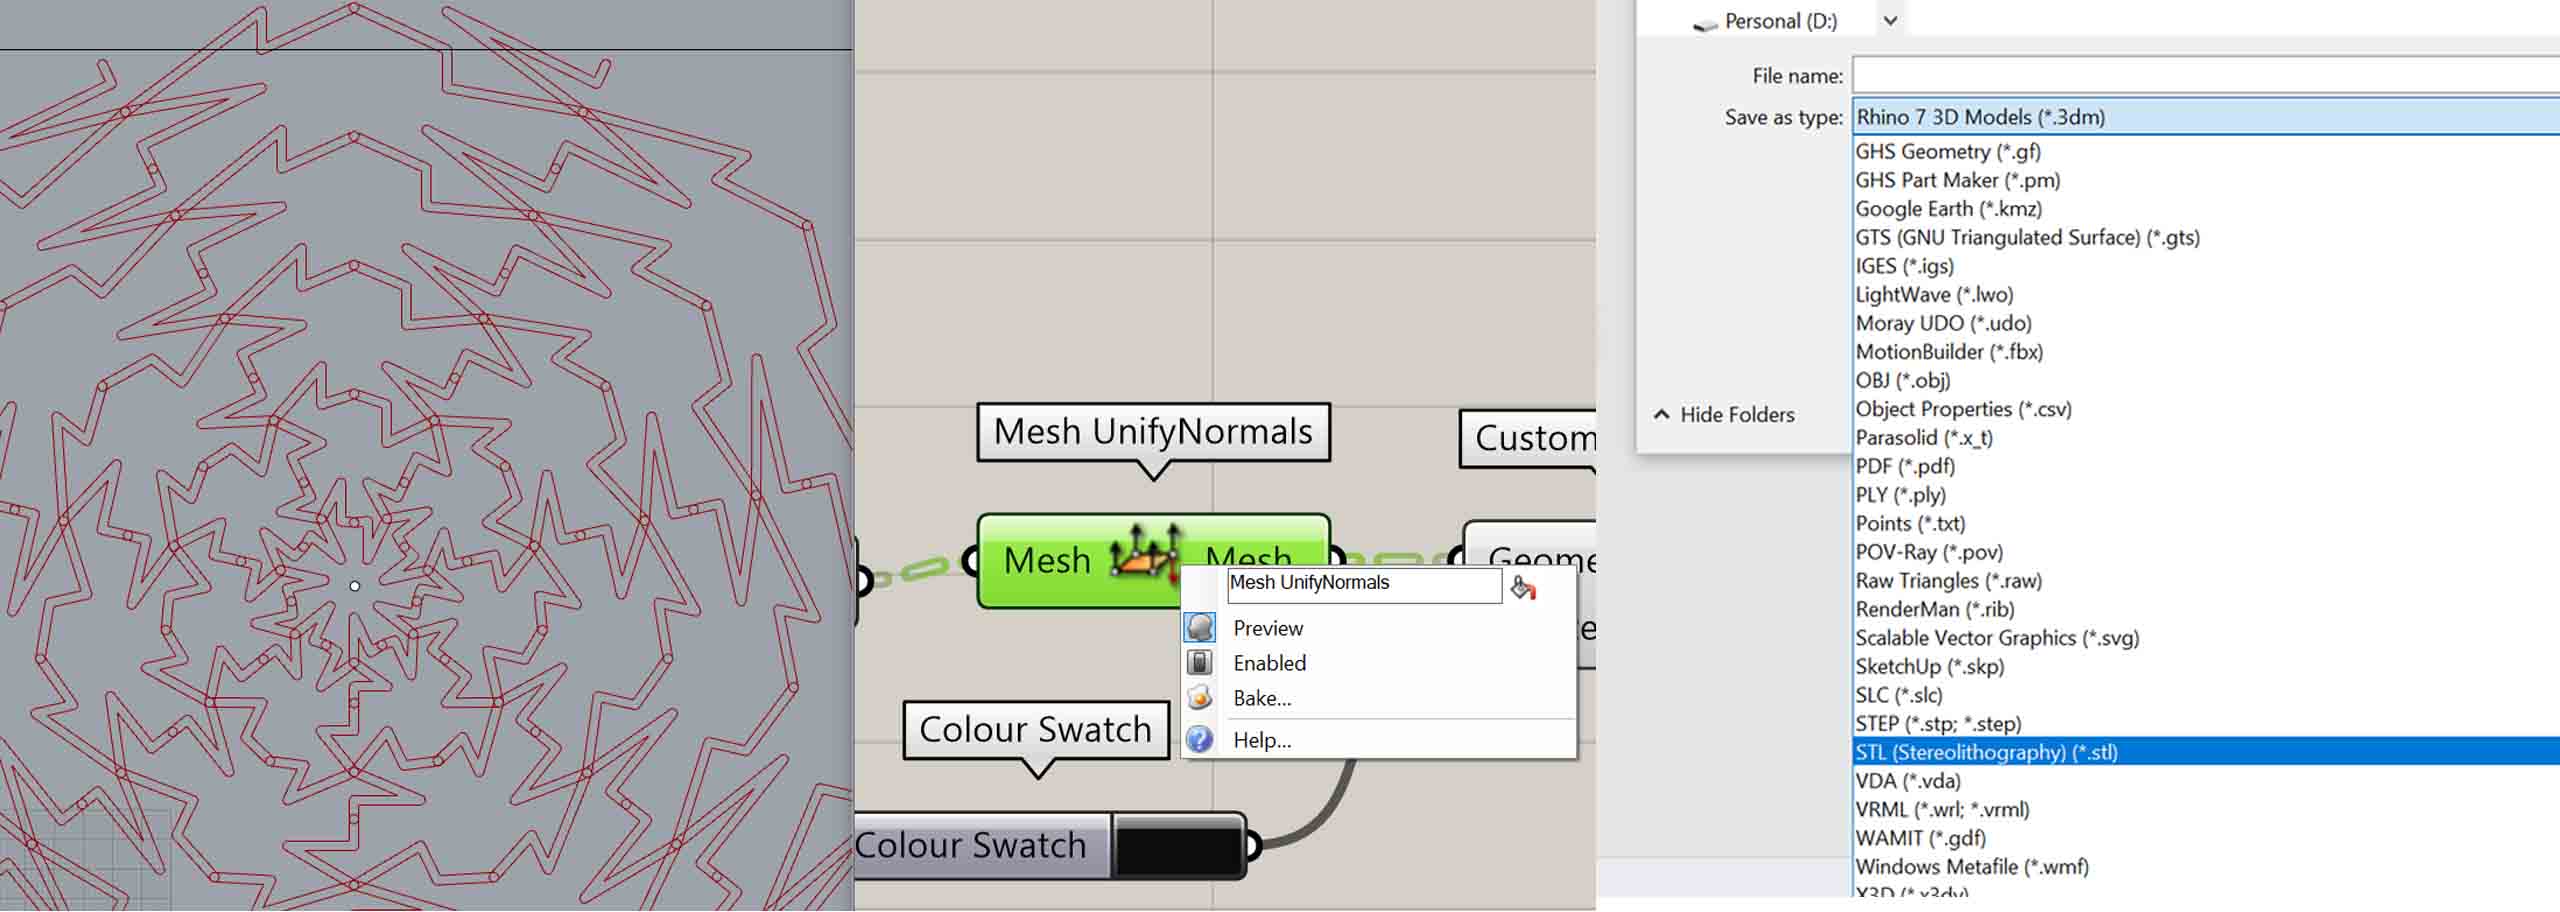
Baking and Exporting process
To bake from grasshopper to rhino- Select the file and right click to bake the object.
To Export the file from rhino- Select the object- Export selected- export as STL.
Machine settings
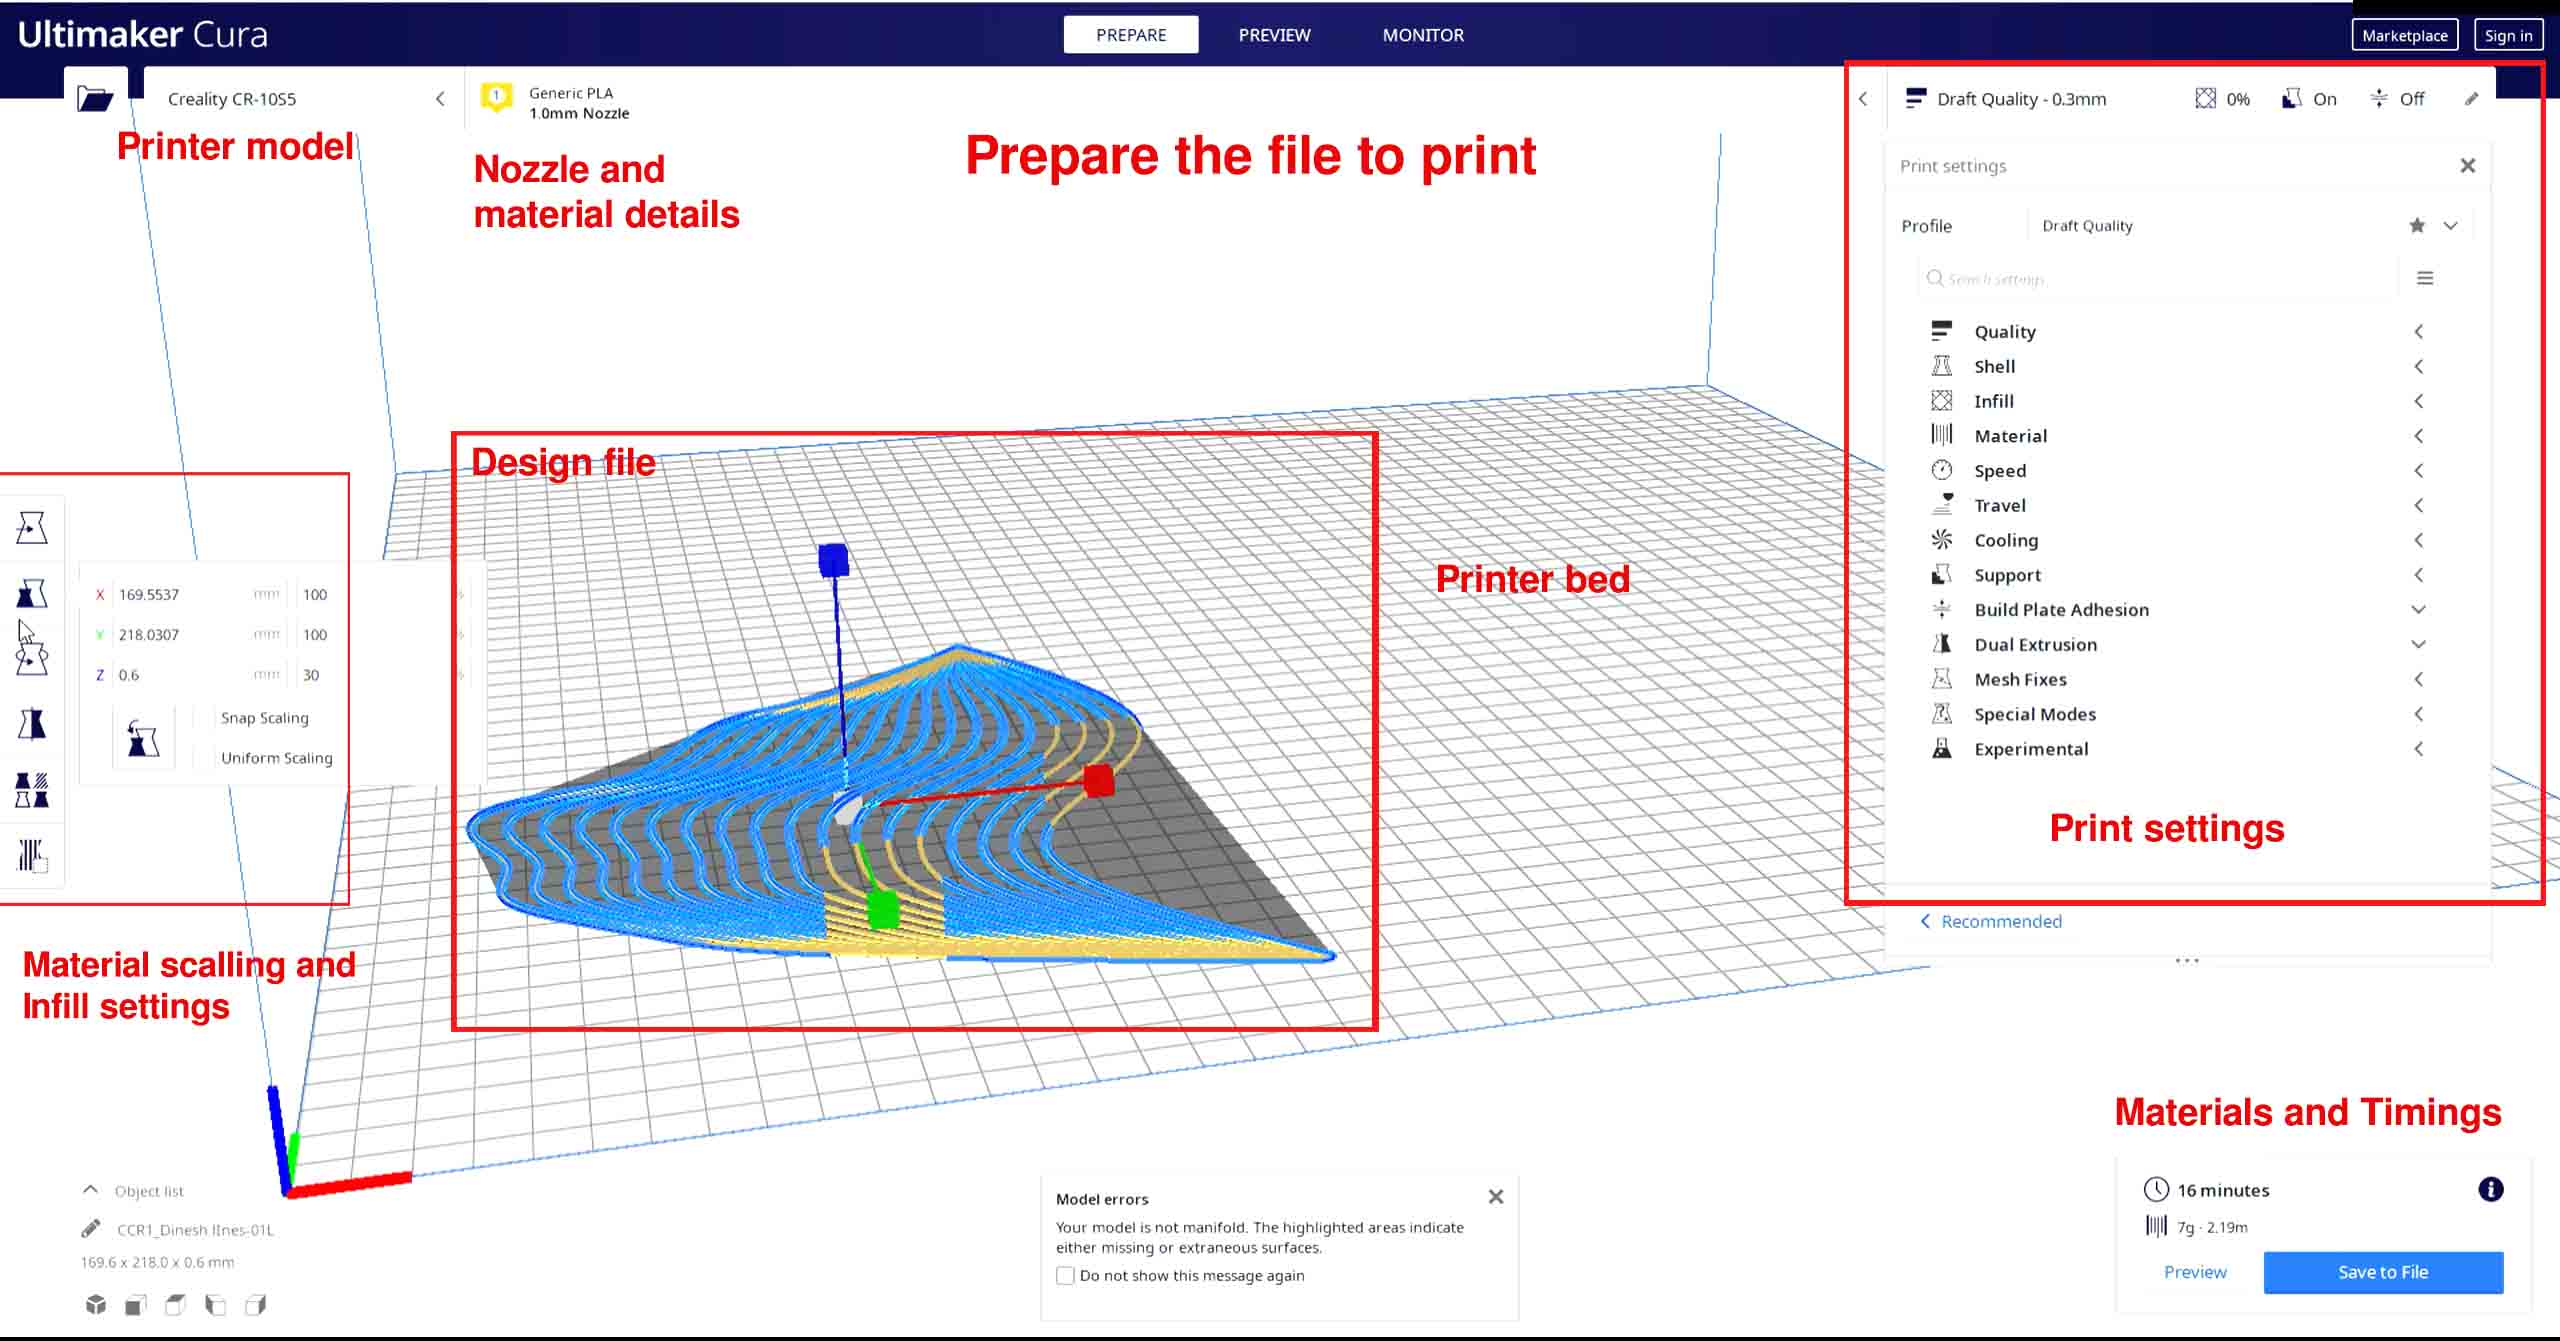
Slicing Settings
3D Print Settings
Software used: Ultimaker Cura
3D Printer: Creality CR-1055
Material used: TPU
Nozzle Size: 1.0 mm
To print one part It takes 16 minutes and material usage is 7g
Final Look

Final Look Explorations Process
Exploring with different backgrounds
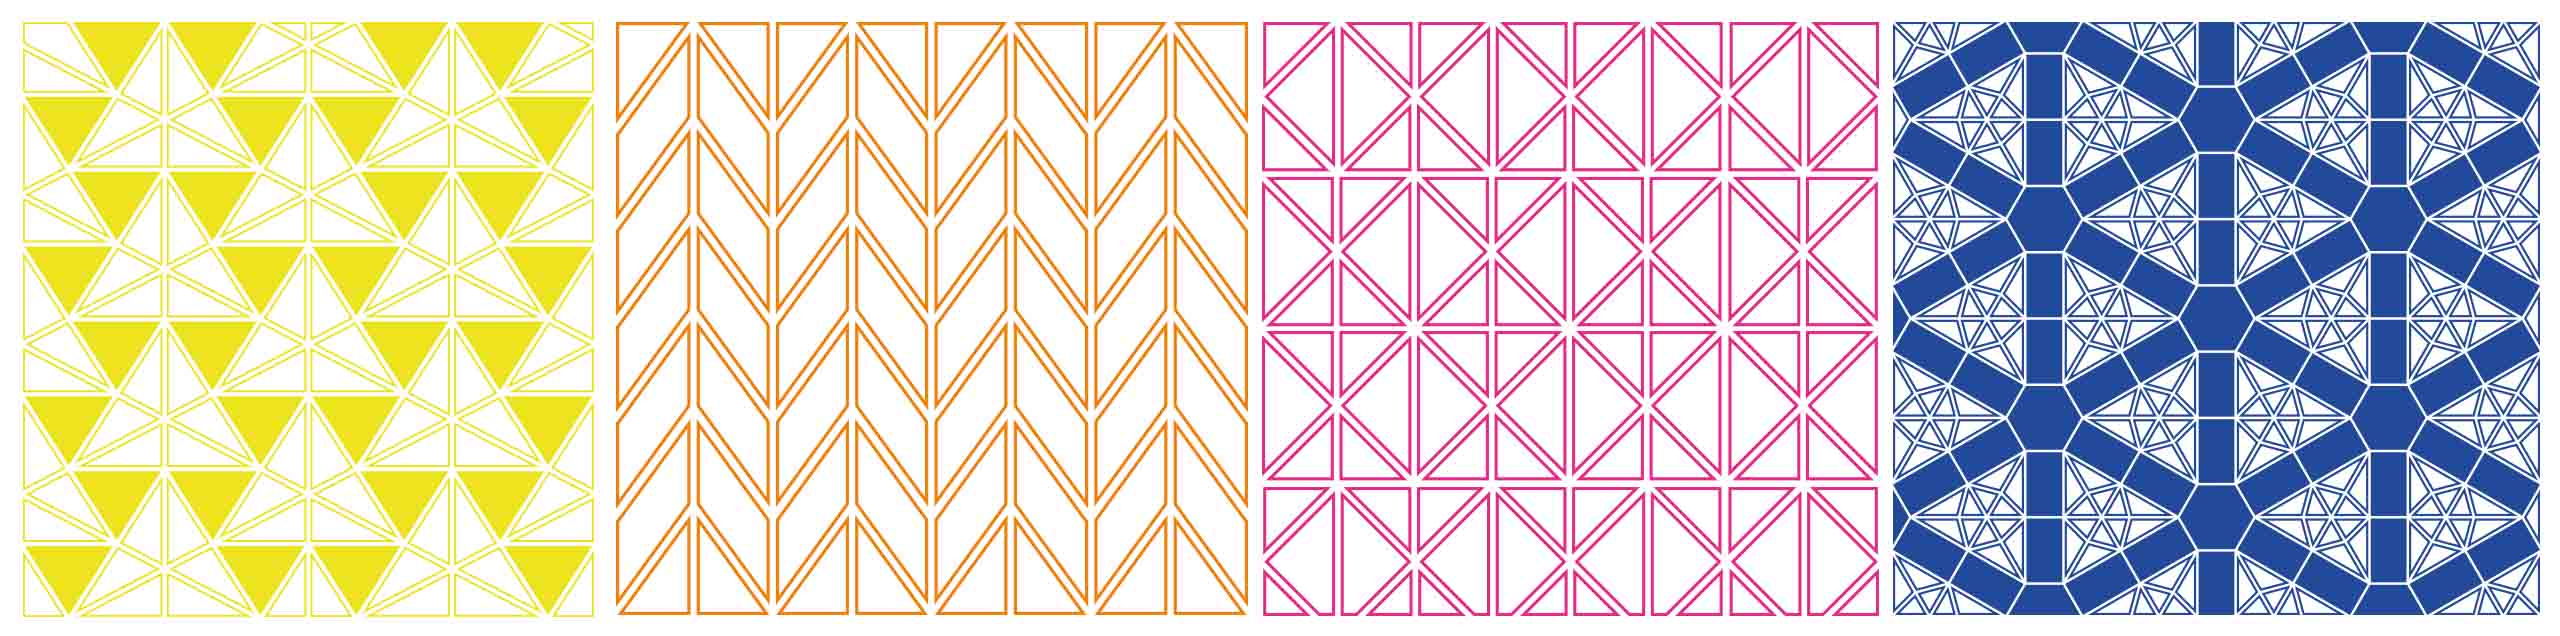
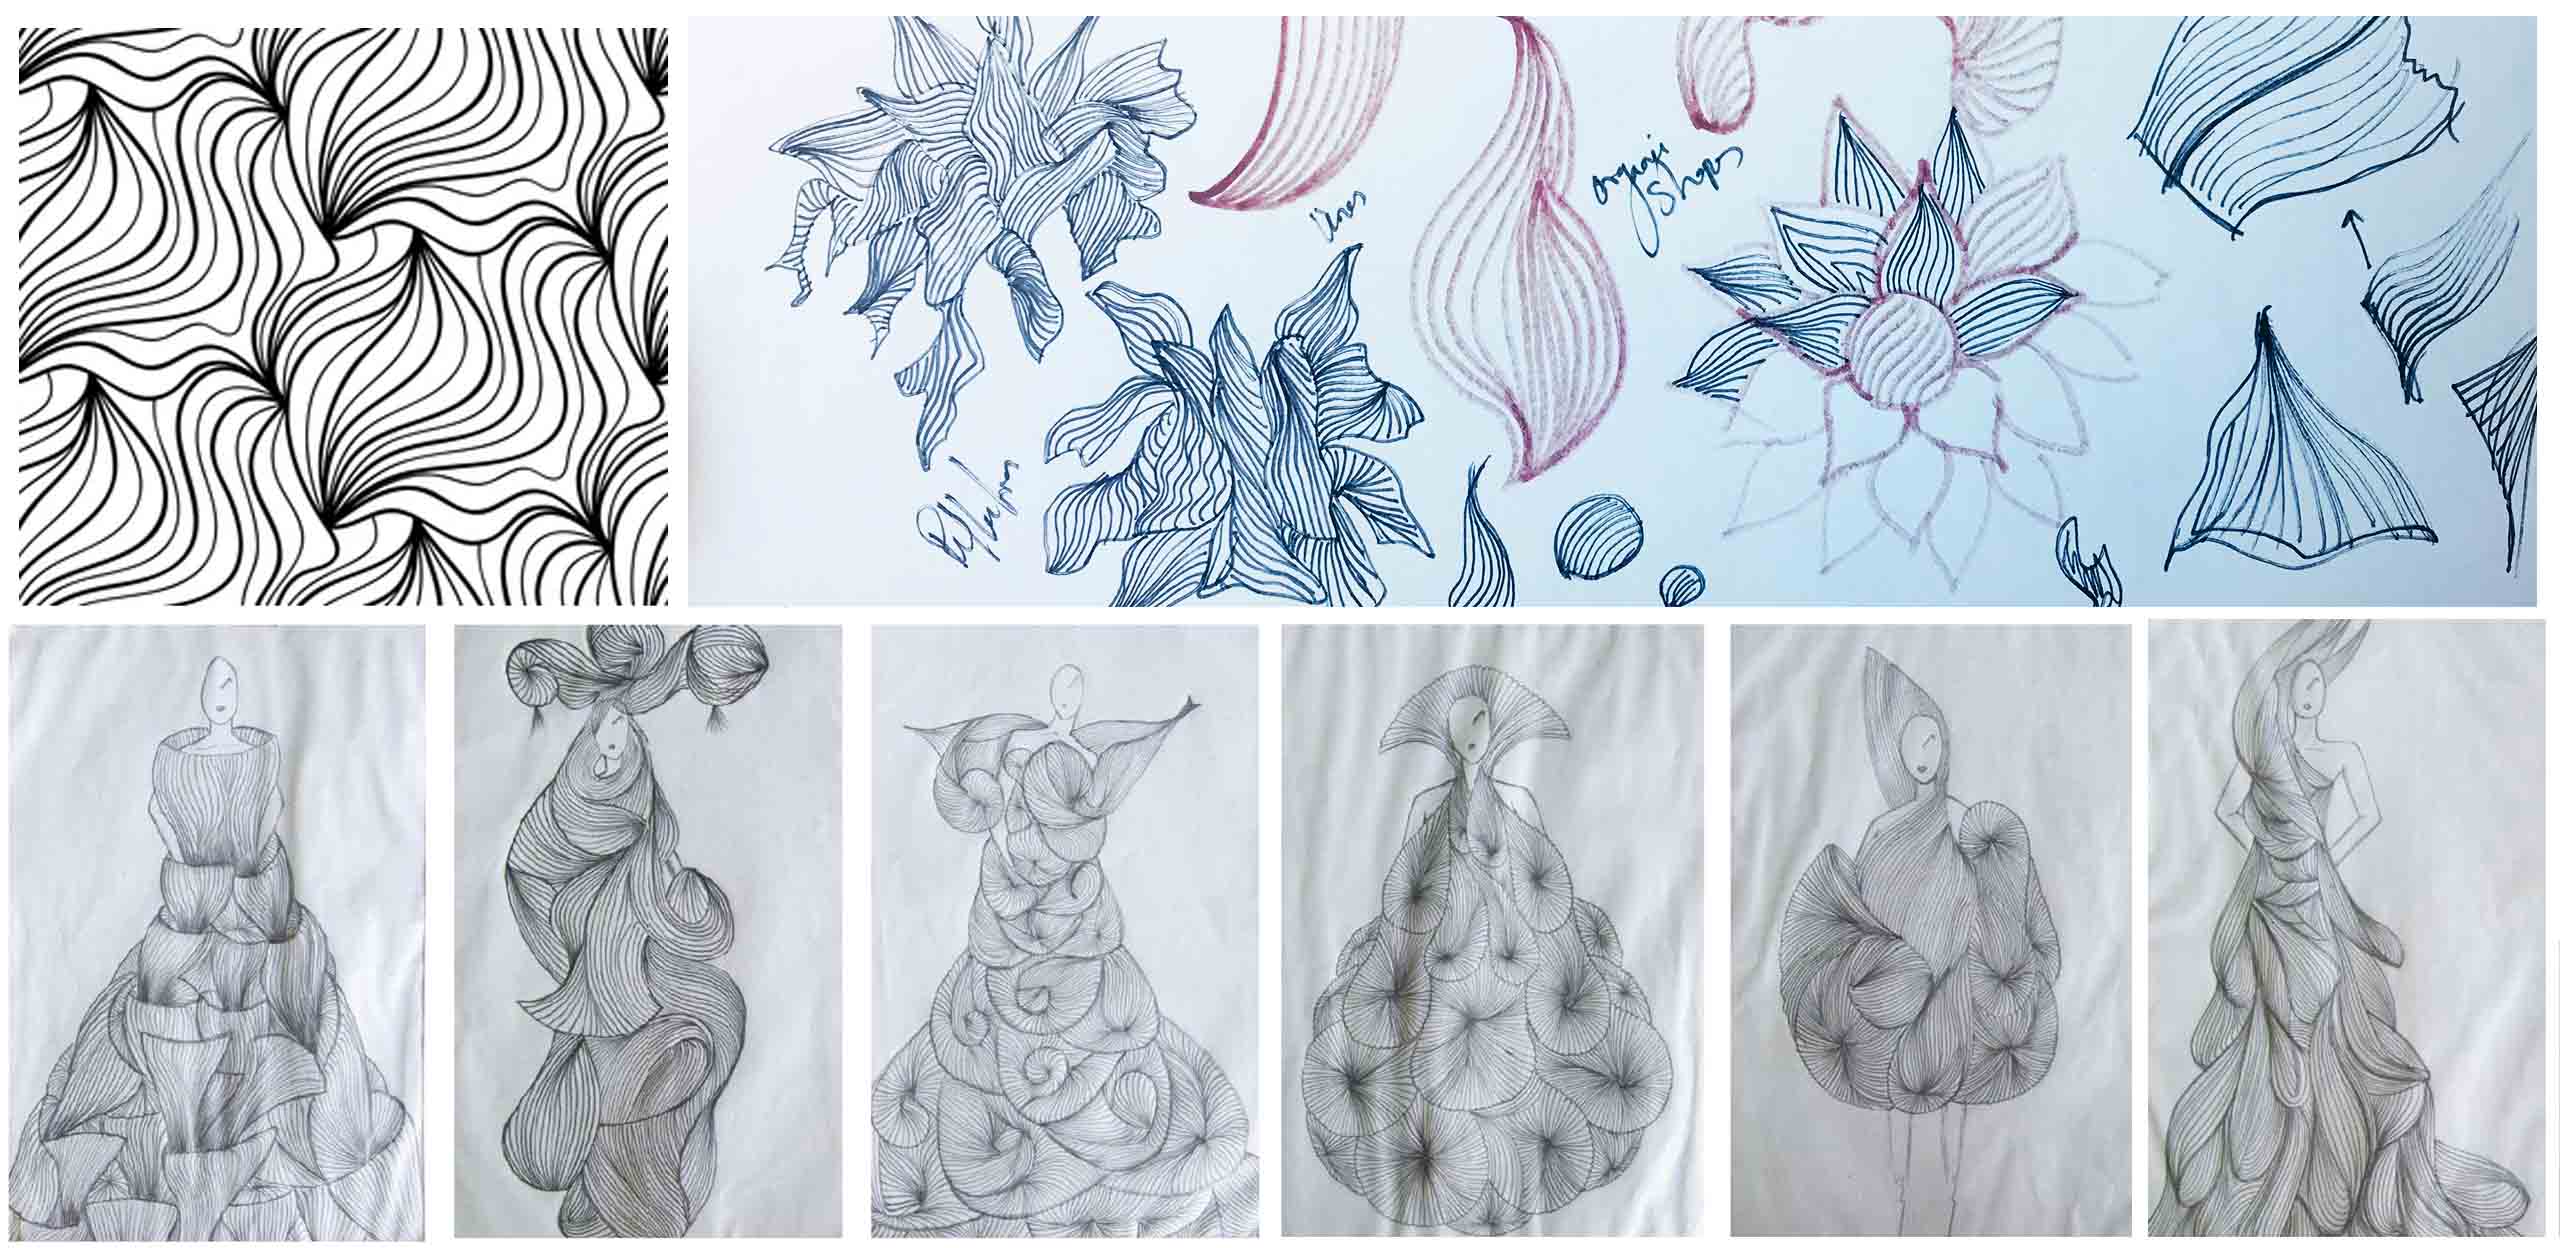
Design explorations-3
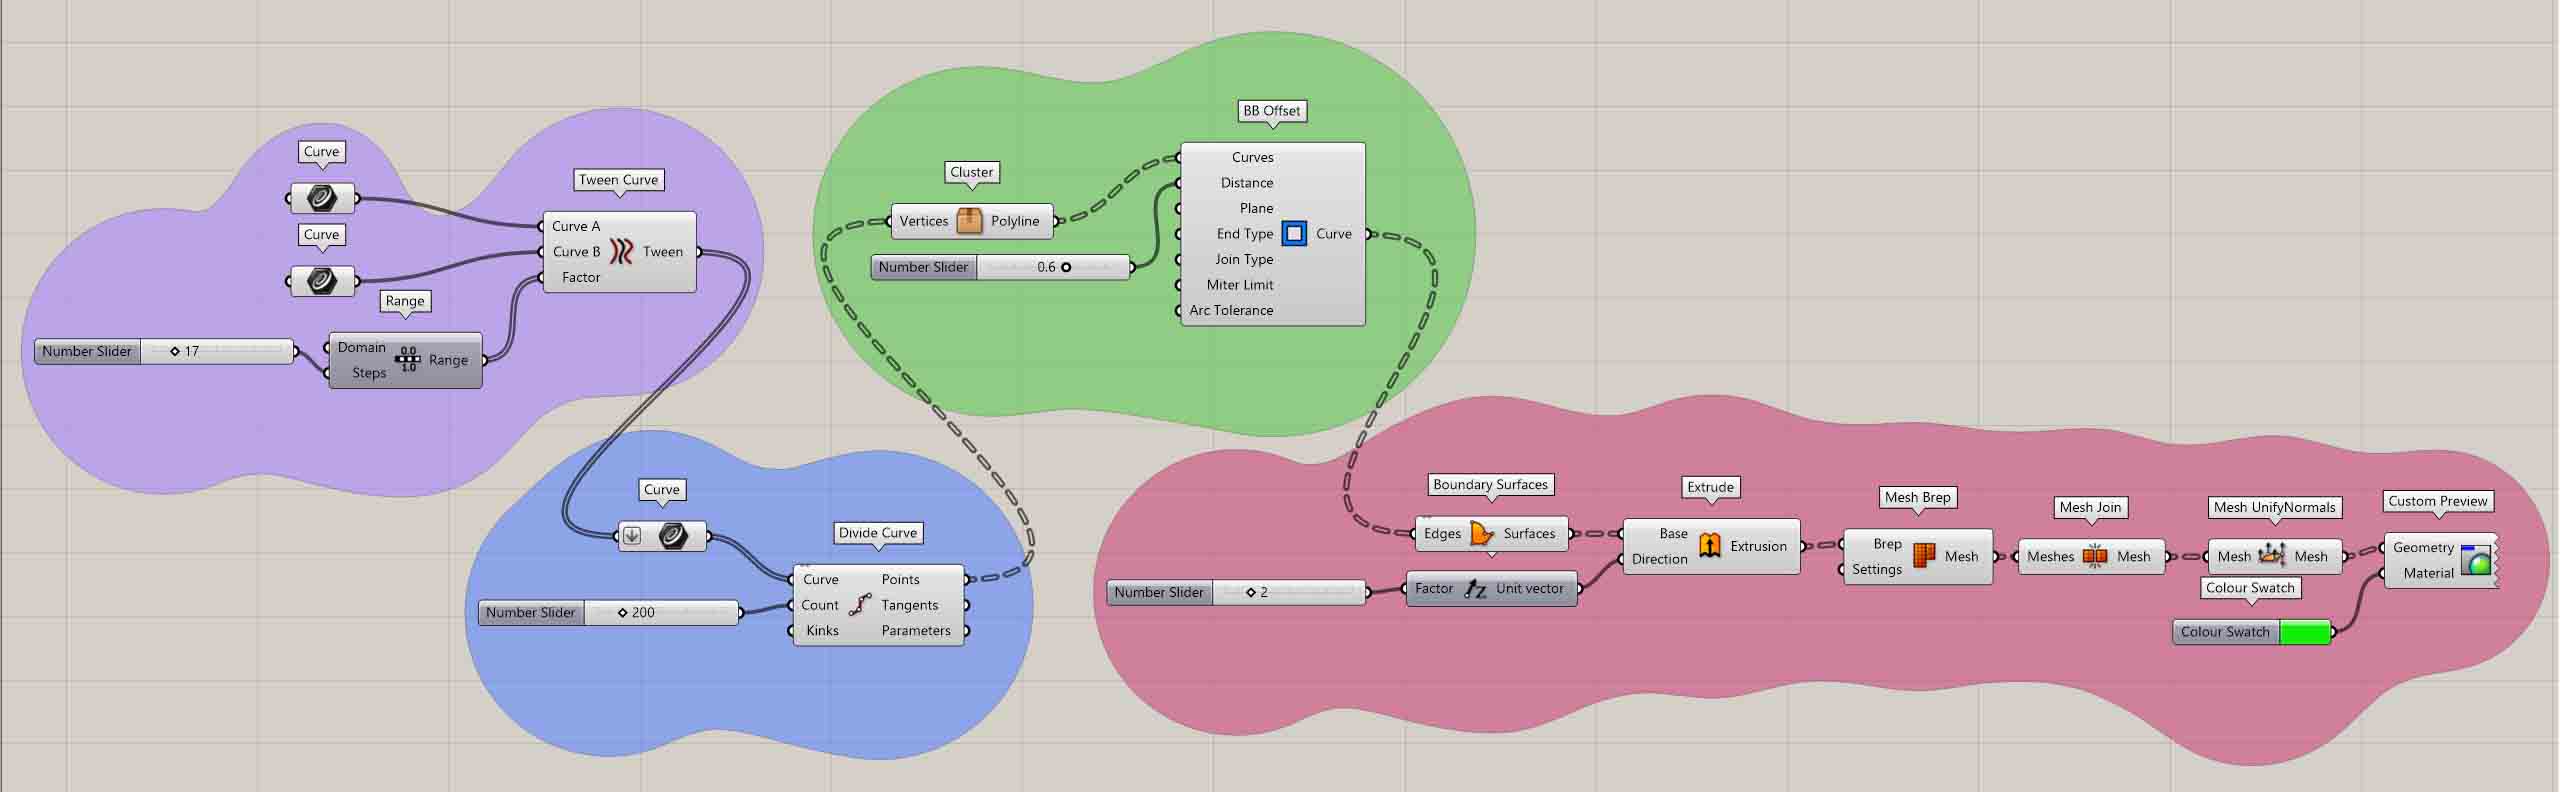
Lines
It was once my obsession to sketch every design with organic lines in order to create a look. In the picture below, you can see some of my old fashion sketches done with lines. Based on that inspiration, I created some simple designs using Rhino and Grasshopper.
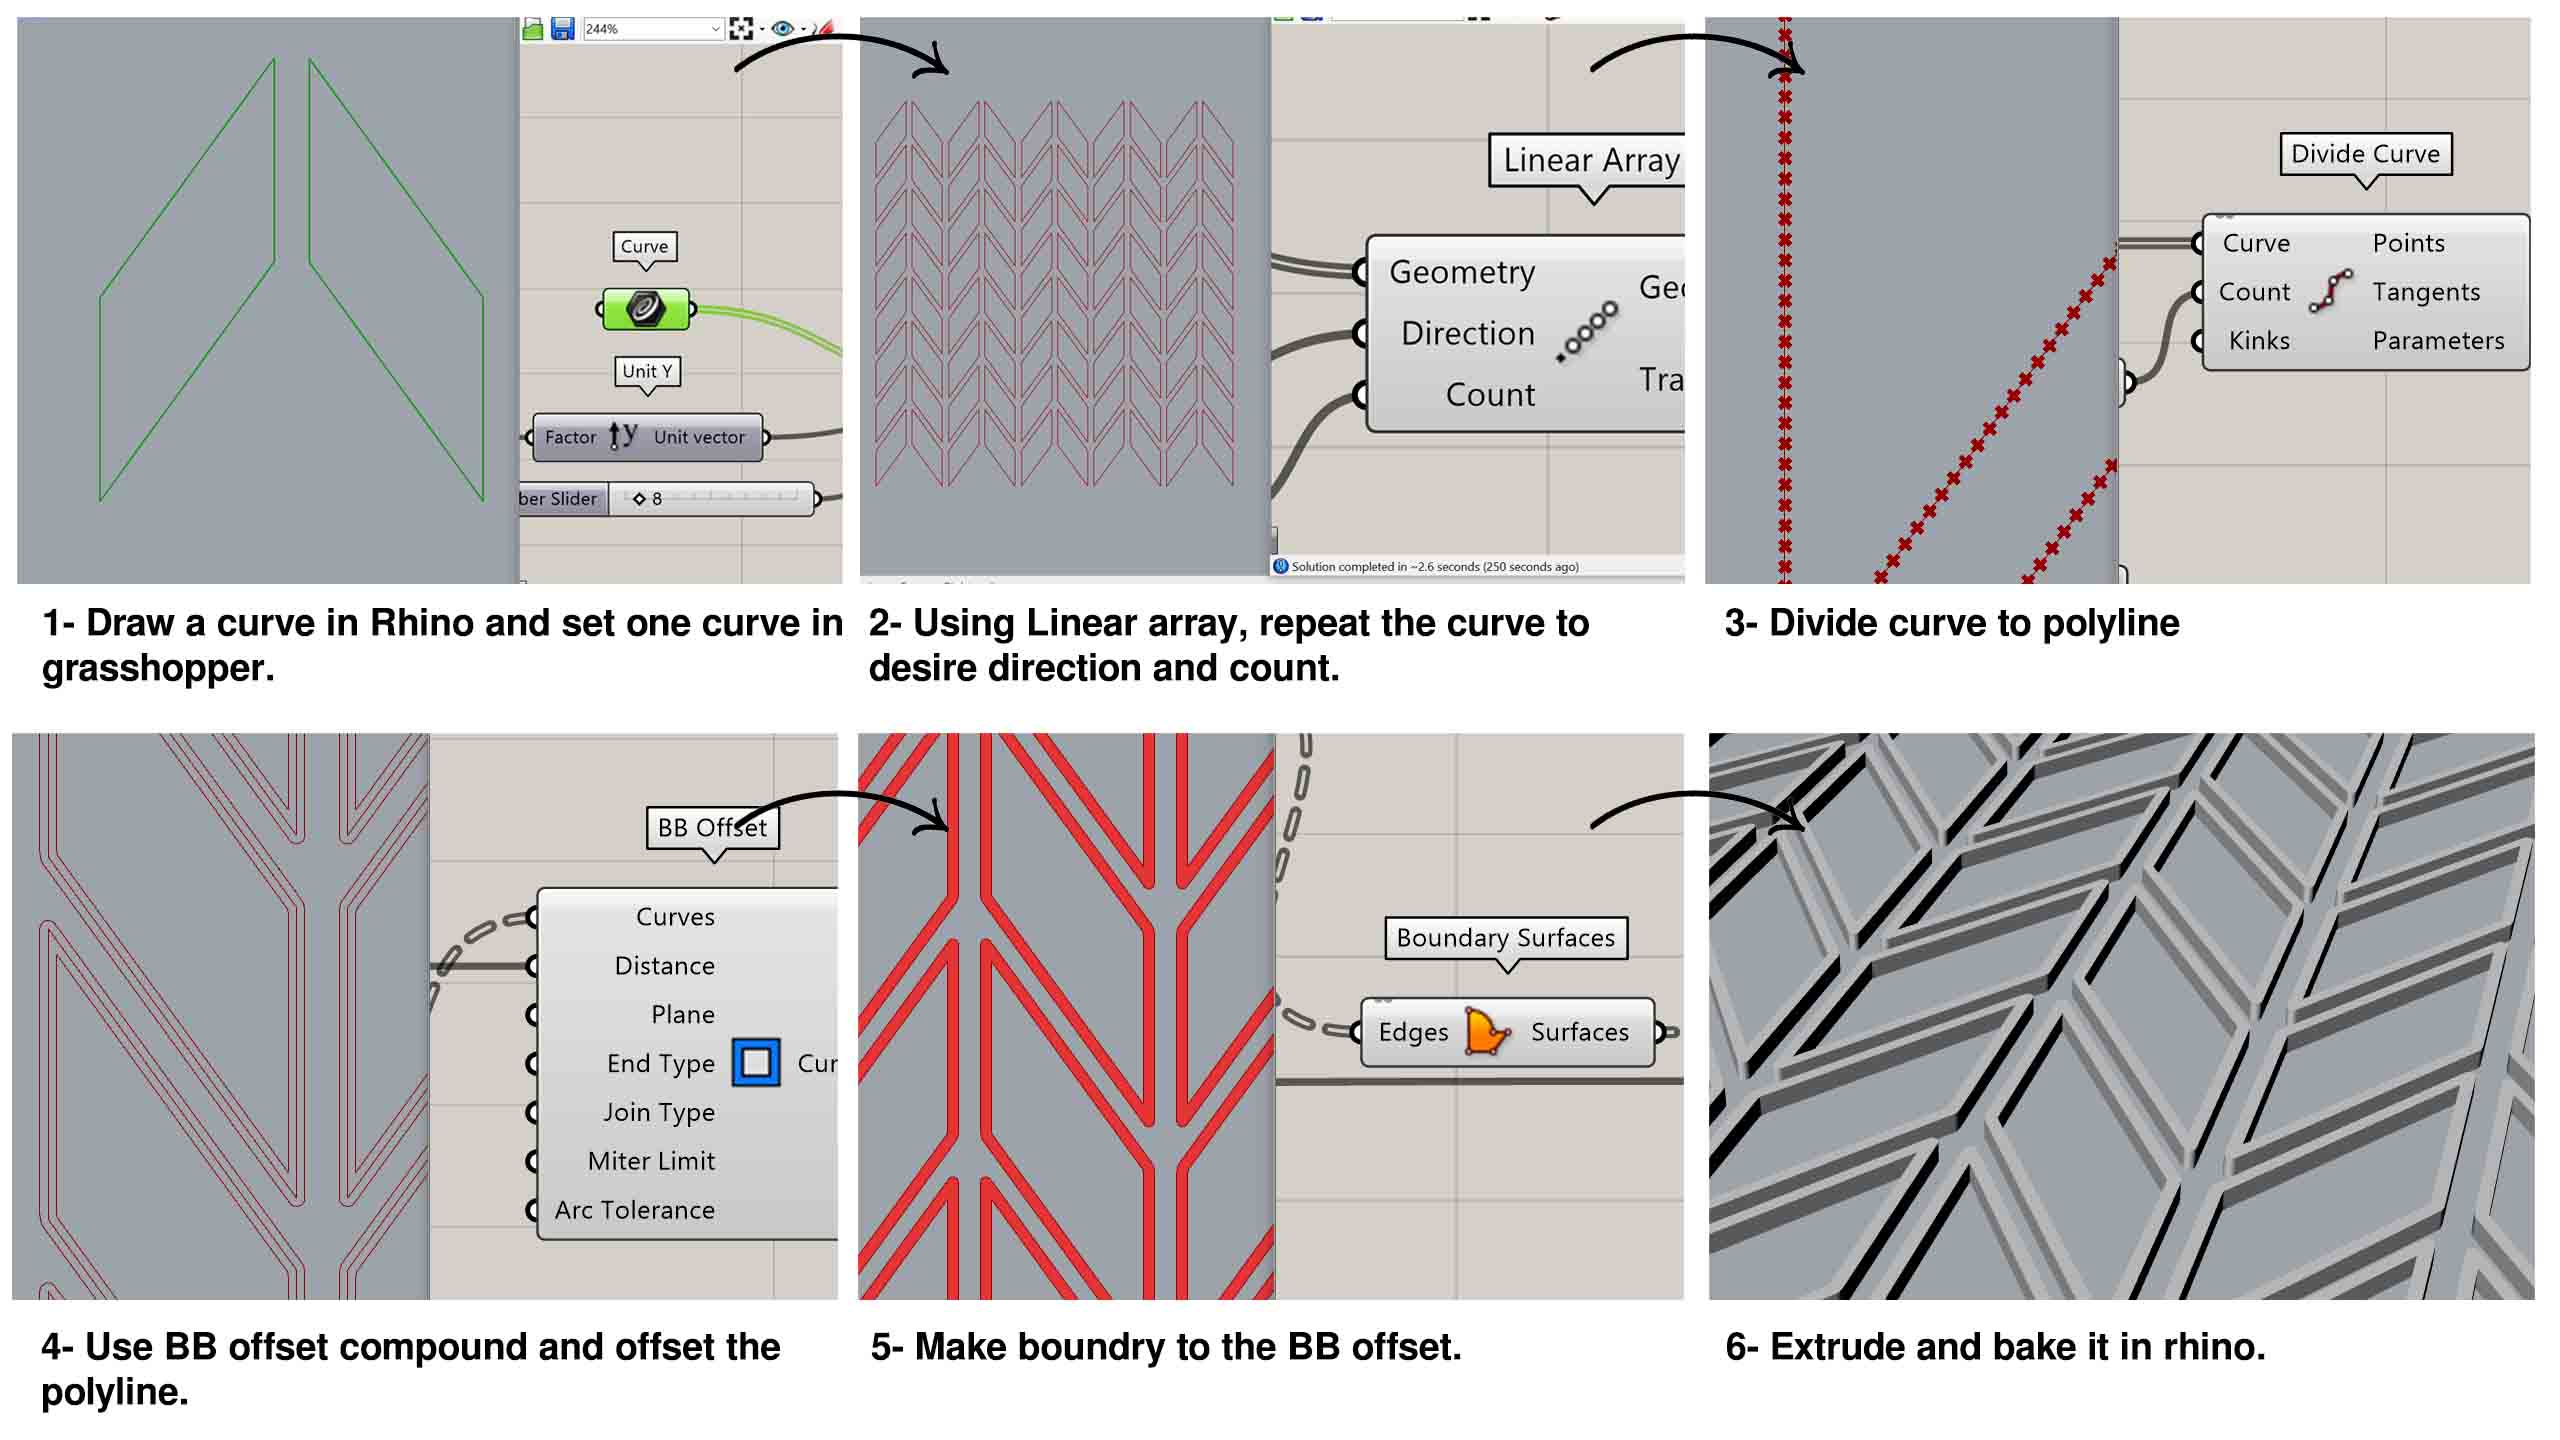
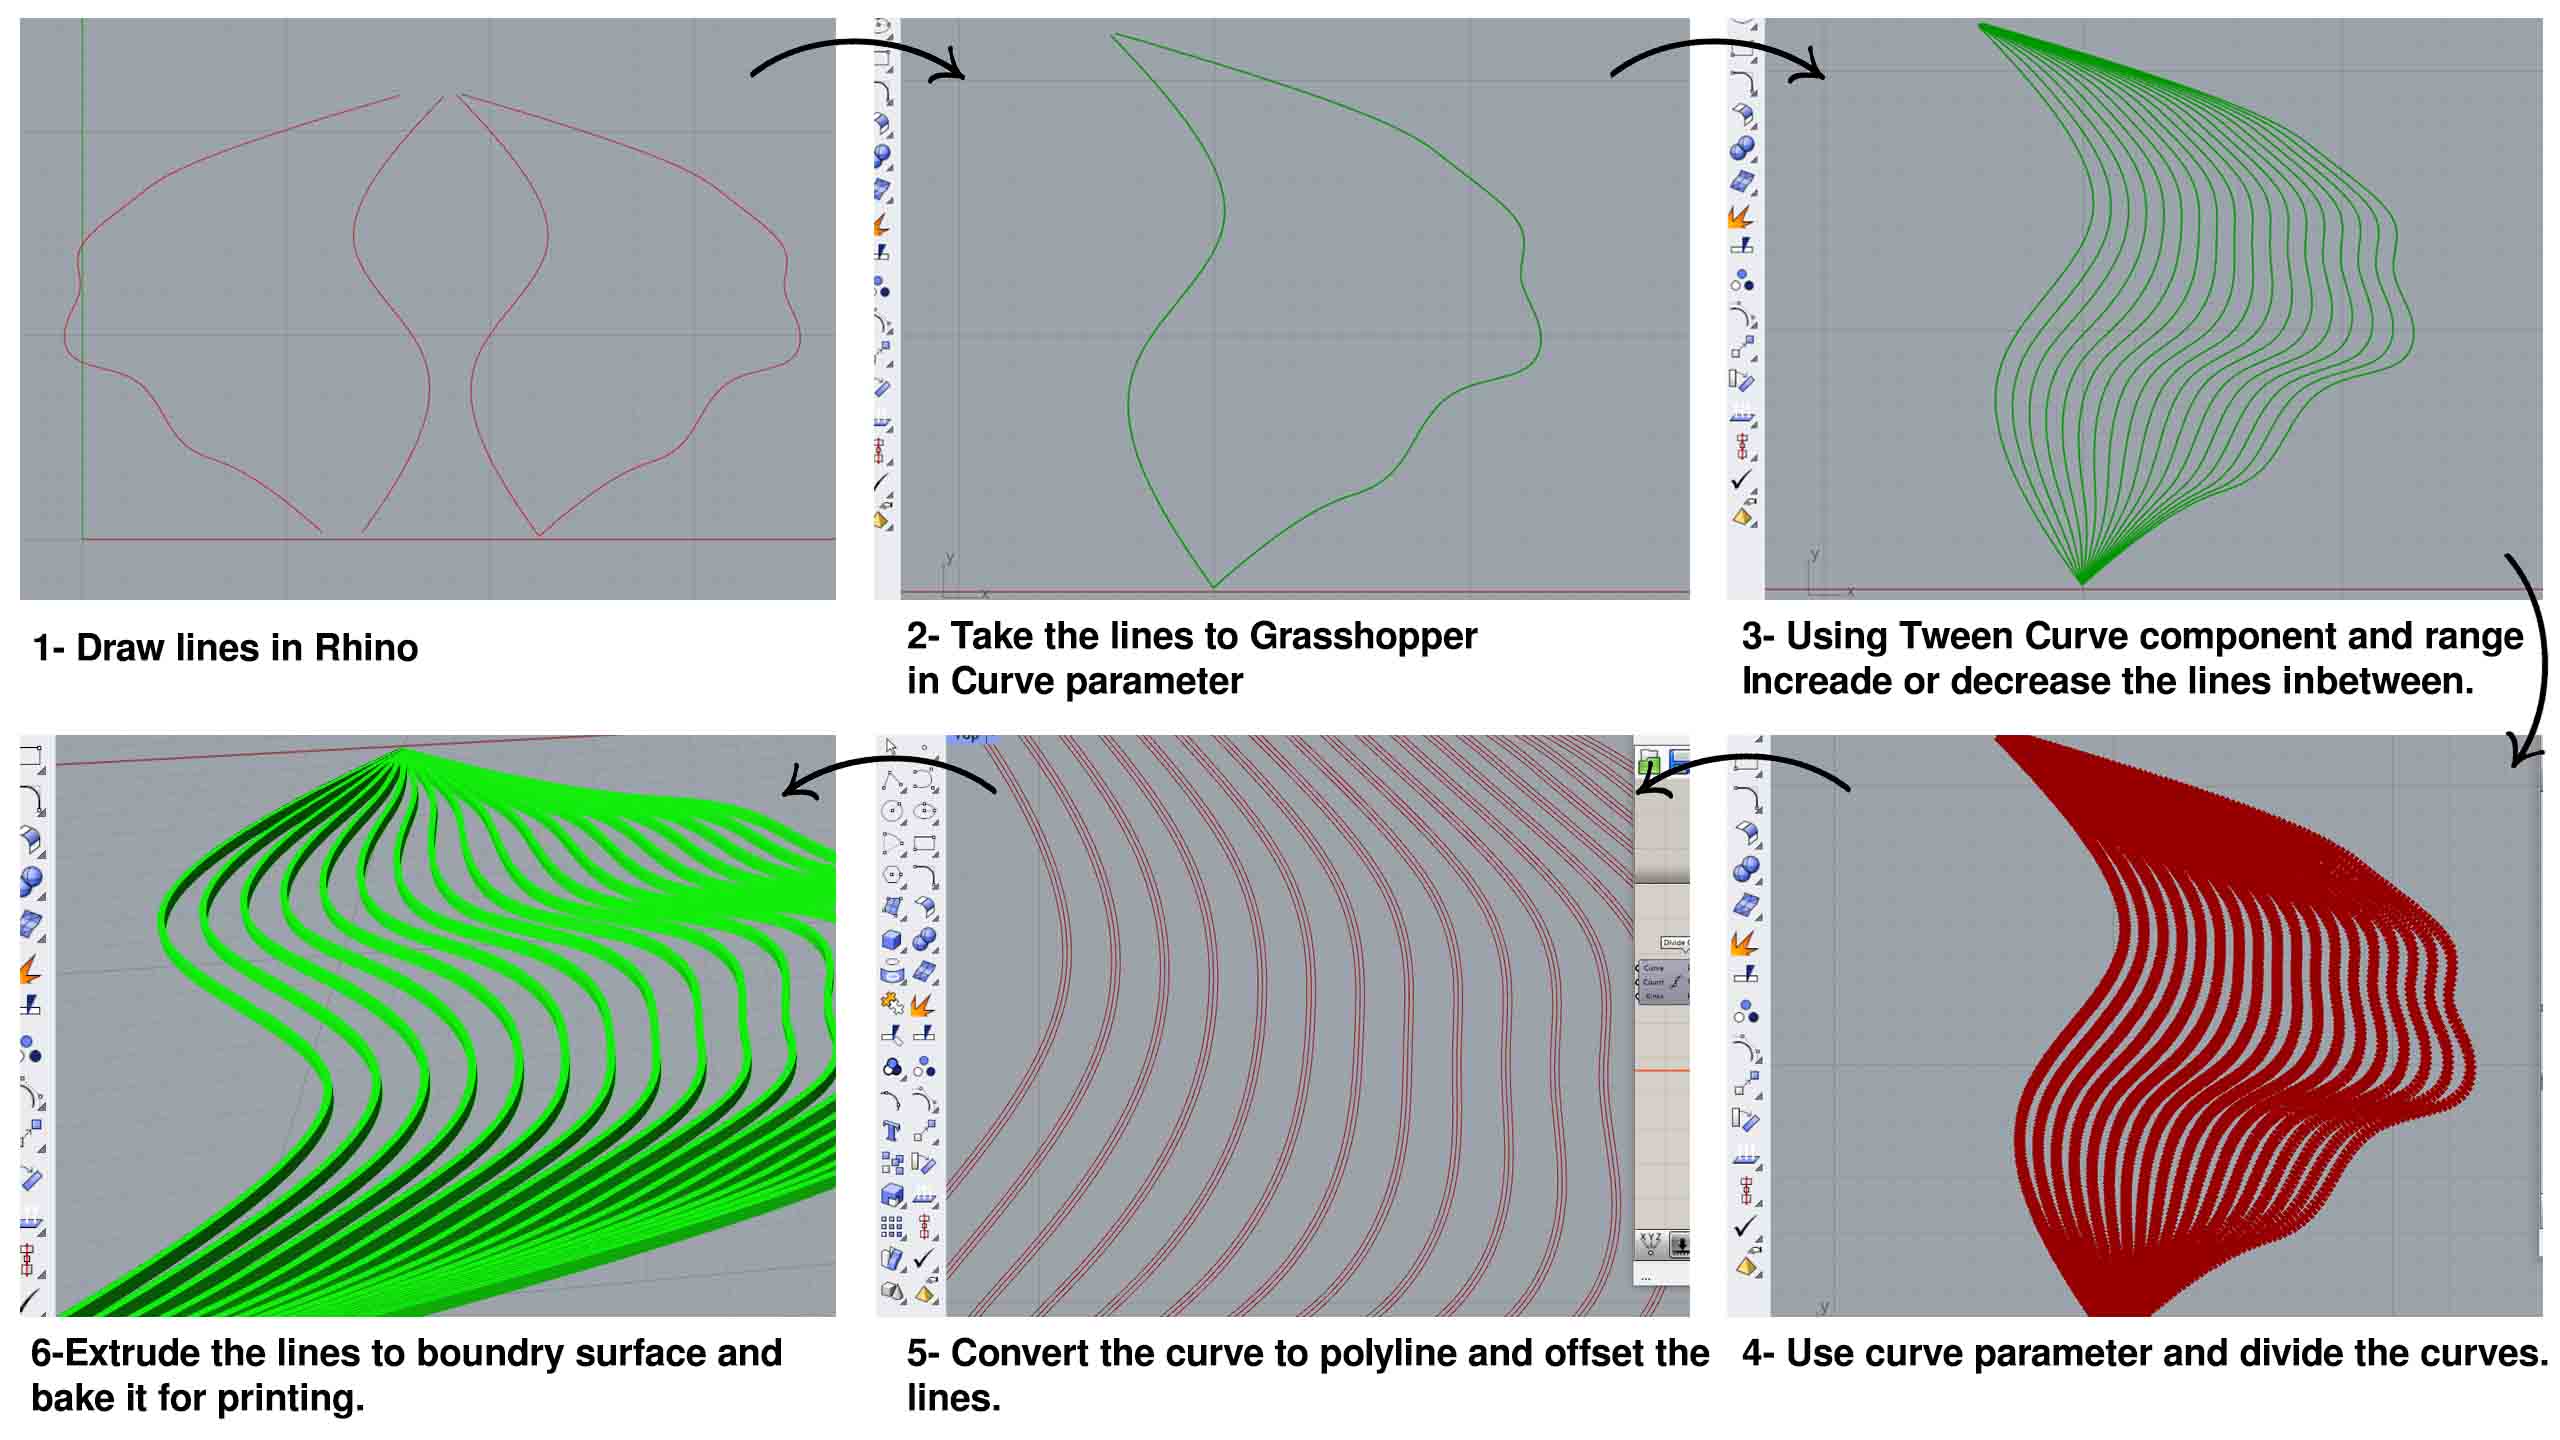
Design Generation
The below visuals show the step-by-step process for generating the designs.
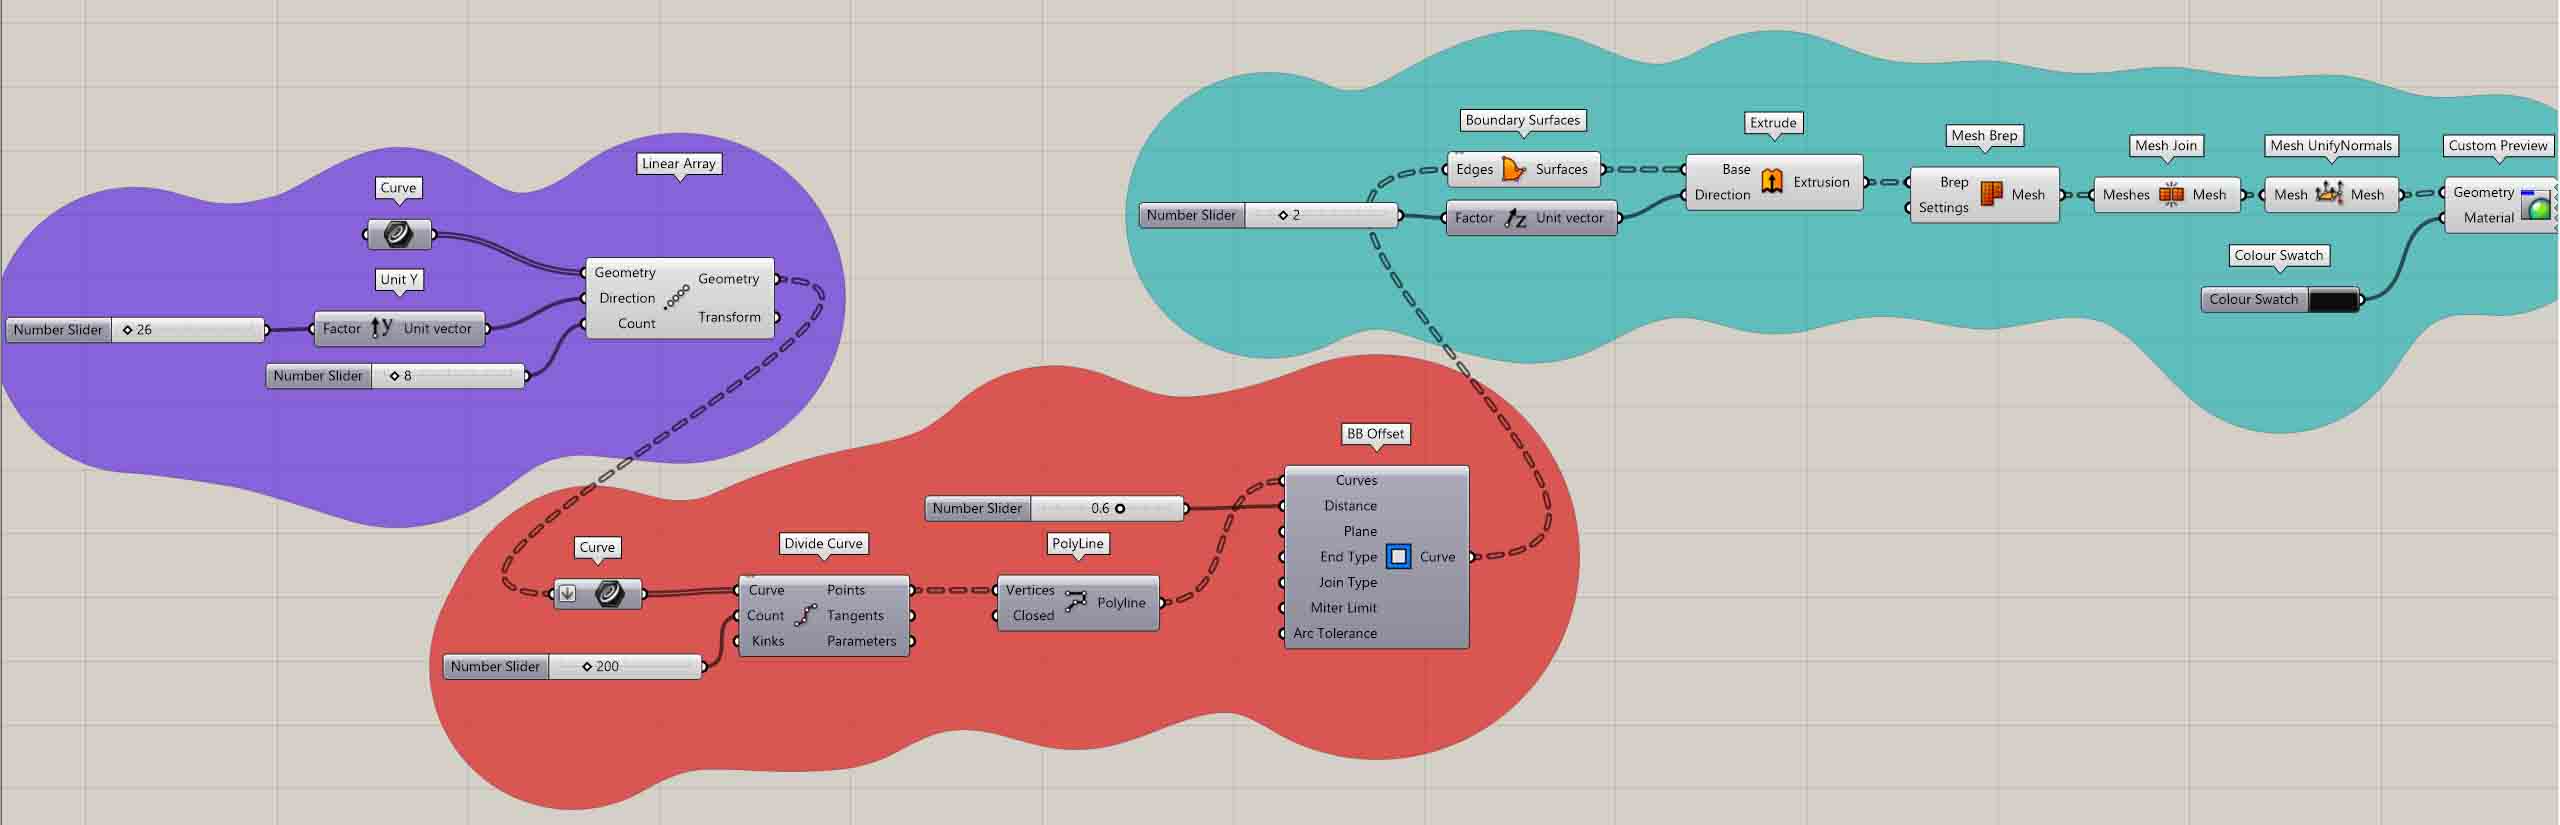
Grasshopper Script
Here is the Script Files you are welcome to download and explore.
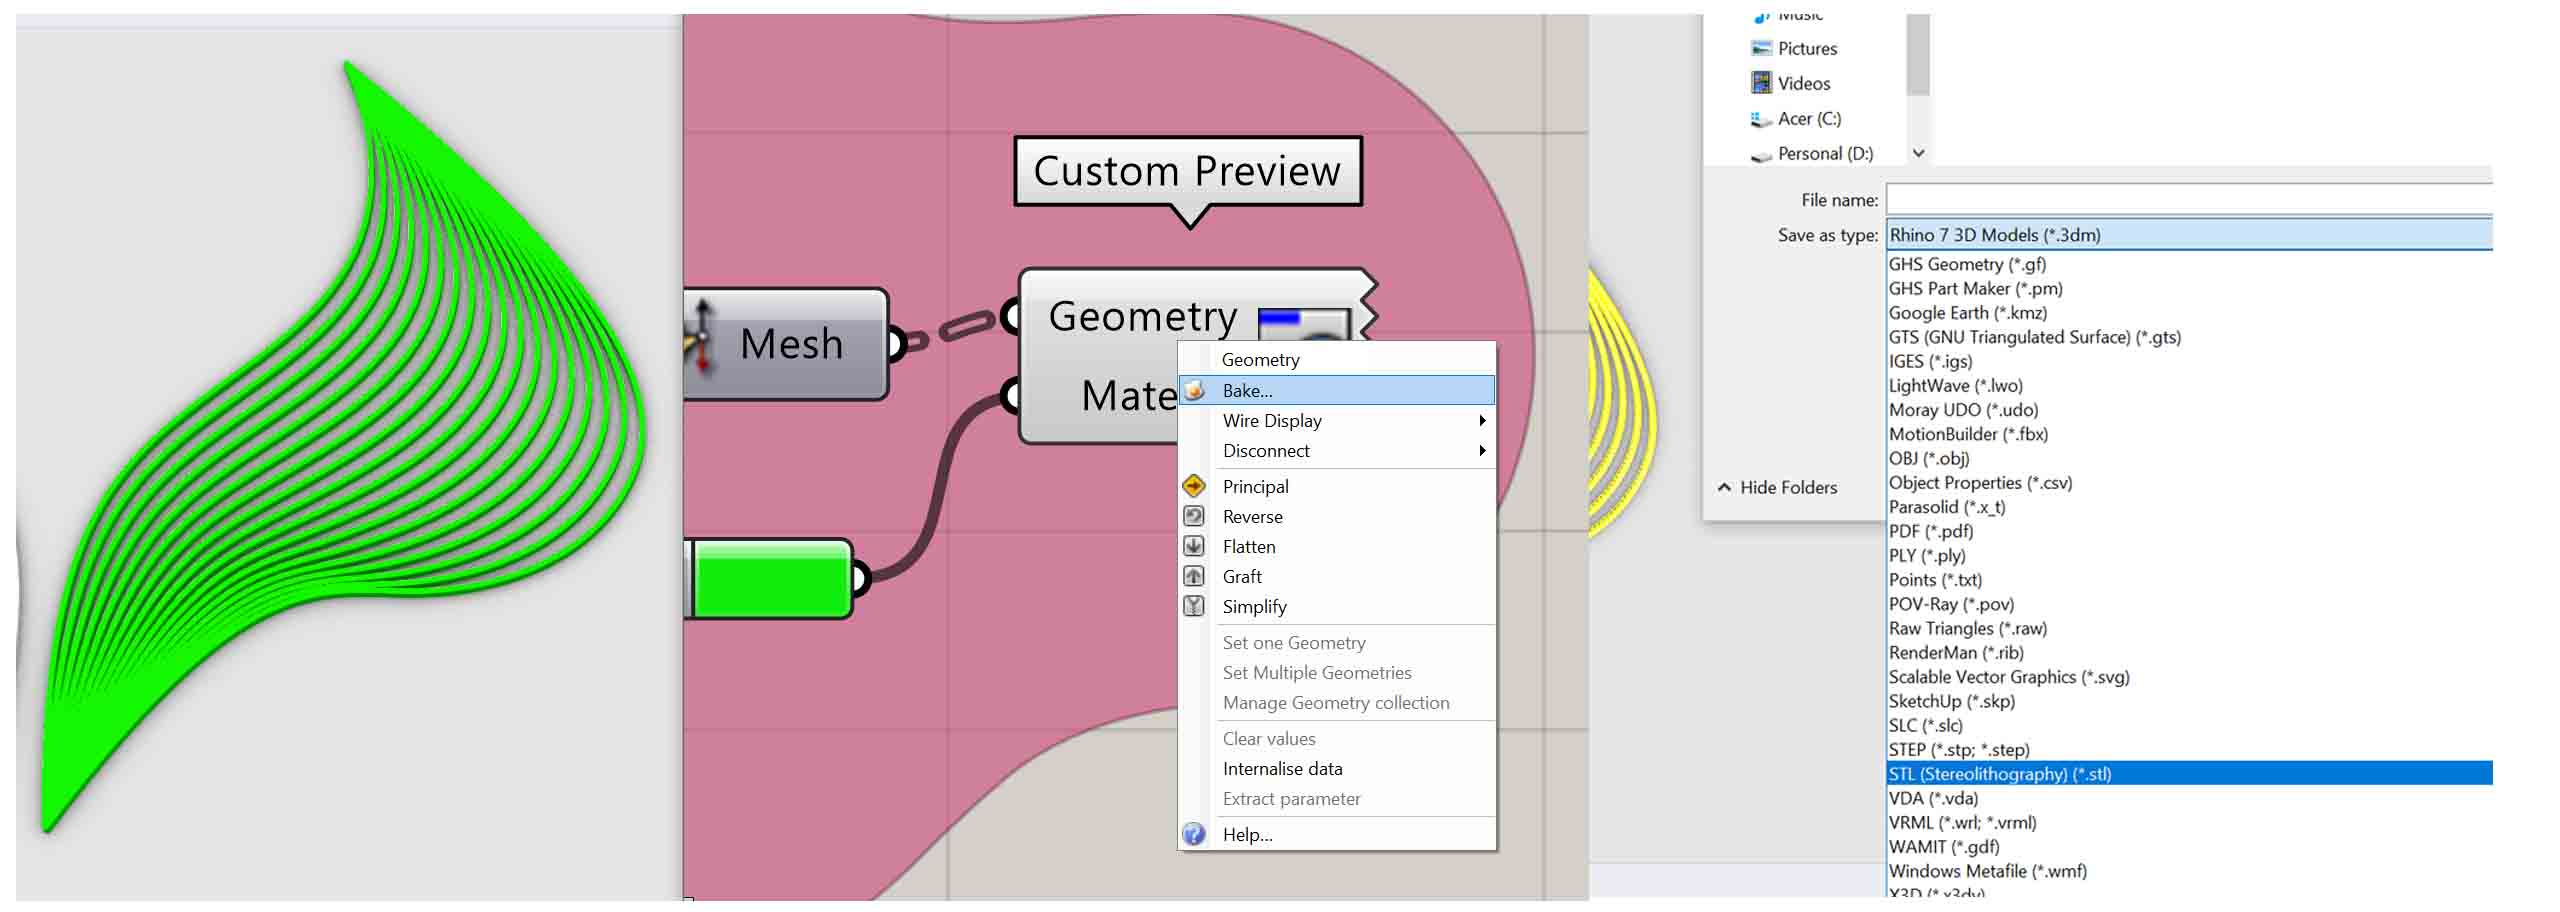
Baking and Exporting process
To bake from grasshopper to rhino- Select the file and right click to bake the object.
To Export the file from rhino- Select the object- Export selected- export as STL.
Slicing for 3D Printing
Once the design is baked to rhino, you can save it as obj. or stl file.
Here you can find the print settings and interface about the Cura software.
Software used: Ultimaker Cura
3D Printer: Creality CR-1055
Material used: TPU
Nozzle Size: 1.0 mm
To print one part It takes 16 minutes and material usage is 7g
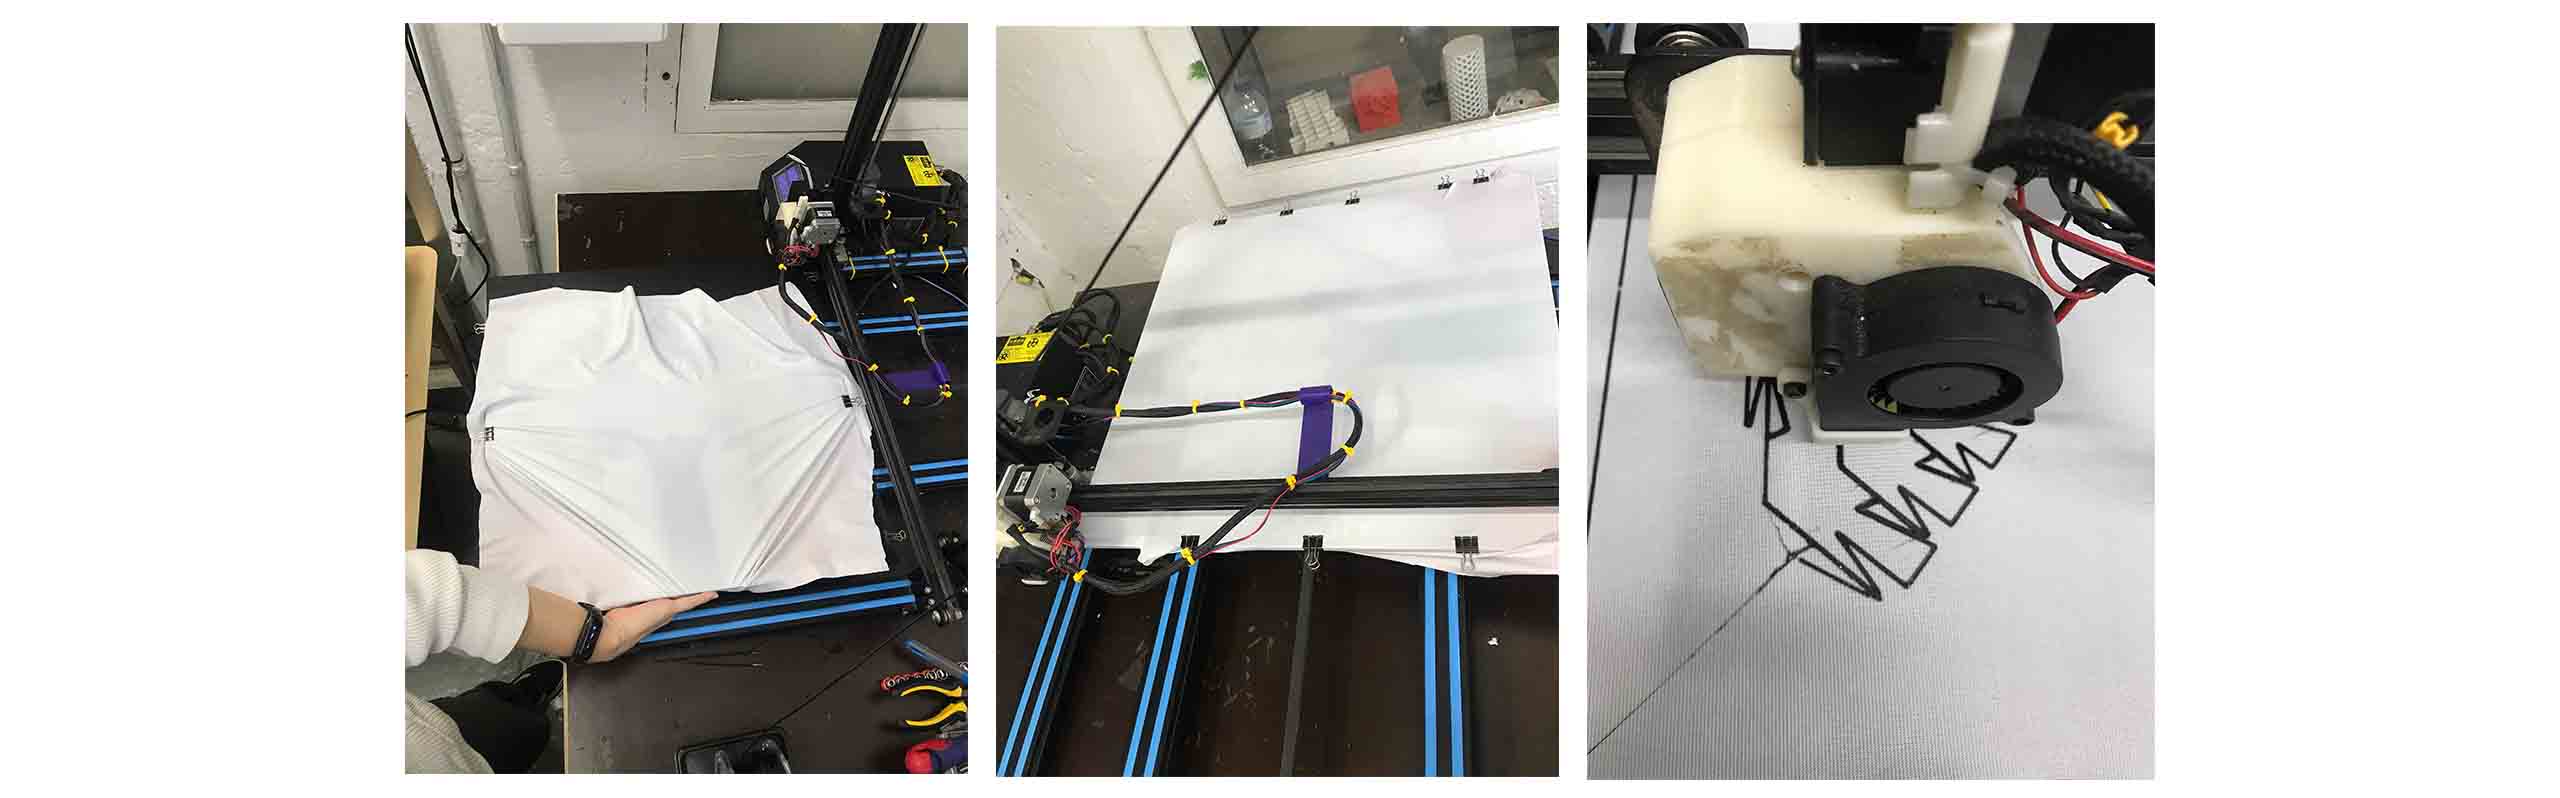
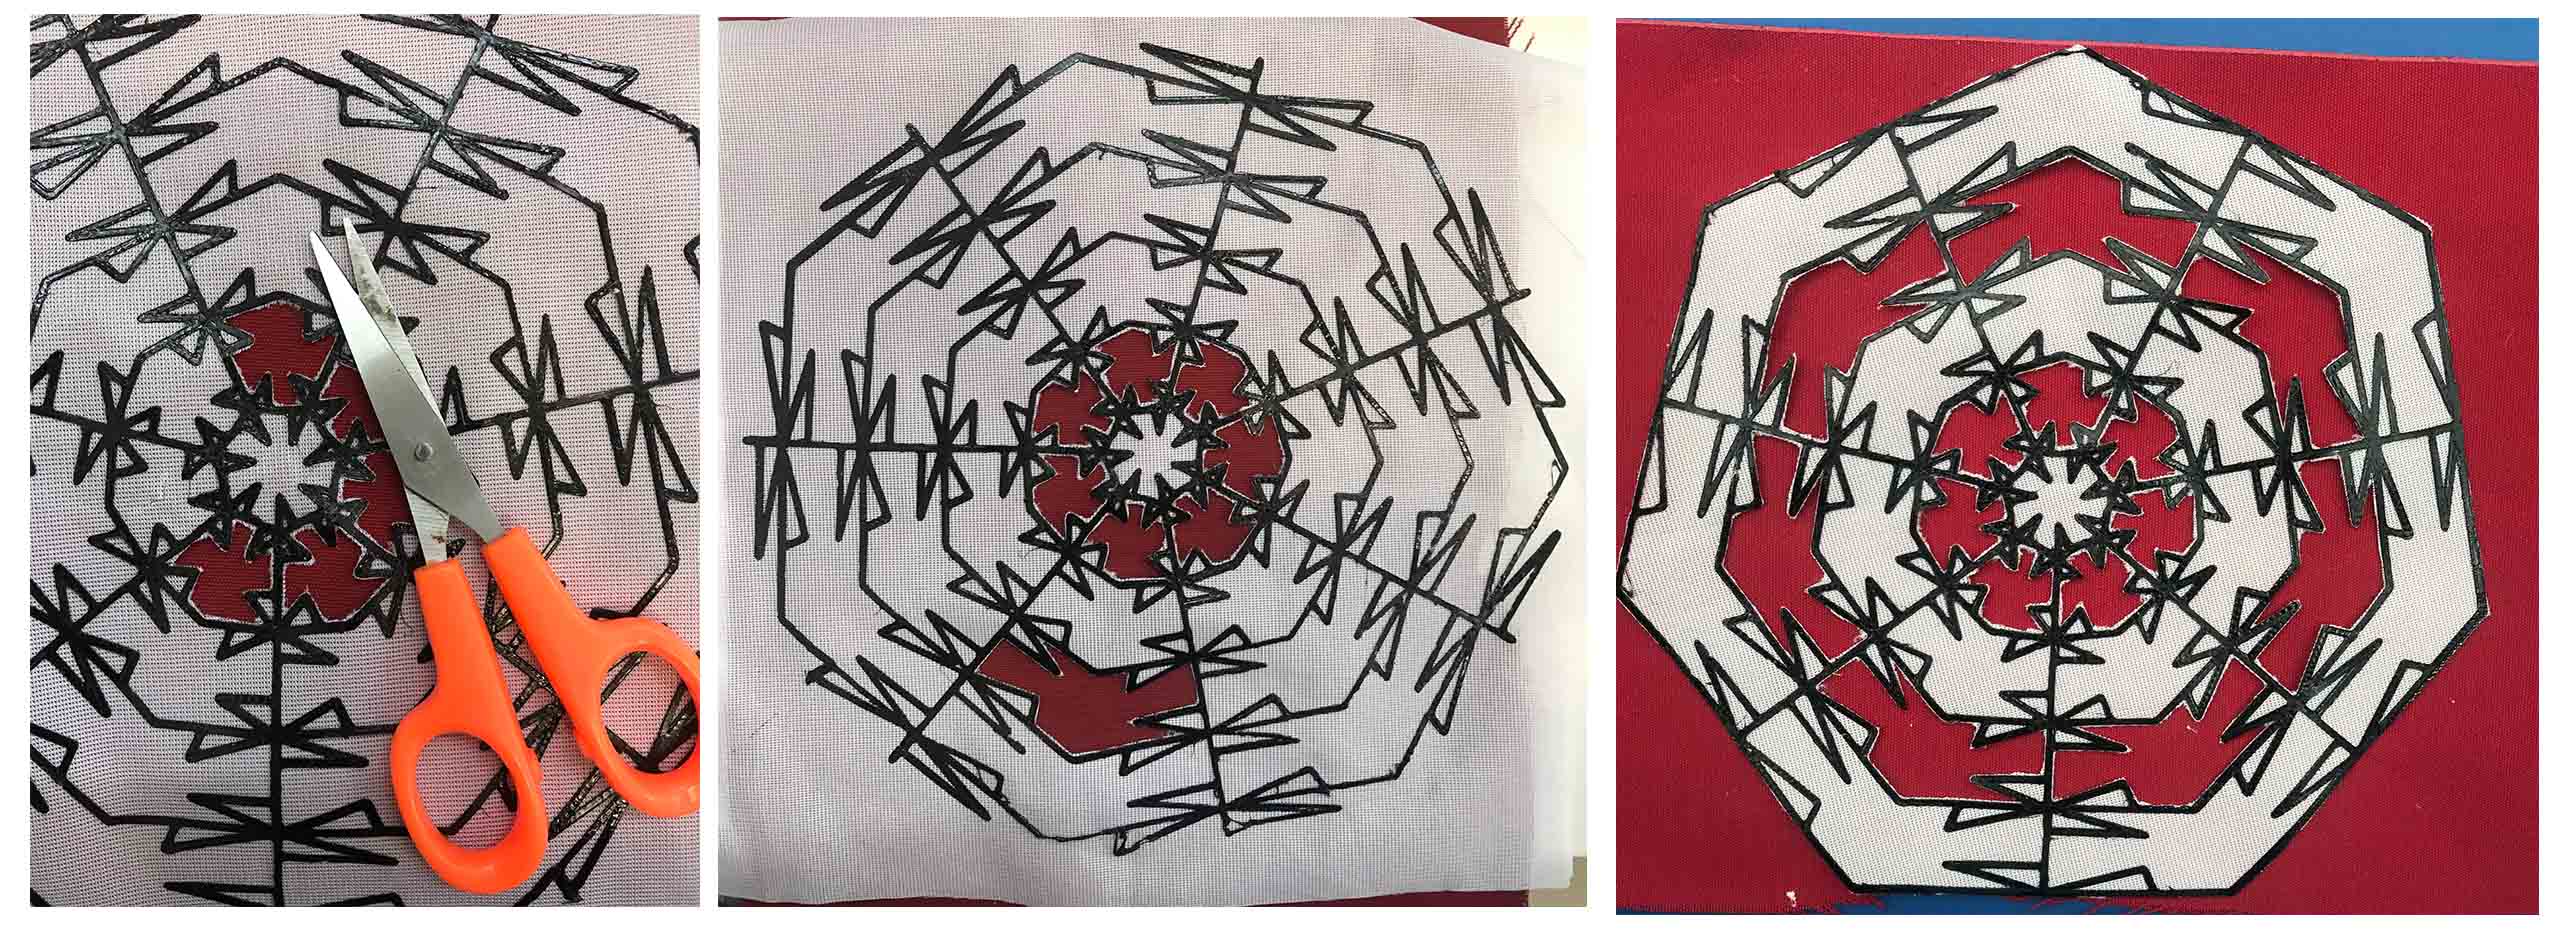
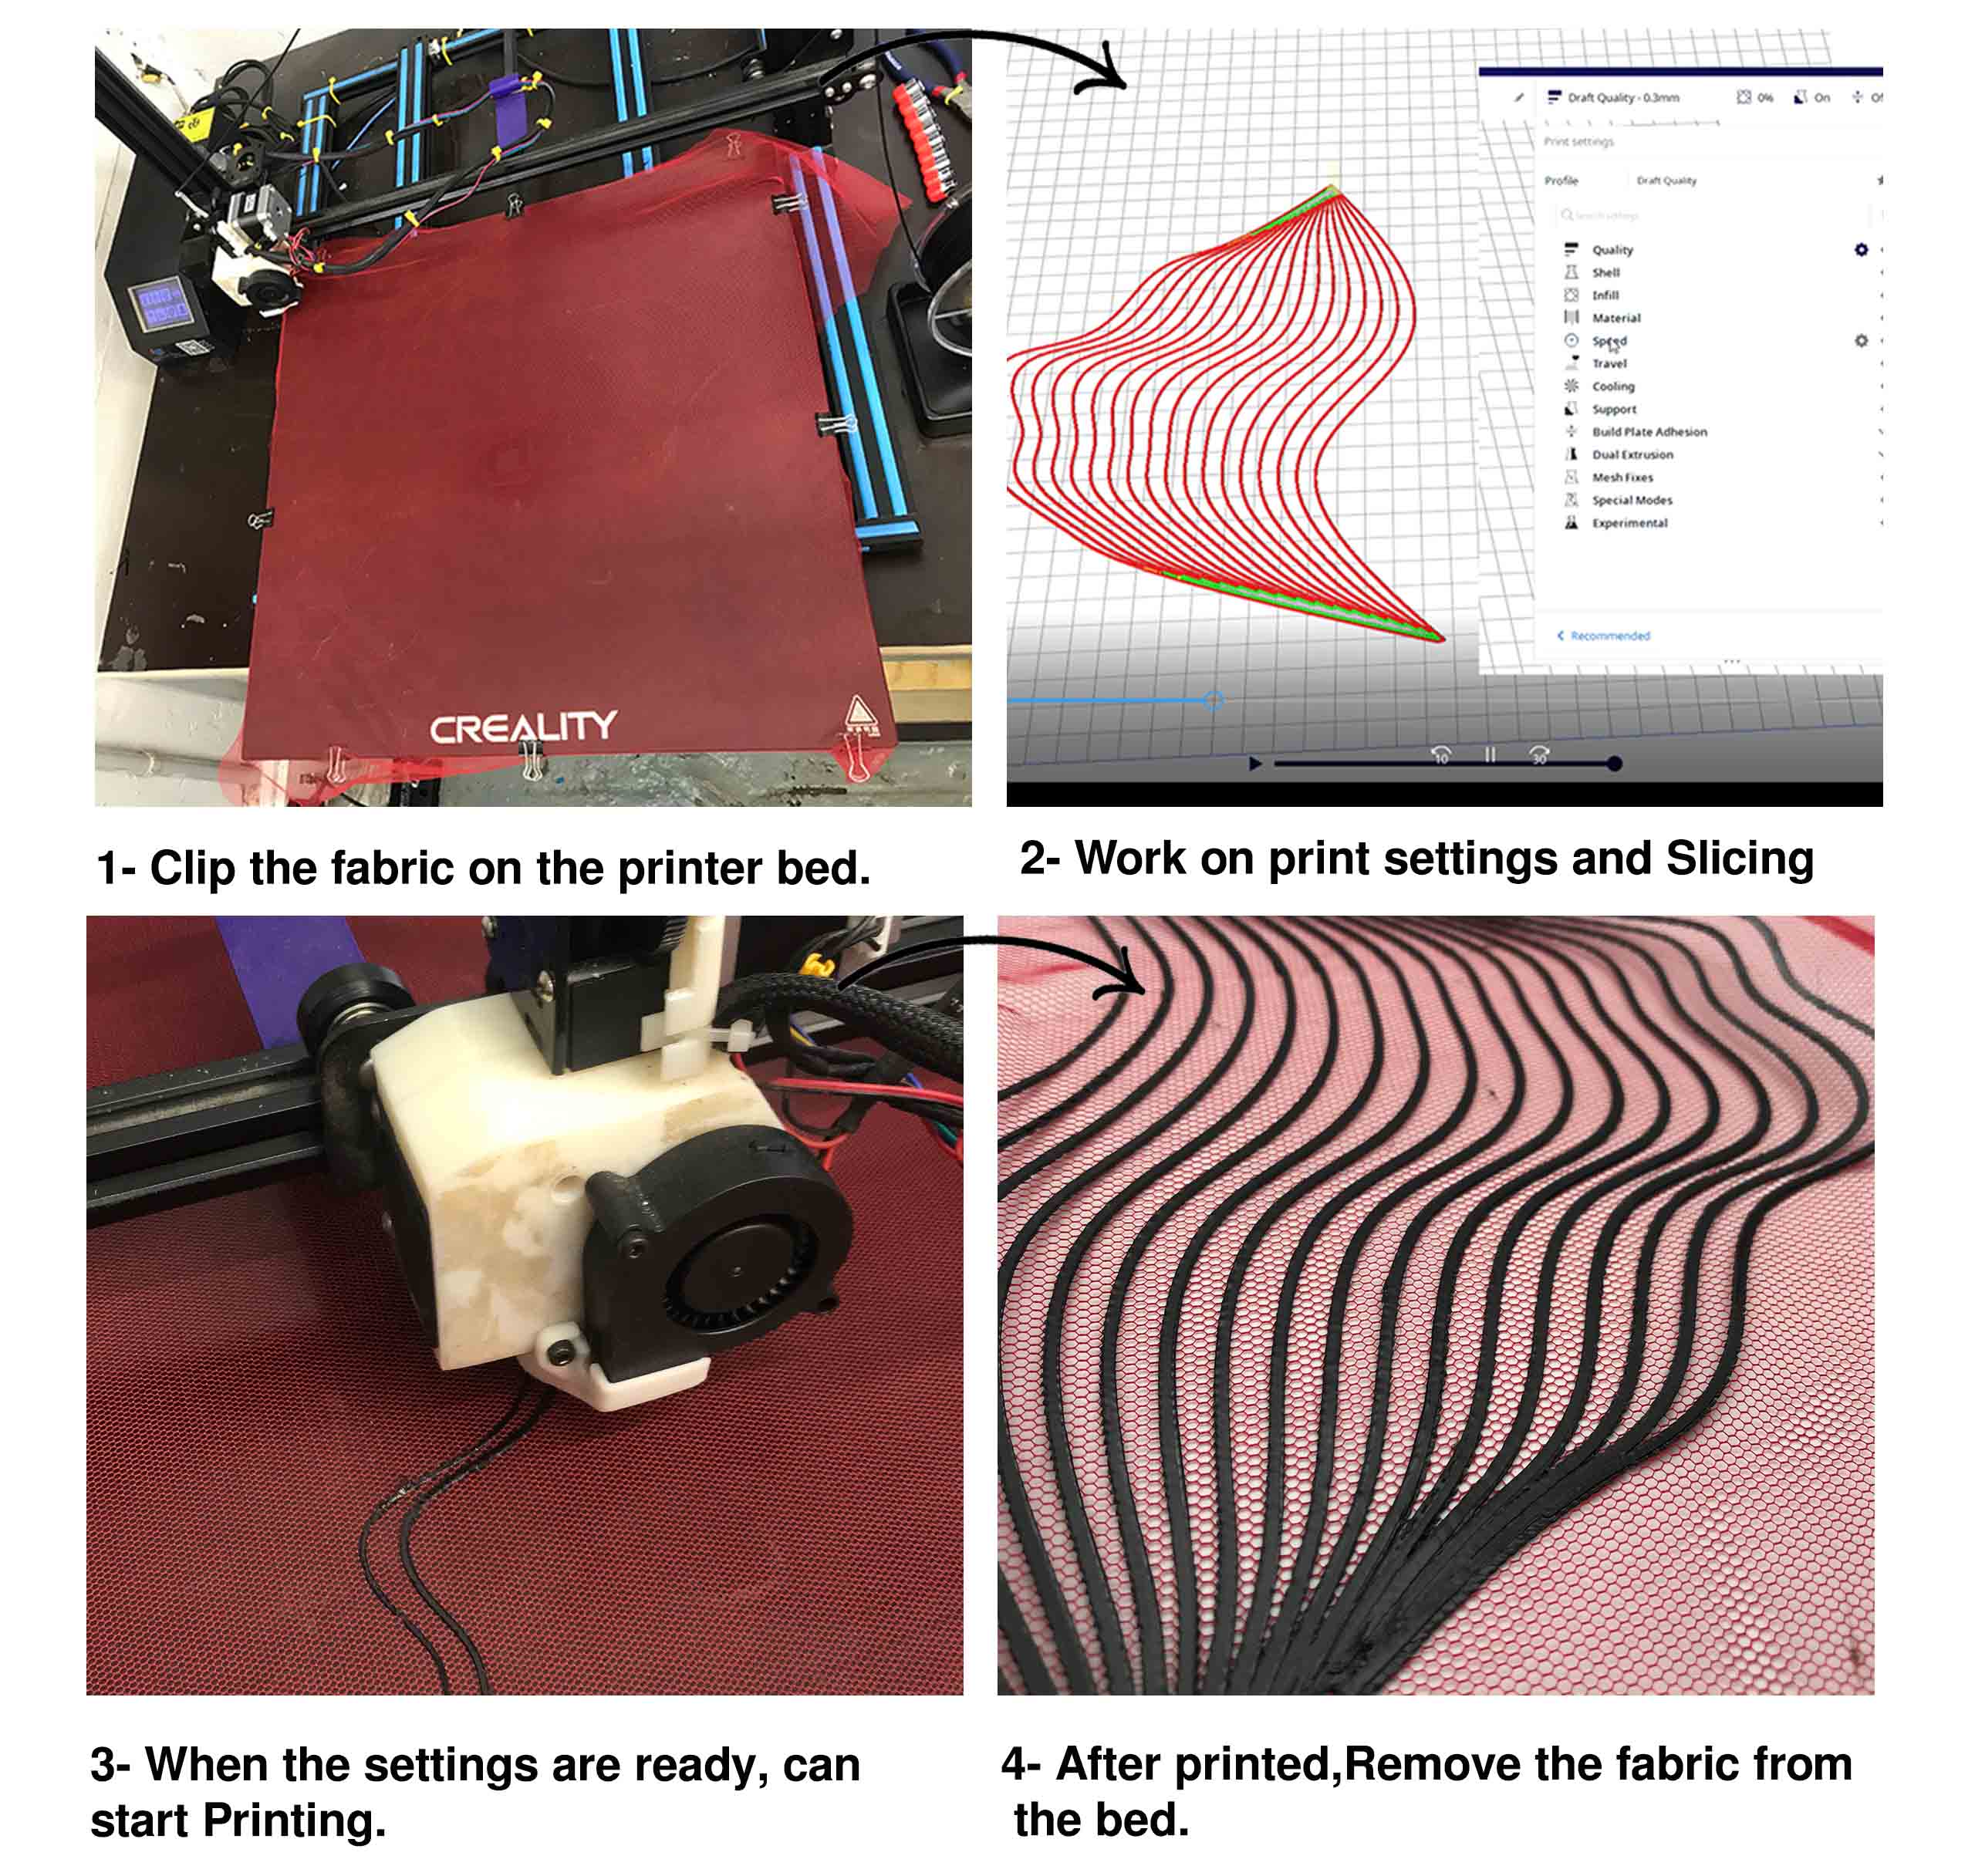
Lines 3D Printing
To print Lines explorations, I used red poly mesh fabric and PLA Black material.
It was difficult to print with the settings at first, but Ana helped us change the layer and retraction settings, and then the print worked.
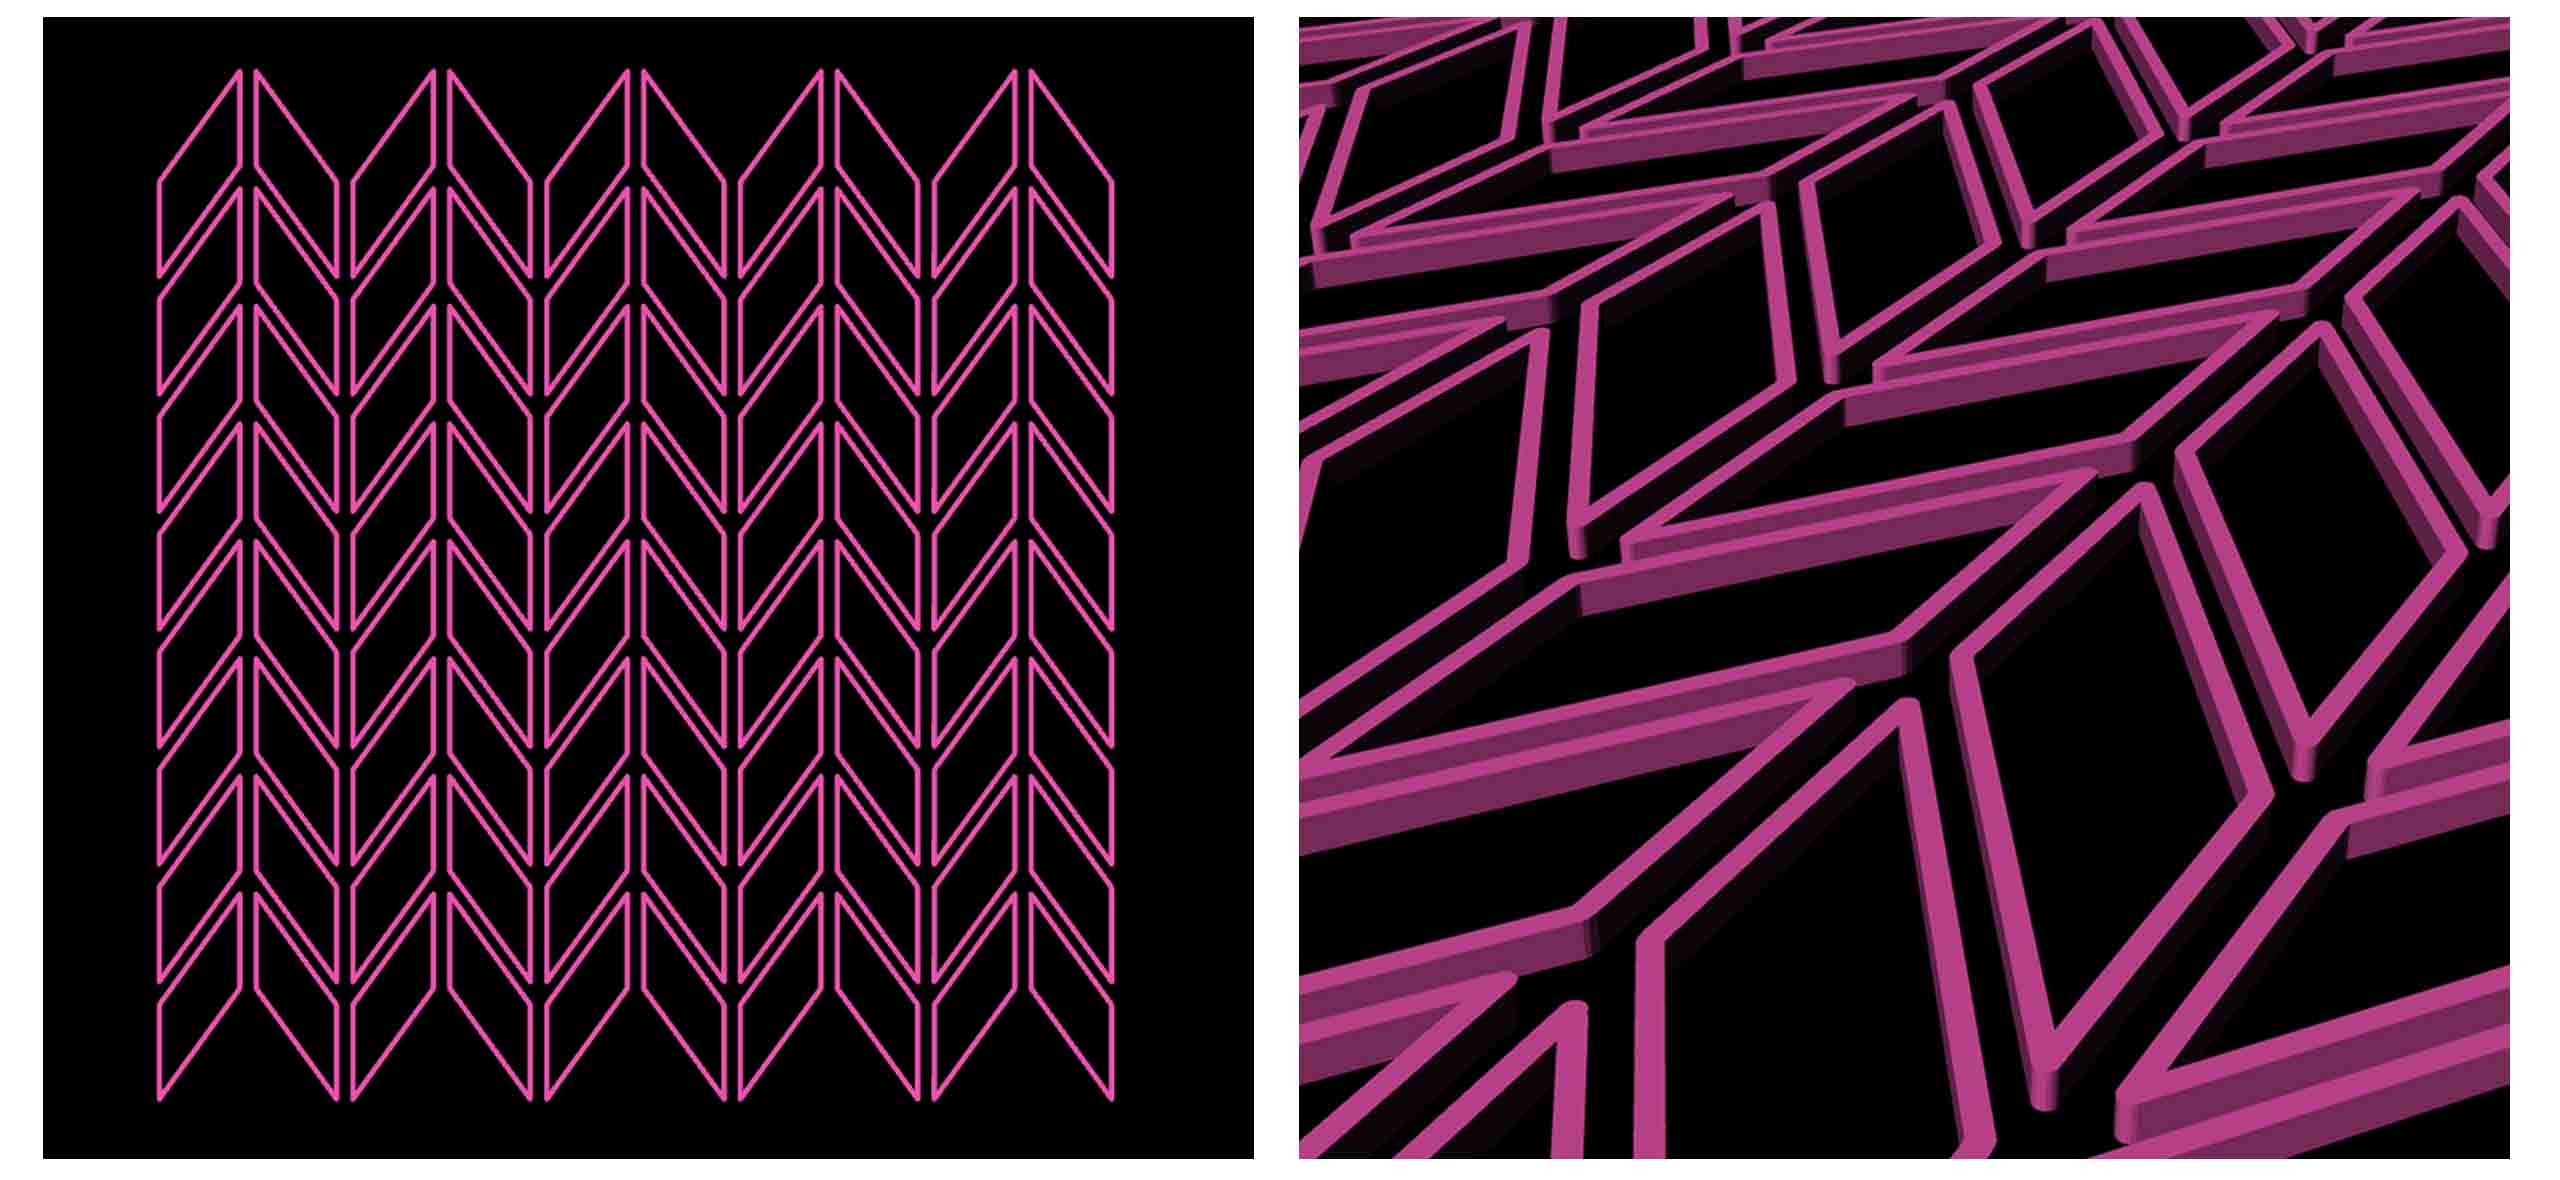
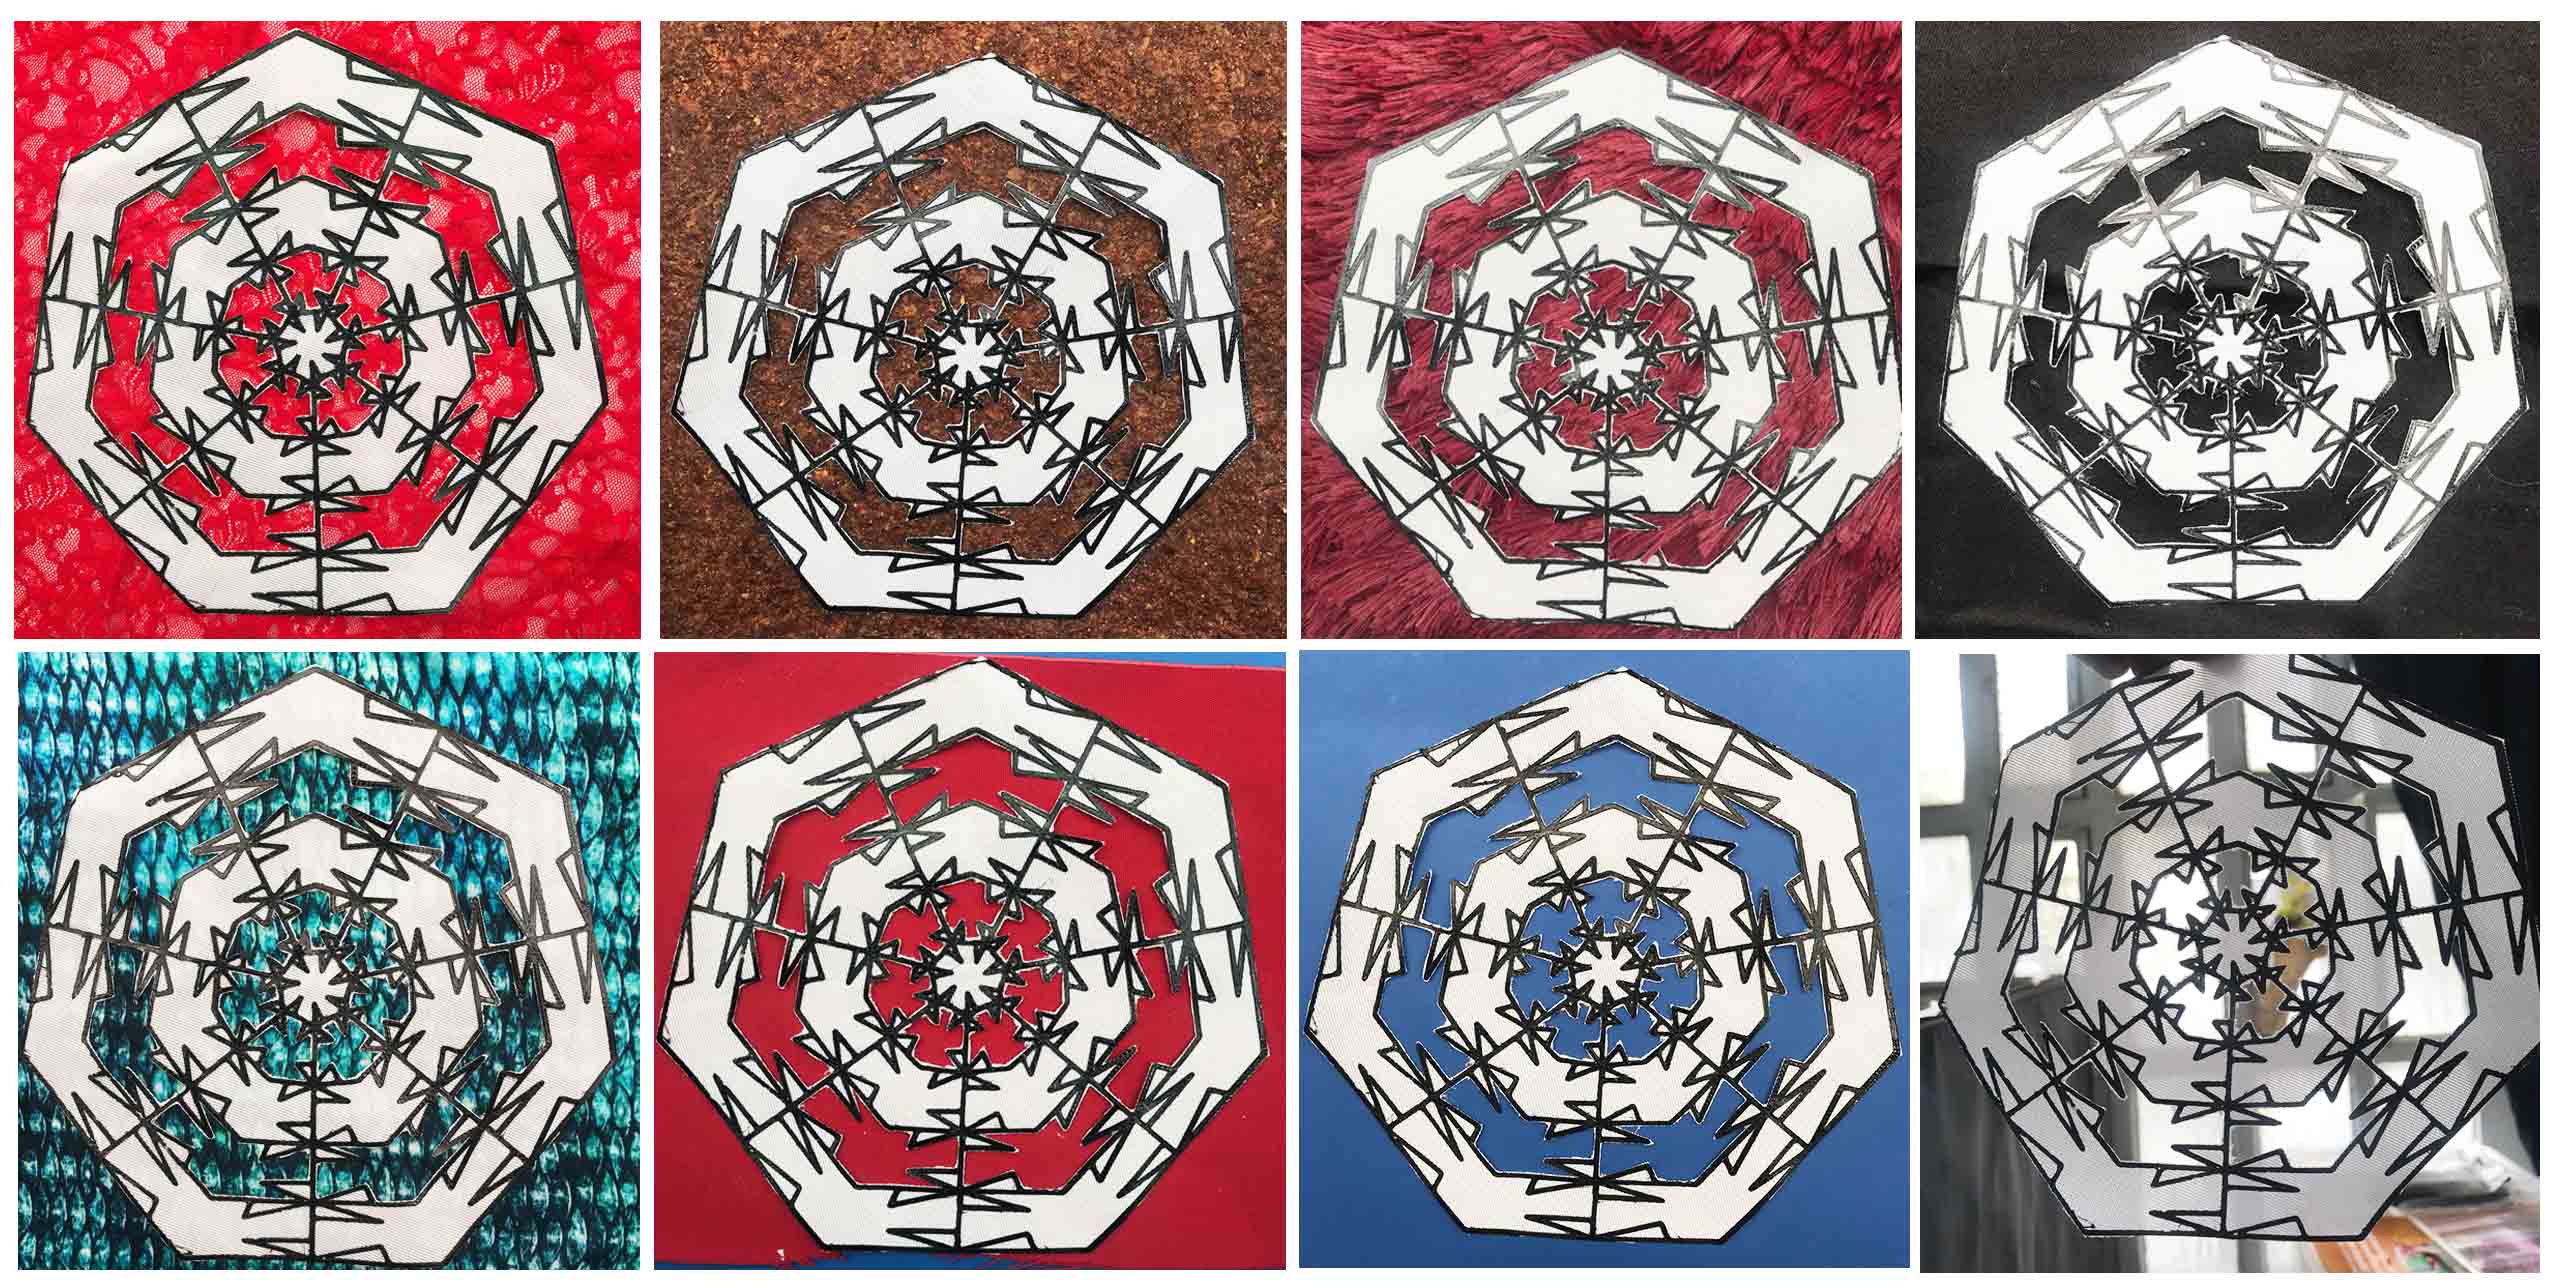
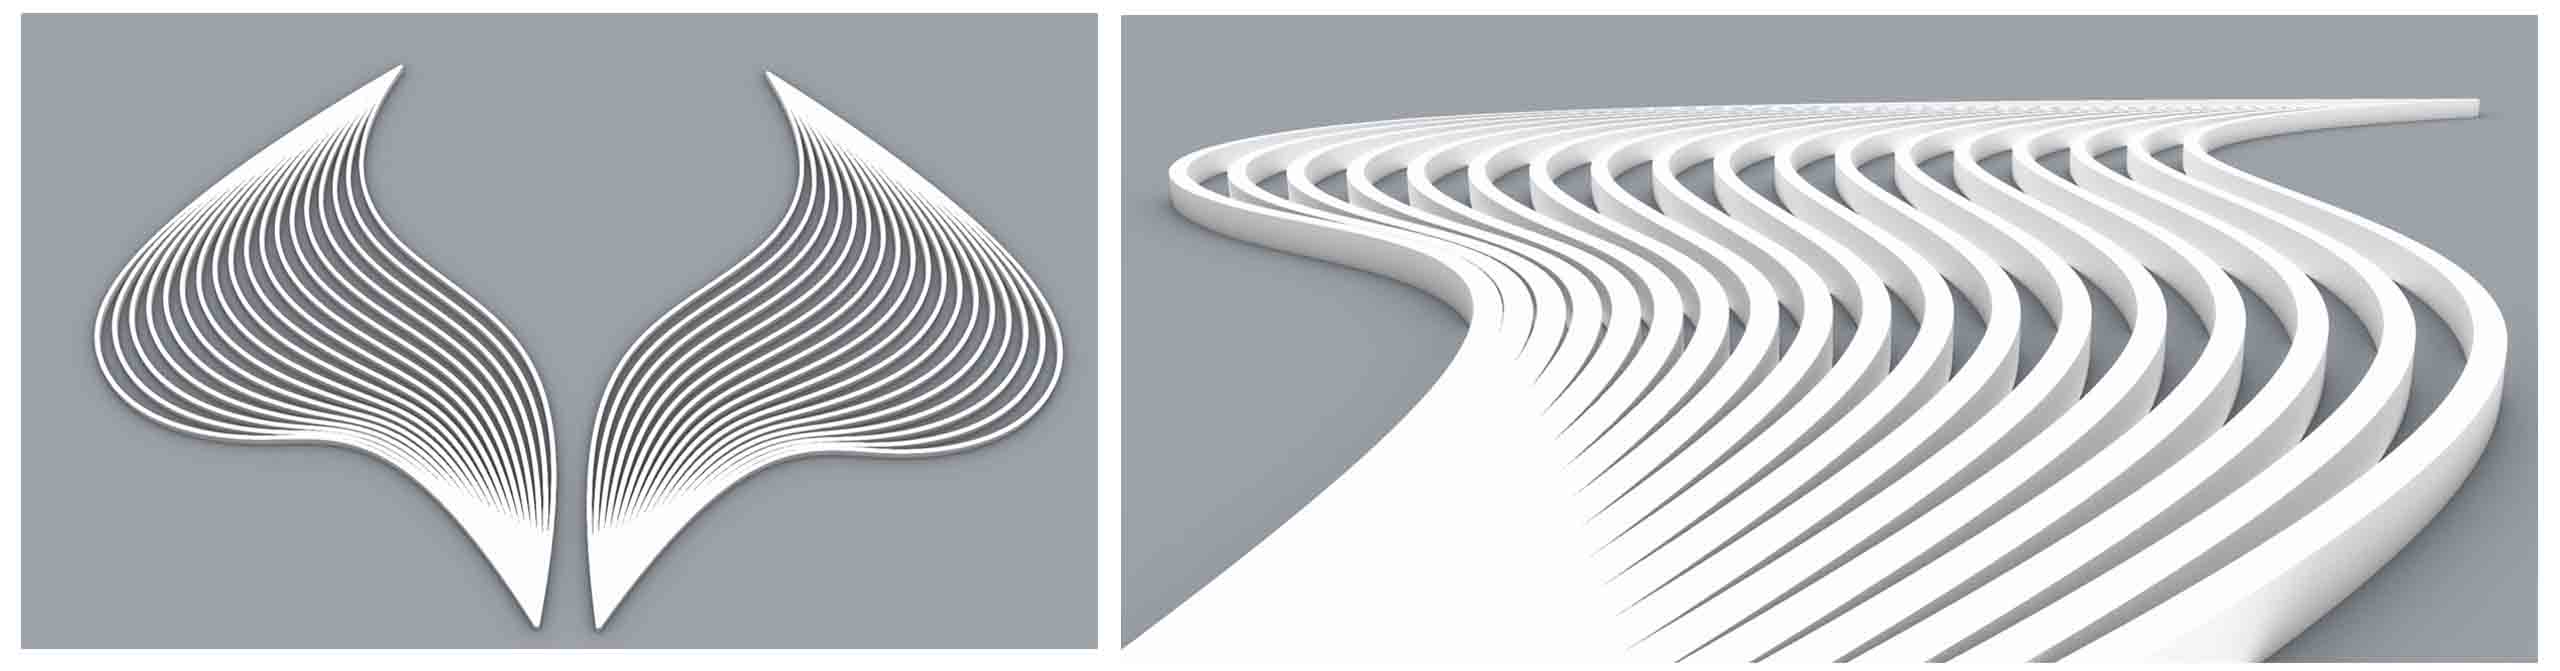
Lines Final look
In order to create the final look, I started taking pictures, but accidentally I created my own patterns. I then went crazy trying out all possible patterns. I am sharing all the fun madness with you below.
and the fun begins....

Here are a few looks I tried with Mannequin.
Thank you for your patience