5. E-textiles
Learning outcomes
- Research skills: the participant has acquired knowledge through references or replicating existing projects
- Design skills: the participant understands how to produce soft circuits, sensors and actuators
- Fabrication skills: Learn how to embed electronics on fabrics, study soft-hard connections
- Process skills: Anyone can go through the workflow, understand it and reproduce it
- Final outcome: The assignment is assembled and either complete or tested
Student checklist
- Build at least one digital and one analogue soft sensor, using different materials and techniques.
- Document the sensor project as well as the readings got using the AnalogRead of Arduino
- Integrate the two soft sensors into one or two textile swatches using hard soft connections
- Document the circuit and its schematic
- Document your swatches / samples
- Upload your arduino code as text
- Upload a small video of the swatches functioning
- Integrate the swatch into a project (extra credit)
Research
I researched the HOW TO GET WHAT YOU WANT which was recommended at the class. I didn't know about its existence, but it was a very interesting site. These can be used not only for this week's assignment, but also for wearables, skins, etc.
- Stocking Skin Stretch Sensor:
- Stroke Sensor
- Sheath bend Sensor
- Knit Touchpad
- Data glove Flex Sensor Rig
References & Inspiration
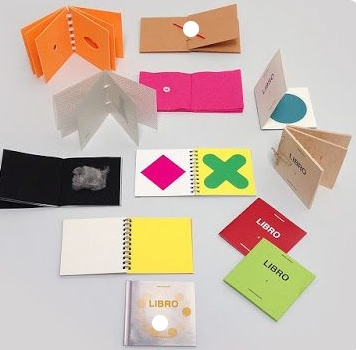
My plan is to create a picture book type sensor sample. The inspiration is from the Ieva Marija Dautartaite's project. Another source is Bruno Munari's picture books. For example, the target of the picture books on the right is children who have not yet met books. Abstract patterns and a variety of materials stimulate children.

Tools
- Arduino UNO: Micon board
- Arduino IDE: Programming environment
- TinkerCad: Circuit diagram
- CorelDRAW: 2D design
- trotec laser
Process and workflow
Conductive materials
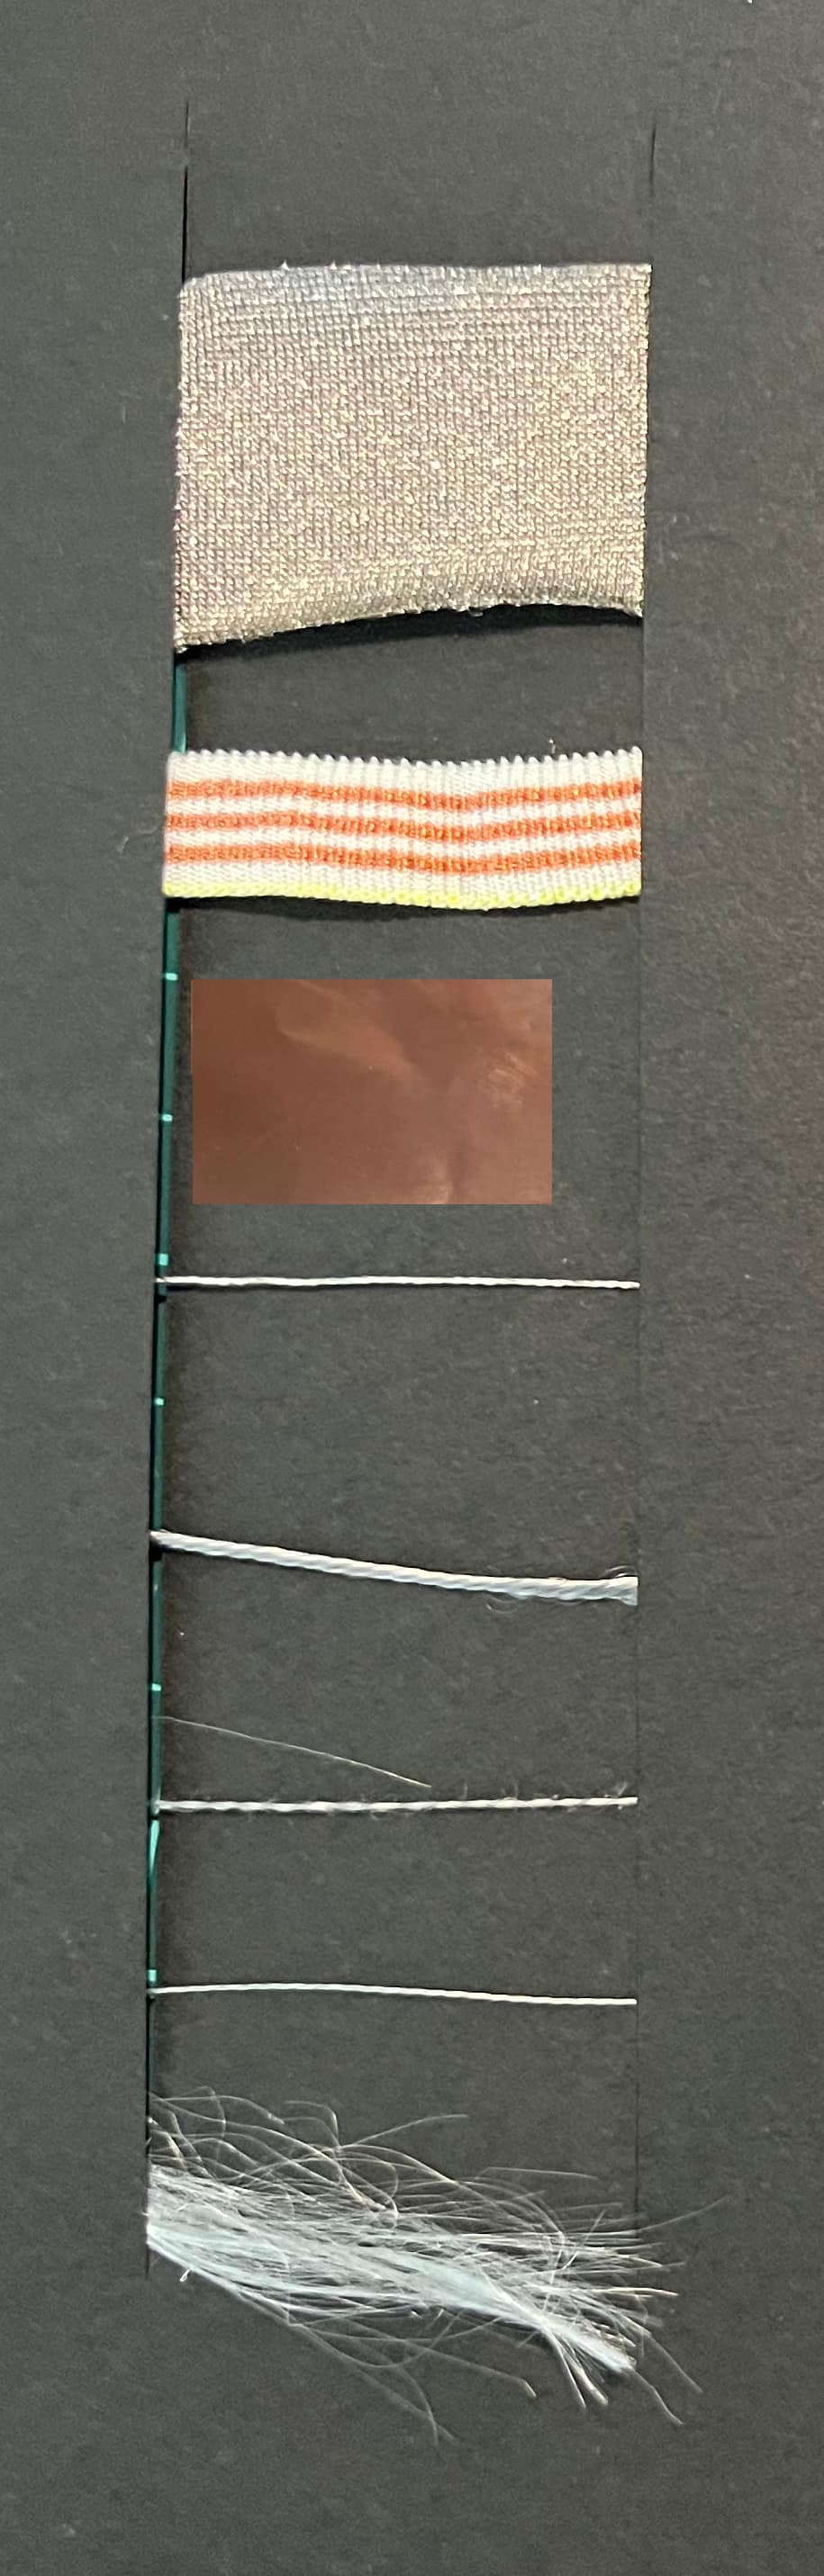
I listed up conductive materials I may use.
1) Conductive Fabric : knit fabric
2) Conductive Tape : stretchable tape
3) Copper foil tape
4) Conductive Thread 1 : stainless steel 0.27Ω/cm
5) Conductive Thread 2 : stainless steel 0.92Ω/cm (end of sale)
6) Conductive Thread 3 : stainless steel 0.92Ω/cm
7) Conductive Thread 4 : polyester, nylon 10Ω/cm
8) Conductive Fiber 5: stainless steel
Book pages
The book pages are designed using Corel draw, then cut using laser cutter. By engraving patterns on the fabric, an expression was created on the plain felt.
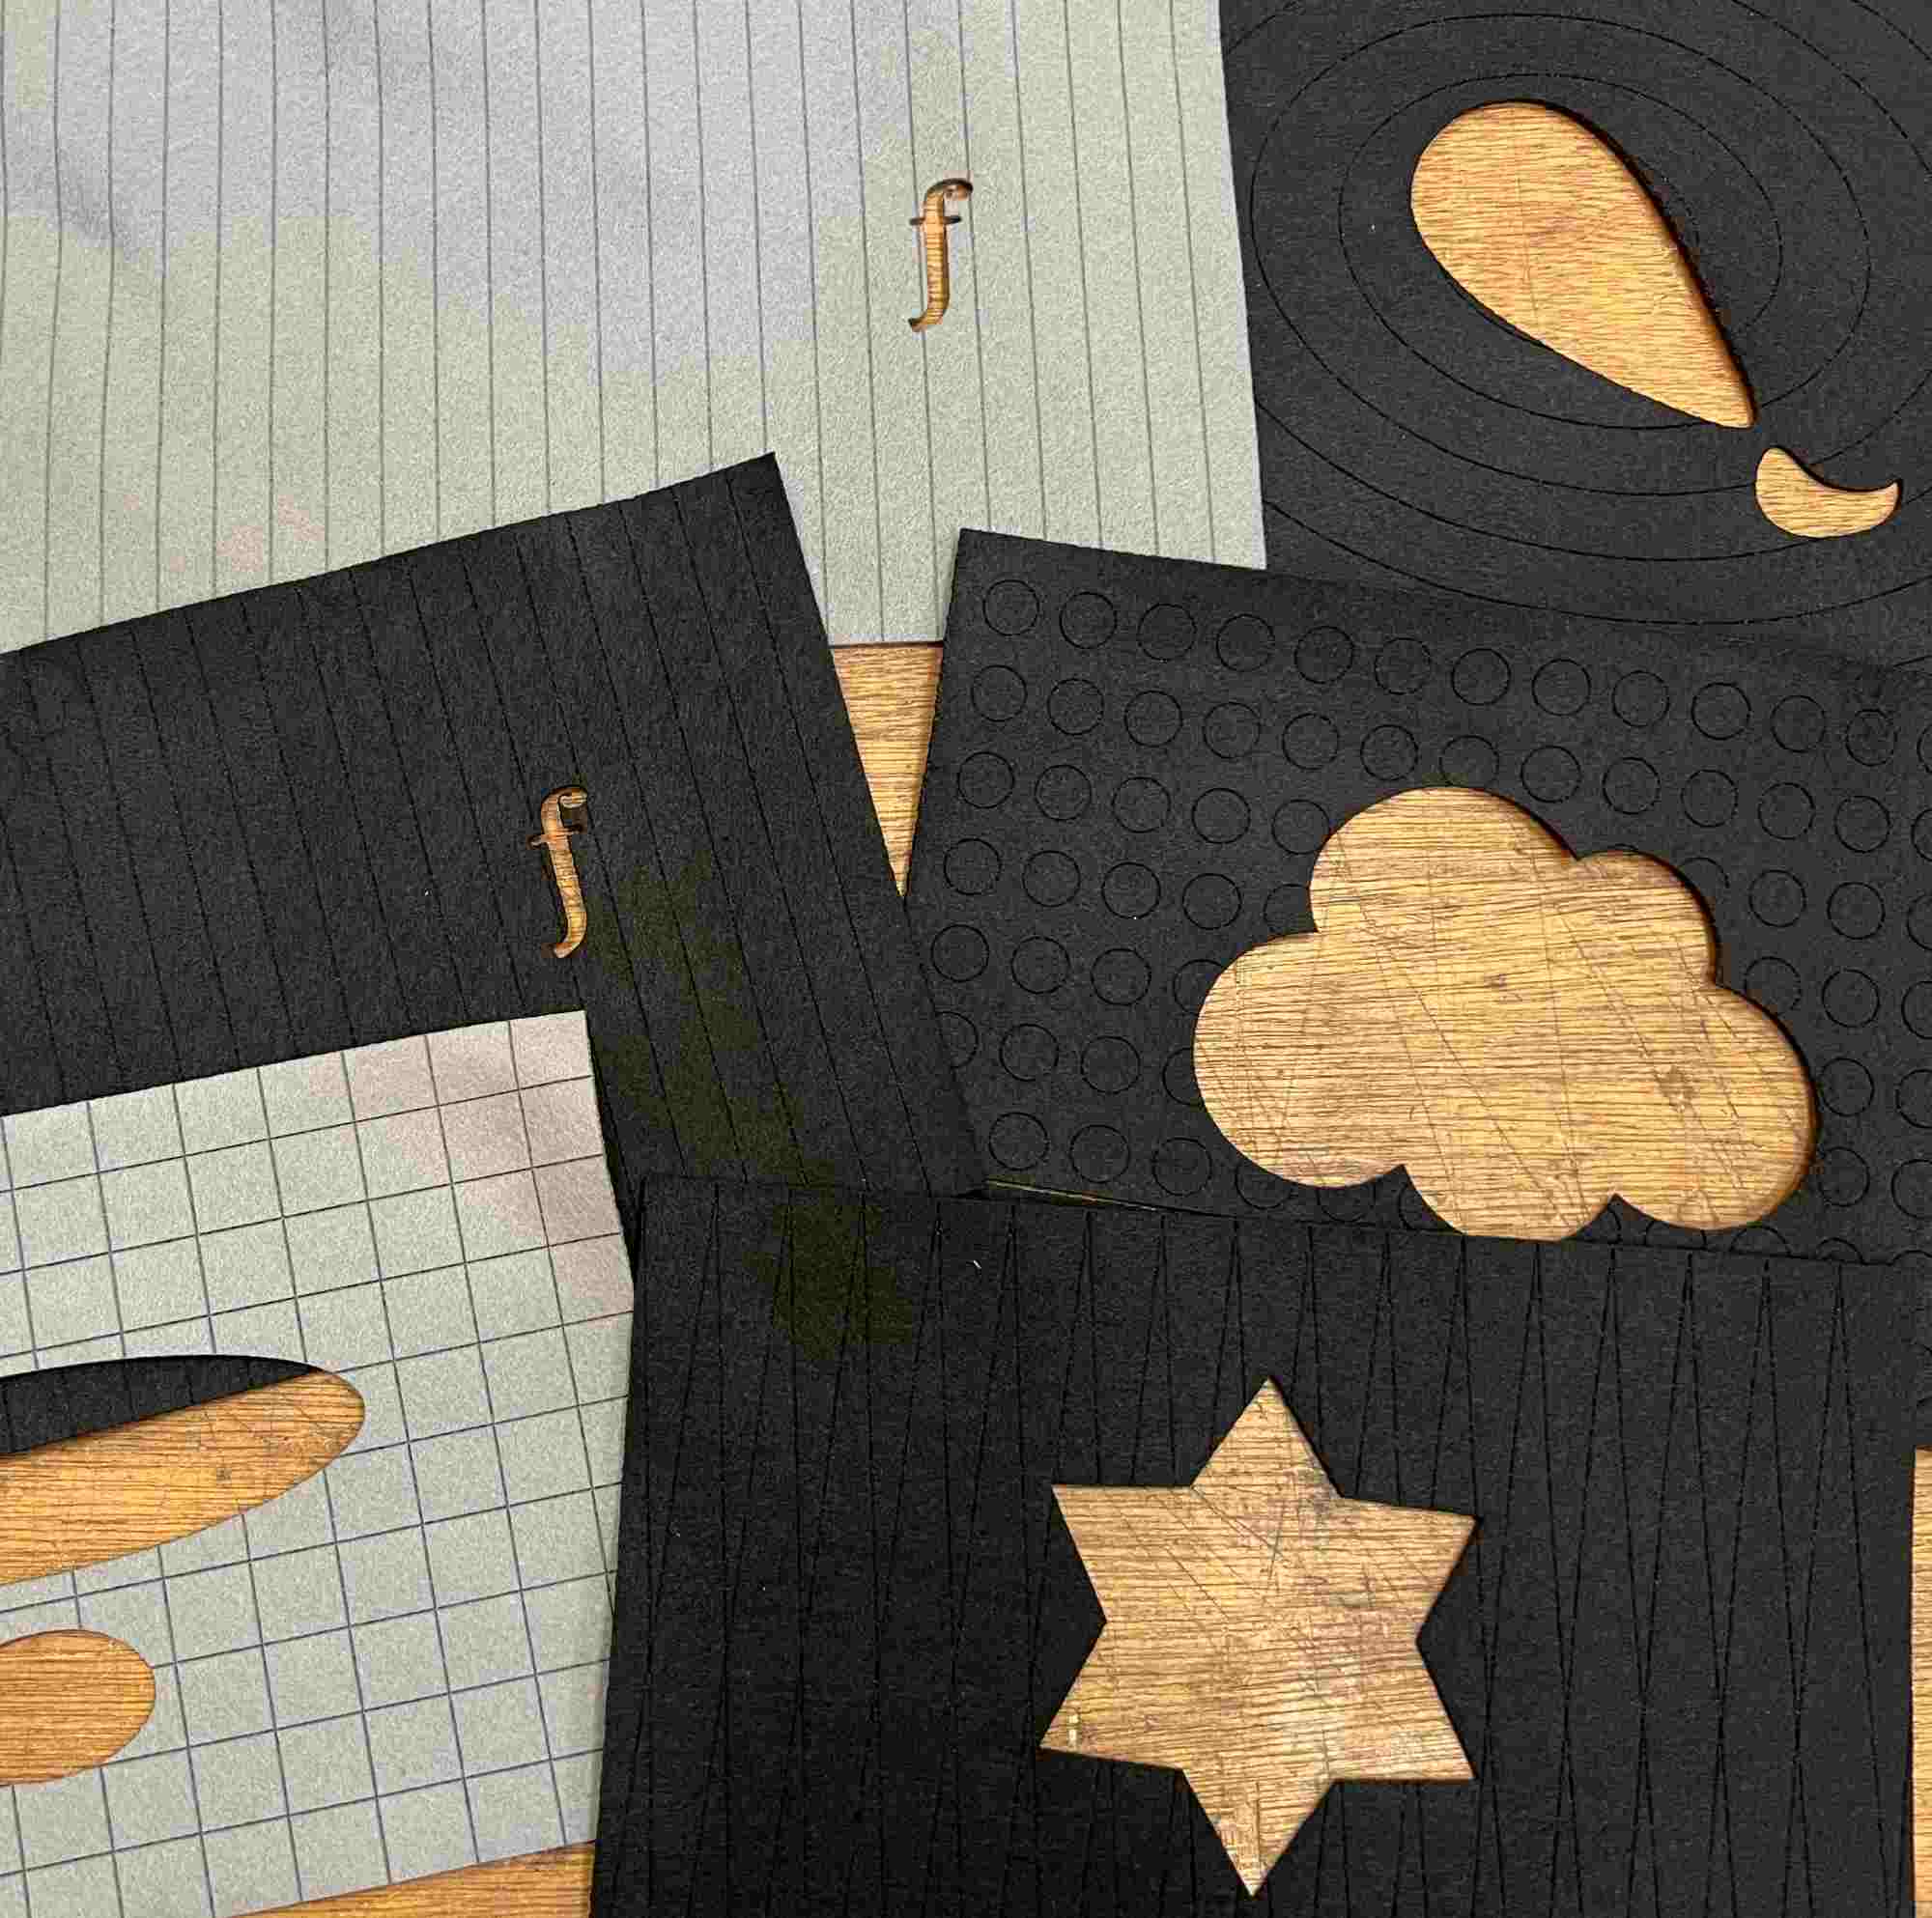
The structure of the book is:
- Cover page: Digital sensor (Magnet button)
- P1: Analogue sensor (Potention meter) + LED
- P2: Analogue sensor (Tension) + LED
- P3: Analogue Sensor (Touch) + LED
Digital Sensor
Magnet button
material
- Conductive fabric #1
- Conductive thread #3
- Felt
- flat Magnet x2
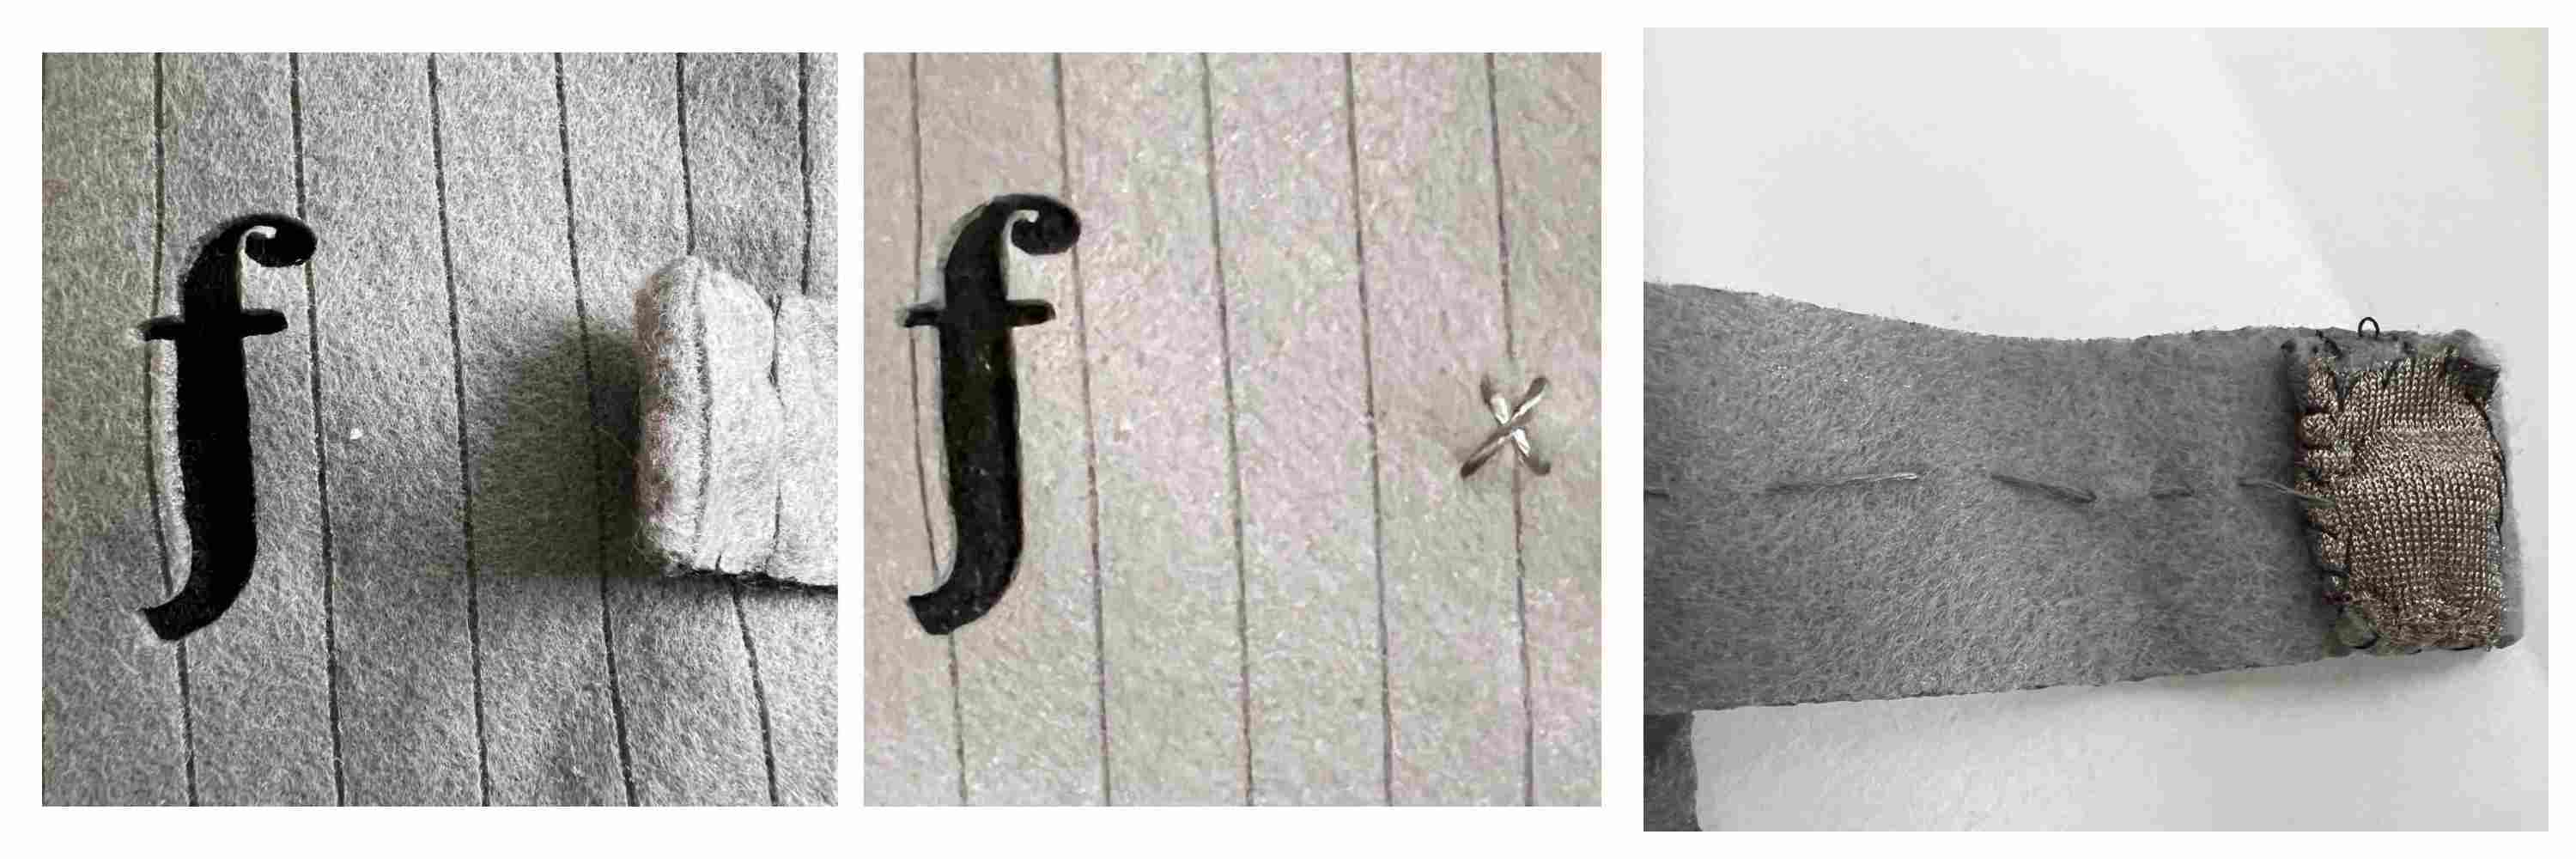
I designed a button for the book cover. It senses open/close of the book. The center image shows a part of button sewn by the conductive thread, which is connected to the Arduino pin. A magnet is put under the cross mark. The right image is another part of the button. A conductive cloth is sewn onto the side of the band, and a magnet with a diameter of 6 mm is inside. A conductive thread is further sewn from the conductive cloth and connected to the GND LINE.
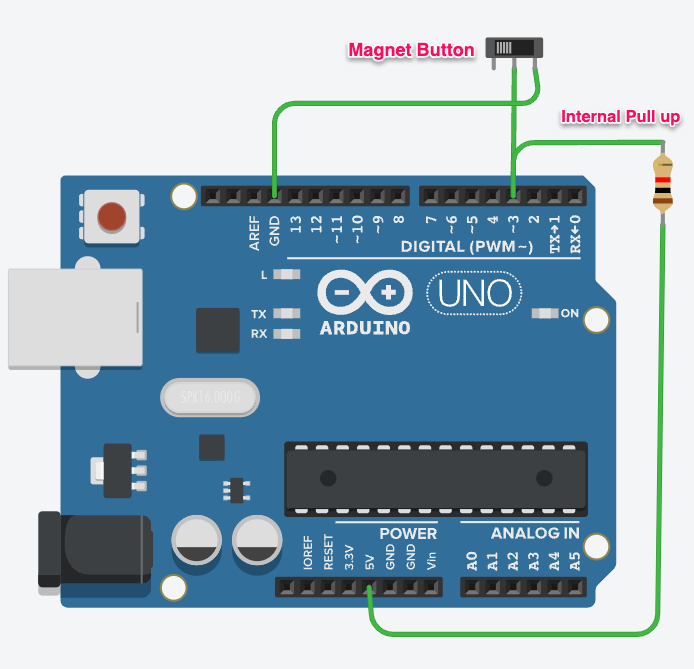
I wrote the circuit using Tinkercad. There is a pull-up resistor in the circuit, but it actually uses the Arduino's internal pull-up resistor. It is defined in the program. This magnetic switch is not a momentary switch, but changes modes like a slide switch, so I tried using a slide switch in Thinkercad.
Below is part of the program. When the book is not open (mode=0), turn off the LED, read the pin status of the magnetic button, and when it becomes High (=1), it recognizes that the book is open and sets the mode to 1. Detection of the book being closed is done within Loop using a function chkMode().
void mode0(){
      pixels.clear(); // Set all pixel colors to 'off
      int a=readDdata(3,btnM0Pin);
      Serial.println(a);
      if(a){
        mode=1;
      }
}
void chkMode(){
      int a=readDdata(3,btnM0Pin);

      if(a==0){
        mode=0 ;
      }
Analogue sensor
Potentionmeter
material
- Copper foil tape
- Conductive thread #3
- Felt
- Resistor 330Ω

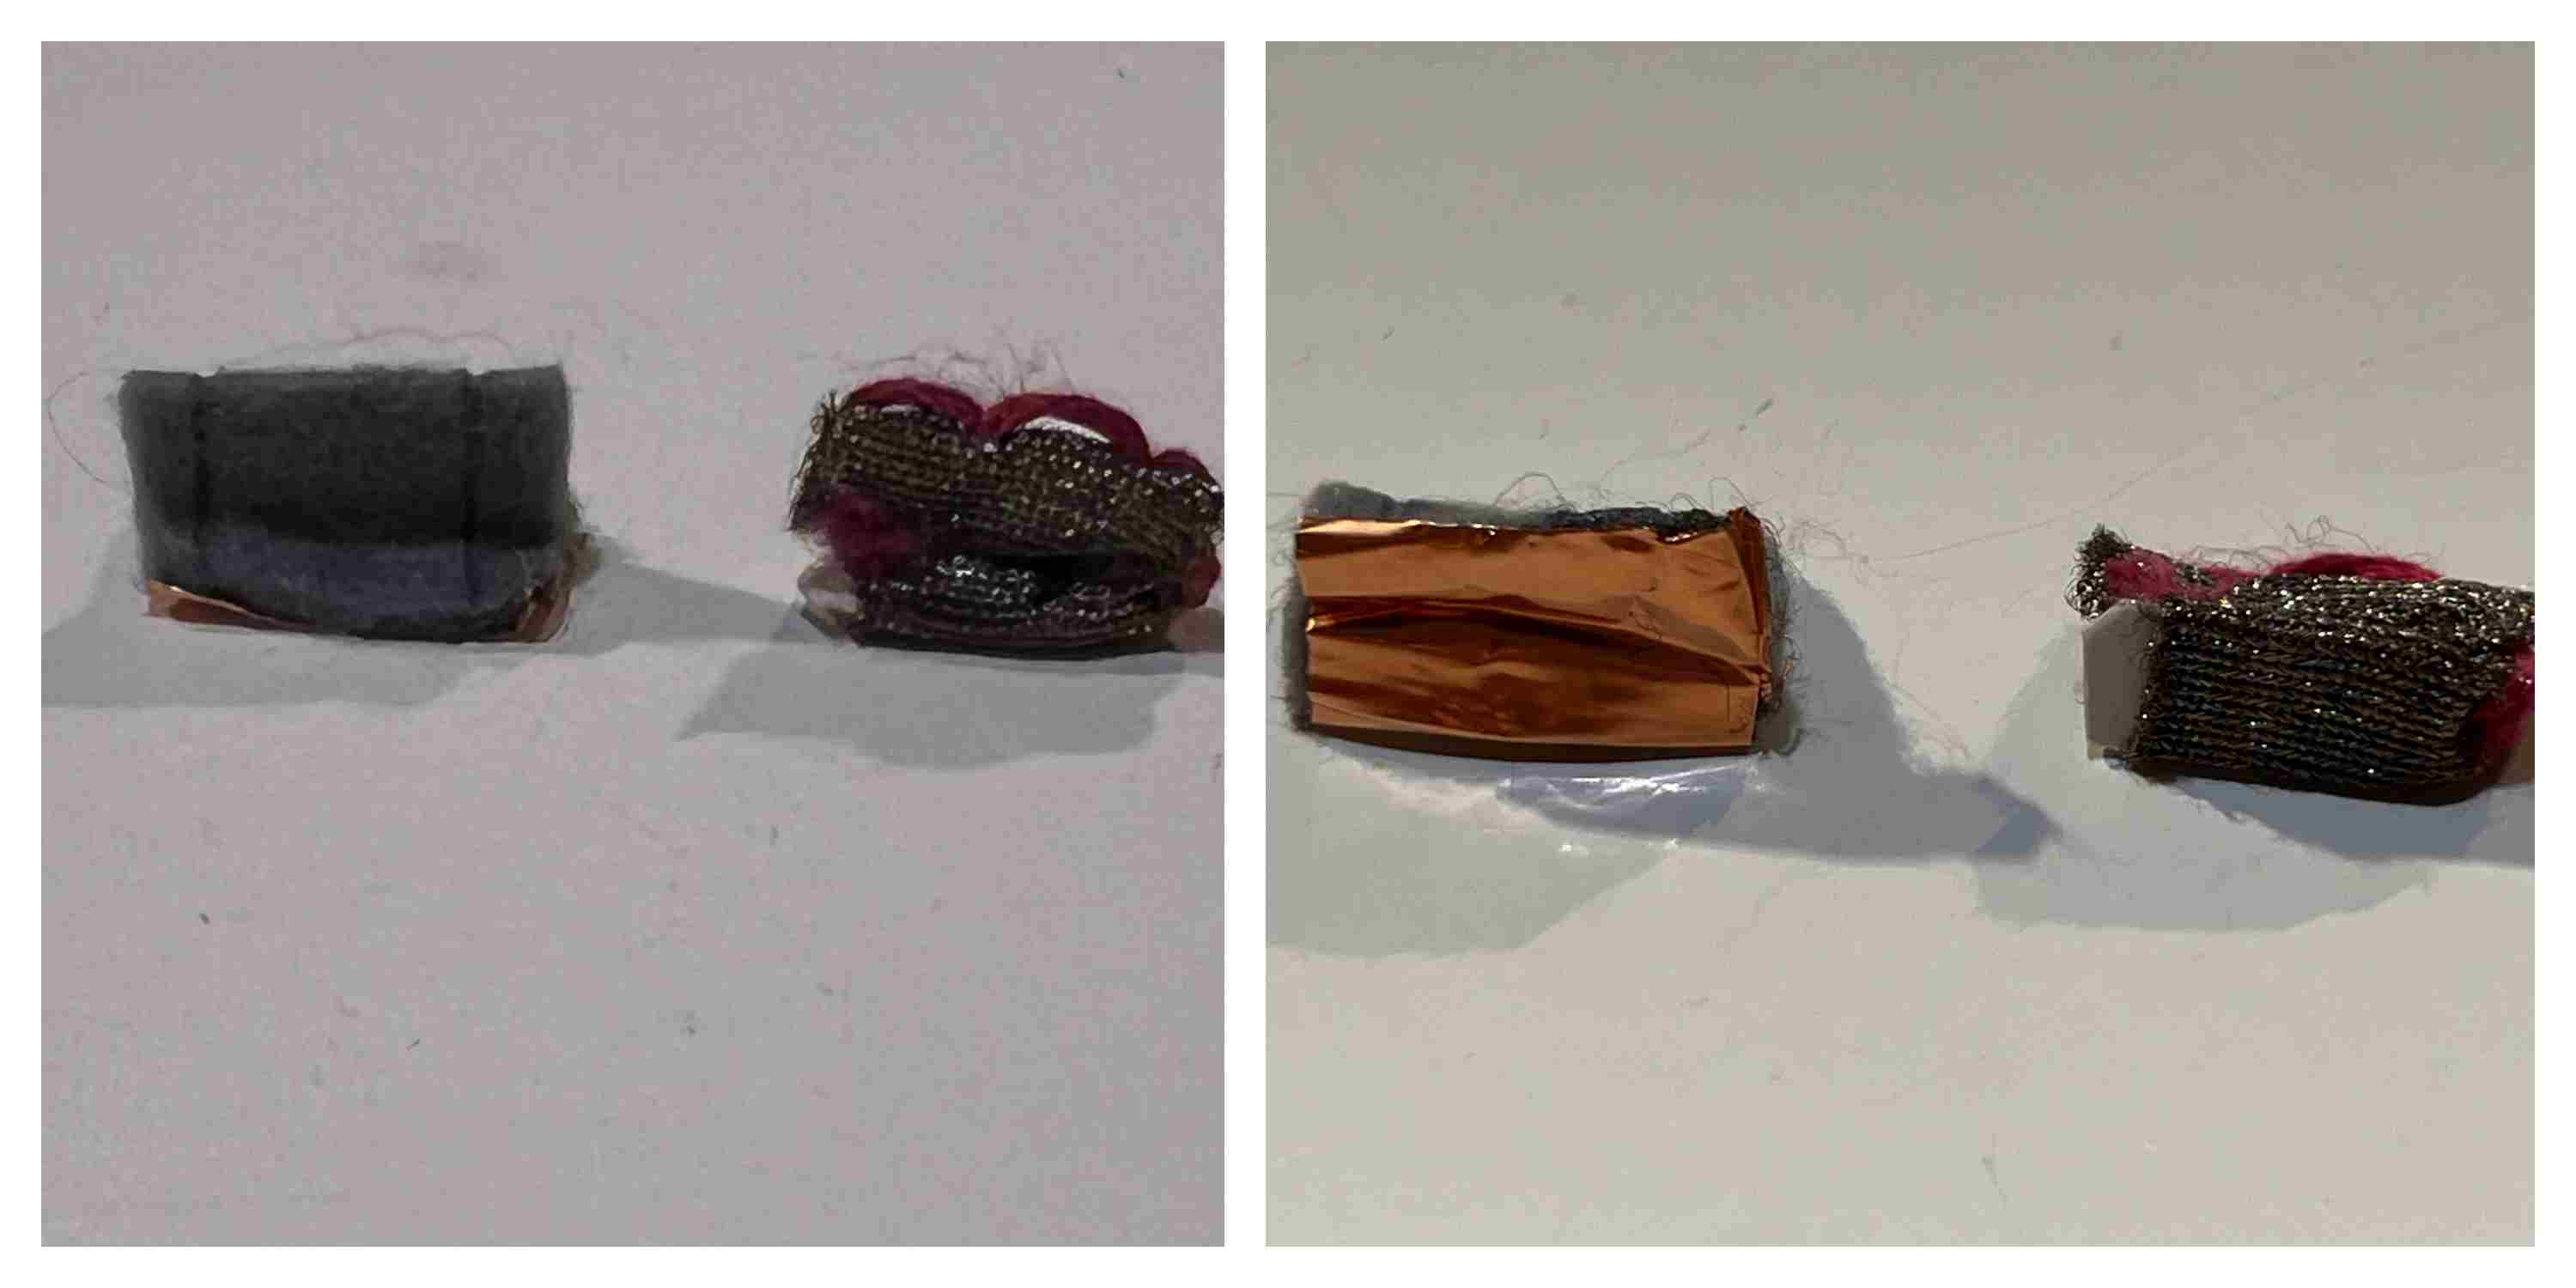
The knob needs to be smooth. At first I used conductive knit fabric(right knob), but the metallic powder fell off and got caught, so I decided to use copper foil tape(left knob).
I attached folded felt to the top of the tape to make a knob.
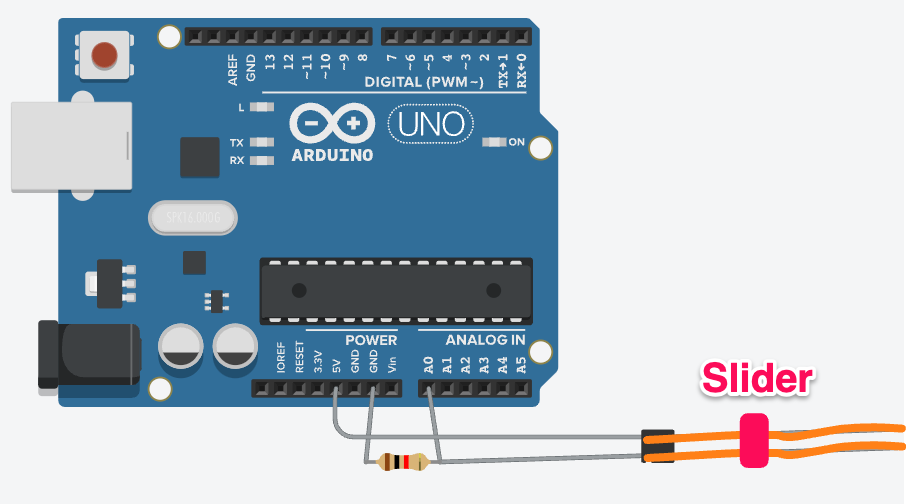
Move it along the groove of the slider. The problem is that the knob floats away from the slider. I need to press it when sliding.
This is initial test to change blightness of a LED according to the sensor analogue value.
It was difficult to see the change in brightness, so I decided to change the color as well. When the slider is moved, the sensor minimum and maximum values are taken and mapped to the number of colors.
void mode1(){

 int a=readAdata(10,sliderPin); //10 times average
 // int a=analogRead(sliderPin);

 valM1=map(a,valM1L,valM1H,0,8);

  if(a>valM1H){ valM1H=a;}
  if((700<a) && (a<valM1L)){valM1L=a;}

  Serial.print("a=");
  Serial.print(a);
  Serial.print(",");

  Serial.print("valM1=");
  Serial.print(valM1);
  Serial.print(",");

  Serial.print("High=");
  Serial.print(valM1H);!
  Serial.print(",");

  Serial.print("Low=");
  Serial.println(valM1L);


  switch(valM1){
    case 0:  //white
      cr=255; cg=255; cb= 255;
      pixels.setBrightness(255);
      break;
    case 1: //yellow
//      cr=255; cg=255; cb=1;
      cr=255; cg=255; cb=0;
      pixels.setBrightness(255);
      break;
    case 2: //orange
      cr=255; cg=128; cb= 0;
      pixels.setBrightness(255);
      break;
    case 3://green
      cr=0; cg=255; cb= 0;
      pixels.setBrightness(255);
      break;
    case 4: //Blue
      cr=0; cg=255; cb= 255;
      pixels.setBrightness(200);
      break;
    case 5: //Blue
      cr=0; cg=0; cb= 255;
      pixels.setBrightness(255);
      break;
    case 6: //Purple
      cr=127; cg=0; cb= 255;
      pixels.setBrightness(255);
     break;
    case 7: //Pink
      cr=255; cg=0; cb= 255;
      pixels.setBrightness(255);
      break;
    case 8: //Red
      cr=255; cg=51; cb= 51;
      pixels.setBrightness(255);
      break;
  }

 // The first NeoPixel in a strand is #0, second is 1, all the way up
  // to the count of pixels minus one.
  for(int i=0; i<NUMPIXELS; i++) { // For each pixel...
    // pixels.Color() takes RGB values, from 0,0,0 up to 255,255,255
    pixels.setPixelColor(i, pixels.Color(cr, cg, cb));
    pixels.show();   // Send the updated pixel colors to the hardware
  }
}
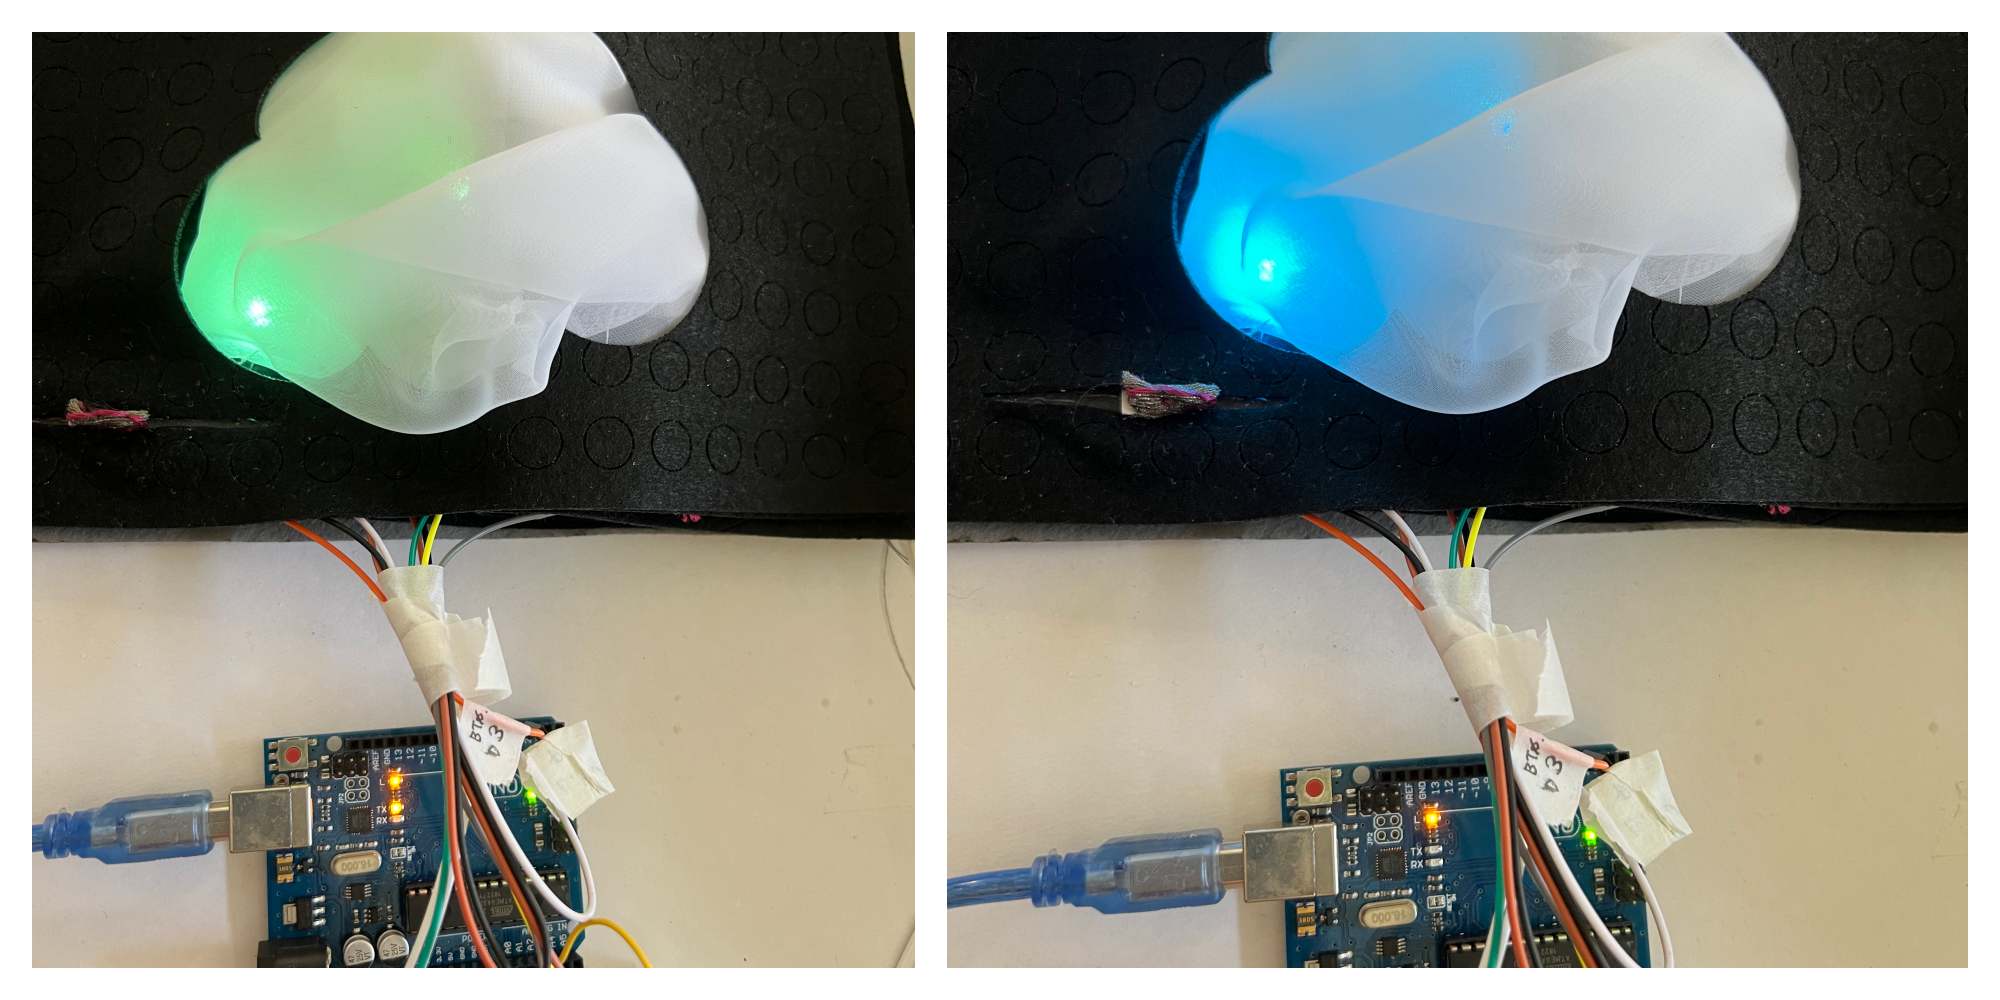
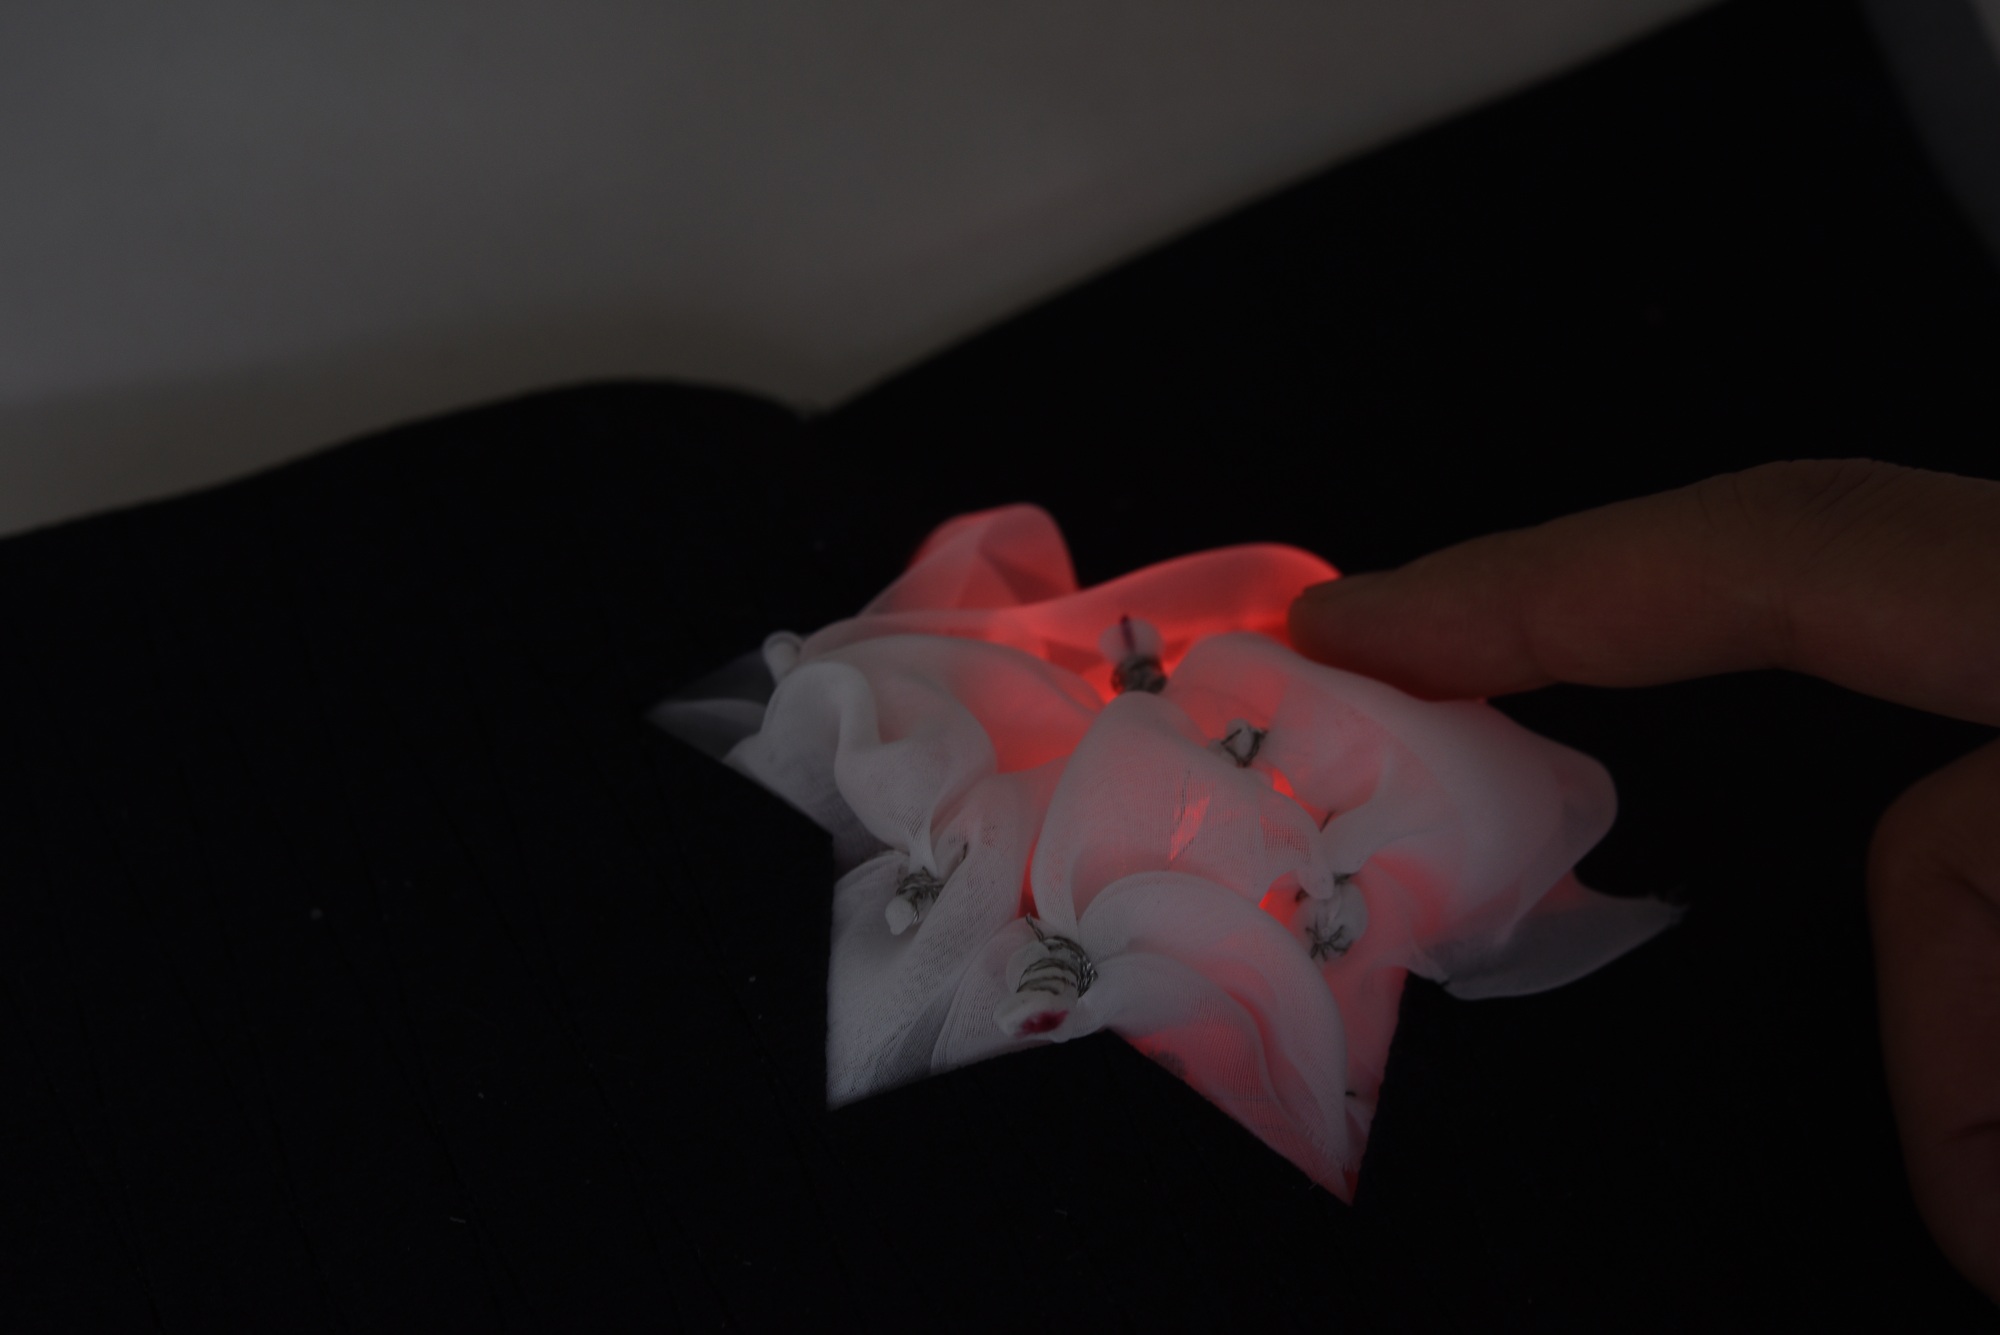
Touch
I made a touch sensor based on the CapasitiveSensor and Fablab Kannai's document. The fabric was tied with conductive thread, similar to tie-dyeing (Shibori-zome). All threads are connected. It senses the change in capacitance when you touch the thread with your finger.
material
- Conductive thread #4
- chiffon georgette
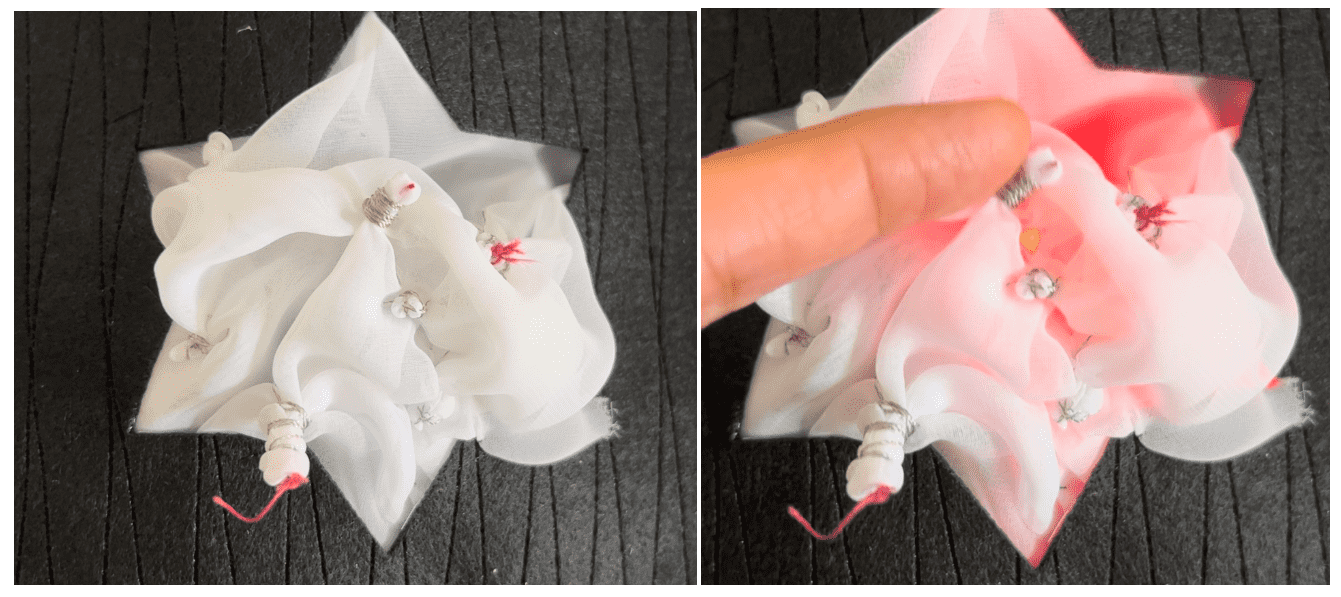
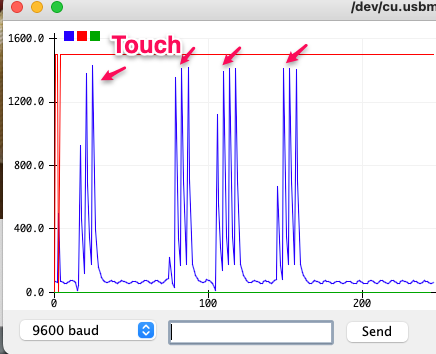
Normally, a touch can be detected with 1MΩ, but I chose 20MΩ because I wanted to use it as a proximity sensor. But proximity didn't work. Needs consideration.

int chkTouch(){

  int a=0;   // Capacitance change amount

  // Output High to outPin
  digitalWrite(outPin, HIGH);
  // Count until outPin goes HIGH when finger touches
  while (digitalRead(inPin)!=HIGH){
    // count
    a++;
  }
  delay(1);
  //delay(2);

  // Output Low to outPin
  digitalWrite(outPin, LOW);

  //filter to smooth the values
  f+=(a-f)/2;

//Serial plotter  (Avoid automatic alignment of vertical axes)
   Serial.print(f);
   Serial.print(",");
  Serial.print(top);      //top = 1500
   Serial.print(",");
  Serial.println(bottom); //bottom = 0

  return (f);
}
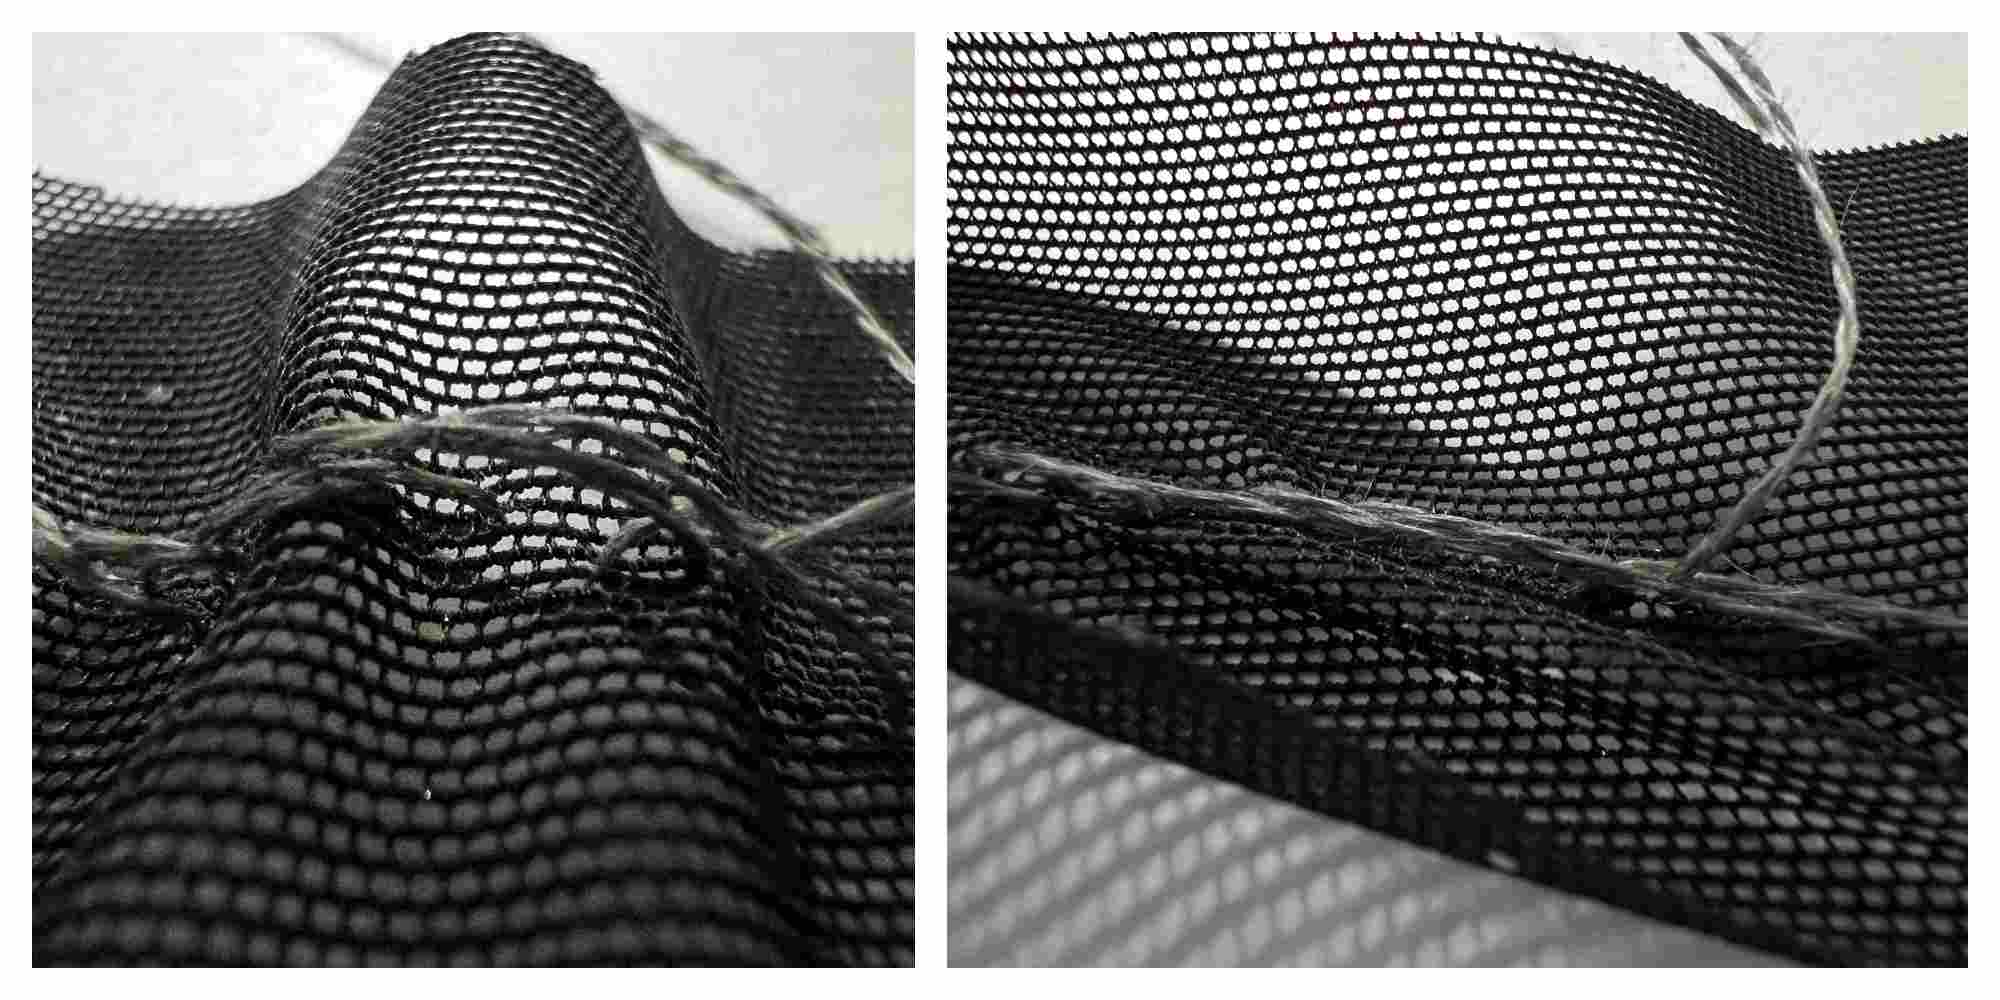
Tension
material
- Conductive thread #4
- chiffon georgette
- Resistor 330Ω
I tried to make a tension sensor by sewing conductive thread diagonally.
Since the fabric is thin and soft, it will sag when sewn. On the other hand, if you pull it, the threads will overlap as shown in the right below.
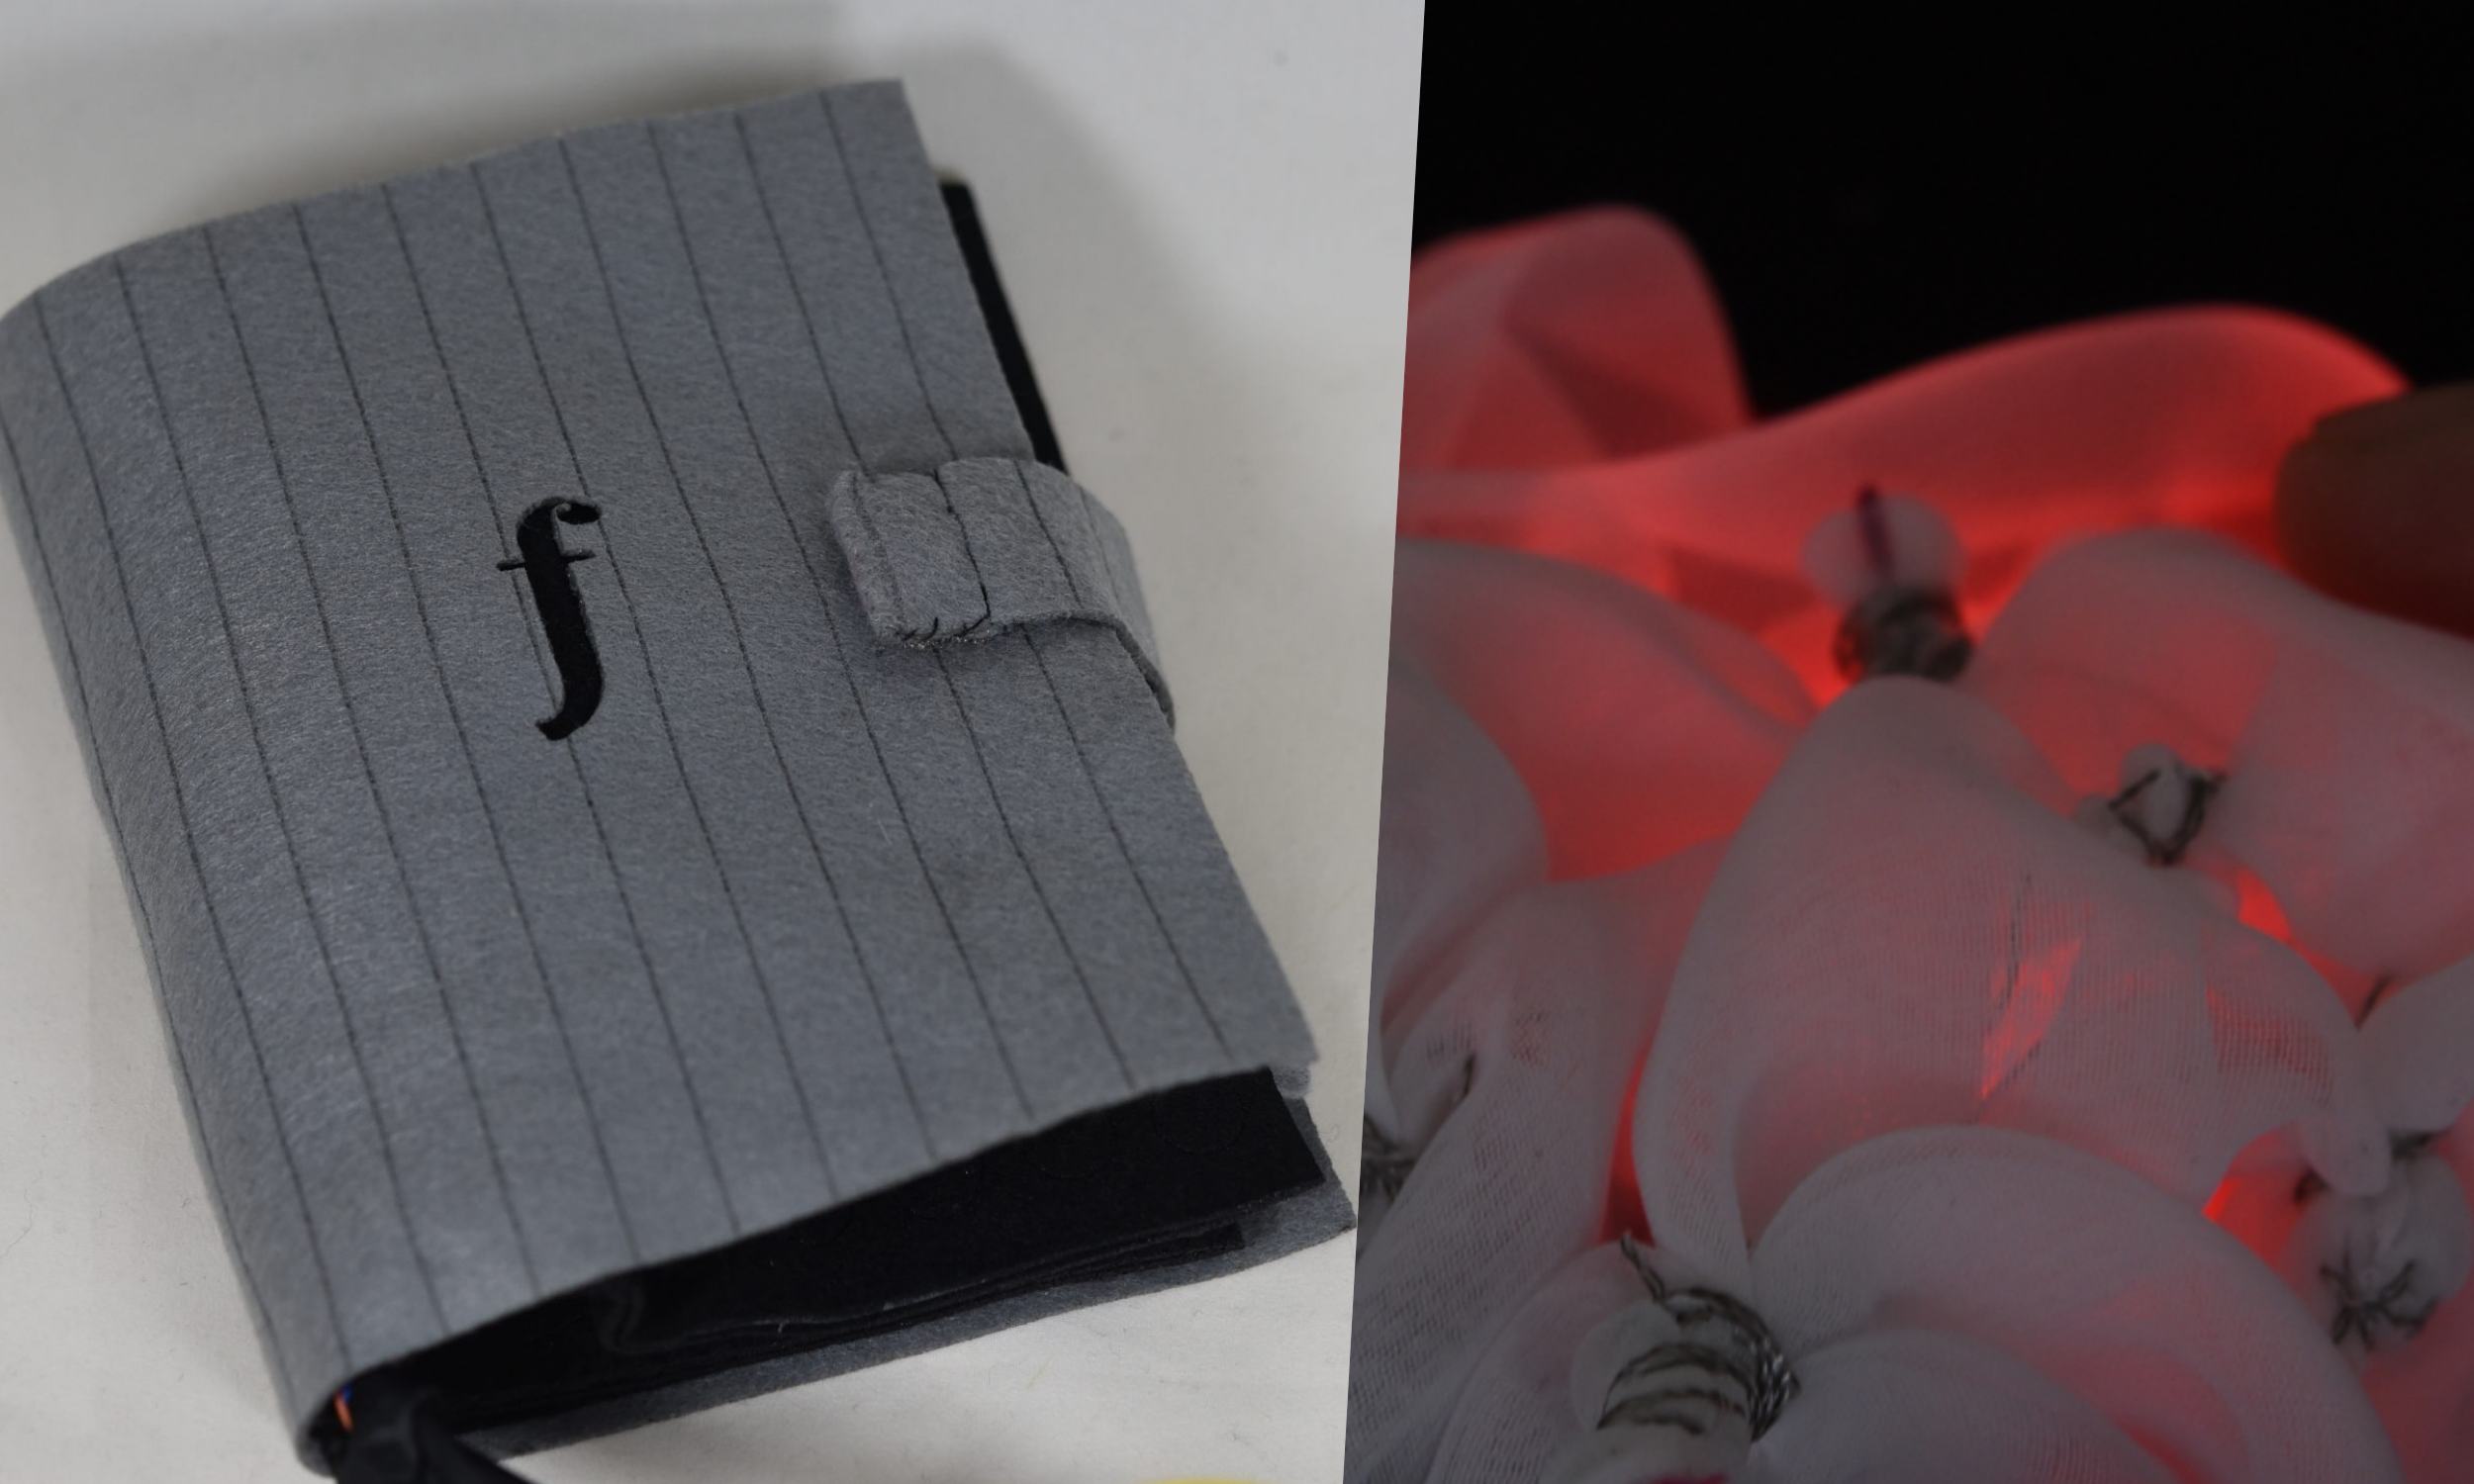
The design of the page is an abstract shape, but when you pull the tail (red mark), the LED lights up and you can see the shadow of a cat's eyes.

  void mode2(){
    int a = readAdata(100,pullPin);

    Serial.println(a);

    if((a>lastValM2+20)|| (a<lastValM2-20)){
         cr=255; cg=255; cb=0;  //yellow
    }else{
        cr=0; cg=0; cb=0;
    }

   lastValM2 = a;

   for(int i=0; i<NUMPIXELS; i++) { // For each pixel...
        pixels.setPixelColor(i, pixels.Color(cr, cg, cb));
        pixels.show();   // Send the updated pixel colors to the hardware
    }
  }
Moisture Sensor
Inspired by dried fruits, I created a sensor that detects moisture. Of course, you can also use cloth. The circuit is same as potentionmeter.
material
- Conductive thread #4
- Vegetables
- Resistor 330Ω
The left below is original carrot with conductive thread. The right is dried ones (one night). The threads are floating.
By blowing mist, the carrots gradually spread. (right image).

Using the Arduino serial monitor, you can see that the analog read value changes.
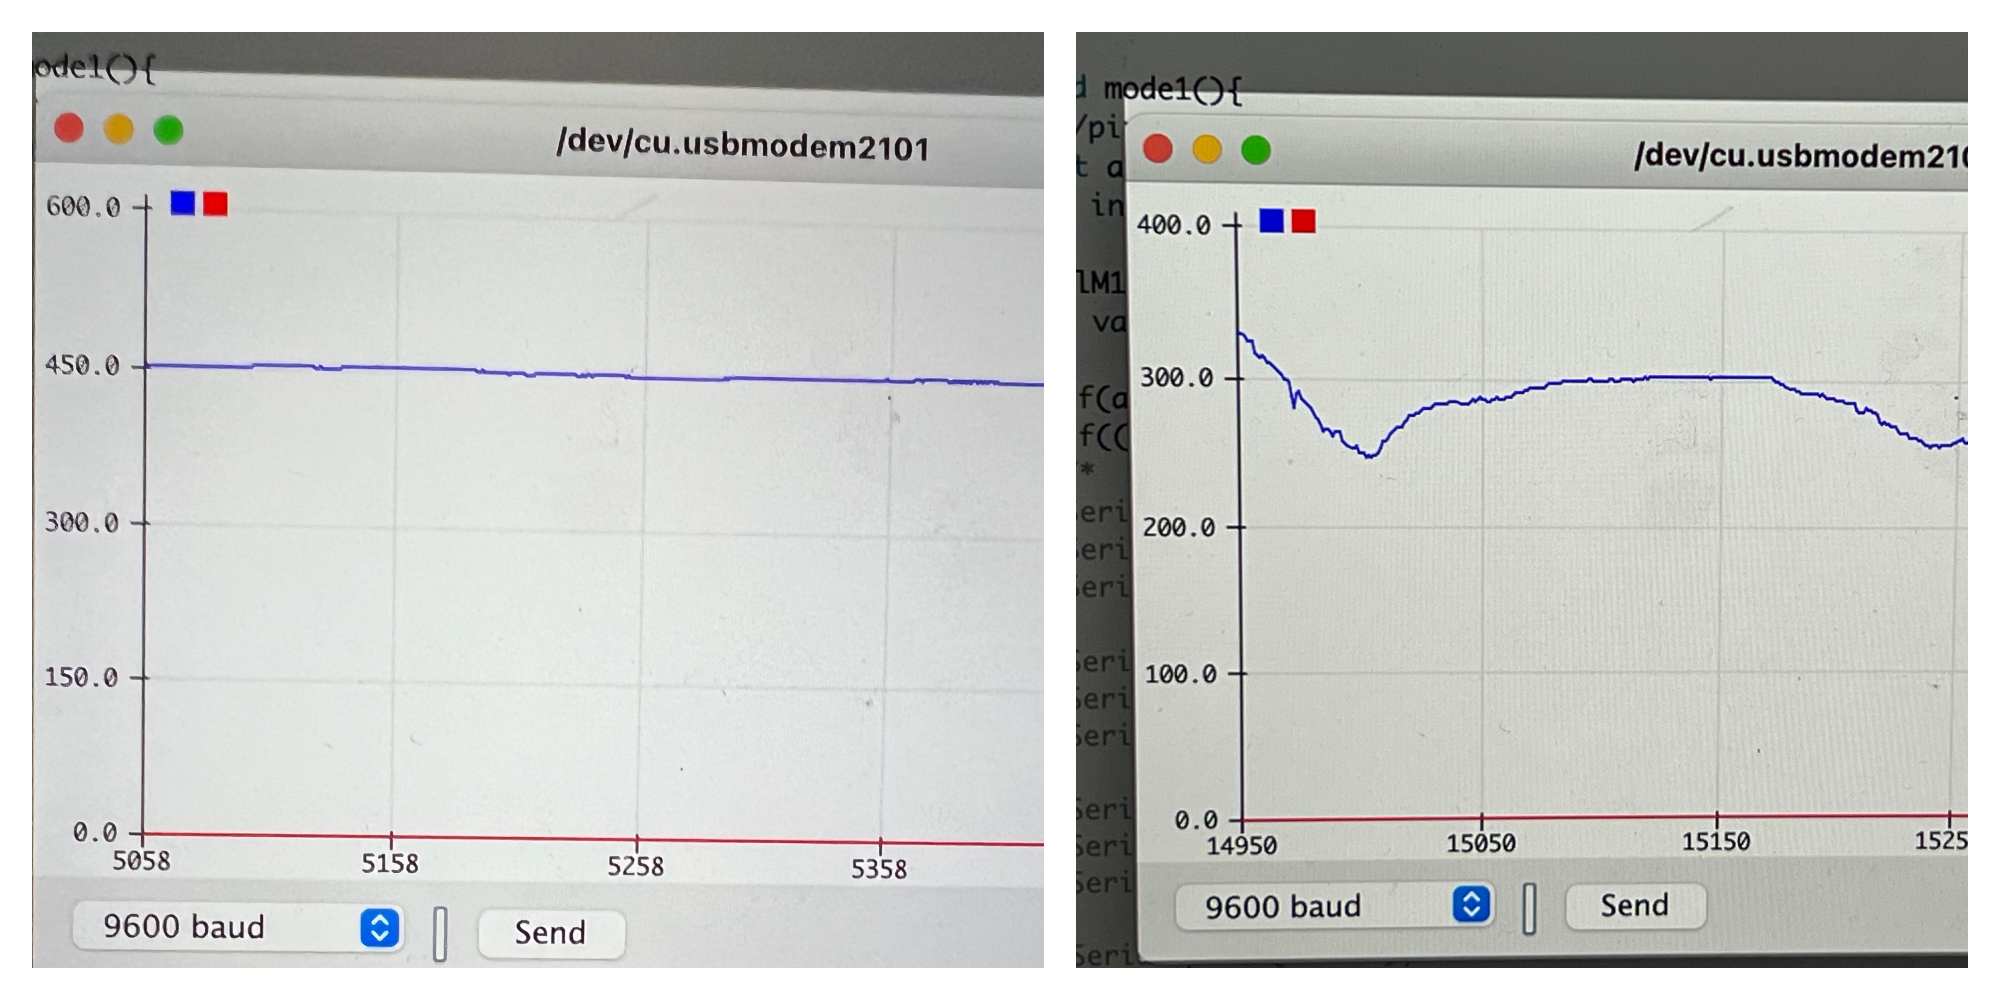
There are many possible use cases, such as dried flowers + aroma, humidity sensor, rain forecast, laundry, etc.
Output device
LED
As output device, I used Flora RGB Smart NeoPixe. The link is 2nd version, but my devices are perhaps 1st version. They're easy to sew, and the chainable design means no crossed threads.
Please note that the data line has a certain direction.

I arranged three neopixels on the felt fabric, and connected them in series by conductive thread #6. The conductive thread and the wire are connected using a small board or by sandwiching the wire between copper foil tapes.
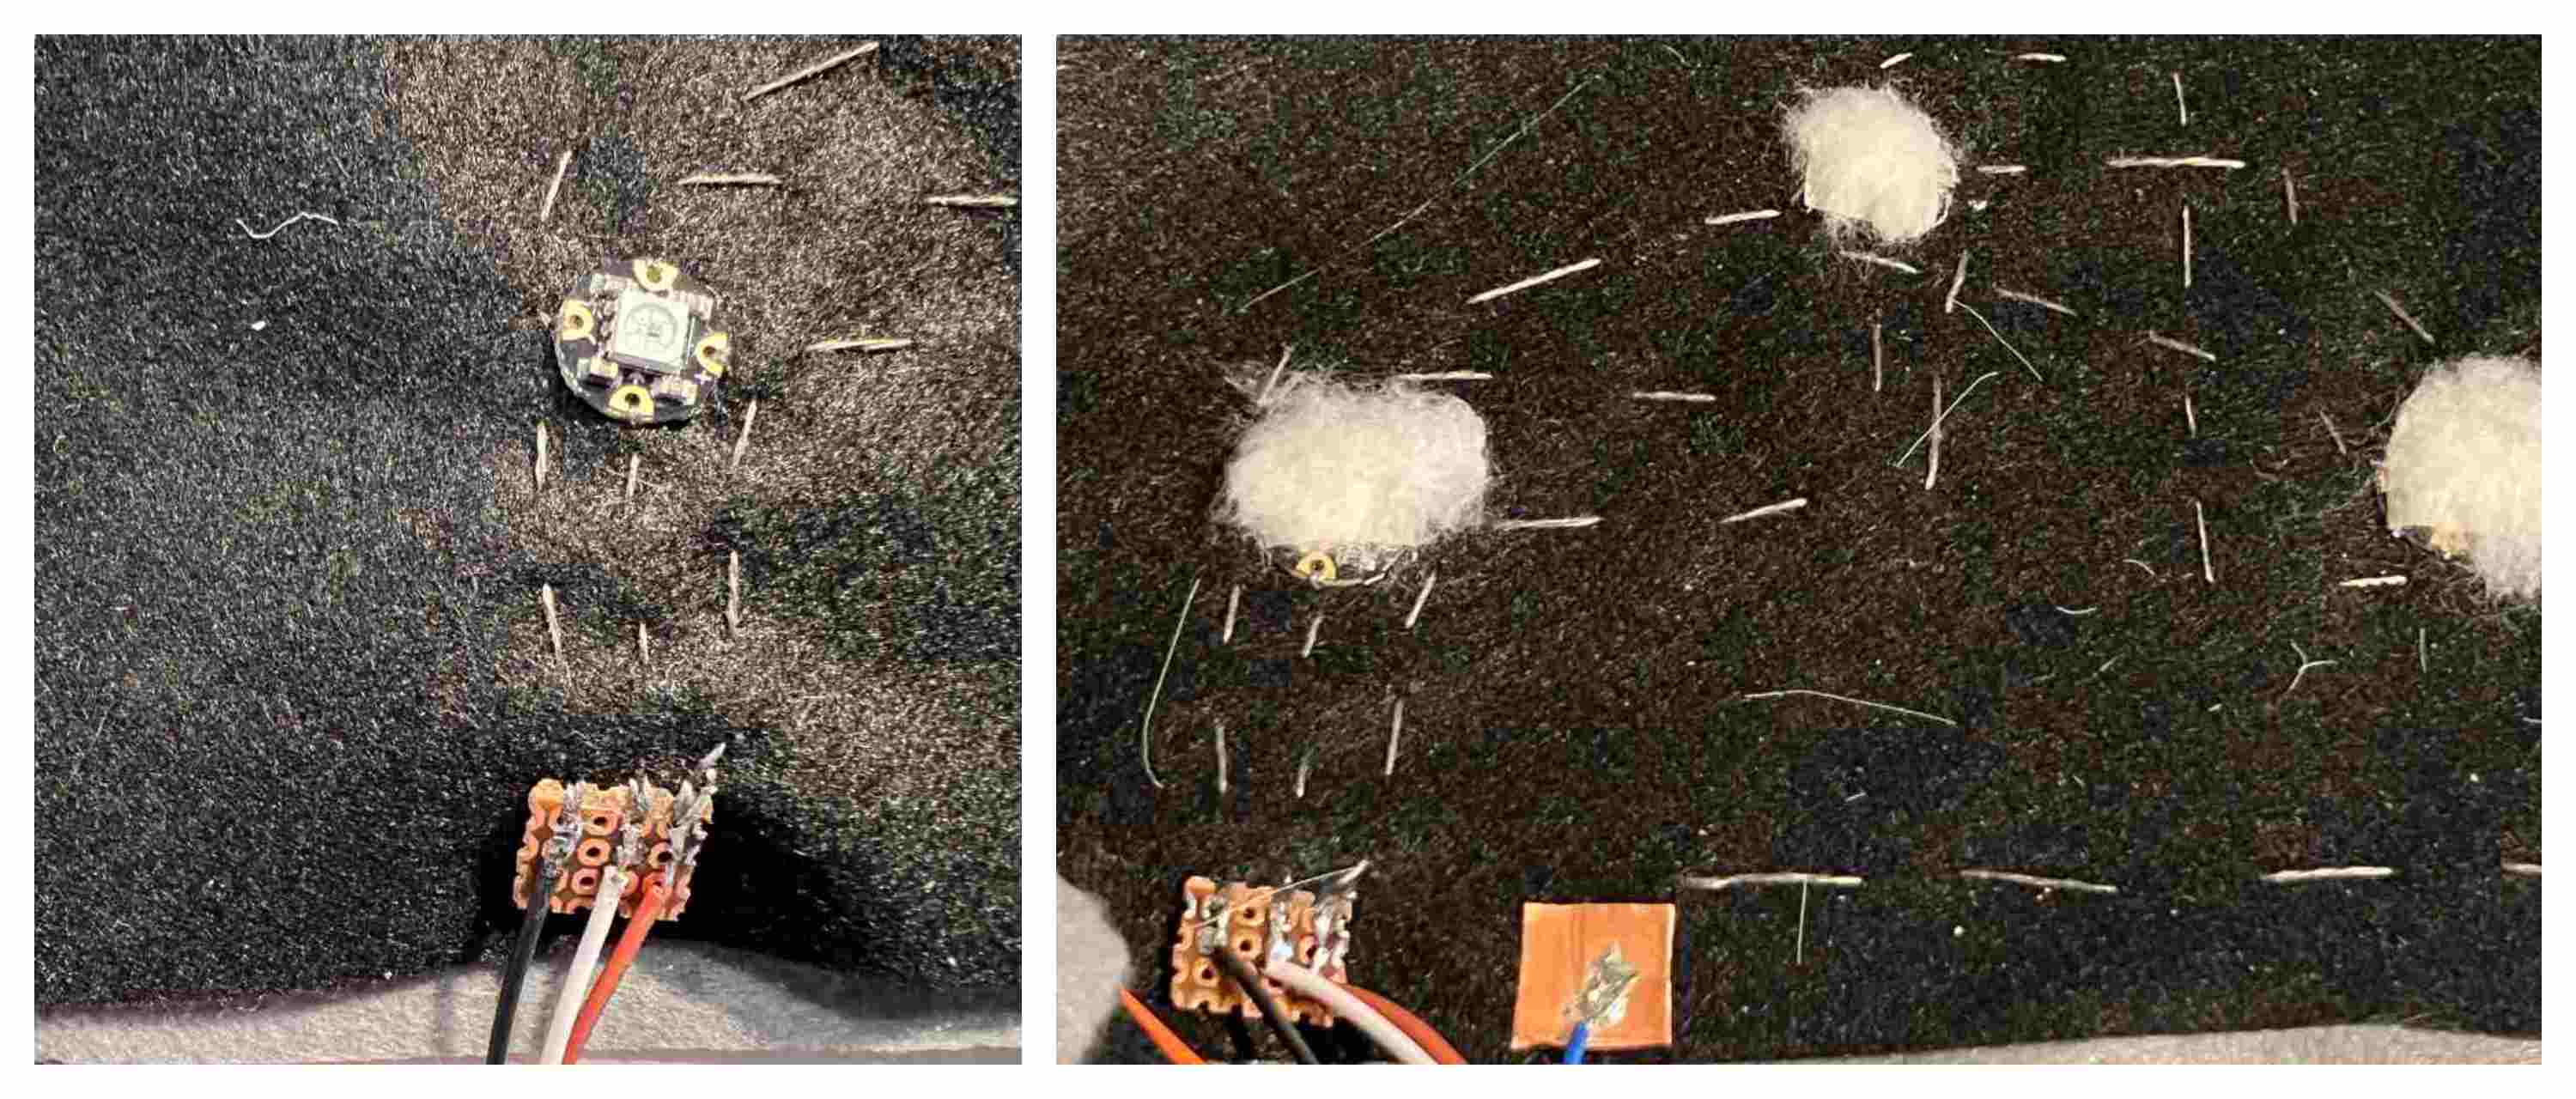
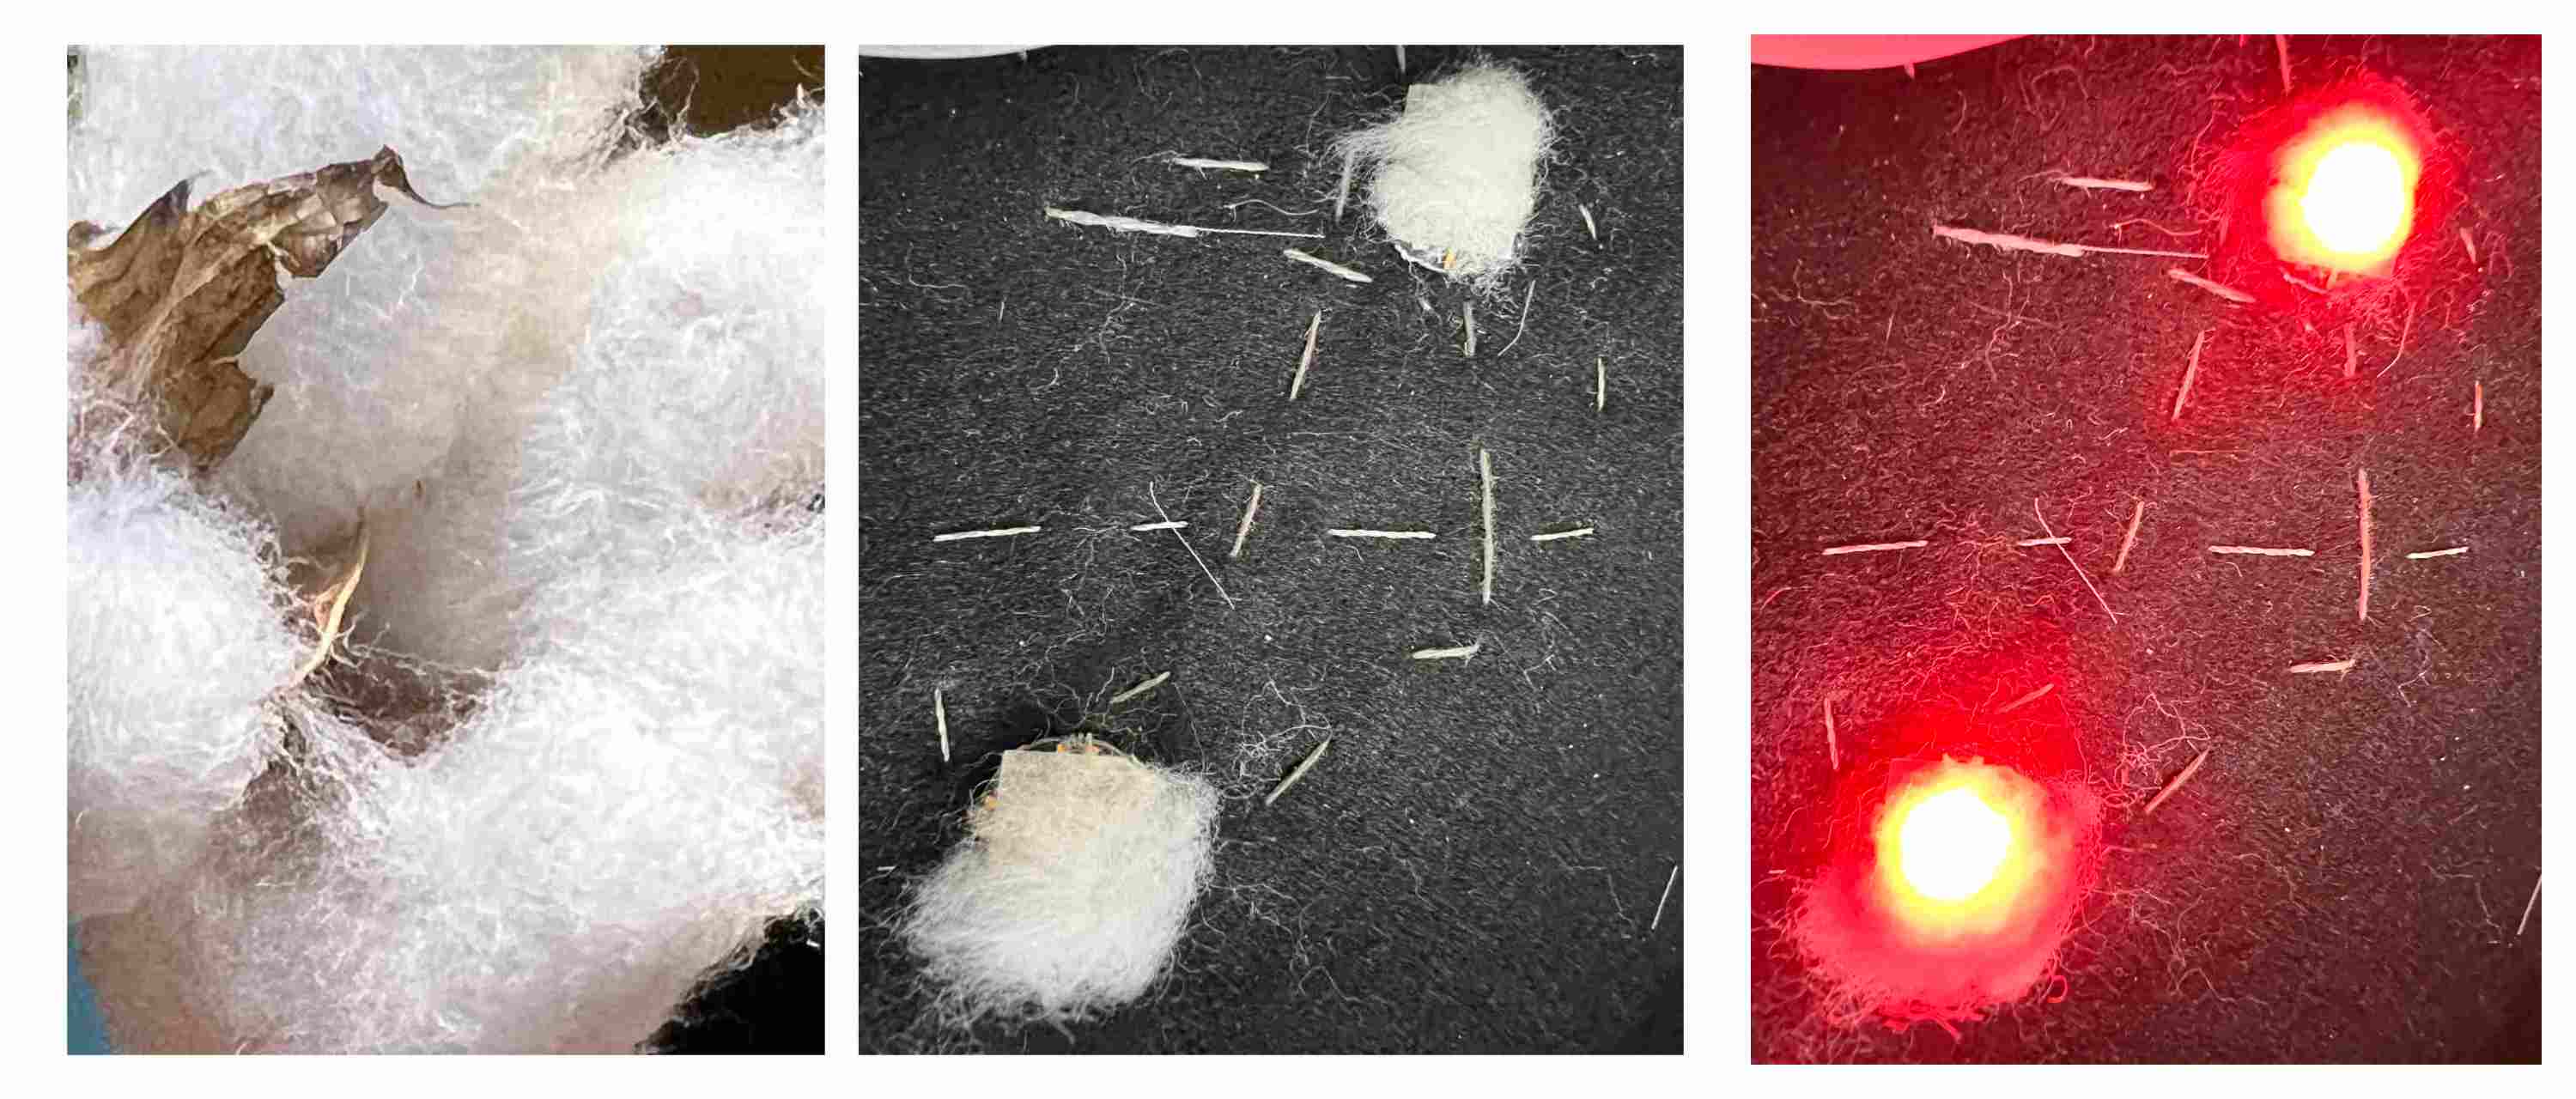
Cotton seeds grown in the garden were used to blur the outline of the LEDs and diffuse the light.

void mode1(){
  //pixels.clear(); // Set all pixel colors to 'off'
  int a=readAdata(10,sliderPin);
  //int a=analogRead(sliderPin);

  valM1=map(a,valM1L,valM1H,0,4);

  if(a>valM1H){ valM1H=a;}
  if((10<a) && (a<valM1L)){valM1L=a;}

  Serial.print("a=");
  Serial.print(a);
  Serial.print(",");

  Serial.print("valM1=");
  Serial.print(valM1);
  Serial.print(",");

  Serial.print("High=");
  Serial.print(valM1H);!
  Serial.print(",");

  Serial.print("Low=");
  Serial.println(valM1L);


  switch(valM1){
    case 0:  //white
      cr=255; cg=255; cb= 255;
      pixels.setBrightness(255);
      break;
    case 1: //Coral

      cr=255; cg=255; cb= 255;
      pixels.setBrightness(255);

      break;
    case 2: //Lime Green
      cr=50; cg=205; cb= 50;
      pixels.setBrightness(255);

      break;
    case 3://Aqua
      cr=0; cg=255; cb= 255;
      pixels.setBrightness(255);
      break;

    case 4: //Royal Blue
      cr=65; cg=105; cb= 225;
      pixels.setBrightness(200);
      break;
    case 5: //White
      cr=255; cg=255; cb= 255;
      pixels.setBrightness(255);

      break;
  }

 // The first NeoPixel in a strand is #0, second is 1, all the way up
  // to the count of pixels minus one.
  for(int i=0; i<NUMPIXELS; i++) { // For each pixel...

    // pixels.Color() takes RGB values, from 0,0,0 up to 255,255,255
    pixels.setPixelColor(i, pixels.Color(cr, cg, cb));
    pixels.show();   // Send the updated pixel colors to the hardware

  }
}
assembly
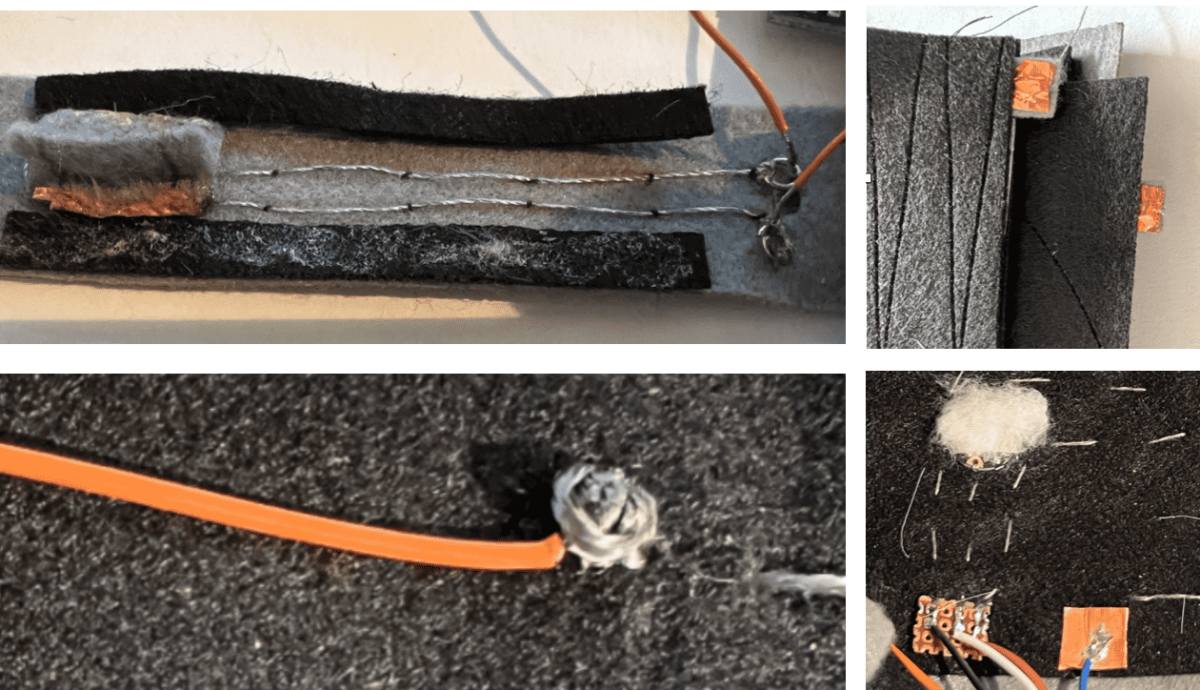
- Connection of conductive thread and wire:
- A substrate, ring, copper foil tape were used. Copper foil tape is easy to use. How to sew conductive thread
- I mainly used running stitches, and for the slider I used a method of securing with a separate thread.
Results


Next step
- Page recognition
- It recognizes when the cover is opened, but buttons to recognize Pages 2 and 3 are currently being implemented.
- Delicate lighting of LEDs
- From breadboard to embedded
- Add interesting actuators
Fabrication files
- Arduino code:main part
- Arduino code2:touch part
- Page design